
Westfield Megabusa - Modifictions and Upgrades
Ian2812 - 9/10/17 at 08:23 PM
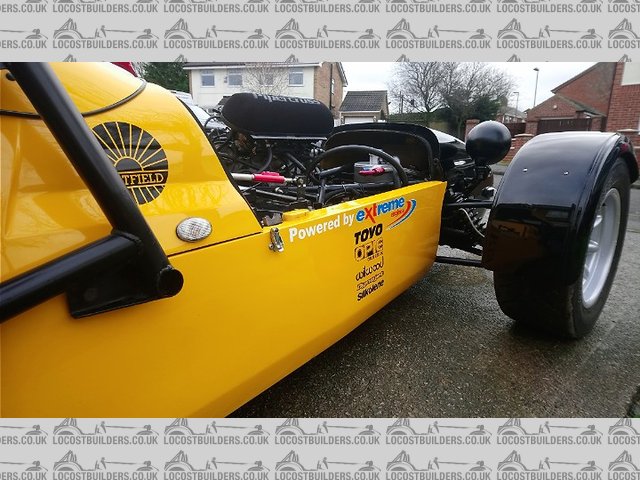
Just thought I'd start sharing the work I have done to my Megabusa...
Hopefully you all agree that they are improvements...
Feel free to browse my other photo's that I haven't got round to posting yet or may be in other threads.
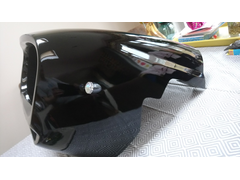
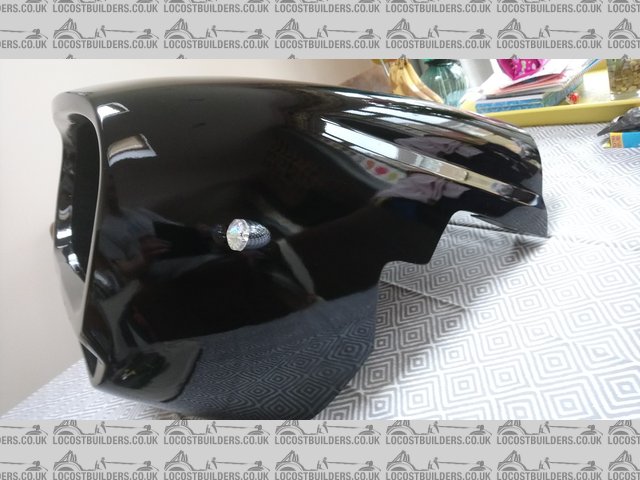
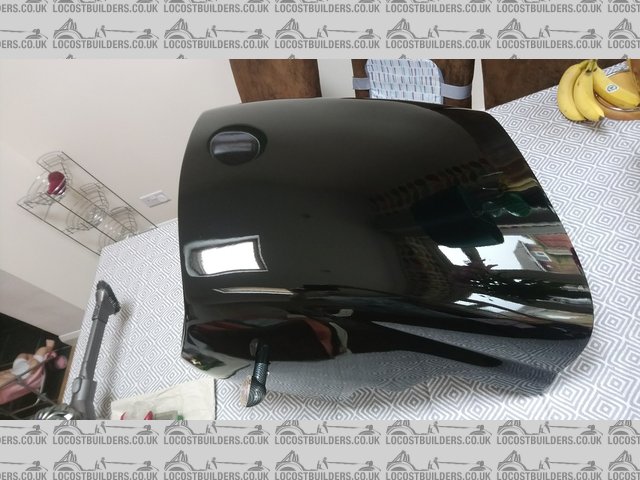
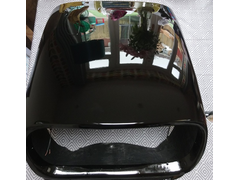
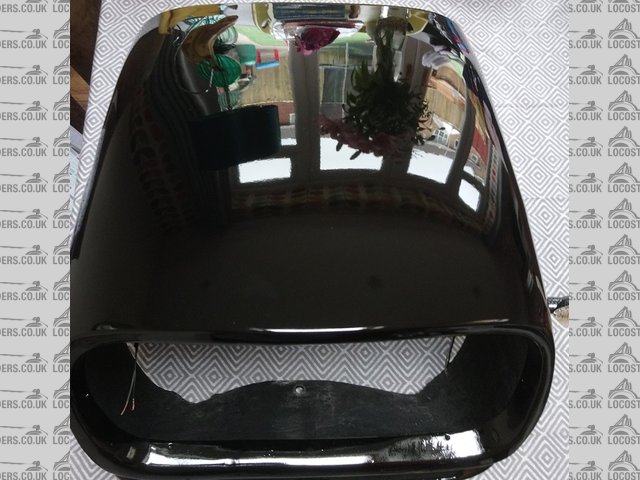
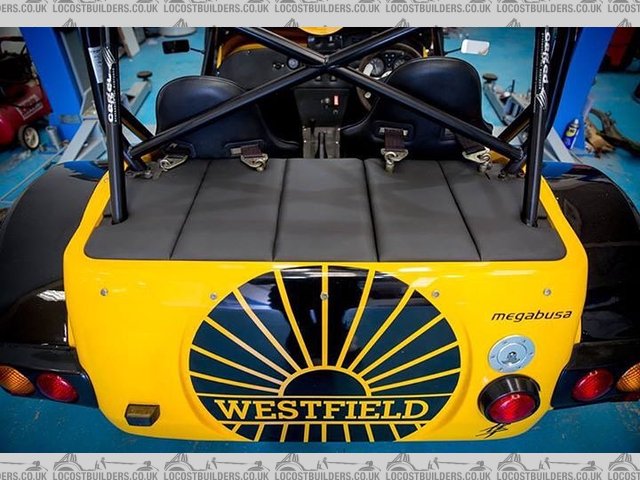
Boot lid - very kindly done after I had already bought it from James. He had this professionally done in Northern Ireland before I picked it up.

Boot lid - Before (plastic)

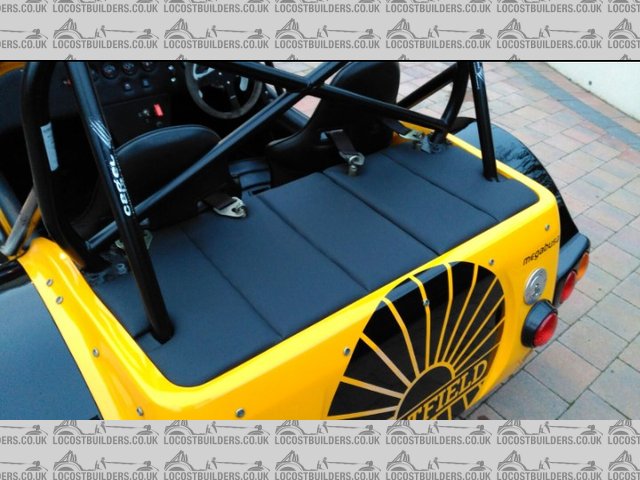
Boot lid - After (Upholstered)
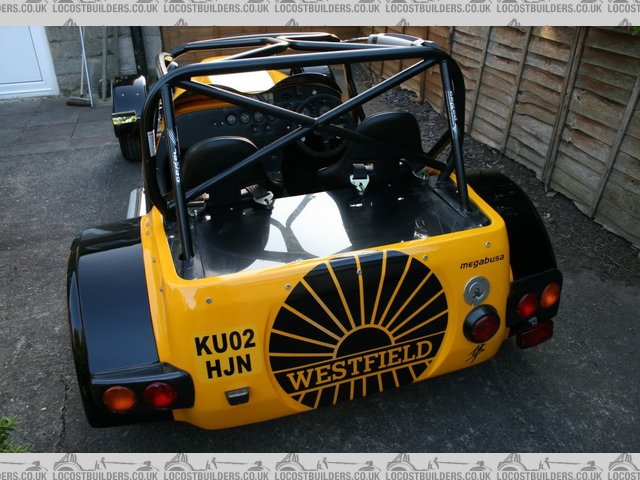
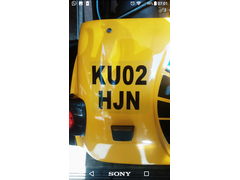
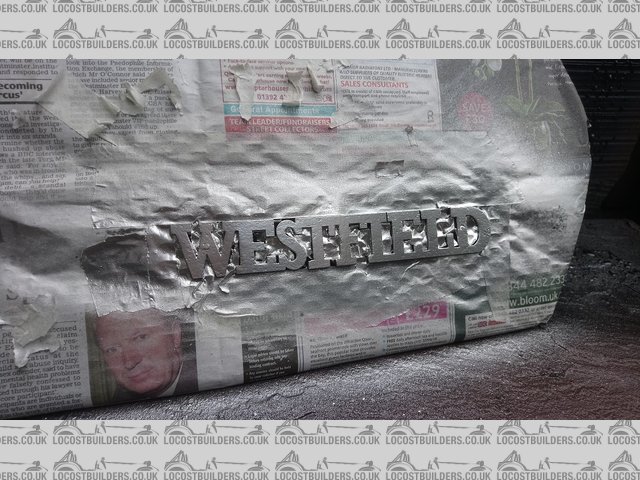
Number Plates & WESTFIELD badge- Rear plate was illegal sticker type and front was massive blocking air flow and WESTFIELD badge which was also
sprayed black
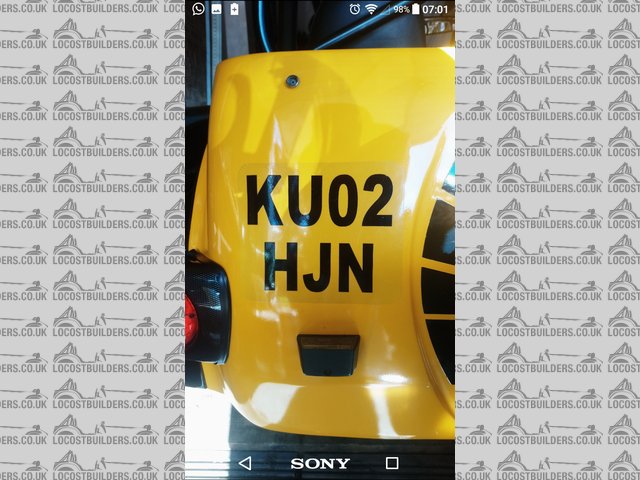
Rear Plate - Before

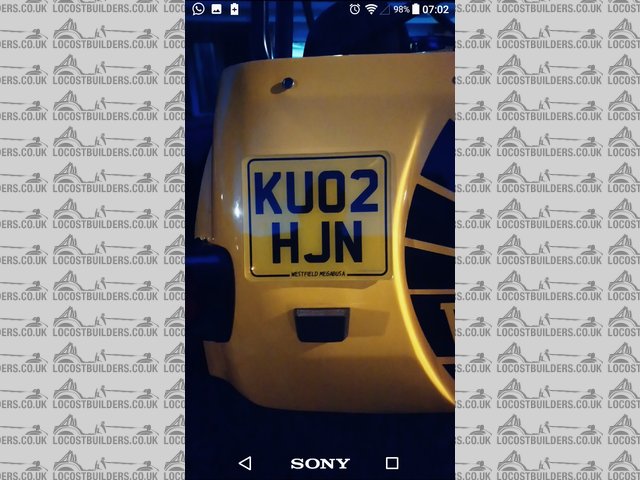
Rear Plate - After

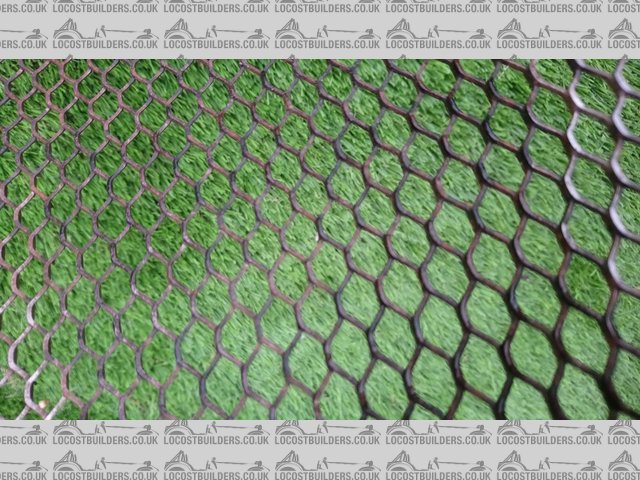
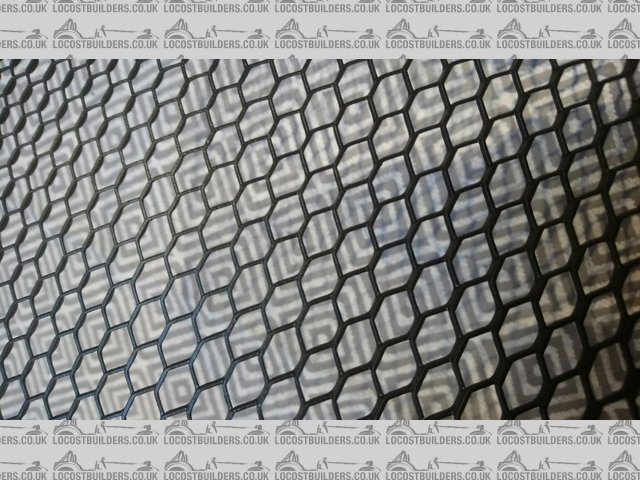
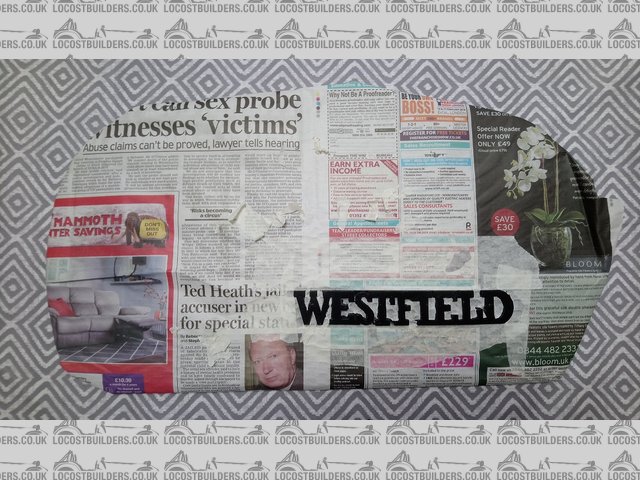
Front Plate & Mesh - Before

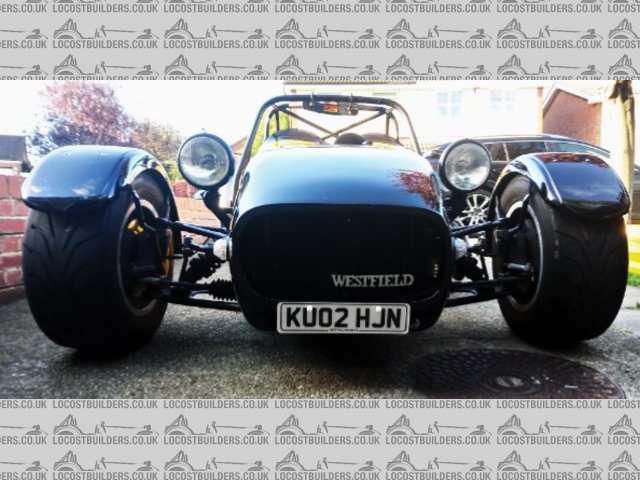
Front Plate & Mesh - After
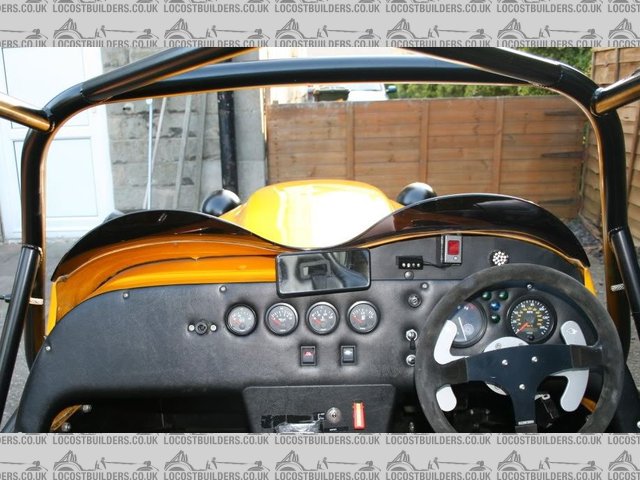
Rear View Mirror - Was a plastic effort mounted on the dash, very limited shaky view... Now a Longacre 14" Roll Bar mounted wide angle view.

Before - Plastic Rear View

Before - Plastic Rear View

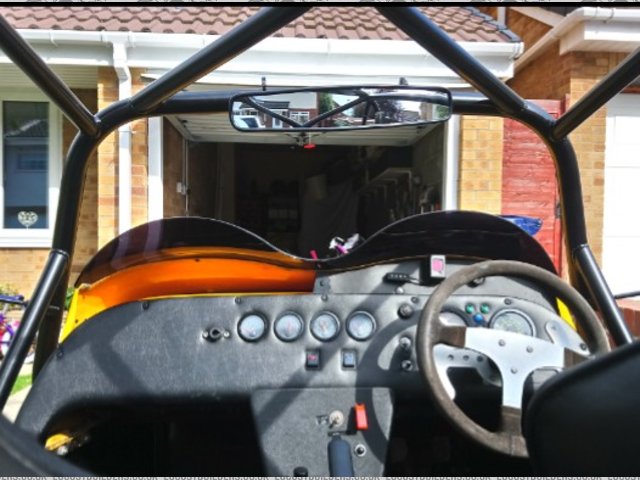
After - Longacre Wide Angle Rear View
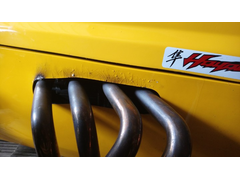
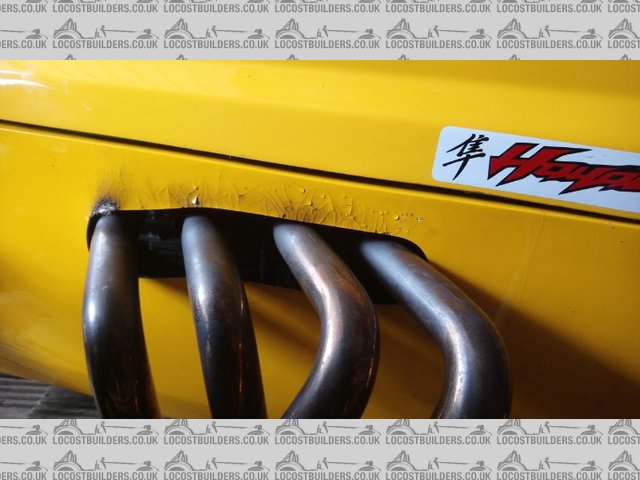
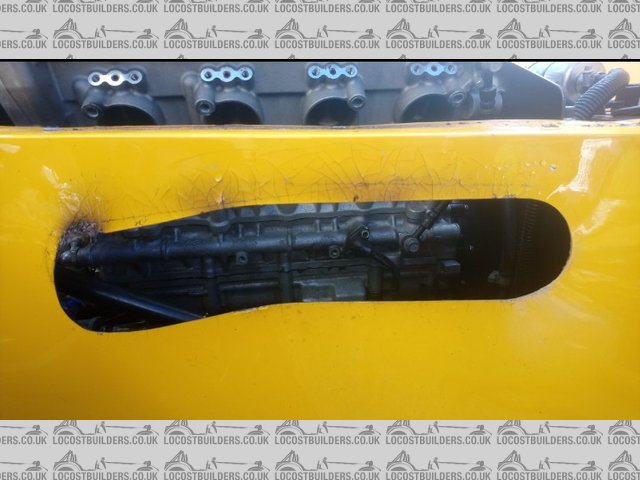
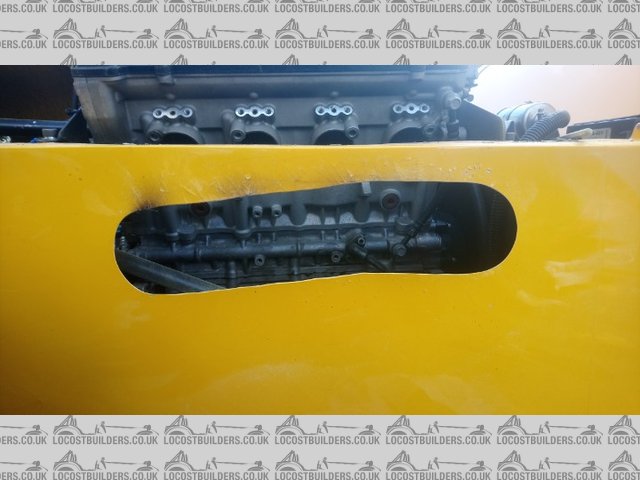
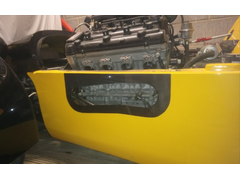
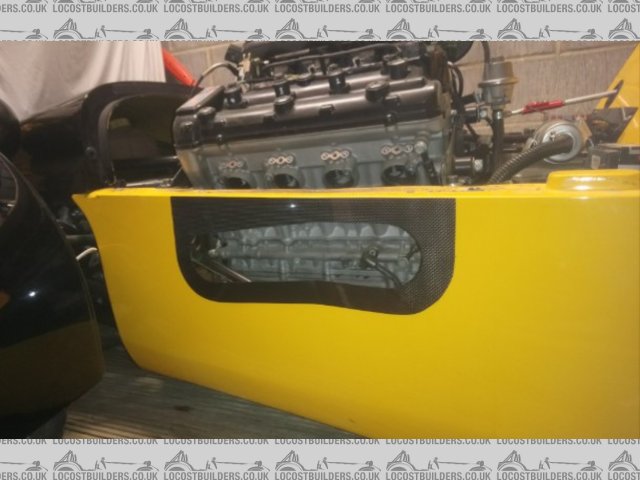
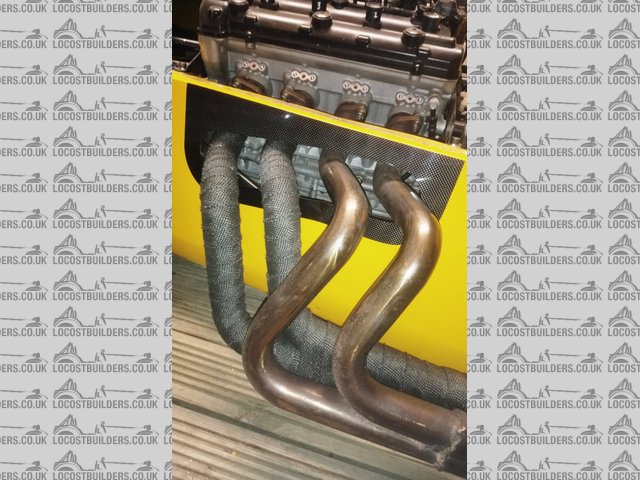
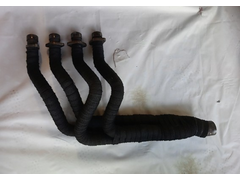
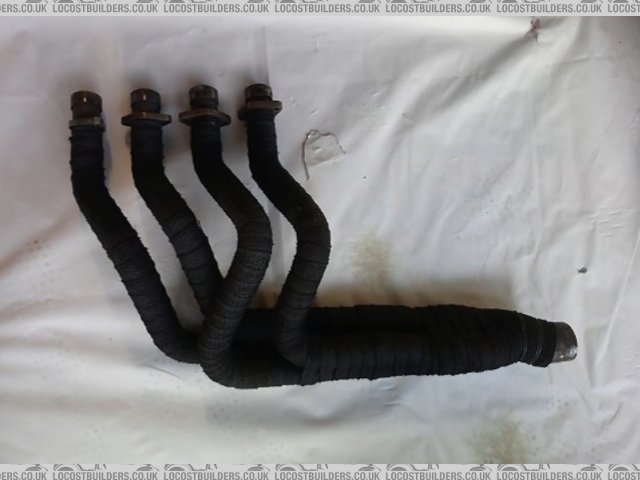
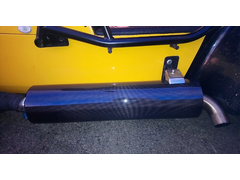
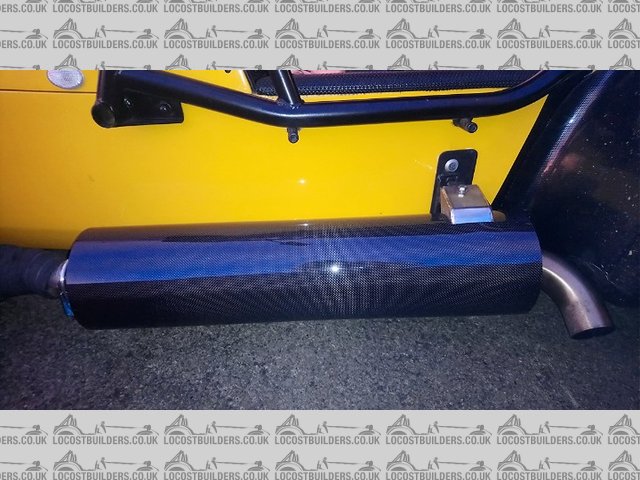
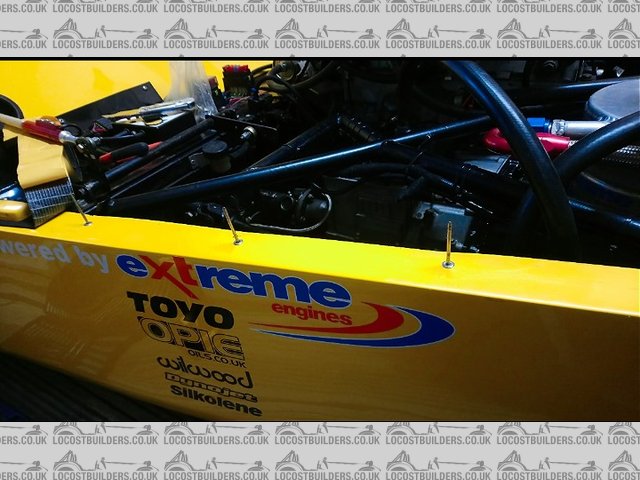
Exhaust System next.
Heat damage to the fibreglass where manifold leaves engine bay.
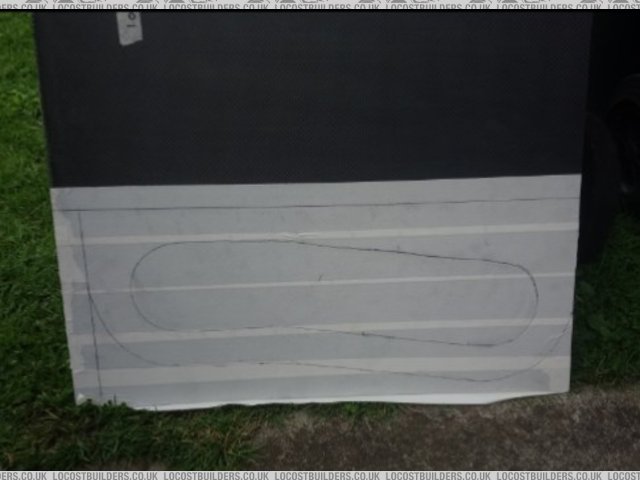
Carbon fiber purchase from Fibre-Lyte Stokesley for a very reasonable price.
Exhaust 1

Exhaust 2

Exhaust 3

Exhaust 4
Exhaust 5
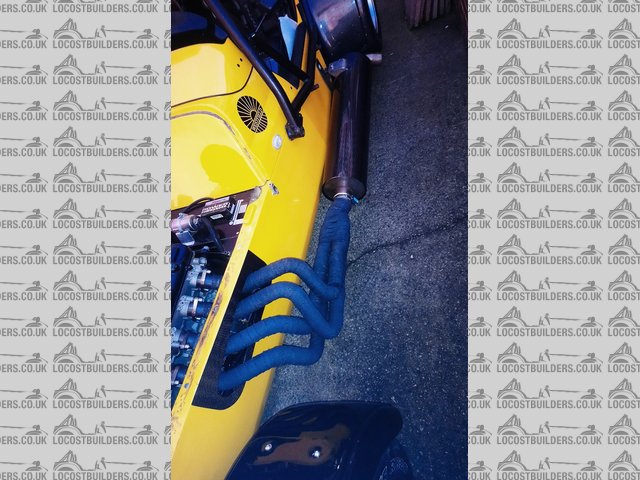
Going to Wrap the manifold with exhaust heat wrap and upgrade silencer to Carbon Fiber. Will post photo's when completed.
madteg - 9/10/17 at 09:45 PM
Very nice
jrod - 10/10/17 at 11:40 AM
Great job on the exhaust trim.
CosKev3 - 10/10/17 at 03:36 PM
Lovely car 
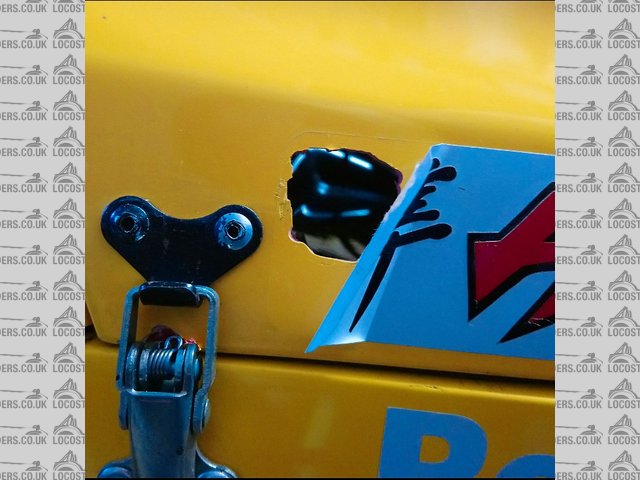
As above,trim around cut out looks good.
Can't believe someone would do such a bodge job to start with though!
Ian2812 - 16/10/17 at 01:51 AM
Thanks guys.
forgot to add this one. This is where I'm at just now.

Exhaust 6
Ian2812 - 9/11/17 at 01:43 PM
Still waiting on my carbon exhaust so a bit more maintenance and cosmetics.
Replaced the boots on my track rod ends, �3.90 from ebay if any one needs to do this.
Westfield Rubber Boots Dust Cover - FREE Metal Securing Clamps x 2
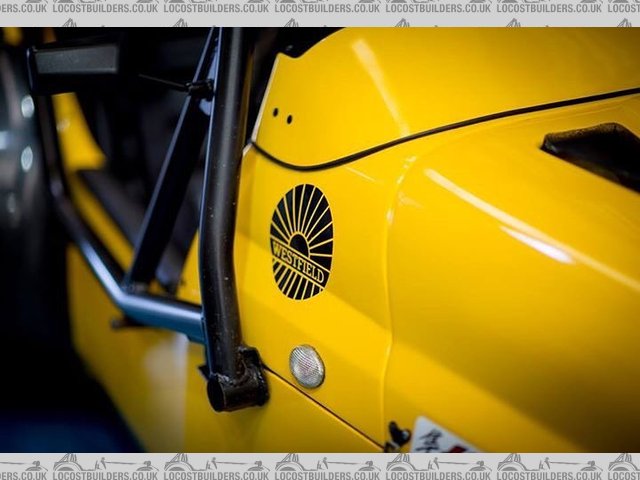
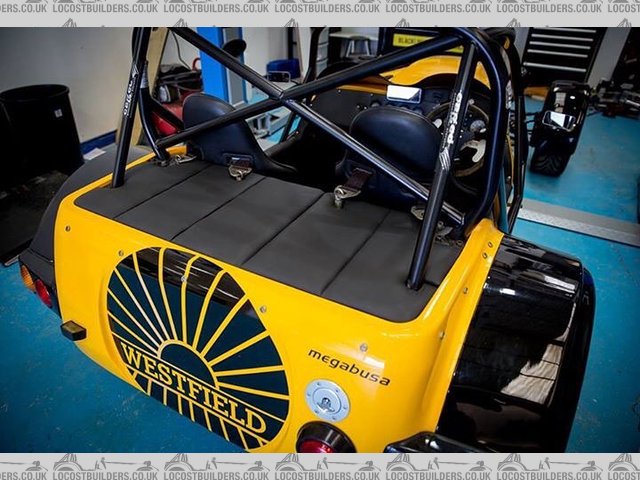
Also, the car is covered in HAYABUSA stickers, I know its a Hayabusa engine but the car is a MEGABUSA.
I looked everywhere and searched through multiple threads trying to source a font to make a MEGABUSA decal in the same style as the Hayabusa text, all
unsuccessful.
Ended up making one on good old Microsoft Paint on a quiet night. Sent image to local sticker shop and got 2 made. One for the rear, and one for the
hood. Took a while to remove existing rear sticker, and the left over sticky residue. (GOO-GONE purchased and this helped dissolve the glue)

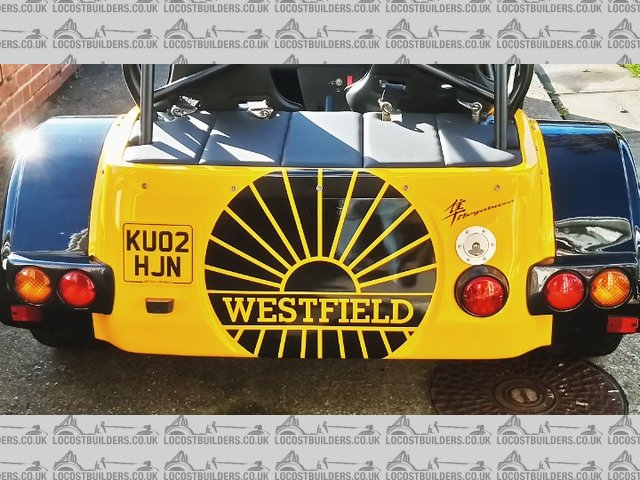
New rear decal
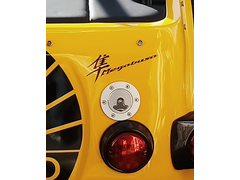
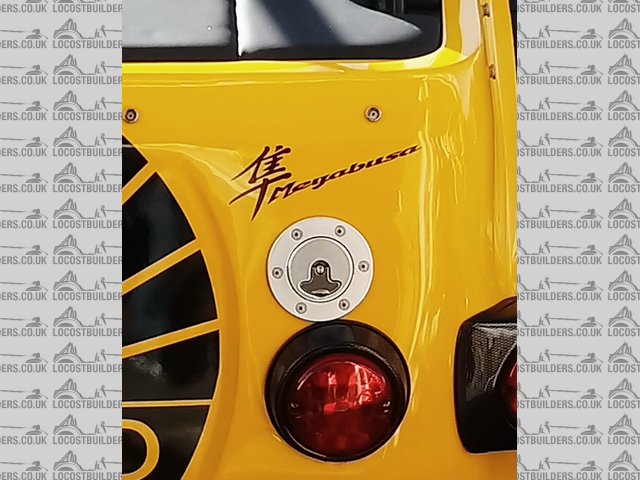
Megabusa decal design & fit.
Hood decal next, when I get a spare hour or two to remove the stickiness... and finish the exhaust when ever the carbon arrives...
CosKev3 - 9/11/17 at 03:27 PM
Sticker looks great.
Where is your carbon exhaust coming from?
As Motad that make them for Westfield have closed down according to a couple of users on the WSCC forum
[Edited on 9/11/17 by CosKev3]
Ian2812 - 9/11/17 at 04:57 PM
Thanks again CosKev3.
Yeah, I got it from the same place as the trim around the manifold.
Business is called Fibre-Lyte, in Stokesley, North Yorkshire.
Website: - http://www.fibre-lyte.co.uk/
I have a re-packable exhaust, they are making a sleeve for me using high temperature resin. (all custom made to measure, �80)
Very nice chaps to deal with and very reasonable prices. �40 for the piece for the manifold trim, and I could have got 4 trims out of the size I
purchased.
CosKev3 - 9/11/17 at 05:27 PM
Ah right that sounds a bargain for a one off piece!
Hopefully it's as good as you are expecting it to be, will look forward to pics
[Edited on 10/11/17 by CosKev3]
Ian2812 - 27/12/17 at 08:29 PM
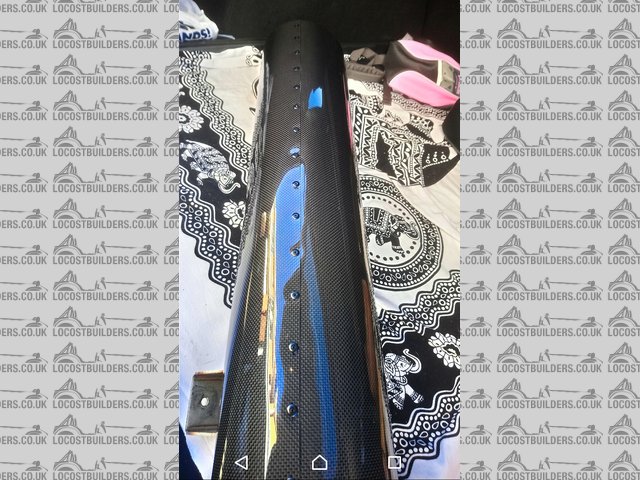
Finally had a spare morning to progress my exhaust.
Do you reckon the carbon can looks fine the way it is or would be better with stainless steel end caps fitted over the ends of the carbon?
Thoughts appreciated please...
Description

Description
Description

Description
Ian2812 - 11/2/18 at 05:30 PM
Now exhaust completed, moving on to body work / engine bay tidy up.
Issues:
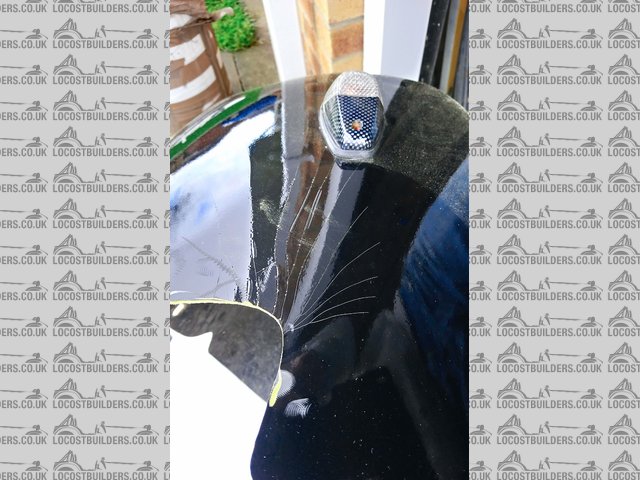
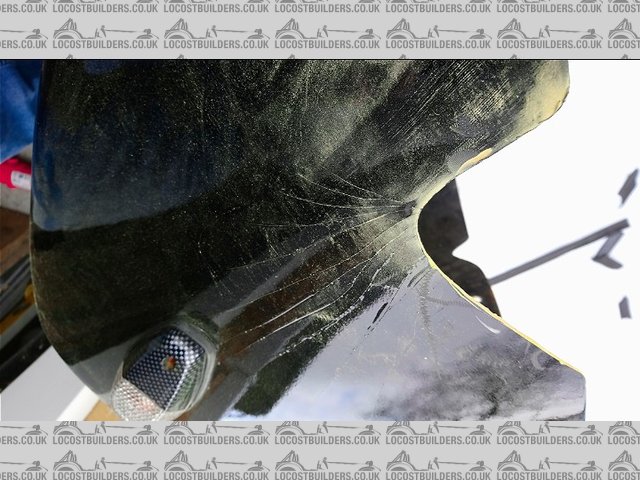
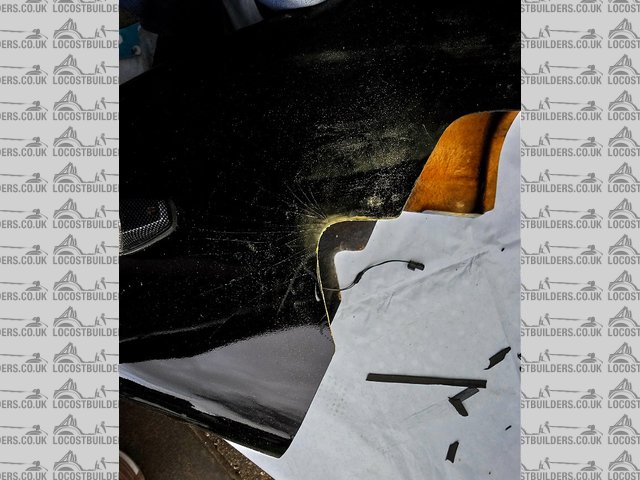
Bonnet - 2x 20mm holes for the original locks still there (just stickered over), a bit of fibreglass lift, 3 vent grills require repainting.
Nose cone - stress cracks in the paint, uneven cut outs around the anti roll bar, indicators don't suit the car so will replace.
Foam strip seals - all seen better days, missing, burnt etc.
Rivets loose on some of the panels.
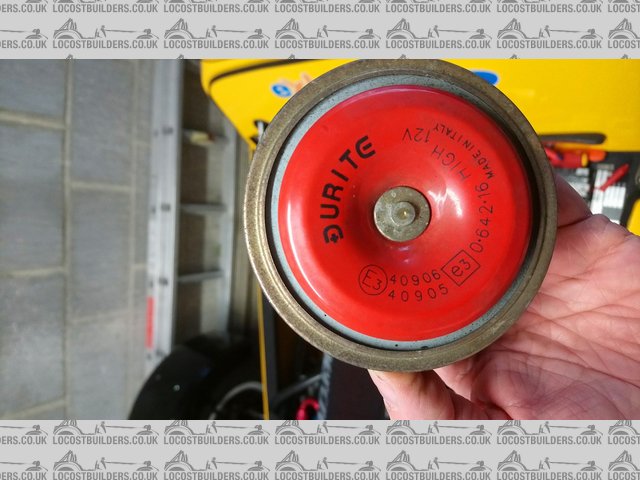
New horns required - Only a high tone fitted.
Wiring - Made a good dent in the wiring, will continue this over time.
Some progress photo's...
Description

Description

Description

Description

Description

Description

Description

Description

Description

Description
Bonnet and nose cone now away getting repaired / re-sprayed hopefully ready by the end of the month.
More photo's to follow once completed...
CosKev3 - 11/2/18 at 08:28 PM
Going to be really nice when you've finished
Exhaust looks good,what have you done to the ends of the carbon cover,sealed it etc?
Ian2812 - 11/2/18 at 09:12 PM
The ends are sealed with extreme high temp 'flue' sealant designed for log burner stoves. It's a nice tidy job, just think it would
would look a bit better with some stainless end caps riveted on. Don't know where or if I I can buy them though. Again, advice / ideas welcomed
by all.
KosCev3, I like the look of the headlights on your car, they look a bit more modern, smaller / neater than the ones on mine, may be the next purchase.
Do you know the size?
CosKev3 - 11/2/18 at 10:57 PM
quote:
Originally posted by Ian2812
The ends are sealed with extreme high temp 'flue' sealant designed for log burner stoves. It's a nice tidy job, just think it would
would look a bit better with some stainless end caps riveted on. Don't know where or if I I can buy them though. Again, advice / ideas welcomed
by all.
KosCev3, I like the look of the headlights on your car, they look a bit more modern, smaller / neater than the ones on mine, may be the next purchase.
Do you know the size?
They are what's known as dominator's, think they are 4.5inch diameter.
They do look the best size IMO on seven type cars,but they don't perform very well!
If you only get caught out in the dark on the odd occasion they work OK, but if you use the car a lot in the dark they would become a pain.
Ian2812 - 30/3/18 at 09:43 PM
Whilst nose cone away for filling / paint...
Only one horn fitted and this was the high tone. Sounded terrible and embarrassed to use, so never did. (Found the usual hand gestures to be just as
effective.)
2 new horns bought and fitted, High and Low tone. Now sounds much better.

Description

Description
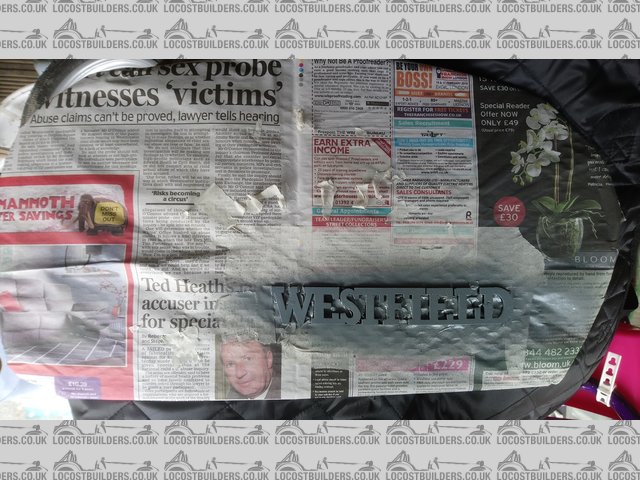
The front grille was looking tired and required a strip back to bare metal, primer, undercoat, paint and lacquered up.
Masked off the rest of the grille and done the 'WESTFIELD' in a chrome coloured paint. Think it looks better than blending in with the rest
of the black.

Description

Description

Description

Description

Description
Ian2812 - 30/3/18 at 11:42 PM
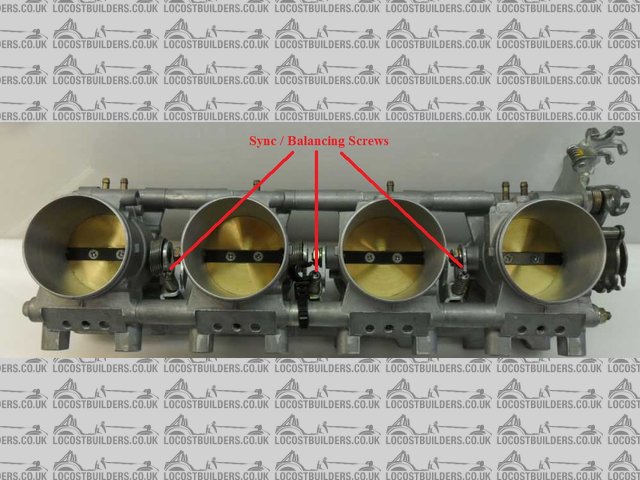
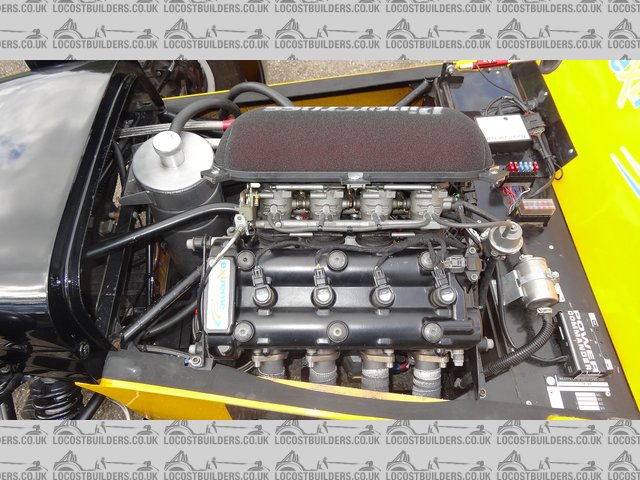
Bought a Morgan Carbtune Pro to check / balance my throttle bodies as it was running a little lumpy at idle.
I've done this as a separate thread in the BEC forum as well.
I followed the Haynes manual for the Hayabusa engine on a bike so a quite a few steps were not required and they seemed to over complicate the
procedure. Couldn�t find a how to on the forum so thought I�d knock this up.
I�ll try and shorten it and make it a �dummies guide�.
Firstly check your idle speed is correct.
Let the engine warm up to a normal operating temperature.
Turn off the engine.
Remove your air filter / box and use some old tights and elastic band to secure around the top of the trumpet to act as a temporary filter.
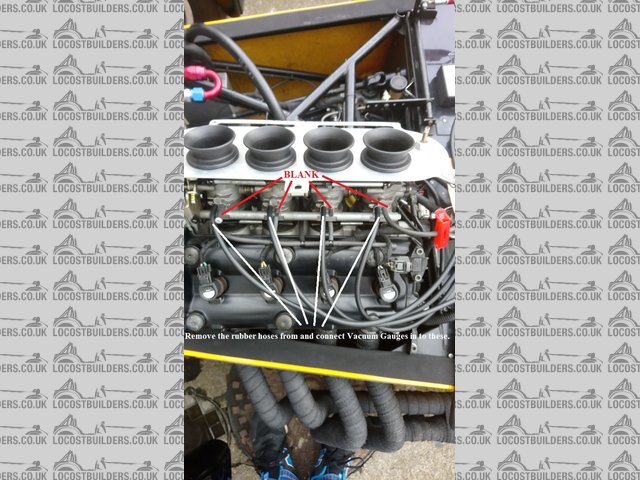
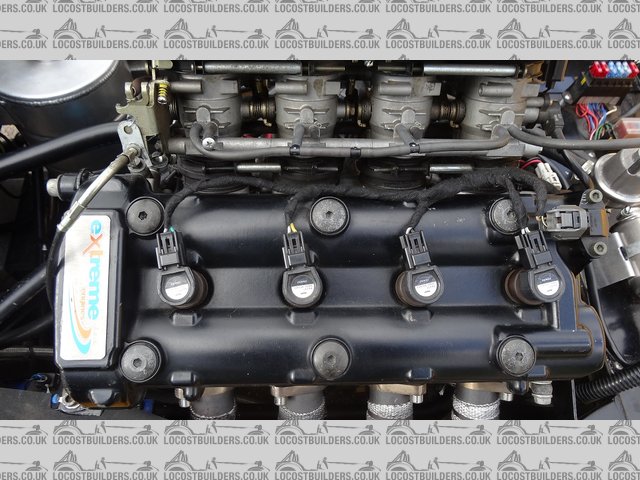
Disconnect the vacuum hoses from the throttle bodies, they might be unwilling to come off due to the heat. (See pic)
Fit the vacuum hoses. (See pic)
Fit blanks as per pic.
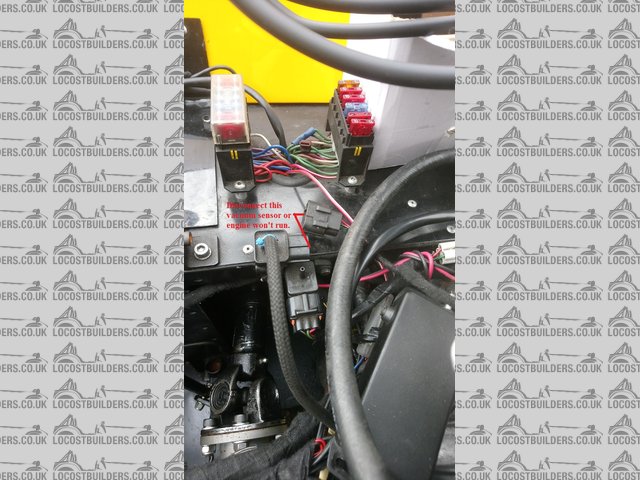
This where I struggled as when I was trying to start the car, the engine just wouldn�t fire up and run.
You have to disconnect the vacuum plug from the sensor, think officially it is called IAP sensor.
Once this is disconnected the engine should start.
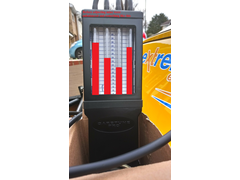
Check on your gauge to see how balanced they are with each other. The actual reading doesn�t matter as long as all balanced.
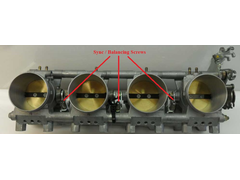
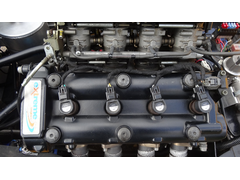
There are 3 little screws, 1 between 1+2, 1 between 2+3 and 1 between 3+4. See Pic.
You balance butterfly valves 1+2 with each other by turning the screw between 1+2 valves.
Then balance butterfly valves 3+4 with each other by turning the screw between 3+4 valves.
Then you turn the screw between 2+3 to balance valves 1+2 with 2+3.
I adjusted my idle speed after balancing up as idle speed had lowered off.
Once happy, put at all back as was before you started.
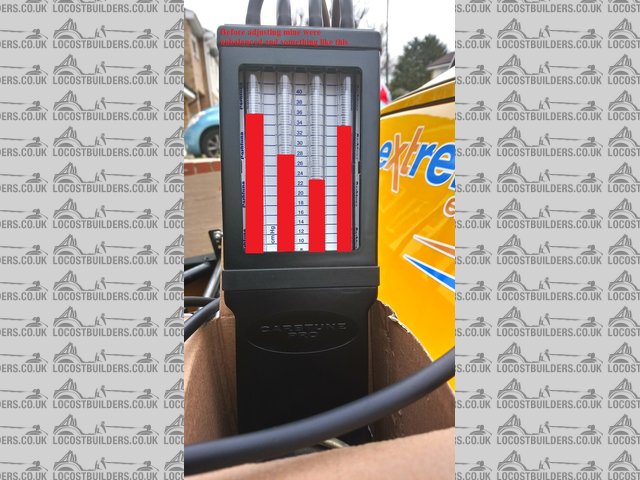
I am very annoyed as took a picture of my vacuum gauge before I set mine up and they were way out as expected as my engine sounded a bit lumpy on tick
over / idle, revs hunting a little.
I deleted it by accident when I was deleting some of the blurry photos I took of the vacuum gauges after I had set them up! So done a little Microsoft
Paint job to show approximately where they were before adjustment.
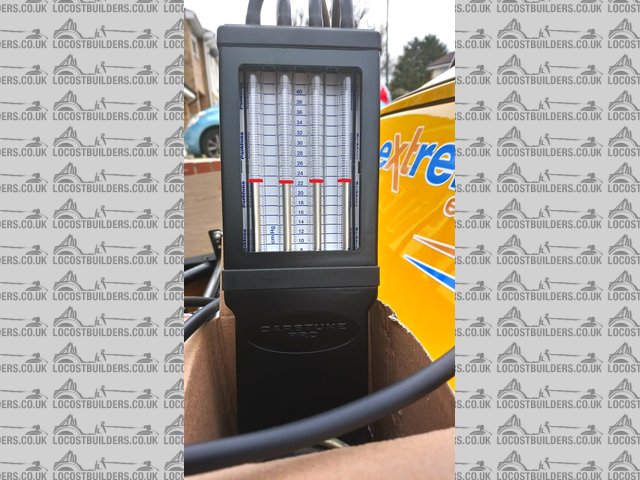
My throttle bodies are now within 0.5cmHg of each other. Engine sounds sweet as a nut now. Can�t believe what a difference that 30mins of relatively
easy tinkering has made�
Hope this helps somebody out.

Description

Description
Description
Description

Description
Ian2812 - 1/4/18 at 03:30 AM
Nose cone repairs and re spray completed.
New indicators fitted, grille fitted and now back on car.
Description

Description
Description
Took for MOT with bonnet not fully completed yet (repaired but not sprayed), and weather not the best... Freezing and raining however, passed with no
advisories!
Job well done!
Summer here we come... Soon... Hopefully... Maybe...
CosKev3 - 1/4/18 at 09:27 AM
Looks a good paint job,lovely deep finish
Ian2812 - 1/4/18 at 08:25 PM
Yeah, its a decent job. Hope the colour match for the yellow is ok...
Ian2812 - 1/4/18 at 08:27 PM
Just a link to a post I have just done for oil pressure sender / gauge fault finding for '0' and 'full scale' reading.
http://www.locostbuilders.co.uk/viewthread.php?tid=212062
Cheers!
Ian2812 - 4/4/18 at 08:40 PM
Came across a few photo's from when Top Secret Evolution had the car to do the fixed boot lid.
Top job guys!

Description

Description

Description

Description
gaz_gaz - 5/4/18 at 06:24 AM
Great looking car.
It's really come on in your ownership. Top job!!
Ian2812 - 5/4/18 at 11:53 PM
Thank gaz_gaz. Bit of time, money and effort paying off.
Ian2812 - 7/4/18 at 09:52 PM
A copy of my other post for Megabusa decal file in the text of the hayabusa font.
'Megabusa' Hayabusa style text font decal sticker
Just wondered if any 'BUSA' BEC owners would be interested in this?
When I bought my Westfield Megabusa, the car is covered in HAYABUSA stickers, I know its a Hayabusa engine but the car is a MEGABUSA. This was one of
them little inaccuracies that really bugged me and felt the true identity of the car was not being advertised.
I looked everywhere and searched through multiple threads trying to source a font to make a MEGABUSA decal in the same style and font as the Hayabusa
text, all unsuccessful.
I ended up making one myself one quiet night.
Sent image to local sticker shop and got 2 made. One for the rear, and a slightly bigger one for the hood.
Megabusa decal design & fit.
If anyone is interested I can forward the file on via email so you can get them made locally to your size requirements, just get in touch.
Cheers, Ian.
Ian2812 - 22/4/18 at 09:47 PM
Well, the time has come, too soon and unexpected...
I will be putting my Westfield Megabusa up for sale.
I will put all details on this page as well as the for sale forum.
Please U2U message me if you require more info or photo's.
Many thanks. Ian.
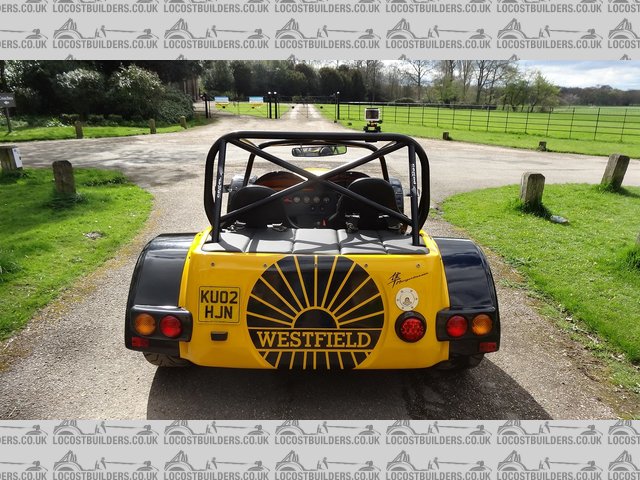
Ian2812 - 22/4/18 at 10:07 PM
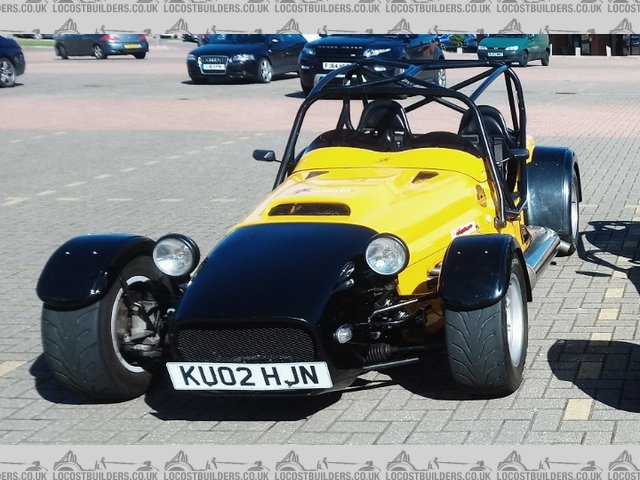
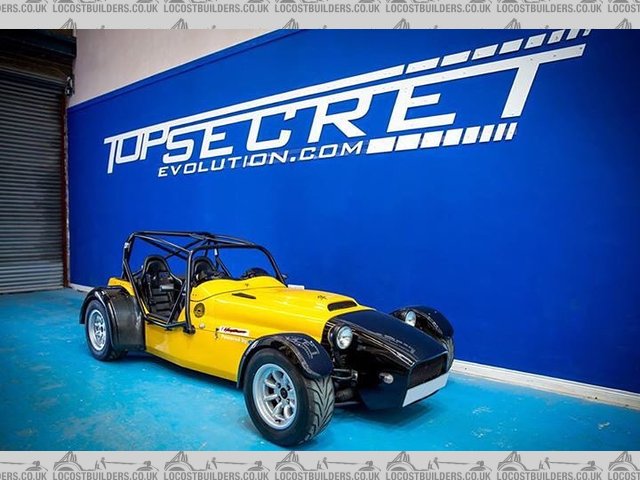
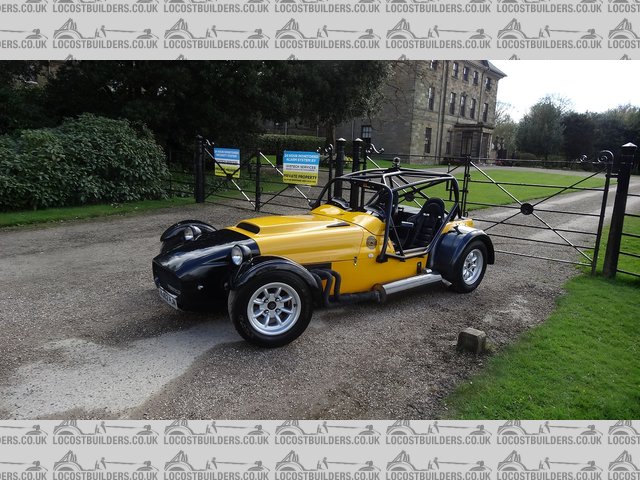
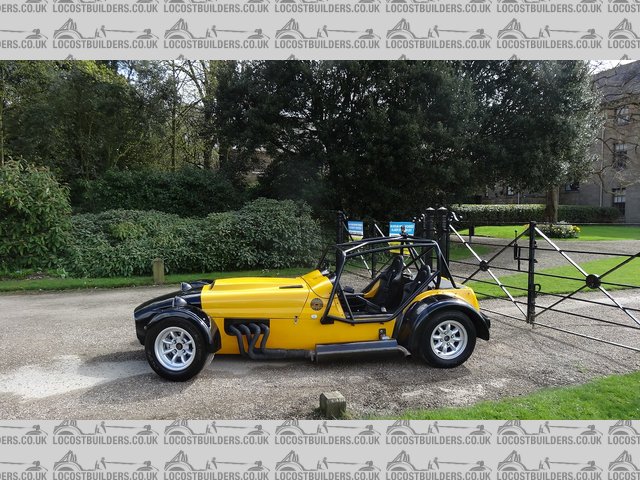
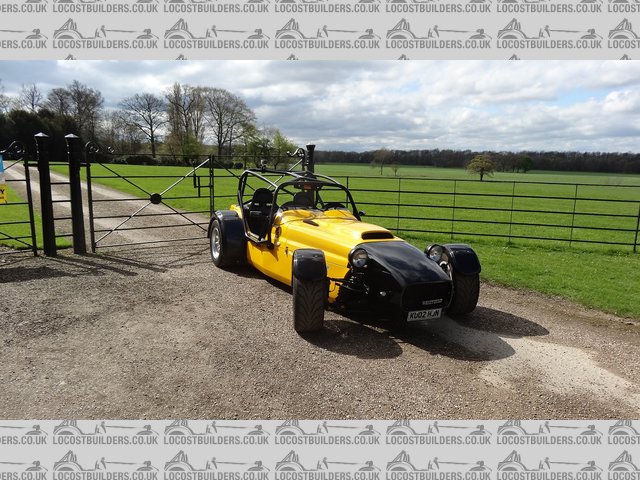
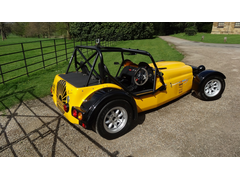
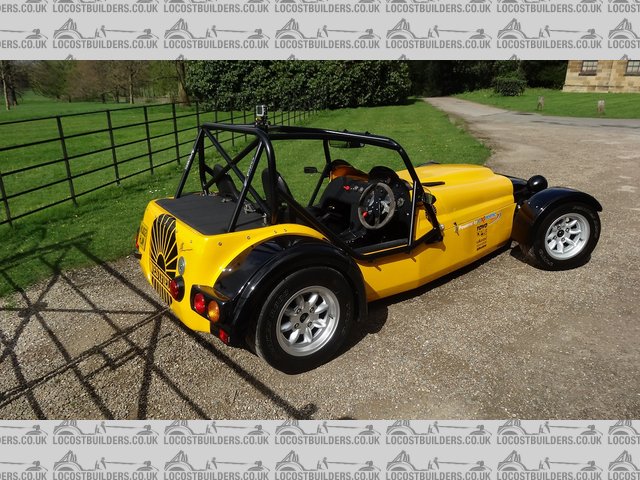
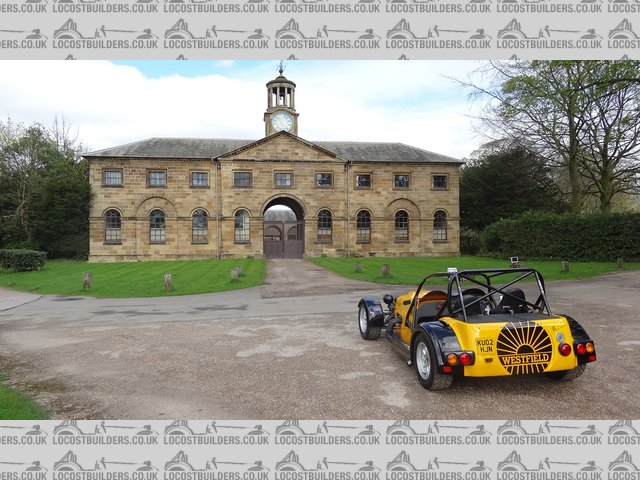
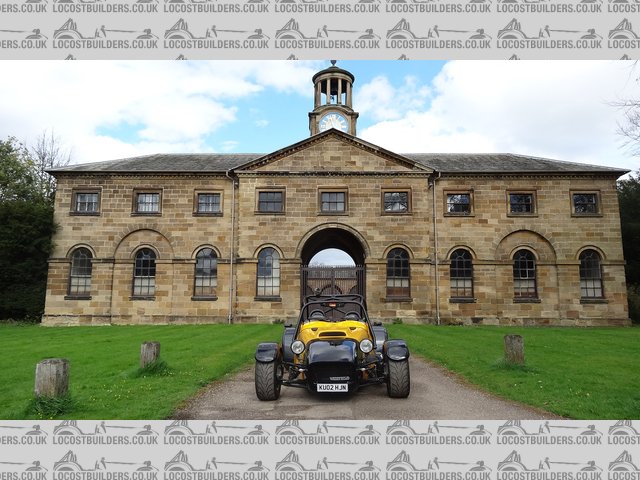
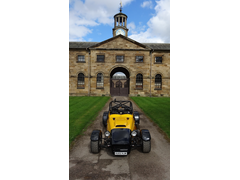
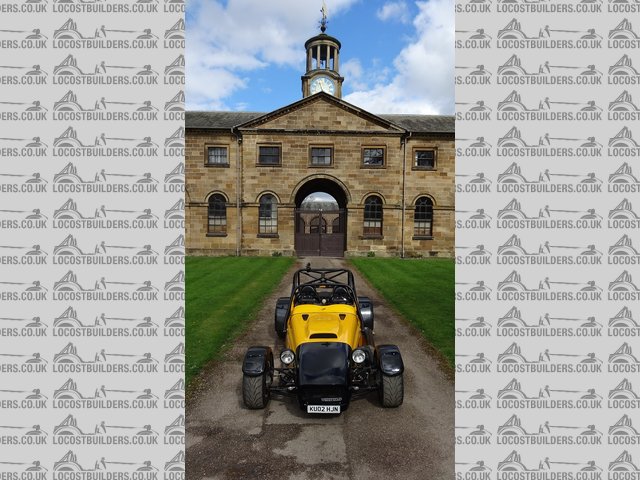
For sale is my pride and joy. This is a very special Westfield Megabusa. Please don�t confuse with standard busa.
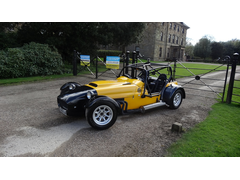
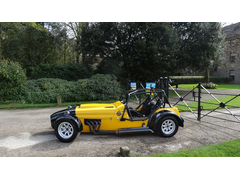
Photos below were taken today, so car is as is seen.
Quick overview of the car itself: -
Built in 2002 on a �02� registration plate, not a Q plate.
Current mileage is around 10,500m.
Excellent mechanical build quality.
Original engine was a Suzuki Hayabusa GSX1300-R covering around 40k when the engine went.
This engine was changed around 2007 for an engine that had only covered 7k miles.
It was put in to Karl at Extreme Engines, upgraded to an increased engine capacity of 1396cc as well as billet dry sump kit and billet covers etc. at
a cost of around �10k including the engine.
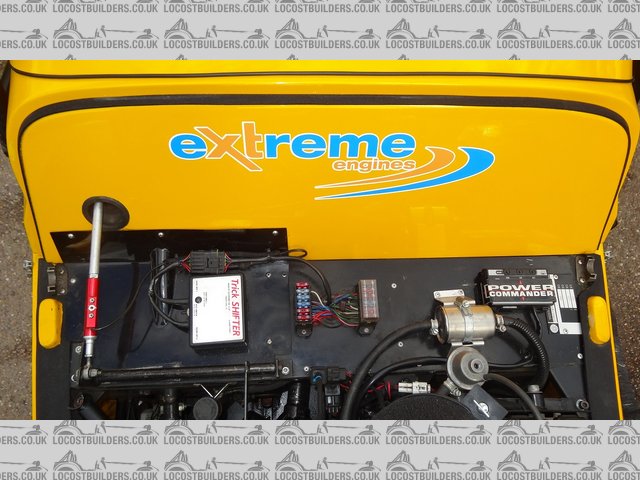
A Power Commander III has been installed and set up on a rolling road by Holeshot Racing with a custom map for the 1396cc engine.
It has had a steering wheel �Flappy Paddle� gear change system fitted along with a Trickshifter Pro to allow full clutchless UP & DOWN shifts
should you feel the need to change gear in a couple of milliseconds.
This car is truly awesome in every aspect. I have loved every minute I have owned the car and enjoyed tinkering / improving the look, reliability and
performance.
The car has a very quick 0-60mph time of around 3 seconds � Bearing in mind this is in the same league as Lambo Aventador / Ferrari 488 / McLaren P1
for a fraction of the price� Not had any car that can keep up with this and l can stick with all motorbikes on a nice weekend run out over the North
Yorkshire moors, (only on the long straights can a big bike pull away.)
Why I chose this car � I have always wanted a 7 type car since around the age of 8 or 9, (now 34), having seen a few go around a track at a car
show.
I looked for around 3 years and decided to get the best, fastest model available so I could grow in to it, thus only buying once.
I decide on this car because it was quite simply the best one that I had seen advertised in the 3 year I was looking. It had lots of history and was
heavily upgraded in the right areas for ultimate performance yet needed a little TLC to bring it up to the standard I wanted so still offered the
chance of modifying and improving.
The car was located in Northern Ireland so I flew across, viewed, test drove, bought and drove it back covering 300miles on my first outing � an
absolute pleasure and thrilling experience to drive.
A brief history of previous ownership of the car: -
Was built and started off life in the south of England when the majority of heavy upgrade work was carried out by Extreme Engines. Other bills include
Z Cars and Holeshot Racing.
It was then bought by a chap in Northern Ireland and continued to be looked after and serviced at regular intervals by a Suzuki Specialist, Paul
Keys.
During my ownership: -
As I planned on keeping the car long term, I have not scrimped on anything. I wanted to do the majority of work myself as I am very hands on and have
a technical background. I bought a Haynes manual for the Hayabusa engine wanting to educate myself on the recommended maintenance required on the
engine and correct torque figures when removing / rebuilding components.
I have had a full new gearbox cluster, shift forks, selector drum etc. fitted in the 1st month of ownership as the car was slipping out of 4th gear.
After full inspection it was decided best way forward was to replace everything � at a cost of �1800 from Karl at Extreme Engines.
Replacement starter clutch also fitted. An excellent used unit was supplied by Karl at Extreme Engines free of charge from an engine he was
overhauling.
Maintenance: - Engine and Gearbox Oil Dropped, Replaced with Silkolene, Oil Filter Replaced, Engine Coolant Dropped, and Replaced with Silkolene,
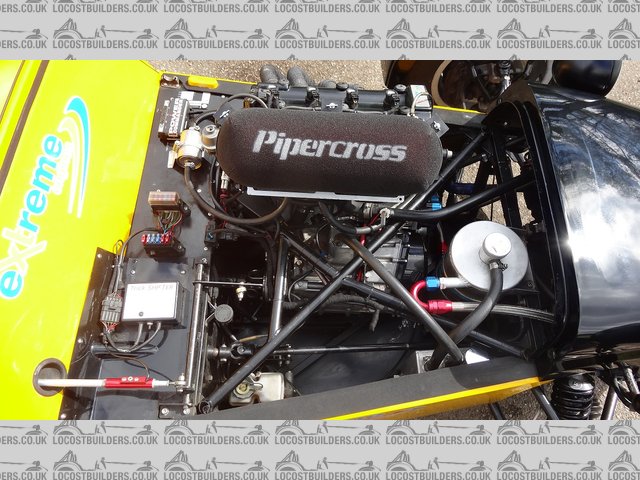
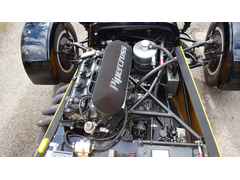
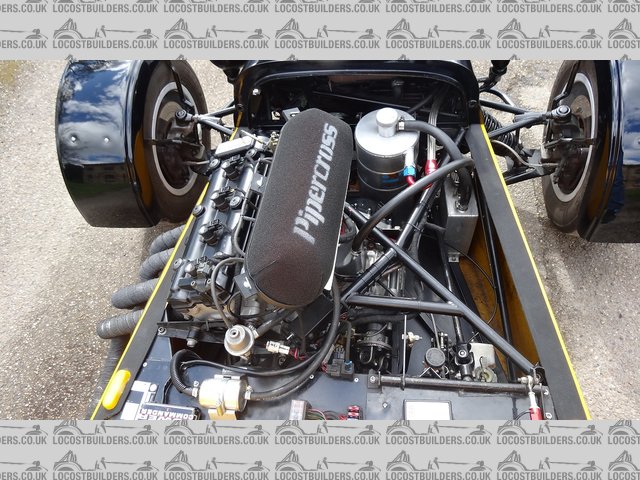
Pipercross Lifetime Air Filter fitted, NGK Iridium Spark Plugs fitted, Westfield Reverse Gearbox Oil Dropped, Replaced with Silkolene, Brake Callipers
Bled and Fluid Changed with Silkolene, Engine Bay Fuel Filter Replaced, Throttle body Synchronisation Set Up, Idle Speed Set, Throttle Return Spring
Replaced, Full Clutch Strip and Inspection, Clutch Pedal set up, VDO Oil Pressure Sender Replaced.
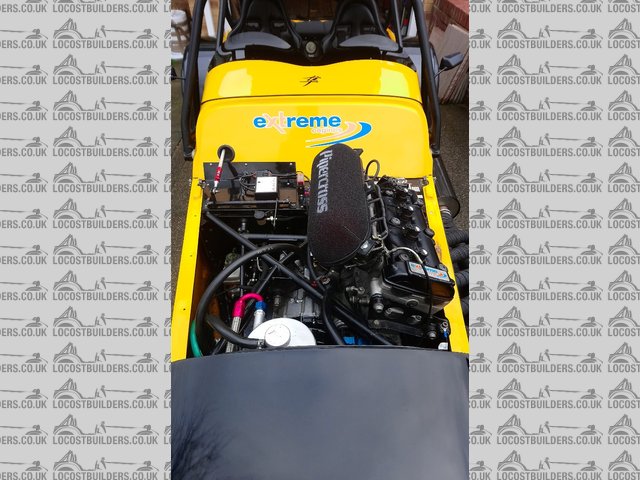
Other improvements: - Some are only small but the attention to the smaller details end up making a massive difference.
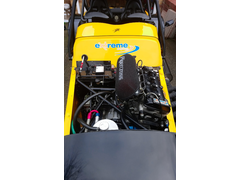
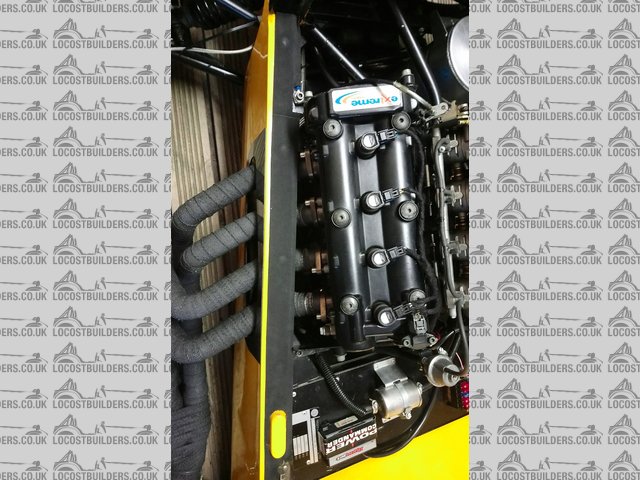
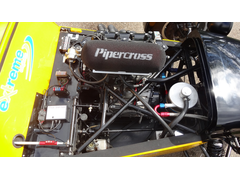
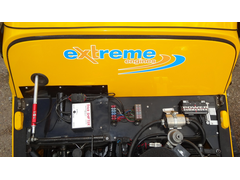
Engine bay wiring re-wired and loomed. The tidiest engine bay of any 7 type car I have seen! Rear fog light replaced with LED fitting. Manifold exit
improved with carbon fiber surround. Manifold heat wrapped to add protection and improves performance. Carbon fiber surround fitted to silencer.
�Megabusa� decals designed, made and fitted. New number plates fitted. Stainless steel bolts replaced with black high tensile, to eradicate dissimilar
metal issues and improves aesthetics. Rear view mirror replaced with wide angle roll cage mounted Longacre. Trickle charge battery maintainer bought
and fitted. New Hi / Low horns fitted. New front indicators installed. Front grille stripped back to clean metal, painted up like new. Nose cone and
bonnet repairs and repaint. All foam seals removed and new fitted.
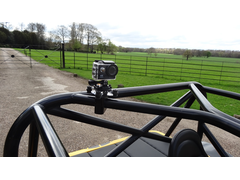
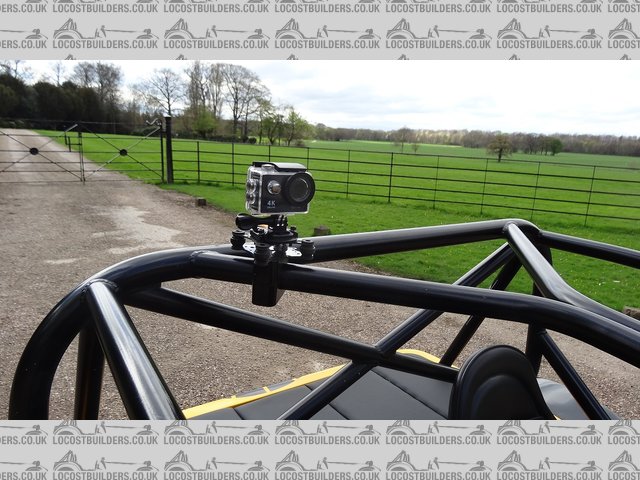
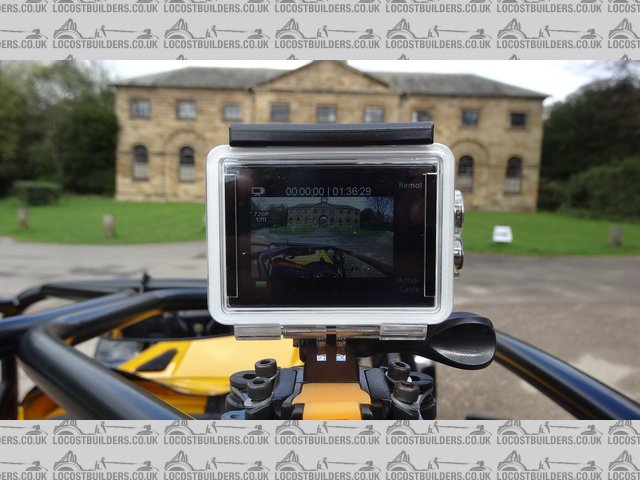
4K UHD Action Camera bought along with an AVM, to use as a dash cam, some people just don�t see you as you are very low down. I will include in the
sale.
All work I have had done / carried out has been documented and before and after photo�s which will be provided on a stick.
I had the car MOT�d on the 23/03/18 with no issues at all - no advisories.
If the buyer would like a new 12 month ticket on the car, I would be willing to do this depending on sale price.
As an indication for insurance, I am 34, 16 years NCB, 3 points sp50, 2000 miles limited per year and it was �119 � Footman James. (Absolutely
astonishing, I know!)
Tax - I think is �130.
Why I have decided to let it go: -
Quite simply, a change in personal circumstances means I am not going to get the time I want to spend on the car and drive the car, and I feel it is
an absolute waste to keep it garaged and not used. Also we need a second car that is usable for the kids and dog and my money is tied up in this so I
have to sell. It is going to be a decision I know I will come to regret�
No test pilots without specific fully comprehensive insurance for this car, which you can organise very easily, due to the performance and very
different driving techniques required for this high powered bike engine car. 3rd party cover on your normal insurance won�t cover my car if you
smashed it and that�s not a gamble I am willing to take.
I am more than willing to drive the car and demonstrate it for you until you have correct insurance in place or you are happy with the car and money
is in my bank. Sorry tyre kickers, I�m sure all you genuine interested buyers will understand this.
Full specification of the car includes, but might have missed something off: -
Engine: -
Extreme Engines Suzuki GSX1396-R Hayabusa - 188BHP
Internal Crankcase porting
Balanced and Shot Peened Con-rods
Lightened Knife Edged Polished and Balanced Crank
Gas Flowed Cylinder Head
Vernier Cam Sprockets
High Compression pistons 84mm
Race Camshafts
Cam Chain and Cam Chain Tension Recall Kit
Extreme Engines Dry Sump Kit
Power Commander III
Electric Water Pump
Large Setrab Oil Cooler
Lightweight Racing Battery
Re-packable Silencer made by Precision Engineering
Drivetrain and Clutch: -
Paddle Shift Conversion � Direct Mechanical Linkage
Trickshifter Pro allowing full clutchless up and downshifts
Heavy Duty Clutch Springs
New Clutch Pawls
Billet Clutch Slave Cylinder / Oil Pump
Freelander Differential with Quaife ATB Internals.
Trickshifter pro fitted with paddle shift allowing full clutchless up and downshifts...awesome job!
Westfield reverse gearbox fitted.
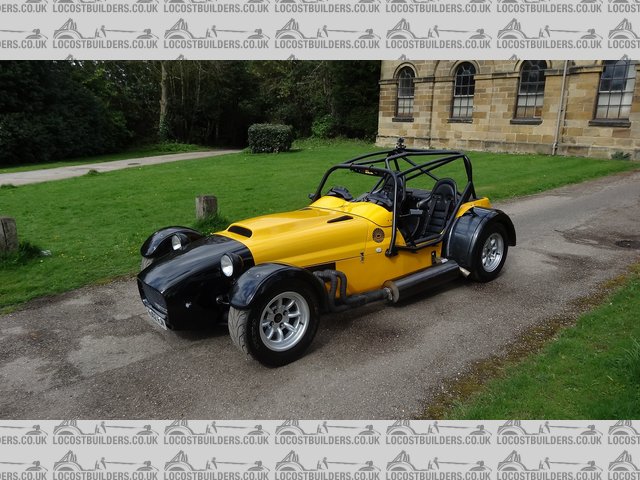
Body / Chassis: -
Year of build: 2002
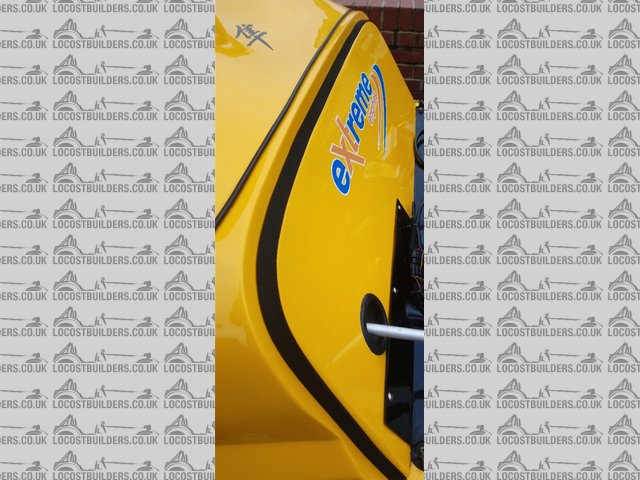
Yellow body with black arches and nosecone
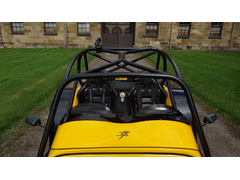
'Caged' FIA Approved Roll Cage
Detachable Front & Rear arches
Carbon effect Rear Arch Protectors
Carbon effect Lighting Pods
Westfield Aero-screen
Fully upholstered boot top
25 litre Westfield Fuel Tank
Steering / Suspension / Wheels & Tyres: -
Quick rack
Widetrack Suspension
Independent Rear suspension
Upgraded Protech Shocks and Corner Weighted
Front and Rear Anti-Roll Bars
Westfield alloy front uprights
Westfield alloy rear uprights
Disc brakes front and rear � stops very quick!
Wilwood 4 pot lightweight alloy front callipers
Floor mounted pedal box
13� Minilite wheels with Toyo R888�s 205/60/R13
Alloys are in pristine condition and tyres have good tread.
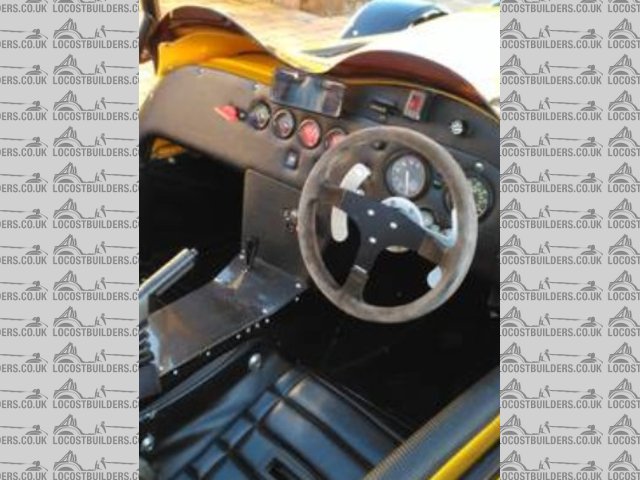
In the cockpit: -
Omex Shift Lights
Geartronics Gear indicator
Race Tech Steering Wheel with removable boss
Westfield padded race seats with Willans 4 point harnesses
FIA approved battery isolator
Westfield gauges
Oil temperature & Pressure
Water temperature
Rev Counter
Speedometer
Fuel level
Over �15k of upgraded extras on this car, quick summary below: -
Extreme Engines Overhaul - �10000
Extreme Engines Dry Sump Kit � �1300
Extreme Engines Billet Starter Motor Cover / Clutch Slave Cylinder / Oil Pump - �500
Power Commander III - �250
AB Performance Paddle Shift Conversion - �750
Trick shifter - �750
Omex Shift Indication - �150
Westfield reverse gearbox - �1000
'Caged' FIA Approved Roll Cage - �1200
Upgraded Protech Shocks - �500
Front and Rear Anti-Roll Bars - �600
I have tried to cover a lot of �answers� in the listing to questions that I asked when purchasing to save you asking. Anything else you want to know
please get in touch.
No silly offers � this is not a red top or pinto engine.
I will update a price in 48 hours so the for sale listing is exclusive as designed.
U2U me any questions you may have.
Description
Description

Description
Description

Description

Description

Description
Description
Description

Description

Description
Description

Description
Description
Description
Description

Description
Description
Description
Ian2812 - 23/4/18 at 03:51 PM
Car now advertised on carandclassic.co.uk
Cheers. Ian.
nickwestie - 25/6/18 at 01:59 PM
A mate of mine has a part share in a Megabusa and up until I heard it run i'd never really thought anything of it, what a shock I got when I
heard it running and then got a blast in it, epic!
So I saw Ian's car for sale only 20 miles from me and bought it.
It is mad, how you can put license plate on it and drive it on the road is crazy but you can so I am!
I had bought it for track days, which Ian hadn't and hadn't even given one a go, so that was my plan. There were a few little jobs needed
doing but nothing major, or so I thought. Taking it to Croft for a track day really threw up the 'gremlins' first thing was the starter
clutch failed, just sat spinning and not engaging so first track day was scrubbed! New clutch fitted and a new battery bought and fitted as the
battery seemed poor, turns out the engine is high compression so really needs 24v on the starter circuit, work in progress for this.
Anyway second track day, got there, first hurdle over. Then onto track with it, first thing it failed the 105 db noise check, showing 106db so the
noise guy was very fair and let me go out and warm it up a bit, came back in 104db, sorted we were on track!
Well it's quick, very quick and the grip from the tyres once they come on is incredible, Toyo's R888, I did Kart racing years ago and it
felt very similar, I also know that you have to be careful with loads of grip as it soon becomes easy to overstep the mark and you'll be lucky to
gather it all up. Anyway had a few hot laps with a very nervous passenger! Found the racing line and soon started to push it harder, probably a bit
too hard as my oil temp went very high so I came in, also found the clutch to be slipping, so thought it best to let it cool down. After about 40 mins
my mate took it out and the clutch was still slipping so started tinkering with the adjustment. Found that the clutch fluid was very contaminated so
replaced it. Long story short still couldn't get the clutch right so called it a day and came home, towed!!
Contacted Karl at Extreme engines and ended up with a new clutch, probably not really necessary but changed it anyway, new oil, and a briefing on how
to set up a Megabusa clutch. All done and now just waiting on the next track day.
I've also put in new Mintex pads, the difference is incredible over the standard pads, can't over emphasise here how much better they are,
so much feel and the ability to be able to get so much graduation in your braking, best money I've spent on it.
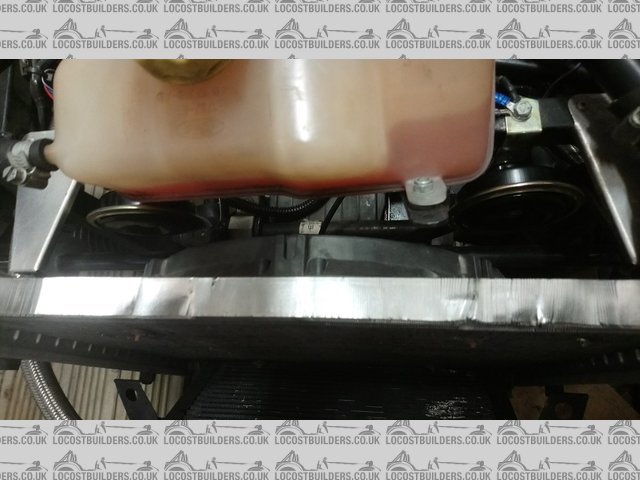
Then I had to fit a duct inside the nose cone to divert the bulk of airflow through the oil cooler and rad, turns out too much bypasses going through
the rads, path of least resistance and all that, so I'm hoping this will help a lot especially on a circuit like Croft where you seem to be on it
all the time.
hobbsy - 25/6/18 at 02:39 PM
So in short another big thumbs up for BECs then?
Clutches can be surprisingly robust as long as you've got the setup right, I never had to replace the plates in mine R1 5PW Fury and I did plenty
of miles.
I was even towed for some distance by another BEC after I holed my sump up a mountain pass in the rain. No issues.
Ian2812 - 25/6/18 at 08:52 PM
Hey Nick, nice to see you are keeping the thread going.
Sorry I couldn't make the track day, it was the day I was travelling back up the road to Aberdeen, you know what that last day at home is like...
I had list as long as my arm to do which I hadn't got round to doing in the 20 days before hand...
Sounds like you are getting it back to a track day beastie!
The fact you're driving it that hard for the oil temps to rise like that says something!
Send me a whatsapp whenever you're doing a track day, especially if you come through to the Teesside Karting track, I reckon it would be perfect
for that car!
Does it start better / run better on idle now you have the 24V set up going on?
Ian.


