alainmengoli@hotmail.com
|
| posted on 11/2/04 at 12:04 AM |

|
|
Welding?????
I think I am ok on welding but sometimes the weld dont look cosmetically pleasing i.e. not always straight especially when you spot weld it to make
sure it's all straight then weld all the parts. My questions is: Doe the SVA things fail you on it even if the weld is strong?
|
|
|
|
|
flak monkey
|
| posted on 11/2/04 at 12:24 AM |
|
|
As far as i know he SVA test doesnt look at your welding. But no doubt someone will correct me if I'm wrong.
However make sure your welds are good and strong. Remember your life and others depend on them! If you are not sure buy a chassis from someone (there
are loads of people selling them at great prices now)...better to be safe than sorry!
Cheers
Sera
http://www.motosera.com
|
|
|
James
|
| posted on 11/2/04 at 12:33 AM |
|
|
Alain,
Practice, practice, practice! Don't risk your life and all your hard work with dodgy welds.
Mostly your welds are only 1" long anyway- how can they not be straight! 
James
|
|
|
David Jenkins
|
| posted on 11/2/04 at 08:36 AM |
|
|
You can fail if the welding is obviously horrible, especially if it's somewhere critical, like seatbelt or suspension mountings.
As James says, practice a lot before you start on the chassis. Get some scrap offcuts and weld them together. Keep trying until they look neat and
tidy, then test the nice tidy joints by (a) beating them senseless with a big hammer (you should be able to wreck the metal without the joint coming
apart) and (b) sawing across the joints to ensure that you have full weld penetration.
Do this for 90 degree and 45 degree joints, and throw in a bit of round tube as well (I hate welding round tube!)
When you get to the point where your joints don't snap under the hammer, and the weld metal is going right through to the far side without
burning holes, then you're ready for the chassis!
Sounds like a heap of work, but it only took me a weekend of playing before I felt confident enough to start on the chassis. Still had to grind out a
few joints and redo them, but generally it all worked out OK.
regards,
David
|
|
|
Metal Hippy
|
| posted on 11/2/04 at 08:39 AM |
|
|
{insert joke about full penetration here}

Cock off or cock on. You choose.
|
|
|
jonti
|
| posted on 11/2/04 at 08:58 AM |
|
|
If your welds "look" wrong then they probably are...In fact, when done by an an inexperienced welder, they can "look right"
and still be wrong...... Jokes apart, penetration is key.
I can weld reasonably well and have built trailers etc over the years with no problems but I still bought a chassis......Reason ?
We're all building high performance cars here aren't we ? The stresses on the frame can be significant, the glue has to be very strong and
I was not confident enough to trust my life to my welding. If something breaks on the suspension you will almost certainly crash.(and probably at high
speed !!!)
I'm sure there are many on this site who would argue that welding the chassis yourself is do-able, the aim should be "locost" and ,
in the spirit of uncle Ron, you should try and scatch build. In essence I would agree as long as your SURE you're up to it........ I might even
do the next one meself...........HOWEVER,........If you're in ANY doubt, please don't risk it. Get someone who can weld to do it for you
or buy a chassis.
Its your neck my friend ..and you only get one.
[Edited on 11/2/04 by jonti]
OFROK
|
|
|
craig1410
|
| posted on 11/2/04 at 01:10 PM |
|
|
Hi,
I agree with all that has been said above and would add something which I didn't immediately appreciate with welding.
To get full penetration you really need to be very accurate when "drawing" the line down between the two pieces which you are welding. Do
not zig-zag back and forth across the weldsite when welding similar materials (ie same thickness) you should be welding right down the middle in
almost all cases.
Also, weld at a speed such that the "white-hot" weld pool is always at the front of the pool where it can properly melt the metal on each
side of the divide. I originally thought that if I travelled slower then I would get more heat and hence more penetration but alas this is not the
case.
To get accuracy you will need both hands on the welding torch, one on the trigger and one nearer the end. Also, get yourself in a position so that you
can comfortably move the torch the full length of the weld site without having to adjust your viewpoint or feet or whatever. Usually you
shouldn't tryo to weld more than about 100mm at a time.
I would recommend an automatic welding mask with the LCD technology to auto-dim the viewing glass as this is truly handsfree. I use a head mask with a
flip up visor but it's not ideal. Don't even think of using the hand-held mask!
There are many people on here who know a hell of a lot more about welding than me and they will help you I'm sure. Don't be put off but
get a decent welder with plenty of amps to spare and learn how to use it properly before doing anything more than tack welding. Get all the protective
gear and look carefully at what is going on in the weld pool. Don't sit with your head 3 feet from the weld site and wonder why your welds are
crap - get up close and personal!
HTH,
Craig.
|
|
|
Alan B
|
| posted on 11/2/04 at 01:18 PM |
|
|
Snipped from Craig...
"I would recommend an automatic welding mask with the LCD technology to auto-dim the viewing glass "
"Don't even think of using the hand-held mask! "
"Don't sit with your head 3 feet from the weld site and wonder why your welds are crap - get up close and personal! "
I've welded for about 25 years. and I'd say these points were crucial (OK, I've not had a auto-darkening mask 25 years, but you get
the point)....you have GOT to see what you are doing, and be in control of where the torch is....then you have a chance....
|
|
|
JoelP
|
| posted on 11/2/04 at 01:28 PM |
|
|
and to add to that, get something to stop the blobs going down your neck i had one the other day that just wouldnt go cool, bounced twice on my
head, down my neck, under my arm and down before it stops burning... i stank like a crematorium.
Beware! Bourettes is binfectious.
|
|
|
blueshift
|
| posted on 11/2/04 at 06:48 PM |
|
|
ah nutsack I knew I'd forget to get something in my last screwfix order.. extra welding glass. I weld up close and personal and the front of
the glass is getting kind of crappy from spatter.
any tips on that o welding sages?
|
|
|
Mark Allanson
|
| posted on 11/2/04 at 07:52 PM |
|
|
I have my mask about 6" to 12" away from the work, I have 'evtek' clear filters on both sides of the gold plated welding lens
(EW9), this is spatter proof plastic which only needs a wipe with a cloth to clean it off. they are usually about 99p each so no great outlay. the
gold plated lenses are about double normal ones but boy, they are worth it.
I always asume the snooker cue position with my left hand, and support the tip of the torch with my thumb so I can control the nozzle position very
accurately, and still have the steadying action of two hand on. I practice the sweep of the weld before I do a 'hot' pass, just to make sure
I can travel the weld length with the torch at the correct angle over its full length, essential on rollbar welds!
The picture shows the gold lens reflecting my pretty kitchen artex! and the kidskin TIG gloves that I use, they are only £3.99 from screwfix and are a
dream to use, with excellent feel.
 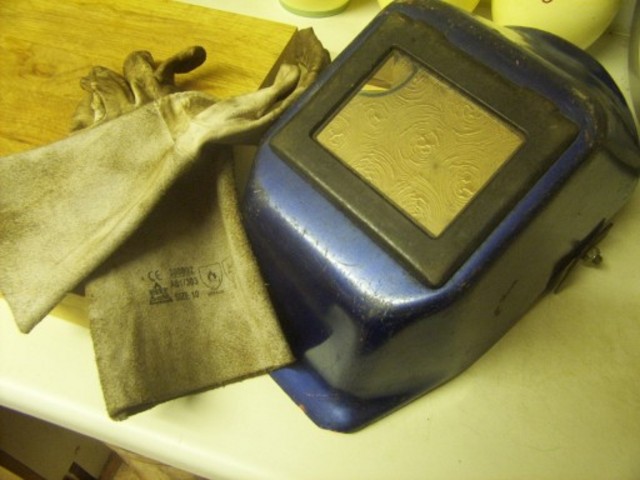
Rescued attachment WeldMask.jpg
If you can keep you head, whilst all others around you are losing theirs, you are not fully aware of the situation
|
|
|
craig1410
|
| posted on 11/2/04 at 09:06 PM |
|
|
Alan/Mark,
Thanks for confirming my "visibility" points, it's nice for a couple of "pro's" to confirm that I'm not
talking bollox! 
I think that the whole visibility thing is missed completely by most welding manuals and to me it's probably more important than any other
single thing. What a difference it has made to me to be able to see what is happening at the weld pool. To begin with I was concentrating on all the
usual stuff like wire speed, power settings, roller tension etc etc and would sometimes get good results and other times get rubbish. It was only when
I got nice and close to the weld and held the torch properly with two hands that I realised the difference. I also practice the welding stroke before
turning on the juice but hate doing round tubes (19mm ones in particular) as I can never get a nice continuous flow due to the stopping and
repositioning.
Where do you get the gold plated lenses Mark? What "darkness" level do you recommend for Mig welding? I read once that most welder's
come with lenses which were one level too dark. It may even have been you who said this...
One final thing - do you recommend the anti-spatter spray? I got some of the water based stuff and it seems to work but causes the steel to rust
afterwards if you don't dry it all off properly. Is it worth the hassle?
Cheers,
Craig.
|
|
|
Mark Allanson
|
| posted on 11/2/04 at 09:30 PM |
|
|
Leave the antispatter spray for arc welding, it just messes up mig welding, you are better off with a small bullnose chisel and a small hammer.
The gold plated lenses should be available at most welding factors, I use 9EW for everything on the car, move to 10EW if you use 150amp upwards (I
have used a 10 and a 9 back to back when using 600 amps in shipyard welding with 8mm electrodes - scary stuff when welding overhead!)
The gold lenses are not just a gimmick, OK the extra eye protection is minimal, but the BIG advantage is that the arc light is reflected back onto the
work so you can really see what you are doing (or more accurately, where you are about to weld).
I cannot emphasise enough about watching the edges of the weld pool, steer the weld pool accurately to the edges of the intended weld, alter the speed
of the weld to make this consistant. DO NOT WEAVE if you do you would probably be better sticking the chassis together with blutak. Always weld
uphand, a vertically downward weld is self supporting, that is the weld will 'cling to the previously deposited metal and barely penetrate the
work if at all - it is the only time 'a weld that looks good is good' theory really falls down. I taught evening classes at the local tech
for a while and made 15 test welds for the students to examine, the best was a vertical downhand, it looked super, I took a deliberately bad uphand
weld and the down, I beat the living sh*t out of the uphand with a 2lb lump hammer until the parent metal sheared at the HAZ (heat affected zone) and
the snapped the beautiful downhand weld with my fingers. Good lesson learned. I had deliberatley balanced the weldpool on the mig wire to give this
effect, and moved down the workpiece as the unattached pool decended under gravity. its worth trying at home to prove how weak it can be.
If you can keep you head, whilst all others around you are losing theirs, you are not fully aware of the situation
|
|
|
craig1410
|
| posted on 11/2/04 at 09:57 PM |
|
|
Mark,
Some good tips there, thanks!
About weaving, I understand that it is acceptable when welding thick and thin that you can weld along the edge of the thick piece, directing most heat
into it and then just "flick" the nozzle towards the thinner metal every few millimeters. Is that the best way to do it?
One other thing that I'm sure some of us have experienced is when we get a slightly bigger gap between tubes than we would like. This happened
to me on some of the more awkward compound angled pieces where I would tend to get it perfect except for one face for some reason. I would then have
to "fill" the gap with weld on the bad face. Don't get me wrong, if it was basically a crap fitting tube then it would get binned
and redone but I'm talking about sawing and filing a piece for upwards of 45 minutes only to find a 3 or 4mm gap on one face.
My method of fixing this was to weld along each side of the gap once and then weld down the middle. Is this okay?
Cheers,
Craig.
|
|
|
Mark Allanson
|
| posted on 11/2/04 at 10:24 PM |
|
|
When welding thin plate to a much thicker parent workpiece, I would use the amps requied for the thicker metal and allow the weld pool to swell onto
the thinner plate until the pool lifts upto the upper edge of the thin plate.
Gap filling. This is do as can do! On pipe welding (I am talking 1/2" wall thickness 8" diameter steam pipe), you usually get gaps because
the pipe cutter, a 'lathe' with a gas axe attached, has play in the bearings and the start of the cut is slightly different to the end of
the cut. Bugger. You tack weld in 3 places then drive in wedges to hold the position. place a low hydrogen root weld in the intentional 1/8"
gap, but this can be upto 1/4 in places, if the gap is great you key hole weld the gap, that is pass up the sides in advance of the weld to lessen the
gap in a U shape. if you do this with 1" ERW, the distortion would be monumental. Your method is perfectly acceptable, I would add at flying
tack at the wide end to reduce any distortion, and perhaps a wedge in the unwelded side of the box section for good measure.
Distortion is dead easy to counter once you understand it. If you bung hot metal in, it will contract as it cools, drawing the metal together. You can
shrink a tube causing distortion by heating it with a blow lamp in a localised area and allowing it to cool, curing a tube which is over tensioned is
more of a problem, you would need to tension the tube with a dozer and heat and allow to cool very slowly (cover with loft insulation for a few
hours)- pain in the ass!
If you can keep you head, whilst all others around you are losing theirs, you are not fully aware of the situation
|
|
|
alainmengoli@hotmail.com
|
| posted on 12/2/04 at 01:51 AM |
|
|
Thanks lads thinks I understand. I mean I do . Really ???!!! Just built a tv stand for my bar and it is poo but thats because I had 1 hour to do it
and steel suppliers never cut bits to the same lenth hence gap filling. But think I can do it, plus I haven't got a choice one off chassis!!!
Think I'll use round tube instead of square. Got me one of those tube cutters from ebay so will have nice tolereances.
One thing for sure, preparation is vital, I mean getting the gaps and grooves right priior to welding makes it so oo much easier .
Cheers again
|
|
|
jonti
|
| posted on 12/2/04 at 12:25 PM |
|
|
quote:
Originally posted by alainmengoli@hotmail.com
Just built a tv stand for my bar and it is poo
But think I can do it
Think I'll use round tube instead of square. Got me one of those tube cutters from ebay so will have nice tolereances.
getting the gaps and grooves right priior to welding makes it so oo much easier .
Cheers again
Please don't misunderstand me and please feel free to tell me to p*ss off but but I'm even more worried about you now mate.
However, if you're determined to go ahead...square tube will be much easier to work with than round.
Butting round onto the side of round really needs a corresponding round profile cut into the abbuting tube ...Use square, get y'self an angle
grinder and one of those bench adaptors from Machine Mart that turn it into a chop saw.
And for f*cks sake practice practice practice before you start to glue up a chassis......
[Edited on 12/2/04 by jonti]
OFROK
|
|
|
David Jenkins
|
| posted on 12/2/04 at 12:40 PM |
|
|
I agree in some ways with Jonti, and disagree in others!
First of all, don't be afraid to make your own chassis - many people have, without problems.
I agree about practice, as I said in a previous post. I also agree about round tube - it's hard enough to weld in a straight line and in a
single plane on square tube, without having to learn how to move the torch around a curved weld.
Have a go, if you feel you want to, but keep life as simple as possible by sticking to the book design.
regards,
David
|
|
|
craig1410
|
| posted on 12/2/04 at 01:01 PM |
|
|
I agree, I hate doing the small diameter roudn tubes. The larger diameter round stuff (like 2" and above) is easier because it is closer to a
straight line but it's still more difficult than straight stuff.
You may be thinking that round will be easier as you can avoid having to do compound angle cuts in square stuff. If so then you should be aware that
the book and McSorley Locost chassis have been designed to avoid as many compound cuts as possible. There are still a few but these can be cut and
fettled to suit without any major problems.
Why not build yourself a frame on which to build the car? A few people have built these using 1" ERW with castors on them to allow you to wheel
the chassis around. Believe me it will be worth it to get the chassis up a bit higher as your knees take a lot of abuse crawling around the chassis if
it's on the floor! Just make absolutely certain that the building surface is perfectly flat and square when you've finished.
By the time you have built your chassis you will be a much better welder than you were at the start but you need to achieve a certain minimum standard
before you do start. Try to find someone (mechanic, welder, engineer) locally who will come round and set your welder up and give you some basic
instruction. It might cost you a bottle of whiskey or something but will be well worth it!
Cheers,
Craig.
|
|
|
Alan B
|
| posted on 12/2/04 at 02:47 PM |
|
|
While I do not dispute Mark's expertise and practical knowledge and experience, I feel I need to redress the balance concerning downhill
welds....a little example will help.....
I designed an automatic welding machine (serveral actually) and this particular one made the 5 legged office chair bases...large dia short tube in the
centre with 5 rect (with one rounded end) tubes arrayed in a circle.....I copied the manual process, ie downhill MIG.
Believe it or not this considered a fairly crucial application...not life or death, but failure could injure someone...so every 10th part is tested to
destruction....VERY rarely does one fail the test, and if so the previous batch of 10 are all rejected and adjustments made to correct the fault
(usually spatter, or torch misalignment)
Hope this shows that downhill MIG is not ALWAYS bad......it is certainly my choice for vertical welds.
Edited to add....
BTW, that company produces several millions poundsworth of office chair parts per year and ALL vertical welds in the entire factory (manual, auto,
robot) are downhill.....and on all parts failures are bad news, but are rare.
[Edited on 12/2/04 by Alan B]
|
|
|
suparuss
|
| posted on 12/2/04 at 04:44 PM |
|
|
thats what i thought alan, i weld any which way i need to and have never had strength problems, just need to watch the pool!
at the end of the day its all about experience, you could have all the best weldors in the world here posting advice but nothing compares to doing
it, getting it wrong, realising where you went wrong and then knowing not to make the same mistake again.
|
|
|
craig1410
|
| posted on 12/2/04 at 05:09 PM |
|
|
Interesting to see it from the other side although I must admit that I prefer to do uphill vertical welds as I feel that I can see the weld pool
better. This is probably the case as my chassis was built on a base board which was at floor level and therefore I was looking downwards at all the
weld sites.
I have also found that when doing downhill welds I sometimes get big blobs of metal falling off and causing fireworks on the garage floor!
What happens to the shielding gas in each of these cases (uphill/downhill)? Is there any advantage in the shielding for one method or the other? CO2
is cold and therefore should sink which might help to shield an uphill weld site for longer. The actual weld pool should be shielded in either case of
course, if the gas is flowing correctly.
Cheers,
Craig.
|
|
|
jonti
|
| posted on 12/2/04 at 07:10 PM |
|
|
Well I tell yer.........
I wish I'd had all this advice when I bought me first welder
If yer man reads all this and practices ( thats the key!) praps he'll be ok after all.
I should try makin' another TV stand first though !
OFROK
|
|
|
craig1410
|
| posted on 13/2/04 at 12:10 AM |
|
|
Jonti,
He he!
Reading Alain's posting again I'd have to agree that another TV stand might be a good idea... I'm not trying to take the pi$$ or
anything Alain but it is quite funny when you admit that the TV stand is "poo" but that's okay because you know you can build a car
chassis. You sound like a born optimist to me and I'm sure you'll do fine!!
Cheers,
Craig.
|
|
|
James
|
| posted on 13/2/04 at 02:19 PM |
|
|
Optimism
quote:
Originally posted by craig1410
You sound like a born optimist to me
You need to be for this bloody hobby!
Alain,
Don't let us put you off- it's fun making your own chassis (if you keep is standard anyway!) and there's a good sense of
satisfaction.
I really would recommend against using round tube though. I can't personally see any benefit at all and lots of disadvantages! For a start-
imagine how hard it's going to be to rivet anything to it!
Then add in how much harder it will be to weld and that you'll have to cut loads of fish mouths etc. Would be a nightmare I'd have
thought!
James
|
|
|