Mash
|
| posted on 19/5/16 at 06:05 PM |

|
|
New MK Indy owner
Hi folks
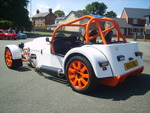
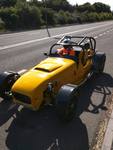
After a few disappointments, finally found a decent car just outside my budget and picked it up this morning.
Pinto engine, type 9 box, loads of bits and pieces. Looking forward to getting insurance and getting it on the road 
Will post some pictures when I work out how 
|
|
|
|
|
zx12r dug
|
| posted on 19/5/16 at 07:30 PM |
|
|
Hi pal welcome
|
|
|
LBMEFM
|
| posted on 20/5/16 at 04:45 AM |
|
|
Well done, just in time for the summer, if we get one of course, have fun and take it easy.
|
|
|
nick205
|
| posted on 20/5/16 at 07:43 AM |
|
|
Welcome aboard - plenty of good people and help available on here.
Take care and have fun 
|
|
|
Mash
|
| posted on 24/5/16 at 05:18 PM |
|
|
Thanks for the welcome guys
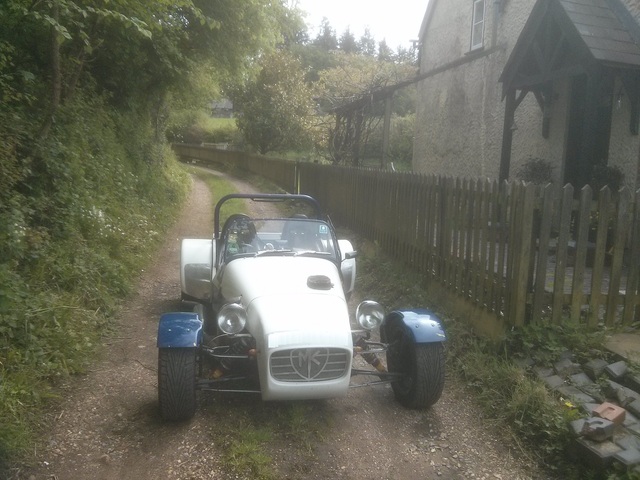
Finally worked out that my photos were too large to up load, so here is one of the car:-
 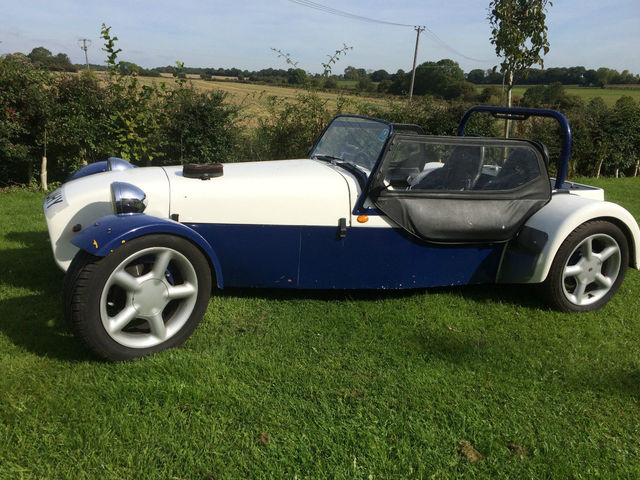
Description
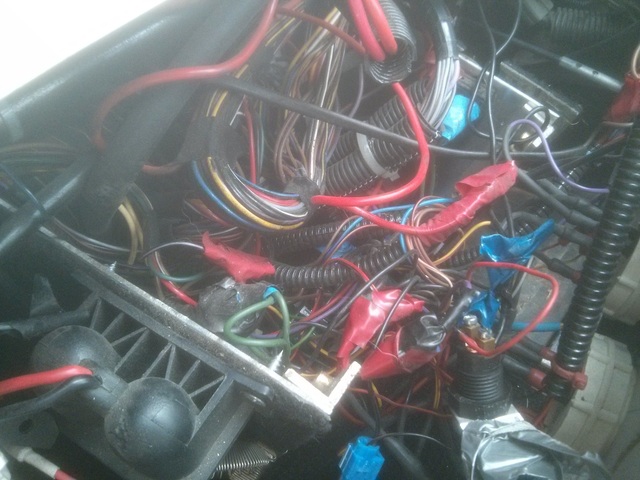
It was apparent that it had one or two rough edges, but I took the dash apart to look at the wiring today and found the biggest mess of spaghetti
I've ever seen! This could take some time. Cut out switch was in amongst it all, and the 12v live was just sitting there unprotected amongst
some of the dodgiest connections I've ever seen. 
Will get there eventually...
Description
[Edited on 24/5/16 by Mash]
|
|
|
Toprivetguns
|
| posted on 24/5/16 at 05:55 PM |
|
|
Welcome aboard ! Bet you can't wait to get her up and running
Only drive as fast as your angel can fly... !
|
|
|
CosKev3
|
| posted on 24/5/16 at 06:01 PM |
|
|
Glad you've found something better!
Pretty sure whatever needs tidying on your MK won't be a patch on that crock of poo thing you were going to buy!!!
|
|
|
Adamirish
|
| posted on 24/5/16 at 08:14 PM |
|
|
quote:
Originally posted by Mash
It was apparent that it had one or two rough edges, but I took the dash apart to look at the wiring today and found the biggest mess of spaghetti
I've ever seen! This could take some time. Cut out switch was in amongst it all, and the 12v live was just sitting there unprotected amongst
some of the dodgiest connections I've ever seen.
[Edited on 24/5/16 by Mash]
Welcome to the club!
Trust me on this, get the wiring sorted! I had the same issue as yourself, I rogue live wire I didn't know about. Threw the kill switch on one
day and saw smoke, lots of it! Cut the kill switch sharpish but the damage was done. A live wire was dangling around in there and somehow found its
way to the top of the fuse box.
After I changed my undies, I cut out the burned wiring, replaced it PROPERLY(!) and all is well now. Also went through everything behind the dash
while I was at it.
I dread to think what would have happened if I had of been driving the car at the time....
Your first proper drive in the car you will love. These things are just fantastic. Enjoy!
MK Indy 1700 Xflow
|
|
|
Mash
|
| posted on 25/5/16 at 01:48 PM |
|
|
Thanks again guys.
Still working on it.....
Spaghetti
|
|
|
SJ
|
| posted on 25/5/16 at 02:27 PM |
|
|
Not sure mine looks much better. I used most of the Sierra loom so lots of spare wire. On the plus side the electrics have always worked perectly
|
|
|
rm0rgan
|
| posted on 26/5/16 at 08:11 AM |
|
|
quote:
Originally posted by Mash
Thanks again guys.
Still working on it.....
Spaghetti
Out of site, out of mind :-)
Sigs are uncool.
|
|
|
Bluemoon
|
| posted on 29/5/16 at 06:23 PM |
|
|
Hi Just take your time with it, but do make sure the electrics are safe, last thing you want is an electrical fire... If in doubt get some local
help.. Its a good excuse to find out what you have. I have used the sierra loom but striped out all the unwanted stuff and shorted it as required, now
have a huge box of "spare" wire larger than the original loom..
Given the choice I would rather have iffy electrics and good mechanics, but I find the electrics simple to understand.
You could always re-wire over the winter if need be after tidying up enough to make sure it's safe..
Dan
|
|
|
Mash
|
| posted on 29/5/16 at 06:56 PM |
|
|
Yes thanks Dan.
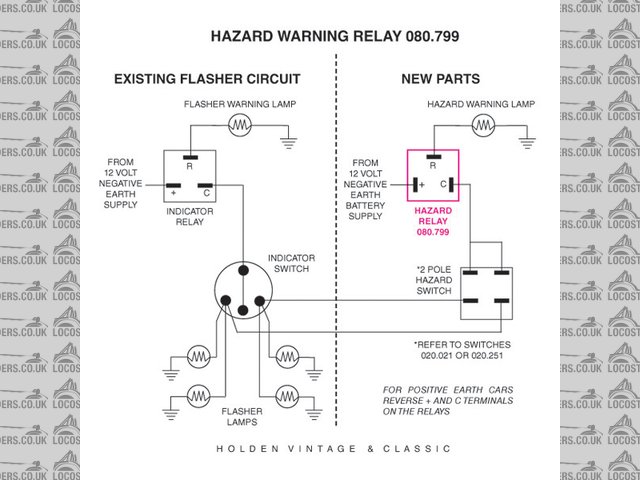
I'm currently sorting out some critical issues. Made the cutout safe, wired up indicators to a toggle switch and a separate hazard switch
(Sierra stalk was shot), and I'll probably do a full sort out later in the year as you suggest.
Mechanically it doesn't seem too bad, fingers crossed Although it does appear to have a wear problem with the left front tyre, so I'll
need to check all the front end.
|
|
|
Mash
|
| posted on 11/7/16 at 04:25 PM |
|
|
Off driving for 6 weeks while I recover from a hip replacement, so I've started my modifications by ripping out the electrics and replacing
them.
Wasn't happy with my indicator/hazard set up, so I've re-wired that using two flashers and it appears to work
Description
Going to set to on wiring up the head lights and the wipers so that I can ditch the stalks altogether, then it will just be a starter switch setup to
replace ignition key/steering lock.
Also, painted my screen surround satin black ( was dark blue before)
 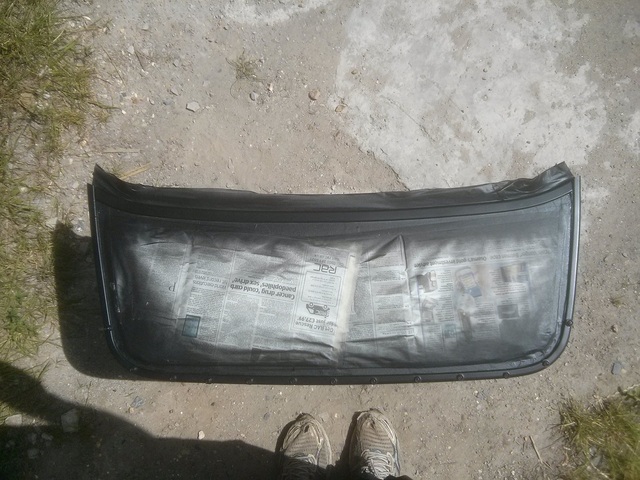
Description
Just waiting for the alloy sheet to arrive so I can make some new supports
Wanted a Momo Steering wheel to replace my Mountney, but they're about £200 so painted the Mountney spokes satin black instead
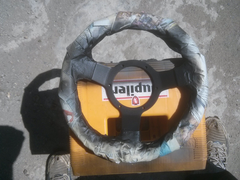 
Description
Made a carbon fibre disc to cover the hole that should have a horn push, and it doesn't look too bad
 
Description
Got some new (secondhand) seats coming in a couple of weeks too when I can drive over and pick them up .....
|
|
|
Toprivetguns
|
| posted on 11/7/16 at 05:28 PM |
|
|
Juplier - what a beer !
Only drive as fast as your angel can fly... !
|
|
|
Mash
|
| posted on 11/7/16 at 05:51 PM |
|
|
quote:
Originally posted by Toprivetguns
Juplier - what a beer !
Yes indeed My cousin lives in Belgium, and she brings me a crat every now and then
|
|
|
Mash
|
| posted on 19/7/16 at 02:18 PM |
|
|
I decided I didn't like the steel windscreen supports as they look a bit rubbish, and they're not both bent the same, plus I'm going
satin black screen and supports, so, decided to make some alloy ones:-
[img]
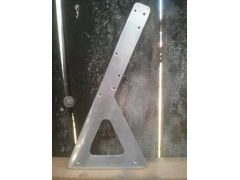 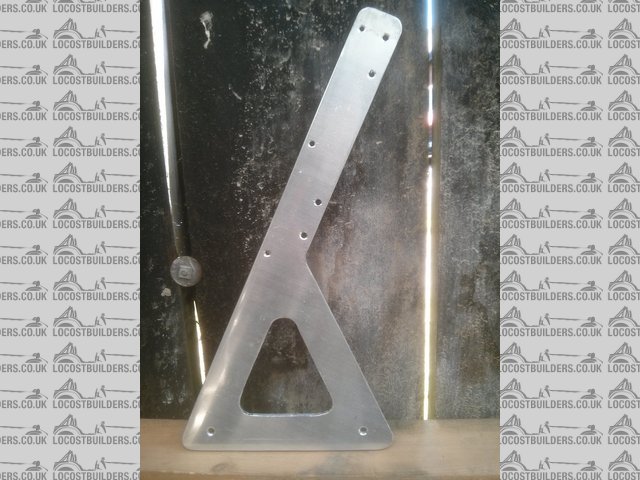
Alloy windscreen support
[/img]
Bought some 4 mm alloy plate from ebay, traced the existing ones shape onto it, and cut them out with a jigsaw, then filed the edges down and drilled
holes to match the existing. Going to rub them down and etch primer them and then spray them. I say "them", but I have still to finish
the second one off, and it's too hot out in the workshop at the moment
Have removed the sierra stalks plus the top part of the outer column and replaced with a much neater tube arrangement. It seems to work fine without
the top bearing, but not sure if I should risk it ?
|
|
|
Mash
|
| posted on 26/7/16 at 12:52 PM |
|
|
So, I searched for info on the top steering column bearing, and the consensus seemed to be that you need somethinng there, so I bought bearing that
was supposed to fit in the end of the convoluted tube, but it didn't
My solution was to cut off all of the extraneous bits from the alloy top section that holds the bearing. i.e. stalk brackets, steering lock/ignition
barrel. and various lugs. Then I replaced it back on the column:
[img]
 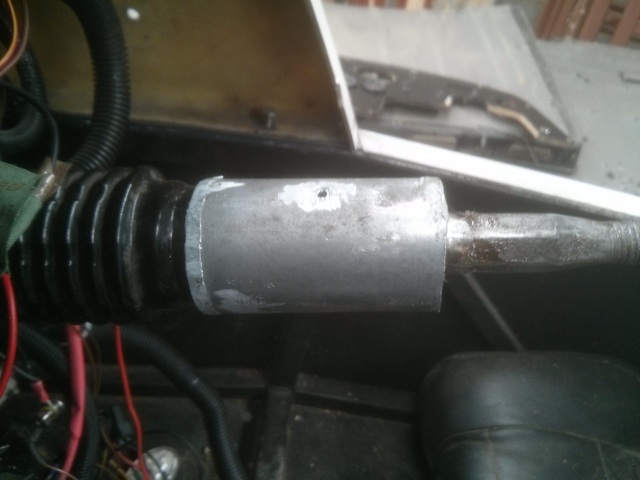
rubbish ground off
[/img]
Then I made up a plastic tube that fits around it and butts up to the convoluted part, and put that in place:
[img]
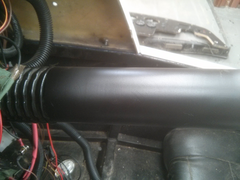 
Plastic tube cover
[/img]
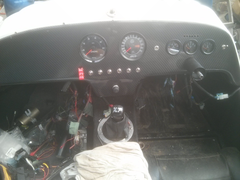
Doesn't look too bad with dash in place:
[img]
 
plastic cover in place
[/img]
Next job is to cut the holes for the speedo and rev counter, plus all of the toggle switches
|
|
|
Mash
|
| posted on 27/7/16 at 05:50 PM |
|
|
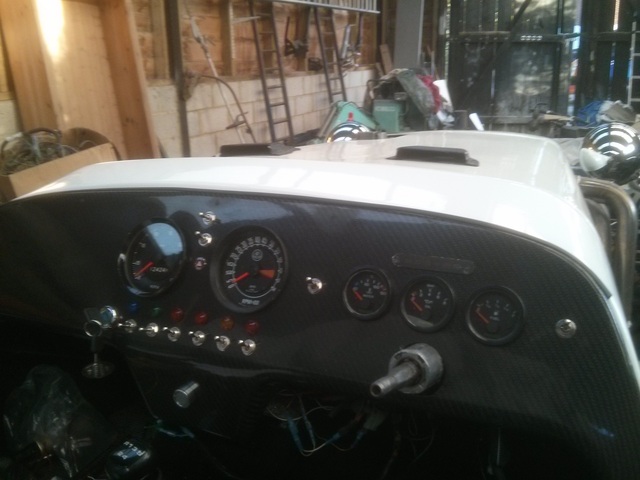
Today I cut holes for speedo, rev counter and switches, and then did a test fit:
[img]
 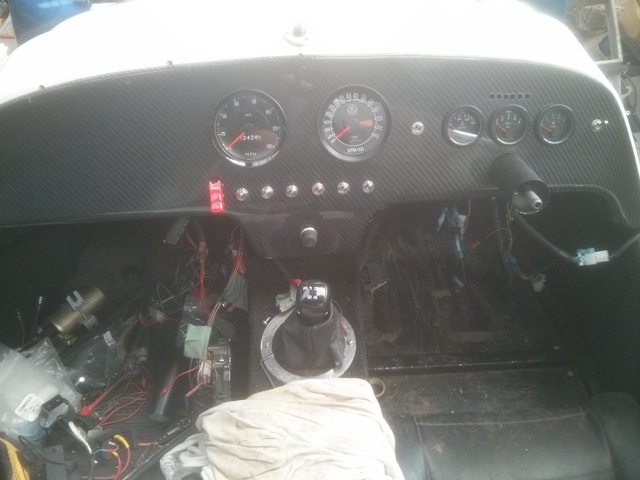
new dash test fit
[/img]
Missile switch is to turn on ignition. Decided to put it furthest away so that I wouldn't accidentally knock it off. Any thoughts would be
welcome
Still have ignition key (2 position second of which will feed missile switch), indicator switch, hazard switch and warning lights to cut out for.
Not completely sure where they're all going to go, although indicator switch will be top between speedo and rev counter, and lights will be
above relevant toggles.
|
|
|
Mash
|
| posted on 10/8/16 at 05:20 PM |
|
|
This is just a small sample of the various bits of tape, cable ties, screw connectors, scotch locks, and general rubbish I have removed from the
wiring. It's starting to look a whole lot better now and less likely to self combust Should be just about done in the next few days
[img]
 
Removed rubbish
[/img]
Just need to finish it off, and wire up the Rev counter (my addition) and the omex rev limiter (fitted, but for some reason not connected at coil
end), and then I can start putting it back together, and fitting the new scuttle and scuttle bulkhead/tray I got from a very nice bloke on here -
cheers Indy Bird Old ones were full of redundant holes, and had been knocked about a bit. In fact, old scuttle had bulkhead as part of it, and a
separate tray bodged together from alloy plate.
|
|
|
Adamirish
|
| posted on 10/8/16 at 08:31 PM |
|
|
RE your steering column top bearing. When I was doing my quick release and had it all apart, both top bearings were shot and were both difficult and
expensive to track down, I scraped the whole ford arrangement and bought one of these in the correct diameter.
http://simplybearings.co.uk/shop/p22810/SBPFL205+Oval+2+Bolt+Pressed+Steel+Bearing+Housing+with+25mm+insert/product_info.html
Luckily enough, the mounting holes were near enough perfect to the existing mounting holes in the chassis. I had to file off about 1mm of the mounting
on the car to make it perfect. Now there is absolutely no play at all in the column and an added bonus is if the bearing ever needs to be changed
again, it's dirt cheap and easy to find.
MK Indy 1700 Xflow
|
|
|
Mash
|
| posted on 15/8/16 at 01:05 PM |
|
|
Cheers Adam, might look at some of those if mine go up the Swanny
|
|
|
Mash
|
| posted on 21/8/16 at 04:37 PM |
|
|
Managed to get a set of Westfield race seats cheap from a nice bloke on the Westfield forum:-
[img]
 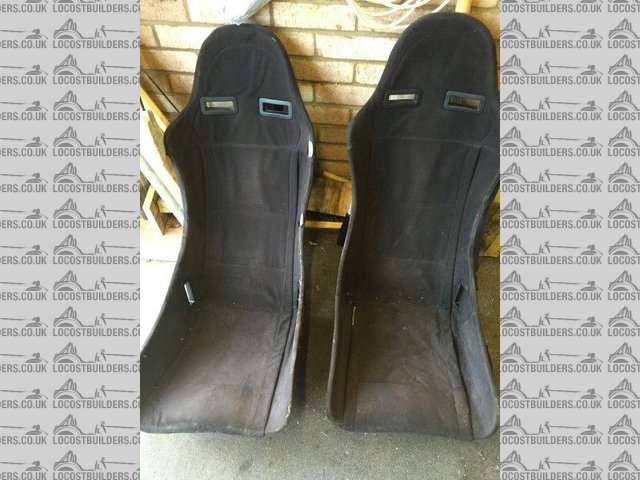
Description
[/img]
Stripped them down......
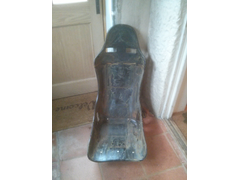 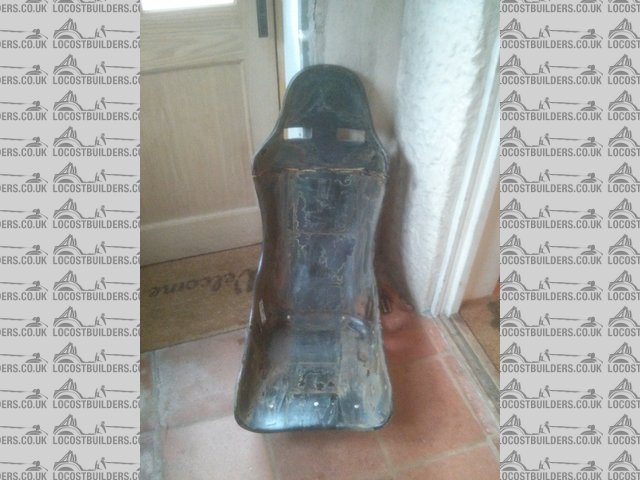
Seat stripped
.....and they're definitely Westfield if nothing else
 
Seat Westfield badge
Cut an old army roll mat (only a few quid of the bay) in half length ways and glued that to them
 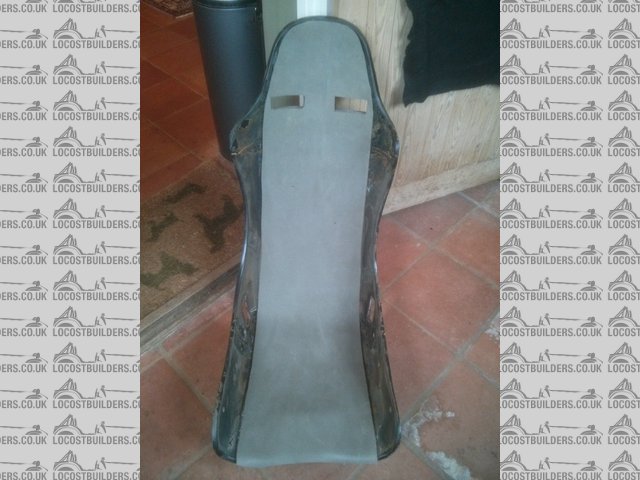
Roll mat fitted
Have some stretchy black headlining material I got for my van from the same place, so will be covering them in that
Also got a good deal on an unused Facet red top from a nice chap from here (thanks Jenko)
[img]
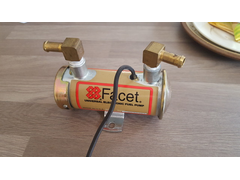 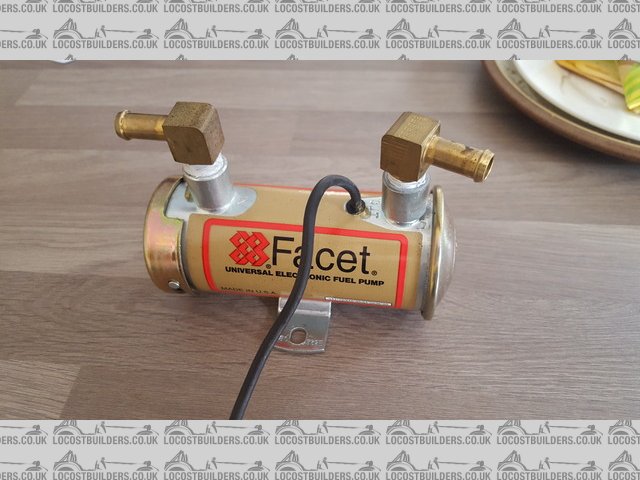
Facet Red Top
[/img]
So now I can remove the mechanical pump and replace it with this one
Hopefully the sun will come out again so I can actually get the car on the road again soon
|
|
|
Mash
|
| posted on 25/8/16 at 07:49 PM |
|
|
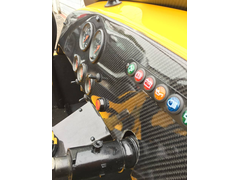
Think I'm finally happy with the dash layout. Removed th missile switch for ignition and put a bike ignition switch in which energises the
savage start button on the second position.
Just need to drill it out to fit the scuttle then clean it up and fit the switch labels
[img]
Description
[/img]
Speedo cable is a bit "heath robinson" so it will be interesting to see if and how well it works when i finally road test it
|
|
|
rm0rgan
|
| posted on 26/8/16 at 01:58 PM |
|
|
quote:
Originally posted by Mash
Think I'm finally happy with the dash layout. Removed th missile switch for ignition and put a bike ignition switch in which energises the
savage start button on the second position.
Just need to drill it out to fit the scuttle then clean it up and fit the switch labels
[img]
Description
[/img]
Speedo cable is a bit "heath robinson" so it will be interesting to see if and how well it works when i finally road test it
That looks such a difference - good work!
You know you can buy waterproof covers for the toggle switches too - would look good on the black carbon.
Dash
Sigs are uncool.
|
|
|