Gav
|
| posted on 22/10/05 at 08:24 PM |

|
|
Blade engine cradle
Hi guys,
im just drawing out my plans for my engine cradle and i think ive pretty much got it right.
However could any of you guys post some pics of your fireblade cradle's just to make sure ive not cocked up 
cheers gav.
|
|
|
|
|
ChrisGamlin
|
| posted on 22/10/05 at 08:37 PM |
|
|
There are some of my R1 cradle in my picture archive. I used to have a blade in the car and used the same pickup points etc and used pretty much the
same design of cradle.
Chris
|
|
|
Gav
|
| posted on 22/10/05 at 08:43 PM |
|
|
So its basically two straight top bars and a take off from the horizontal bar accross them which picks up the bottom mounts that would normally attach
the rear suspension linkage?
i was planning on taking that from the bottom chassis rails, however with this design i guess you could just undo the prop/gear/eletrics/fuel and just
lift the entire thing out?
|
|
|
ChrisGamlin
|
| posted on 22/10/05 at 08:54 PM |
|
|
Yep, I originally used the Stuart Taylor cradle for the blade which was an H shape. Imagine my R1 cradle with a bar running across the top of the
gearbox to join the two parallel bars together. The gearbox mounts then picked up on this crossmember (rather than onto my chassis diagonal as with
the R1). If done like this, you disconnect wiring, fluids and prop and then can lift the engine straight out.
Also have a look how Westfield do theirs with an X shaped cradle across the chassis, IMHO its probably a bit better than my design because it will add
a bit more strength to the engine bay area, and also allows you to lift the engine out in the same manner.
Here's a few of my Mate's Megabusa, obviously for the Hayabusa engine rather than blade but the fundamental design is the same.
here
and
here
Westifeld also use a lower cradle that links the lower chassis to the lower gearbox mounts, it may be necessary with their X frame design but with the
H frame I used the blade and R1 awere / are fine without it (the blade cradle was 2" x 1" as the gearbox also picked up onto it so needed
to be a bit stronger than the layout I use for the R1)
[Edited on 22/10/05 by ChrisGamlin]
|
|
|
ChrisGamlin
|
| posted on 22/10/05 at 09:00 PM |
|
|
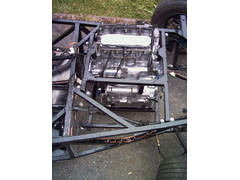
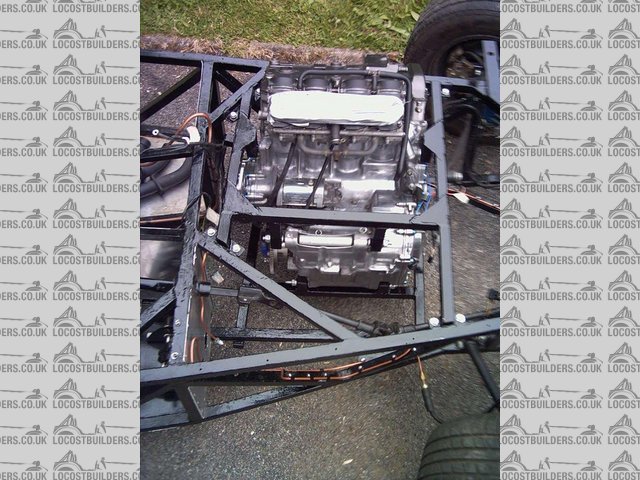
Here are a couple of very poor quality pics of my old blade cradle, best Ive got Im afraid
 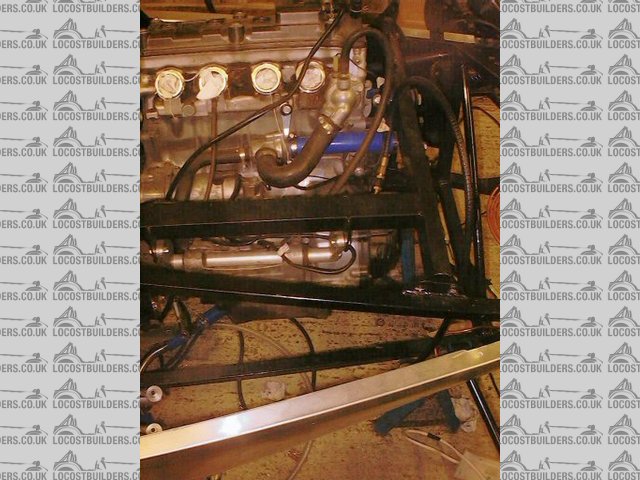
blade cradle 1
 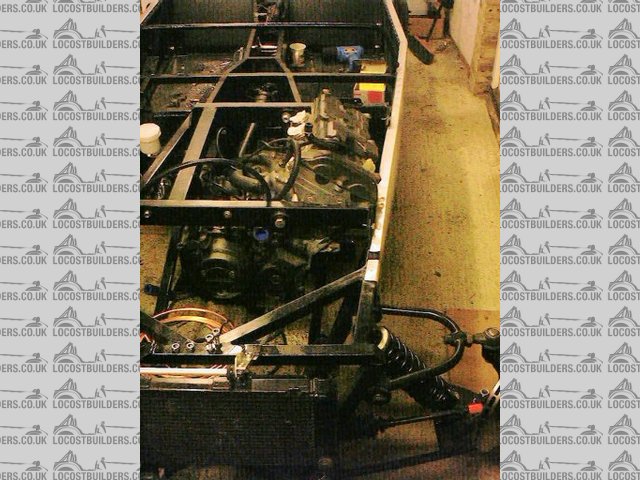
Blade cradle 2
Chris
|
|
|
Gav
|
| posted on 22/10/05 at 09:11 PM |
|
|
Thanks for that Chris, i did see X type cradle design in your pics, i think you could probably remove the entire R tube since the whole bay would be
crossed braced.
|
|
|
ChrisGamlin
|
| posted on 22/10/05 at 09:18 PM |
|
|
Yep if doing that I would remove the diagonal tube that mine picks up on (I dunno the book name for it - I assume thats the "R" Tube?).
One thing I wish I had done differently is to make the pickups on the chassis different. Mine are vertical on the edge of the chassis rail so when
dropping the engine in, you have to hold the engine precariously whilst putting the bolts through. Had I done it with bucket bushes like the Westie X
brace, which sits onto horizontal plates on the chassis, it would make it much easier as the cradle would just sit on the chassis by itself without
the bolts.
|
|
|
andrew.carwithen
|
| posted on 22/10/05 at 09:43 PM |
|
|
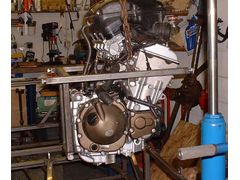
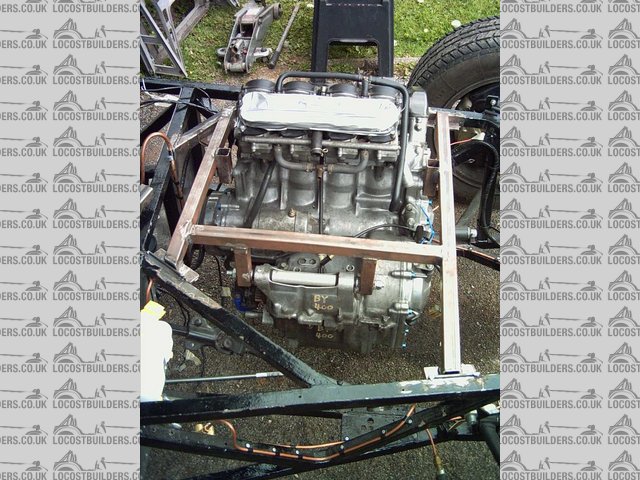
I made my own blade cradle. Similar principal to that of Stuart Taylor type (i.e. H-frame)
I also welded in a lower H-frame across the bottom chassis rails to pick up the rear lower engine mounts.
Rescued attachment engine finally bolted in position.jpg
|
|
|
ChrisGamlin
|
| posted on 23/10/05 at 10:47 AM |
|
|
Andrew, out of interest how come you needed the two sets of UJ's in the steering column?
Chris
|
|
|
Peteff
|
| posted on 23/10/05 at 12:29 PM |
|
|
It's not a blade but it's the same idea. It seems the obvious solution is the easiest as well. Six bolts and the prop undone and all the
lot lifts out with the hangers I left on bolted to the chains.
Rescued attachment cradle5.jpg
yours, Pete
I went into the RSPCA office the other day. It was so small you could hardly swing a cat in there.
|
|
|
chrisf
|
| posted on 23/10/05 at 02:43 PM |
|
|
Here's mine.
|
|
|
andrew.carwithen
|
| posted on 23/10/05 at 05:42 PM |
|
|
quote:
Originally posted by ChrisGamlin
Andrew, out of interest how come you needed the two sets of UJ's in the steering column?
Chris
That's how Tiger supply it as part of the kit.
I think its to keep it out of the way of the engine (don't forget, the Avon is originally designed to use pinto or zetec power and a straight
shaft would deffo foul it.)
A further bonus is that as its dog-legged, it would tend to fold in the event of an accident.
Andy.
|
|
|
ChrisGamlin
|
| posted on 23/10/05 at 05:56 PM |
|
|
Ah ok, makes sense if its the same one as they use for other engines, just asked because Id think you might get a bit more slop in the column with an
extra UJ in there.
|
|
|
skint scotsman
|
| posted on 23/10/05 at 08:04 PM |
|
|
hijacking the thread abit but...
...once you've got the cradel built how have you guys atatched the engine to the cradel??
I'm thinking threaded bar with ruber gromits and an assortment of nuts and washers or am i just making things to complicated??
car engines sit on rubber mounting blocks do bike engines in cars still need to??

|
|
|
andrew.carwithen
|
| posted on 23/10/05 at 09:06 PM |
|
|
My engine's bolted solidly into cradle as is cradle to chassis.
Used threaded bar through both rear engine mounts and high tensile bolts into threaded bosses on cylinder block.
|
|
|
skint scotsman
|
| posted on 23/10/05 at 09:32 PM |
|
|
ok so it is safe enough to bolt it solid
is it also safe enough to just bore holes through the rhs and bolt it that way or does some form of bracket need to be made??
appologies for what are probably stupid questions.
|
|
|
andrew.carwithen
|
| posted on 23/10/05 at 10:05 PM |
|
|
I would think bolting through the rhs would probably weaken it (even if you welded in crush tubes.)
I made up brackets out of angle iron and welded these to the chassis rails. Corresponding flat brackets were welded on the ends of the H-frame
enabling the cradle to sit on the angle iron brackets and then bolted through.
The attached pic should explain what I mean.
Rescued attachment Engine cradle 2..jpg
|
|
|
skint scotsman
|
| posted on 24/10/05 at 07:47 AM |
|
|
cheers andrew obvoiusly didnt explain my self very well but your pic both simplyfies my question and answers it .....

....... the area in the green box was what i was reffering to your threaded bar runs through the box section used to make the cradel.
as first suspected i was trying to make things difficult for myself
|
|
|
andrew.carwithen
|
| posted on 24/10/05 at 08:12 AM |
|
|
Ah! I see what you mean, now....I thought you meant the main chassis rails themselves....
In fact, I need to apologise, the mount you've highlighted in my pic, is indeed rubber mounted.
Its the original rubber bushes and spacer tube that was originally fitted to the bike.
The rest, however, is bolted solidly, so I don't think the engine will move anyway.
Where the threaded bar passes through the RHS mounts, I have welded in crush tubes to prevent the mount 'squashing' under tightening and
to prevent the hole in the mount elongating over use.
|
|
|
Gav
|
| posted on 12/11/05 at 01:41 PM |
|
|
Ive got some more garage time this weekend,
ive ordered my bodywork so im not sure how low it should sit, from the pics it looks like the bolts at the front are 100mm ish from the top rails?
also to get the engine angle right, im assuming that the honda logo on genterator cover should be level ?
|
|
|
ChrisGamlin
|
| posted on 12/11/05 at 04:00 PM |
|
|
Gav, the best way to do the engine is to put the chassis on 1-1.5"" blocks of wood then sit the engine on the floor and position it where
you want it to go. The engine really needs to go as low as possible but you're limited by ground clearance (about 1" to 1.5" below
the chassis is about right hence the blocks). Doing it this way also assures that the engine sits at the right angle as sitting flat on the floor is
about the angle it needs to go.
Chris
|
|
|