TheGecko
|
| posted on 10/11/13 at 12:28 PM |

|
|
There's a few updates I hadn't got around to posting here due to being busy with the Nationals and then sick so, here they are.....
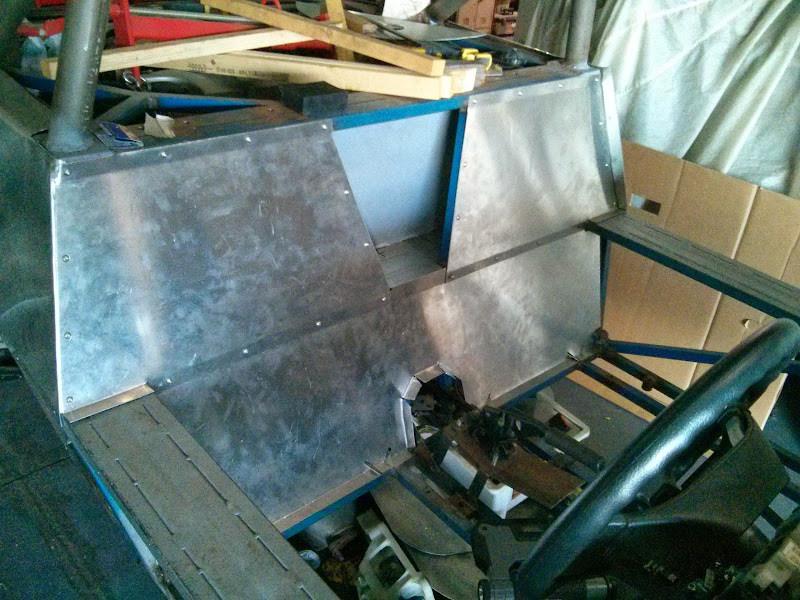
I found time to cut and fit the seat back panels:

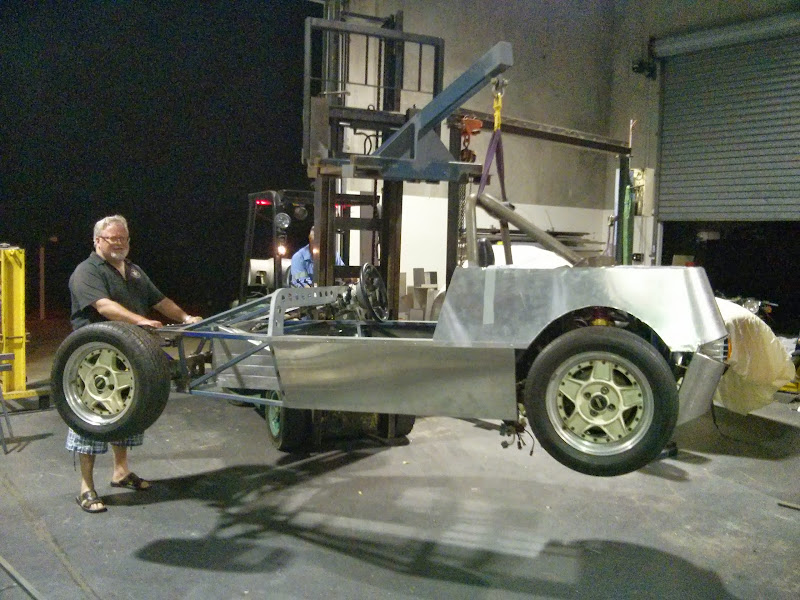
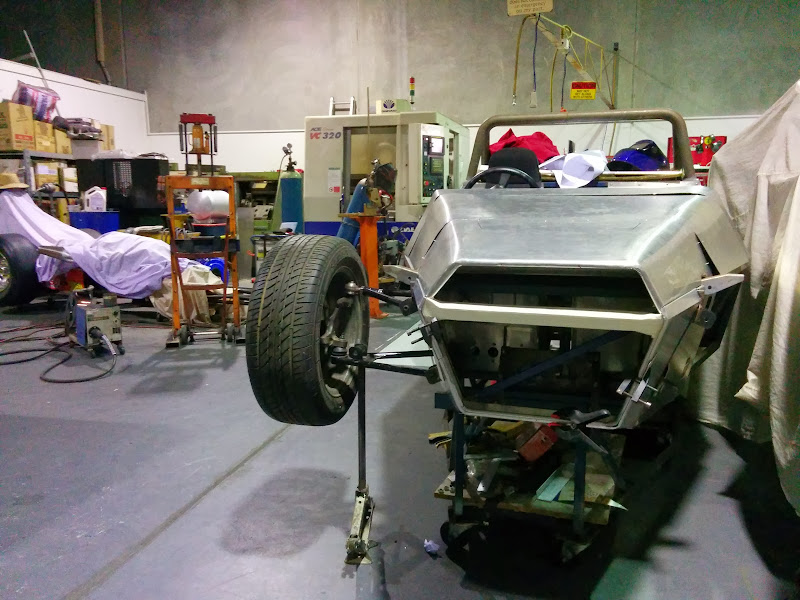
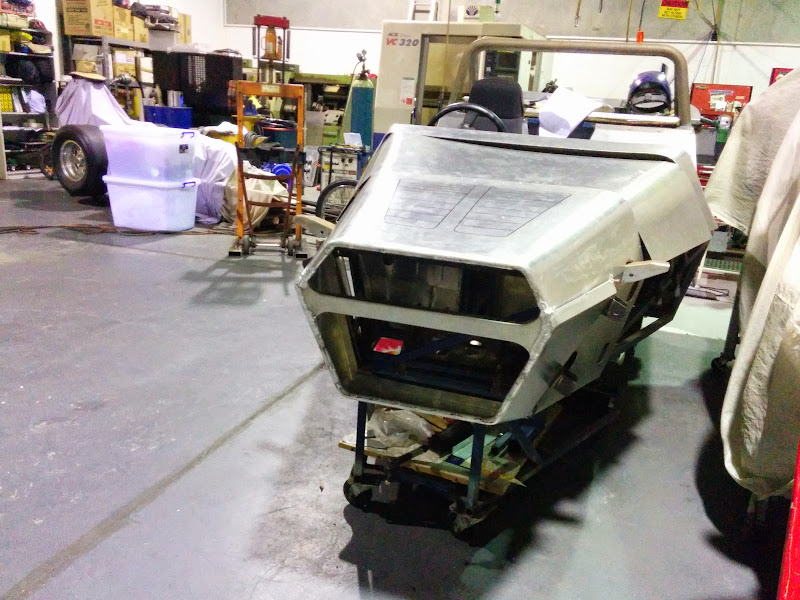
Got a little more done than I thought I might before the car got "craned" out and onto a trailer for the trip up to the Nationals - one
rear guard is properly attached at least and the rear grille section is now properly mounted too. Best of all, the car sat on the ground on four
wheels for the first time ever  Bad photo, but you get the idea.... Bad photo, but you get the idea....

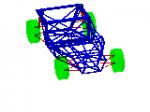
Crane lift shows where the CofG currently is - directly under the roll bar (Coops is just steadying the front to stop some sway - it's level on
its own)
Been away plenty since the Nationals (and getting over the flu I caught too) but finally getting a little bit more done on the car over the last week
or so.
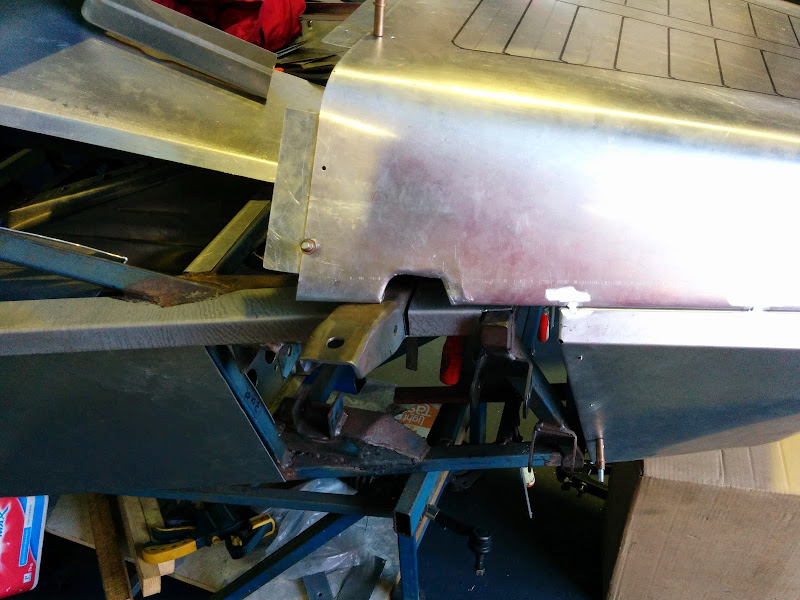
Got the other rear guard mounted (would have been nice to have this on for the Nats - oh well):
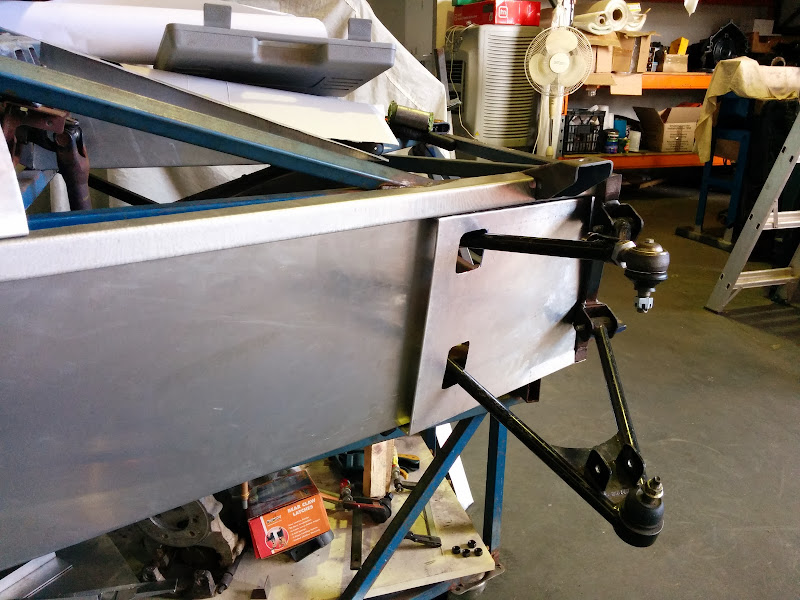
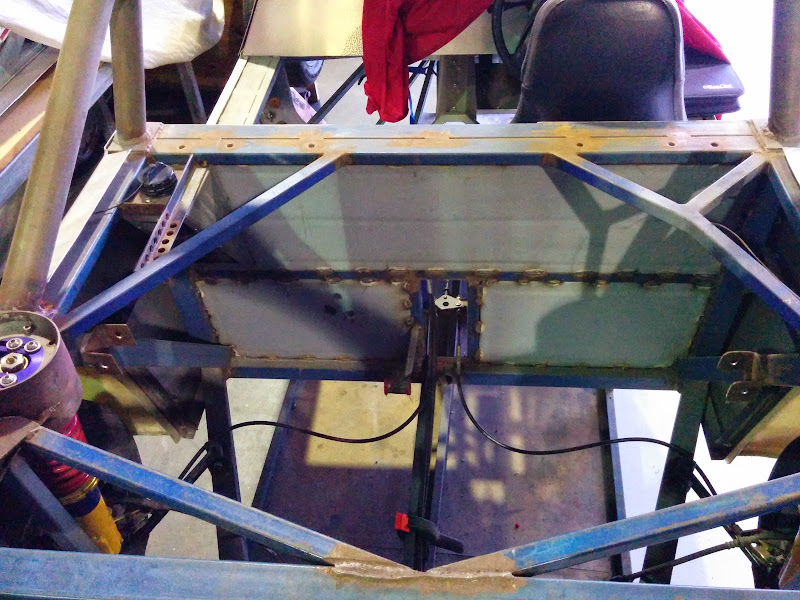
One of the problems that became apparent (once all of the suspension was put together and the car put on the ground) was that the top shock mounts
were in the wrong place. For reasons I can't explain, I centred them over the middle of the bottom wishbone, which means the springs touched
the top wishbone due the the caster angle. The proper way to fix it was to cut the mounts off, make new ones and mount them 20mm further back. Some
things I learnt today:
Plasma cutters are great!
In experienced hands, a plasma cutter makes very short work of cutting out complicated brackets
In less experienced hands, plasma cutter burns are pretty much self cauterising 
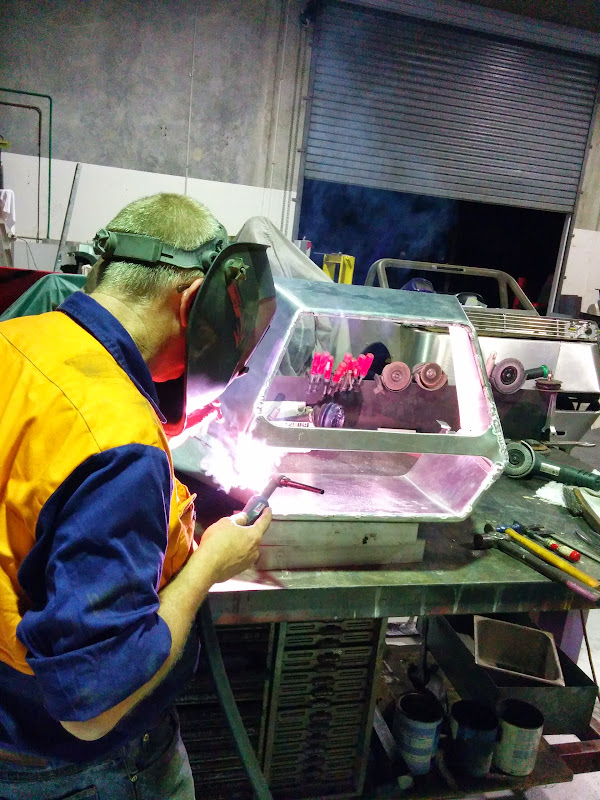
Here's the first bracket after some clean up and welding plus the second one after the cutting out phase:

With the two brackets finished (and a coat of primer) they were clamped up with some straight bars to ensure correct alignment and then tacked up to
check fit:


End result? The springs now fit 
Ran out of time for anything else today - more as it happens.
D
|
|
|
|
|
TheGecko
|
| posted on 5/12/13 at 06:41 AM |
|
|
Been silly busy in the run towards the end of the year so haven't got much done on the car. Completed a number of little jobs, the most visible
of which is the rear undertray, which is now properly trimmed and has all of its mounting bolts done.

The diffuser vanes are mostly for what I, in colloquial Australian language, would call "Wank Factor"
Next two big-ticket items to finish are the nosecone and bonnet. After that (or before, depending on how the mood takes me), the engine cover. That
will then mark pretty much the end of the sheet metalwork phase of the project and I can get onto the simple stuff like plumbing and wiring
D
|
|
|
TheGecko
|
| posted on 8/12/13 at 10:07 AM |
|
|
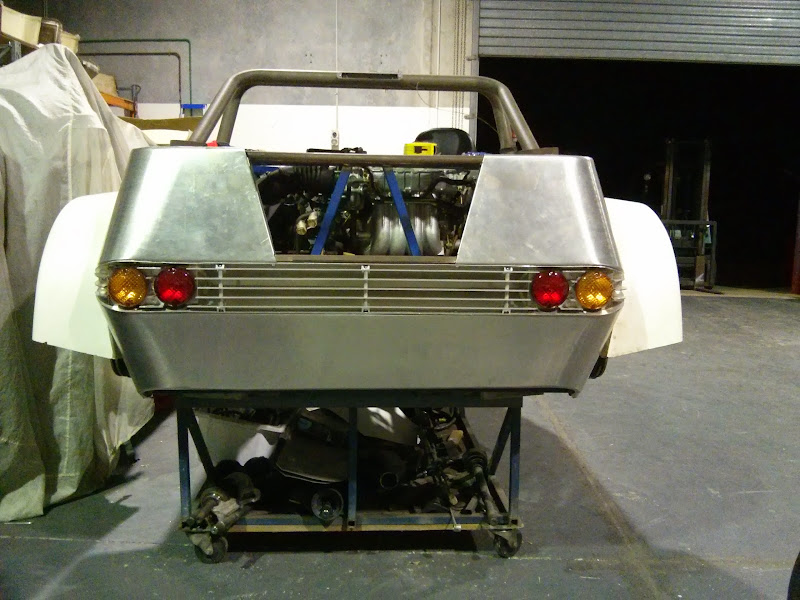
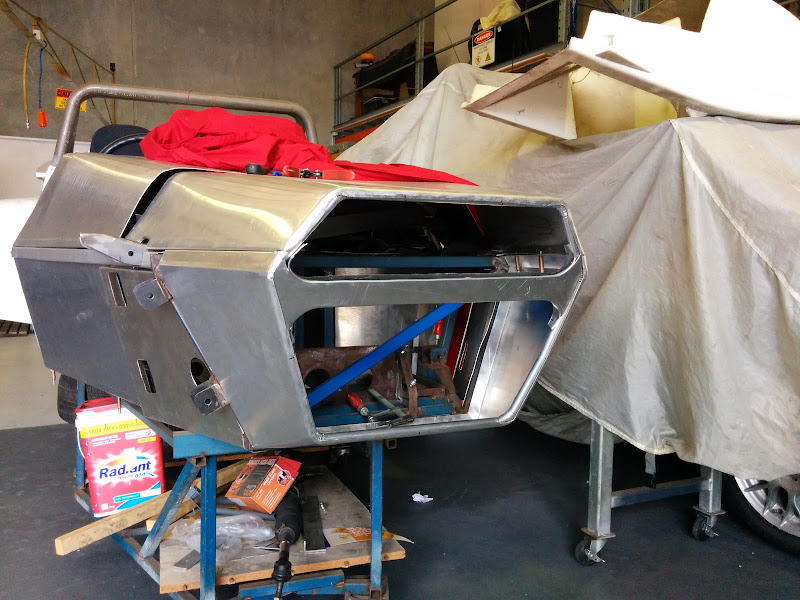
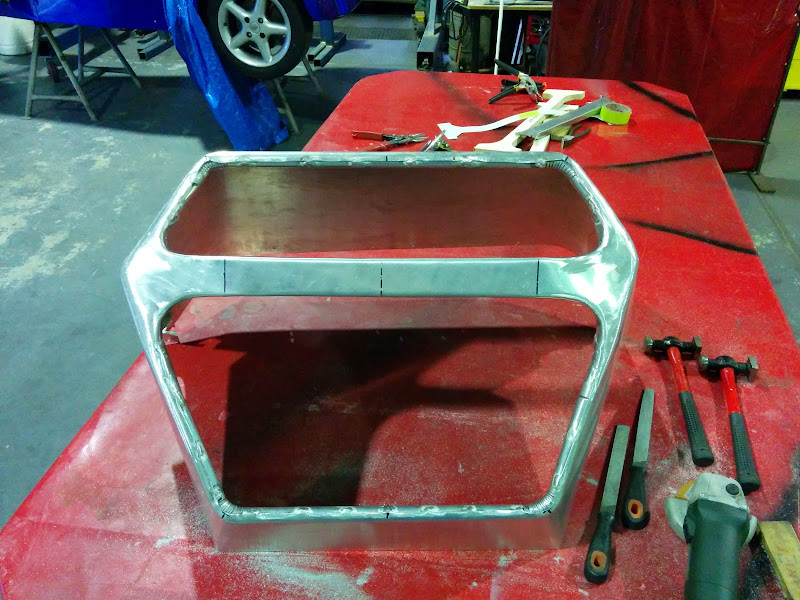
Got a little more done today. Most notably, I finally made the middle fill-in panel for the back of the car.

Makes quite a difference to the appearance to have that gap finally closed The sharp-eyed will notice some imperfections around the corners. A
little judicious TIG work will happen someday soon to correct those.
I also fiddled around with headlight mountings (but forgot to take any photos of that) and measured, thought, re-measured, re-thought, then measured
and thought some more, about scuttle/bonnet/nosecone juxtaposition & relationship. they may yet all become one big forward-tilting piece......
More as it happens.
D
[Edited on 8/12/2013 by TheGecko]
|
|
|
TheGecko
|
| posted on 17/12/13 at 12:45 PM |
|
|
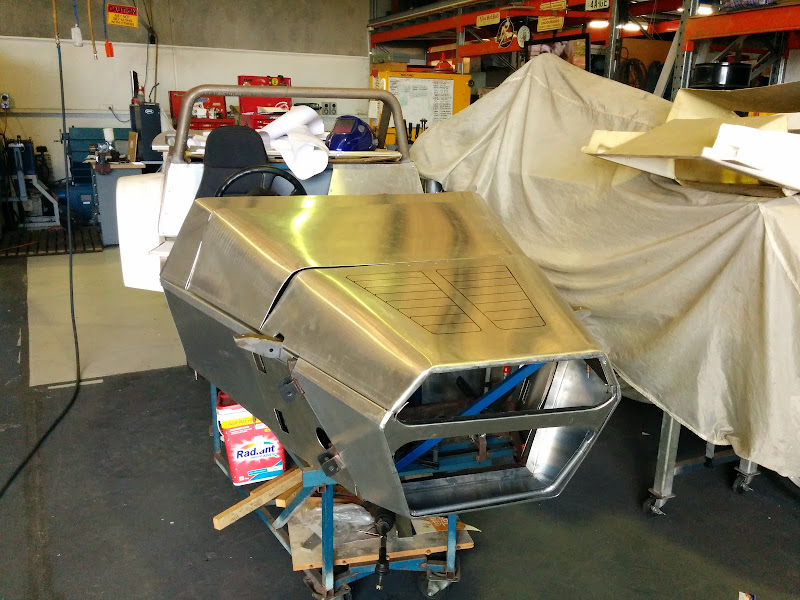
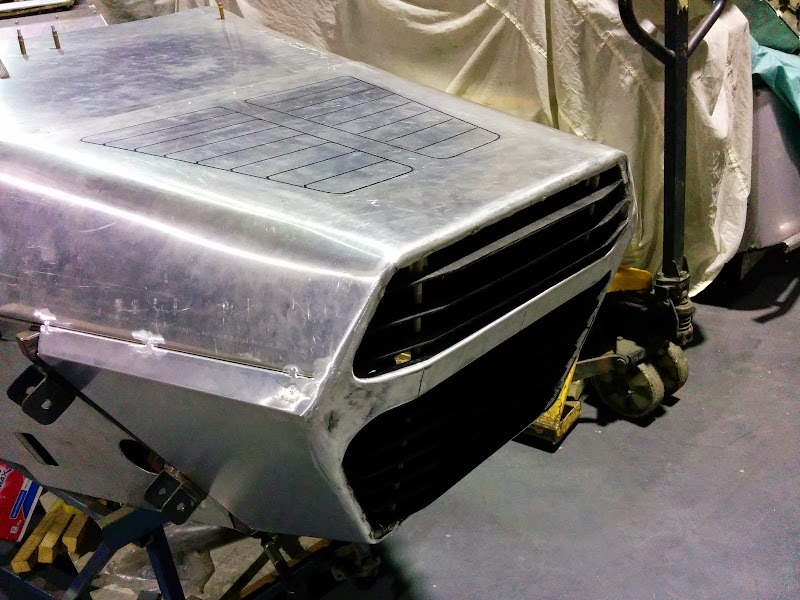
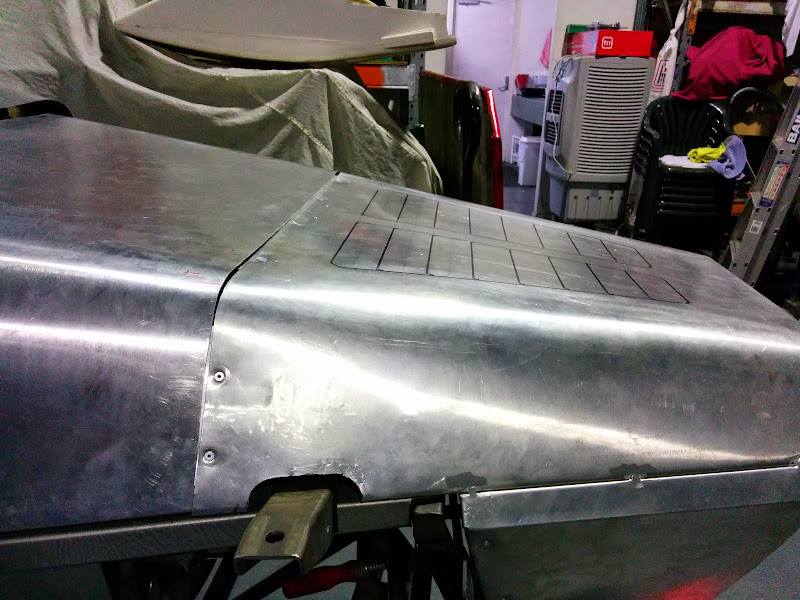
Behind the lower-rear panel will be the muffler and cat so some extra ventilation has been deemed appropriate. Did a bit of doodling of possible
vents first:

Then took the bit between my teeth and cut big holes in a perfectly innocent panel

Used some home made "flanging sticks" to put some edge on the holes and stiffen things up:

And stuck it all back on the car for a look see. Given that the dimensions were chosen by a fairly arbitrary process, the end result looks OK I
think. In finished form, the holes will get filled with black mesh - just haven't got to that bit yet.

Plenty more holes like this to come........
Dominic
|
|
|
TheGecko
|
| posted on 28/12/13 at 11:42 AM |
|
|
XMas etc is limiting my build activity at present. However, here's a teaser for something else I've been working on. Any guesses?

Dominic
|
|
|
ashg
|
| posted on 28/12/13 at 01:53 PM |
|
|
that looks very pretty, allways fancied doing a diy dash do share
Anything With Tits or Wheels Will cost you MONEY!!
Haynes Roadster (Finished)
Exocet (Finished & Sold)
New Project (Started)
|
|
|
TheGecko
|
| posted on 28/12/13 at 02:02 PM |
|
|
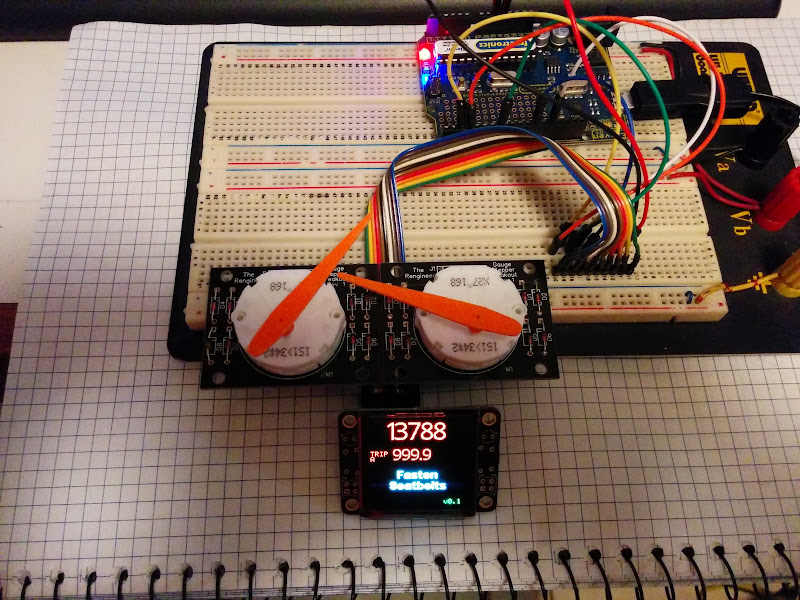
It's very much just the beginning of something right now - I'll be posting more about it as it proceeds. Major components right now
are:
- Switec X27 gauge steppers on TheRengineer.com breakout boards
- Freetronics.com 128x128 OLED display (nice and bright)
- Freetronics Eleven Arduino Uno clone
The Arduino Uno is going to be swapped for a 2560 Mega soon as there's just not enough I/O (particularly interrupts) on the Uno.
Working on it is certainly reminding me that I prefer byte bending to metal work
Dominic
|
|
|
TheGecko
|
| posted on 1/1/14 at 03:17 AM |
|
|
I said the nosecone/bonnet/scuttle was "coming soon" - made a start yesterday
Quite a while back, I made this wooden buck (which is in a top and bottom half):

Which has been fitted with nice hardwood leading edges:

Yesterday I "Xmas-wrapped" the top half to make a pattern:

Which got me this far today:
Thursday is "smack hell out of innocent aluminium with a body hammer" day, whence I will try to form the leading edge. Then the lower
half gets made via the same method and the two halves will get TIG'ed together.
Dominic
[Edited on 1/1/2014 by TheGecko]
|
|
|
TheGecko
|
| posted on 4/1/14 at 09:21 AM |
|
|
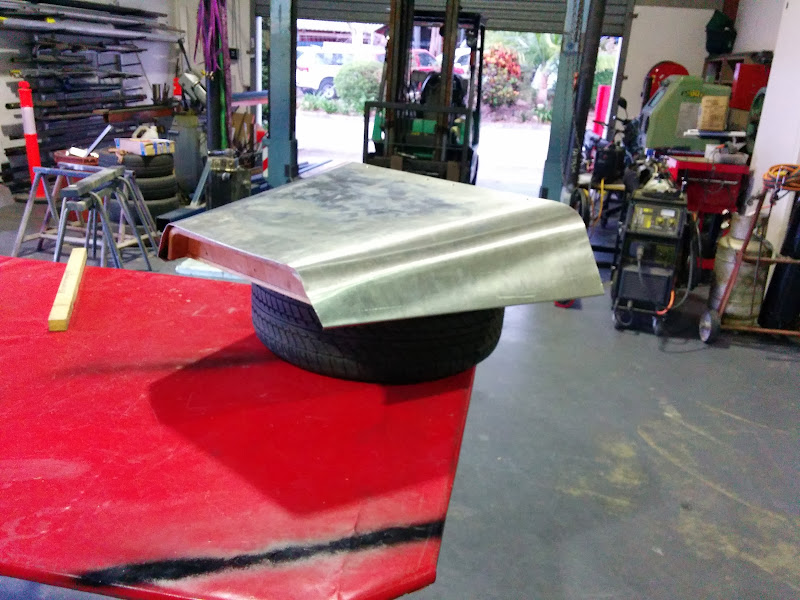
Having smacked the front edge into some semblance of a consistent curve I arrive at this:

After some trimming to make clearance reliefs and more hammer/dolly work around their edges, it looks like this:

Too hot in the workshop today so didn't get much more done. Need to do some more fiddling with the bottom half of the forming buck so
it's ready for the next stage.
{Next Day}
Waaaay too hot to be doing much today, plus I need to do more work than expected to get the bottom half of the nosecone buck sorted. So, all I got
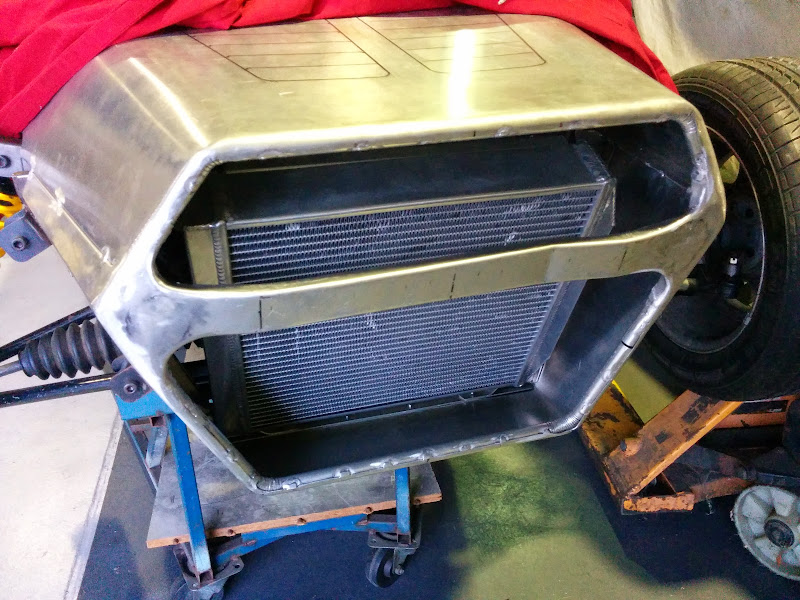
done was this:

The diaphragm panel stiffens the nosecone and stops the radiator venting into the "luggage" space.

The radiator will need to vent somewhere so....

Before any points it out, yes I'm aware that that isn't a big enough exit vent - it's just a "what would that look like"
sketch at present.
No more workshop till next week now.
Dominic
|
|
|
TheGecko
|
| posted on 9/1/14 at 01:30 PM |
|
|
Another two days worth of work rolled into one update:
Marked out the pattern for the bottom half of the nosecone using the wooden buck:

Cut the resulting "bowtie" shape out of 1.2mm ali and started rolling the corners:

The corner radii are too small for the forming rolls so I had to use classic methods - pipe, clamp, and brute force

Only got as far as folding the rear flanges tonight - next visit, I'll finish the top flanges (where it'll join to the top half of the
nose) and roll the front edge over:

(Second night):
Offered the part up to the chassis and trimmed somewhat where the radiator support interfered with the bottom edge/face:

Trimmed things at the top a bit so I could drop the top half of the nosecone in place (with the edges just overlapping for now):

Yes, it is a bit "wide mouthed frog" There's going to need to be some attention to that aspect of it - it will look somewhat
smaller once the edges are rolled in and a it's in body colour with a black grille etc.
Took an overall shot as well to get a sense of how it's all coming together:

I'm pretty pleased with how it's looking but maybe it's a face only a mother could love
Now, as confession is good for the soul, I must admit that I am going to have to remake the whole bottom half of the nose. In the process of folding
edges, trimming notches, etc, etc, I basically f***ed it up  . So, it's now getting treated as a pattern to make a second one without all
the various issues that caused me to ruin this one. But I won't get back to the car until next week now.... . So, it's now getting treated as a pattern to make a second one without all
the various issues that caused me to ruin this one. But I won't get back to the car until next week now....
More when it happens,
Dominic
|
|
|
Fred W B
|
| posted on 9/1/14 at 05:58 PM |
|
|
Looking good, and don't stress, the second part you make is always much better then the first..
Regards
Fred W B
You can do it quickly. You can do it cheap. You can do it right. Pick any two.
|
|
|
TheGecko
|
| posted on 27/1/14 at 01:16 PM |
|
|
Thanks Fred - I'm well familiar with the "second attempt" effect
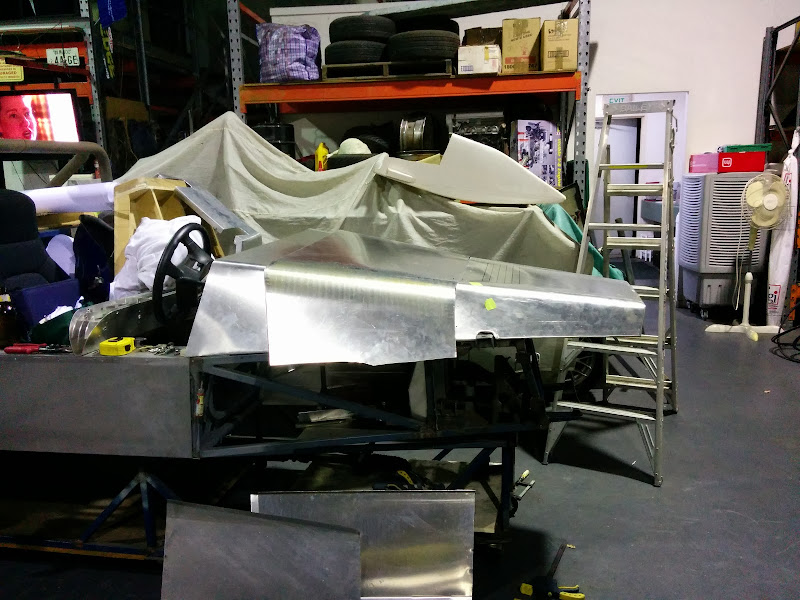
Haven't got back to the bottom half of the nosecone yet, but I have rolled both a scuttle and a bonnet, although there's some more
trimming and finishing needed for both of them yet.
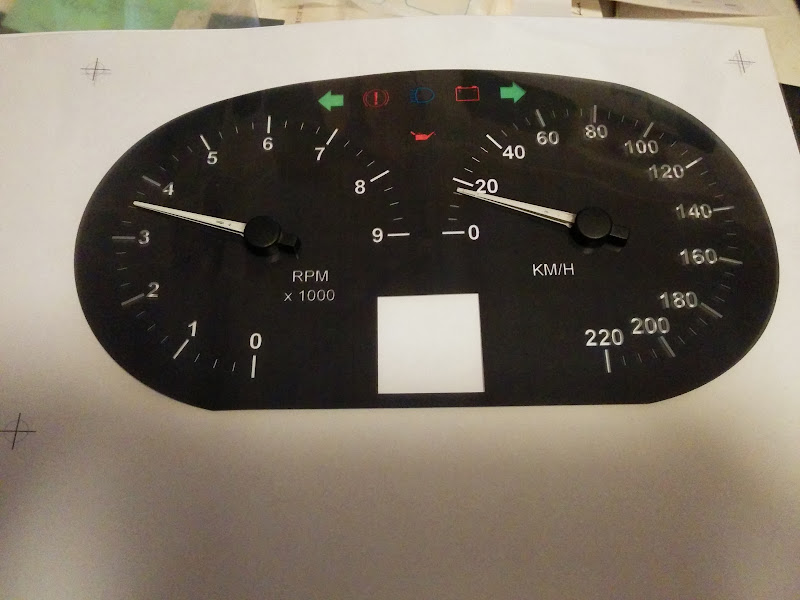
Plus, I've continued on with my dash development, and have got this far with the panel overlay. It looks better in the flesh, because
it's reverse printed on transparency film and isn't being held properly flat in this picture.
Dominic
|
|
|
TheGecko
|
| posted on 10/2/14 at 09:49 AM |
|
|
Not much to show for the last few weeks of work. This bit actually photographed OK so I'll put it up. And don't worry, a hole got cut
for the tie rod too, I just didn't take another photo 
Dominic
|
|
|
TheGecko
|
| posted on 9/3/14 at 08:22 AM |
|
|
Some updates for the last 4 weeks of effort:
Marked the bonnet to size and formed the bottom edges (this picture was before I'd done the left side which is why it's sagging):

Remade the bottom half of the nosecone and got it (temporarily) joined to the top half for fitting. Still needs its front edge rolled over but I need
to modify my forming buck a little for it to fit.


Dominic
[Edited on 9/3/2014 by TheGecko]
|
|
|
TheGecko
|
| posted on 11/3/14 at 01:28 PM |
|
|
Got a bit done tonight. Having trimmed the wooden buck down enough (just) I squeezed the bottom half of the nosecone over it, marked, removed,
trimmed, re-fitted, and then hammered the edge over. Having done that, I could turn to my "What's an easy way of reinforcing this edge
and making sure it's got a nice profile" solution a.k.a. a length of 16mm ali tube Some pie-cuts in the corners (which will get a
visit from Mr TIG) and Robert's your mother's brother.
Need to get another bit of tube because I only grabbed enough to try the idea and was a little surprised how well it went so only got this far
tonight:
Don't worry - there's a mitigation process in the planning as well to address the Whale Shark (©, ®, and TM) look of the front
More on Thursday night (probably).
D
[Edited on 11/3/2014 by TheGecko]
|
|
|
TheGecko
|
| posted on 13/3/14 at 12:43 PM |
|
|
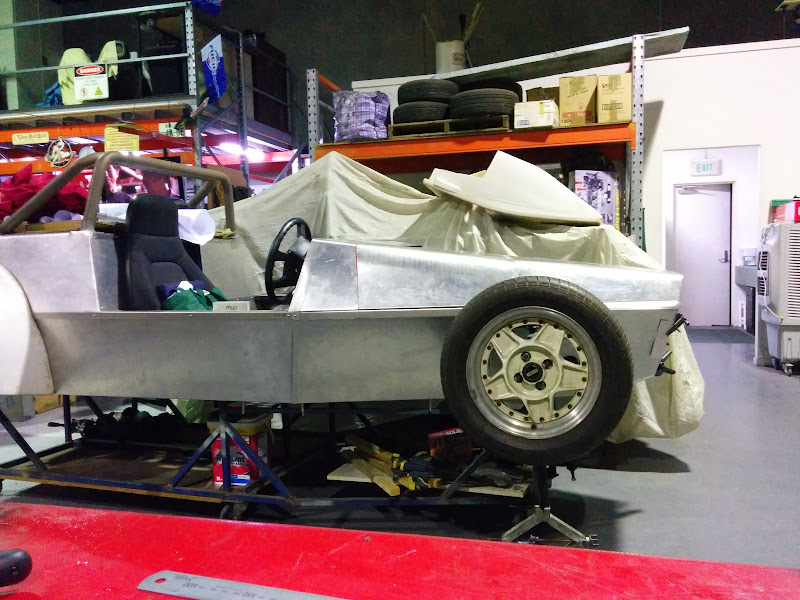
The anti-Whale Shark work has begun This is just mocked up in card here although I have started on the ali piece. Stuck a wheel on to get some
sense of proportion too.
Profile looks alright to me as well....
Sunday is finish the nosecone day:
- Finish the cross piece/splitter
- TIG all of the corners of the edging tubes
- TIG any other dodgy corners etc
- Make an internal C-section stiffener for the back edge where it'll hinge from
- Dimple and countersink rivet lots of pieces in place
Not all of the above will necessarily get done. If it does, then I can:
- Cut out the front diagonal and put it in the other way so the bottom radiator hose can get through
- Remake the bottom radiator mounts for the new position
- ditto the top radiator mounts/s
- Trim the "sticky out" ears at the front corners of the chassis (after reinforcing the inner corner)
- Make the baffle panel to shroud the radiator to the nosecone
So, not much to do then
More as it happens.
|
|
|
TheGecko
|
| posted on 23/3/14 at 09:19 AM |
|
|
Bit of a lag in updates due to illness/work/general lassitude
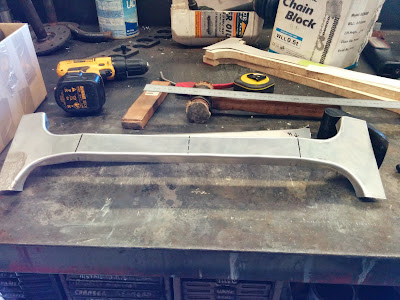
Today I made a hammer form and knocked out a proper cross rail for the nosecone:
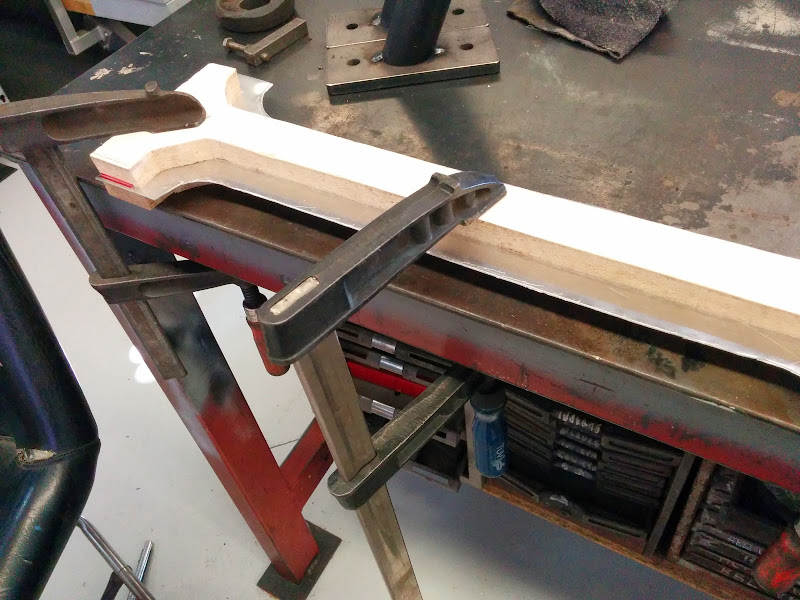
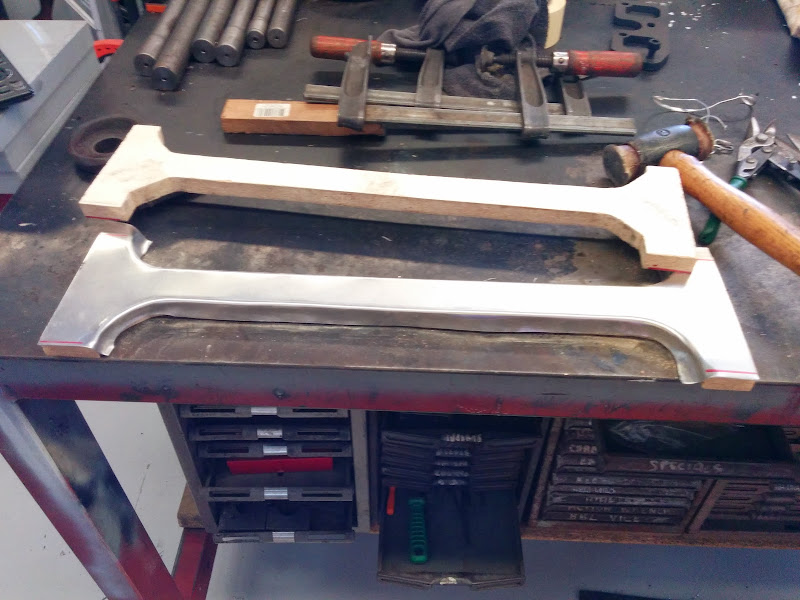
After some trimming, that was rough fitted:
TIG welder is out of action at present so nothing's welded yet. I did have another stab at what the radiator exit grille might look like, in
preparation for getting a prototype waterjet cut in a week or so (I'm piggy backing on one of Paul's orders to avoid the minimum
charge):
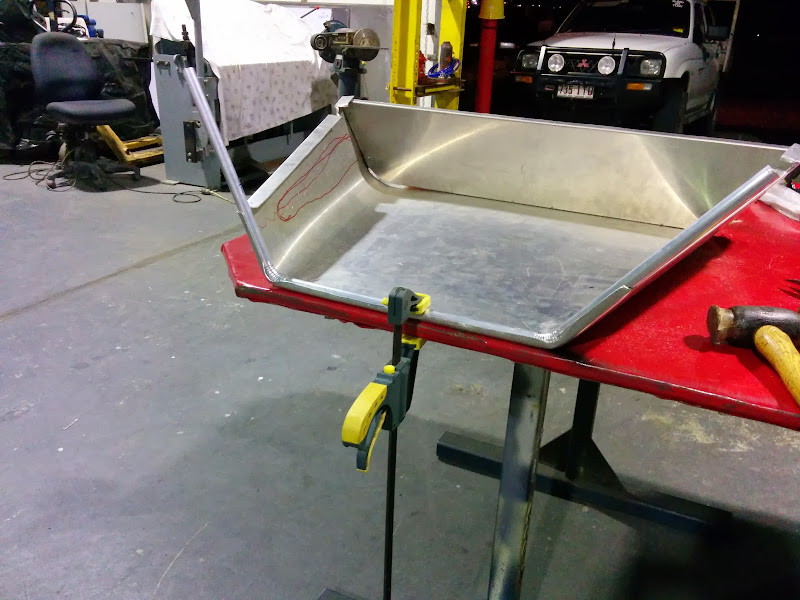
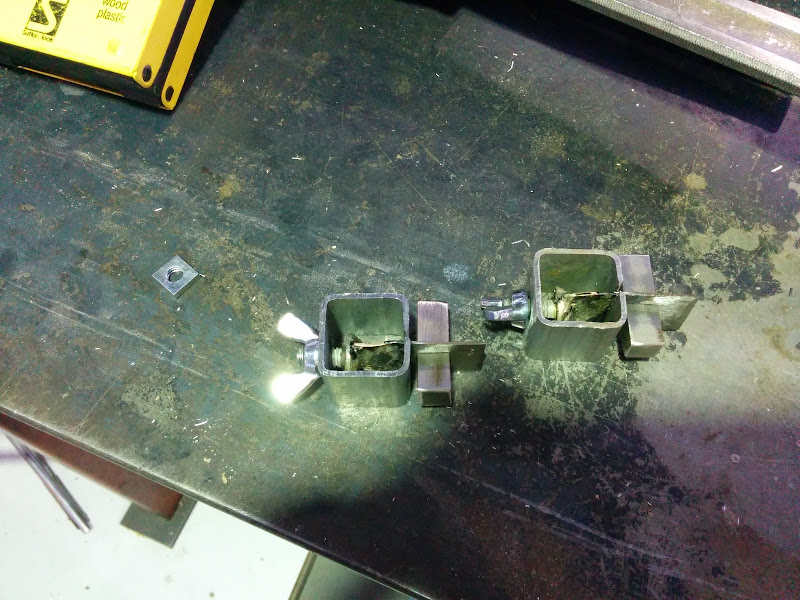
As well, there's a variety of places where I'll need to butt join panels so it's nice to have a way to keep things clamped and
aligned. You can buy these clamps but I'm not paying $12/ea + postage for something that can be made from scrap in half an hour or so. Made
four to start with but may yet make a few more:
Hopefully the TIG will be back online on Tuesday night and the nosecone can start to come together.
More then,
Dominic
|
|
|
TheGecko
|
| posted on 6/4/14 at 10:21 AM |
|
|
Well, sh*t
Since last we spoke, quite of bit of this has happened:
and some of this as well:
The end result being this:
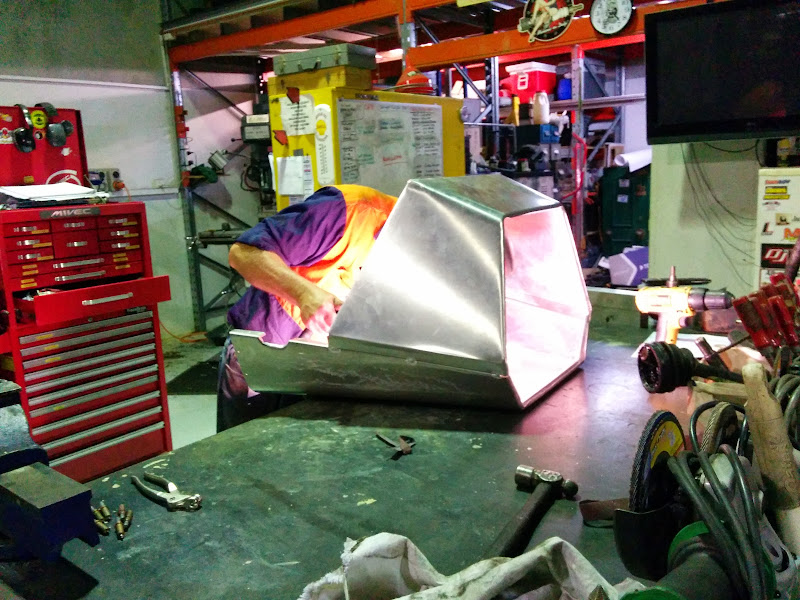
However, your eyes do not deceive - those top corners are NOT the same shape This is the result of me not checking carefully while the nose was
being rolled around on the bench for tacking and then welding. So, on Thursday night I spent some quality time with sash cramps etc trying to pull
the whole thing back into shape. And then I cut partially into the joints around the cross-piece and leaned on it some more. And then I cut one
whole end of the cross piece free (with a sproooooingg of released tension!) and tried some more. And finally, I hacked the whole cross piece out and
forced the cone back into its proper shape 
So, now I have to make a new cross piece (not so bad, I have the former etc), clean out the remains of the old one (crappy, fiddly, work with a flap
wheel), trim the new one to fit (I know how to do that now!), and ask (i.e. pay) Paul to weld it all up - AGAIN!
Measure 400 times, weld once. There endeth the lesson........
[Edited on 6/4/2014 by TheGecko]
|
|
|
TheGecko
|
| posted on 6/4/14 at 11:17 AM |
|
|
The previous update was actually from 2 days ago, I just hadn't posted it here yet.
OK, after Thursday night's frustrating setback today was pretty successful
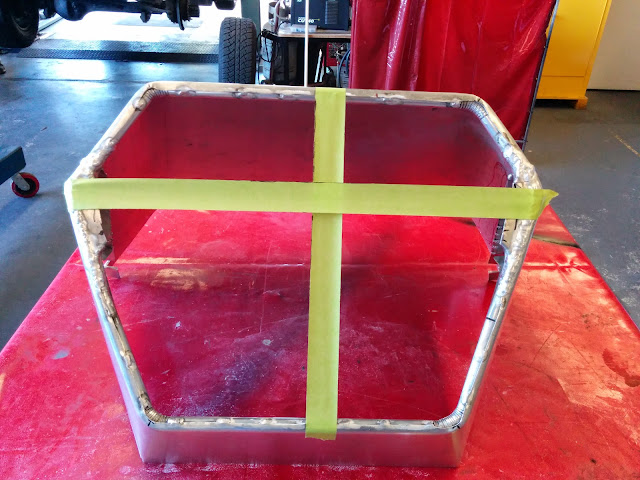
Made a new cross bar and shrunk the flanges a little at each side to put some more shape in it:
 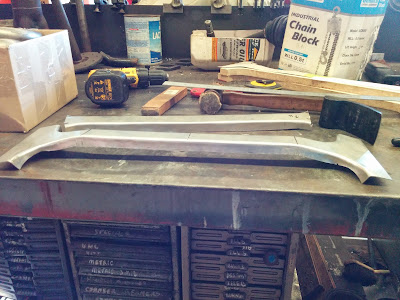
Much careful laying out of centre lines etc (don't panic, the centre is the left edge of that vertical tape strip!) and checking measurements
etc...
Trim the new part and offer it up...
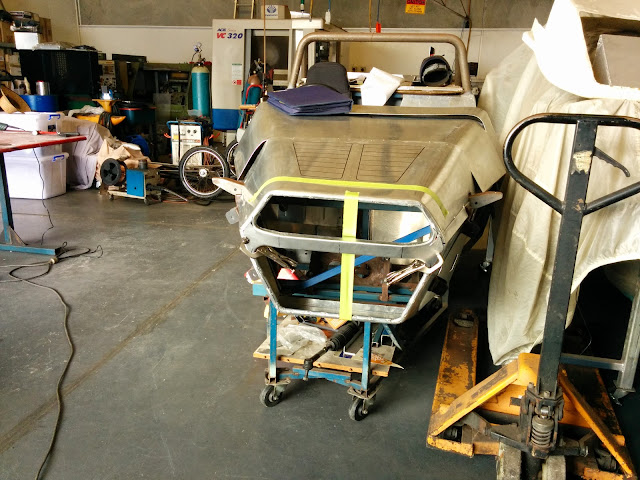
Tack it in place using the chassis as the ultimate alignment jig
More checking measurements and alignments and then weld it all in
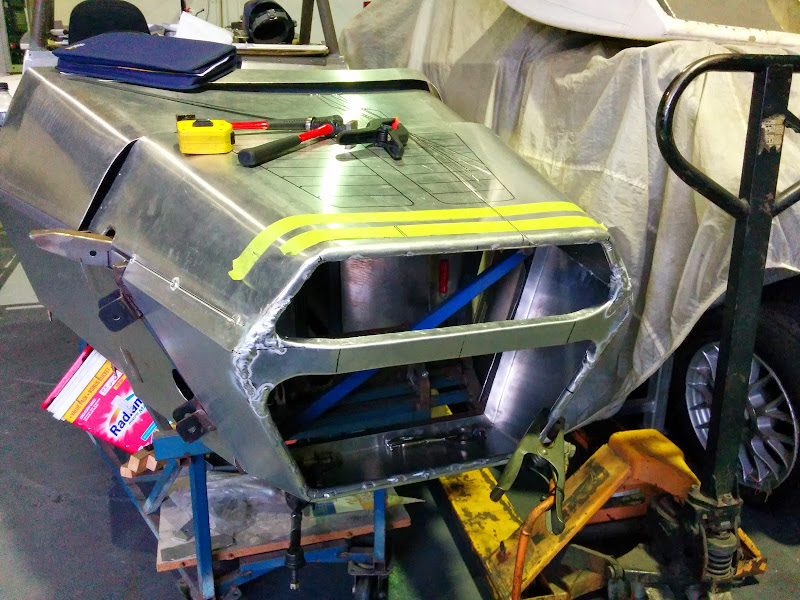
Then lift off and dress all of the welds. And don't worry, it's still square - the angle of the photo just makes it look skew
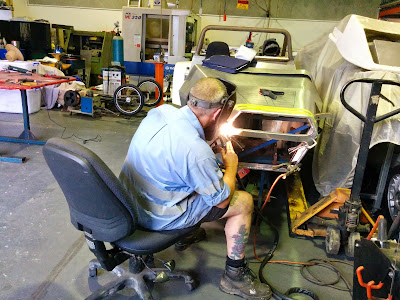
Greatly satisfying to get to this point. Many, many thanks to Paul for cheerfully (well, as cheerful as Paul ever is ) welding it all together
for me twice in a week!
Next is finish bonnet and latches and we're getting much closer to body work done. Aim is to get it out of Paul's workshop and back to
mine before ANZAC day.
D
|
|
|
kb58
|
| posted on 8/4/14 at 01:03 AM |
|
|
Hello sunburn... or worse. I admit that I've done that myself, with the excuse that when I do, it's because it's 100+ deg F in the
garage.
Mid-engine Locost - http://www.midlana.com
And the book - http://www.lulu.com/shop/kurt-bilinski/midlana/paperback/product-21330662.html
Kimini - a tube-frame, carbon shell, Honda Prelude VTEC mid-engine Mini: http://www.kimini.com
And its book -
http://www.lulu.com/shop/kurt-bilinski/kimini-how-to-design-and-build-a-mid-engine-sports-car-from-scratch/paperback/product-4858803.html
|
|
|
TheGecko
|
| posted on 8/4/14 at 04:41 AM |
|
|
quote:
Originally posted by kb58
Hello sunburn... or worse. I admit that I've done that myself, with the excuse that when I do, it's because it's 100+ deg F in the
garage.
Strangely enough, Paul (that's who's welding in those pics, not me) rarely seem to cover up much for TIG work although he
certainly does for extended MIG sessions. From the colour of the TIG arc I would have assumed it's just as bad for UV content?
He's been welding for 40-odd years so he seems to know what he's doing I know I've given myself some fabulous sunburns with the
MIG
D
|
|
|
TheGecko
|
| posted on 15/4/14 at 02:03 PM |
|
|
Not much progress since last update for various reasons. After the welding of the new crosspiece, there was a hollow on each side, as per picture:
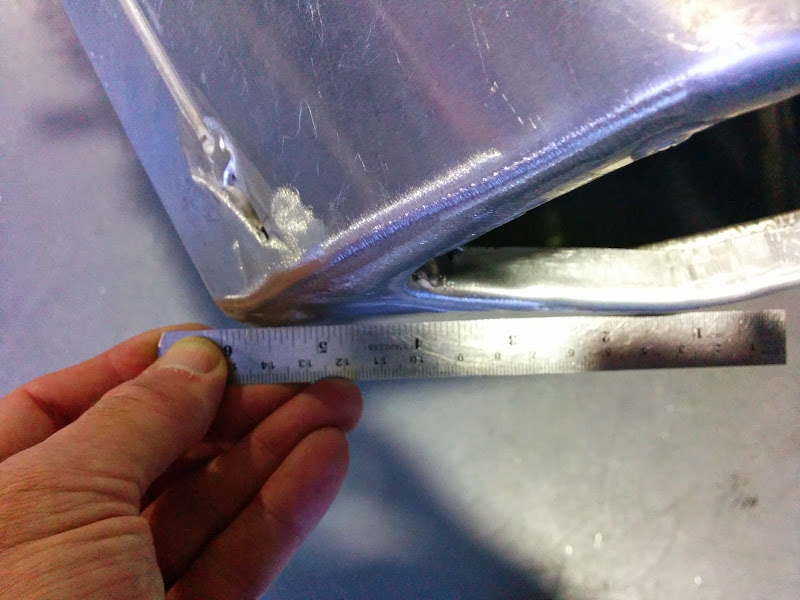
Some judicious hammer and dolly work saw that reduced to basically nil:

The only other thing worth showing a picture off is the mockup set of grille bars I made to check proportions etc with. They don't photograph
well, being (very) matte black but you get the idea:
The final shape will be a somewhat flatter for that top bar so it follows the shape of the nose better.
|
|
|
TheGecko
|
| posted on 29/4/14 at 11:30 AM |
|
|
Been busy doing anything but working on the car over Easter etc - starting to get a bit done again now.
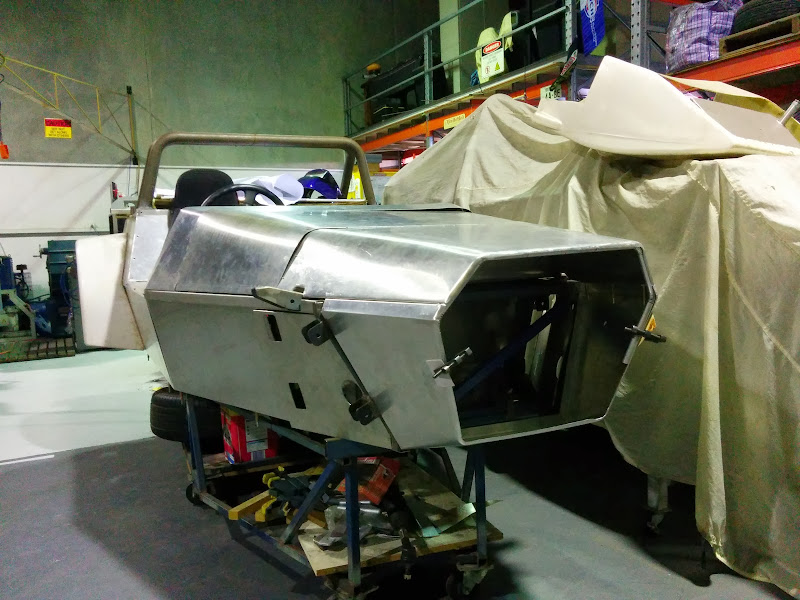
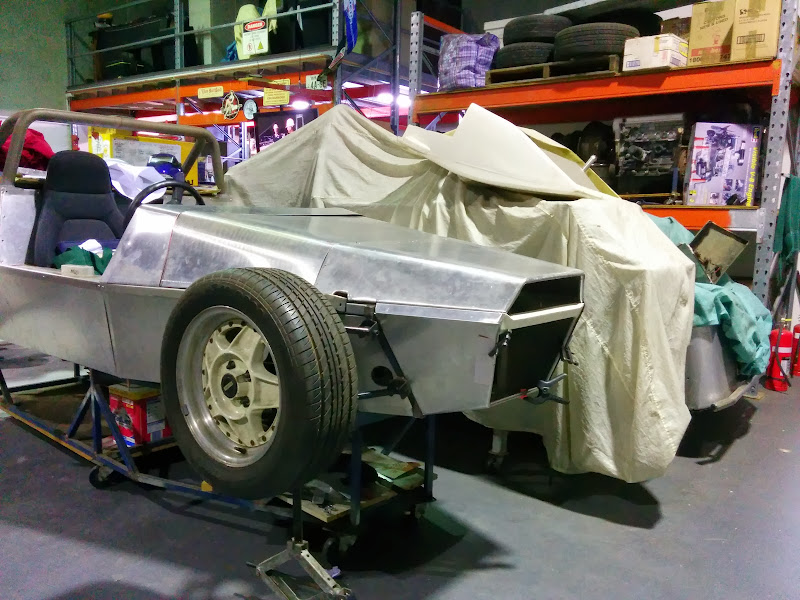
Hinged the nosecone off the bottom front of the chassis:

Which of course then makes it clear that I hadn't thought through the pivot radius etc viz-a-viz the notches that clear the headlight mounts
Some judicious trimming has made the notches bigger and I can pretend it was designed that way This shot shows the trimmed notches and the reason
for tilting the nosecone....
Yep, the whole lot will tilt as an assembly.
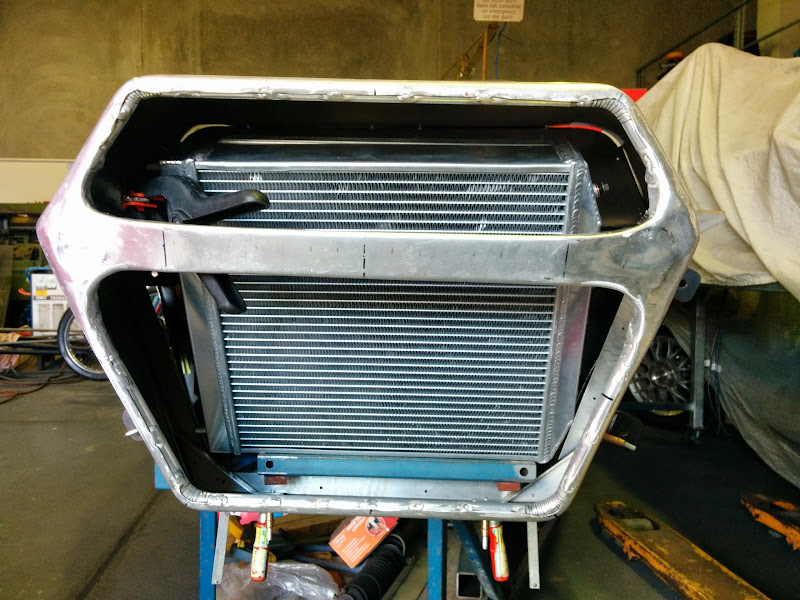
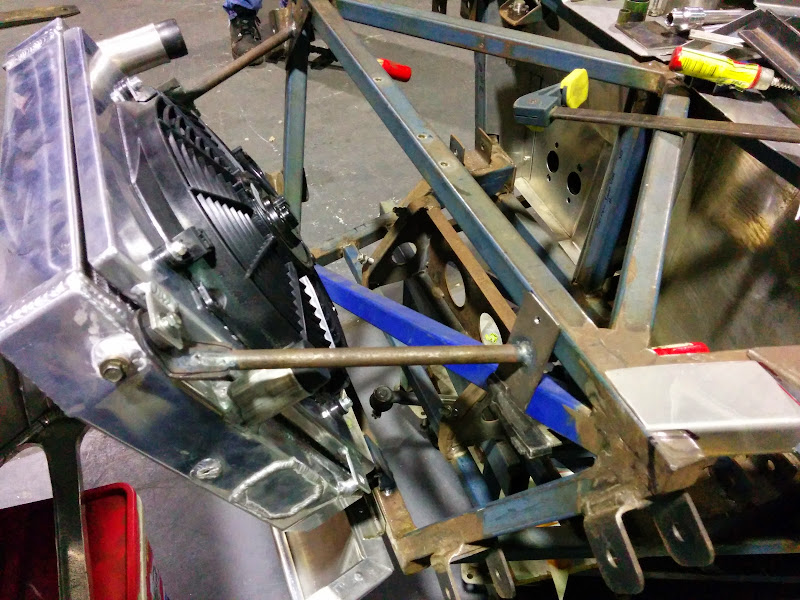
The reason I needed to finalise the bonnet/nosecone was because I'm trying to finish the new radiator mounts. It's mocked up in position
but that's as far as I got tonight:
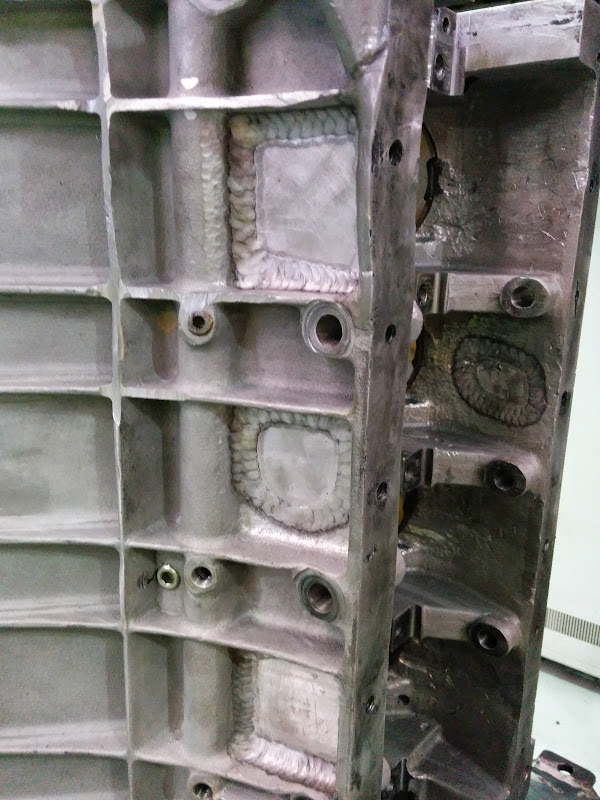
There's always interesting distractions in Paul's workshop.......

520ci Keith Black alloy-block dragster motor - in need of some love after the sudden departure of a con rod . Obviously not the first time as
evidenced by the various repairs visible on the outside
More (on my car at least) as it happens.
|
|
|
TheGecko
|
| posted on 31/5/14 at 03:22 AM |
|
|
Throwing a whole bunch of updates in at once here as I haven't been organised in posting.
Busy doing house projects at present (if I never see another fence paling I'll be a happy man!) so the car isn't getting much of my time.
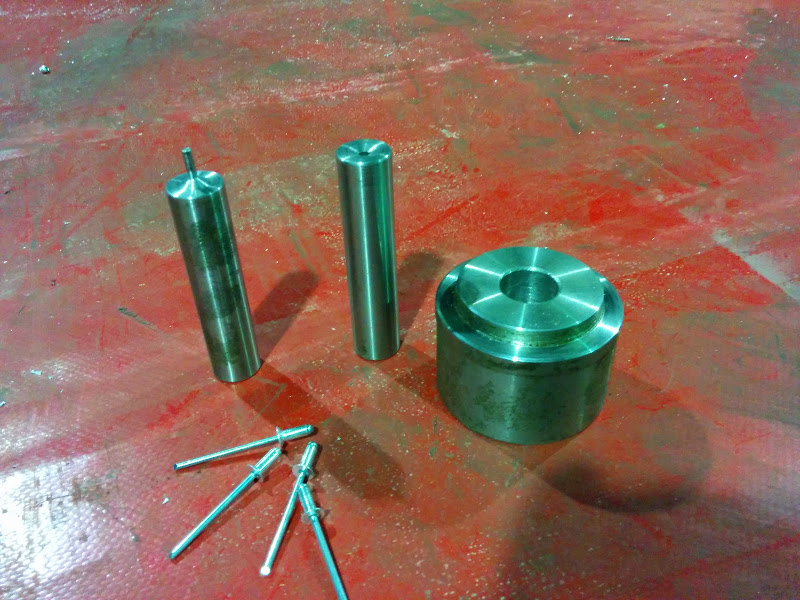
Since the last update, Paul has made a nice little dimple tool for me to set the ali sheets for countersunk rivets. I drill 1/8"; setup the
tool through the hole on the guide pin; wack with BFH; drill to 5/32" (final rivet size) to clean up the resultant distortion of the hole; and
then rivet. There's some tweaking yet to get my technique right but here's the tool and a few examples...
The apparent distortion around the riveted area isn't as bad as it looks in the photo A quick skim of filler and block down before paint
These rivets are just holding the stiffener diaphragm panel inside the nosecone - connecting the bonnet is to come.
In other news, the (new) radiator mounts have been finalised. Didn't take a pic of the bottom mounts but the tops are a pair of light tension
struts with a rubber grommet at the radiator end. Couple of M5 or M6 rivnuts in the chassis at each side and they're done. They'll also
get cleaned up and go off the the platers in whatever next batch of plating Paul sends out.
----------------------------------------------------------
-- Next Update
----------------------------------------------------------
Hasn't been much in the way of updates recently - lots of non-clubbie things going on, consuming both time and mental energy
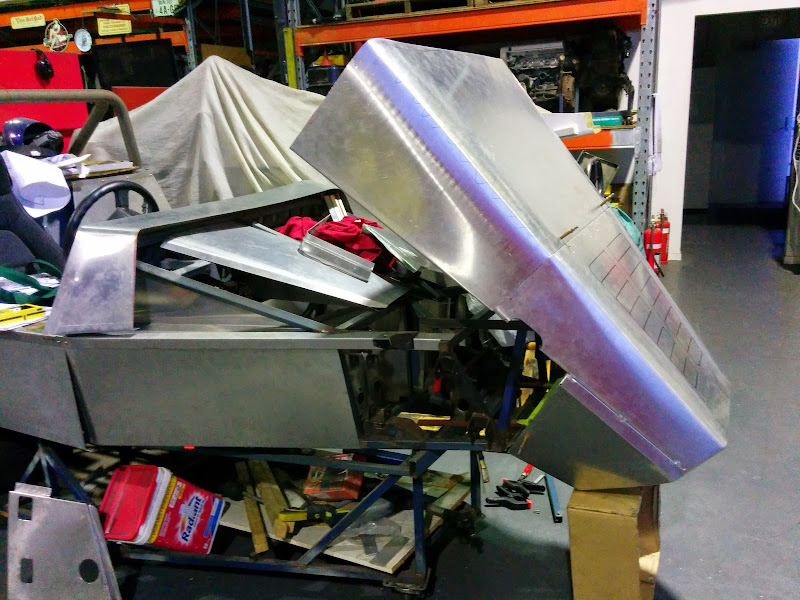
Been pushing on trying to get the car out of Paul's workshop and back to my place and went at it today trying to finish that process. What is
it that they say? "More haste, less speed". Don't rush is what it comes down to. For instance, if you rush, you might leave a
hinged aluminium nosecone carelessly propped and then move something else causing the whole assembly to swing down and around until the build table
interrupts progress......

Oh goody, a reason to practice my panel beating
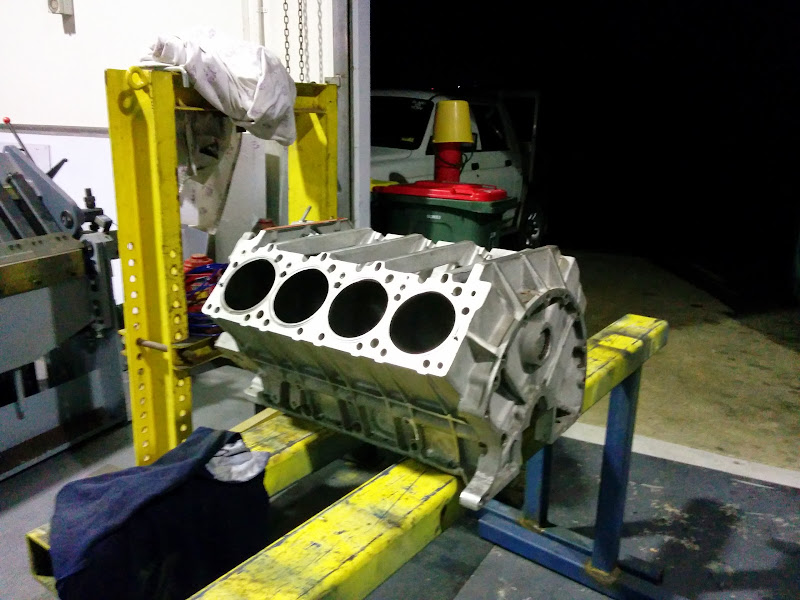
On the (slightly) plus side, I did pull the engine. It's going to stay at Paul's for now so that the various belt tensioner etc mods can
be done. Interesting to see the engine bay empty again:
Current plan is to get the car back here on Saturday morning. Let's see what else I can f*ck up in the interim.......
----------------------------------------------------------
-- Next Update
----------------------------------------------------------
Well, after more than 2 years in Paul's workshop, the Gecko is back in its' birth place to be completed Will be nice to be able to
walk downstairs and do 30 minutes or an hour on the car without having a 50km and 1 hour round trip to do it.
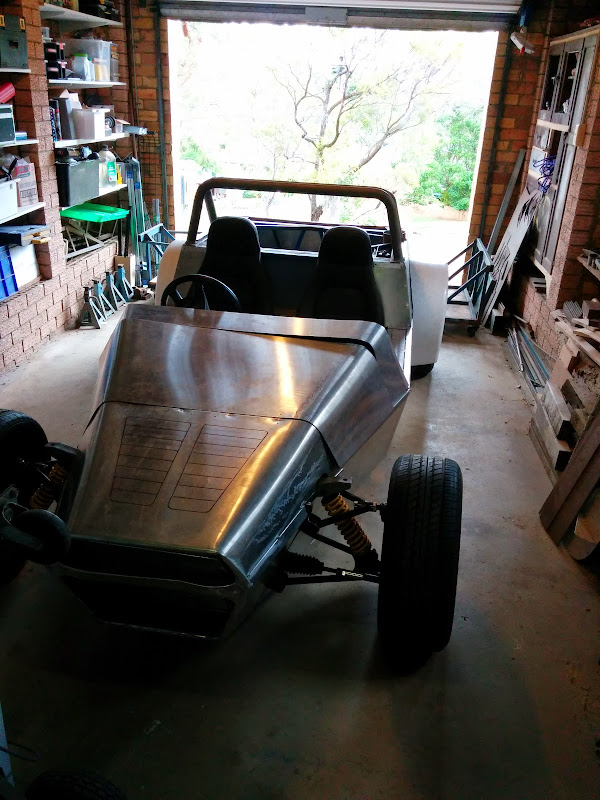
There's still HUUUGE amounts of work to be done but Paul's input over the last 2 years has brought it to a point where I feel confident in
finishing it sooner rather than later.
D
[Edited on 31/5/2014 by TheGecko]
|
|
|
beebo82
|
| posted on 24/6/14 at 09:39 PM |
|
|
Really enjoyed reading this whole thread, can't wait for the next update!
|
|
|