Humbug
|
| posted on 2/12/06 at 04:21 PM |

|
|
Clutch foot rest
Done it today - inspired by, but nowhere near as neat as, Fozzie's
 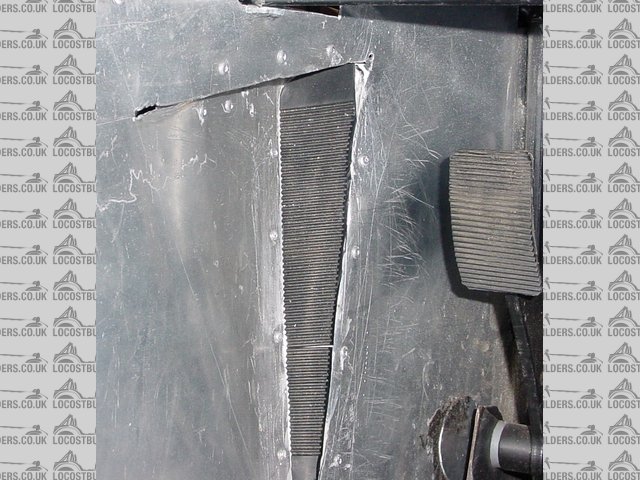
Rescued attachment 2006-12-02 ST foot rest.JPG
|
|
|
|
|
Surrey Dave
|
| posted on 2/12/06 at 04:28 PM |
|
|
What did you use a can opener or an axe!!
It's a good idea ,but difficult to do when the car is finished
[Edited on 2/12/06 by Surrey Dave]
|
|
|
Humbug
|
| posted on 2/12/06 at 04:42 PM |
|
|
Yes, it is a bit scratched, isn't it? 
Drilled small pilot holes then used a jigsaw.
The good news is that it is not very visible except from the driver's seat
|
|
|
Fozzie
|
| posted on 2/12/06 at 06:10 PM |
|
|
Mind your feet on the sharp bits Simon, and your shoes don't get caught!
Mine has just been re-vamped as I found it a bit too far back, and have now moved it a bit more forward.
I had for-seen, when building, that the tunnel panels, may have to come off at sometime, for work/maintenance, hence mine is not in one piece, and I
didn't use rivets.
Fozzie 
'Racing is Life!...anything before or after is just waiting'....Steve McQueen

|
|
|
Humbug
|
| posted on 2/12/06 at 07:04 PM |
|
|
Thanks Foz... I think I have filed off the sharp bits, and I did see that yours was rather far back, so I have positioned mine furhter forward, i.e.
just a little behind the face of the clutch pedal (it looks more in the photo).
Re yours - the old one at least looks like it certainly did use rivets??
http://www.locostbuilders.co.uk/photos.php?action=showphoto&photo=Footrest1.jpg
Cheers,
Simon
quote:
Originally posted by Fozzie
Mind your feet on the sharp bits Simon, and your shoes don't get caught!
Mine has just been re-vamped as I found it a bit too far back, and have now moved it a bit more forward.
I had for-seen, when building, that the tunnel panels, may have to come off at sometime, for work/maintenance, hence mine is not in one piece, and I
didn't use rivets.
Fozzie
|
|
|
Fozzie
|
| posted on 2/12/06 at 07:19 PM |
|
|
The picture, yes the 'shaped bit' was rivetted, I meant the actual tunnel pieces were not rivetted (for access).
The part of the tunnel and the shaping were rivetted to form one panel that in turn, to screw to the mainstay of the tunnel panel.....
Ooooo thats as clear as mud isn't it.....
Fozzie
'Racing is Life!...anything before or after is just waiting'....Steve McQueen
|
|
|
Humbug
|
| posted on 2/12/06 at 08:50 PM |
|
|
Oh, yes, I see what you mean - I see the dome head bolt in one of the pics
|
|
|
Surrey Dave
|
| posted on 3/12/06 at 01:36 PM |
|
|
Another way?
Another way could be to cut out a square or rectangle then make the foot rest in a piece of ally that forms a cover for the hole ,and bolt , self
tapper or rivet it back .
Being careful not to cut any pipes or wires when making the cut out.
I know what I mean anyway!!
|
|
|