Fozzie
|
| posted on 4/11/10 at 03:00 PM | |
|
'How to'.....Metal Shaping and Making of Bonnet Parts.....by 2cv
A collection of 'How to's' .....
written by 2cv
and kindly collated in .pdf format by TheGeko
The revised version is available here
linkydink (about 3.8M PDF file).
[Edited on 4-11-10 by Fozzie]
'Racing is Life!...anything before or after is just waiting'....Steve McQueen

|
|
|
|
|
splitrivet
|
| posted on 4/11/10 at 05:51 PM | |
|
Nice one Fozz and 2cv.
Any chance of tutorial on how to whittle a new Missus from 24 fosters tins and a couple of melons.
Cheers,
Bob
I used to be a Werewolf but I'm alright nowwoooooooooooooo
|
|
|
mistergrumpy
|
| posted on 4/11/10 at 06:34 PM | |
|
Nice one. I thought it was a tutorial on how to build 2CV parts at first 
|
|
|
Fozzie
|
| posted on 4/11/10 at 06:44 PM | |
|
quote:
Originally posted by mistergrumpy
Nice one. I thought it was a tutorial on how to build 2CV parts at first
LOL Title now rearranged......
'Racing is Life!...anything before or after is just waiting'....Steve McQueen
|
|
|
aka Keith
|
| posted on 5/11/10 at 11:19 AM | |
|
can I ask a bit of a muppet question. When shaping the metal, is the metal for the bonnet bulge say draw from the sides of the panel of metal being
worked upon, it is it simply being thinned/stretched at the point of work?
|
|
|
907
|
| posted on 5/11/10 at 03:04 PM | |
|
quote:
Originally posted by aka Keith
can I ask a bit of a muppet question. When shaping the metal, is the metal for the bonnet bulge say draw from the sides of the panel of metal being
worked upon, it is it simply being thinned/stretched at the point of work?
First of all may I congratulate 2cv for raising an interest in metalshaping. Well done. 
I would say it's probably a bit of both Keith.
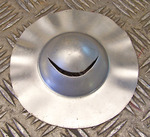
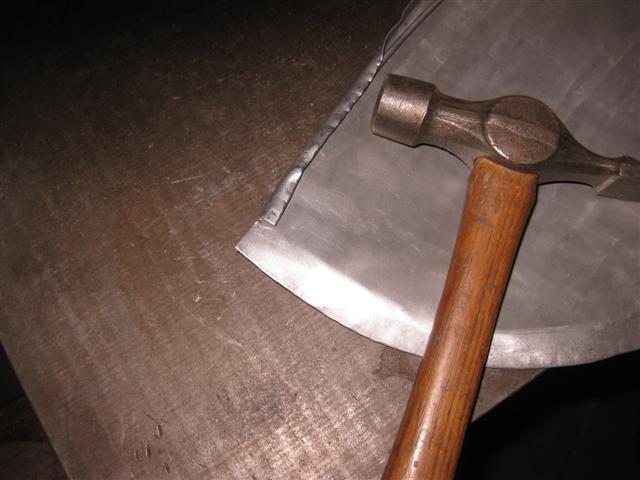
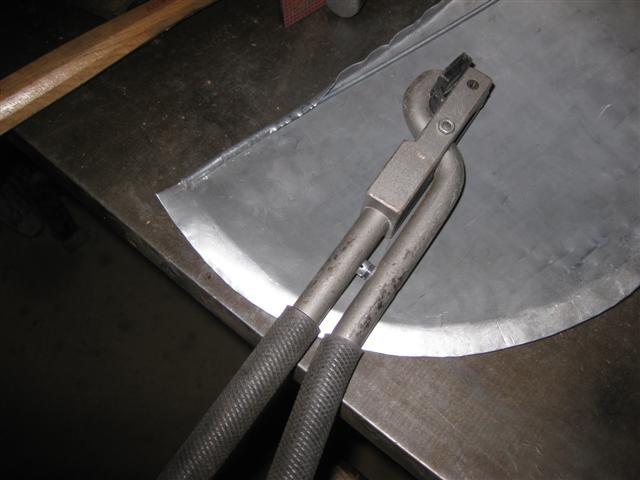
A while back I made a press tool with the idea of pressing the shape of my indicator housings.
Attempt 1 involved bolting the ally sheet to a plate, so stretching only.
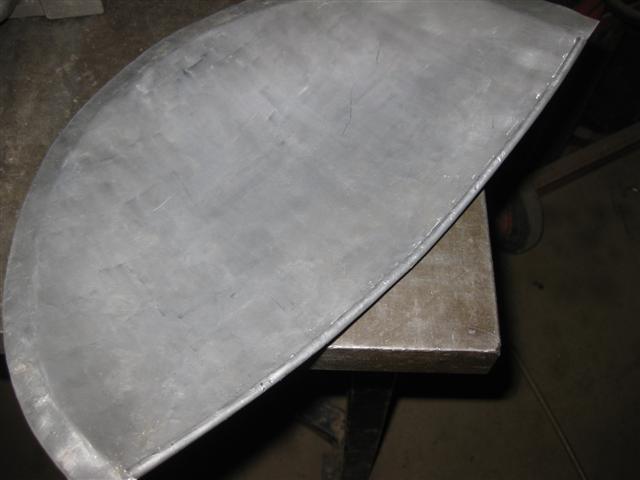
Attempt 2 was a smaller disc with no bolts, so stretching with a little gathering in of metal. (see pic)
I think the ally was laughing at me.
You definitely can stretch too much.
I did succeed in the end by pressing a little, then hammering to the rough shape of the former, then pressing a bit more.
Repeated this a couple more times and got there in the end.
If I ever get round to IVA I might have a go at pointy racing mirrors to match.
Cheers
Paul G
 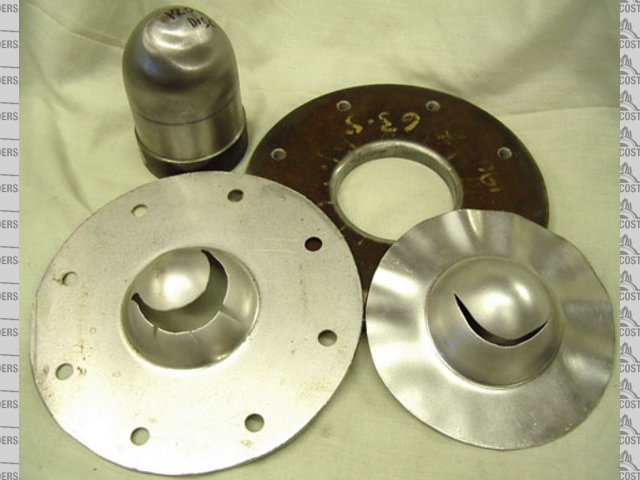
Ally indicators attempt 1 to 2
|
|
|
2cv
|
| posted on 5/11/10 at 03:40 PM | |
|
quote: First of all may I congratulate 2cv for raising an interest in metalshaping. Well done.
Thank you Paul, that's very kind of you. I just wondered if you annealed the aluminium before you formed it. Annealing would certainly make the
aluminium more ductile (if I remember my metallurgy I think that's the right term) and more of it would then take part in the stretching rather
than the majority being at the point of hammer contact.
Keith I think Paul is right. The majority of stretching must be at the point of work but areas outside that must also stretch as well. Ron Fournier
covers blocking very well in one of his videos and he marks the areas to strike with felt tip pen lines to indicate where to strike. By varying the
weight and frequency of hammer blows from one area to another you can put more depth into one part than the other so that you can achieve for instance
a teardrop shape.
[Edited on 7/11/10 by 2cv]
|
|
|
2cv
|
| posted on 6/11/10 at 02:00 PM | |
|
Edge Wiring
This is sometimes used around the edges of mudguards for stiffening or cockpit sides of vintage cars and other components for finishing of the
edge.
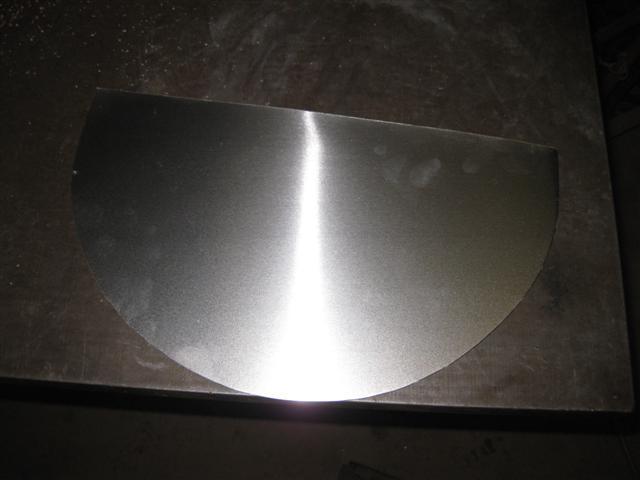
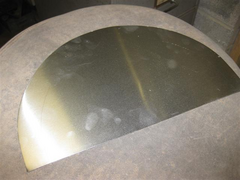
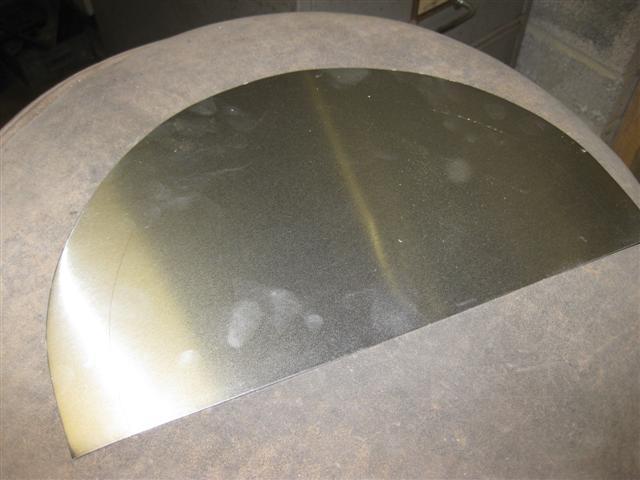
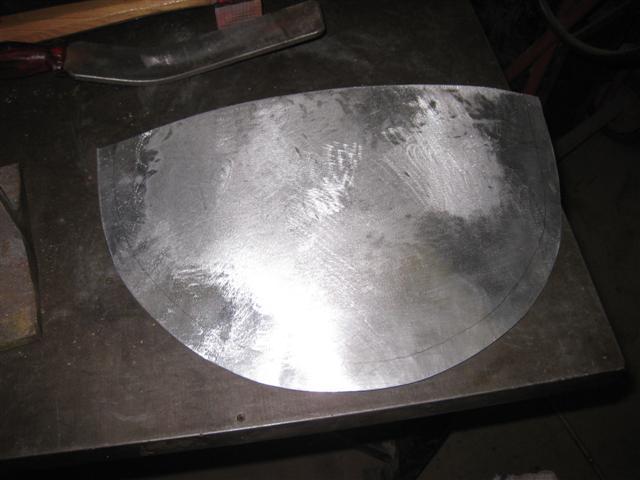
Here are a few pictures showing a scuttle fairing being made and this has a wired front edge. The desired shape is cut out from 1.2mm thick
non-annealed pure aluminium and a 1 inch wide line drawn around the circular edge. This is there to define the limit of hammering because we do not
want to stretch the edges of the work.
[img]
Description
[/img]
[img]
Description
[/img]
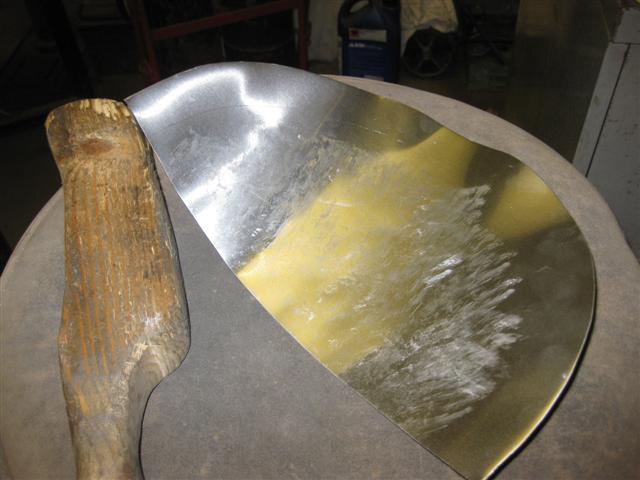
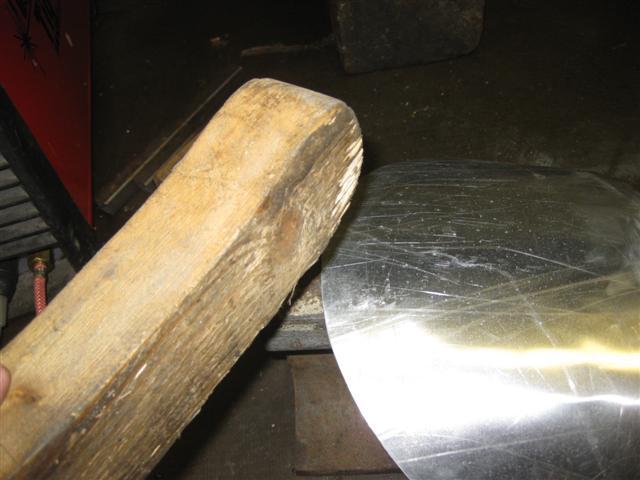
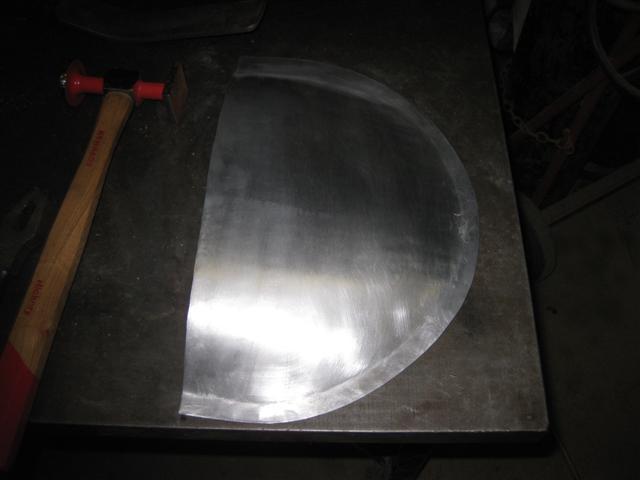
The flat sheet is placed on the shot bag and shape put in using both a slapper and bossing mallet. As the shape develops, crinkles form around the
edge in the "No hit" area. These can be shrunk out using the wooden slapper with the aluminium sitting on a steel surface, in this case a
piece of railway line.
[img]
Description
[/img]
[img]
Description
[/img]
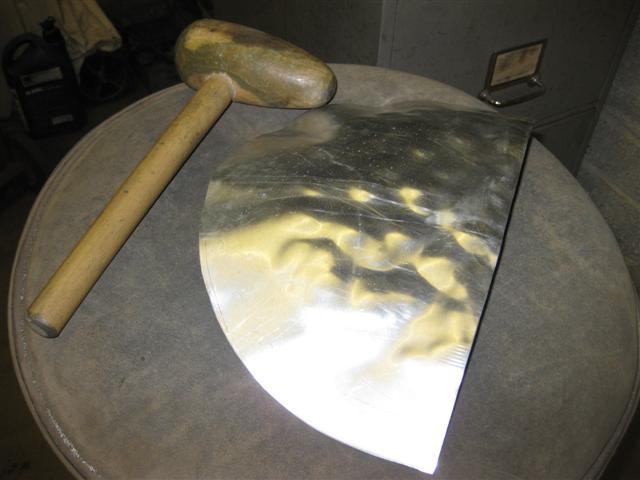
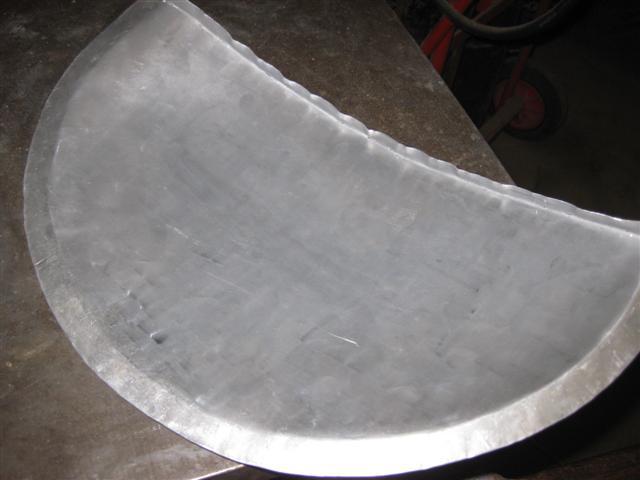
It's important to check the shape by reference to a flat surface frequently to prevent distortion taking over.
Alternately put more shape in and remove the crinkles. It is then planished using a planishing hammer and steel slapper.
[img]
Description
[/img]
[img]
Description
[/img]
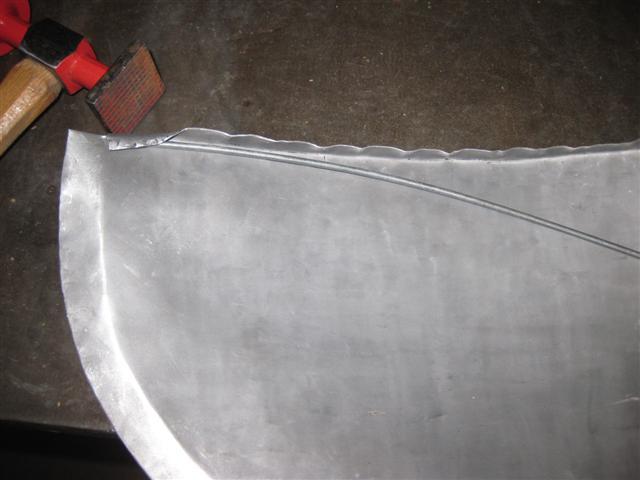
A 20mm wide flange is then formed using the glaziers pliers.
[img]
Description
[/img]
[Edited on 6/11/10 by 2cv]
|
|
|
2cv
|
| posted on 6/11/10 at 02:08 PM | |
|
I'm using 3mm galvanised steel wire so we need to form a 9mm wide flange and trim back the mounting flange by that amount. The flange is easily
formed using the glaziers pliers up to a right angle. Place the wire right in the corner formed by the flange and the base and trap the wire by
hammering the aluminium down against it.
[img]
Description
[/img]
[img]
Description
[/img]
[img]
Description
[/img]
At this stage it doesn't look too tidy but don't despair. With the aid of a door skinning tool the aluminium can be neatly rolled around the
wire.
[img]
Description
[/img]
[img]
Description
[/img]
|
|
|
2cv
|
| posted on 7/11/10 at 09:00 AM | |
|
907 said: I did succeed in the end by pressing a little, then hammering to the rough shape of the former, then pressing a bit more. Repeated this a
couple more times and got there in the end.
Paul, do you have any pictures of the finished pressings?
|
|
|
907
|
| posted on 7/11/10 at 10:37 AM | |
|
quote:
Originally posted by 2cv
907 said: I did succeed in the end by pressing a little, then hammering to the rough shape of the former, then pressing a bit more. Repeated this a
couple more times and got there in the end.
Paul, do you have any pictures of the finished pressings?
Hi 2cv.
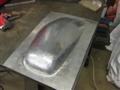
Each pressing took out the hammer marks from the last stage till it was the length I wanted.
I then cut off the excess and welded in a disc, although I could have knocked an edge over
to form the lip that the lens screws go into.
I bought the lenses with rubber bulb holders from a stand at Stoneleigh but couldn't make my mind
up between clear or orange. I have now decided that a plain ally car needs the odd splash of colour.
The stems I turned from solid ally bar, drilled through 8.5mm and tapped m10 both ends.
Cheers, and keep up the good work.
Paul G
 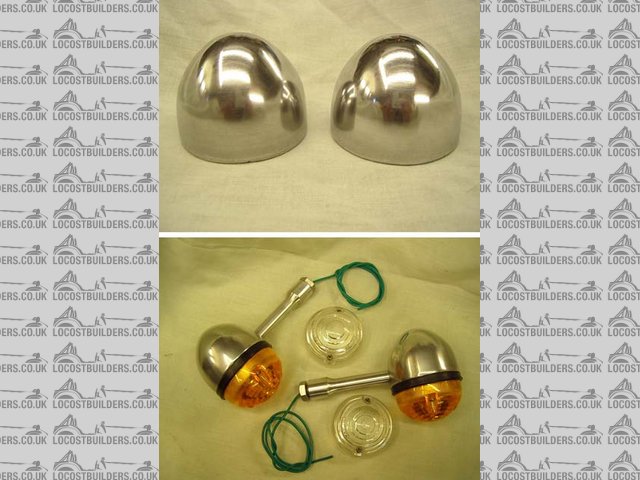
ally winkers final stage
|
|
|
2cv
|
| posted on 7/11/10 at 10:55 AM | |
|
Paul, that is superb work; I take my hat off to you. Great stuff!
|
|
|
TheGecko
|
| posted on 16/3/11 at 01:10 PM | |
|
There's an updated (version 3) PDF file now at
this link(5.3m PDF) which includes the edge
wiring details form above and the recent threads on both clamshell and cycle guards.
Thanks again to John [2cv] for his ongoing and useful contributions to LocostBuilders.
Dominic
|
|
|
2cv
|
| posted on 17/3/11 at 05:35 PM | |
|
Thank you Dominic great piece of work and thank you for your encouraging words.
Bearing in mind the hoops that you are having to jump through to get your car built and on the road, it would be very nice if you opened a build
thread particularly showing pictures of your progress on the nosecone buck and the metal shaping.
Take care, best wishes
John
[Edited on 17/3/11 by 2cv]
|
|
|
MakeEverything
|
| posted on 17/3/11 at 06:02 PM | |
|
Speechless, absolutely speechless - In awe of two true craftsmen.
Kindest Regards,
Richard.
...You can make it foolProof, but youll never make it Idiot Proof!...
|
|
|
TheGecko
|
| posted on 18/3/11 at 01:23 PM | |
|
quote:
Originally posted by 2cv
Thank you Dominic great piece of work and thank you for your encouraging words.
Well, it was meant quite sincerely John. You've taken the time and effort to setup sample projects and photograph the stages. I've got a
shelf full of metal-shaping books here by the likes of Fournier, Covell, & Remus but I think I've learnt just as much from your posts
here.
quote:
Bearing in mind the hoops that you are having to jump through to get your car built and on the road, it would be very nice if you opened a
build thread particularly showing pictures of your progress on the nosecone buck and the metal shaping.[Edited on 17/3/11 by 2cv]
There actually is already a build thread for my car here but I
haven't updated it since last June  As I mentioned in an email, I'm taking 4 weeks leave to work pretty much continuously on the car
(starting three weeks from now!! ) so I hope to show some measurable progress soon. As I mentioned in an email, I'm taking 4 weeks leave to work pretty much continuously on the car
(starting three weeks from now!! ) so I hope to show some measurable progress soon.
I'll add up some "teaser" pics of the nosecone work there (teasers because I haven't had time to make any more progress).
Dominic
|
|
|
TheGecko
|
| posted on 24/3/11 at 01:29 PM | |
|
Tripped across some nice amateur aluminium forming online and thought it may be of interest here. There is (apparently) a thriving community building
"mock" F16 cockpits for slight simulator play. This guy has done some very nice self taught aluminium panel work. The
link is to page 19 of his build thread which has a step by step example but it's
well worth trawling through the whole thread for lots of interesting stuff.
Please note: I've just upgraded to Firefox 4.0 and it crashes as soon as I open the above link. No apparent problems with earlier versions or
IE. It's probably one of my plugins but it's a little late in the evening to work my way through turning them off one at a time to see
which is the problem.
Dominic
|
|
|