contaminated
|
| posted on 20/1/11 at 12:00 AM |

|
|
I've just looked again and I'm sure I'm correct. You are using the right flaring bit but definately on the wrong side of the tool.
Use it on the flat side and it will work.
Tiger Super Six Independent
www.southernkitcars.com
|
|
|
|
|
dan8400
|
| posted on 20/1/11 at 07:06 AM |
|
|
quote:
Originally posted by Davegtst
I found some copper pipe flared better than others. New stuff seemed much easier to work with and i used the exact same tool.
I found the same thing with the same tool. Got fed up trying to flare an old roll of copper pipe I had so went to the motor factors and bought a new
roll. It was so easy to work with by comparison...softer. It flared a treat and I forgot all about the woes of the old pipe when the going was good

Dan
Hey - That's Journey!!!
|
|
|
Howlor
|
| posted on 20/1/11 at 07:41 AM |
|
|
I agree with Contaminated. When I did mine I used the other side of the clamp first then if you want to double flare then turn over the clamp and go
in with the cone.
Regards,
Steve
|
|
|
jabs
|
| posted on 20/1/11 at 08:02 AM |
|
|
take a look at http://www.lotuselan.net/forums/viewtopic.php?t=15759 explains it all and has a extract from the instructions
also found this explaination
How to Use a Flaring Tool
Flaring tools are described as either single or double flare. Both work the same way, but the double makes a stronger, safer flare. The single flare
is a one-step operation and forms a flare from a single layer of the tube, while the double first forms a bulged out area in the end of the tube,
which is folded over itself to make a double-layered flare during the second step.
The largest part of a flaring tool is the tube clamp. This clamps has several holes, which are marked for the various tube sizes. Loosen the wing nuts
to allow the tube clamp to open and insert the tube into the proper-sized hole. Set the small flaring adapter--this is the small disk with the stud
protruding from one side of it--upside down beside the end of the tube and adjust the tube to stick out of the clamp the same distance as the
thickness of the adapter disk. Tighten the wing nuts securely. If they are loose, the tube will slide in the clamp and ruin the flare.
Attach the flaring screw to the clamp. It attaches by sliding down over the clamp and twisting sideways to hold it in place. The cone on the end of
the flaring screw should line up with the end of the tube. Place the protruding end of the adapter disk inside the tube, using brake fluid as a
lubricant. Tighten the screw against the back of the disk until the disk is pressed against the sides of the clamp and then back the screw off and
remove the adapter disk. Add another drop of brake fluid to the end of the tube and tighten the cone of the flaring screw into the end of the tube
until it stops.
Loosen and remove the clamping screw and set it aside. Loosen the wing nuts and remove the tube from the clamp. Examine the flare. It should be
uniform and without any cracks.
[Edited on 20/1/11 by jabs]
|
|
|
MikeRJ
|
| posted on 20/1/11 at 08:40 AM |
|
|
quote:
Originally posted by loggyboy
Ive tried several flaring kits, including one similar to yours and failed miserably with most.
My dad has an old kit which is based on the clamp styles ones you see for about £100 on ebay, however knowing my dad I know he would not have paid
that much! SO must have been a cheaper version. But it works fine.
However I cant find anything similar on the internet. 
Agreed, the cheap flaring tools are pretty poor at best. The Sykes Pickavent type you are describing are an absolute pleasure to use; rarely if ever
do you get a duff flare from these, but they are very expensive for infrequent use.
What I would say is make sure the little nipple on the die that fits inside the brake pip is straight, it's not difficult to bend them on some
of the triple-C brand tools and it'll never make a decent flare.
|
|
|
splitrivet
|
| posted on 20/1/11 at 09:05 AM |
|
|
All the above regards reaming, lube, distance through die is right etc but whats causing the poor flare is the tube is slipping through the die,
tighten the wing nut nearest the pipe first then tighten the other end then tighten both using a spanner.
The original tool that these cheapo copies ripped off had a lot finer thread on the wing nut pin giving loads more pressure on the tube.
Cheers,
Bob
[Edited on 20/1/11 by splitrivet]
I used to be a Werewolf but I'm alright nowwoooooooooooooo
|
|
|
rusty nuts
|
| posted on 20/1/11 at 08:18 PM |
|
|
If you have the time to come over to Cambridge this weekend I can show you how to prepare the pipe and do a proper flare using a decent pipe flaring
tool that you can borrow . I've been making brake pipes for over 40 years and have never had any problems except once and that was using a tool
similar to yours
|
|
|
macc man
|
| posted on 20/1/11 at 08:52 PM |
|
|
I used one of those tools on my car and like you I found the quality varies between flares. I notice that the tool wears very quickly and is worn out
after a dozen flares. I ended up going to local motor factors with my pre-cut pipes and got them to
make the ends off. Best of luck.
|
|
|
AndyW
|
| posted on 21/1/11 at 02:55 PM |
|
|
Thanks for all the reply's, I didn't expect to get that many, interesting though how some of the opinions vary from what is
"right" and "wrong". All advice is taken on board and as usual I appreciate help. I am taking up an offer from a fellow
locoster to be shown "the way"! Hopefully then I can post up some pics of proper pipe flares and a smiley face.
Again, thanks......
Andy
PS I am now short of brake pipe by one long length from master cyl to rear splitter, so if any one has a length going spare, i am again willing to
give it a good home....
|
|
|
rusty nuts
|
| posted on 21/1/11 at 07:44 PM |
|
|
You have u2u
|
|
|
NS Dev
|
| posted on 22/1/11 at 10:55 PM |
|
|
Lots af variables, but the biggest one is that those tools (in my opinion) are crap!
I have one for flaring pipes "on car" when nothing else is very easy, but a proper "lever action" type or similar is hard to
beat and I have never had a mis-flare with one, whereas I have had a lot with those cheap tools
Retro RWD is the way forward...........automotive fabrication, car restoration, sheetmetal work, engine conversion
retro car restoration and tuning
|
|
|
Valtra
|
| posted on 24/1/11 at 10:05 PM |
|
|
I had a cheepo flare tool and it was very poor . Then bought a better branded one which I now sell (the brand not the flare tool) and it is a lot
better, clamps tighter and works much smoother . All about prep, but really most of those pictures would seal ok , at the end of the day the steel
fittings squish it into the correct shape anyway . I haven't had any leaks 
"If it looks like it works and it feels like it works, then it works"
|
|
|
sogs_pater
|
| posted on 13/1/17 at 11:23 AM |
|
|
If steel fittings don't squish into shape!
Hi
I'm a bit of a novice in the brake pipe game but I thought I'd share this post having just replaced all the brake lines on my car.
Here's one of my favourite links on this topic
as it seems to cover pretty much everything apart from maybe what tools to use if you want to do Kunifer piping.
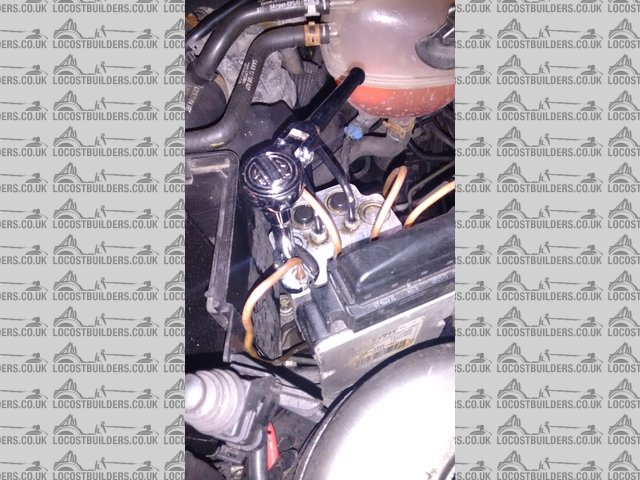
That said I was struggling to find a site that mentioned anything about what to do to get above the first bend in the hard piping after the junction
box/manifold.
"KS TOOLS Flexi-Head Brake Bleeding Flare
Nut Spanner Set" seemed like the best option but then I came across a link for a set of Crows foot spanners. It occurred to me I already
had a set which I bought to replace a steering gearbox on my old Jeep.
So a 11mm Crows foot with a 3/8" extension and a stubby 3/8" drive was the final solution. It slots right in between the other unions on
the manifold and gets my drive up above the rest of the pipes - plus I get a much better idea of how much torque I'm applying and haven't
mauled any of the unions.
Description
For anyone else with inaccessible leaky brake pipe unions I suggest you give this a try.
|
|
|


.jpg)