Badger_McLetcher
|
| posted on 15/9/13 at 11:44 PM |

|
|
New Haynes Roadster Build
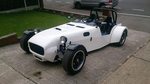
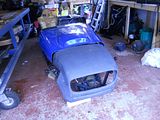
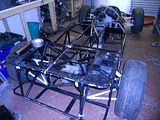
Well after many years of what can only in reality be called fiddling around with car projects, I have decided to build myself a Seven-esque car 
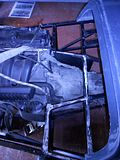
I picked this up the other week from a kind gentleman in west Wales, who was selling it as an part built project. All seemed in good order for the
price, and so a deal was done and it was brought back to Brizzle. The whole package consisted of the chassis, bodywork and running gear, plus a few
extras.

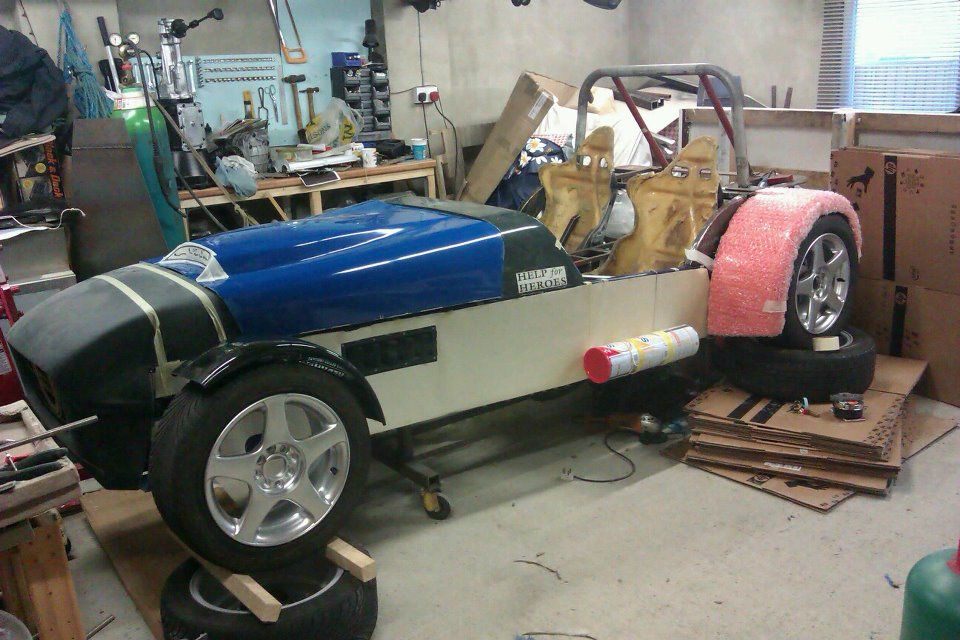
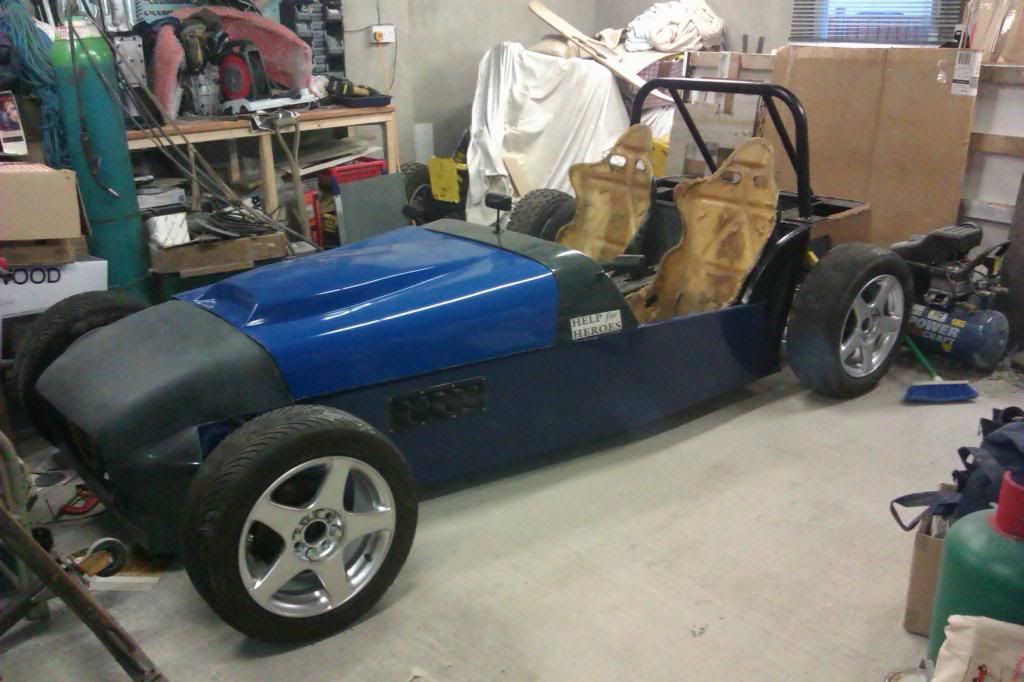
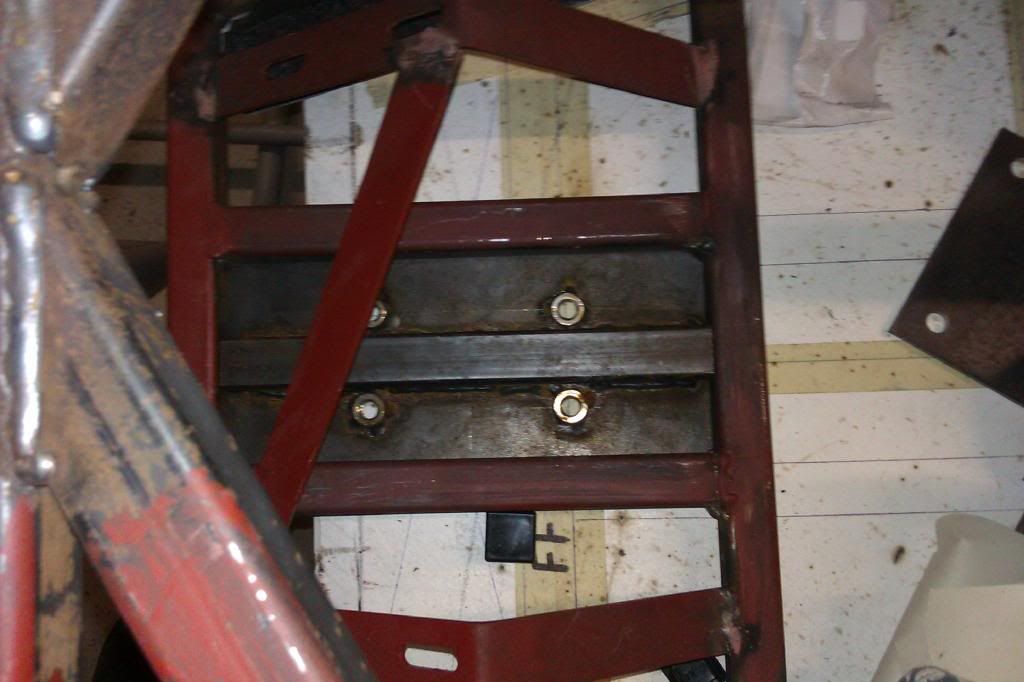
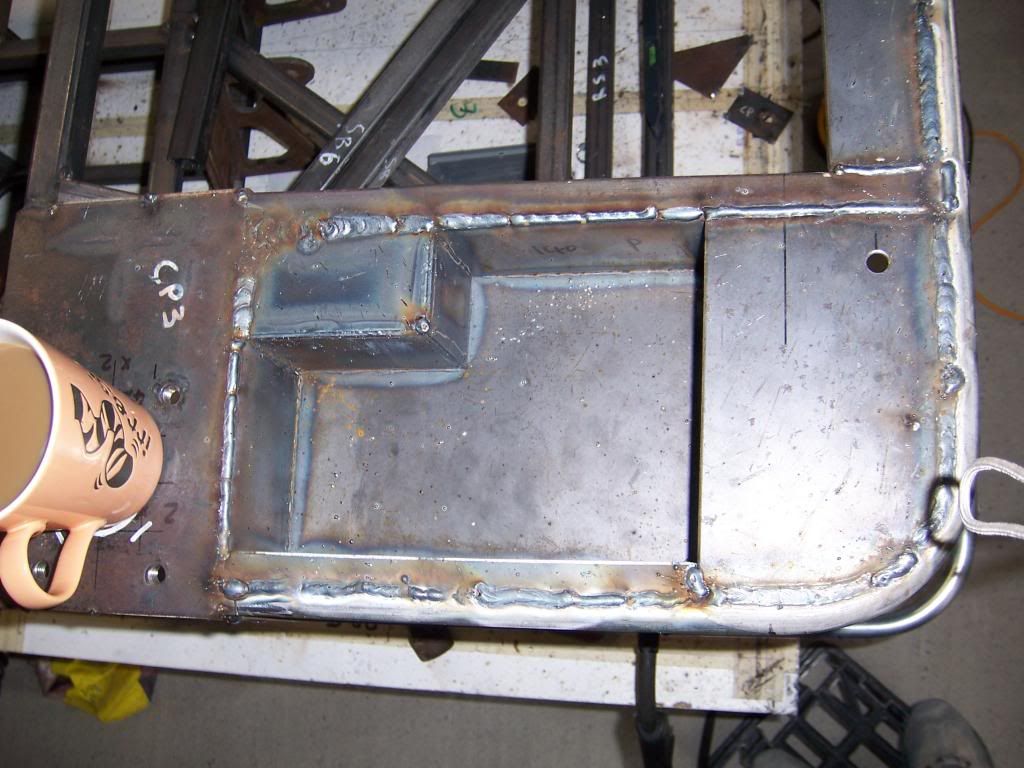
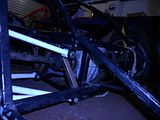
The guy who built the chassis put in a couple of mods - a reinforced towing section in the front (with 5mm plate) and some pockets at the back.
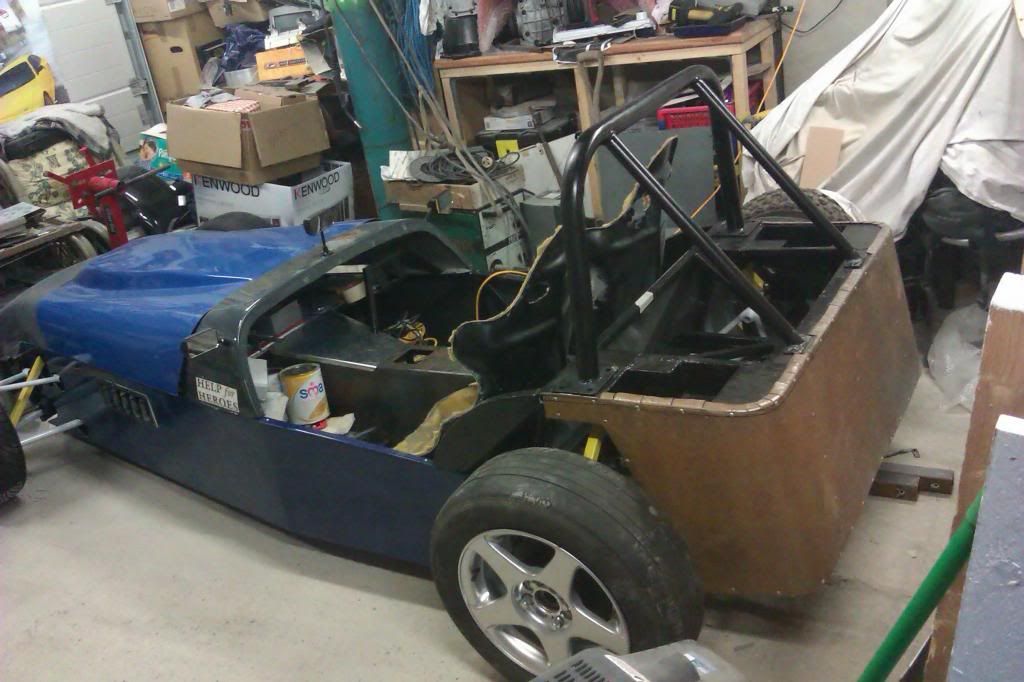
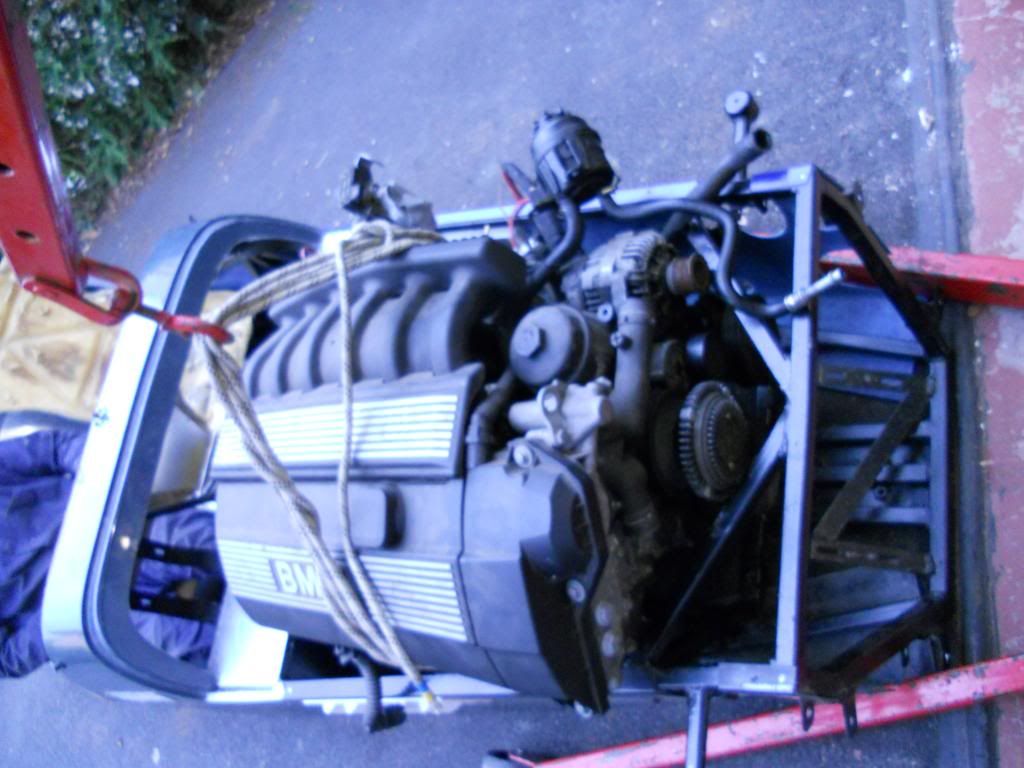
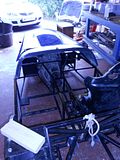
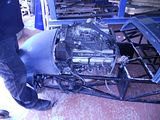
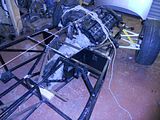
So the first order of the (next) day was obviously to have a sit in it, make some "BRUMMMM" noises and see if the engine fits (it does...
just!).

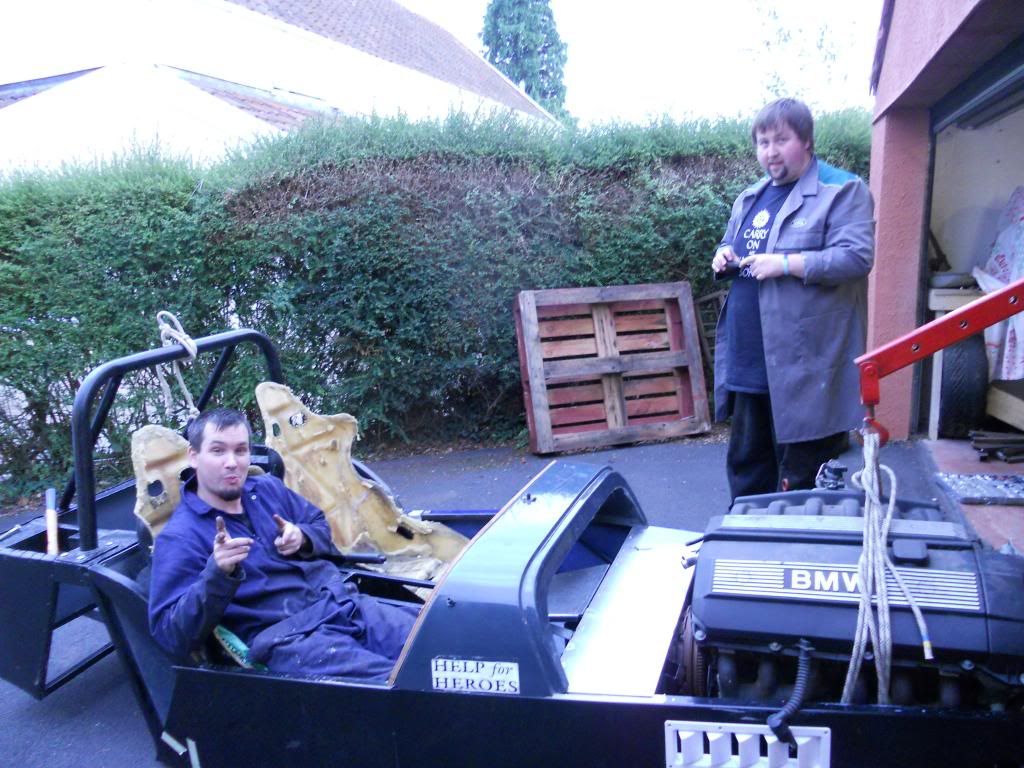
The scrotey looking fellow in the overalls is none other than me, whilst the gentleman in the coat is my best mate Beaver who has been helping me out
with these kind of projects for far, far too long!
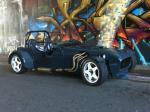
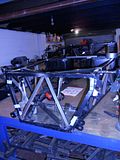
Since having it I have stripped it right back to inspect it, and it is now less complete than when I bought it! I've stripped out the floors (I
felt 2mm steel was a bit excessive!) and am modifying the chassis slightly to strength it. However like the eejit I am I've left the camera in
the workshop! So for now I shall leave you with a picture of Cooky, the car I originally bought as a donor but then found I don't need it, and
is now serving as a bit of fun
[Edited on 15/9/13 by Badger_McLetcher]
If disfunction is a function, then I must be some kind of genius.
|
|
|
|
|
Nickp
|
| posted on 16/9/13 at 05:38 AM |
|
|
Will be following this thread with interest, and hopefully picking up some inspiration 
|
|
|
carlknight1982
|
| posted on 16/9/13 at 06:31 AM |
|
|
if you join the haynes forum the fella who build it was a member look for help for heros roadster build in the announcement section
Logic will get you from a A to B
Imagination will take you everywhere.
|
|
|
Not Anumber
|
| posted on 16/9/13 at 01:27 PM |
|
|
Its nice to see the Help for Heroes roadster has gone to someone who will enjoy finishing it. He did a grand job of getting it as far as he did
during difficult circumstances. The roadster forum has to be the next place you go to. http://www.haynes.co.uk/forums/index.php
|
|
|
Badger_McLetcher
|
| posted on 16/9/13 at 06:05 PM |
|
|
I'm already registered there  I did a bit of research before I bought it, so I had a look at his blog and all - he was also kind enough to
give me a load of pictures that I can use to help get through the IVA. I did a bit of research before I bought it, so I had a look at his blog and all - he was also kind enough to
give me a load of pictures that I can use to help get through the IVA.
I should point out that the fact that I am modifying the chassis is no comment on how he's built it- just on the different approach I am taking
If disfunction is a function, then I must be some kind of genius.
|
|
|
Deanno
|
| posted on 27/9/13 at 11:31 AM |
|
|
I wish in a way i had sold the grill to go with it but as i said it was very sentimental to me, but just hope you get to finish it.
I have found loads more build pictures on my works computer but will have to get them off for you and send them via my home e-mail as we have a small
amout of data we are able to send out.
|
|
|
nick205
|
| posted on 27/9/13 at 12:44 PM |
|
|
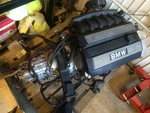
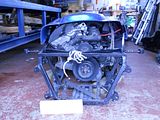
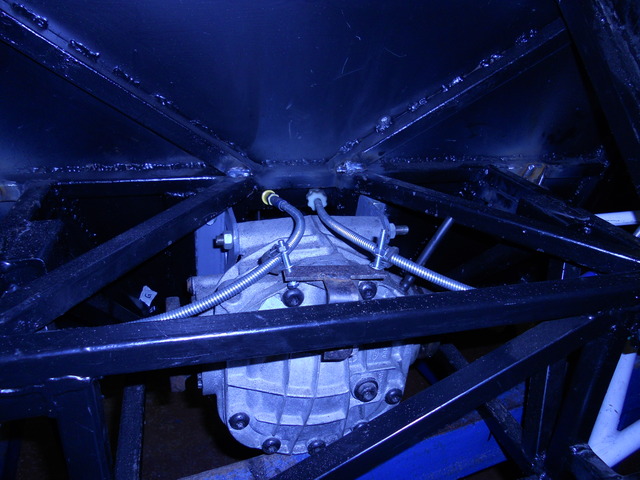
That engine looks like tight fit
|
|
|
Nickp
|
| posted on 27/9/13 at 12:59 PM |
|
|
I'm doing similar over here and yes it's tight
http://forum.ppcmag.co.uk/viewtopic.php?f=7&t=9383&sid=60c298d00cb279047e20f770488390bb
|
|
|
Badger_McLetcher
|
| posted on 30/9/13 at 10:52 PM |
|
|
quote:
Originally posted by Deanno
I wish in a way i had sold the grill to go with it but as i said it was very sentimental to me, but just hope you get to finish it.
I have found loads more build pictures on my works computer but will have to get them off for you and send them via my home e-mail as we have a small
amout of data we are able to send out.
No worries mate, please bung them over if you get a chance No worries about the grille mate, I completely understand. So far it's been
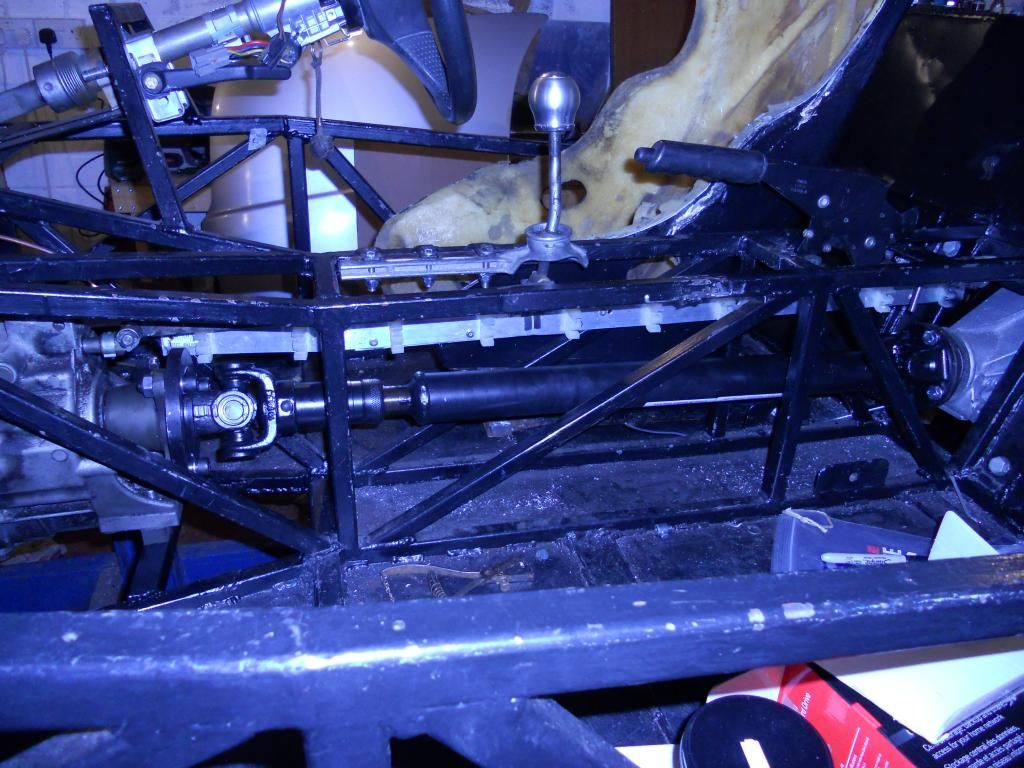
consuming my weekends quite well, but there's steady progress being made.
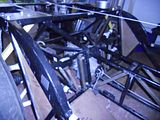
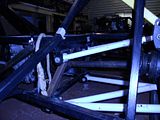
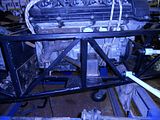
And yep, it's quite tight- the chassis needs a little butchery to make it fit in fact! But I figured I'd go the whole hog and try to do
some strengthening mods whilst I was about it.
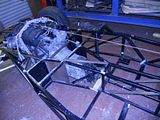
The bonnet fits over the engine... just!
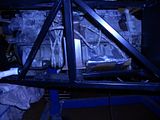
These are the mods I'm doing to the front section.
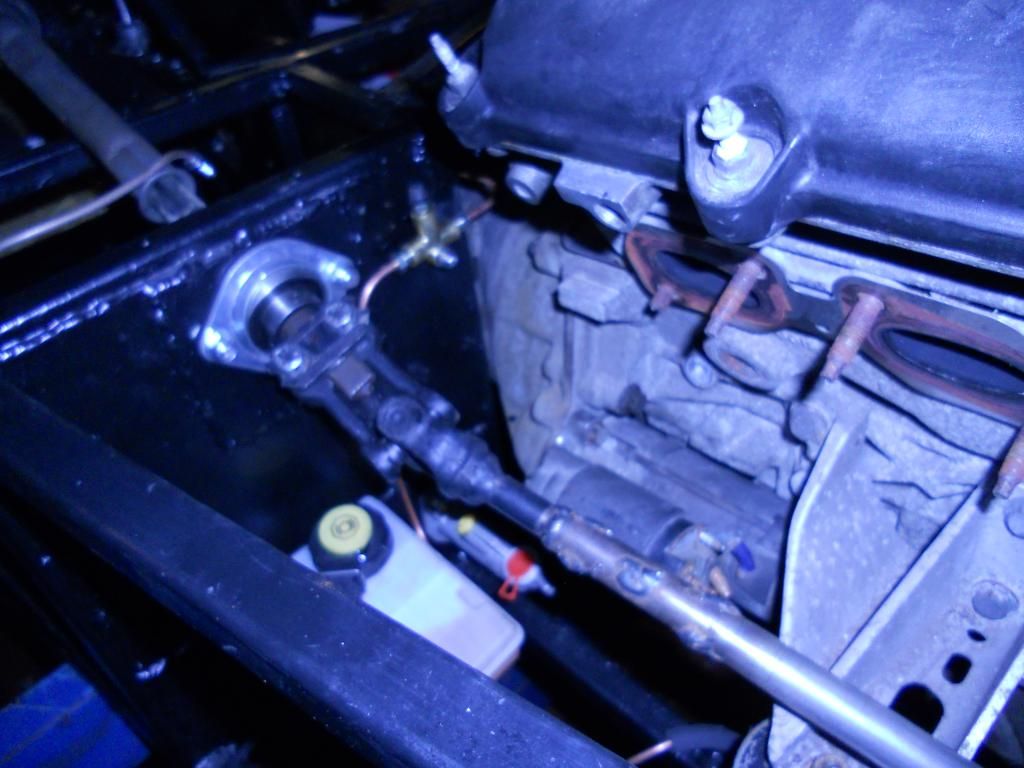
This is the tube that needed removing - as with most of the rest of the bracing on the engine bay, I need to get it back on wheels and position the
engine in order to see how best to fit the bracing.
And finally a dangerous discovery was made... if I had a manual transmission for it, I'd probably be having a V8 roadster!
As per usual there were more pictures, but something went Pete Tong and they didn't upload... typical!
If disfunction is a function, then I must be some kind of genius.
|
|
|
Julian Thrussell
|
| posted on 12/11/13 at 01:01 PM |
|
|
Can you get to all the service points and sensors - you may need a double jointed arm?
|
|
|
Badger_McLetcher
|
| posted on 12/11/13 at 05:25 PM |
|
|
Having made the engine mounts and all it's not too bad actually - especially if I were to use a custom intake (an idea with which I'm
toying). I'd even hazard a statement that access will be easier than on the original car!
If disfunction is a function, then I must be some kind of genius.
|
|
|
Badger_McLetcher
|
| posted on 28/4/14 at 09:48 PM |
|
|
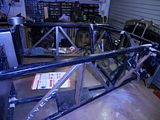
So it's been a bit of a while since my last update. Between work and other projects this weekend was the first time I've been able to work
on it since just after Christmas. Over Christmas we managed to finish off welding in the new bars into the chassis and gave it a coat of paint to
protect it. I also made the engine mounts.
String: Useful stuff
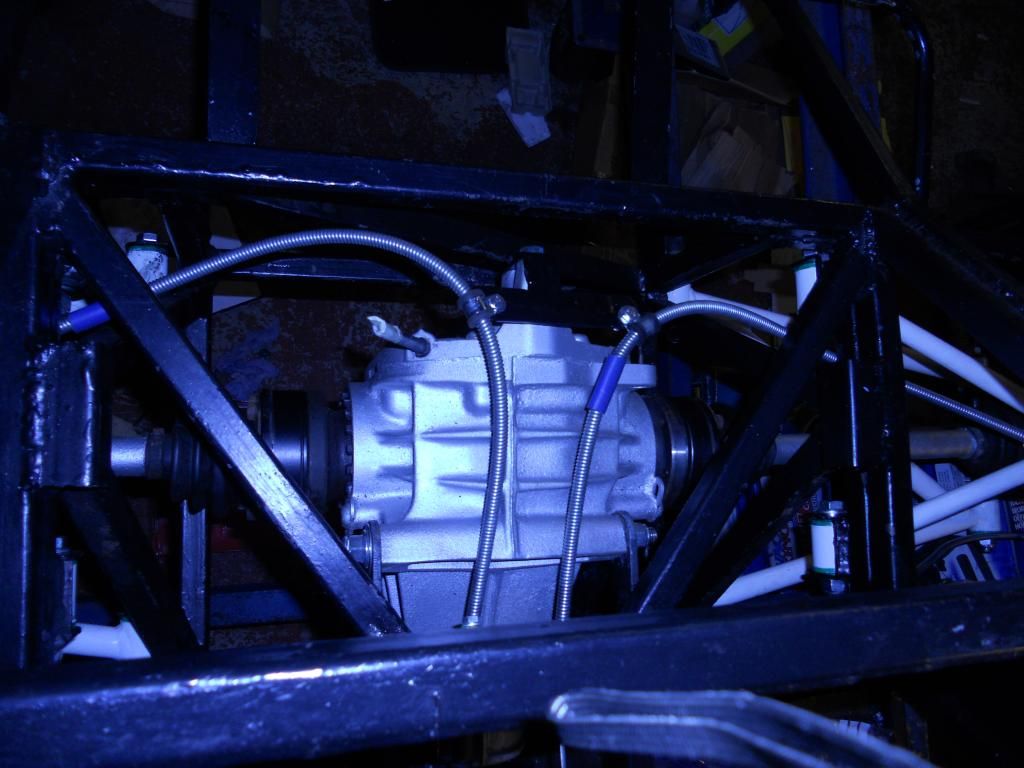
Mods to the rear snout.
This weekend I started on the first assembly of the car to take stock of what I need to buy and what needs to be done (and also any further work to
the chassis that I want to do, e.g. brackets, reinforcing the steering rack mounts, etc.). So in went the engine, suspension and I started eyeing up
the steering arrangement (I'm planning on using a Fiesta column, as I got hold of one for free).

I now have a relatively significant shopping list for parts, including rear bearings, calliper refurbishment kits for the front and rears, tubing to
finish the steering column and some tube to repair one of the rear hubs which is misaligned.
Of course I completely forgot to make note of which bearings and calliper kits I need and since I'm away until the weekend I can't look
to see! 
If disfunction is a function, then I must be some kind of genius.
|
|
|
MBrown
|
| posted on 28/5/14 at 04:18 PM |
|
|
Hi, I notice in one of your above pics that with the bonnet on as such the engine is about 2 inches too high, I am putting the same engine, how are
you planning on getting the engine lower? Thanks
|
|
|
Badger_McLetcher
|
| posted on 29/5/14 at 05:59 AM |
|
|
So that picture was taken with the engine resting on one of the chassis rails because the sump is a funny shape, in reality the sump and gearbox can
poke out the bottom slightly once modified, making the whole lot lower. Also my bonnet is slightly warped and so looks worse than it is
If push comes to shove, there's always the bonnet bulge route!
[Edited on 29/5/14 by Badger_McLetcher]
If disfunction is a function, then I must be some kind of genius.
|
|
|
MBrown
|
| posted on 29/5/14 at 06:17 AM |
|
|
Awesome, I thought your engine was there after the sump modification! Thanks
|
|
|
Badger_McLetcher
|
| posted on 29/5/14 at 04:31 PM |
|
|
No worries mate, I'll trial fit the bonnet again when I get back this evening - I've since made the engine mounts so it should give you a
definitive answer
If disfunction is a function, then I must be some kind of genius.
|
|
|
Badger_McLetcher
|
| posted on 29/5/14 at 07:36 PM |
|
|
Right, a quick update: Nope!
The nose cone and bonnet do not properly fit with the way I have mounted my engine at the moment - if it was dropped further a couple of inches it
would be OK, but then the gearbox would be a couple of inches below the bottom chassis rail, the sump a bit more (I've currently got a butchered
sump on for clearance, so can't tell you how much by). This was my choice to try to keep the bottom of the car smooth for ground clearance, so
it's possible you can get the engine slightly lower.
On the flip side a central bonnet bulge running into the nose cone would give the required clearance, or possibly some minor pipework re-routing on
the engine. My major issue is the front water hose on the head fouling on the bodywork, so that is where clearance is required. Also I don't
have the air intakes on at the moment, but I don't think those will create an issue.
Sorry for the mixed messages, I was running off memory as it's been a while since I trial fitted the bodywork! Ironically the V8 I tried fit
like a glove, being a shorter engine!
If disfunction is a function, then I must be some kind of genius.
|
|
|
MBrown
|
| posted on 30/5/14 at 12:52 PM |
|
|
I think it's probably best I get a bonnet with a scoop and then fit the engine so I can check at an early stage, thanks for the heads up
|
|
|
Badger_McLetcher
|
| posted on 15/9/14 at 09:55 PM |
|
|
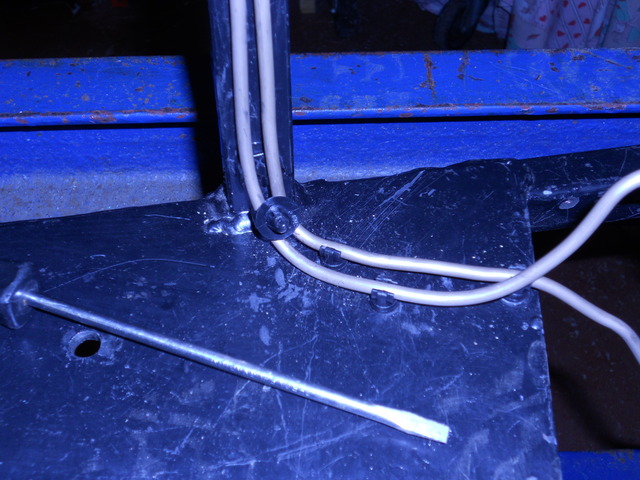
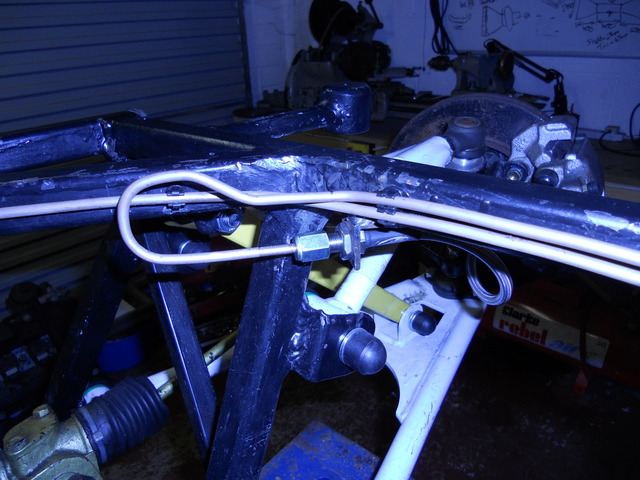
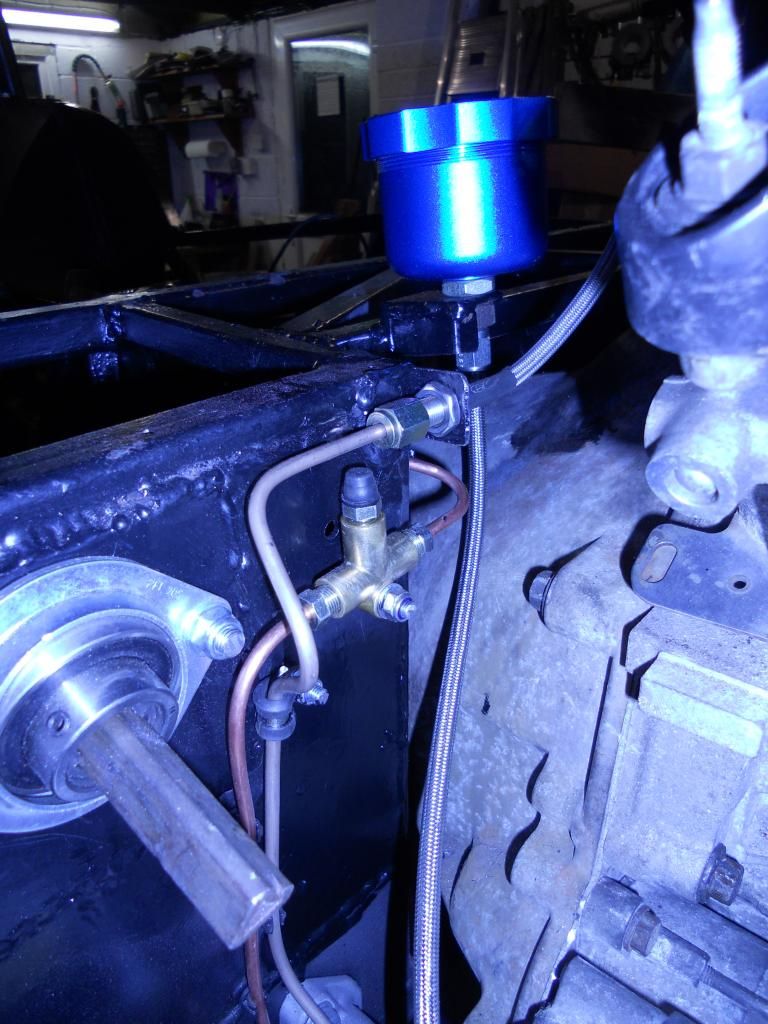
It's been a while again, so here's another update. First up: Handbrake.
 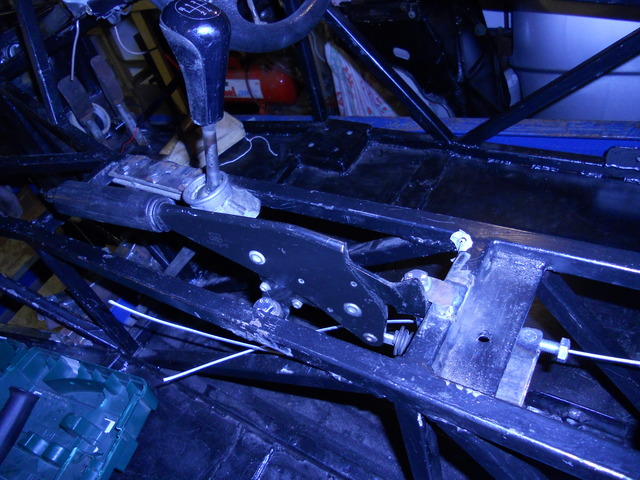
Description
Handbrake mounted - tabs are 3mm steel, handbrake is spaced down about 10mm off them for clearance. I've used the MX5 position as an
inspiration and put it next to the gear lever, at an angle for clearance. Yet to see how well this works.
 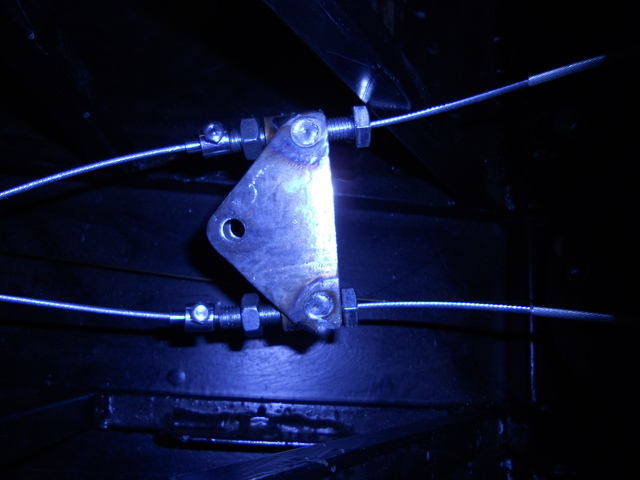
Description
I made a new balance bar\adjuster for the cable - it's loose here for the picture. When I do my full build I'll attach the cables inside
the bolts (not the clamps here) - not sure whether silver solder them or just weld.
Description
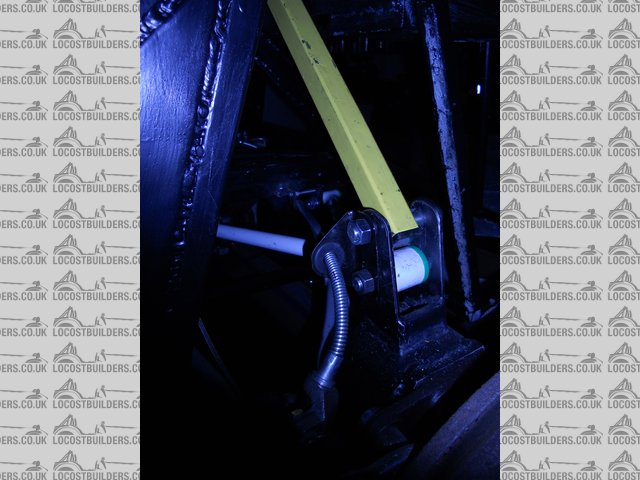
A bit dark, but shows the bracket I made to space the handbrake cable away from the upright and over the top of the upper wishbone.
 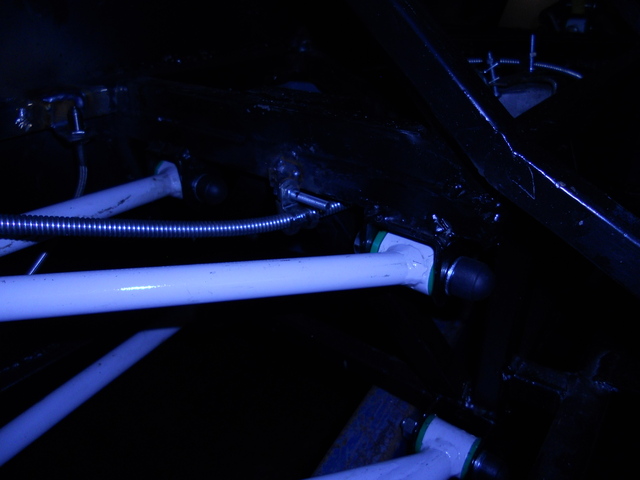
Description
This one is very dark, but you can just make out the P-clip on the chassis on the handbrake cable.
Description
There's another bracket to be fixed onto the rear of the diff, which allows more P-clips to on the cable.
Using this set up the handbrake cable is held nicely and won't hit anything else.
If disfunction is a function, then I must be some kind of genius.
|
|
|
Badger_McLetcher
|
| posted on 15/9/14 at 10:00 PM |
|
|
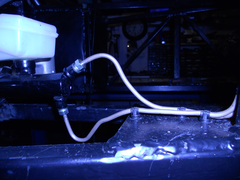
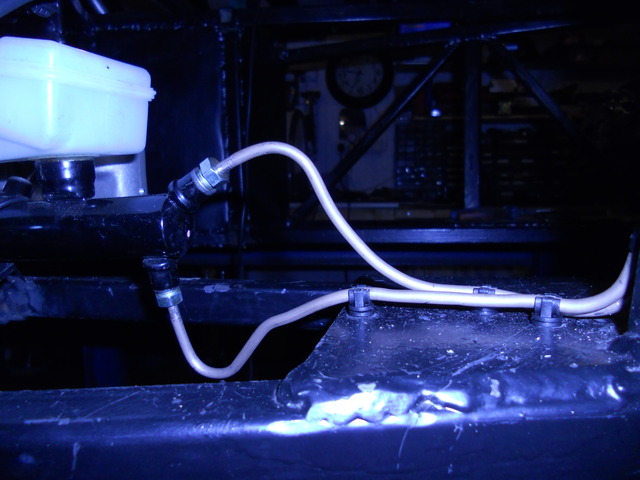
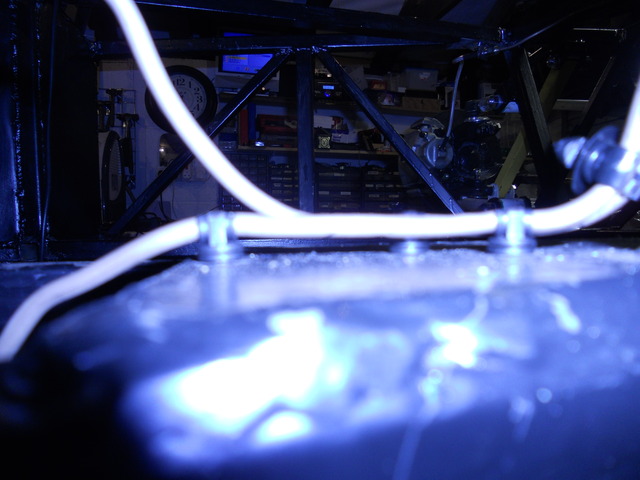
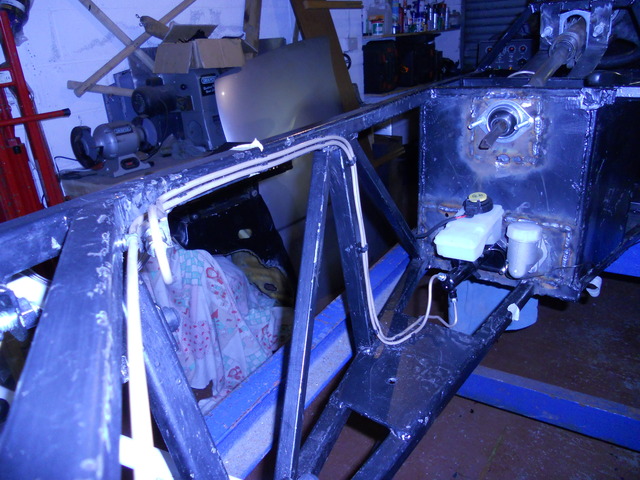
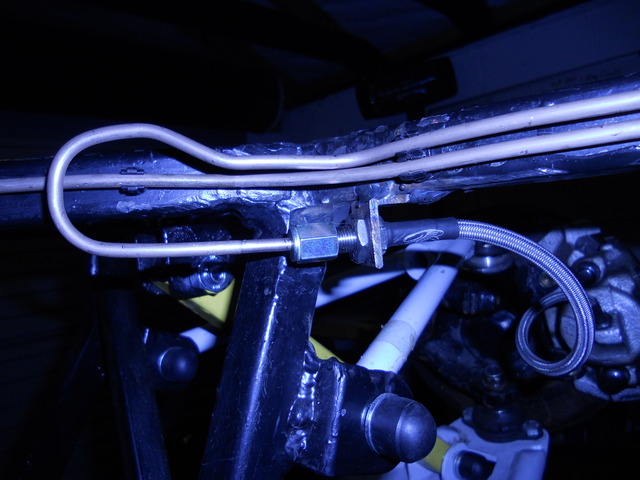
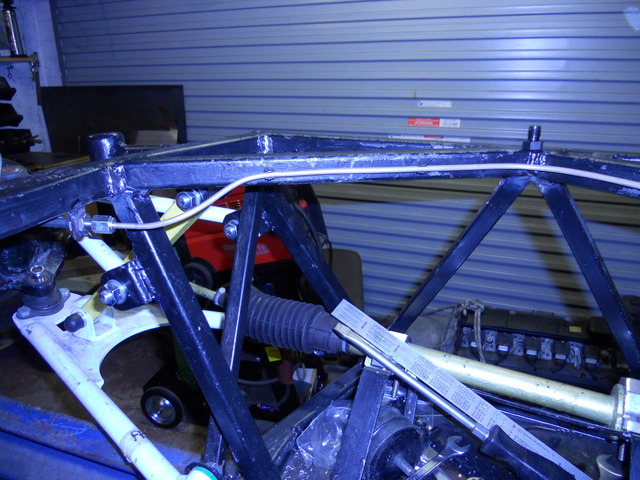
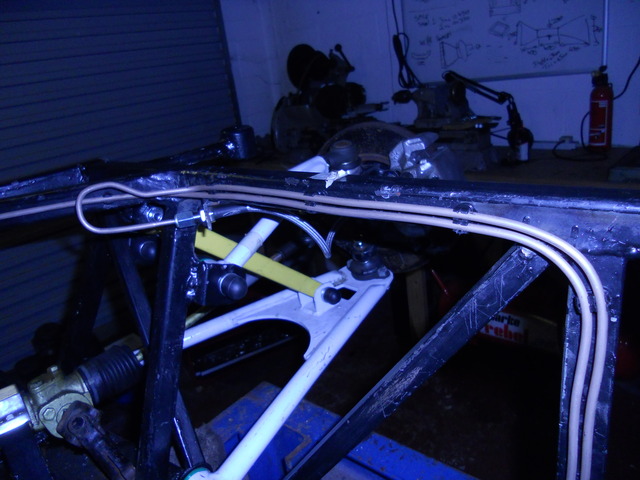
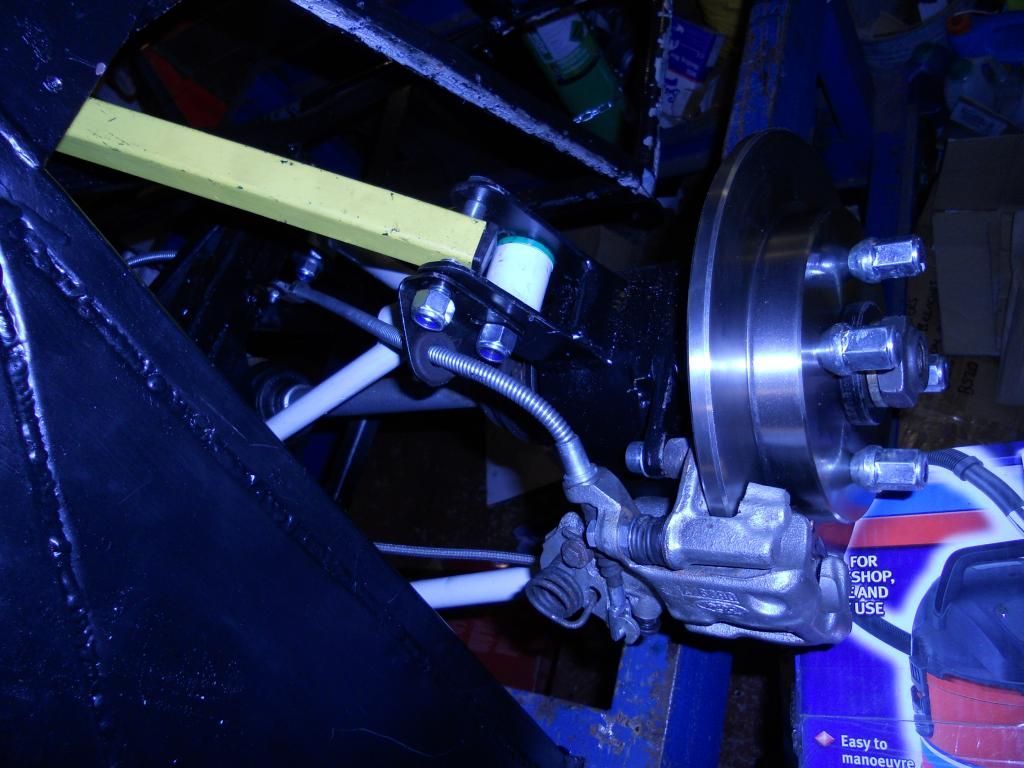
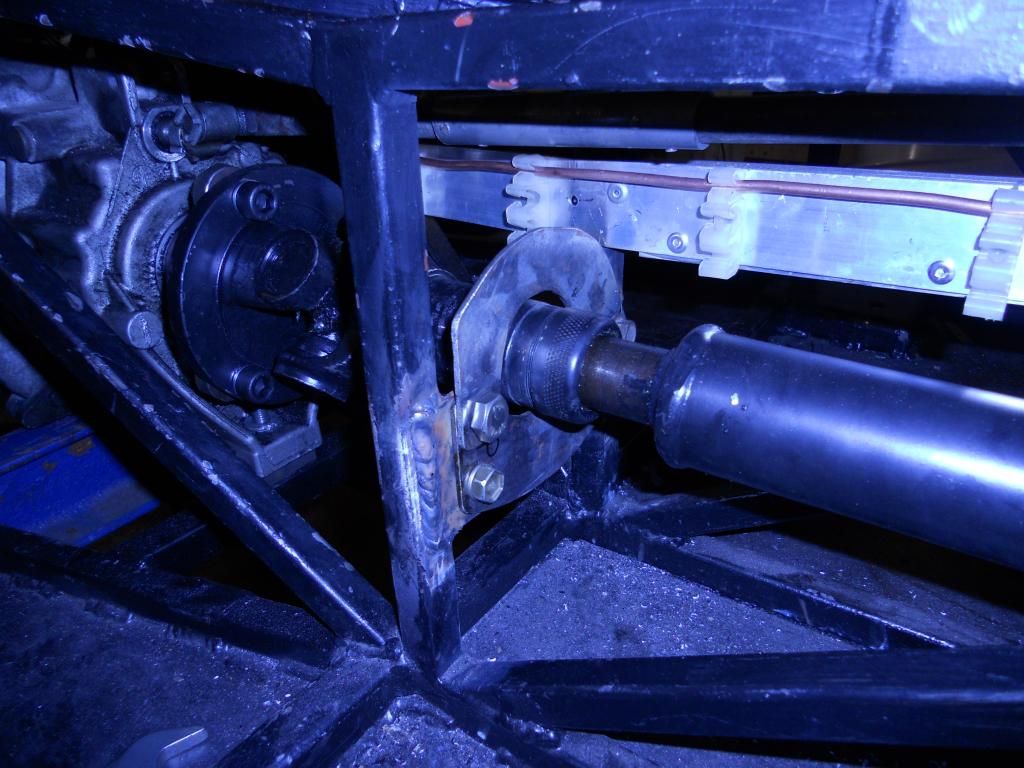
I've also started on the service brake and got the front ones done... ish.
Description
Description
Description
Description
Description
Description
Description
Description
It's all supported at intervals of no more than 250mm using plastic clips. It's my first attempt at doing brake lines, and isn't as
neat as I'd like, however there are no kinks in it and it's all tucked out of the way. Will have to wait and see if there are any leaks,
and how well it bleeds.
If disfunction is a function, then I must be some kind of genius.
|
|
|
Dick Axtell
|
| posted on 17/9/14 at 02:47 PM |
|
|
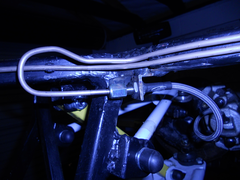
Hi Badg,
Noted the brake line run in this pic : -
http://www.locostbuilders.co.uk/galpreviews/DSCN1223.JPG
I would strongly recommend that your mcyl reservoir should be at the high point of your total brake system. Otherwise, it'll be a right bugger
to bleed successfully. Second thought - why did you route these brake lines along the top rail?
Work-in-Progress: Changed to Zetec + T9. Still trying!!
|
|
|
Badger_McLetcher
|
| posted on 17/9/14 at 05:16 PM |
|
|
Thanks for the reply! I've pretty much resigned myself to having a remote reservoir for the master cylinder, even without those lines the
calipers are higher than the standard one.
The reason for running them up the top rail was because I was worried about clobbering them when I put the engine in if I ran them on the top or
sides of the bottom rail - the M52 is a long engine and there's only a couple of inches of clearance on that point. By running them along the
top I gained myself a bit of wiggle room, though not much.
I'm currently (still!) considering an engine change, so I'm not above starting again and welding up the holes!
If disfunction is a function, then I must be some kind of genius.
|
|
|
Badger_McLetcher
|
| posted on 11/5/15 at 10:17 PM |
|
|
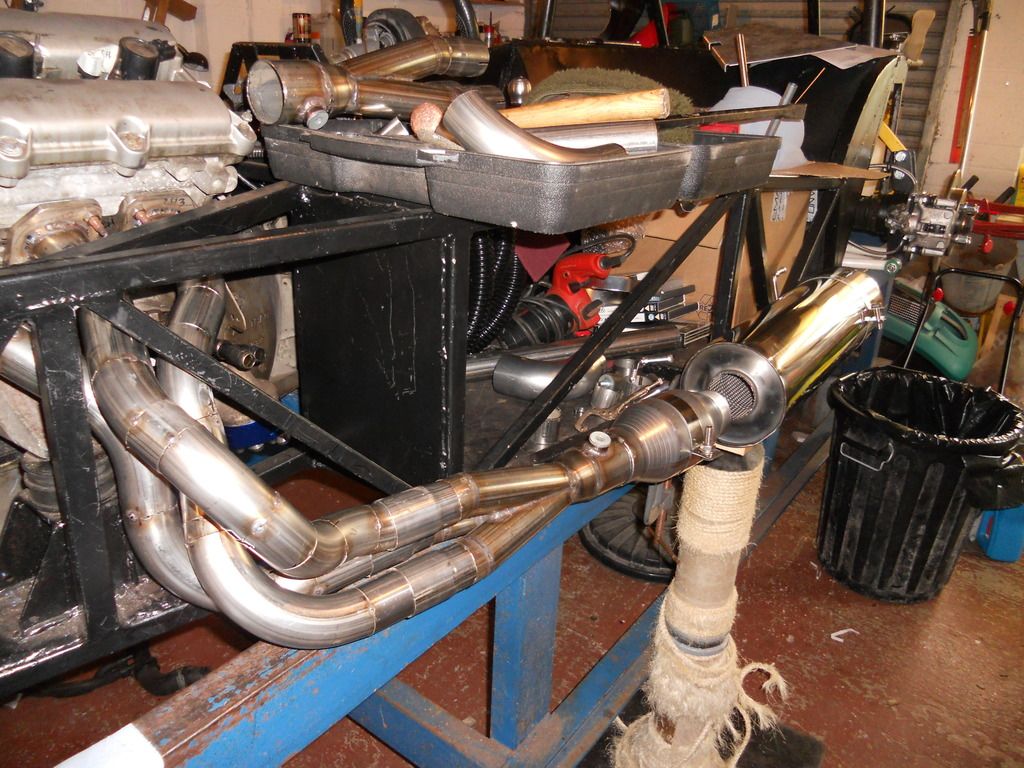
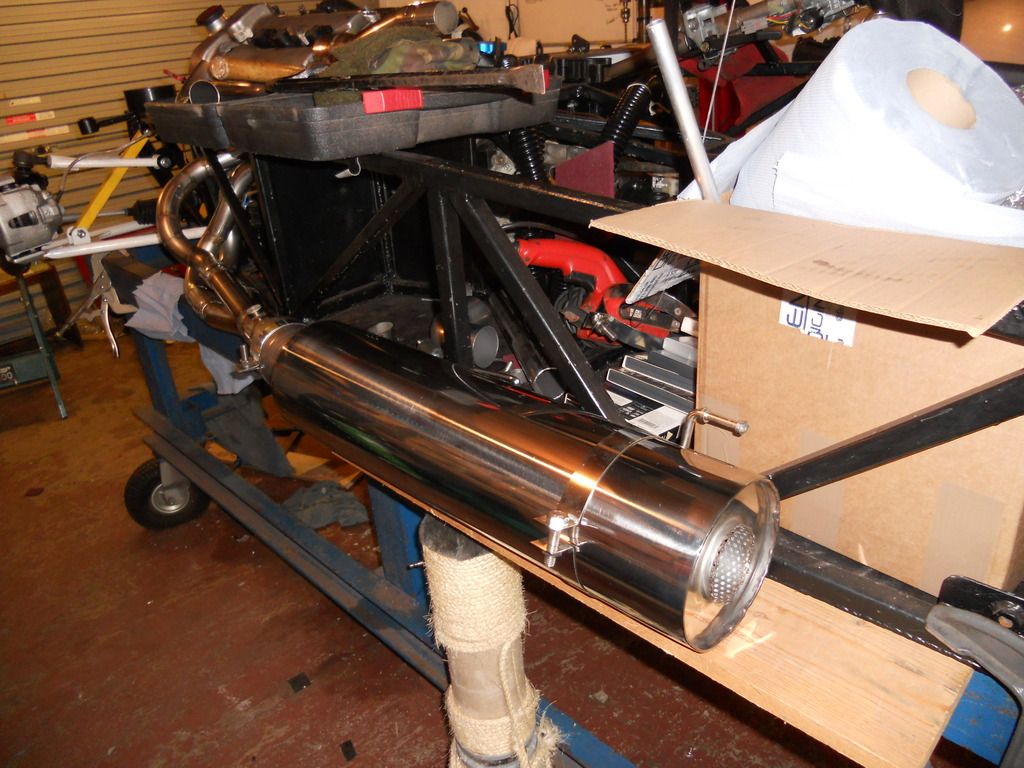
Hmmm... I haven't updated this in a while! Soo... engine has been changed to a Jag V6, the brakes have been re-located, the system finished and
bled, the clutch is plumbed in and I'm currently working on the exhaust system. 3-1 collectors are a bitch to make. Apologies for the heaviness
on the pics!

If disfunction is a function, then I must be some kind of genius.
|
|
|
alex1991
|
| posted on 11/5/15 at 11:34 PM |
|
|
Where did you get that silencer from?
|
|
|
Badger_McLetcher
|
| posted on 12/5/15 at 05:00 PM |
|
|
http://www.ebay.co.uk/itm/231404659787?_trksid=p2057872.m2749.l2649&var=530664158211&ssPageName=STRK%3AMEBIDX%3AIT
If disfunction is a function, then I must be some kind of genius.
|
|
|