Derkjohn
|
| posted on 17/8/14 at 04:12 PM |

|
|
Derk's Haynes Roadster Build
Hi Guys
My name is Derk. I live in Johannesburg, South Africa with my beautiful wife Katie.
I've been building a Haynes roadster for the last four months or so and have learned so much by reading other peoples builds on this forum.
I'll post some of the pics of my build up that will hopefully be of help to other builders.
[Edited on 17/8/14 by Derkjohn]
|
|
|
|
|
Derkjohn
|
| posted on 17/8/14 at 04:20 PM |
|
|
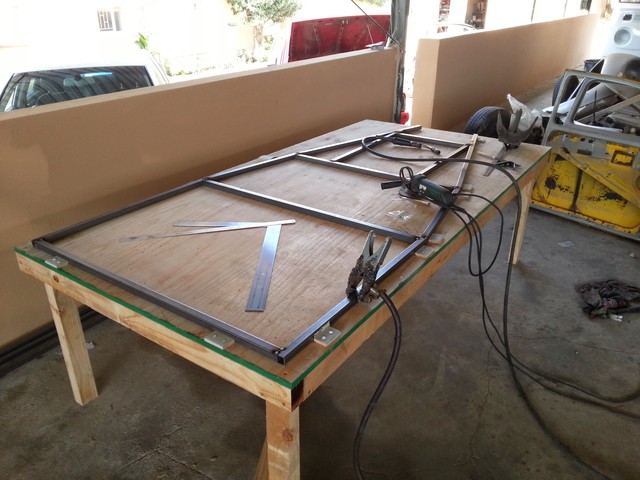
Laying out the first tubes
Description
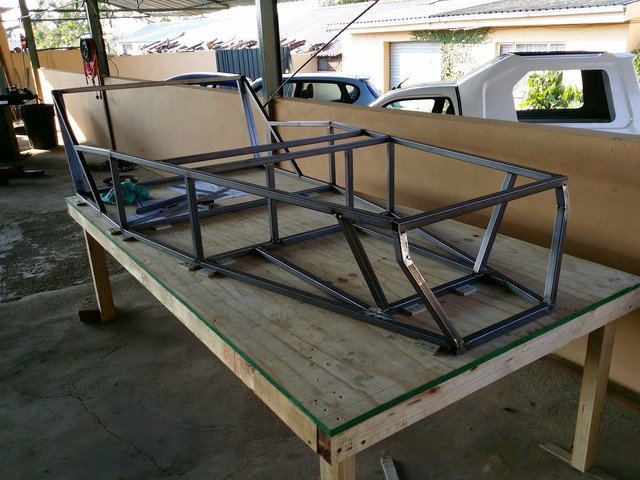
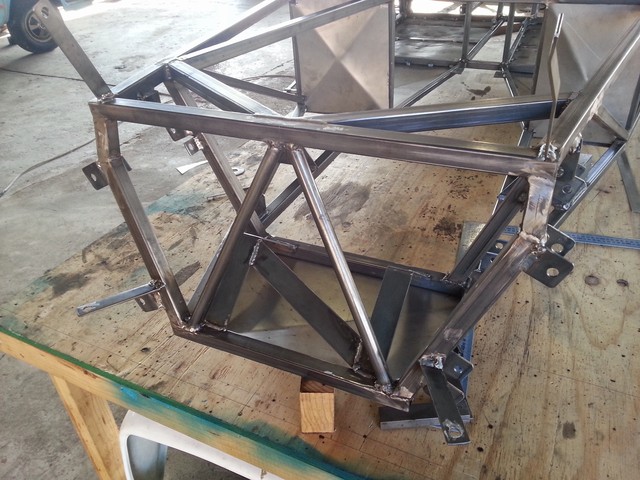
So this is how it started. I built a table out of some ply wood and 75mm x50mm. The tubes for the frame are 25mm x 25mm and are 1.6 mm thick
|
|
|
Derkjohn
|
| posted on 17/8/14 at 04:24 PM |
|
|
 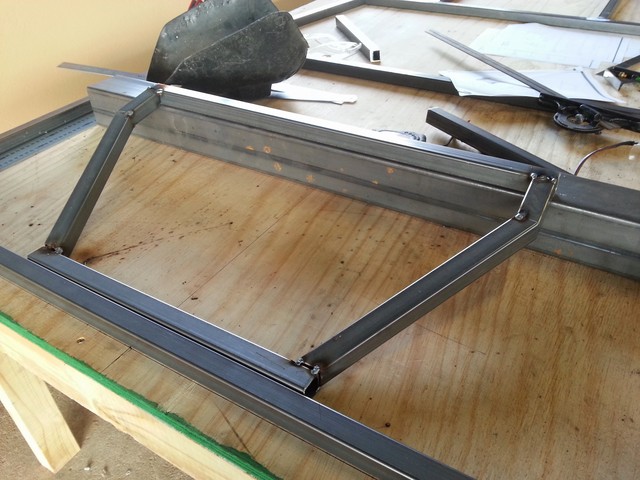
Description
The nose section being built up. The book was a bit confusing on the developed length I thought. But that might just have been my ignorance 
Description
More tubes being tacked together
|
|
|
Derkjohn
|
| posted on 17/8/14 at 04:31 PM |
|
|
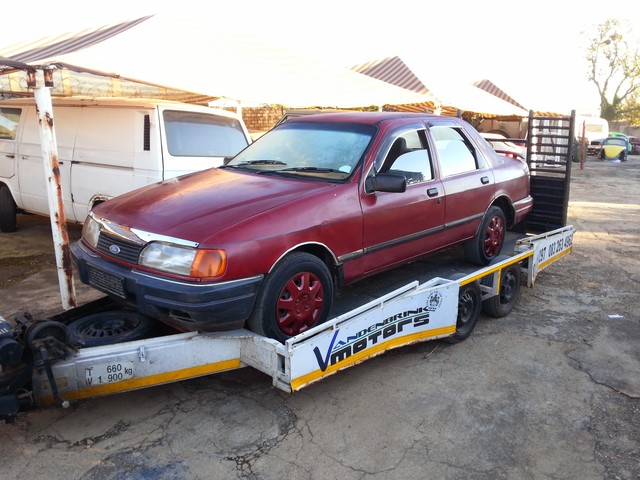
This is the donor vehicle I bought a few weeks into the build. It is a 1990 2L Ford Sapphire (I think these are exclusive to South Africa) but all the
suspension and drive train components are the same as the Sierra.
Description
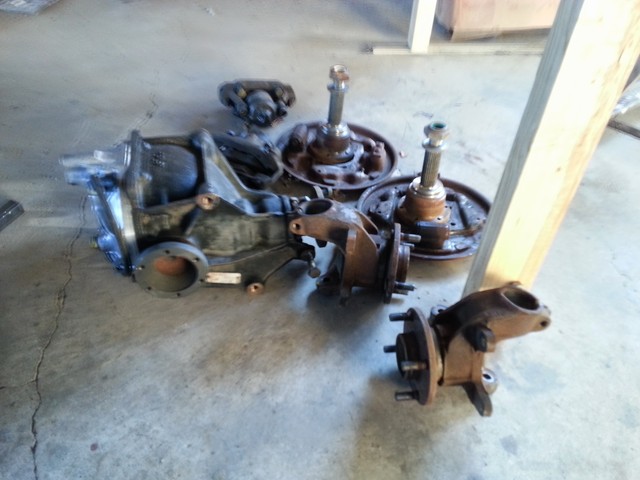
Some of the parts that I stripped out
Description
The rear brakes are drums, but I have since bought a 1991 3L (essex) Sapphire and will be using the discs from that
[Edited on 17/8/14 by Derkjohn]
|
|
|
Derkjohn
|
| posted on 17/8/14 at 04:42 PM |
|
|
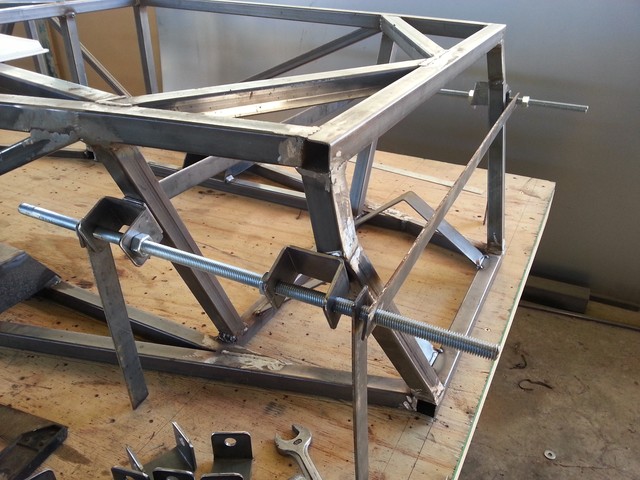
Description
Description
Making the rear shock and roll bar supports
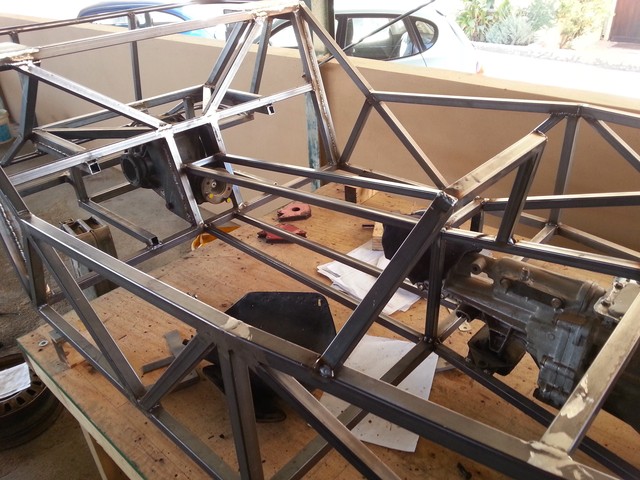
Description
Description
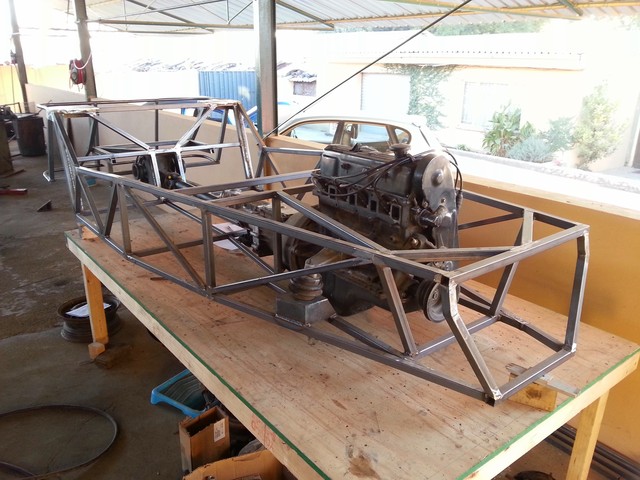
Trail fitting the engine
Description
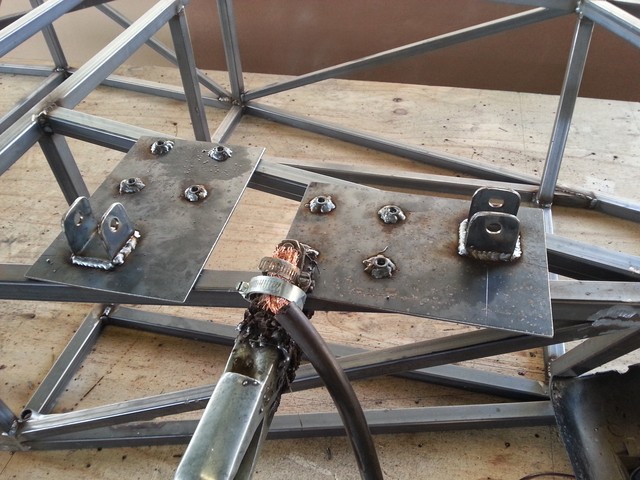
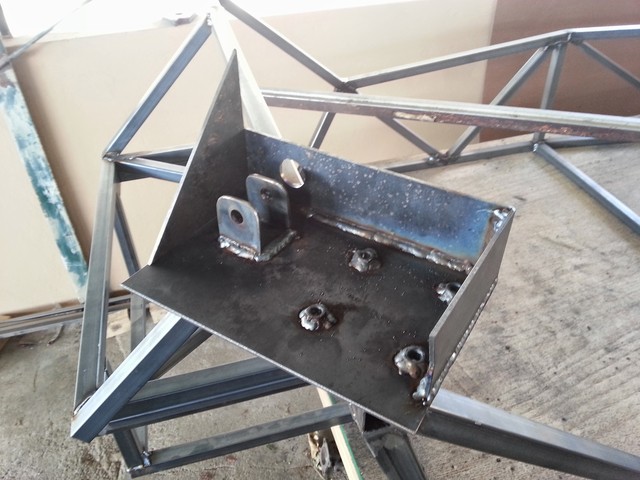
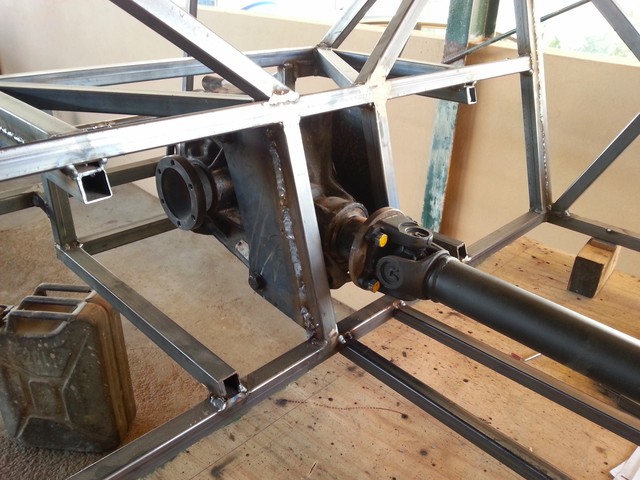
I decided to weld the diff mounts directly onto the chassis. Simplify and add lightness
|
|
|
Slimy38
|
| posted on 17/8/14 at 05:01 PM |
|
|
quote:
Originally posted by Derkjohn
Description
The nose section being built up. The book was a bit confusing on the developed length I thought. But that might just have been my ignorance
The nose section in the book is wrong, from memory one of the measurements is too short and the angles don't quite make sense. So I'm not
surprised you were confused!!
Have you looked at the amendment that are on the Haynes forum;
http://www.haynes.co.uk/forums/showthread.php?t=2430
You're probably already a fair bit through but it might still be worth looking at them.
|
|
|
maccmike
|
| posted on 17/8/14 at 05:17 PM |
|
|
Thats great Derk but can we see pictures of Katie please 
|
|
|
Derkjohn
|
| posted on 17/8/14 at 05:45 PM |
|
|
quote:
Originally posted by Slimy38
quote:
Originally posted by Derkjohn
Description
The nose section being built up. The book was a bit confusing on the developed length I thought. But that might just have been my ignorance
The nose section in the book is wrong, from memory one of the measurements is too short and the angles don't quite make sense. So I'm not
surprised you were confused!!
Have you looked at the amendment that are on the Haynes forum;
http://www.haynes.co.uk/forums/showthread.php?t=2430
You're probably already a fair bit through but it might still be worth looking at them.
Thanks Slimy. I ended up finding the length by matching it to the jig. It seemed to have worked out ok.
|
|
|
Derkjohn
|
| posted on 17/8/14 at 05:49 PM |
|
|
Description
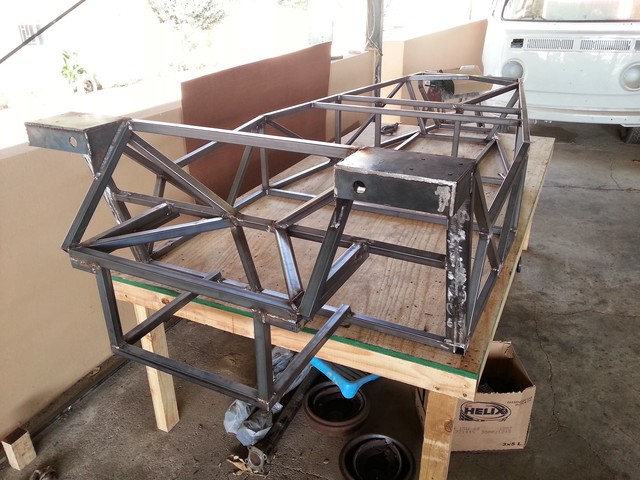
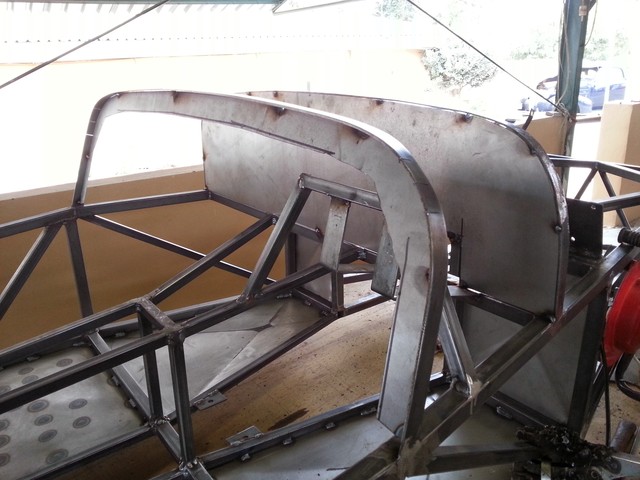
I decided to lower the back of the transmission tunnel to give me some more elbow space.
 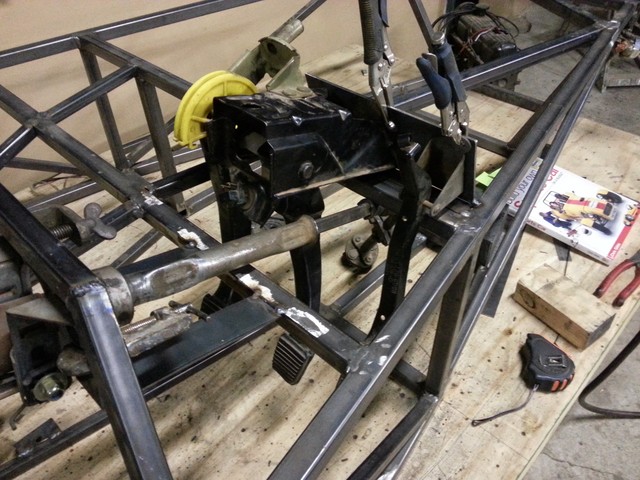
Description
 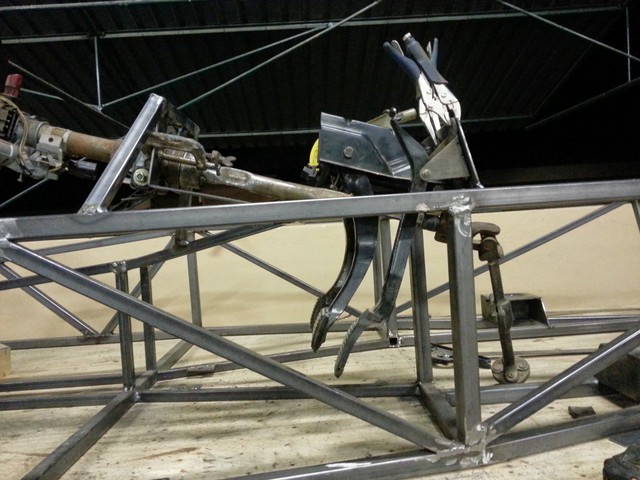
Description
Here is what I did for the pedals. I figured I would try to get the standard Sierra pedals to fit to save the effort of building them from from
scratch. So far it seems to be working great! I hope I don't run into trouble later on.
|
|
|
Derkjohn
|
| posted on 17/8/14 at 05:50 PM |
|
|
quote:
Originally posted by maccmike
Thats great Derk but can we see pictures of Katie please
Lol, she would kill me
|
|
|
garyt
|
| posted on 17/8/14 at 05:57 PM |
|
|
welcome Derk, great work so far keep us posted and good luck with the build, don't be shy to ask questions as there is a wealth of knolage on
here, oh by the way we like pics
gary
|
|
|
garyt
|
| posted on 17/8/14 at 05:57 PM |
|
|
welcome Derk, great work so far keep us posted and good luck with the build, don't be shy to ask questions as there is a wealth of knolage on
here, oh by the way we like pics
gary
|
|
|
big_wasa
|
| posted on 17/8/14 at 06:15 PM |
|
|
Nice to see a scratch build these days. Be warned making one change to the book can have so many knock on changes down the road.
Like have you left enough room for the hand brake cables / Fuel pipes and electrics in the rear of the tunnel ?
|
|
|
Derkjohn
|
| posted on 17/8/14 at 06:20 PM |
|
|
Description
Description
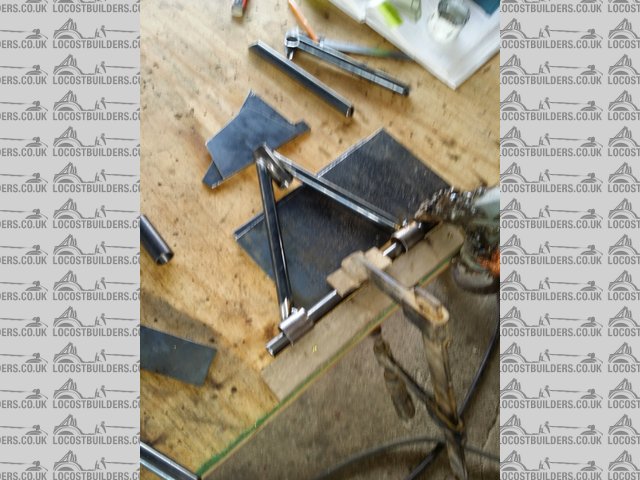
Making up the suspension brackets. I managed to make 16 of them only to realise the were 10mm to short.  Once I had re-cut them again I made a
little jig to help me bend them at the correct length. Once I had re-cut them again I made a
little jig to help me bend them at the correct length.
 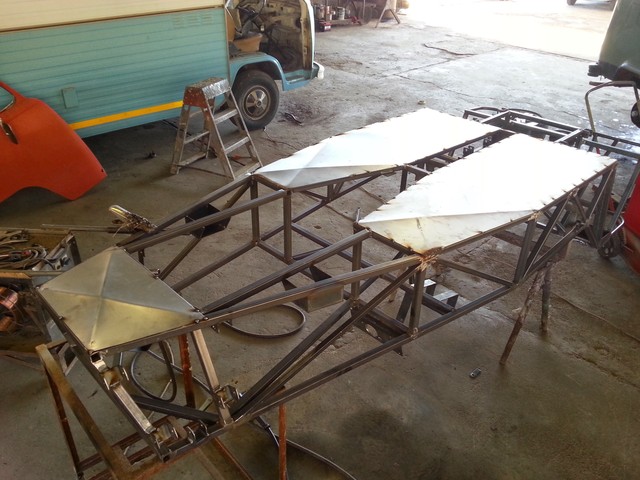
Description
The floors are made from 1mm mild steal. I put two diagonal bend lines on each to help prevent the drumming effect once welded. This worked well for
the front section, however I didn't bend the back as that's where the seat supports go. I ended up having to heat shrink the back section
to get it tight.
 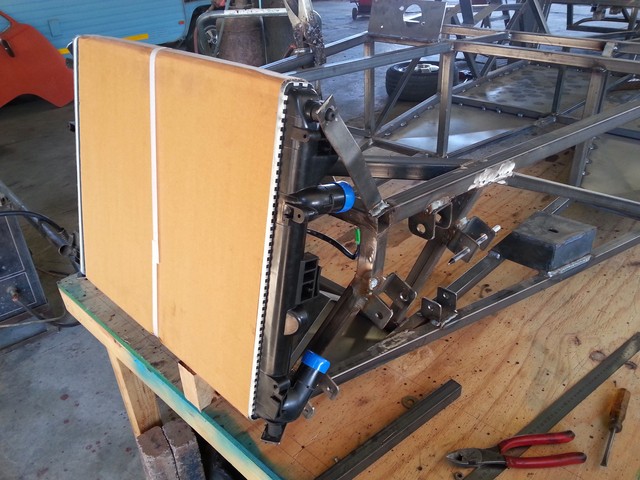
Description
Radiator mountings. I realised that the books radiator is mounted upside down 
Description
Description
 
Description
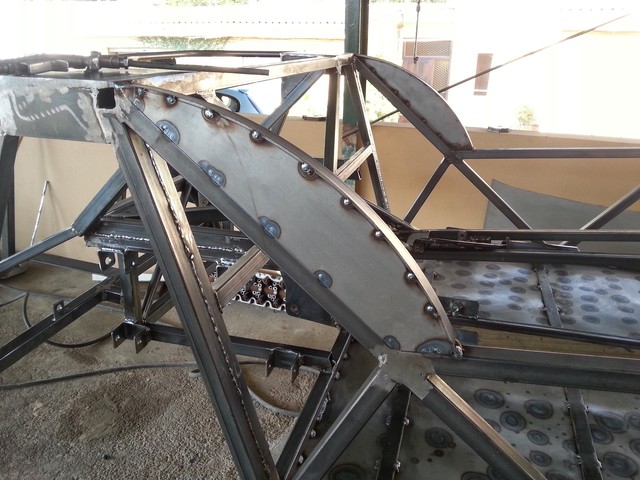
Description
I'm making my scuttle out of steel and aluminium plate.
Description
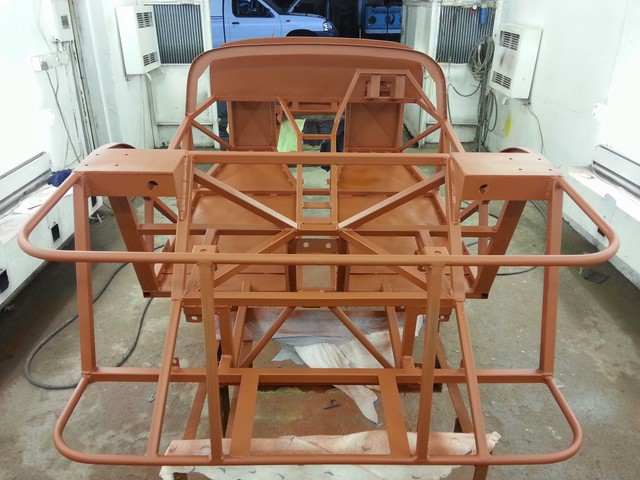
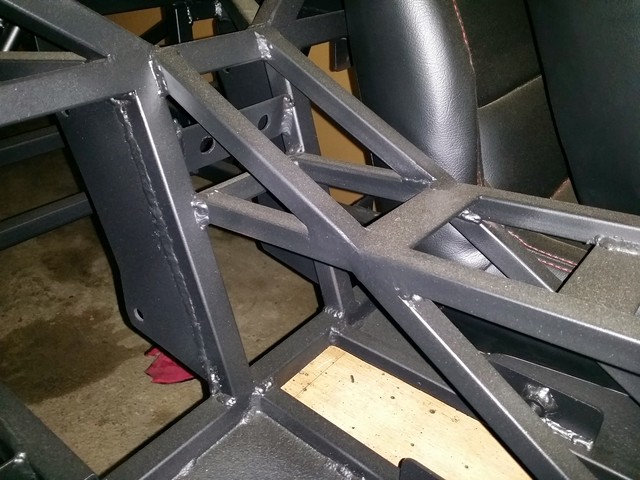
Red Oxide!
Description
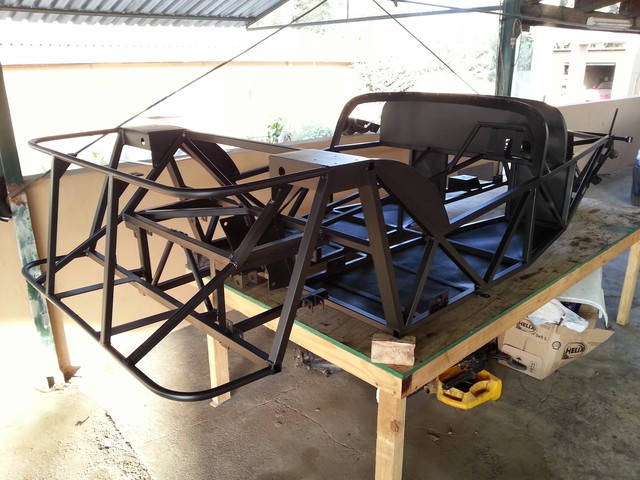
This is where I'm at now. I painted the frame with red oxide followed by a product called Raptor liner by U-pol. Its usually used to line
pick-up truck loading bays but I thinned it down and applied it with a standard spray gun, except on the floors where I used a textured effect spray
gun.
|
|
|
Derkjohn
|
| posted on 17/8/14 at 06:31 PM |
|
|
quote:
Originally posted by big_wasa
Nice to see a scratch build these days. Be warned making one change to the book can have so many knock on changes down the road.
Like have you left enough room for the hand brake cables / Fuel pipes and electrics in the rear of the tunnel ?
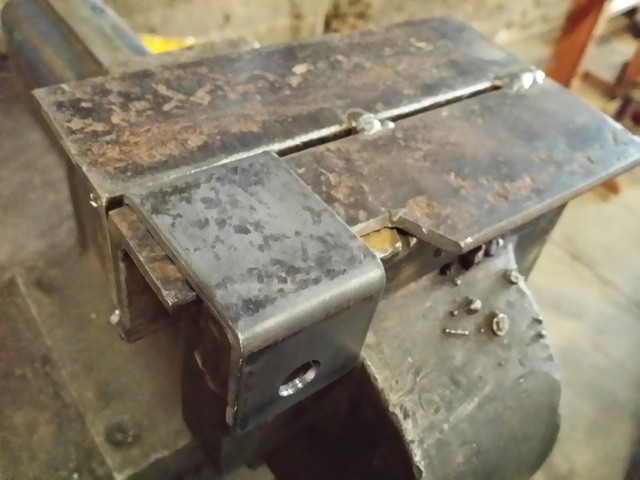
I've checked that the handbrake cables will go in and put the bracket at an angle to compensate.
Description
The wiring and brake/fuel pipes will be tight but I think it should fit
[Edited on 17/8/14 by Derkjohn]
|
|
|
Derkjohn
|
| posted on 17/8/14 at 06:41 PM |
|
|
Engine
 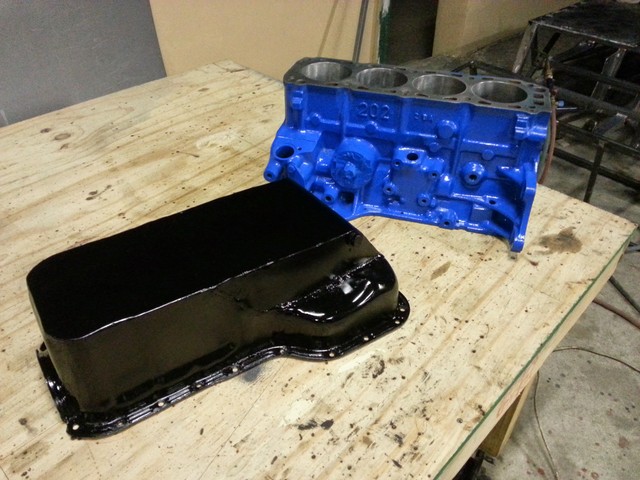
Description
 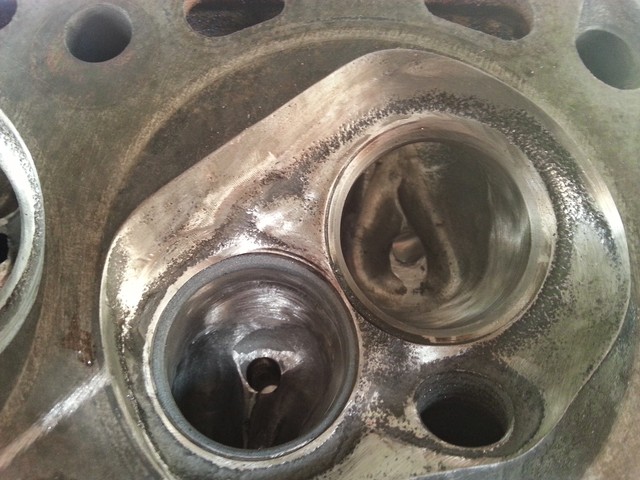
Description
Here's a bit of info on the engine. Its a 2.0 L pinto. The 2.9 cosworth pistons that seem quite popular in the UK aren't available in SA
as we only ever had the Ford v6 in the Essex version. So the pistons are just 1mm oversize standard pistons. I've had the flywheel lightened and
the bottom end balanced. Other than that it's stock. On the head side of things I've opted for a 288 deg camshaft and I've
gas-flowed the head with the help of David Vissard's book. The plan is to run a set of R1 throttle bodies that I have. They are the ones that
still have the vacuum operated venturi but also run fuel injectors. Apparently they only came out for a year or so after which the R1's ran
normal throttle bodies.
[Edited on 17/8/14 by Derkjohn]
|
|
|
Derkjohn
|
| posted on 17/8/14 at 06:49 PM |
|
|
Seats
 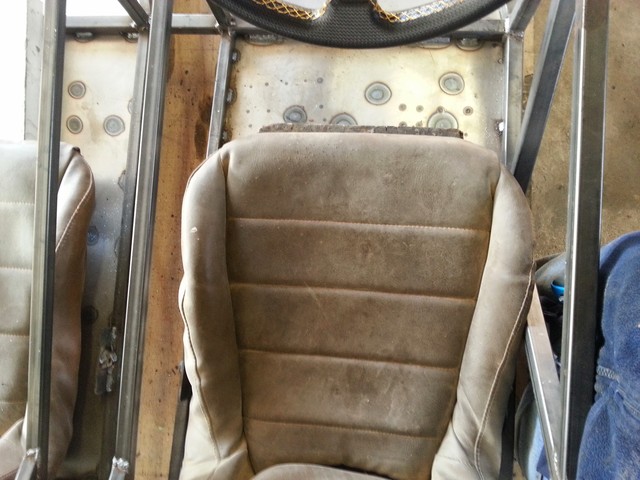
Description
 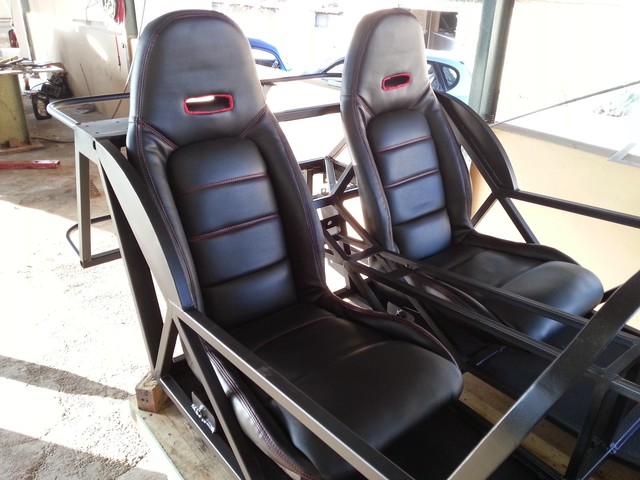
Description
These are the seats I'm using. I found them in a beach buggy in a scrap yard. They were slightly to wide, but as they are made from steel tubing
I was able to bend the edges in and make them fit I then had them re-covered for R1700 (90£) Not bad eh?
|
|
|
coozer
|
| posted on 17/8/14 at 07:18 PM |
|
|
Looking like a good build there Derk, keep up the good work.
Get Katie to sit in the car and make the brum brum noises and post the pic
1972 V8 Jago
1980 Z750
|
|
|
Slater
|
| posted on 17/8/14 at 09:17 PM |
|
|
Good work Derk, where did you the get the seats recovered? I need the same done to my pair. That seems like a good price.
Where are you in Jo'burg? I am in Fourways area, i just got a seven 3 weeks ago and am slowly getting it up to spec.
Keith
Why do they call Port Harcourt "The Garden City"?...... Becauase they can't spell Stramash.
|
|
|
Derkjohn
|
| posted on 18/8/14 at 08:54 AM |
|
|
quote:
Originally posted by Slater
Good work Derk, where did you the get the seats recovered? I need the same done to my pair. That seems like a good price.
Where are you in Jo'burg? I am in Fourways area, i just got a seven 3 weeks ago and am slowly getting it up to spec.
Keith
I'm just down the road from you, 1km past Kya Sands. I used a guy in Honeydew called Vinhod. His number is 0117947379
|
|
|
Slater
|
| posted on 18/8/14 at 06:17 PM |
|
|
Thanks i will call him tomorrow
Why do they call Port Harcourt "The Garden City"?...... Becauase they can't spell Stramash.
|
|
|
Derkjohn
|
| posted on 12/10/14 at 04:10 PM |
|
|
Update on build
I've managed to get a bit more done over the last few weeks.
 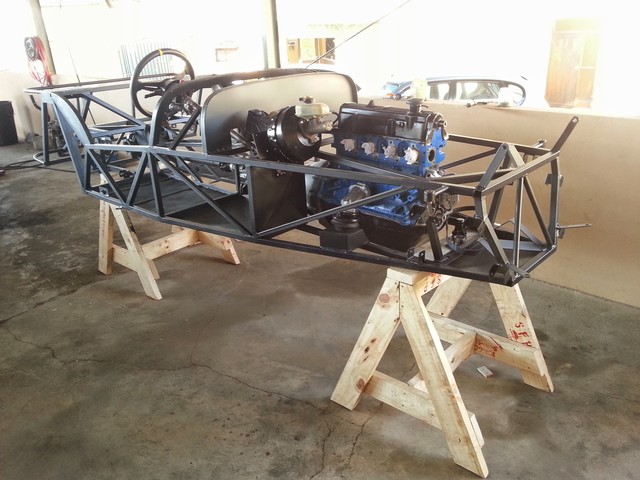
Description
The engine, diff and gearbox has been fitted.
Description
 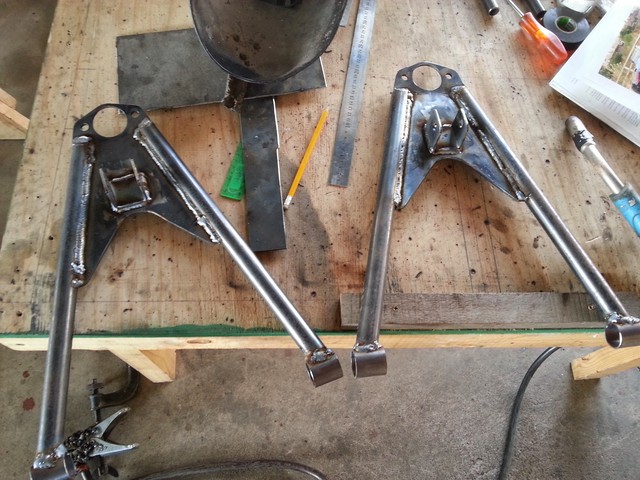
Description
Front wishbones being made up.
 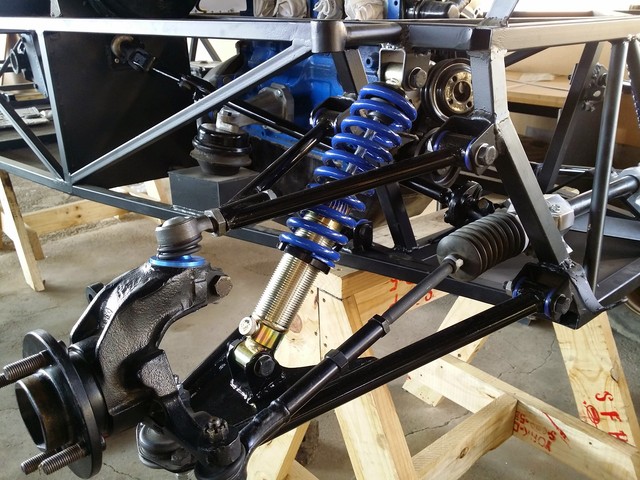
Description
Front suspension complete 
 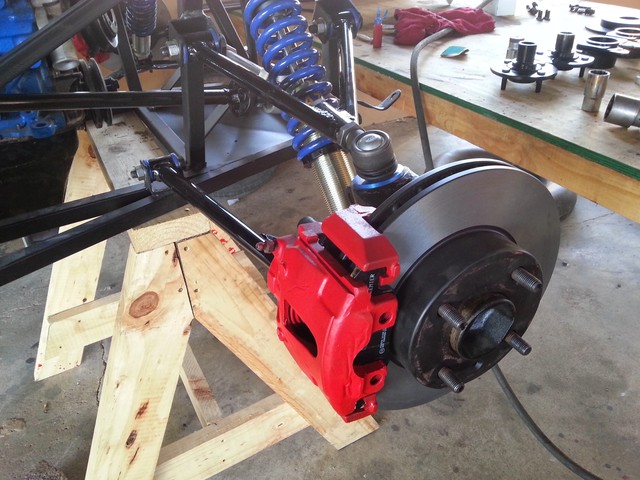
Description
The brakes are from a 3.0L Sierra and are slightly larger than the 2.0l brakes. I wanted 3.0 discs as these have discs on the rear opposed to the 2.0l
which has drums. And yes, I couldn't resist painting the callipers red
[Edited on 12/10/14 by Derkjohn]
|
|
|
Derkjohn
|
| posted on 12/10/14 at 04:21 PM |
|
|
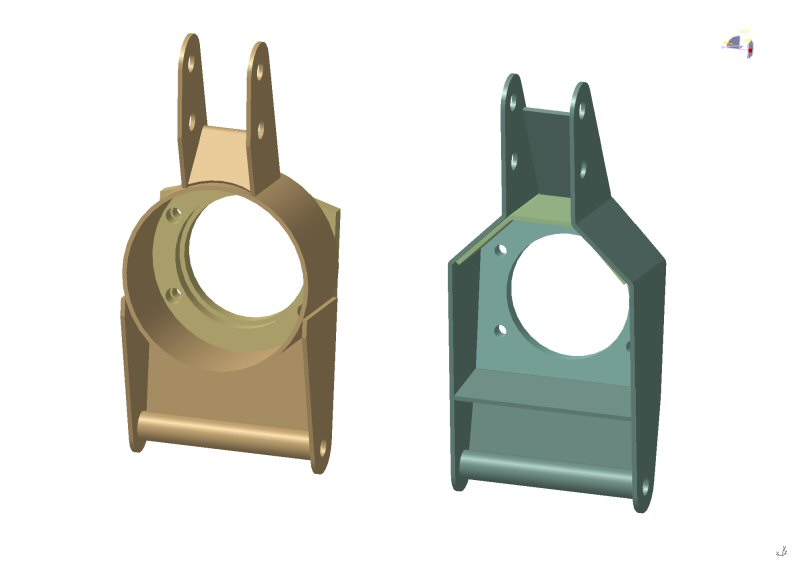
Alternative design for rear uprights
I've been thinking about re-designing the rear uprights for my Haynes Roadster. The book uprights seem unnecessarily complicated and heavy
compared to other designs I have seen. I've drawn up some plans for some uprights which should be a lot easier to make up. The suspension
geometry remains the same as the original uprightsI would value your opinions and ideas on these.
 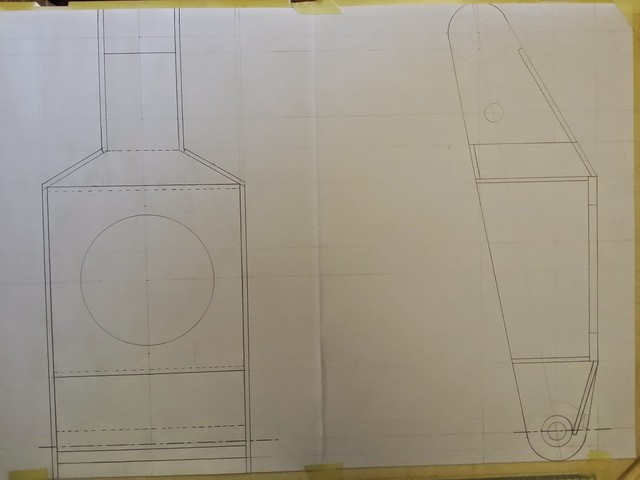
Description
|
|
|
rallyelwood
|
| posted on 10/2/15 at 12:55 PM |
|
|
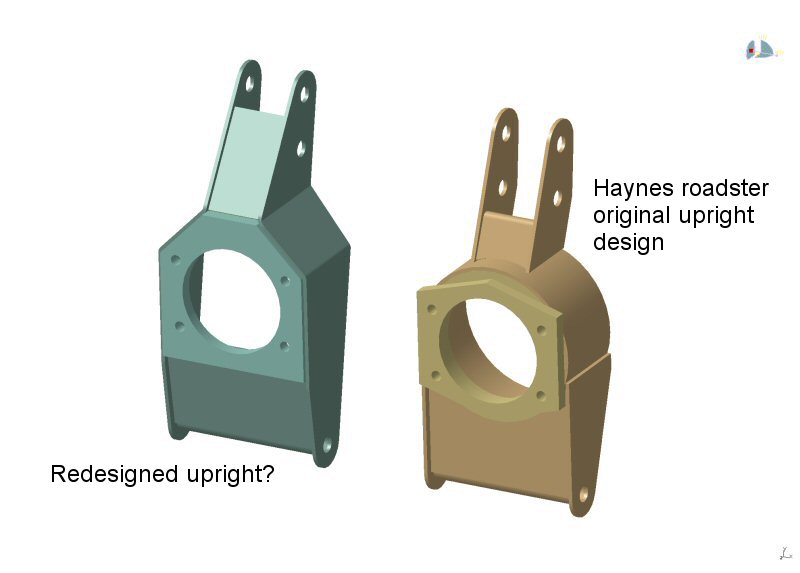
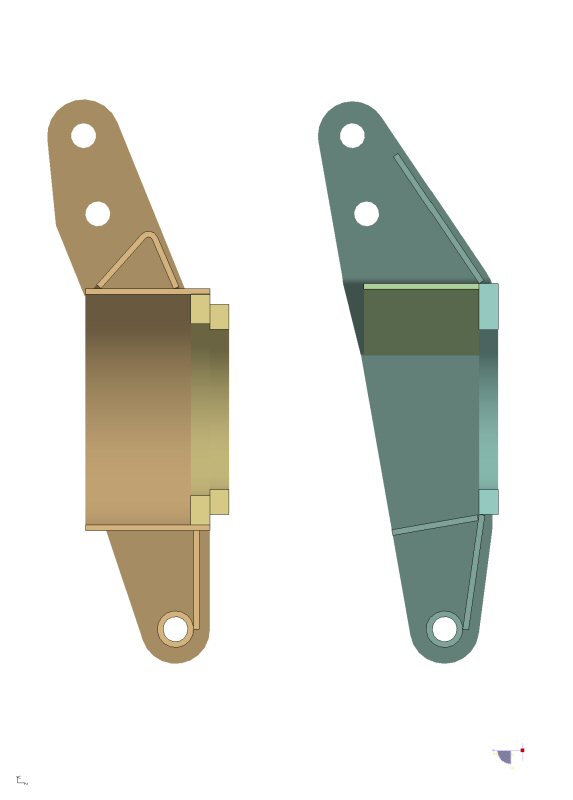
Hi Derk.
Me and my borther have just started building our Haynes Roadster, and I'm thinking about a re-designed rear upright similar to what you are
thinking, and for the same reasons.
My first thought was that the sides (between the upper and lower a-arms mounting points) should be one continuous piece without welds, for better
safety. Then I also thought that it should be able to design the upright with fewer parts.
This is what I came up with, but we haven't decided which design we should use... The benefit with the original design is that the cross-section
of a circle is stiffer (flexes less) than the cross-section of a sqaure.
Saab 99 GLT16 -84
Kobolt Runabout mkI -?? (Haynes Roadster)
|
|
|