bart
|
| posted on 30/11/14 at 09:47 PM |

|
|
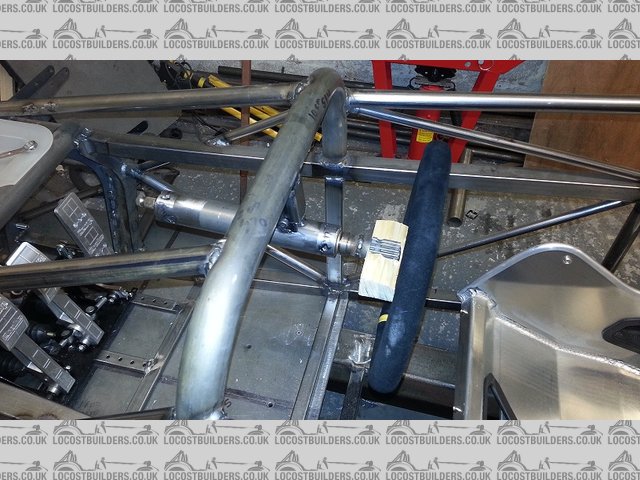
trial fit of new steering column
second post tonight
I forgot ( old age ) I also trial fitted the new steering column that I made on Thursday
only a temp bracket just so I can get the position exactly correct . took it of and modded it half dozen times.
I can now design a bracket that has a small degree of adjustment , back and forward say + - 20 mm up down +- 20 mm
Description
[img]
Description
[/img]
also I have decided to build in and fit the worlds first " SPEED TEA TRAY " somewhere to keep your BREW when doing a fast track day. I
might apply for a patent on this idea
Description

|
|
|
|
|
wylliezx9r
|
| posted on 1/12/14 at 10:52 AM |
|
|
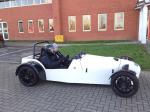
The styling I was talking about. Anything similar and you'd be onto a winner IMO.
 
Underneath pretty similar to your car really.
[Edited on 1/12/14 by wylliezx9r]
I spent a lot of money on booze, birds and fast cars. The rest I just squandered.
George Best
|
|
|
bart
|
| posted on 1/12/14 at 11:12 AM |
|
|
styling
the thought had passed my mind !!!!!
but will I be able to still fit the tea tray ?
[Edited on 1/12/14 by bart]
|
|
|
wylliezx9r
|
| posted on 1/12/14 at 11:31 AM |
|
|
Why stop at the tea tray ? Go for a picnic table instead 
[Edited on 1/12/14 by wylliezx9r]
I spent a lot of money on booze, birds and fast cars. The rest I just squandered.
George Best
|
|
|
designer
|
| posted on 1/12/14 at 07:20 PM |
|
|
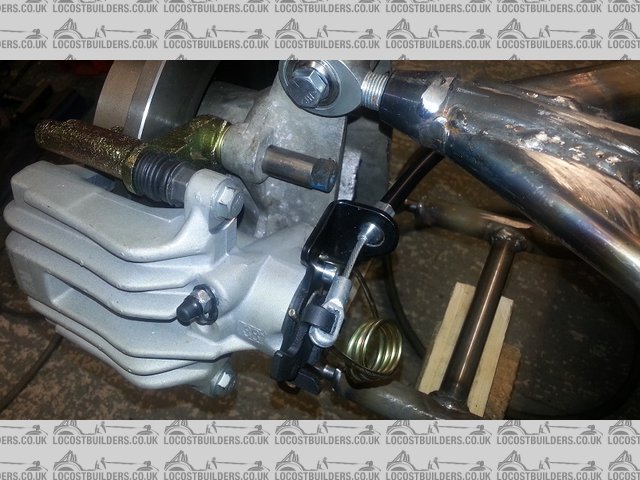
Why are there heat marks on the upper rear wishbone tubing at the mid point?
You must think about the steering wheel, it's not as simple as we think as vertical wheels are tiring to the arms. This is beecause, in real
life, we actually steer by pushing and pulling on an angled wheel not by turning. Turning a vertical wheel, without any power steering, is hard.
|
|
|
bart
|
| posted on 1/12/14 at 09:05 PM |
|
|
re heat marks on top arm
re heat marks on top arm
its only on one arm , for some reason this arm had the bushes slightly out of alignment when finished also slightly to narrow
so I spotted the arms to bring them back.
I may remake this arm not sure.
re steering wheel
in the picture the temp bracket had dropped the wheel will in fact be angled . was just held in with a temp bolt in a big hole so I could move it
about to feel correct.
did not achieve much today just lots of measurement and planning to move forward , ordered some bits ect. progress tomorrow with luck.
[Edited on 1/12/14 by bart]
|
|
|
bart
|
| posted on 2/12/14 at 08:54 PM |
|
|
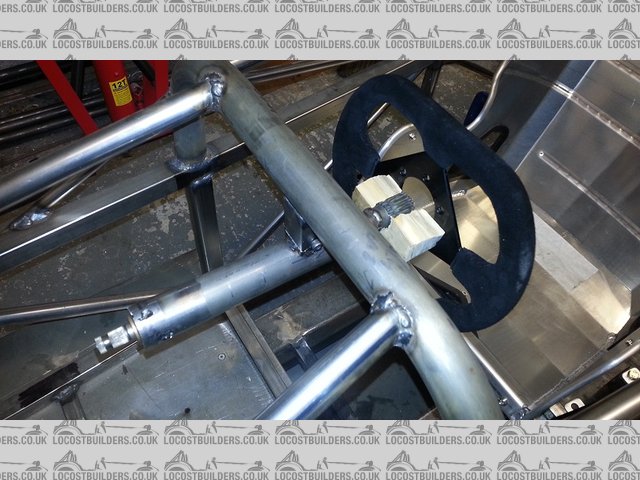
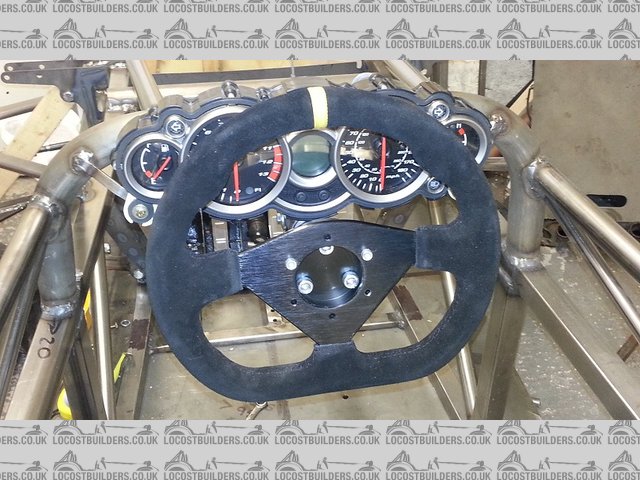
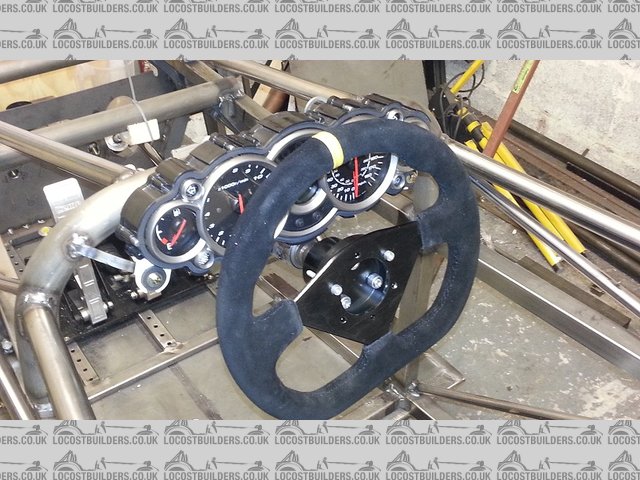
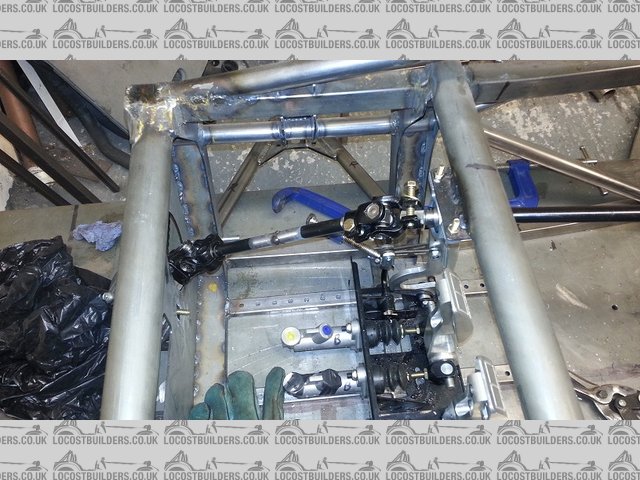
steering wheel and clocks mounted
hi all
mounted the steering column and the clocks today along with lots of small jobs
had to make a bracket for the column . its in and working will need a side brace stiffener
1) did the seat belt mounts
2) finished seat mounting points
3) finished of the handbrake mounting posts
4) had a sit in the car several times to get it all correct ( with appropriate noises ect )
now some will notice that the clock are partially obscured by the wheel. yes you are correct for iva it will have to be bigger and none removable
going to make another inner column to take an iva steering wheel. there answered that one before anyone spotted it .!!! 
tomorrow's list is finish the steering rack area and reinforce .
run the hand brake cables for position brackets ect.
gear change lever position and make.
steering column intermediate bearing
assemble all the rear suspension both sides and measure up for extended half shafts.
so ! easy day tomorrow.
todays pics :
[img]
Description
[/img]
[img]
Description
[/img]
[img]
Description
[/img]
BE ALERT > BRITAIN NEEDS LERTS
|
|
|
coozer
|
| posted on 3/12/14 at 03:50 PM |
|
|
Looking good Bart, keep it coming!
1972 V8 Jago
1980 Z750
|
|
|
bart
|
| posted on 3/12/14 at 09:48 PM |
|
|
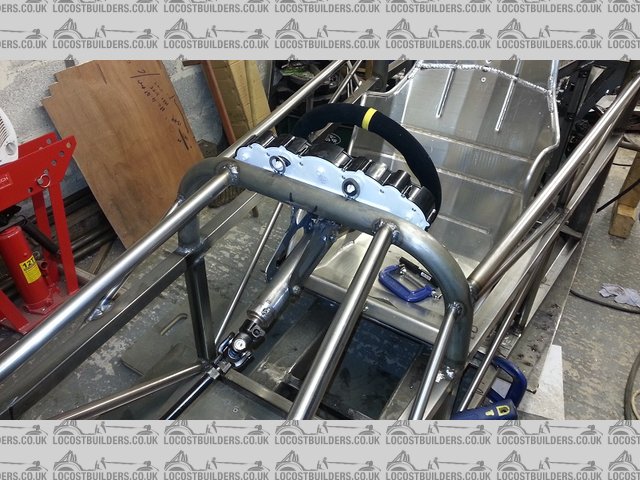
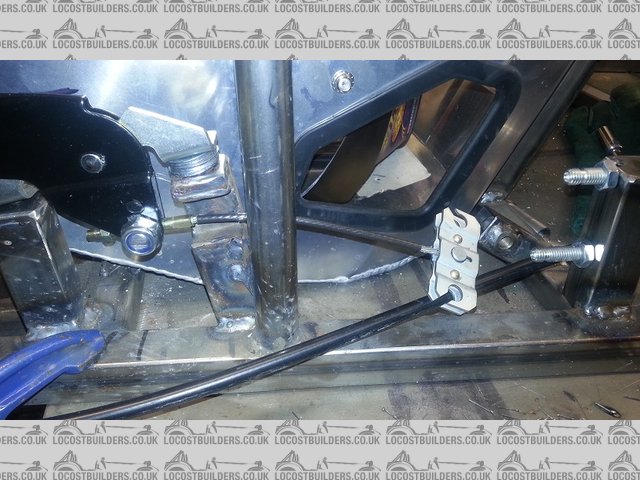
hi all
well big list today , but did not get all the list done , in fact the list got shorter as the day went on.!
completed the steering column added a ctr support bearing for the steering shaft
boxed the support bracket for the steering column.
and added a side support
checked all the angle's on the steering knuckle's.
installed the bush for the gear change .
in the below picture's the hand brake will fowl the gear change , did not see this when I took the pictures
all done at the end of the day.
only when editing the pictures for posting and then checking when having a clean up .
still I have a solution so tomorrow will change ..
[img]
Description
[/img]
[img]
 
Description
[/img]
[img]
Description
[/img]
[img]
Description
[/img]
BE ALERT > BRITAIN NEEDS LERTS
|
|
|
bart
|
| posted on 4/12/14 at 10:31 PM |
|
|
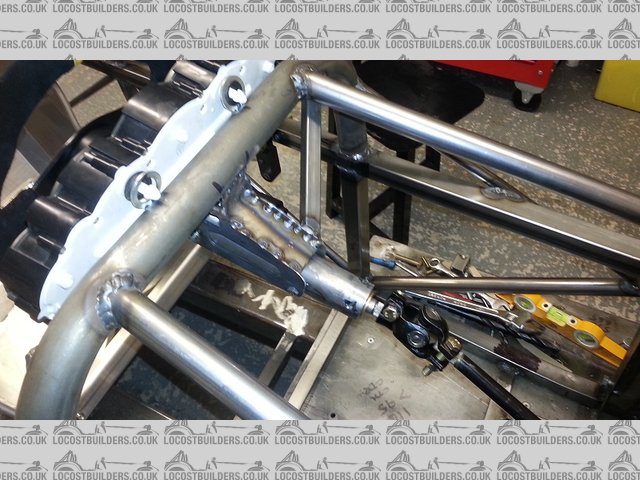
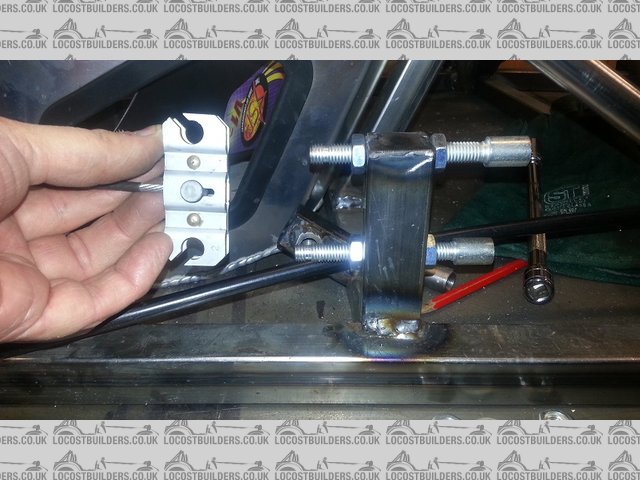
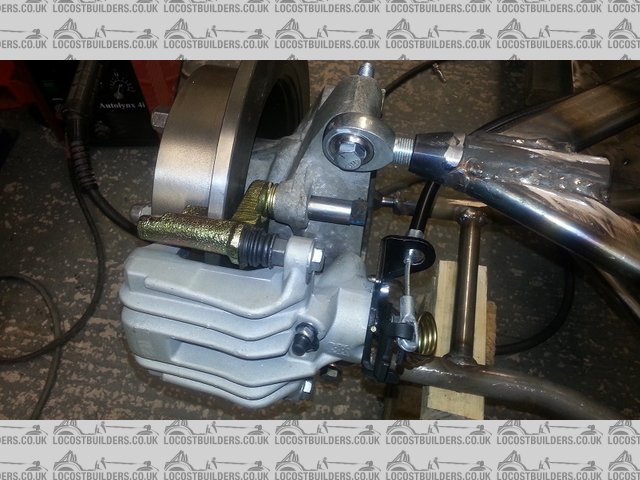
evening all
hello all
today I made and installed the full handbrake working mechanism
and temporarily run the hand brake cables
you can now see when install what I was jabbering on about earlier about altering the hand brake brackets
they now miss the upright casting by a long way ( yippee!)
I also measured the installation of the half shafts and have the measurements to send off.
I altered the gear change but forgot to take a picture ( will post tomorrow night )
I also took possession of an exhaust for the engine . unfortunately it is to far forward for my use so its up for sale same price as I paid £60 +
postage ( no international sorry )
apart from the picture it comes with a silencer as well , so anyone interested u2u me
[img]
Description
[/img]
[img]
Description
[/img]
[img]
Description
[/img]
[img]
Description
[/img]
[img]
 
exhaust
[/img]
this exhaust is for sale !
BE ALERT > BRITAIN NEEDS LERTS
|
|
|
kingster996
|
| posted on 5/12/14 at 09:13 AM |
|
|
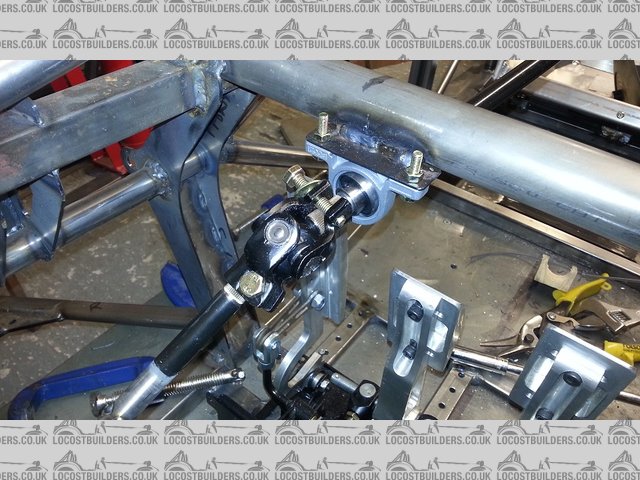
quote:
Originally posted by bart
hello all
today I made and installed the full handbrake working mechanism
and temporarily run the hand brake cables
Bart - that looks like a Sierra cable, the Golf one should look like this:

I guess if it works, then no worries 
[Edited on 5/12/14 by kingster996]
I used to be indecisive, but now I'm not so sure
|
|
|
bart
|
| posted on 5/12/14 at 10:07 AM |
|
|
thanks for the hand brake info
the one in the picture was just a fit and see , I shall be making custom cables to finish.
nice to get response though .
BE ALERT > BRITAIN NEEDS LERTS
|
|
|
kingster996
|
| posted on 5/12/14 at 10:10 AM |
|
|
No problem - took me ages to finally get my handbrake sorted with the right cable/lever combo. Should have been easy (it's a Westfield after
all!) but my choice of parts veered from the designed version, so been through a few variations!
All done now though 
I used to be indecisive, but now I'm not so sure
|
|
|
snakebelly
|
| posted on 5/12/14 at 11:40 AM |
|
|
Bart,
I know that most people use 1.5mm but I have always used 2mm or in places 3mm and have never regretted it, it withstands impacts much better and seems
to beef everything up. I also use PU adhesive and not silicon as silicone whilst making it waterproof adds very little to the bond in comparison to PU
which does both, just have a look on EBay or the like for PU Adhesive or sometimes referred to as Body-kit Adhesive. Latest iteration of the Tiger now
has a composite floor of carbon Kevlar and foam core and that's about 8mm thick but has added substantially to the stiffness of the chassis. Oh
and big head rivets are the way forward! I bought a big bag of bright orange 10mm head ones ages ago and am on the lookout for more as I'm
almost out :-(
HTH
quote:
Originally posted by bart
hi all
I am at the stage when I need to rivet the alloy floor to the frame
? what to use
I intend to use 1.5 mm half hard aluminium sheet and 4mm c/s aluminium pop rivet's with silicon sealant between.
any comment's would I be better using large head rivet's ? or steel rivet's ect
any advice welcome.
I have posted this question as a separate post as well , as long as I get some answers not bothered where you answer
|
|
|
cloudy
|
| posted on 5/12/14 at 02:01 PM |
|
|
bart - Sikaflex 221 for floor bonding
www.warnercars.com
|
|
|
coozer
|
| posted on 5/12/14 at 02:42 PM |
|
|
I used a lever from a Rover 2/400 as the mech was a lot more compact. For the cables I found the Freelancer has nice fat beefy cables that fit the
quadrant. Both from one side, the short one as one side is longer than the other. I'm now in possession of a lever from a Range Rover, no idea
what year but its even smaller than the the 200 one and would be ideal for tight spaces.
Keep up the good work.
1972 V8 Jago
1980 Z750
|
|
|
bart
|
| posted on 6/12/14 at 08:05 PM |
|
|
engine turn over cradel
hi all
started work again today
made a start on the gear change lever and is ready for welding , then machining
then had a think , I need to put the engine back in to get all the brackets finished and shimmed
also the engine needs finishing
swing sump
clutch springs ect
so I made the decision to spend the rest of the day making the cradle to put the engine in the engine turn over I made before
in the pics you can see how I made the adapter , I took an educated stab at the ctr of gravity.
well I good not have got it closer no mater how many times I could have tried.
it take no effort atall to turn it over , Near Perfection !!!
by this time the temperature was plummeting and I could not feel my toes , so it was in for late tea - dinner and a rest
next step prep engine and design fuel tank to be made Monday / Tuesday
looking to put engine back in Wednesday if all goes well.
the car at that stage will have all the suspension on so I may be tempted ( read as defo will ) weigh the car
I can allow for all the bits not yet fitted , so I will have a good idea of total weight
i'm betting 450kg with body when finished ,
as stated before I am aiming for a end of February date for completion of mechanical work , then its onto body
 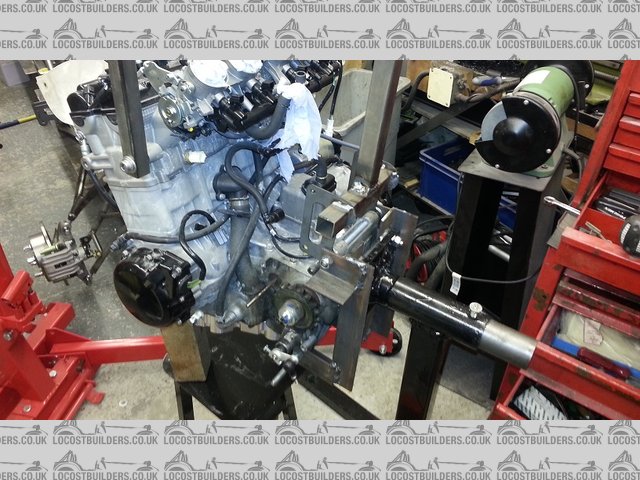
Description
Description
Description
if anyone shows interest I will take some pics of engine prep build - wet swing sump - baffle - oil pipes - clutch
if no one needs to know I wont bother just get it done.
[Edited on 6/12/14 by bart]
BE ALERT > BRITAIN NEEDS LERTS
|
|
|
bart
|
| posted on 7/12/14 at 08:05 PM |
|
|
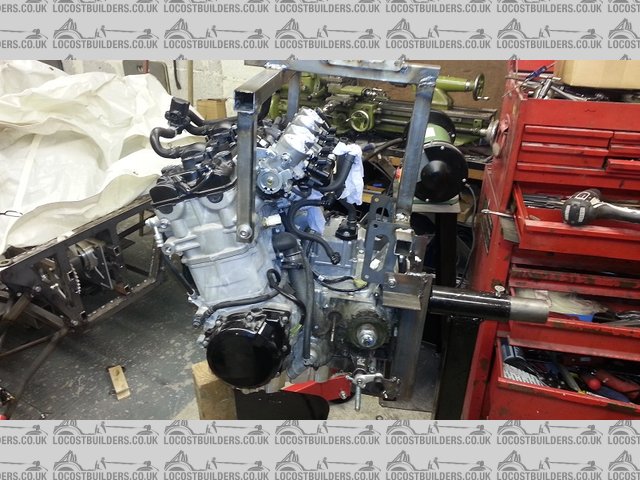
well today was stop start 2 steps forward 1 step back.
put the swing sump kit on the engine and stripped the clutch ready to uprate and put a baffle plate in
had to stop when I realised I needed a clutch lock tool
so put it back together for now and put the engine back in the car , no small task on my own .
had a quick ponder on what's to do next and called it a day.
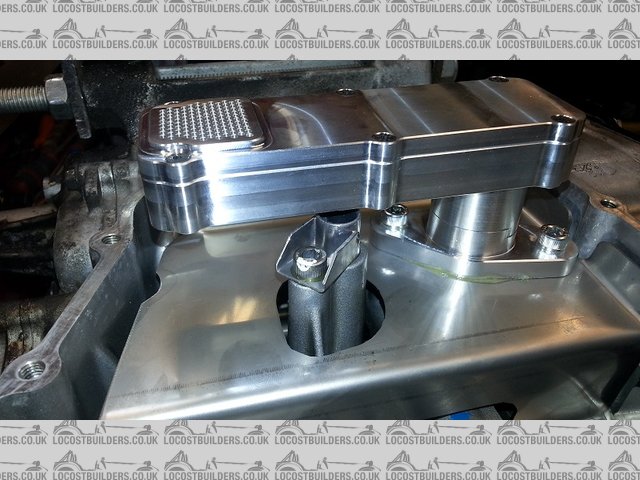
ps: the swing sump kit needed some small mods to make it fit _ was a little upset about this as it was expensive
it was from extreme engines , but i'm pretty sure its a rilltech item due to the large r on the bottom.
 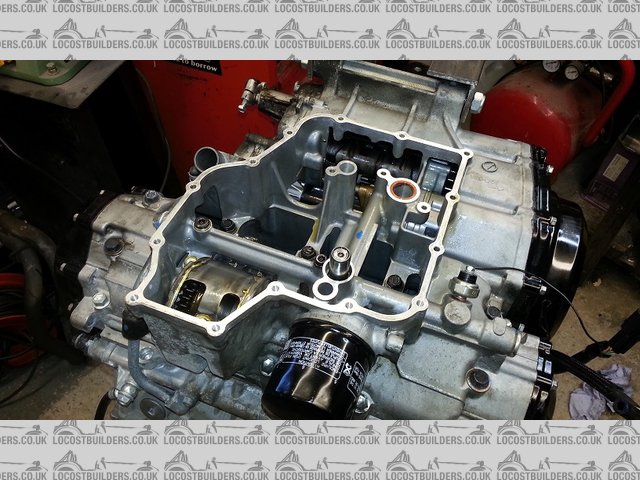
Description
engine cleaned ready for installation
 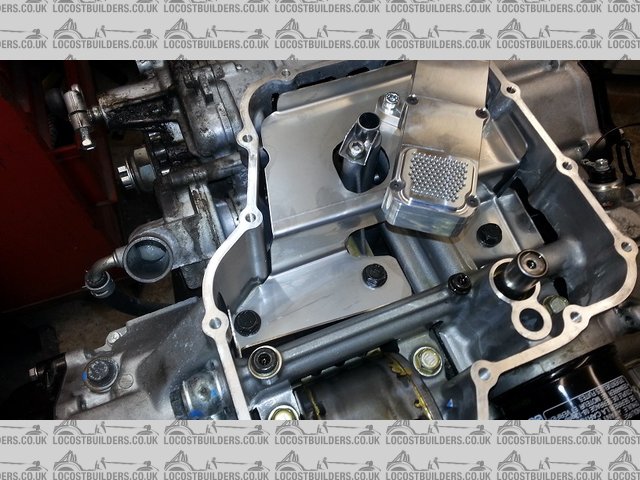
Description
swing sump and baffle installed
Description
showing mods to oil return pipe and the swing arm itself
 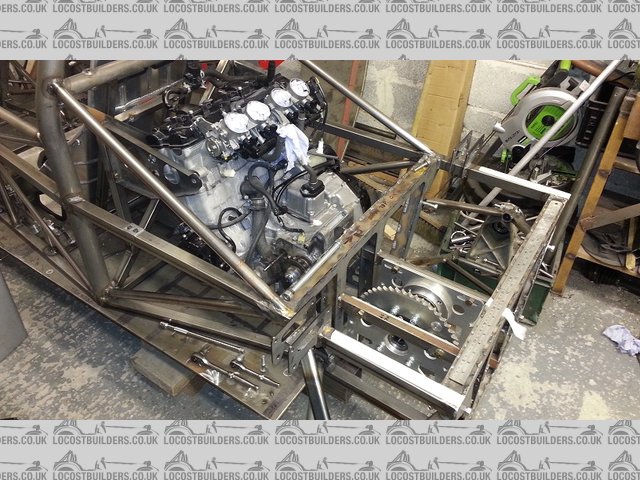
Description
engine back in.
with hind sight I wish I had left more space between the engine and the roll bar bulk head , I can get an exhaust in there but its tight , very tight.
we shall see it arrives Monday / Tuesday.
aiming to get all the bits that I need to order and get made organised tomorrow so that I can continue over xmas and new year .
aiming to get any bits that I need to order / get made sorted tomorrow so that I can continue over the Christmas.
BE ALERT > BRITAIN NEEDS LERTS
|
|
|
cloudy
|
| posted on 7/12/14 at 09:09 PM |
|
|
Can that sump pickup swing a full 360 degrees? Might just be the picture but looks like it'll foul on one side?
Can only imagine that'll mean when jumping on the brakes/throttle in left or right corners (depending on which side fouls) the pickup will fall
against the side of the engine and jam and leave you in a worse position for pickup than if you just had a normal central one..
James
www.warnercars.com
|
|
|
bart
|
| posted on 7/12/14 at 09:59 PM |
|
|
it has built in stops
swings about 110 degree
BE ALERT > BRITAIN NEEDS LERTS
|
|
|
cloudy
|
| posted on 7/12/14 at 10:05 PM |
|
|
not good! 
www.warnercars.com
|
|
|
bart
|
| posted on 7/12/14 at 10:17 PM |
|
|
go ahead explain more . ill take note of any advice
BE ALERT > BRITAIN NEEDS LERTS
|
|
|
cloudy
|
| posted on 7/12/14 at 11:16 PM |
|
|
Found an image which I guess is a similar setup - perhaps a busa
Consider the following condition - accelerating out of a left hand bend

The pickup would be forced against the stop - and not provide any benefit (in fact probably slightly worse than a well baffled sump with a central
pickup... This could arguably occur even accelerating in a straight line
James
[Edited on 7/12/14 by cloudy]
www.warnercars.com
|
|
|
bart
|
| posted on 7/12/14 at 11:36 PM |
|
|
mmmmm need to think this through. thinking cap
on

any body out there runing
one of these sump ????
[Edited on 7/12/14 by bart]
BE ALERT > BRITAIN NEEDS LERTS
|
|
|
bart
|
| posted on 8/12/14 at 10:51 AM |
|
|
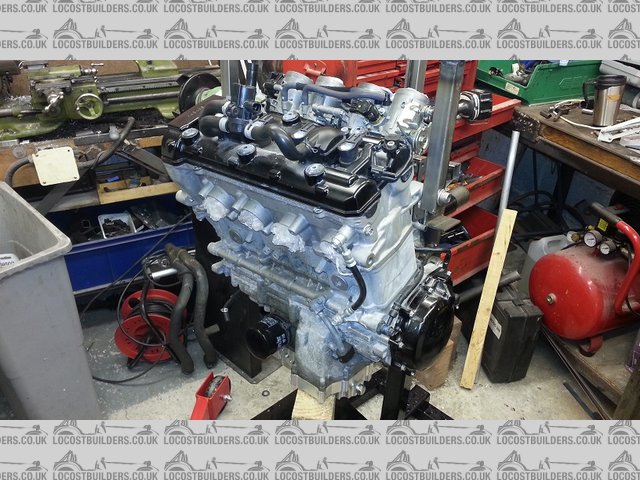
the exhaust fits !!!!!!
well massive relief the exhaust fits
picture of the exhaust manifold ( not in my car ) .
when I finish the whole installation this will take some time , I will post full installation pictures , need to mod the system to fit a cat ect .
big relief though did not know for sure if I had enough room .
 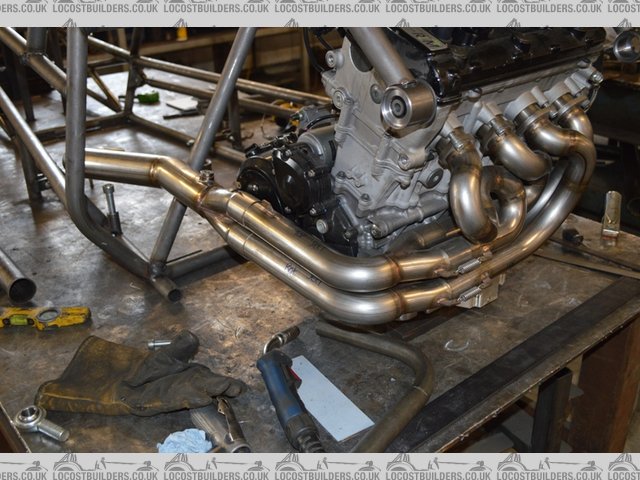
Description
same system just not on my engine / car
BE ALERT > BRITAIN NEEDS LERTS
|
|
|