Xtreme Kermit
|
| posted on 14/11/09 at 05:27 PM |

|
|
Looking good!
I remember reading somewhere that the cam chain tensioner can cause issues of duratecs.
Are you planning to replace/upgrade?
|
|
|
|
|
flak monkey
|
| posted on 14/11/09 at 05:34 PM |
|
|
Thanks. 
My understanding was that there have been issues with the tenisioner at prolonged high revs (i.e. race use) but in normal driving and with a 7500rpm
or less rev limit the standard one was ok.
I know SBD do an aftermarket one to fit though.
David
Sera
http://www.motosera.com
|
|
|
scootz
|
| posted on 17/11/09 at 08:28 PM |
|
|
What are you guys doing with the plumbing... ???
I had resigned myself to going down the Raceline route, but as I've bags of room in the engine bay I thought I'd just core-plug one of the
ports on the OEM outlet and route piping to the rad. Am I being a tad simplistic, or is it simply a case of 'if the cap fits... '???
It's Evolution Baby!
|
|
|
flak monkey
|
| posted on 17/11/09 at 08:43 PM |
|
|
I was going to use some 32mm stainless tube to bring the outlet on the back of the head to the front and then simply connect to the rad.
Its a job for the next month or so.
Should be simple enough to fabricate a pipe to do it rather than spend a fortune on a water rail
David
Sera
http://www.motosera.com
|
|
|
scootz
|
| posted on 17/11/09 at 08:55 PM |
|
|
I'm trying to visualize the OE outlet... am I right in thinking it has 2 large diameter opposing outlets and one smaller one???
It's Evolution Baby!
|
|
|
flak monkey
|
| posted on 17/11/09 at 08:59 PM |
|
|
It has 4 connections IIRC 32mm, 2 off 19mm and a 6mm IIRC.
So 32mm to rad, 19mm to header tank, other to thermostat bypass and 6mm air bleed to header.
David
Sera
http://www.motosera.com
|
|
|
scootz
|
| posted on 17/11/09 at 09:19 PM |
|
|
Cheers David.
It's Evolution Baby!
|
|
|
flak monkey
|
| posted on 21/11/09 at 06:23 PM |
|
|
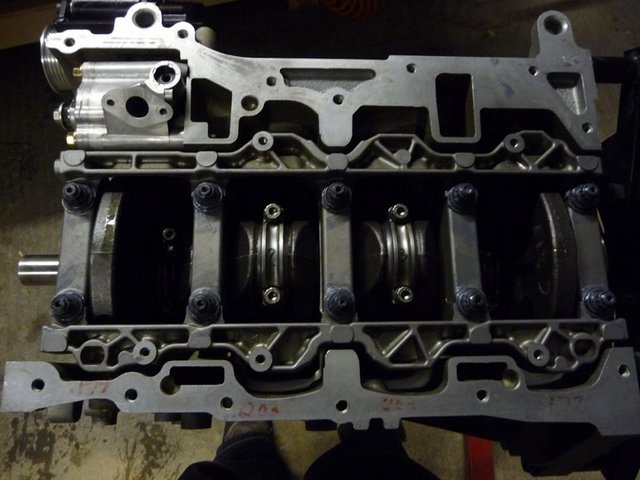
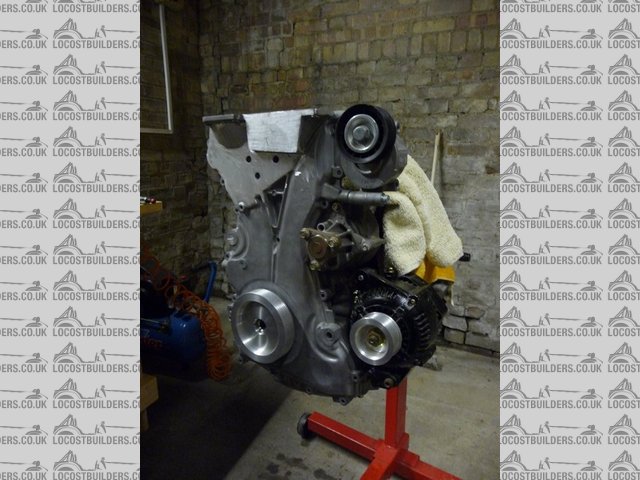
Continued with the engine rebuild today.
Deglazed the bores and then washed everything down to get rid of the grit.
Fitted the ARP main studs into the block. Removed, inspected and cleaned the bearings in both the block and the ladder.
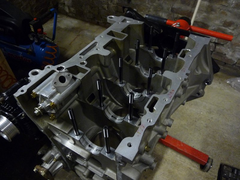 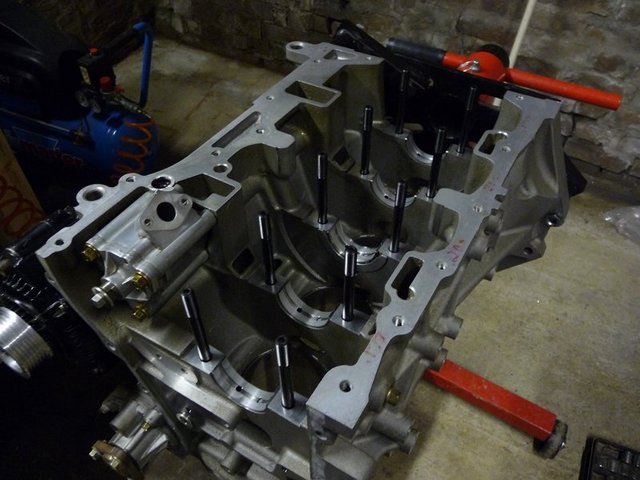
ARP Mains
Fitted the pistons to the rods, which was a nice clean and easy job with the fully floating pins. There's definately a knack to fitting
spriolocks though, and it seems to be a quick shove with a piece of dowel!
Also fitted the rings, which was a nice easy job, did them all by hand this time. I did check the ring end gap before fitting them to the pistons and
all seemed well.
 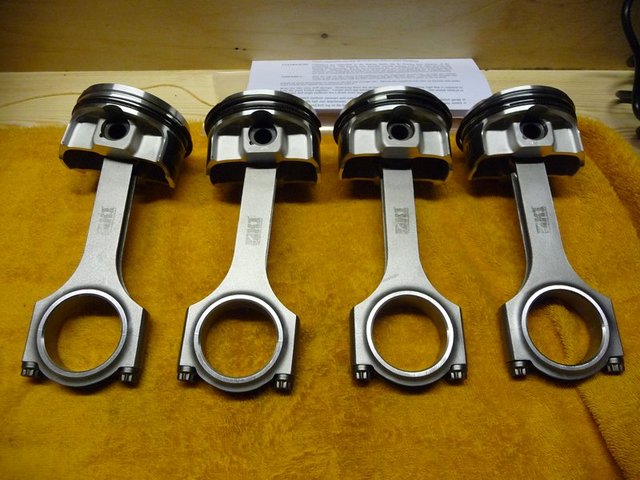
Rods and pistons
Next the pistons and rods were fitted to the block. Also fitted the ARP head studs
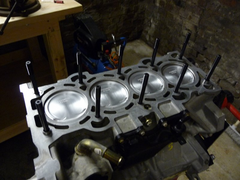 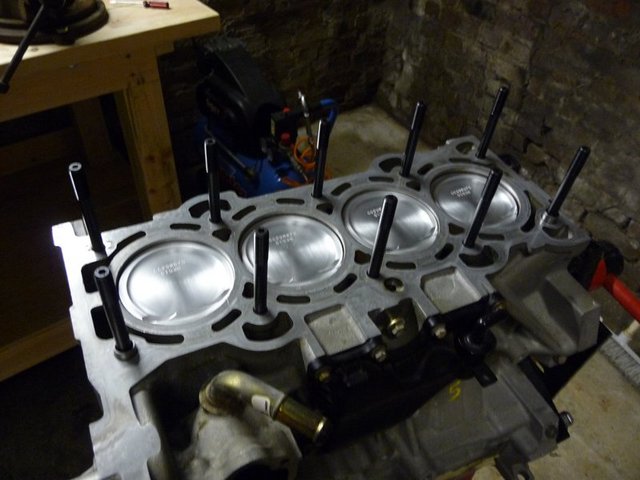
ARP head studs
Closer examination of the head reveals 4 bent exhaust valves from when the exhaust cam snapped. More expense which I could do without at the moment.
Its looking more and more like the engines not going to be ready and the whole projects slipping behind at the moment.
Next job is to take the crank to be modified by Scholar on monday morning, this can then be refitted back into the block
David
Sera
http://www.motosera.com
|
|
|
beaver34
|
| posted on 21/11/09 at 06:50 PM |
|
|
i can sort you new valves out cheaper than retail, you still have my email?
|
|
|
goaty
|
| posted on 22/11/09 at 11:06 AM |
|
|
how much did you manage to get the arps for in the end?? were Arrow useful??
And i spoke to Scholar about my bottom end, been there for 3 weeks now and on Friday they hadn't even started....lol. No prob as i dont have
time anyway at mo.
cant wait to see mine looking like that 
|
|
|
flak monkey
|
| posted on 22/11/09 at 11:48 AM |
|
|
Got them from arrow, £75.15+vat so cant complain really!
I am taking my crank down to Scholar on monday and they are doing it while I wait hopefully anyway!
Going to get both my ali crank pulley and the std one keyed I think.
David
Sera
http://www.motosera.com
|
|
|
goaty
|
| posted on 22/11/09 at 05:14 PM |
|
|
cool, progress is being made. cant wait to see both done
|
|
|
flak monkey
|
| posted on 23/11/09 at 07:22 PM |
|
|
Another busy day today.
Took the crank down to Scholar Engines in near Stowmarket to get the crank keyed. Top job and turned it around in 2 hours for me as well! So I was
home just after lunch.
 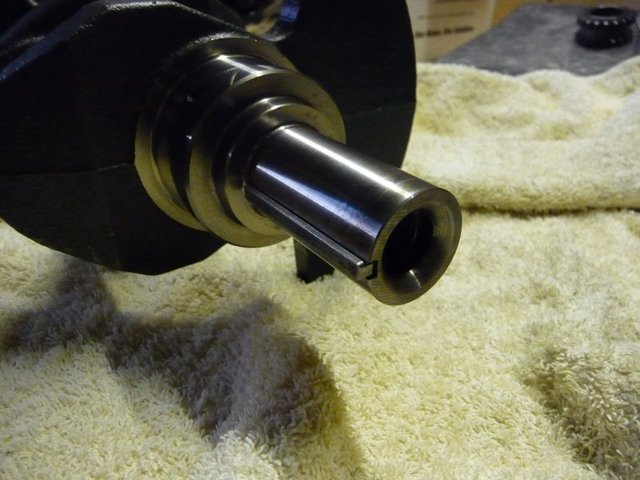
Keyed crank
 
keyed pulley and gear
Cleaned it all up and fitted to the block. Torqued up the ARP main studs then fitted the conrods to the crank, again with ARP bolts.
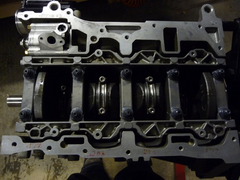 
Crank and rods refitted
Then fitted the gear to the crank and the oil pump and fitted the modified oil pick up pipe.
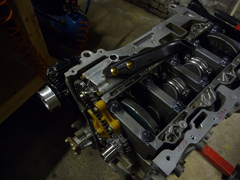 
Oil pump drive
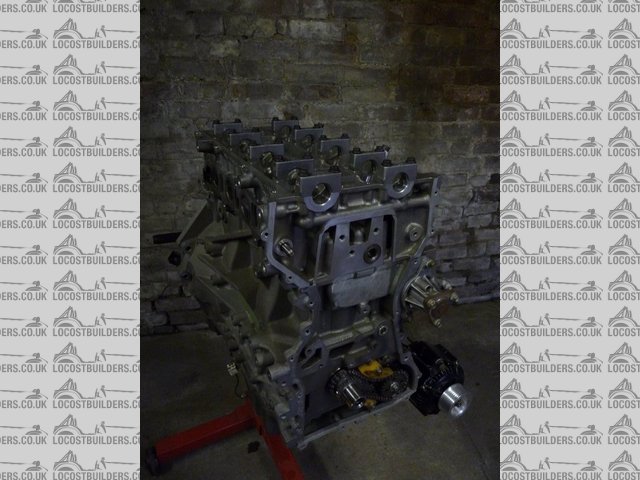
I also nearly finished modifying the chain cover. The engine mount is redundant and possibly in the way of the belt so I cut it off with the grinder.
Still need to tidy it up a bit, then probably paint the cover to tidy it up, though I may not.
This is the std front cover with the fwd engine mount
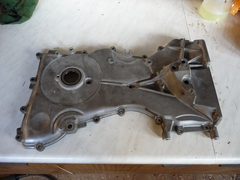 
Std front cover
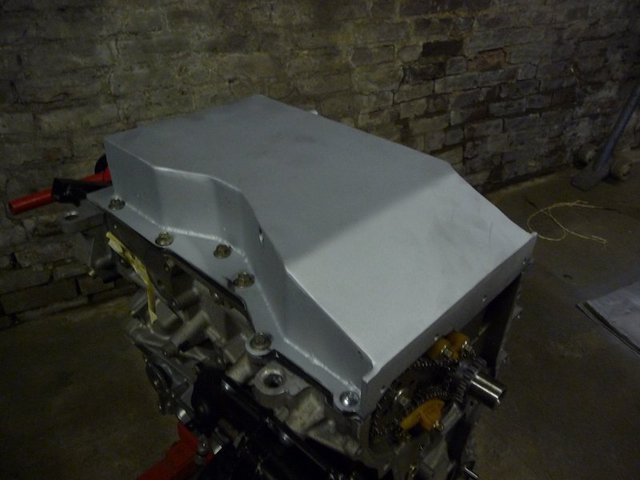
And this is the same cover with the mount removed
Modded front cover
I will make some bungs for the old bolt holes too as they arent required any more either. Or I could counterbore the holes and fit cap heads. Not
really decided yet!
Sera
http://www.motosera.com
|
|
|
matt.c
|
| posted on 28/11/09 at 07:50 PM |
|
|
New garage needs a nice girly calendar on the wall 
Engine is coming along nicely now. Can wait to hear it running. 

|
|
|
flak monkey
|
| posted on 6/12/09 at 07:48 PM |
|
|
Been fettling the head and getting it ready to fit this weekend, in amongst pulling some ceilings down in the flat. So all in all a productive and
destructive weekend all around!
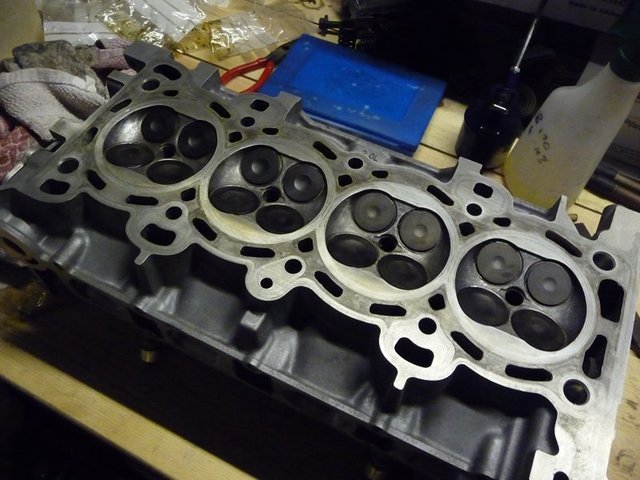
I took the oppotunity while the head was off to remove all the casting marks from the ports and smooth off the short turns in the inlet ports as these
had a sharp edge in, similar to that seen in the early pinto heads. Other than that the ports are incredibly well shaped from the factory so I didnt
remove a lot of material.
My felxi shaft broke halfway through which means I couldnt really touch the dividers in the ports as I didnt have enough reach, that said they arent
bad, and with the amount of turbulence the supercharger is going to create I dont think it will matter too much!
I also removed all the sharp edges from the inside of the combustion chamber to prevent any hotspots then gave them a quick once over to smooth them
over. There isnt really a spotface for the valve inserts, which was good, so other than removing the edge, they were left as machined.
Final job was to lap the valves in which didnt take too long as the seats were in very good condition anyway.
Heres the pics of the finished article. Apologies for the crappy quality, forgot my camera today so these are off the phone!
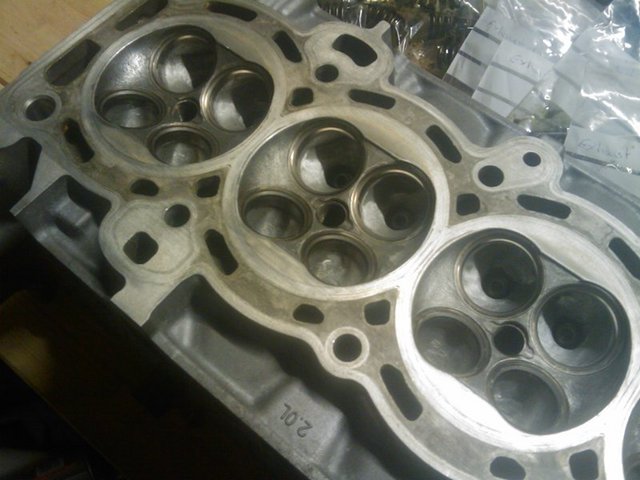
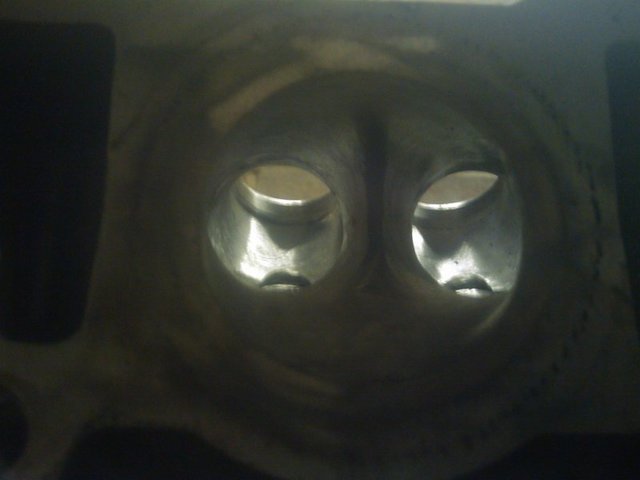
Inlet ports:
Head rebuild 1
 
Head rebuild 3
Head rebuild 6
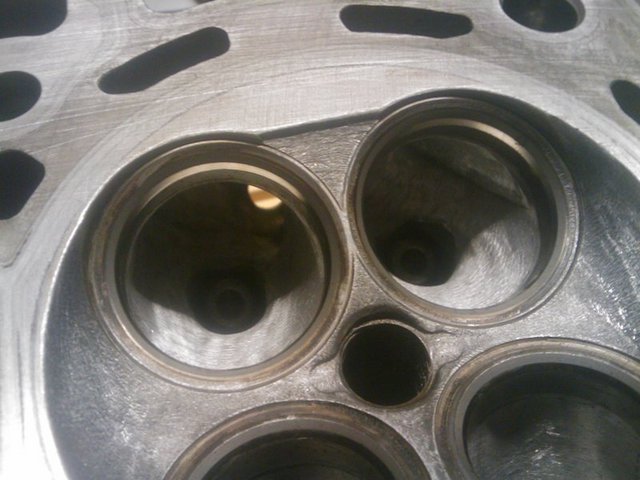
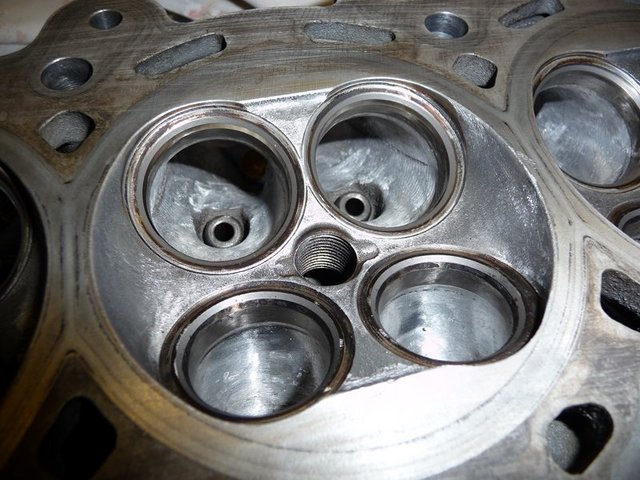
General view of combustion chambers:
Head rebuild 2
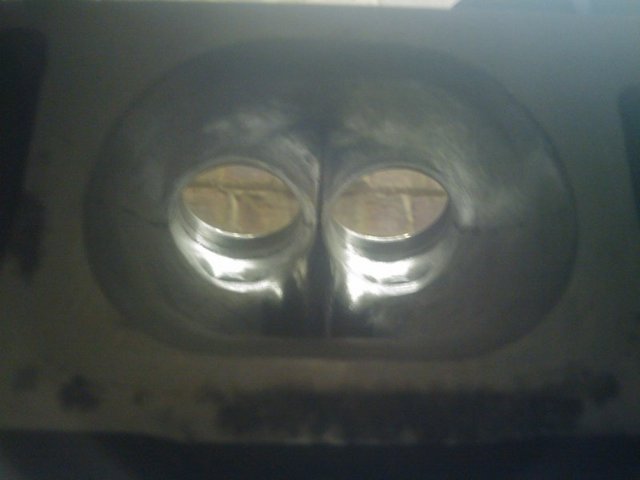
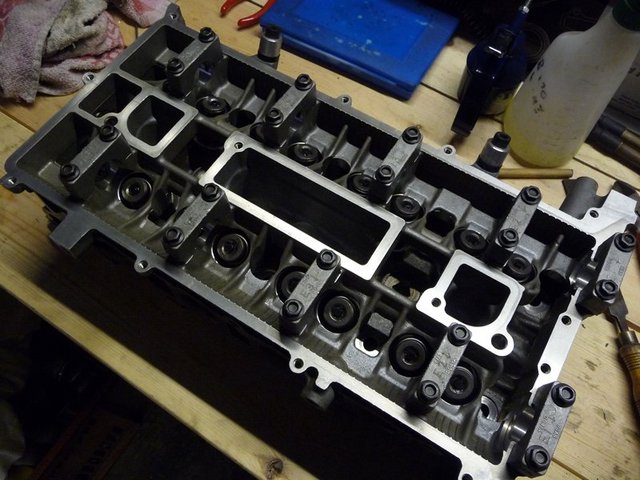
Exhaust ports:
Head rebuild 4
 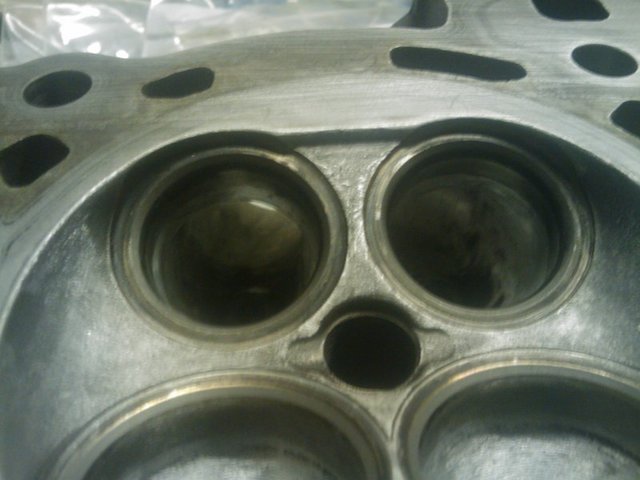
Head rebuild 5
All this was followed by a thorough hosing down and blowing all the passages out with the airline to remove all traces of swarf.
Just waiting for the uprated valve springs to arrive now. Thought it was worth fitting them now while the head was off, so if I decide to change the
cam at any time I dont need to take the head off again!
Sera
http://www.motosera.com
|
|
|
scootz
|
| posted on 6/12/09 at 09:51 PM |
|
|
Very nice!
[Edited on 7/12/09 by scootz]
It's Evolution Baby!
|
|
|
gdc
|
| posted on 18/12/09 at 08:20 PM |
|
|
slightly of topic , i have in the last 12 months fitted an st170 engine its badged as a duretec but its i think a transition engine between the zetec
and duratec .
cast block and ally head but with vvt .
with A very restrictive ex manifold ie a standard rhsc zetec one its producing over 200 bhp on jenvies and megasquirt mapping .
by the way i do like the look of that duratec engine ,
all the best with the project graham
|
|
|
flak monkey
|
| posted on 18/12/09 at 08:33 PM |
|
|
Thanks Graham
Yes the ST170 is a zetec engine with VVT for the extra power
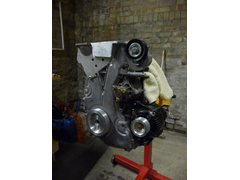
I have done a bit more today, but will put a full on update on at the end of the weekend.
All being well the engine will be fully build, new sump fitted and everything ready for the car. Then it will be on to making the supercharger
brackets
Sera
http://www.motosera.com
|
|
|
flak monkey
|
| posted on 19/12/09 at 05:11 PM |
|
|
A little more progress today. I can't feel my toes, but there we go!
This morning I made my clutch slave cylinder spacer. I skimmed a bit of material off the bellhousing so I could make a spacer thick enough to
counterbore the heads of the SHCS into it.
Not bolted it in yet.
 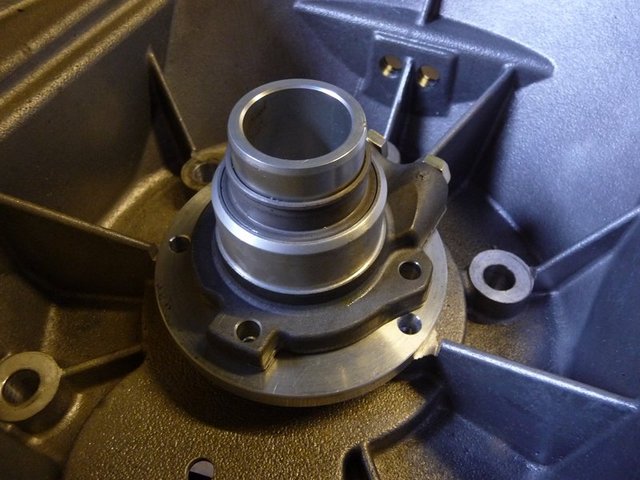
Clutch spacer
Refitted all the valves to the cylinder head yesterday afternoon. Bit of a tedious job. Found the best way to refit the collets was with some grease
on a screwdriver, unless you have really small fingers!
Springs were replaced with uprated kent cams ones as the standard ones are a bit weak.
Head rebuild 7
Head rebuild 9
Head rebuild 10
Then I set about refitting the cylinder head. Lubed up all the ARP studs before slipping the head on as its virtually impossible to reach them once
the head is on. Used some grease in a socket to fit the nuts and then torqued it all up.
Head on
Once that was on I refitted the camshafts and torqued the caps. Then checked all the valve clearances, looks like I will need a few new buckets!  More expense!
Then I fitted the new sump. Leak tested it last night and all seemed ok, then fitted the windage tray and then cleaned it all out again. Sprayed it
with high temp paint this morning before starting the other jobs. Its more silver than it looks in the pics.
Put a bead of loctite 5900 around the flange and popped it on the engine. A bit of a fiddle to ensure the flaps dont get stuck in the wrong place.
Sump fitted 1
 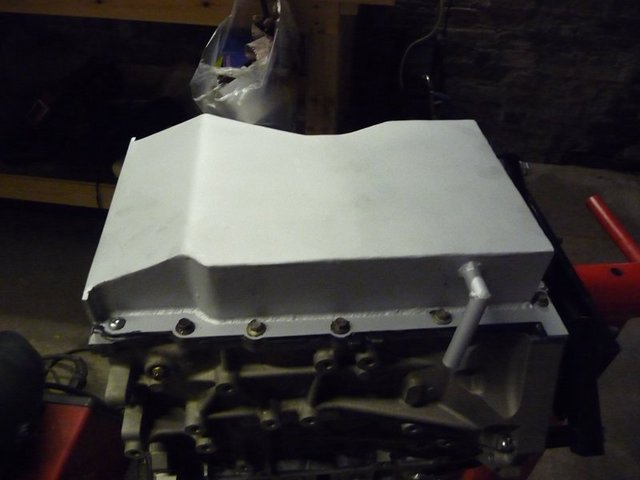
Sump fitted 2
Think that will probably be it for this weekend, too damn chilly out!
Sera
http://www.motosera.com
|
|
|
FASTdan
|
| posted on 20/12/09 at 09:54 AM |
|
|
Looking good!
Quick question - how the hell does the alternator tensioner work on these engines?
We have the one from the 2.0 mondeo (but will be using the 1800 foci one as you have) but it looks like they both operate in a similar manner.
Are they sprung? We cant get ours to move in any direction at all?! It has a couple of arrows on but we've had it in a vice etc trying to move
it but no luck?
Is there any adjustment in them?
NEW danST WEBSITE NOW LIVE! Bike carbs, throttle bodies and more......
http://www.danstengineering.co.uk/
|
NOTE:This user is registered as a LocostBuilders trader and may offer commercial services to other users
|
flak monkey
|
| posted on 20/12/09 at 11:15 AM |
|
|
Hi Dan,
The focus one swivels.
Looking at it from the front (pulley side) it should be spring loaded if you try and turn it anticlockwise. Put a big spanner on the hex in the middle
of the pulley and try to turn it anticlockwise and it should move against the spring.
The mondeo one is also similar but fits on the bottom left of the block.
David
Sera
http://www.motosera.com
|
|
|
goaty
|
| posted on 20/12/09 at 12:11 PM |
|
|
lloking awesome now David, i do love the look of a nice lean engine coing together. And i guess the Kent springs arrived first...lol.
manaed to get some done on mine yesterday too, but was too cold. will load some pics too
|
|
|
FASTdan
|
| posted on 20/12/09 at 09:12 PM |
|
|
quote:
Originally posted by flak monkey
Hi Dan,
The focus one swivels.
Looking at it from the front (pulley side) it should be spring loaded if you try and turn it anticlockwise. Put a big spanner on the hex in the middle
of the pulley and try to turn it anticlockwise and it should move against the spring.
The mondeo one is also similar but fits on the bottom left of the block.
David
I thought that must be how its supposed to work, Will have to give ours another try. So to install the belt presumably you use the spanner to relieve
some of the tension then wrap the belt over and release?
Still need to get hold of a focus tensioner.
NEW danST WEBSITE NOW LIVE! Bike carbs, throttle bodies and more......
http://www.danstengineering.co.uk/
|
NOTE:This user is registered as a LocostBuilders trader and may offer commercial services to other users
|
flak monkey
|
| posted on 21/12/09 at 12:48 PM |
|
|
Thats correct. Turn tensioner anticlockwise with spanner, then slip the belt over and release.
Sera
http://www.motosera.com
|
|
|
Micael
|
| posted on 21/12/09 at 07:15 PM |
|
|
quote:
Originally posted by flak monkey
Flywheel part number
Just for information
The flywheel Flak is using can be found on
Ford Focus 2004-2007 1.8 petrol, with engine code Q7DA.
[Edited on 21/12/09 by Micael]
Micael Moose Åman
Petrolhead and all around nice guy
"Don't leave the duck there. It's totally irresponsible. Put it on the swing, it'll have much more fun." //Sleep Talkin Man Dec 23
2009
|
|
|