Keith Weiland
|
| posted on 15/4/09 at 09:27 PM |

|
|
That looks great Alex, I have changed my mind I want the engine back  . .
Just kidding, any chance I can come borrow your engine hoist tomorrow?
|
|
|
|
|
omega0684
|
| posted on 15/4/09 at 11:18 PM |
|
|
yes mate no probs, just give me a bell when you want to come over
|
|
|
vindicator
|
| posted on 16/4/09 at 08:43 AM |
|
|
let me know when it is all done and you are ready to test.....I'll come and watch from a very safe distance and take photos.....
TimR
timr.spaces.live.com---build blog
|
|
|
omega0684
|
| posted on 16/4/09 at 11:58 AM |
|
|
mate your welcome over at anytime
|
|
|
omega0684
|
| posted on 16/4/09 at 07:21 PM |
|
|
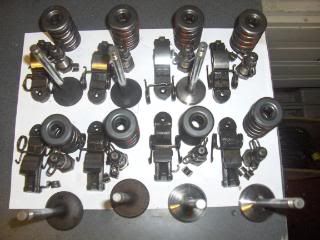
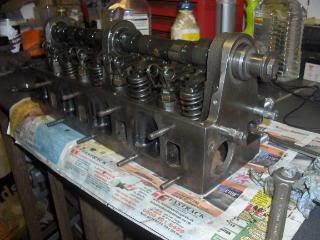
ok so spent yesterday afternoon and this afternoon dismantling the head and cleaning, the valve springs came off quite easily and had no major
problems apart from a collet flying away somewhere that took me ages to find. the valves on the other hand were in a bit of a state and some
mega-cleaning was needed to get them back into shape (this was most of my day!)
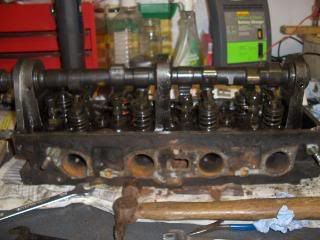 
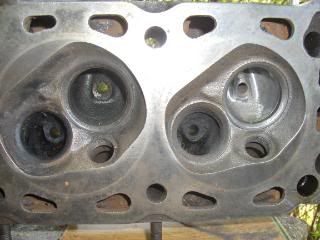
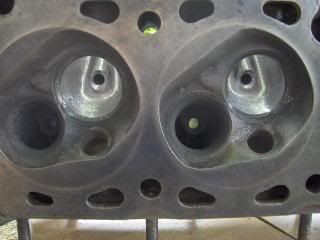
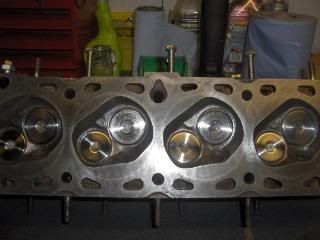
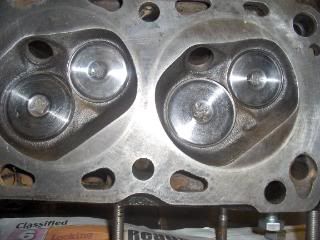
as you can see the head was pretty manky and covered in crud! but after a bit of cleaning it came up alright
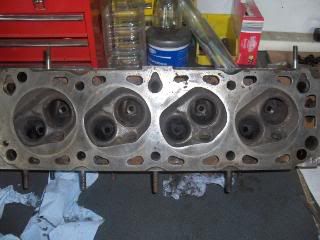 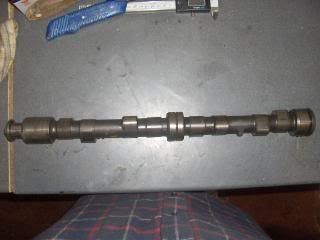
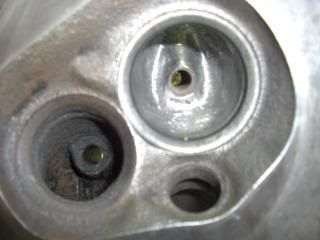
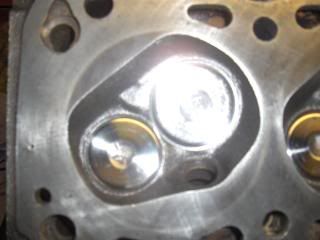
here are the valve ports, i have only just started working on these the seats don't appear to be in too bad a shape either, i was quite
surprised. the cam is in good knick aswell, no scroring on the lobes at all.
 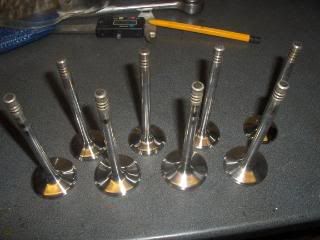
the photo doesn't really show the extent of how bad the valves were, especially the exhaust valves (inlet pictured on left), you can probably
see in the top photo, the exhaust valves that is. i have had to order some new valve stem seals because they were absolutely knackered! pretty much
ripped to pieces.
tomorrow im hoping to get the head finished and painted, i might even have a little go at some light porting of the inlets, and then get the head and
rest of the bits and pieces painted.
will keep you posted
|
|
|
vindicator
|
| posted on 17/4/09 at 08:12 AM |
|
|
Fantastic pictures and article.
I have been informed that my 4th cyclinder valve stem seals need replacing and have intending to do all of them but was reluctant to take the head
off.
But seeing the picures and thinking what else I could do I may give it a go......
Keep up the good work....
TimR
timr.spaces.live.com---build blog
|
|
|
Daddylonglegs
|
| posted on 17/4/09 at 08:54 AM |
|
|
This is my next major stage of the build (1.6 Pinto) so watching this article with interest
Looking good, just hope my cam is in good nick too! Think I'll be taking lots of piccies throughout.
JB
It looks like the Midget is winning at the moment......
|
|
|
MautoK
|
| posted on 17/4/09 at 06:43 PM |
|
|
You can change Pinto valve stem seals in situ....
I did mine a week before SVA and only one collet flew across the garage! 
quote:
Originally posted by vindicator
Fantastic pictures and article.
I have been informed that my 4th cyclinder valve stem seals need replacing and have intending to do all of them but was reluctant to take the head
off.
But seeing the picures and thinking what else I could do I may give it a go......
Keep up the good work....
TimR
He's whittling on a piece of wood. I got a feeling that when he stops whittling, something's gonna happen. (OUATITW/Cheyenne)
|
|
|
omega0684
|
| posted on 23/4/09 at 08:17 PM |
|
|
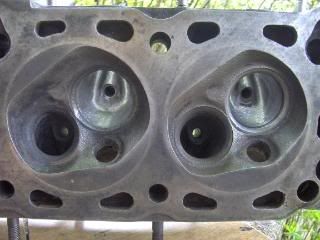
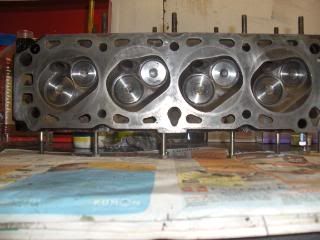
pinto recon continues: Porting the head
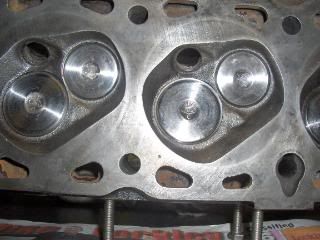
carrying on with my pinto rebuild today, i did a bit of porting on the head, took me pretty much all day to do as the exhaust ports were a right mess,
pictures below, i managed to polish up the valves as well
|
|
|
02GF74
|
| posted on 24/4/09 at 07:08 AM |
|
|
that must be hard going being cast iron head.
make sure you lay the gaskets on top to open out the inlet and exhaust ports to match.
I used a 1/2 round hand file and dremel stones but the don't last long. To finish off I use a small sanding wheel followed by 180 wet
'n' dry.
|
|
|
omega0684
|
| posted on 24/4/09 at 07:55 AM |
|
|
i used a tough die grinding stone and yes it took ages!
[Edited on 24/4/09 by omega0684]
|
|
|
DaveFJ
|
| posted on 24/4/09 at 08:33 AM |
|
|
looking good...
you could loose some material from the valve guides in to allow a little more flow...
I had a document somewhere detailing how much material you can safely remove from a Pinto head that i used when porting mine.... you can take loads
off the exhaust ports but general consensus is that the inlets are pretty big already and just need fettling.....
Basically got some over sized cometic exhaust gaskets and opened the ports to to match
[Edited on 24-4-09 by DaveFJ]
Dave
"In Support of Help the Heroes" - Always
|
|
|
omega0684
|
| posted on 24/4/09 at 08:36 AM |
|
|
i have removed some of the material from around the guides and removed all sharpe edges so they are all nice and rounded, the only problem with
removing valve guide material is that it reduces the longevity of the head and since im not having brass guides fitted im not going to remove a great
deal.
|
|
|
DaveFJ
|
| posted on 24/4/09 at 08:41 AM |
|
|
I figured that if the engine only lasts 20k thats probably a lot longer than I need so hacked away loads! my inlet guides now are just a small
smooth bump!
Dave
"In Support of Help the Heroes" - Always
|
|
|
02GF74
|
| posted on 24/4/09 at 08:41 AM |
|
|
quote:
Originally posted by omega0684
the only problem with removing valve guide material is that it reduces the longevity of the head
yep - you don't get something for nothing.
that may be an issue for a 10,000 mile commuter but we do lower mileages in aour kits and swap/rebuild engines out all the time!
NB going to bigger gaskets would need you need to open the inlet and exhasut manifolds out - the exaust may not be possible.
|
|
|
DaveFJ
|
| posted on 24/4/09 at 08:46 AM |
|
|
On a Pinto head you can take loads off the exhaust ports
Dave
"In Support of Help the Heroes" - Always
|
|
|
omega0684
|
| posted on 15/5/09 at 03:38 PM |
|
|
its been a while since i have posted an update on my pintorebuild but thats because i haven't been doing much lately, due to other
commitments,
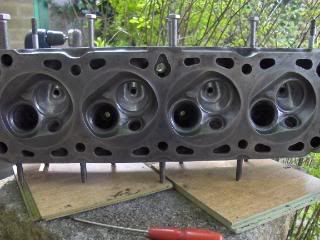
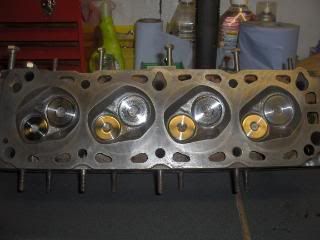
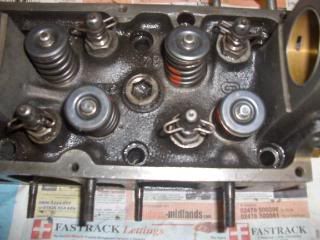
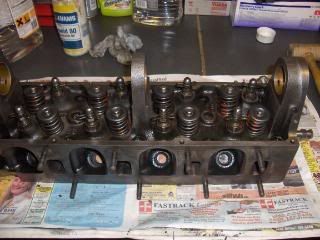
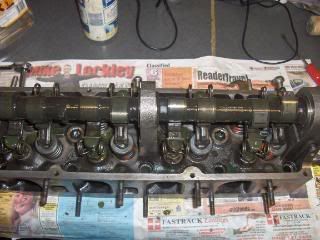
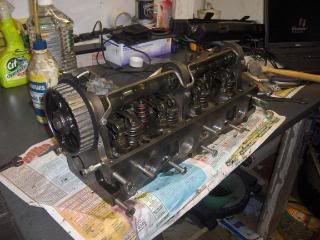
but last night i managed to get in to the garage and rebuild the head, i've reseated all the valves, new stem seals, new cam seal, new oil spray
bar. cam & followers are in very good condition with hardly any wear on them at all, here area few shots of the head being rebuilt. i managed to
get a lick of paint on the head too and the cam pulley and backplate as well.
i know some of you guys were watching the progress of the rebuild so my apologies for the delay in posting,
im off to set the valve clearences now.
All the best
Alex
|
|
|
vindicator
|
| posted on 15/5/09 at 08:55 PM |
|
|
That head looks ok now....
timr.spaces.live.com---build blog
|
|
|
omega0684
|
| posted on 15/5/09 at 10:58 PM |
|
|
looks a hell of a lot better than it used to
|
|
|
mcerd1
|
| posted on 16/5/09 at 09:23 AM |
|
|
quote:
Originally posted by omega0684
im off to set the valve clearences now.
your at the same stage as me now....
but I've got to mix 10 big loads of concrete before I can finish mine (4 years into the build and I'm finally sorting the garage  ) )
have you got that spare head ported yet ? 
[Edited on 16/5/09 by mcerd1]
-
|
|
|
omega0684
|
| posted on 16/5/09 at 02:52 PM |
|
|
haven't even looked at that head yet or the crossflow i've got. i thik i'll stick to one engine at a time for the moment. just got
to make a engine stand out of some small pallets i've got hold of.
|
|
|
mr henderson
|
| posted on 16/5/09 at 03:04 PM |
|
|
When I looked at this thread last night, there was a big picture that meant I had to keep scanning across.
This morning, unless I dreamt it, it was gone and a series of pictures that fitted into the standard frame had taken their place.
Now the big pic is back
Did I dream it?
John
ps edit, nothing about editing in the post in question, must be the way it's displaying
[Edited on 16/5/09 by mr henderson]
|
|
|
omega0684
|
| posted on 16/5/09 at 03:37 PM |
|
|
i sometimes get the screen only on half of the page and other times its full page, its wierd, but thats on the whole forum not just one post
|
|
|
omega0684
|
| posted on 18/5/09 at 09:08 PM |
|
|
Sump Cleaning URGH!
over the weekend and for today i went on the dirty adventure of cleaning the sump! it was aweful! the inside was fairly clean to be fair but the
outside was rusted beyond belief! it took 24 hrs in the electroysis bin and a couple of hours on the bench drill to get it looking half decent.
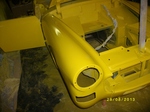
i managed to get it primed up today and will paint it tomorrow.
after elctrolysis and wire brush
 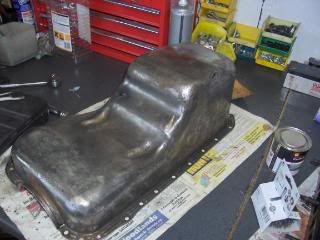 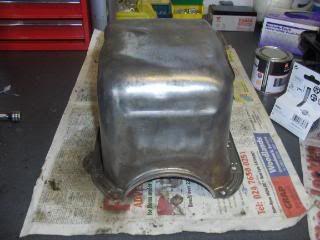
first layer of primer!
 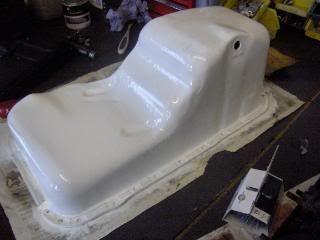
2nd coat of primer
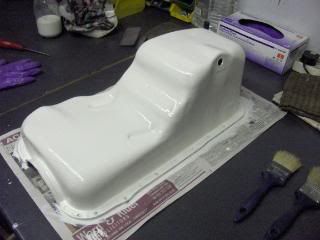 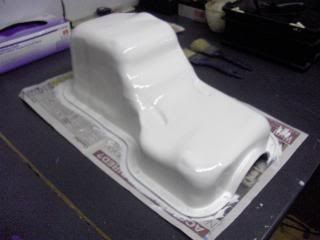
will post painted sump pictures tomorrow.!
|
|
|
mcerd1
|
| posted on 19/5/09 at 07:34 AM |
|
|
quote:
Originally posted by omega0684
...but the outside was rusted beyond belief! it took 24 hrs in the electroysis bin and a couple of hours on the bench drill to get it looking half
decent....
That doesn't look too bad at all - most of mine had holes in them 
-
|
|
|