markal
|
| posted on 1/4/06 at 11:26 AM |

|
|
Diy Wheel Alignment
Hi, could someone post pics please of wheel alignment tools they have made, and how they work, thanks.
|
|
|
|
|
eddymcclements
|
| posted on 1/4/06 at 01:46 PM |
|
|
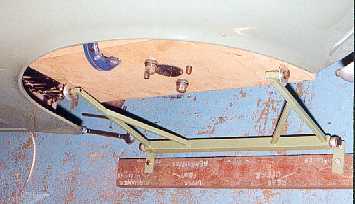
I did tracking with this set-up which is two equal-length ally bars front and back with
fishing line stretched round to make a rectangular box. I measured from the box to the leading and trailing edges of each wheel to get the toe
settings. The thing on the boot cover is a camber gauge - a white board with a 287mm pendulum and a 5mm scale, giving 1 degree camber per graduation.
This was rested against the wheel rim and camber measured with about 1/2 degree accuracy or better.
Hope this helps,
Eddy
|
|
|
JB
|
| posted on 1/4/06 at 02:25 PM |
|
|
Tracking gauge
This page explains my DIY set up.
http://www.beardmorebros.co.uk/website%20pages/how%20to/tracking.htm
On my latest car I construct a rectangle from fishing line around the car. I have bolt on bars on each end of the car. Then I measure from the string
to the wheel rims.
This is my bumpsteer gauge.
John
|
|
|
zetec
|
| posted on 1/4/06 at 05:37 PM |
|
|
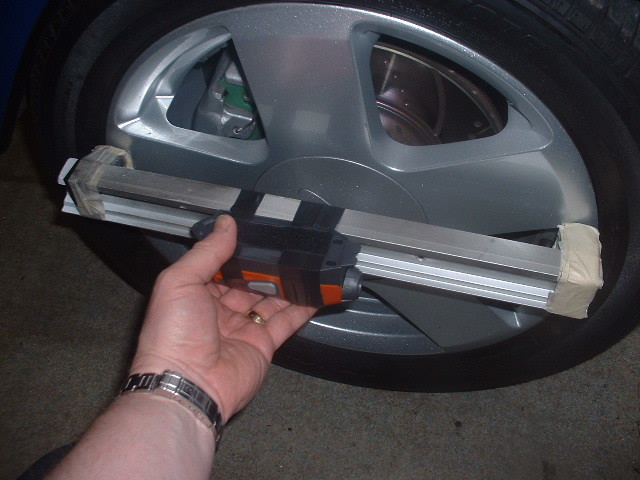
I went the laser route, cost £500...sorry £5.00.
The laser casts a accurate light within 1mm over a distance of 10ft, checked using the edge of the MDF kitchen worktop!
1. Rest the guage on the wheel rim.
2. Lay a length of wood on a couple of stands a couple of feet across in front of the car and mark where the light falls. Move the guage to the other
wheel and mark the wood again for this wheel. You now have the distance the wheels are apart.
3. Now move the wood back 10ft and do the same. This will give you another measurement.
Patent pending!
If the second distance is less than the first the wheels are toe in, and vice versa if it is greater. Only takes a few mins to do so rechecking a few
times is no hassle. Seems accurate as just a half a turn on the track road gives a change of a good few mm at 10ft.
Rescued attachment DSCF0028.JPG
" I only registered to look at the pictures, now I'm stuck with this username for the rest of my life!"
|
|
|
tobymack
|
| posted on 1/4/06 at 06:53 PM |
|
|
I've used a proper dunlop alignment gauge, a laser lash up and the string box method.
I much prefer the string box method as (assuming you make the box long enough) you can roll the car back/forward to let the tracking settle and
rechecking is a matter of seconds.
Mine is a couple of bits of wood on 4 axle stands and some string.
|
|
|
JB
|
| posted on 2/4/06 at 06:44 AM |
|
|
Laser
I really like the laser method for the tracking. Its accurate and should be very repeatable, the only real potential for error is placing the laser on
the rim, but that should be very easy to do.
The problem with all the string rectangle methods around the car is getting the rectangle accurate and aligned to the centre of the car.
If you can construct the rectangle with 3 lasers, (middle and each side) using a method similar to the tracking then this could simplify the set
up.
Zetec, you have got me thinking!
John
|
|
|
Chazzy
|
| posted on 2/4/06 at 01:59 PM |
|
|
i used one of the freebie levels attched to a bit of ally I bar wich is about 16" long (15" wheels). there is a set screw at each end of
the bar. a bit of maths trigonometry tells you how much further out one screw should be than the other for your required camber. the level determines
true vertical.
Chas
I used string for toe in.
|
|
|