
Tiger build so far,
furryeggs - 22/6/15 at 08:13 PM
A few (lots) of pictures of the build so far.
Front uprights before
[img]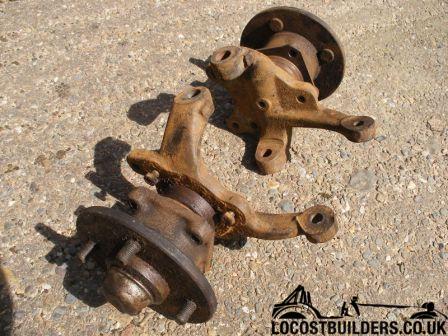 [/img]
Hubs getting ready for paint
[img] [/img]
Painting
[img]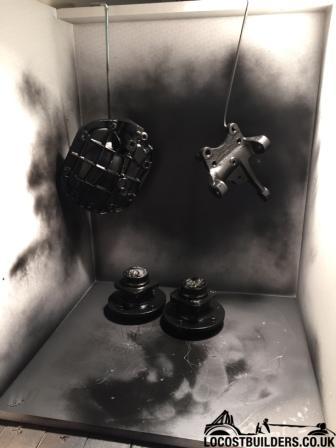 [/img]
Upright
[img] [/img]
Completed upright/hub
[img]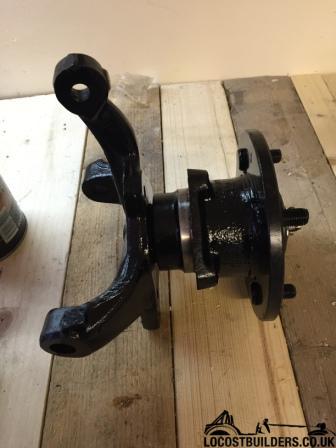 [/img]
Rear shafts
[img] [/img]
Shafts before/after cleaning
[img]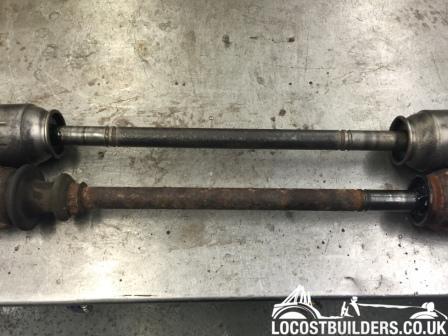 [/img]
Hub
[img]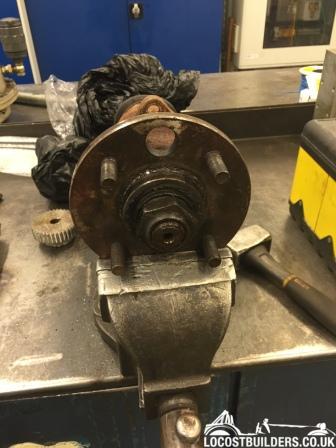 [/img]
knackered seals/bearings
[img]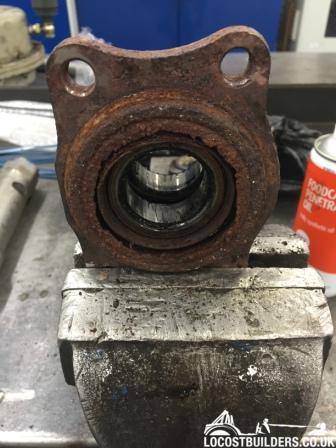 [/img]
Rear brake back plate
[img]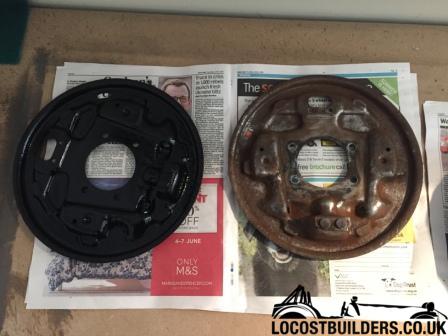 [/img]
Rear drums
[img]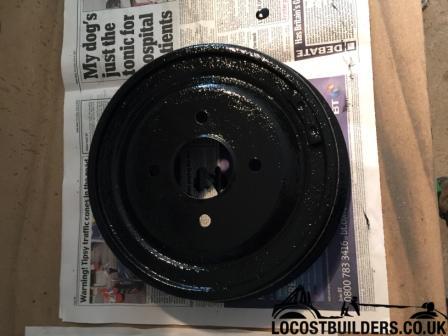 [/img]
Painted diff
[img]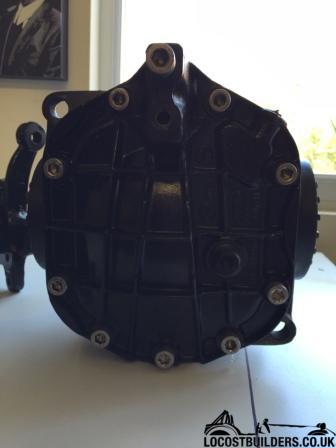 [/img]
Floor panels.
[img] [/img]
Start of the riveting
[img]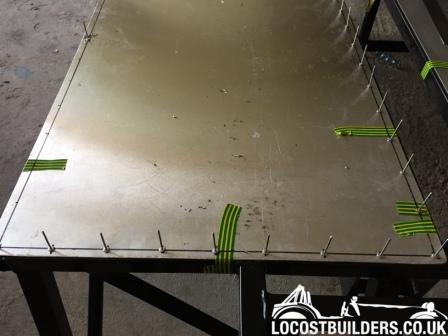 [/img]
Seat back forming
[img]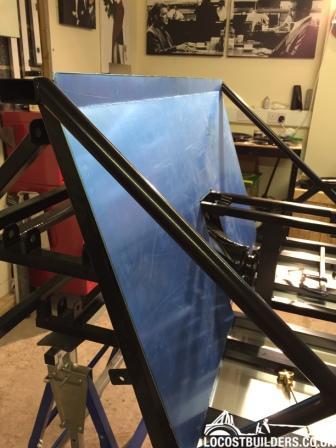 [/img]
Plenty more picture to come
big_wasa - 22/6/15 at 08:19 PM
Keep up with the photos as I would love to see what the current quality of the kit is like and how it comes together.
furryeggs - 22/6/15 at 09:04 PM
The overall quailty so far seems ok, no major issues with anything, offered up wishbones etc all bracketing looks ok. diff mounting holes were 0.5-1
mm out but a quick file and it slid in.
Pre cut panels have been a bit out. Yes there is alway trimming to be done but the floor panel angles were off to the chassis rails in places but
I've managed to sort it fairly well. The odd delivery scuff/scratch on the powder coating to touch up, all in all. not bad
The only main issues has been the book and CD, not much use. Build blogs and diarys have been more use with alot more useful info along with Tiger
owners club site and this site.
Rosco86 - 23/6/15 at 11:34 AM
looking good! is it mx5 based?
furryeggs - 23/6/15 at 12:29 PM
Sierra mainly. Been collecting bits for months before the chassis even turned up.
Lander - 23/6/15 at 04:52 PM
Looking good, what did you use to clean the uprights and hubs ?
Ian
furryeggs - 23/6/15 at 06:30 PM
Brake/clutch degreaser, brush and then a wire wheel in an angle grinder. 2 coats of etch primer 3 satin black paint 2 clear coat.
I'm happy with the results, didn't take that long either. All bearings and seals have been replaced as well.
Lander - 23/6/15 at 06:40 PM
Cheers, Do you fancy doing mine ? 
Rosco86 - 23/6/15 at 06:56 PM
Are they cortina front hubs then?
furryeggs - 23/6/15 at 08:03 PM
yep, mk 4/5. cheap ebay find.
furryeggs - 29/6/15 at 08:32 AM
That's all of my suspension/drive sorted, just waiting for front callipers and discs and I can get rolling...
[img]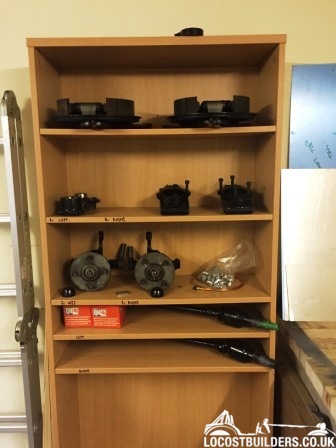 [/img]
furryeggs - 1/7/15 at 07:24 PM
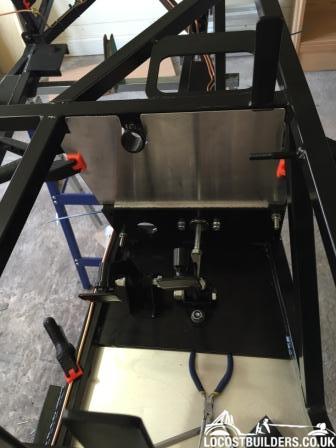
Got brake lines and pedals in today, not yet fully fixed to the chassis yet but getting there.
[img] [/img]
[img]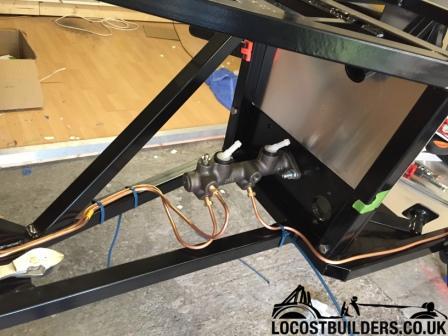 [/img]
[img]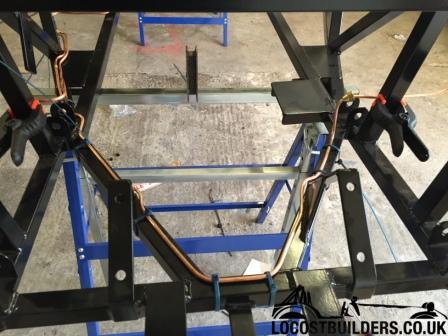 [/img]
Rosco86 - 5/7/15 at 05:09 PM
Looking good, nice and neat!
furryeggs - 5/7/15 at 06:34 PM
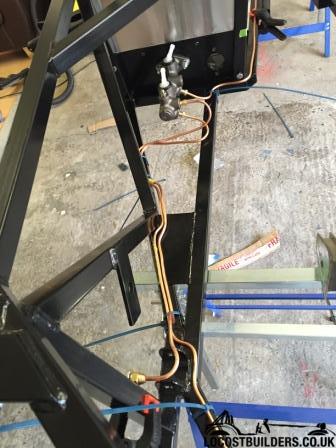
Not much done this weekend, just a few more panels cut and bent ready for fitting. I started to fully fix brake lines at the front also. fuel line and
wiring loom through the tunnel next then time to fix the panels for good.
[img]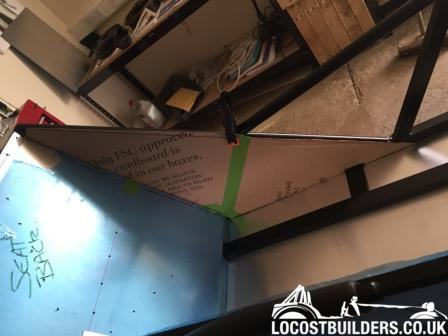 [/img]
[img]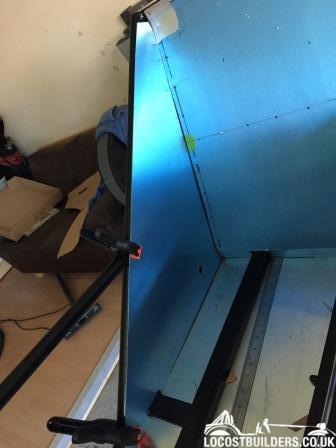 [/img]
[img]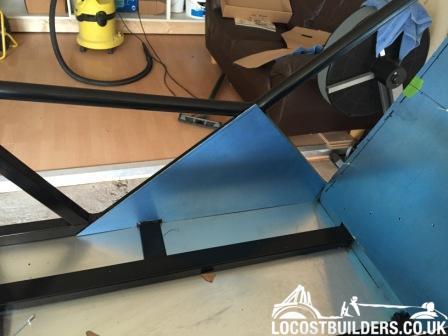 [/img]
furryeggs - 30/1/16 at 09:18 PM
It's been a while since the last update. With a knackered back stopping me dead for weeks, the baby, NVQ exams, wedding anniversary and Christmas
all getting in the way, I can see now how it can take so long to build these things.
Lots of smaller bits done and out the way whilst my back recovered so here's update.
Managed to get the sender drilled and fitted in the tank...
[img] [/img]
[img]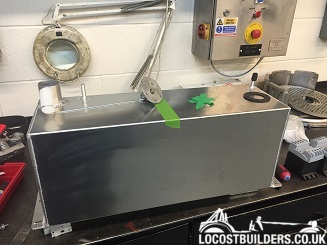 [/img]
[img][img]http://locostbuilders.co.u/img]k/upload/IMG_4645.JPG[[/img]
Got a inlet plate from DanST, cut, machined and welded inlet tubes and gave them a lick of high temp graphite paint. hopefully they'll do the
trick???
[img]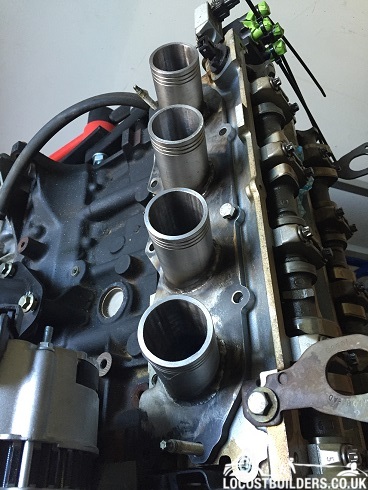 [/img]
[img]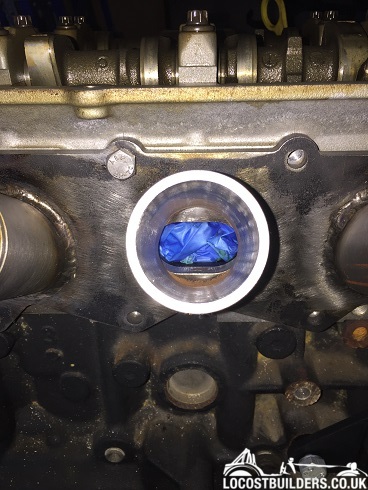 [/img]
[img]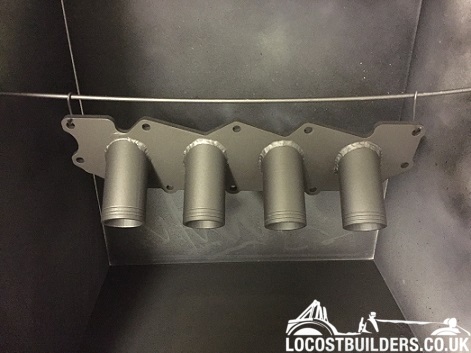 [/img]
Refurbished my alloys, sanded, metal filled, painted and new center caps fitted...
[img]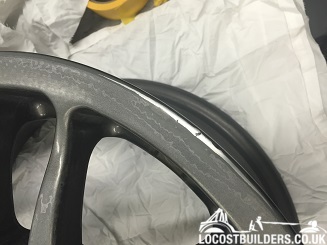 [/img]
[img]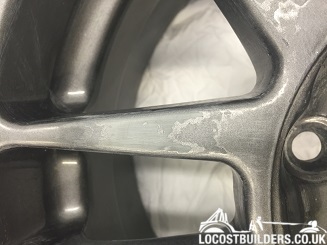 [/img]
[img] [/img]
[img]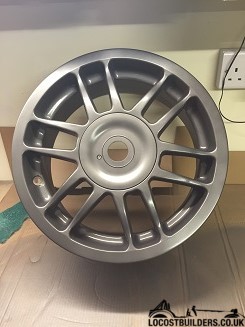 [/img]
[img]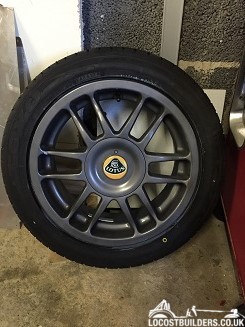 [/img]
Stripped and cleaned my calipers, painted graphite, replaced seals ready for rebuilding.
[img]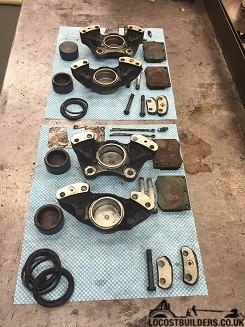 [/img]
[img]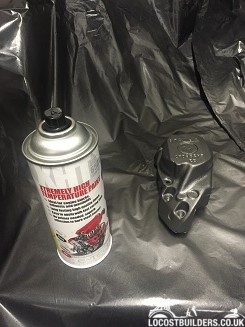 [/img]
[img]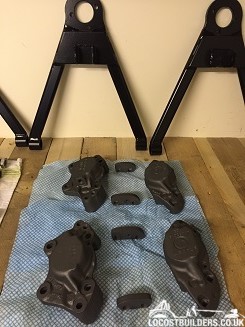 [/img]
Plus a bit of painting of other bits, Oil catch tank, fuel pressure regulator both graphite and some brackets black.
[img]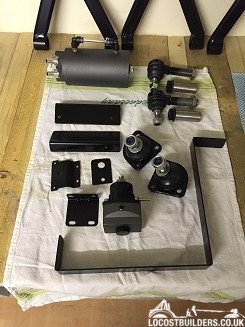 [/img]
[img]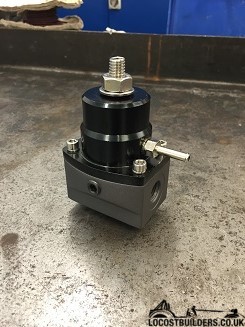 [/img]
[img]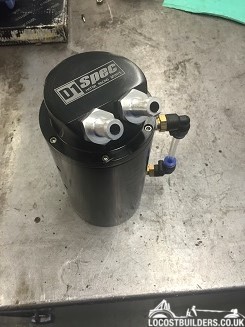 [/img]
I've also changed to wide track front wishbones and painted them black, collected a rear roll bar, fitted a few more panels and spent to much on
bits i don't need yet.
The backs sorted now so the next few weeks hopefully will be a lot busier
neilp1 - 31/1/16 at 06:52 AM
Some good progress made their especially with a bad back
locost7-online.com - 31/1/16 at 11:00 AM
Nice progress furry eggs I've had a few slow weeks, should get loads more time now as changed my job to do less hours for same money!
furryeggs - 10/2/16 at 09:25 PM
Few more pictures.
Fuel line knocked up for the tunnel.
[img]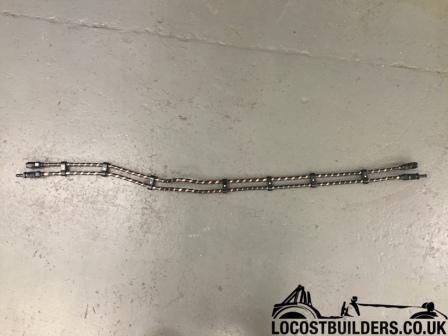 [/img]
10" rear brakes assembled, new shoes etc.
[img]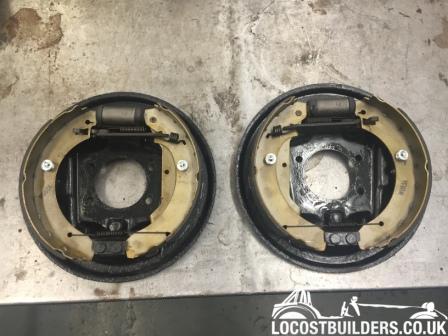 [/img]
New 2.4 quick rack mocked up.
[img]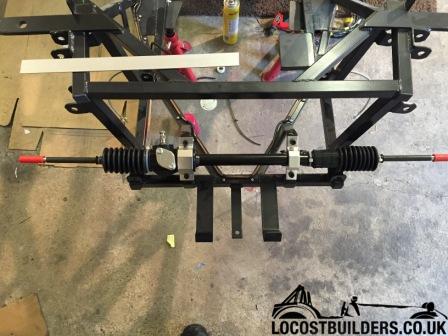 [/img]
New GAZ 13" open front shocks for my wide track bones, Ł170 inc springs.
[img]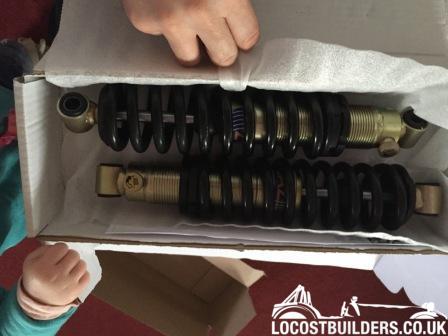 [/img]
Front calipers rebuilt with new seals and monuted to measure up discs.
[img]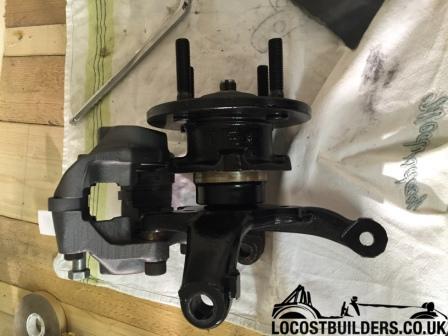 [/img]
Rear roll bar modified and mocked up to measure for front bar and cross bars.
[img]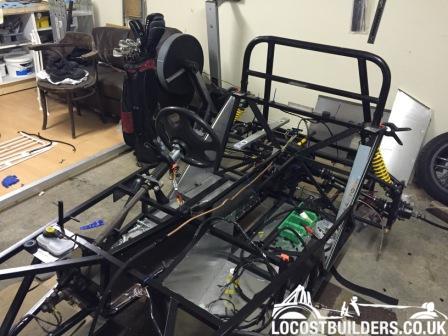 [/img]
I still think it's taking to long?
furryeggs - 18/3/16 at 09:04 PM
I'm still not getting as much time as I'd like on the build but its going ok.
I have tried my hand at a little aluminium weld/braze repair to the end cap of my R1 exhaust. Speaking to Yamaha you can't buy them separately
and I didn't want to fork out more on another exhaust that would probably still have the same damage.
The damage all bike exhaust seems to have.
[img]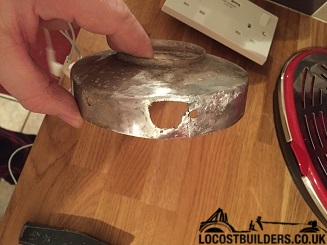 [/img]
Repair patch in place.
[img]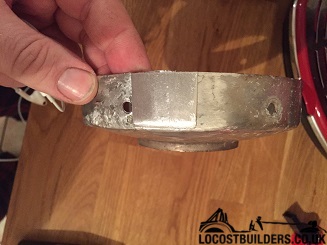 [/img]
Welded and ready for tidying up.
[img]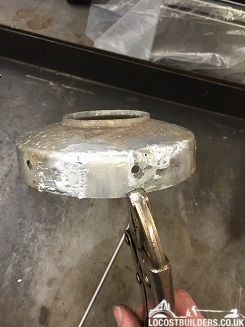 [/img]
almost finished, I will probably paint it with some aluminium vht to help hide any imperfections. Its going to be on the bottom side facing the road
so i'm not overly worried.
[img]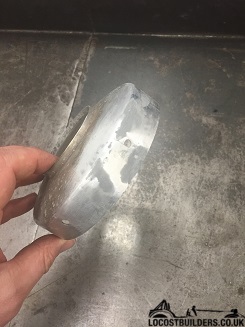 [/img]
Still waiting for my leaking shock to be replaced so I can finally get her on the ground and get the last panels riveted on should only be 2-3hrs more
work to have her sitting on all 4 wheels. This is how she looks. Engine and wiring next.
[img]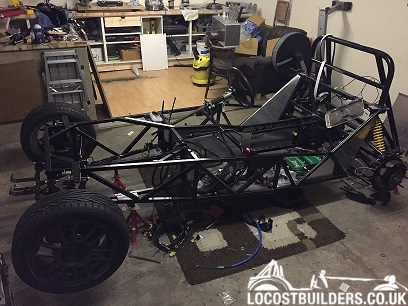 [/img]
furryeggs - 4/4/16 at 08:32 PM
She touched ground for the first time...
[img]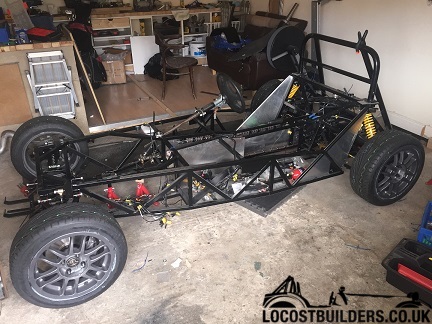 [/img]
Gearbox checked and a few new gaskets fitted...
[img]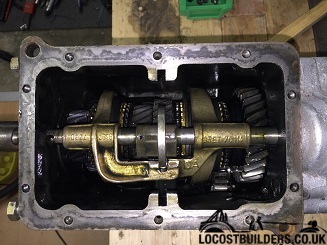 [/img]
[img] [/img]
[img] [/img]
I need to work out how to remove the reverse stop ready for the quickshift and extension...
[img] [/img]
JMW - 4/4/16 at 09:34 PM
"I need to work out how to remove the reverse stop ready for the quickshift and extension... "
Not sure I understand this, why do you need to remove it?
furryeggs - 4/4/16 at 09:46 PM
I was wondering that myself? I've been told that when using a remote extension the stop has to be removed to allow the right amount of play???
the book says remove it as well. I'd prefer not to take it out if i don't have to.
JMW - 4/4/16 at 09:56 PM
I suppose it depends on the remote extension. The one I have (Rally Design I think but not sure) does not need anything removed, it replicates the
reverse blocker in the extension bit, and where it engages with the original it does so without the plastic saddle clip and does not have a shoulder
at that end which would otherwise conflict with the reverse blocker in your photo.
I hope this makes sense.
In any case get the remote of your choice first and offer it up before hacking away.
furryeggs - 4/4/16 at 10:08 PM
it does make sense, and Its the rallye design one i've ordered.
neilp1 - 5/4/16 at 07:49 AM
I didn't need to remove mine either
furryeggs - 14/4/16 at 06:23 PM
That's the quick shift and extension fitted, the stick was sloppy as F@$k so I fitted a new saddle to the extension, much better.
[img] [/img]
[img]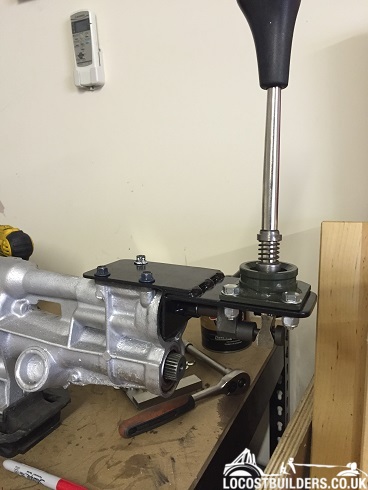 [/img]
Got the rear seat panel fitted now the tanks fitted along with the pump, filter and the fuel lines and loom are run through the tunnel and fixed.
[img] [/img]
Trial fitted my TB's to my DIY manifold, 95% straight after welding (slight bow but i'm sure it'll pull in using a good gasket)
[img]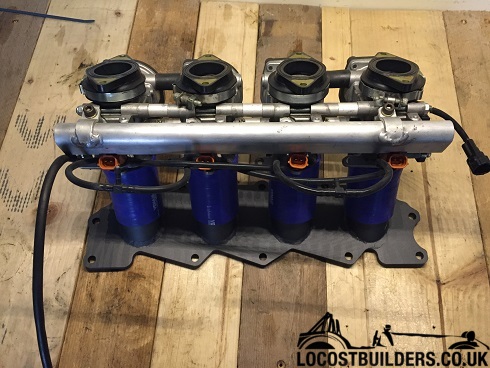 [/img]
Not had a lot of time and my backs gone again so it'll be light duty for a few weeks.
I need to cut 10-15mm of my quick rack to get the wheels pointing the right way and all my bits for my engine service/upgrade are here, so that's
my next few weeks sorted out. Just waiting for my sump to arrive and that's it. Tiger have sent me my prop and steering shaft so I now have
everything to get my engine/gbox in the chassis and lined up.
I'm collecting my water lines and expansion tank from Stoneleigh so hope to have the engine up and running by june??? I just need to choose the
colour and hope that tigers mould is repaired asap.
mk7matt - 14/4/16 at 08:43 PM
Looking good chap.
Sitting in the car making brum brum noises is so much better once it's off the stands 
furryeggs - 14/4/16 at 09:08 PM
Its back on stands now as i reckon it'll be easier swinging the engine around without the wheel's in the way. I'll find out this
weekend as i've got the crane from work, you might have to come and lift it all off me if it goes tits up.
neilp1 - 15/4/16 at 05:30 AM
Keep it on the stands as long as possible. Much easier on the back if the car is higher on stands than on the wheels.
furryeggs - 16/4/16 at 07:31 PM
Floor mounted pedal bracket to add a little extra support and allow me to also bolt it to the bulkhead back plate.
[img]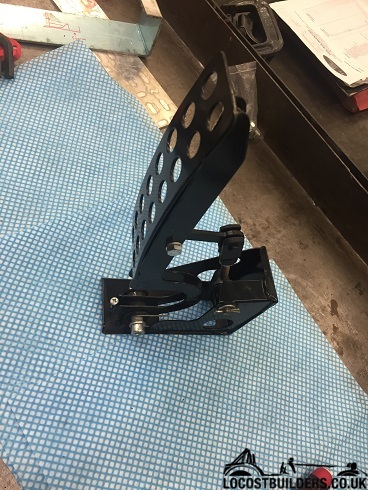 [/img]
[img] [/img]
[img]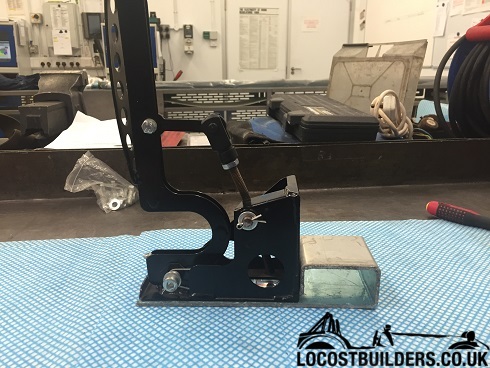 [/img]
I managed to get the engine turned on the stand so I can now get the sump off. Previously I had it mounted using 2 of the lower sump bolts so I
couldn't remove it.
both parts of the sump removed.
[img]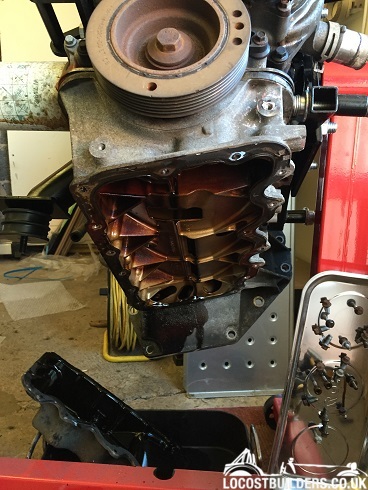 [/img]
sump gasket and pick up removed.
[img]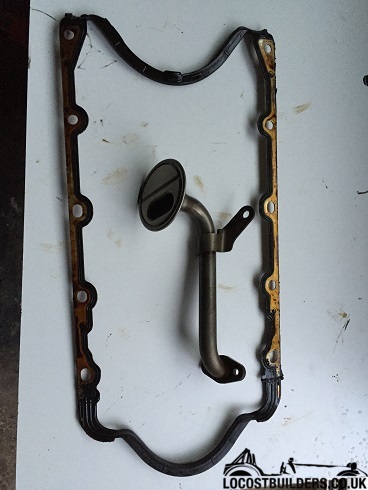 [/img]
new sump (155mm deep) lined up with the old sump (210mm deep)
[img]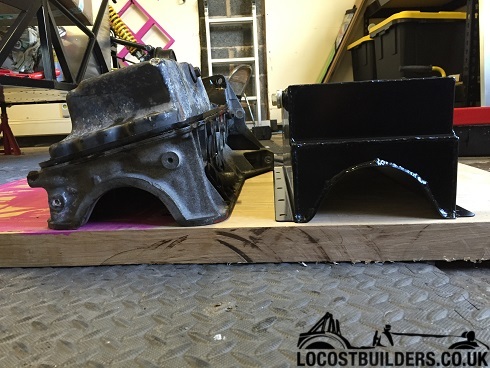 [/img]
Daf - 16/4/16 at 07:45 PM
Lovely neat build you've got there, I love it when people put the effort in to make the stuff that nobody sees neat too!
Quick question if you don't mind - what's the quality of that sump like? I'm considering changing mine and they look a lot cheaper than
the Raceline one that's tempting me!
furryeggs - 16/4/16 at 08:29 PM
Its pretty good, if you u2u me your email i can send some pictures. I'll probably start a thread at some point so others can see what its like.
it holds 5 odd litres of oil and has plenty if baffling so should work a treat.
furryeggs - 8/5/16 at 08:35 PM
I've had nut ache of a time trying to sort my sump issues (premiermotorsports.co.uk, not a very good service), It doesn't fit properly
causing the rod bolts to catch and hit the inner edge, now about to send the 2nd sump back for refund as this is also wrong. GBS's new steel sump
getting ordered asap.
Shiny new Coolex radiator purchased at Stoneleigh.
[img]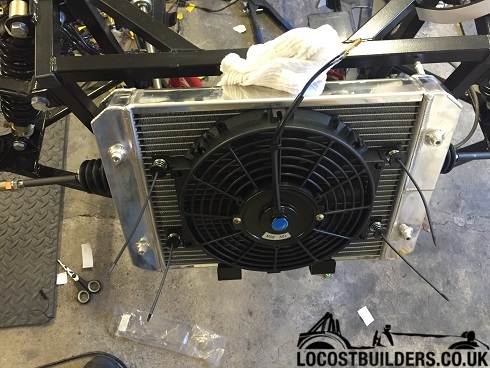 [/img]
New radiator brackets knocked up out of some ally.
[img] [/img]
[img]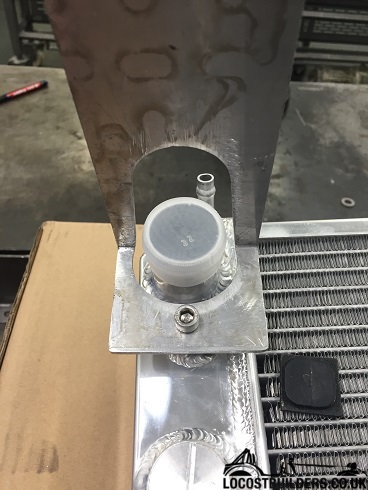 [/img]
[img]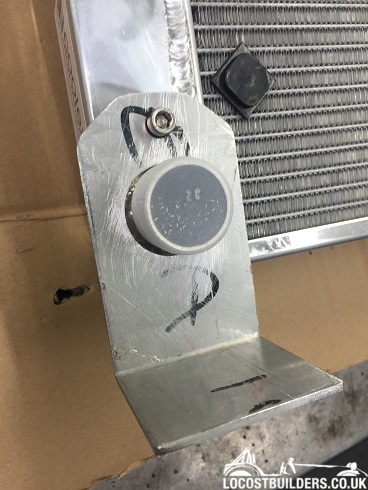 [/img]
[img]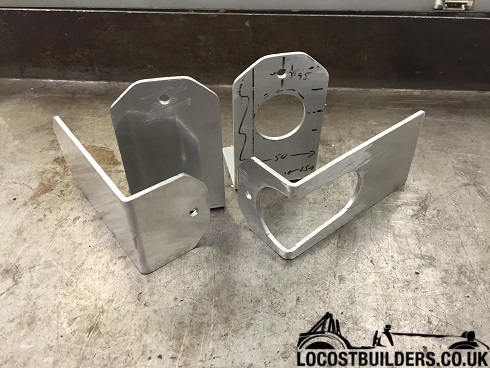 [/img]
[img]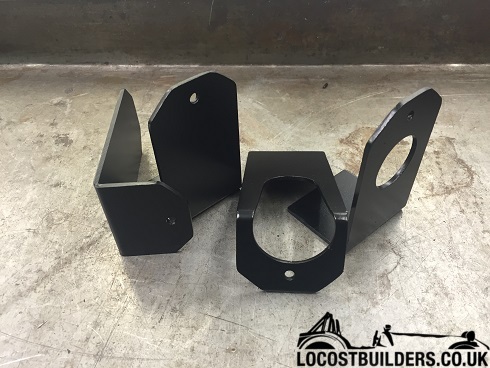 [/img]
Stainless breather blanking plate made using the old gasket.
[img]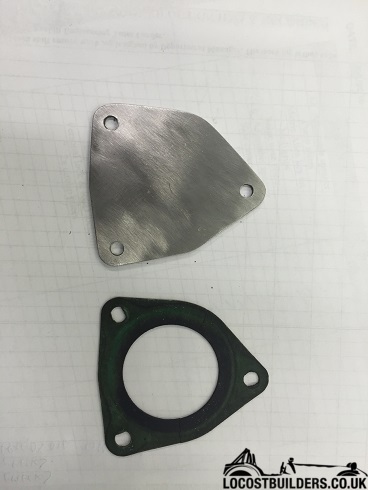 [/img]
[img]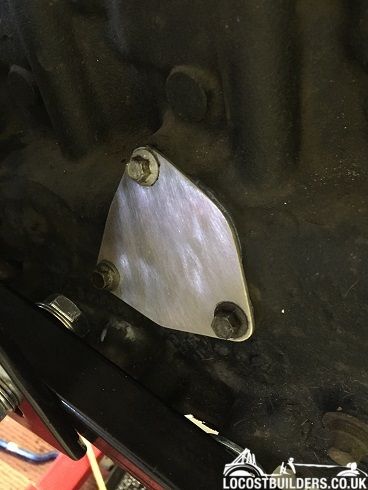 [/img]
I did manage to get my sumpless engine/G-box together and test fitted.
[img]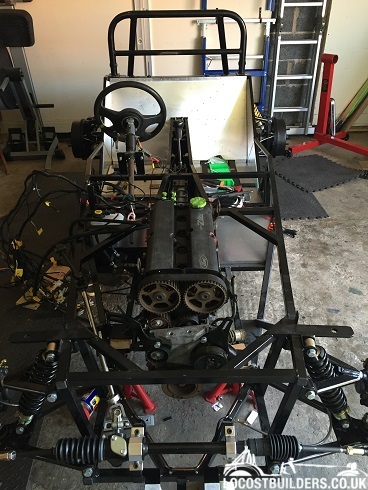 [/img]
[img]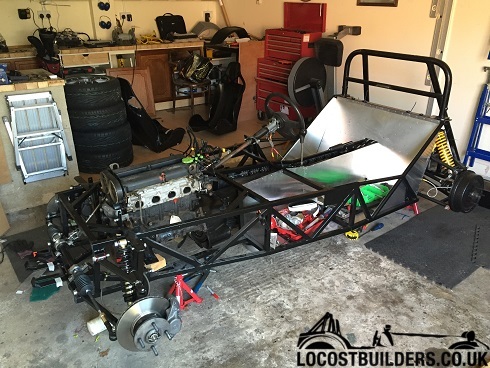 [/img]
furryeggs - 13/6/16 at 07:33 AM
Still running behind schedule, plodding along when possible getting things done at work though.
Got the sump chopped to hopefully the right height.
[img]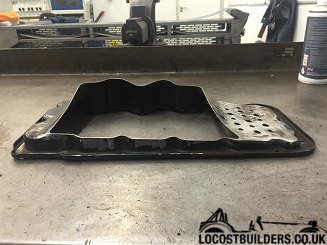 [/img]
Made a plate to weld in place and add some capacity back.
[img]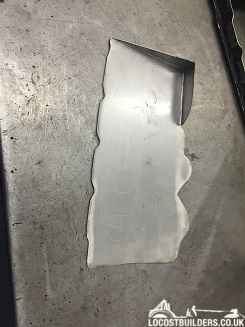 [/img]
[img]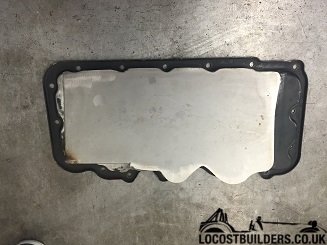 [/img]
[img]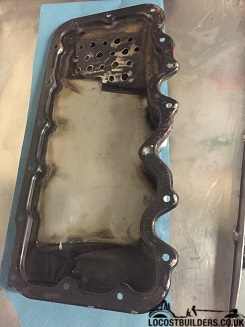 [/img]
welded in a small plate to drill and tap for a new drain plug. M14 x1.5
[img]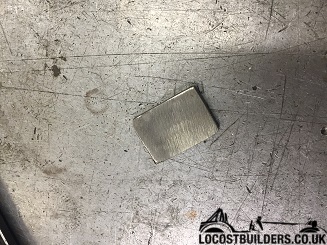 [/img]
[img] [/img]
shortened my pick up. cut 2 45 degree cuts, removed roughly 1" and welded together.
[img]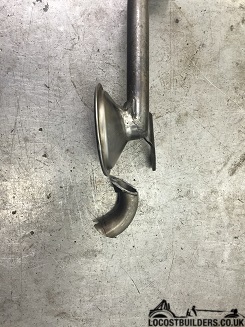 [/img]
Cut 3 groves 70% of the way through and bent up and welded to gain the last bit of height. should be 8-10mm clear of the bottom.
[img]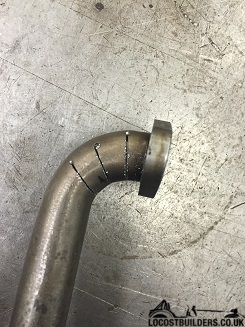 [/img]
[img]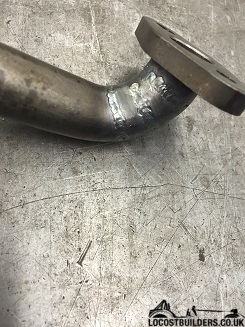 [/img]
Some how I managed to get it 97% straight and level :-)
[img]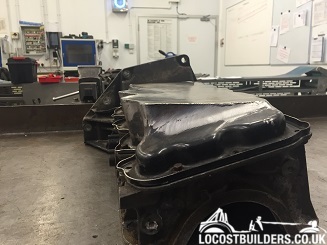 [/img]
furryeggs - 22/6/16 at 08:06 AM
Not much done this week but I did manage to pimp my wheels.
[img] [/img]
[img]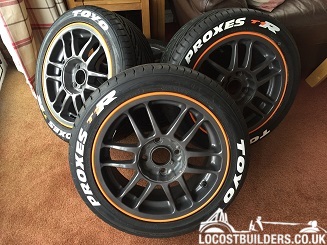 [/img]
furryeggs - 20/9/16 at 02:19 AM
Yet again I seem to be taking more things off than fitting. The engines and g/box have been out again to fit a new release bearing and clutch pin. The
radiator and water piping have been in and out getting brackets sorted.
I've finalised my steering by cutting tigers stupid tube arrangement and replaced it with a self centring bearing.
[img]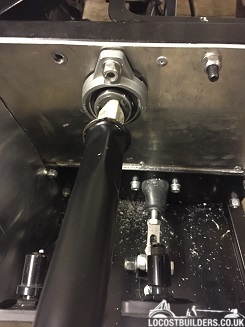 [/img]
Got rid of the st170 manifold for tigers stainless 4-1 exhaust.
[img]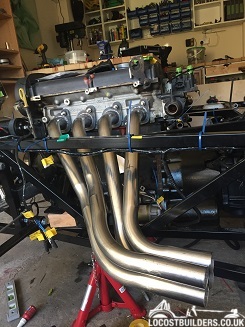 [/img]
Got my head lights rewired with new side lights.
[img]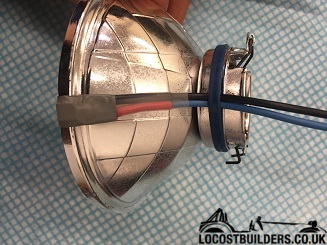 [/img]
[img]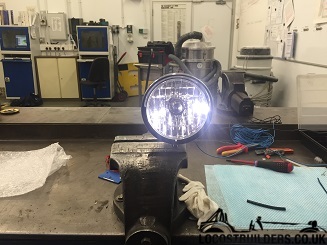 [/img]
Got my miss match bodywork collected and started cutting and prepping for paint.
[img] [/img]
[img]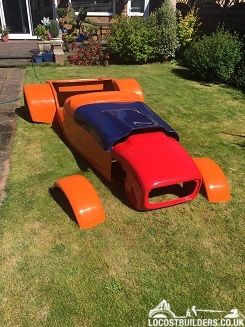 [/img]
[img]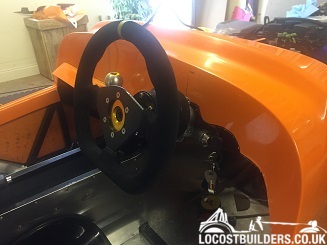 [/img]
[img]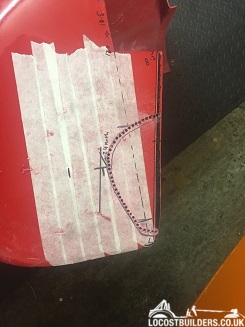 [/img]
Also tried to mock up a dash 2 to see if it'll fit behind the steering wheel. (it won't)
[img]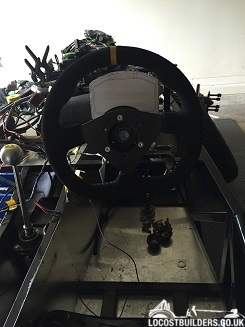 [/img]
mk7matt - 20/9/16 at 07:56 PM
Coming along nicely chap.
furryeggs - 22/9/16 at 11:49 PM
Not a lot to do at work so I managed to get around to shortening my gearstick on the lathe and re-threading the knob, roughly 4". It should now
clear the bottom of the dash without taking off my knuckles every gear change.
[img]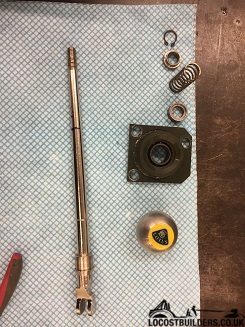 [/img]
[img]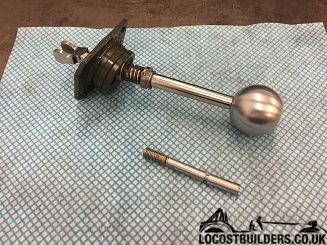 [/img]
I've also started to mock up the dash layout. I'm trying to keep as much in and around the area of the steering wheel as possible without
obstructing anything. I've managed to keep 70mm above the column so I have plenty of room for 52mm gauges. looking at most Avon dashes they are
usually cut almost right to the top of the dash area. My thin bucket seat has helped keep the steering position low.
[img]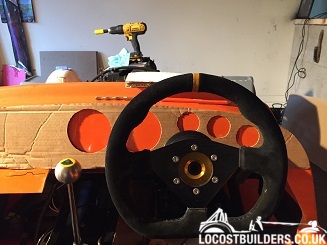 [/img]
[img]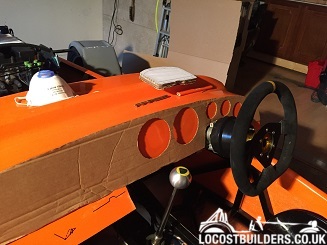 [/img]
[img]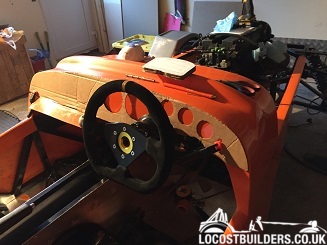 [/img]
Mash - 23/9/16 at 09:41 AM
you do some excellent work Mate, very impressed 
Looks like you'll end up with a layout very similar to how I've done mine on my Indy, which I'm very happy with
new dash test fit
Huttojb - 3/10/16 at 07:21 PM
furryeggs
Looking good. Can't wait to see the next install of pictures
furryeggs - 9/10/16 at 11:13 AM
Well the bodies been on and off a few times over the last week or for measuring and cutting, its now off for hopefully the last time before it goes
off to paint
Now its off I can get all the little jobs finished of ready for firing the bitch up for the first time in a few weeks???
Wirings first up, the tiger looms way to long and all in the wring place. I've started at the front cable tying it up before I start drilling
holes for clips, everything lines up pretty well where it should other than the middle section. From the starter motor spur to up under the dash is
roughly 1m long, it needs to be at least half that length, this has left a coil of loom that I either need to hide somewhere or strip the entire
engine bay part of the loom (Balls).
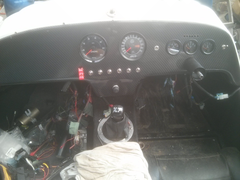
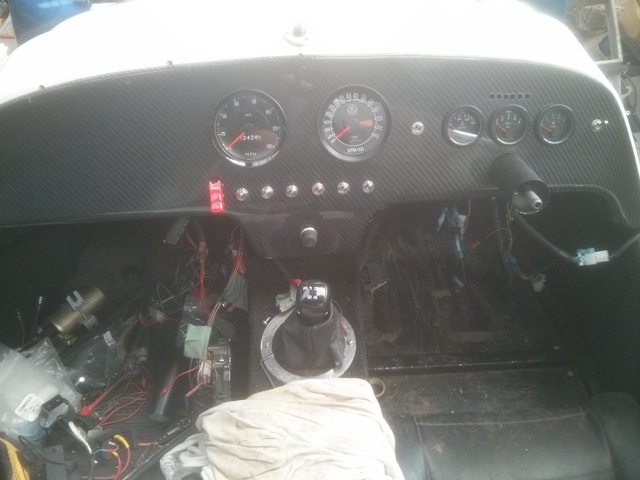
Gauges and lights turned up this week for the dash, so I've wired what I can ready to finalise positions of everything before I make the final
dash. way to much money spent.
[img]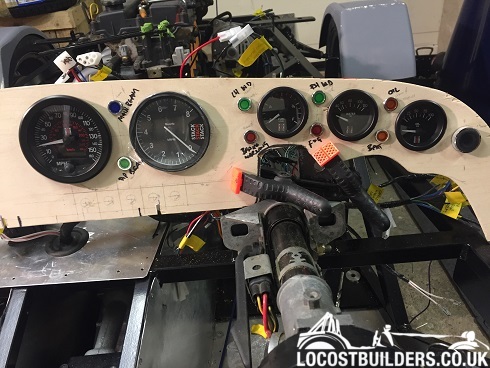 [/img]
[img]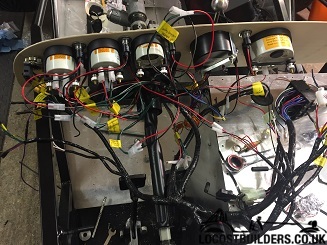 [/img]
[img]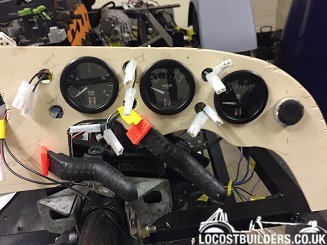 [/img]
I've positioned a few bits as well. fuel pressure gauge and a fuel tank vent.
[img]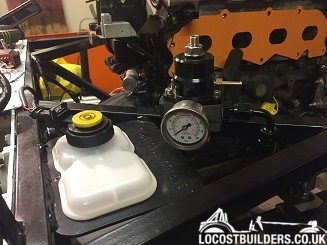 [/img]
 .
.
There's lots of 10-15m jobs i need to get done over the next few weeks. In-between a Job interview and a week in Norfolk I should have time to
get at least 1 of them done.
furryeggs - 27/10/16 at 07:43 PM
Managed to get a few more little jobs done before the body goes of to paint, and found 20 more still to do.
Finally got round to getting the tunnel top done.
[img]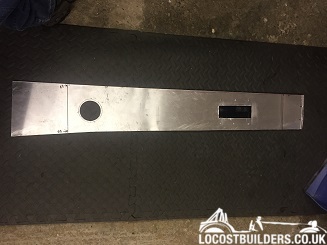 [/img]
There's going to be a 2nd carbon or GF top over this with edges that drop down over the side once I've finalised what I'm going to
finish the dash in.
[img]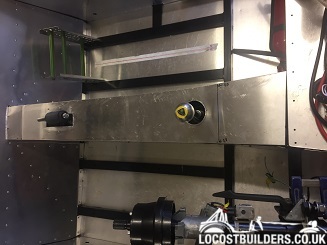 [/img]
Started to cover any small gaps in the panelling with some aluminium tape.
[img]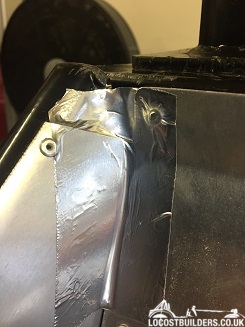 [/img]
Made a canvas gearstick gaiter, this will be waterproofed and a door brush wind thingy fitted underneath to help keep stuff coming through.
[img]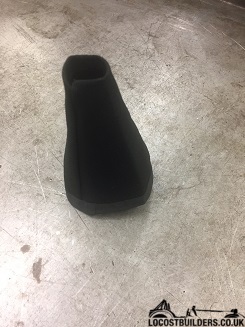 [/img]
I've made a template for the exhaust hole in the side bodywork. I've taken the measurements from the top suspension mount as the reference
point. I just need to pluck up the courage to cut it...
[img]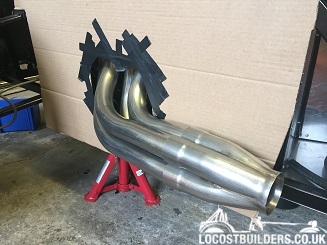 [/img]
This is what I hope it'll be like. I have cut the final template, I just haven't taken a picture with it in place.
[img]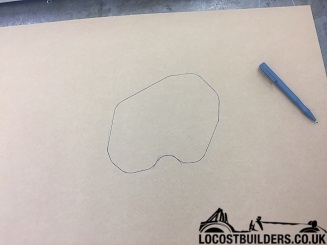 [/img]
I've also almost done with my steering wheel pad. there will be a separate thread for that as I have a question or 2.
I'm hopefully getting 3-4 small jobs done a week, mainly ones that I need the body on to sort/plan the layout. I don't want to be
drilling/cutting anything once the paints on the body. Need to finish the dash and tunnel, cut the exhaust hole, then the roll bar holes and fuel
filler.
Mike-B - 28/10/16 at 04:14 PM
Absolutley love this thread - watching with interest.
furryeggs - 30/10/16 at 09:31 PM
Got the bodywork back on, again, ready for cutting the exhaust hole. whoopy
Also got a little side tracked with the dash. I decided to get it knocked up in fibre glass s, I proceeded to cut a length of 34mm waste pipe and
stuck it onto the back of the wood template. Once I have glassed and sanded it I should have the 19mm radius required.
[img]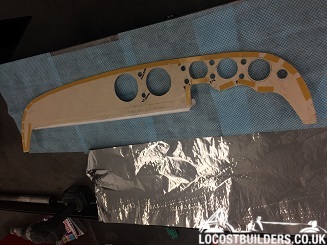 [/img]
[img]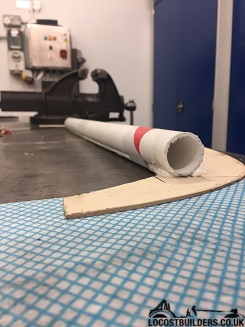 [/img]
it was the wrapped it in foil to stop the glass sticking.
[img]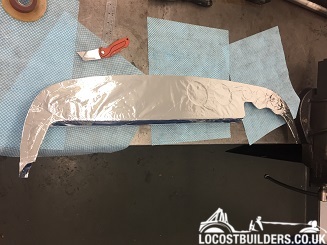 [/img]
A few layers of glass and resin, with a little extra at the radius start point for sanding smooth.
[img]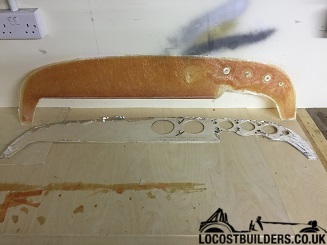 [/img]
All done and roughly trimmed then left to cure, .
[img]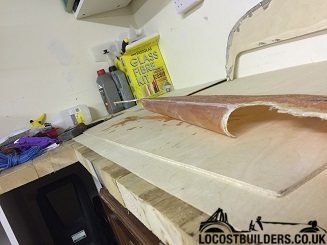 [/img]
furryeggs - 10/11/16 at 12:30 PM
I've got a bit more bodywork cut and templates made for various bits.
rear boot panel and roll bar hole template made, There's a little bit of tweaking to the final design but this is pretty much how it'll
be.
[img]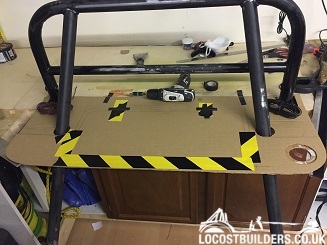 [/img]
[img]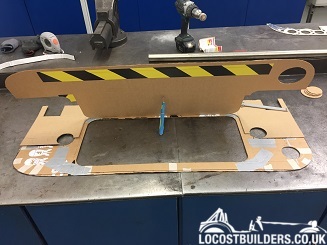 [/img]
I took a bit of courage to go at the bodywork with a drill and saw. I had to take a little bit more off than expected but I can patch /cover anything
unsightly with GF.
[img]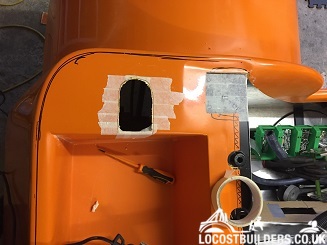 [/img]
[img]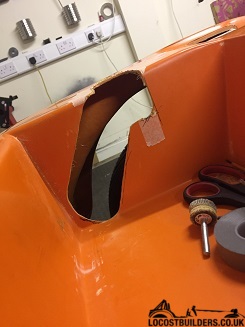 [/img]
A bit more GF for boxing around the roll bar stays, It just need trimming and a template making for the top to be made in GF.
[img]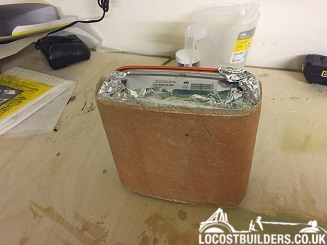 [/img]
[img]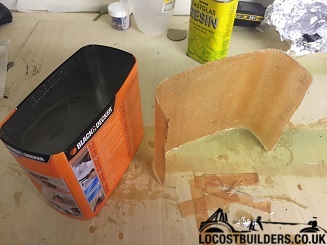 [/img]
[img]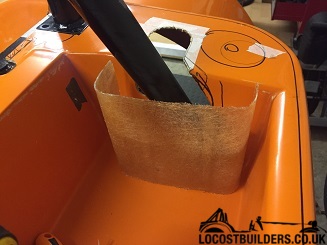 [/img]
Roll bar finally in place (temporally).
[img]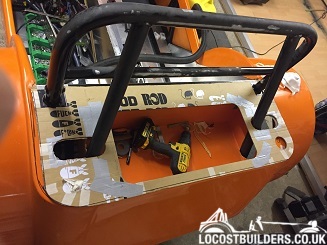 [/img]
[img]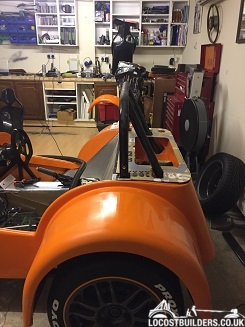 [/img]
And finally, my dash is almost done.
[img] [/img]
Lots more to do.
furryeggs - 28/11/16 at 10:19 AM
Well, getting ready for a new job next week has taken even more time away from the build, luckily I've been on nights so I've been able to
get a few bits done.
All my exhaust is 2" pipe, so you'd think ordering a 2" cat would offer straight up... Nope.
[img]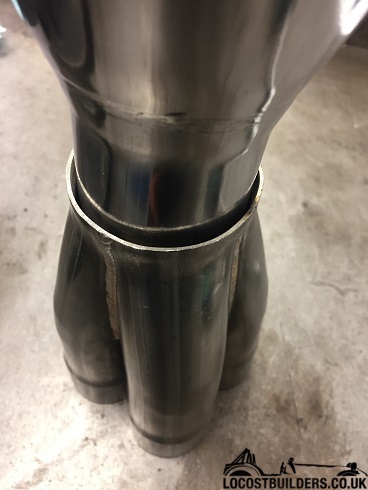 [/img]
A little bit of cutting and basic maths can sort out a reducer to make it work.
[img]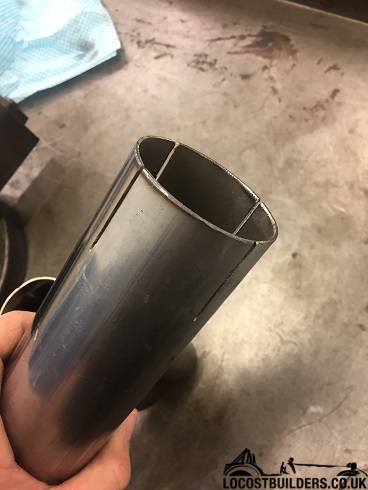 [/img]
Jubilee clip and a bit of TIG and it's a perfect fit, a measure and cut to length and welded to my collector
[img]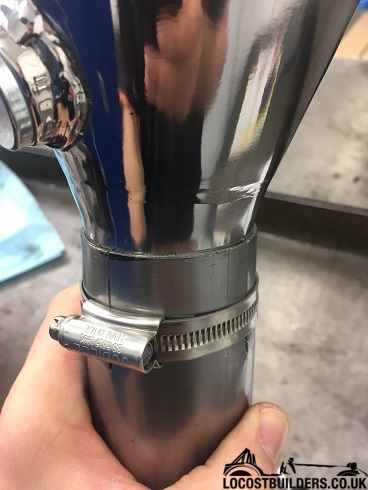 [/img]
[img]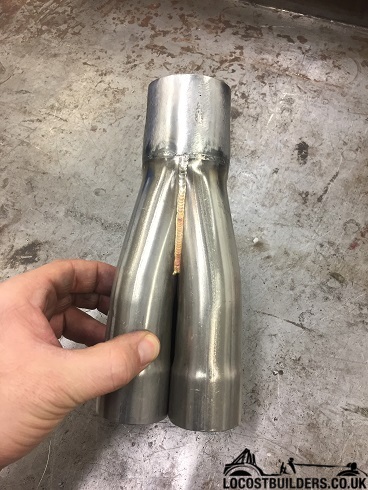 [/img]
Finished collector/CAT combo. Do I weld it or relief cut and clamp it?
[img]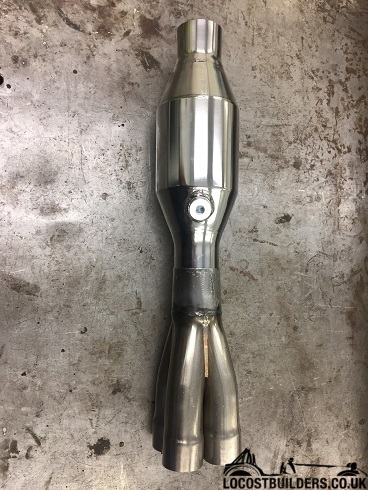 [/img]
Also got my air filter and TB's joined. Not to sure on the angle of my manifold? might have to pay DanST for one of his.
[img]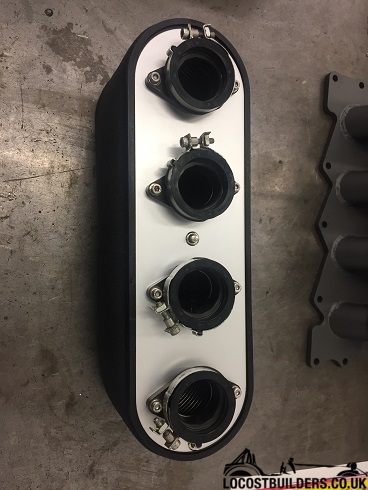 [/img]
[img]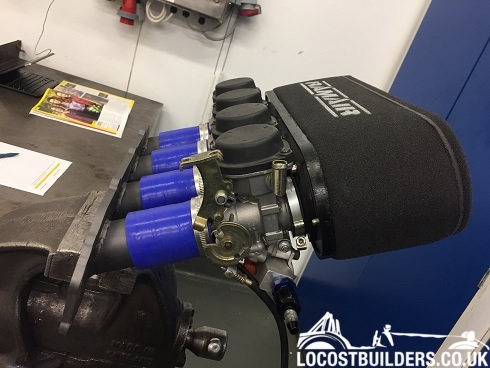 [/img]
[img]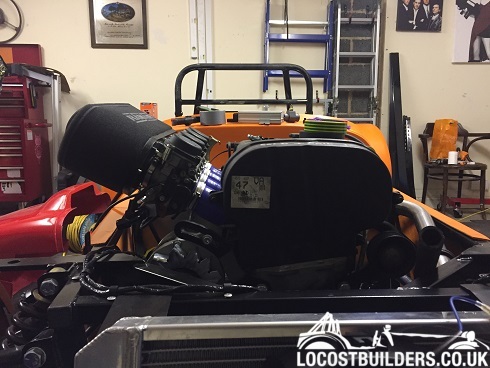 [/img]
furryeggs - 14/1/17 at 08:20 PM
Still not had a lot of time on the build but the little bit I have has been pretty useful. I seem to be past the take on-off-on-off stage and things
are starting to be fitted to stay.
I've had a bit of an induction side change. Gone are the R6 TB's and manifold and in come some bigger Hayabusa TB's and manifold.
I'm going to knock up an additional support bracket to help hold them in place as they are quite close to the alternator and I want to minimise
the chance of them touching.
ITB's with 90mm trumpets fitted. New hoses required as these are slightly to small in diameter, had to stretch them slightly over the runners.
[img]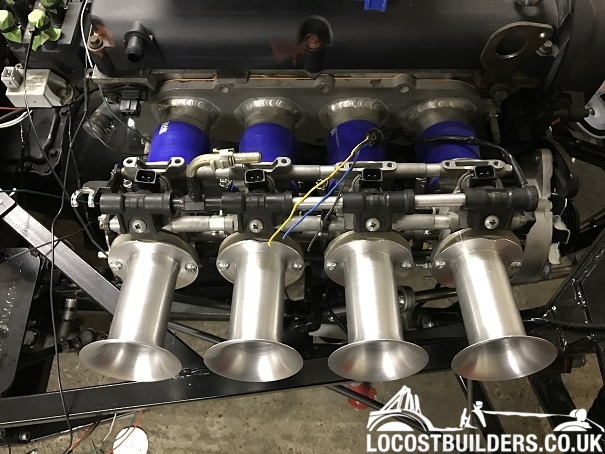 [/img]
[img]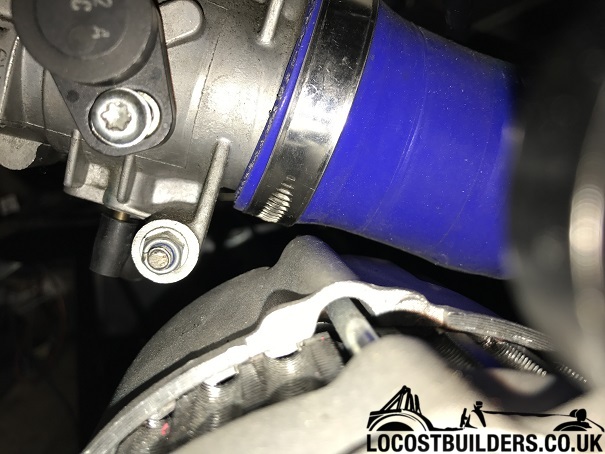 [/img]
[img]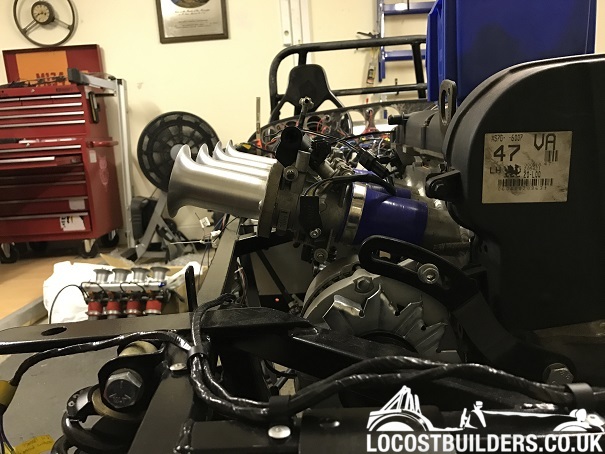 [/img]
I've modified my radiator and cooling layout slightly but that's all now fitted in and fixed in place, just the bleed hose to go in once the
header tanks fitted when the body goes on.
The 4 brackets in place with rubber pads on the supports to minimise rubbing etc.
[img]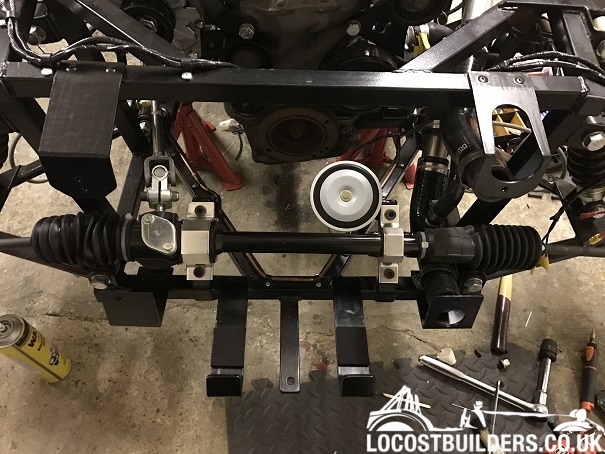 [/img]
Side view of the radiator in place.
[img]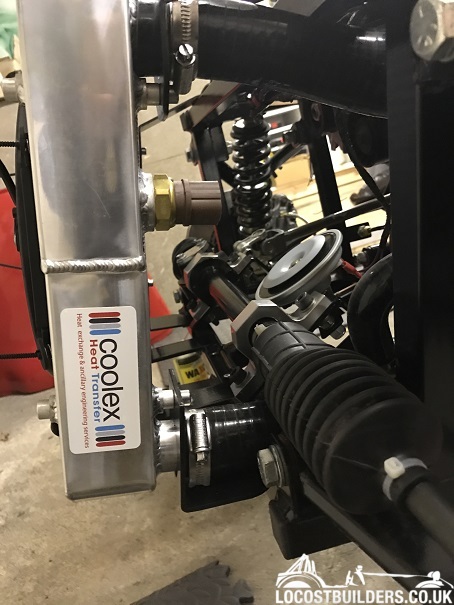 [/img]
Top hose bracket
[img]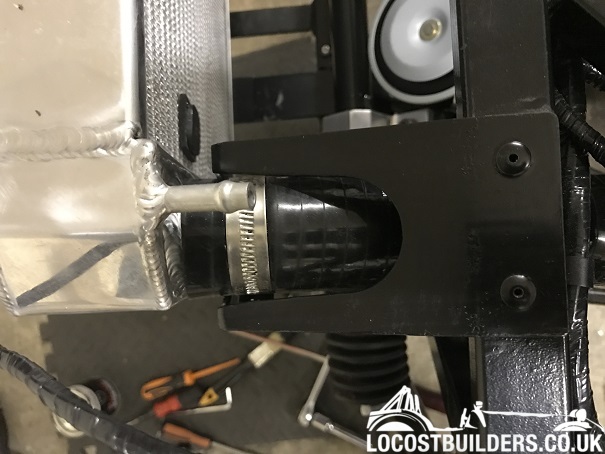 [/img]
Top view.
[img]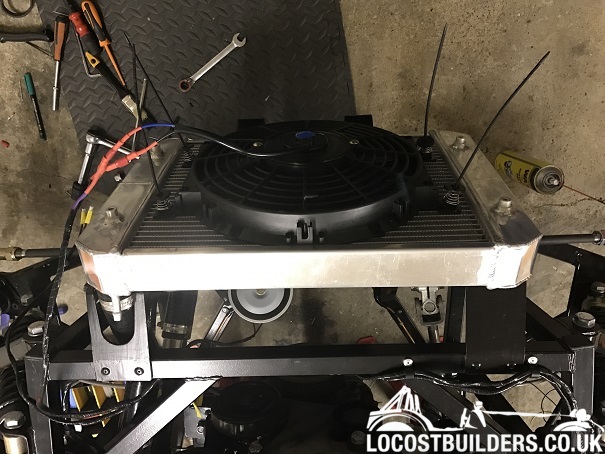 [/img]
Finished the main bits of the exhaust, all in 2" but not 2", so a few couplings/reducers had to be made to get it all to fit.
completed CAT couplings, just clamps required. there is a bit of a gap from the main pipes into the collector that I'm not 100% how to sort.
Paste and some exhaust springs I'm thinking.
[img]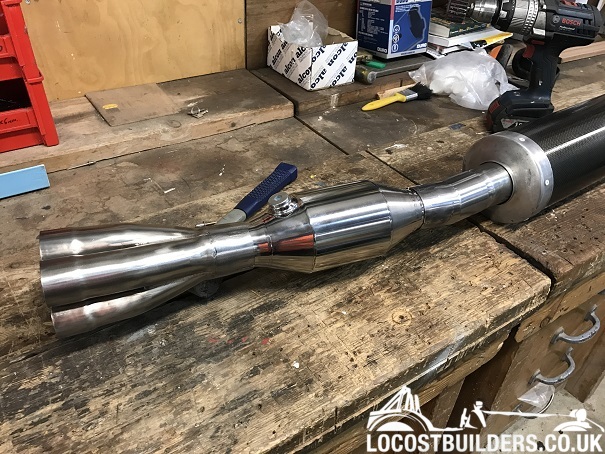 [/img]
A little tidy and paint on the end caps then rolled end piece fitted and It's done.
[img]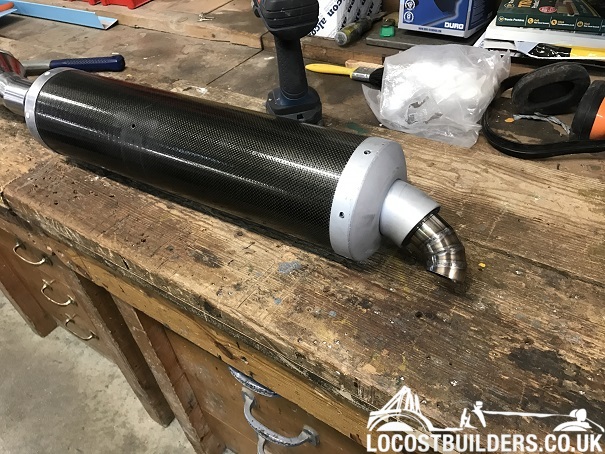 [/img]
Complete exhaust from can to collector, Happy with the angle to match the body work (all done by eye).
[img]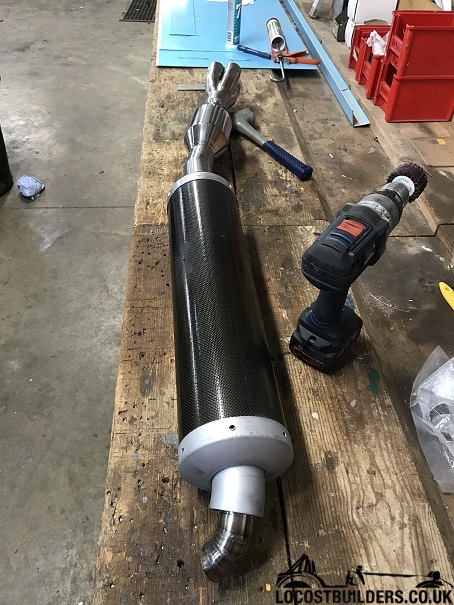 [/img]
Mocked up and test fit in place, just the pipes to collector to work out.
[img]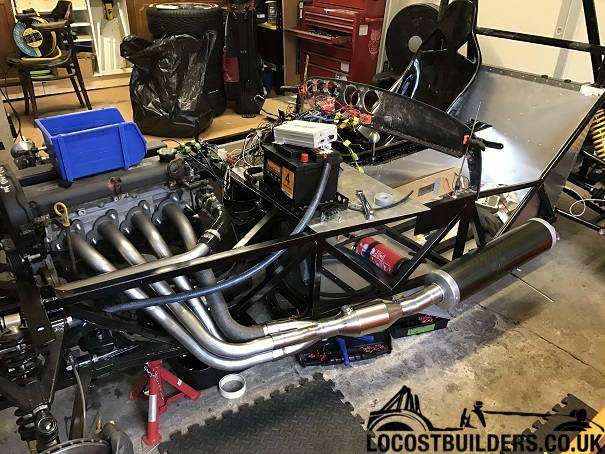 [/img]
Getting the wiring finalised, blanked off a lot of un-needed wiring, shortened a lot of it and added a few bits. Just need to tidy it up and work out
how best to fix it all in place.
[img]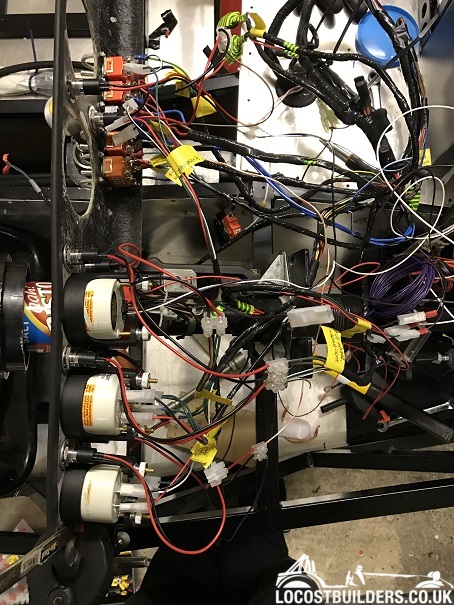 [/img]
furryeggs - 27/2/17 at 09:13 PM
Managed a little bit more time in the garage over the last week or so, lots of little finishing off jobs but still finding I have to take bits off to
fit other bits.
Accelerator pedal and cable finally fitted and working...
[img]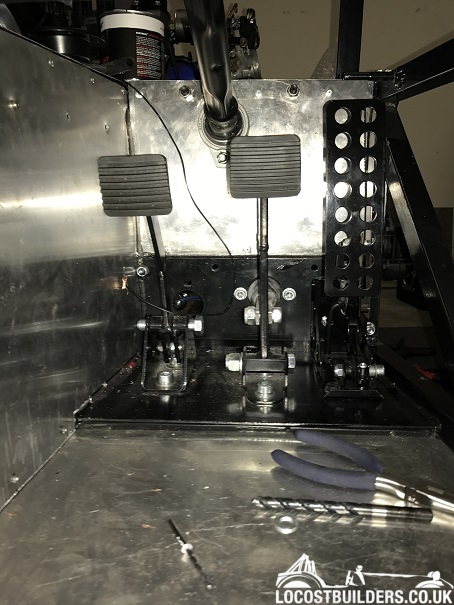 [/img]
New rocker cover gasket fitted, and rocker cover painted and re fitted...
[img]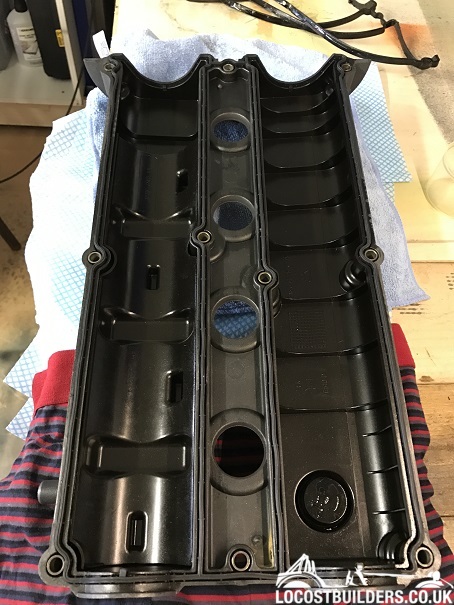 [/img]
[img]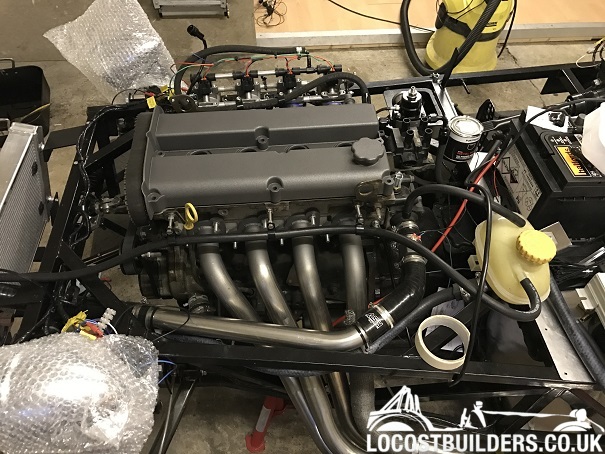 [/img]
Old spark plugs removed and replaced with some NGK platinum's...
[img]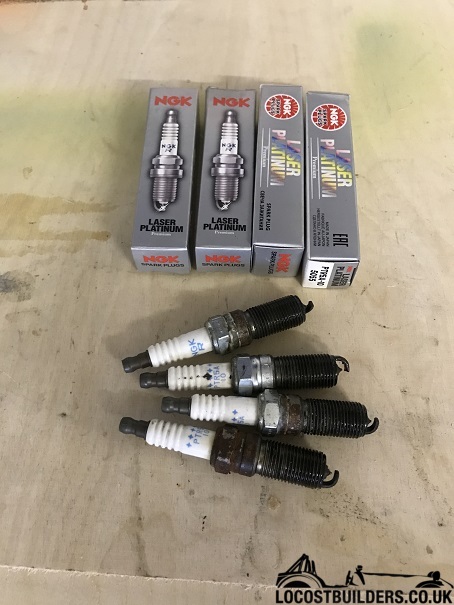 [/img]
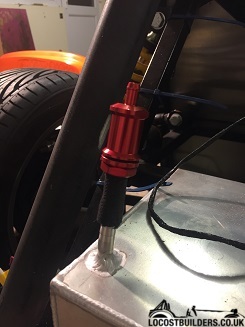
Fuel pressure regulator repositioned and plumbed in...
[img]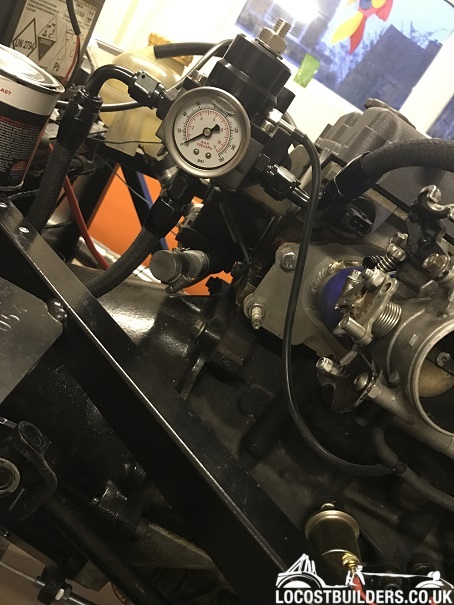 [/img]
Front wings tattooed, It looks all black from a distance but up close you can see it,(not sure it'll be staying). This is one of the jobs I need
to do that requires taking lots off to be fitted. As the wings are already mounted to the stays I need to take my uprights off splitting the top ball
joint and brake lines to get them on, plus I need to machine a few spacers to fill the 6-7mm gap between the stay and back of the hub. (the stays are
flat and the hubs aren't).
[img]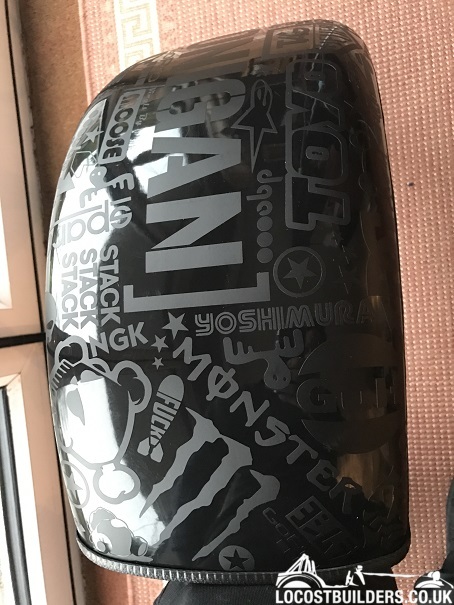 [/img]
[img]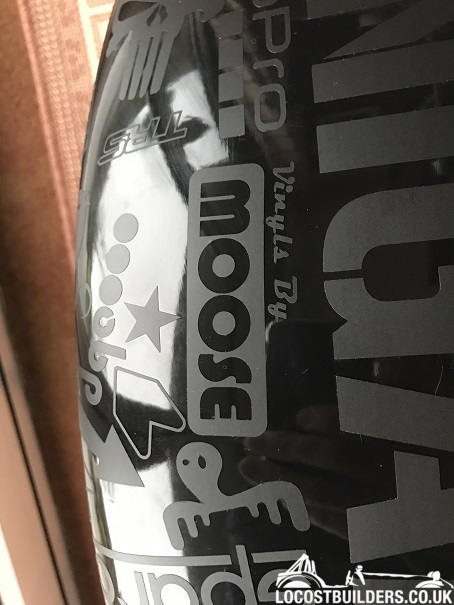 [/img]
[img]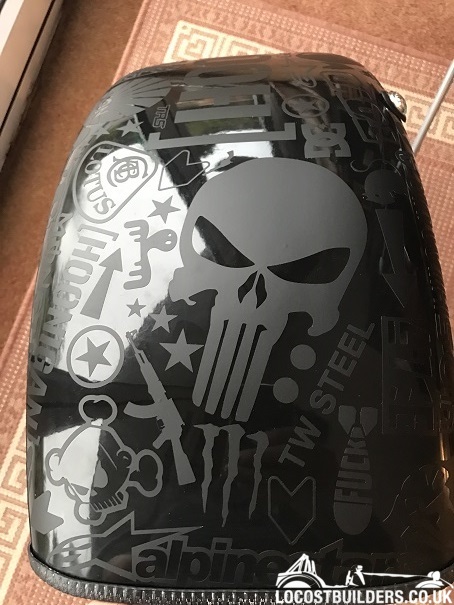 [/img]
My wirings all complete, checked, tested and ready for firing up as soon as the water plumbing's finished,just the expansion tank to go (Ł5 from
a scrap corsa).
I've had it cranked over ok with no obvious knocks and bangs. (ecu and fuel pump disconnected at the time).
The oils in after resealing the slight leak in the sump, It's filled to the top notch on the dipstick roughly 3.5 litres, Hopefully it's
enough???
furryeggs - 9/3/17 at 09:38 PM
Bit more done this week.
First thing and what I have been most worried about is the engine and ECU wiring. I started another thread on this see "Emerald ECU question
K3" thread bellow. Long and short of it running, after a quick wiring check and re-wire it fired first time and made me poop myself as I
wasn't expecting it...
http://www.locostbuilders.co.uk/viewthread.php?tid=207948
After putting it off for a few weeks I've managed to get on the lathe at work and machine some bushes. Some Alloy ones for my wing stays to space
them off the hub. And some stainless ones for my rear suspension...
[img]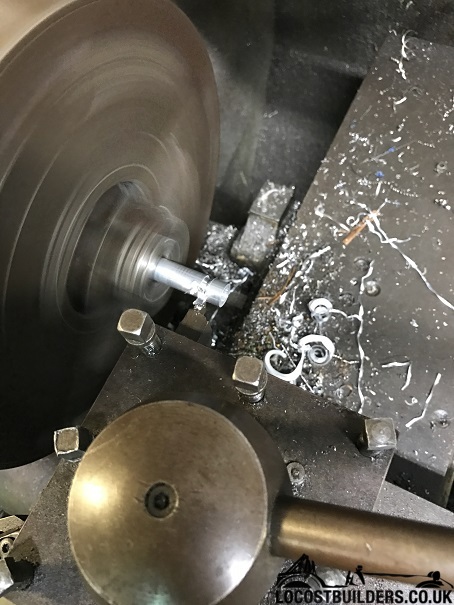 [/img]
[img]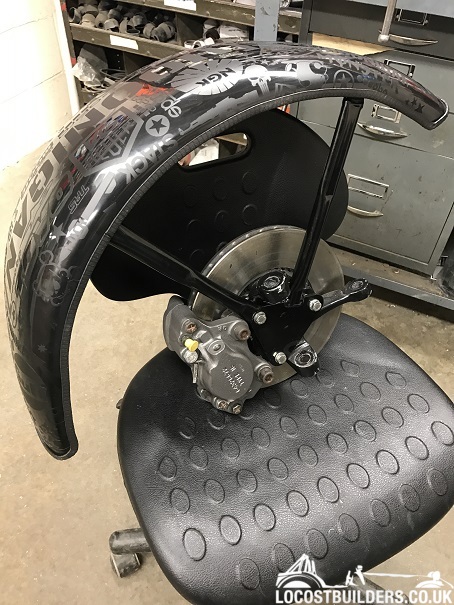 [/img]
[img]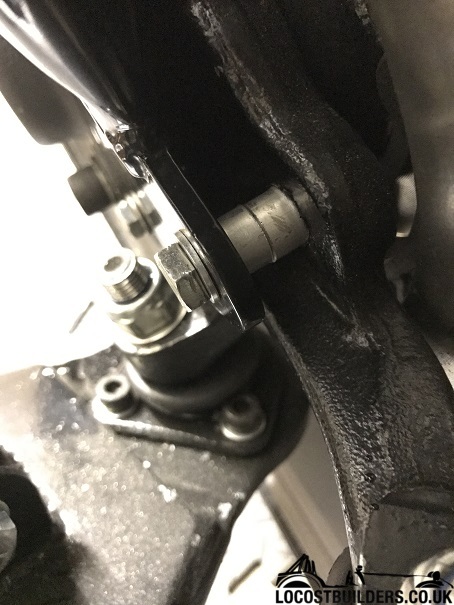 [/img]
I'm going to have to either fit some wheel spacers (10mm ish) or change my alloys for a different offset (35 at the minute) as I seem to have a
rubbing issue... Tiger stays and tiger recommended offset so somethings not right? I've already got 40mm wider wishbones either side so adding
another 10mm is gonna make it wide I would add spacers to the stays but I can't go any further with them as I won't be able to get to the
bottom ball joint nut.
[img]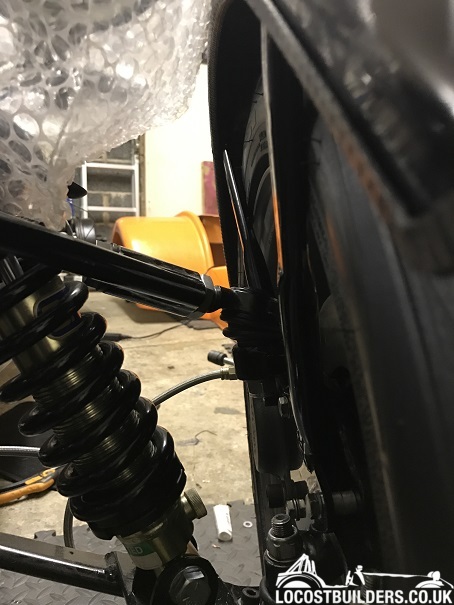 [/img]
Rear suspension bushes in place.
[img] [/img]
Got my passenger seat brackets fitted ready for mounting...
[img]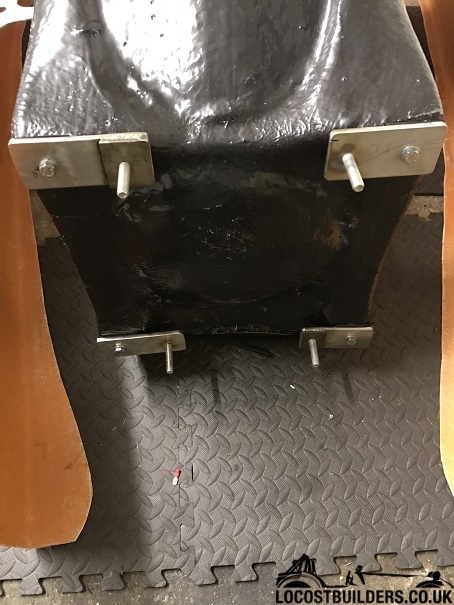 [/img]
I've also made a few Fibre glass sheets for various bits for the tunnel, under dash and drivers foot well access.
[img]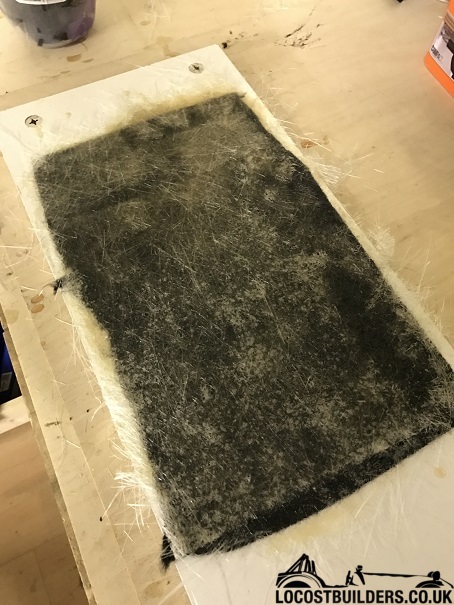 [/img]
[img]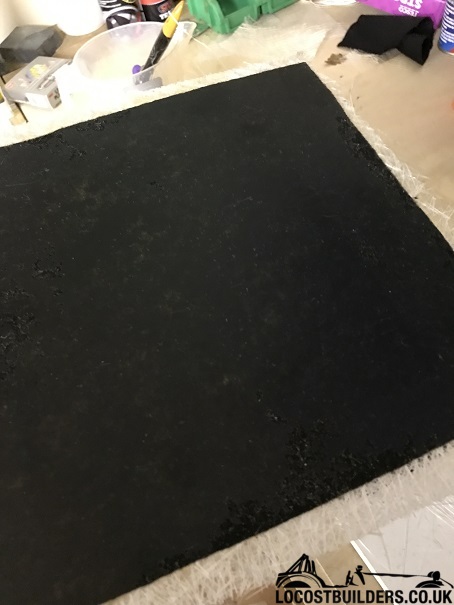 [/img]
neilp1 - 10/3/17 at 11:52 AM
I used to run with ET24 offset wheels and when I went to the 13s ET35 I used spacers on the front and I also have longer wishbones up front.
Can you bend the wing stays by the welds to give you the clearance and maybe bend the tops at the flat bar so the sit parallel with the wheels?
furryeggs - 10/3/17 at 02:06 PM
I think once it's finished I will change the wheels, but for now Ł20 on some 10mm spacers for the front will have to do.
neilp1 - 10/3/17 at 02:35 PM
Remember it's never finished!!
furryeggs - 3/4/17 at 07:50 PM
Bit of an update on the build. now I have 95% of everything I need it's now on the final stages. I reckon I'm about 80% done, but
there's a lot of small finishing off jobs to be done some of which will have to wait for the body to be painted, the list is slowly getting
smaller though.
I've glassed in the end plates for the boot area from when I cut it down to fit the roll bar. just a little bit of trimming and I can get the
cover made up.
[img]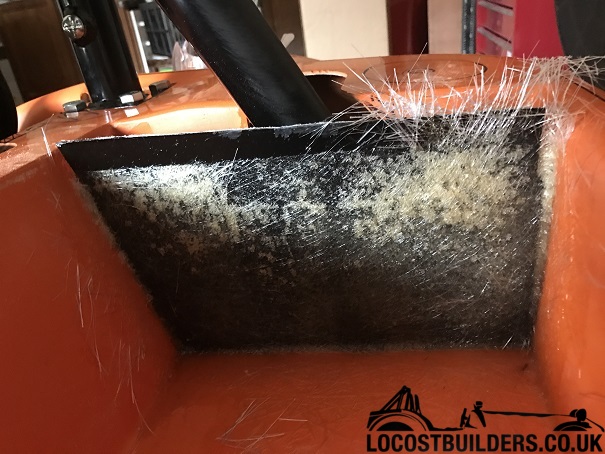 [/img]
[img]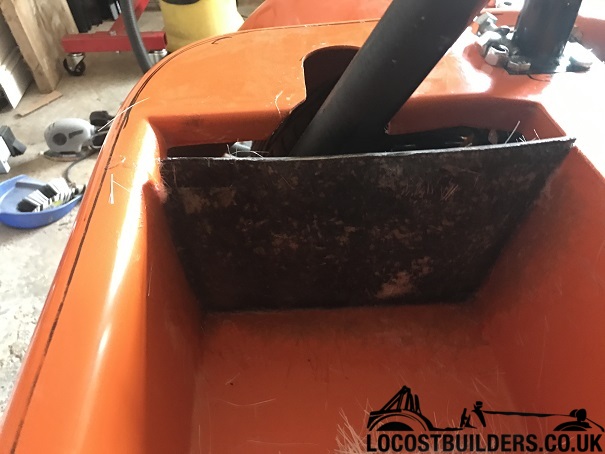 [/img]
I've also made the bottom of the dash using the wifes loaf tin as a mould, Again just a bit of trimming to fit and flocking.
[img]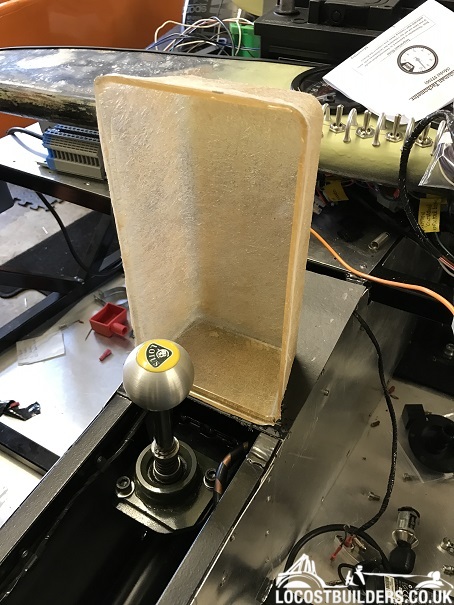 [/img]
The dash tub has been cut to get the dash fitted in place.
[img]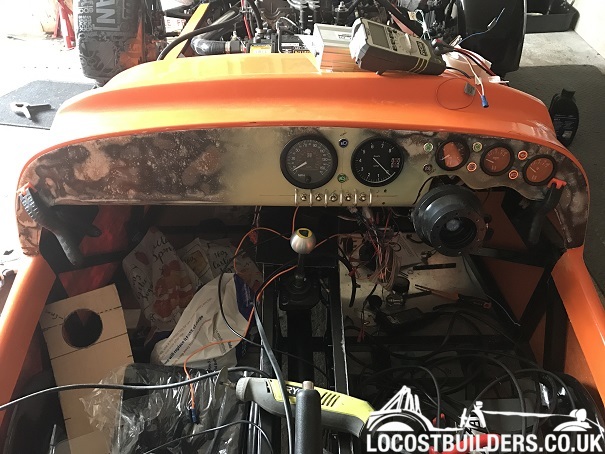 [/img]
Once done I've removed it and covered it, then refitted the dials and lights. It's a hard dash so 19mm bottom edge and a thin neoprene
trim.
[img]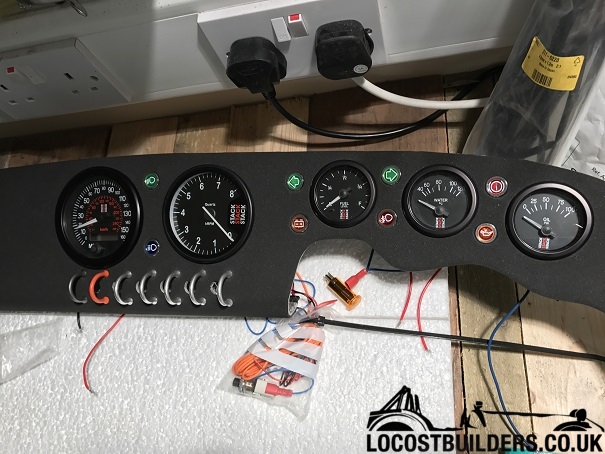 [/img]
[img]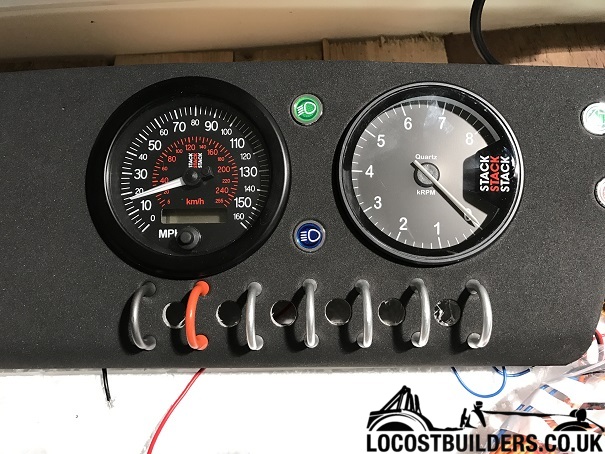 [/img]
I decided to spend an hour or so getting the wheels and suspension set in roughly the right place. I've had to fit wheel spacers on the front to
fill the arches and stop rubbing on the stays and the rears still need to come out about 20mm. But once it's closer to being finished I'll
pop it to a mates for laser alignment and corner weights.
[img]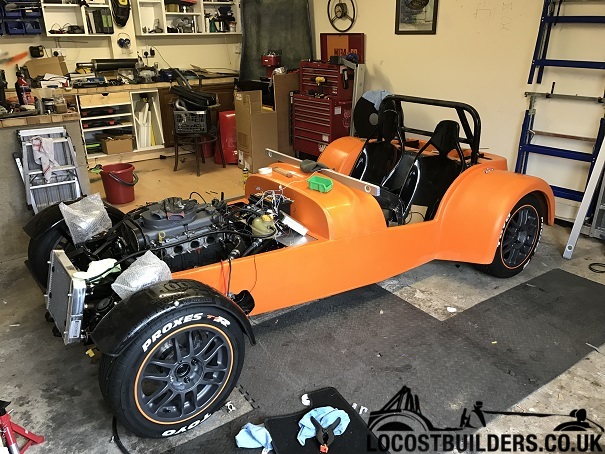 [/img]
And just as I thought there was no more wiring I went and got this.
[img]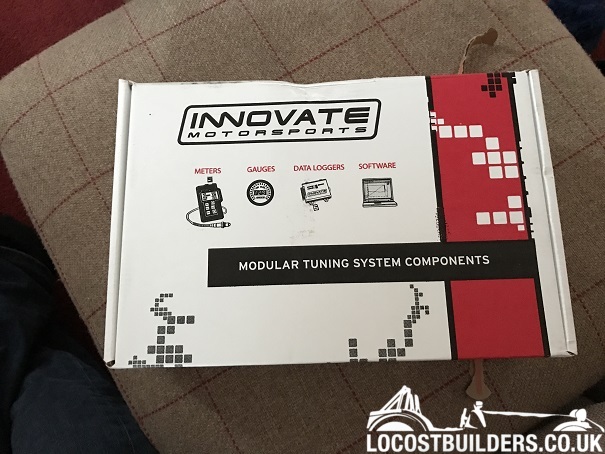 [/img]
DJT - 4/4/17 at 12:44 PM
Looking good. And a nice set of gauges.
furryeggs - 4/4/17 at 03:13 PM
Bloomin expensive gauges. They're the single most expensive thing I've got on the car. I managed to get my engine, g/box, TB's, diff
and wheels for less (just).
furryeggs - 9/4/17 at 08:32 PM
Well I've been on nights this week so there's not been a huge amount done.
I made a tunnel mould from a previous template out of 18mm ply, rounded off the edges to give me an IVA compliant radius. This was wrapped in foil and
glassed up using 1 layer of fleece and 2 glass fibre layers.
[img]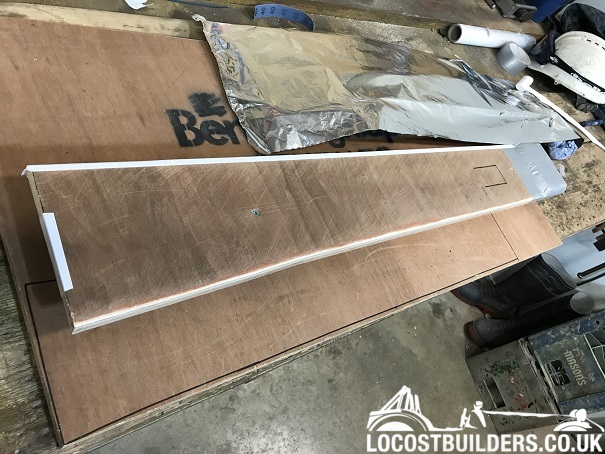 [/img]
This will hopefully give me a 18mm ish overlap along the edge covering panel edges and rivets... If it fits.
[img]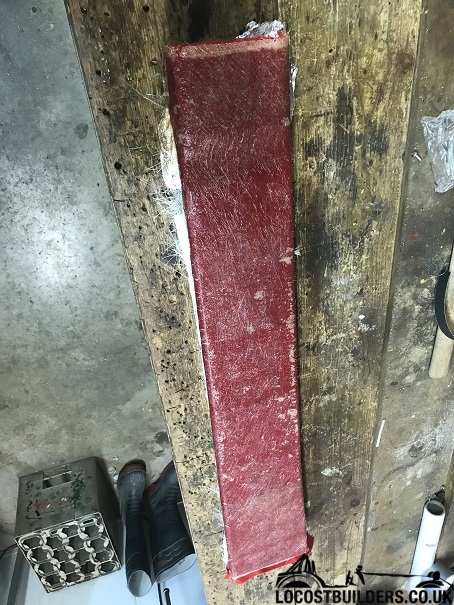 [/img]
It fits... I've put a quick skim of P38 filler over the glass to smooth of any imperfections. Once sanded It's getting covered to match the
dash so I'm not worried about having it perfectly smooth. just need to finish off the hole around the gear nob.
It is a tight fit as intended, as it needs to be removable does it have to be fixed (bolted) or can I panel clip it/Velcro in place
[img] [/img]
I've also refitted the exhaust so I can make up a hanger bracket and sort out the lambda cable hole. I'm going to have to cut and re-solder
the wiring for this as the plug on the LC2 is massive.
[img]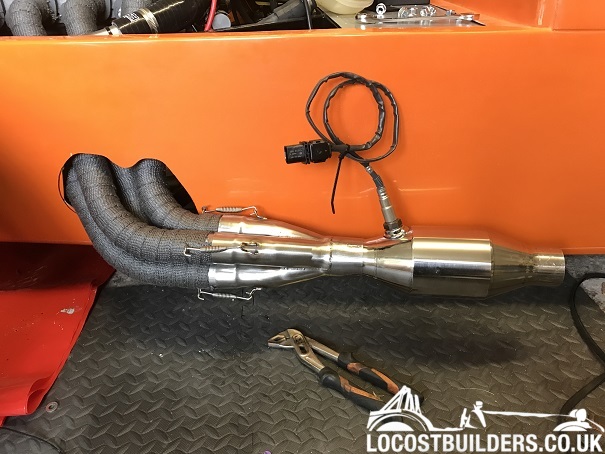 [/img]
R1 carbon wrapped can looking good. once finished the rest will be wrapped in exhaust wrap to match downpipes.
[img]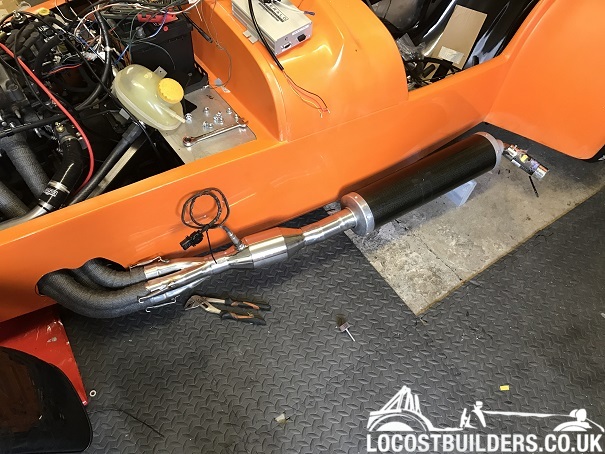 [/img]
I've made up a link pipe by machining an edge into some stainless tube to fit into the end of the R1 can, lobster backed and TIG welded a bend
(no access to a bender)... and fitted a Ł6 chrome tip, this needs cutting a little to fit properly.
[img]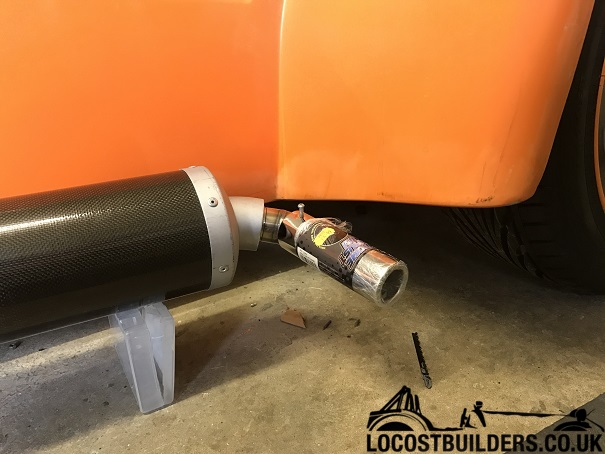 [/img]
I have almost 2 hole days this week on the car so I'm hoping to get the wiring under the dash sorted and fixed in place, the tunnel top finished
and covered and any additional body trimming finished off. I can then get it off to paint whilst I worry about getting the garage door in.
furryeggs - 12/4/17 at 07:42 PM
I decided to spend the day getting the bodywork finished off or as close as I can get. Firstly none of the pieces are square, level, the same width or
height so it's mainly been done by eye. There was a bit of measuring to start off with but when you've got 10-20mm difference in
measurements it's a little tricky.
The bonnet and nose cone offered up, gaps everywhere, and a lot of fettling required...
[img]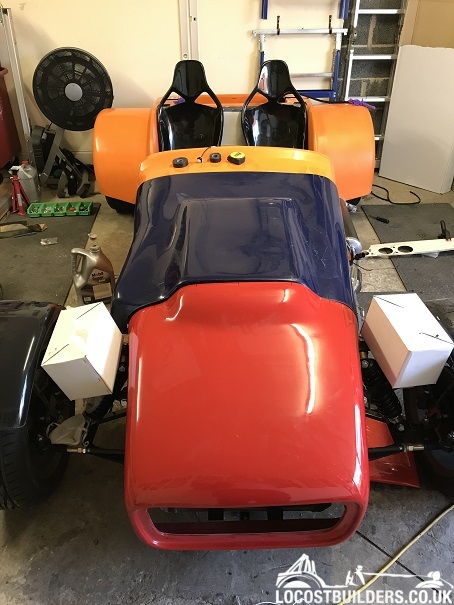 [/img]
With the bonnet trimmed there is a noticeable gap on both sides, once the catches are fitted these should pull in.
[img]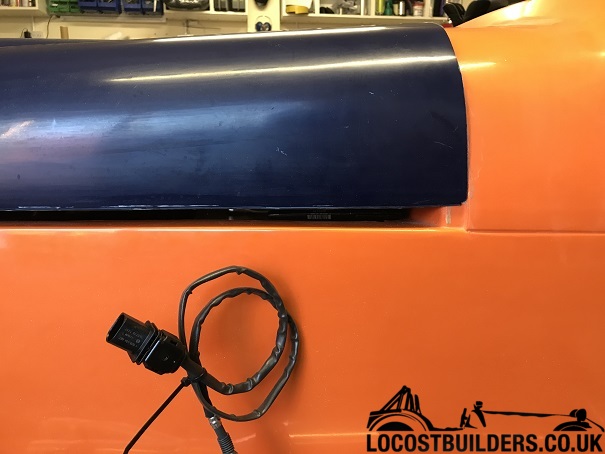 [/img]
[img]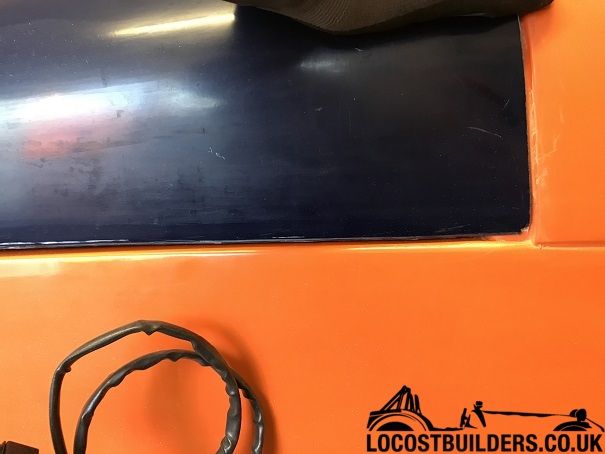 [/img]
The passenger side pulls in ok but the drivers side there's still a gap. A little more fettling required.
[img]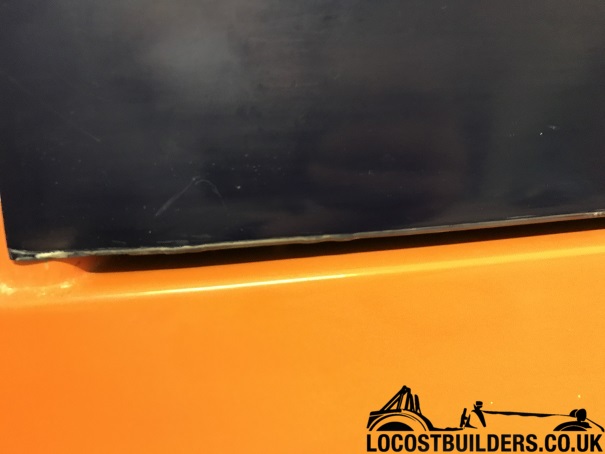 [/img]
A lot better fit now it's trimmed, just waiting for catch's and a little bit more trimming around the filter.
[img]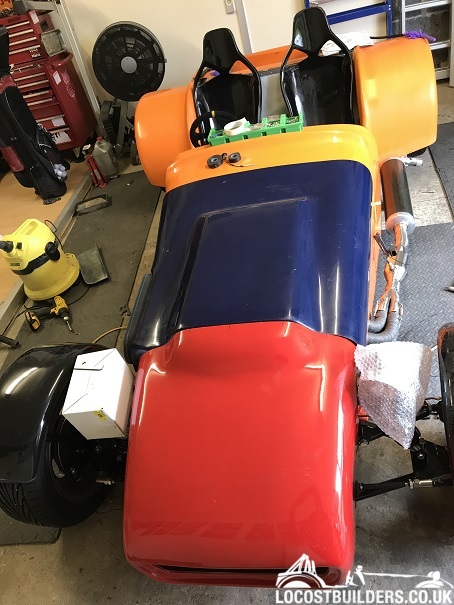 [/img]
The last bit of body work is getting the boot sorted, I fished out my cardboard templates from a few months ago and started transferring over to some
ply. This is going to be a 2 layer boot lid, one covering the boot box area and roll hoop cut outs, with an edge that the boot lid will seal against.
The second layer will neatly cover all the roll cage holes and leave the reses for the boot lid to sit in with 2 locks to secure it.
The boot lid marked up ready for cutting.
[img]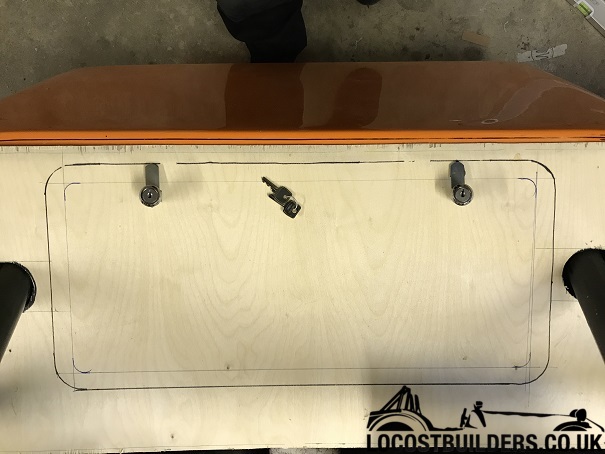 [/img]
The tether for the fuel cap was drilled an fitted, I drilled the housing bellow the level of where the clamp will hold the pipe in place so there
won't be any chance of leaking. This will also let the tether to be internal to the cap.
[img]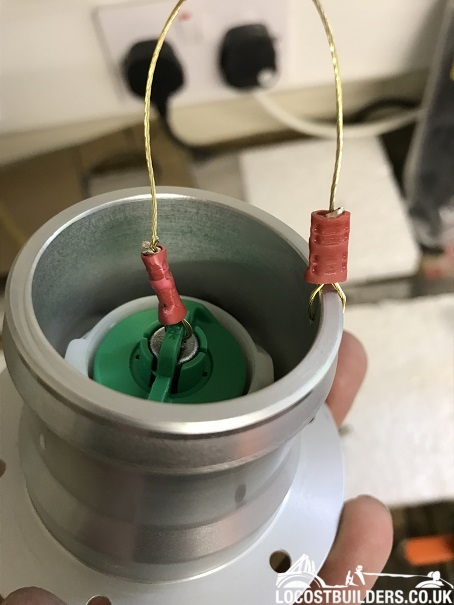 [/img]
[img]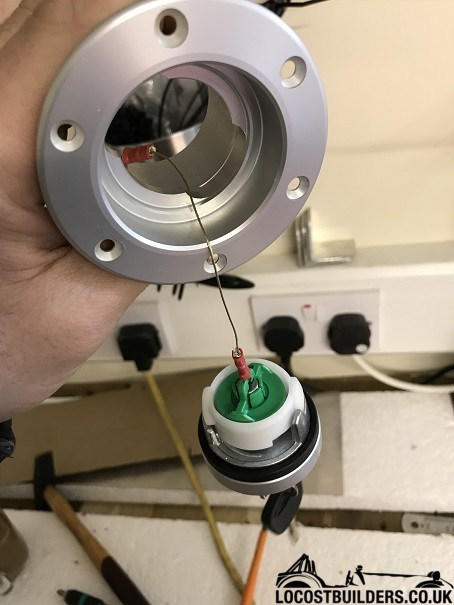 [/img]
furryeggs - 16/4/17 at 01:22 PM
I've found a few hours to get my boot lid finalised and done, well almost done at least. There will be a little fine tuning once it's back
on the car, but for now I need to decide what to cover it in.
1st piece, this will sit on the body tub whilst the roll bar is fitted.
[img]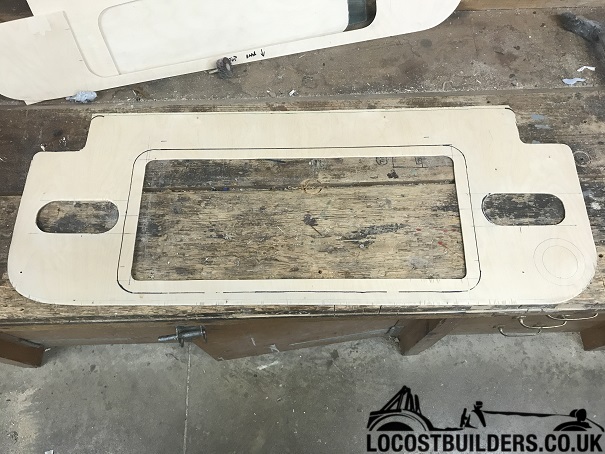 [/img]
2nd piece, this covers most of the roll bar cut outs and will be trimmed around the hoop stays. It also forms part of the recess that the boot lid
will sit in.
[img]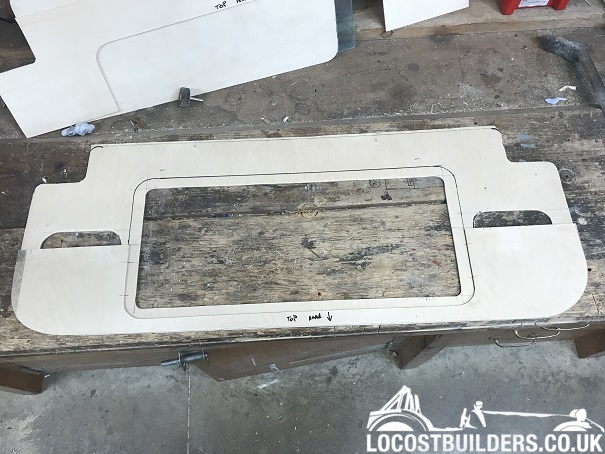 [/img]
3rd piece, this covers the remainder of the cut out and will also be trimmed around the stays. Completing the remainder of the boot recess.
[img]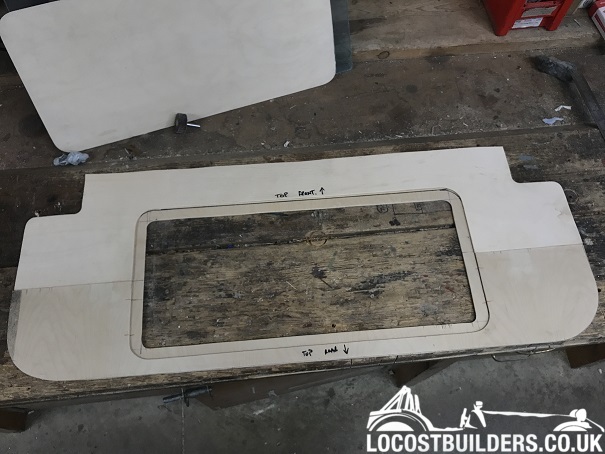 [/img]
The final piece, the boot lid. trimmed and sanded neatly to finish. Now what to cover it with??? suggestions welcomed
[img]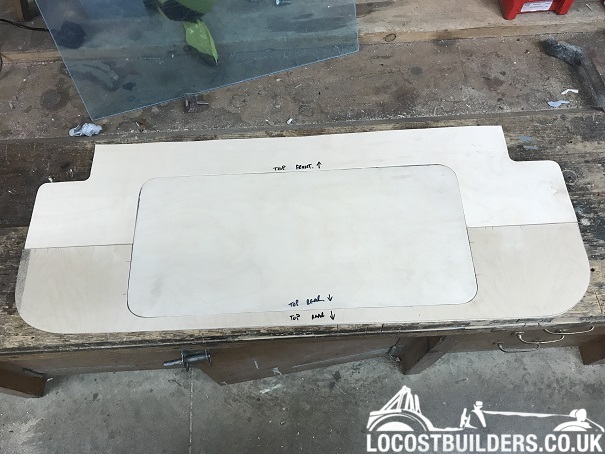 [/img]
melly-g - 16/4/17 at 03:32 PM
I see you dropped the height of your steering wheel, was that only possible by using the self centering bearing? That tube tiger put in is a pain in
the butt! My wheel sits as you say very high on the dash. Is it harder to get in out with the wheel that low?
furryeggs - 16/4/17 at 04:14 PM
It's hieght adjustable. My seats are very low, fixed direct to the floor and no padding on them so the Tiger steering wheel position was pretty
much in my face. I can raise the hieght to get in and out and then drop it to the driving position (plus its quick release once the IVA's done).
It's more central compared to the tiger position as well.
Plus I didn't want all my gauges on the passenger side so I had to get enough room for 52mm gauges, which I couldn't get with the tiger set
up.
melly-g - 16/4/17 at 04:50 PM
I forgot about height adjustable columns.
I would like to drop my shell but it would be a lot of work now.
furryeggs - 6/5/17 at 09:05 PM
I've got lots more little bits done over the last week. Mainly bodywork and anything that needs sorting whilst the bodies on...
I decided to make a small patch panel for the dash, I wasn't 100% sure on the bottom radius requirements on that side.
[img]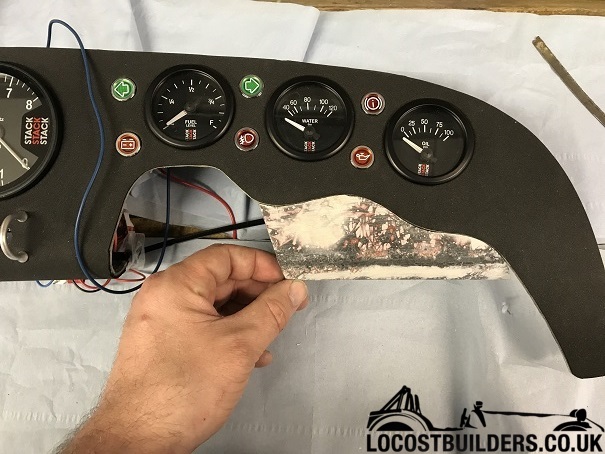 [/img]
Mocked up the dash decals and cut them ready for fitting.
[img]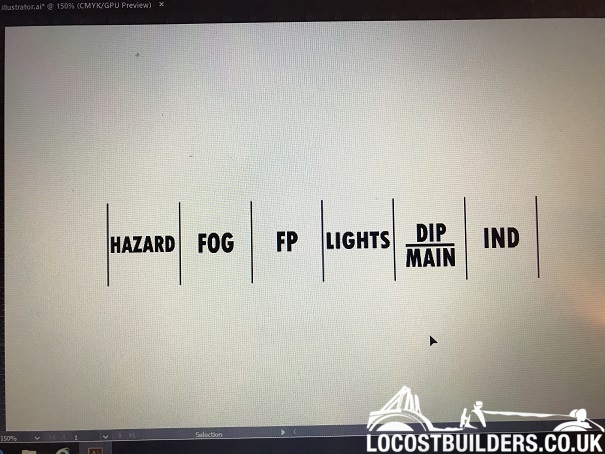 [/img]
[img]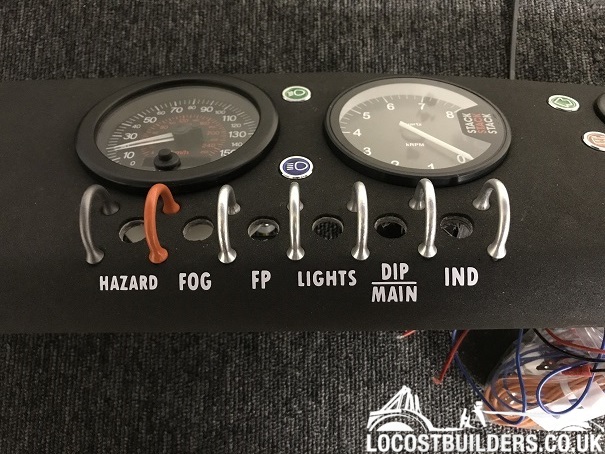 [/img]
Tunnel top covered and test fitted along with the dash pieces.
[img]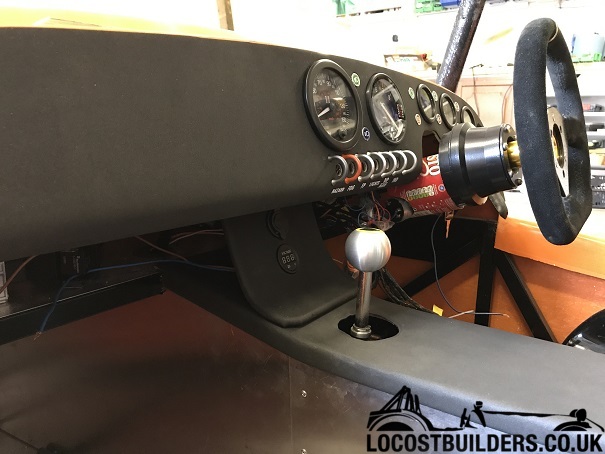 [/img]
I had to modify my exhaust coupling slightly to clear the front hoop of my cage.
[img]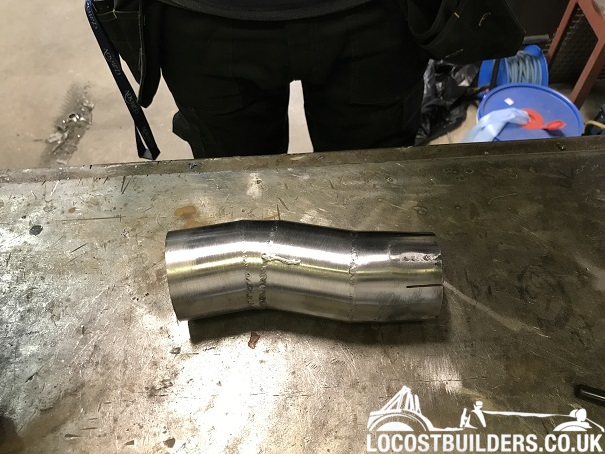 [/img]
[img]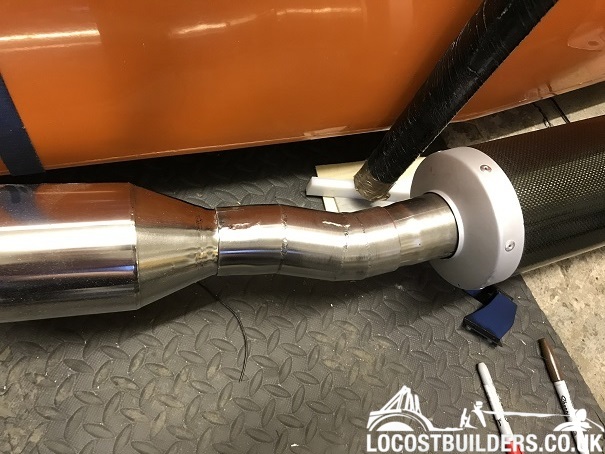 [/img]
After a lot of measuring and worrying my front hoop turned up from Tubebender and to my utter surprise fits a treat, I had the bottom legs made
slightly long to allow me plenty of adjustment when it comes to fitting. They'll be cut to length once tacked up and in place. Now for measuring
up for the top bars and side bars.
[img]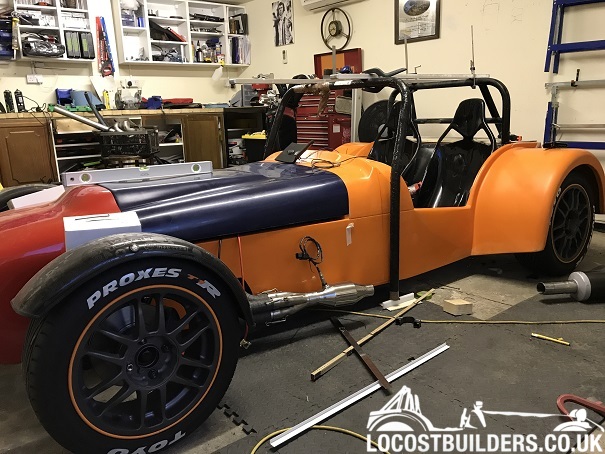 [/img]
[img] [/img]
[img]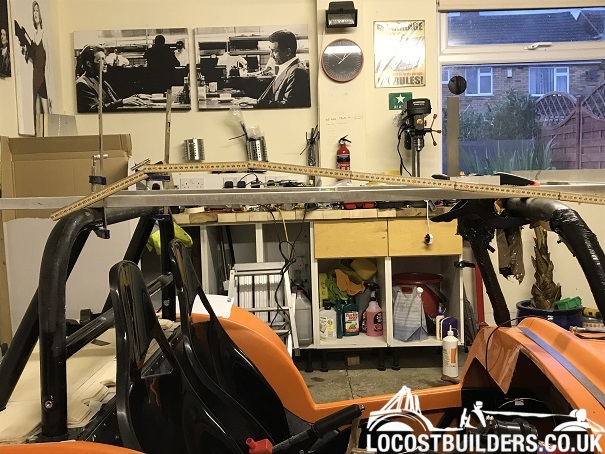 [/img]
Made the end caps for the boot and covered them ready for fitting. As you can see by the size difference, the tiger boot isn't square, at all.
[img]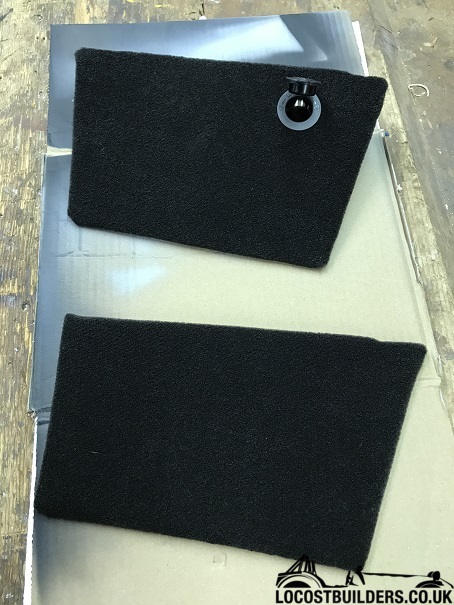 [/img]
I've almost finished the bonnet fitting as well, pins and catches sorted out and the vent moulded. Just the vent hole to cut and bonding it in
place.
[img]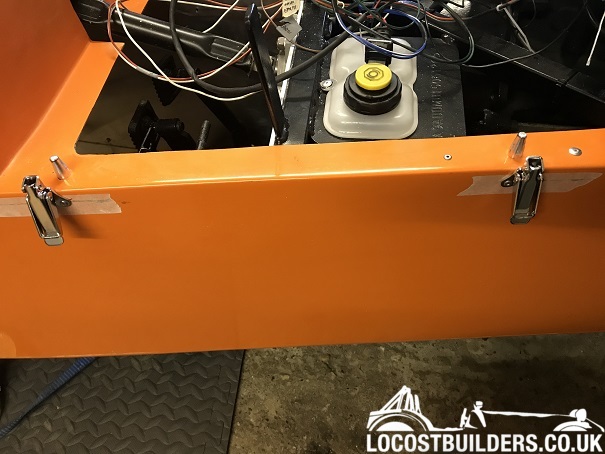 [/img]
[img] [/img]
[img]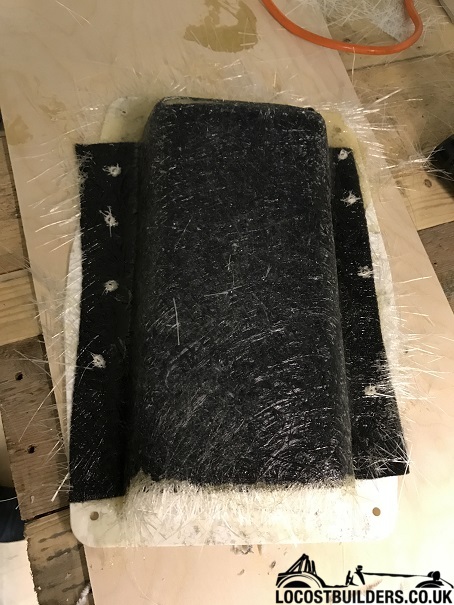 [/img]
The bonnets not a perfect fit, I've managed to keep it square with a 4mm even gap down both edges.
[img]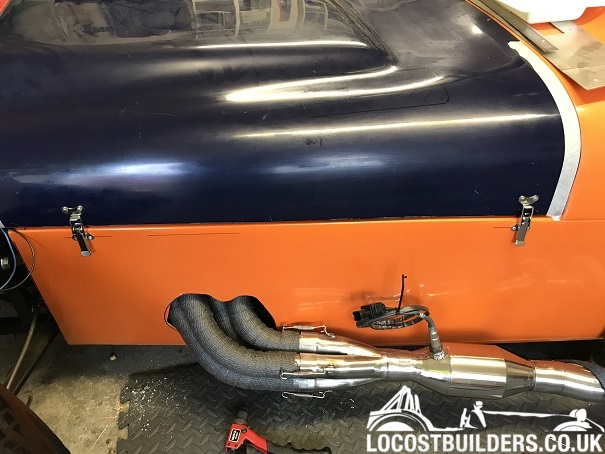 [/img]
[img]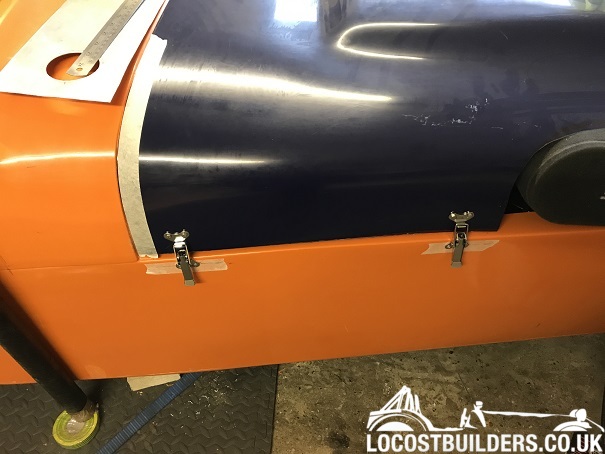 [/img]
furryeggs - 5/6/17 at 09:04 PM
Well it's been a hectic 2 weeks trying to get as much done as possible before bits go off to paint. The nose cone, bonnet and spare wings have
all gone off to paint. I did manage to get everything on them trimmed and drilled where required.
I machined some extensions for the front indicators and drilled some bolts so the wirings hidden.
[img]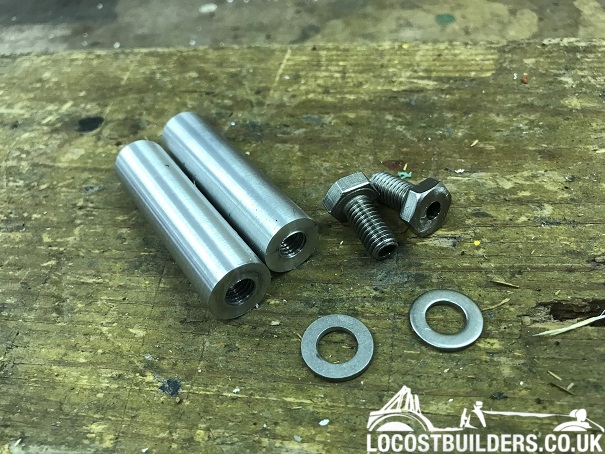 [/img]
Fitted to the lights.
[img]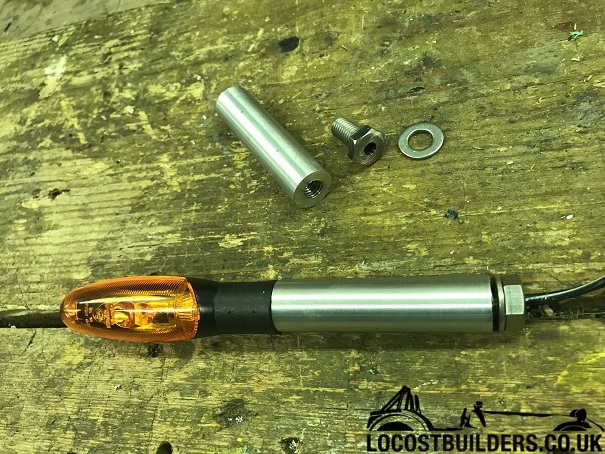 [/img]
In place on the nose cone. as with everything the nose is no where near even/square so most of the positioning has been done by eye, It's all
square from the front but if you look from above there's 10mm difference side to side.
[img]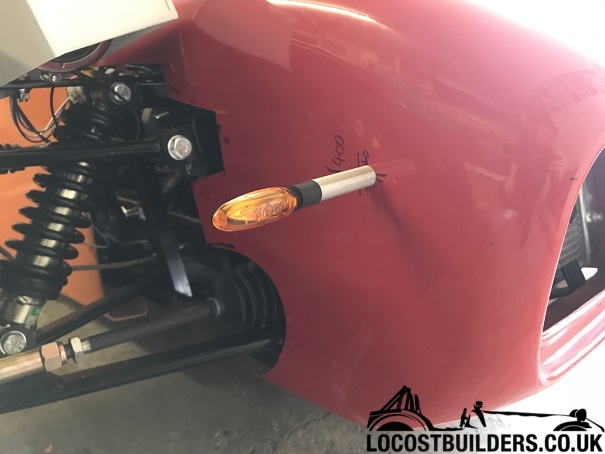 [/img]
After a lot of ball ache trying to get a blade aeroscreen made I decided to just get the tiger one. personally it's not ideal but it'll do
for now.
[img]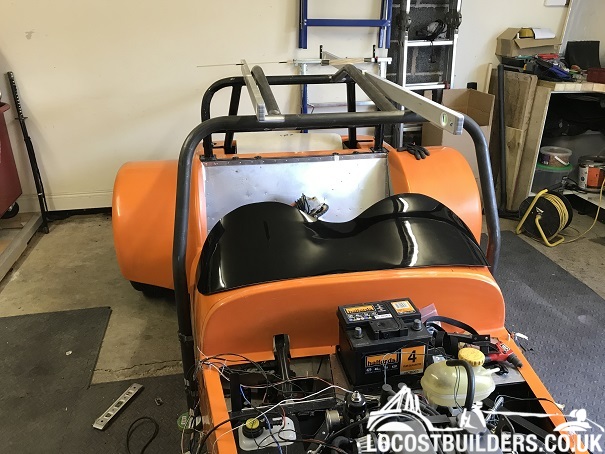 [/img]
The last picture taken before it got stripped to go to paint.
[img]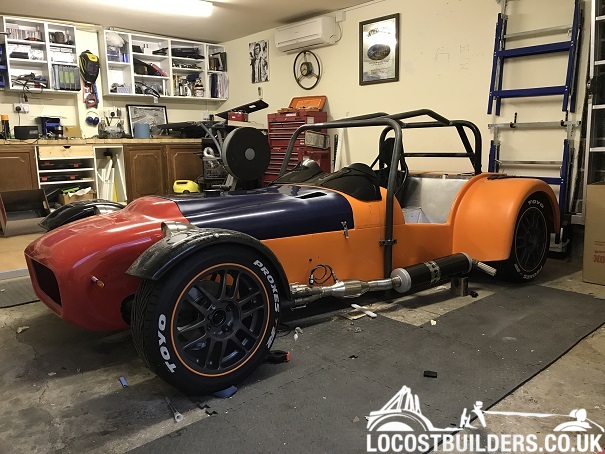 [/img]
My steering wheel cowl is made from a bit of drain pipe and covered to match the dash and tunnel.
[img]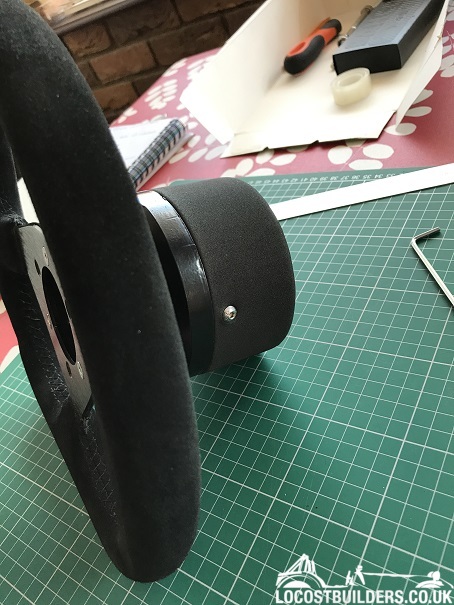 [/img]
I've got round to replacing the wheel studs that I cut to length before realising I needed spacers... Doh
[img]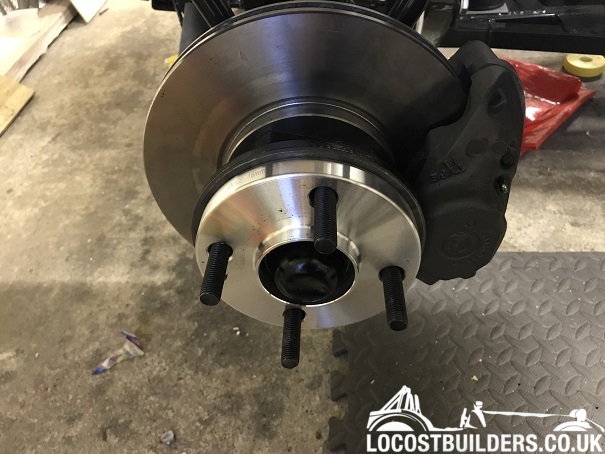 [/img]
And I've finally got round to making a bracket for my speed sensor, and wrapped it all in spiral wrap and clipped it in place.
[img]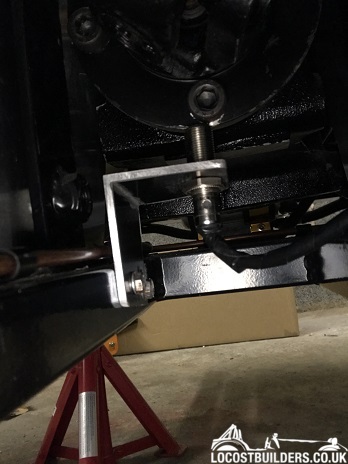 [/img]
[img]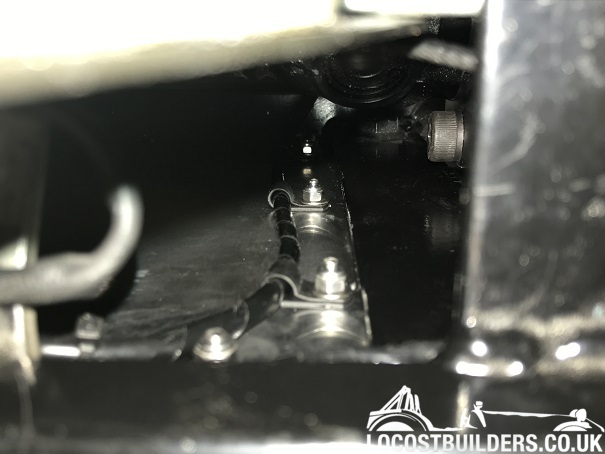 [/img]
I've got a fair amount more done but haven't got any pictures. I have finished off some wiring, spent a few hours setting the front and rear
suspension to as close to the recommended alignment, this will be checked and set along with the ride height and corner weights.
And if that's not enough I've got the garage wall all stripped back and render removed ready for the door to be knocked back through.
[img]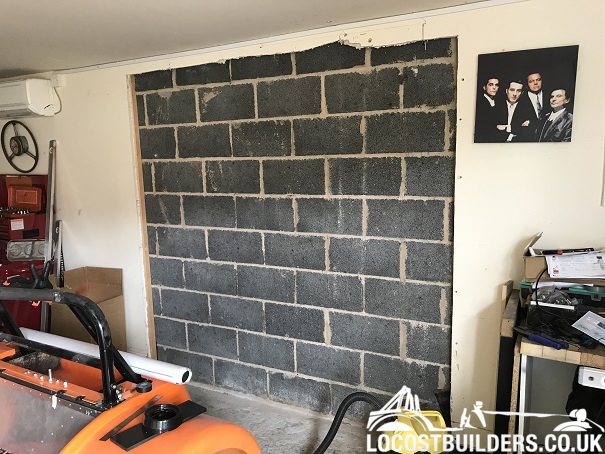 [/img]
furryeggs - 2/7/17 at 02:55 PM
It doesn't seem to getting much closer to being finished by some of the pictures, but seeing that most of the jobs I've been doing are the
small fiddly bits that never get seen It's getting close. I've not taken pictures of everything as some of it is a little dull but I have
been busy getting lots done.
-Trimmed the seat edges for IVA.
-Changed my fuel sender for one with a low level light and ran a new wire.
- I've added a fuel light to the dash, and bonded in my patch panel for the bottom radius on the drivers side, then recovered the hole thing.
-Lots of wiring, tidying up and deleting chock block connectors, these are for my headlights. I also had to rewire one of the lights and rotate it as
the beam pattern was upside down.
[img]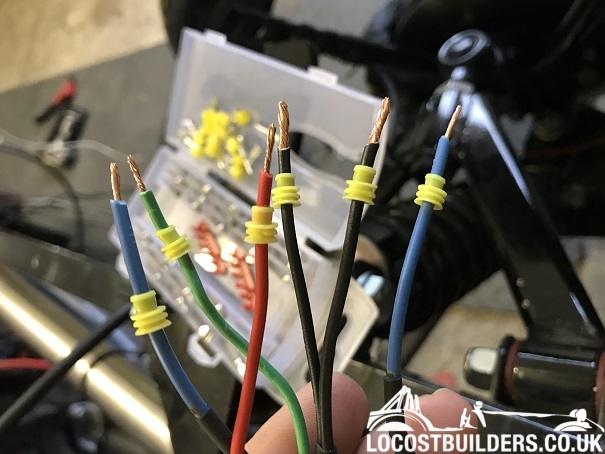 [/img]
[img] [/img]
[img] [/img]
-Before the body went of to paint I took lots of measurements and now the body is off I've been trying to get the geometry and ride height to as
close to spec as possible. It'll get aligned properly once it can be driven down to a mates garage.
-And as for the body. I have the nose cone and bonnet back from paint, it's looking good. The main tub however has had a few issues, I've
had to go over to sort out a few areas the primer coat flagged up, namely 2 spider cracks in the gel coat.
Tub primed.
[img]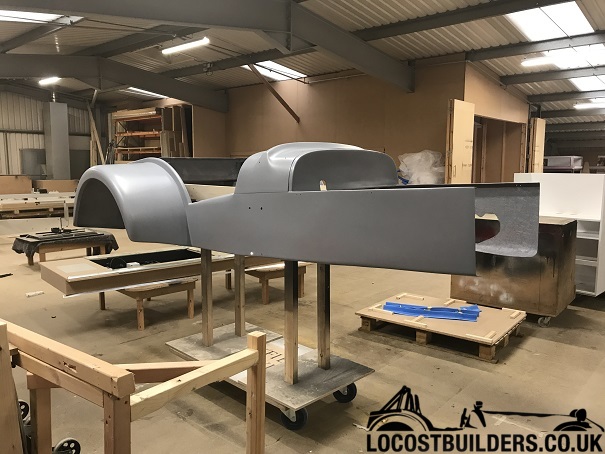 [/img]
one of the crack just below the scuttle.
[img]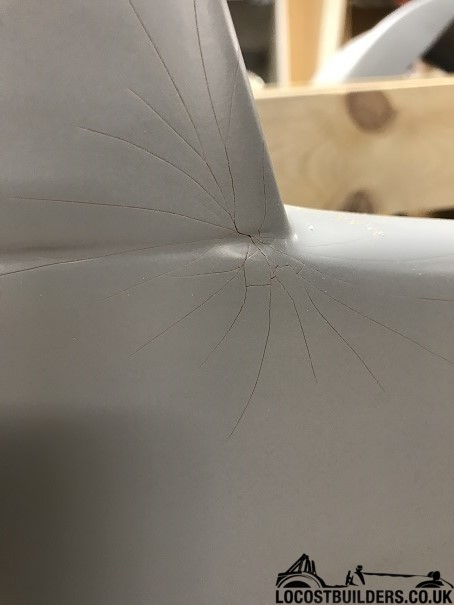 [/img]
I've drilled the end of each crack and filed out the cracks to a v that reaches just reaches the fibre.
[img]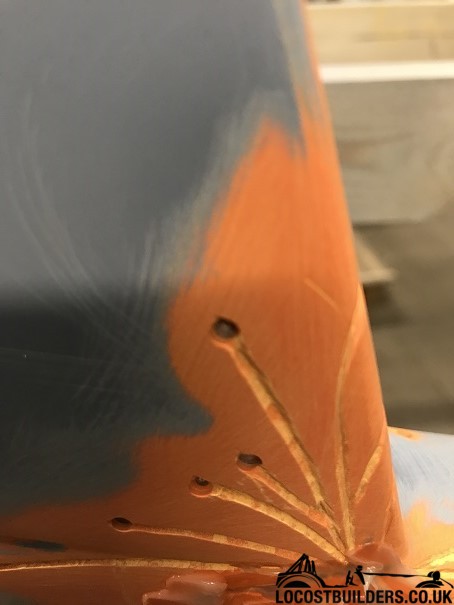 [/img]
[img]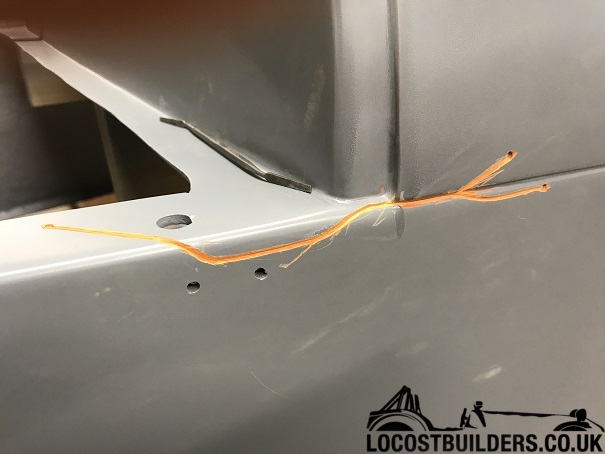 [/img]
This has then been filled with a 2 part epoxy and left to cure, it was then sanded back down ready for re priming and paint.
[img]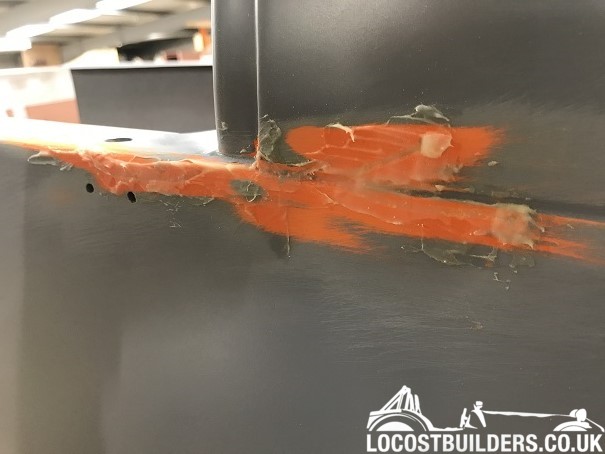 [/img]
[img]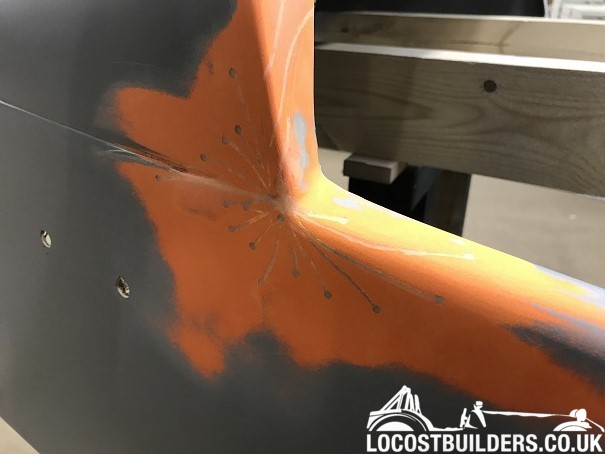 [/img]
There's still lots to do but it's starting to get close and the list of jobs is getting ticked off pretty quickly.
furryeggs - 4/8/17 at 03:00 PM
The list of jobs is forever getting shorter, yet I still find bits that need sorting. I'm now pretty much ready to fill out the IVA paperwork,
what I've got left to finish shouldn't take much more than a week or 2... hopefully.
Again, I've not taken picture of everything but what I've got done since the last update is quite a lot.
-I noticed a lot of crud and crap in my coolant bottle so I had to drain the system and flush it through.
-My exhaust wrap had something in it that didn't like heat??? It was free stuff from my last work at a bakery that we used for the oven flues, it
had been lying around for a while and maybe had oil and allsorts in it. It smoked like a gooden to the extent I grabbed the extinguisher just encase
it went up. Needless to say that's been stripped off and some proper stuff ordered.
-I've got the wiring finished... Hooray... just 2 clips left to fit tonight.
I've got my LC-2 wideband wired up too. There was a bit of cutting involved as they had sent me an 8ft cable and wanted more money for a shorter
one that would of still been to long.
[img] [/img]
Its a screened cable so it got interesting, when cut it turned out that there were 2 yellow cores, after a little testing it turned out they both
terminated at the same pin on the plug which made it easier.
[img]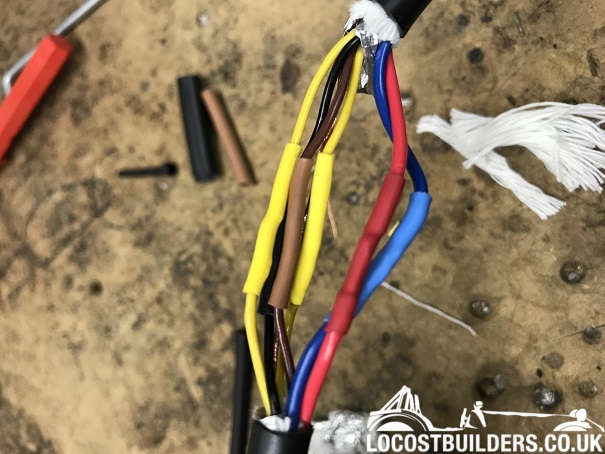 [/img]
Once soldered back up I re screened the cores that required it and heat shrank it up to seal.
[img] [/img]
[img] [/img]
It powered up with no fault codes and calibrated ok, the ECU seems to be getting the signal so all is good. Made it as tidy as I could too.
[img]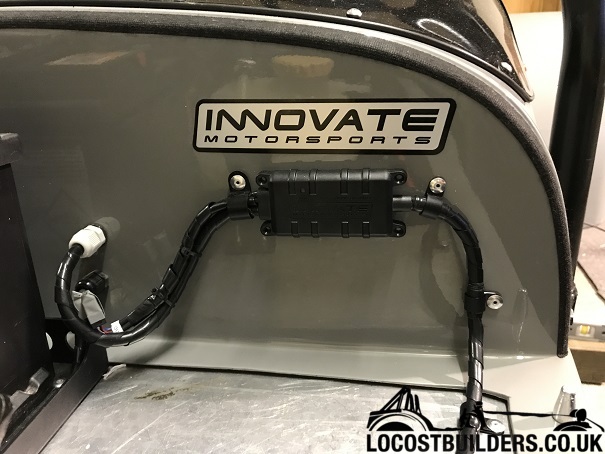 [/img]
And the last wiring was the usb socket and volt gauge.
[img]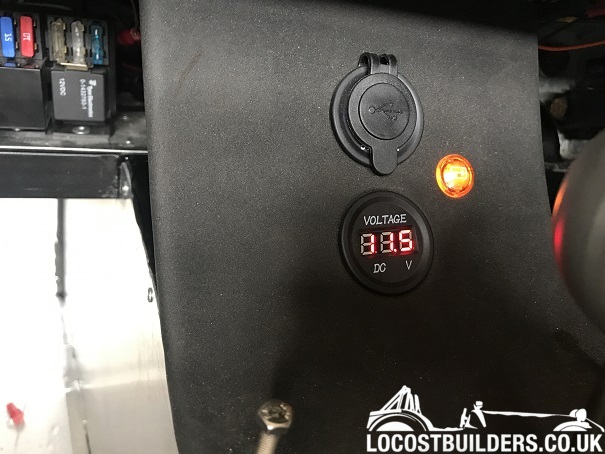 [/img]
I have under sealed the rear wings with grey Wunderseal It's a little thick but it paints on ok.
[img]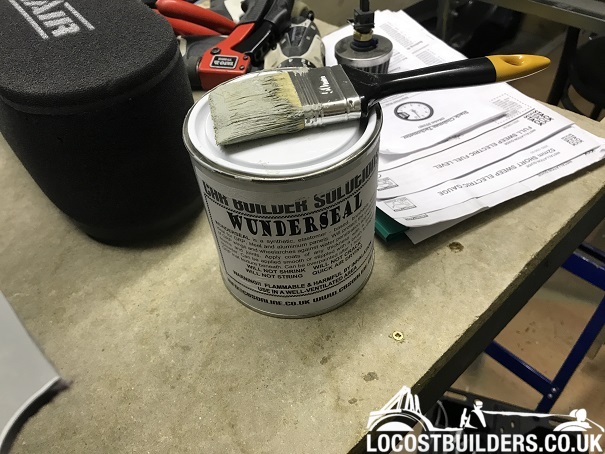 [/img]
[img]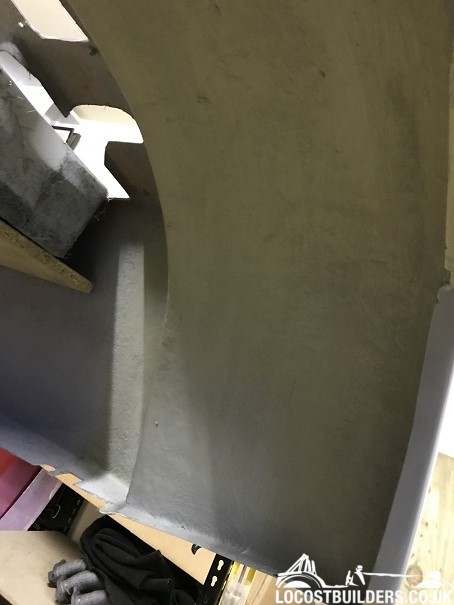 [/img]
the inner body tub and boot was painted with black roofing rubber paint from screwfix.
[img]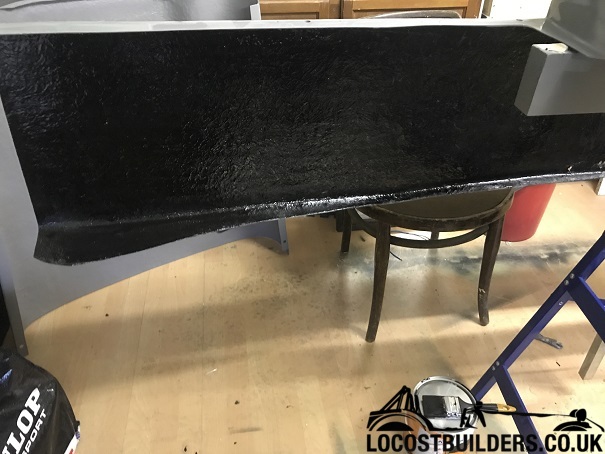 [/img]
[img]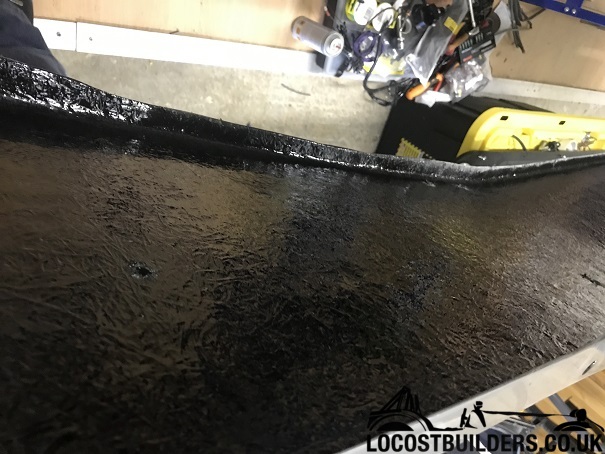 [/img]
IVA friendly wing mirrors piping cut and fitted
[img]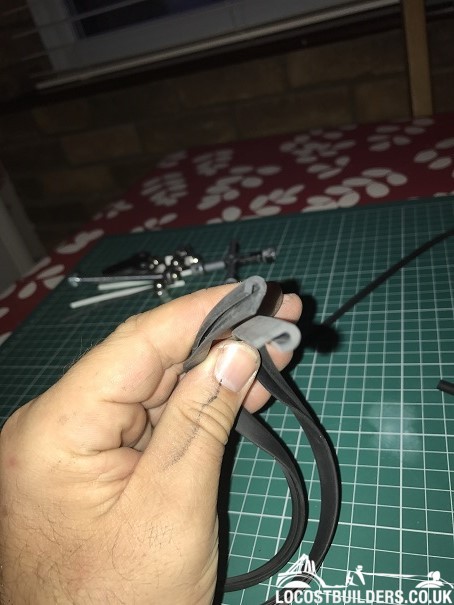 [/img]
[img] [/img]
-Sanded prepped and painted the role cage DIY style with metal paint and a roller, yes a roller. I'll keep the pictures back until the final
reveal in a week or 2. I'm 95% happy with it and it looks almost as good as a powder coat. plus it cost Ł7 to do.
-I'm not a fan of tigers badge. (sorry Tiger) so I'm working on my own. This is the first test one which I have stuck on the nose already
but it wasn't quite right so it got taken off. It's a little to orange.
[img]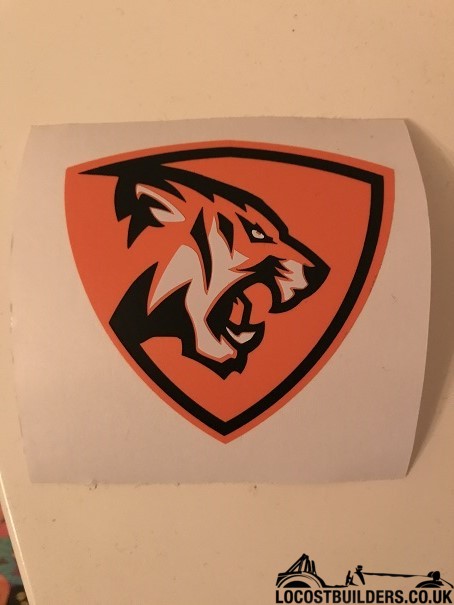 [/img]
More to follow soon... Test drive tonight so I'll let you know how it goes.
furryeggs - 6/8/17 at 12:30 PM
Got a few small bits done at work (it's a quite day)...
-I have knocked up some glass fibre foot plates for in front of the seats, I'll give these a coat of rubber paint and a layer of sand for a bit
of grip.
[img] [/img]
-My new exhaust wrap turned up so my down pipes have been wrapped.
[img]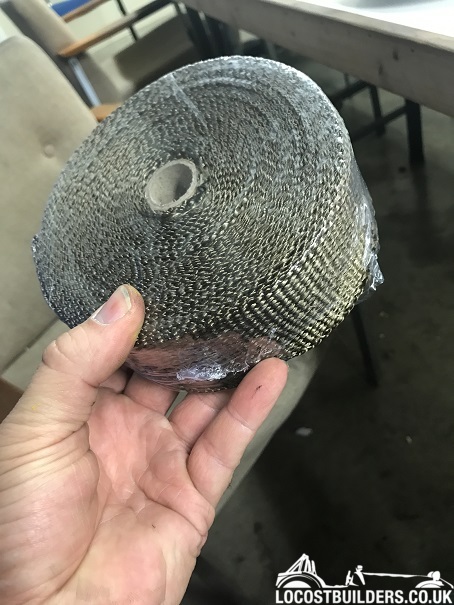 [/img]
-There isn't enough room in my filter back plate for the air temp sensor, so I've made up a small bracket to fit it in the nose cone.
[img]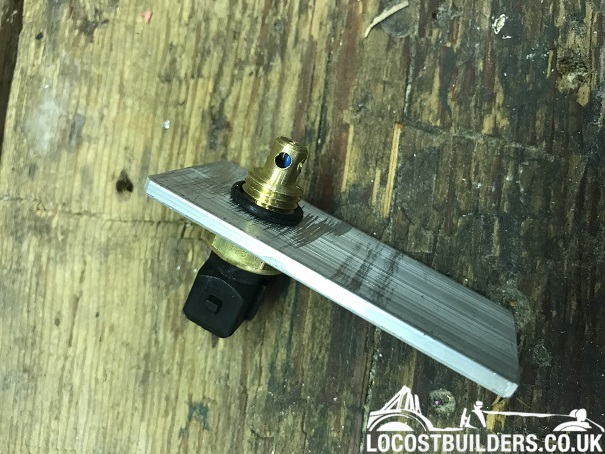 [/img]
-The boot cover has been given a last coat of rubber paint to seal it all before it gets covered.
[img]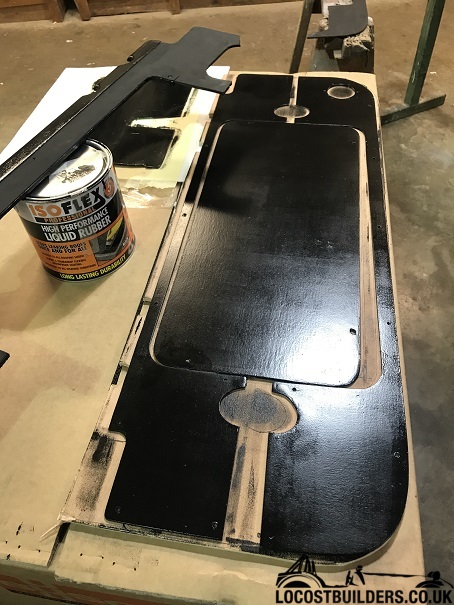 [/img]
-IVA paperwork is filled out ready to post this week so there is plenty to crack on with.
furryeggs - 11/8/17 at 05:34 PM
Can you guess what the exhaust hanger was in a former life?
[img]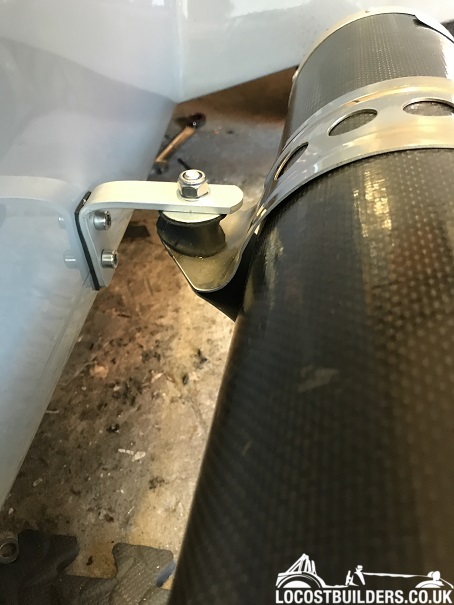 [/img]
Andybarbet - 11/8/17 at 06:48 PM
Coat hook ?
Looks good though.
craigdiver - 11/8/17 at 07:11 PM
Looking amazing, where did you get the switch protection hoops that you have on your dash - really like them?
furryeggs - 11/8/17 at 07:52 PM
quote:
Originally posted by craigdiver
Looking amazing, where did you get the switch protection hoops that you have on your dash - really like them?
Ebay from America, they were each about Ł4 cheaper than CBS. Until customs got involved and charged me Ł11 in tax and an Ł8 handling charge...
B@$*"x#s
craigdiver - 12/8/17 at 07:04 AM
quote:
Originally posted by furryeggs
[img][/img]
Not sure I like your headlights and the aim looks way out ;-)
furryeggs - 13/8/17 at 01:10 AM
I've been trying to sort out the running and MAP so that's been taking up most of the time this week. this is the thread
https://www.locostbuilders.co.uk/viewthread.php?tid=209900[/url]
I have managed to sort out covering some trim panels and the boot lid.
[img]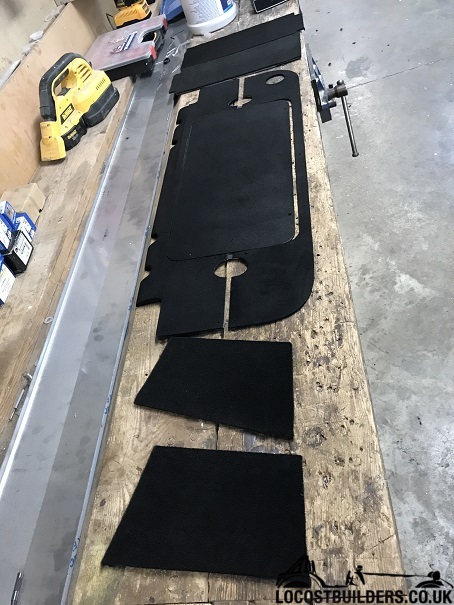 [/img]
furryeggs - 27/8/17 at 09:38 PM
Well I've managed to do my back in again so things have slowed down again. Reluctantly I've held off sending my IVA paperwork in as I
can't guarantee I'll be able to get things finished in time. It'll also give me time to make sure everything's spot on before I
book it in.
I have been able to sort out the exhaust tip however, when I fitted the slip on exhaust tip I just ended up with gas, soot and crap blowing out the
gap and onto the bodywork...
I've got a 1"-2" dairy pipe reduced and marked up where to machine the size to match the exhaust.
original 1.75" tip (no rounded lip)
[img]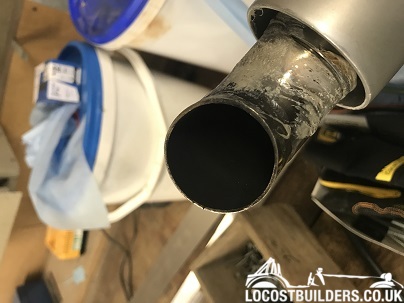 [/img]
Reducer marked up.
[img]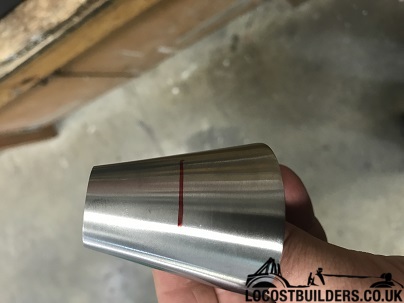 [/img]
Slip on tip marked up for cutting.
[img]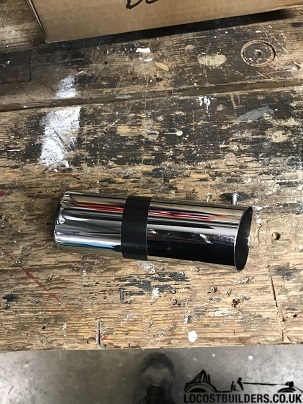 [/img]
The 2 pieces welded together.
[img]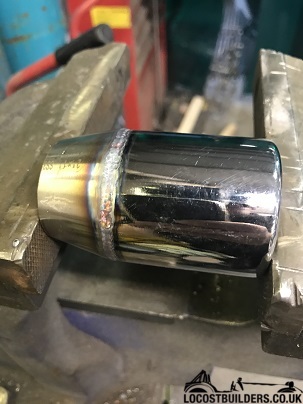 [/img]
And the finished exhaust.
[img]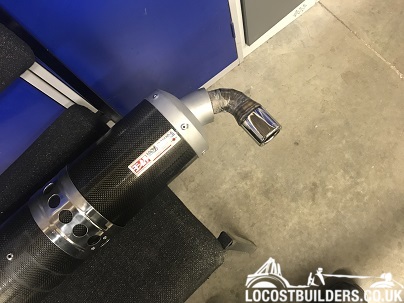 [/img]
furryeggs - 3/10/17 at 07:53 PM
With a few weeks off with my back again not much has got done on the car.
I've fitted my wing mirrors but need to check the edges on the clamps for IVA.
[img][img]http://locostbuilders.co.uk/upload/3IMG_7133.JPG[/img[/img]
[img]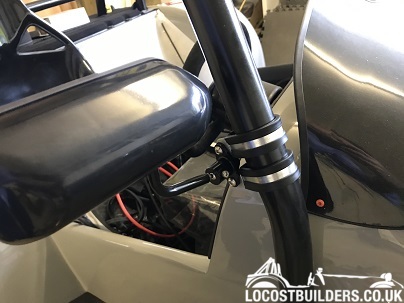 [/img]
I found a Raceline sump off a Genetta race car that was cheap on ebay and turned out to be 2 miles away so a quick visit to check it out and it came
home with me... I need to trim a little off the engine support bracket to stop rubbing but it's now fitted...
[img]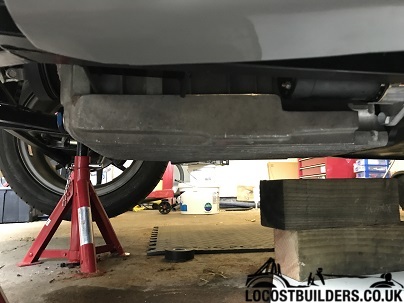 [/img]
[img]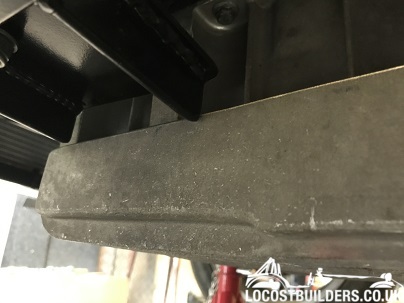 [/img]
I've also been pimping the garage a bit ready to make room for my bro's Cobra that he wants re freshing.
Theres new doors hung for the cupboards, floor repairs and half the floor painted.
I've also treated my self to some dollys to move the car around the garage i little easier. I can now get the other half of the floor
painted...
[img]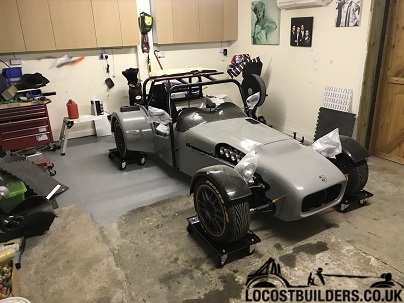 [/img]
mk7matt - 9/10/17 at 07:43 PM
Looking awesome buddy.
Nice quality build.
I look forward to it being on the road so we can go for a run out.
furryeggs - 9/10/17 at 08:20 PM
quote:
Originally posted by mk7matt
Looking awesome buddy.
Nice quality build.
I look forward to it being on the road so we can go for a run out.
cheers dude, not long to go. Just started to finish off the little bits now, theres just sh*t loads of them.
furryeggs - 20/10/17 at 08:12 PM
I've had a few more hours in the garage this last few weeks, not as many as I need but I'm almost there...
I've managed to get some carpet on the rear bulkhead...#
[img] [/img]
Finally got round to shortening the handbrake cables and sealing the ends...
[img]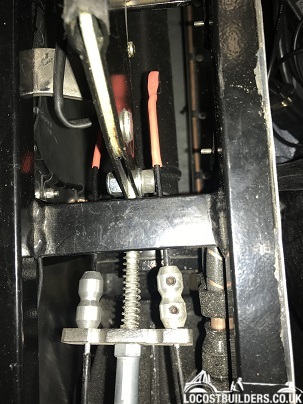 [/img]
I've got the seats back in and belts fitted...
[img]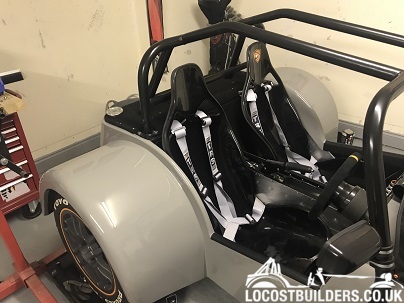 [/img]
Fitting nut covers in place where required as i go round tightening down bolts...
[img]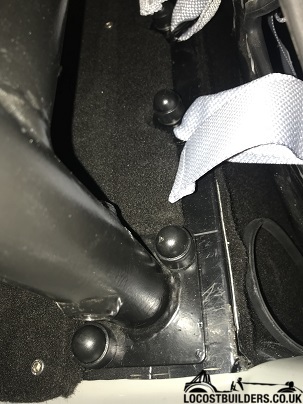 [/img]
[img]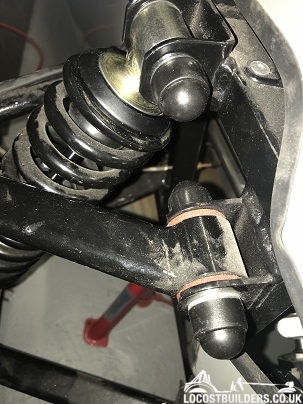 [/img]
The filters back on now the TB's are as close to balanced as i can get them. Along with the drivers side footwell plate offered up, this just
needs drilling and screwing down...
[img] [/img]
I've carpeted the boot and covered the lid. This just needs the fuel cap bolting down and its done...
[img]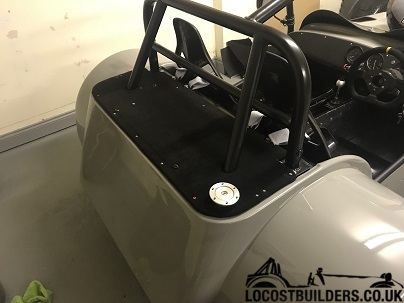 [/img]
This is as close to finished as I've had it and it's looking good
[img]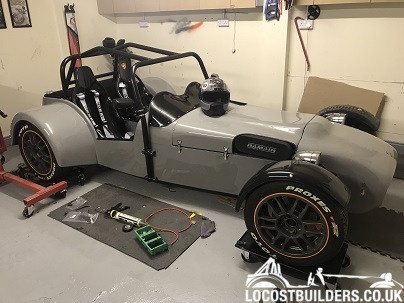 [/img]
Although the list of jobs doesn't make it seem being close to finished...
[img]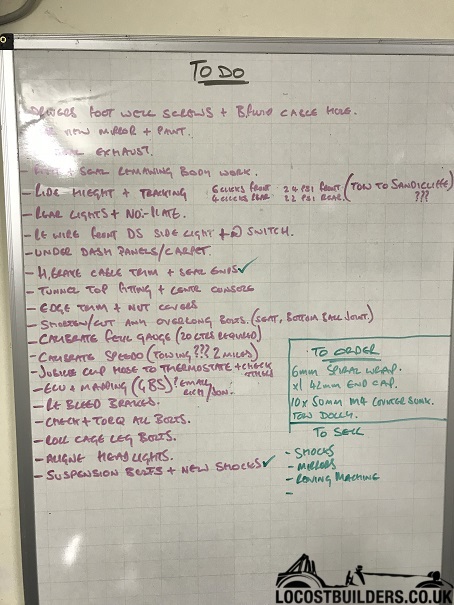 [/img]
furryeggs - 19/11/17 at 08:30 PM
I've managed to sort out my thermostate housing this week, it has been one of the unexpected jobs I've had added to the list along with
trimming my engine mount plate as it was knocking on my raceline sump.
Some how during modifying my original thermostate one of the screw holes cracked and i didn't notice. I had a little leak on reassembly so gunked
it up with some rubber gasket. I probably over did it and it cracked...
[img]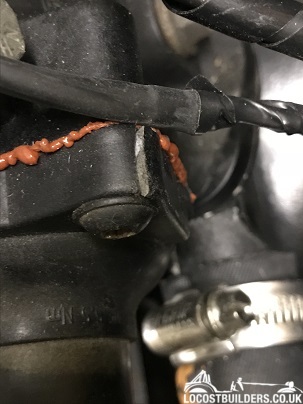 [/img]
The old thermostate nose and thermostat along with the new (92 degree)...
[img]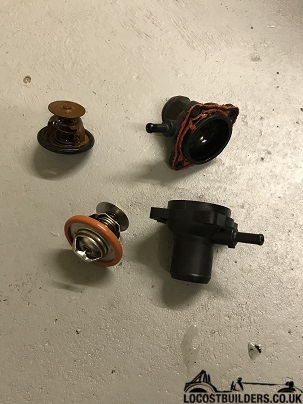 [/img]
As I'm not running a heater there's a few blocked up outlets. I'm not running a bypass pipe back to the bottom radiator hose so tiger
advise to drill a hole in the thermostate to act as a bypass for water to flow. I decided to run with 3 to keep it circulating...
[img]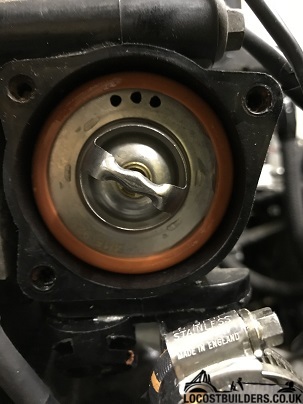 [/img]
All done, re installed and topped up...
[img]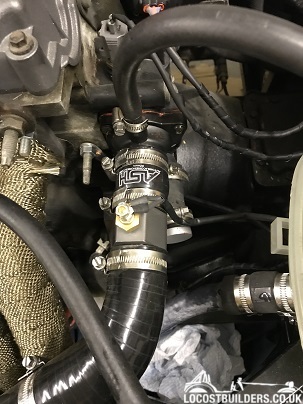 [/img]
Next job will be the rear lights.
CosKev3 - 19/11/17 at 09:40 PM
Just be aware there is a good chance you will have to remove all the nut covers on the suspension mounting bolts as the tester will want to check the
bolts are long enough to pass through the nylock nuts
furryeggs - 21/1/18 at 12:05 AM
There's not been alot going on with the build over xmas but it's now time to get ready for IVA.
I've been putting drilling big holes for the rear lights off for long enough, I've masked everything up and started to take measurements.
The Tiger body is nowhere near square at any point across the rear tub. This has pretty much made a tape measure and level usless.
I have managed to get everything pretty well lined up...
[img]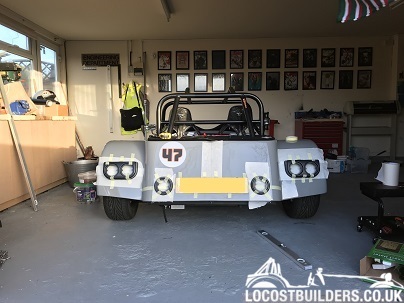 [/img]
I've started to add the vinyls aswell, so far I've got my bonnet patch and race numbers cut and applied...
[img]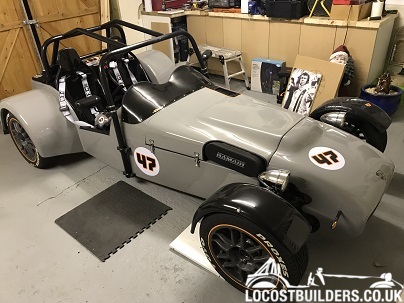 [/img]
[img]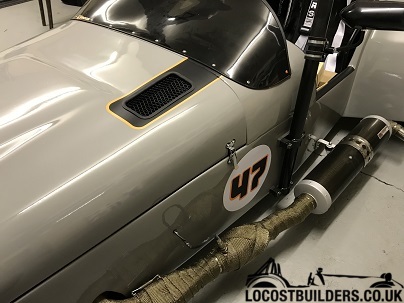 [/img]
Once the lights are finished I need to get the maps sorted and tuning done.
Daf - 21/1/18 at 07:41 PM
Looking good, if you get your IVA done soon you should be able to make stonleigh this year
furryeggs - 21/1/18 at 08:22 PM
Thats the plan... hopefully i can get IVA done by the end of march.
Daf - 21/1/18 at 08:41 PM
quote:
Originally posted by furryeggs
Thats the plan... hopefully i can get IVA done by the end of march.
Is all the paperwork filled in and sent? Get it done ASAP then you can book the test when you're getting closer, I made the mistake of
"finishing" the car then sorting the paperwork. Ended up waiting for ages with a car that was ready to be presented.
furryeggs - 21/1/18 at 09:01 PM
Most of it is. I just need to print off and photo copy reciepts/invoices to send with it.
furryeggs - 28/1/18 at 08:18 PM
Frustrating week this week, fuel regulator issues and a coolant temp sensor faulty means the engine won’t start, see this thread
( https://www.locostbuilders.co.uk/viewthread.php?tid=211522 )
I’ve ordered a 3 bar bosche regulator and housing from pure motosport along with a new temp sensor. Hopefully that’ll sort the engine issues?
I have managed to get my rear lights drilled and fitted, then it’s tiding up ready for IVA... The paperwork will be sent as soon as I’ve sorted the
engine issues.
Fingers crossed
furryeggs - 6/2/18 at 02:49 AM
So I'm finally there, roughly 4-5 hours left of jobs and she's finished IVA paper work and armature build forms are all printed off and
signed, along with photo's of the build and invoices, I'm just waiting for a invoice from Tiger for the chassis...
-fit the under dash panels and secure foot plates.
-finish wiring in a switch to the fuel pump and tidy under das wiring.
-Set front tracking and torque the suspension bolts.
-Fit new battery leads.
-Bleed brakes.
-Cut the tail pipe of my exhaust. I inadvertently made a trumpet by welding on a wider bore tip to the tail pipe.
-Exhaust heat shield
My new 3 bar bosch FPR and Pure motorsport housing are now fitted and plumbed in, it's holding good pressure, unlike the adjustable one it
replaces...
[img]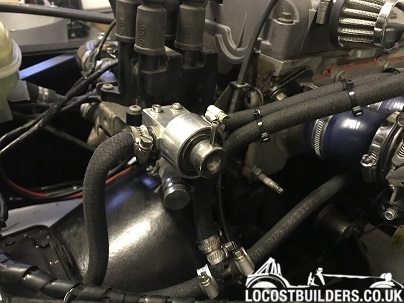 [/img]
One thing I do need to sort is make a heat shield for in between the exhaust and water pipes. They are very close.
[img]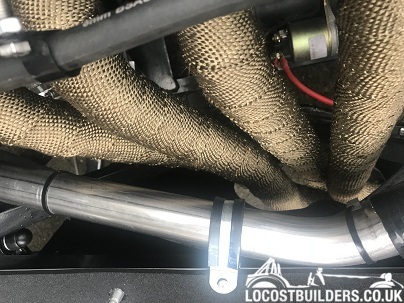 [/img]
She drives under her own steam again...
[img]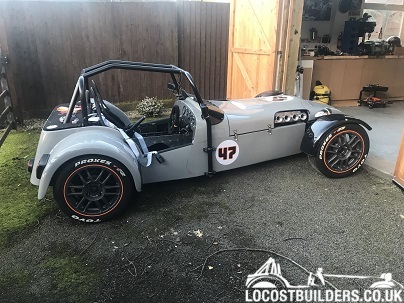 [/img]
Daf - 6/2/18 at 12:39 PM
Looks good, have you had it at an MOT centre to check the emissions? That was the one thing that caught me out on my IVA as it's one of the only
things you can't check at home - if you haven't already got one fitted a wideband lambda is a good call.
Get loads of pics up and I'm sure everyone will give you some IVA thoughts and opinions - you will be on the road for summer
furryeggs - 6/2/18 at 12:58 PM
Wideband fitted, and running.
I’m getting it down to a mates asap for an emissions check, the light’s aligned and the tracking/ride hieght. I’m hoping the emissions are ok, Prior
to my running issues it was running rich, even with your (Daf) IVA Map. You could put your hand over the tail pipe and it’d come away covered in thick
black soot. Now with new FPR and plugs it’s clean as a whistle, and smells of exhaust, not petrol.
furryeggs - 13/2/18 at 09:08 PM
I've started a new IVA thread
http://www.locostbuilders.co.uk/forum/29/viewthread.php?tid=211698&page=1?#pid1767979
I'll try and keep them both updated
furryeggs - 17/2/18 at 08:59 PM
I've had a few hours in the garage today trying to sort out my mirror mounts... I think I've got it sussed.
Took some brackets I've had lying around that I wasn't sure about using (to bulky)
[img]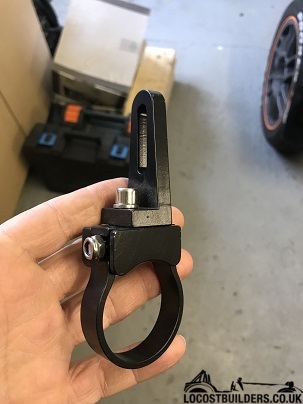 [/img]
This is the mounting on my side mirrors I've been trying to sort out without drilling the cage...
[img] [/img]
Split both down to their component parts...
[img]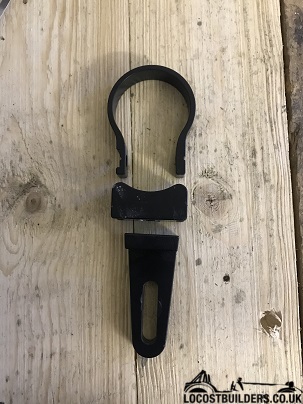 [/img]
[img]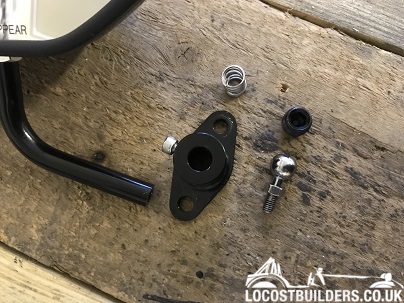 [/img]
A little drilling and a few modifications and 2 become 1, Just need to get them fitted tomorrow.
[img]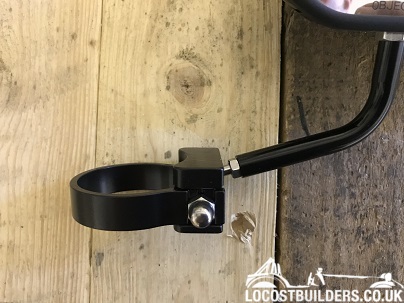 [/img]
I used another bracket and process to get the rear view mirror attached...
[img]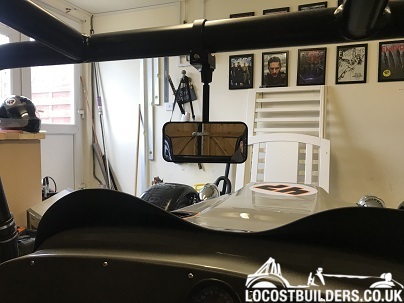 [/img]
[img]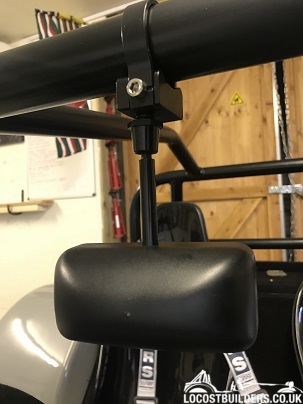 [/img]
And i managed to get 2 new Tiger badges made up for my seats.
[img]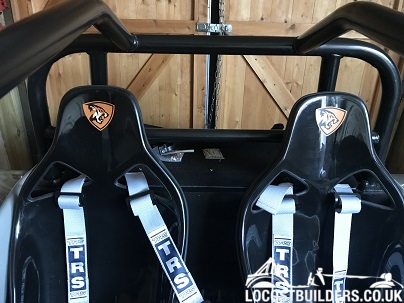 [/img]
furryeggs - 2/3/18 at 08:25 PM
Getting closer to my IVA, just finishing off little bits...
Machined and fitted some spacers for my seat belts.
[img]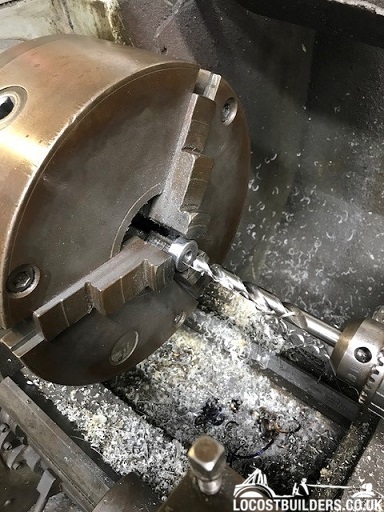 [/img]
I now have clearence to the seat when I'm sat in the seat so I should be ok.
[img]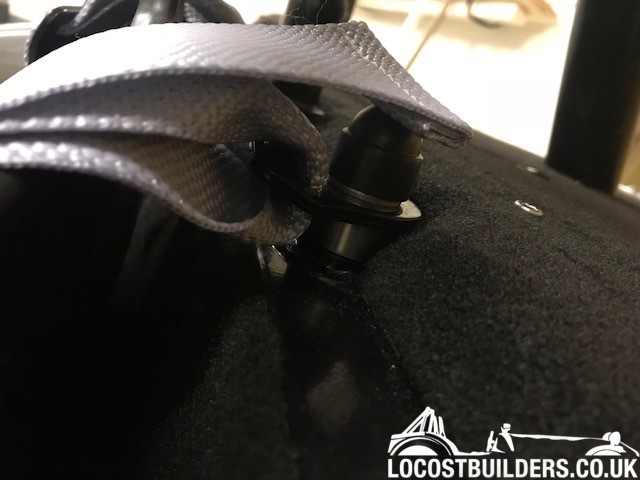 [/img]
I've made the boot lid a little to tigt so I've made a paracord pull to get it open...
[img] [/img]
Made up some bonnet catch covers, again, hopefully now IVA ok...
[img] [/img]
Mocked up some under dash carpet panels...
[img] [/img]
I've rubber covered my exposed ignition barel and wrapped the top column in cloth.
[img]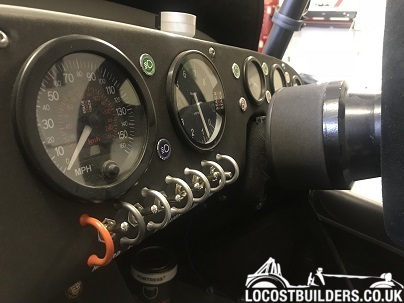 [/img]
Just a few bolts to sort out and finish tidying under the dash and thats me done
Mikael nordin - 11/7/18 at 09:48 AM
quote:
Originally posted by furryeggs
.....
And i managed to get 2 new Tiger badges made up for my seats.
[img][/img]
Hi
Nice Tiger!!!
I have a Tiger b6 with Gsxr 1000 engine here in Sweden and would love to have the Tiger stickers. Are those custom made or bought some place?
Thanks
Mikael
furryeggs - 27/8/18 at 08:55 AM
Since passing IVA a few months ago I've managed to get 300 miles on the clock, there's been a few niggly bits to sort but all in all It
seems to be holding together... EXCEPT... when I'm a knob and forget to clip the bonnet down :-( I got lucky and it didn't hit anything or
anyone as the roads were empty. It was all In slow motion, up and over, and hiting the grass verge and across the kurbing. If it had hit the road it
would of been alot worse...
The main damage was to the front corner and scuffing along the top edge...
[img]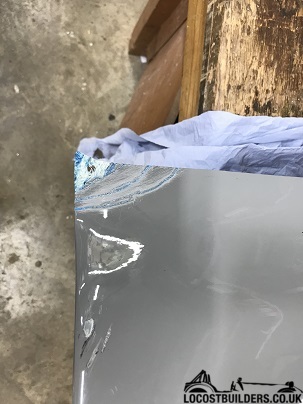 [/img]
[img]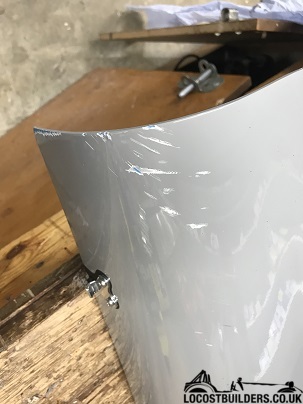 [/img]
There were several cracks through the gell coat In more than one place which I had to drill out and re resin...
[img]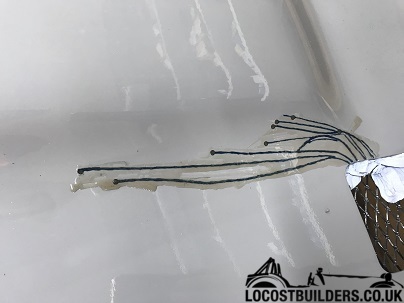 [/img]
I also had to rebuild and strengthen the front corner. This was then trimmed and reshaped...
[img]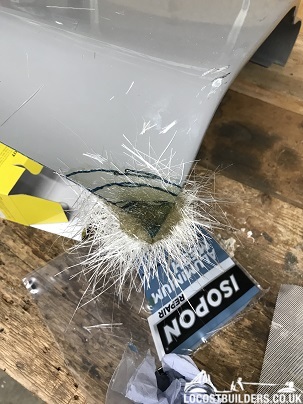 [/img]
I added a front bonnet pin to keep that front edge lifting, This has been one of the issue I've noticed so now was the time to do it.
[img]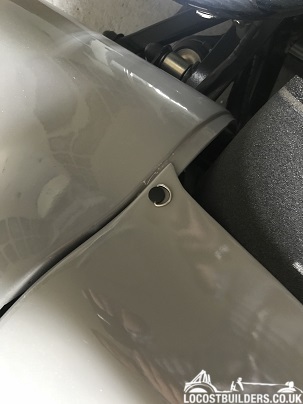 [/img]
All done and re painted... Just need to re do the vinyls.
[img]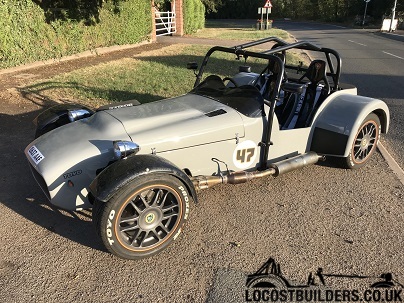 [/img]
Another issue I have had is with my exhaust, It's been blowing through the collector and I am on my 2nd better flowing silencer. I bit the bullet
and had laura at tiger send me their collector and got rid of the ill fitting ebay special. it's all sealed up nicely now but my 2nd hand rear
box is loud, I think I need to redo the wadding. It's not a massive can 5" diameter and about 20" body with 2.25" pipe. but with
the wadding cloged it may as well be a straight through pipe, I don't think it's doing much silencing...
[img] [/img]
Also fitted my extinguisher to stop it knocking around the boot...
[img]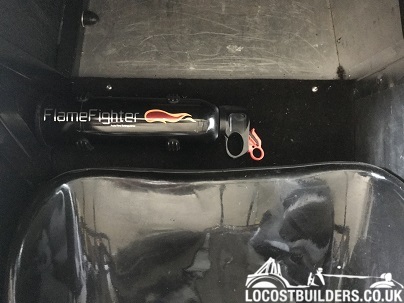 [/img]
I have also got a leak from the tail seal on my gear box which i need to get round to doing, but I think that will be a winter job. along with side
bars on my cage and possibly a screen?
mk7matt - 27/8/18 at 09:28 AM
I’ve got a screen for mine. No wipers or demister though so I had to remove come MOT time.
Been caught out in the rain with it on and I couldn’t see a thing. Had to pull over and wait.
That’s why I now use the aeroscreen.
If you do go for a screen, think about fitting wipers too.
