
Locost with a difference
super-ron - 6/5/17 at 07:49 PM
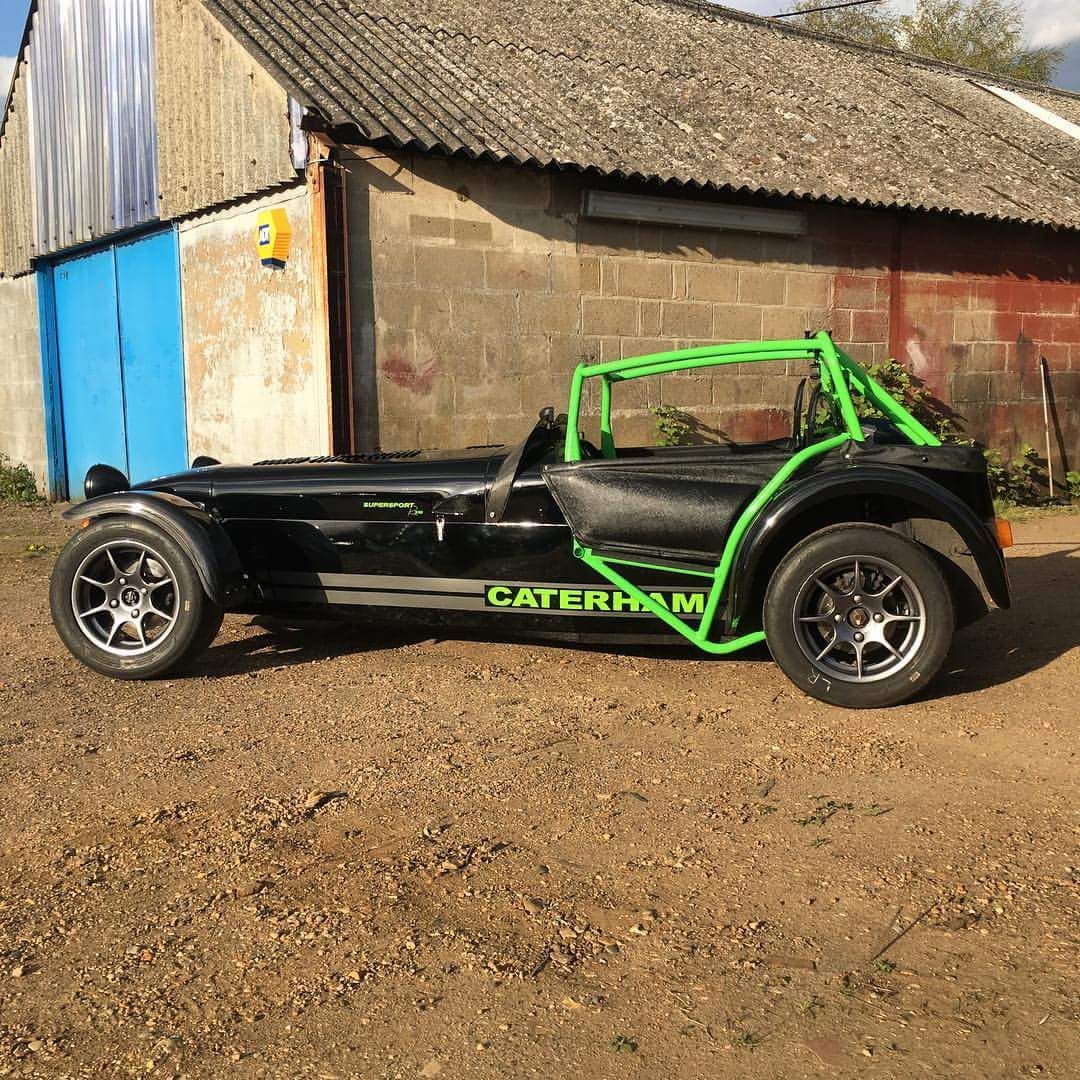
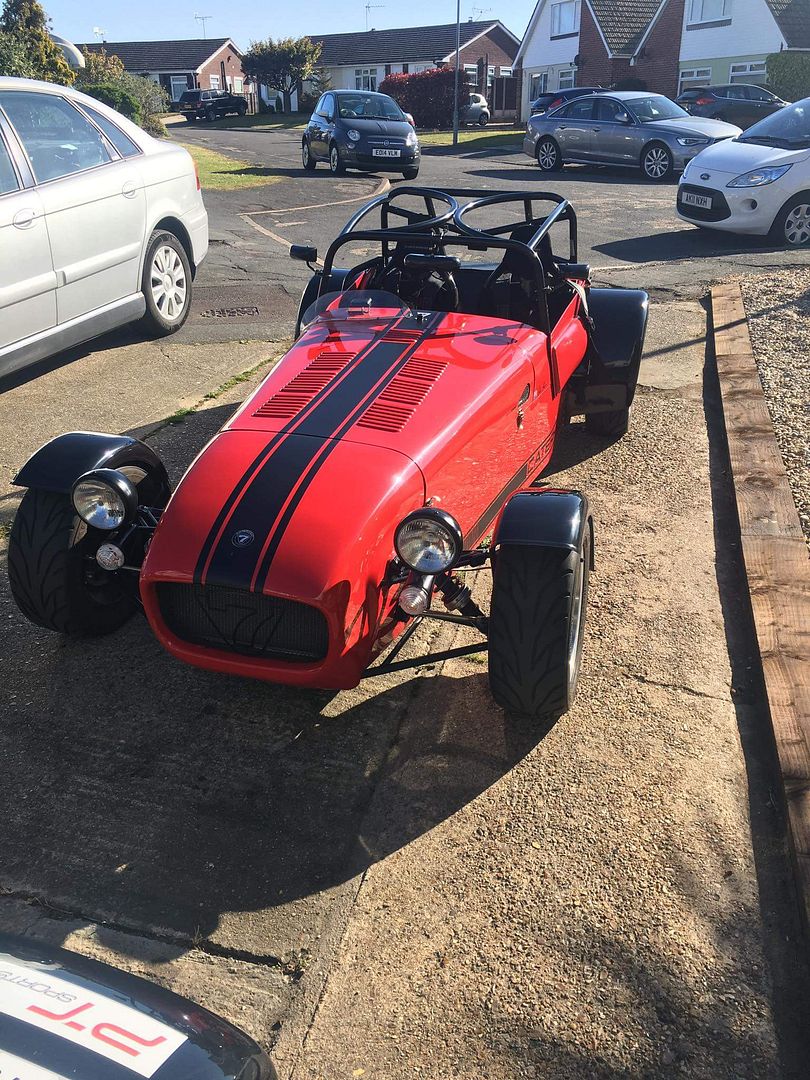
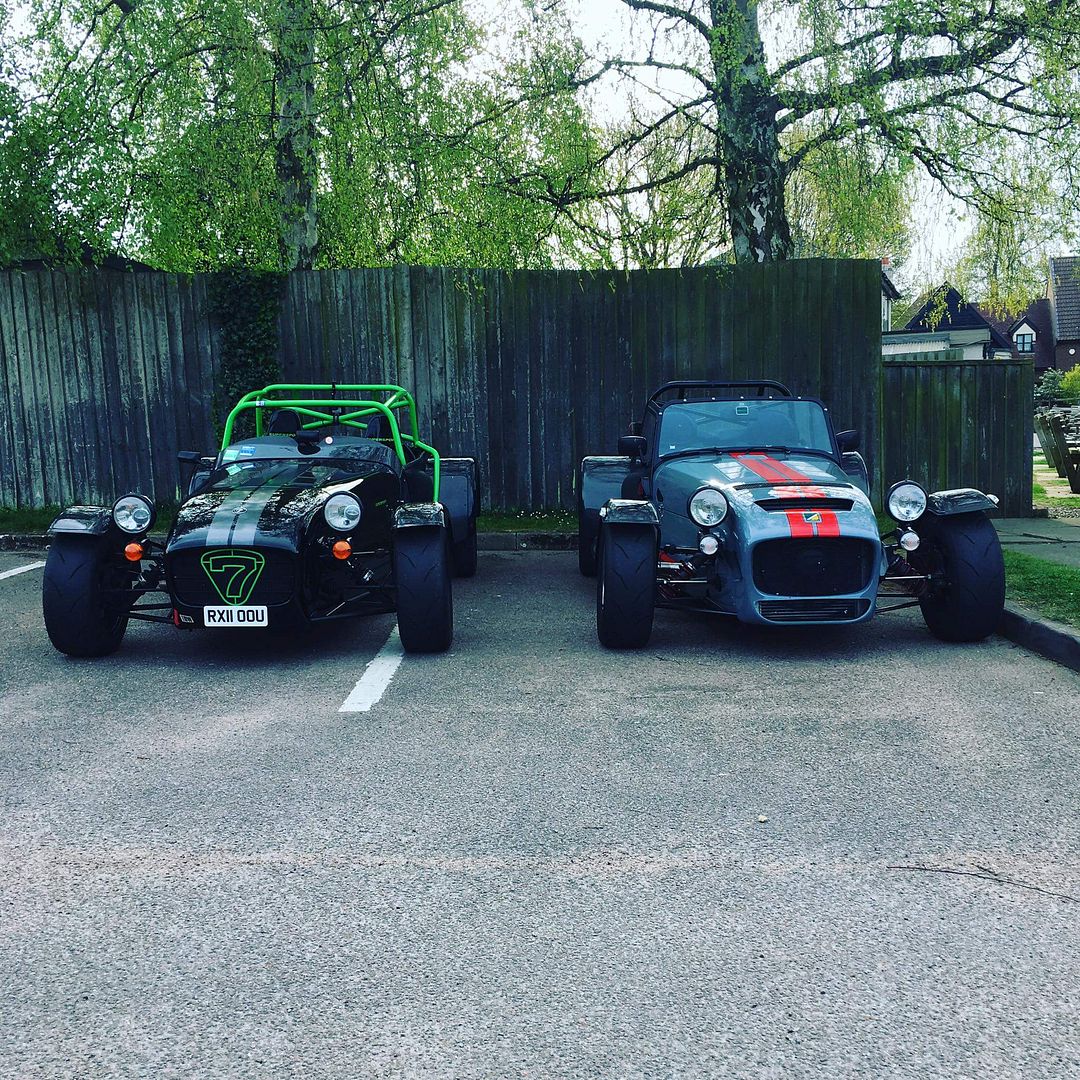
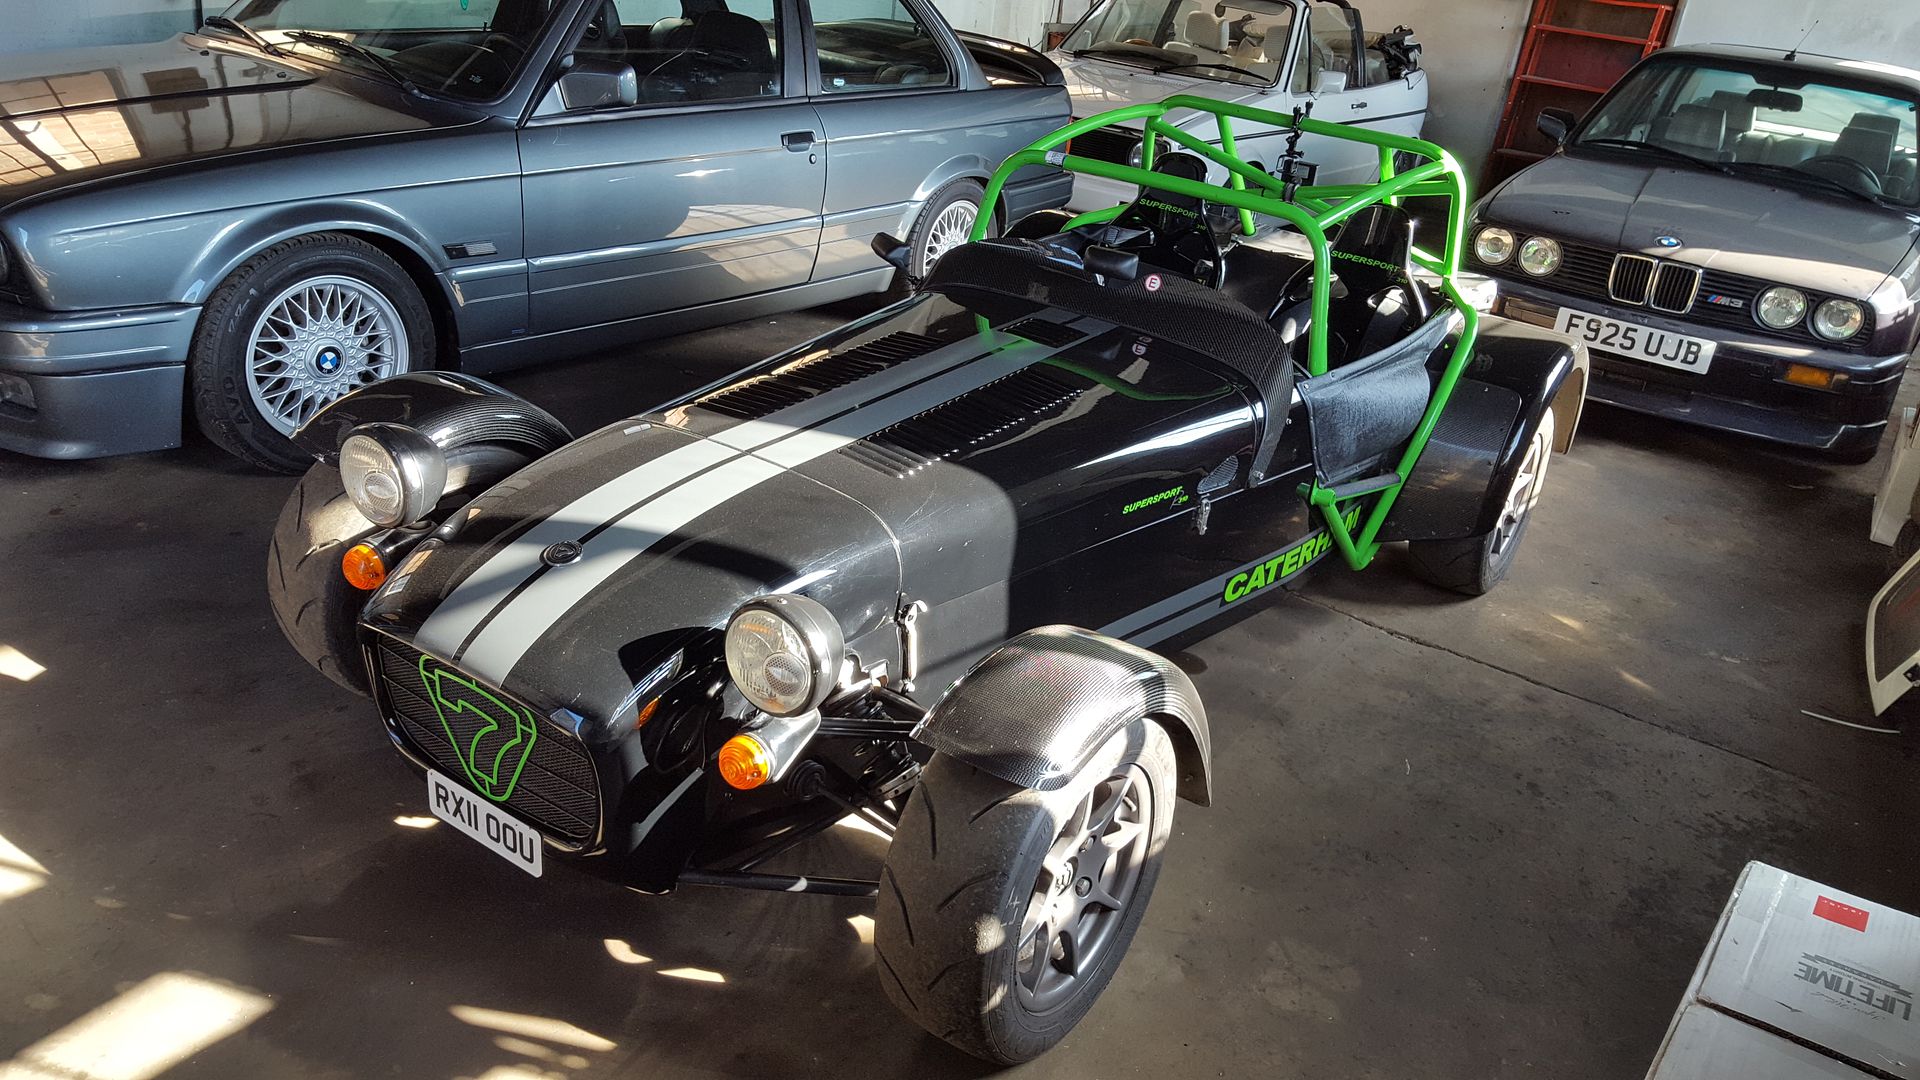
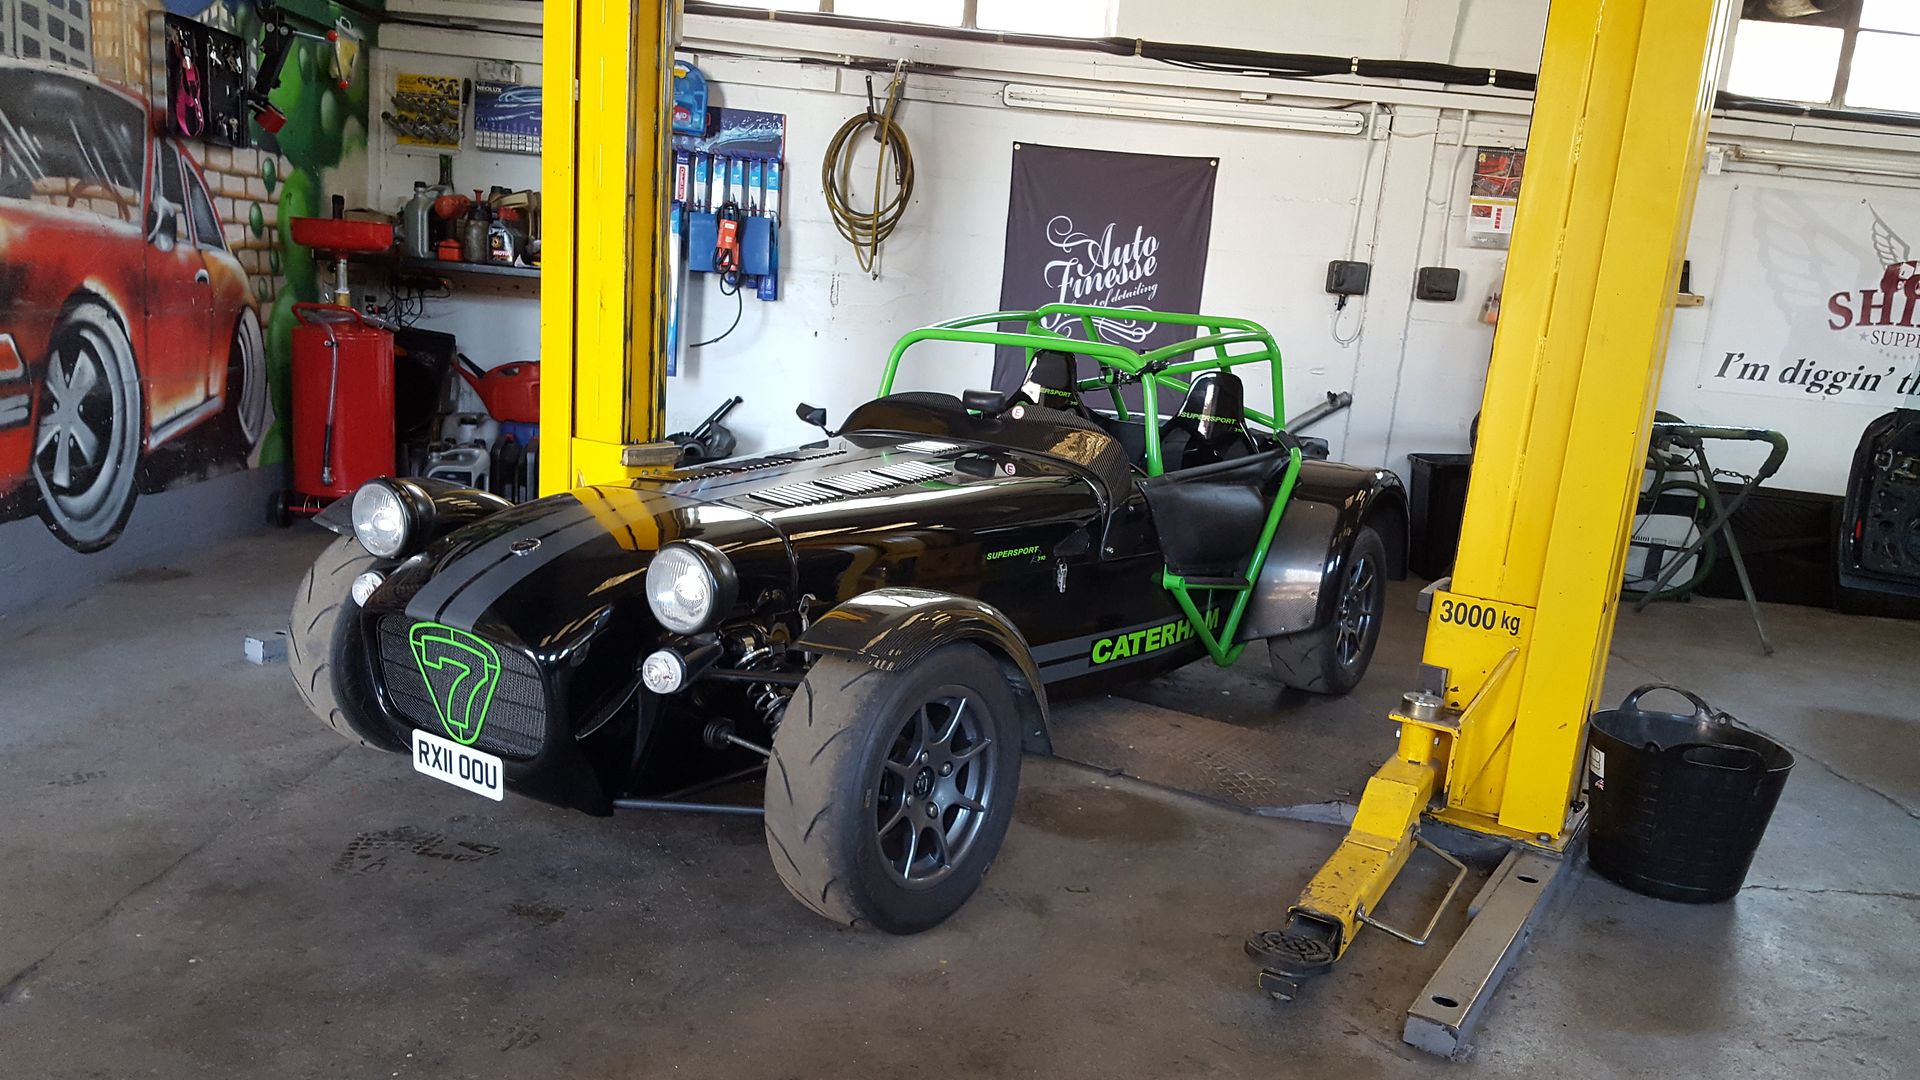
This is a bit of a impulse build.... Alot of my friends have got into the Caterham scene, two really good friends have got Supersport 310's 1.6
16v's (green ones a 2011 and red ones 2008)
and also went out in this the other day, a 2014 620r, 2.0 supercharged 6 speed sequential gearbox, the fastest thing i have ever been in, accelerated
like nothing ive ever experienced before!! 620bhp per ton!
But, alas,...... i dont have Ł15k to spend on a Caterham (or Ł50k for a 620r  )
)
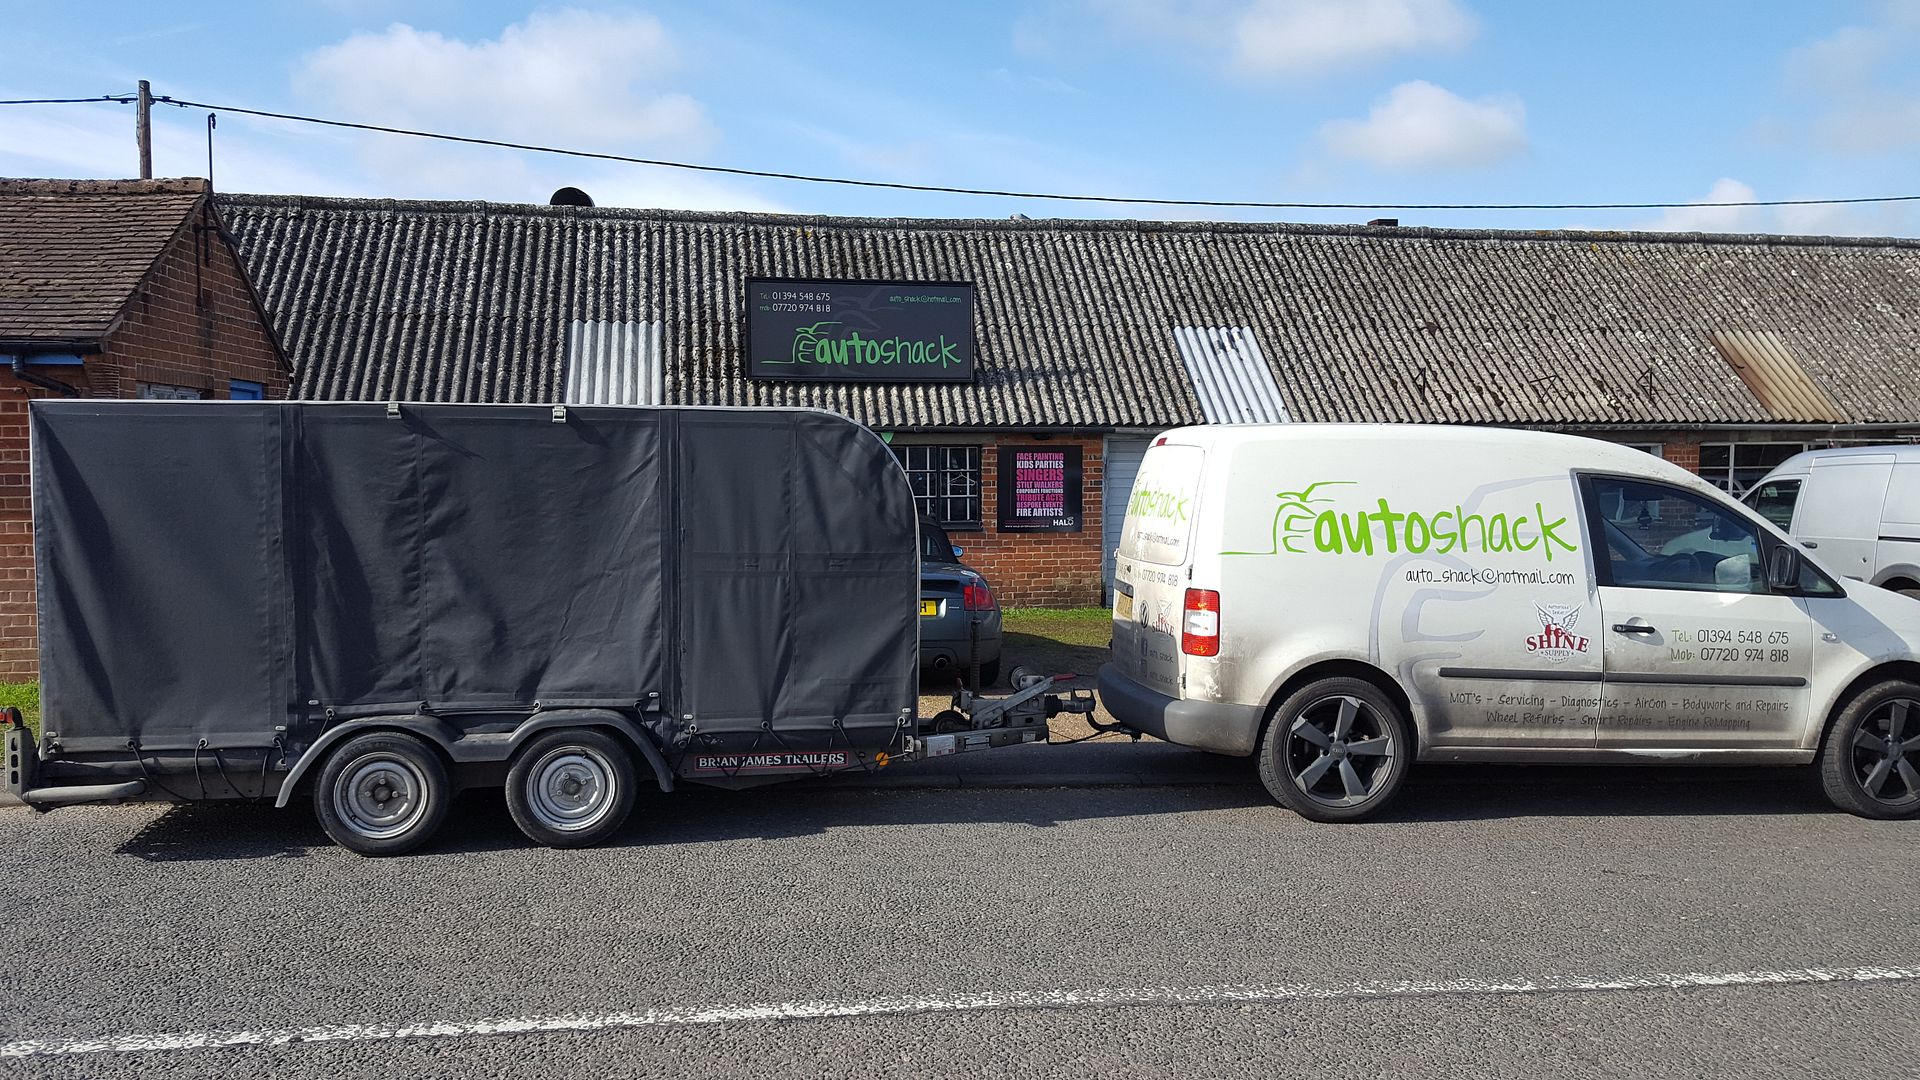
so i went onto ebay looking to see what i could build on a budget, bidded on a unfinished project. so the next weekend i headed from Suffolk up to
Crewe on a roadtrip with the Autoshack gang
Then detoured in the way back to Aylesbury for another Ebay bargain i'd spotted.

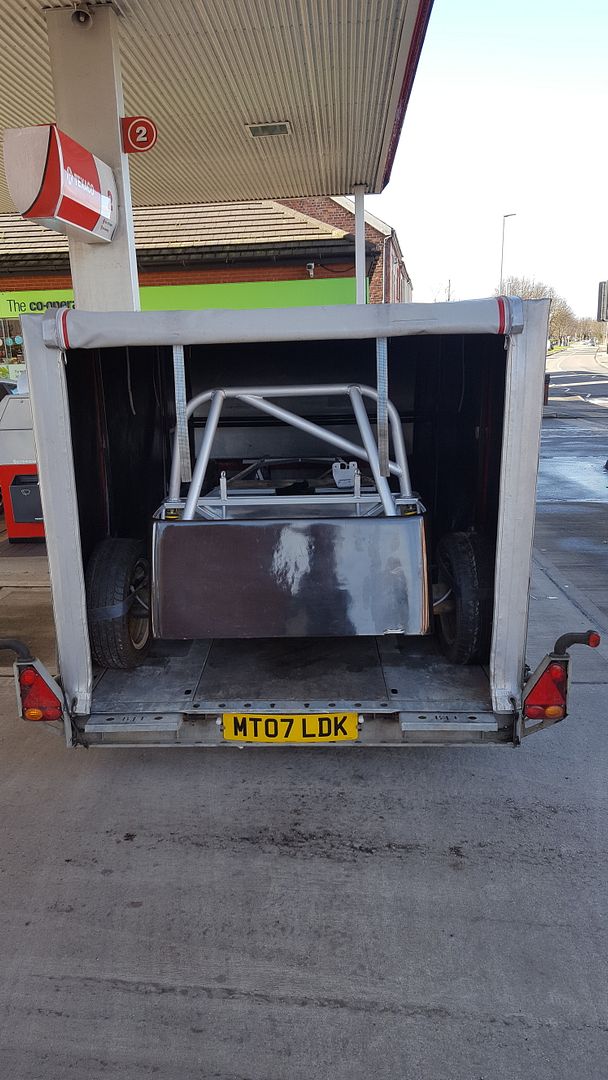
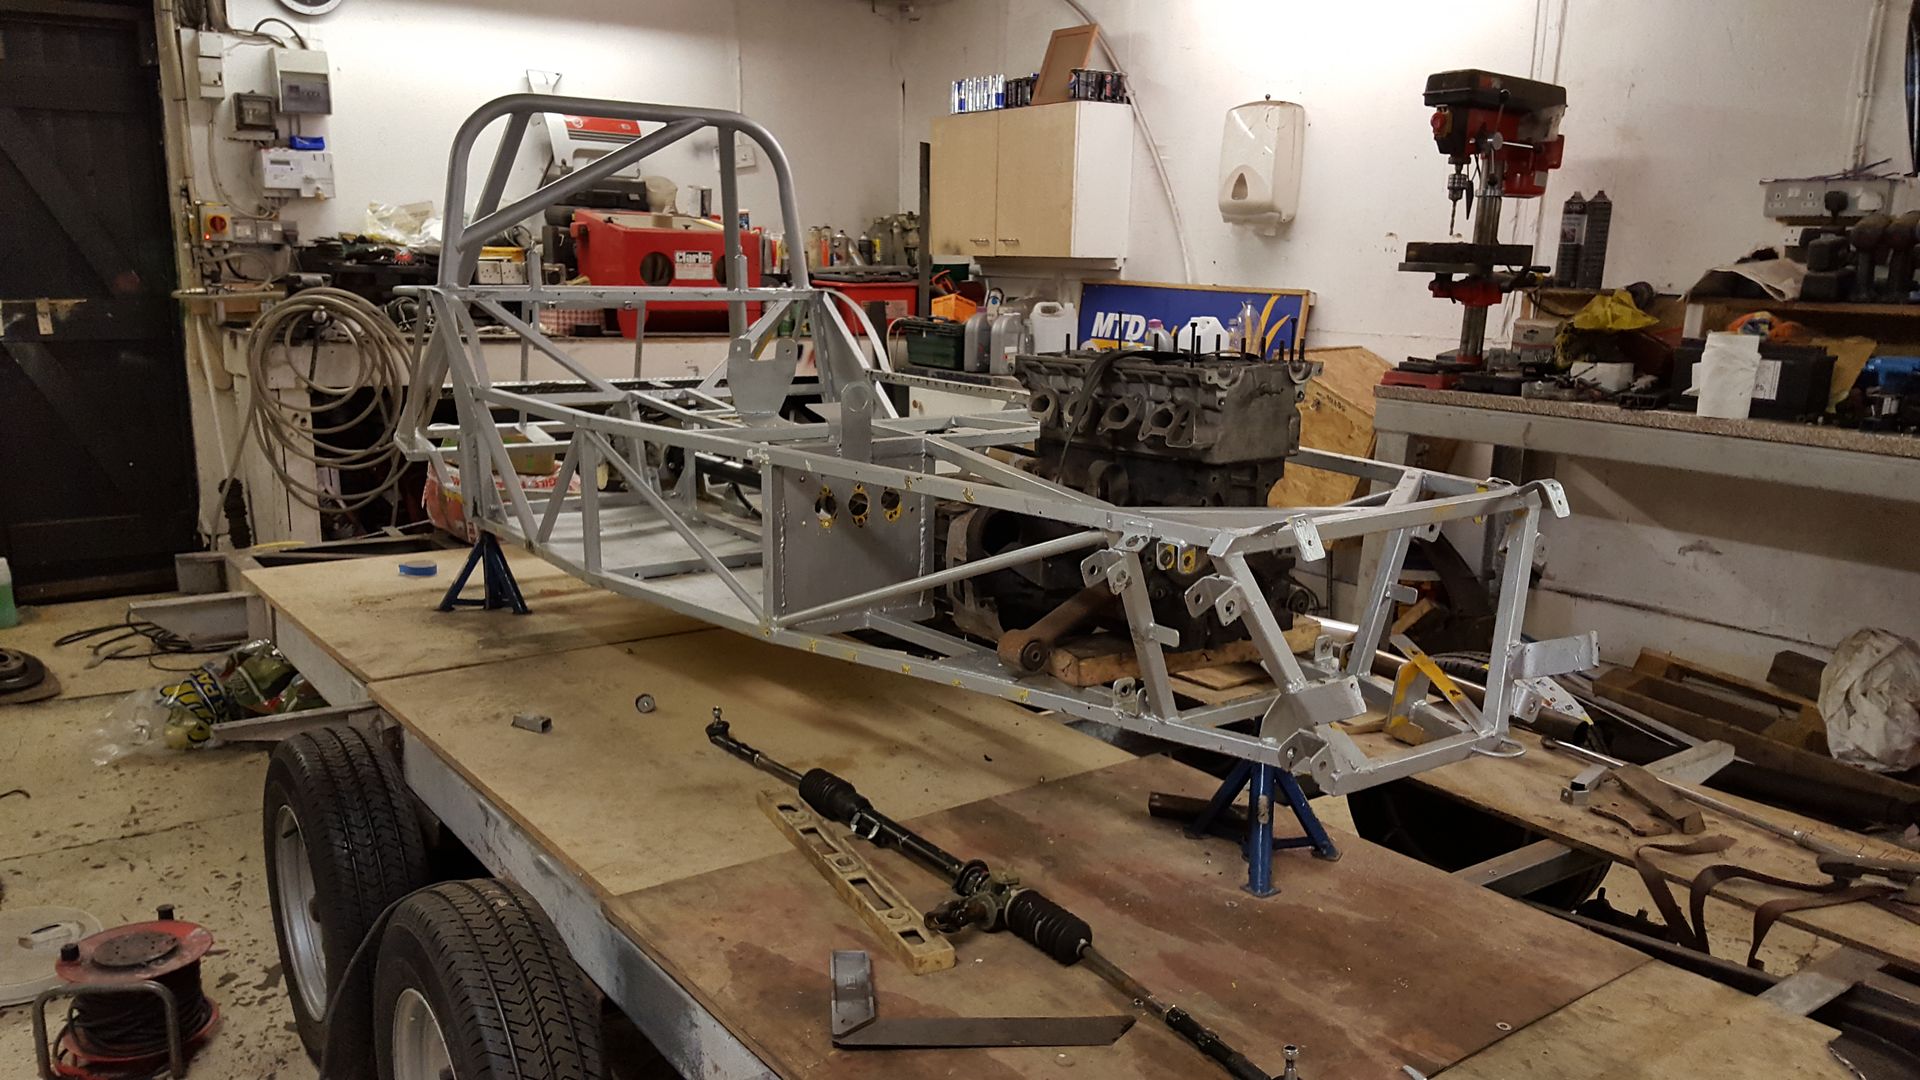
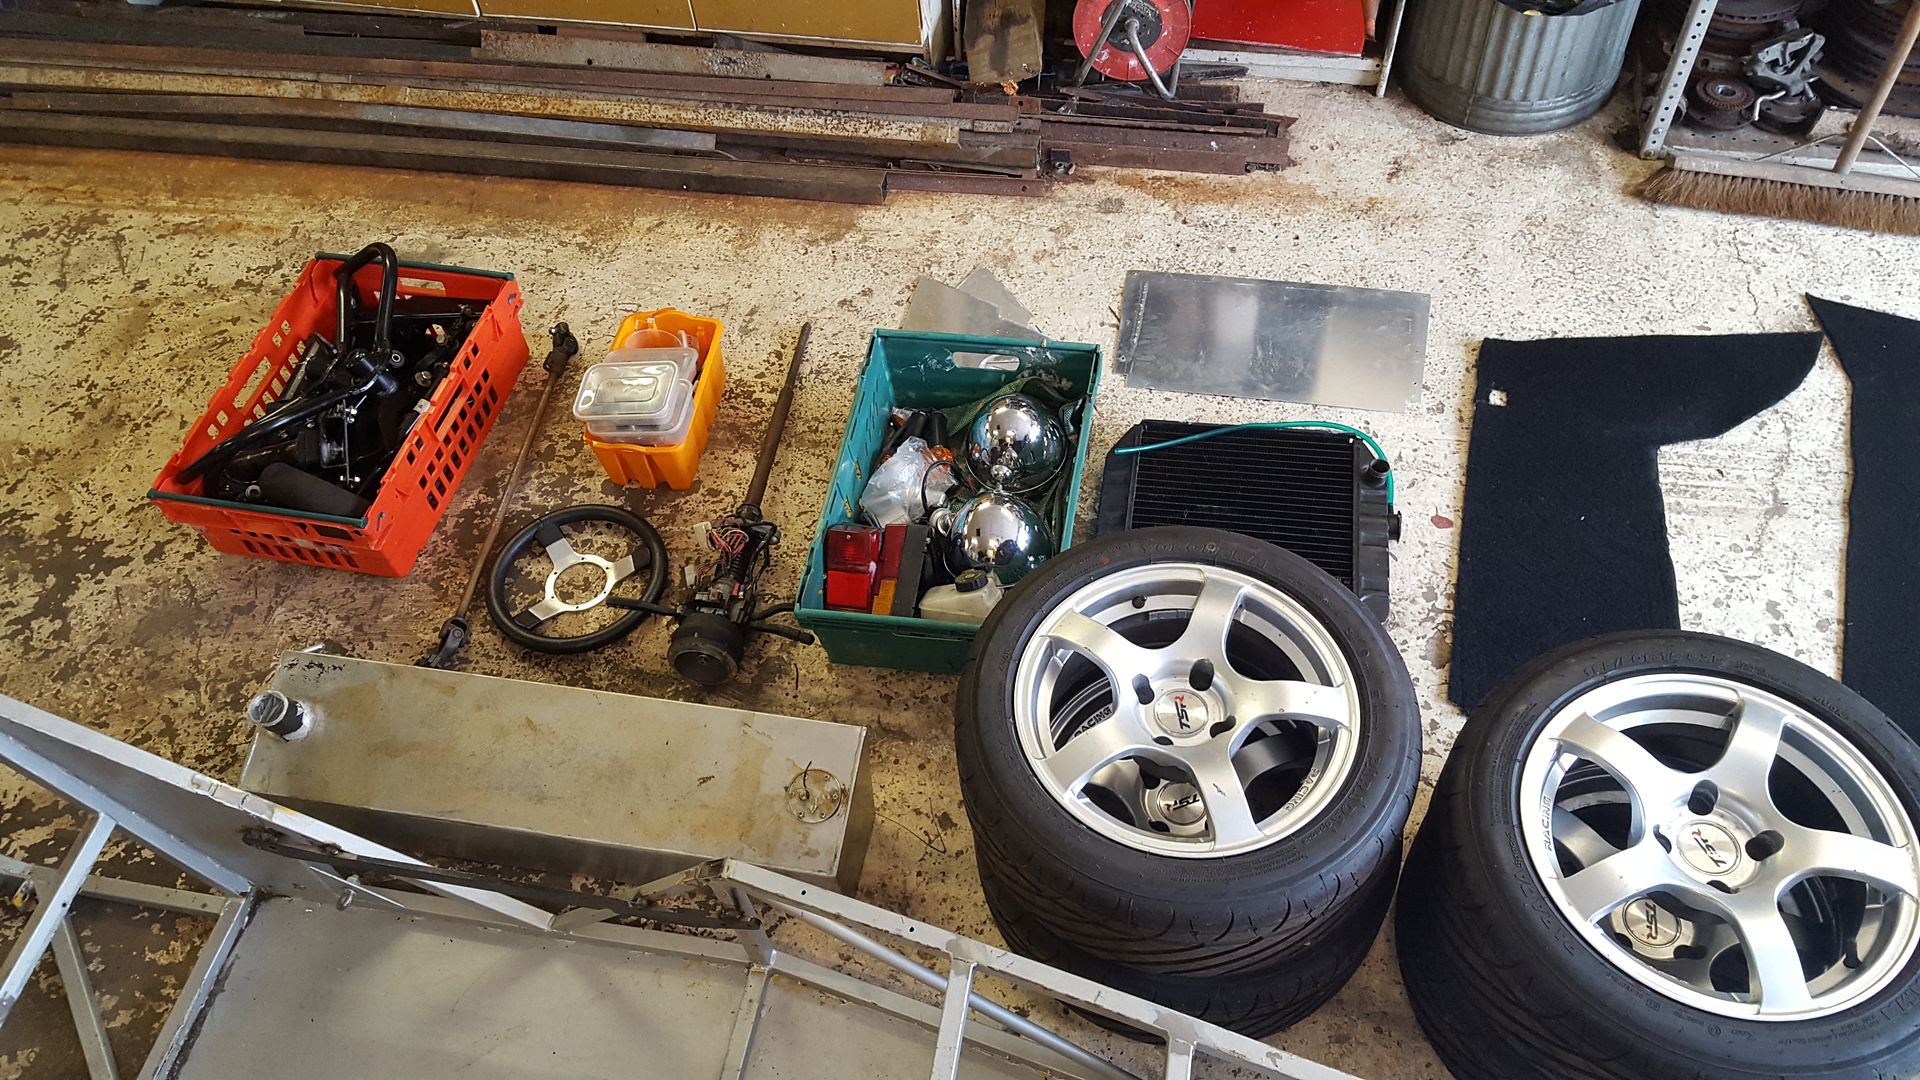
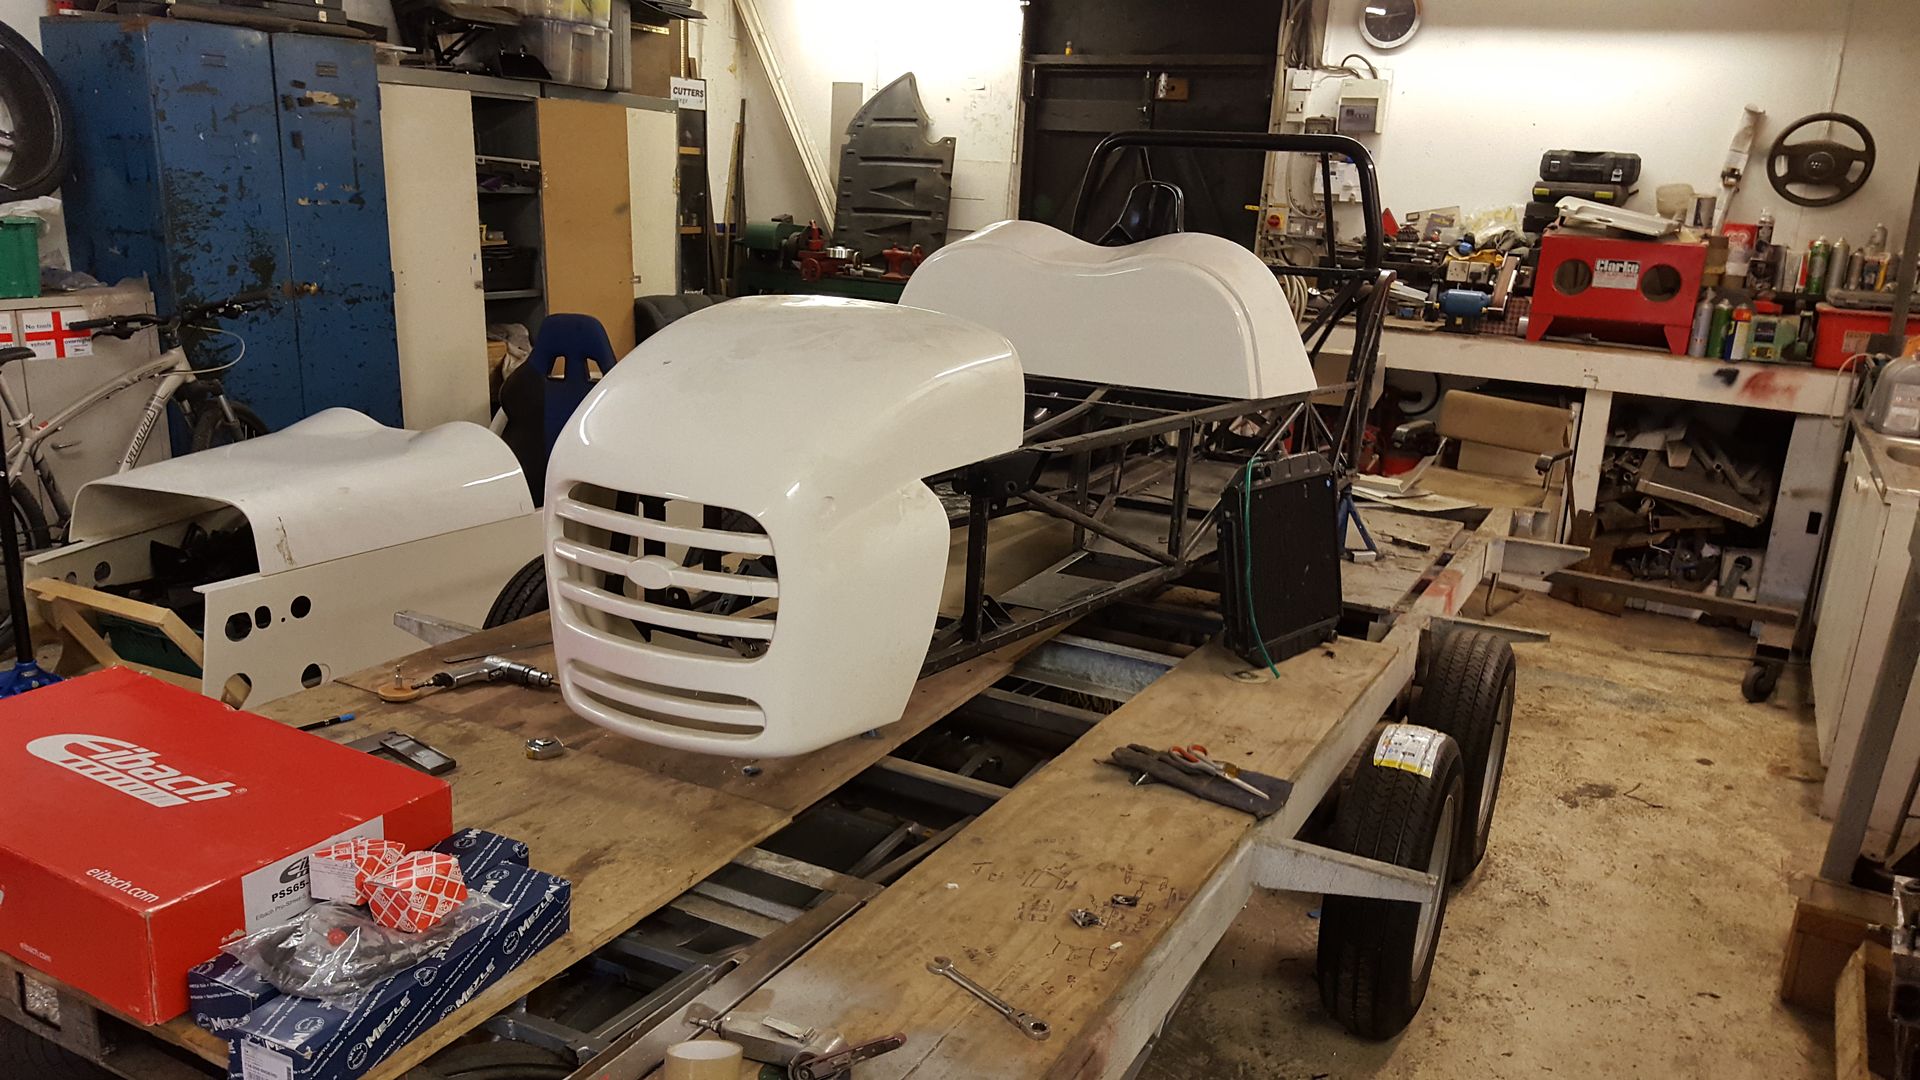
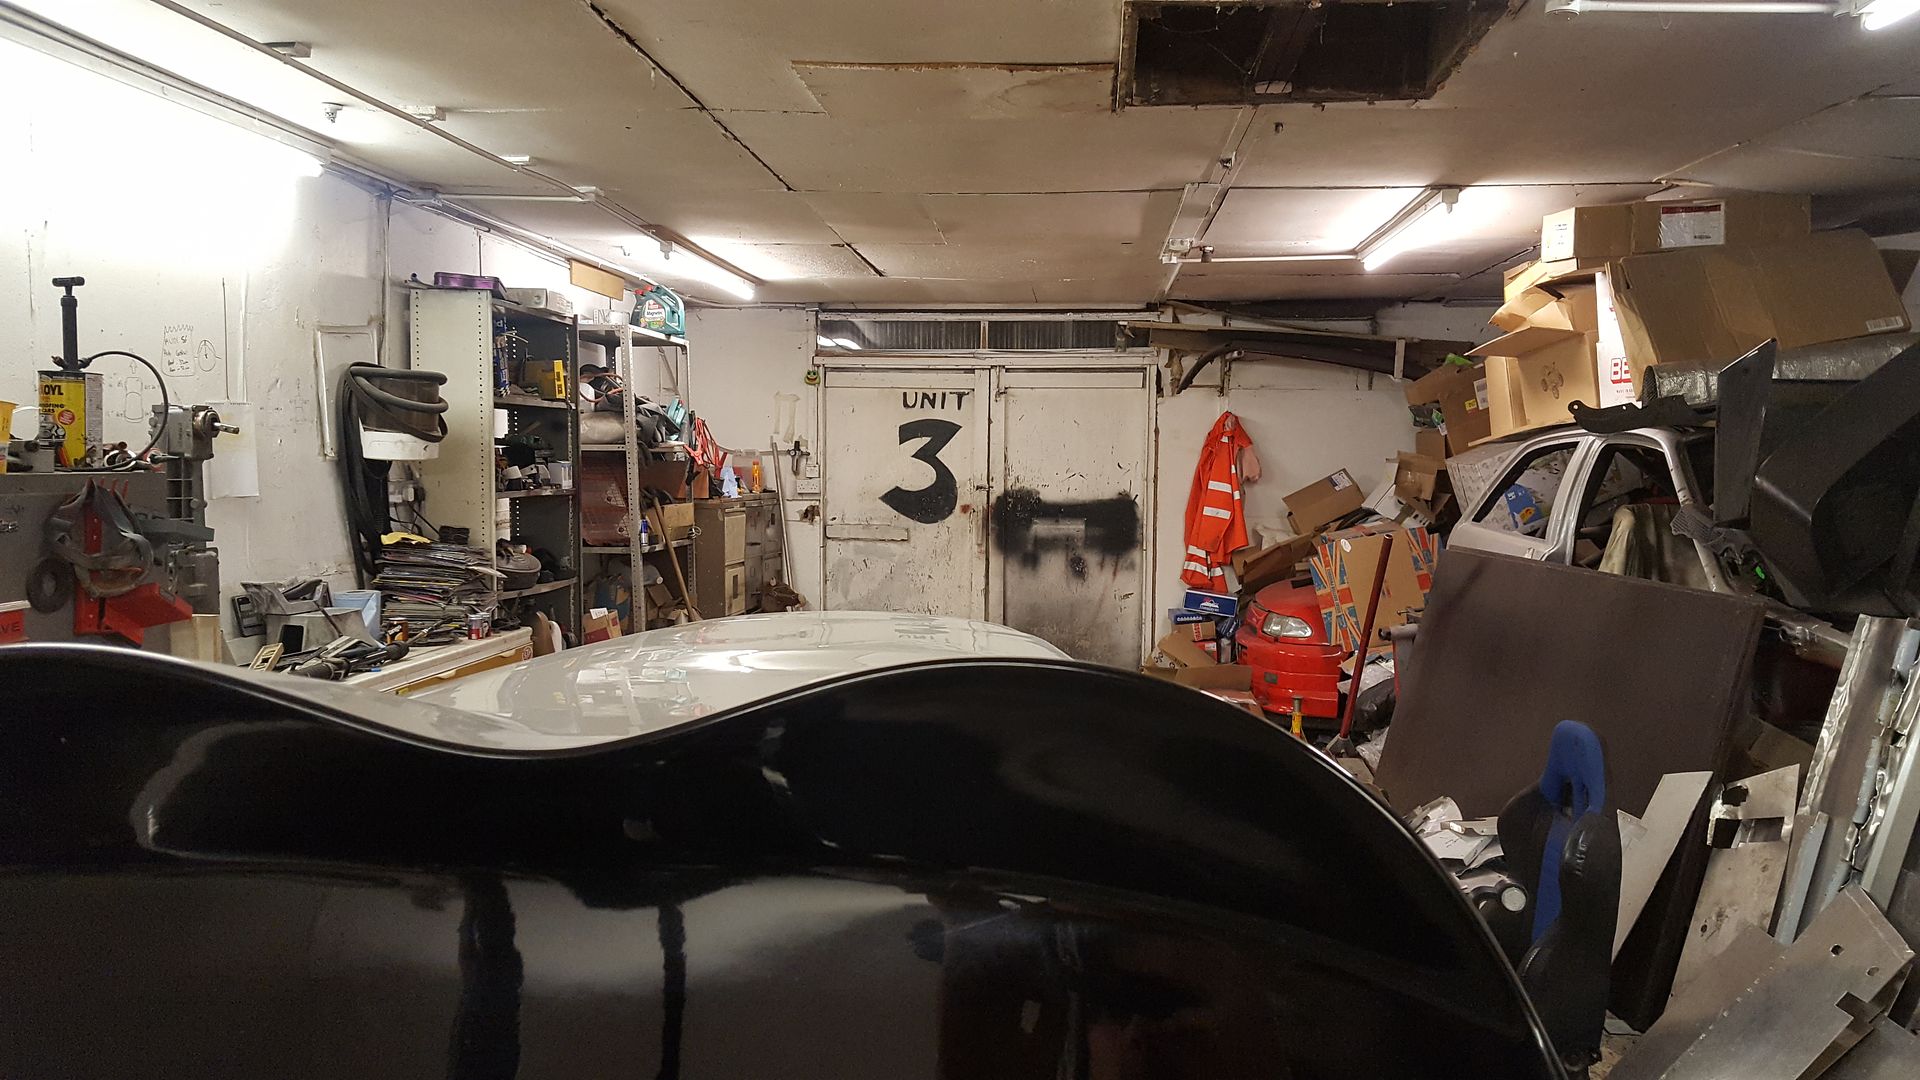
So about 500miles done lets see what i actually bought.
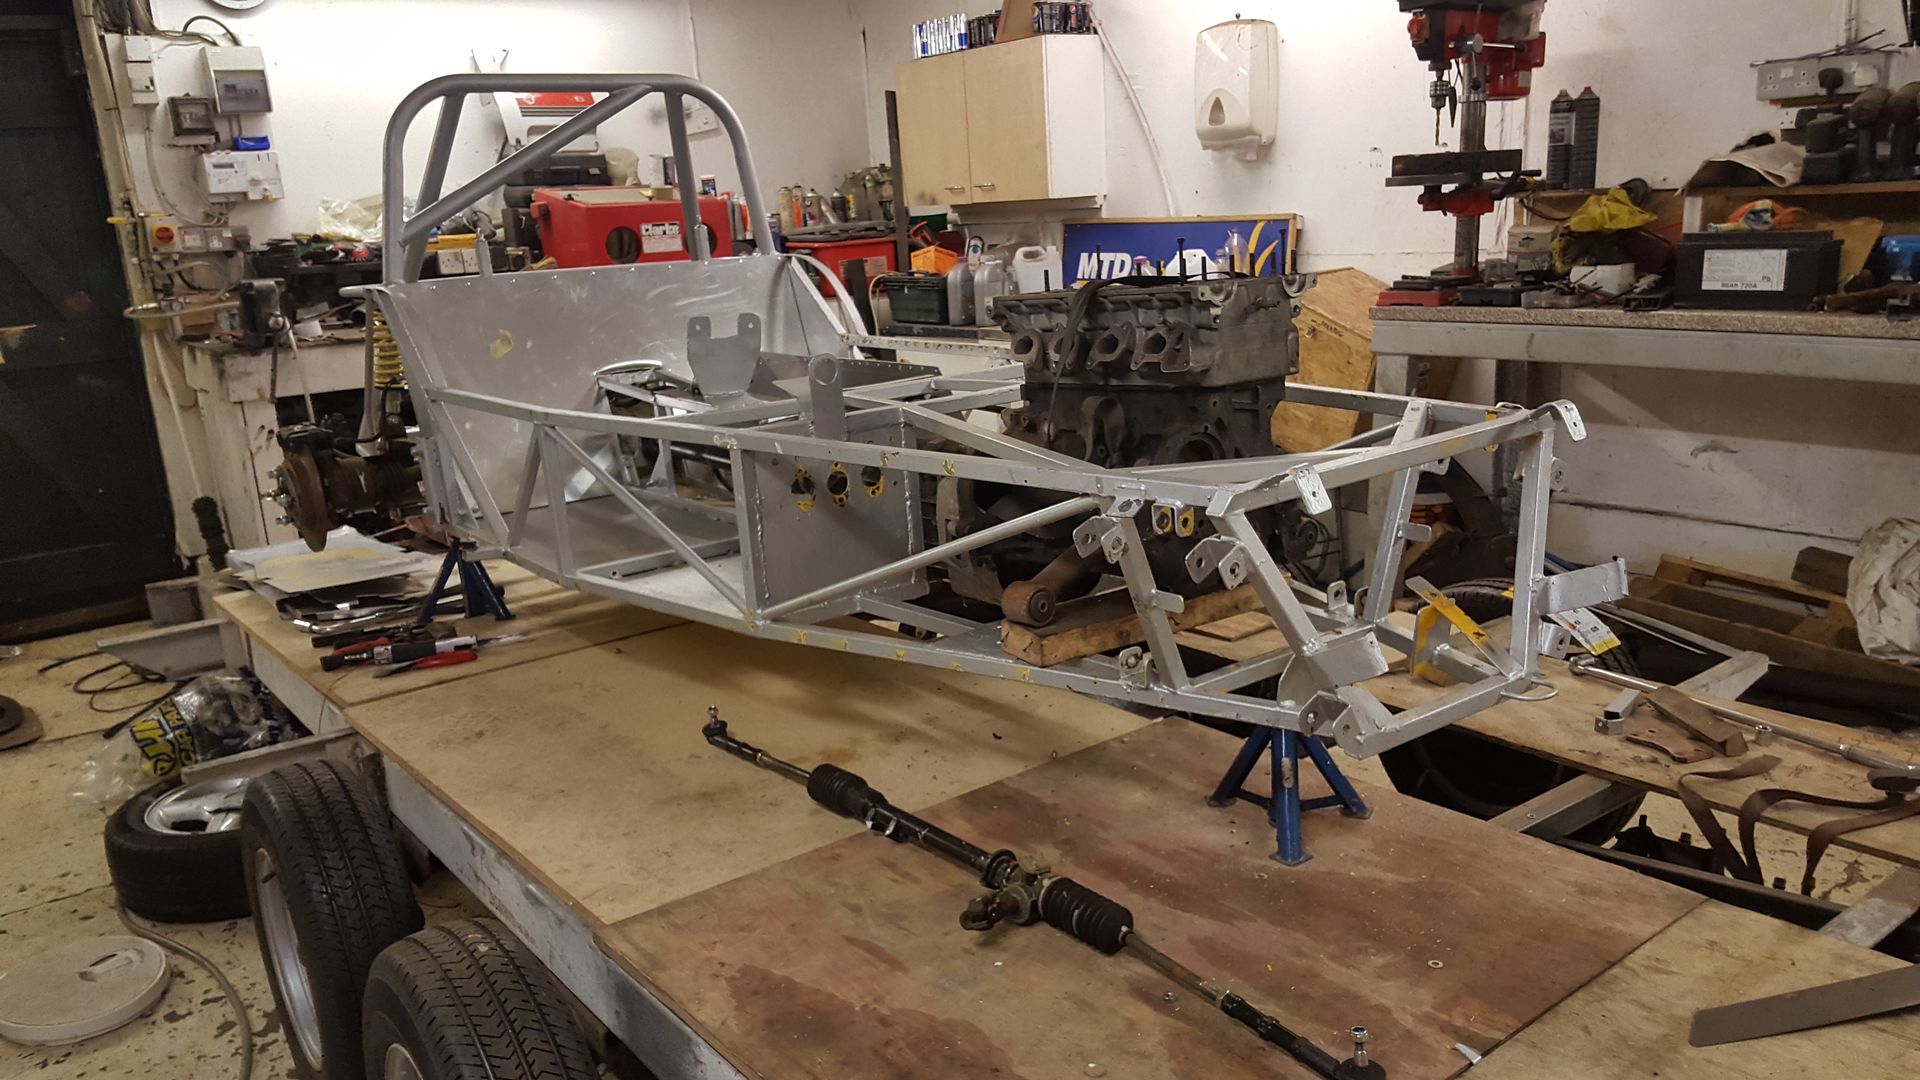
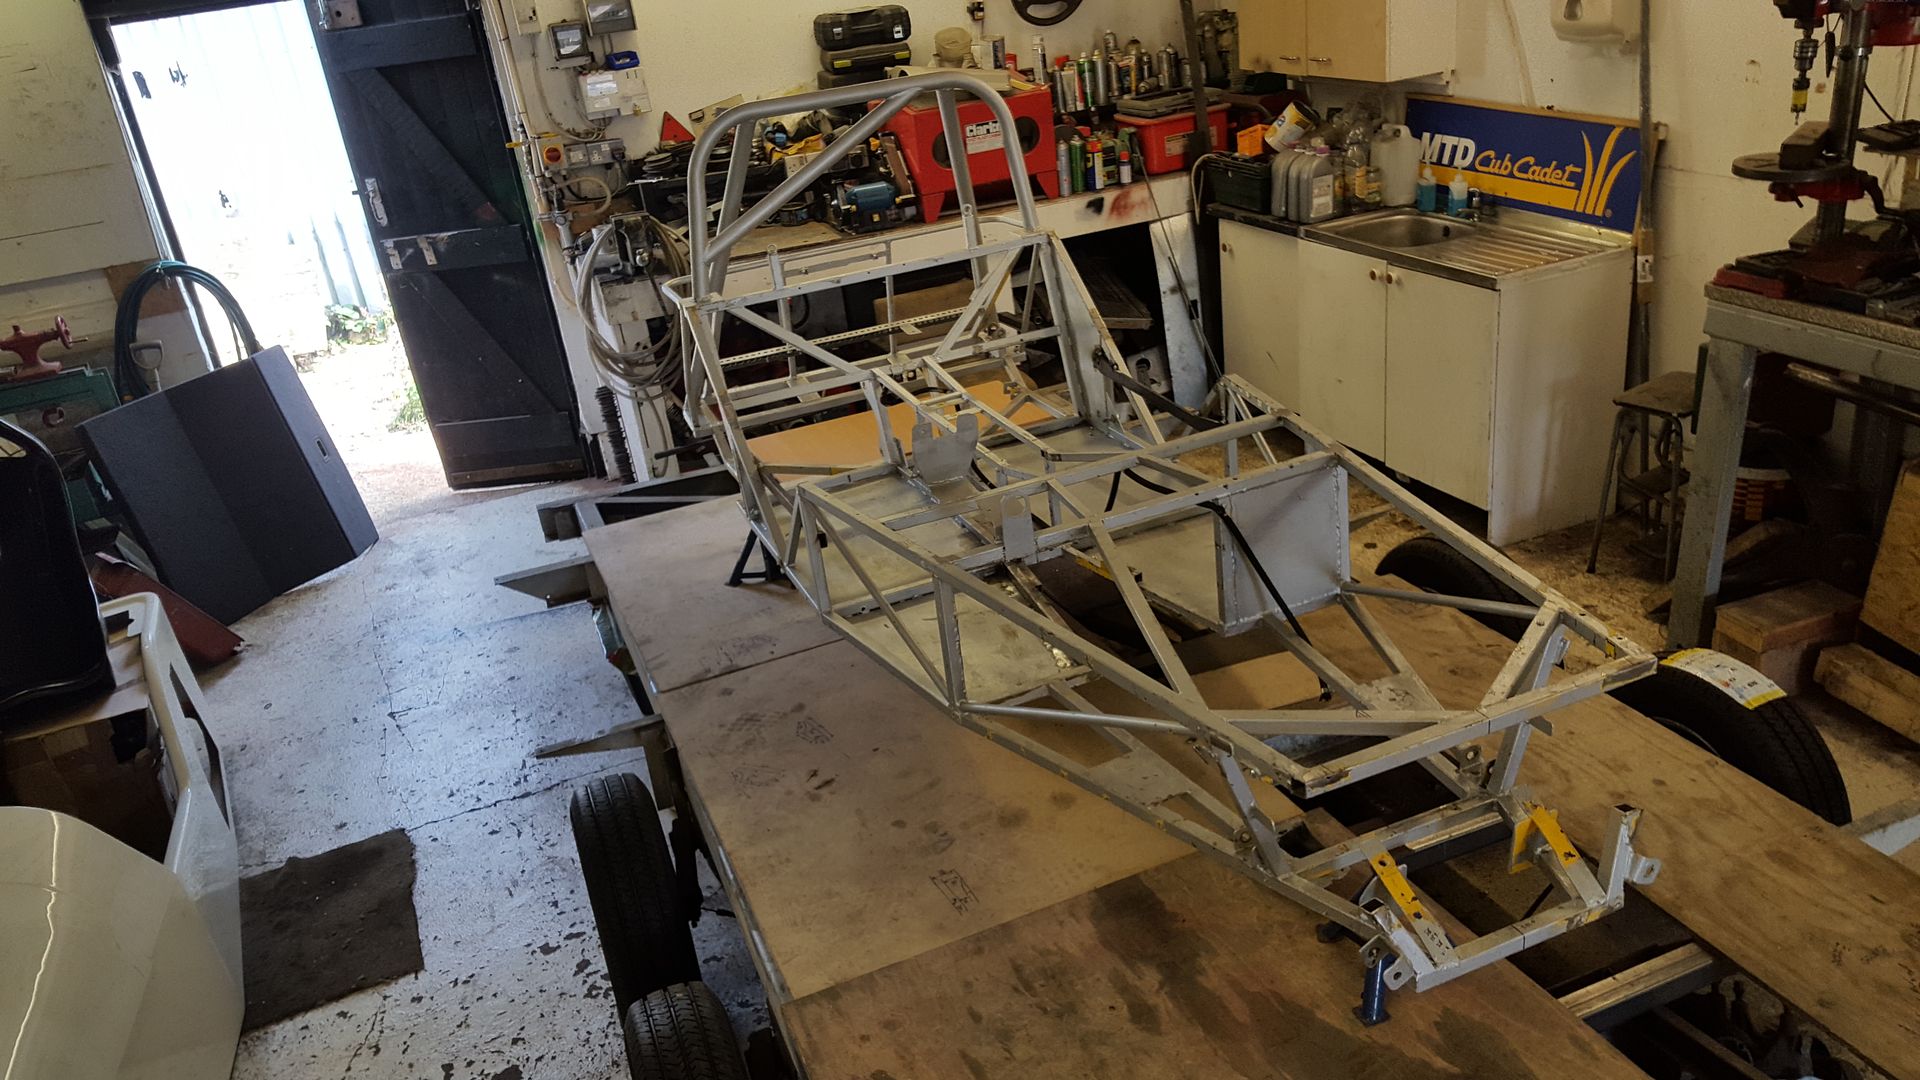
The unfinished Locost i won for Ł495!!!
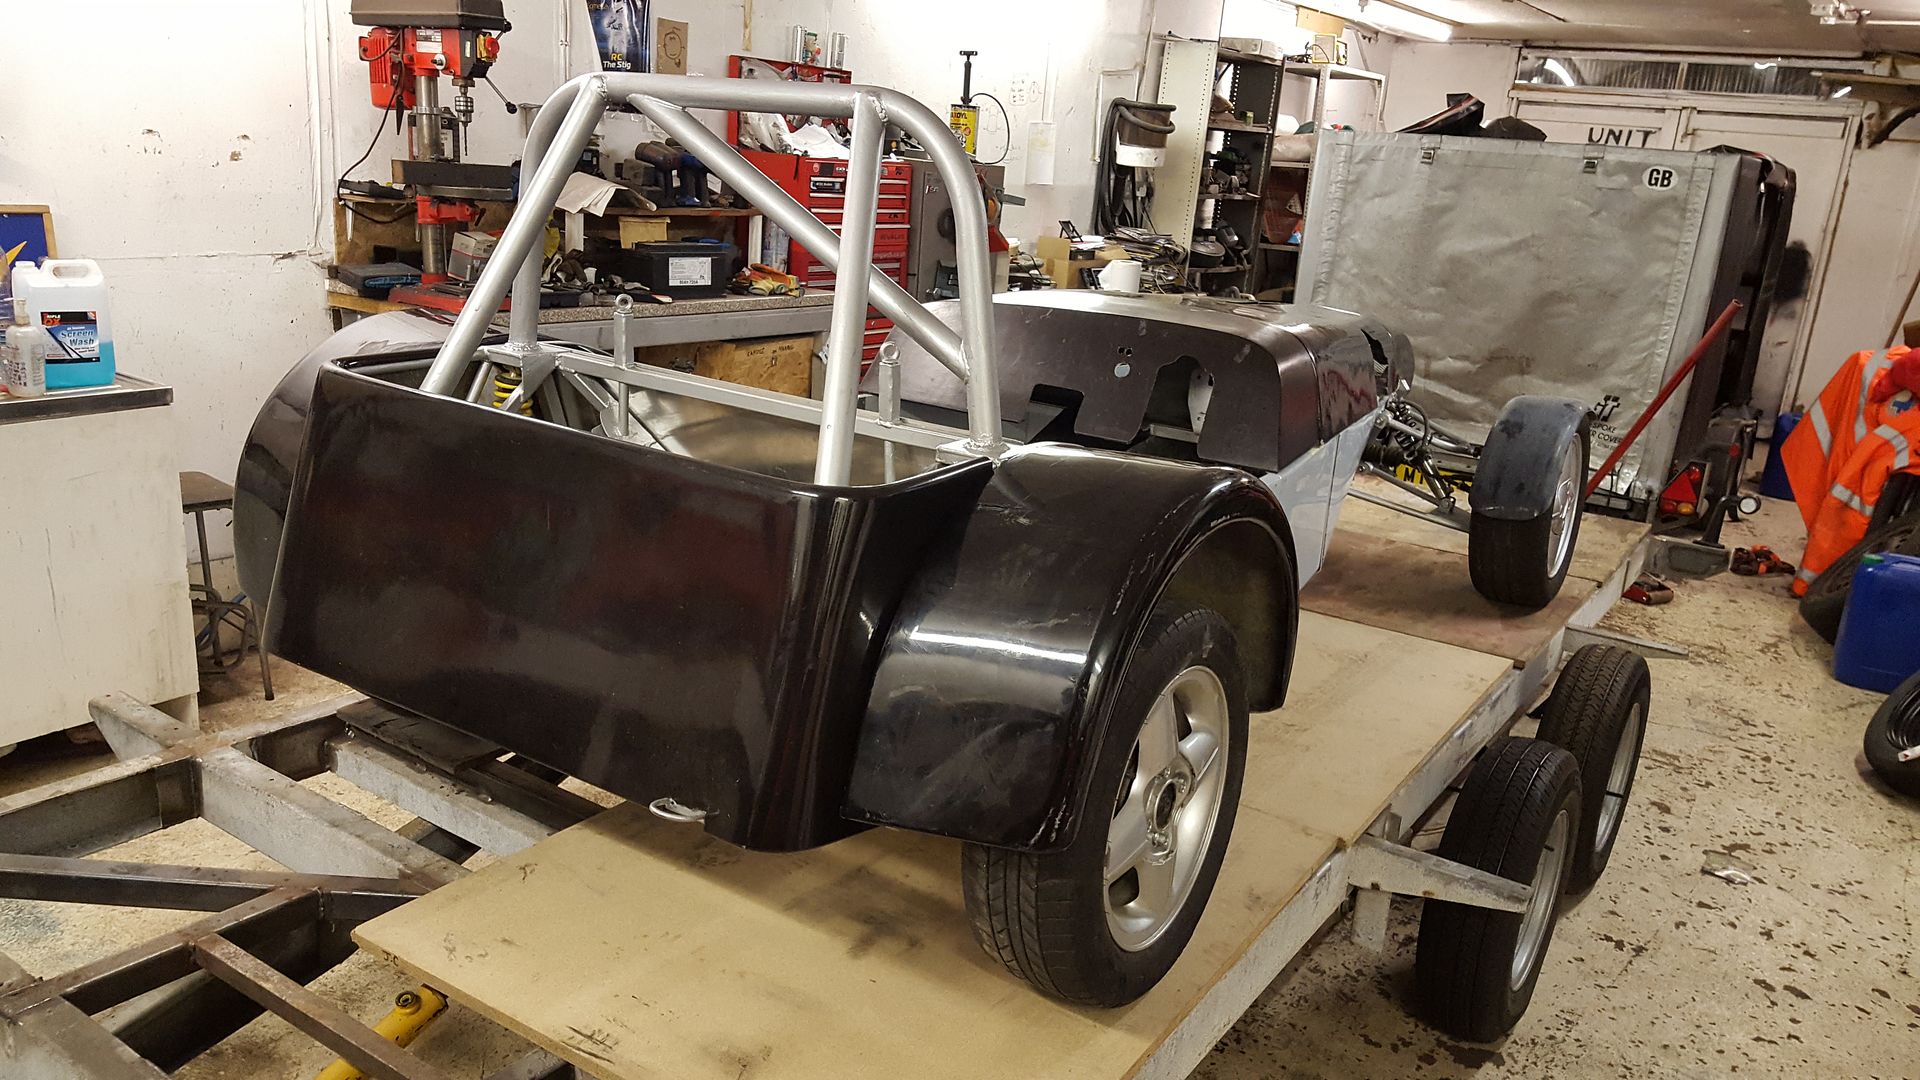
So i paid Ł495 and got a hell of alot!!#
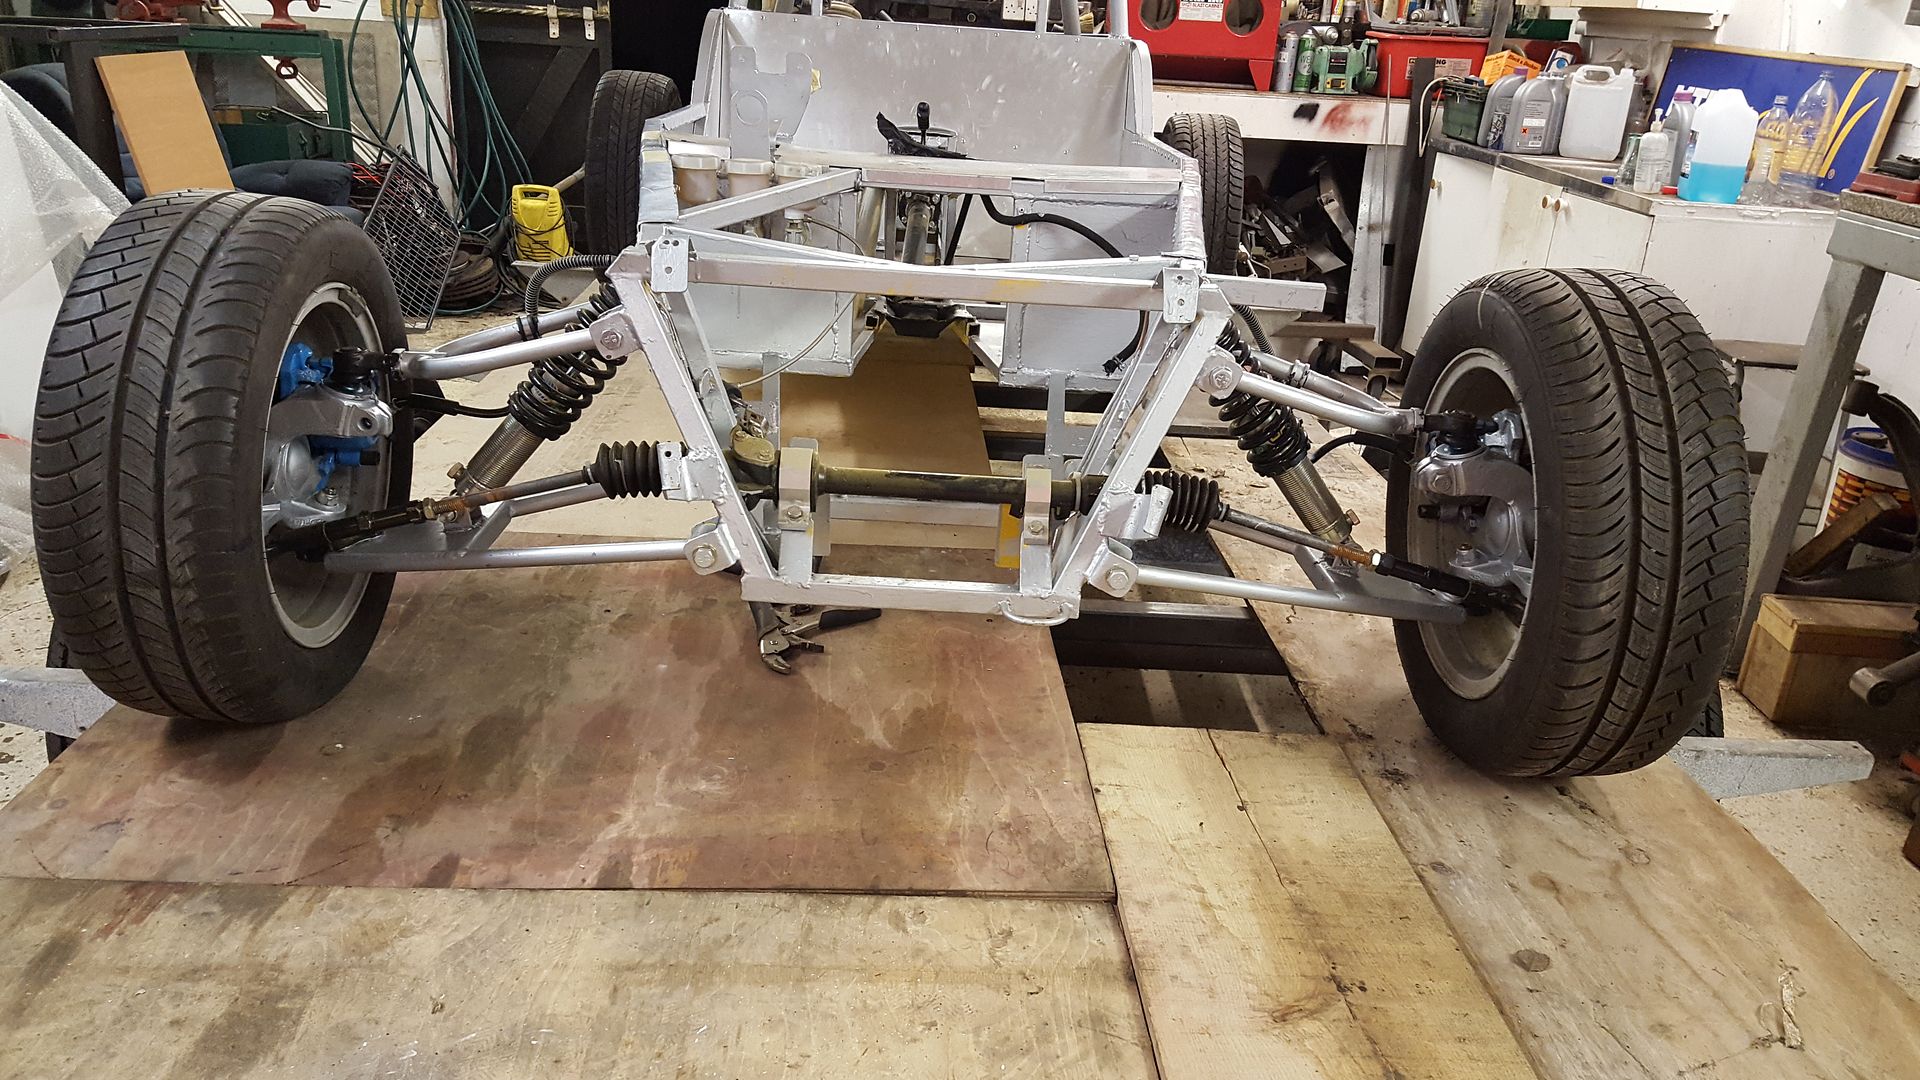
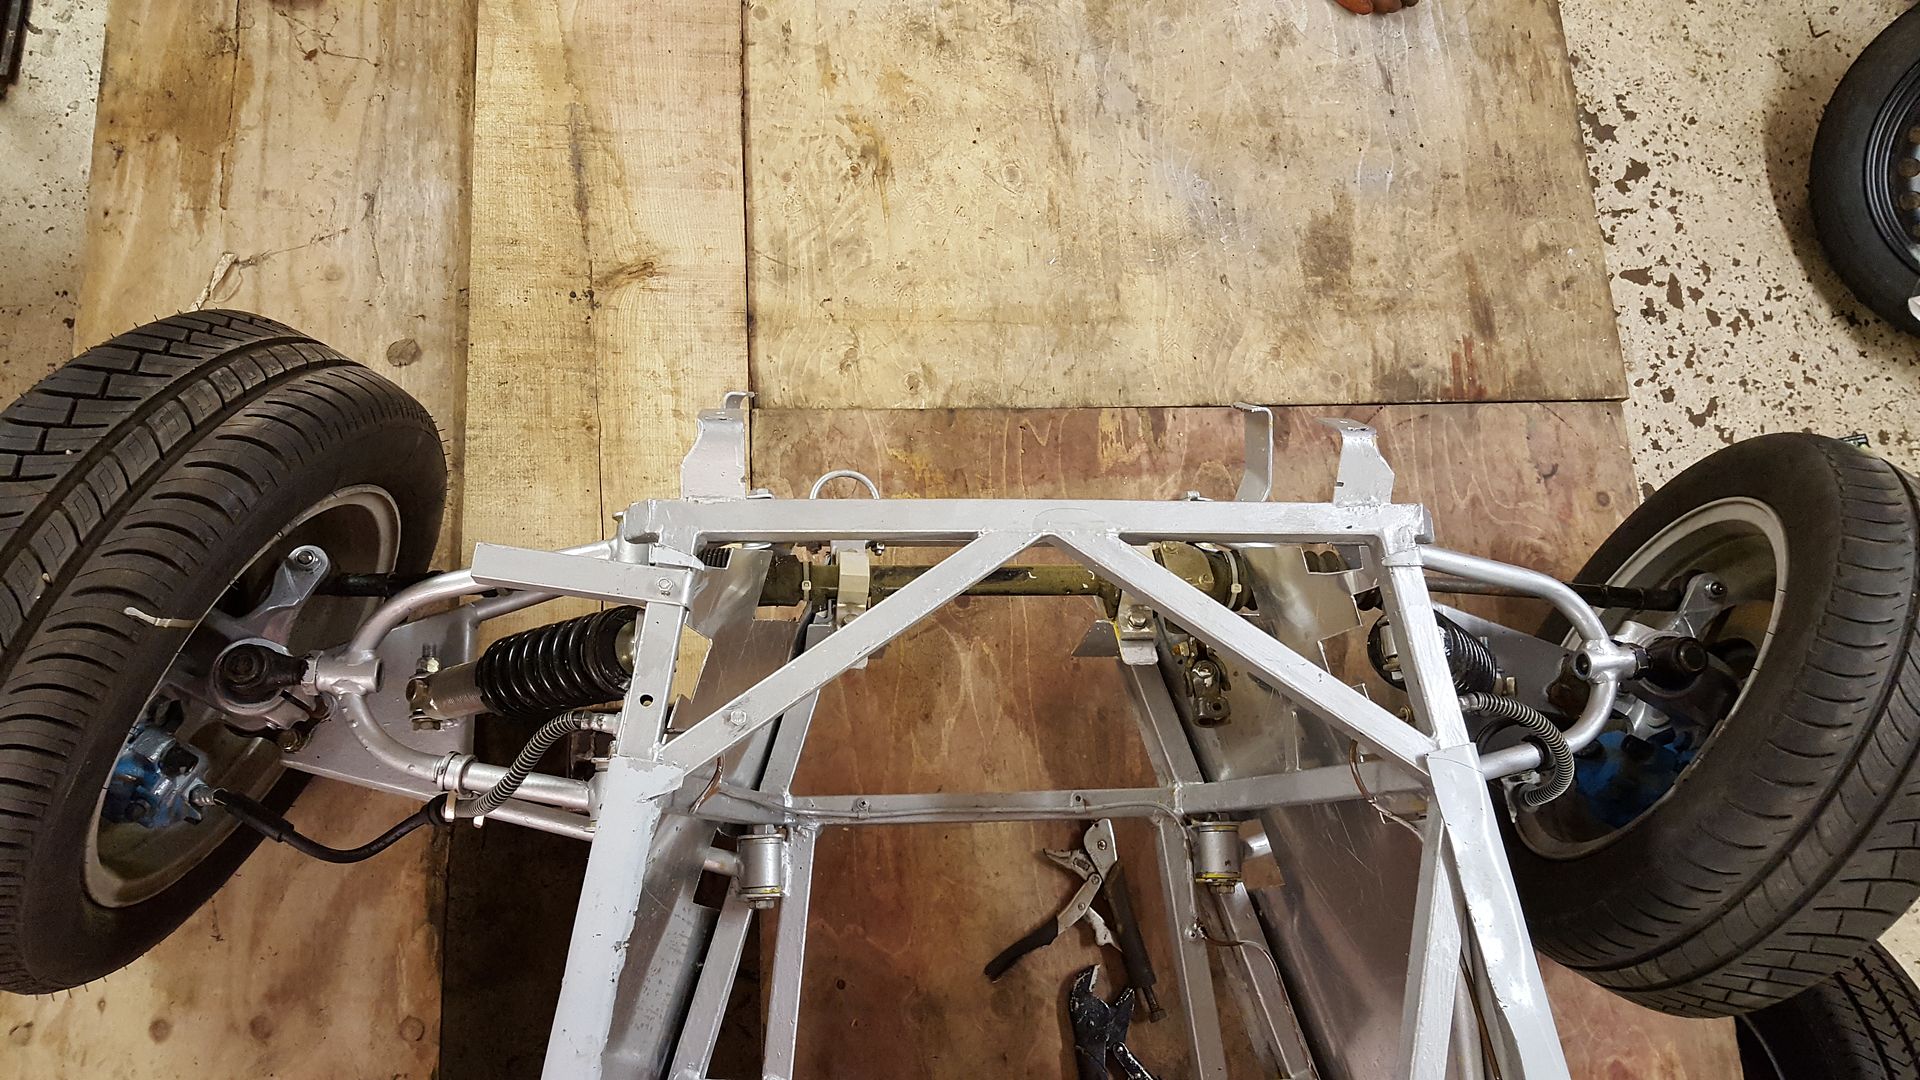
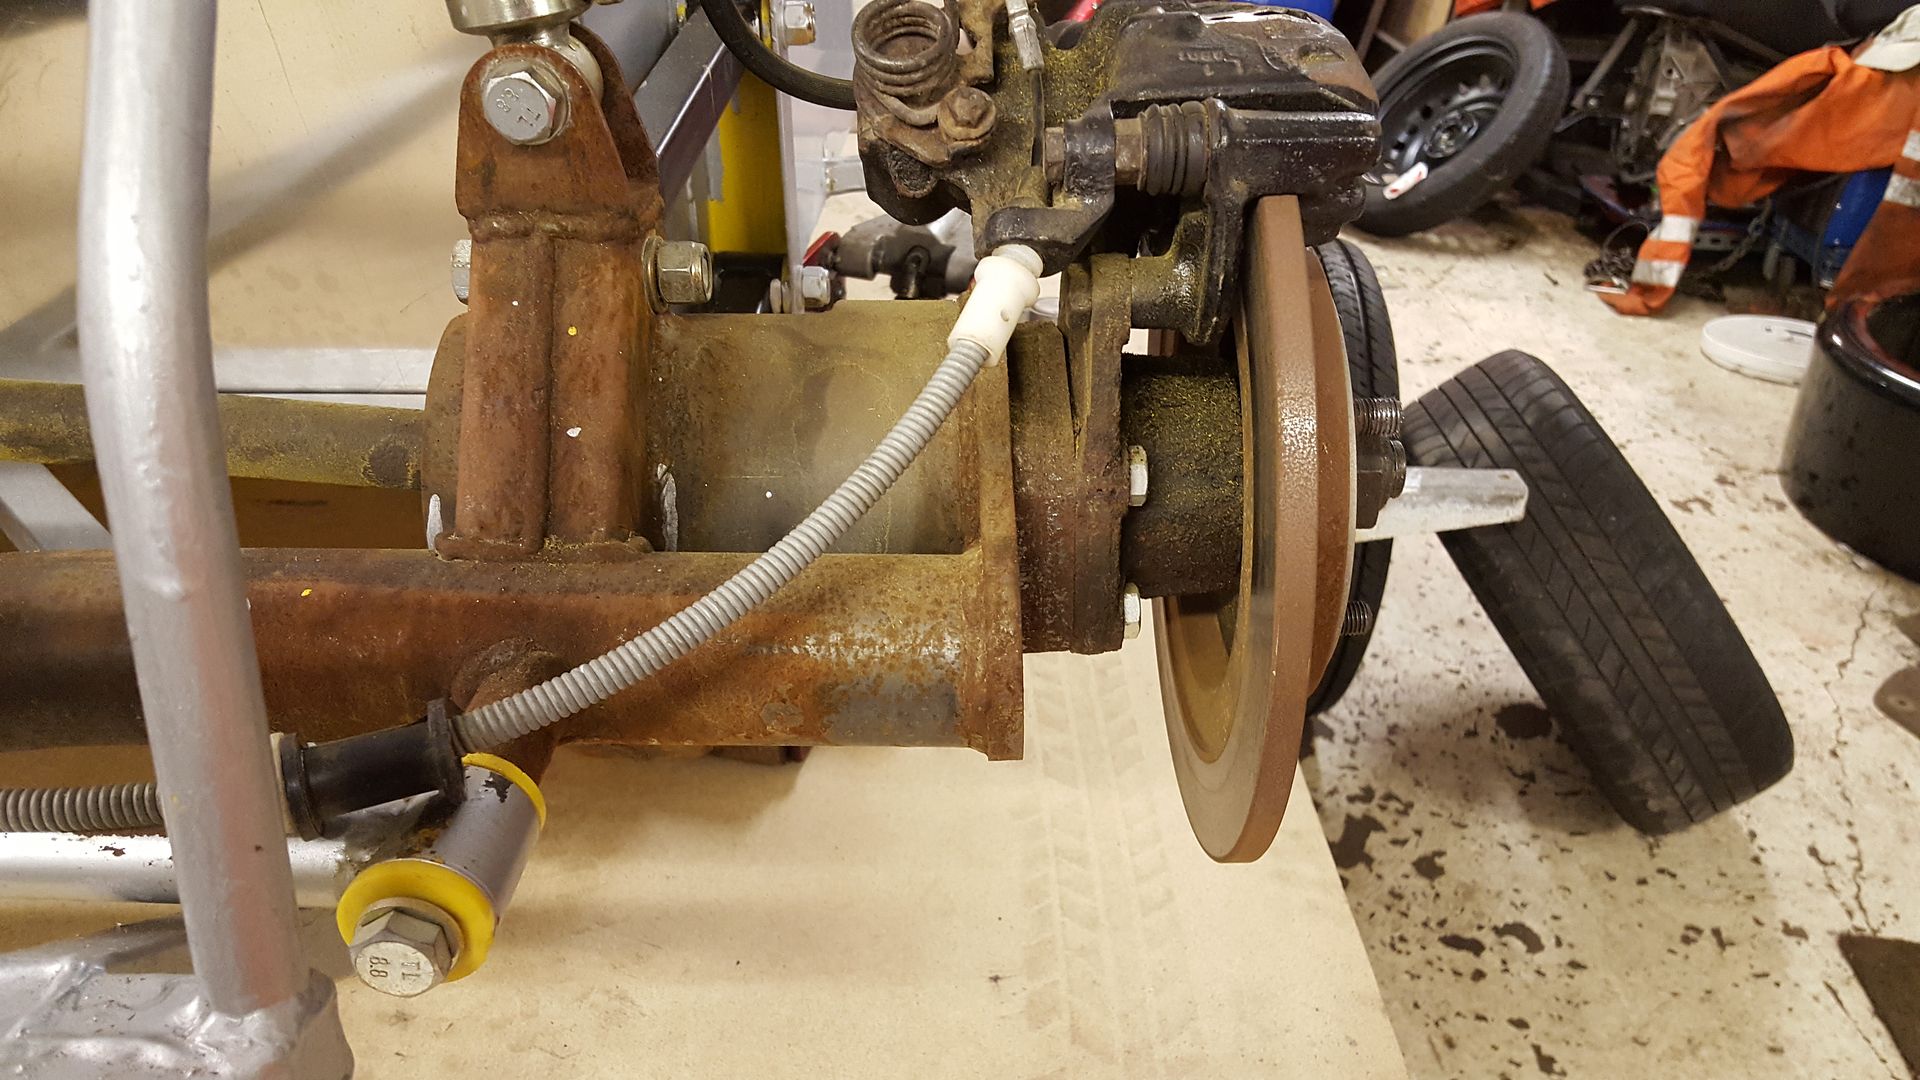
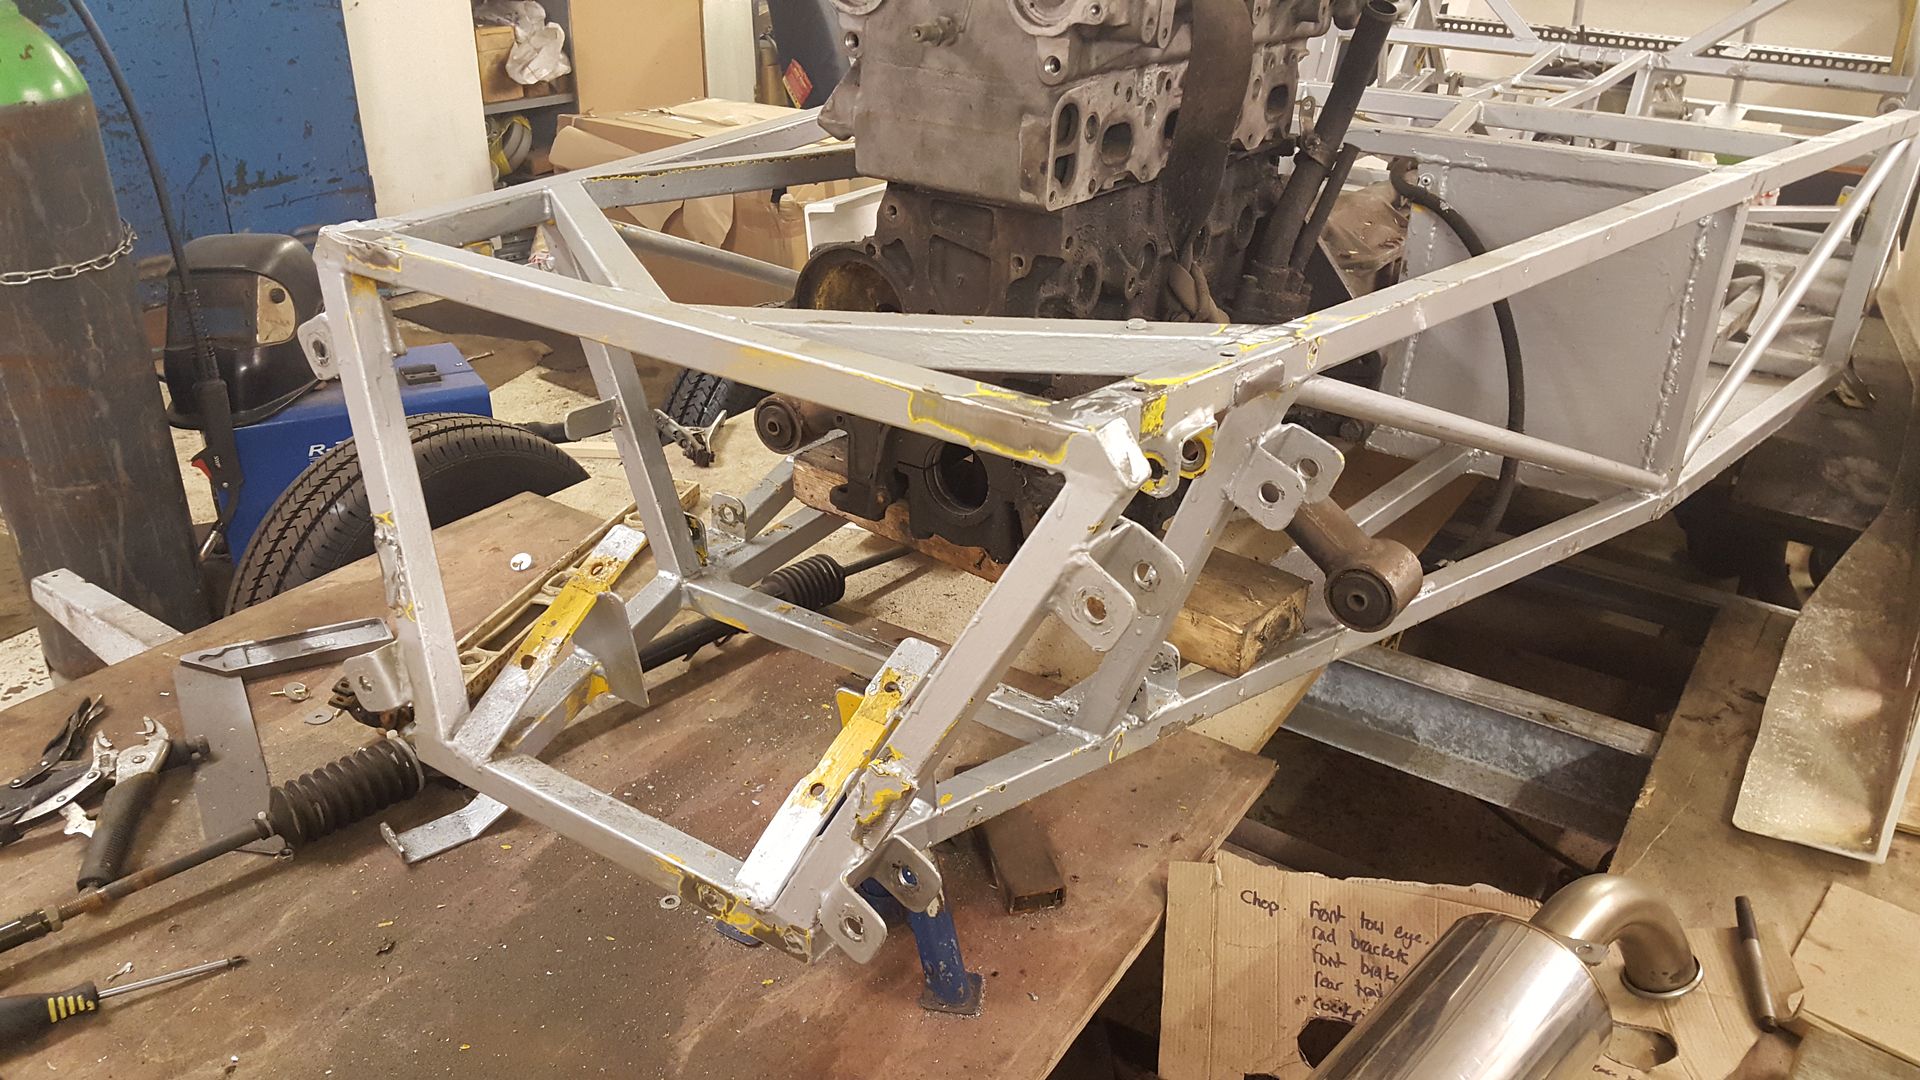
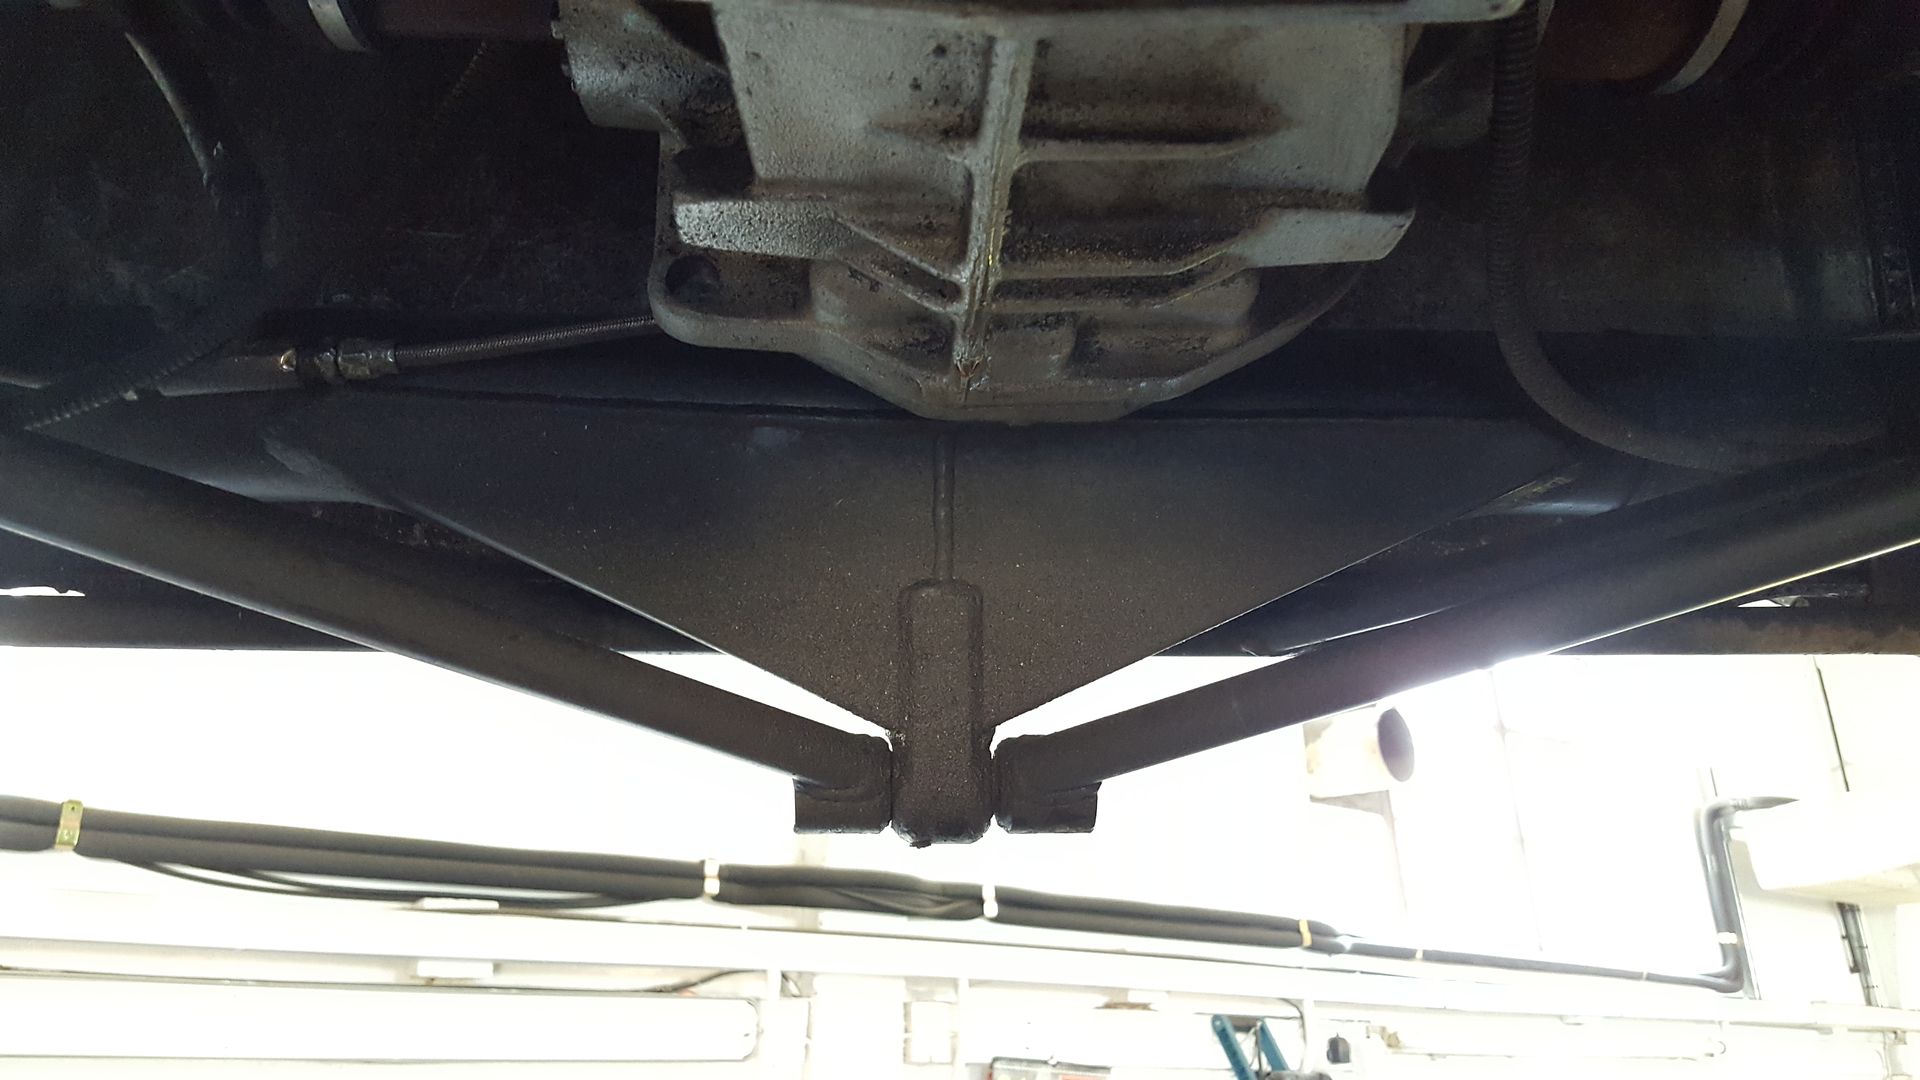
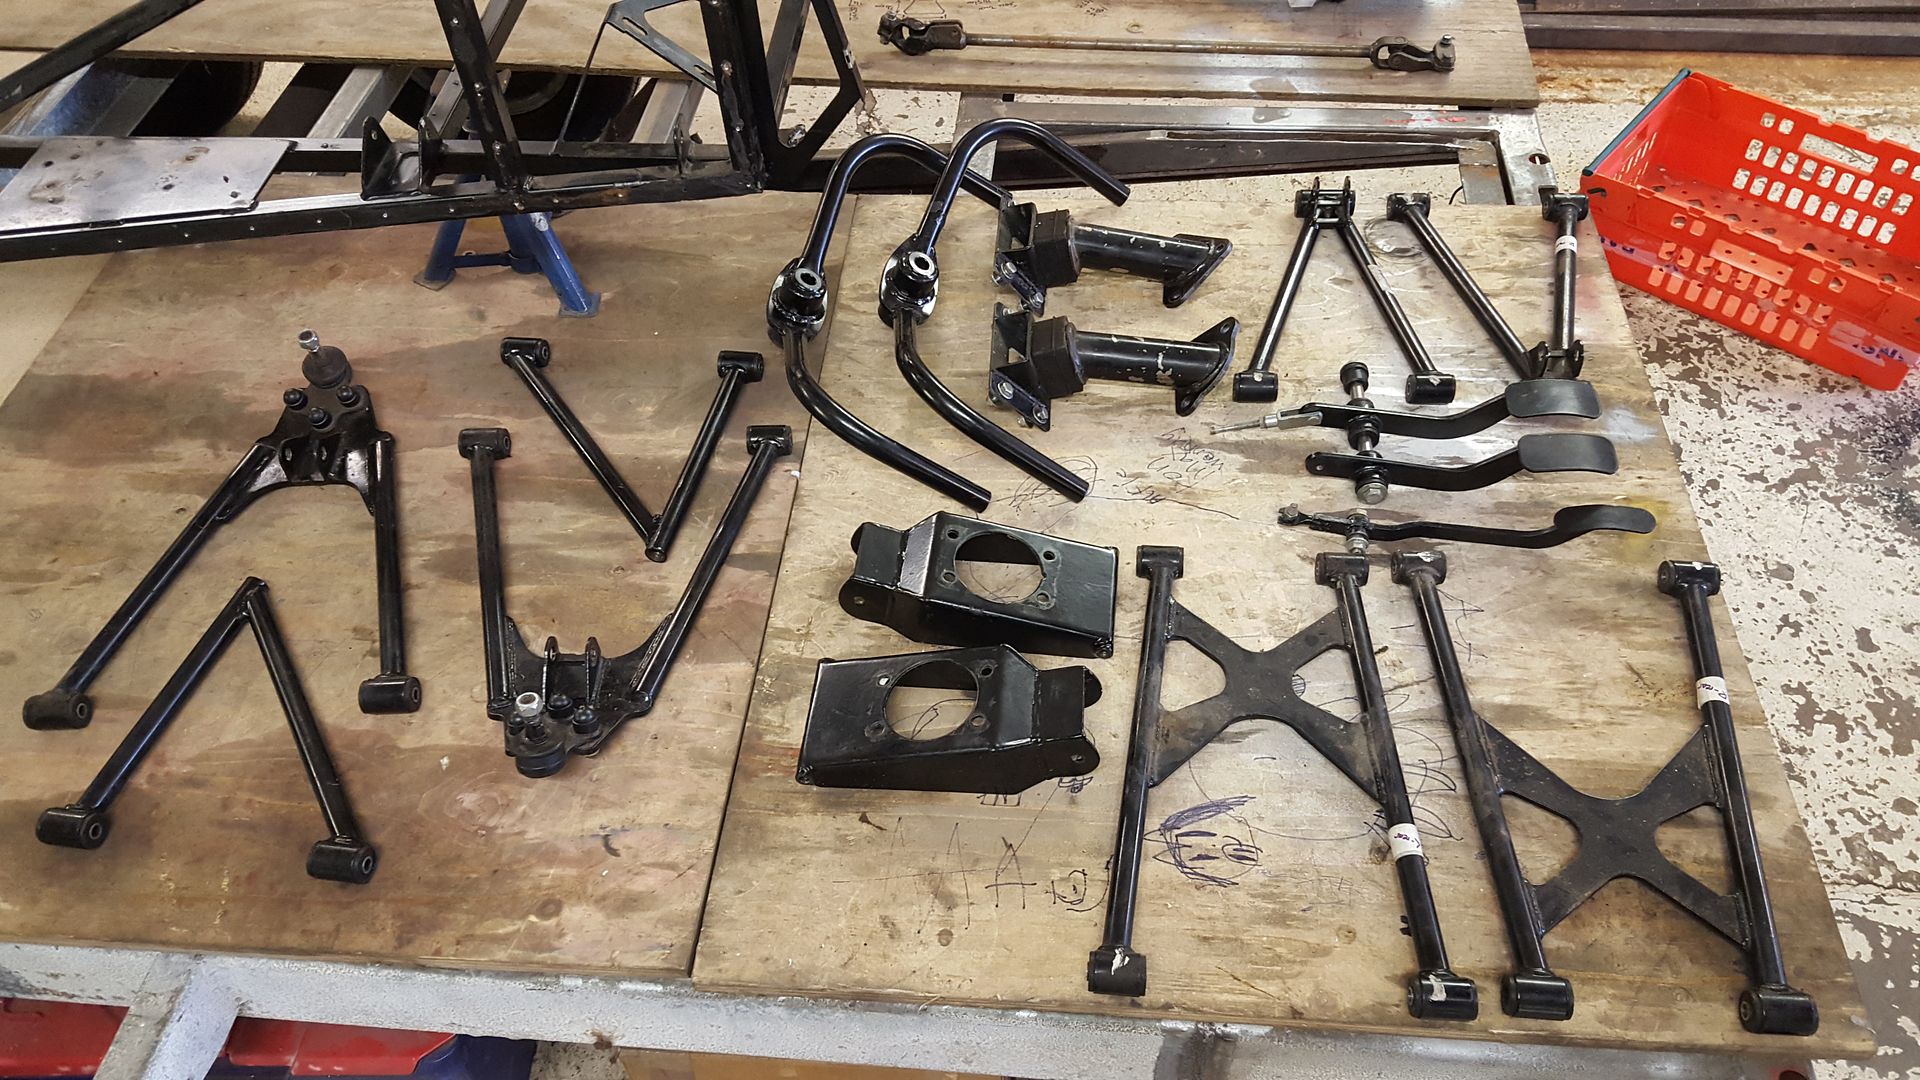
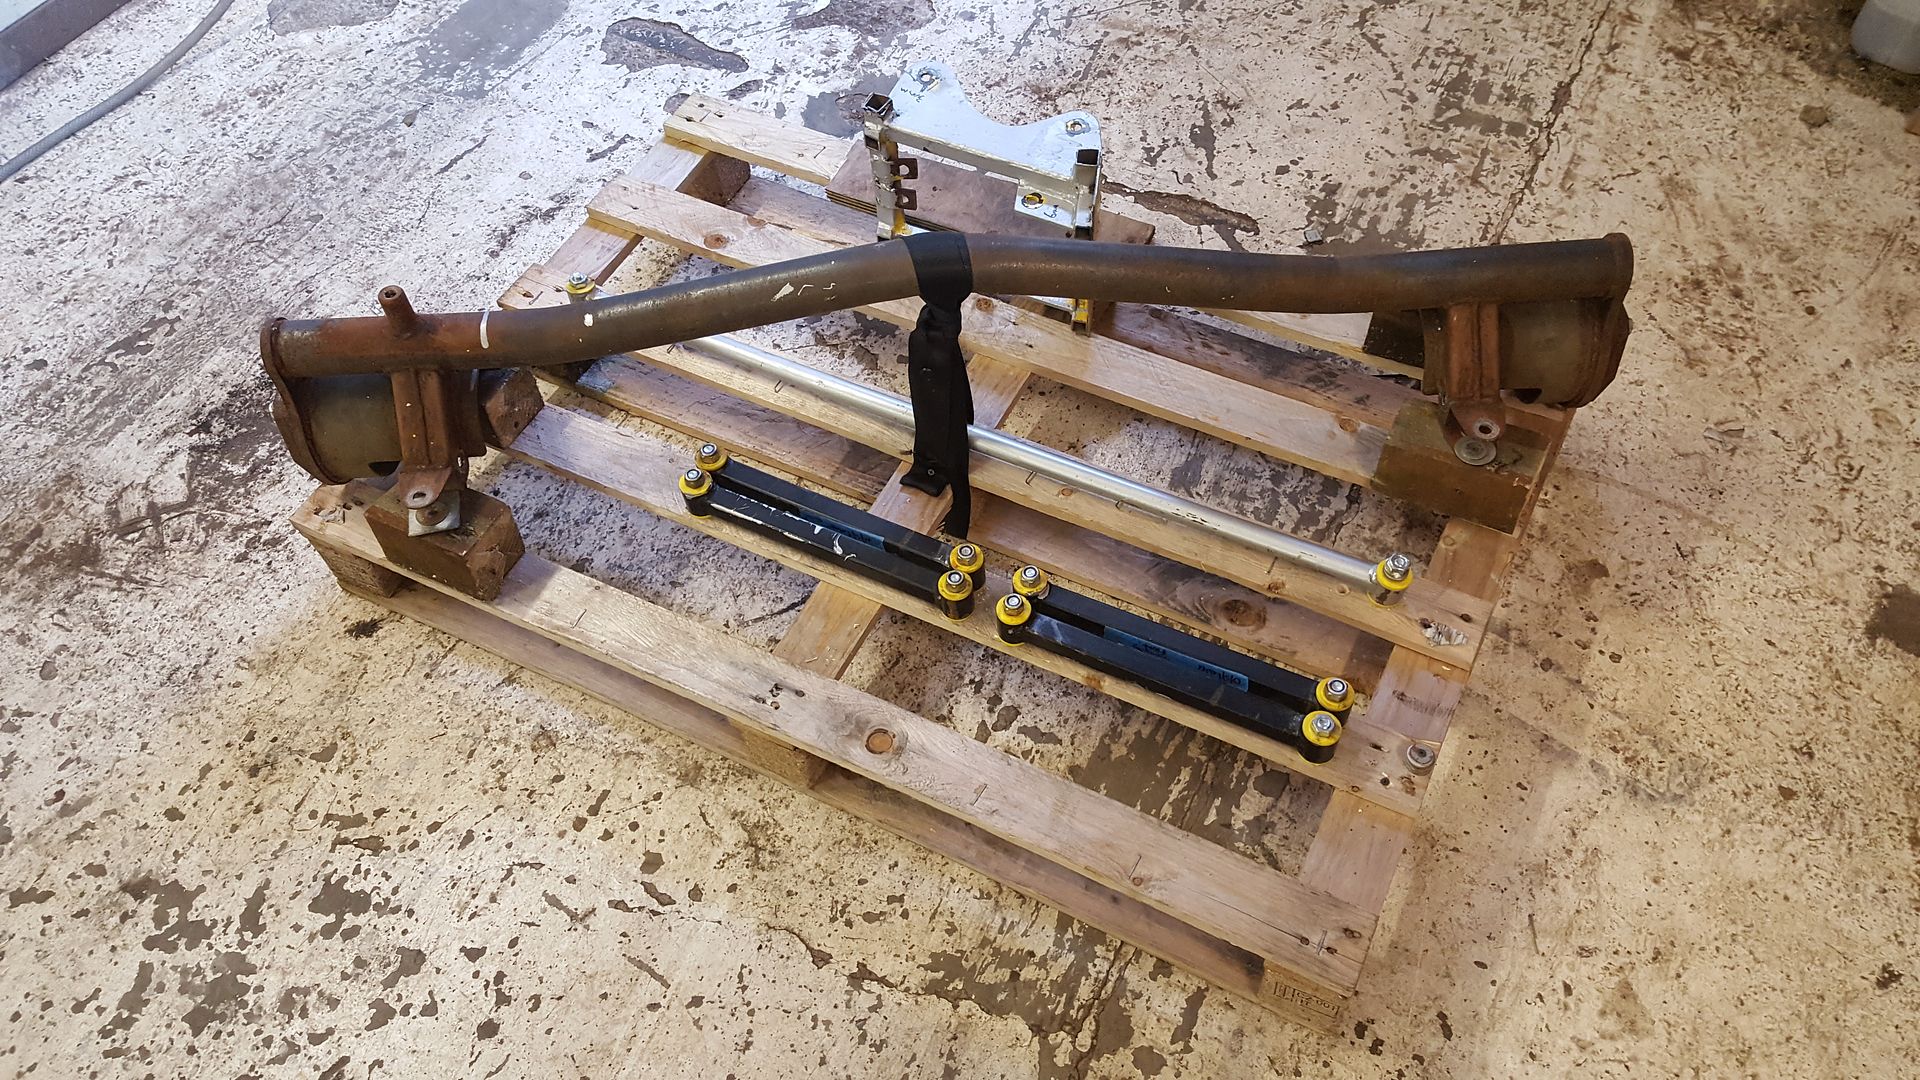
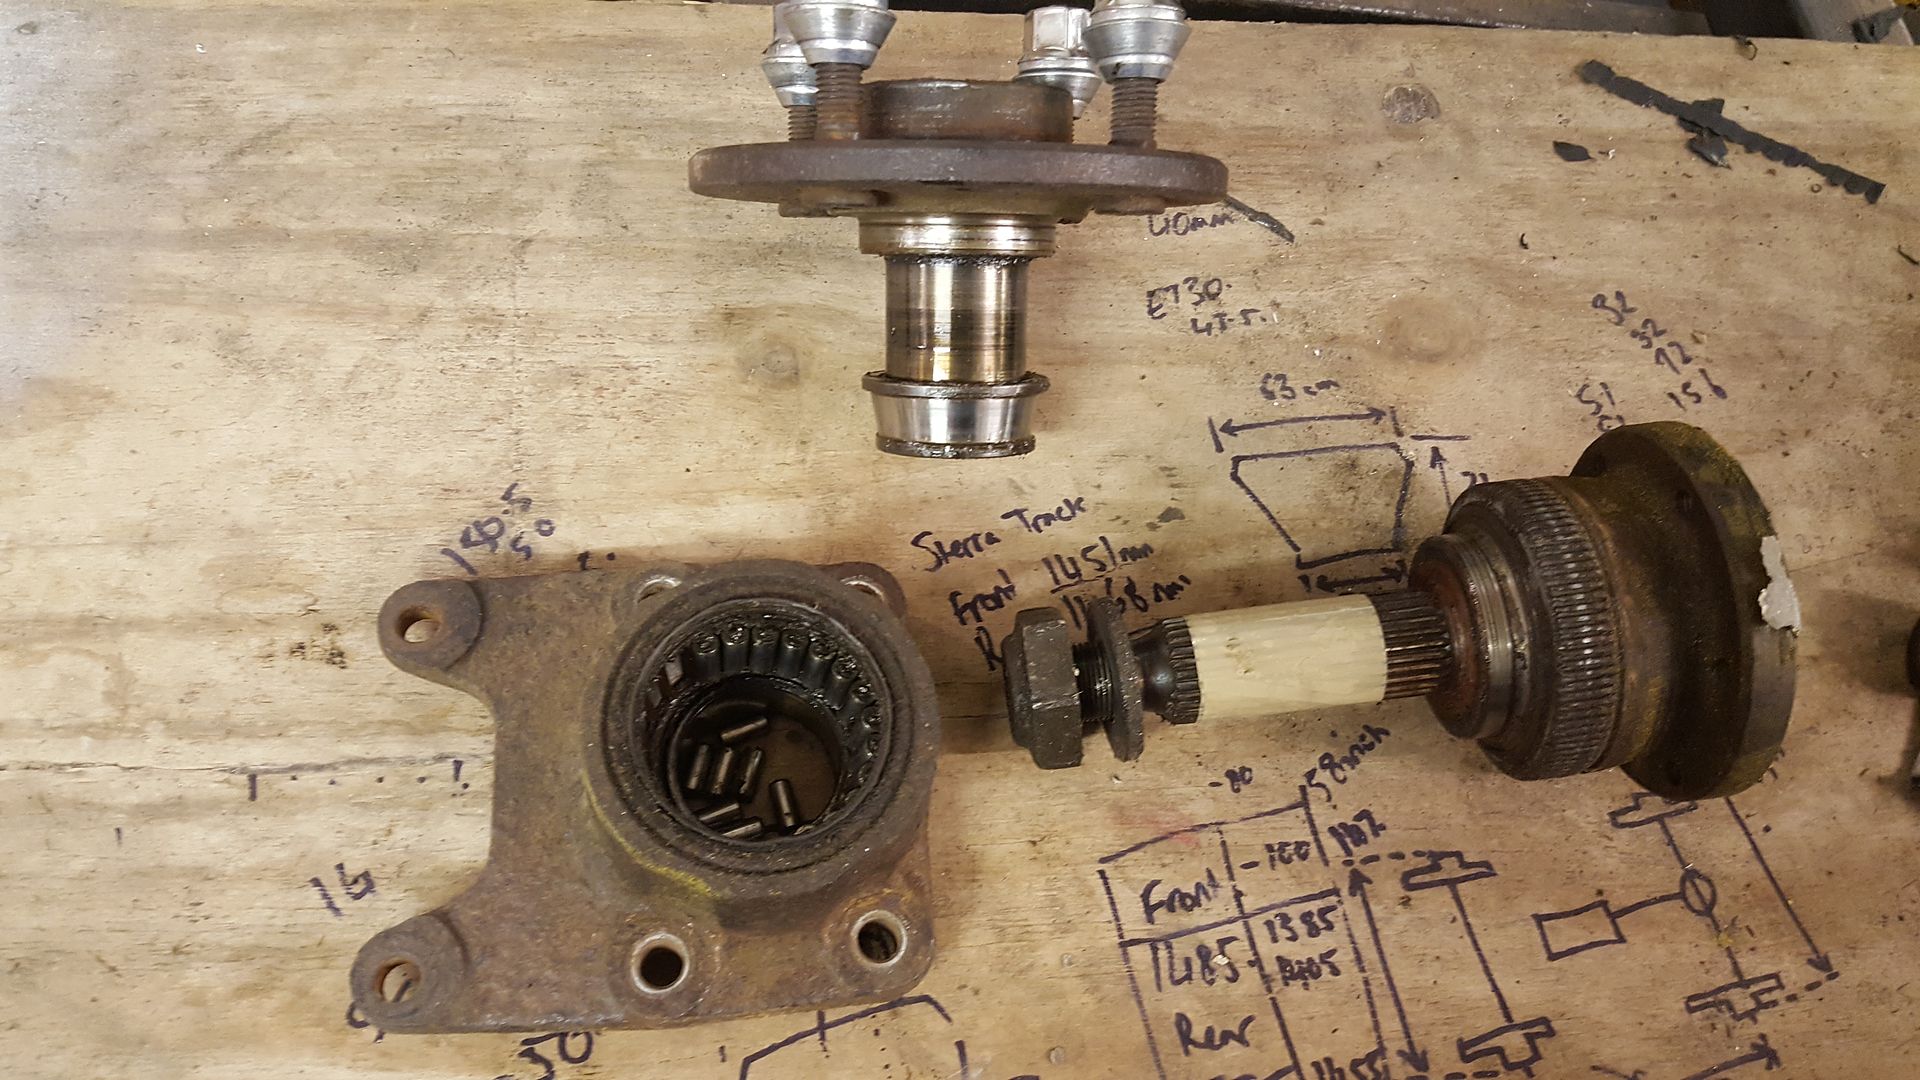
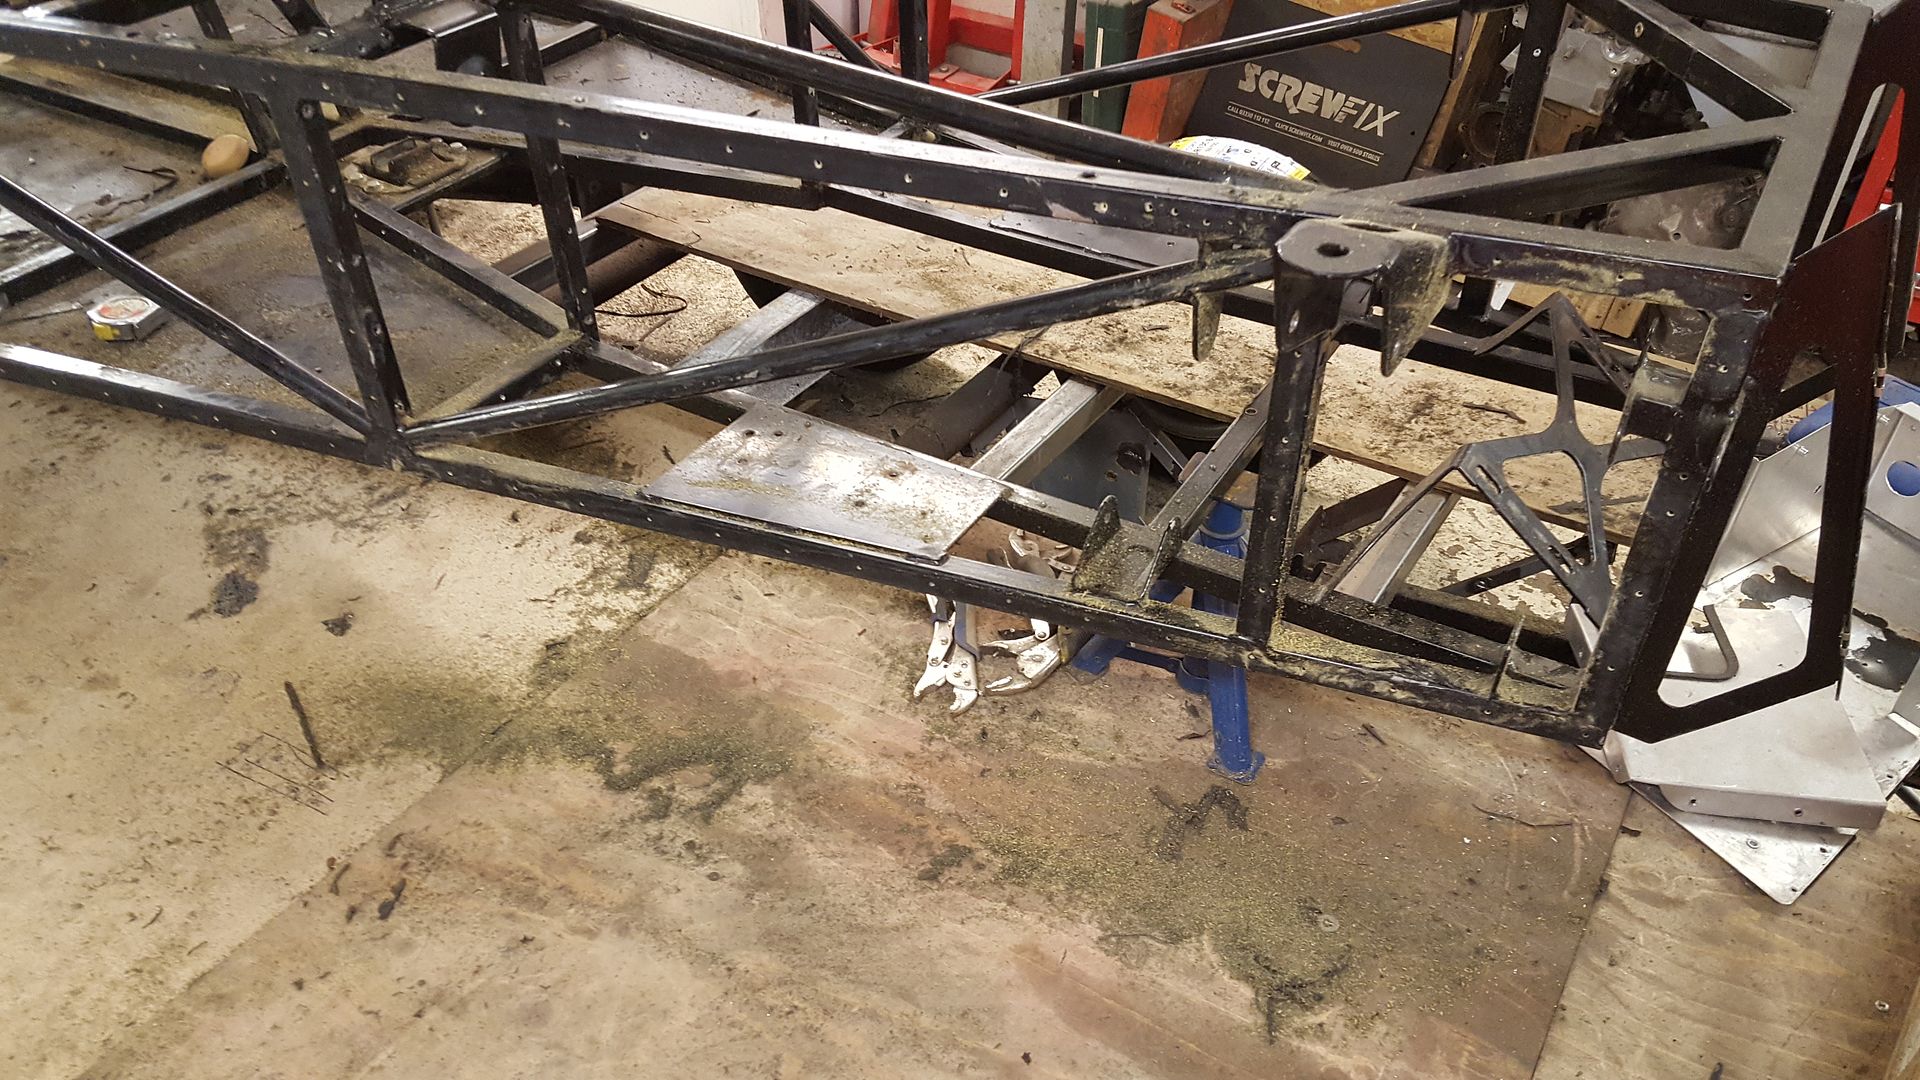
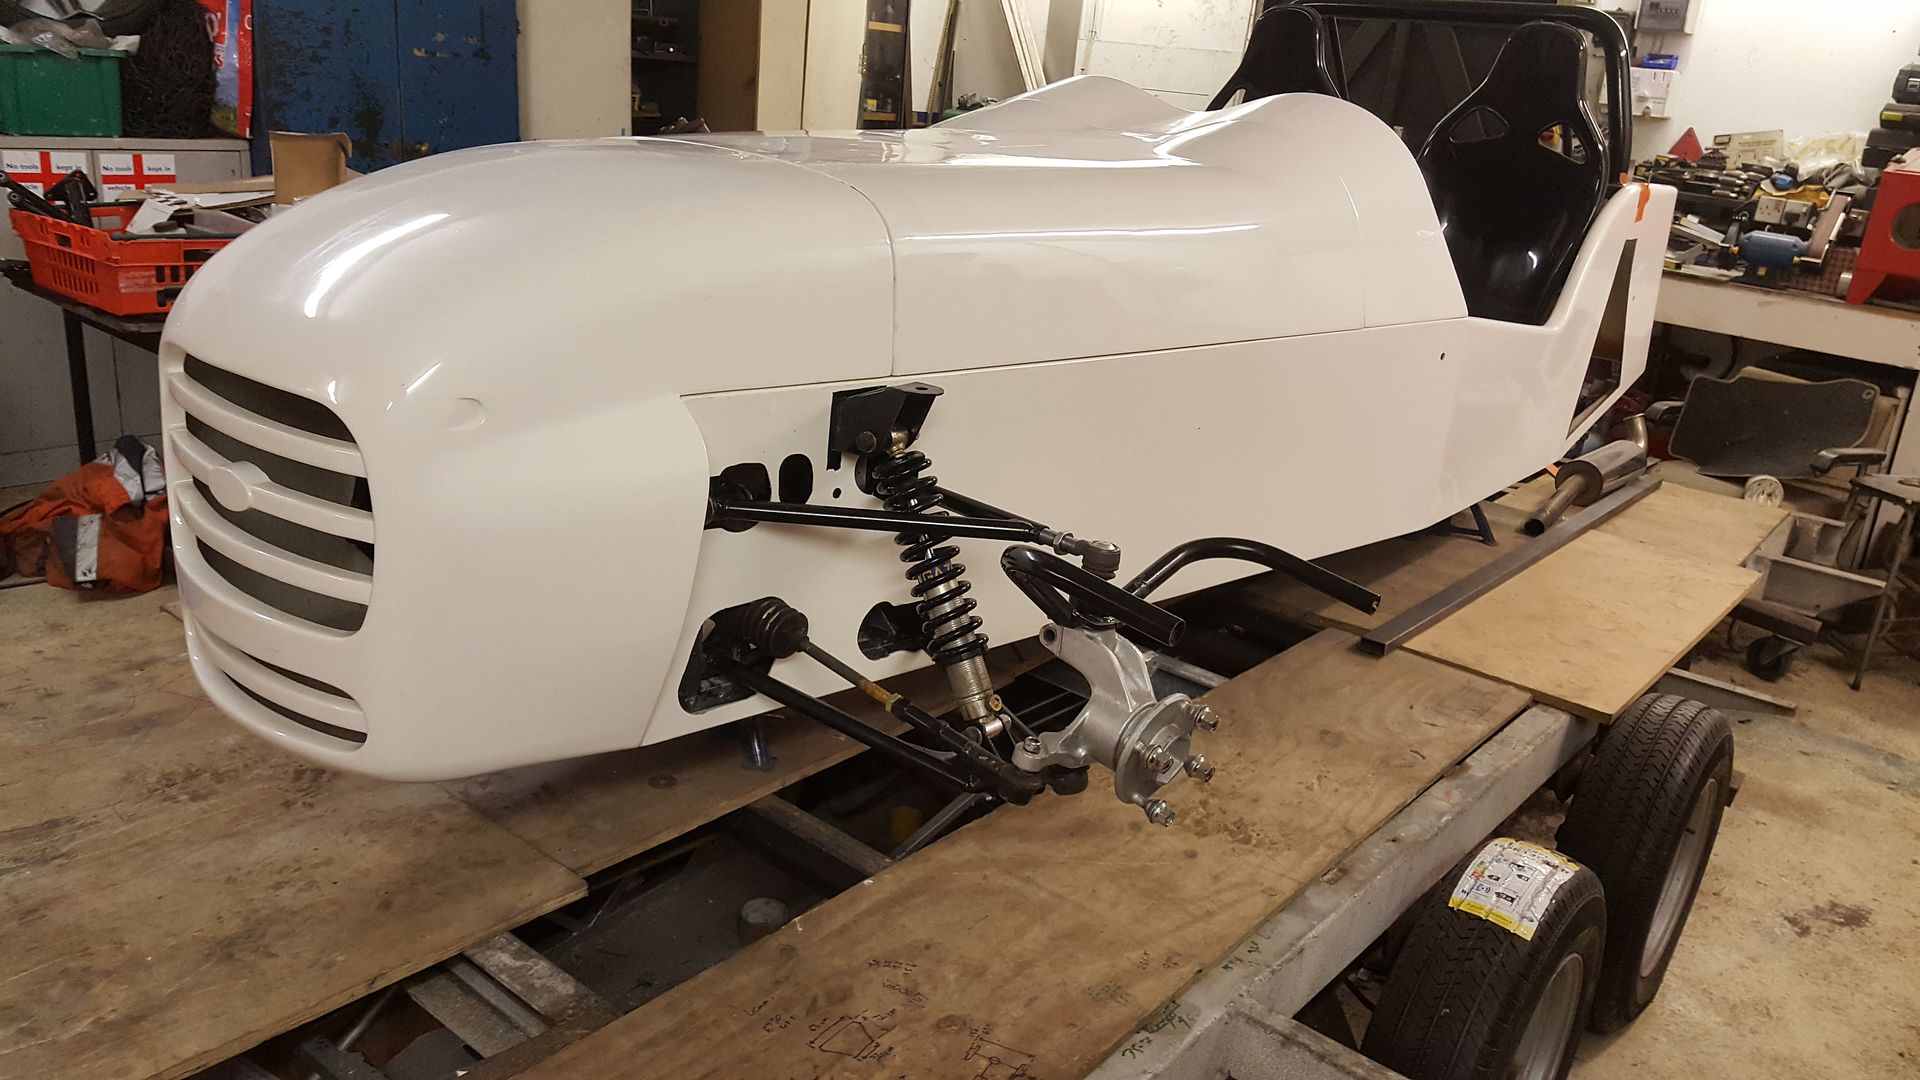
Its a Ron Champion Book spec chassis which has then been modified with a De Dion Rear to replace the Live axle and Sierra front hubs instead of the
Cortina uprights. Over all it looks like a copy of a MK INDY, although i have been in contact with MK and the were very helpful but did confirm it was
not a genuine MK Indy.
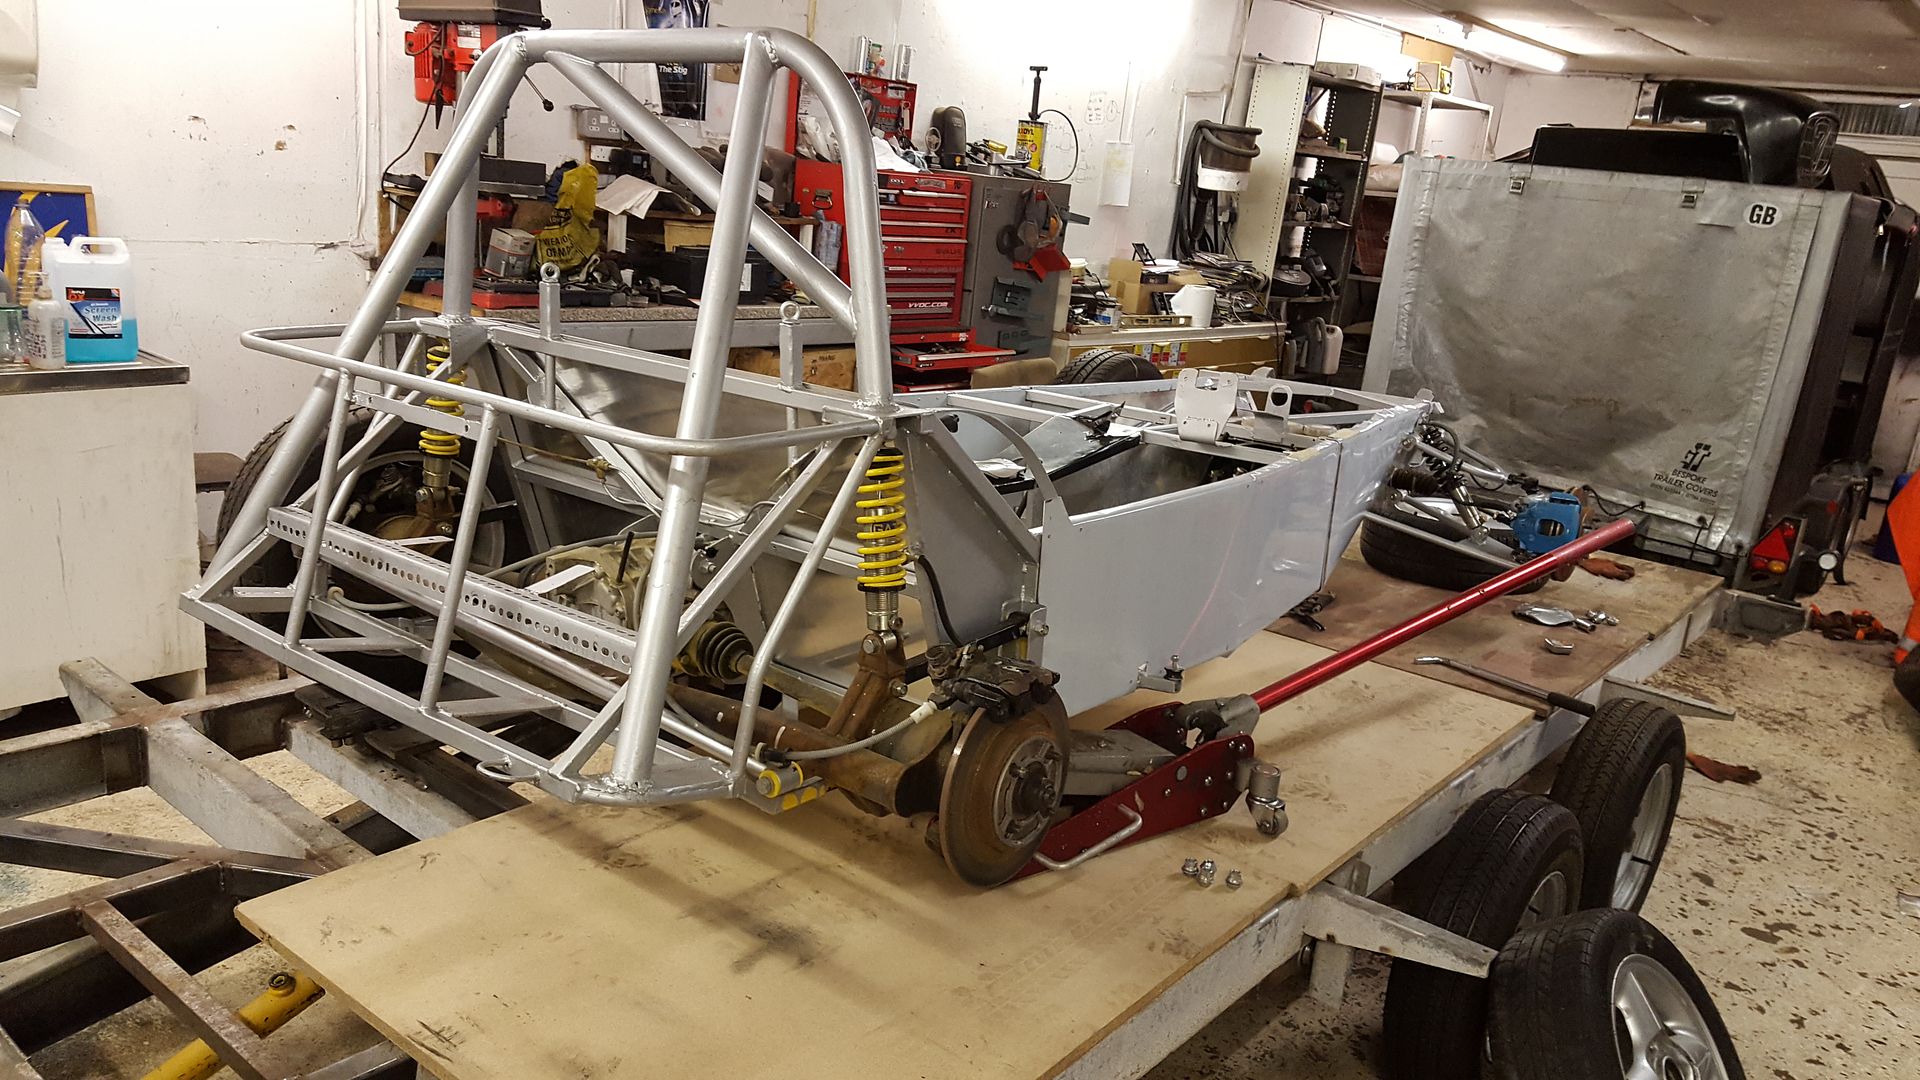
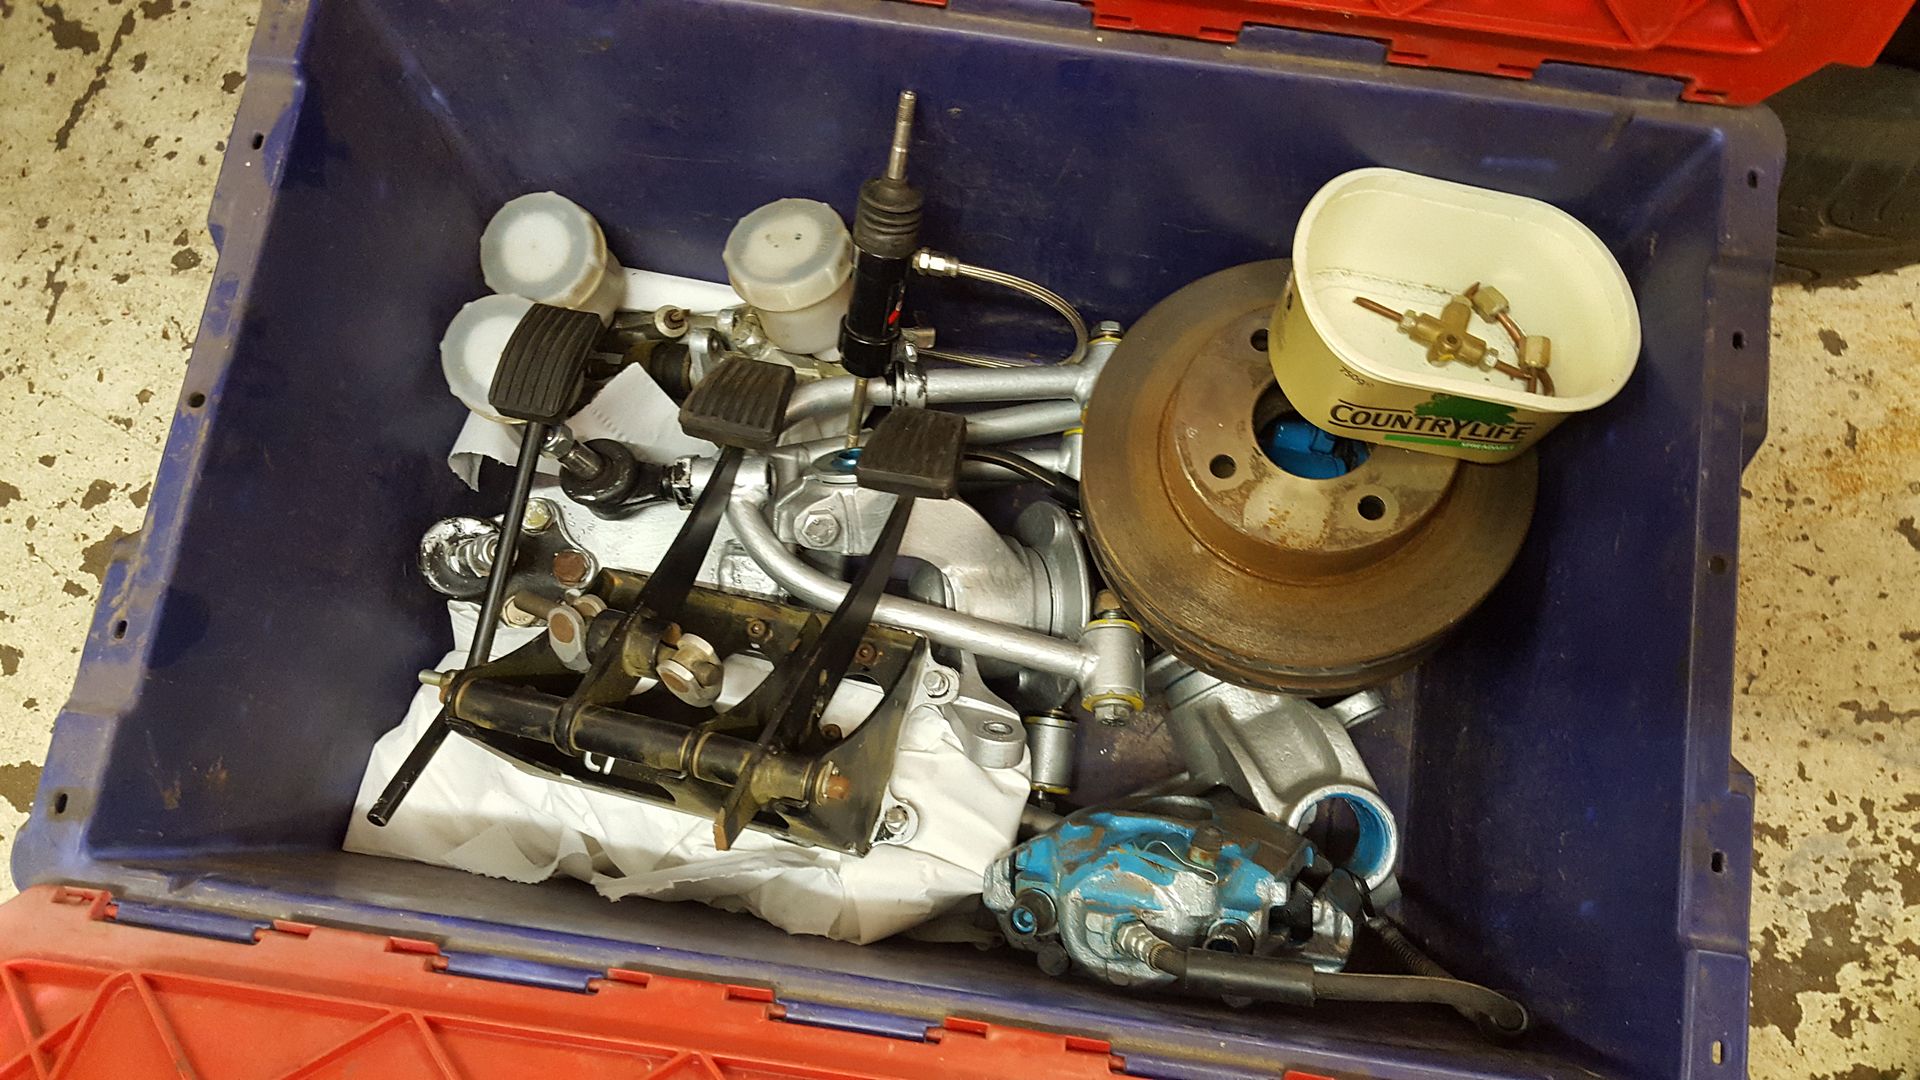
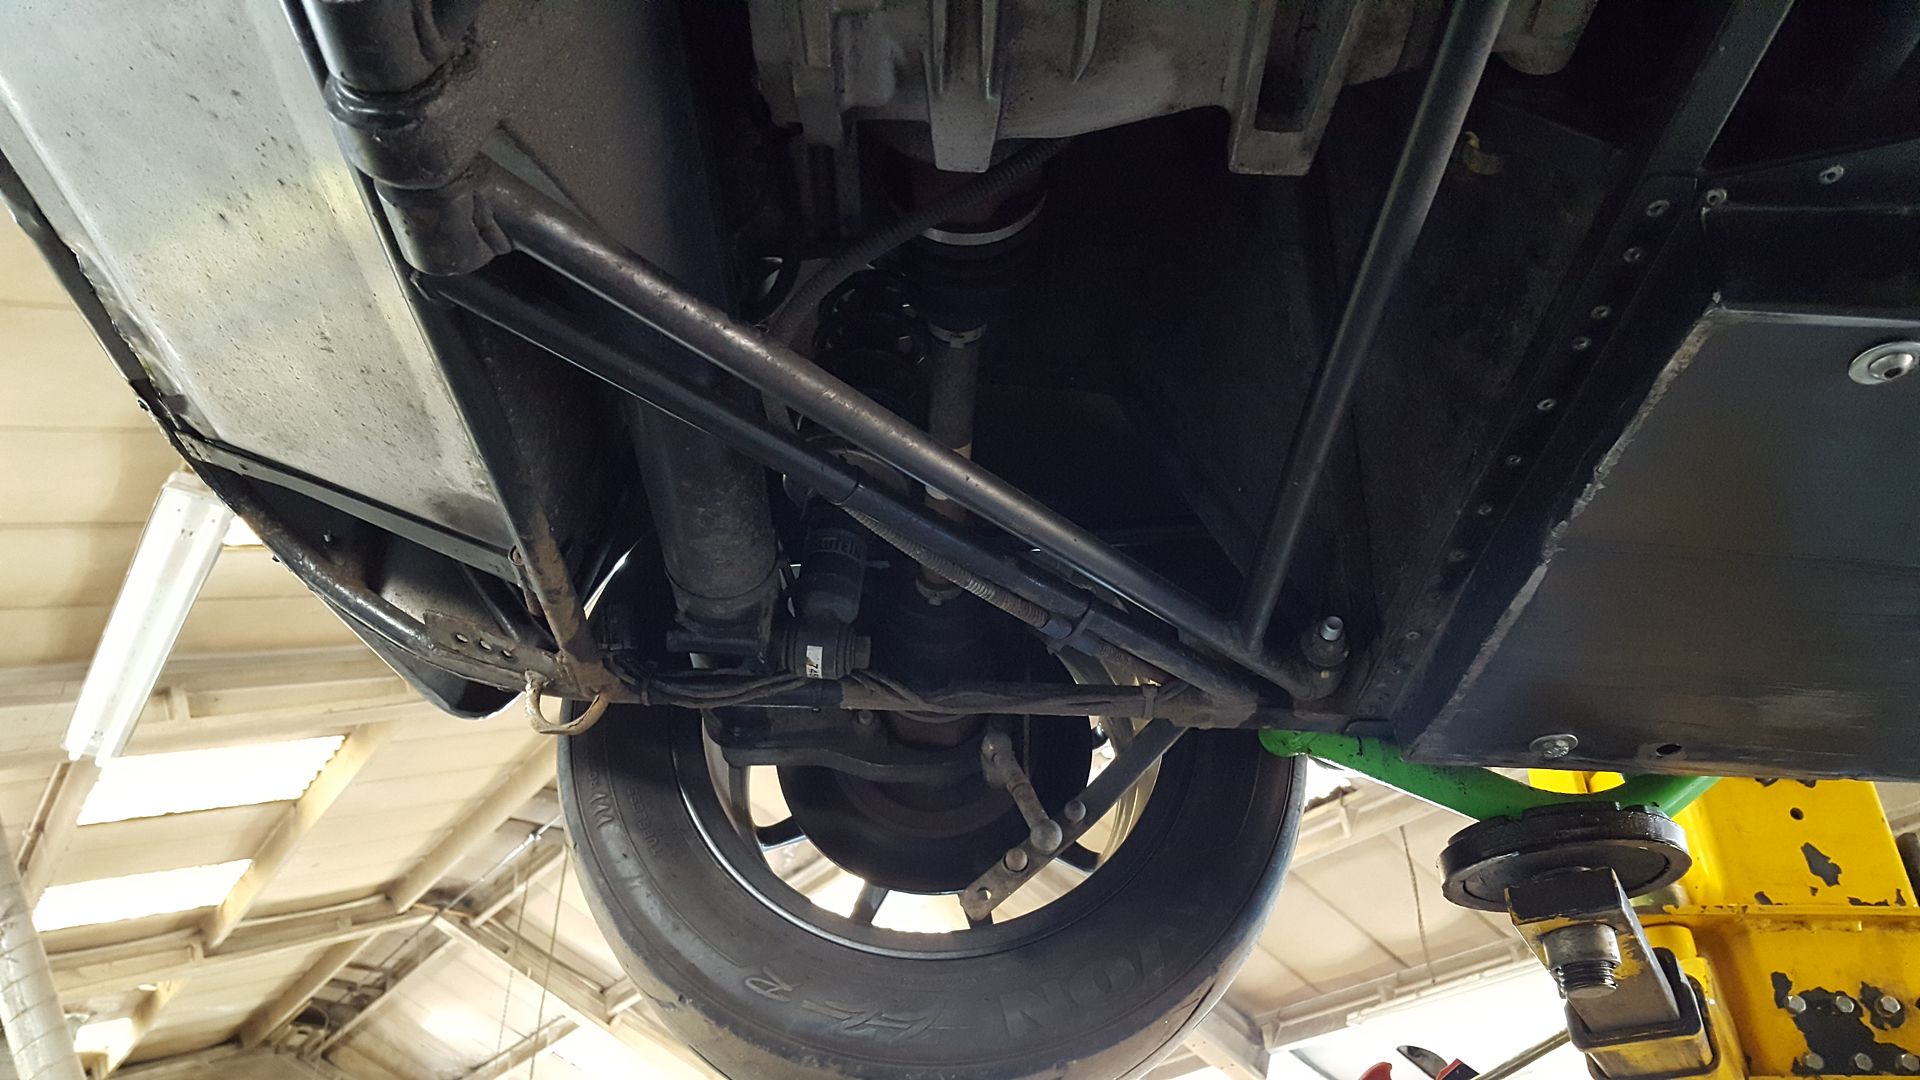
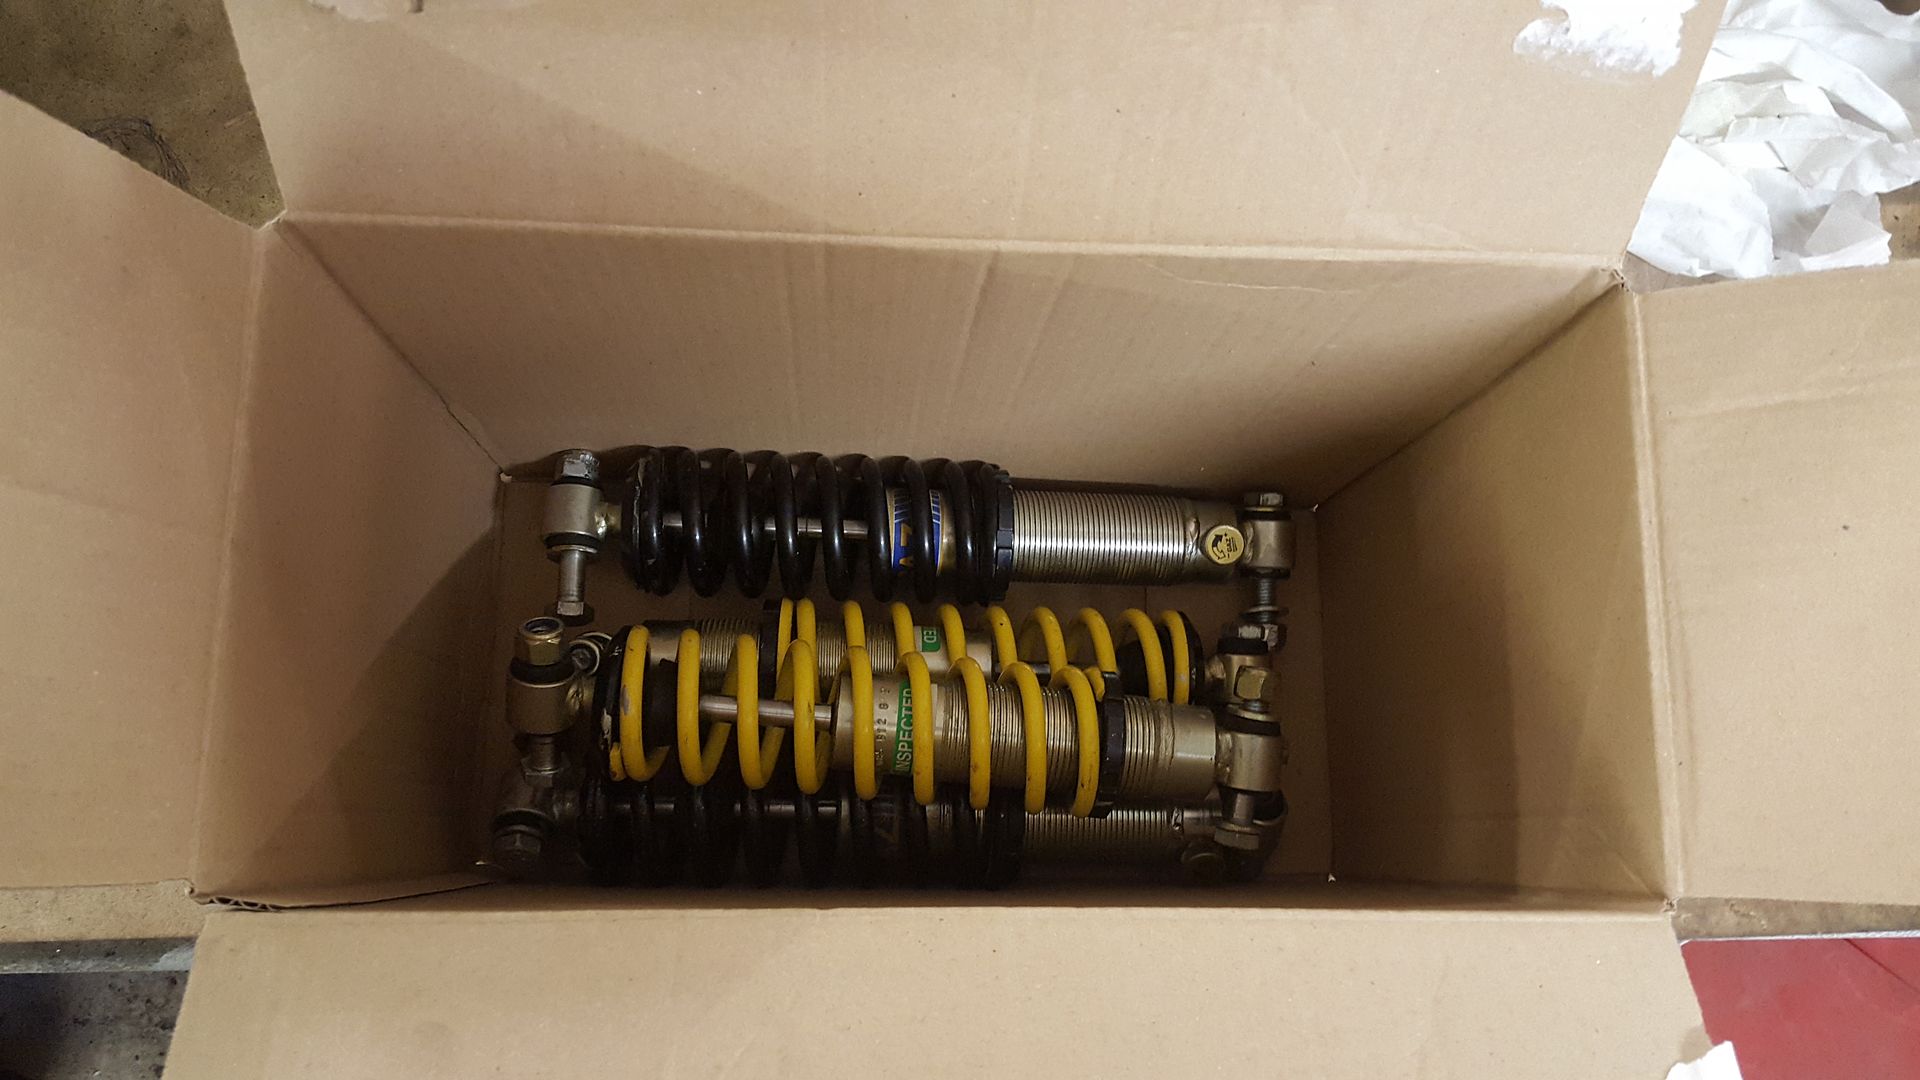
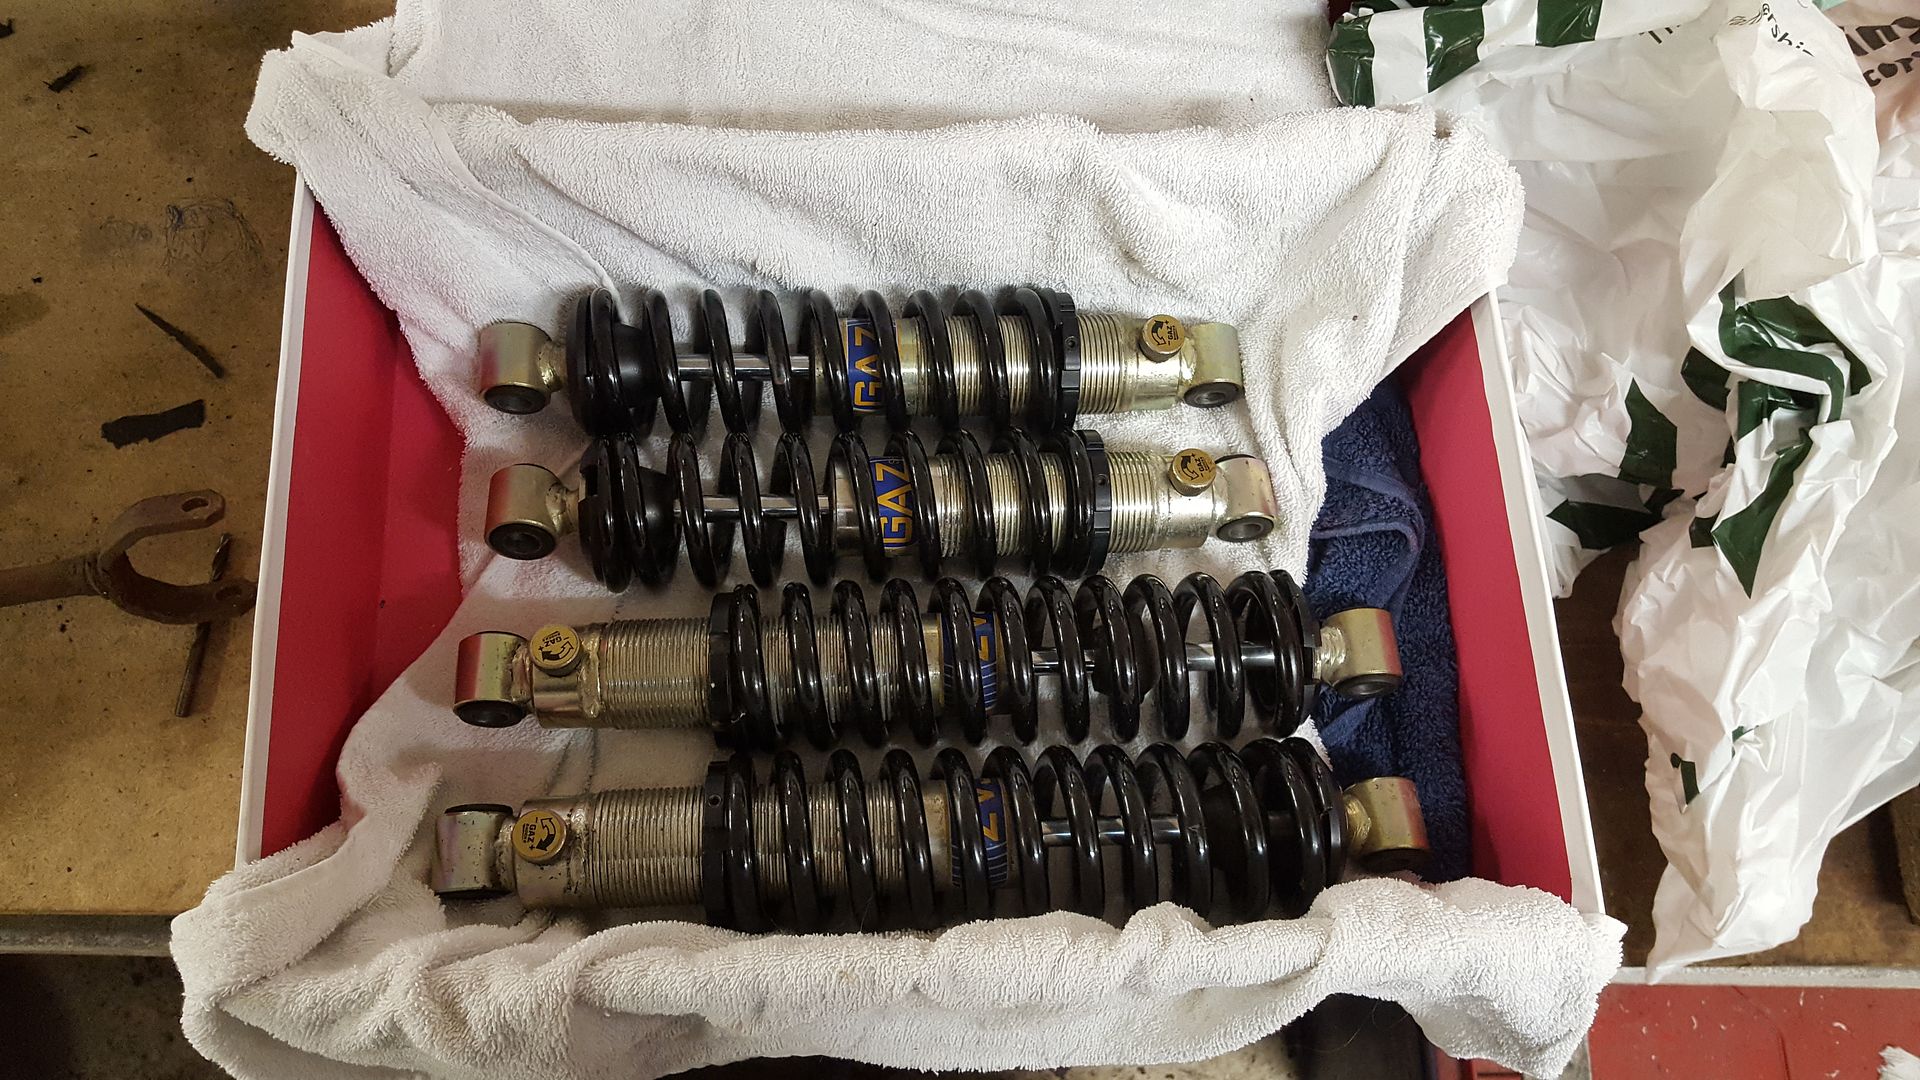
Its a full Rolling chassis with a ton of new parts,
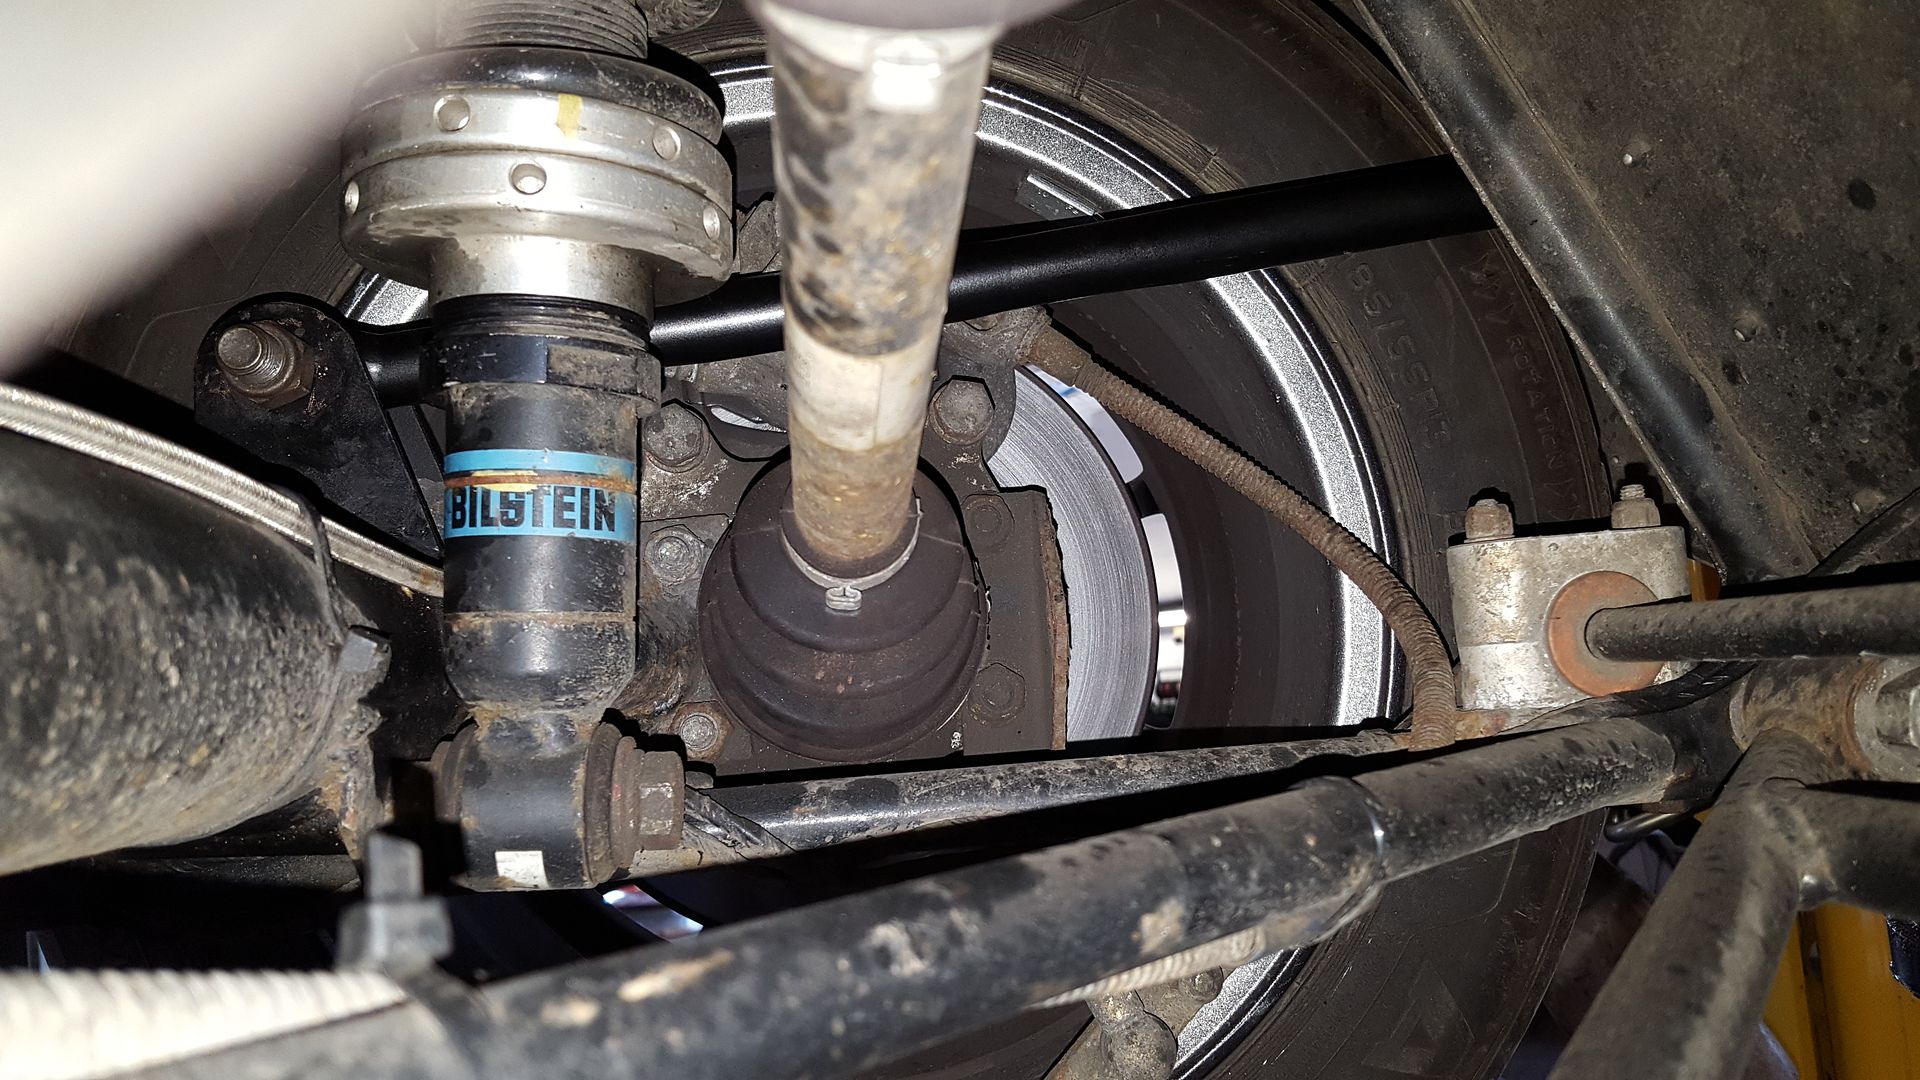
- new Gaz adjustable coilovers all round
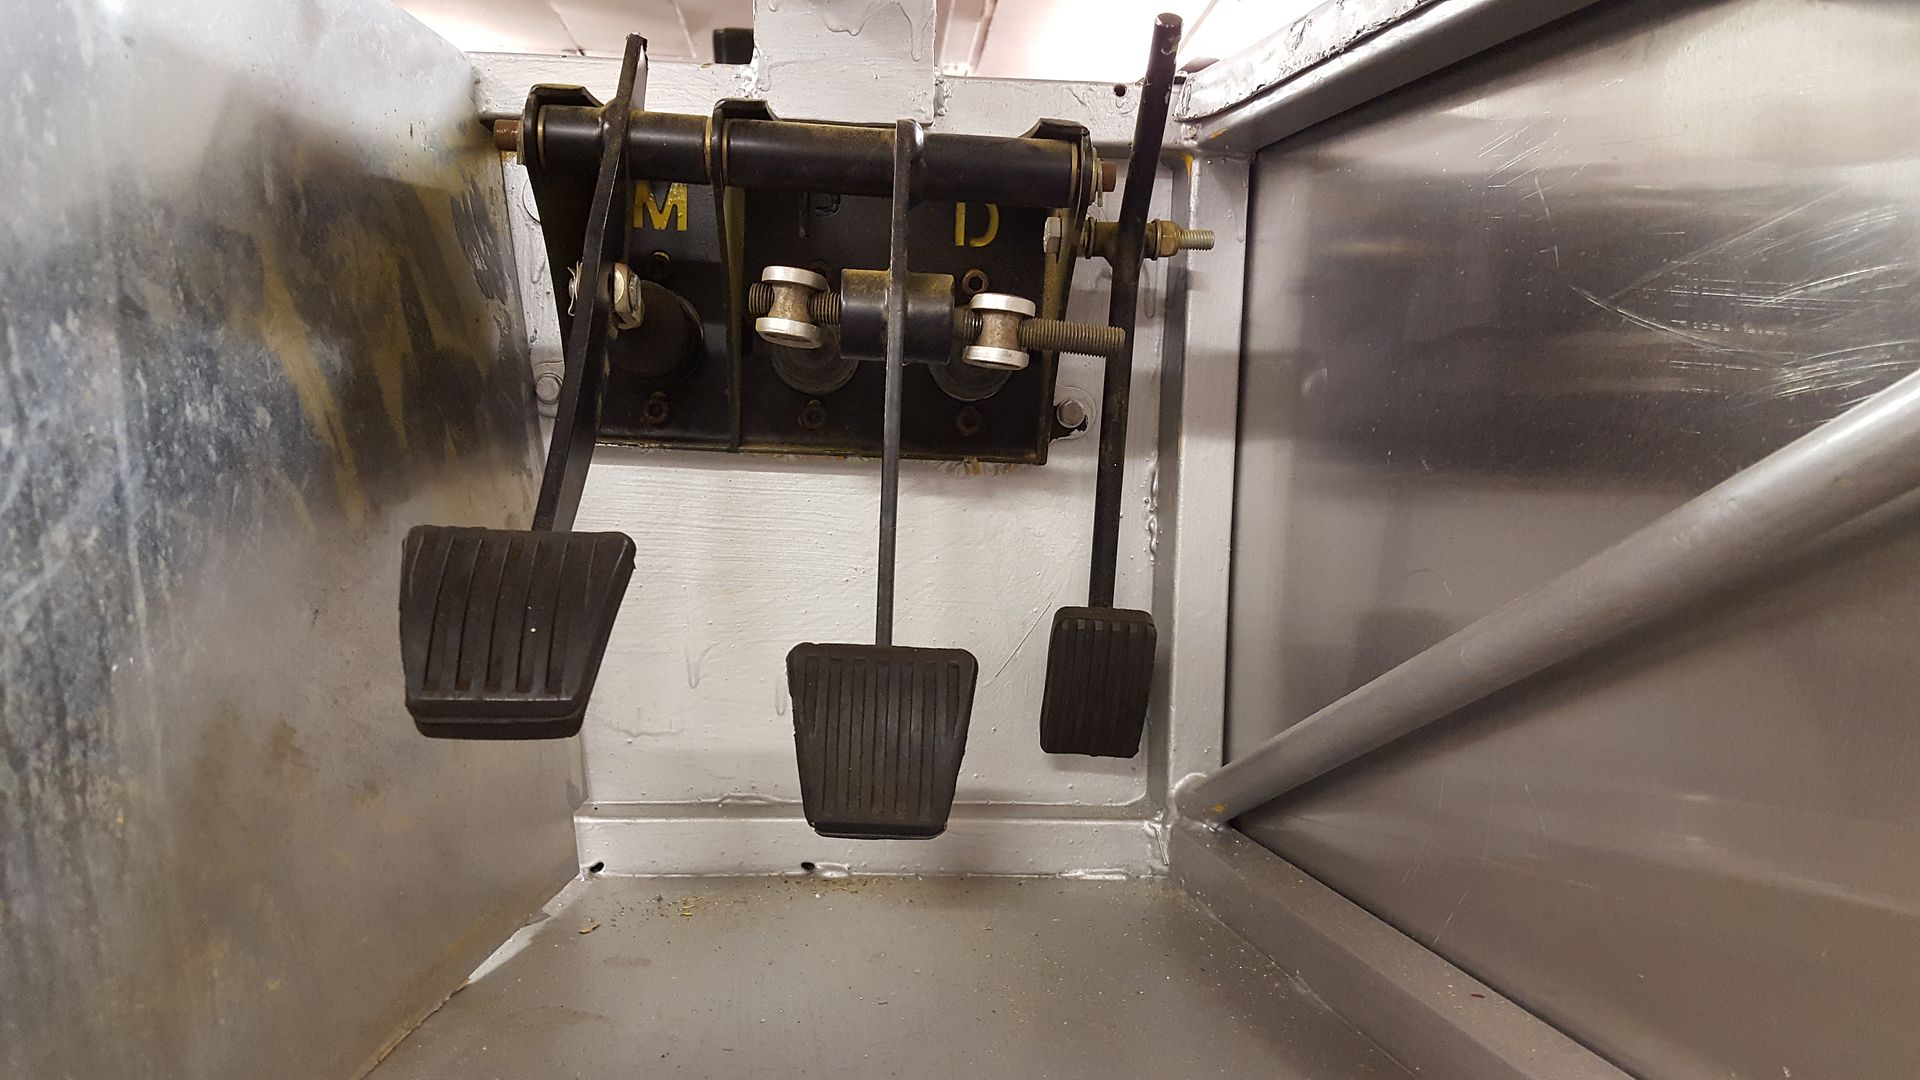
- new Bias pedal box with Willwood mc's
- Willwood hydraulic clutch setup
- new mk2 escort steering rack
- new polybushes all round
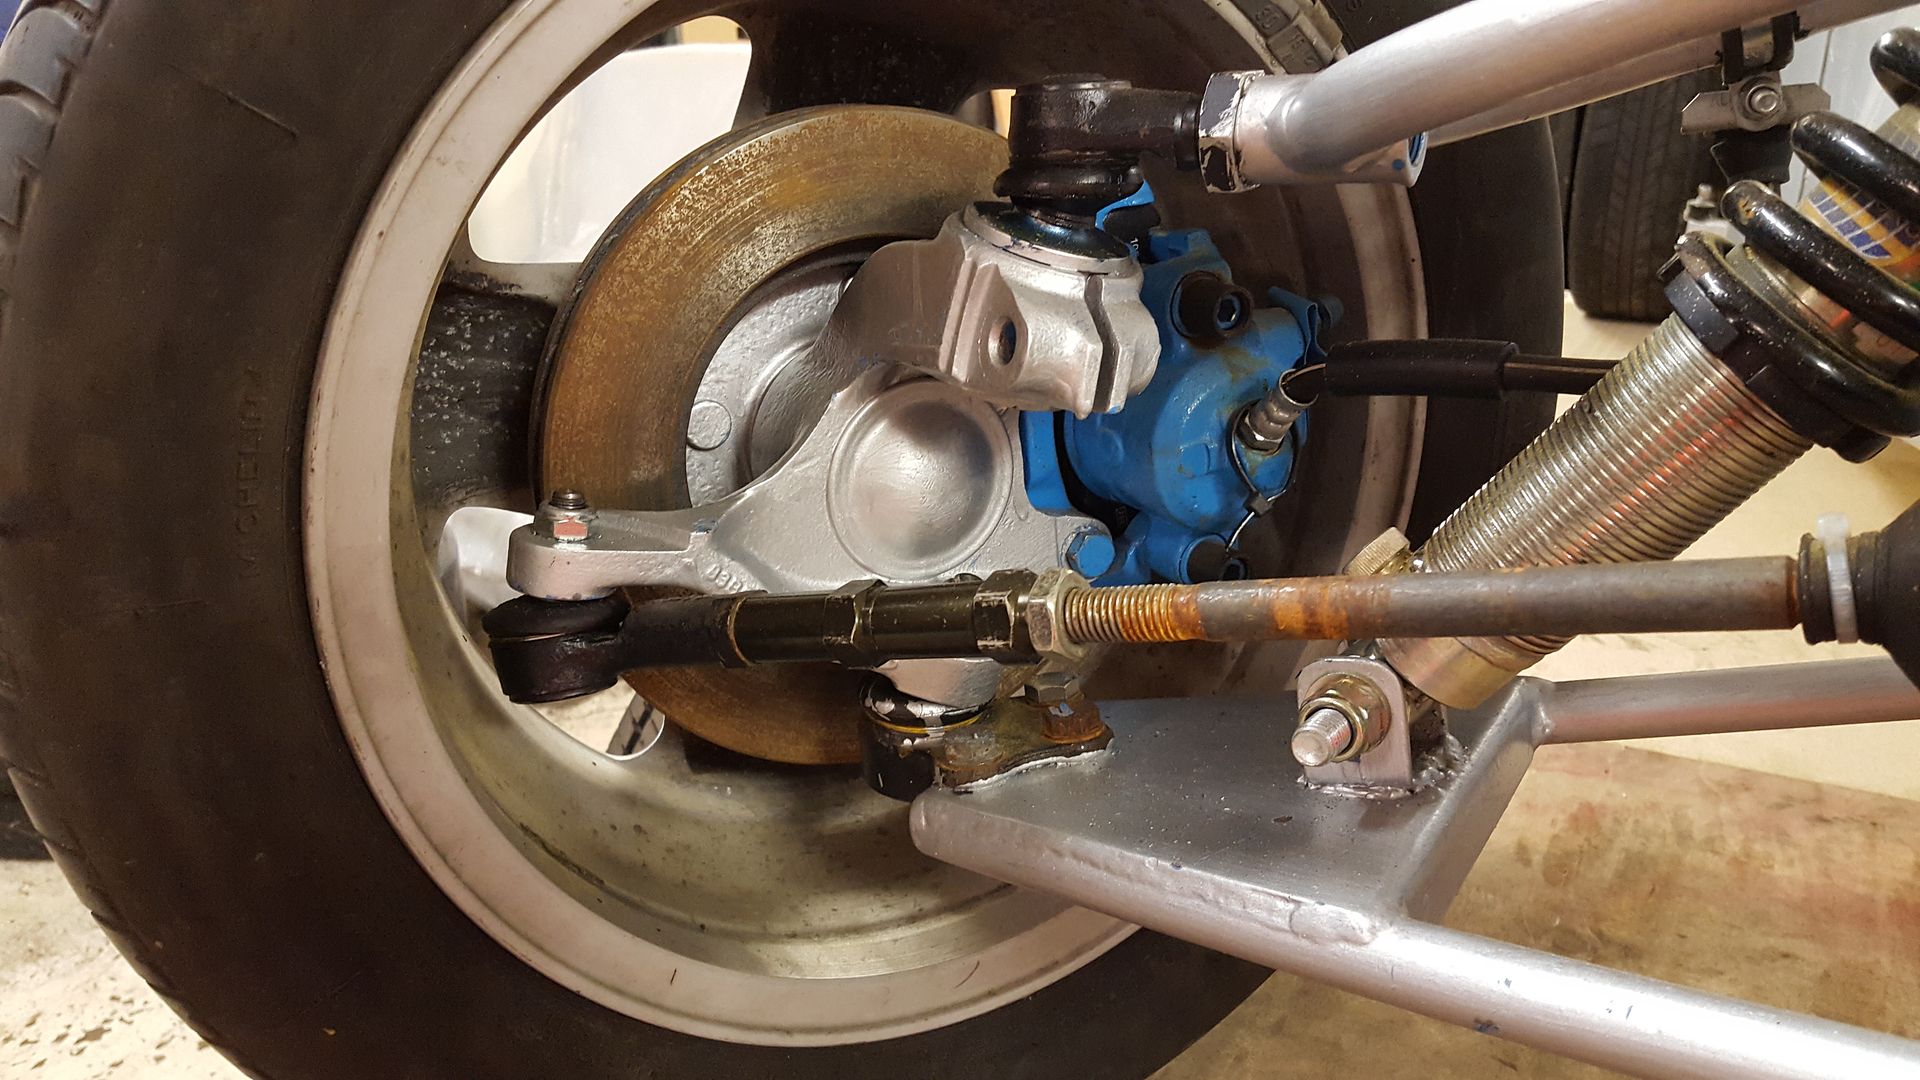
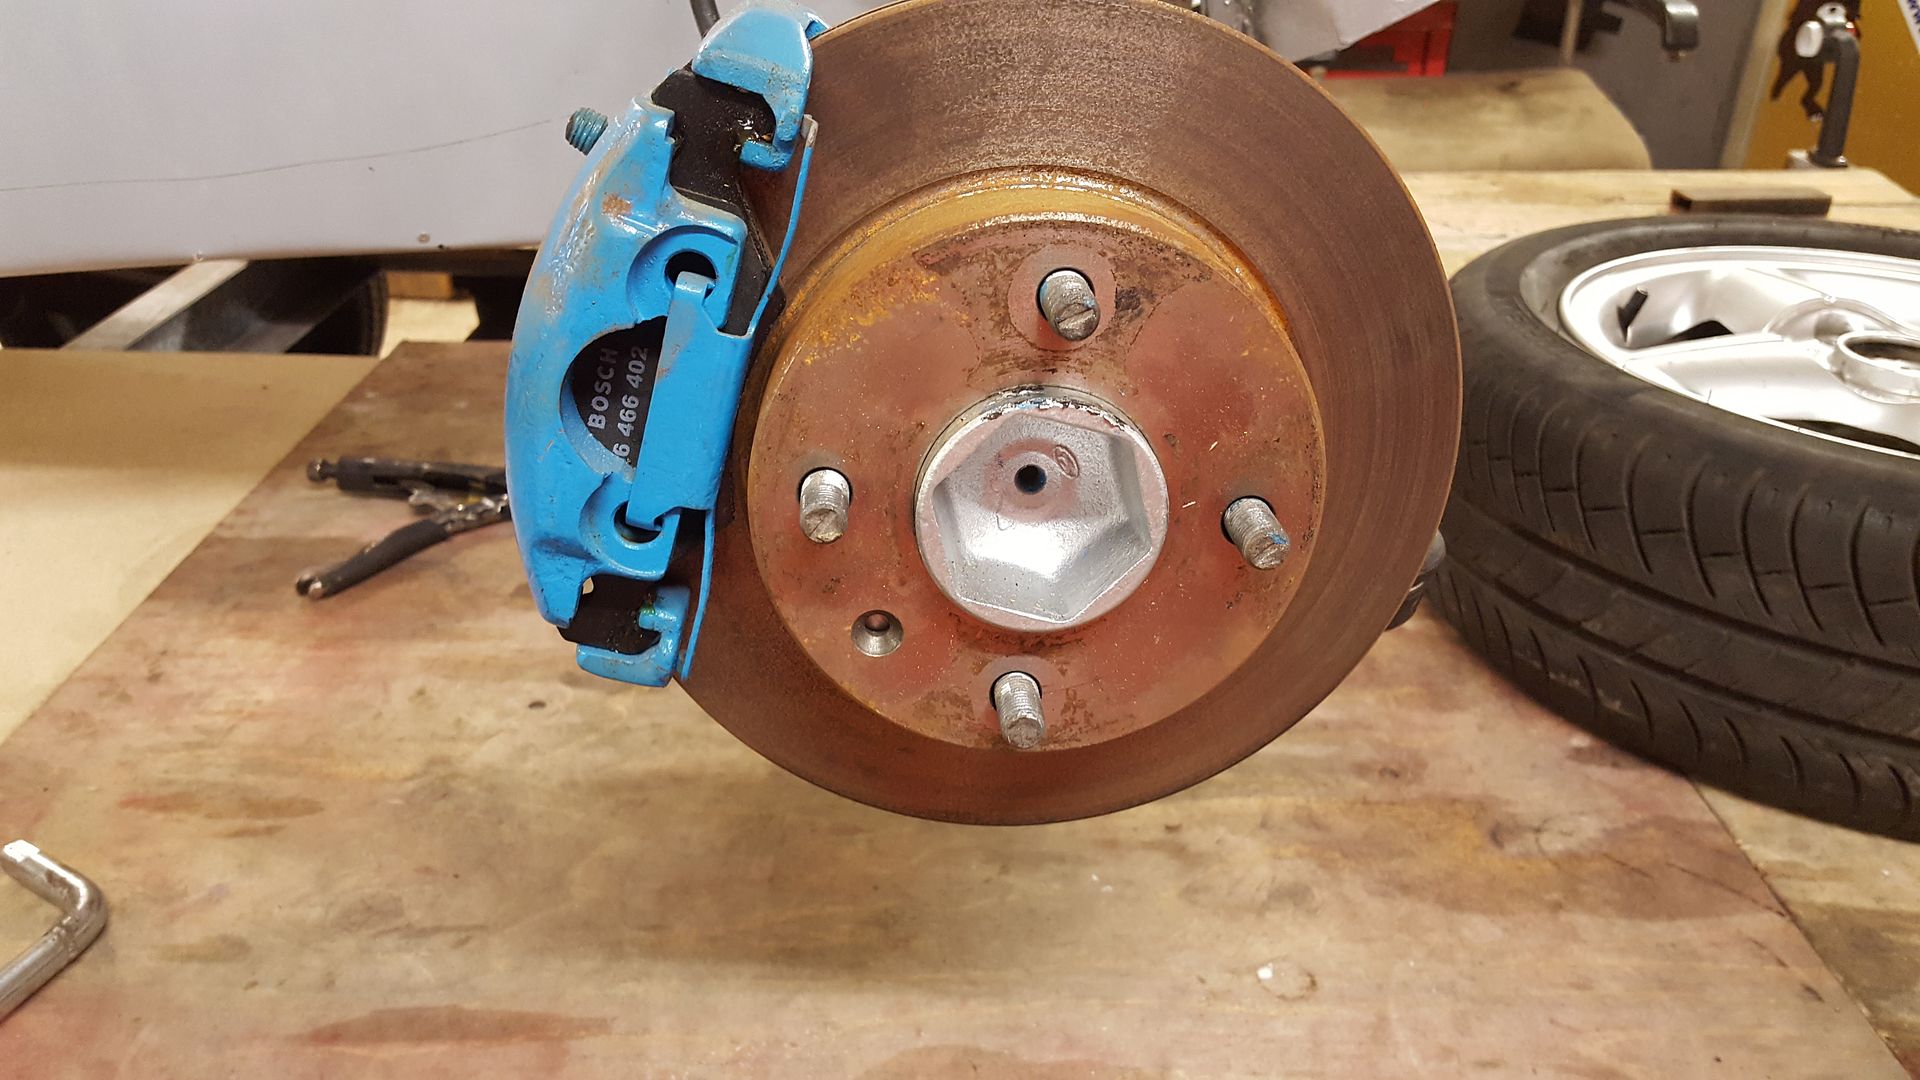
- 2.0 Sierra front brakes with new discs pads and flexys
- Sierra Cosworth rear brakes with new discs pads flexys and handbrake cables
- all new brake copper lines all round
- new kit car shorteded prop
- 7 inch Cosworth 4x4 LSD
- all body panels
- set of 14ich ford wheels with good tyres
so basically engine, gearbox, fuel tank, steering column and you could have a pretty fun track toy for a few hundred quid.
However, that isn't really my style lol
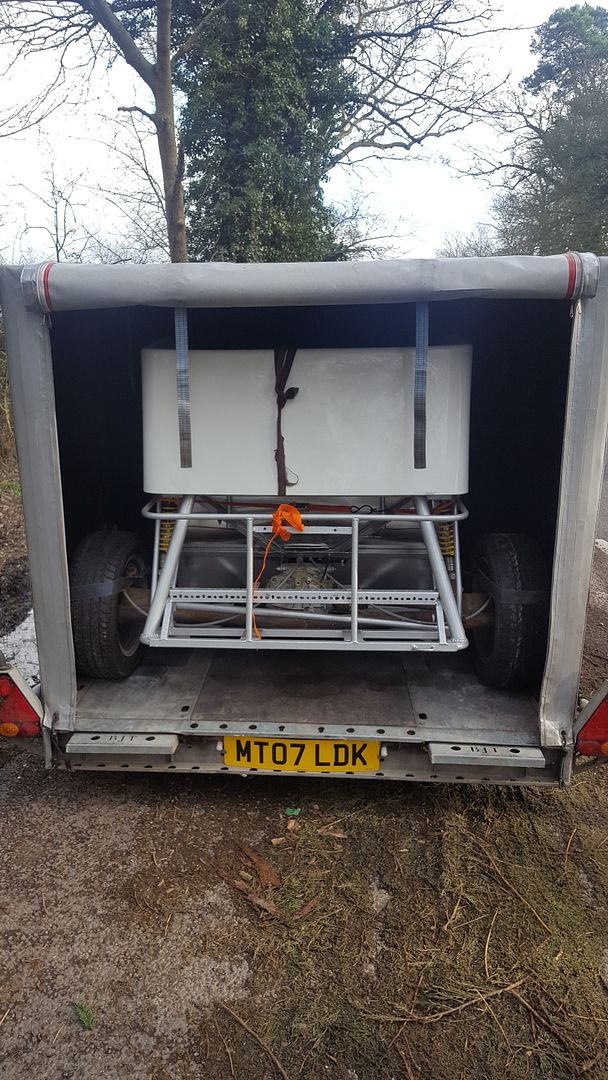
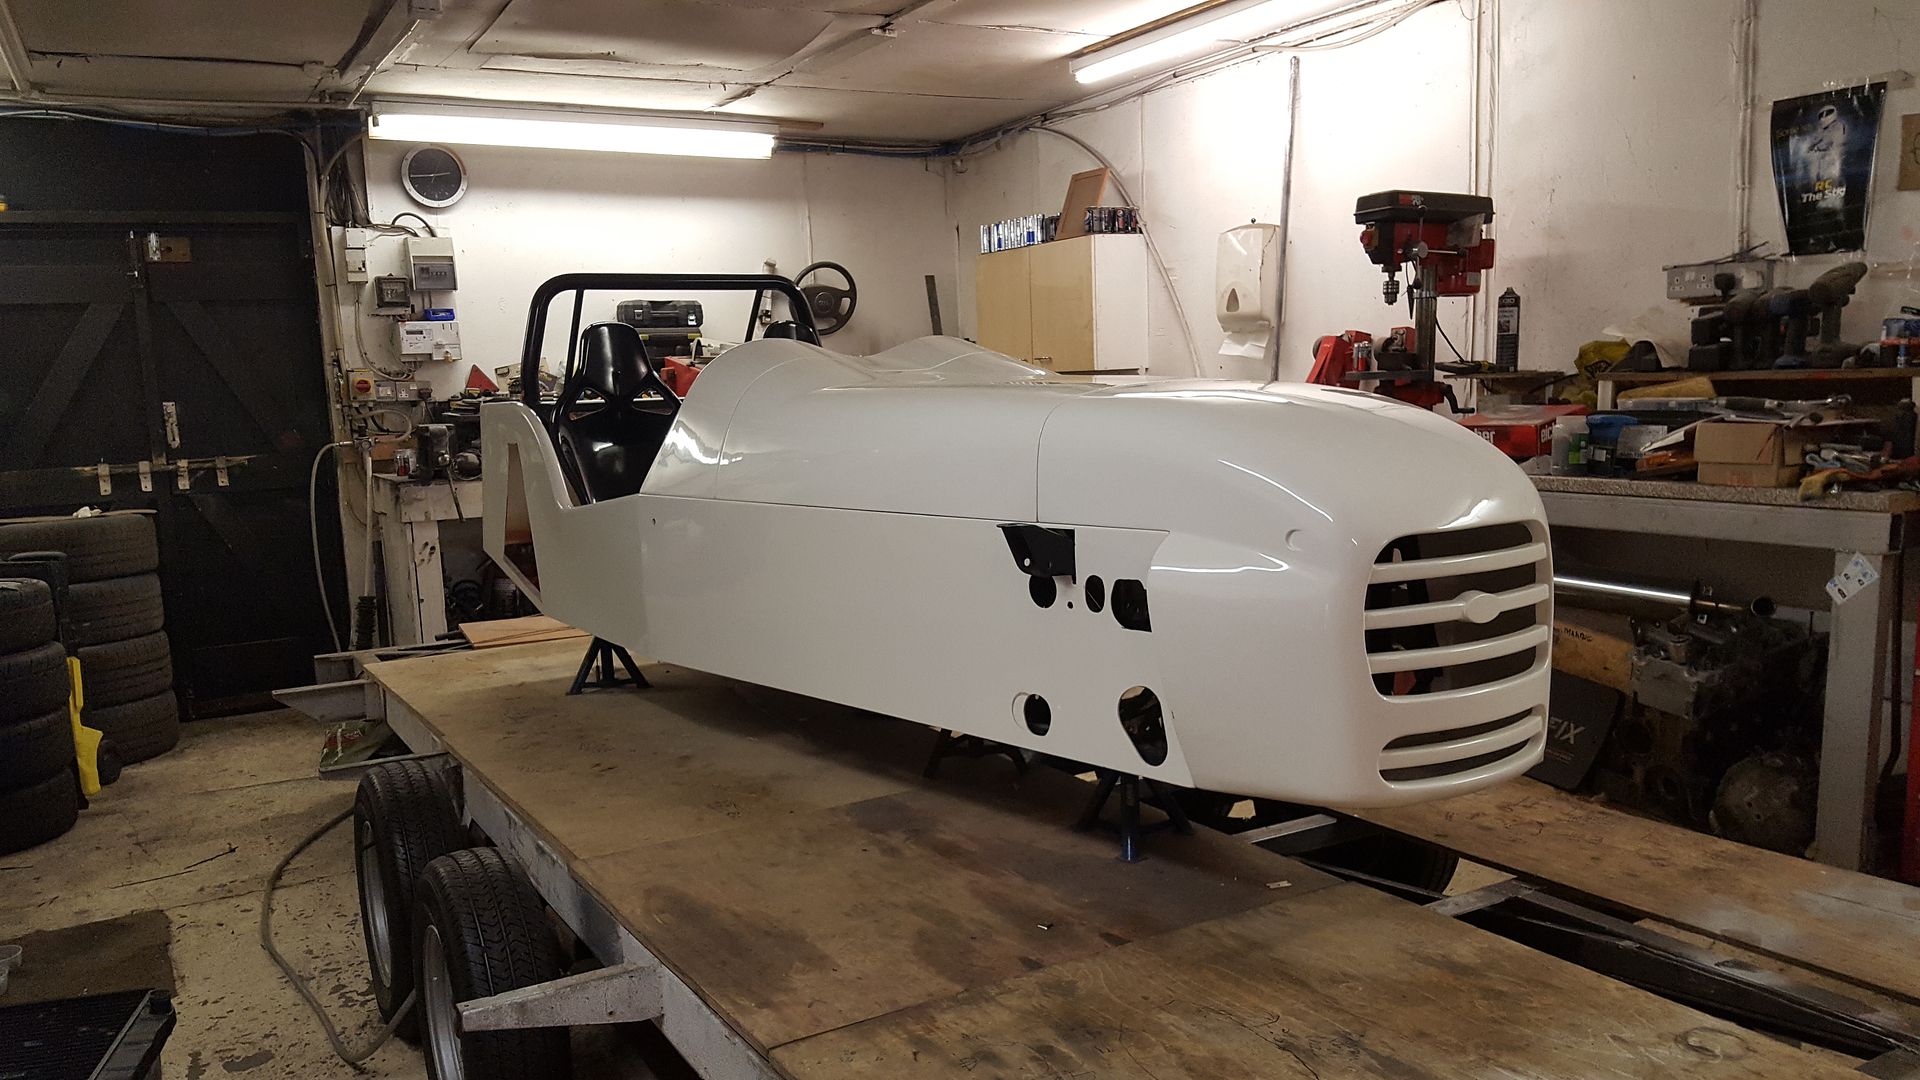
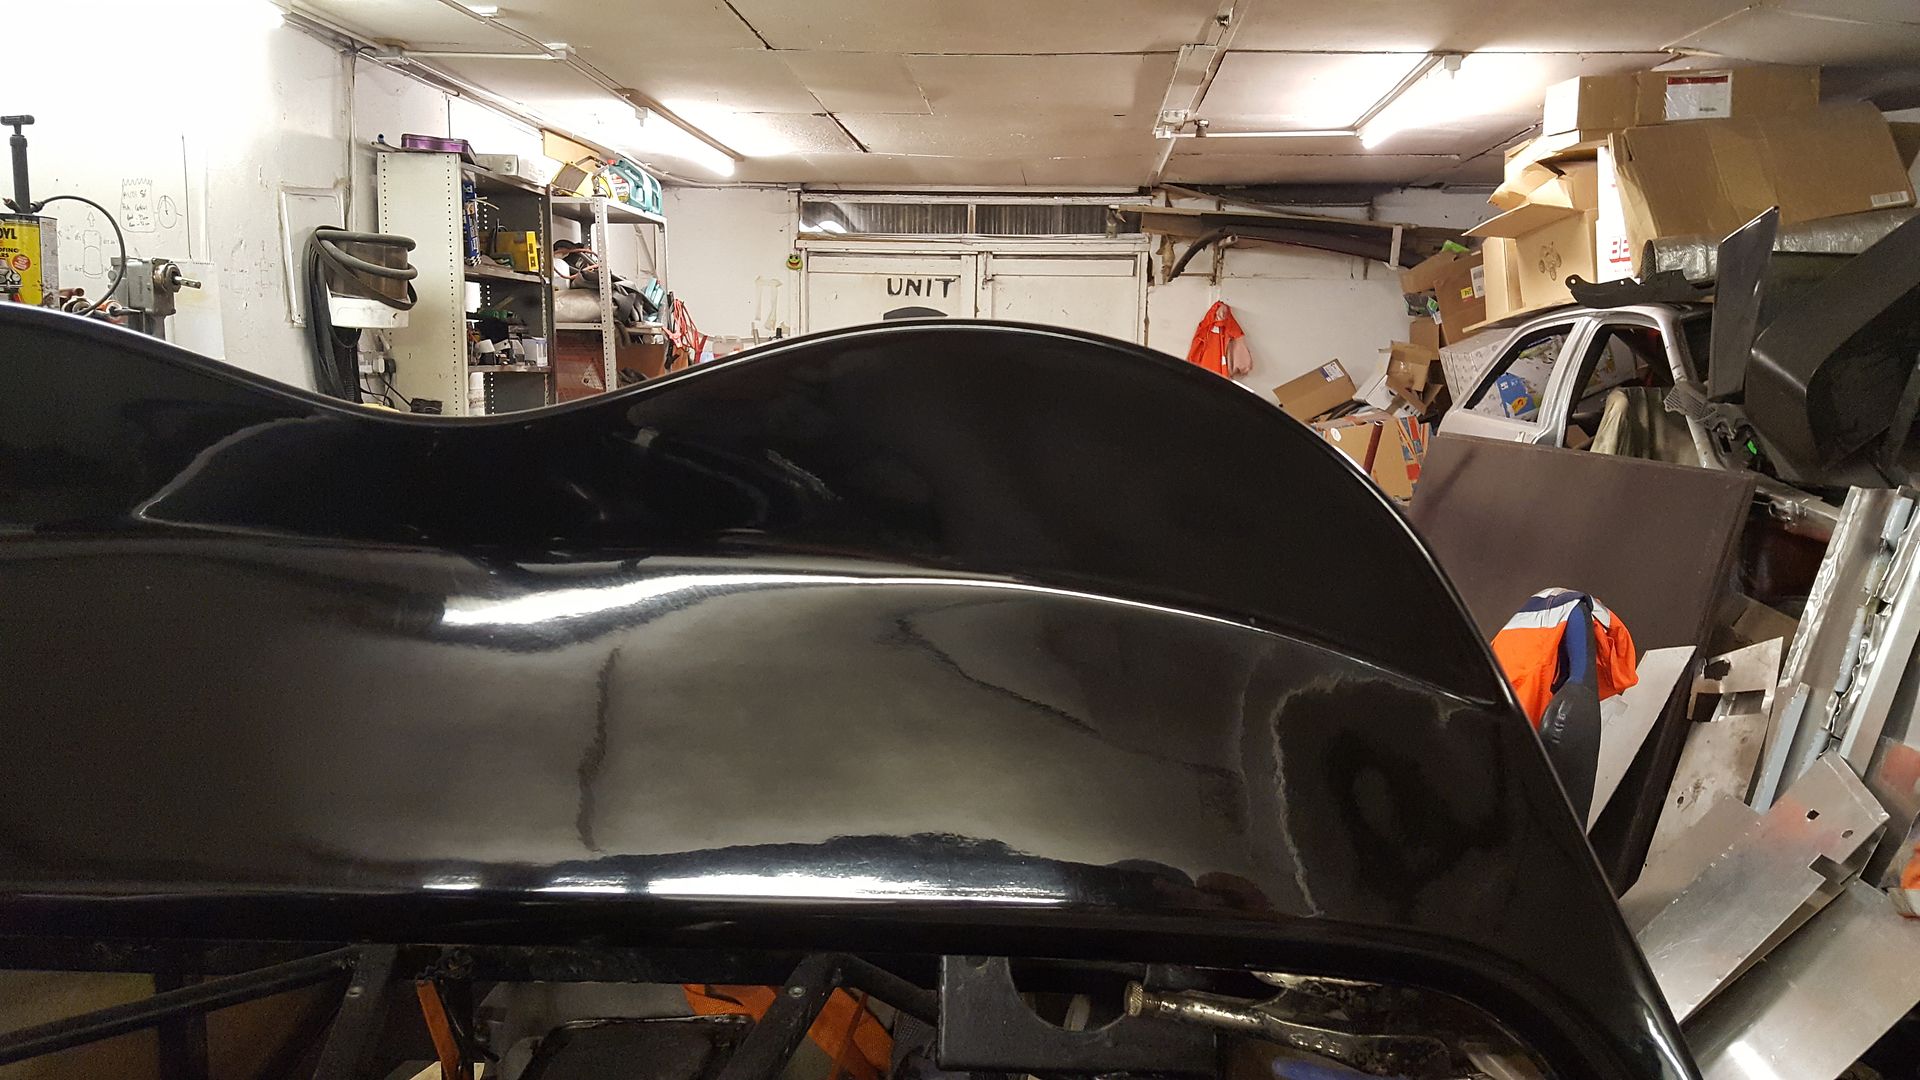
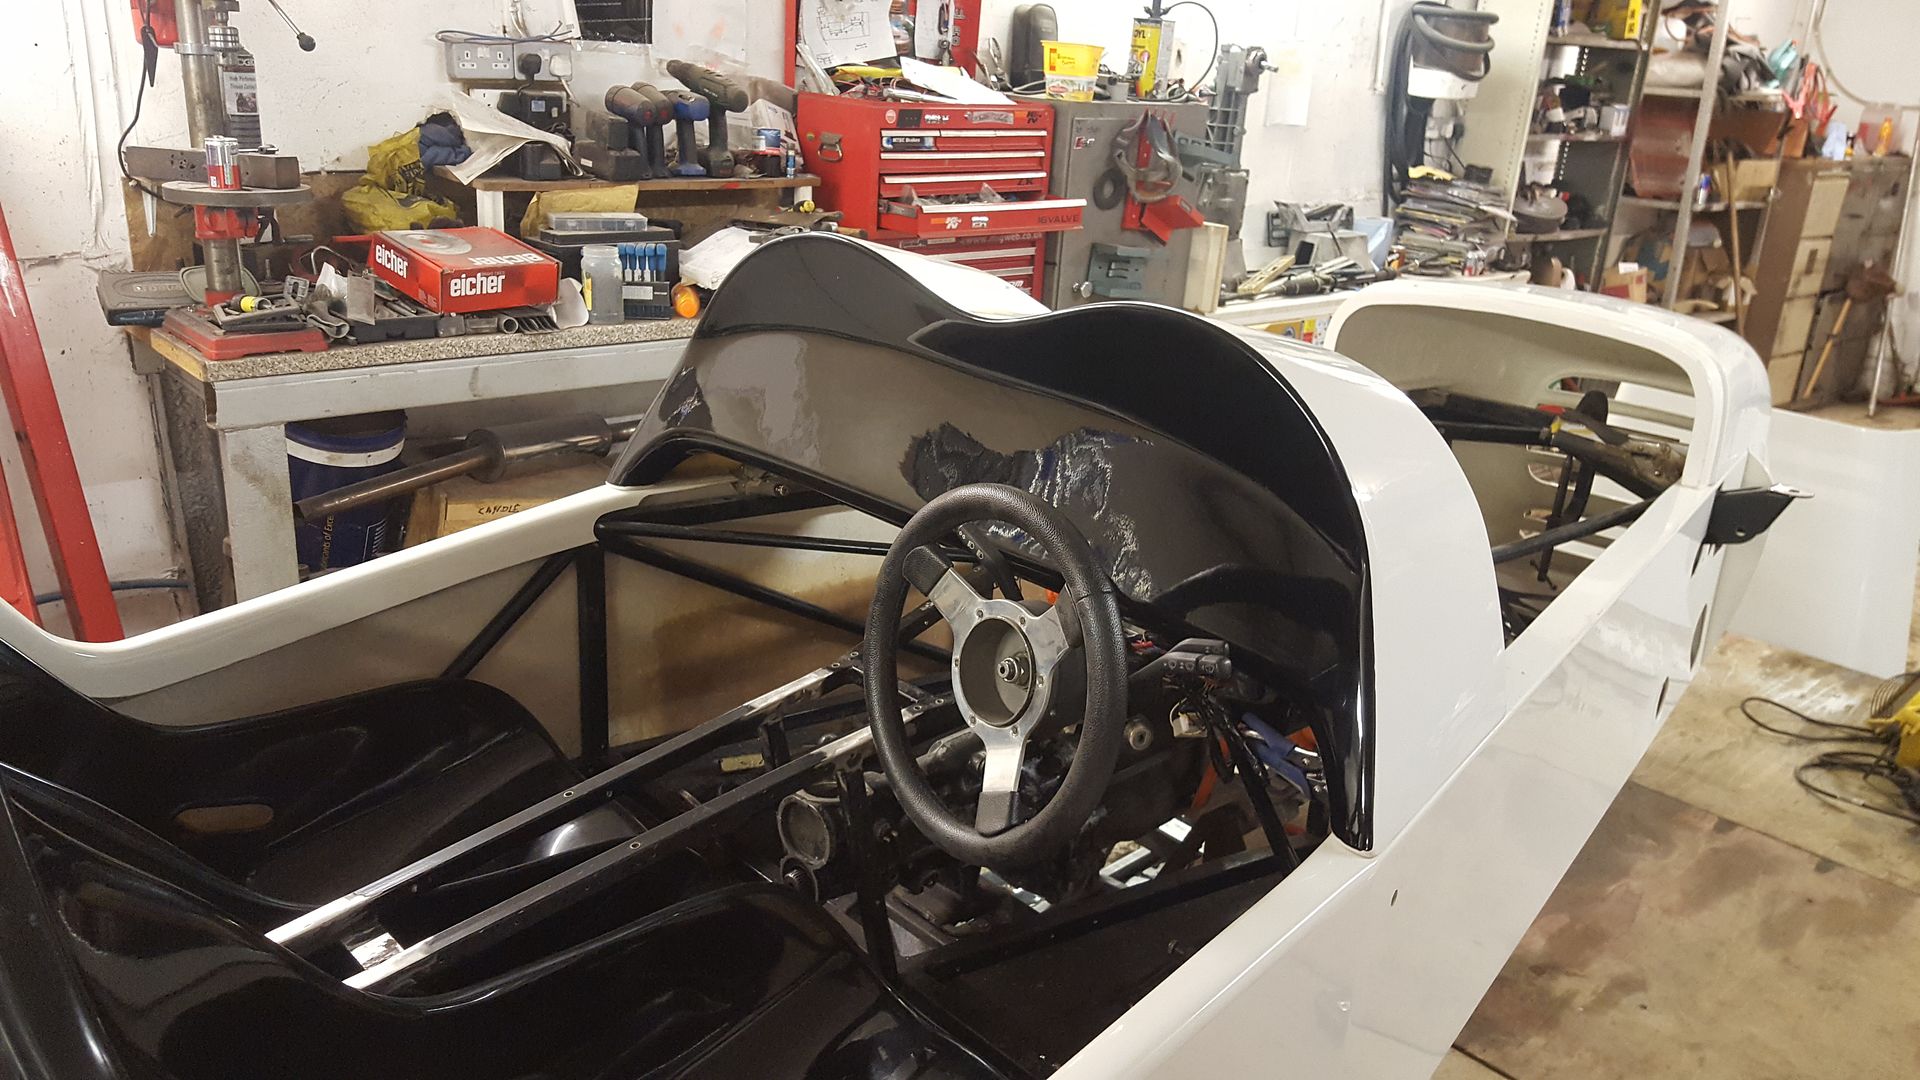
now, the detour we took on the way to Alyesbury was to pick this up
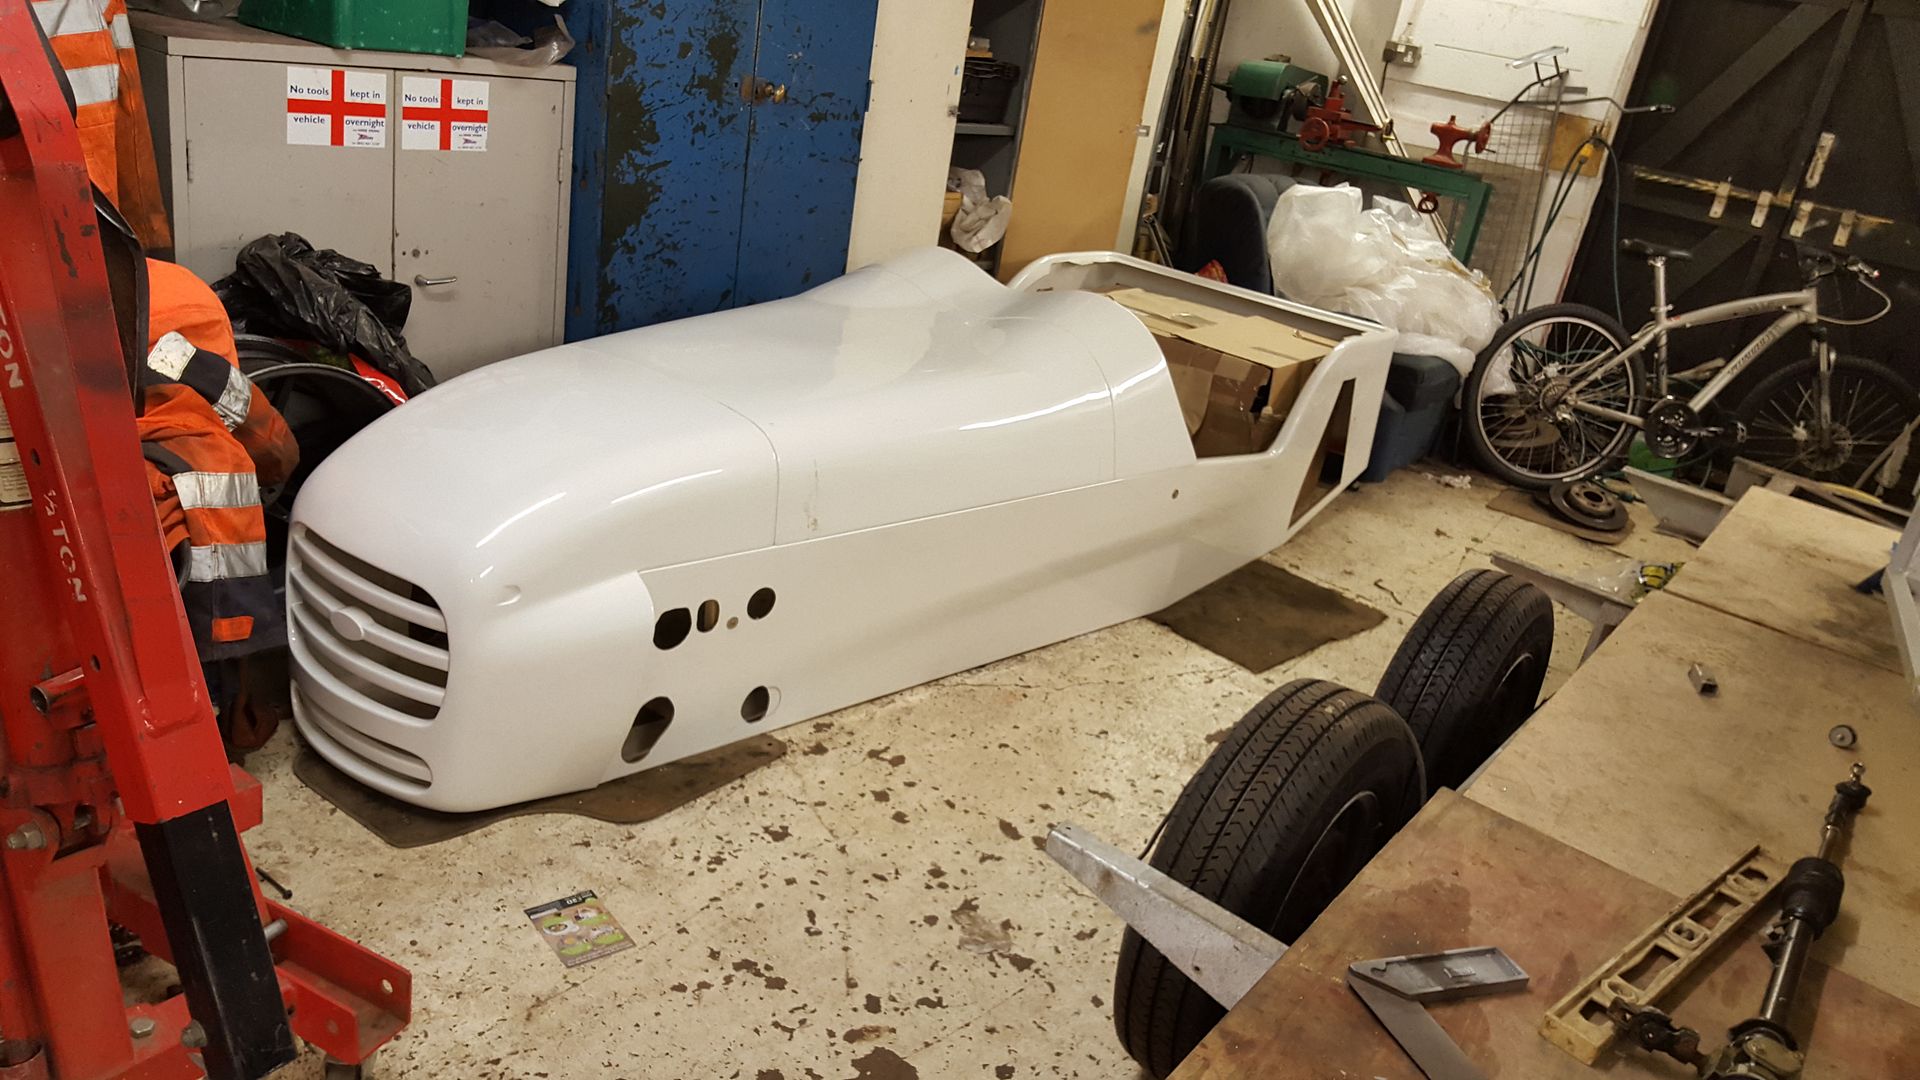
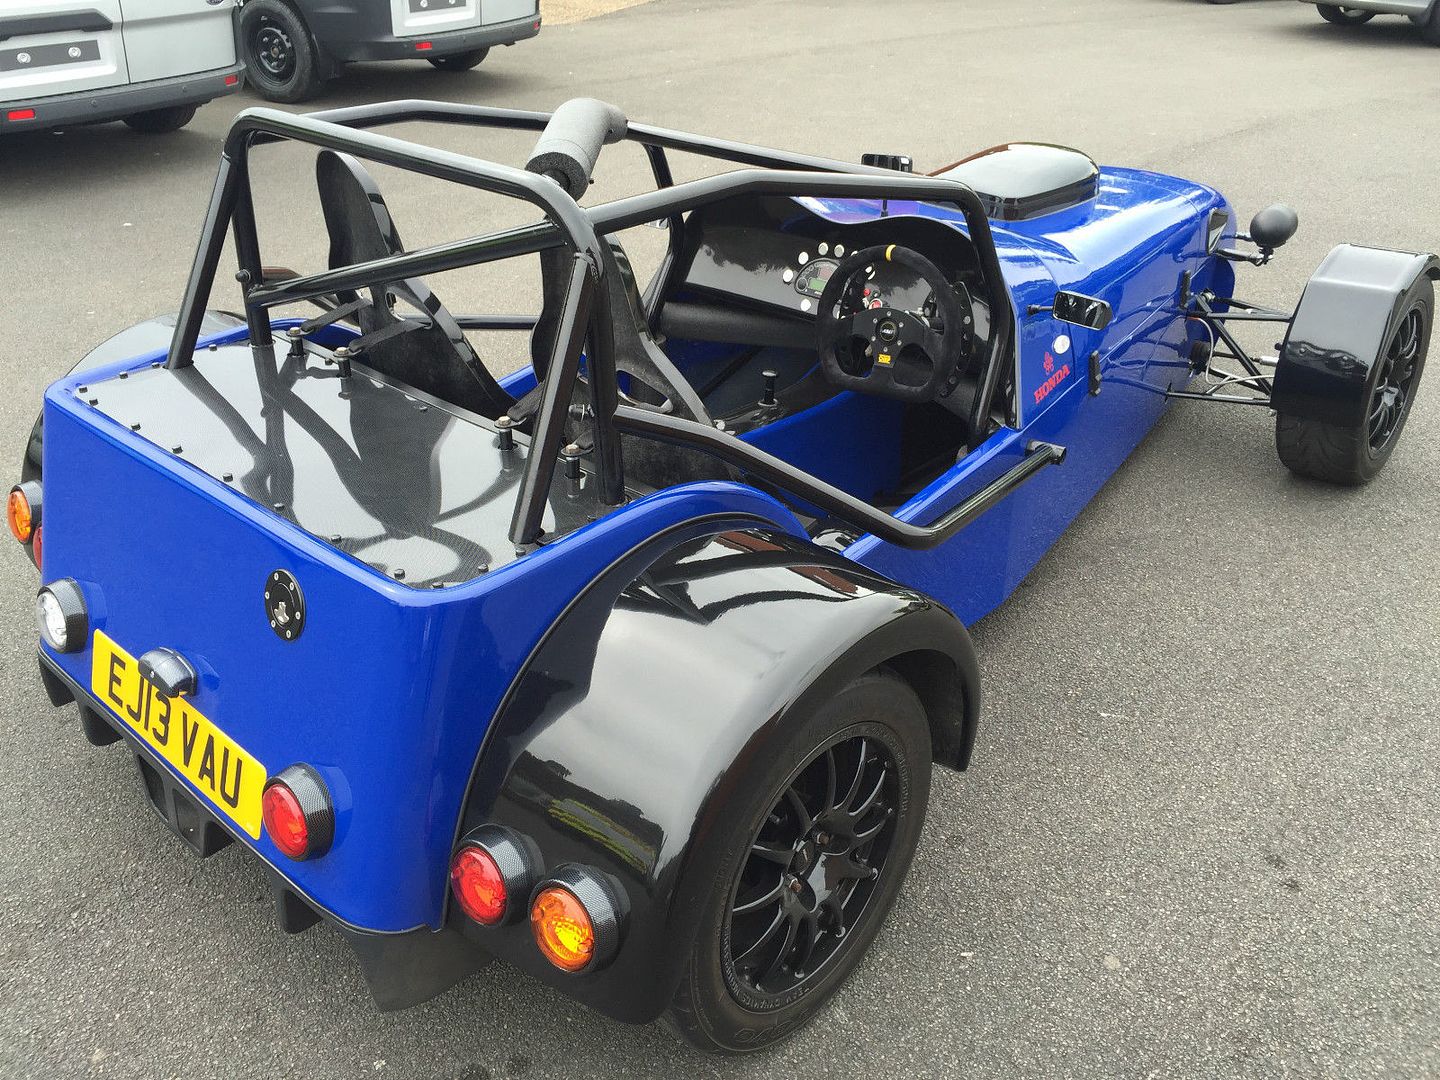
A full body for a MNR VORTX. These are pretty rare and VERY hard to get hold of, NMR are very cagey about who they sell parts to, only really selling
anythingto people registered with MNR chassis's. They are going to have a bloody fit when they find one is going on a mongrel chassis :face:
:lmao:
The best part is i paid Ł200 for the lot and it is brand new never been on the road!
just laid the bids on to get an idea of coolness
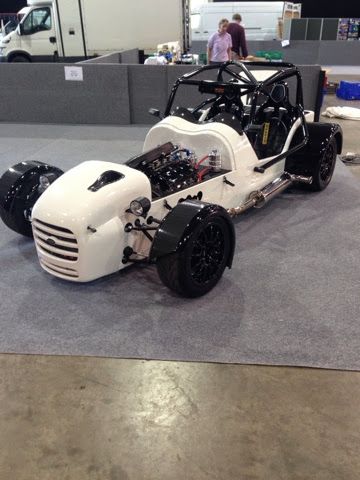
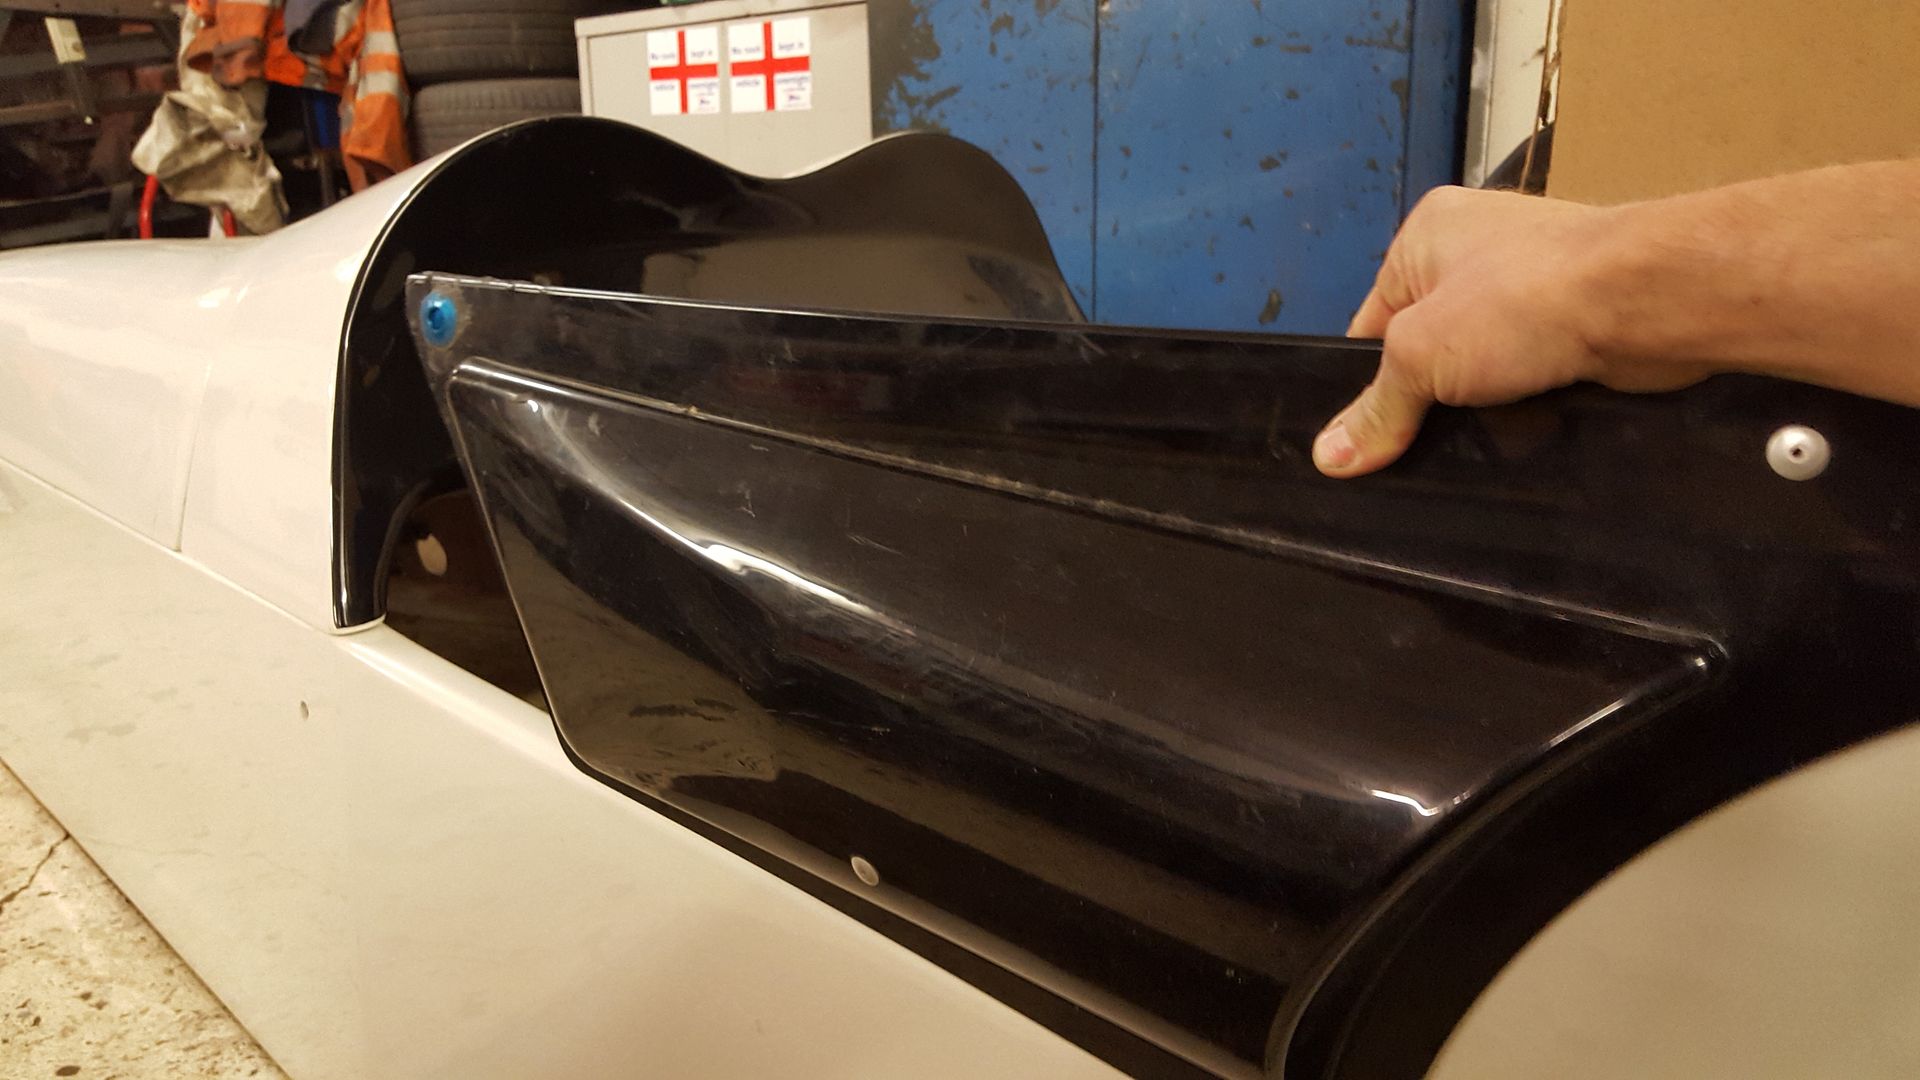
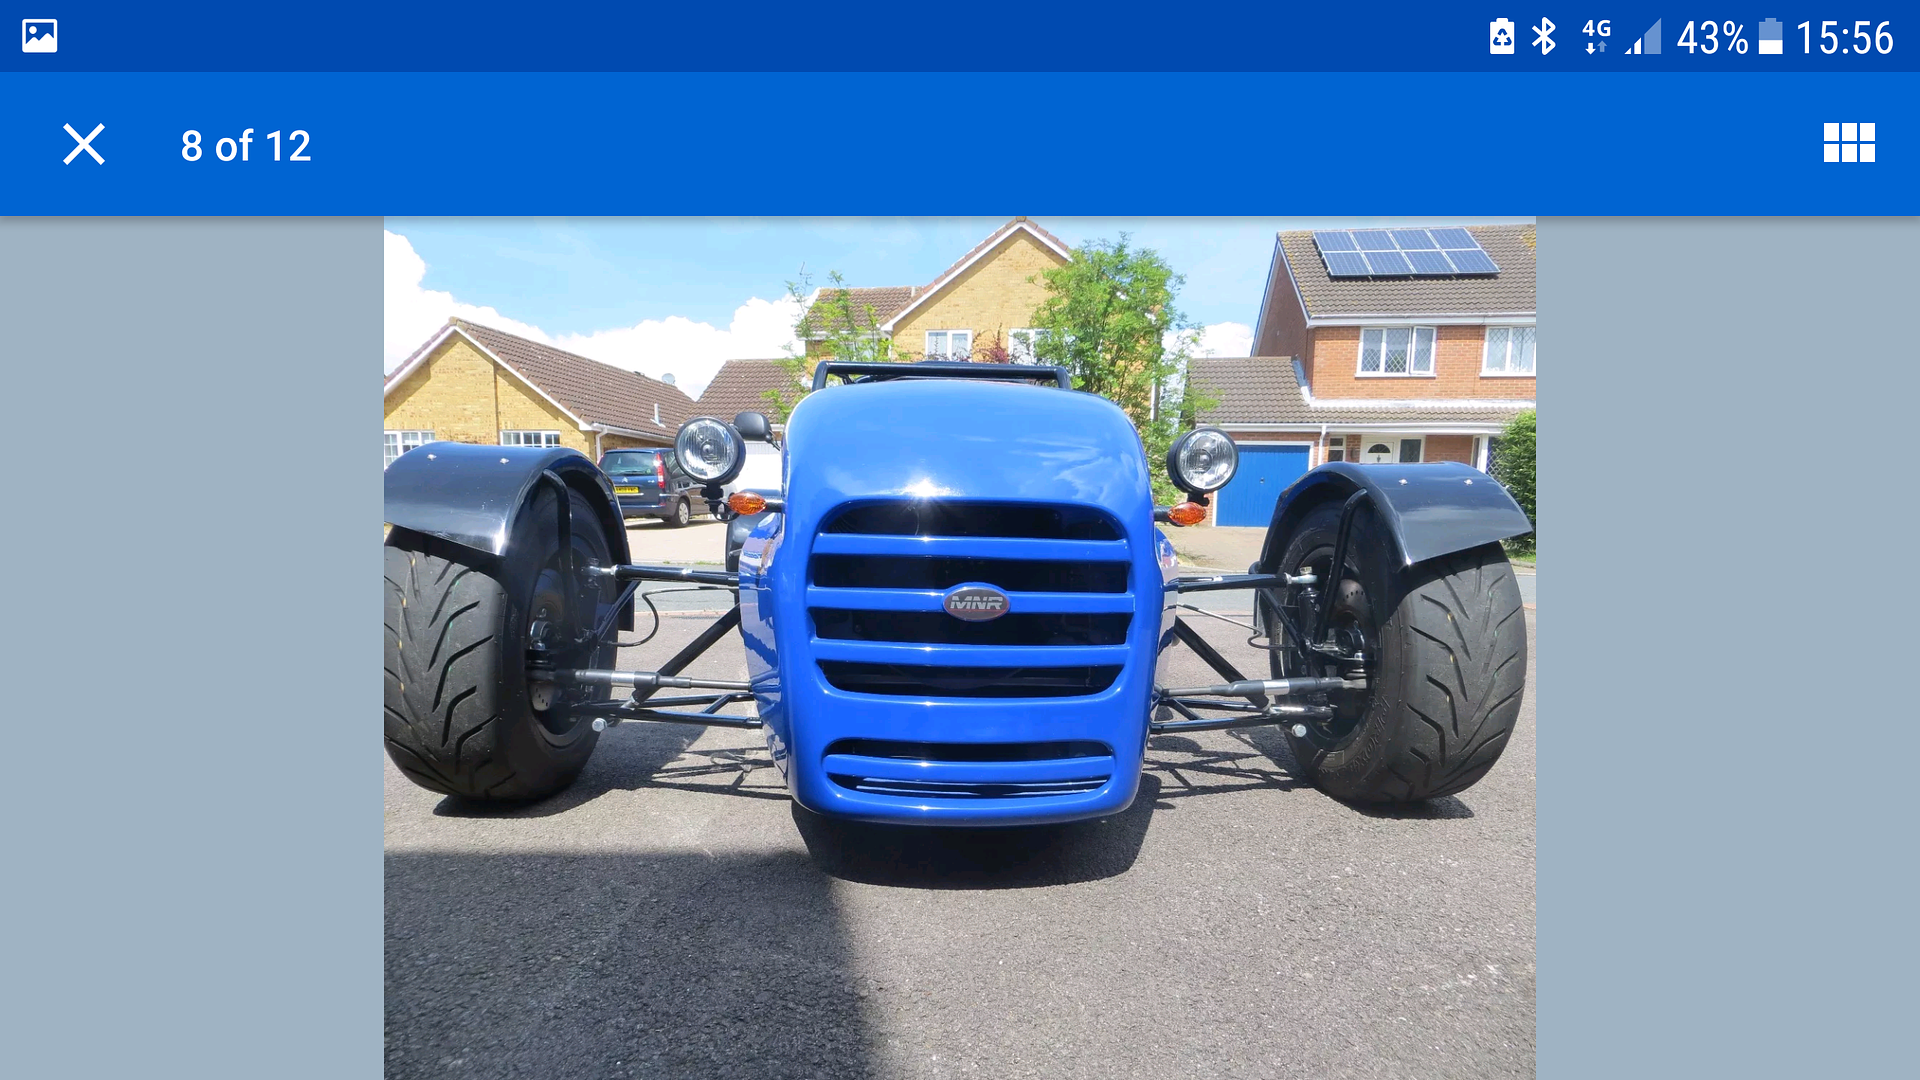
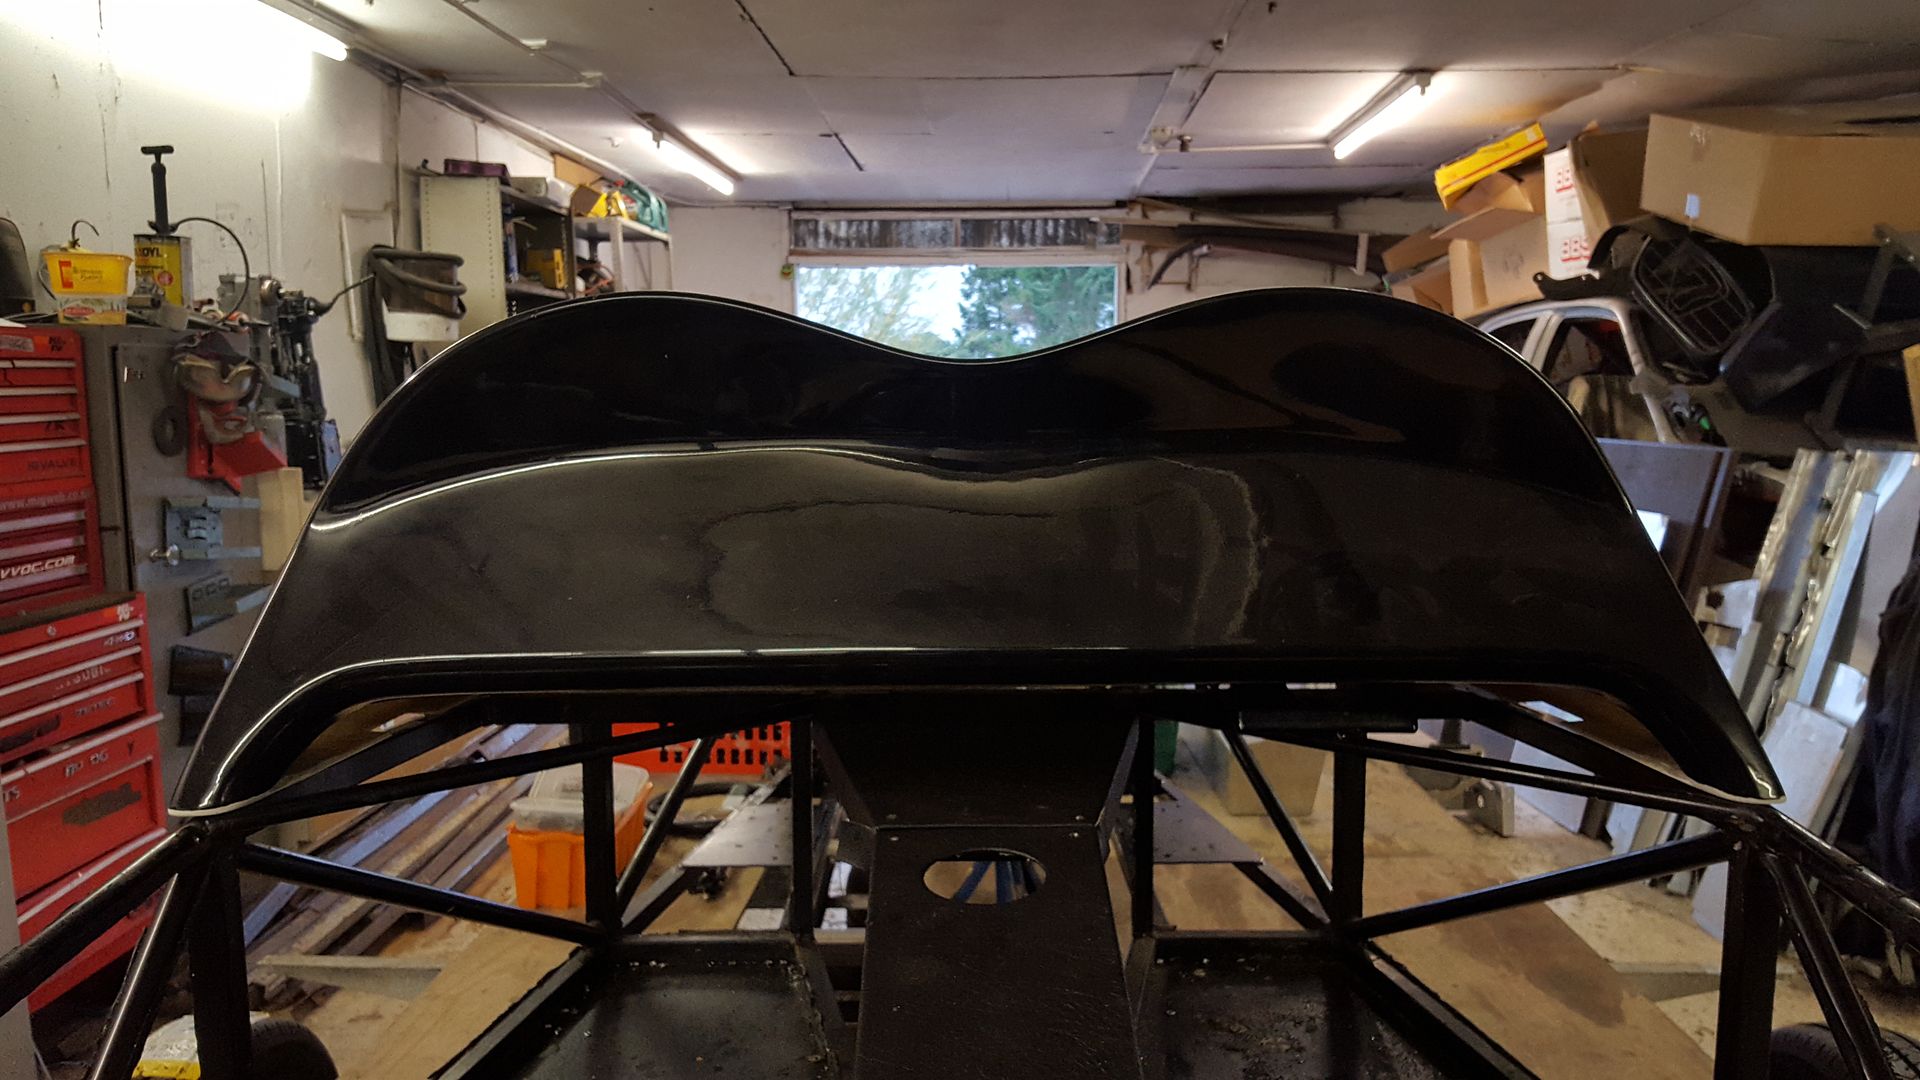
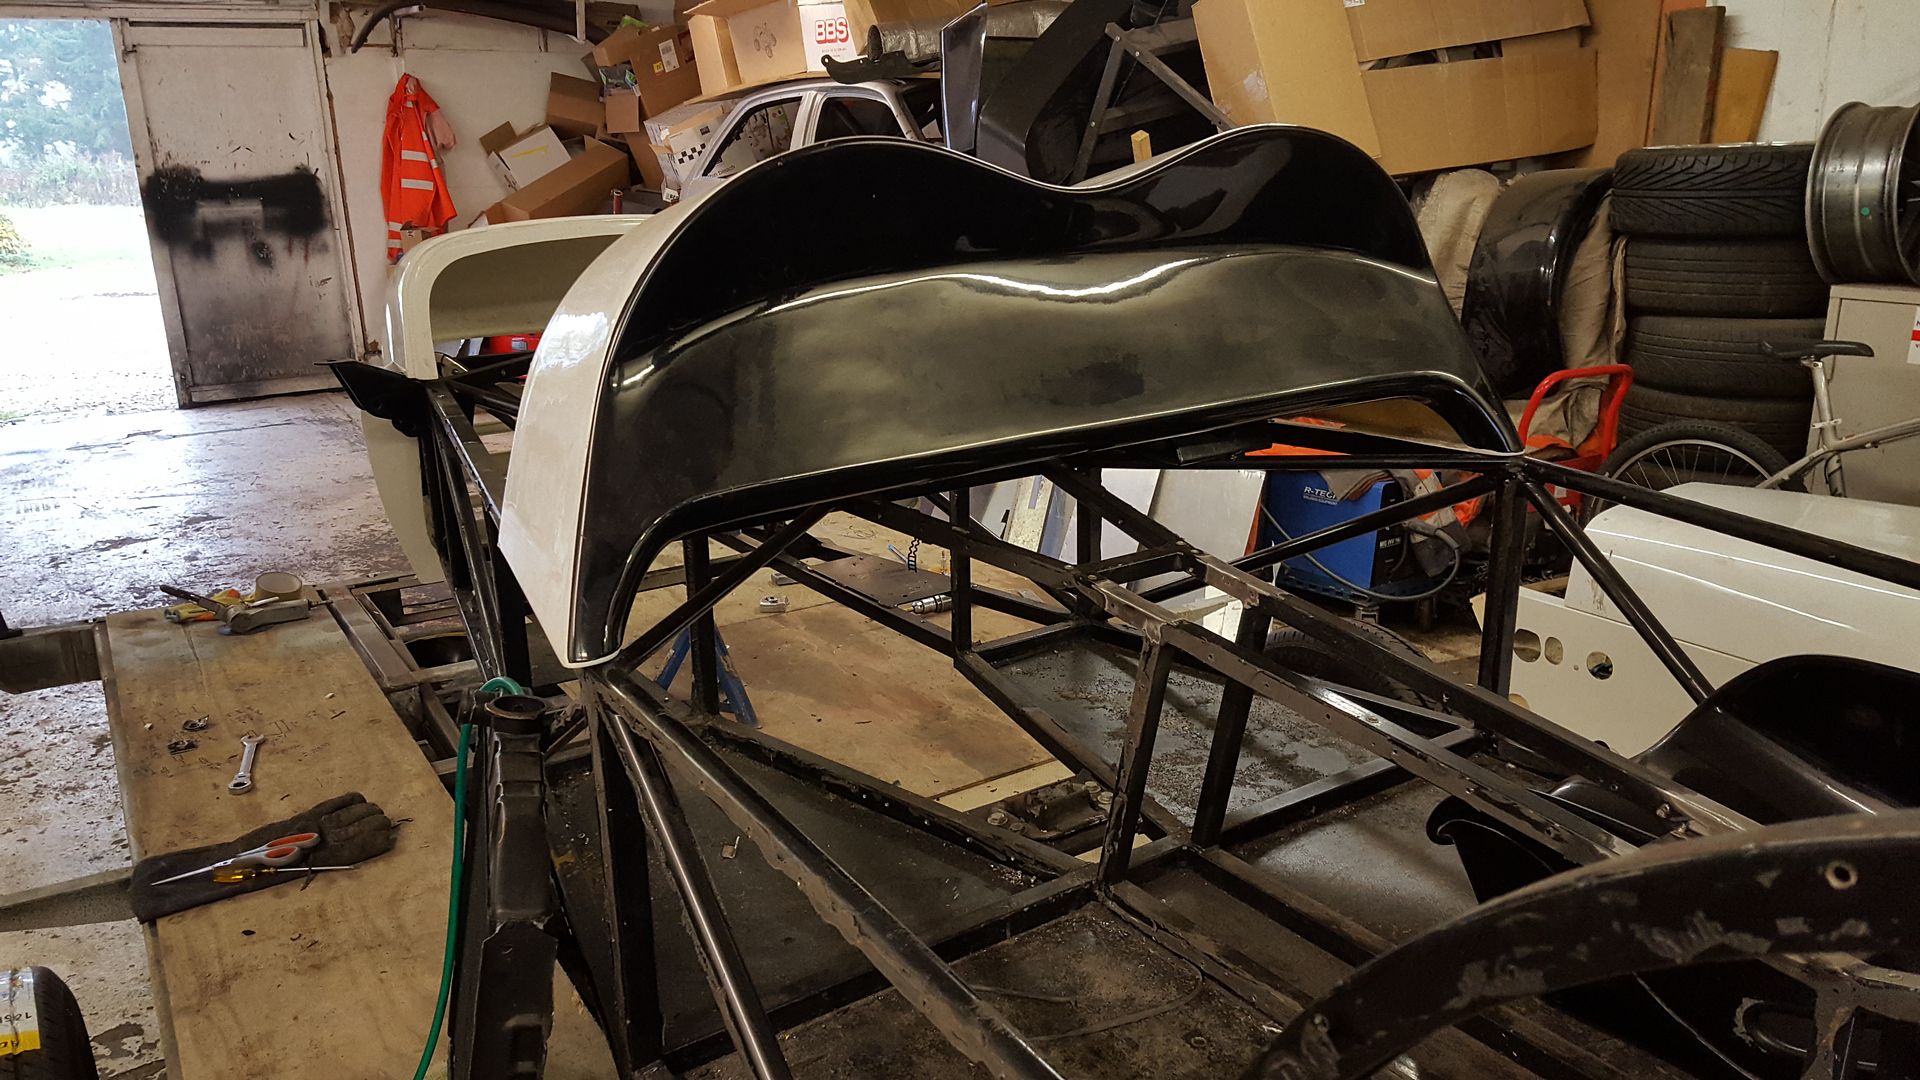
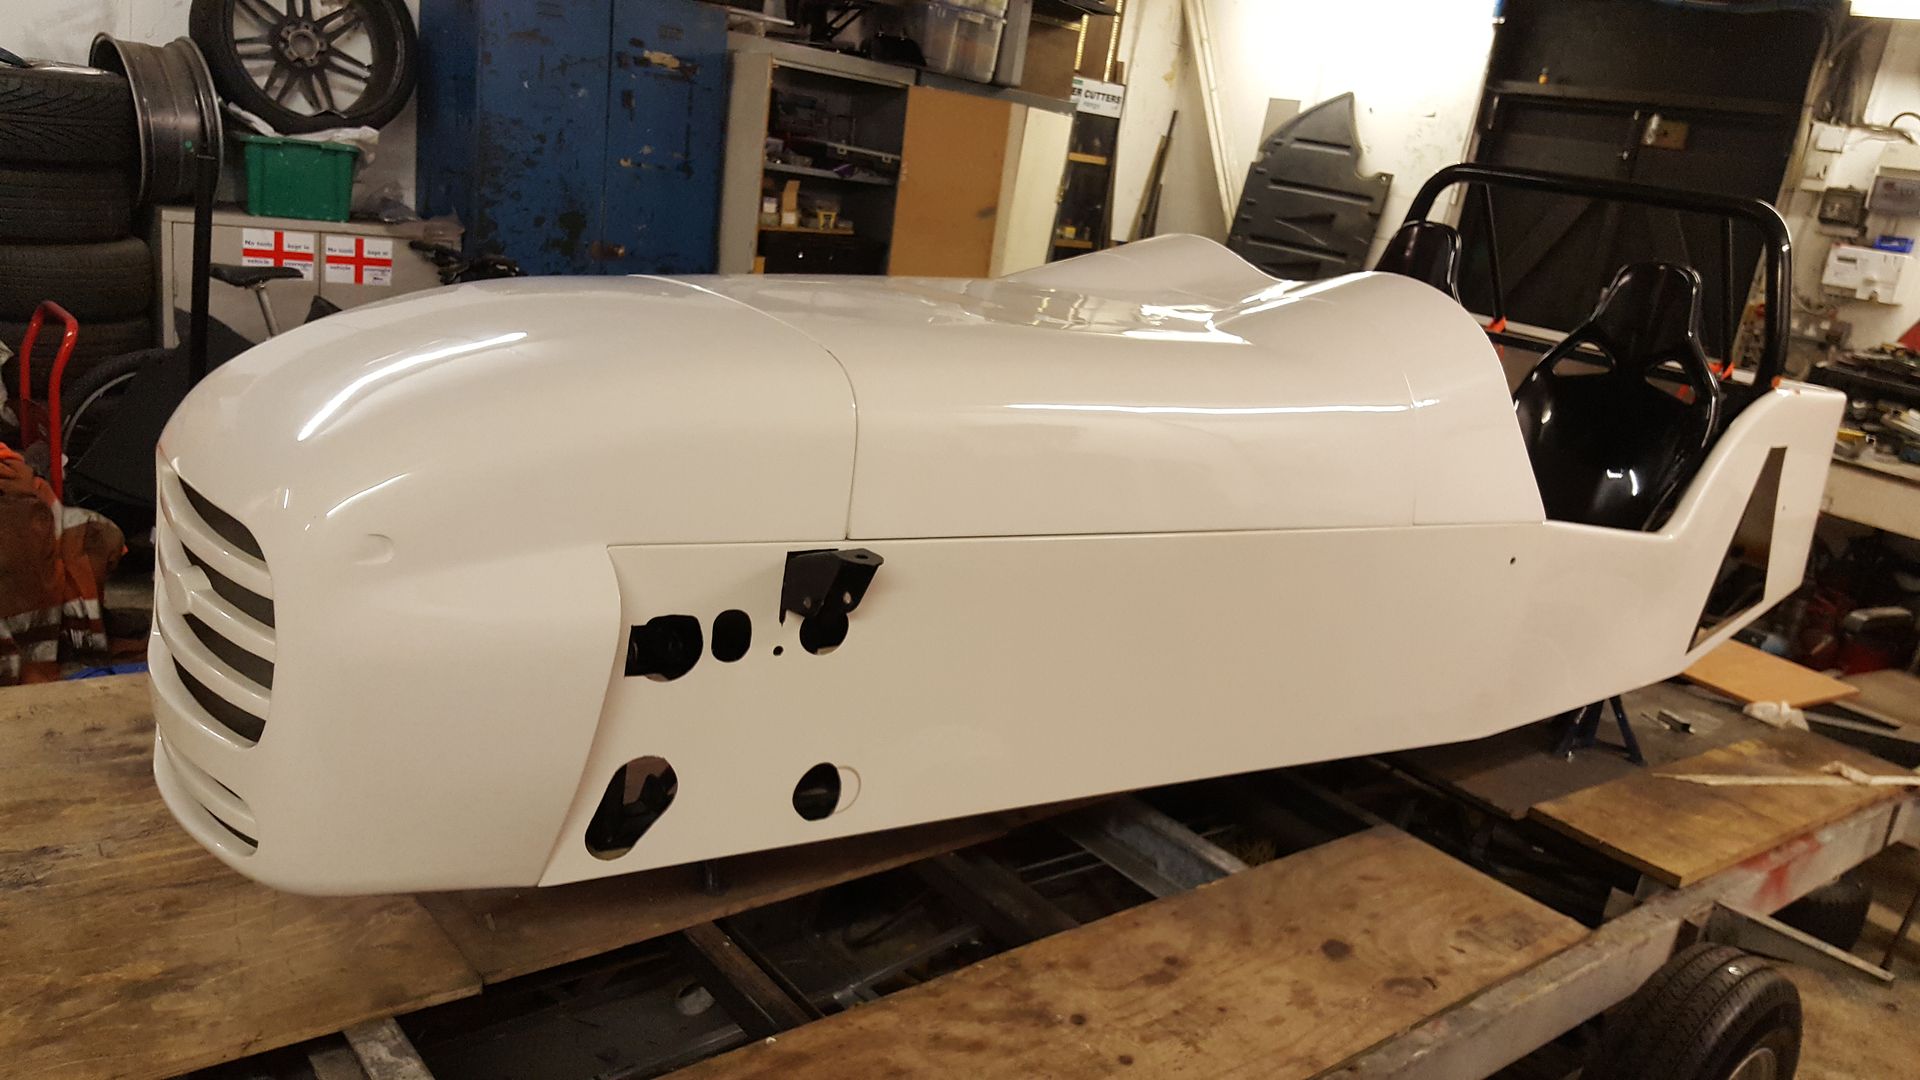
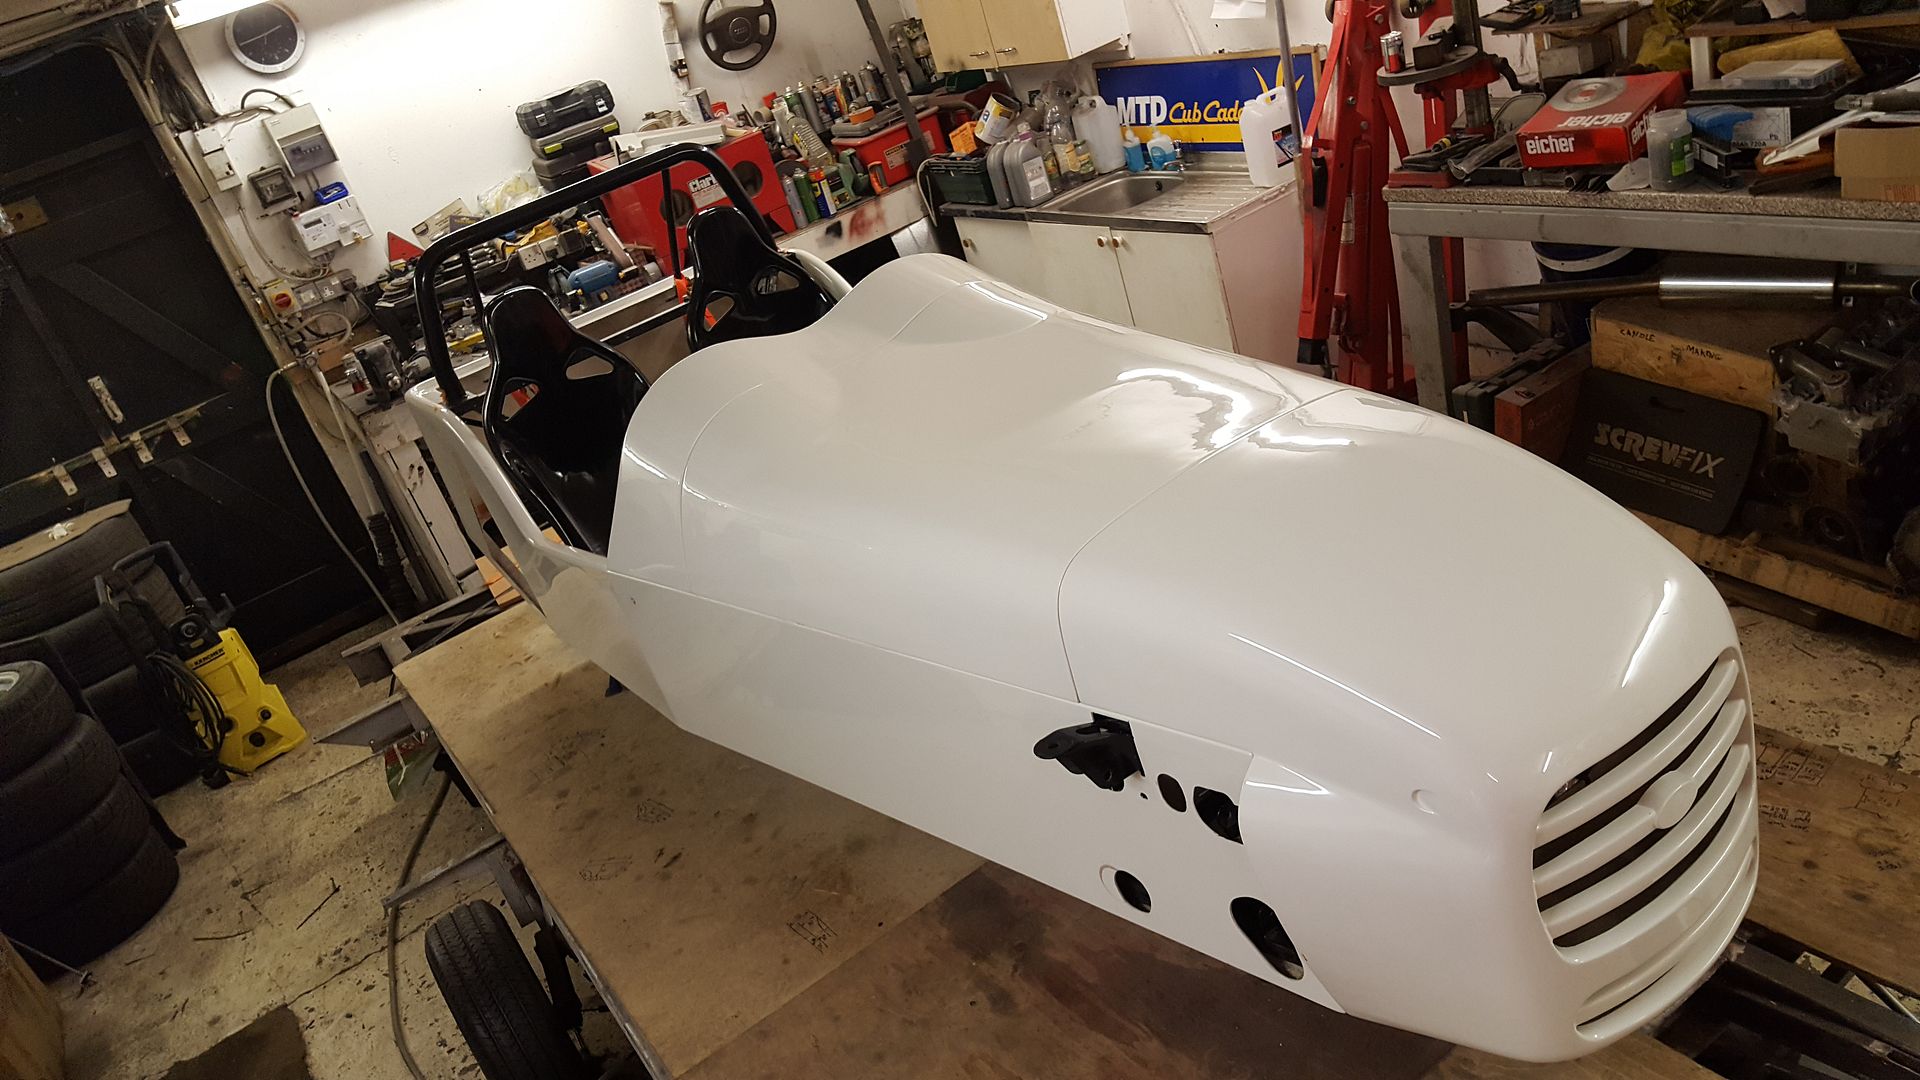
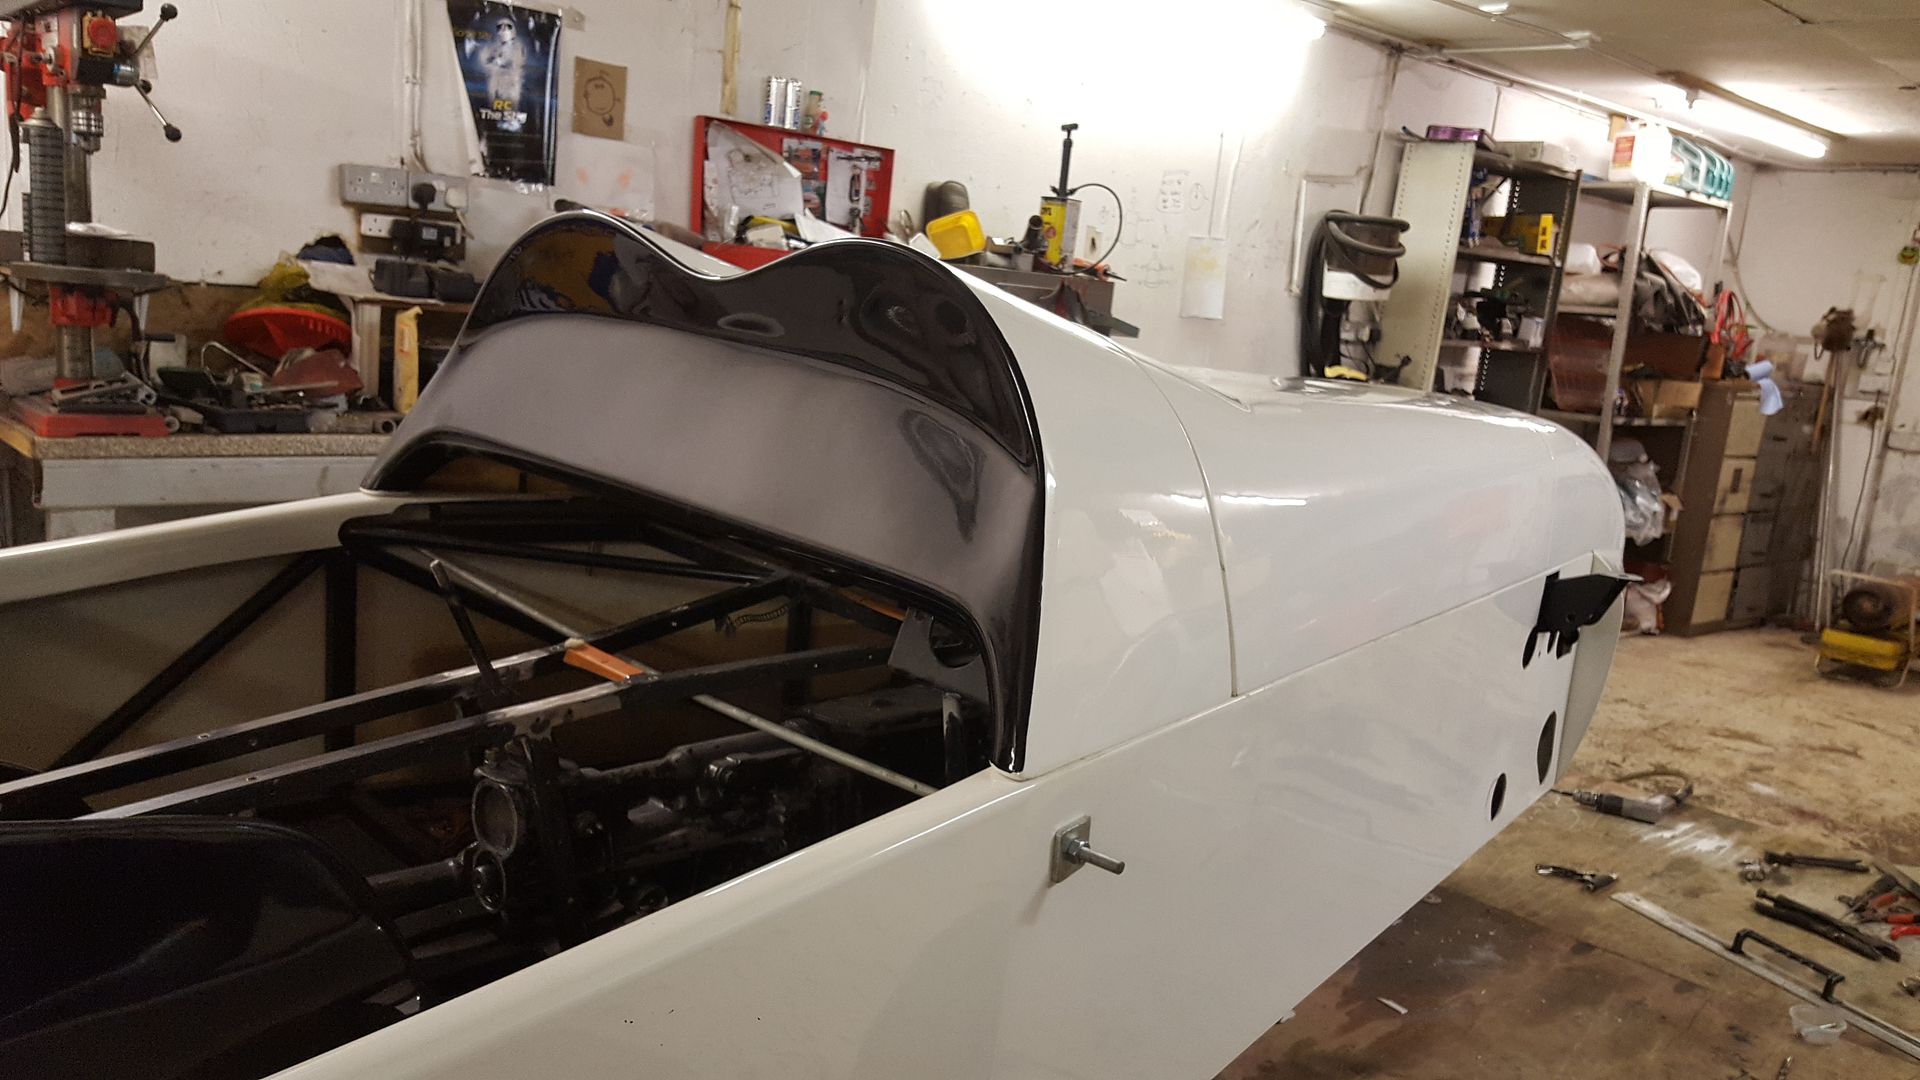
love the double bubble scuttle on these!
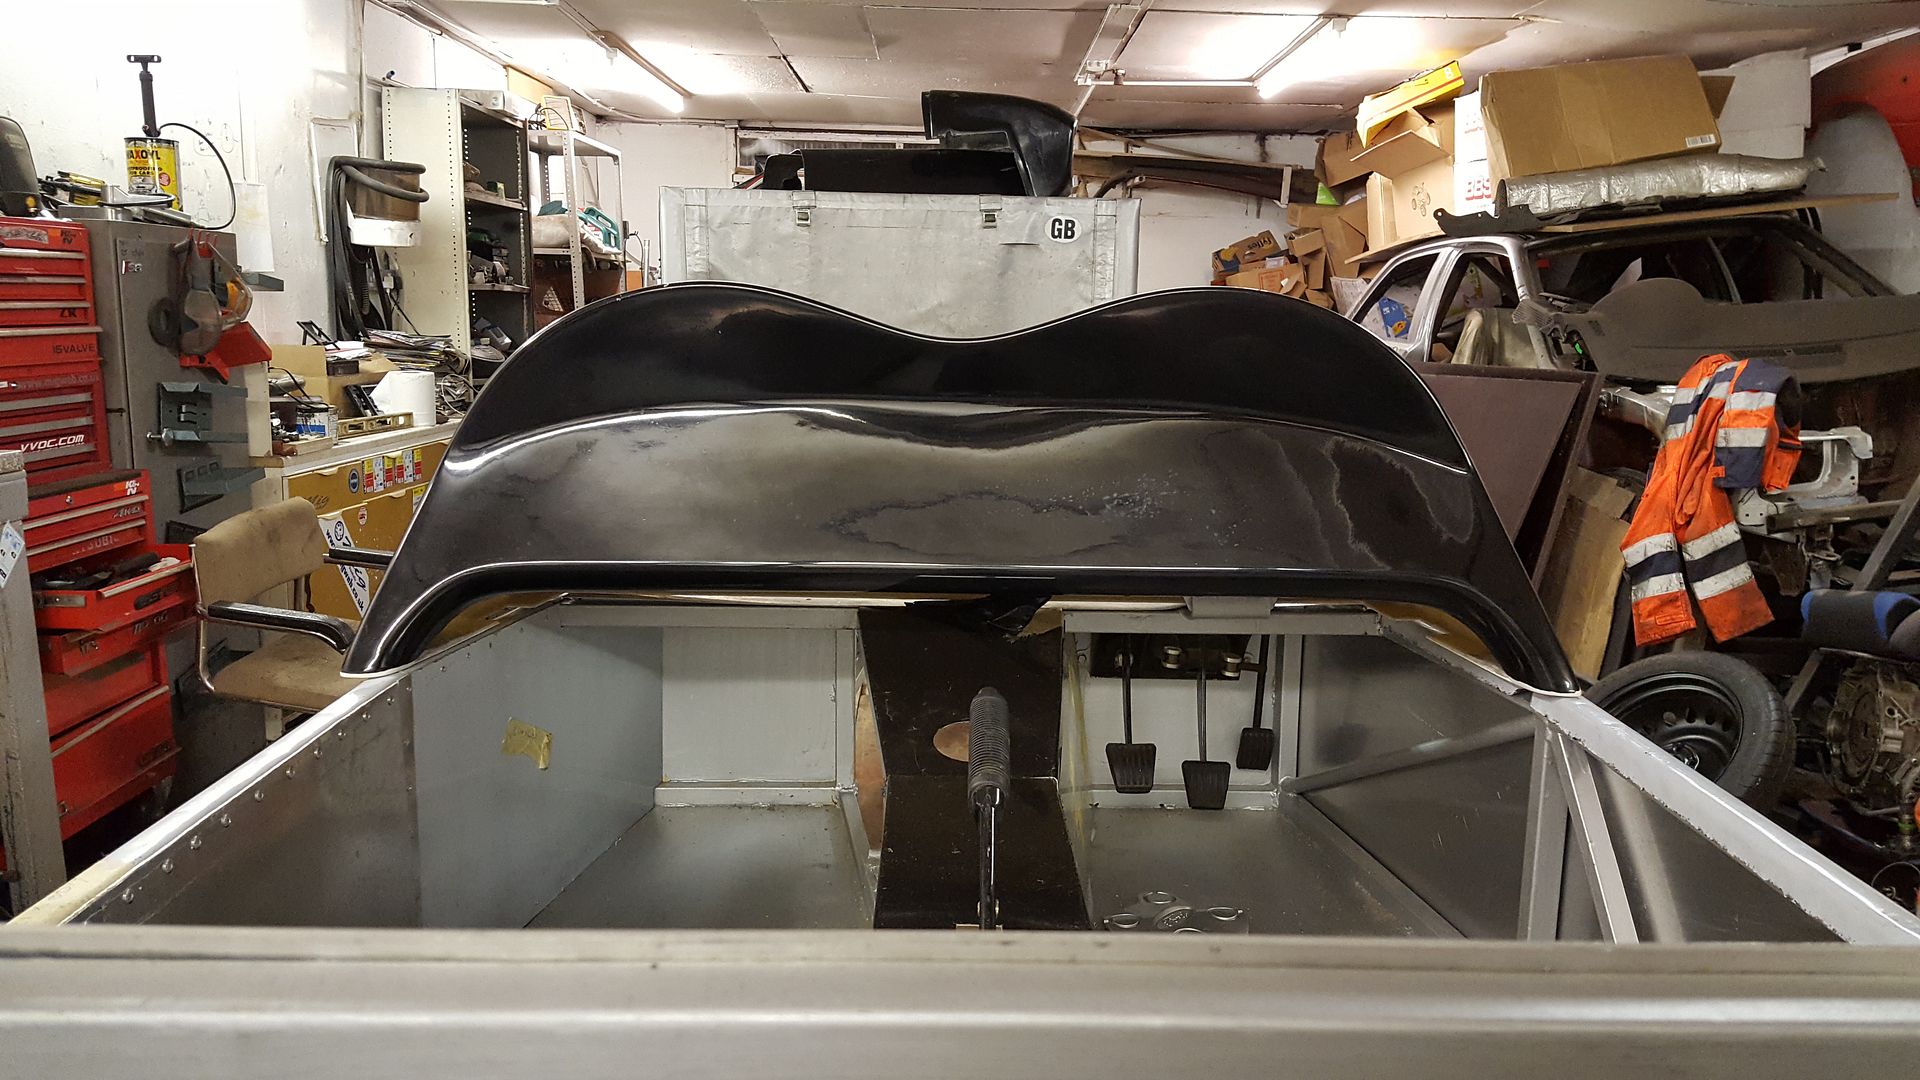
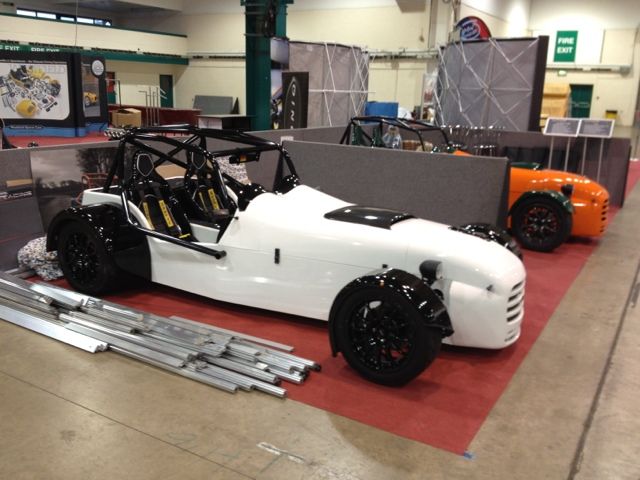
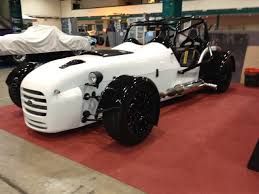
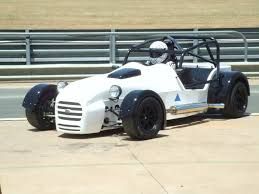
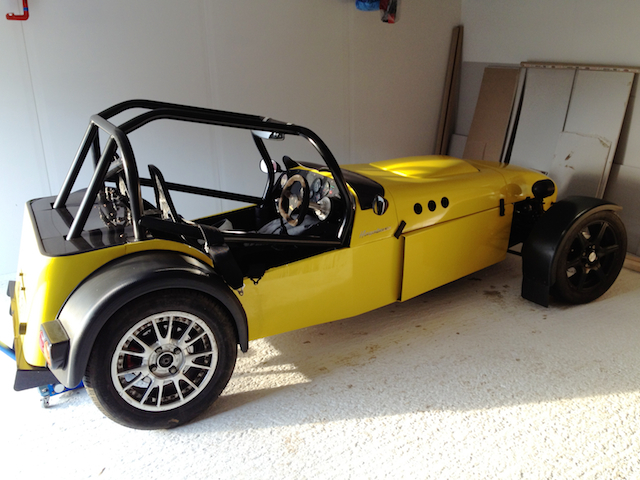
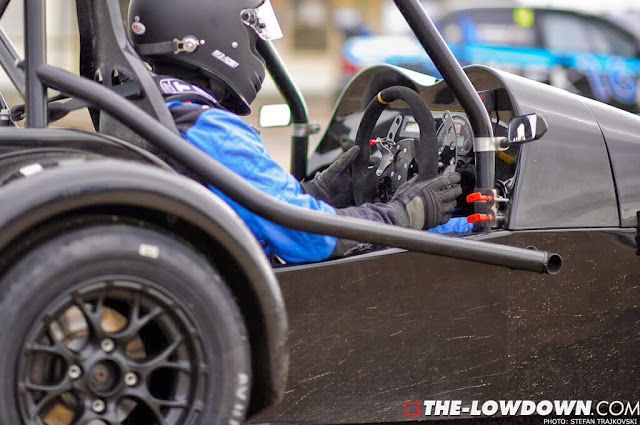
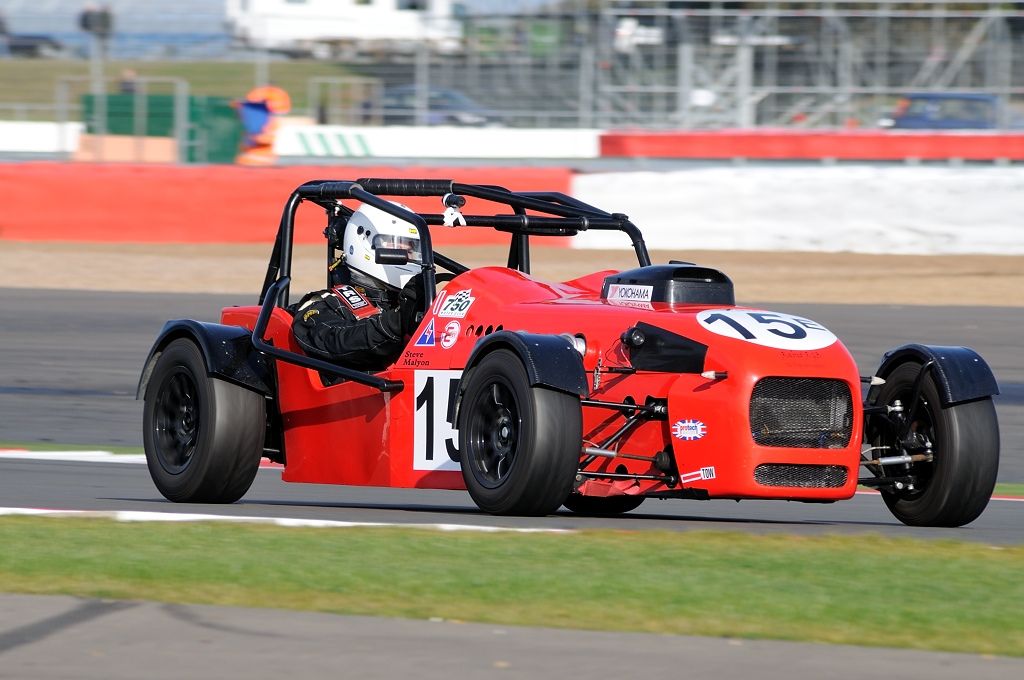
here are a few pics off google. this is wht it will look like when finished 
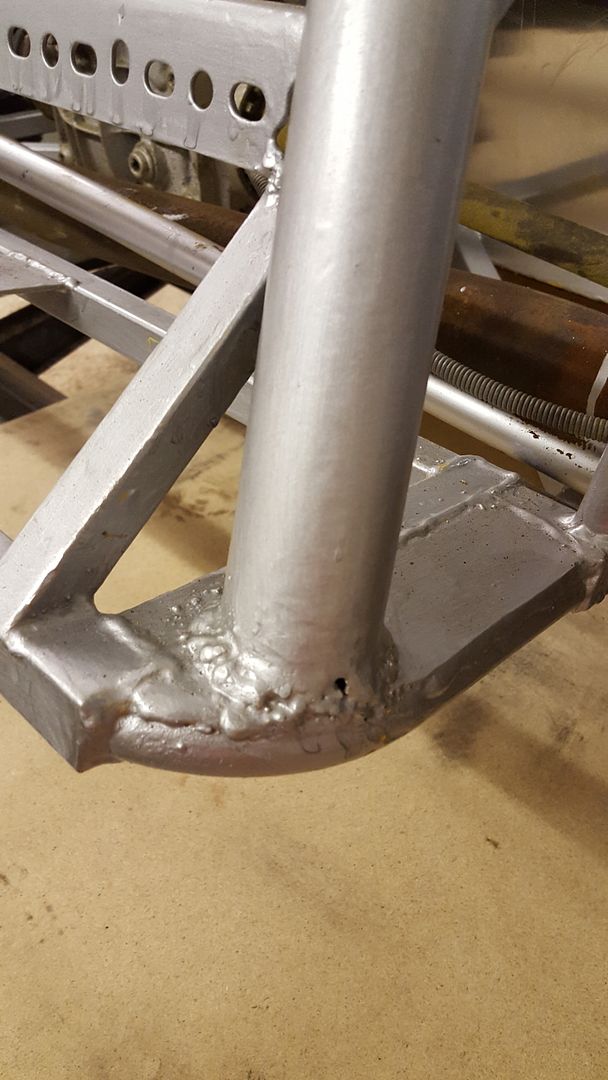
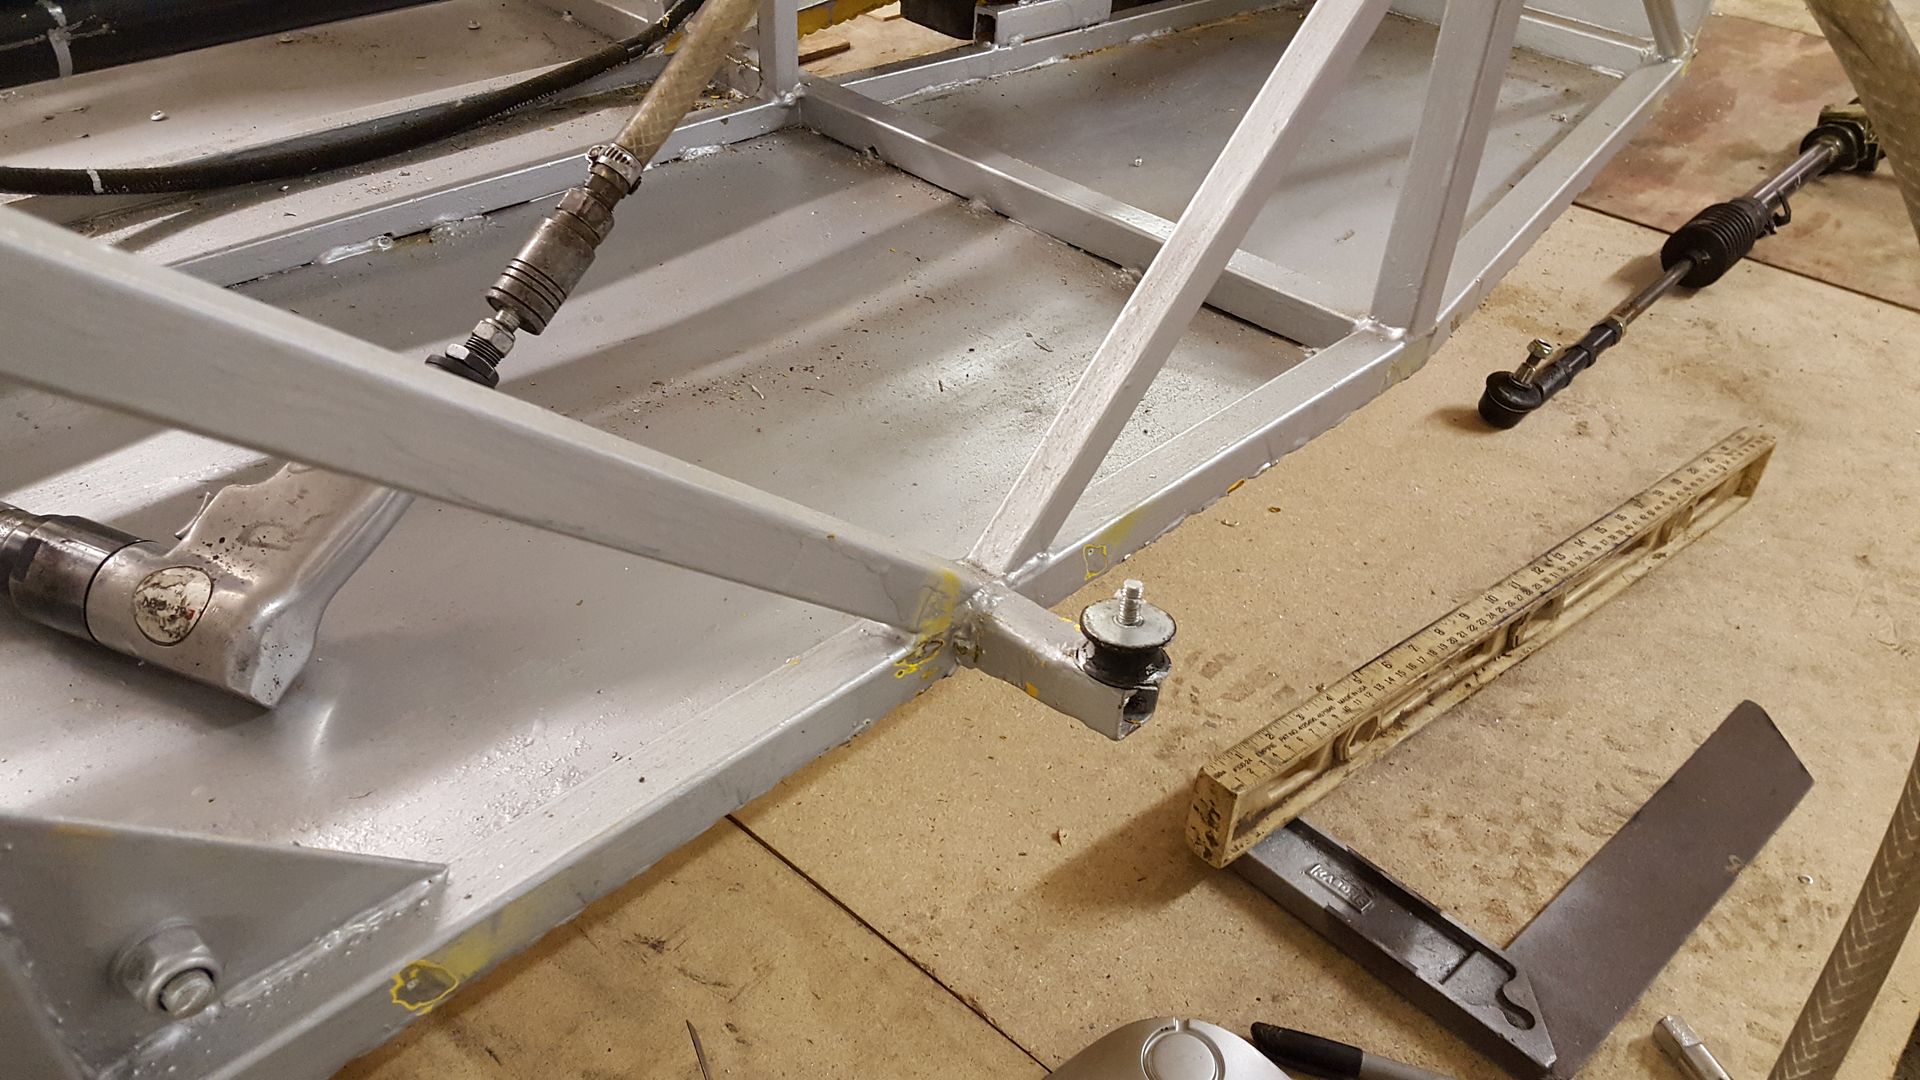
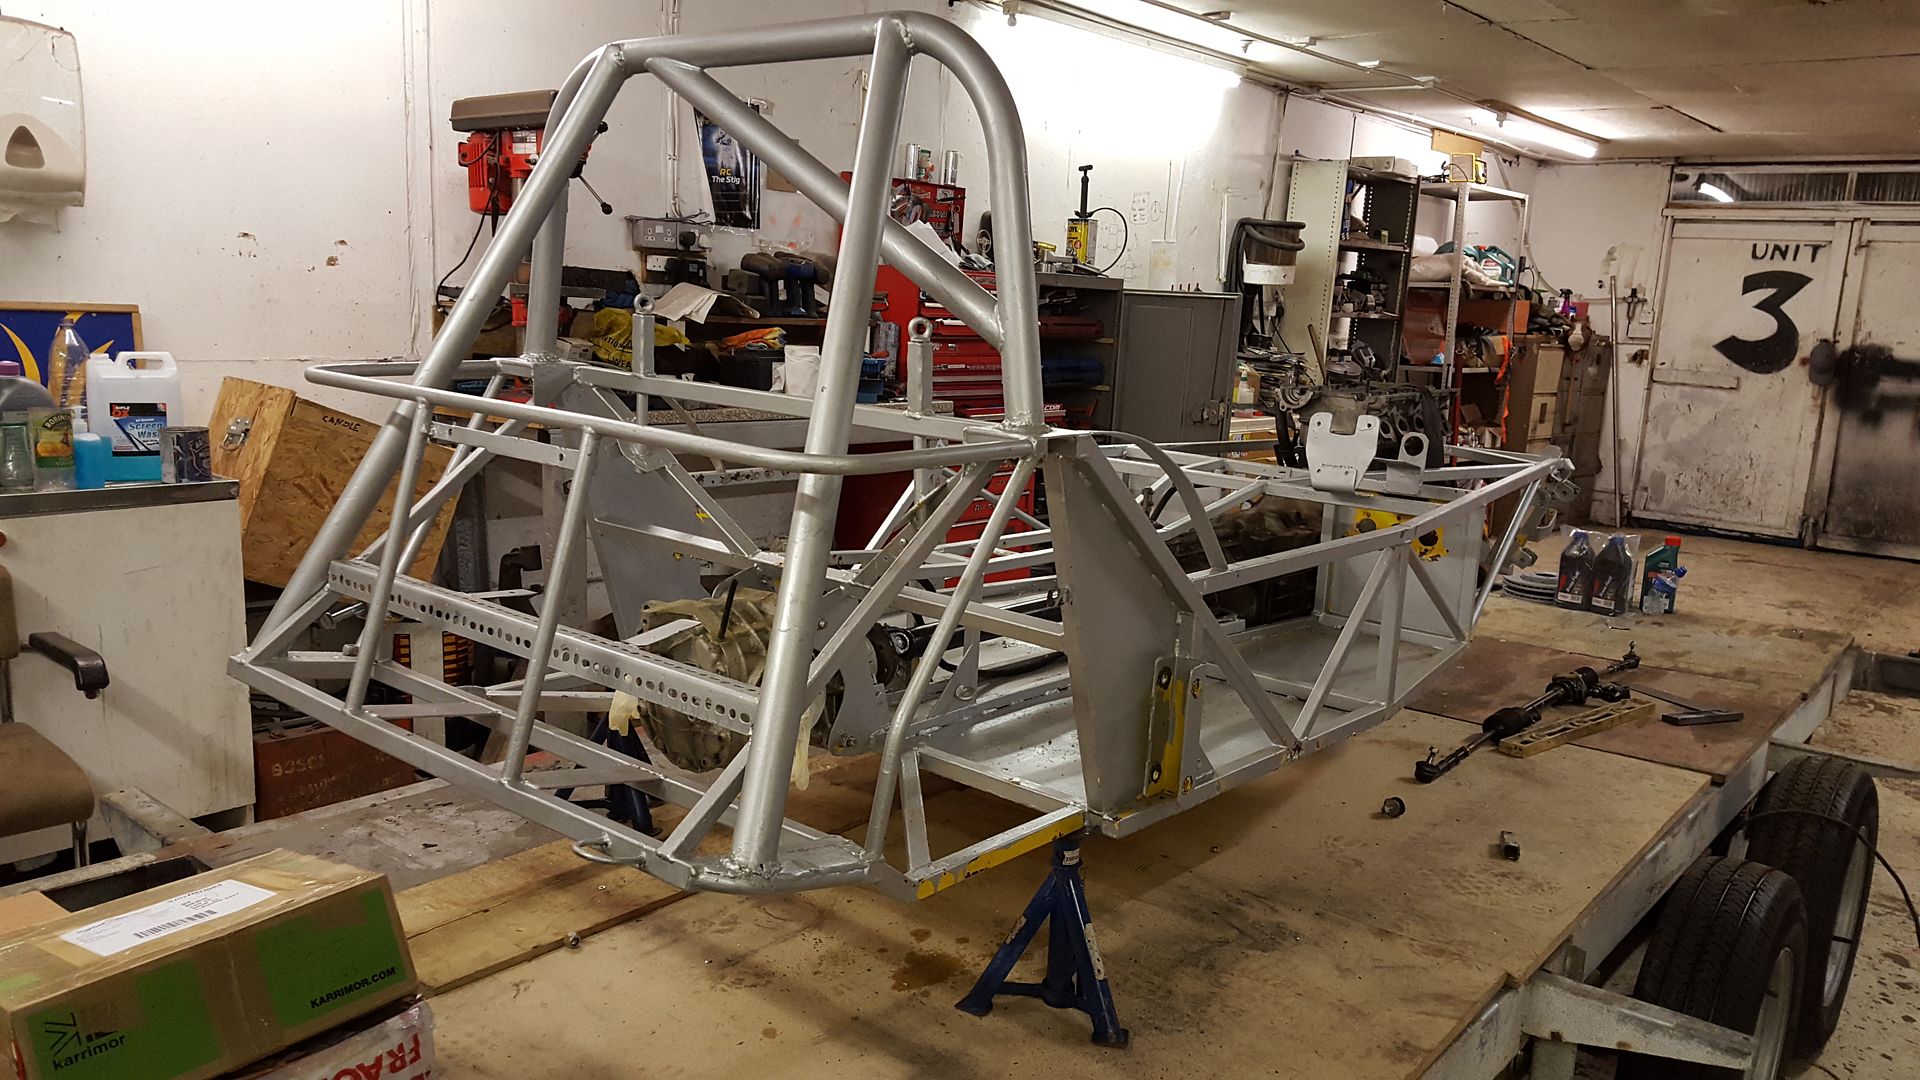
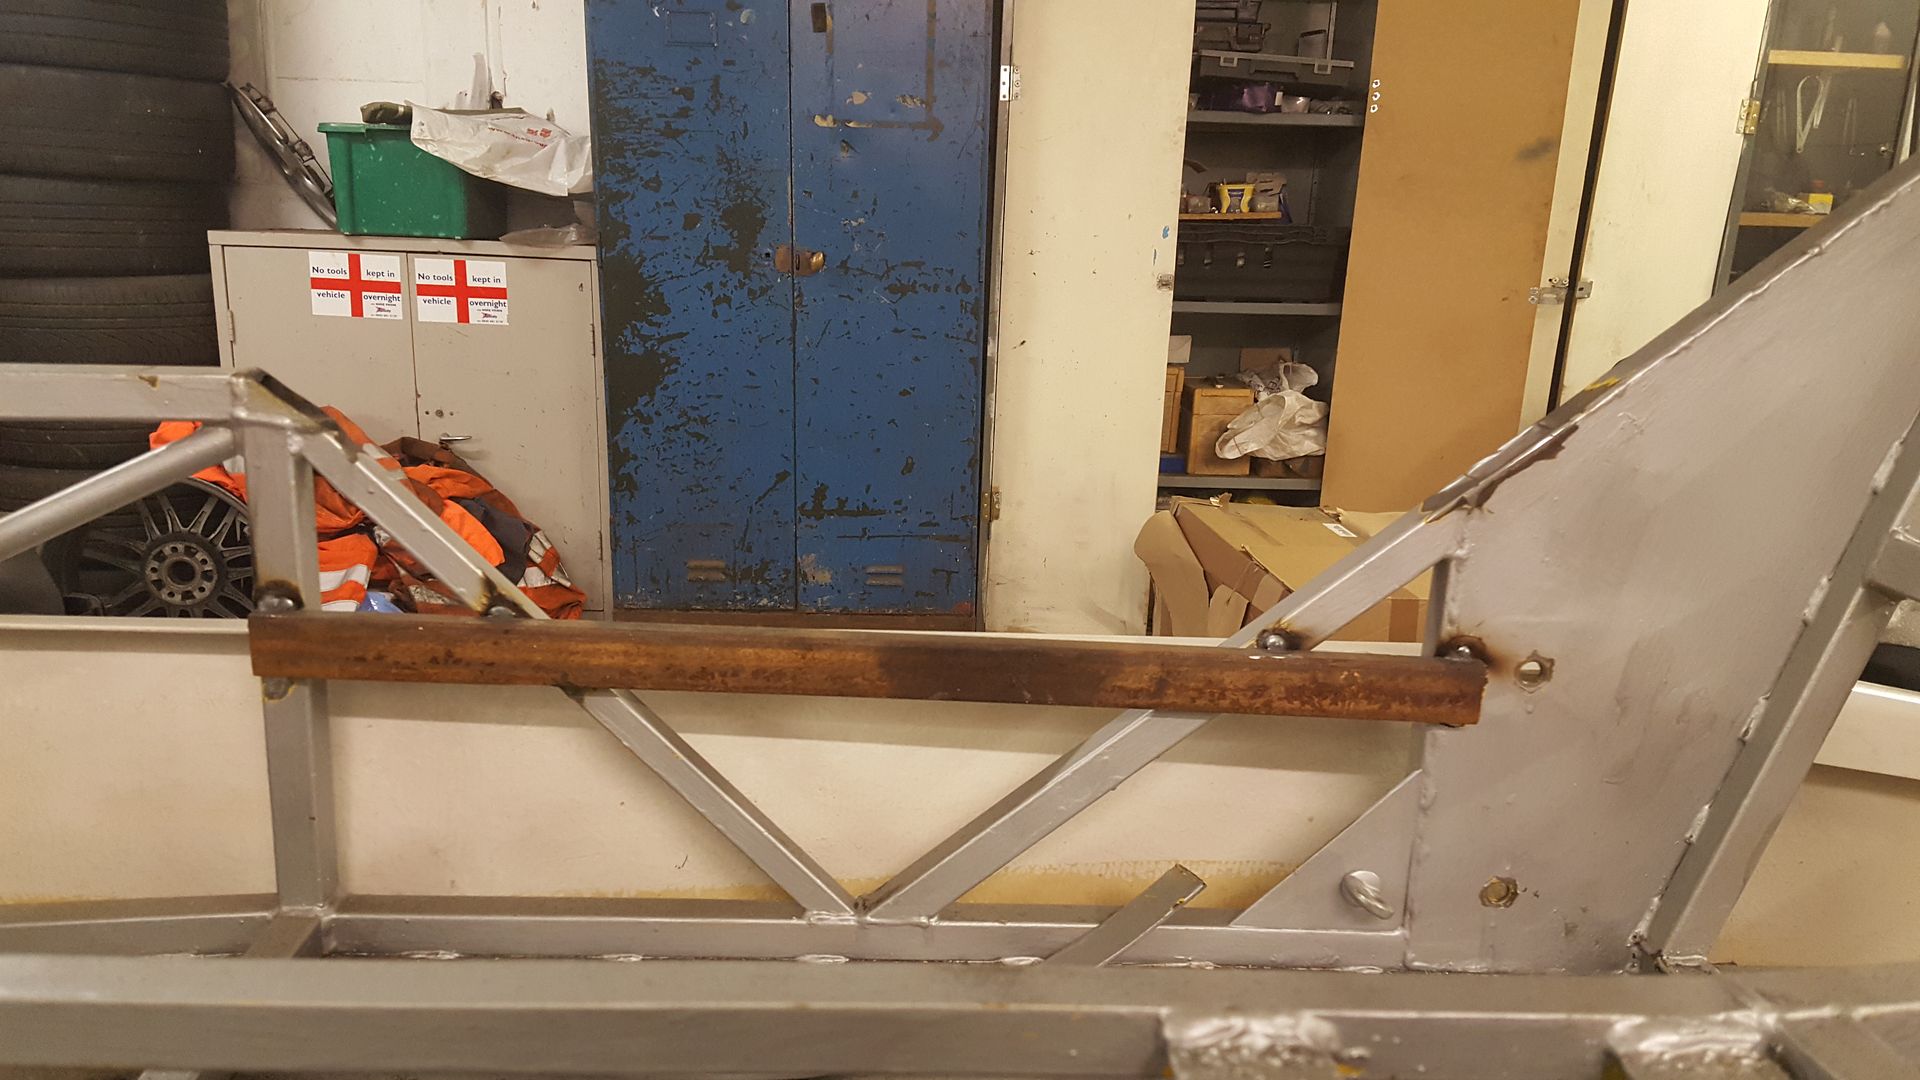
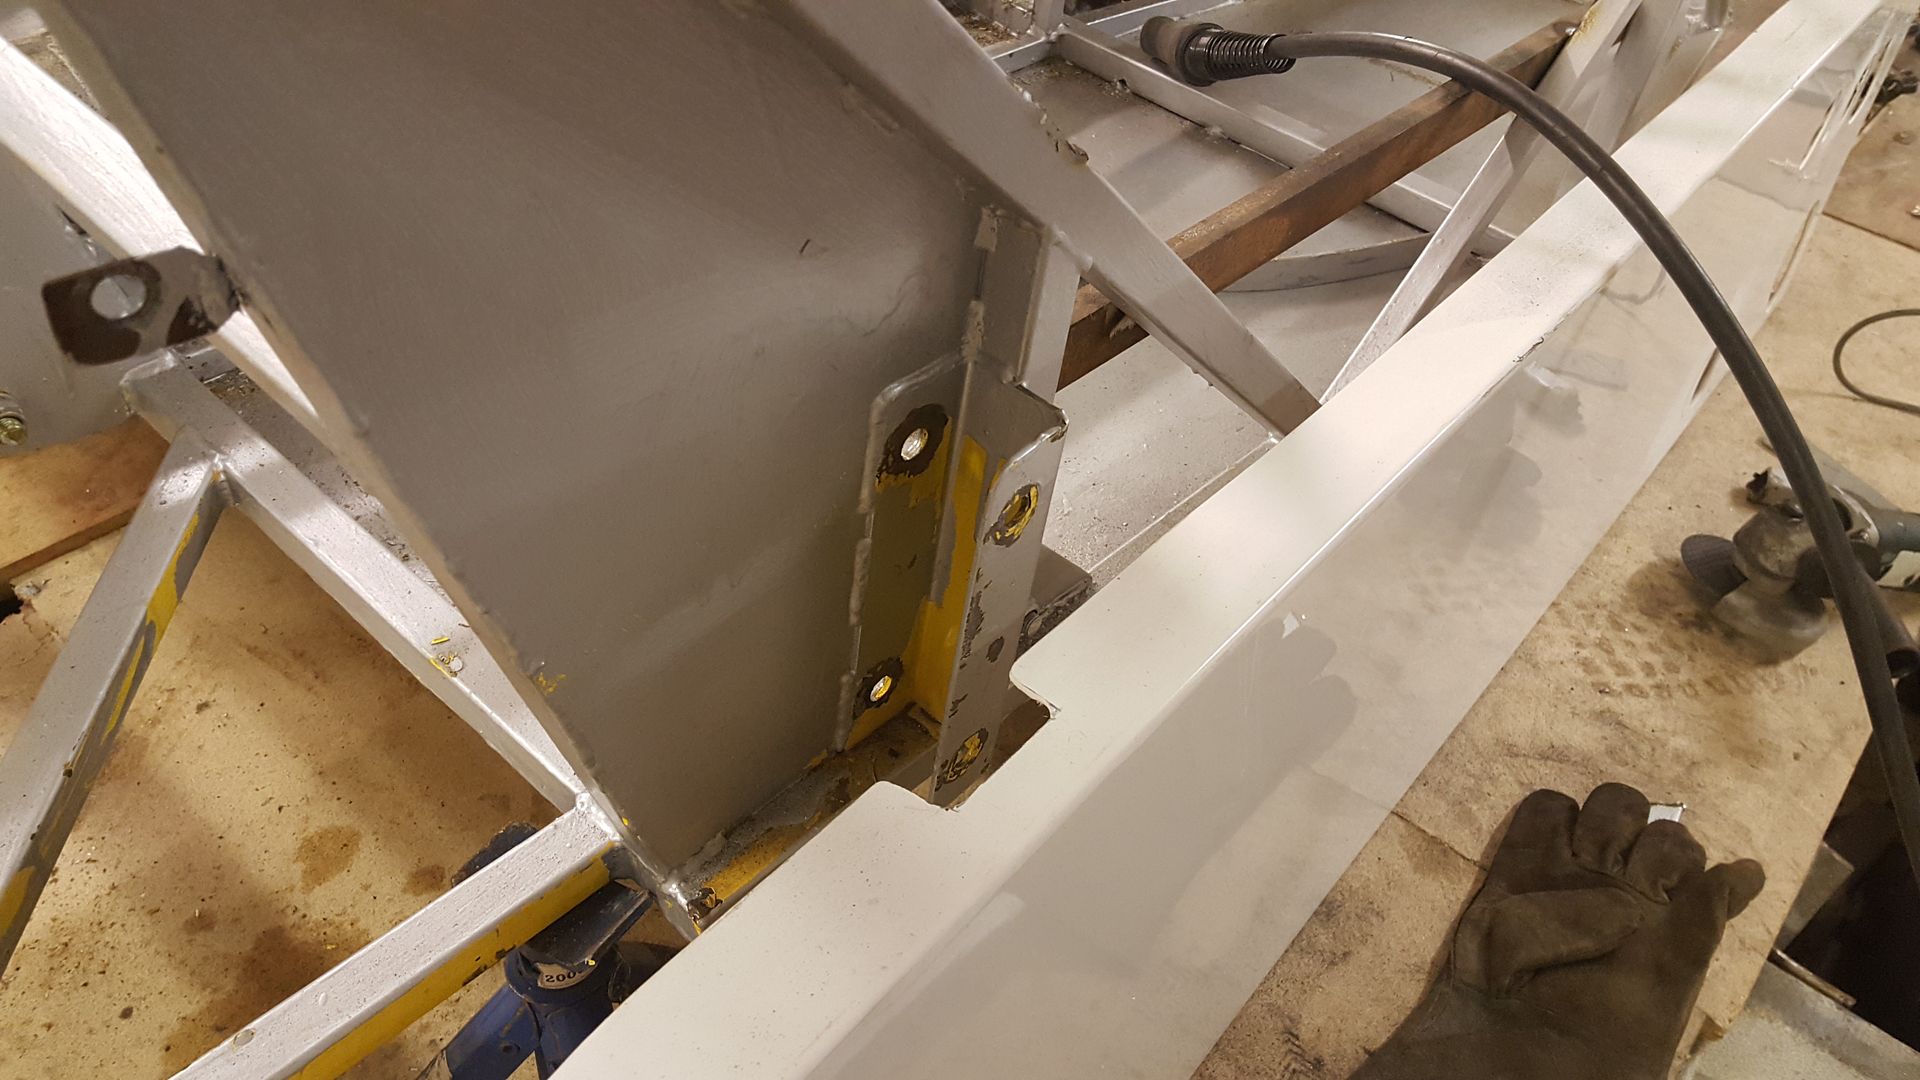
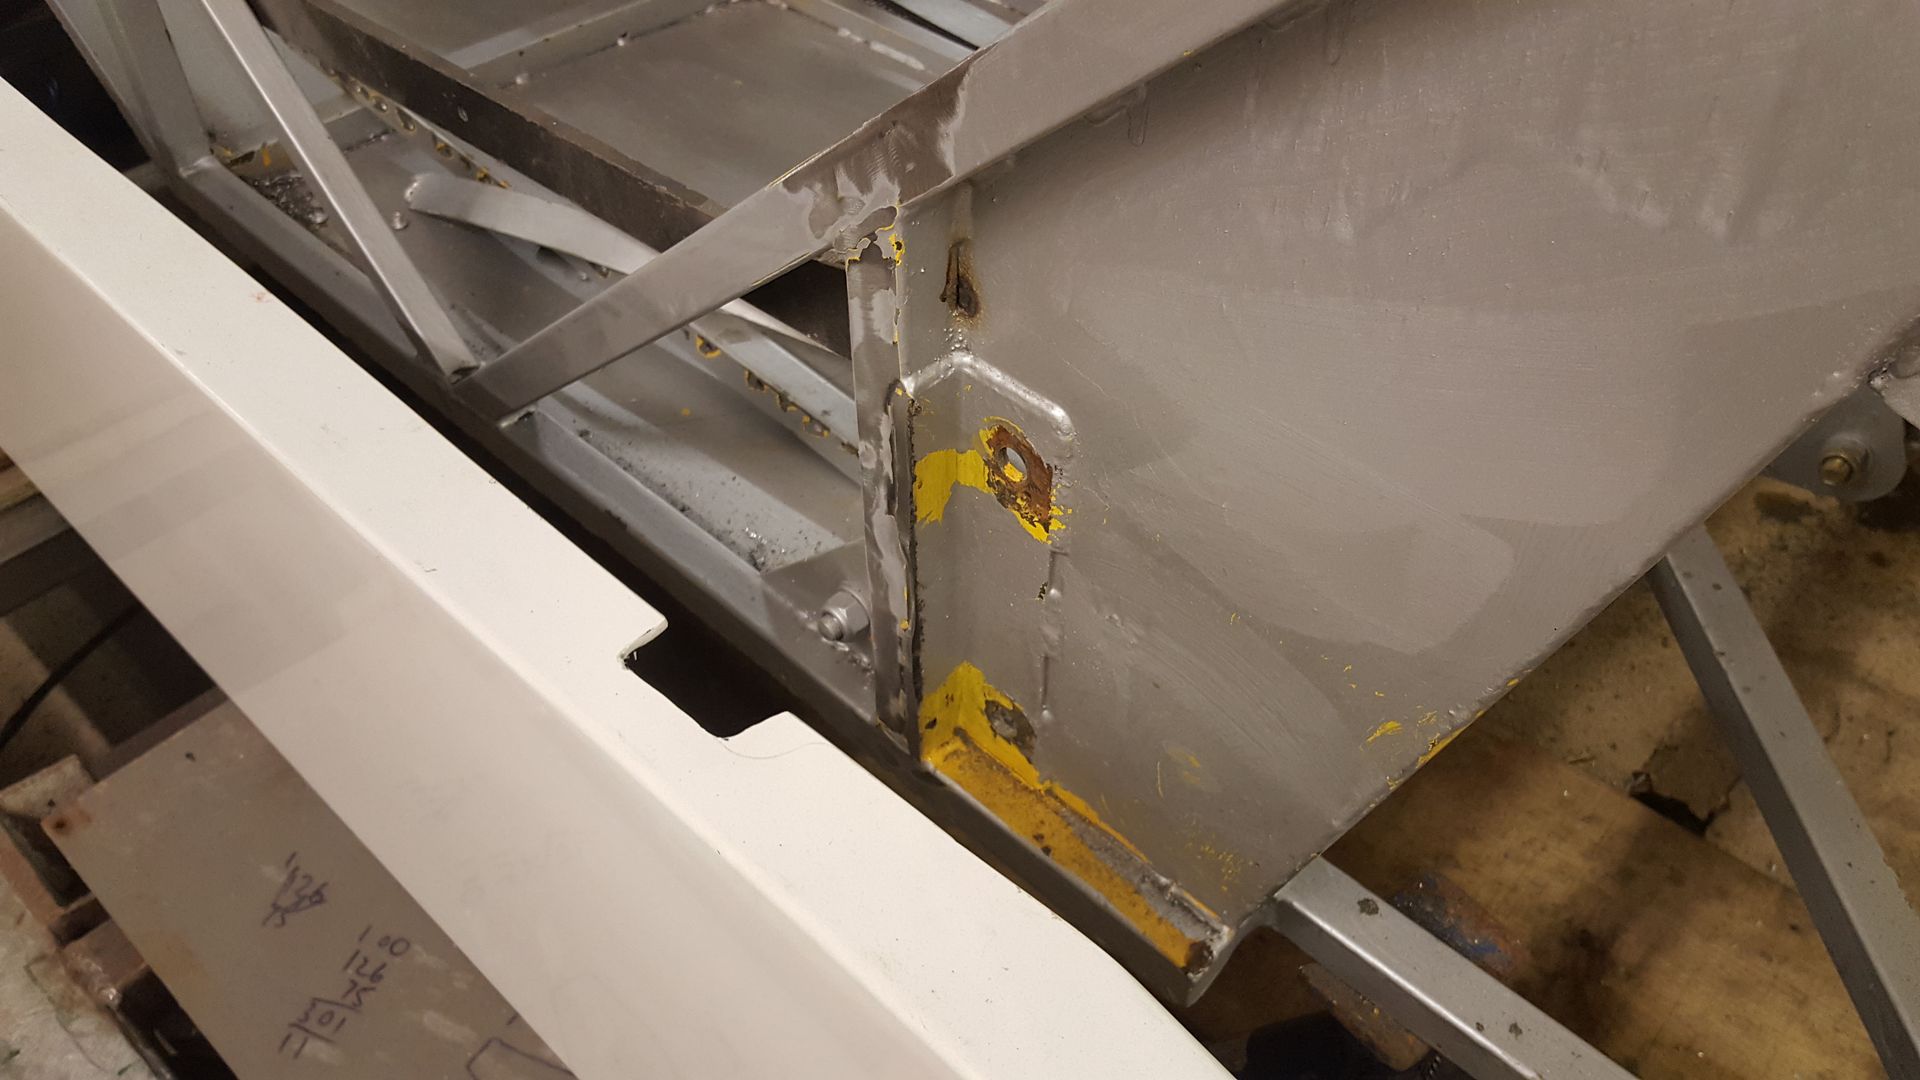
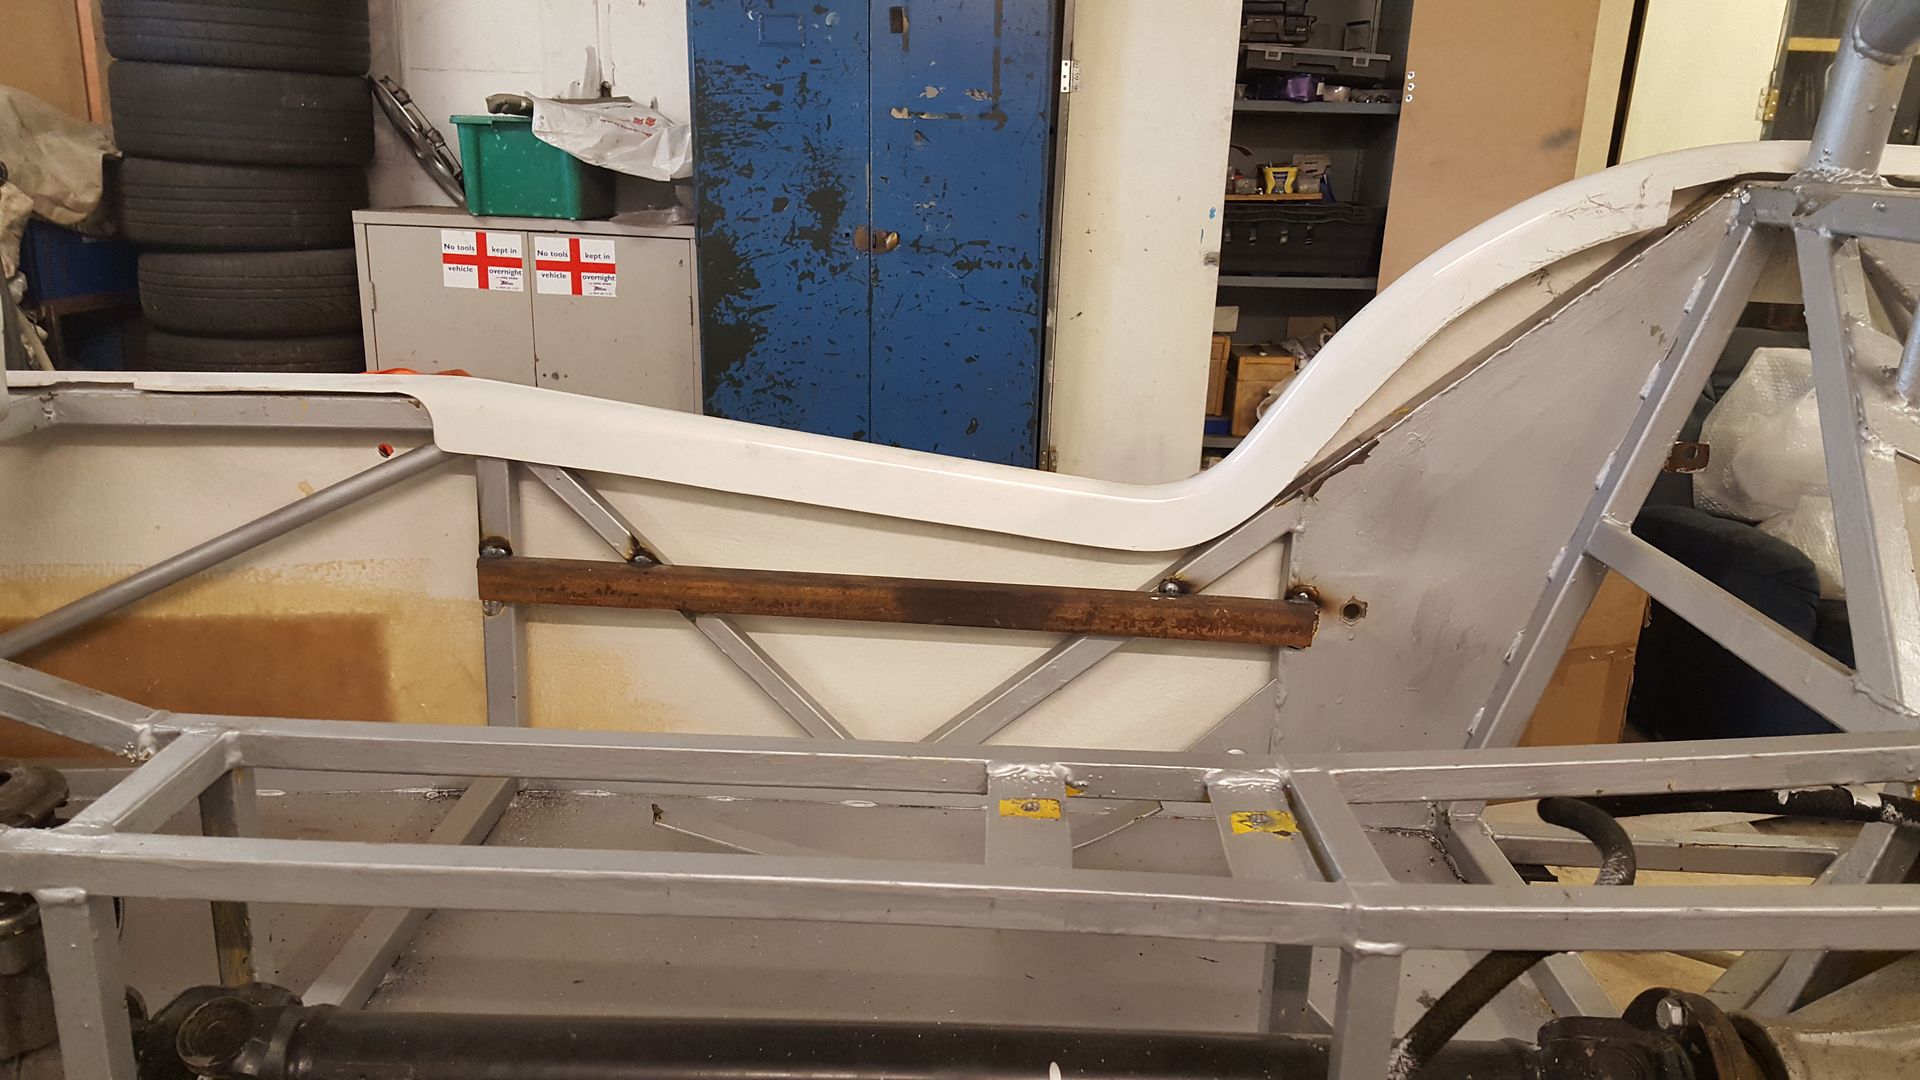
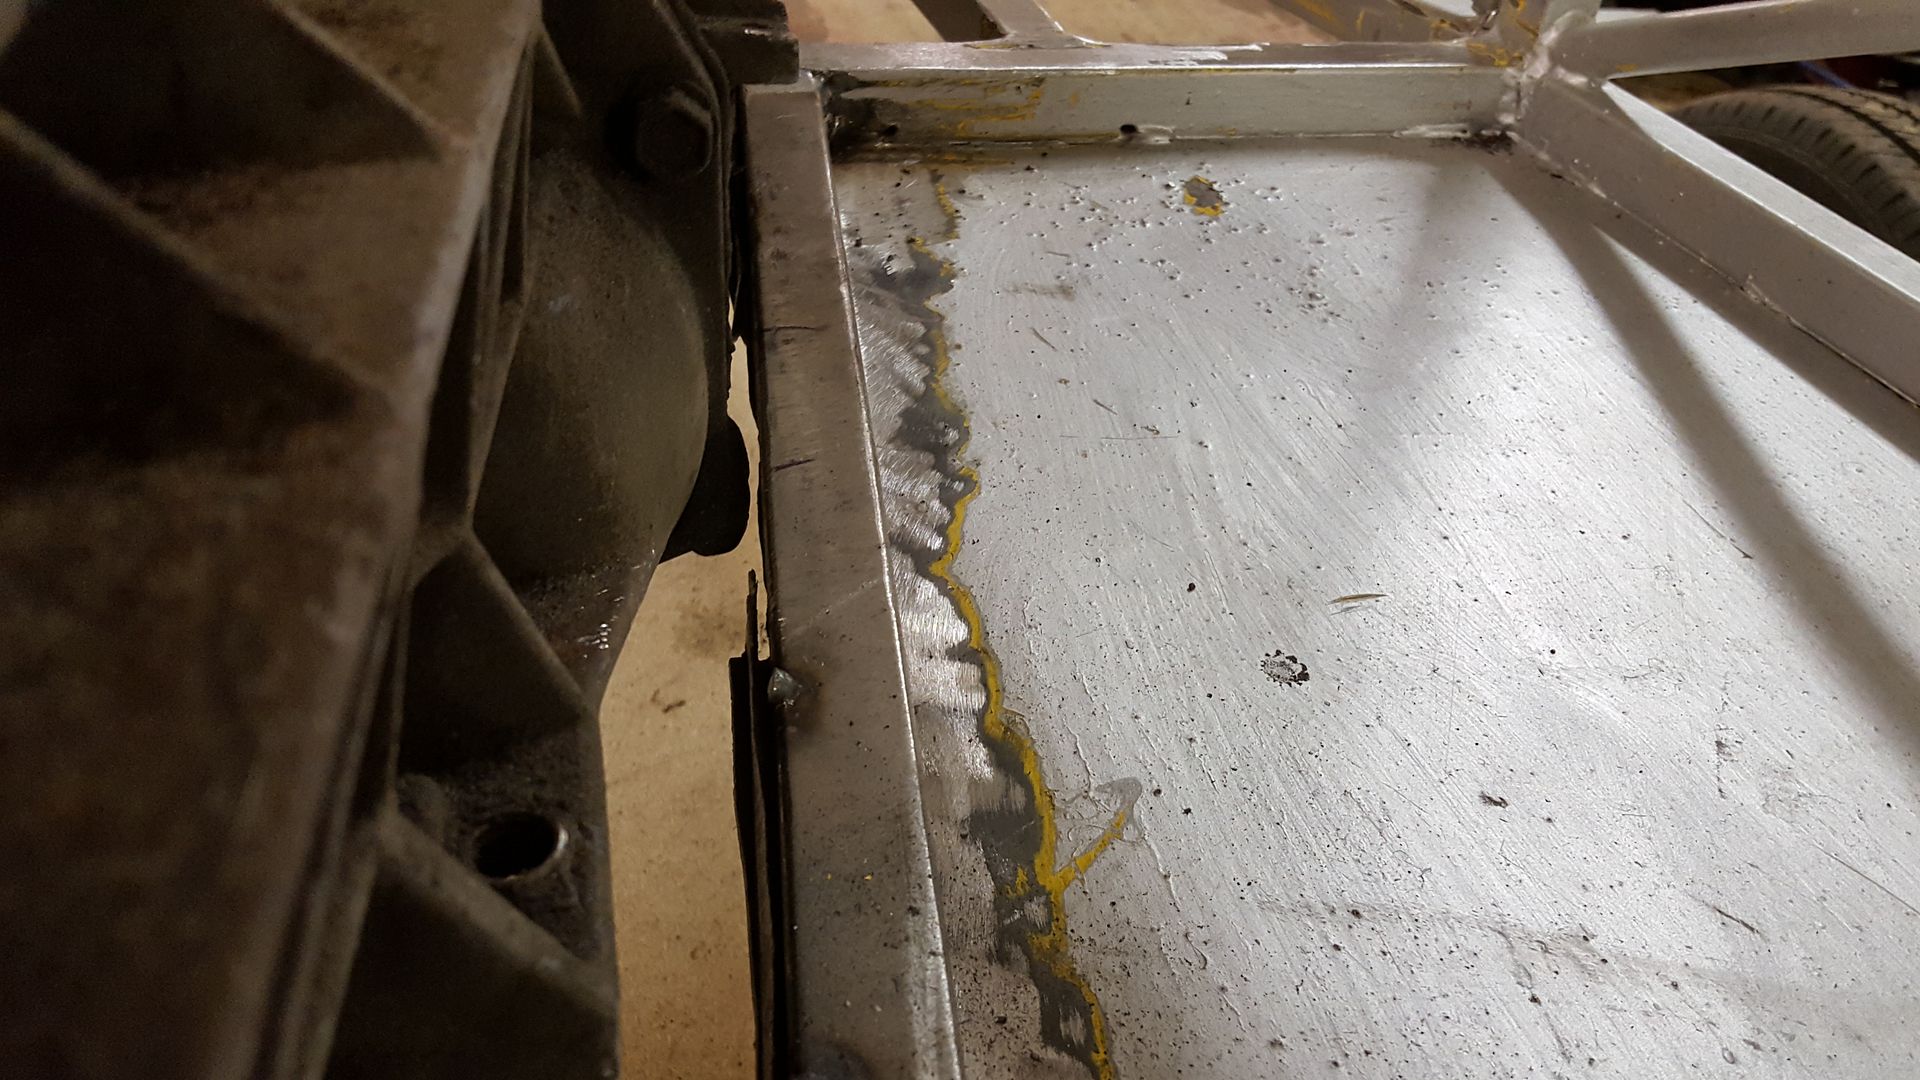
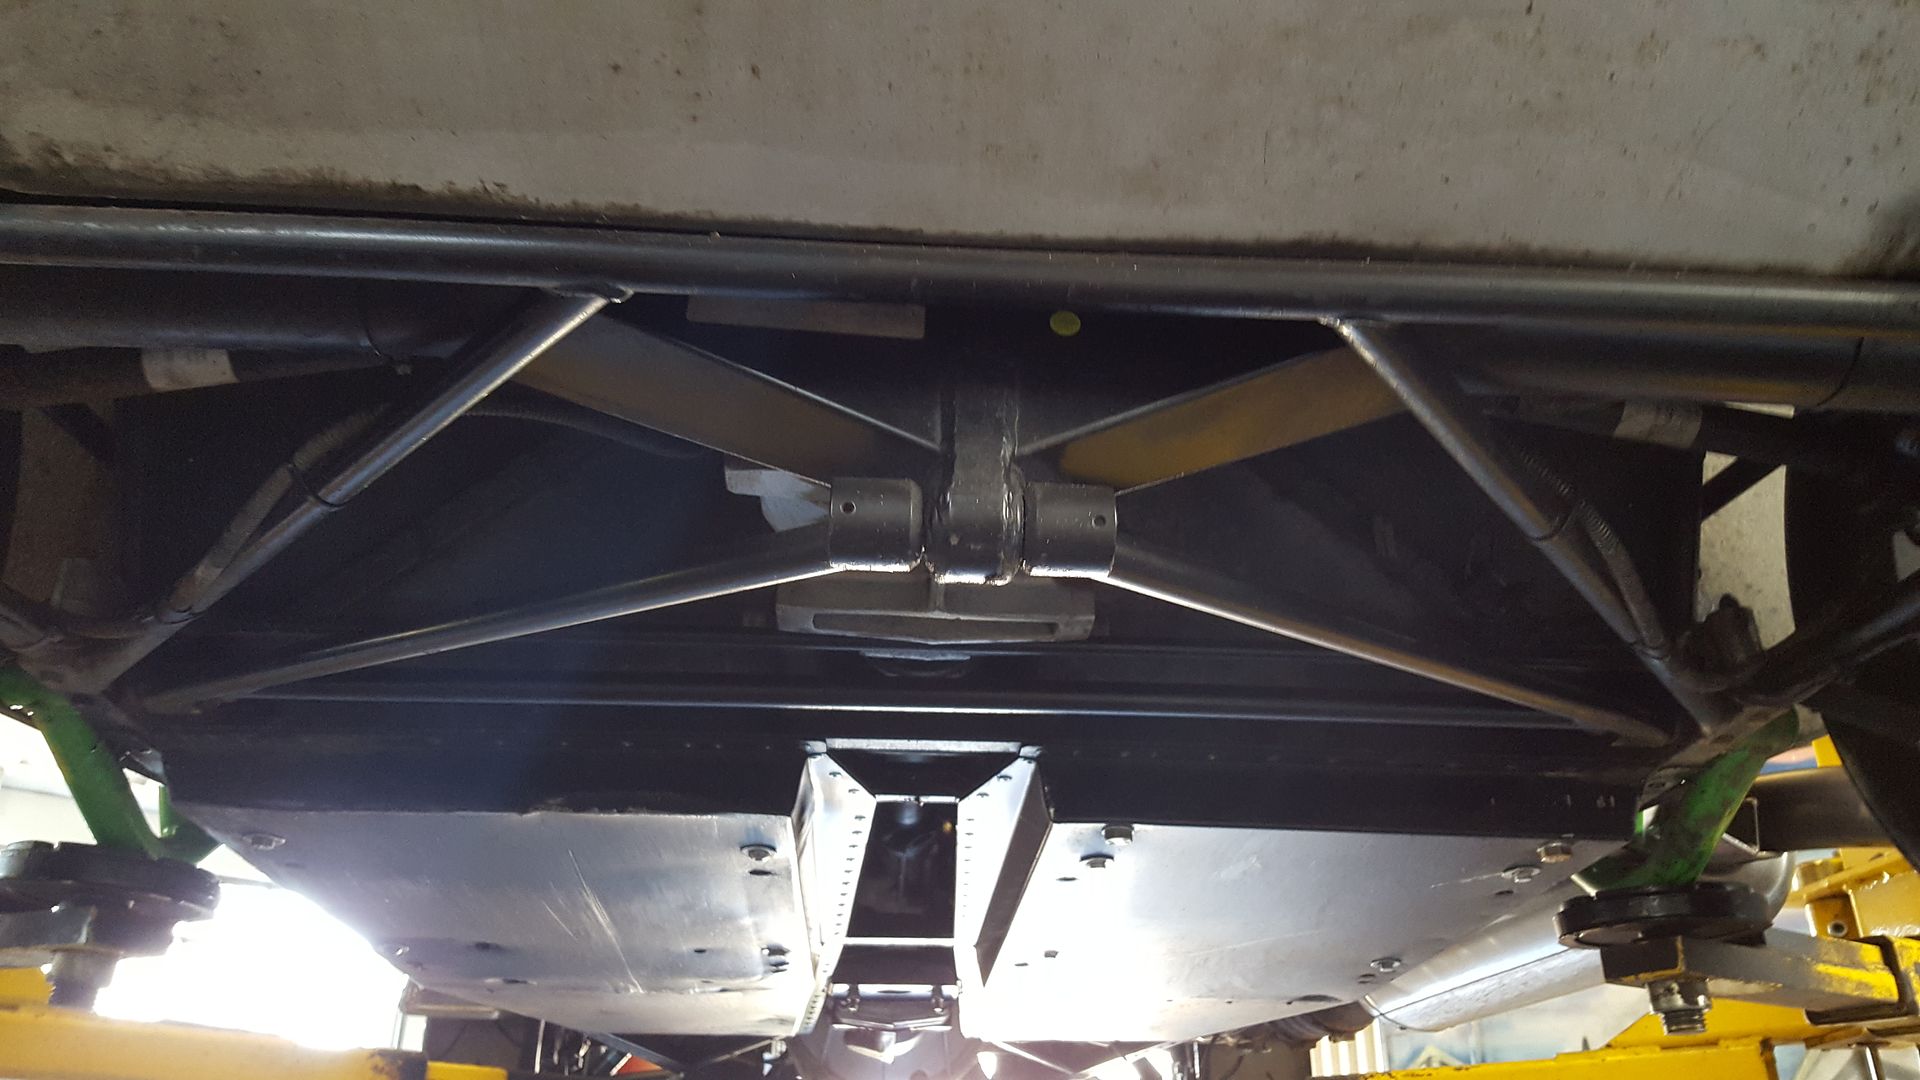
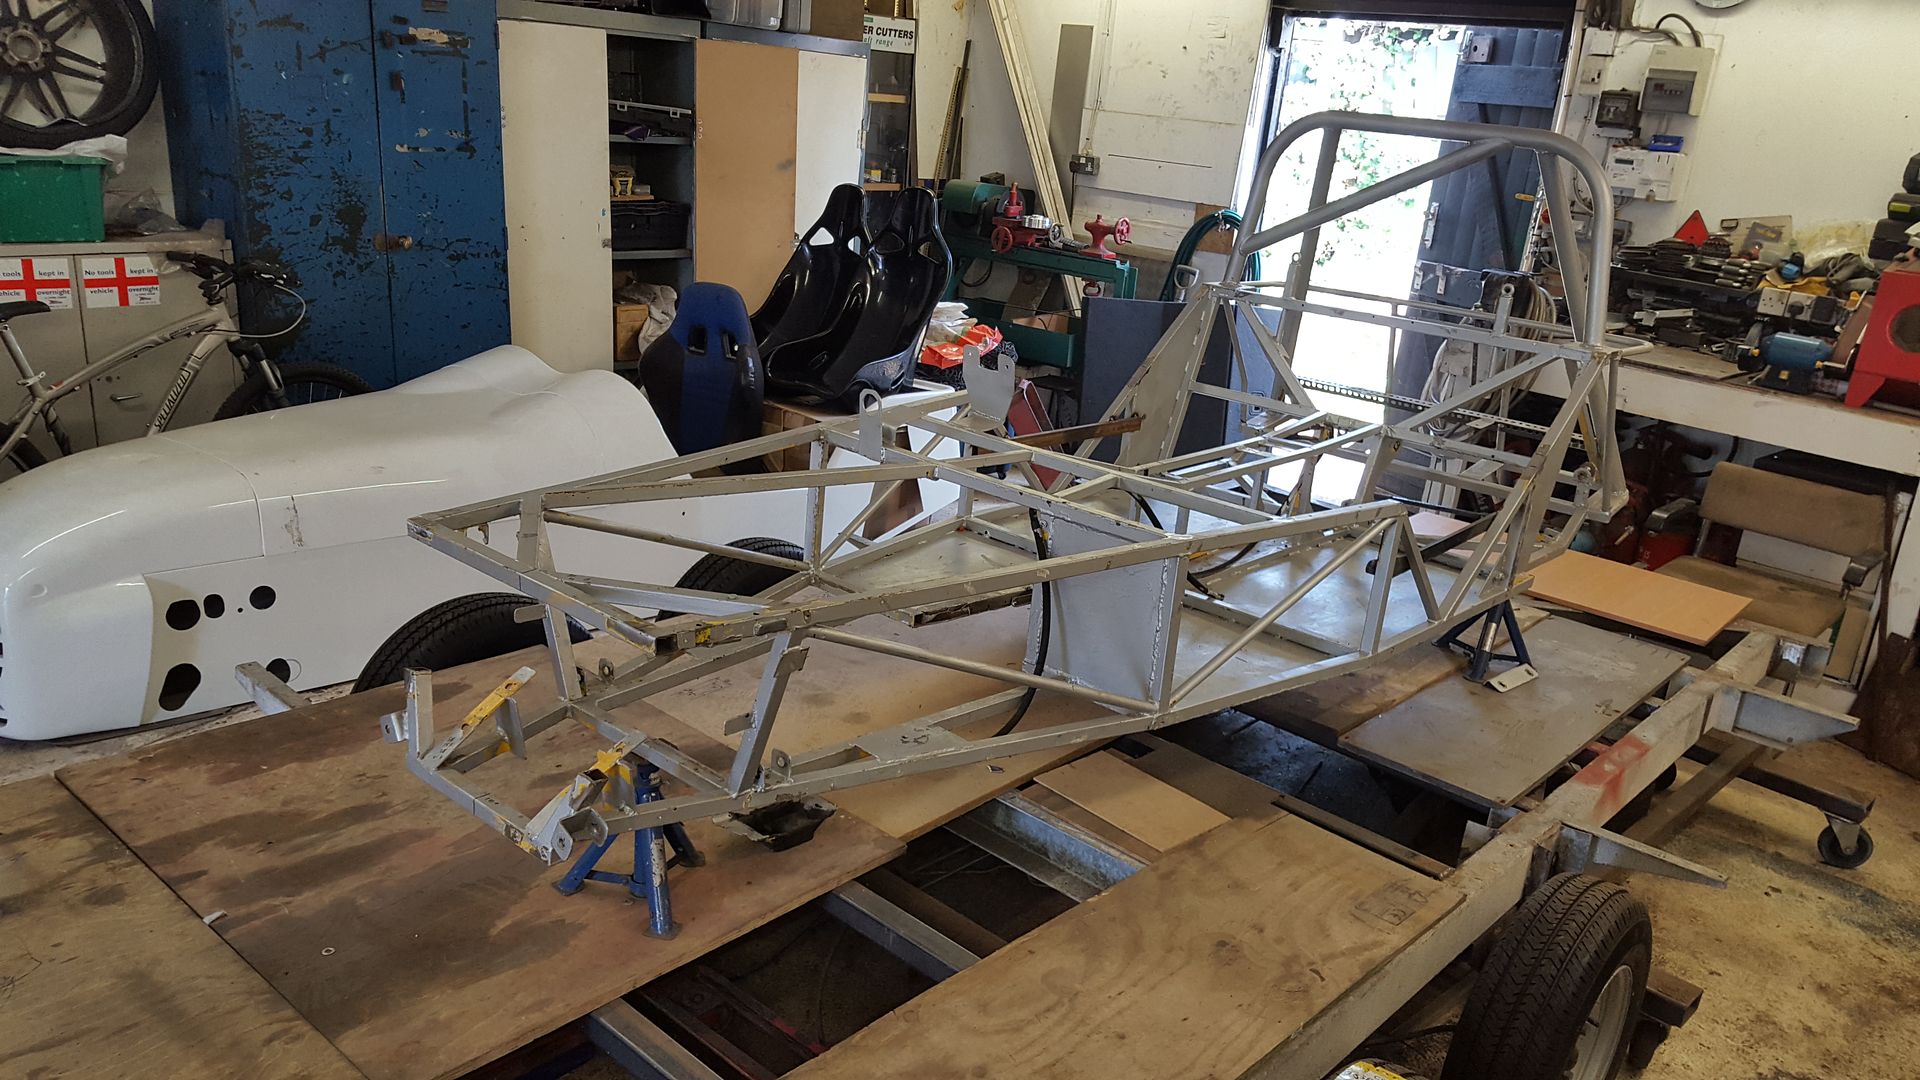
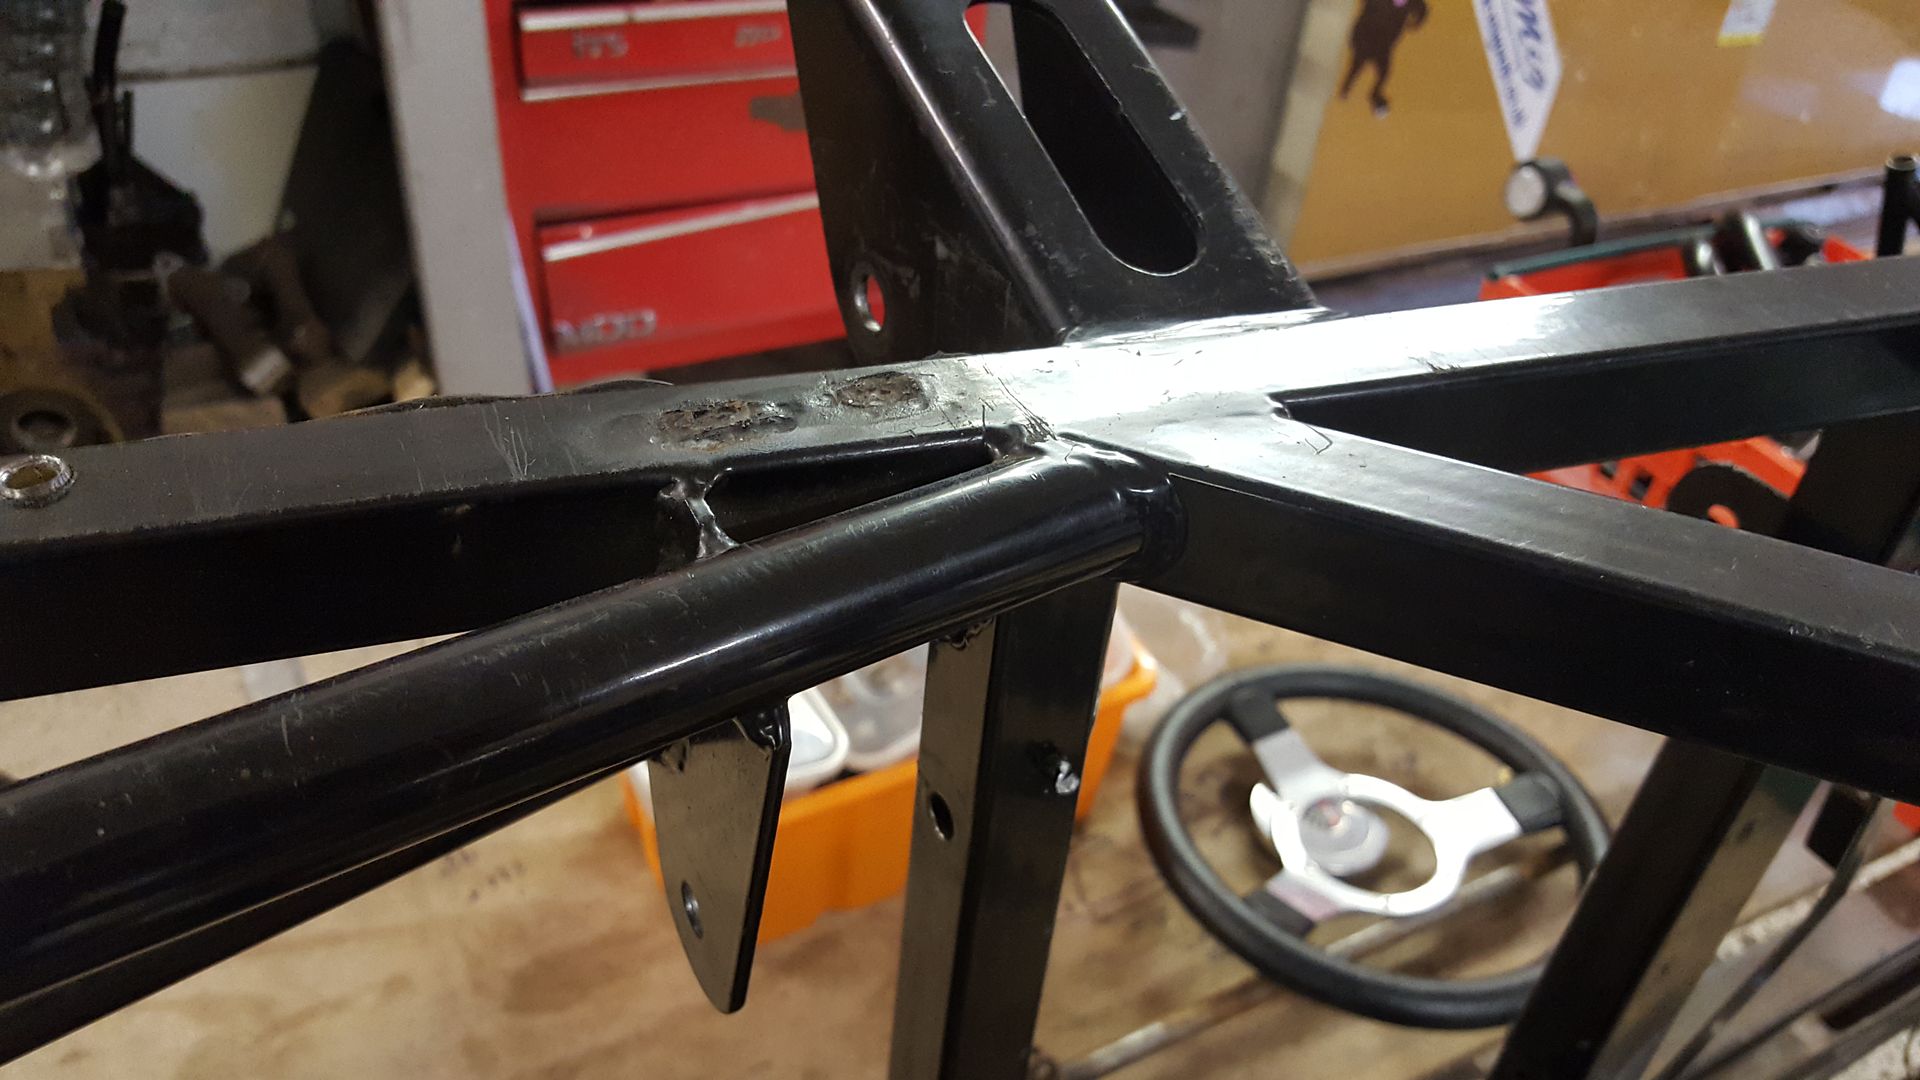
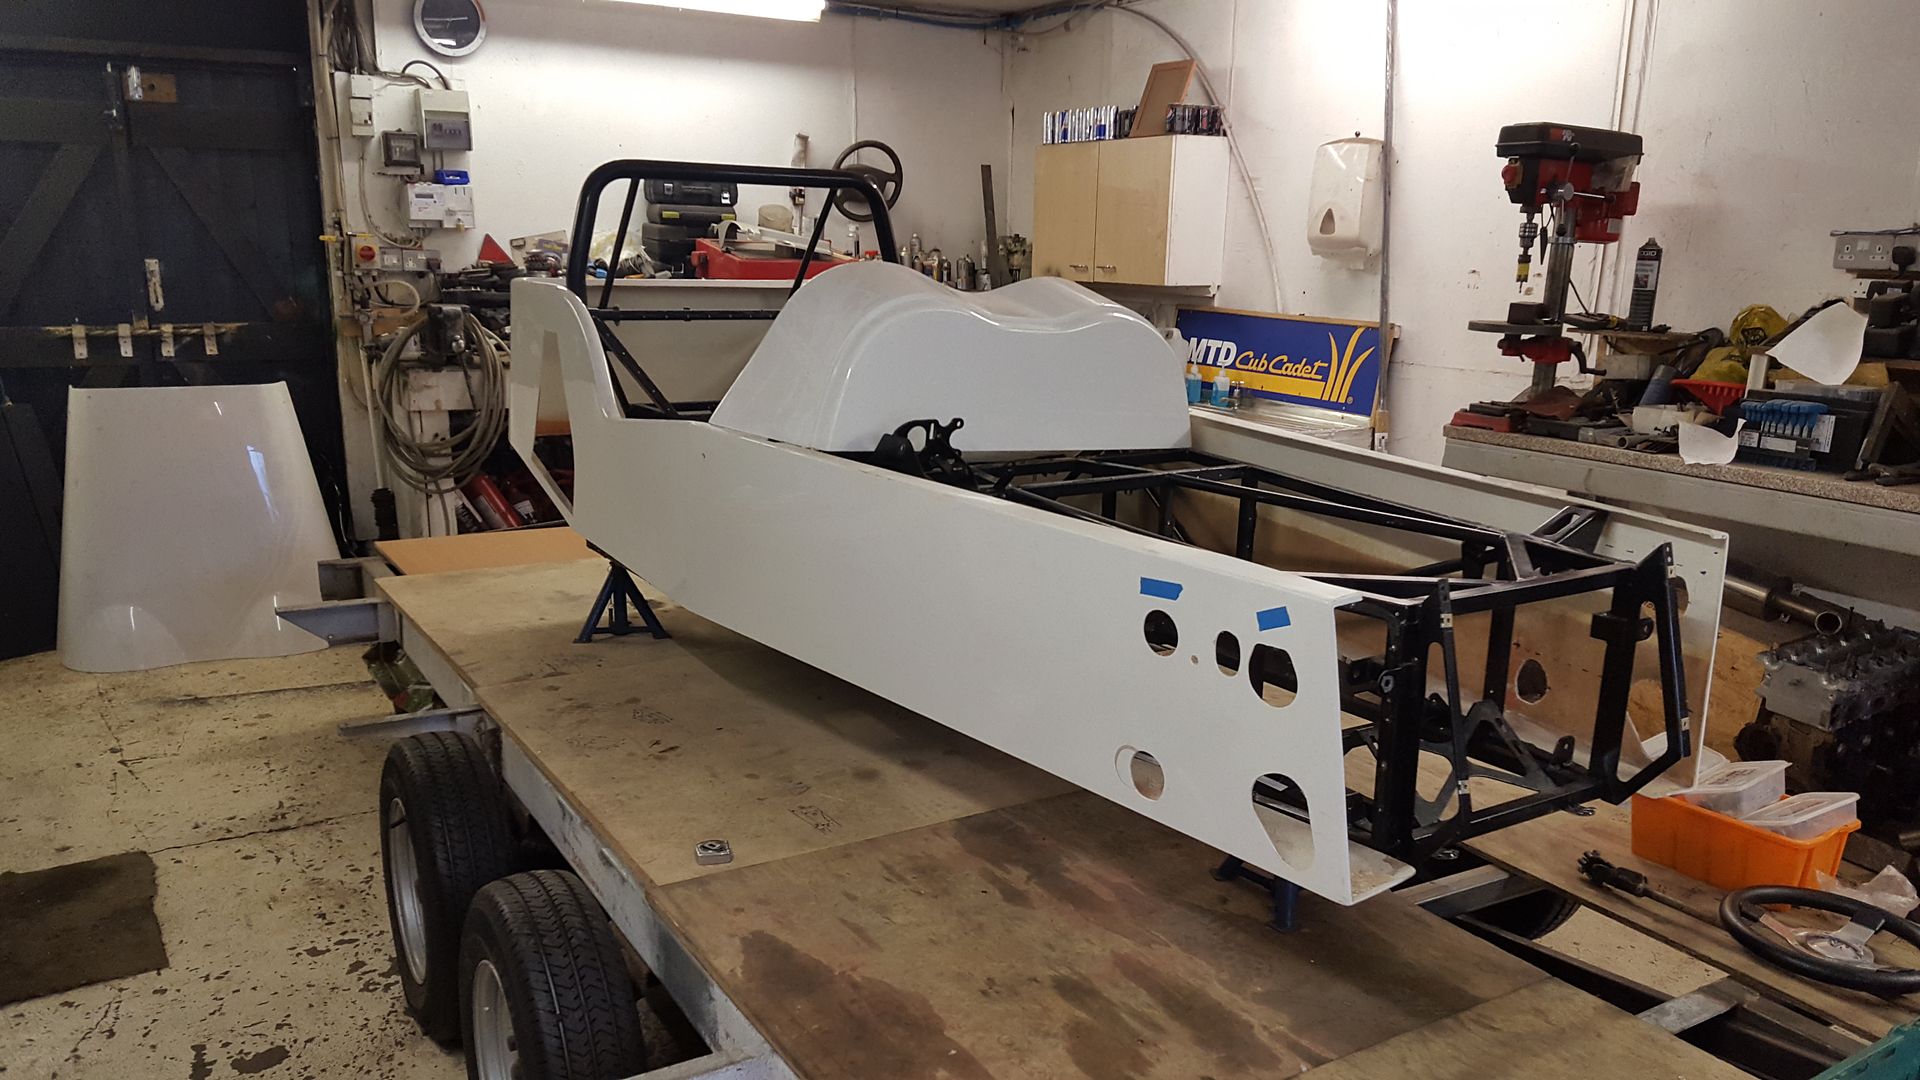
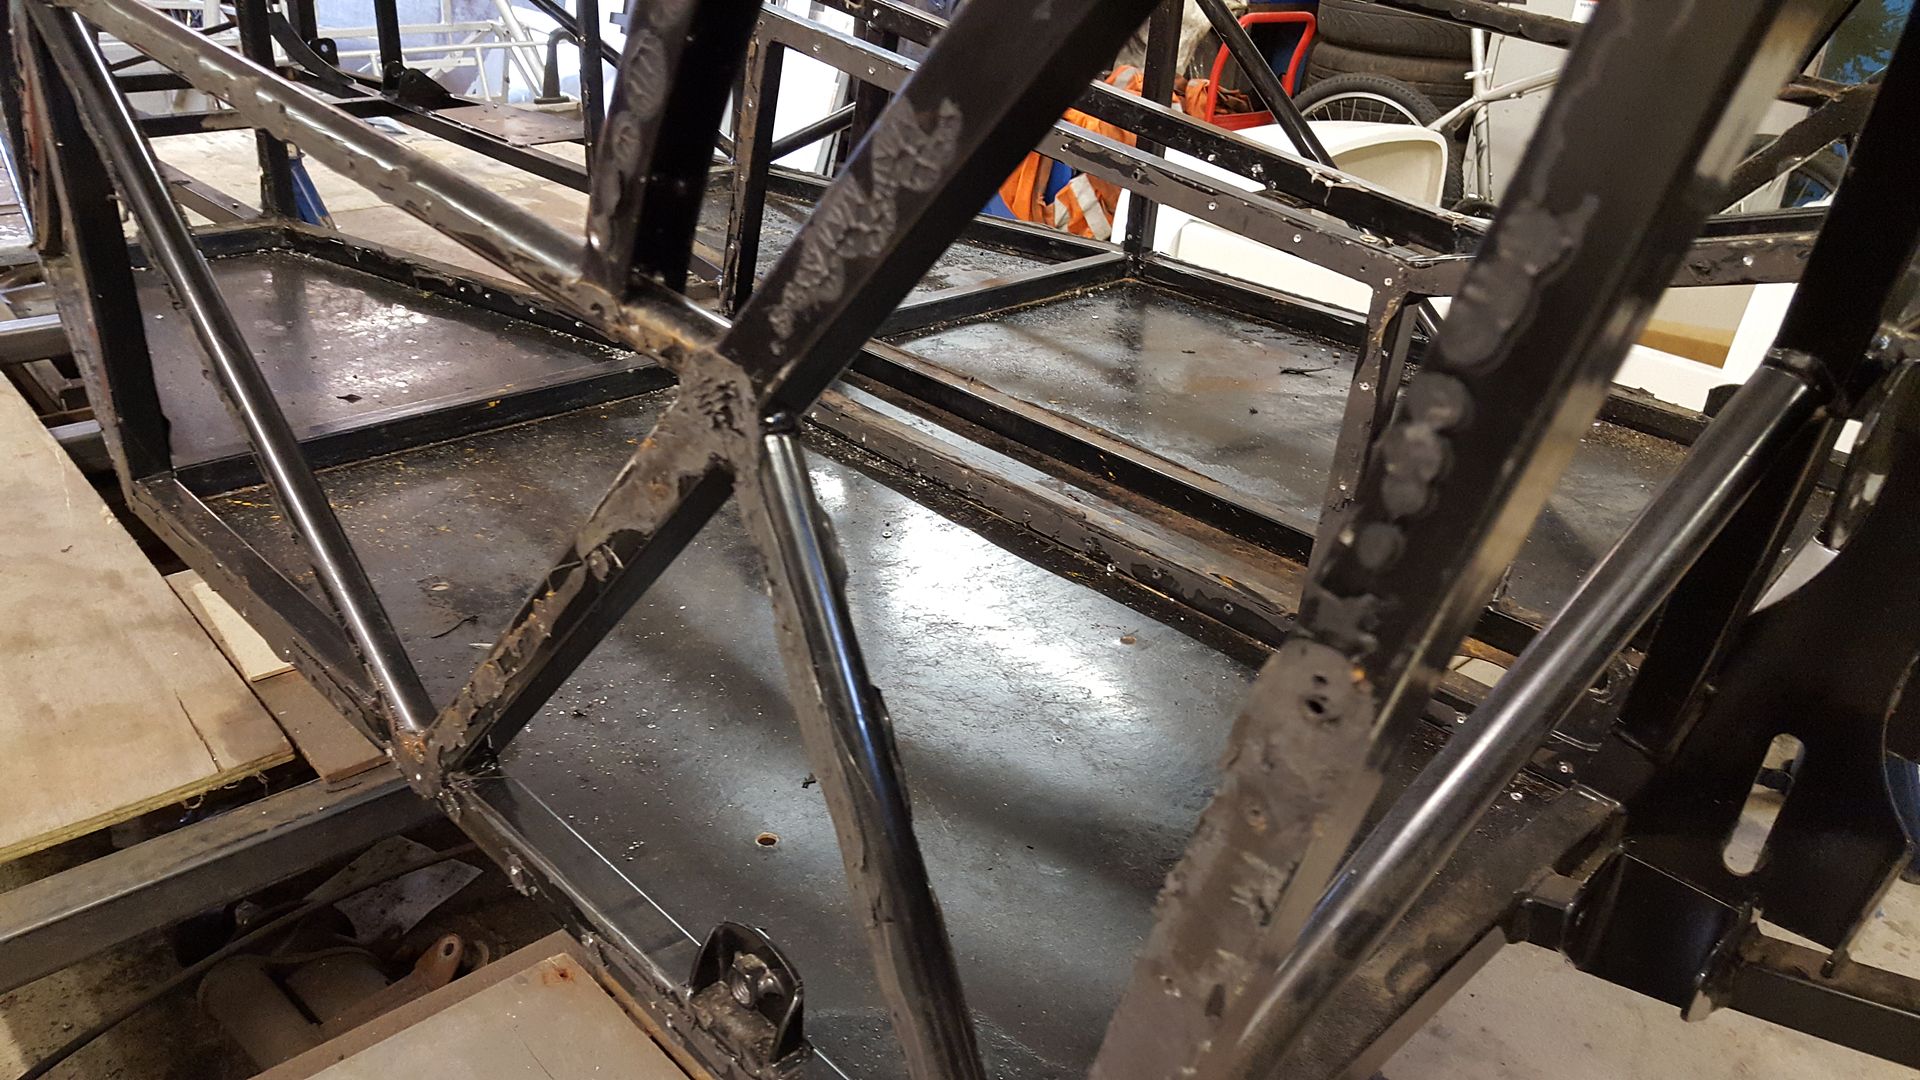
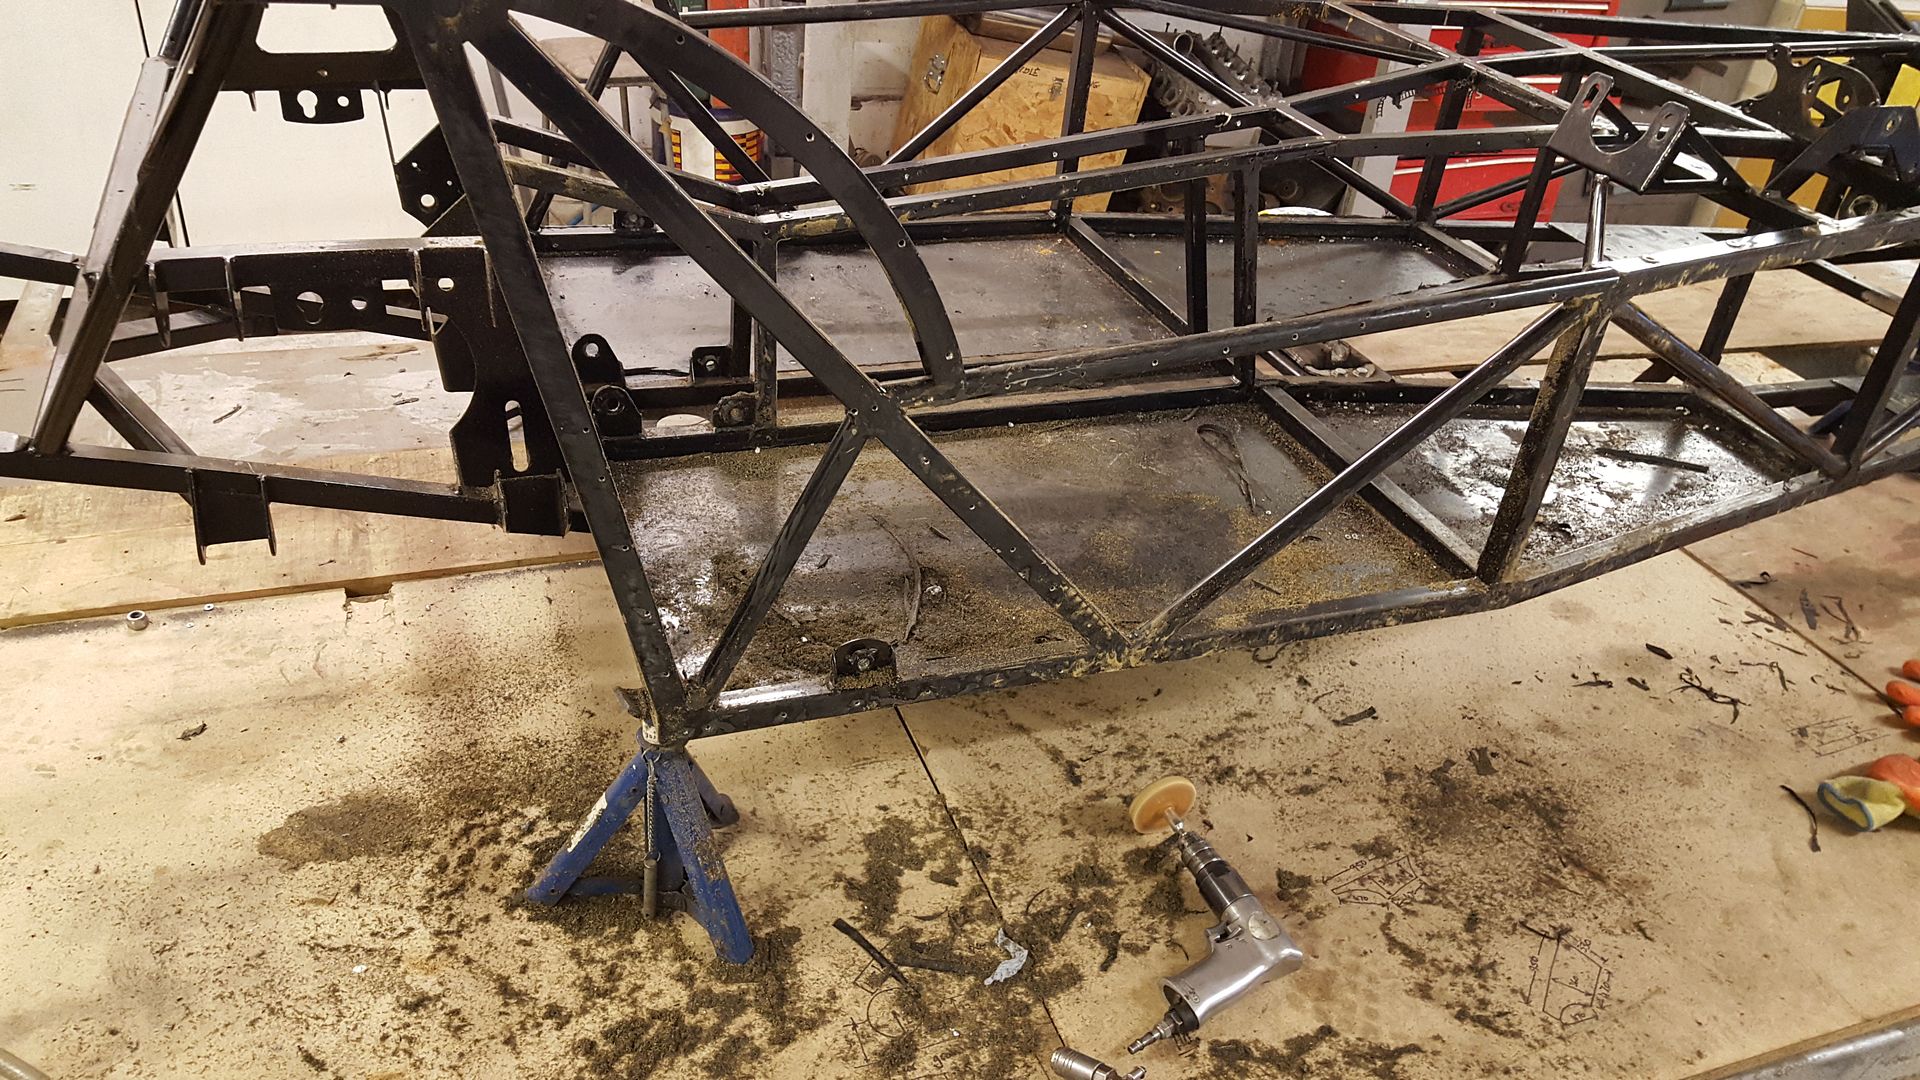
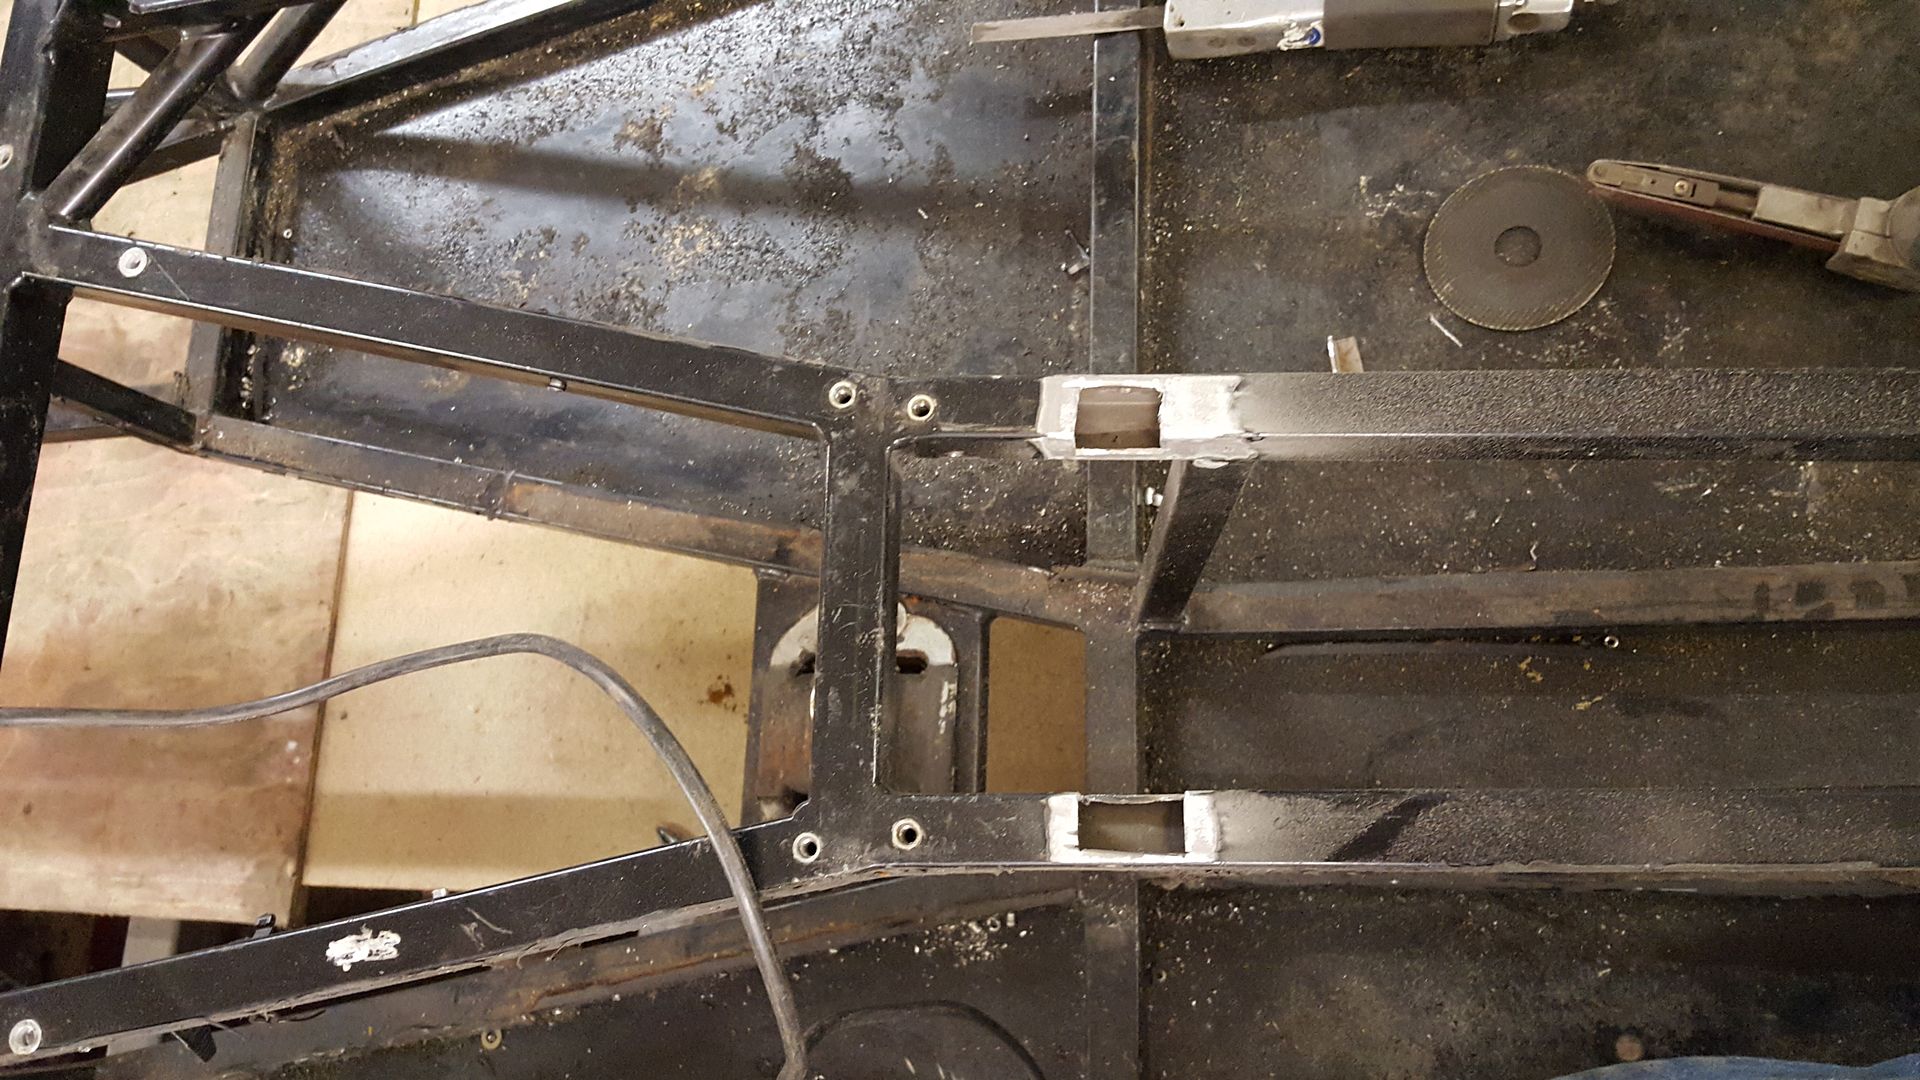
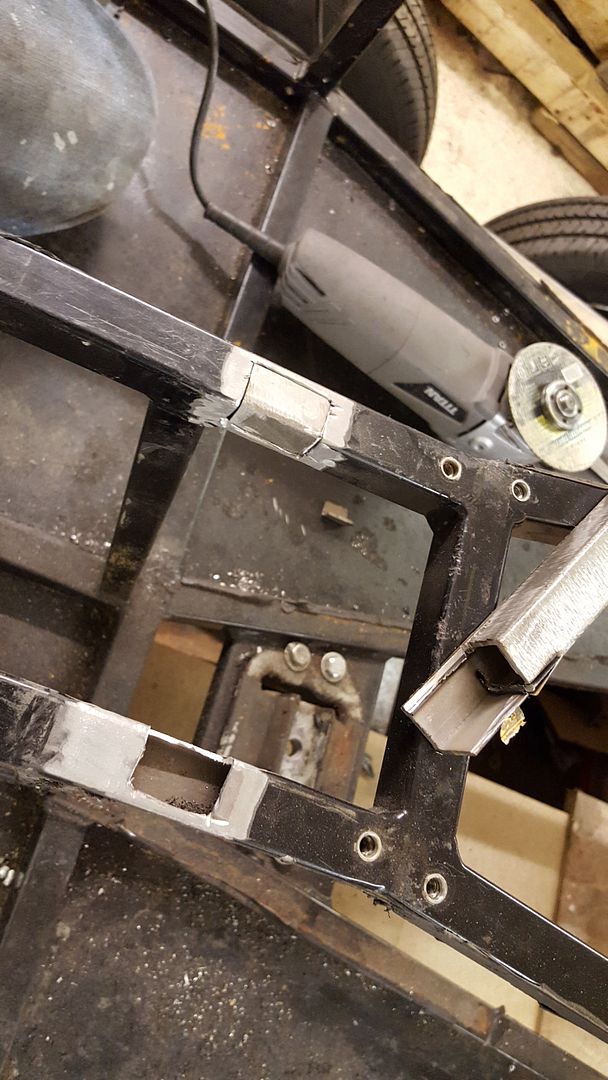
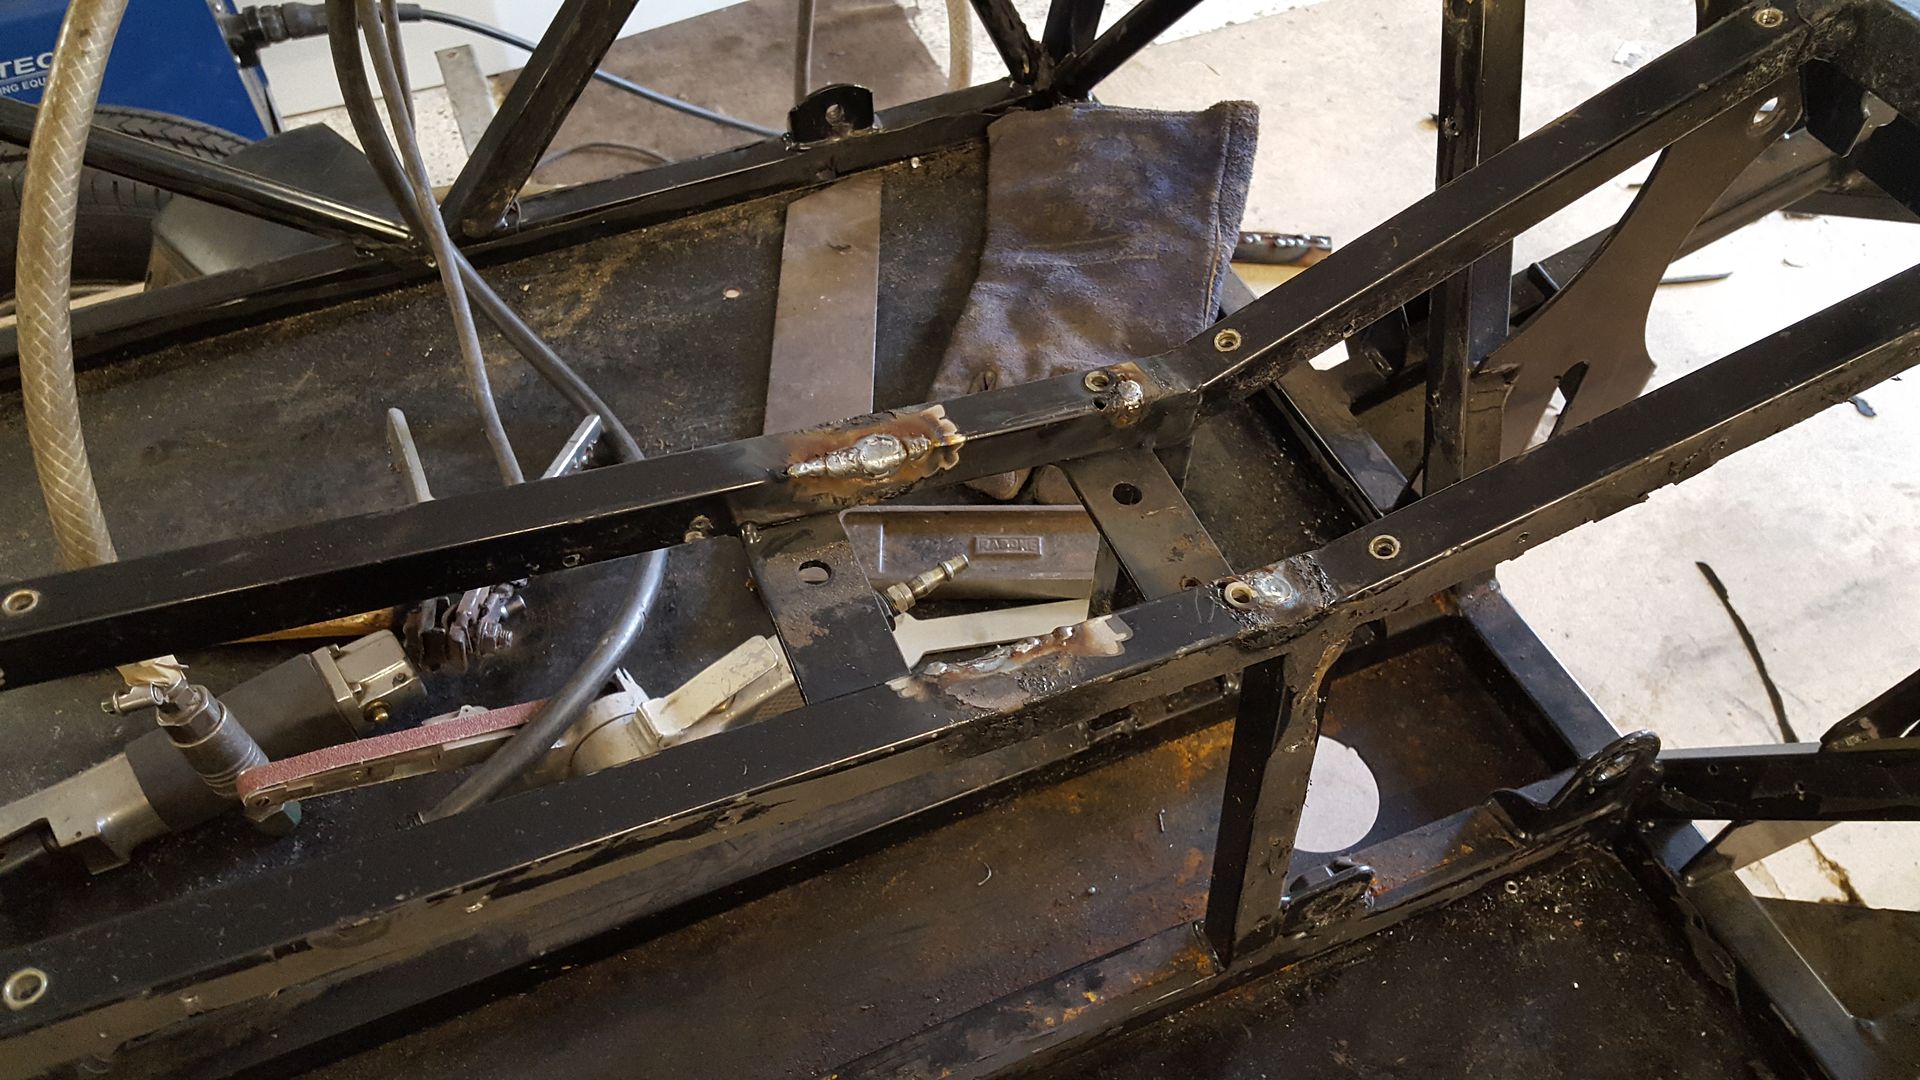
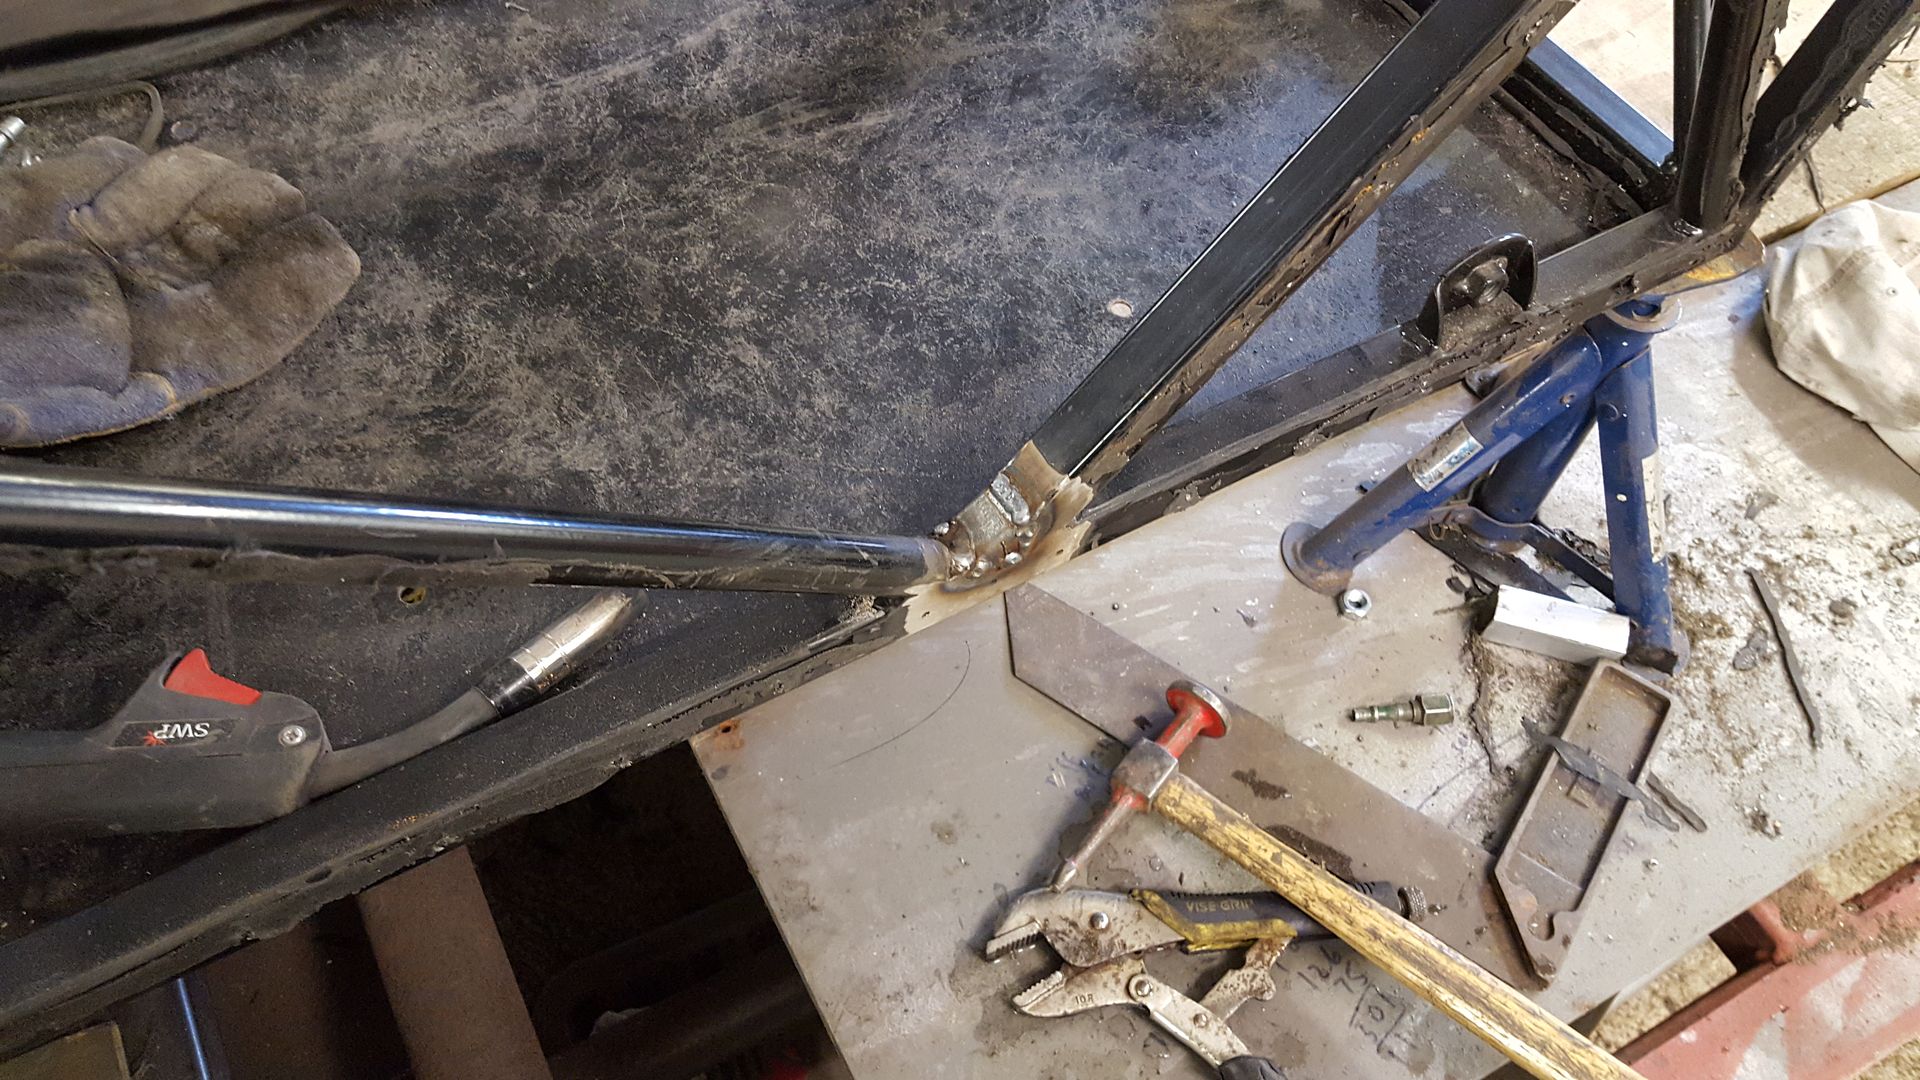
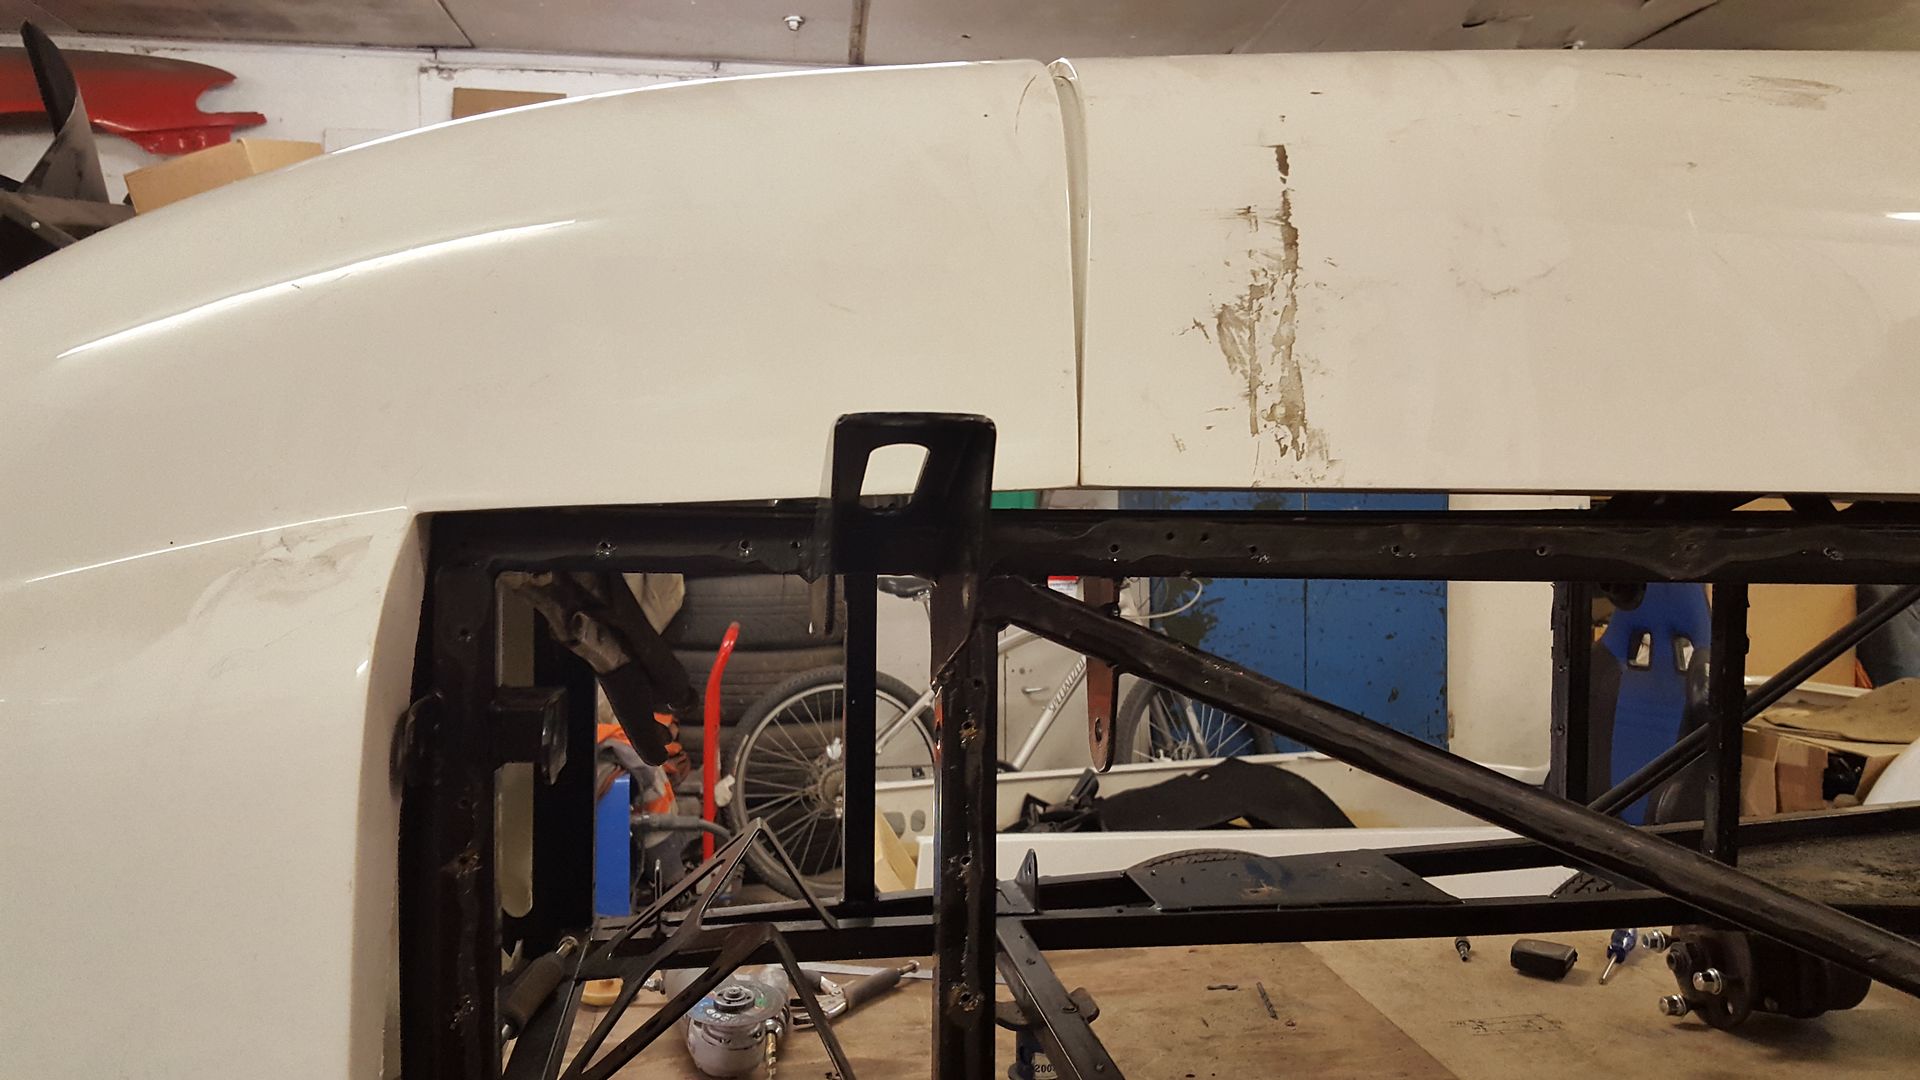
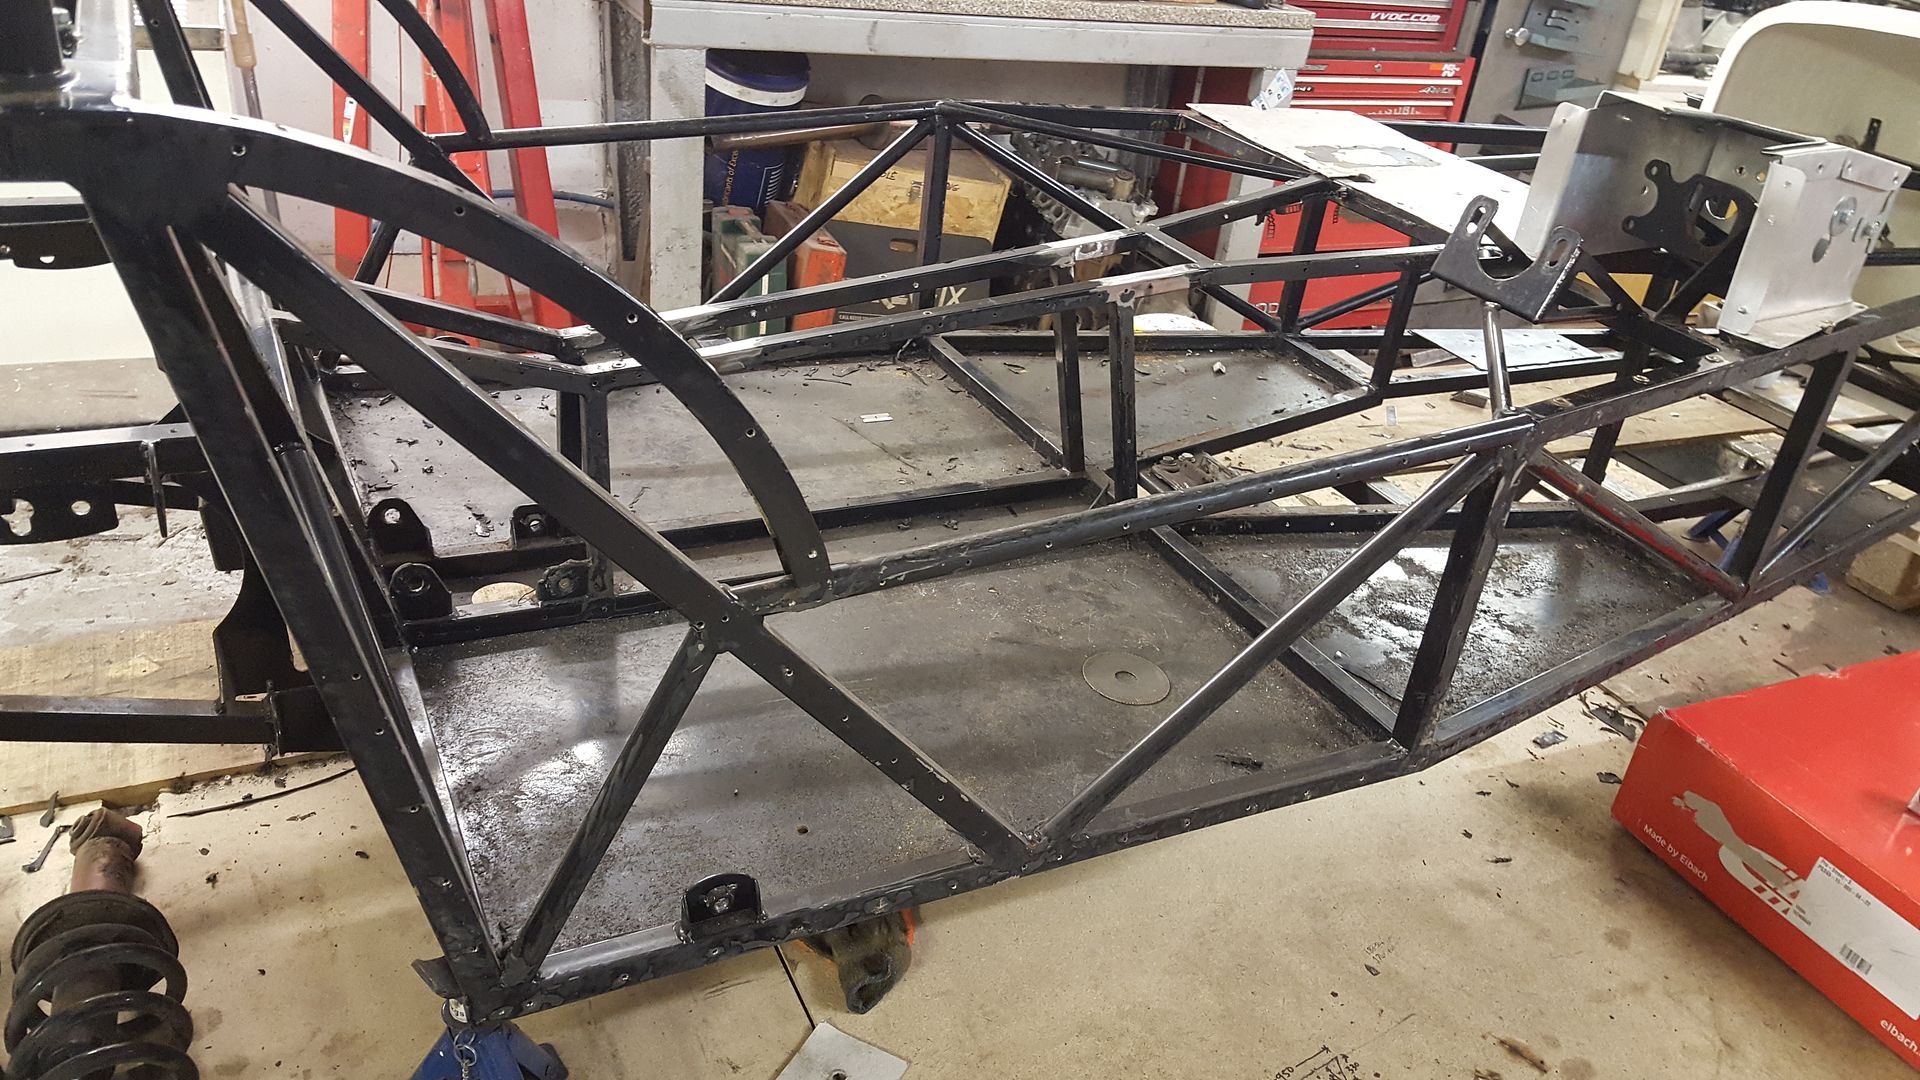
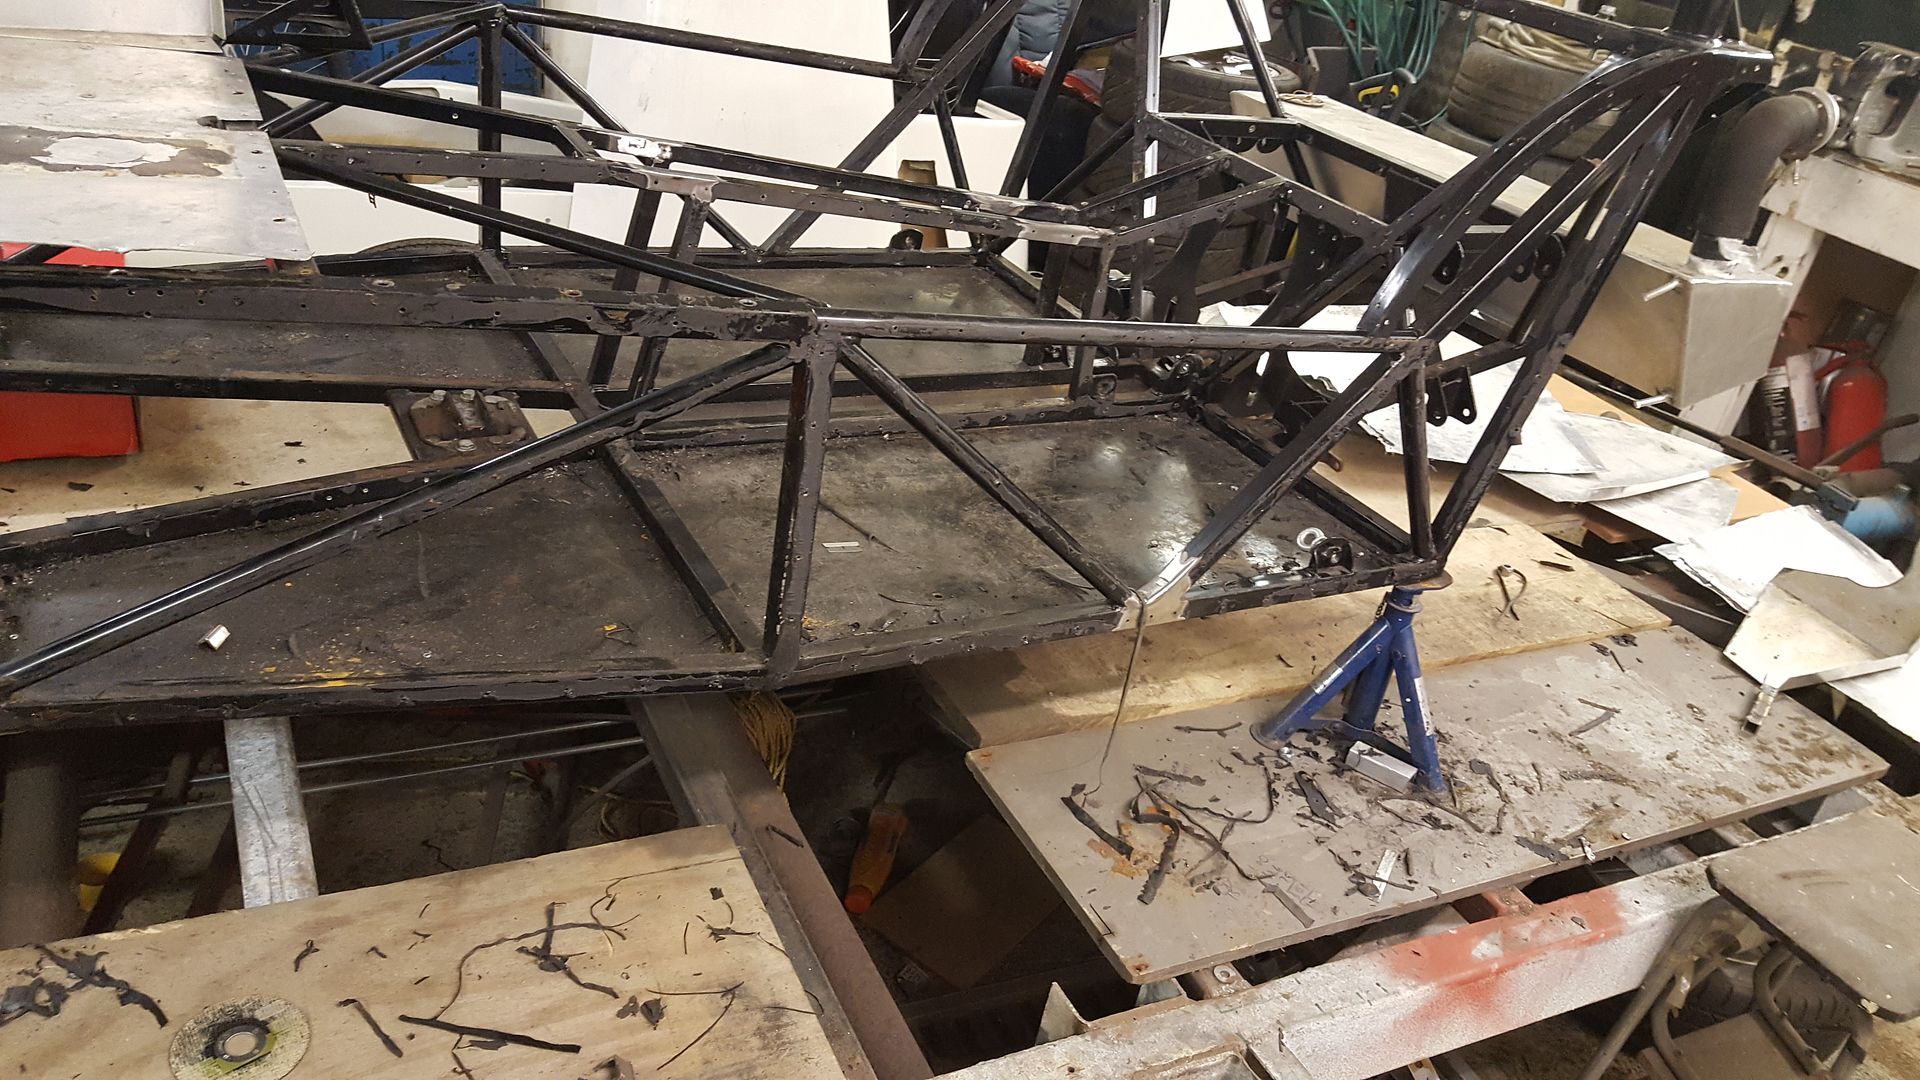
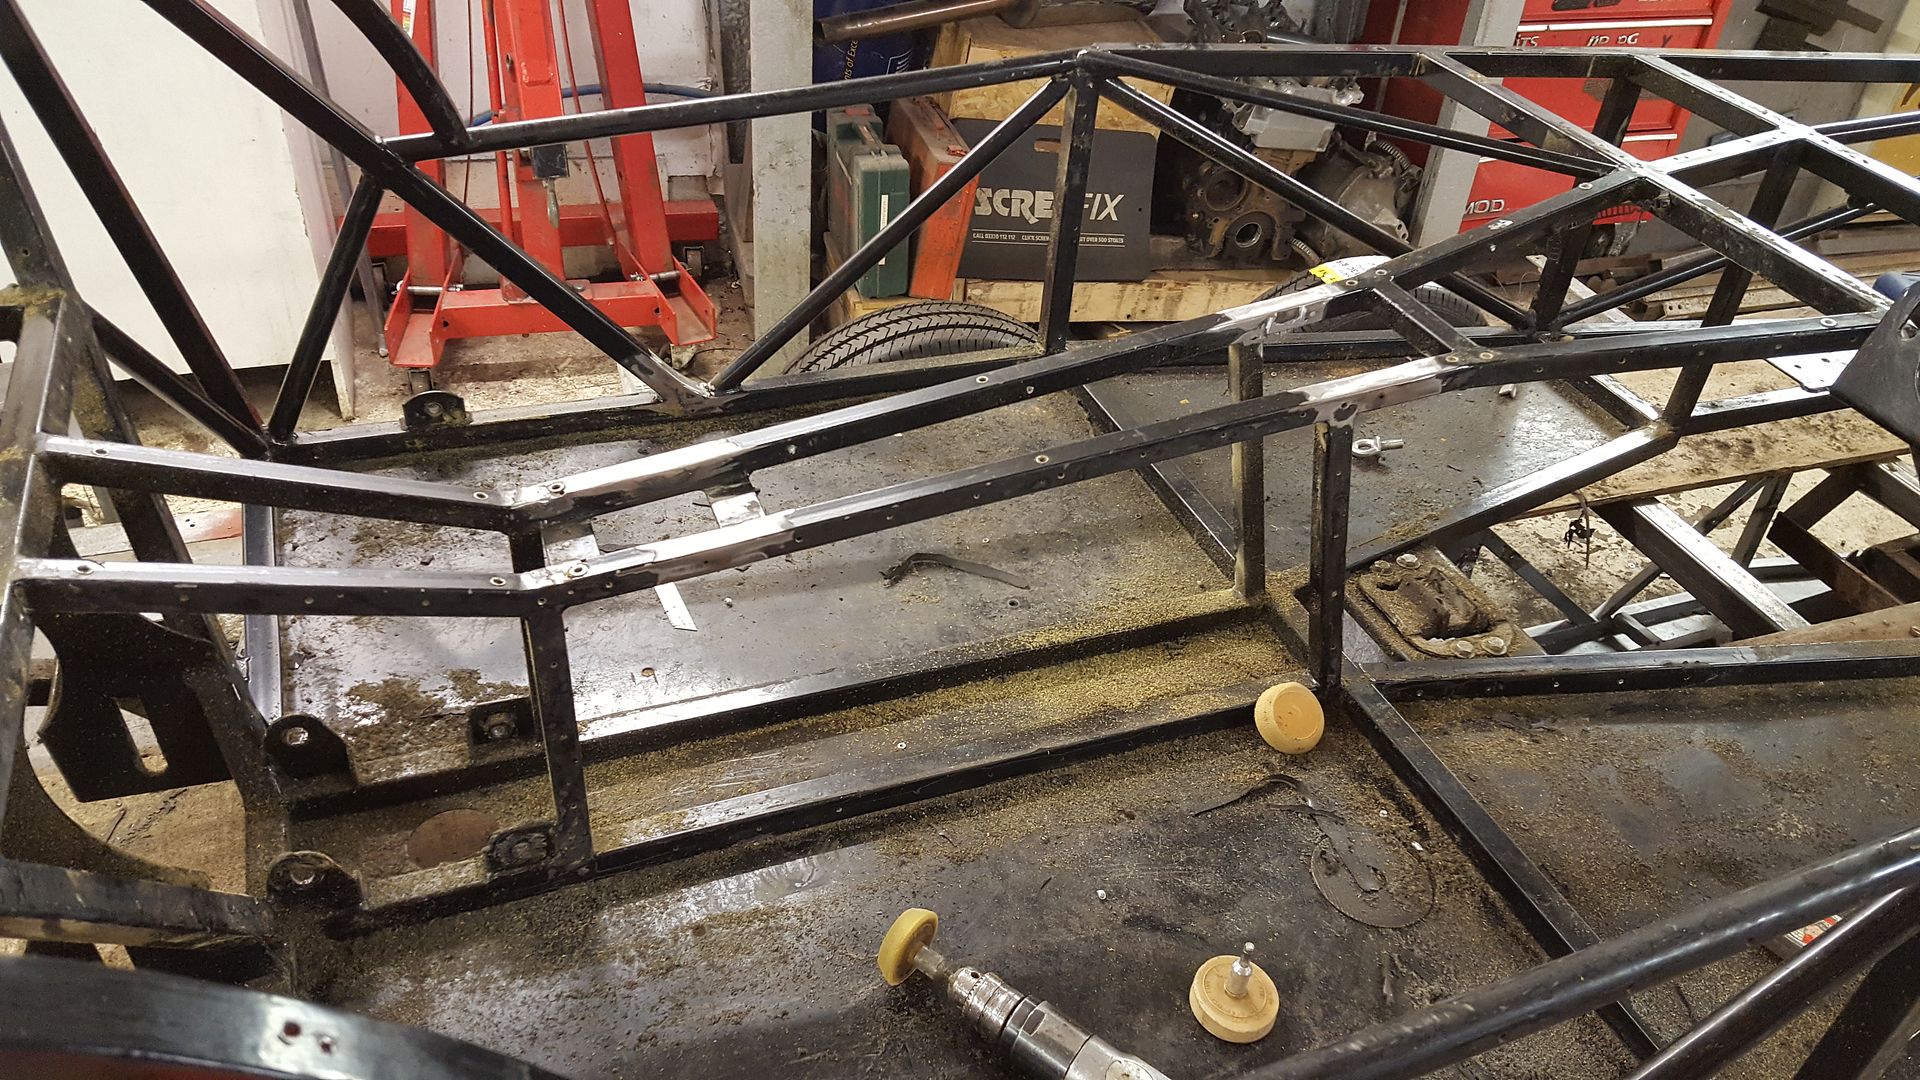
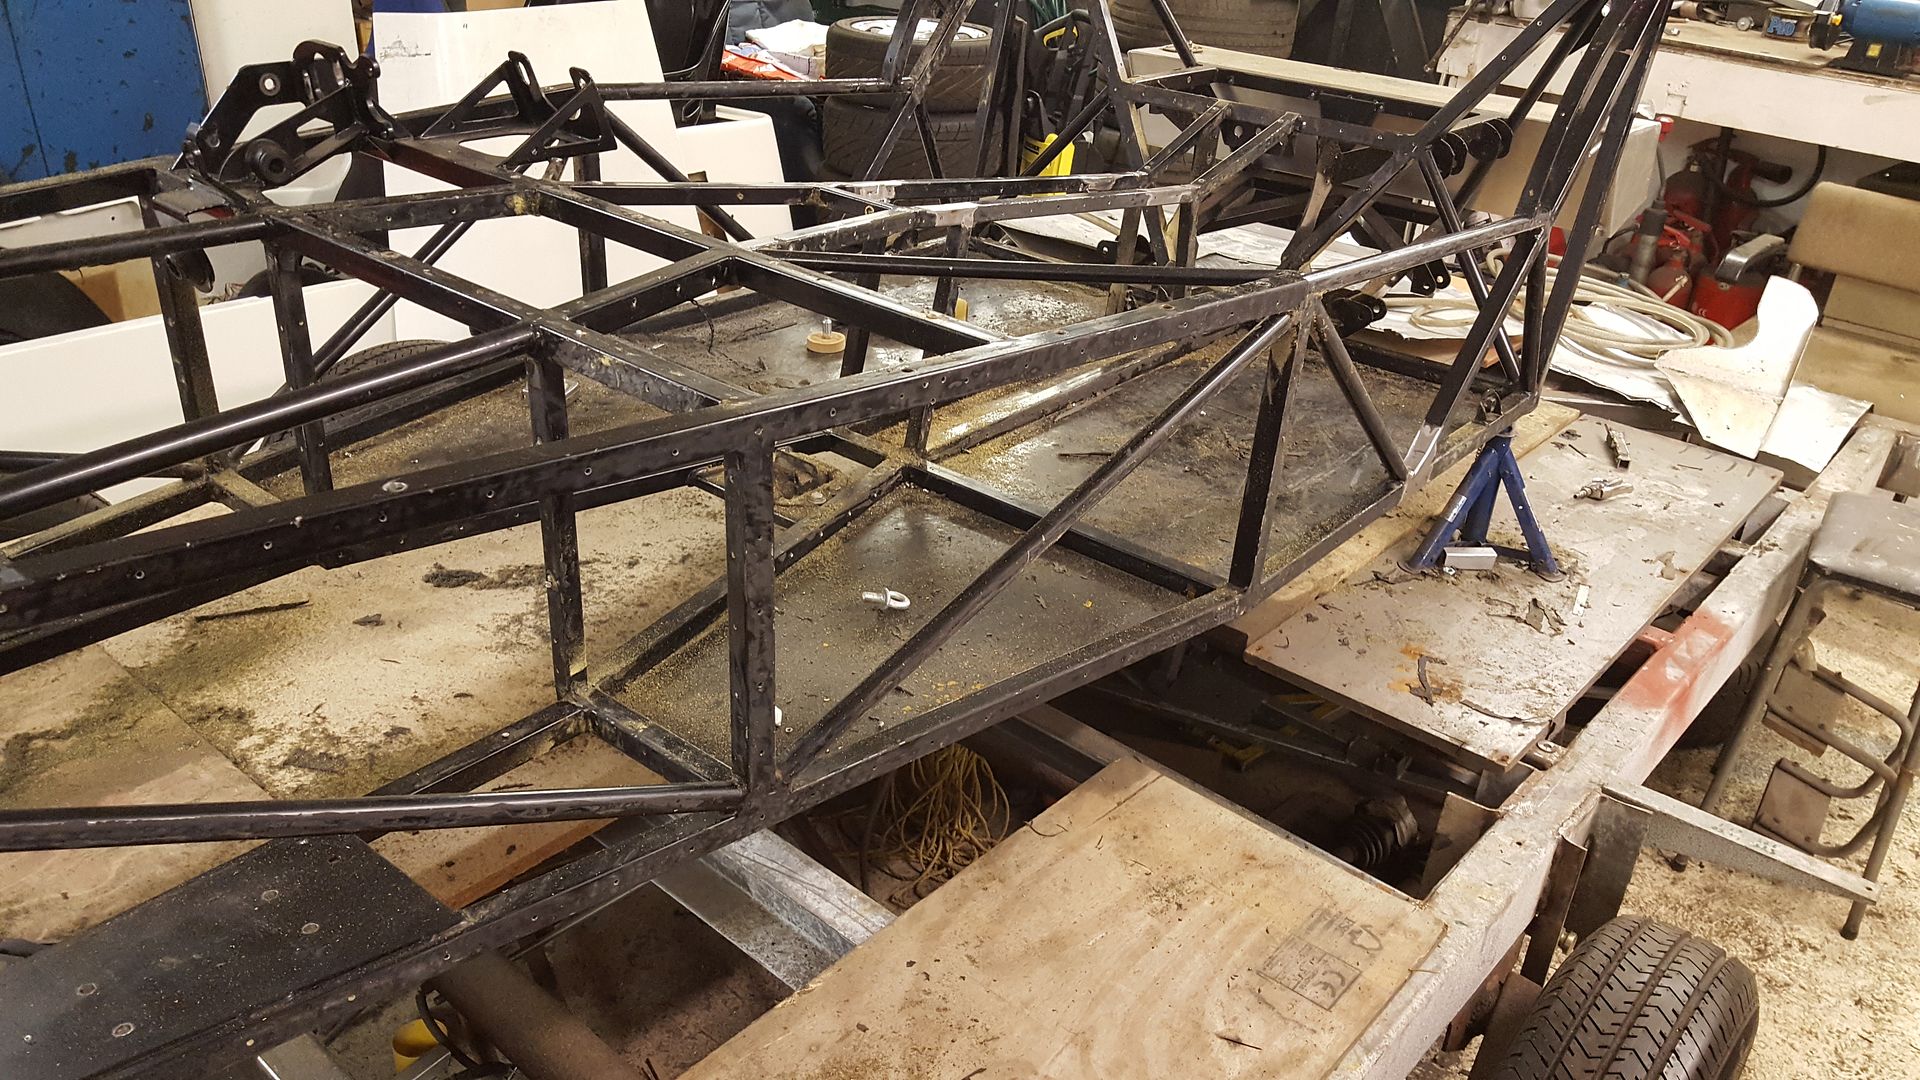
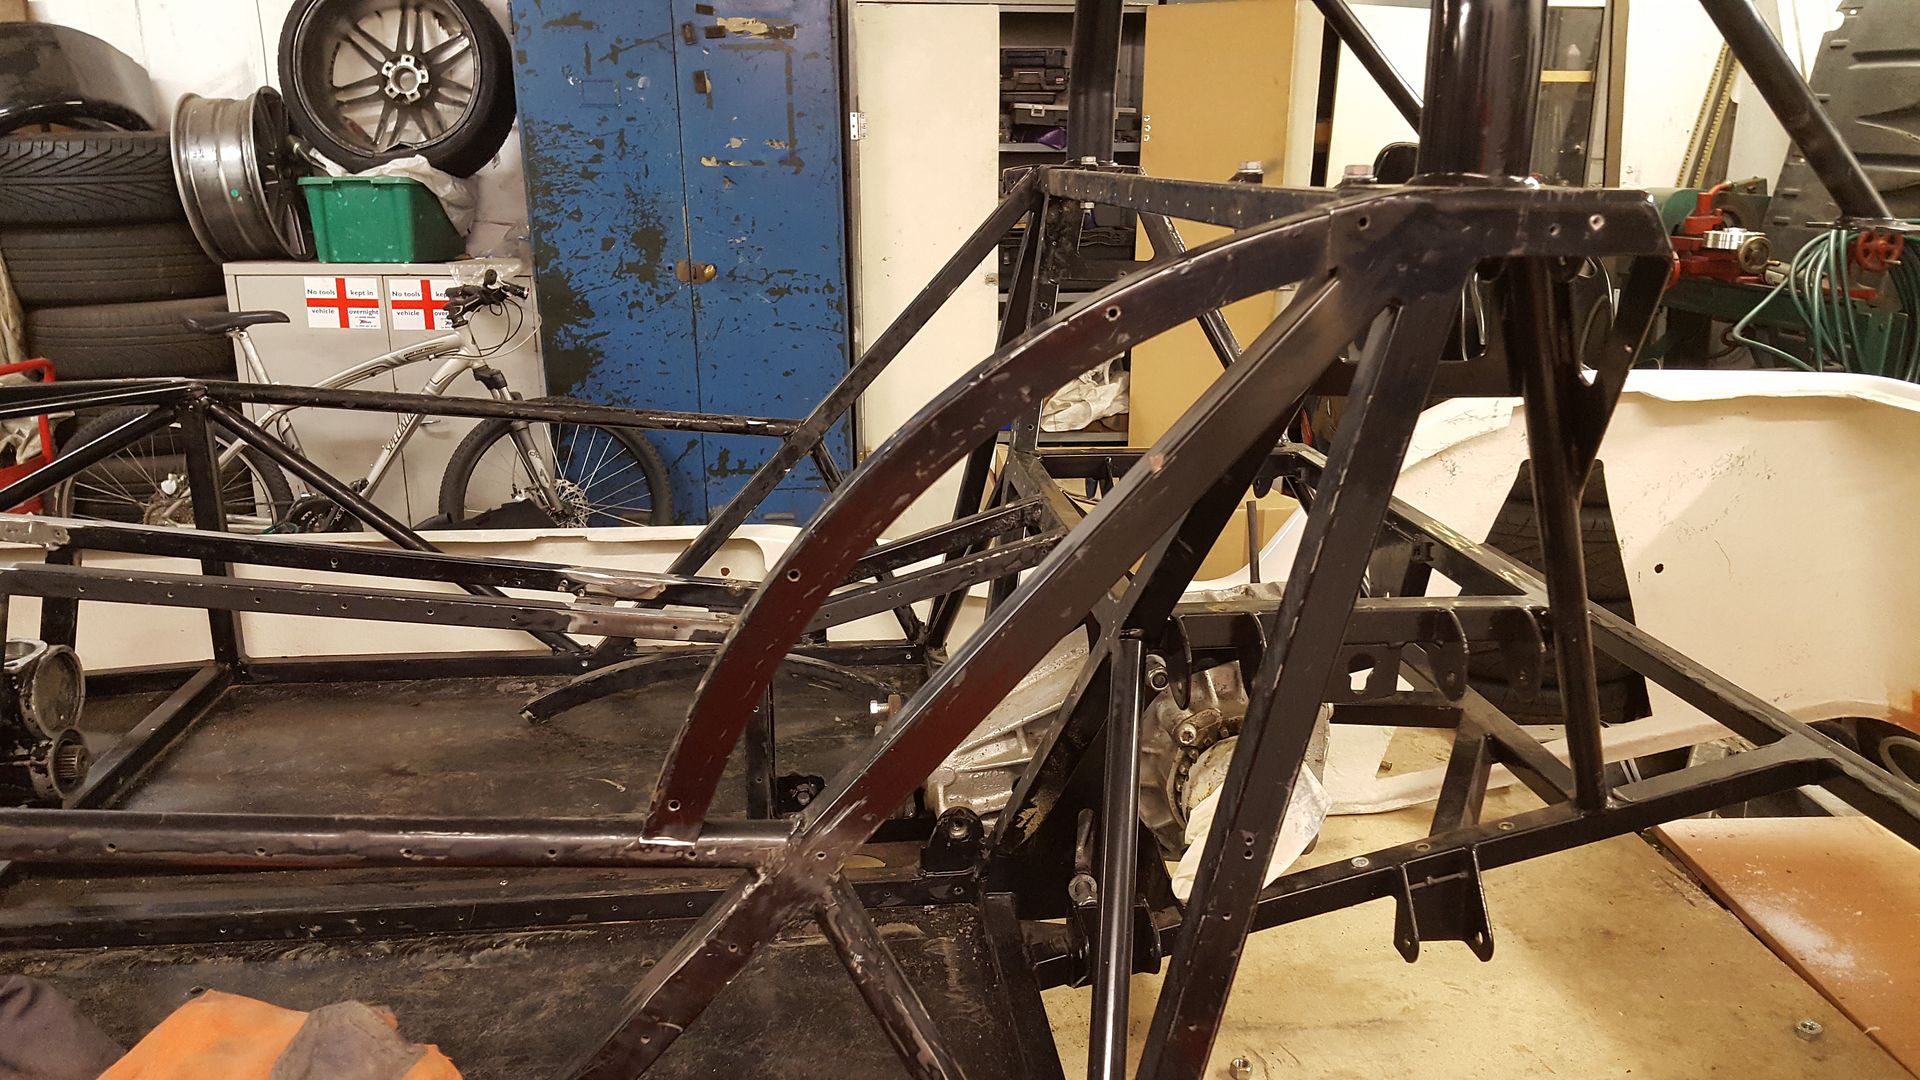
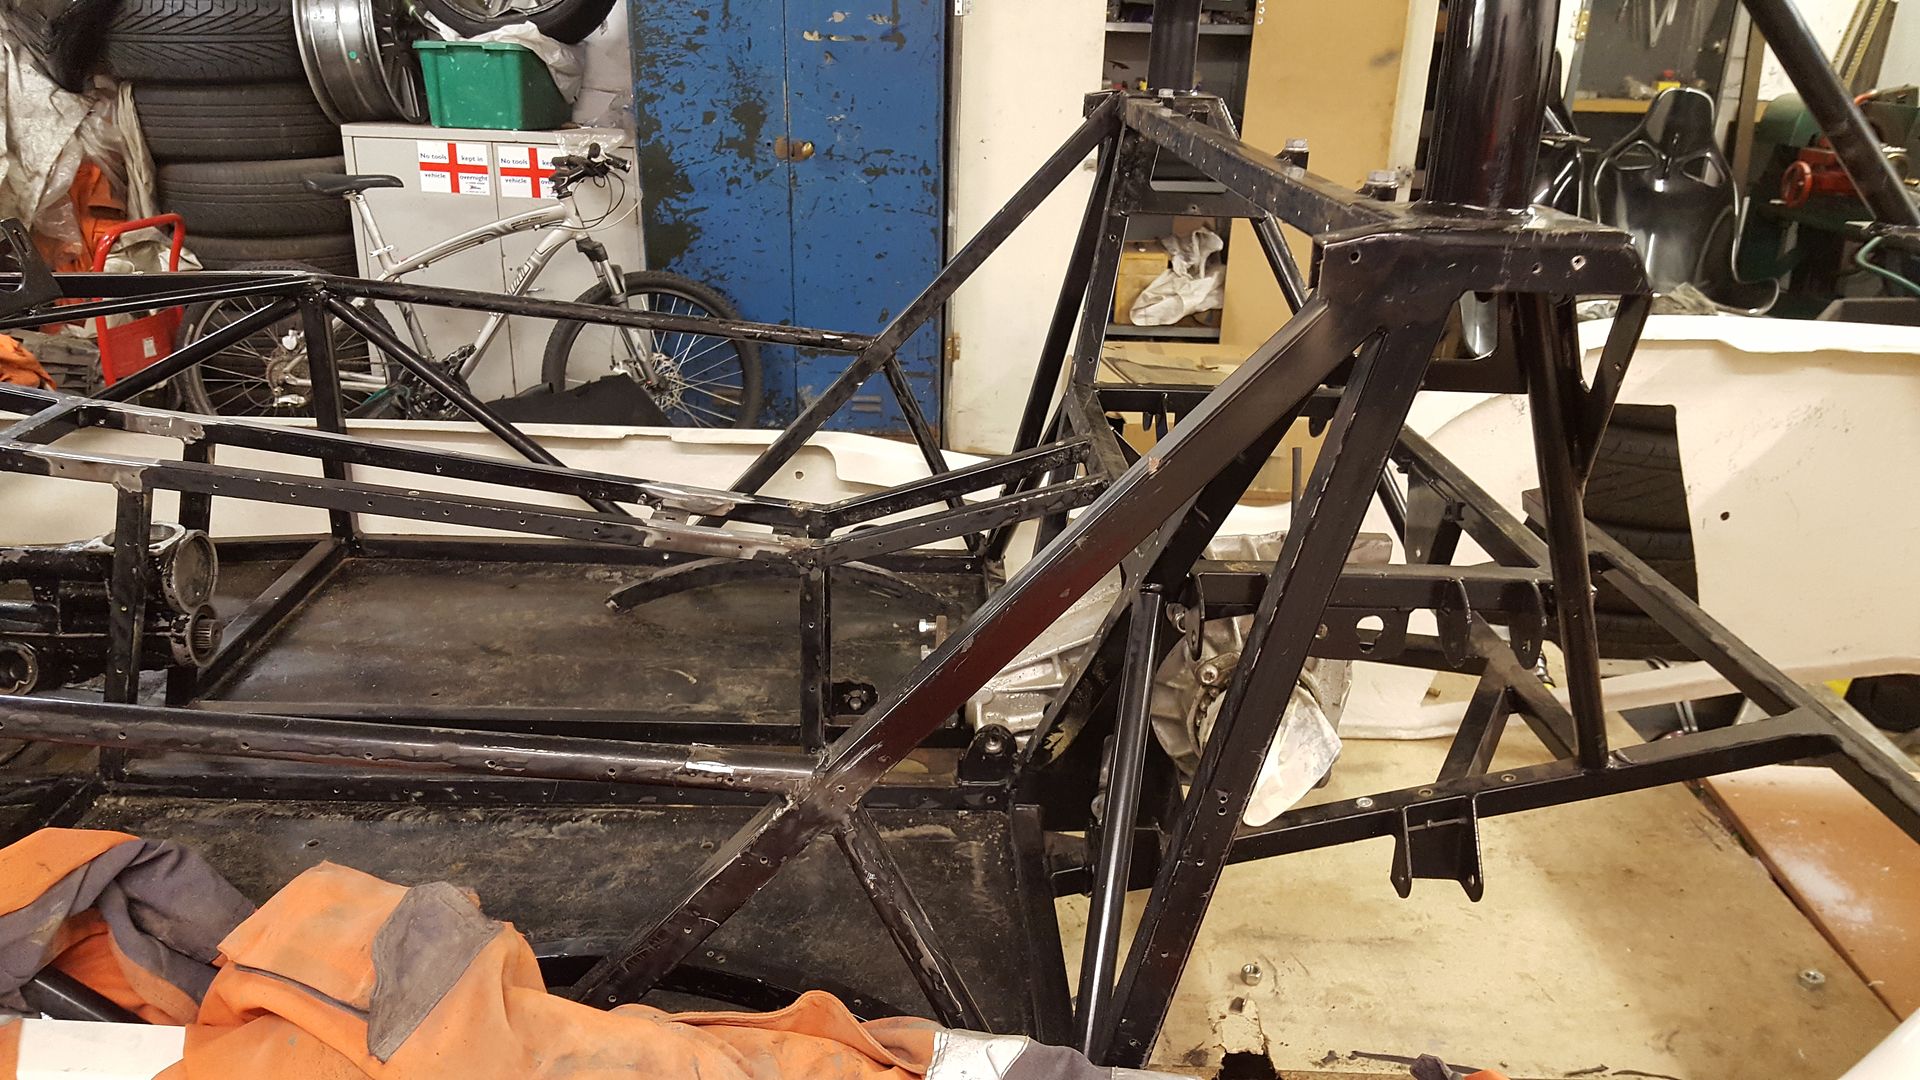
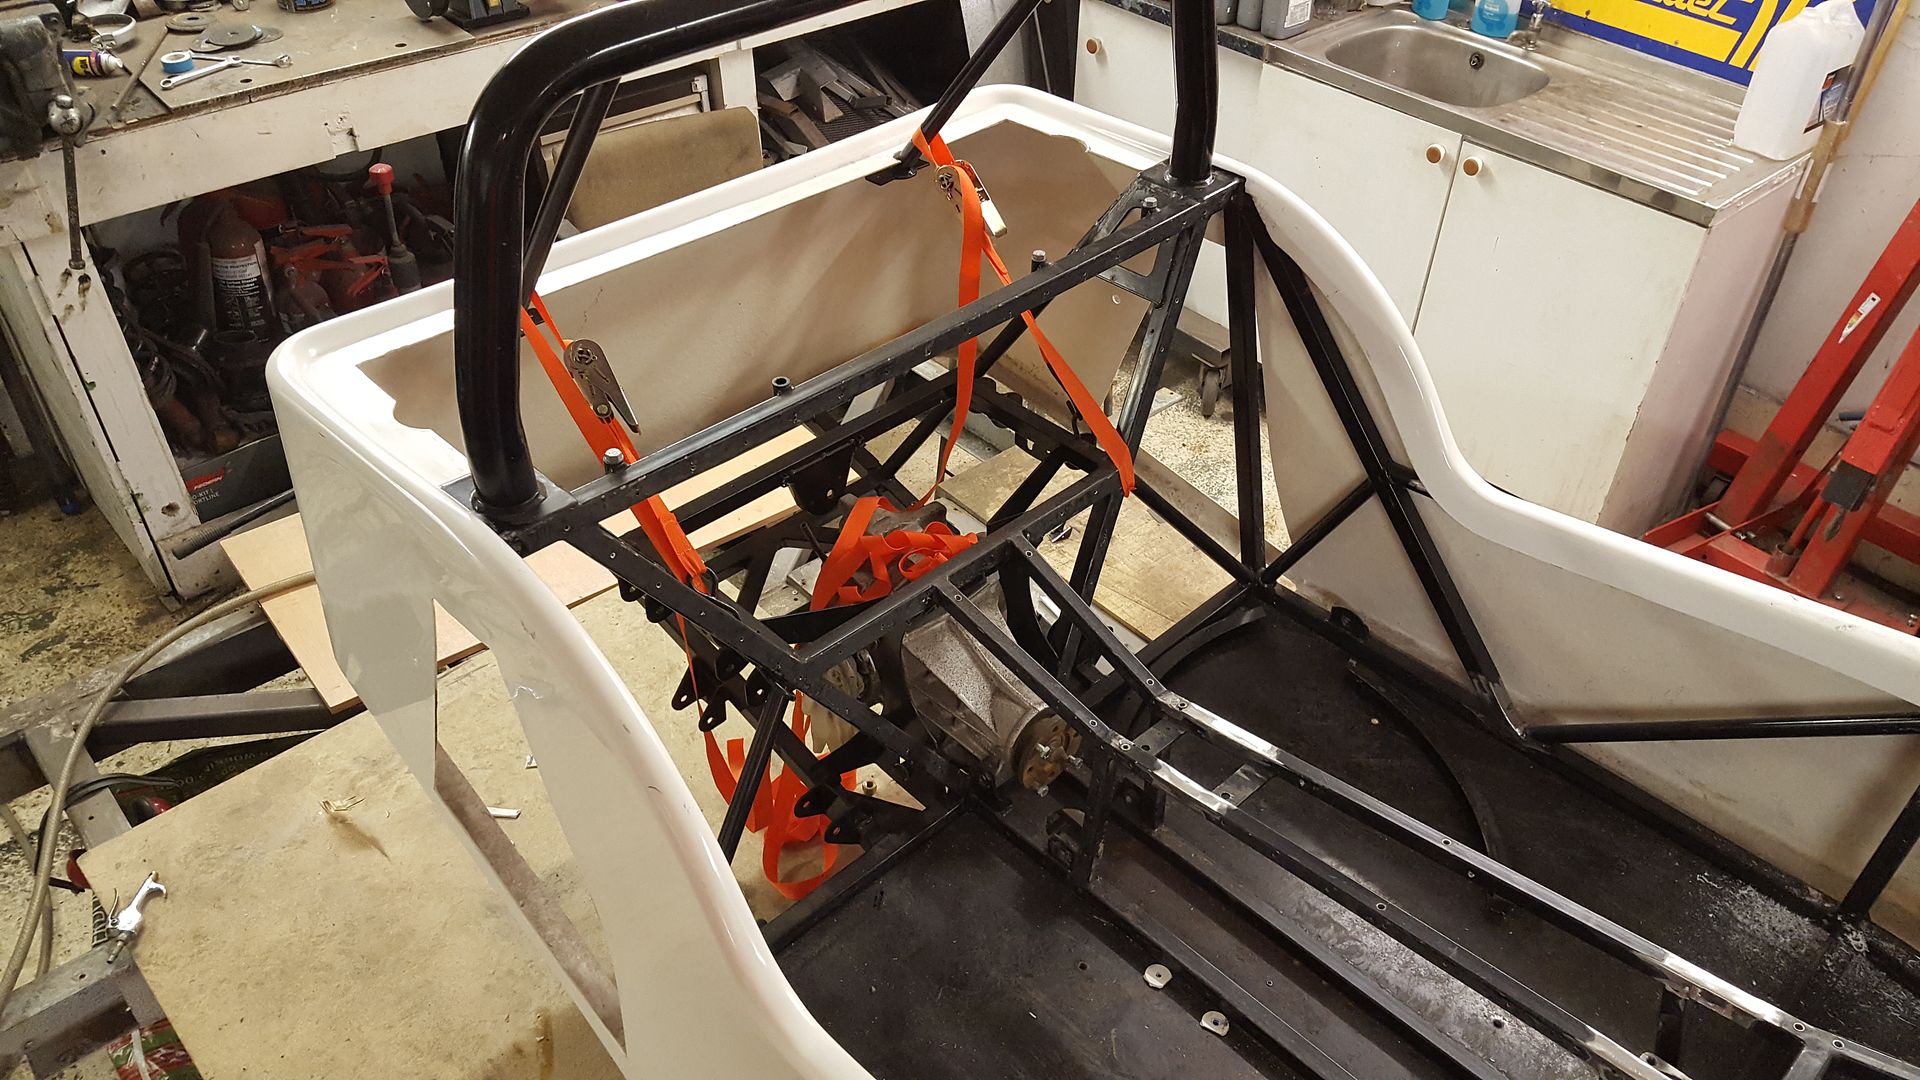
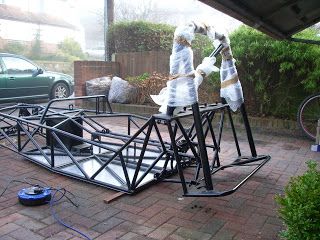
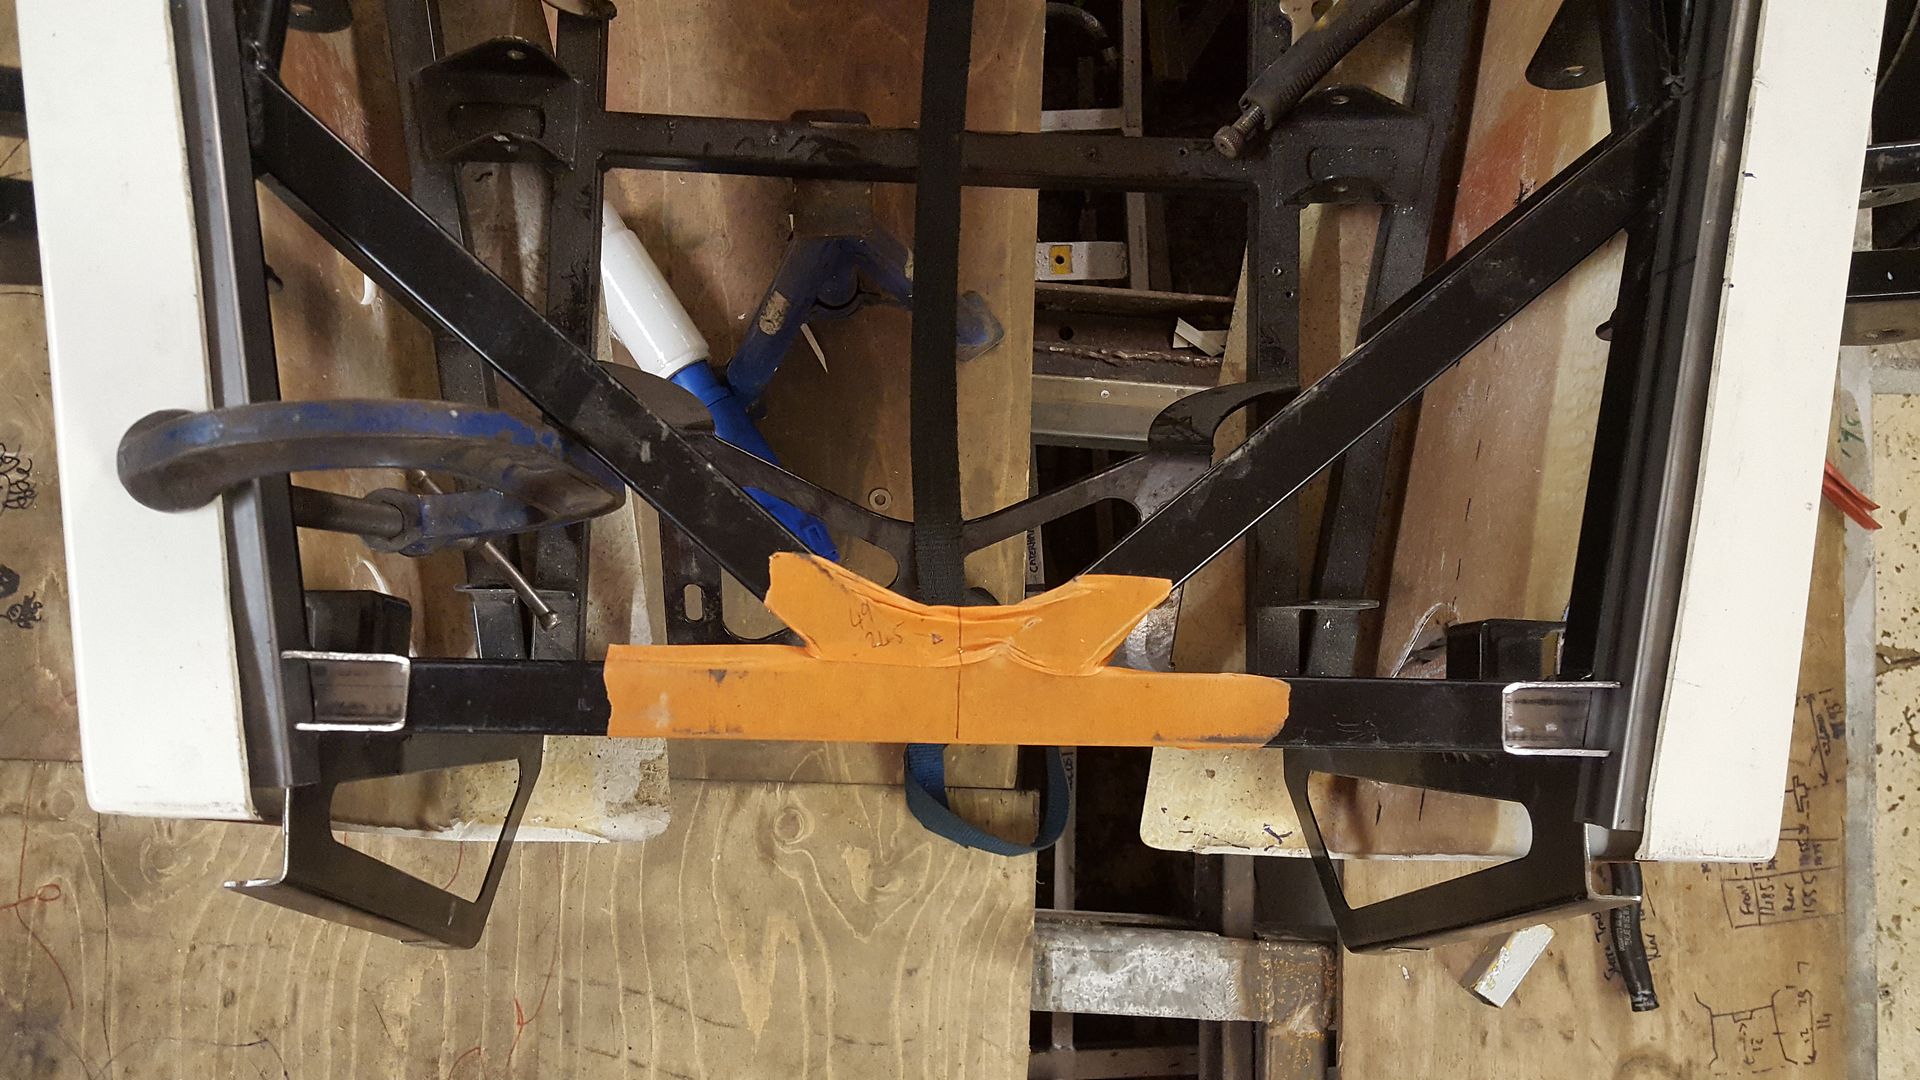
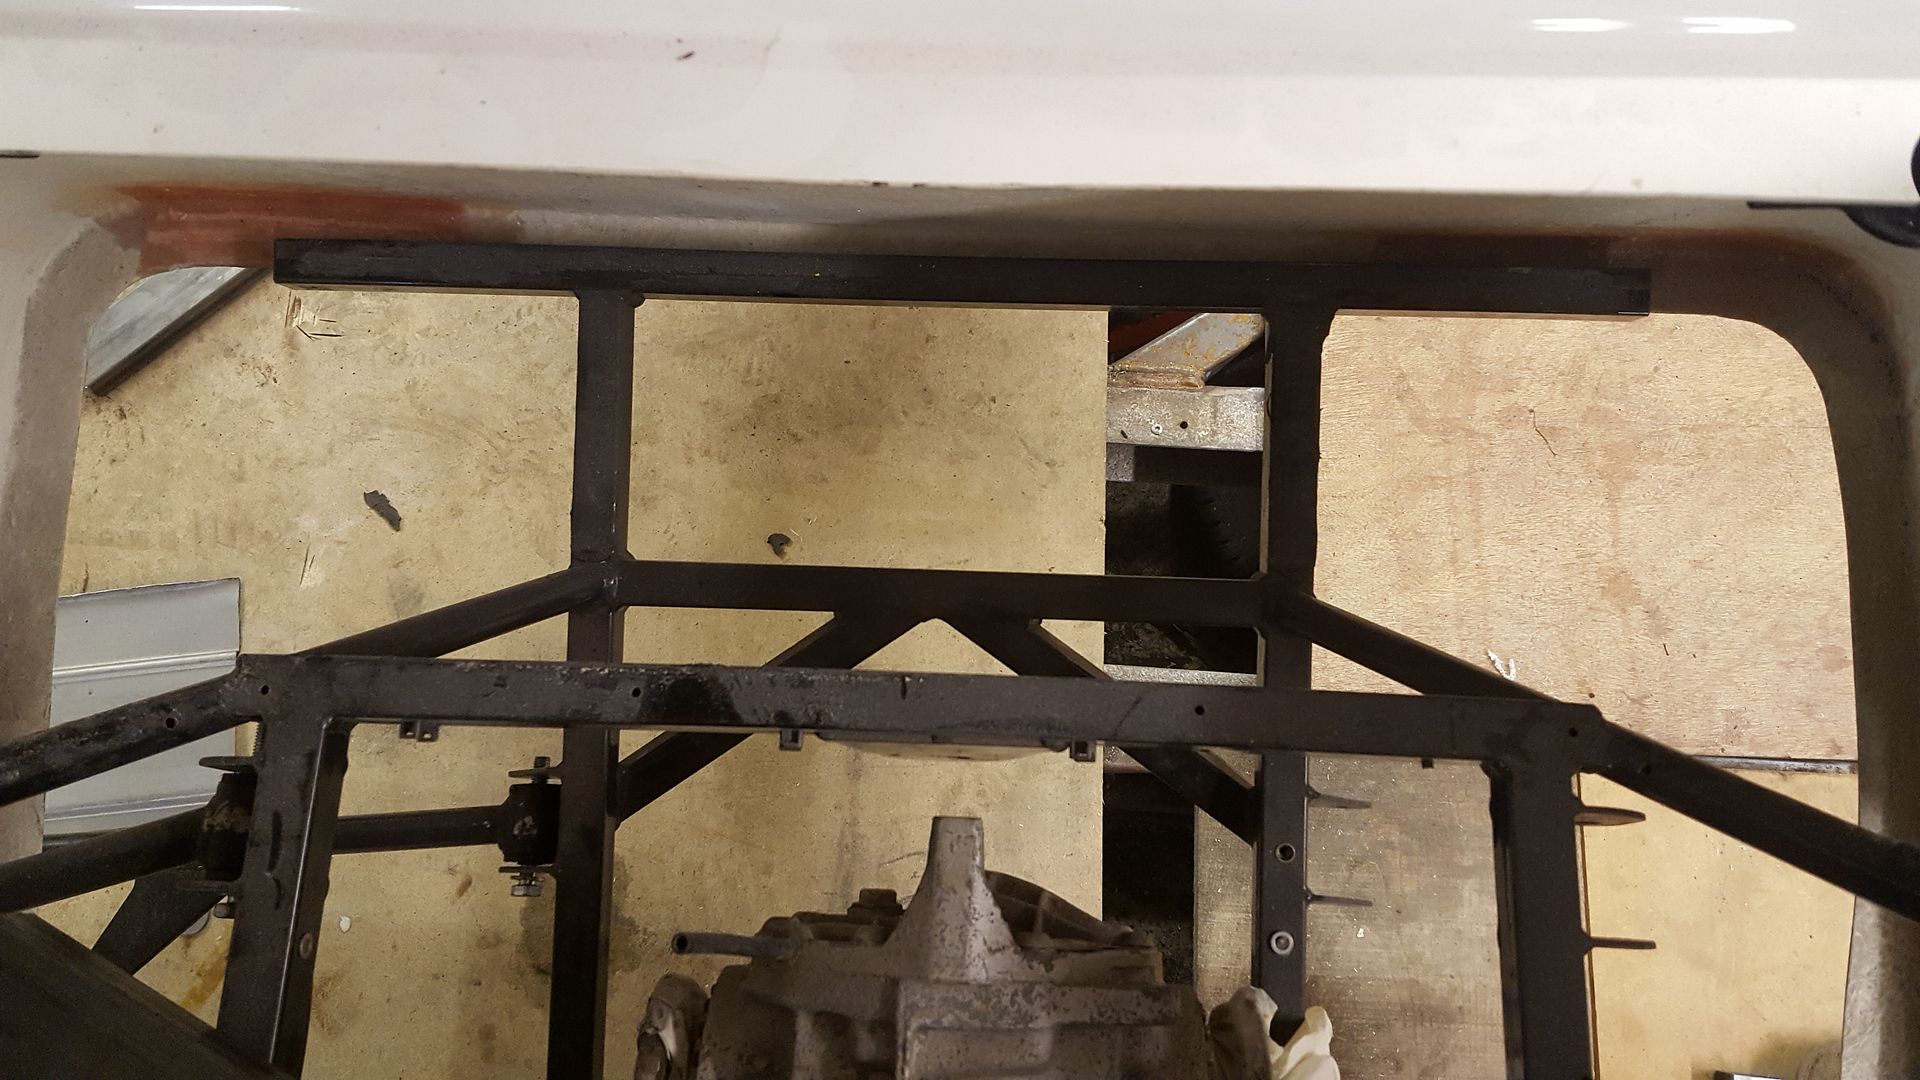
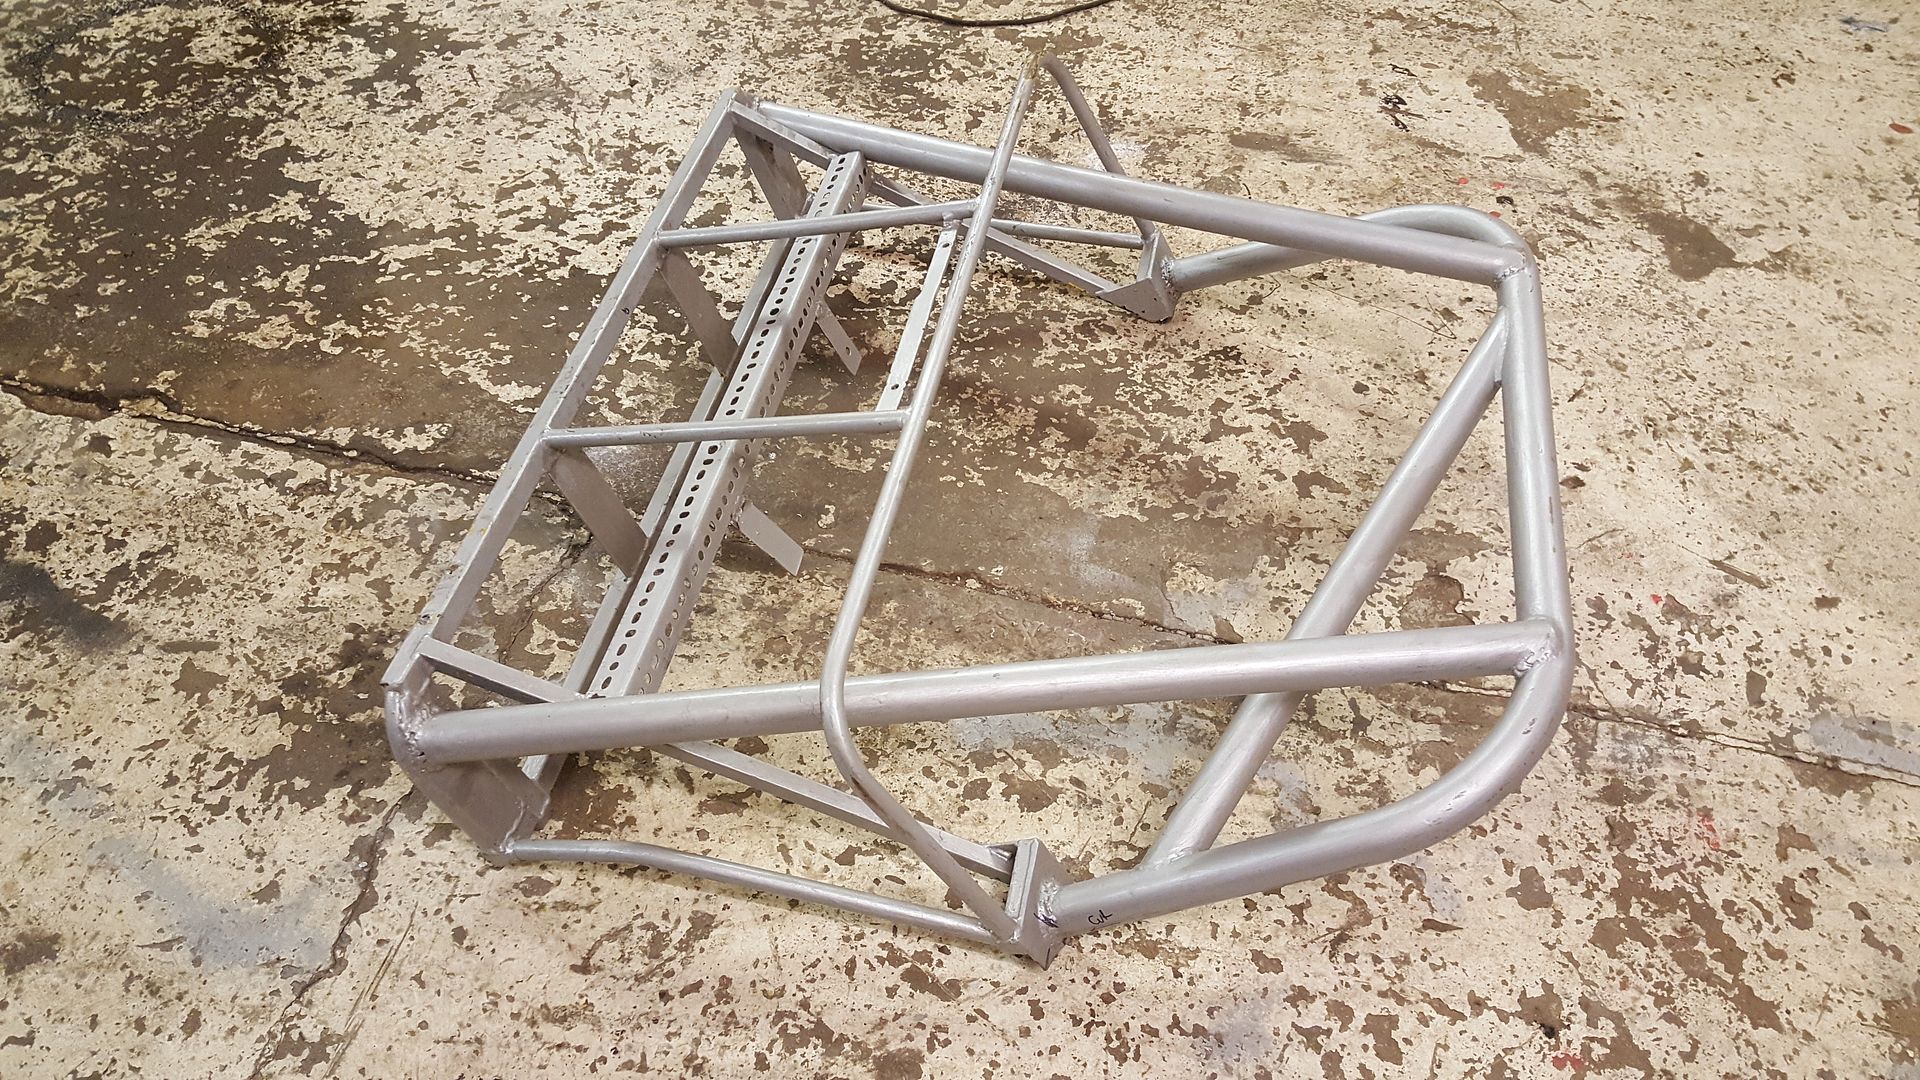
The original chassis was built to a pretty high standard, it sits true and some great welding. HOWEVER..... everything else that was welded on after
was not up to my standard. All the floor panels were certainly welded by someone else, they're structural but not pretty, then things like the
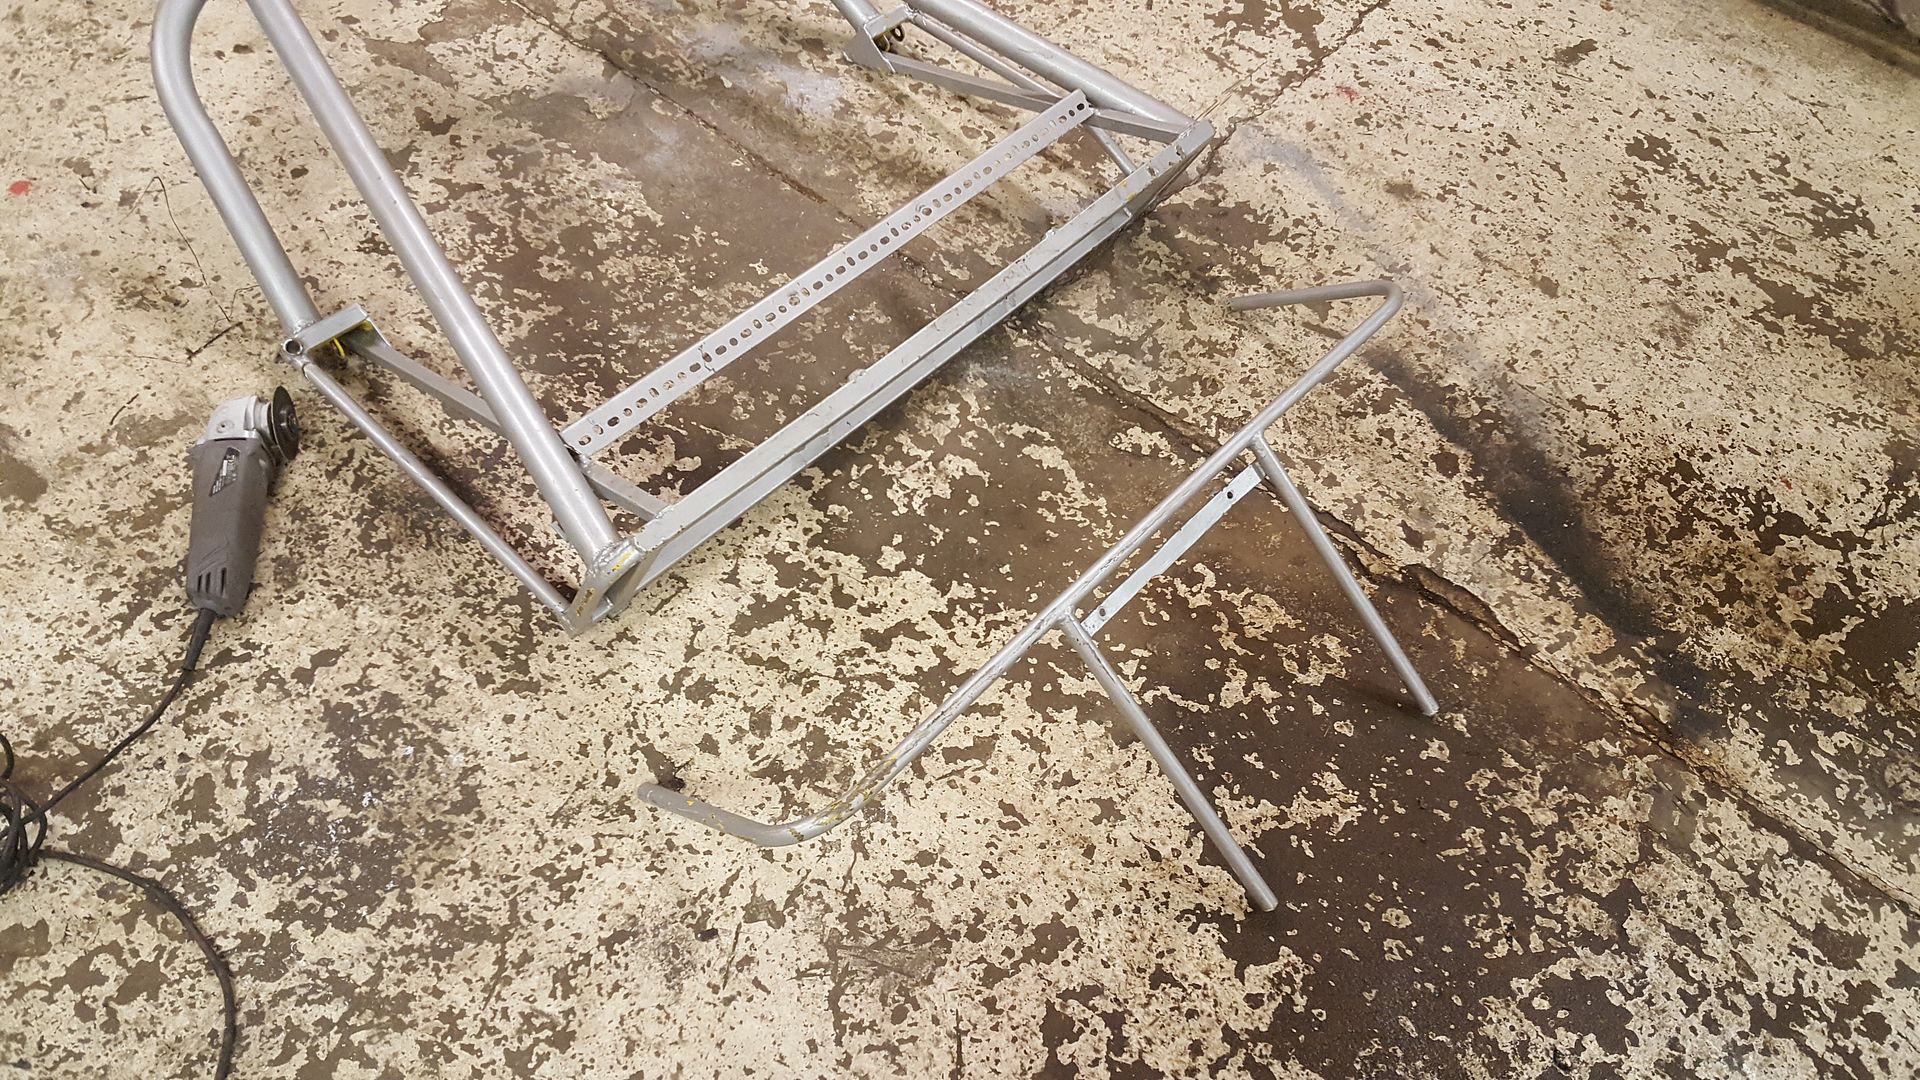
rad mounts, various brackets and certainly the roll cage are just going to be cut straight off! and the bit of racking on the rear......
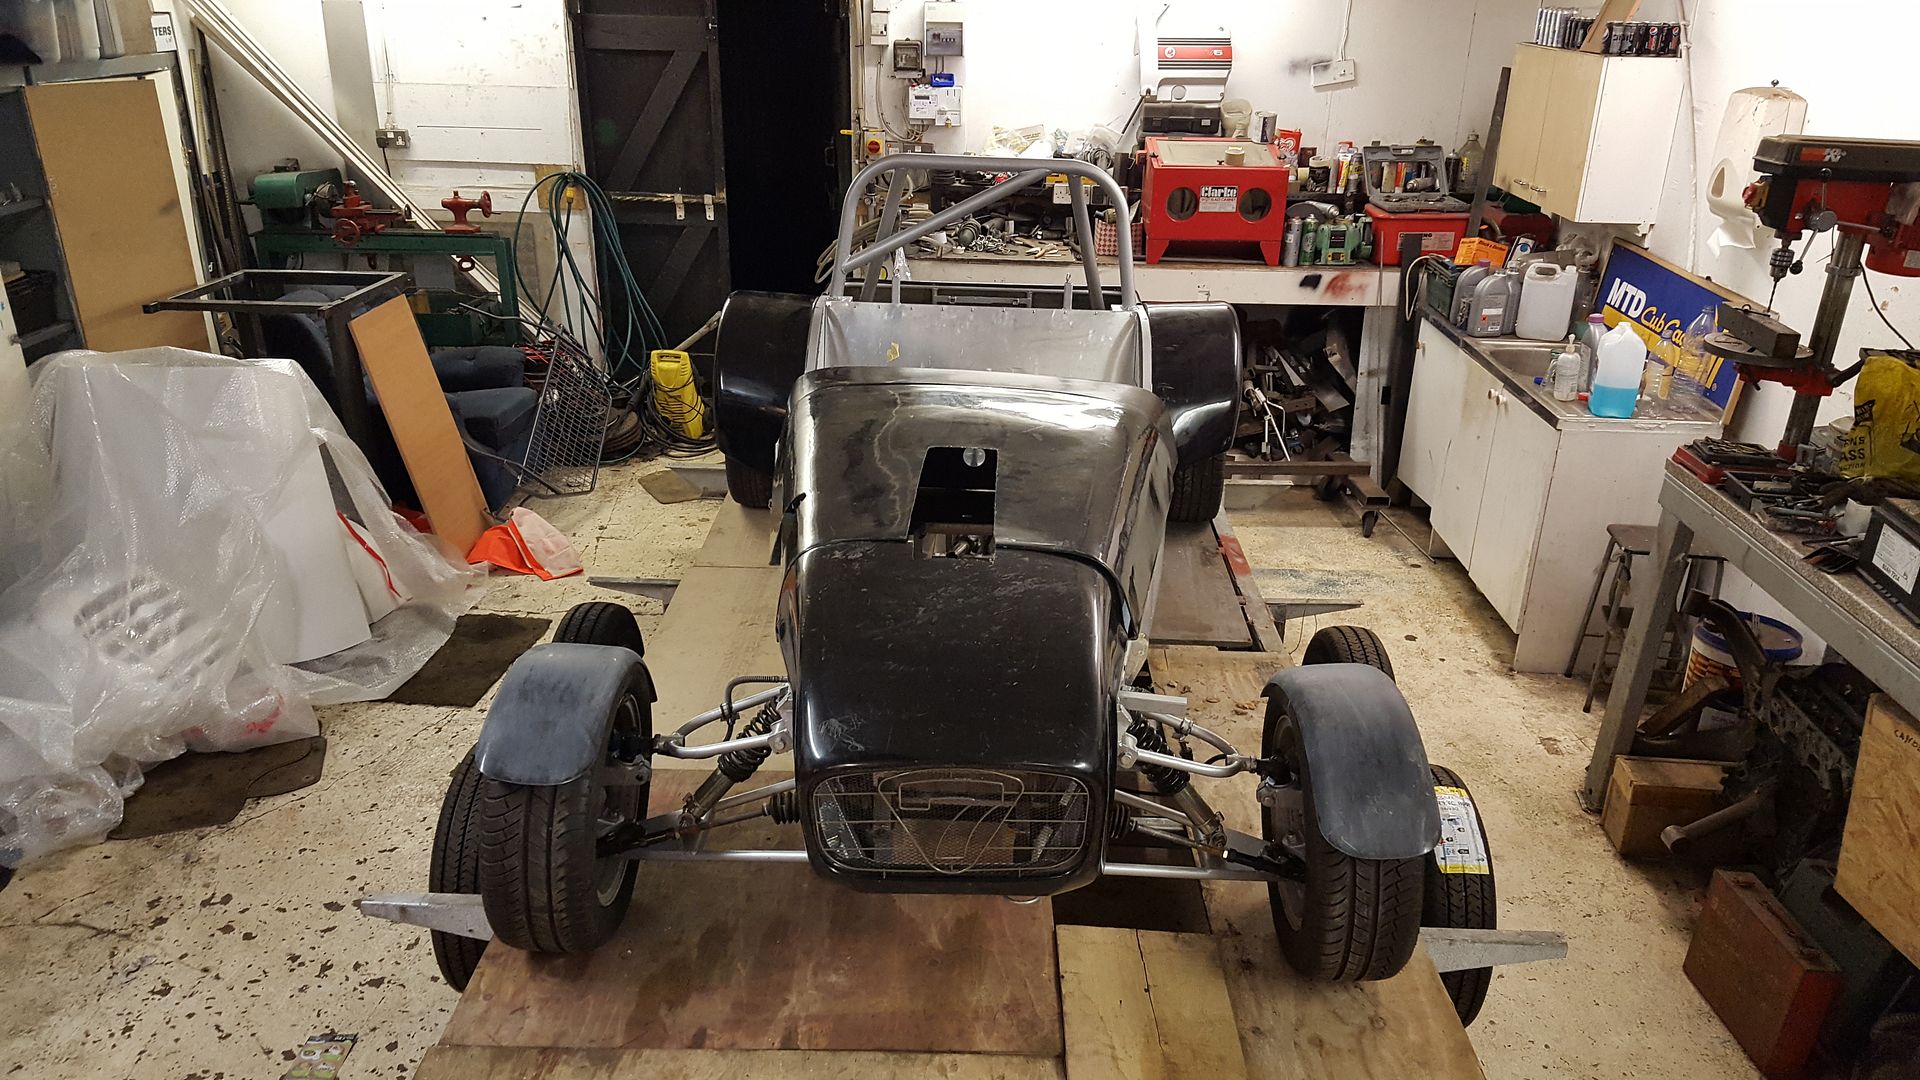
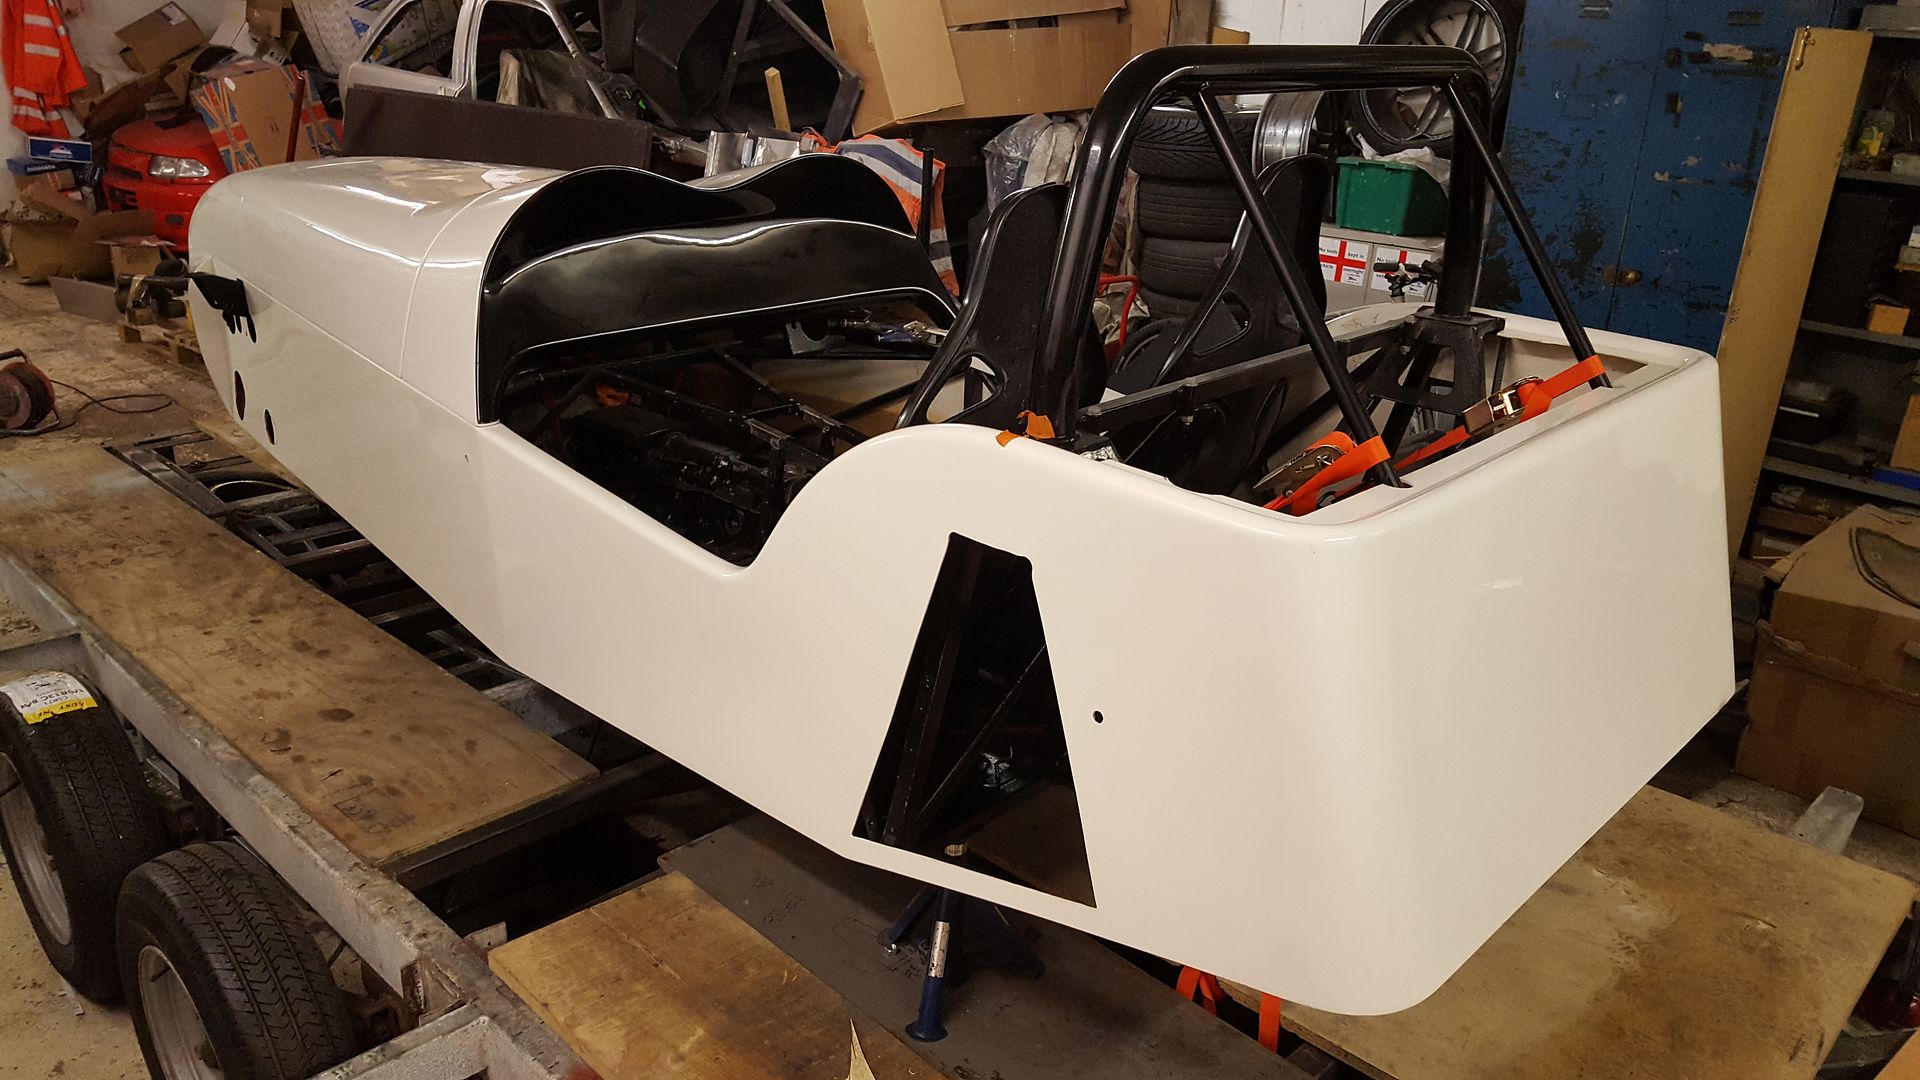
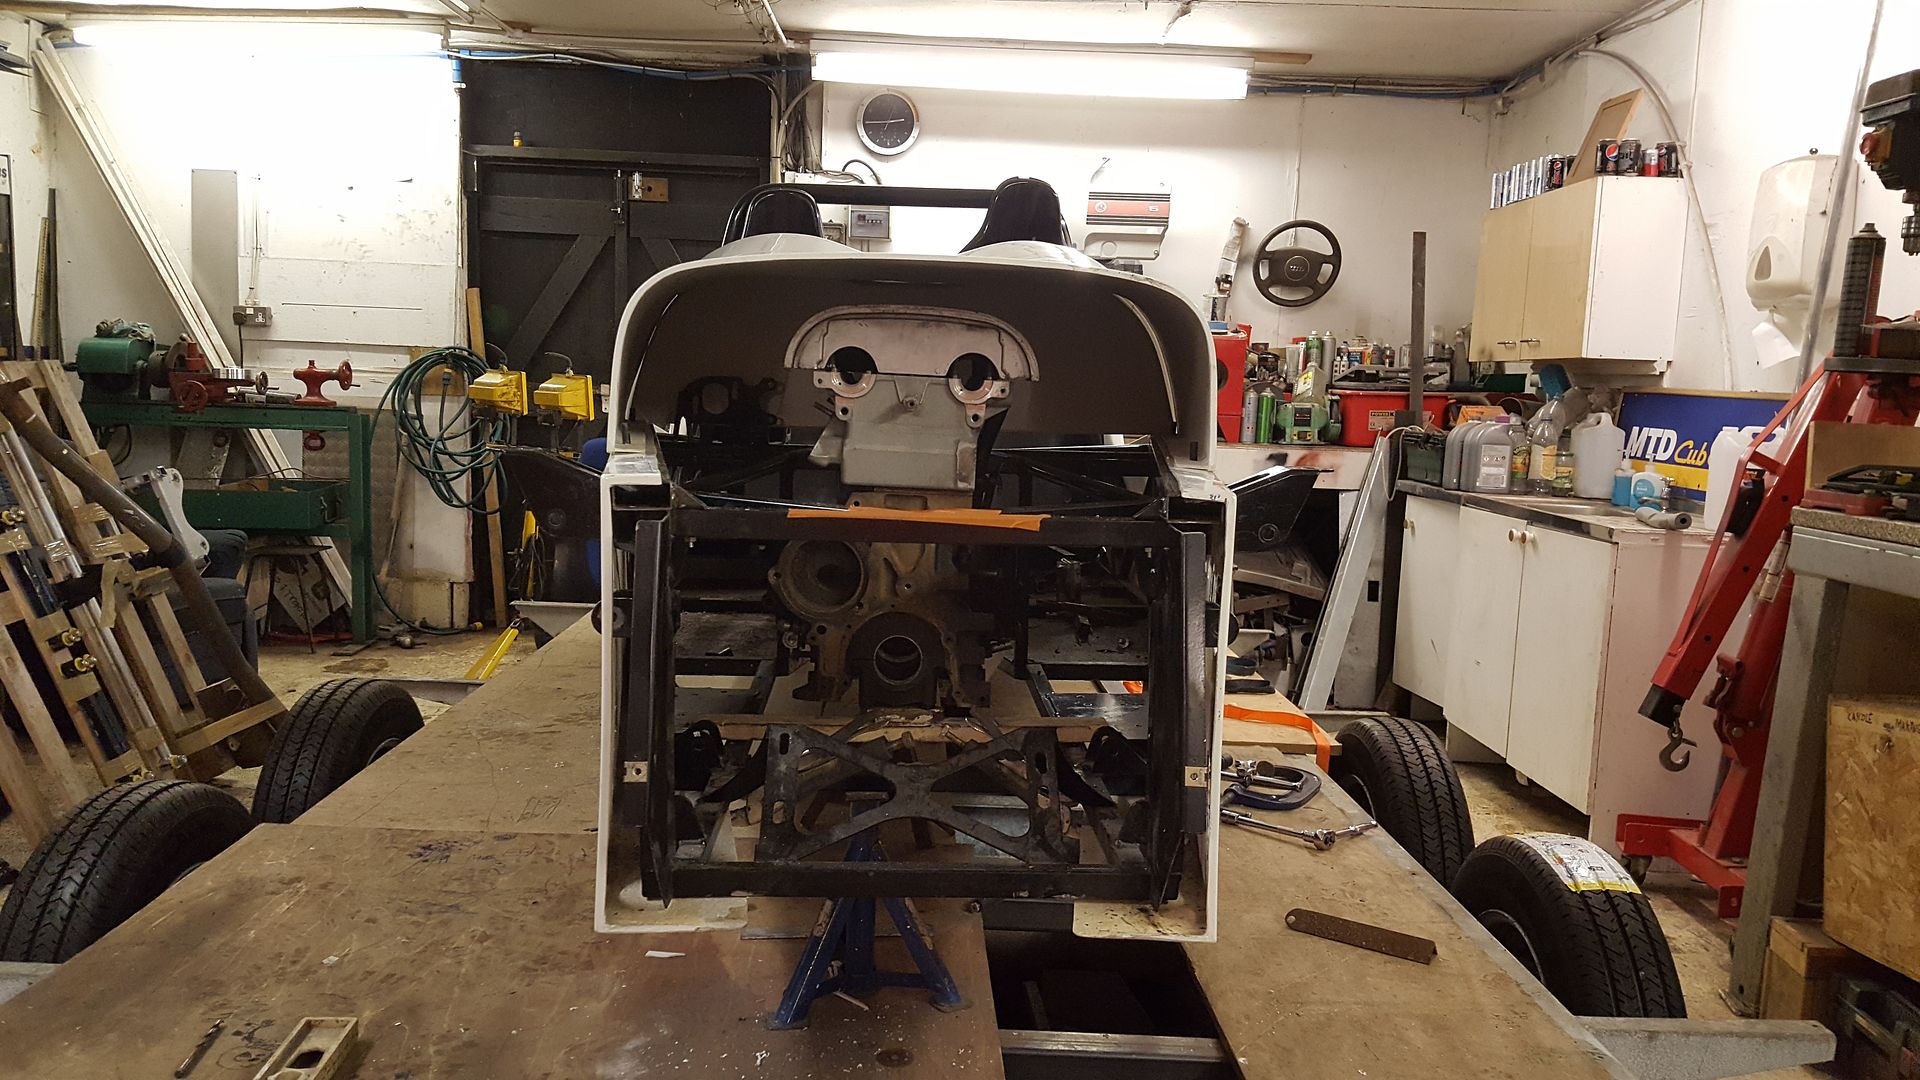
heres a walk around the whole thing


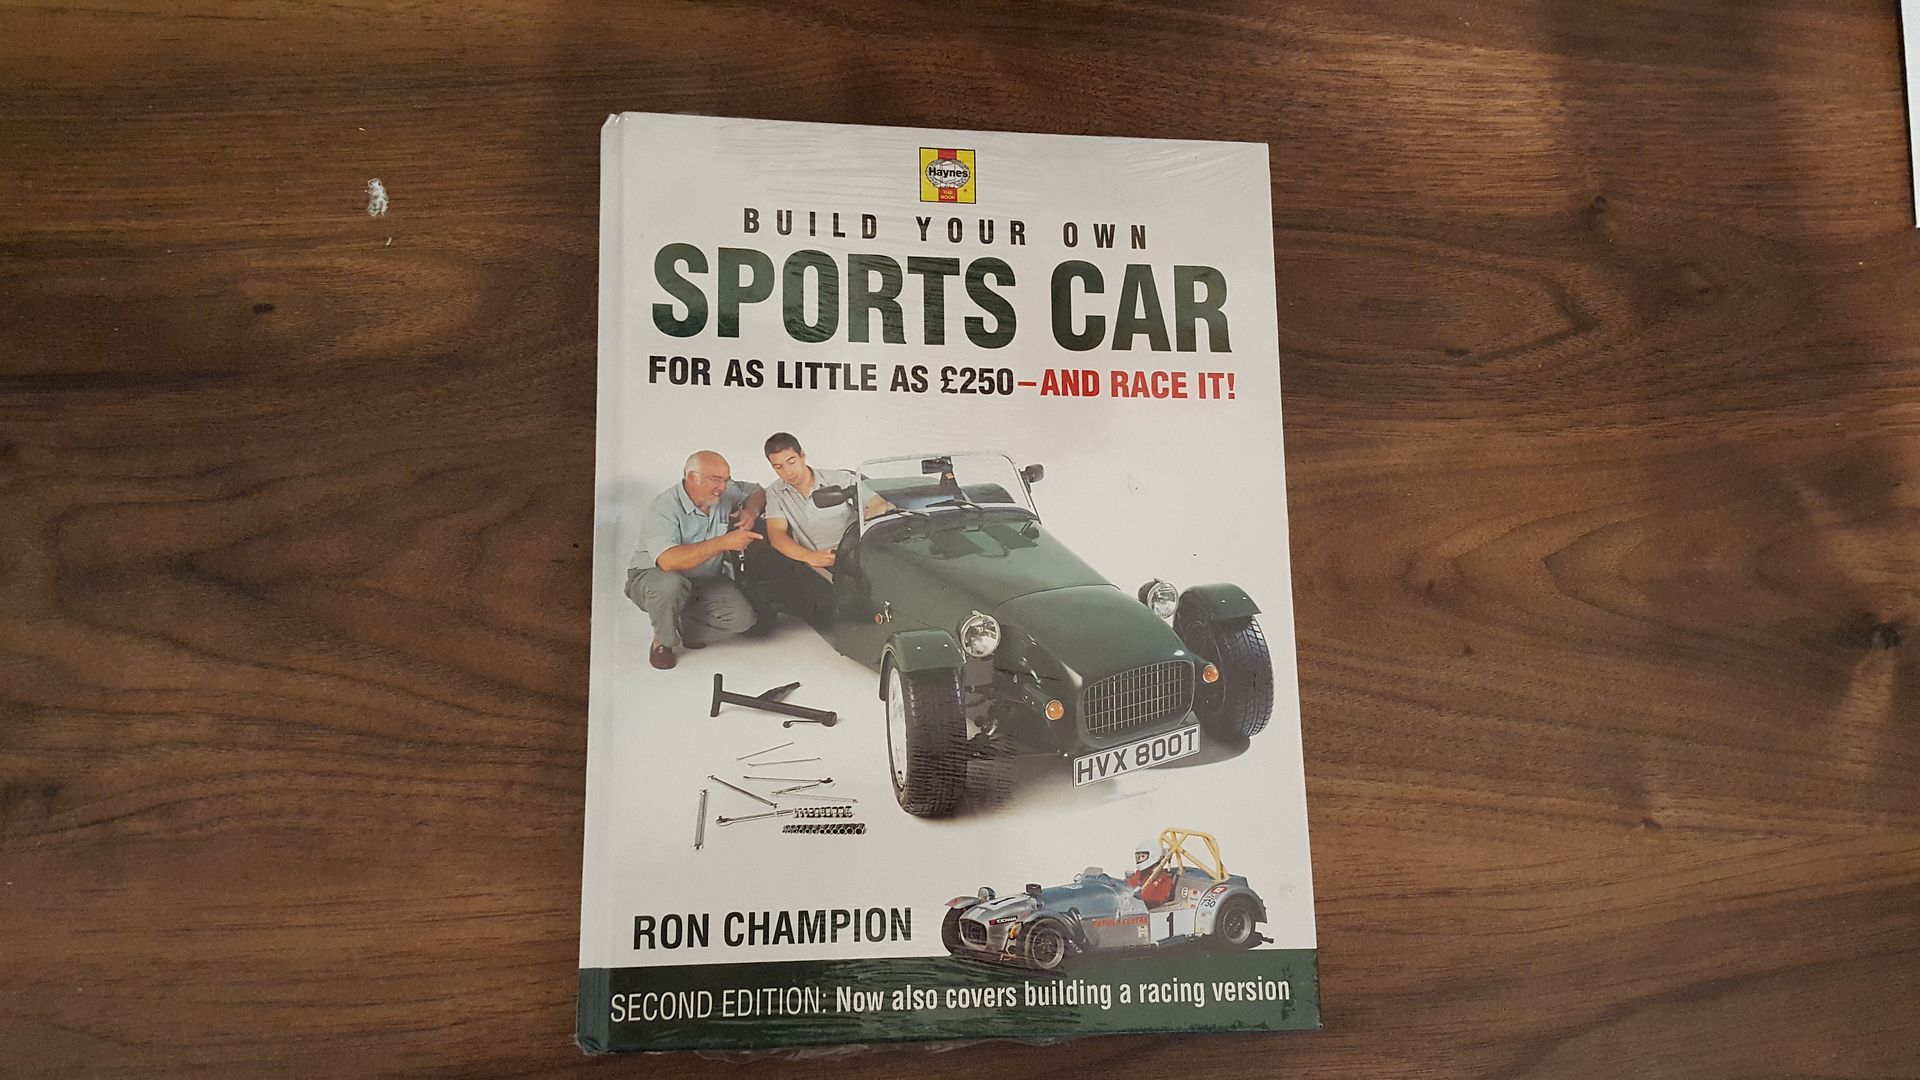
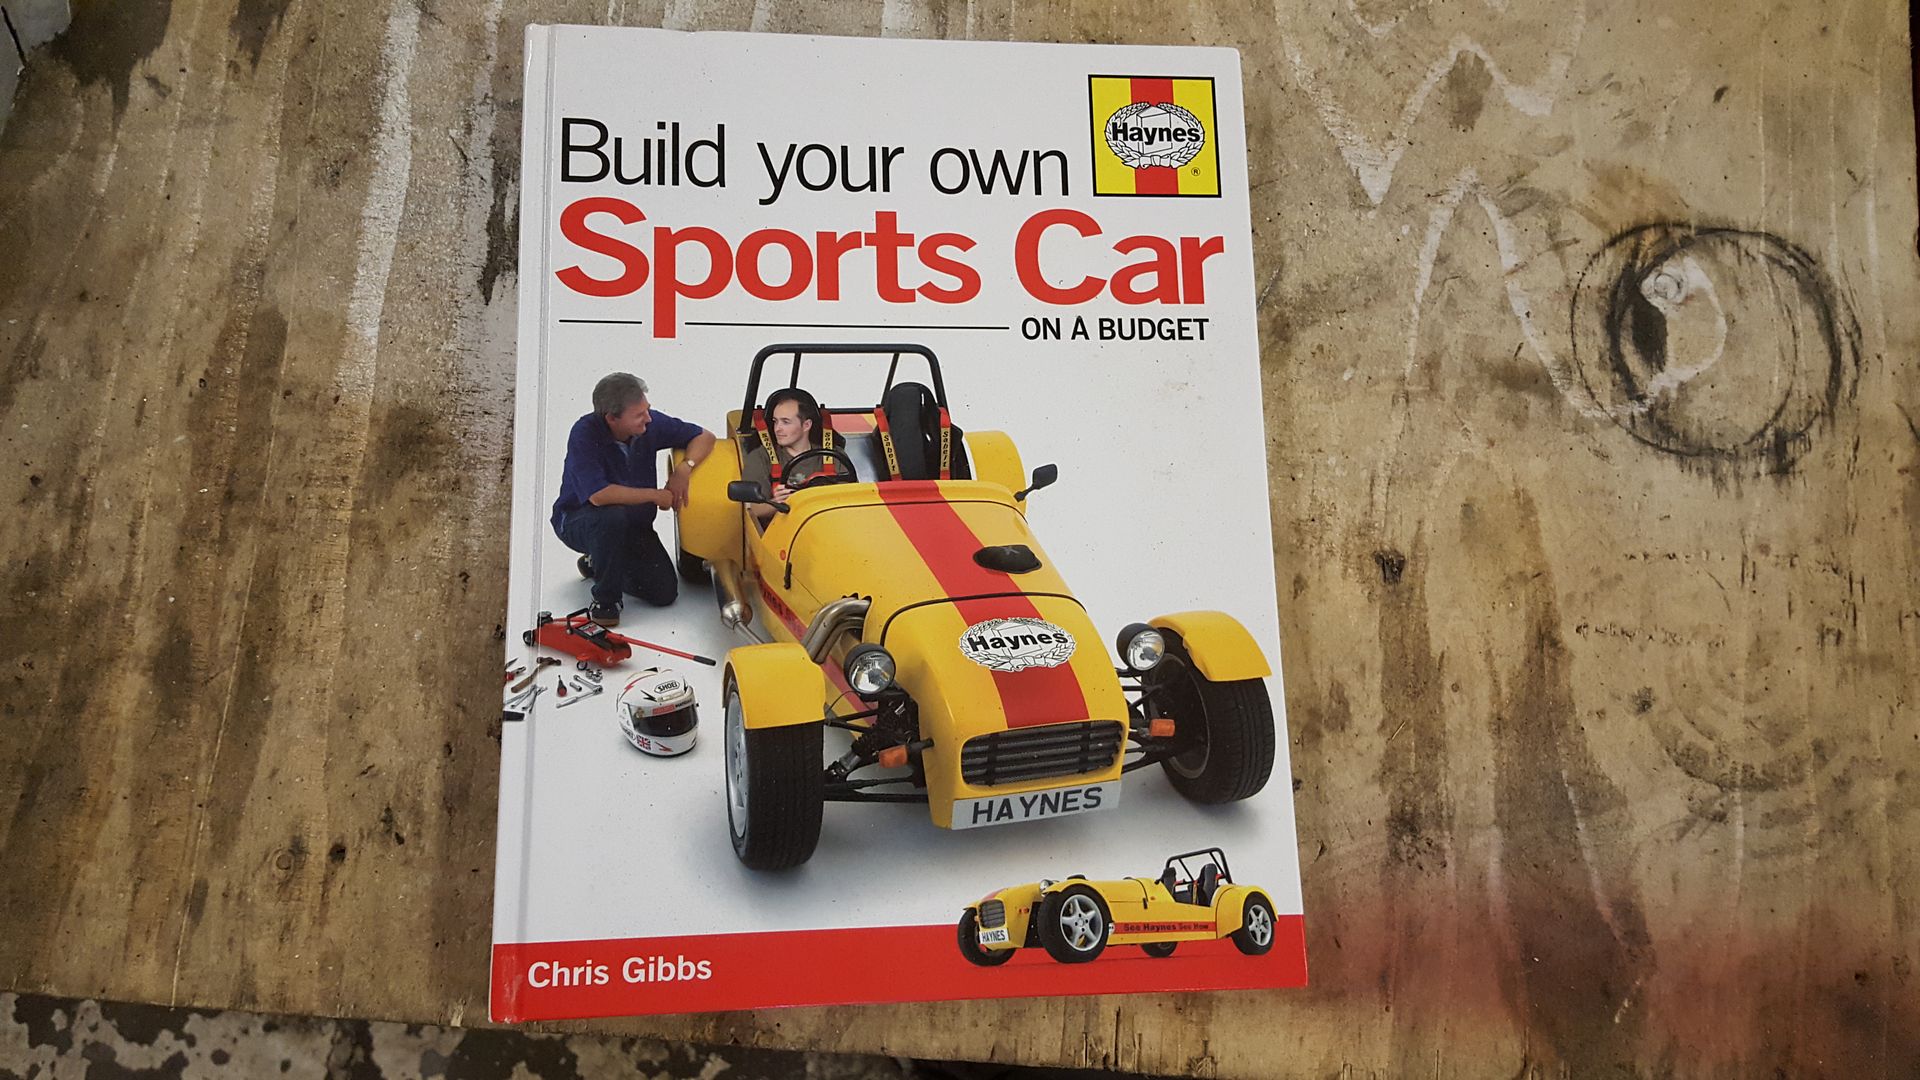
i got a book to check it all out
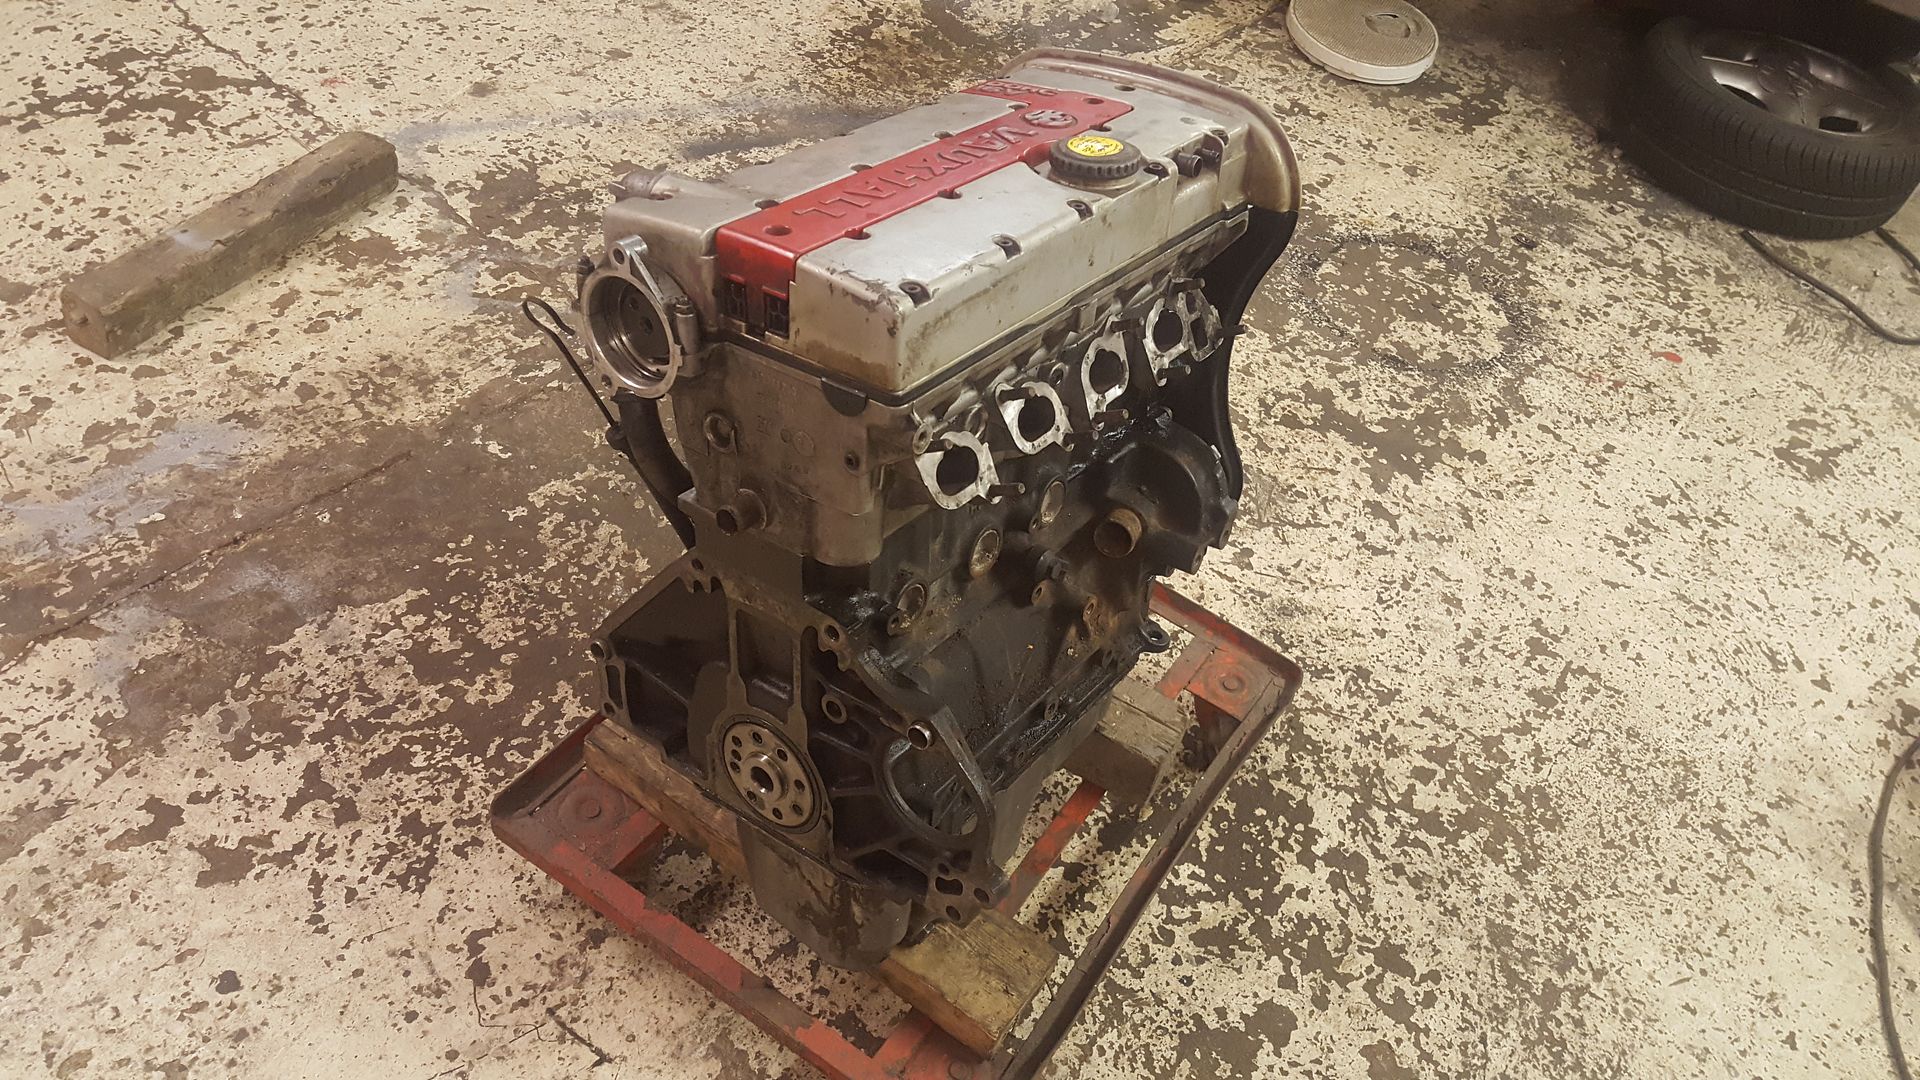
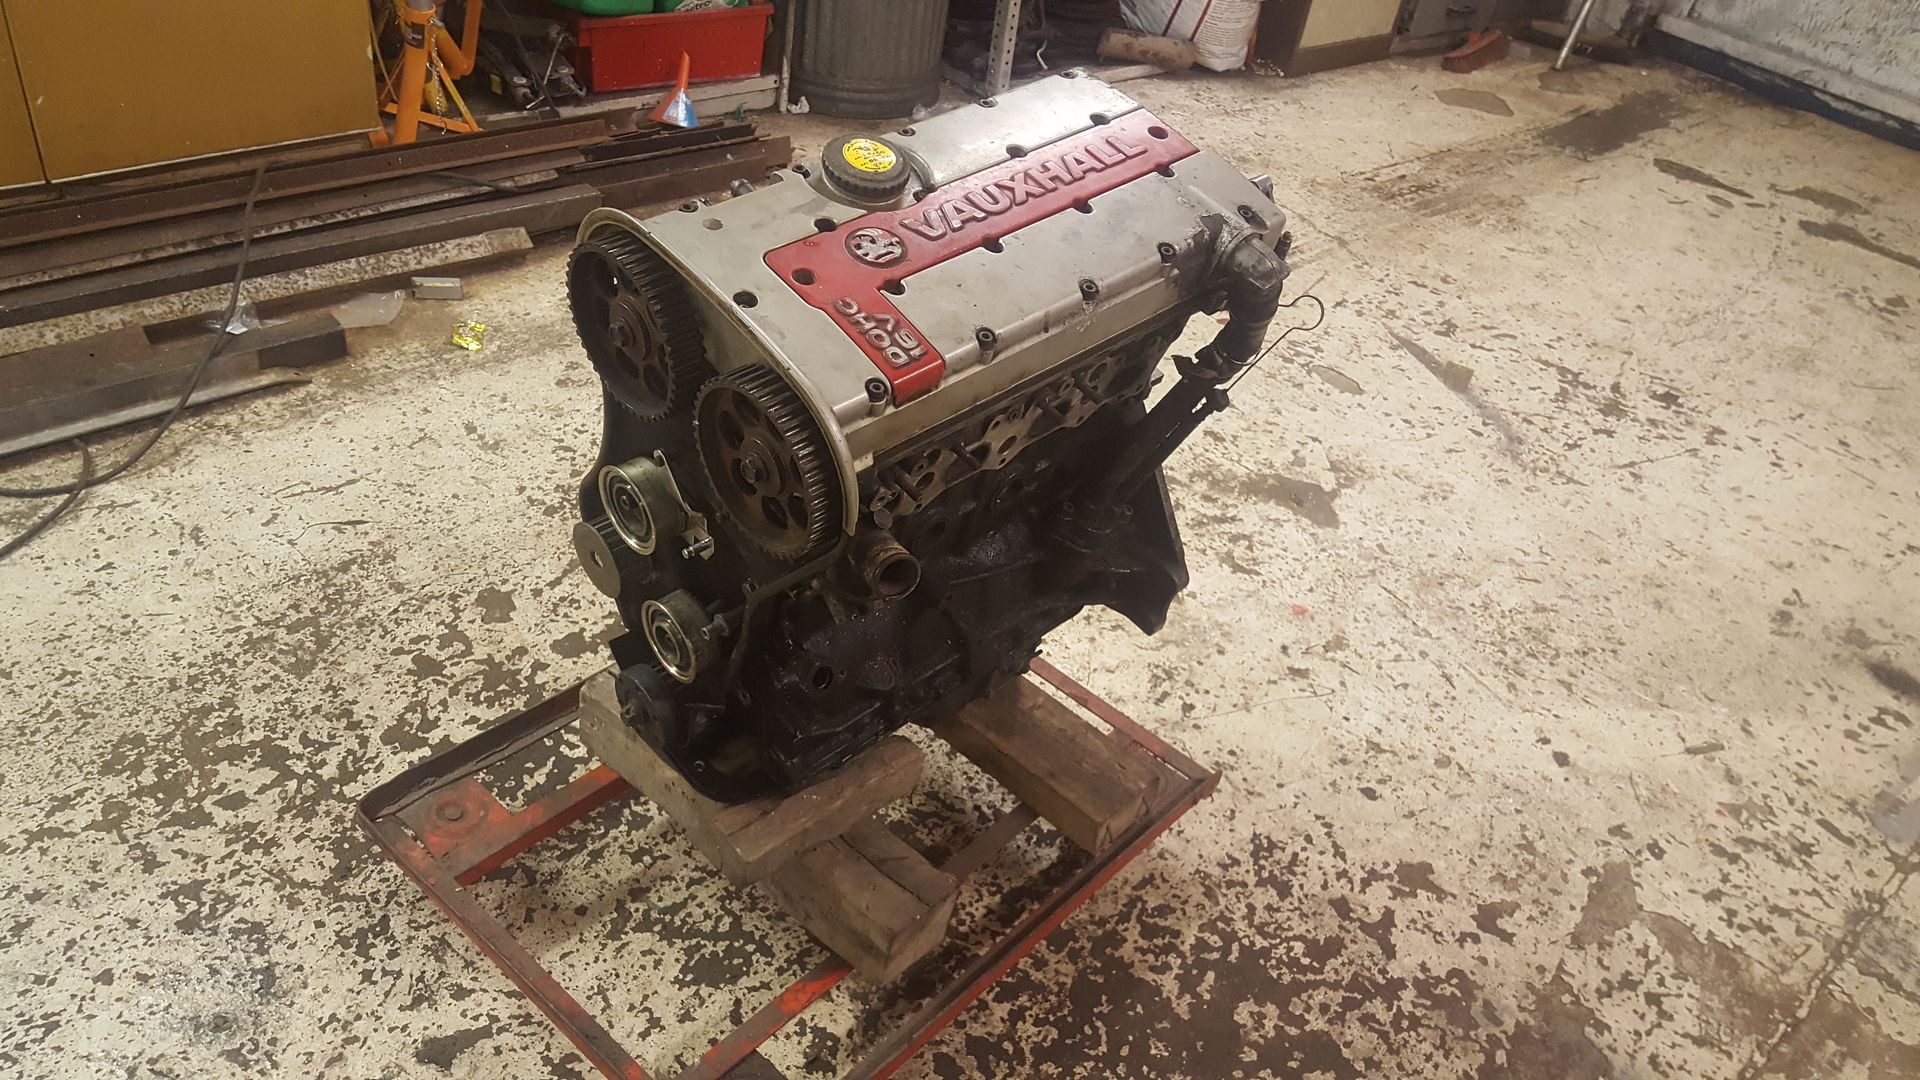
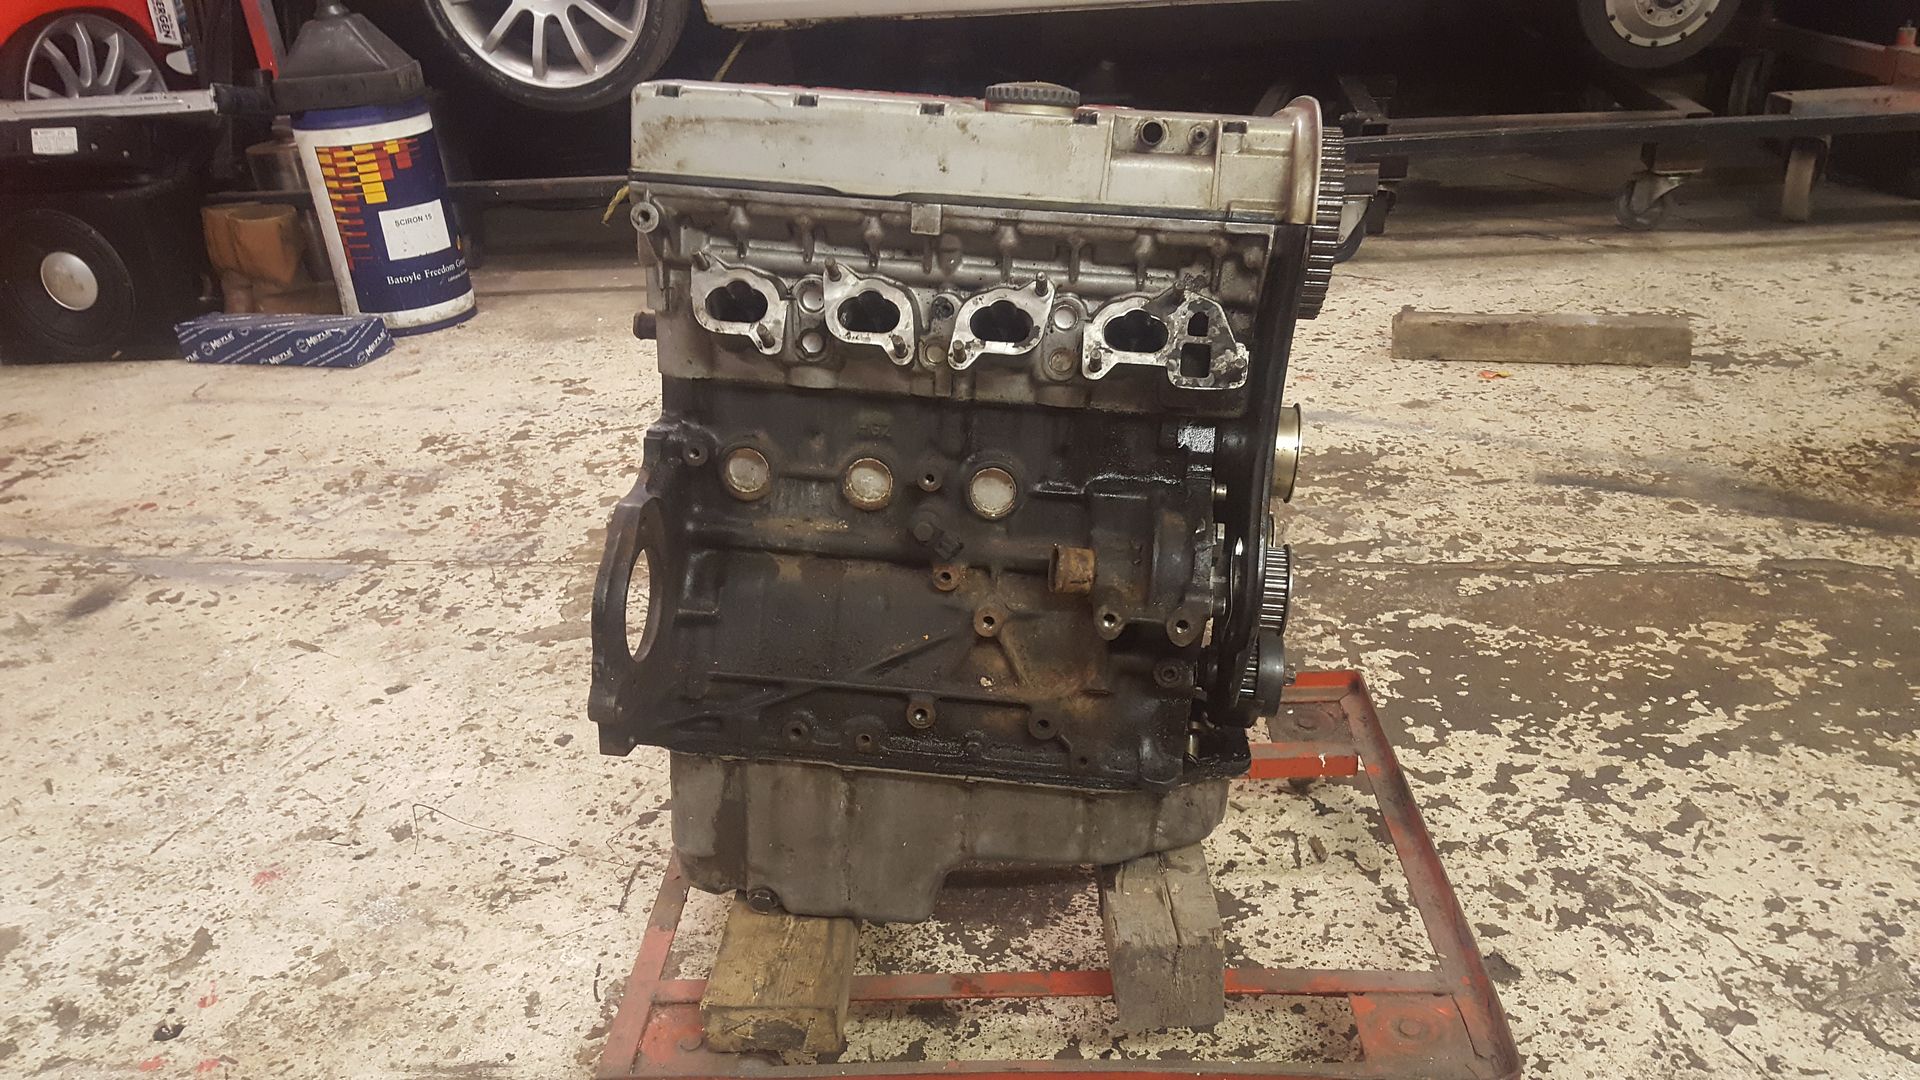
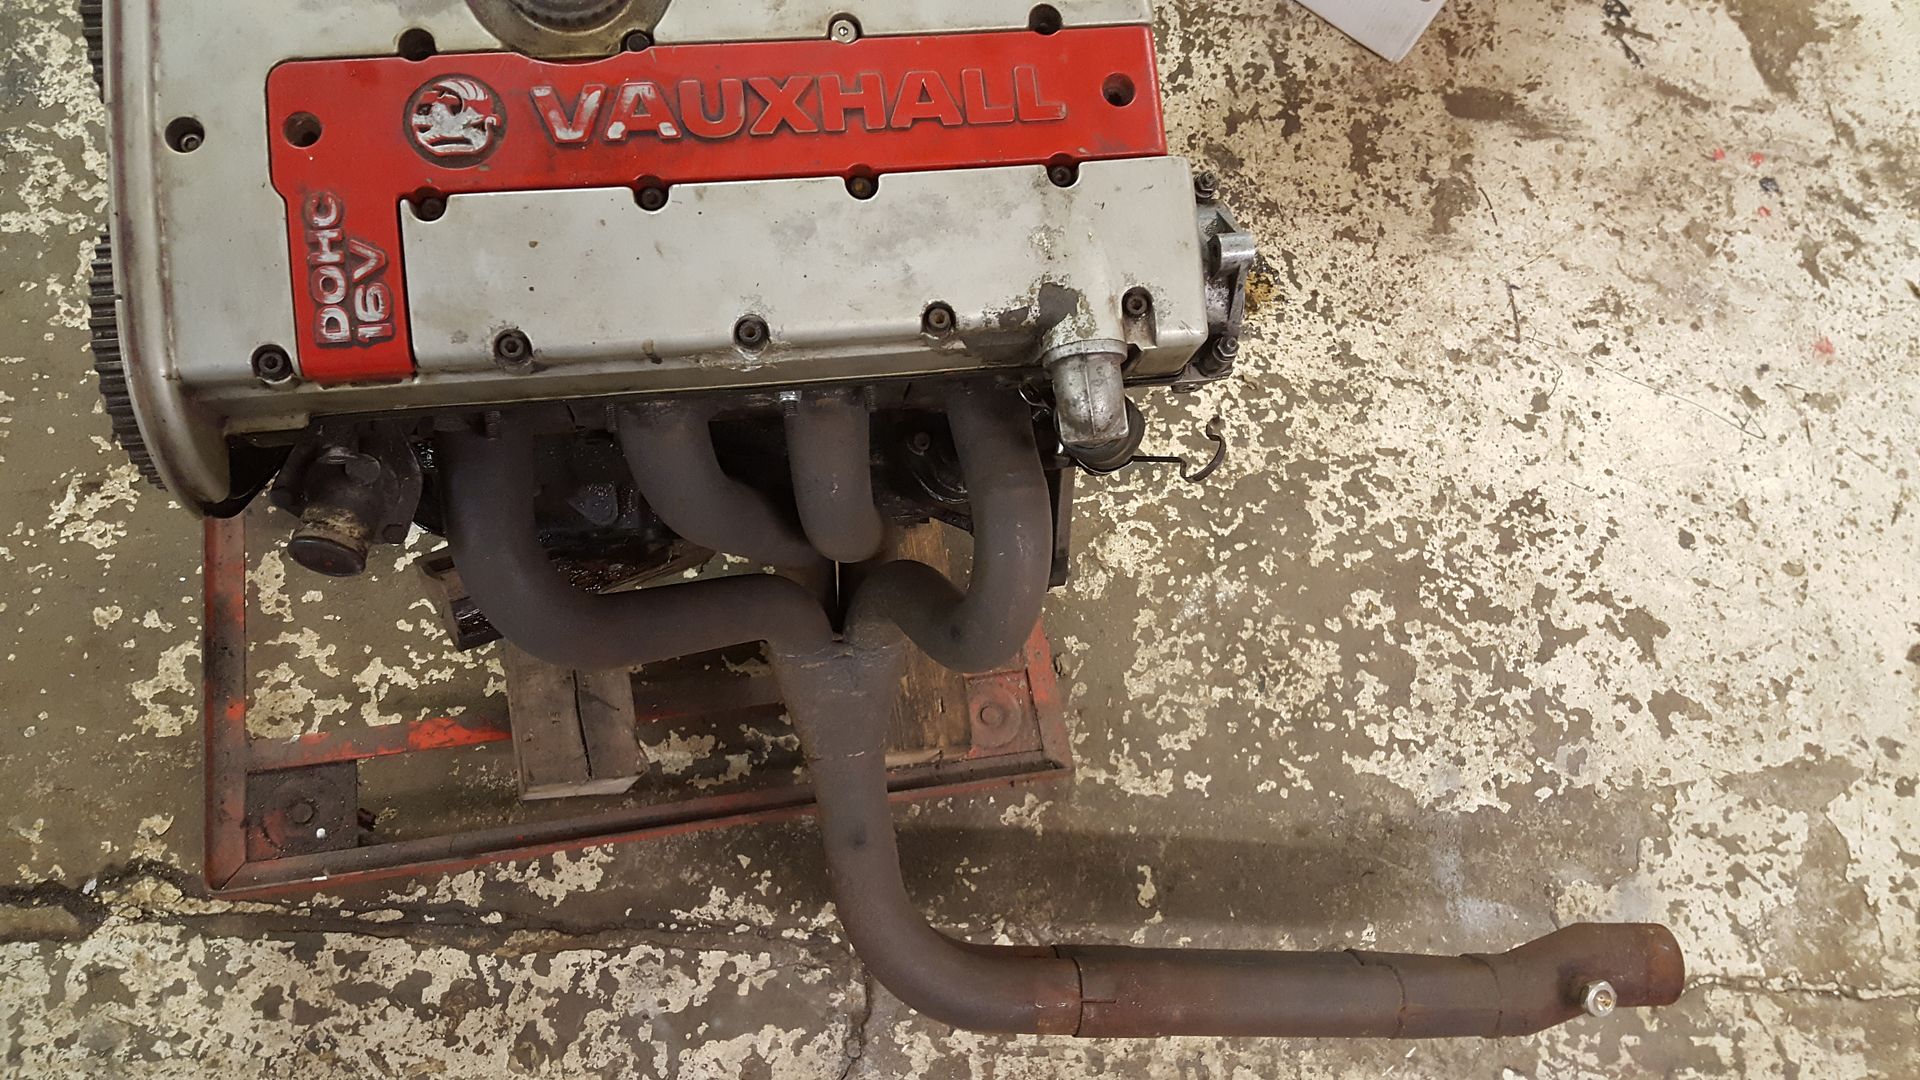
Although i may have deviated to ze germans the last few years, i am Vauxhall at heart so there was only ever going to be one choice for a power
plant.... C20XE 
8 odd years ago when i started a Vauxhall Astra rwd project i planned to use a high powered C20LET in rwd configuration, meaning i have loads of bits
laying around as i am now going to use a different power plant.
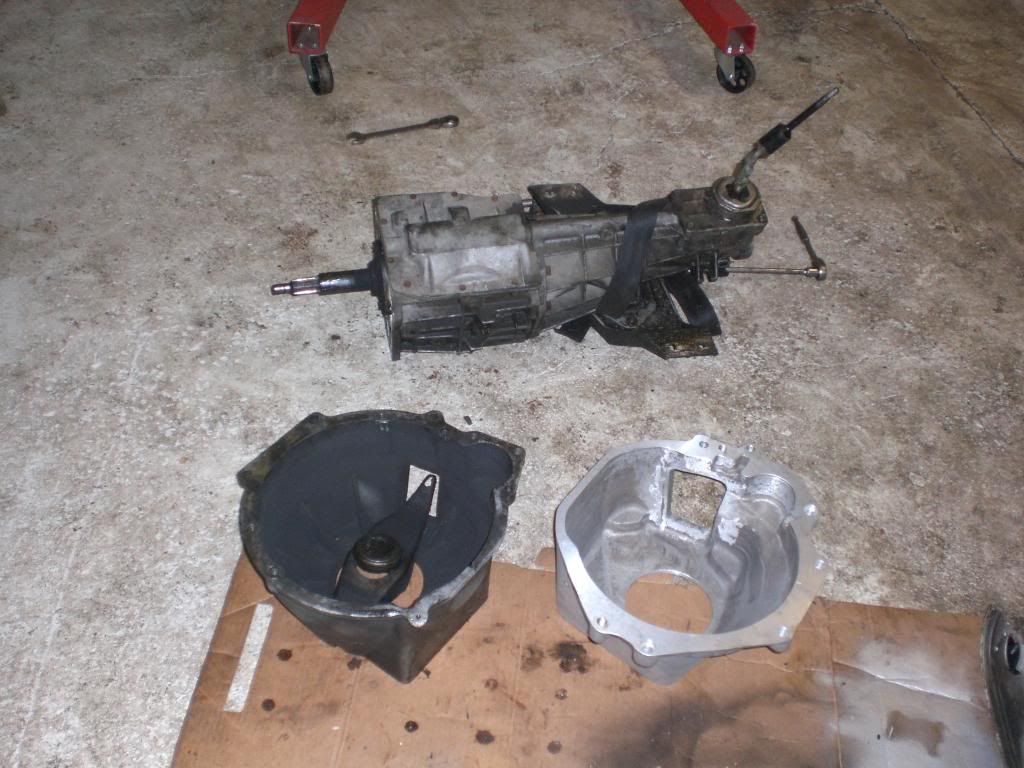
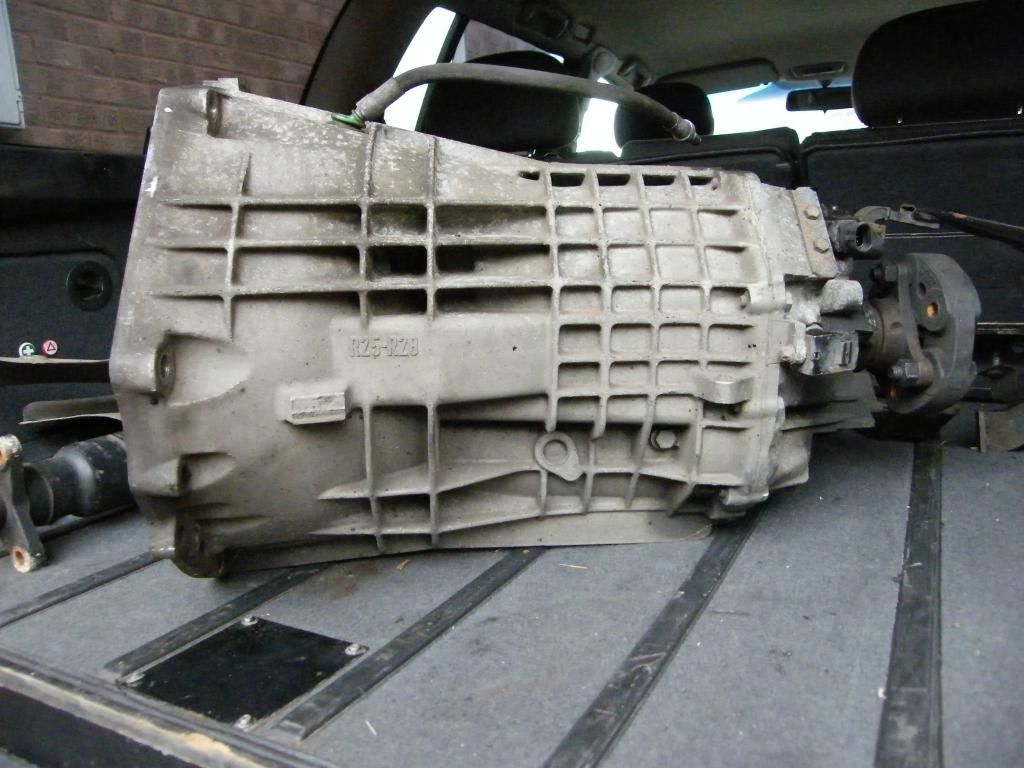
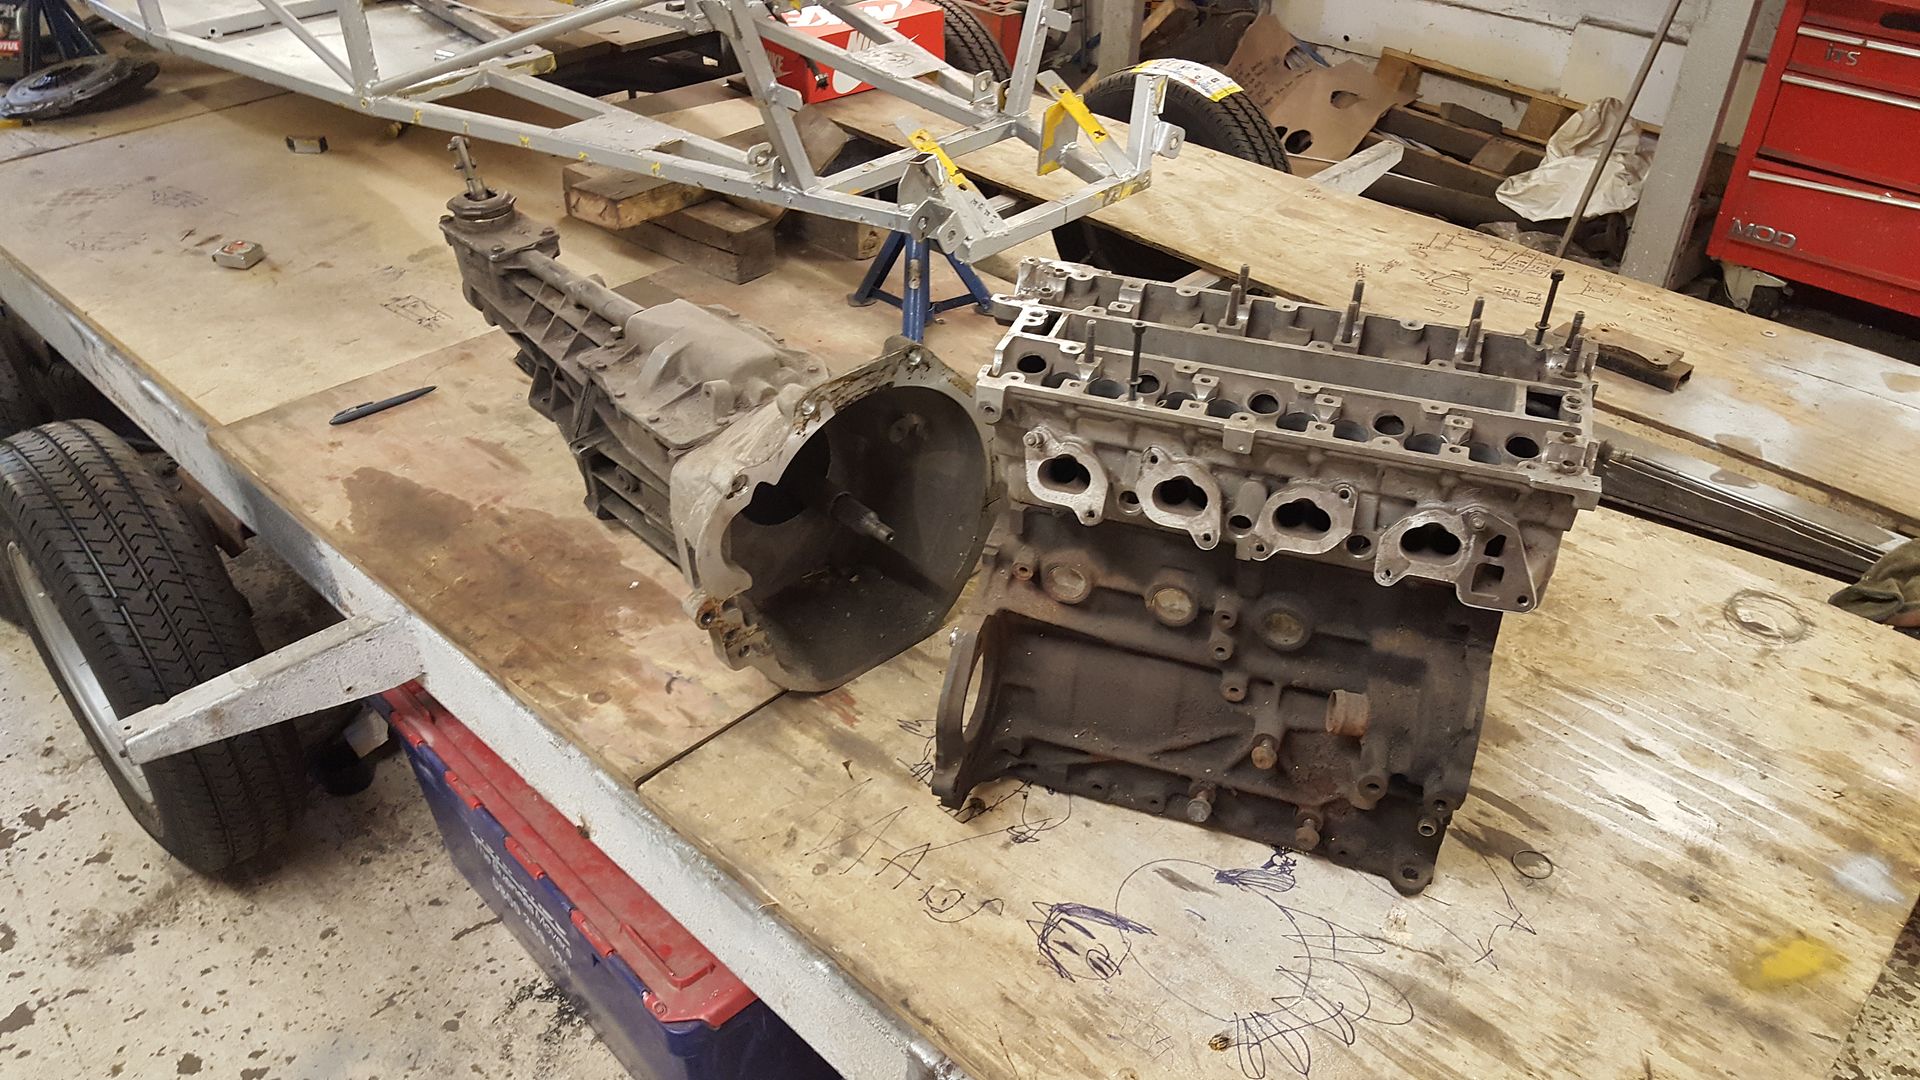
i had a good Cosworth T5 gearbox (back in the days when you could pick them up for under 100quid
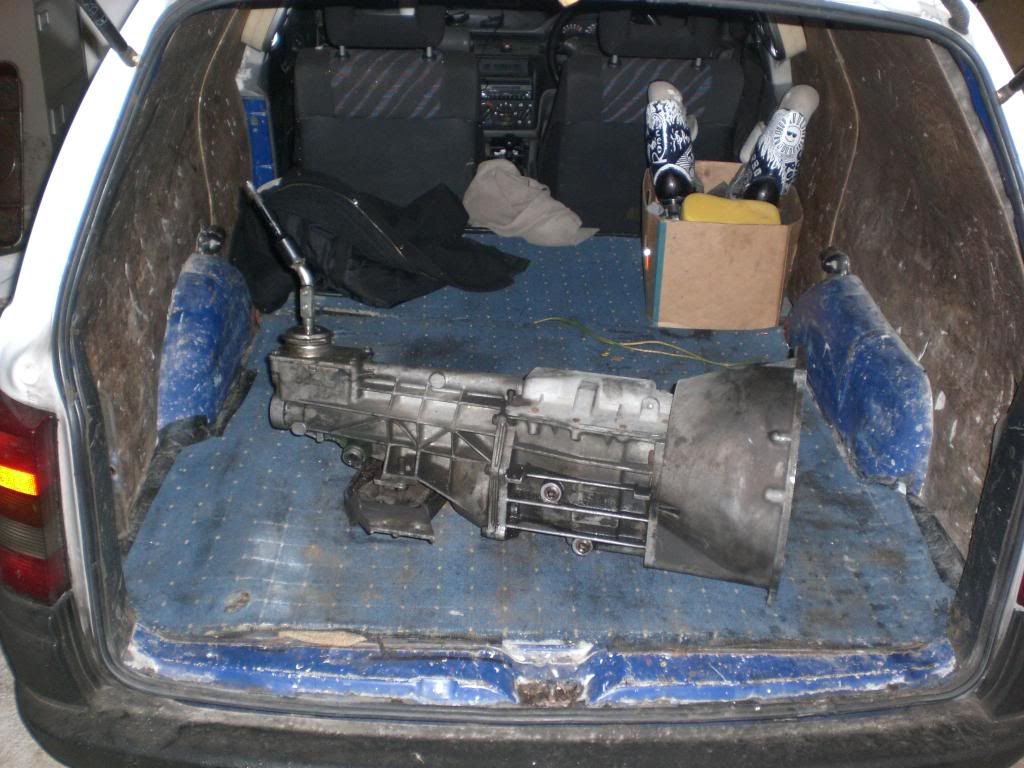
and a A-frame engineering bellhousing adapter
and then for 8 years that has sat under my drill bench :lmao:
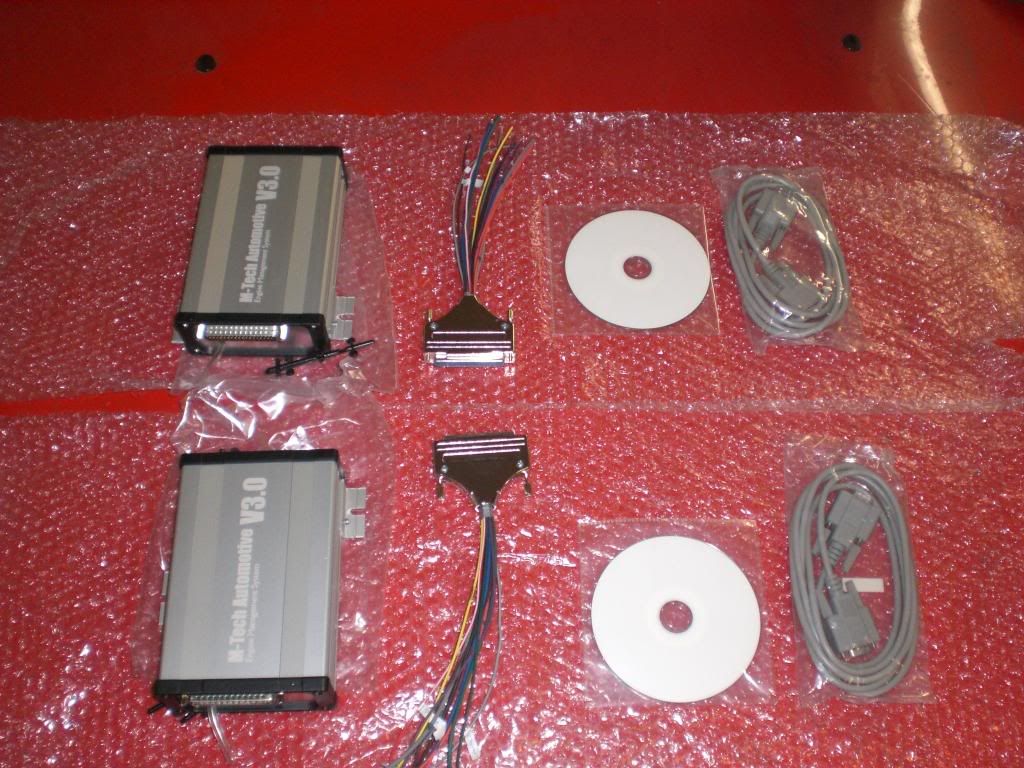
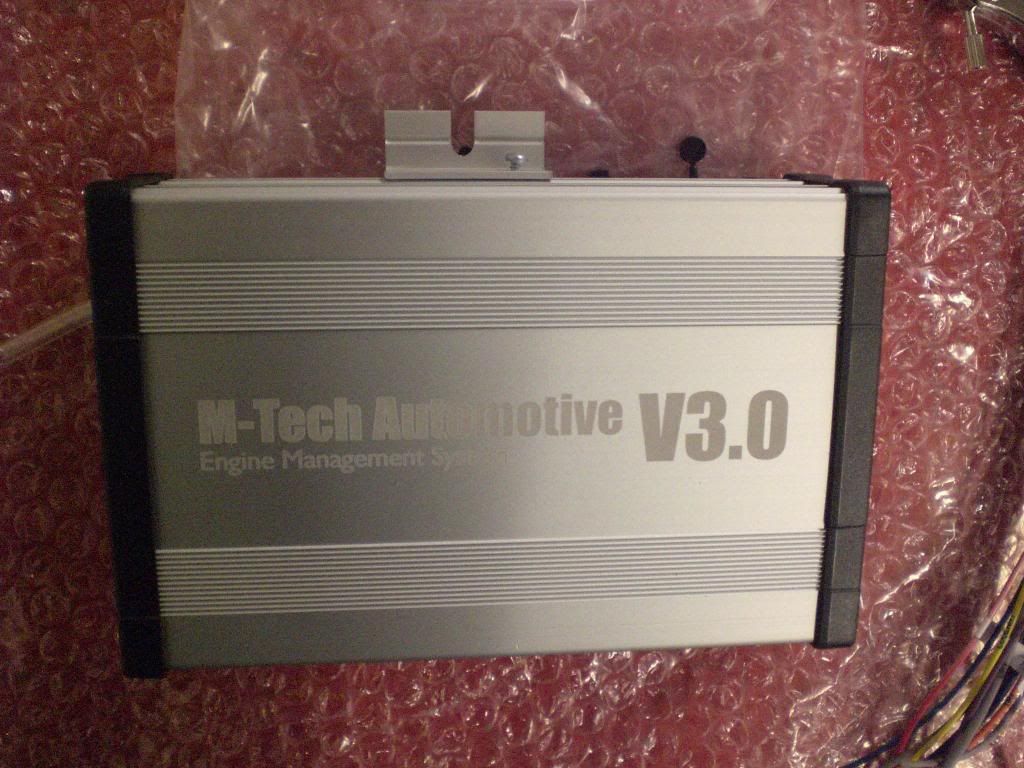
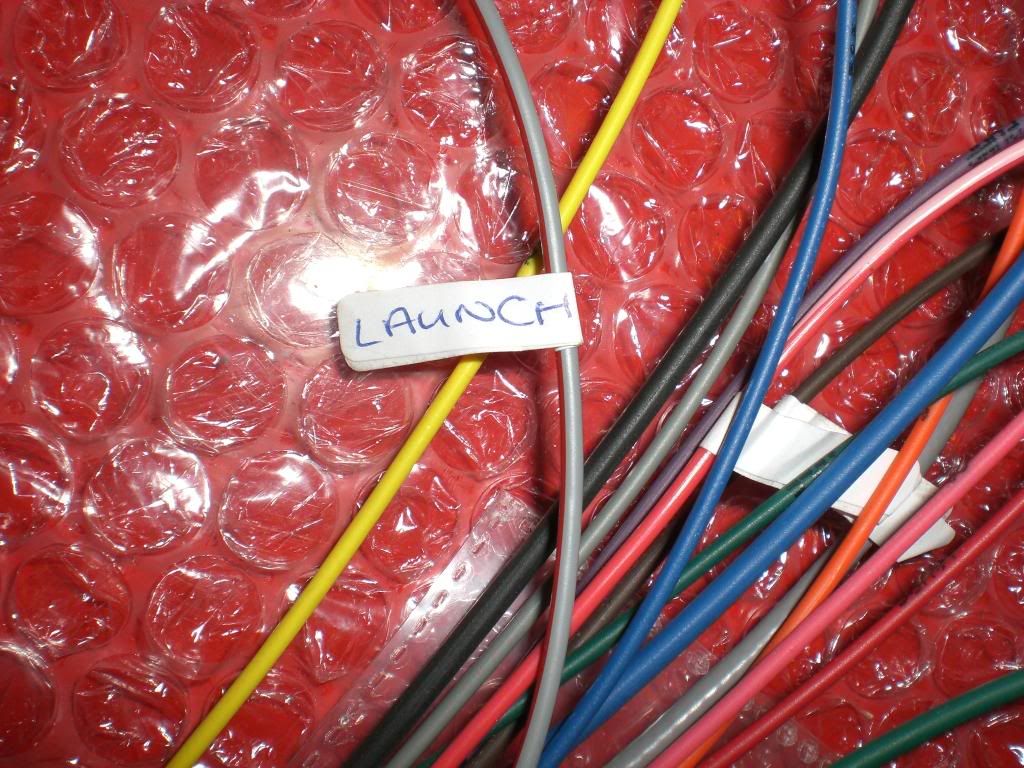
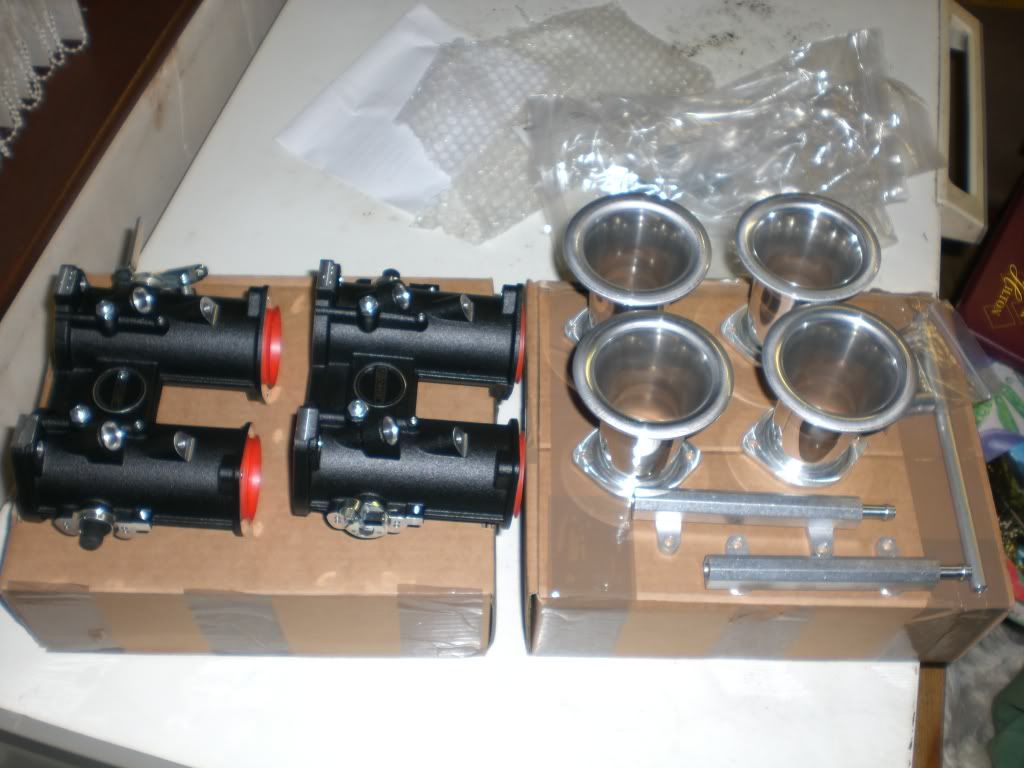
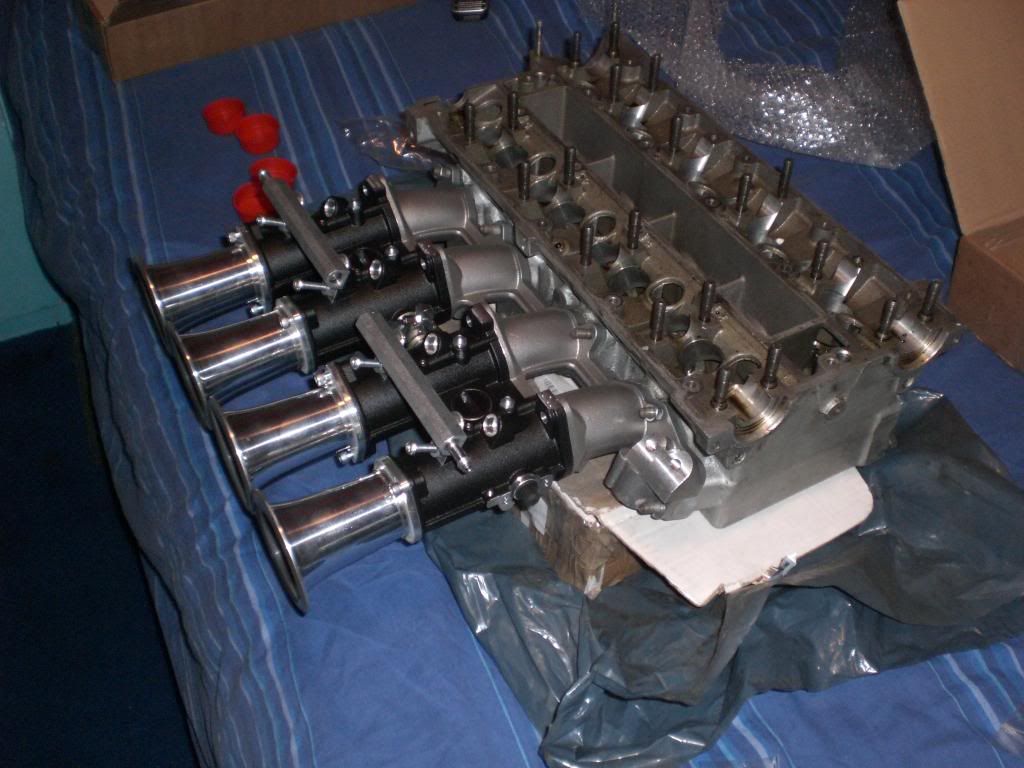
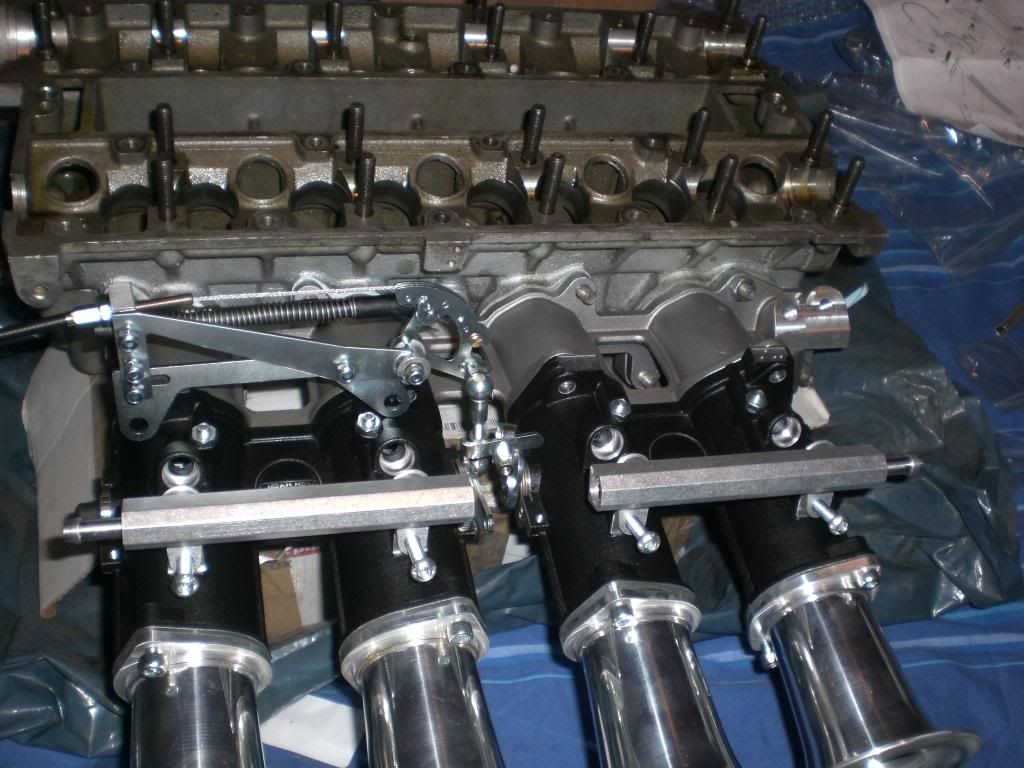
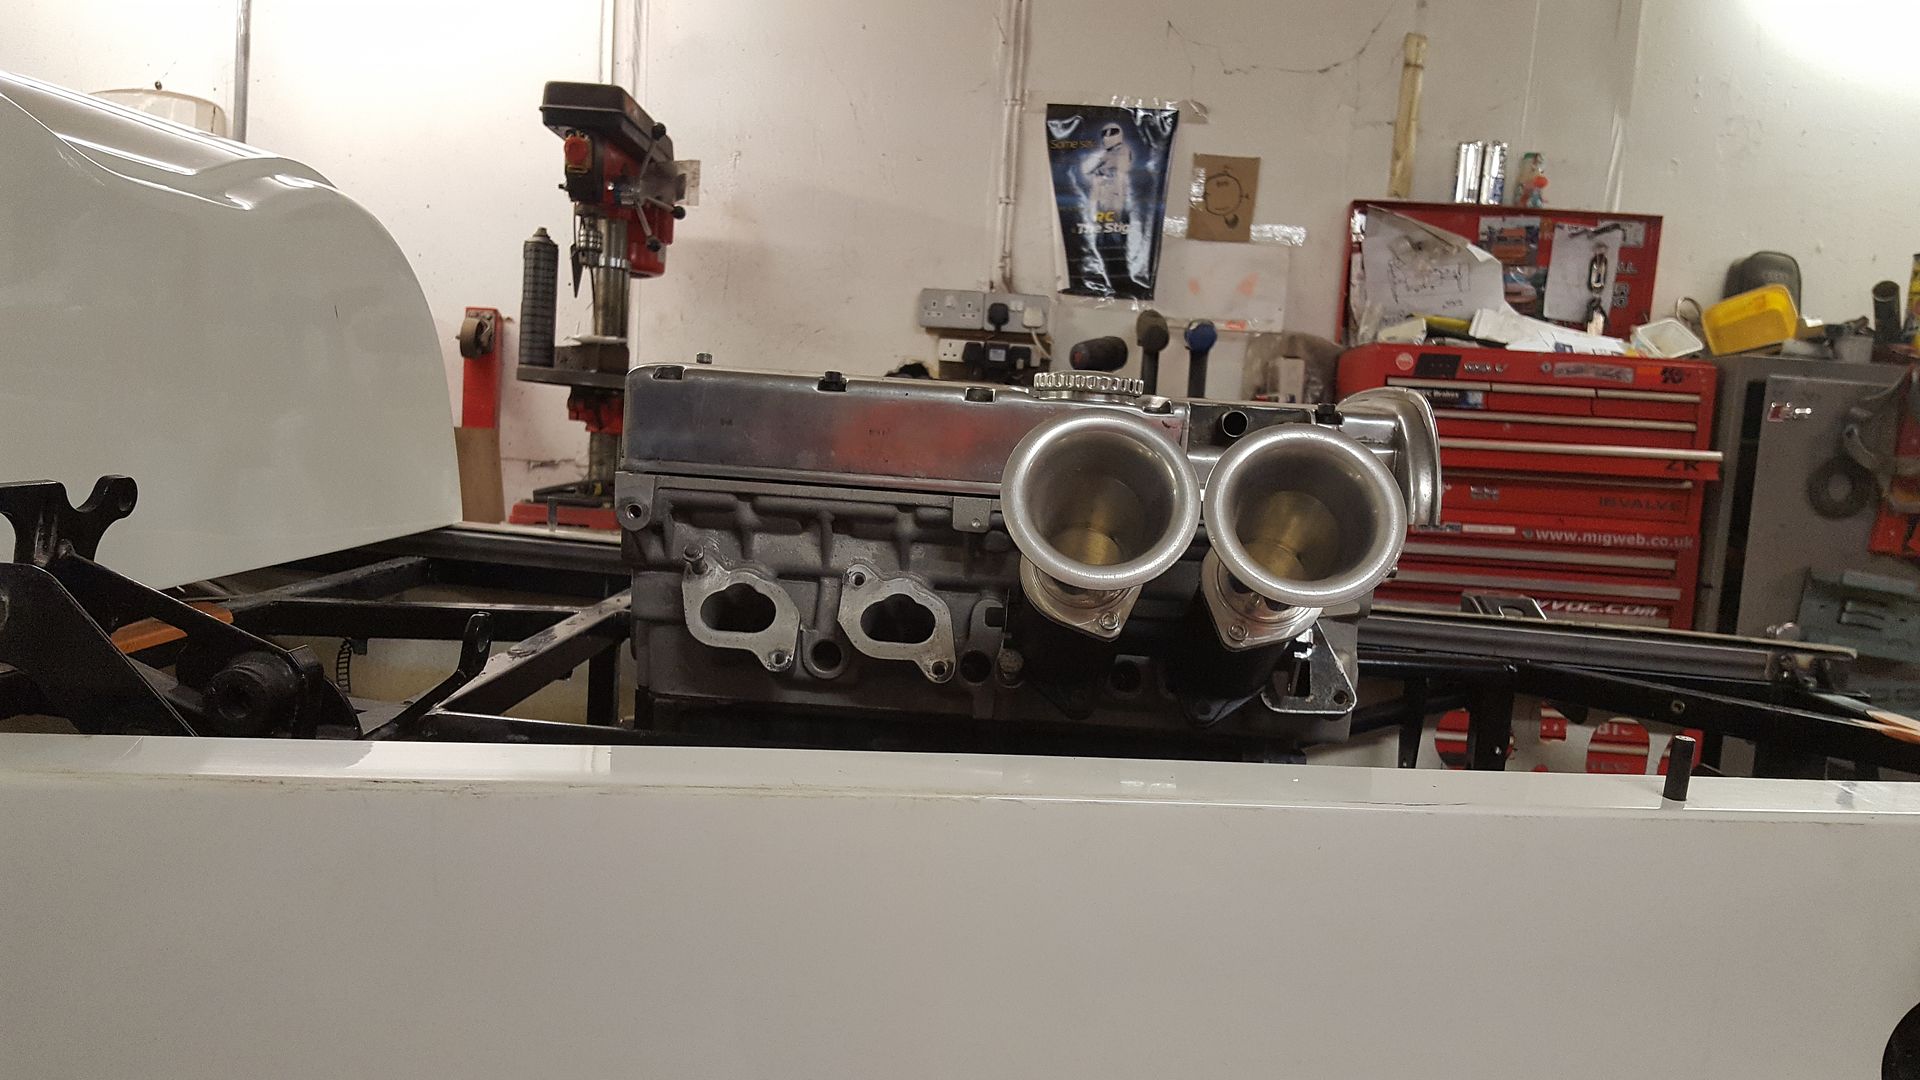
Also back in 2009 i bought Mtec aftermarket managment (with launch control) and jenvey throttle bodies
i also have things like a solid T5 mount
and a yukspeed xe rwd sump (although i dont know if ill use this)
all of that has just been sitting in boxes in a top secret location for 8 plus years, and is all still like new :lol:
It will most probably be a standard refreshed c20xe with throttle bodies and the mtech, and a few ARP bolts holding it together and should be
180-200bhp at a guess to start with.
i keep remembering other odd bits and pieces as i go along i have in stoarage.
I will be building this to spec to get it IVA'd and fully road legal once finished. and be using it for track days and good blasts out on the
road.
Anyone thats been through the process is welcome to fire any pointers as i go on the way, anything that i've drastically overlooked.
Hope to get progress here and there so stay tuned
Andybarbet - 6/5/17 at 08:20 PM
Bargain :-)
The coilovers alone pretty much cover what you paid for the car & getting hold of some untouched MNR bodywork was a hens teeth find too.
Keep the photos coming.
neilp1 - 7/5/17 at 08:15 AM
Agree with you on the welding of the roll bar and I'd cut it straight off and start again.
Good buy there though.
Dick Axtell - 7/5/17 at 04:00 PM
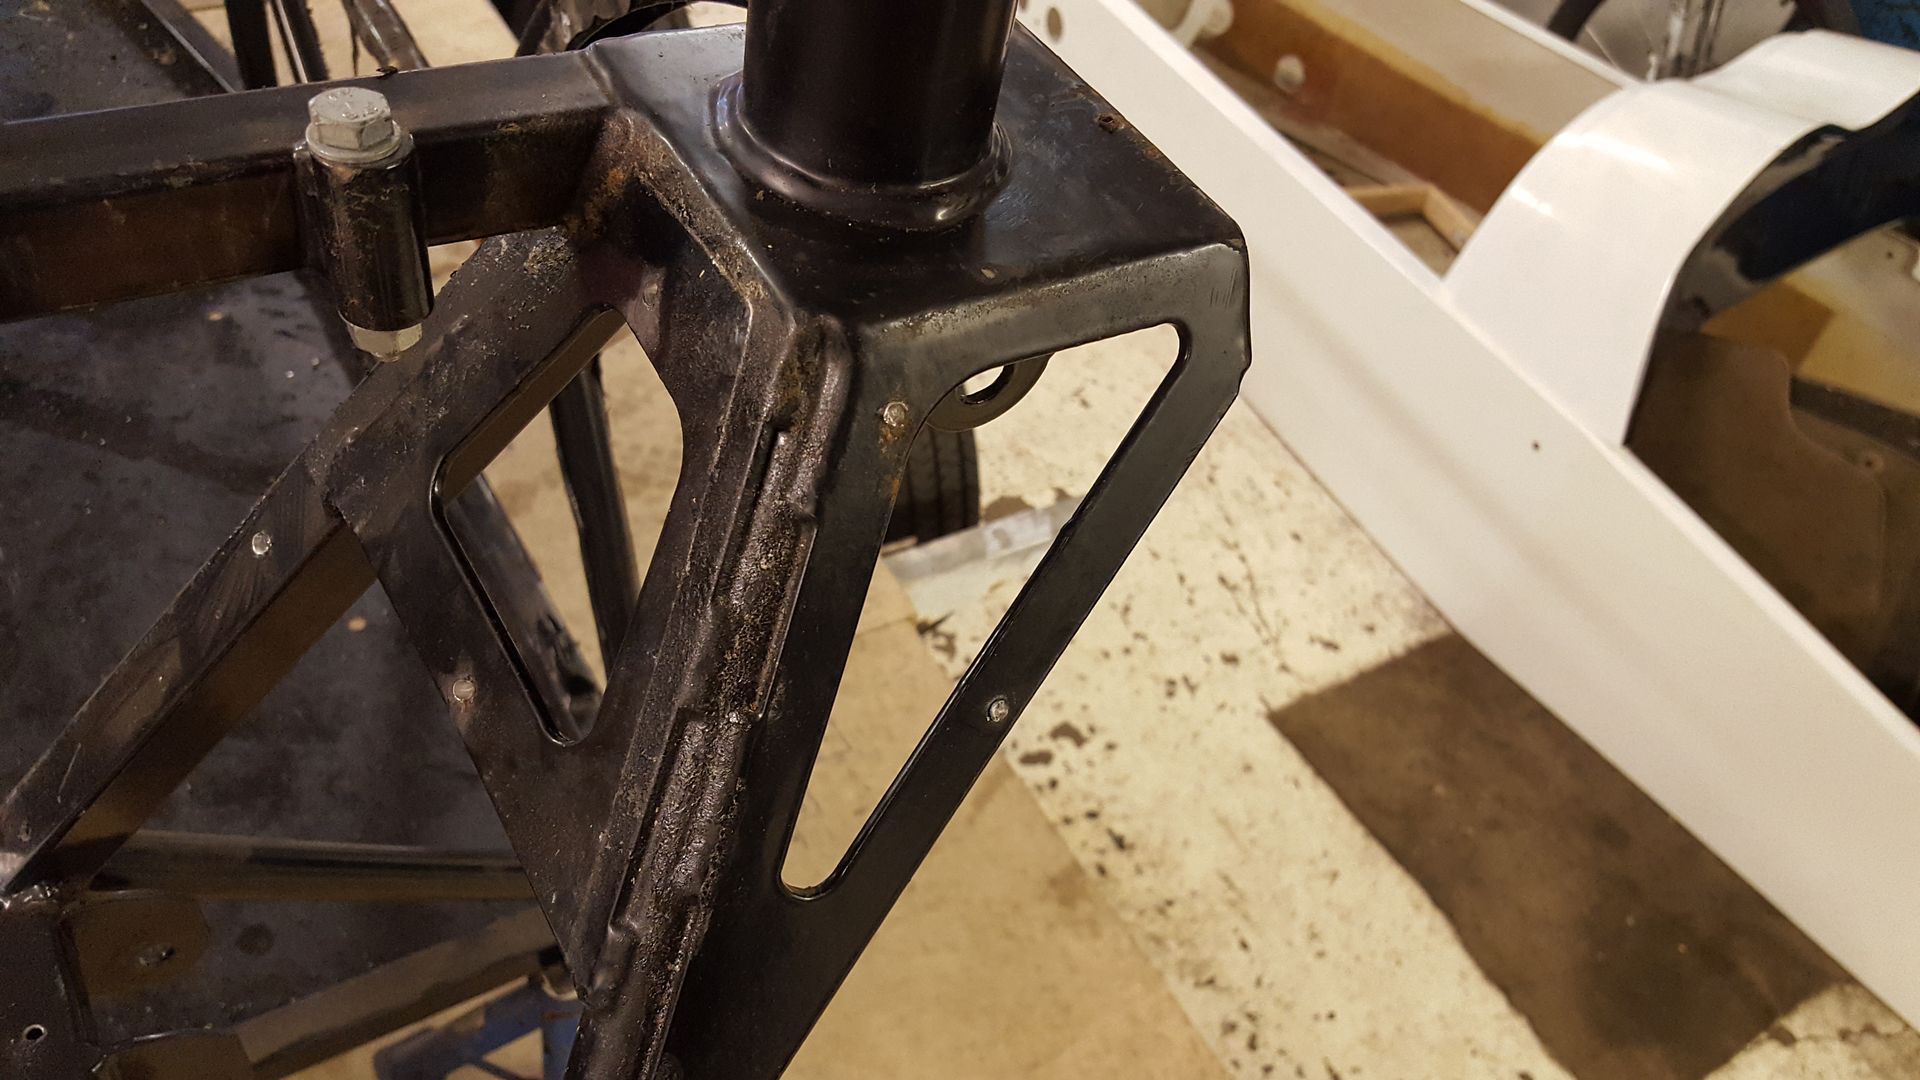
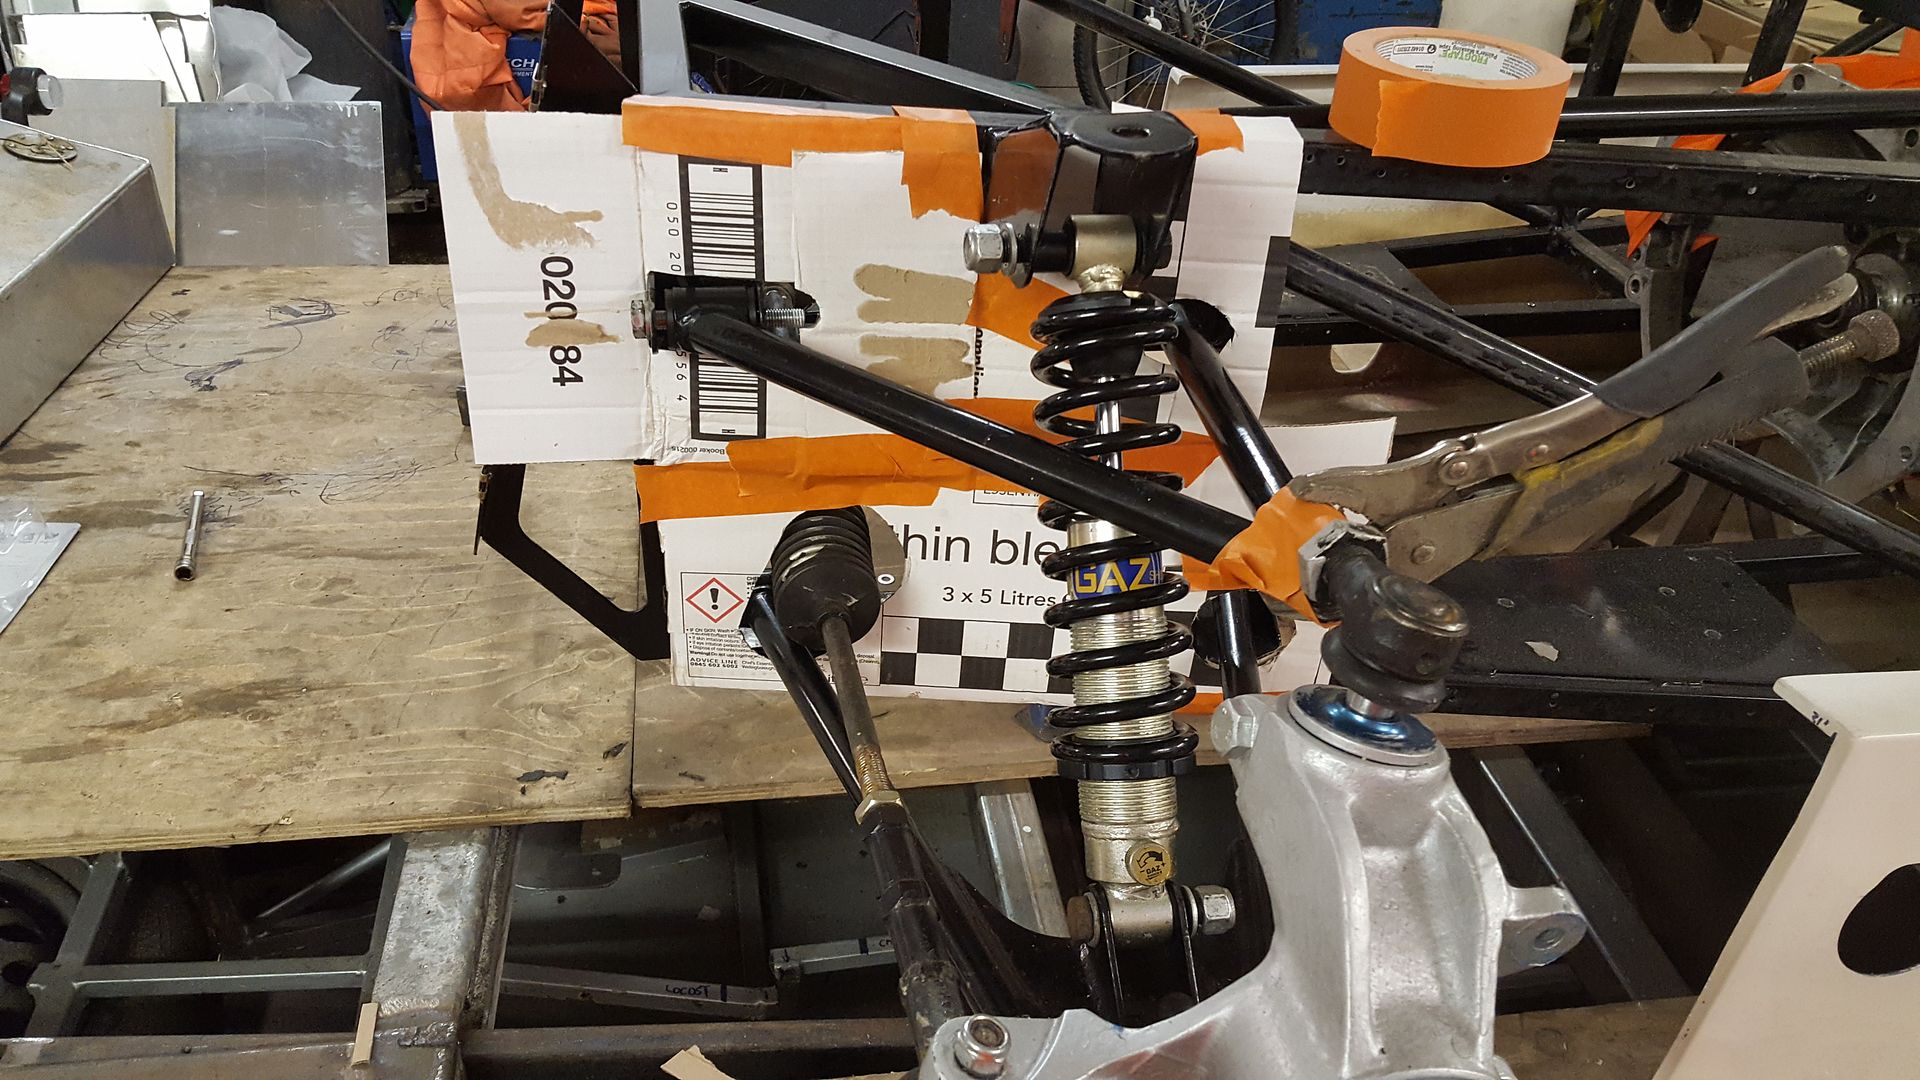
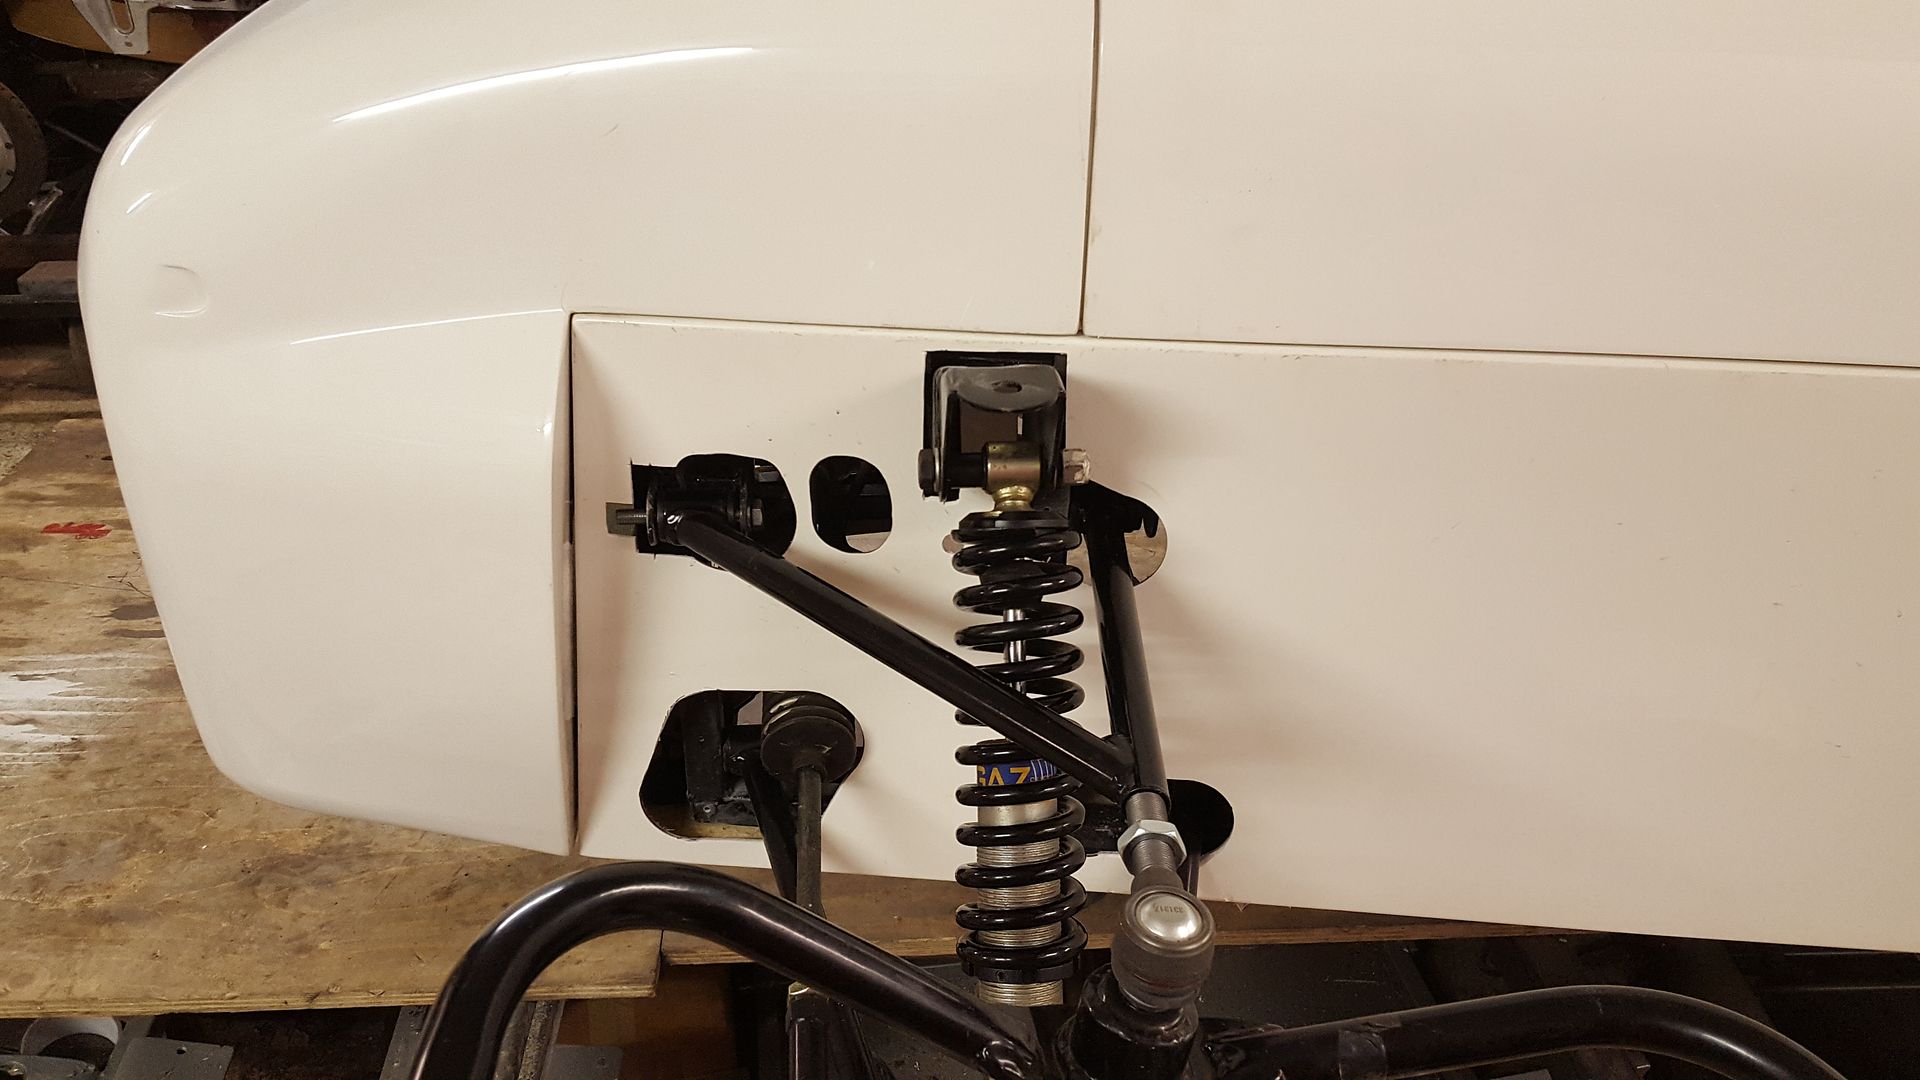
While you're into bracket cutting & re-welding, I would strongly recommend that you re-position the front coil-over upper mounting brackets.
(I didn't, and I regret that now!!) . Other more developed chassis tend to have these upper brkts welded on to the outer side of the top rail.
This brings the coil-over into a slightly more upright position, which helps to counter some "falling rate" tendencies, which have been
reported here, with the more angled style of coil-overs.
With the rear coil-overs, I would also recommend shifting the upper mounting brackets slightly inboard (if its possible). With mine, which appear to
be same as your "new" chassis, with brkts directly under the roll-over bar mounting plate, every time I needed to work on the rears, it
involved lengthy dismantling and removal of various parts. No doubt you'll find that out!
It'll be interesting to see your progress. Whose de Dion set up was used?
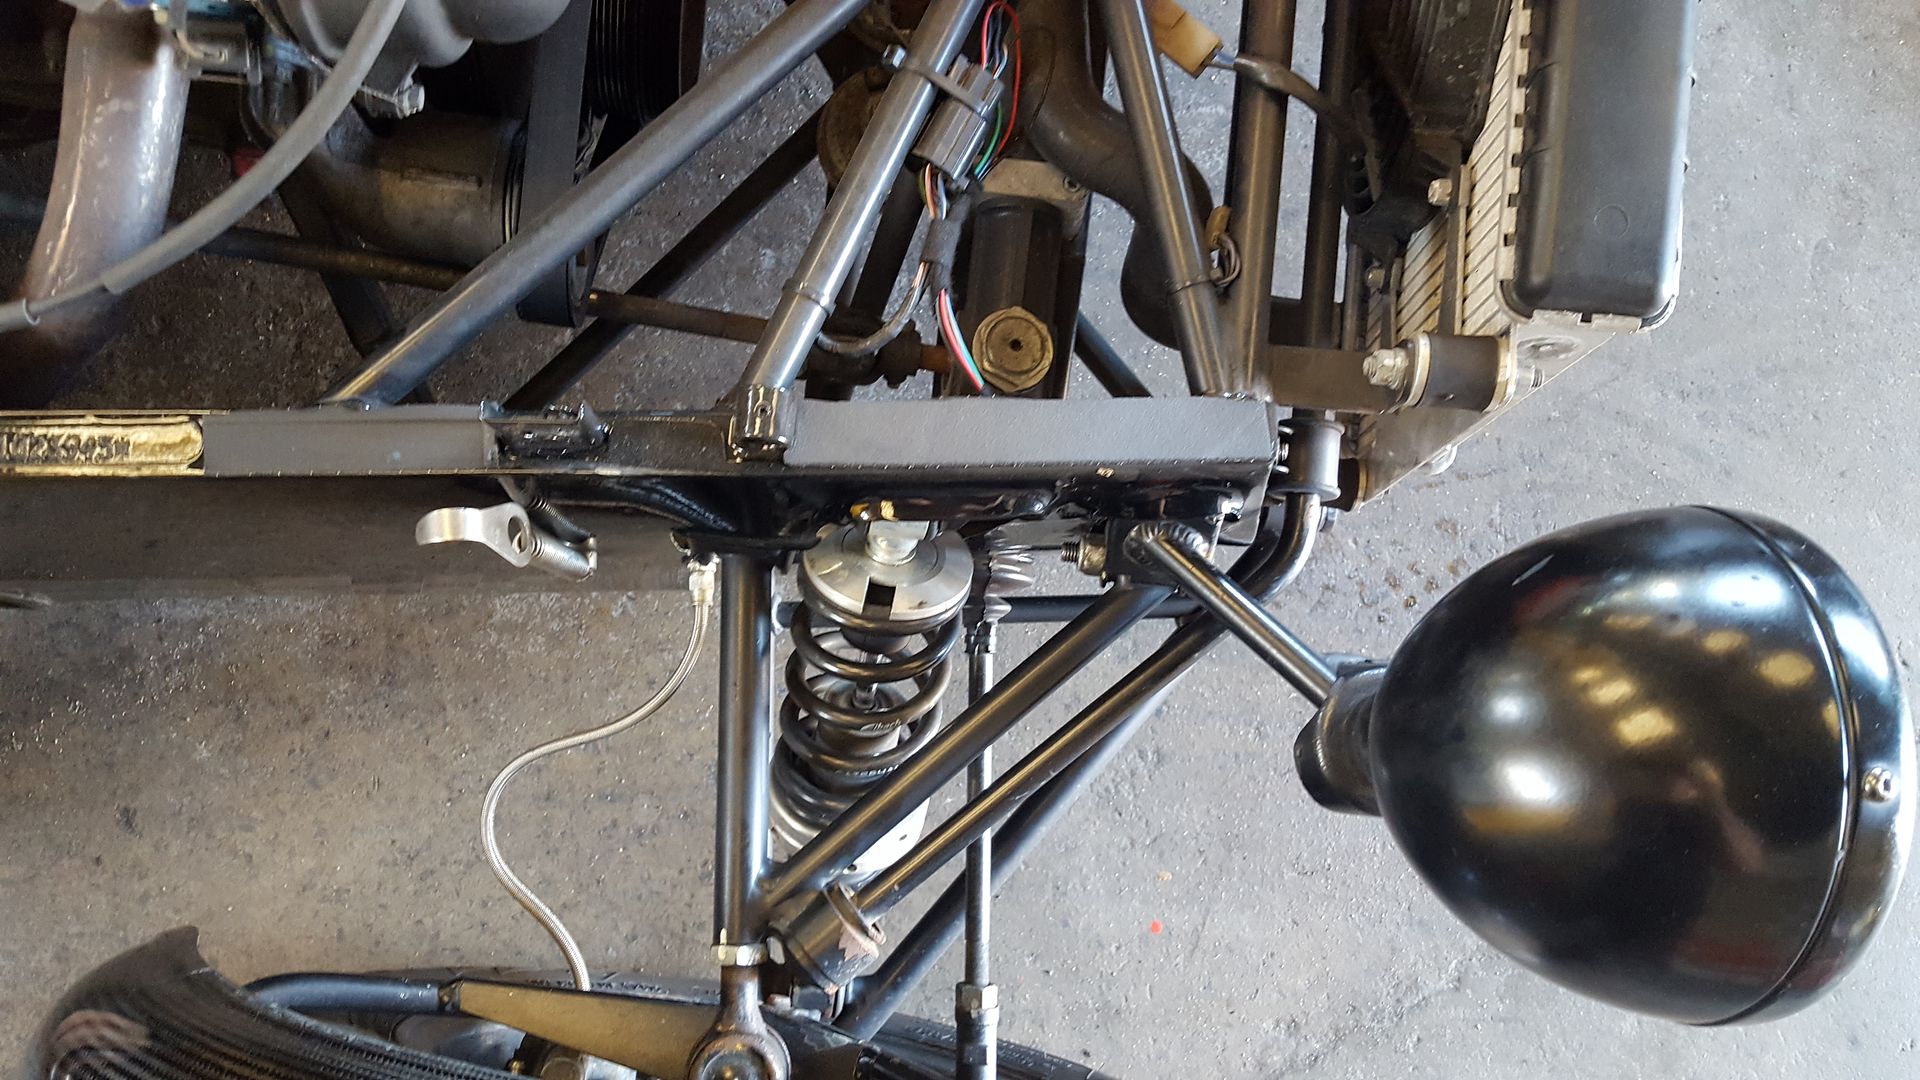
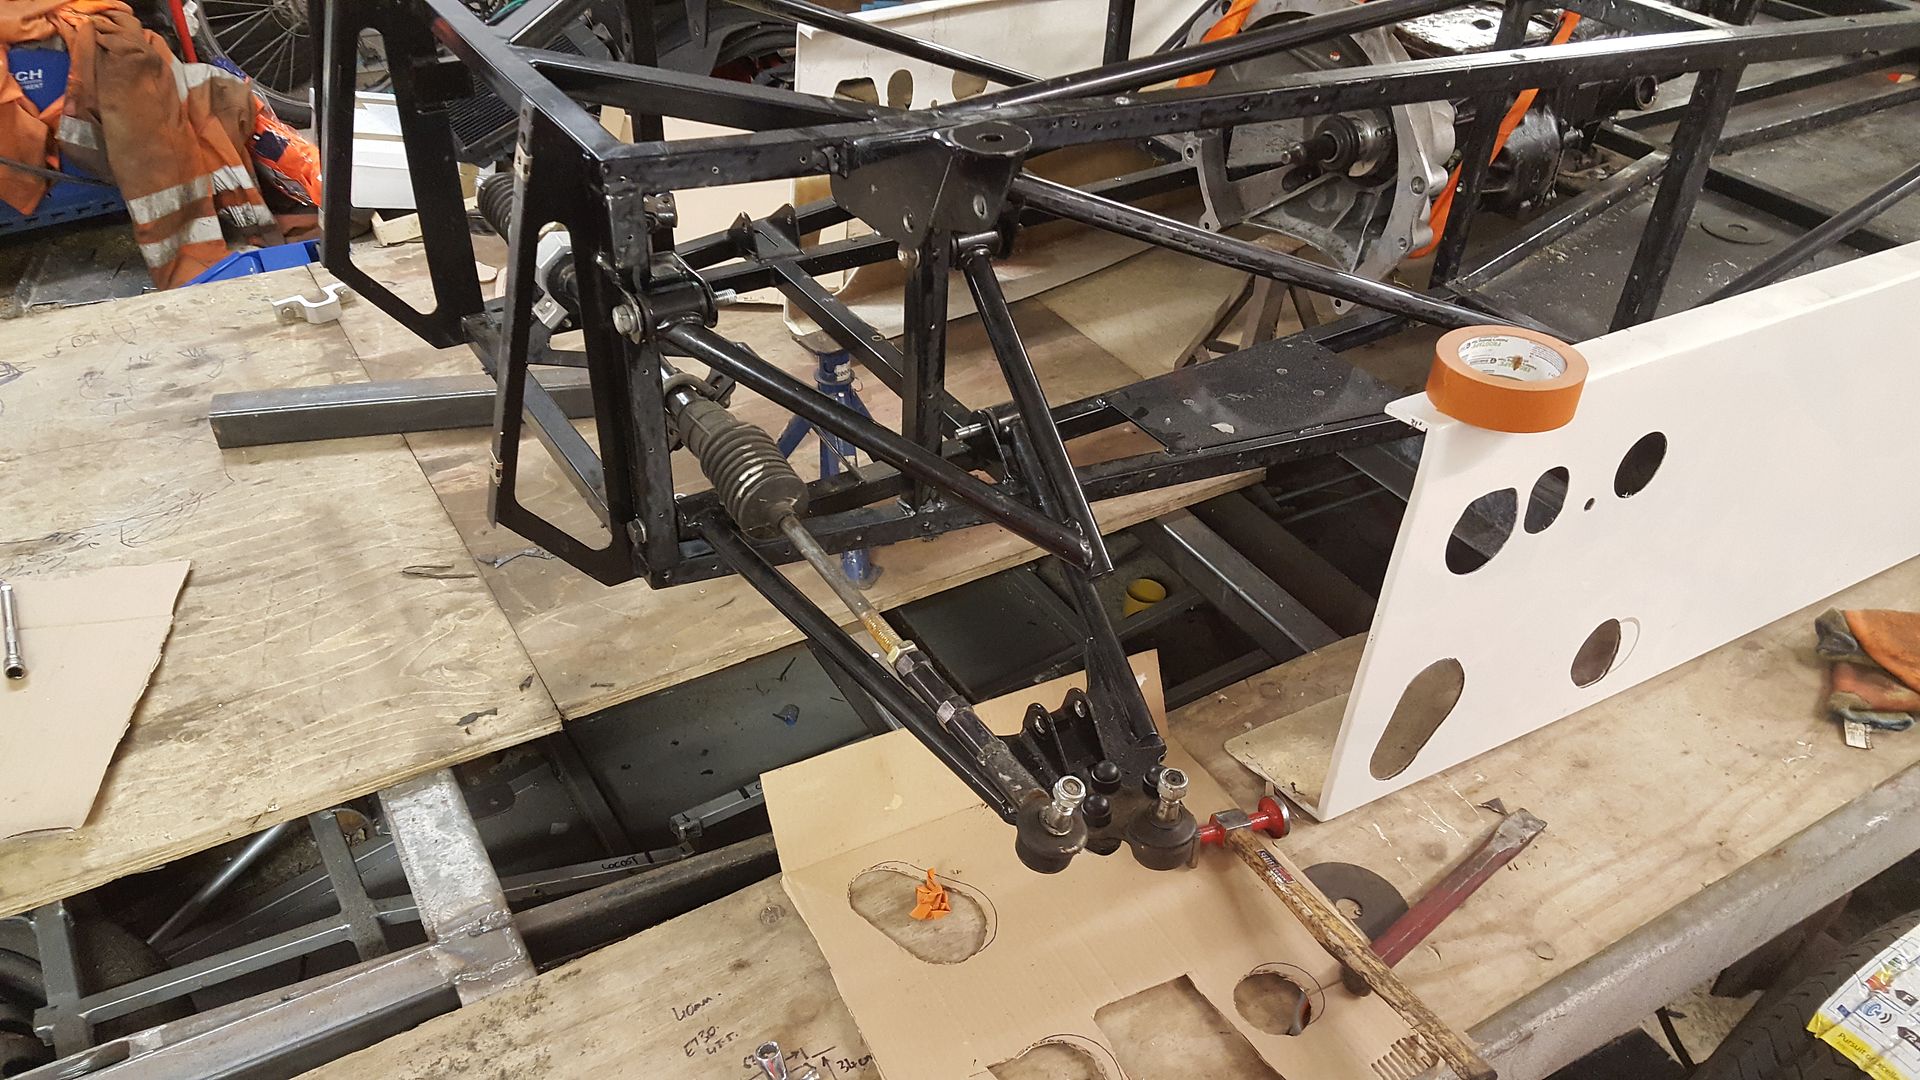
Volvorsport - 7/5/17 at 04:12 PM
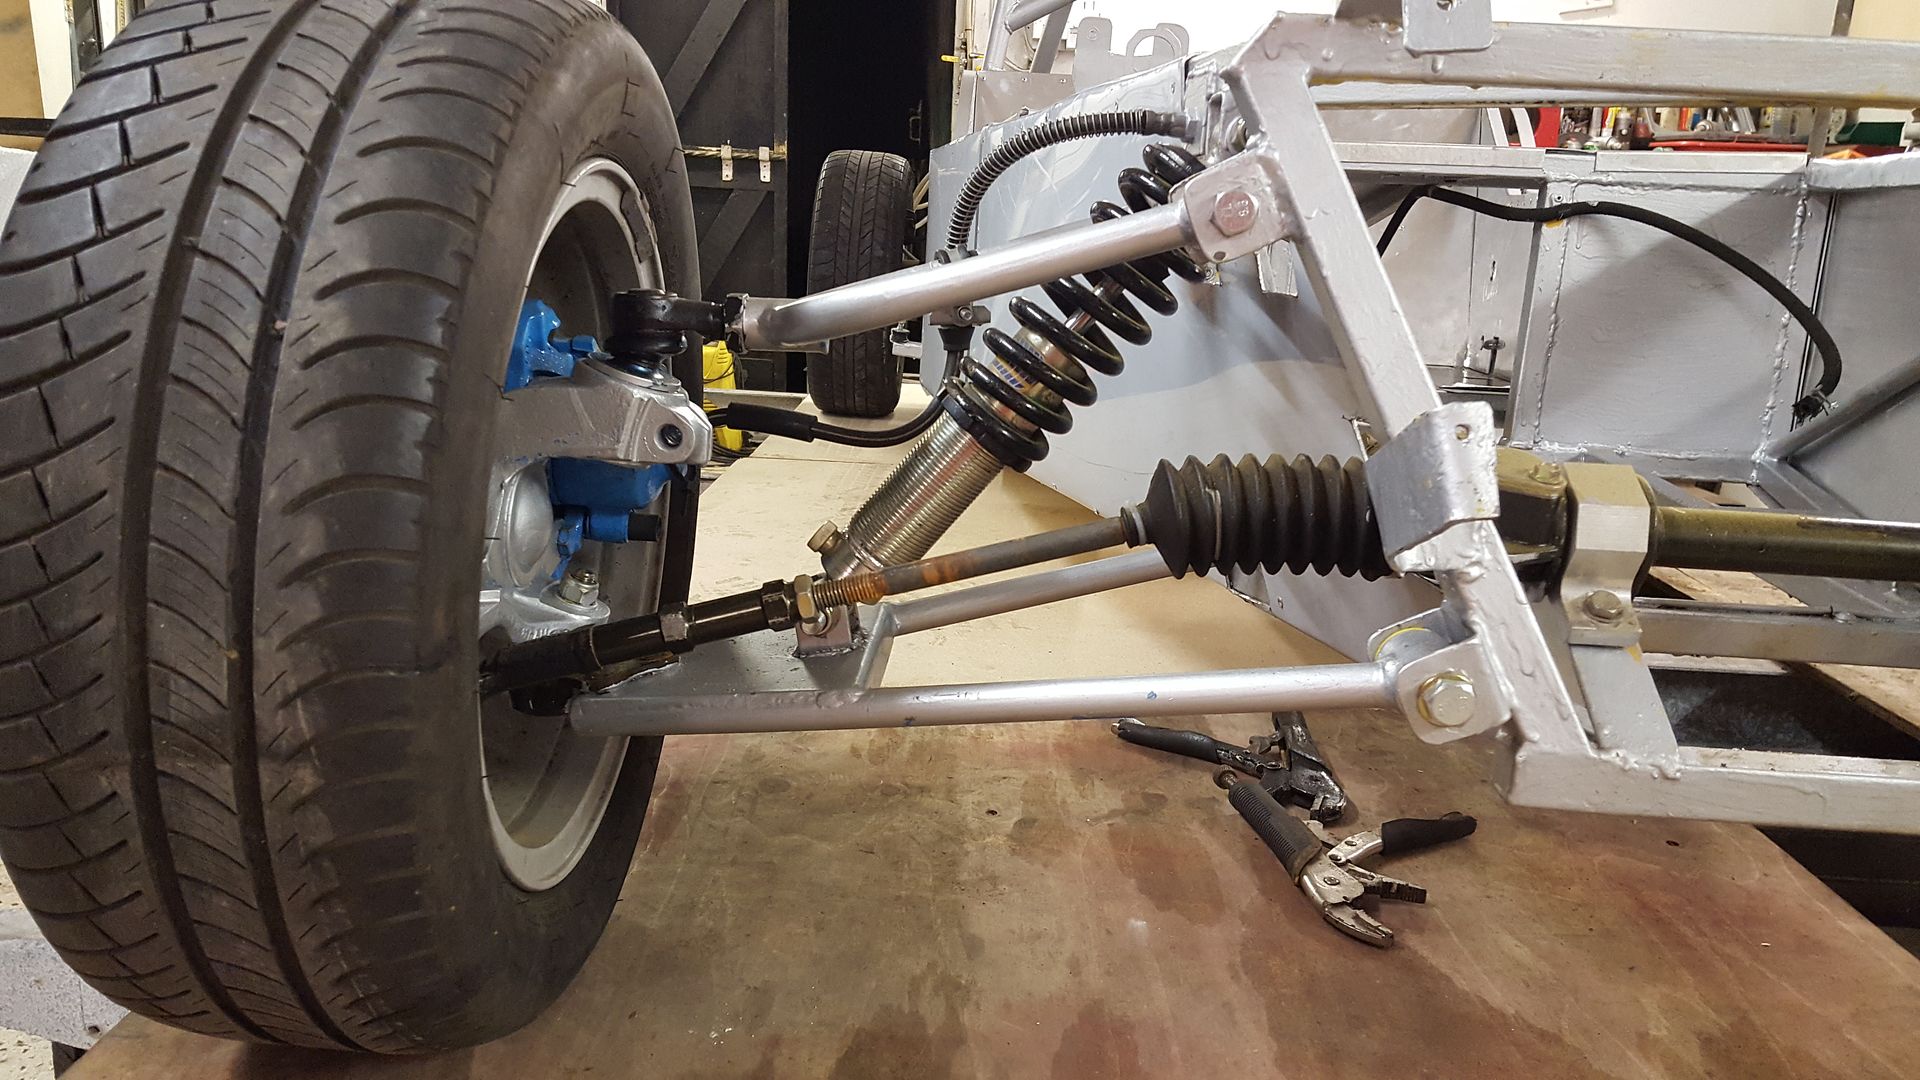
Front suspension geometry looks like if needs a review i think
super-ron - 7/5/17 at 07:22 PM
Great thanks for the replies! I am very pleased with it for the price. like you say the new parts alone would cost treble the price i got the complete
rolling chassis for. Thanks for the pointers on the suspension points. i did look at the rear upper coilover mount and thought that is going to be a
nightmare once the one piece body is on.
I'm not sure who made the DeDion beam. it looks a quality job though with nice welds. it is very similar to the early MK ones but they have
confirmed it is not one of theirs. The front arms appear to be MK copies too (have been advised to change the lower ones as they crack in the middle).
There will be quite a rethink in the front suspension setup from what i've read about the locost geometry problems.
super-ron - 7/5/17 at 09:11 PM
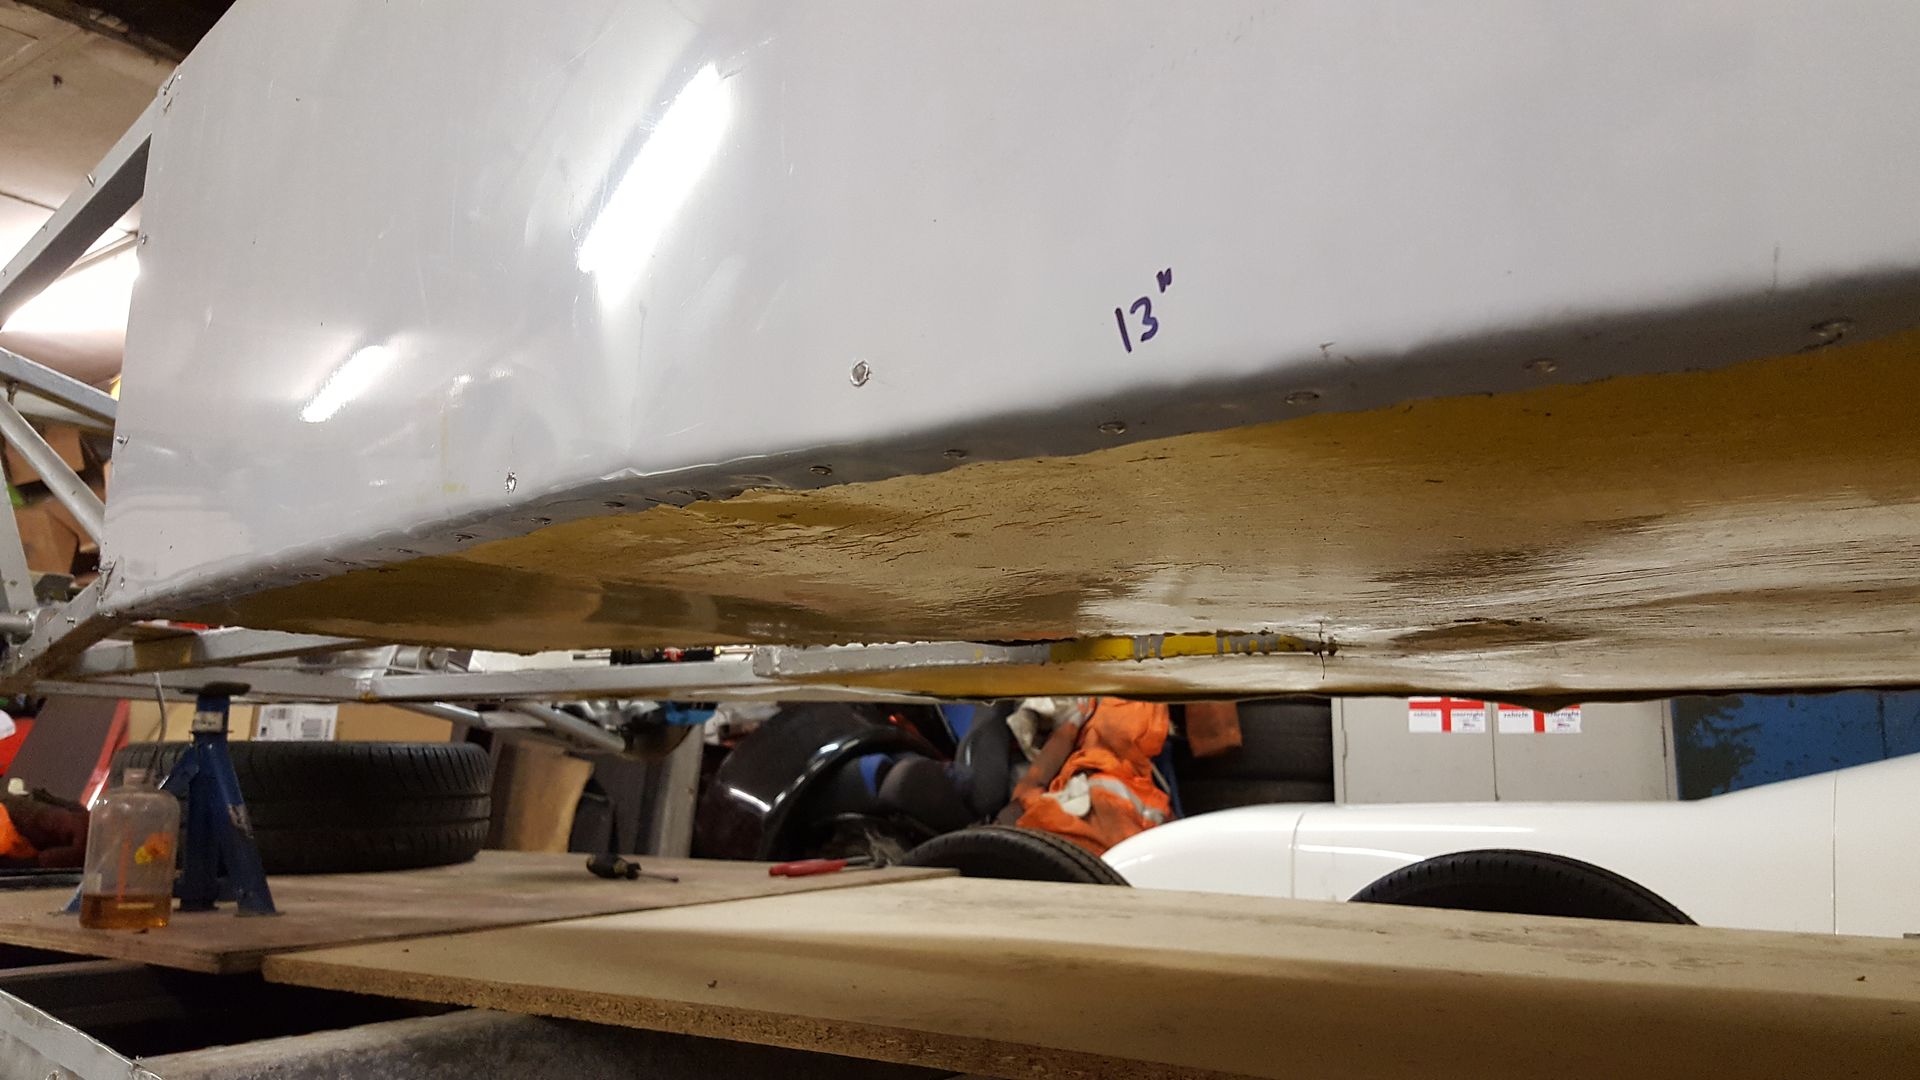
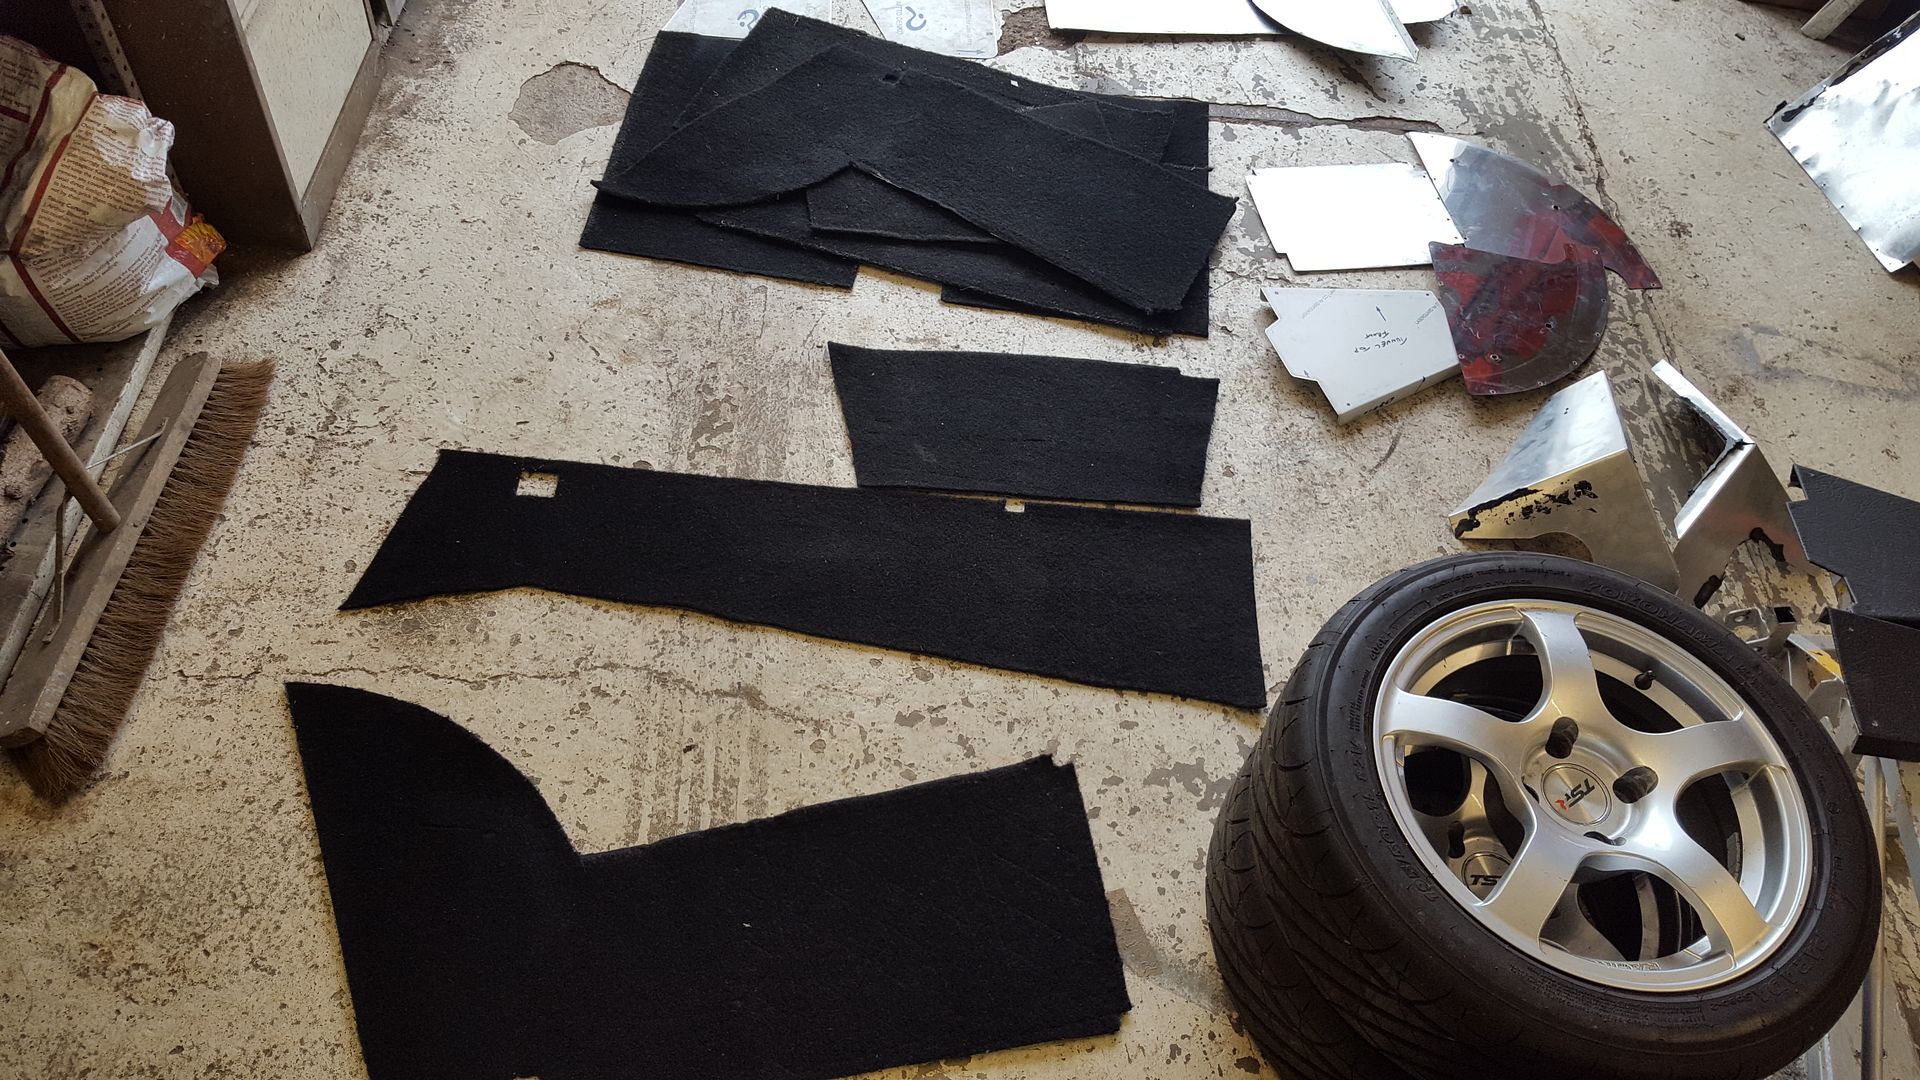
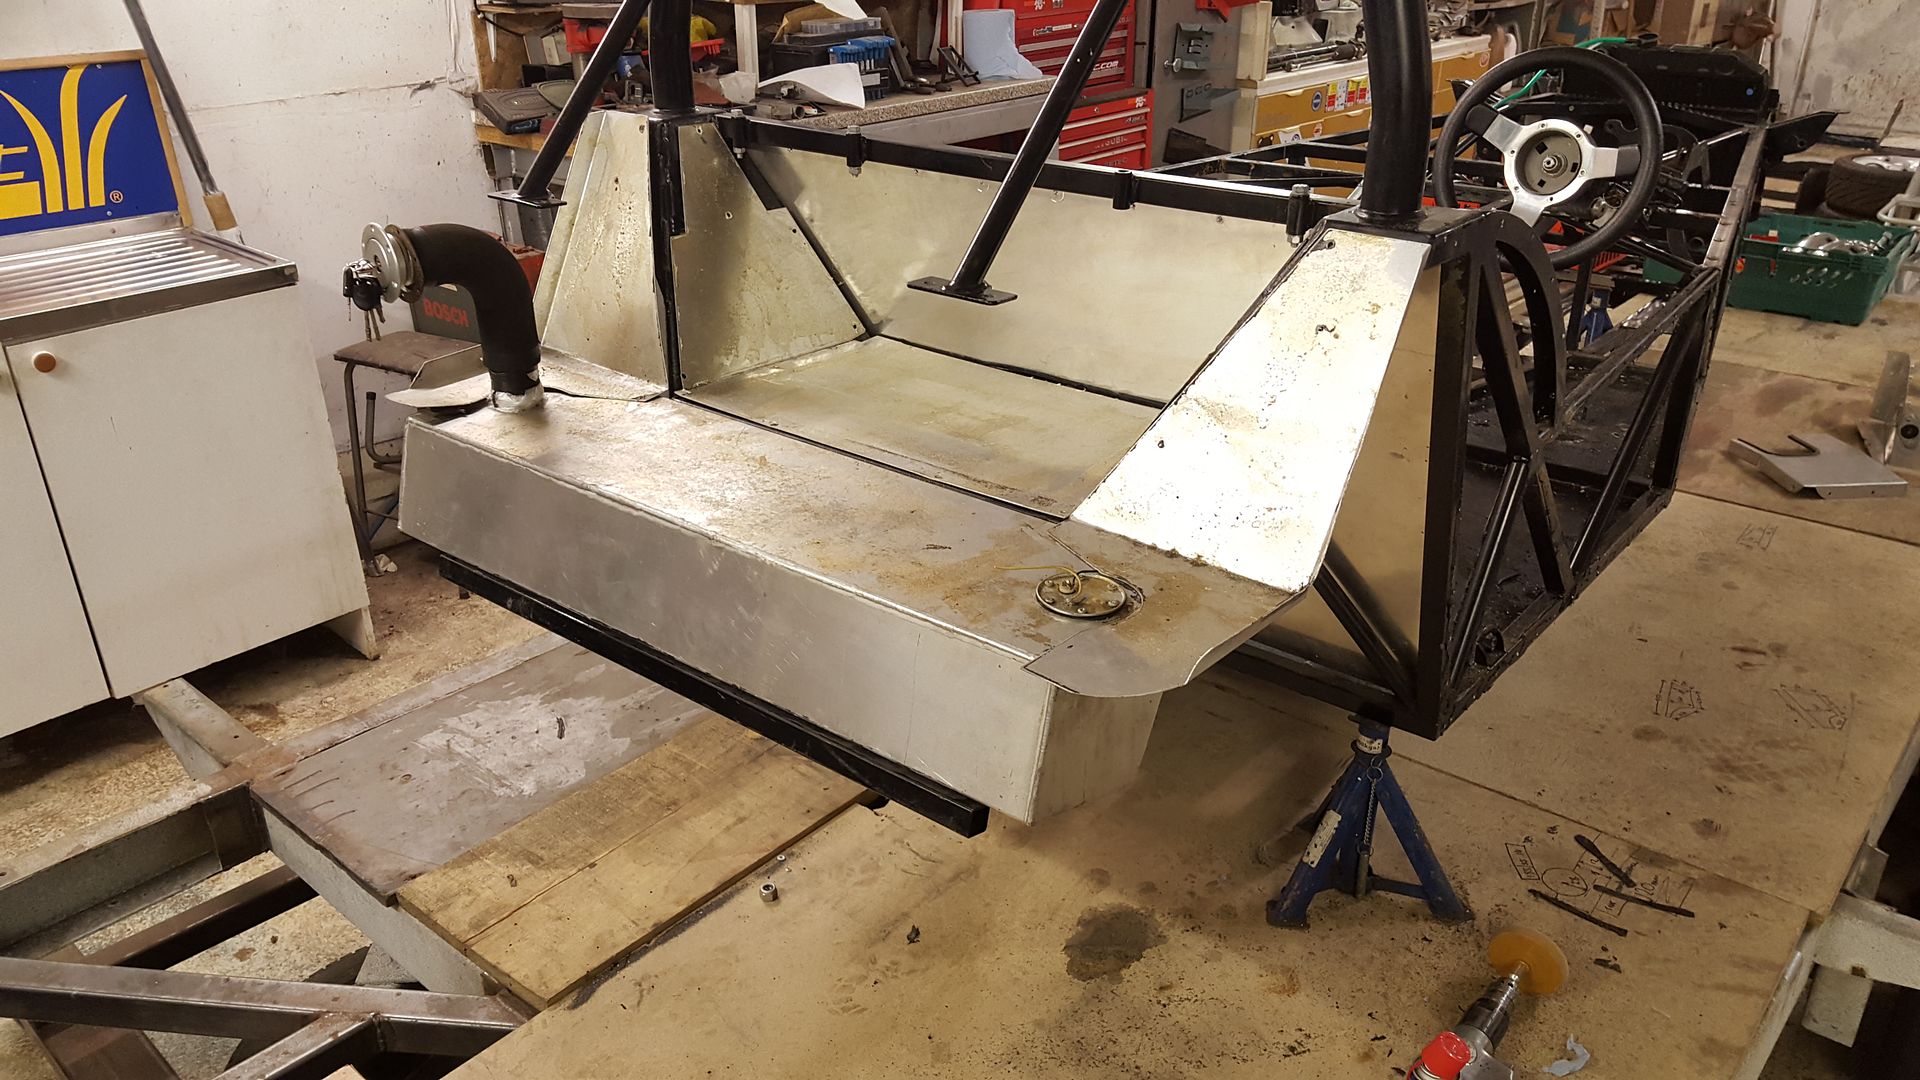
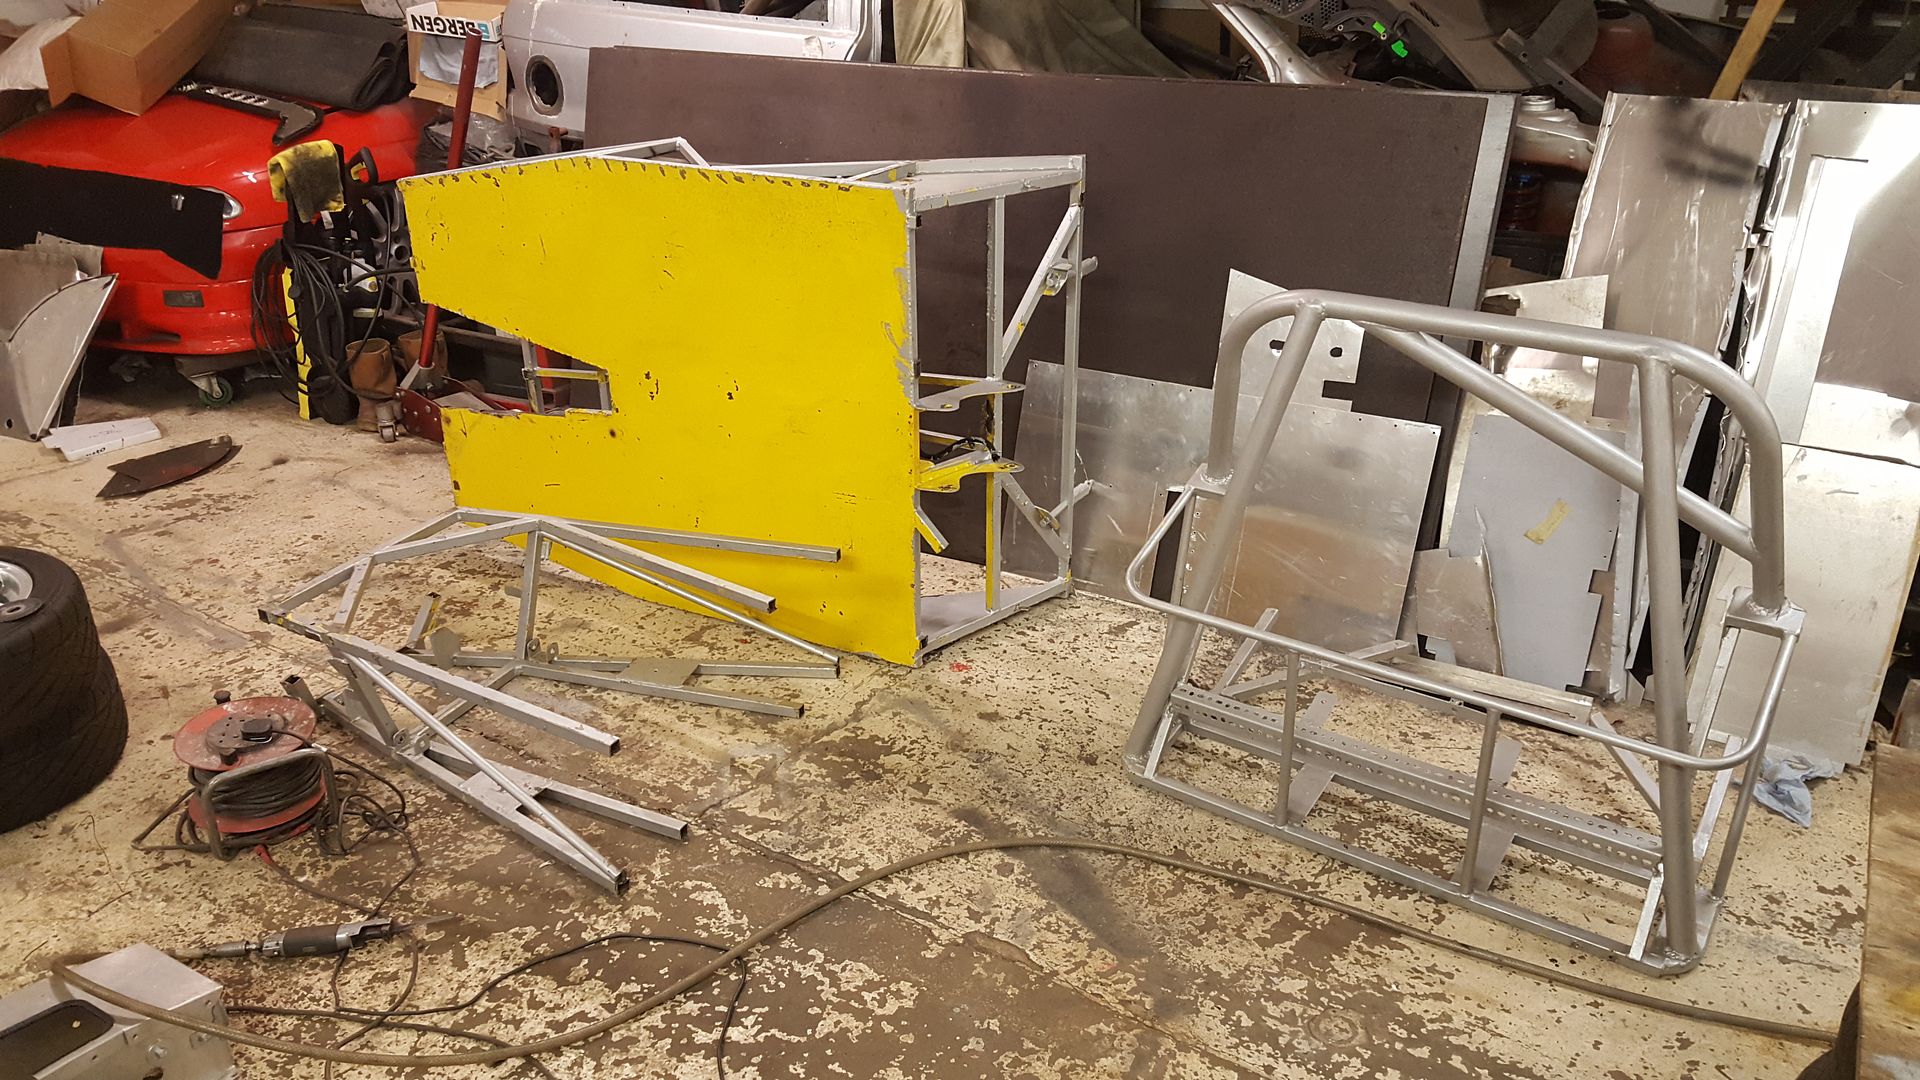
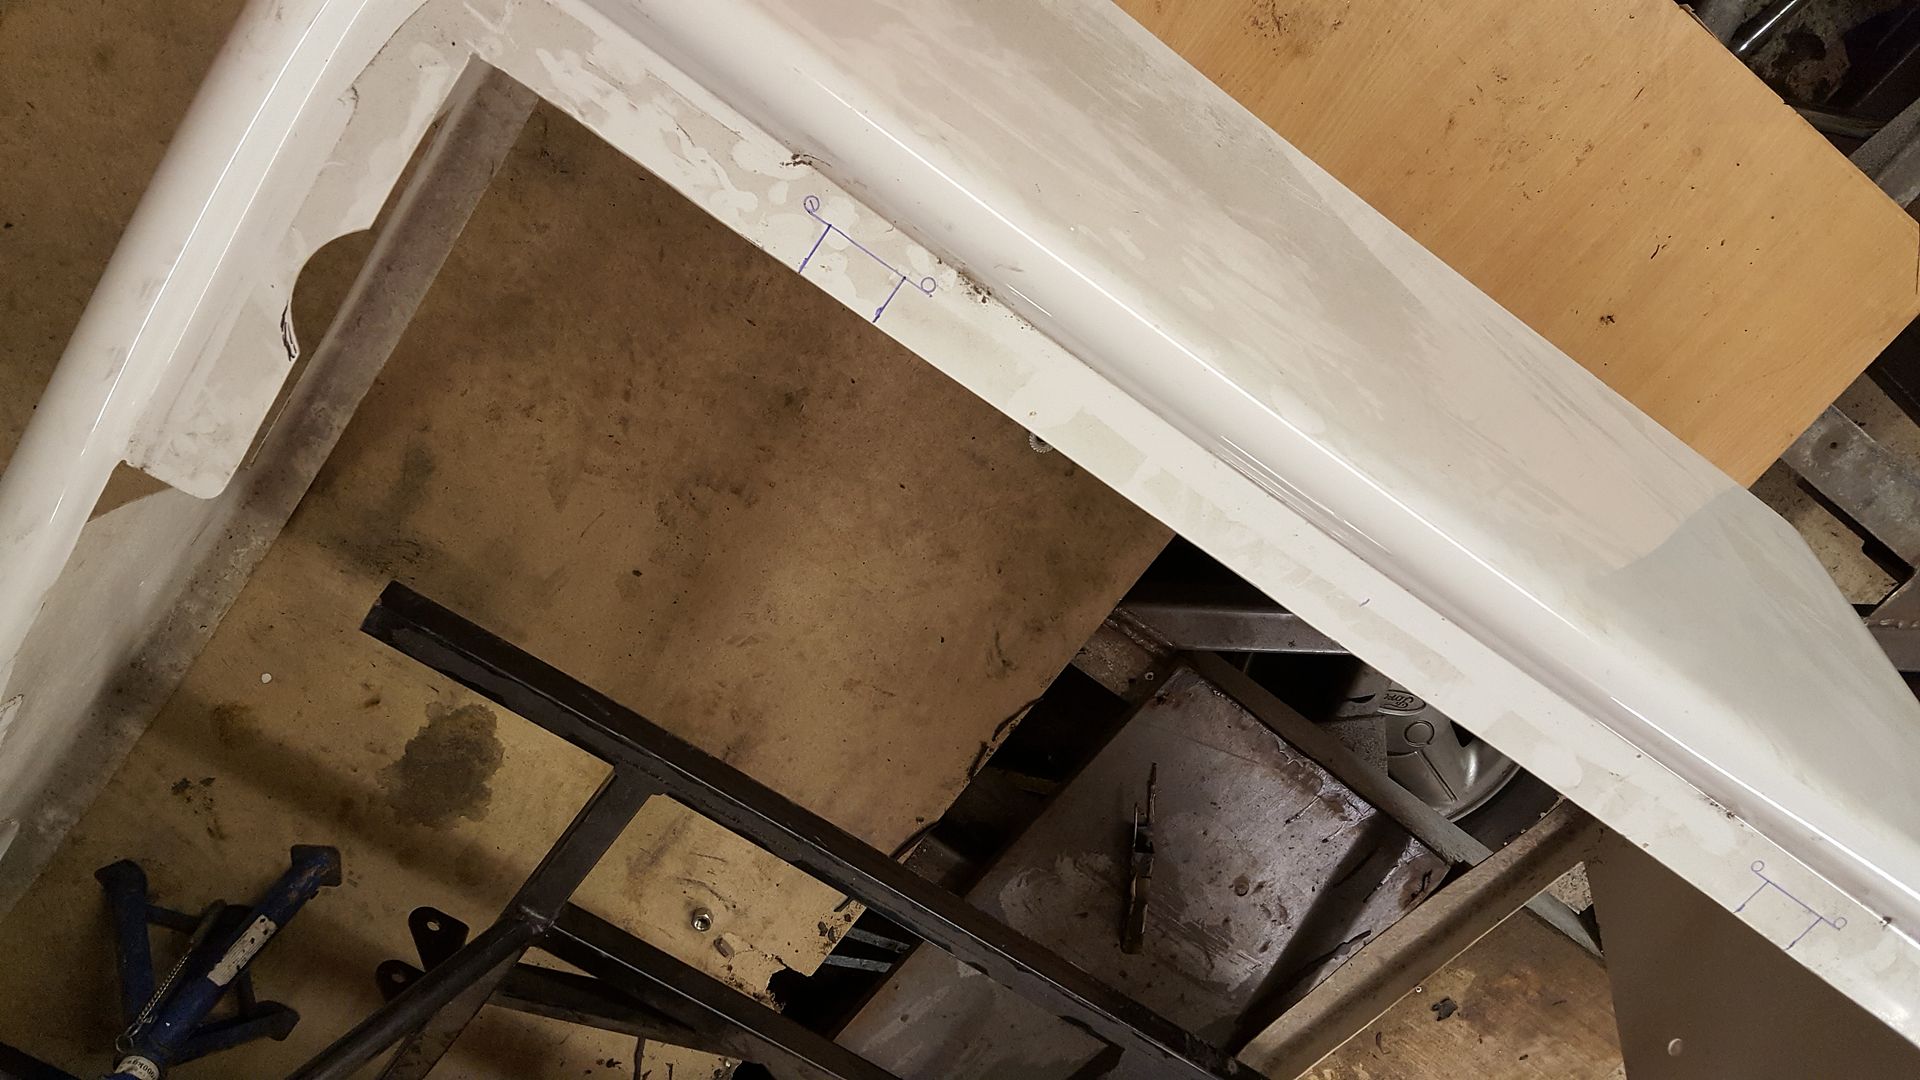
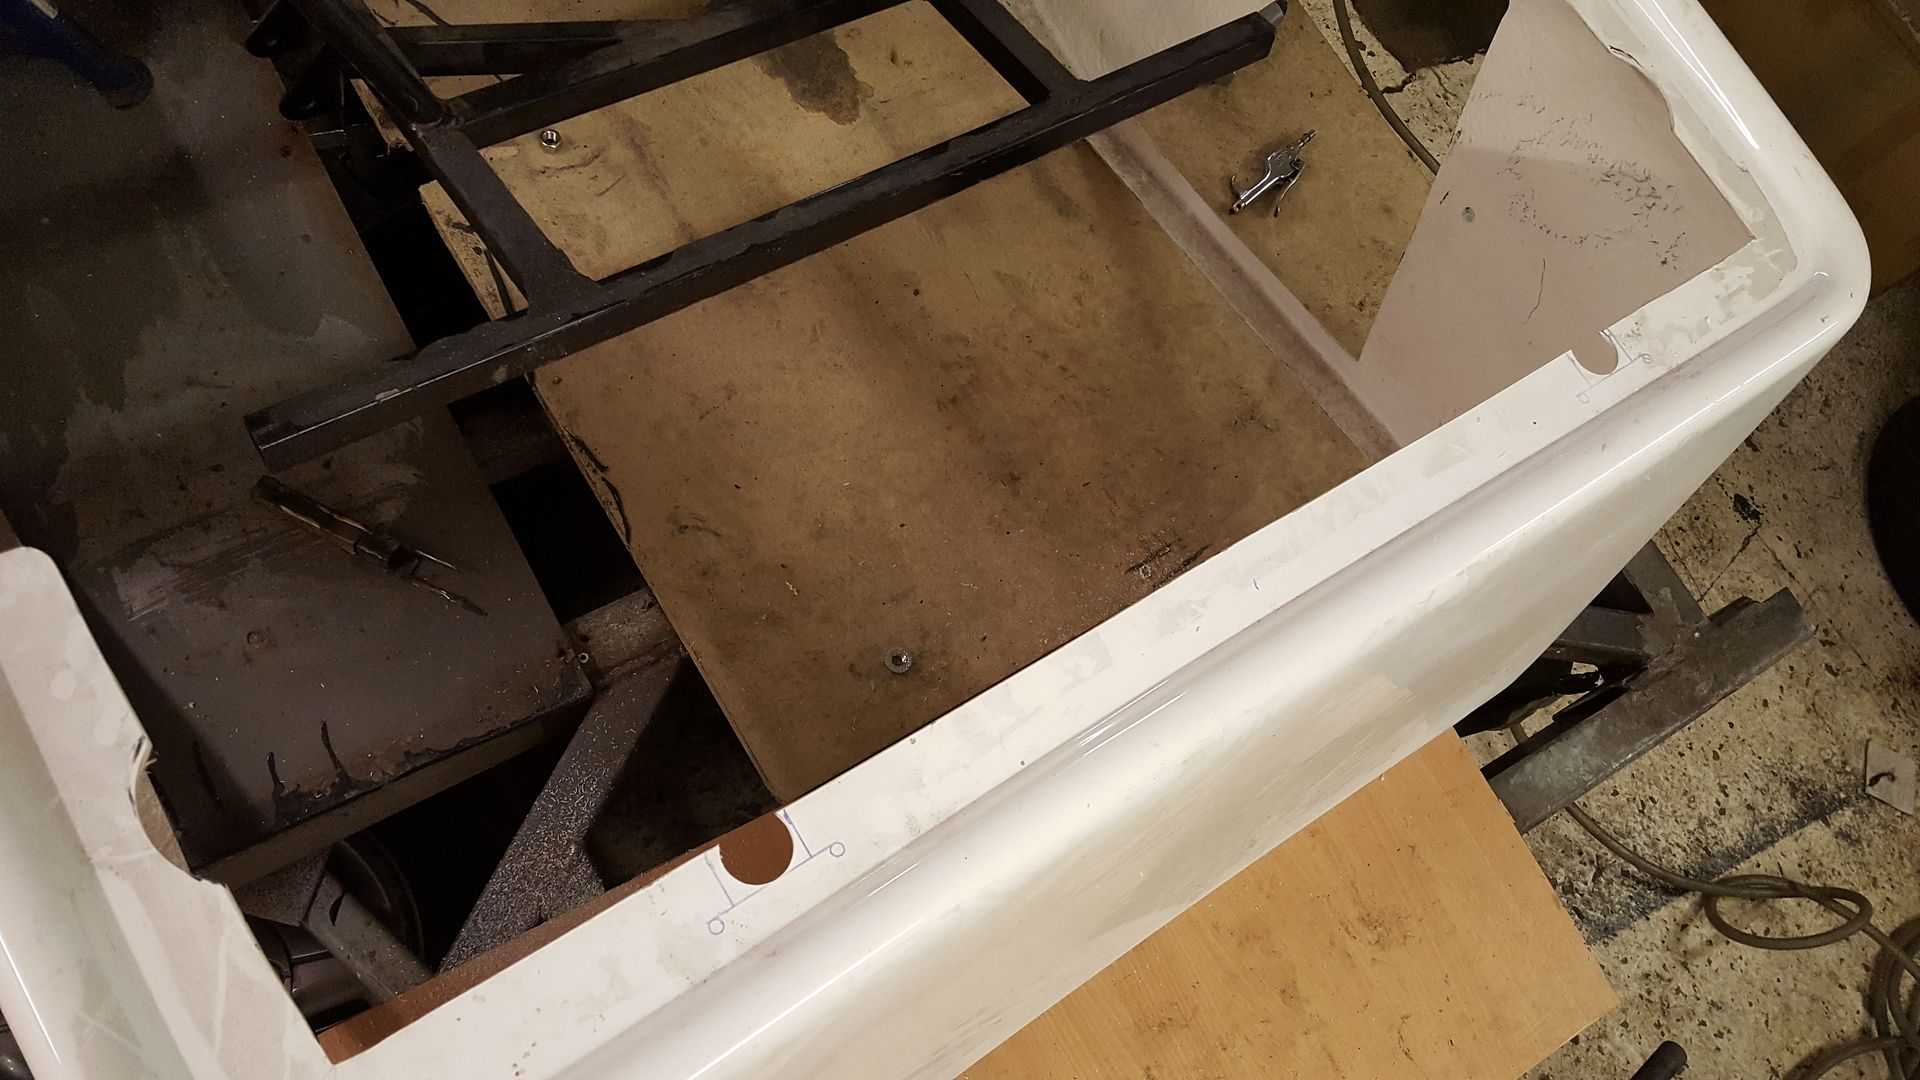
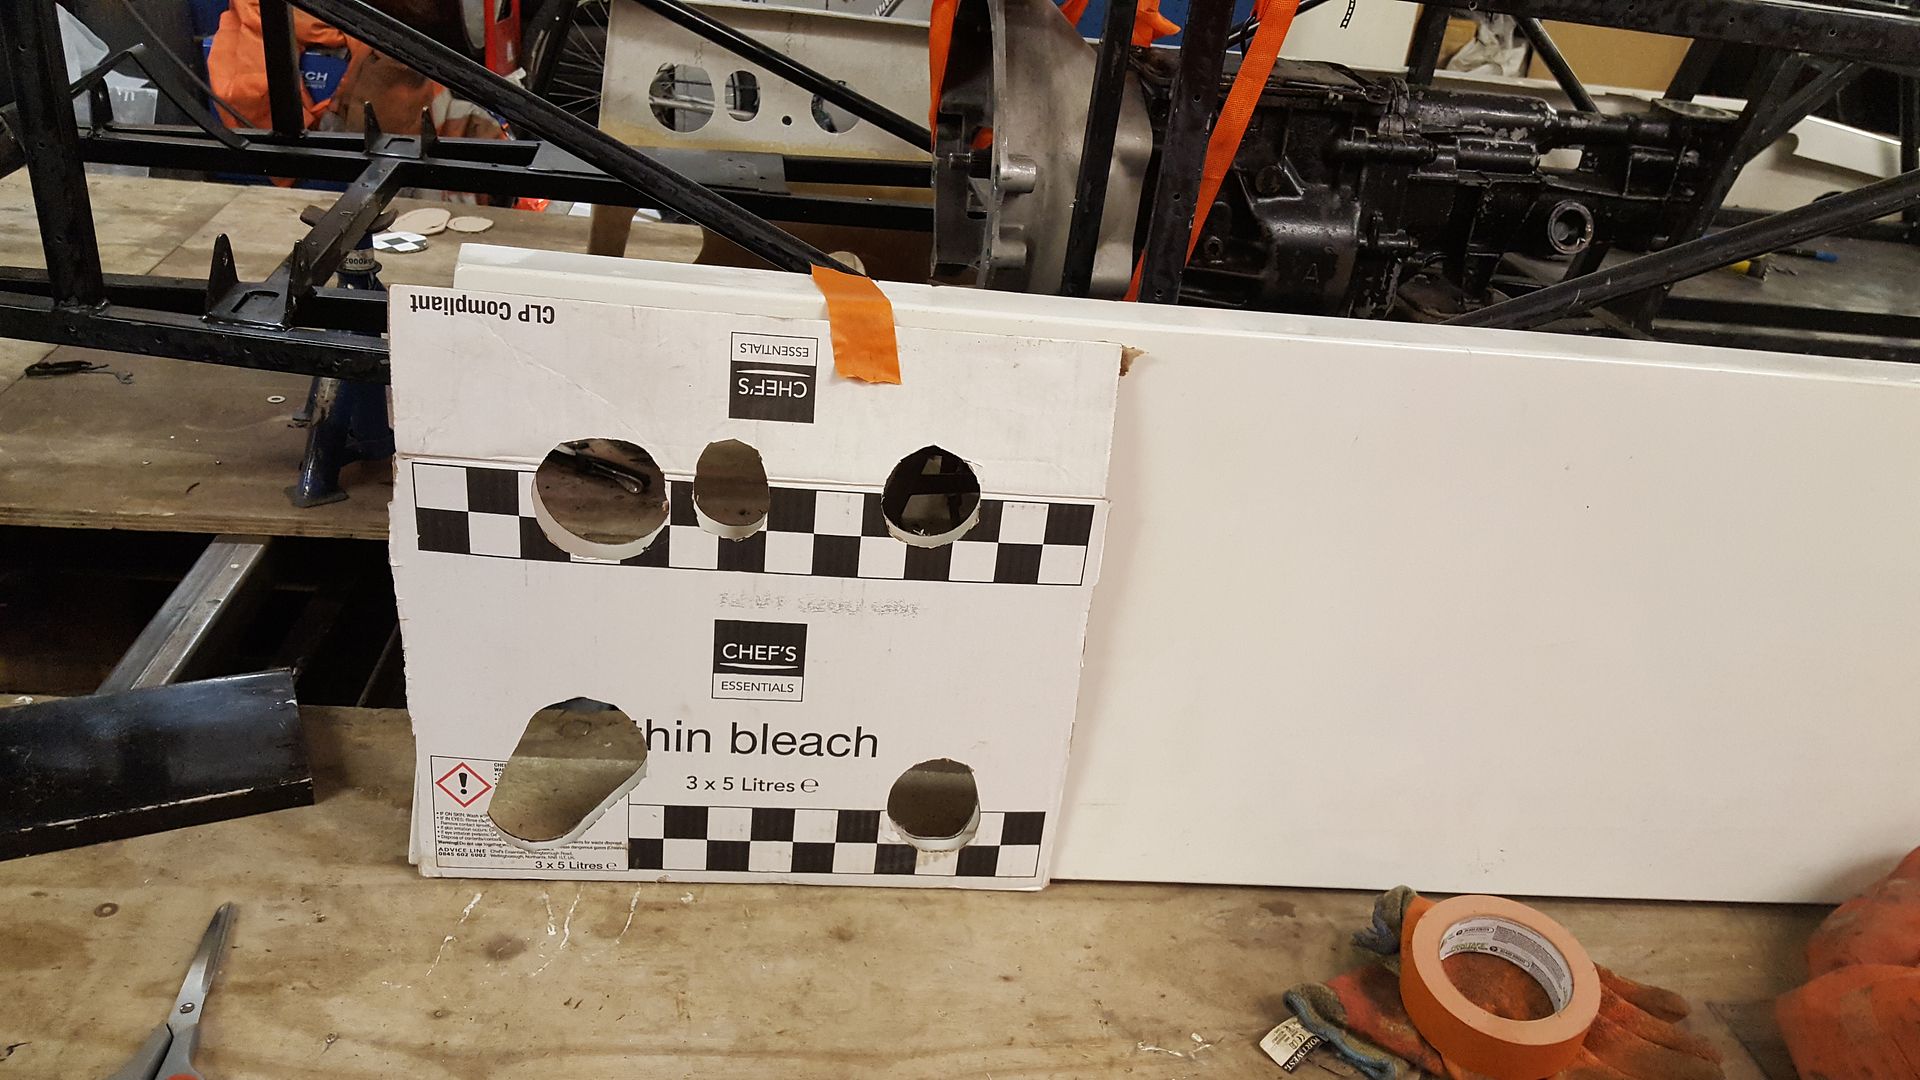
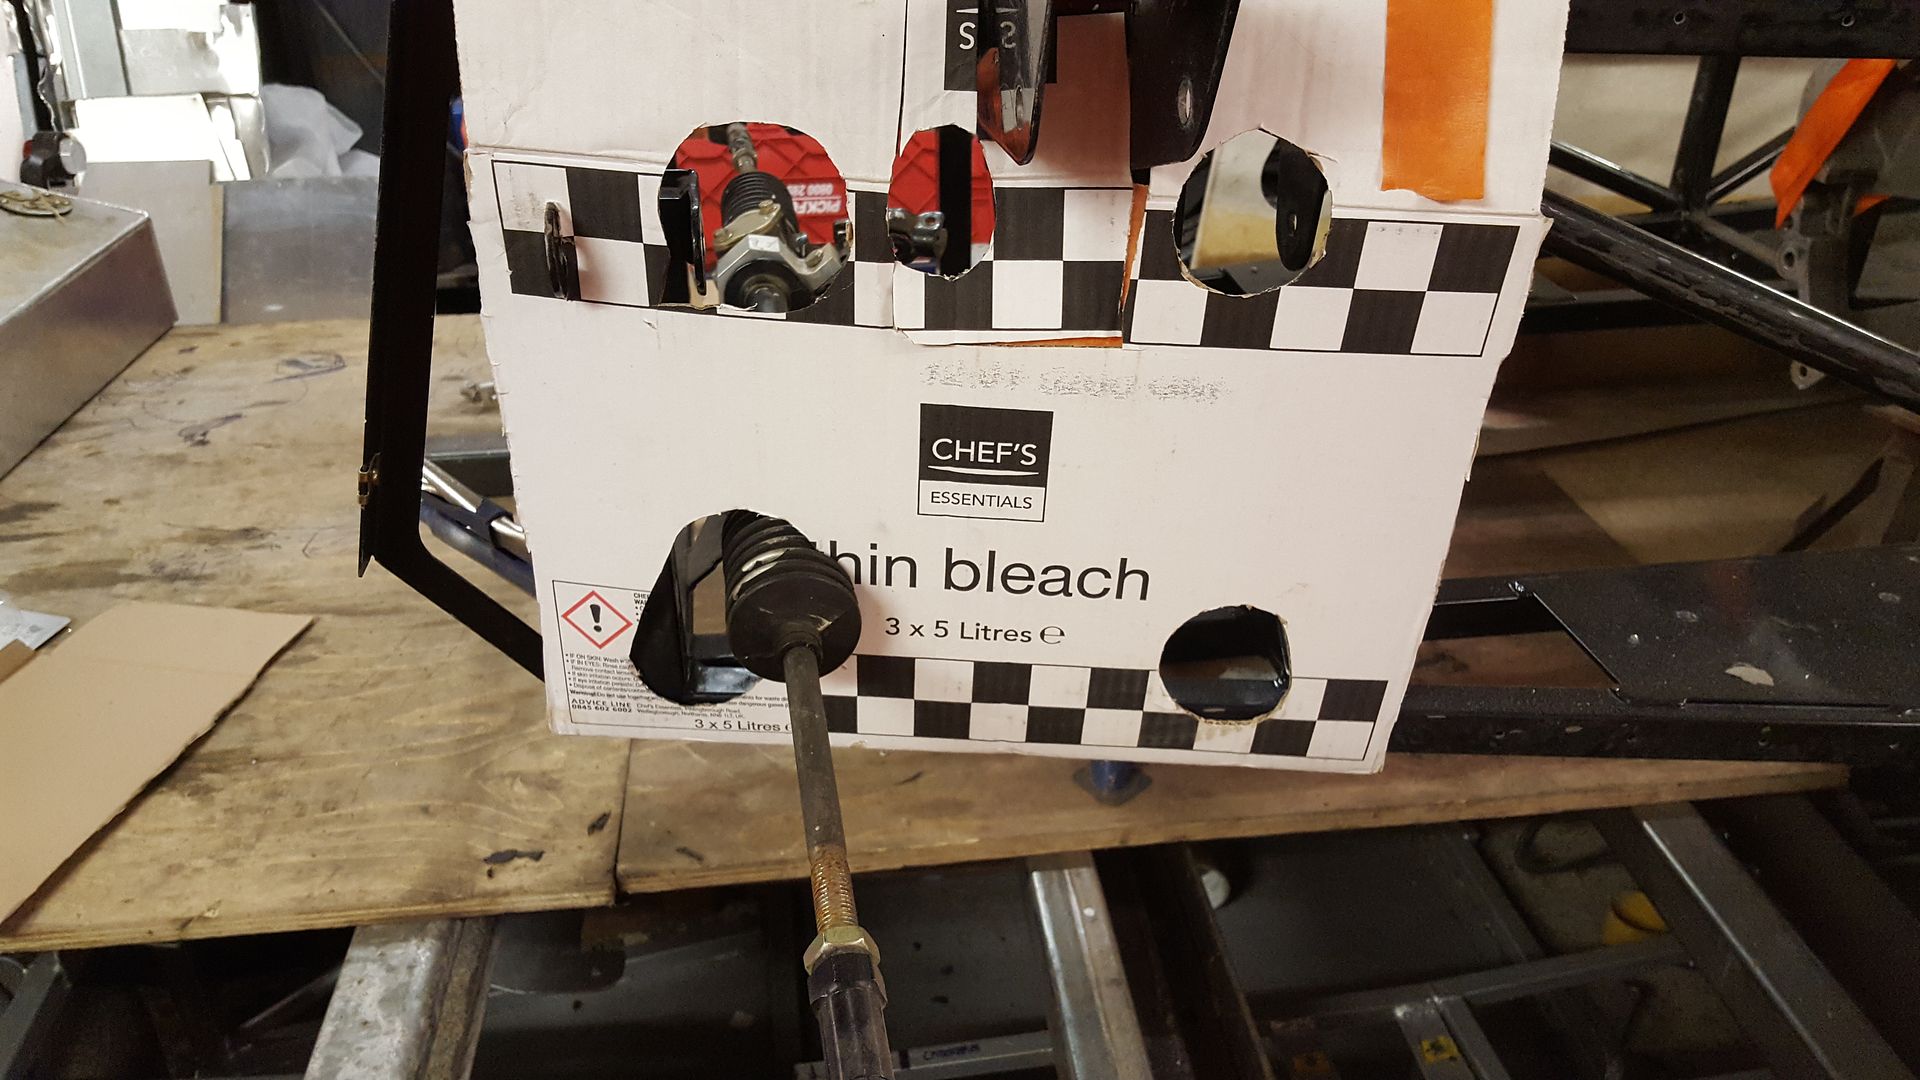
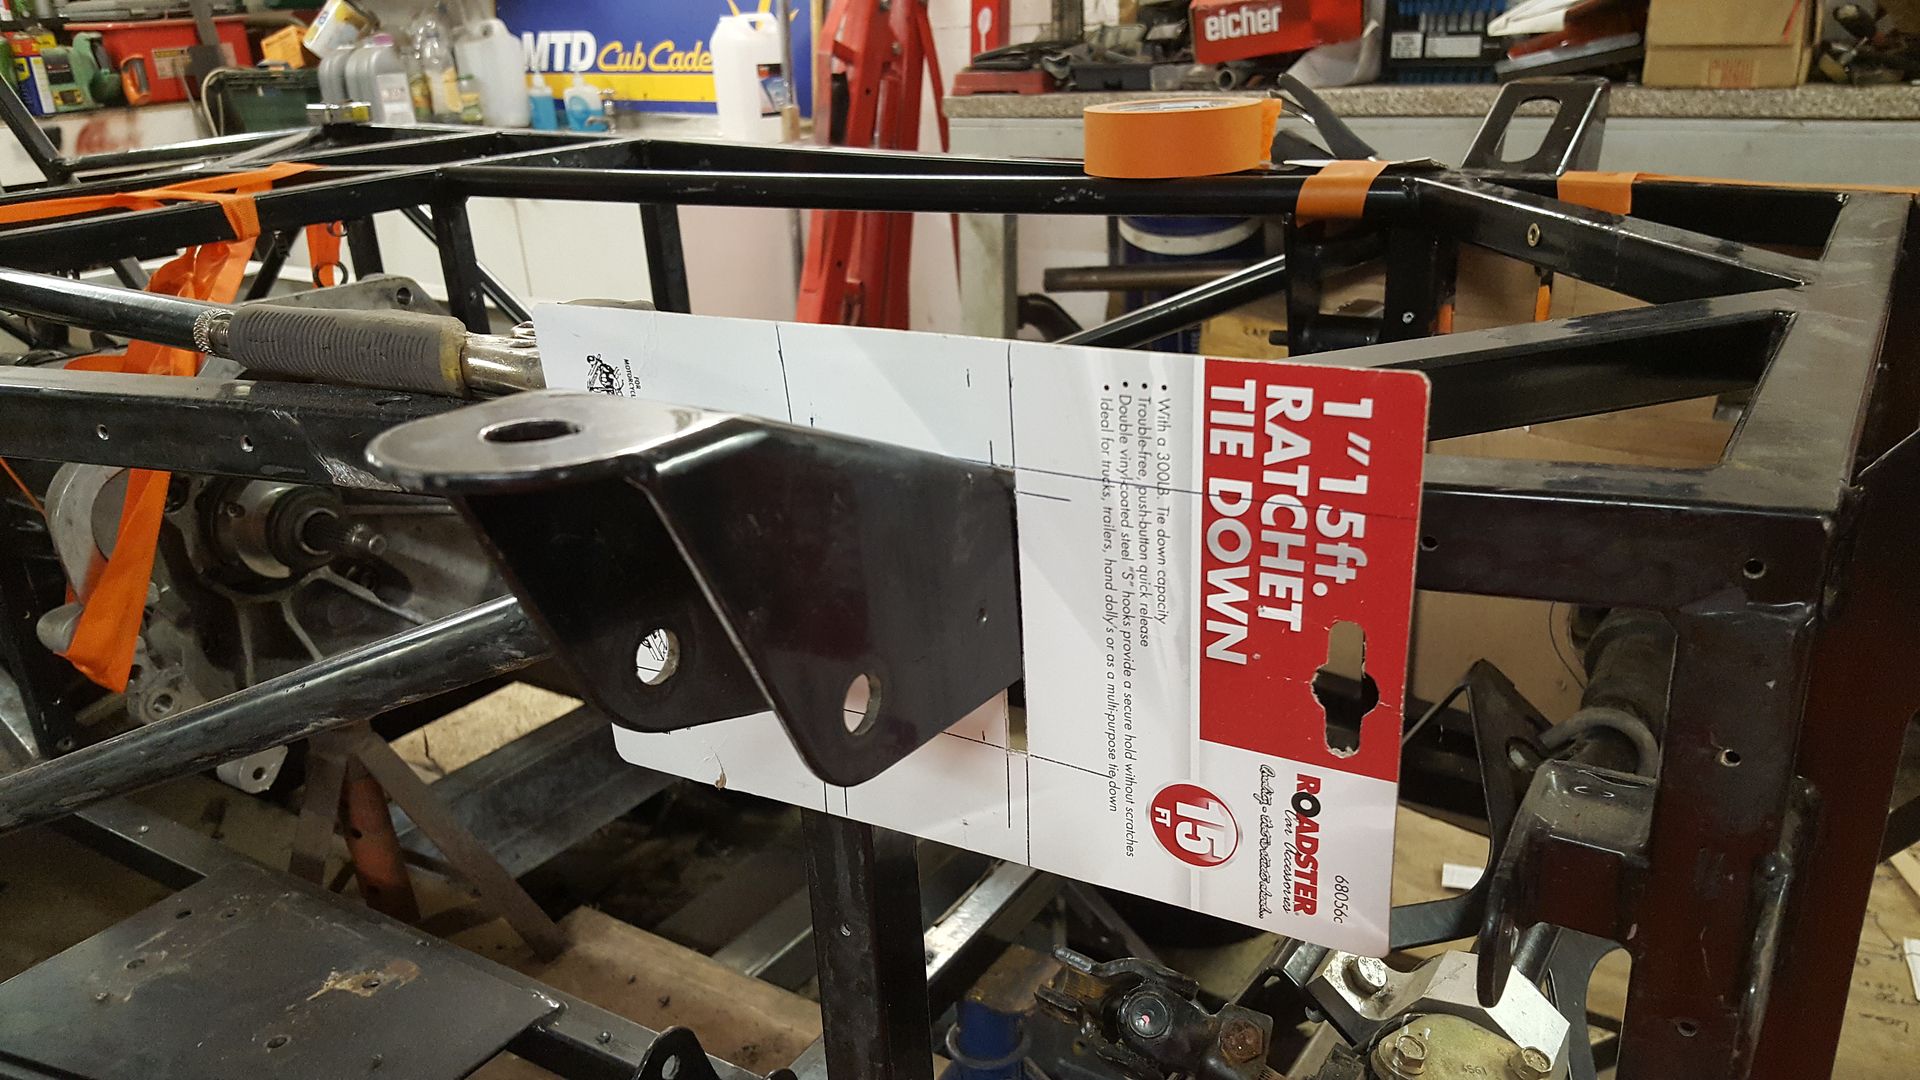
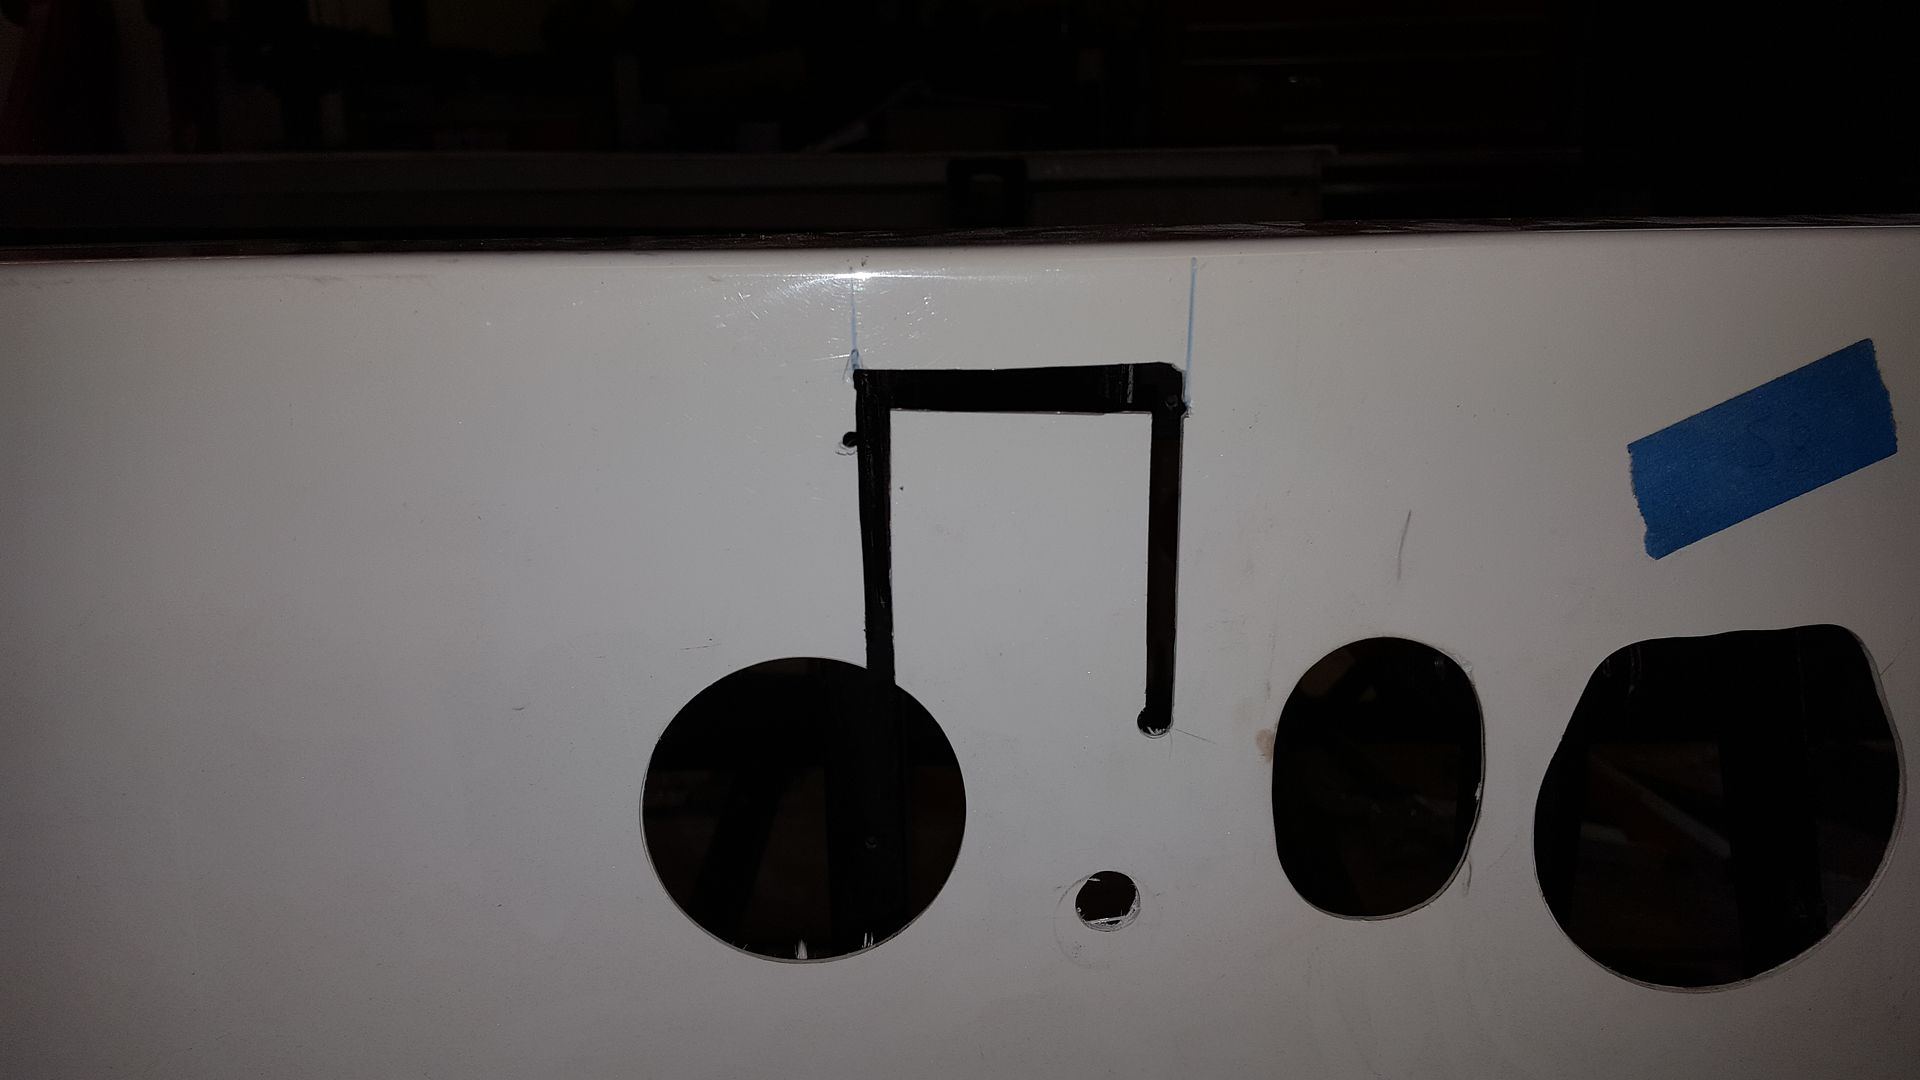
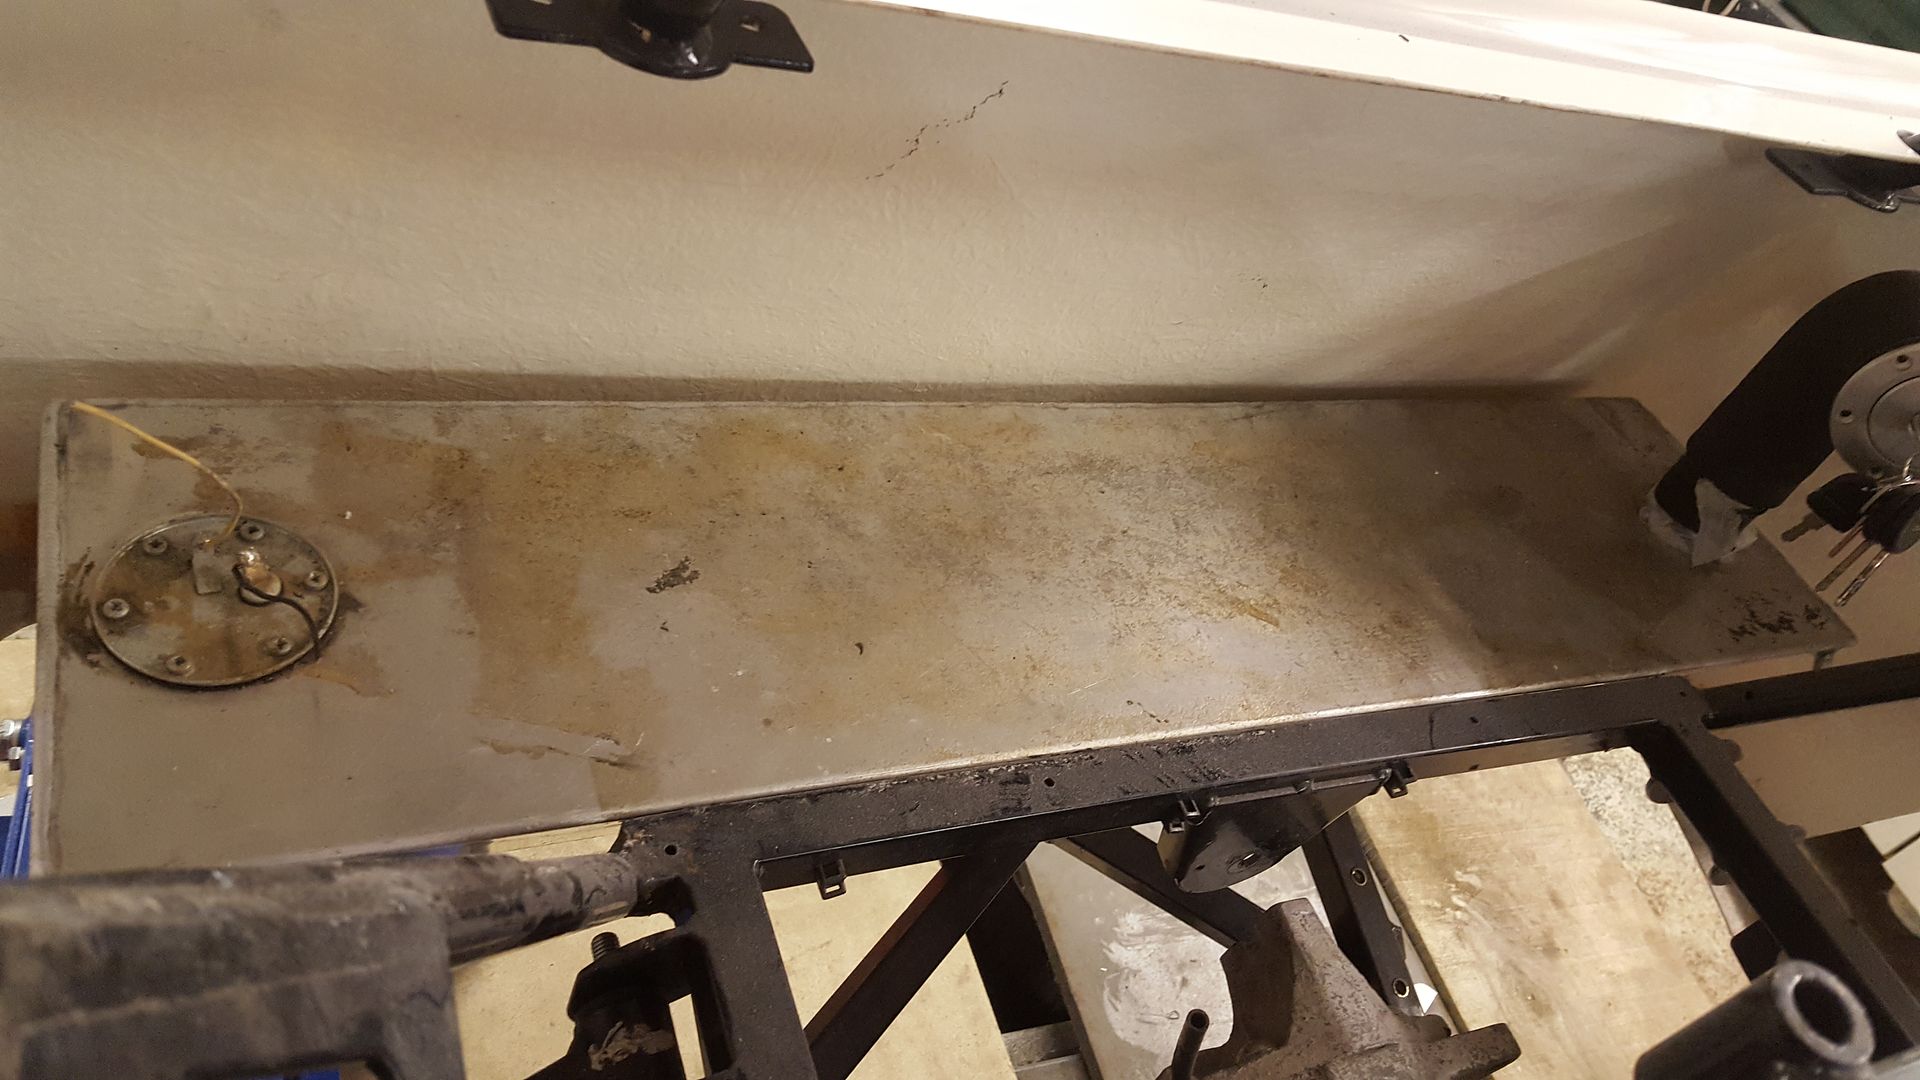
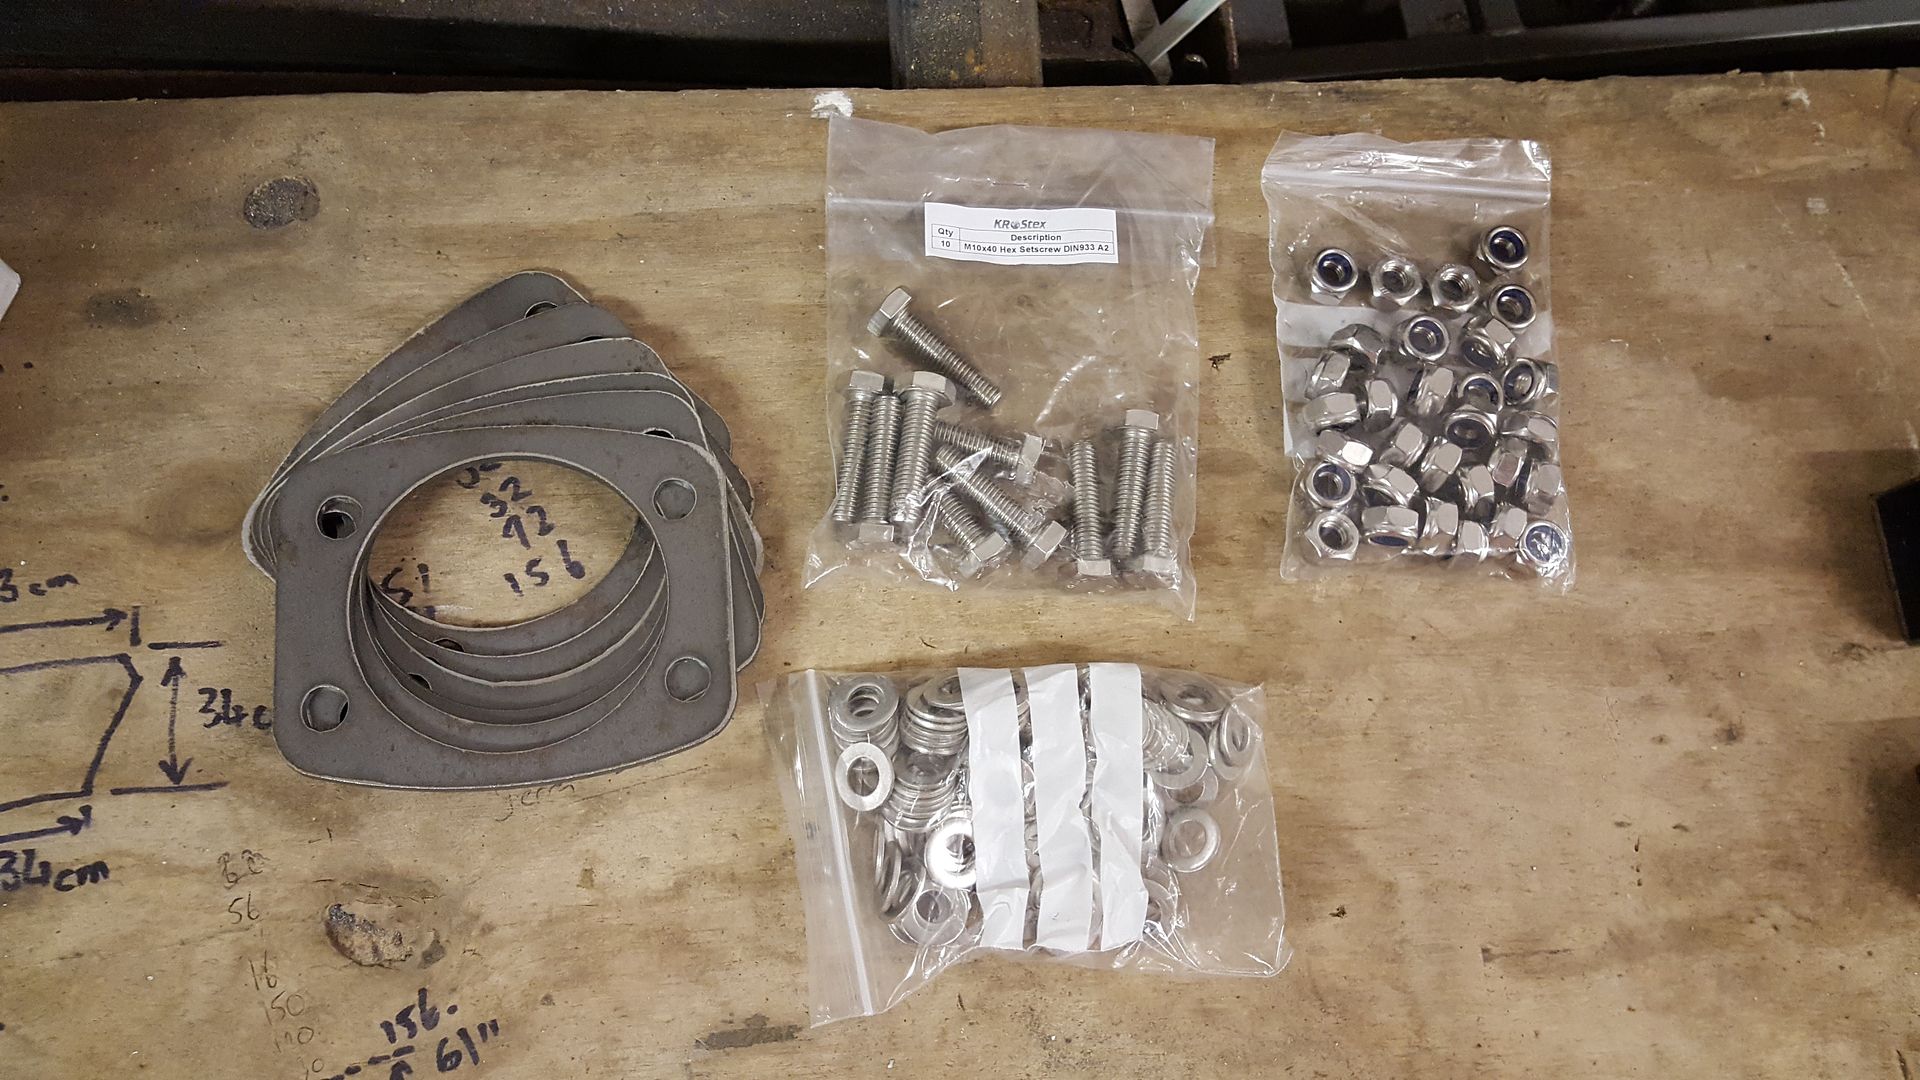
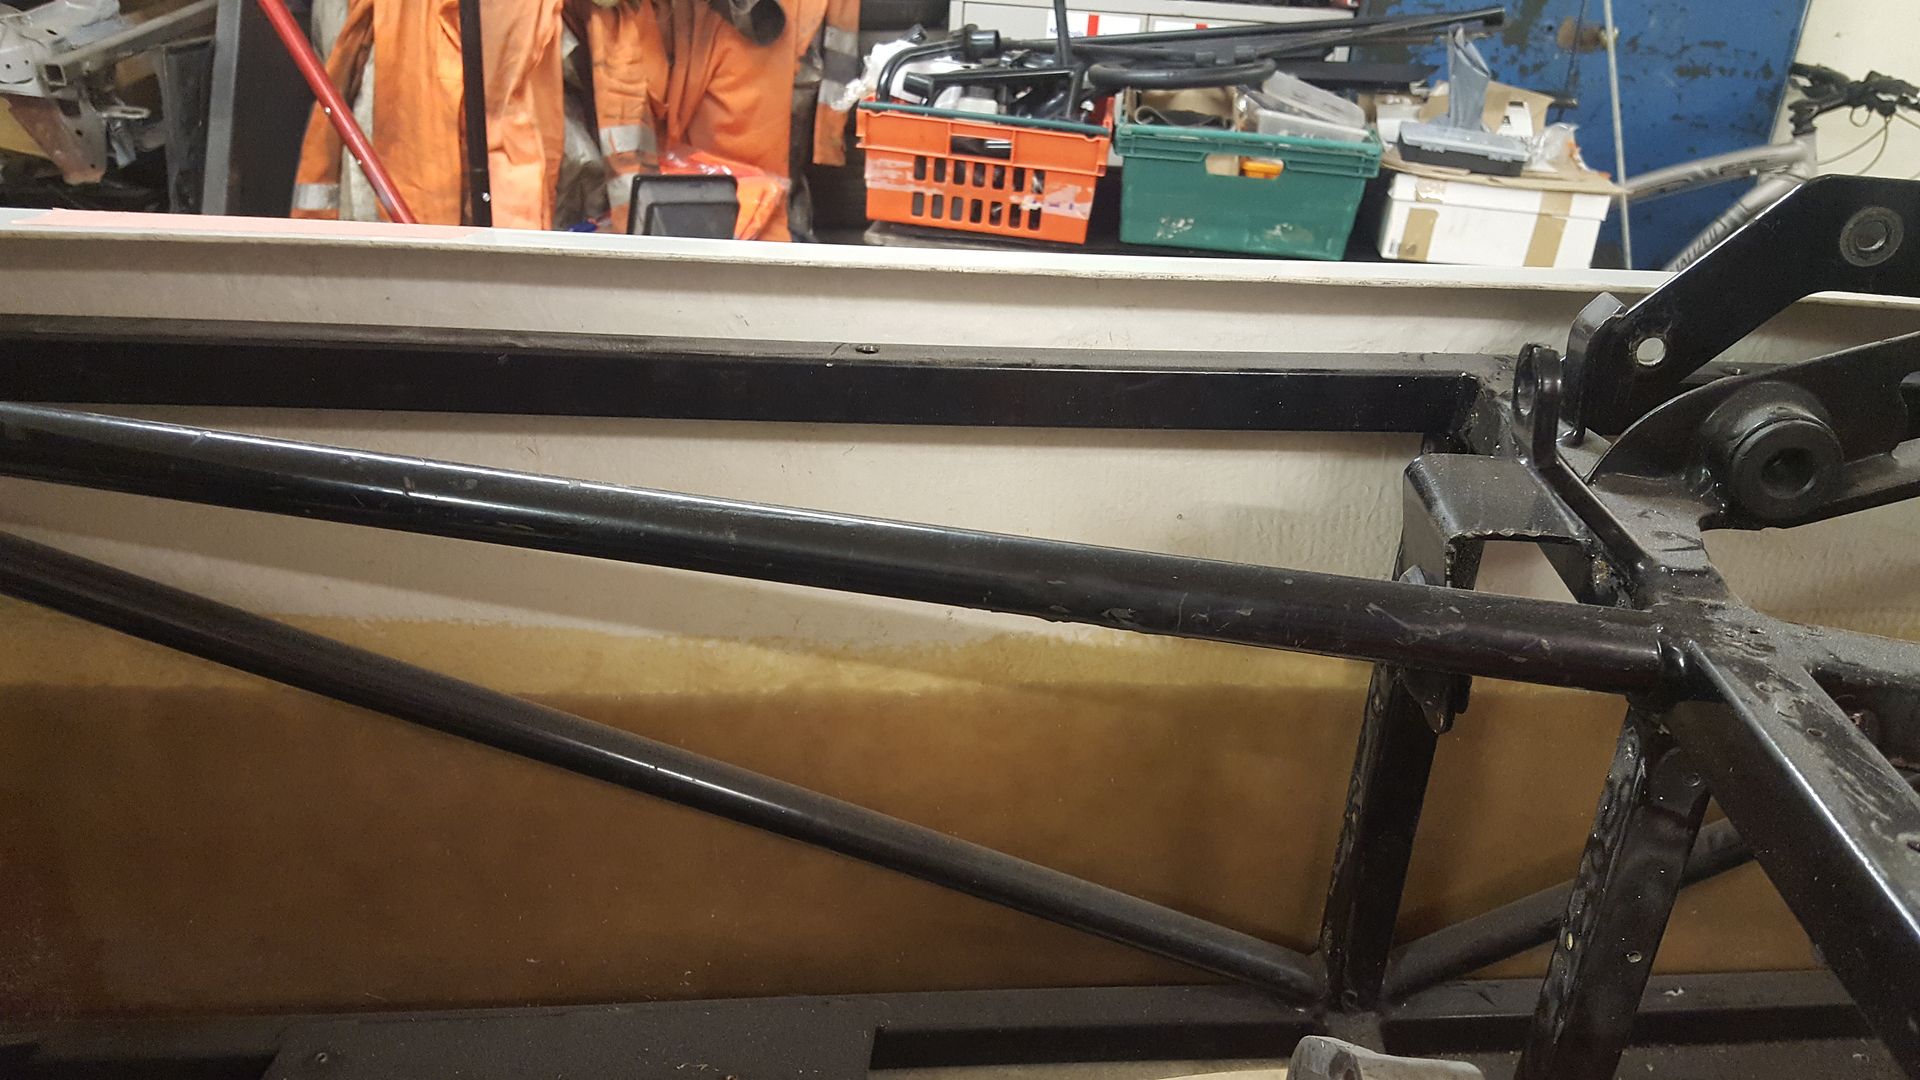
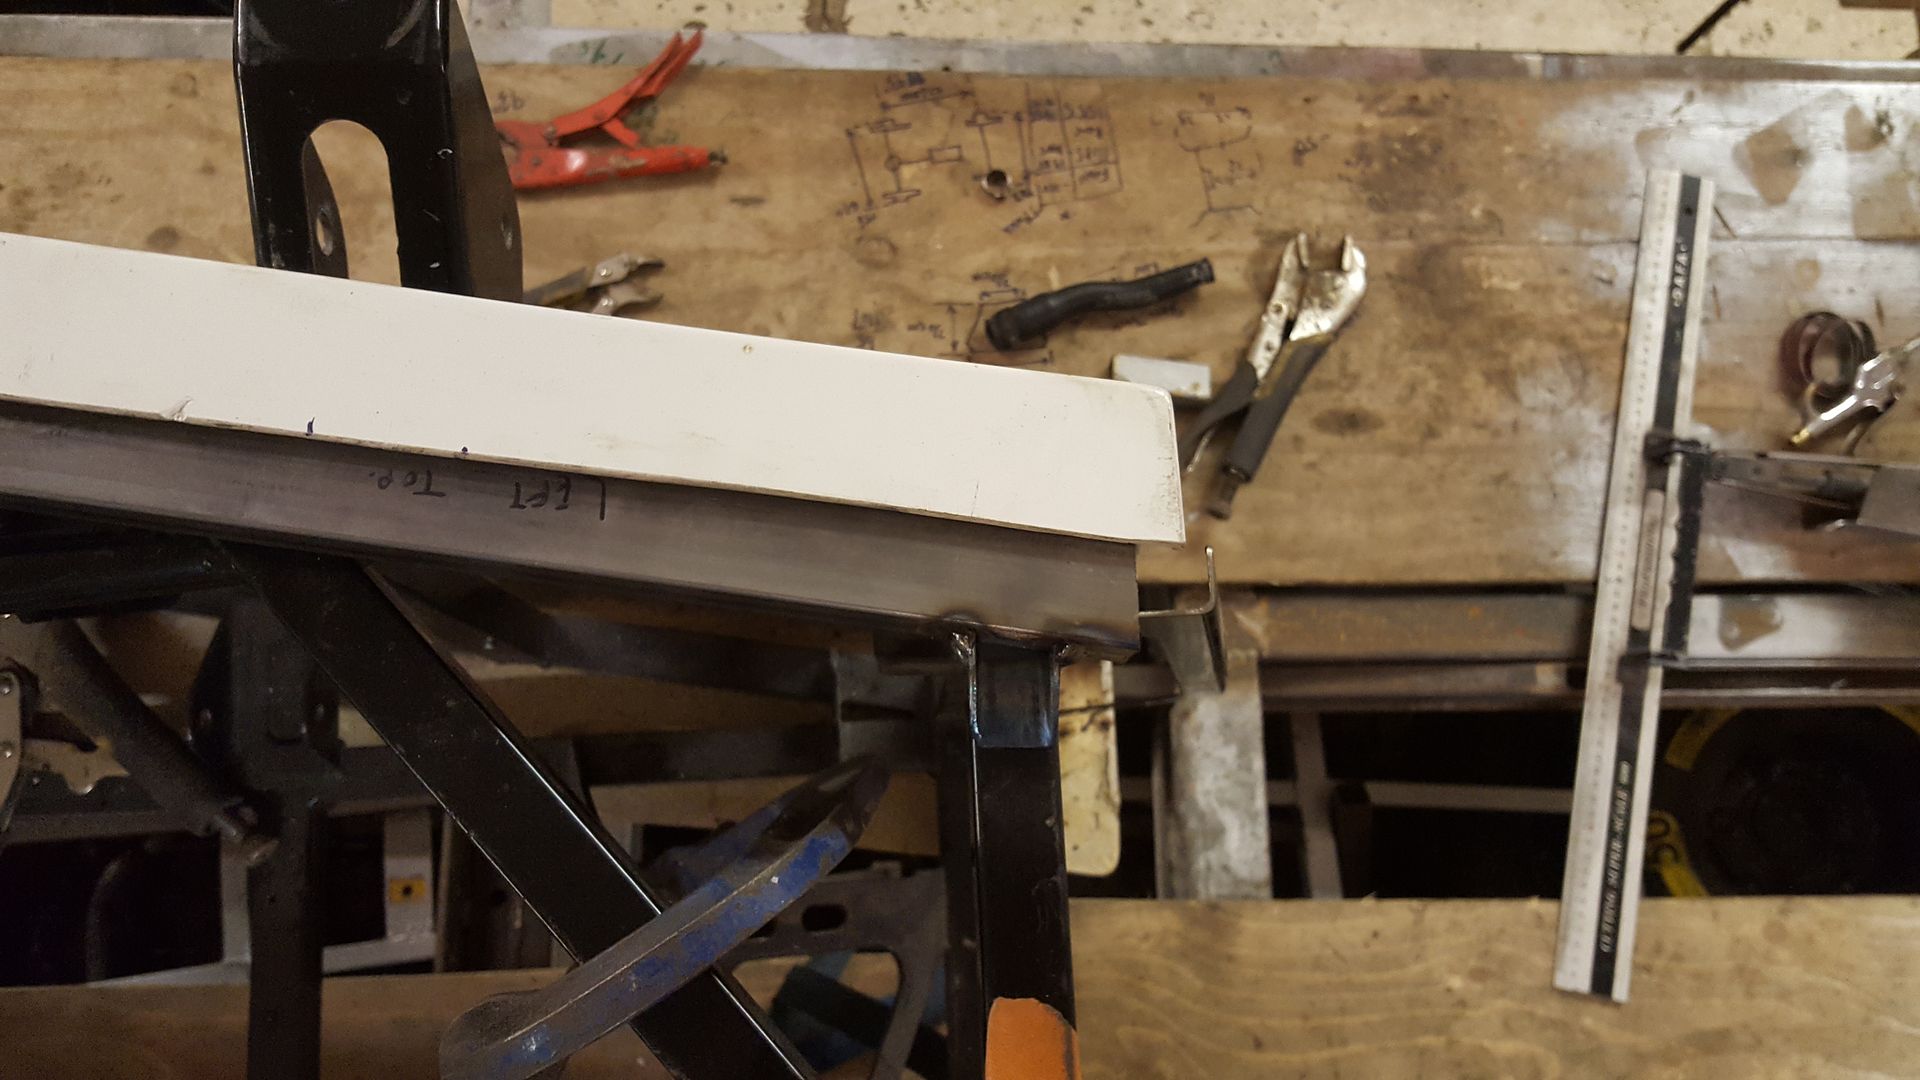
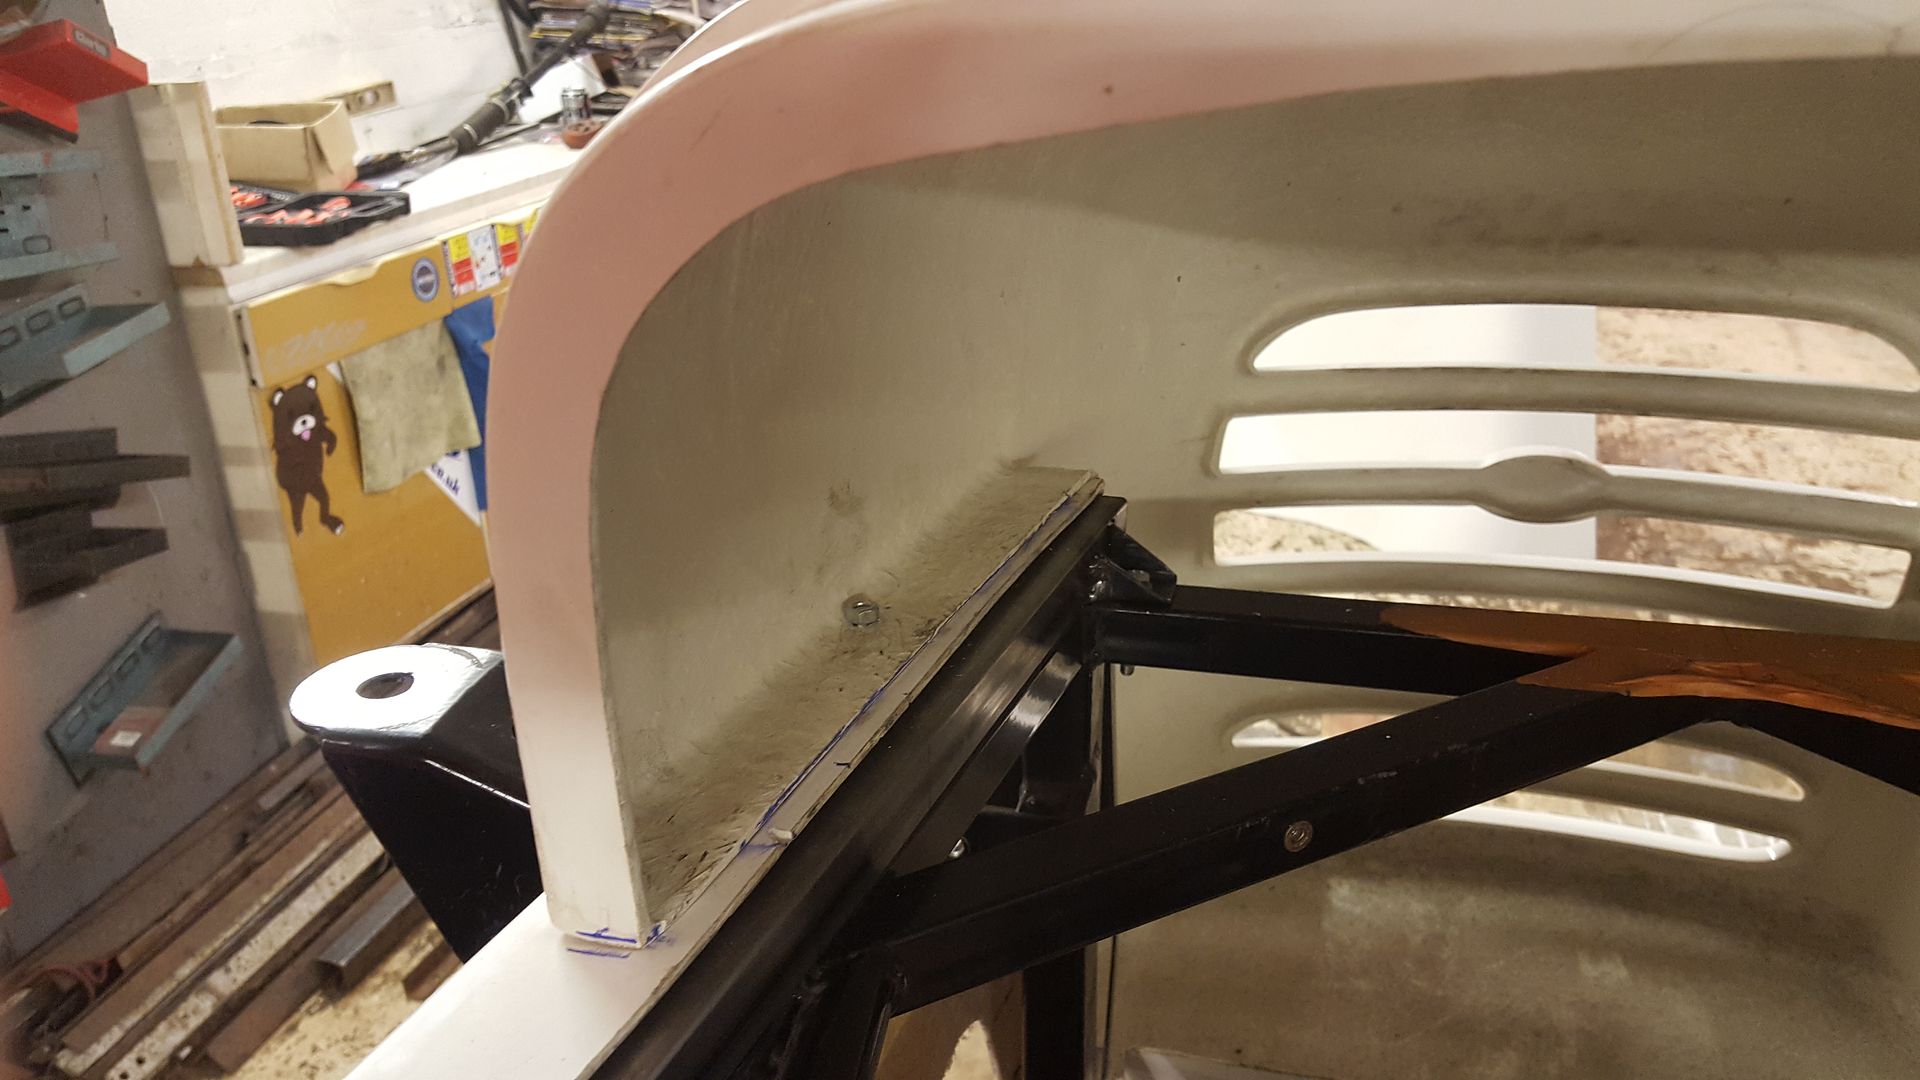
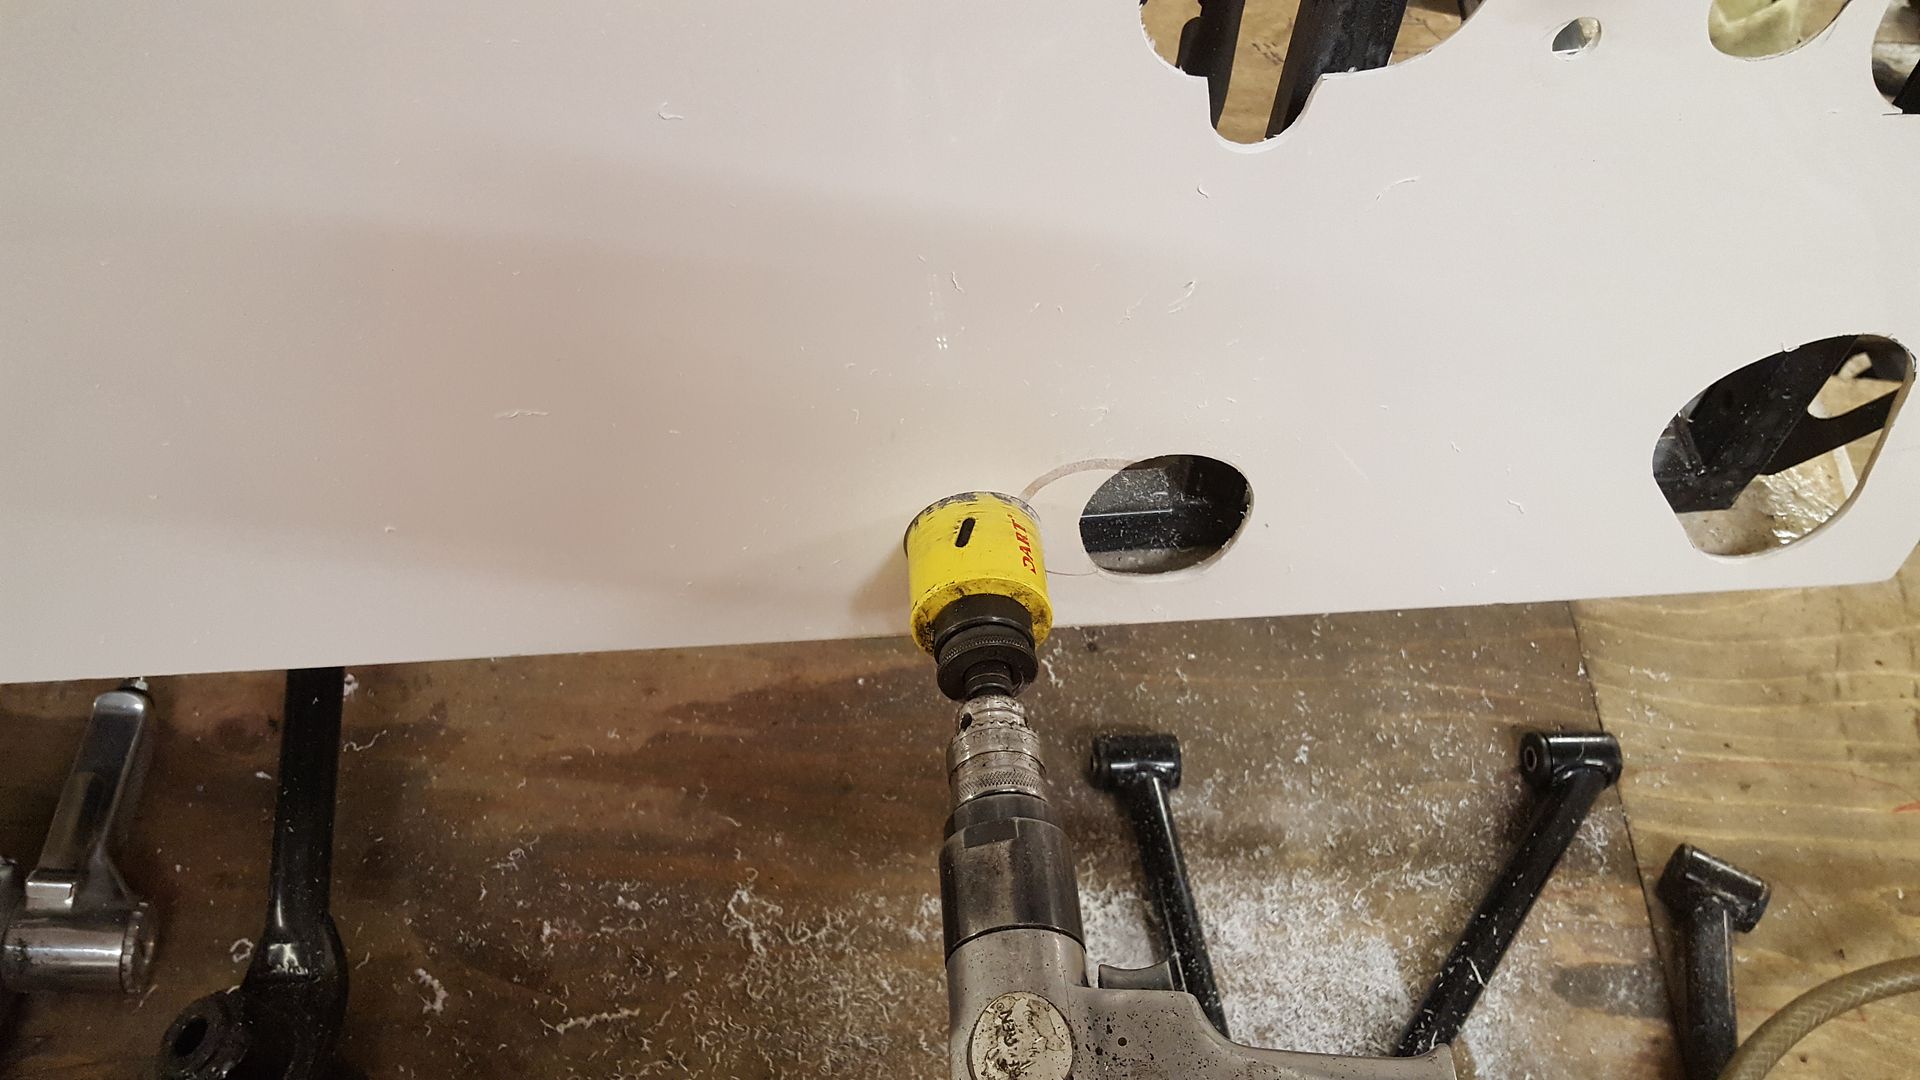
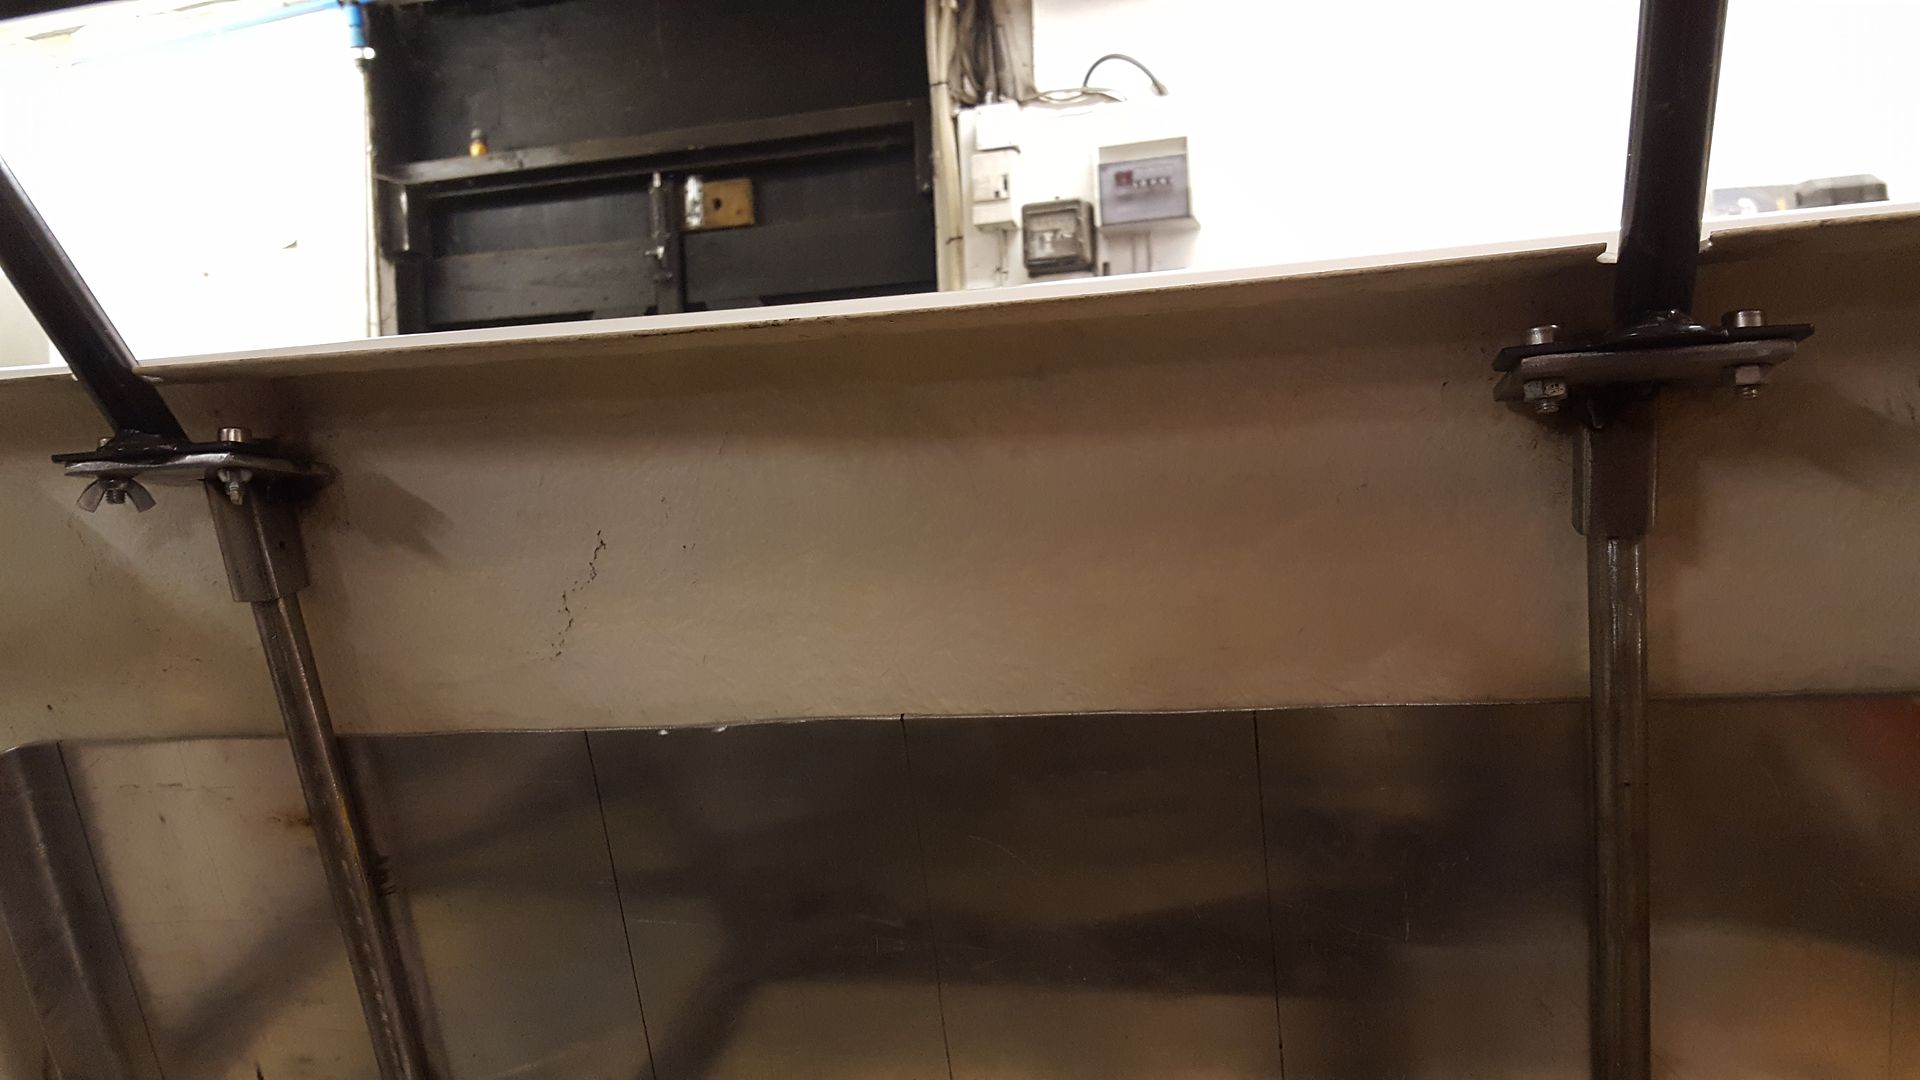
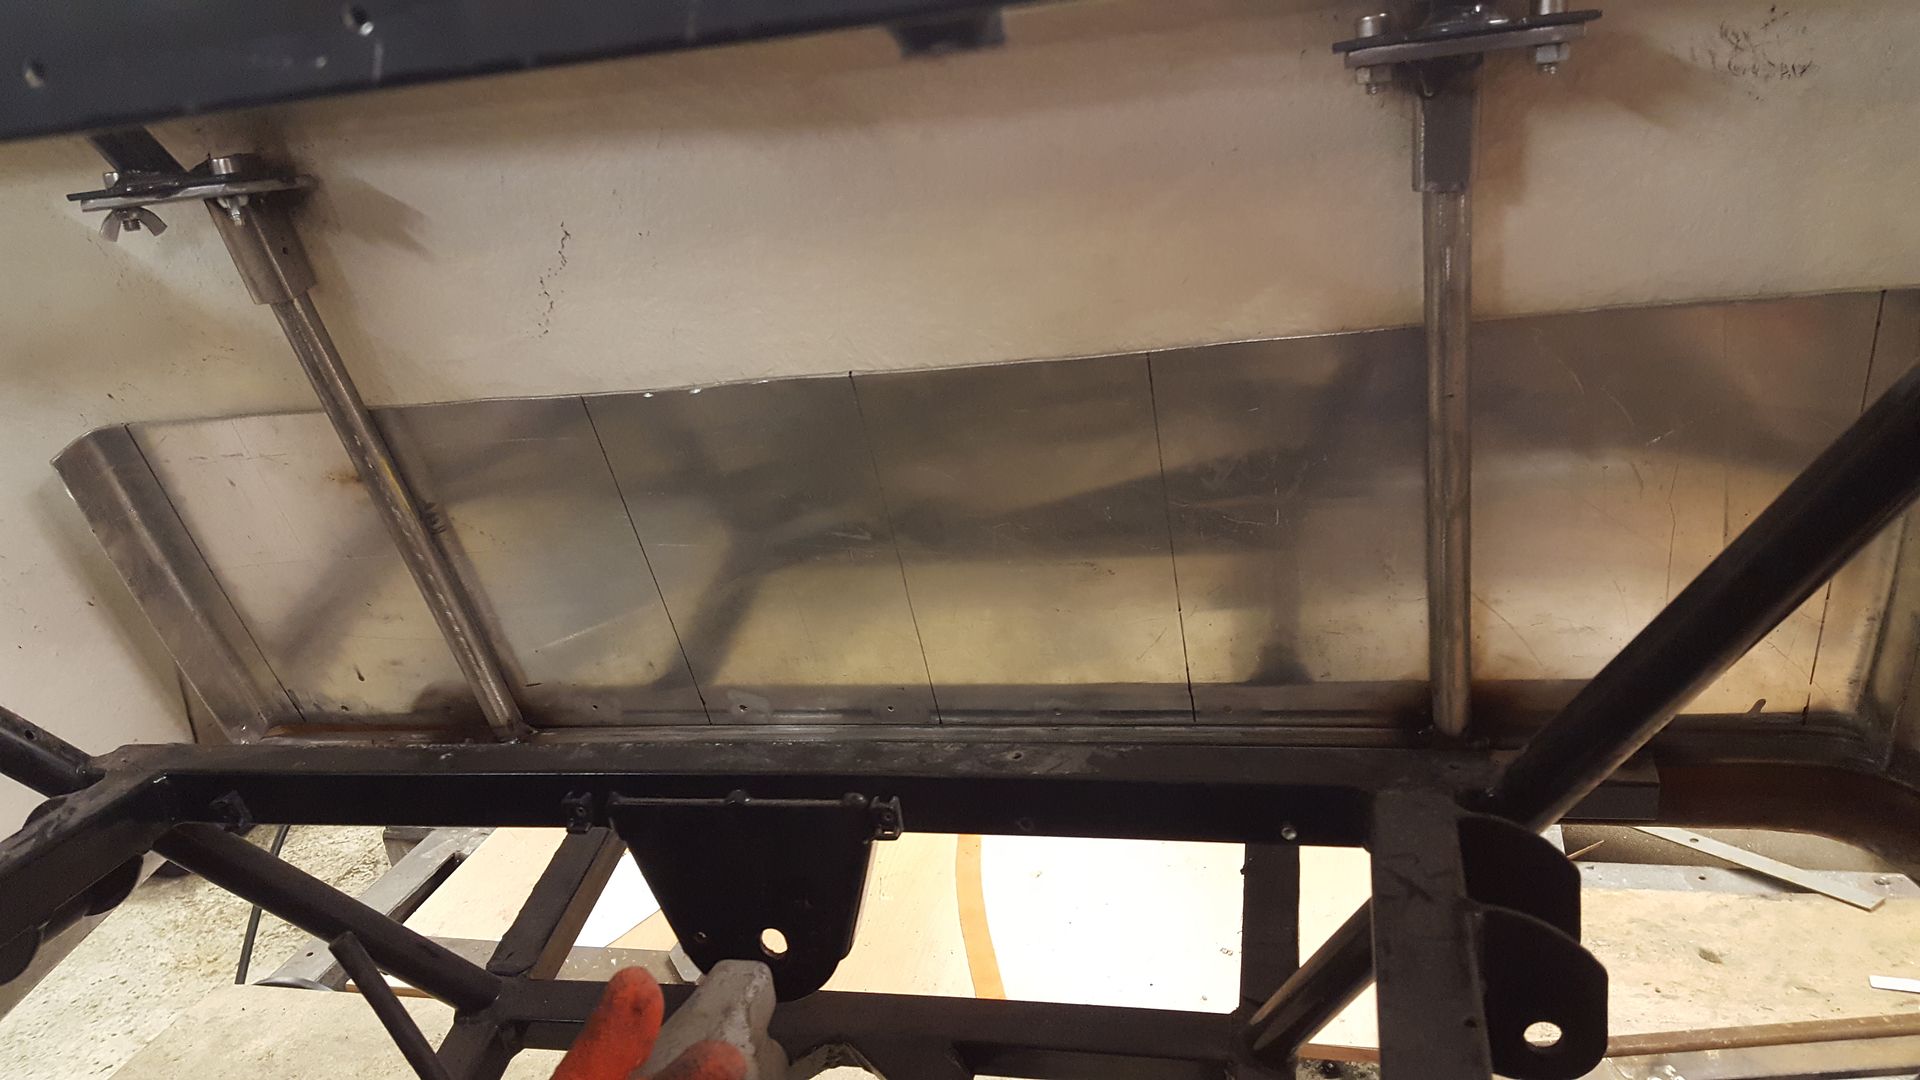
The side panels had all been measured to size and riveted on, and they are all stainless steel. it would have made a pretty flashy looking stainless
shiney body once finished. As many of you will know, stainless is VERY difficult to work with, bend and drill as its so bloody strong! This is
something they found when they started fitting the panels
(yes this is how they were fitted)
so got the drill out and expelled all of those
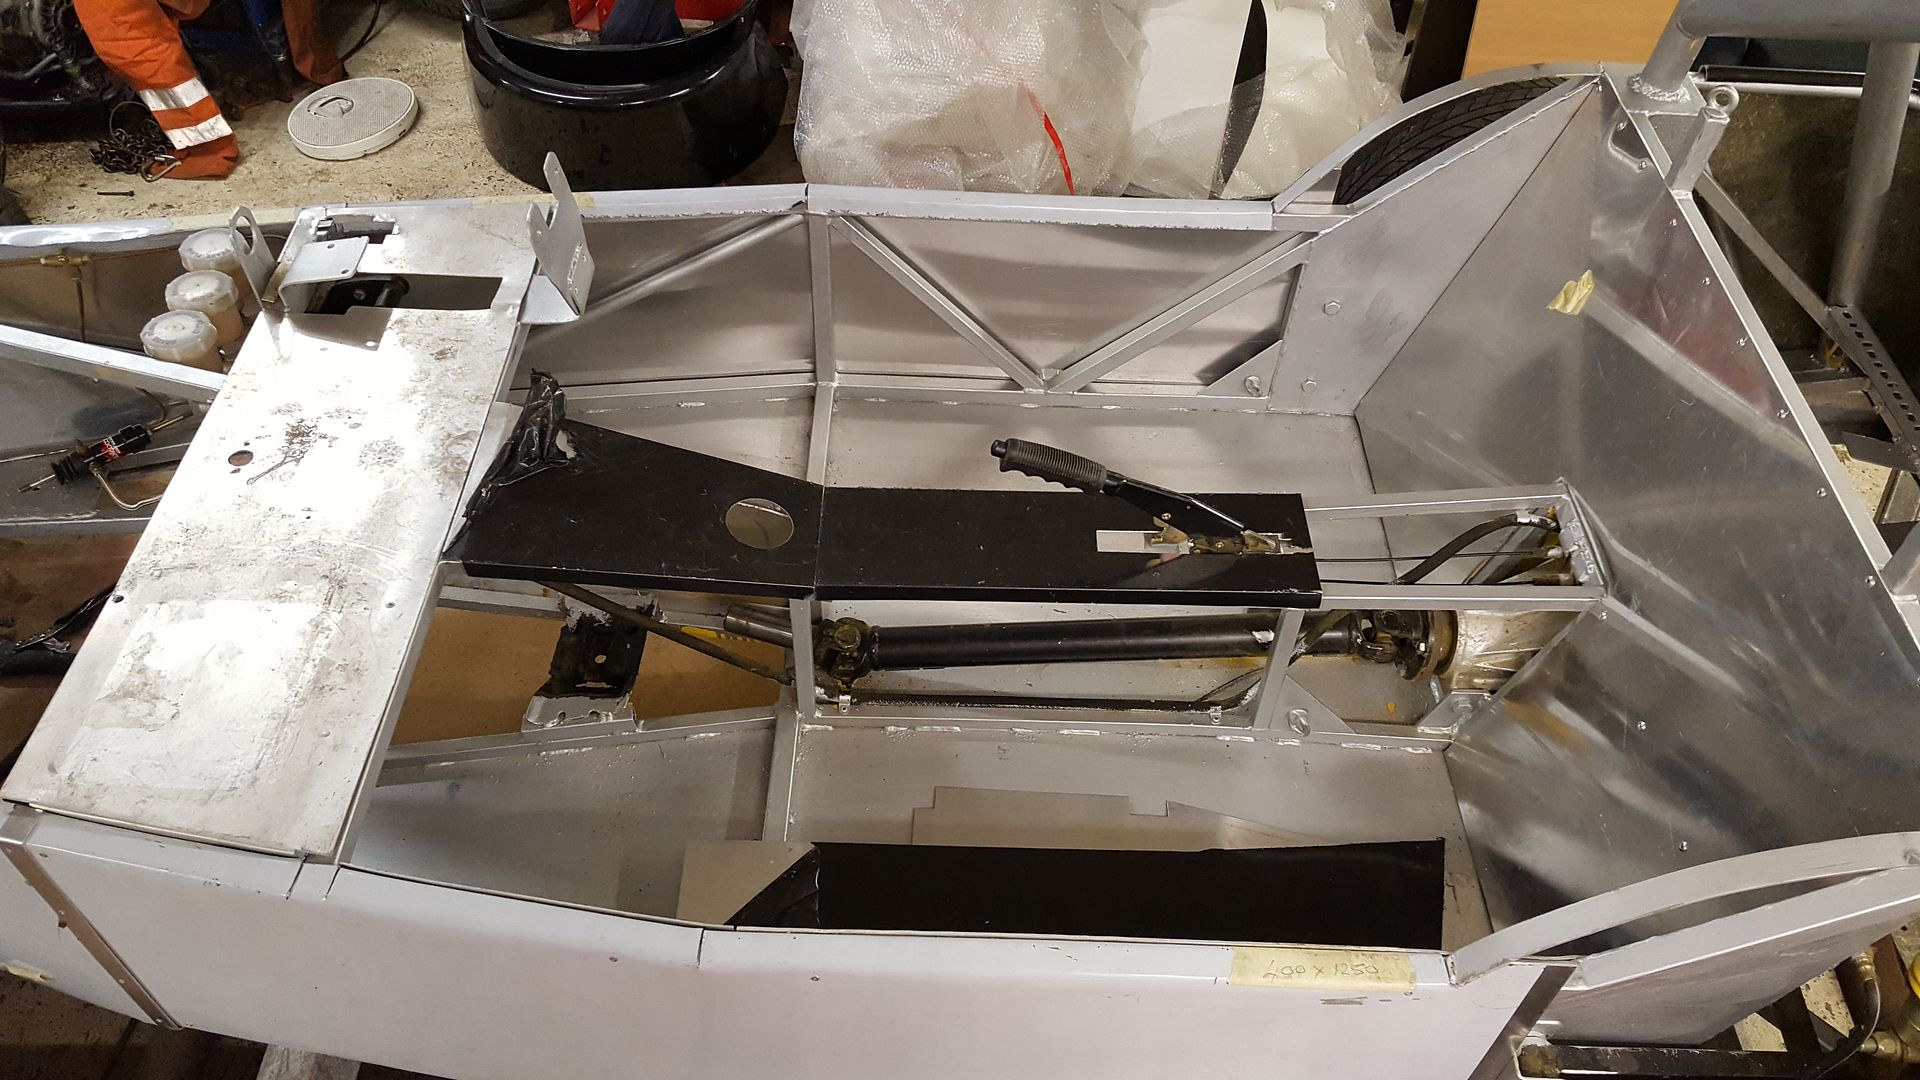
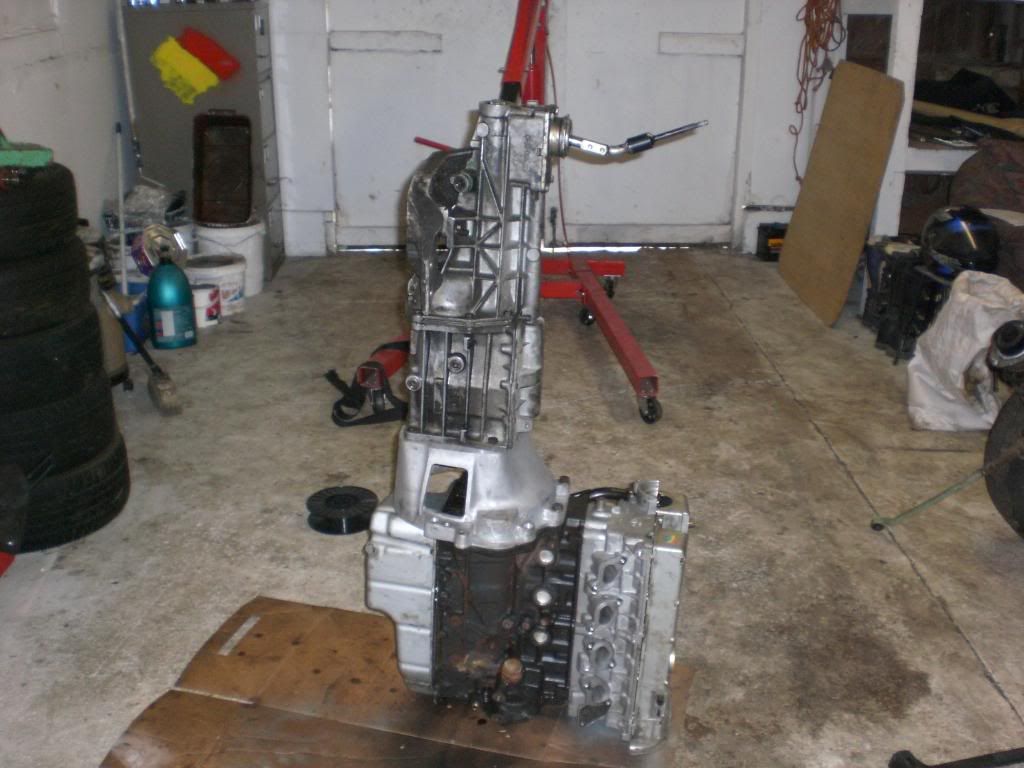
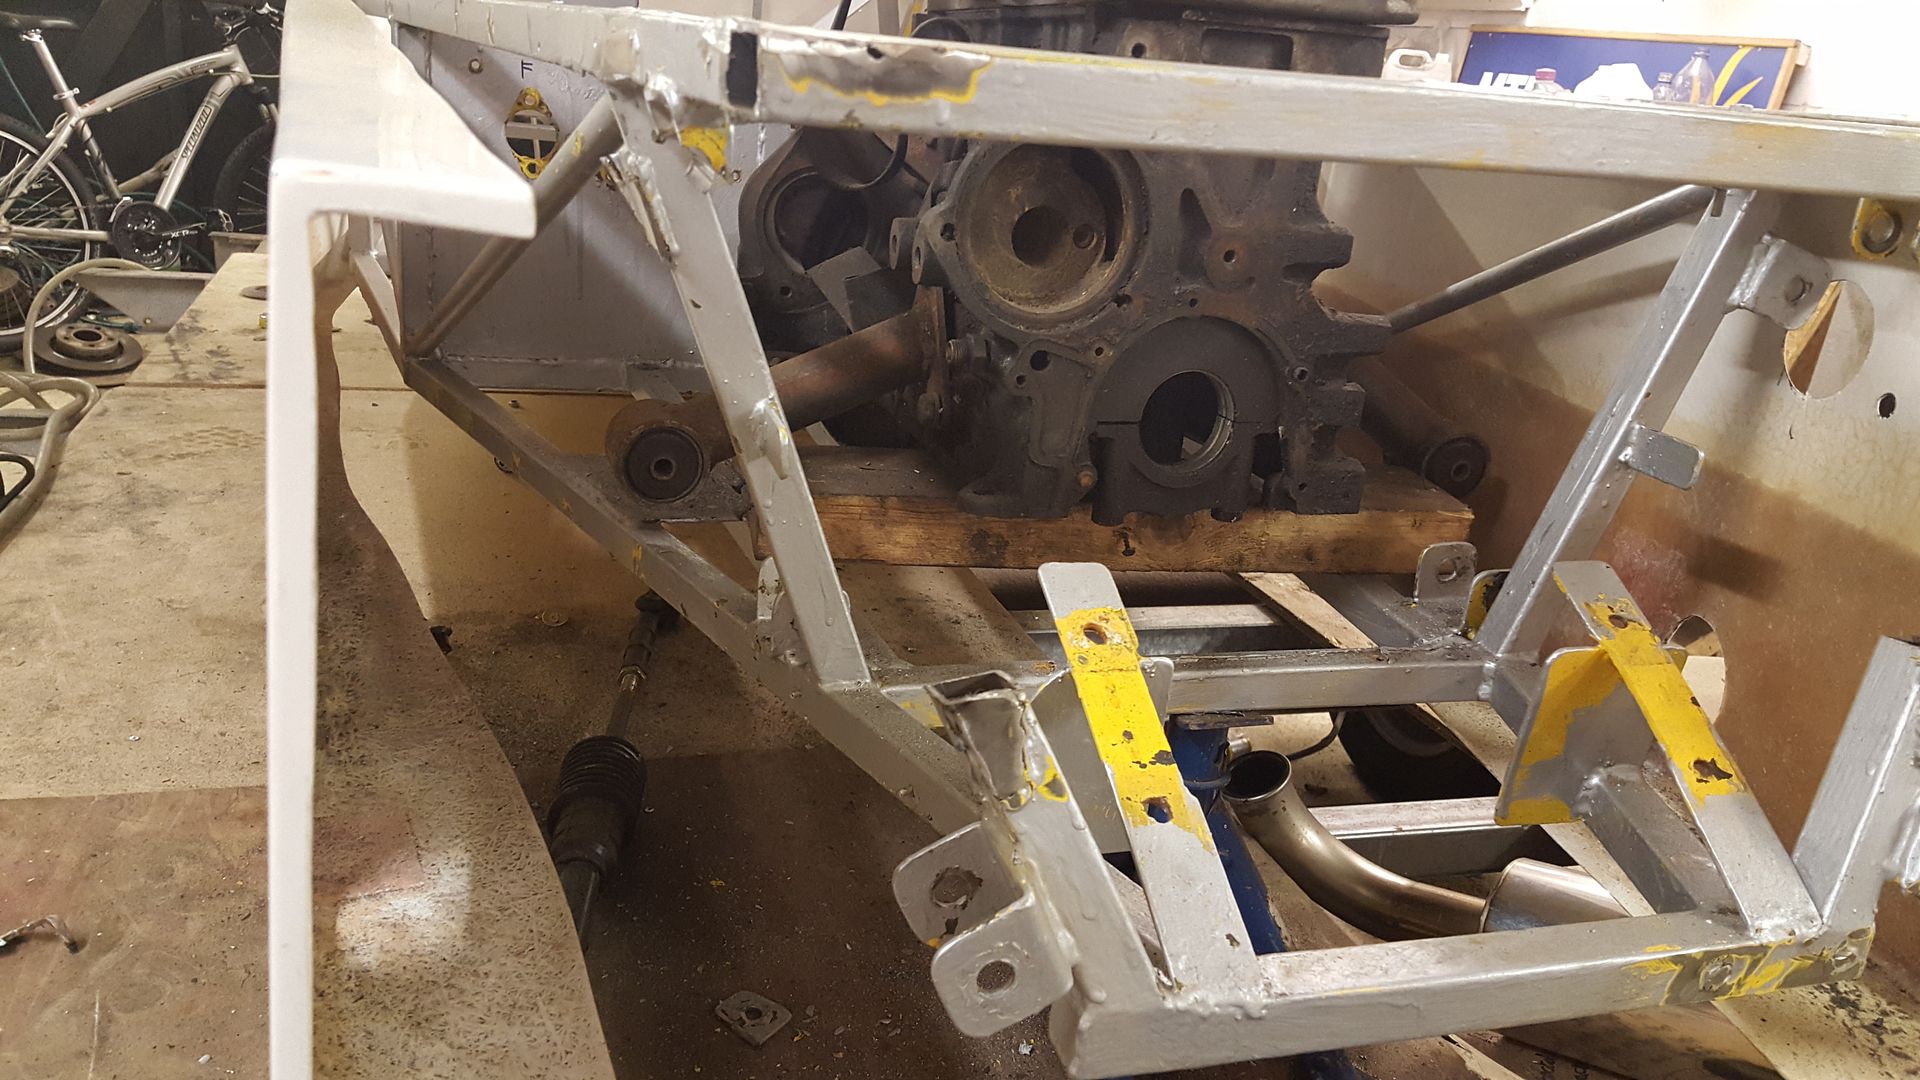
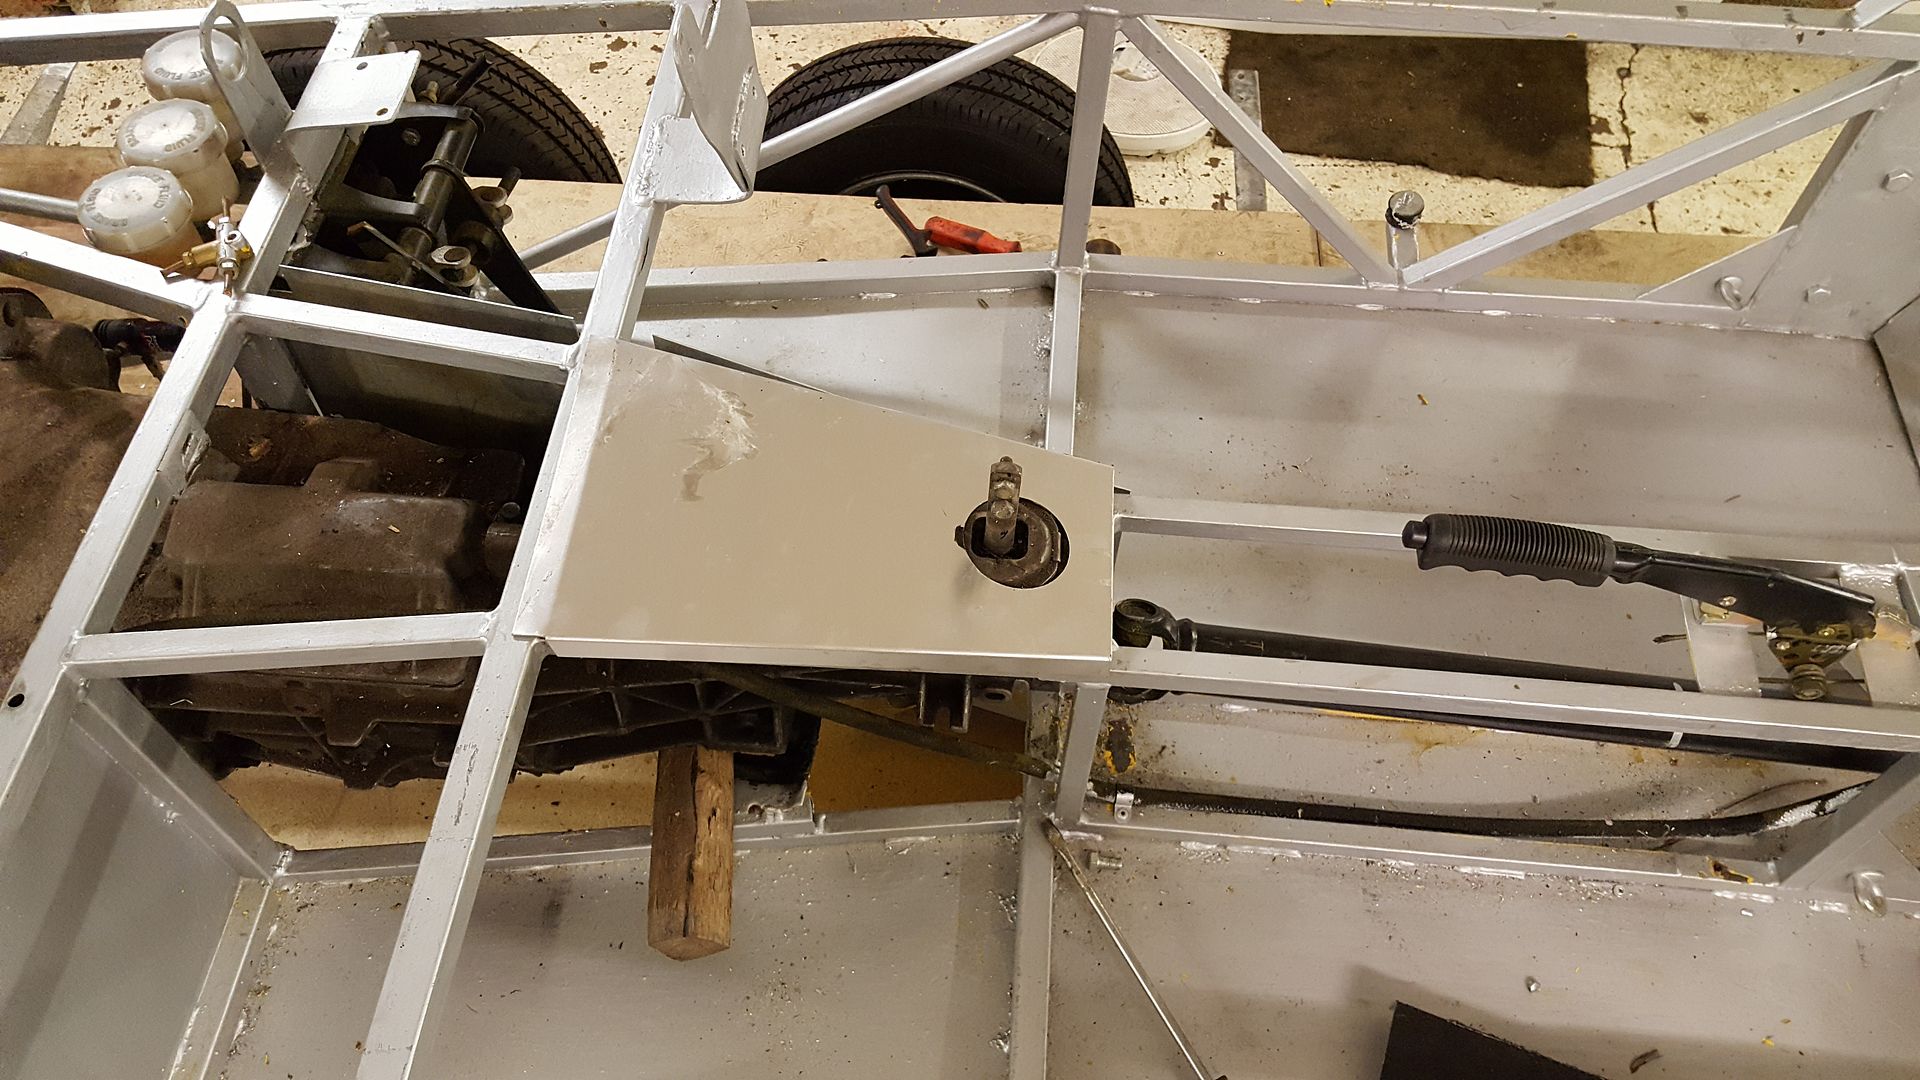
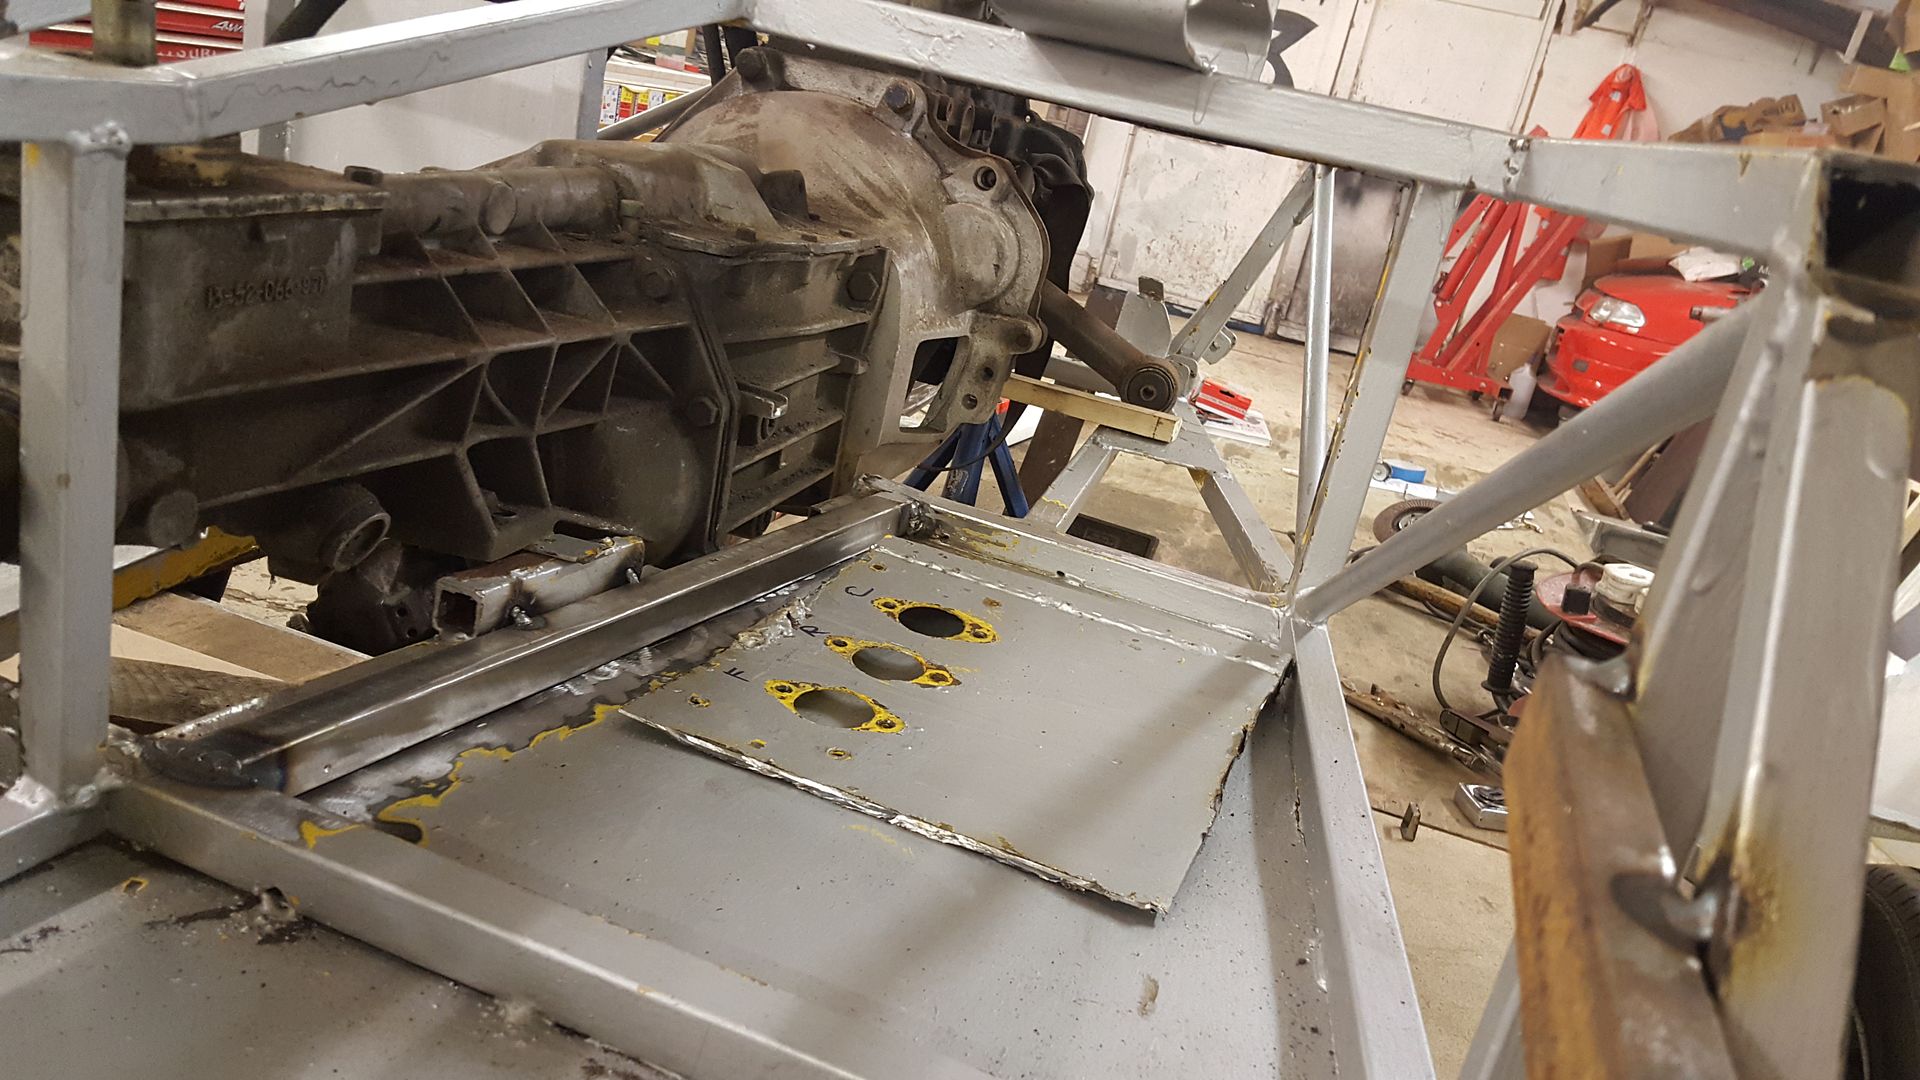
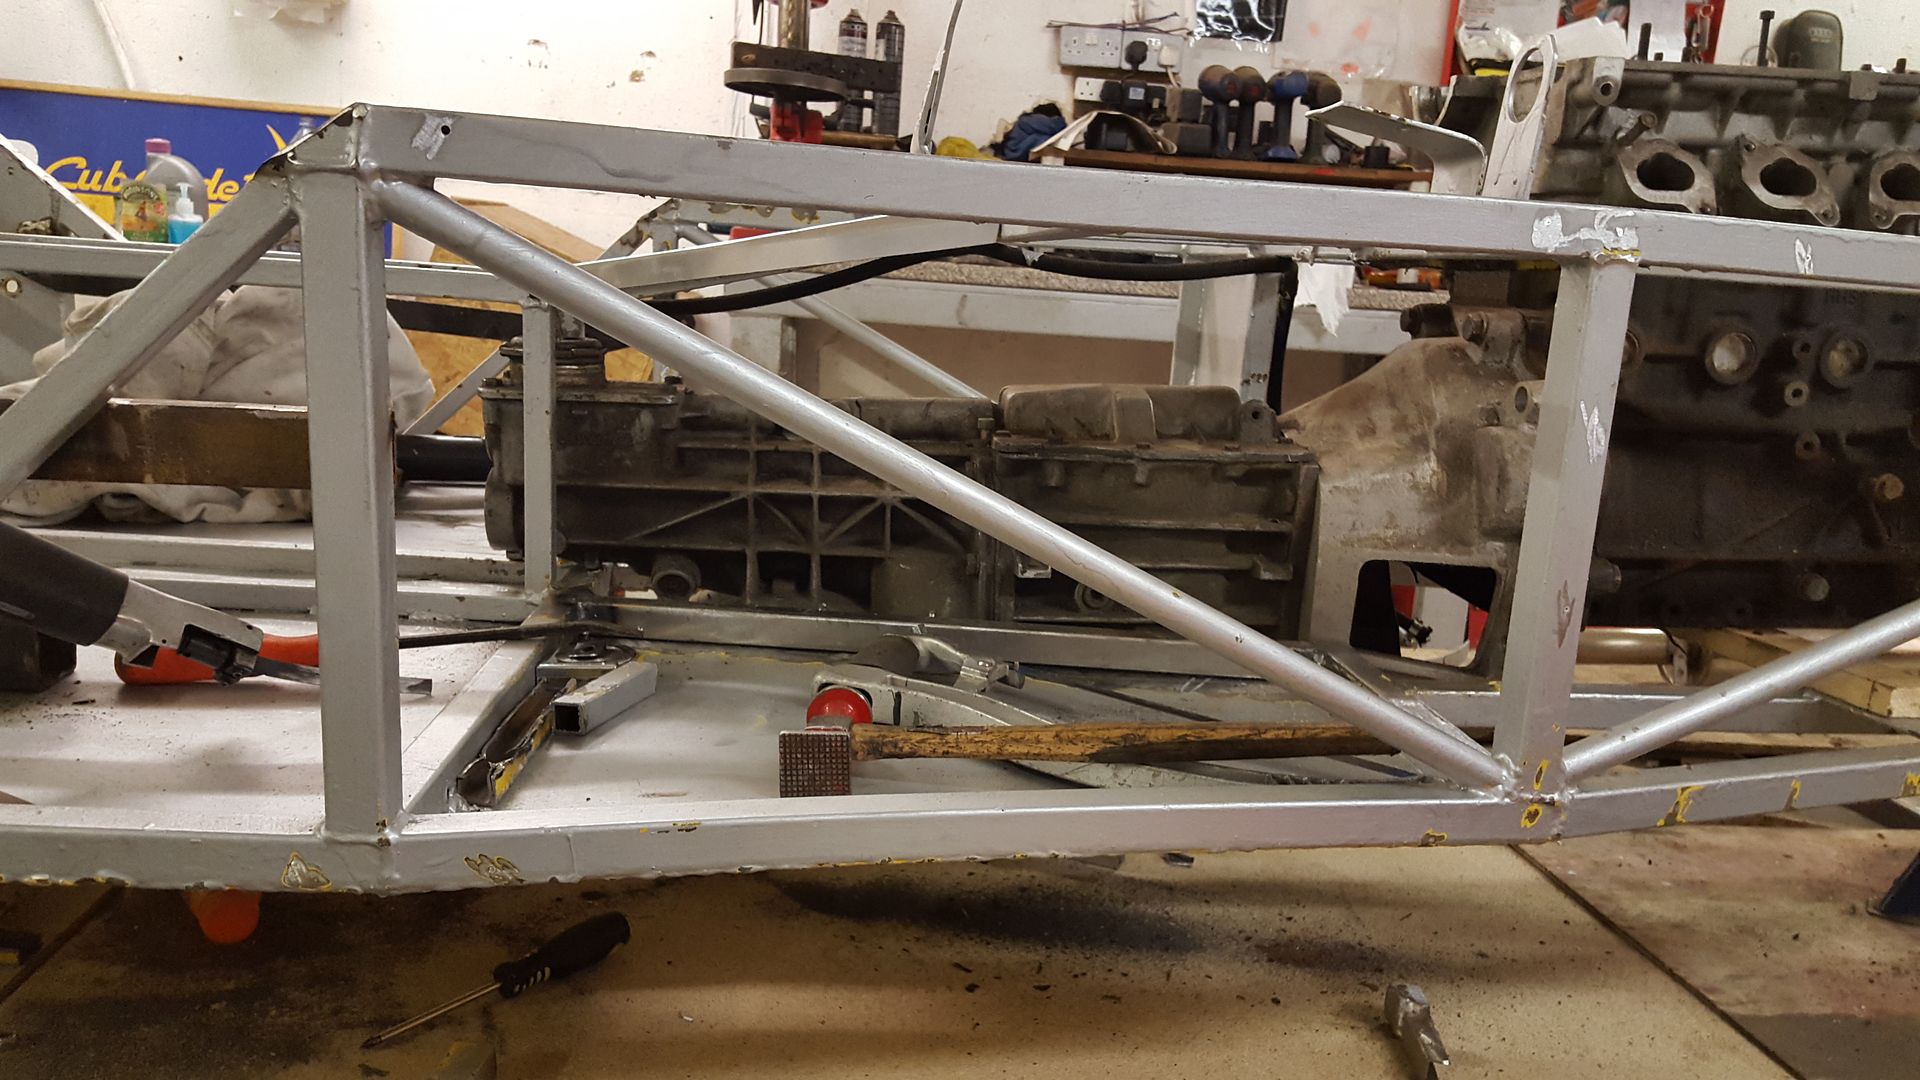
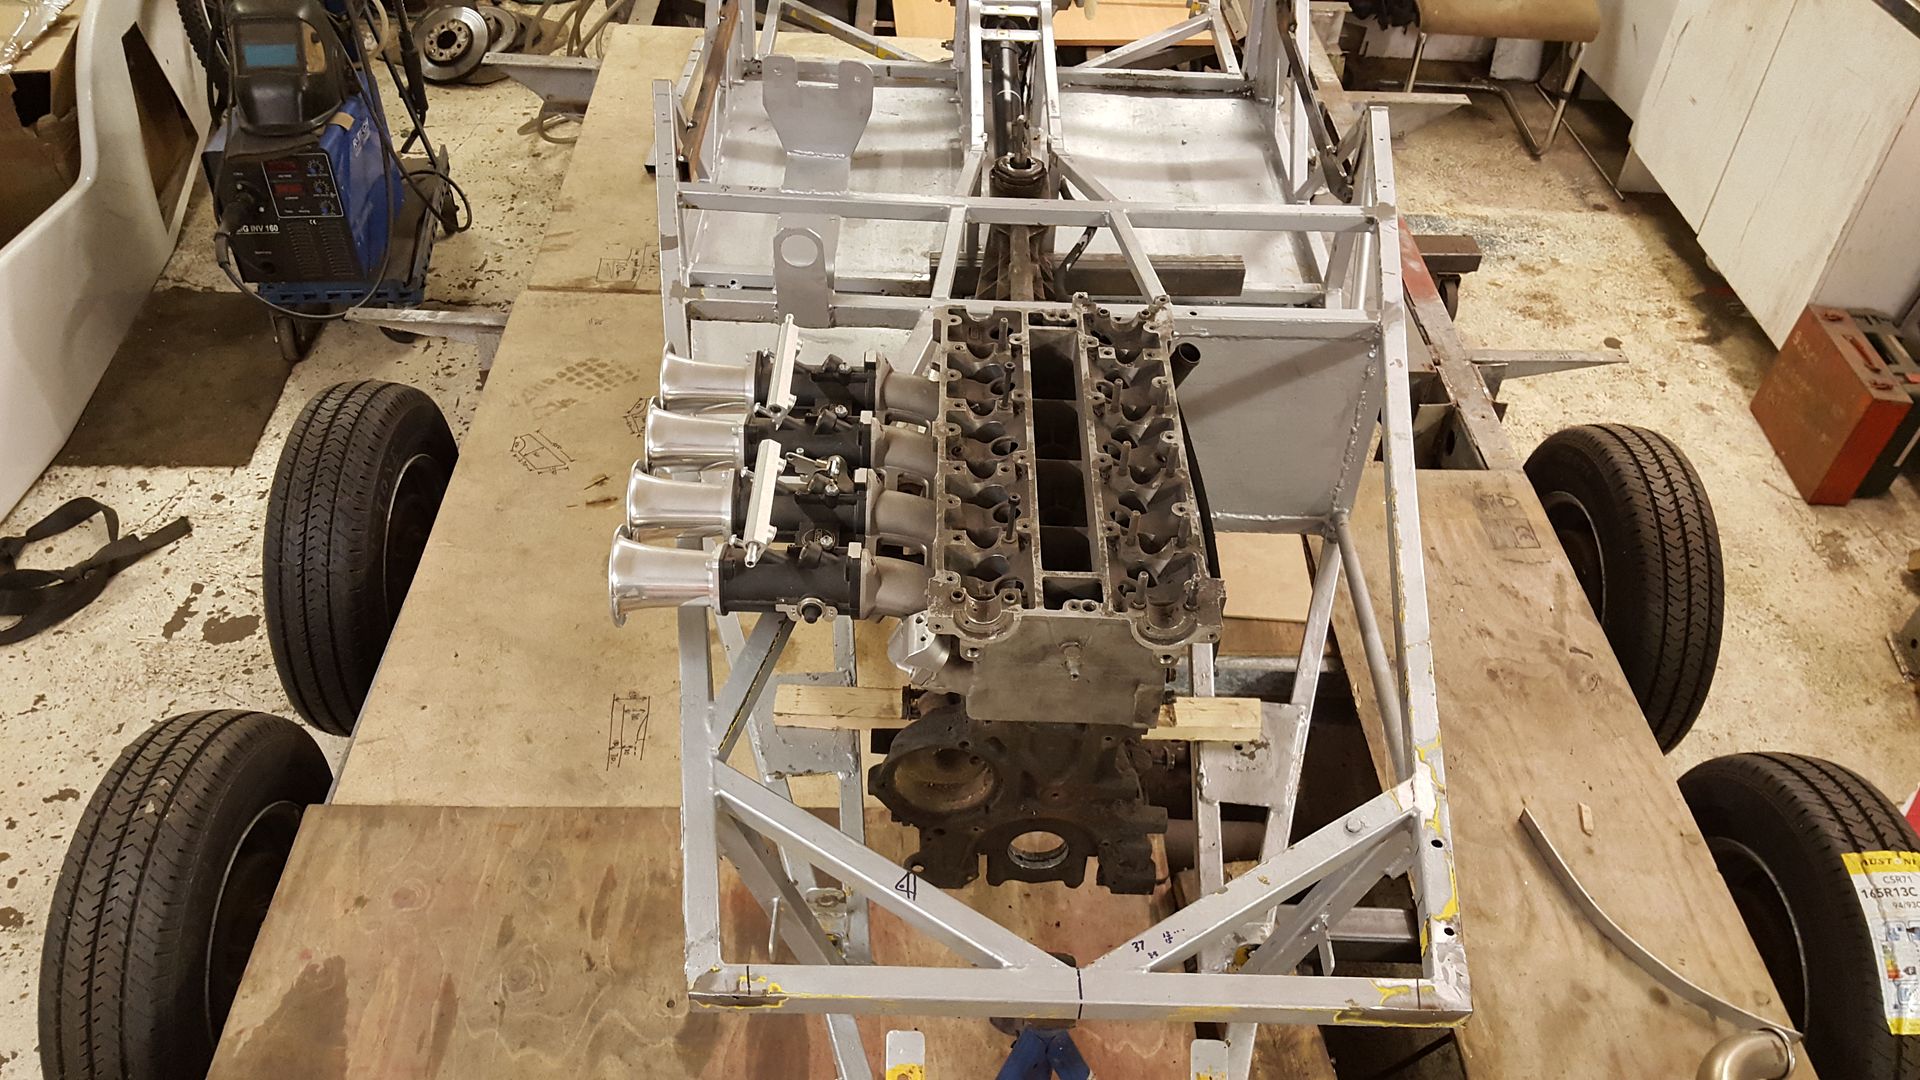
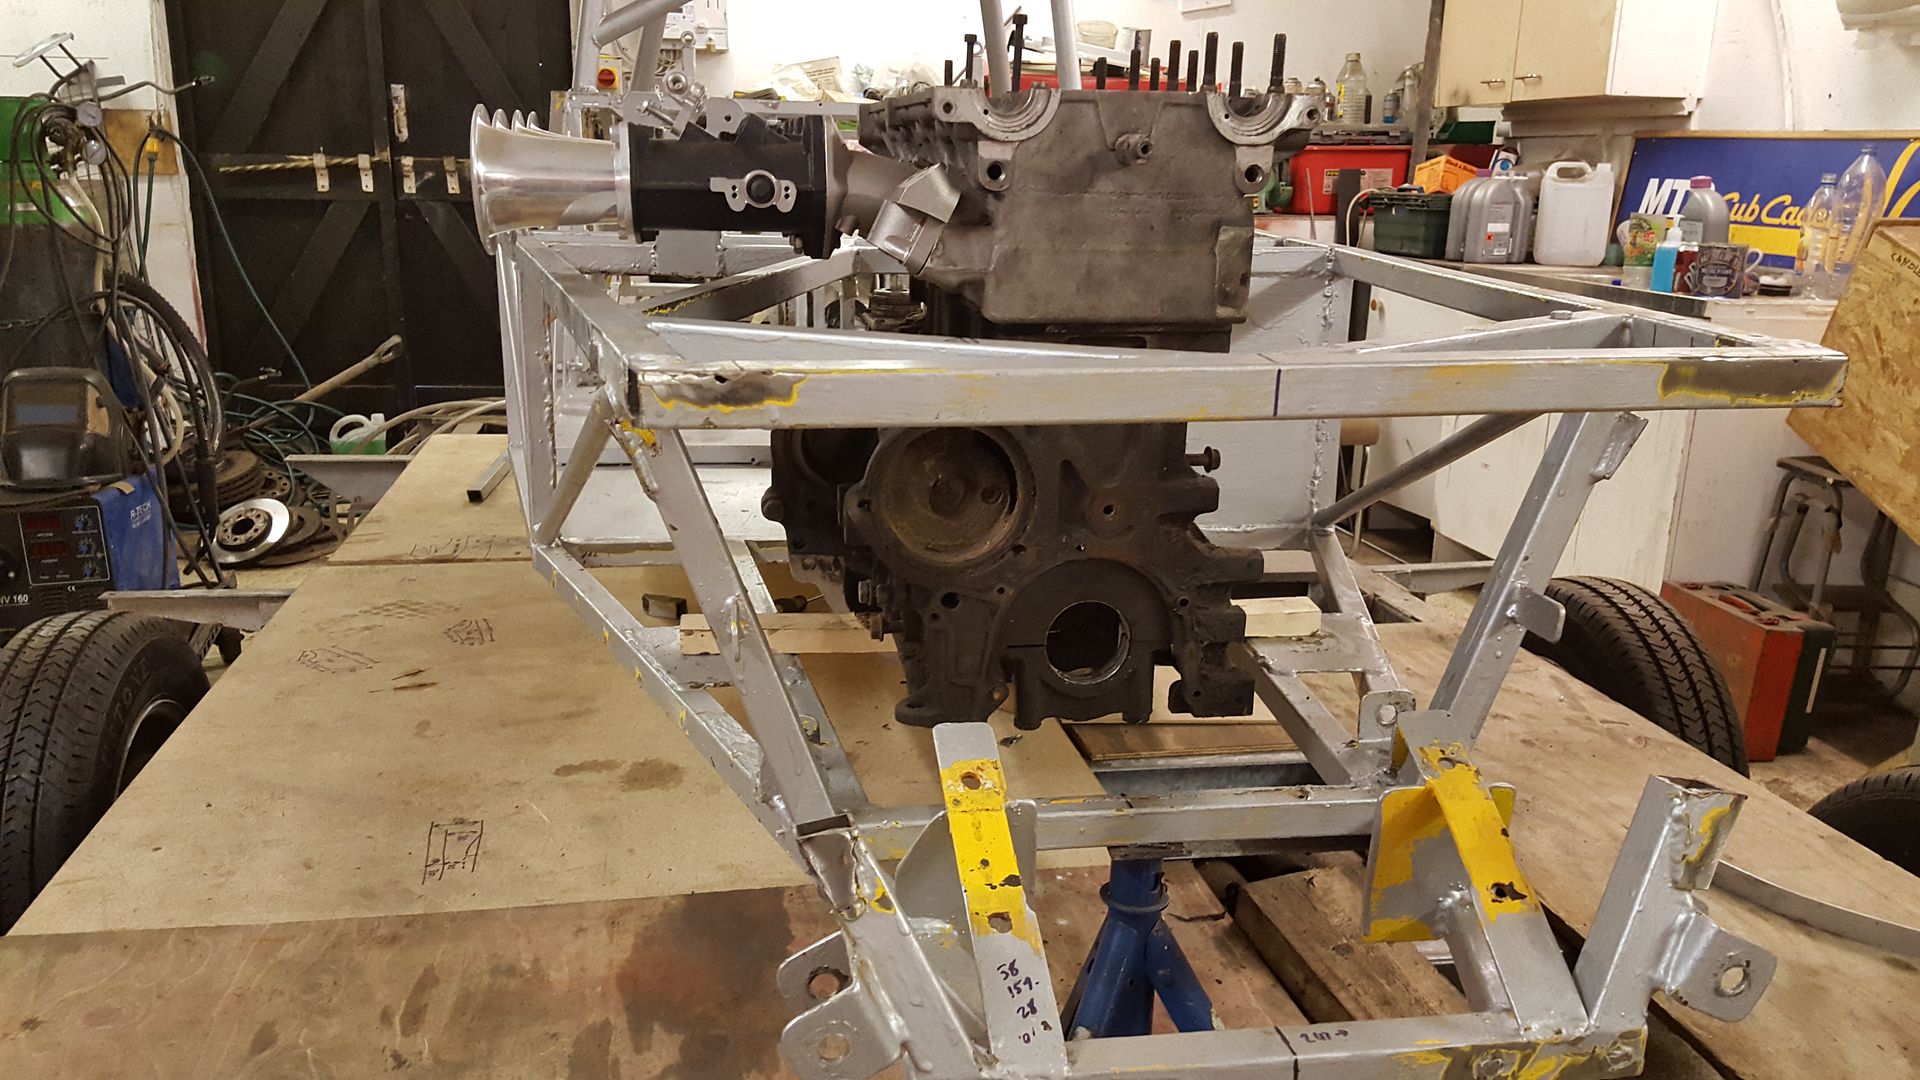
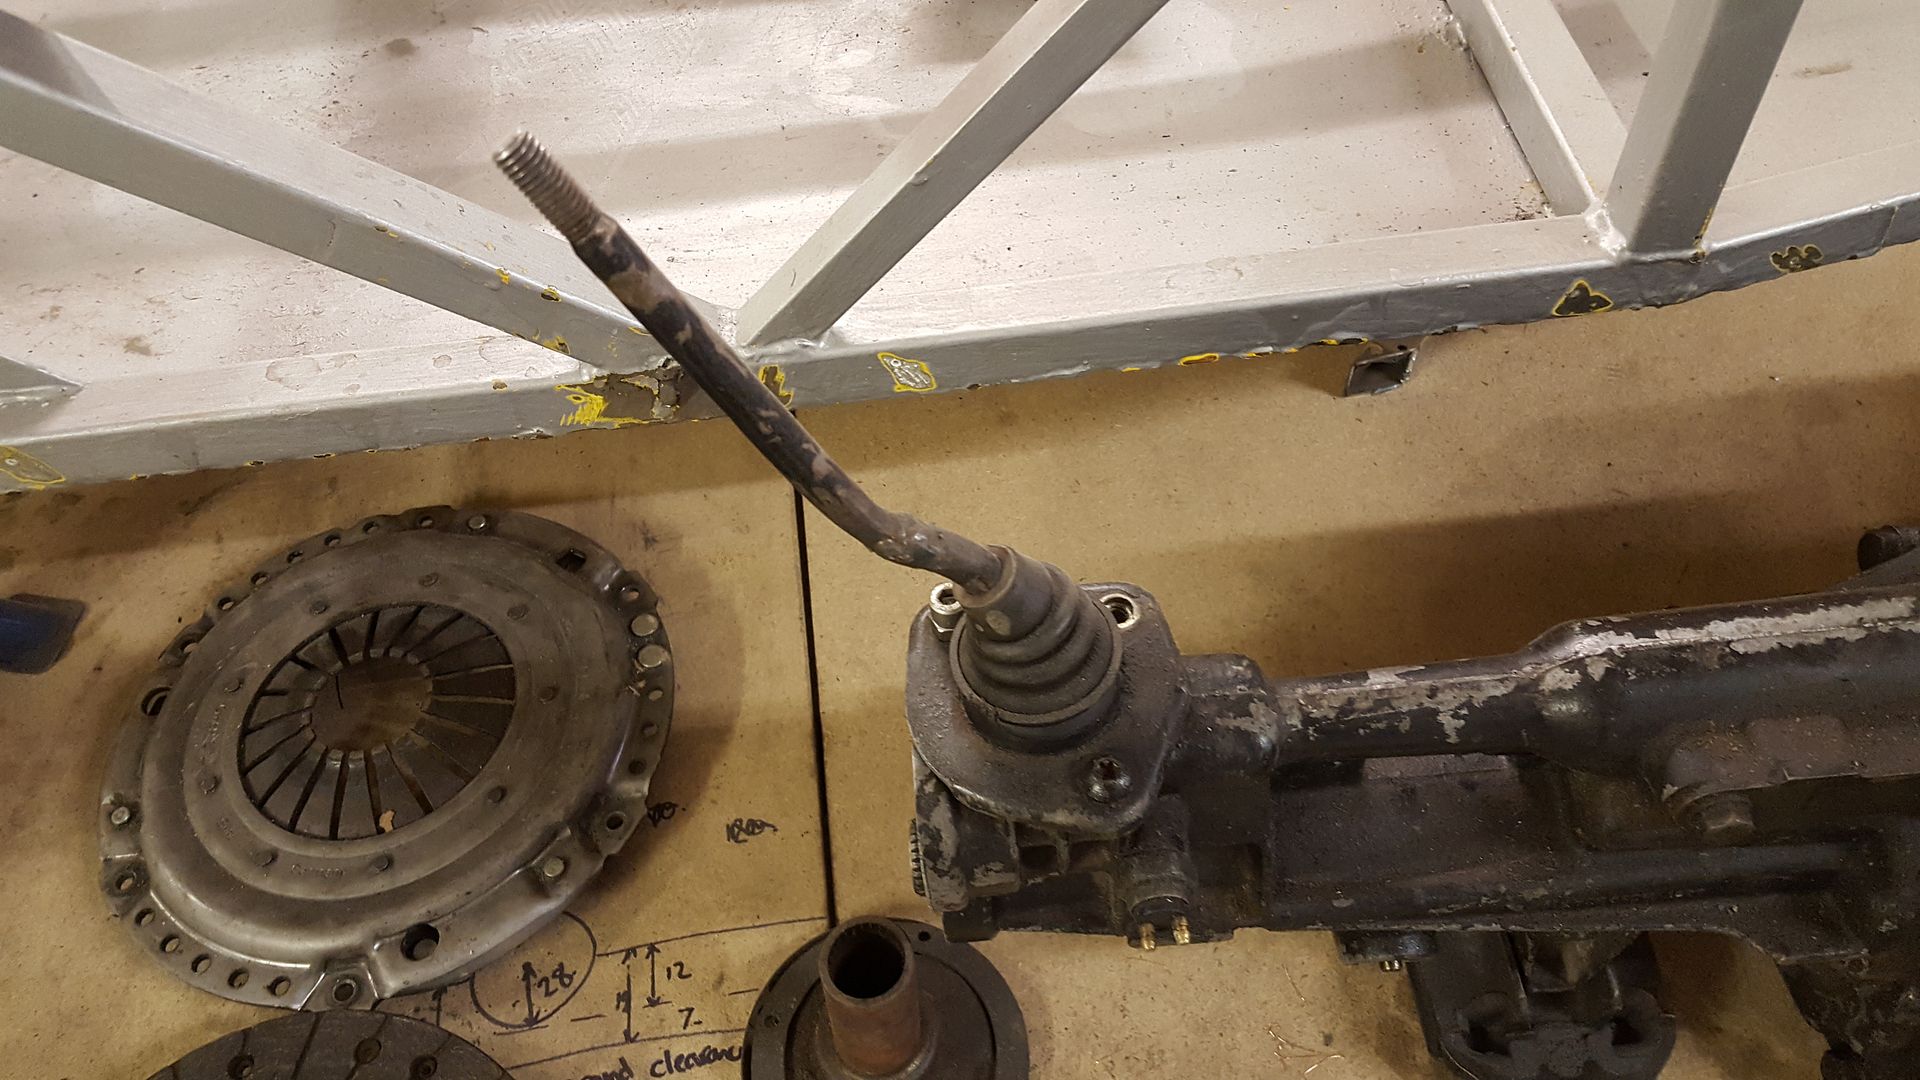
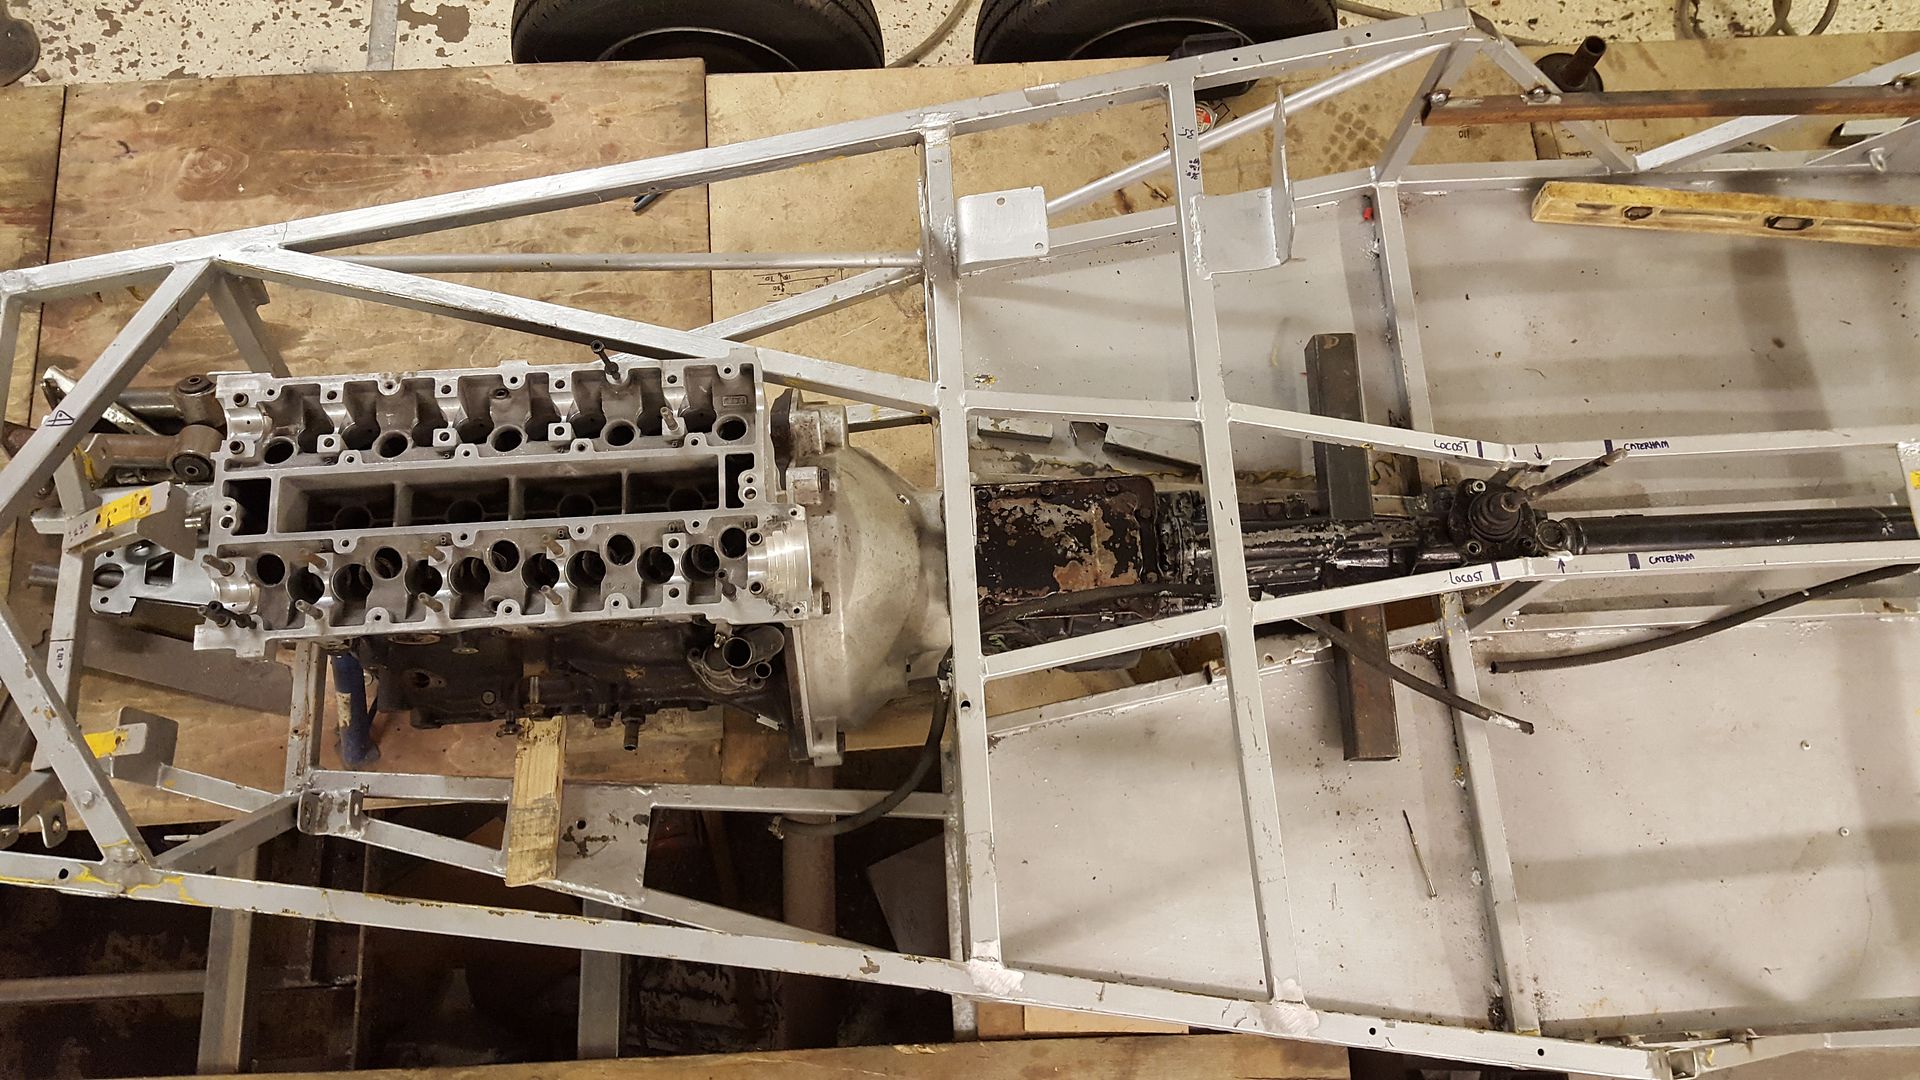
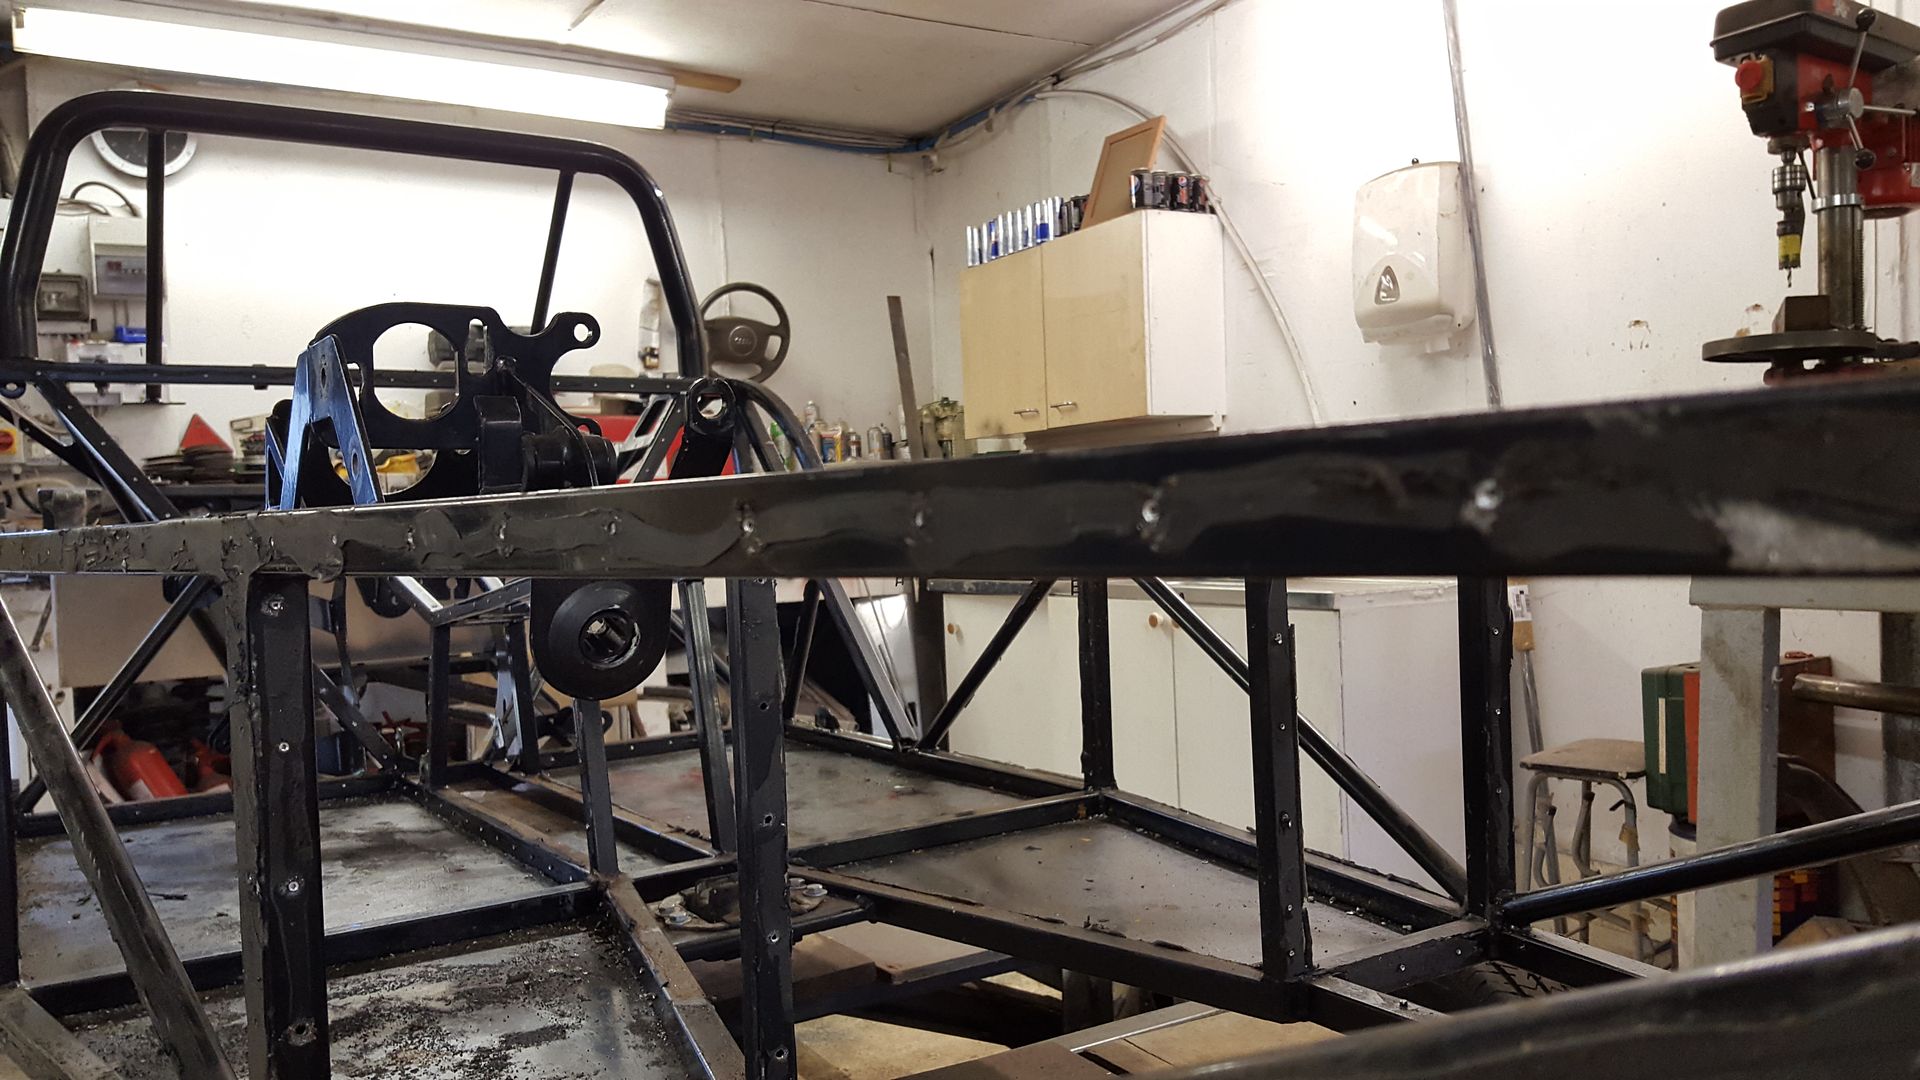
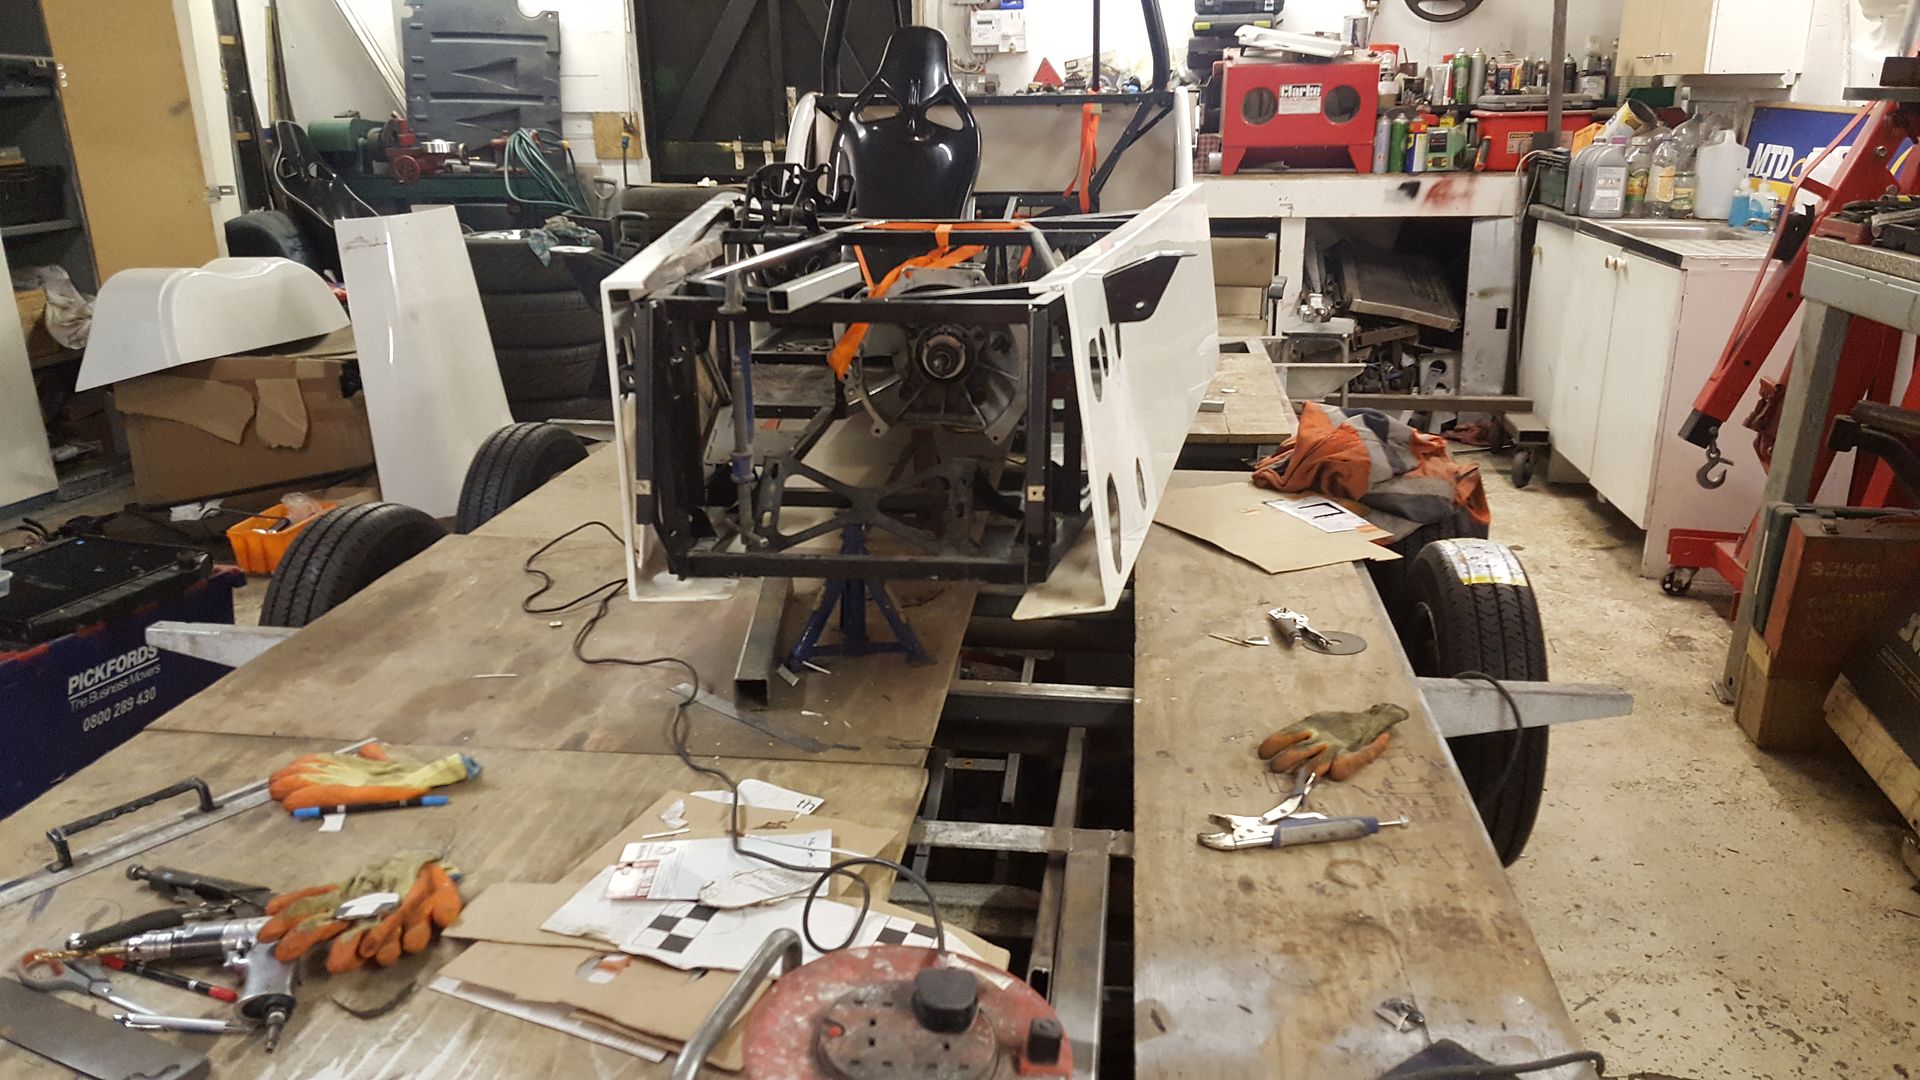
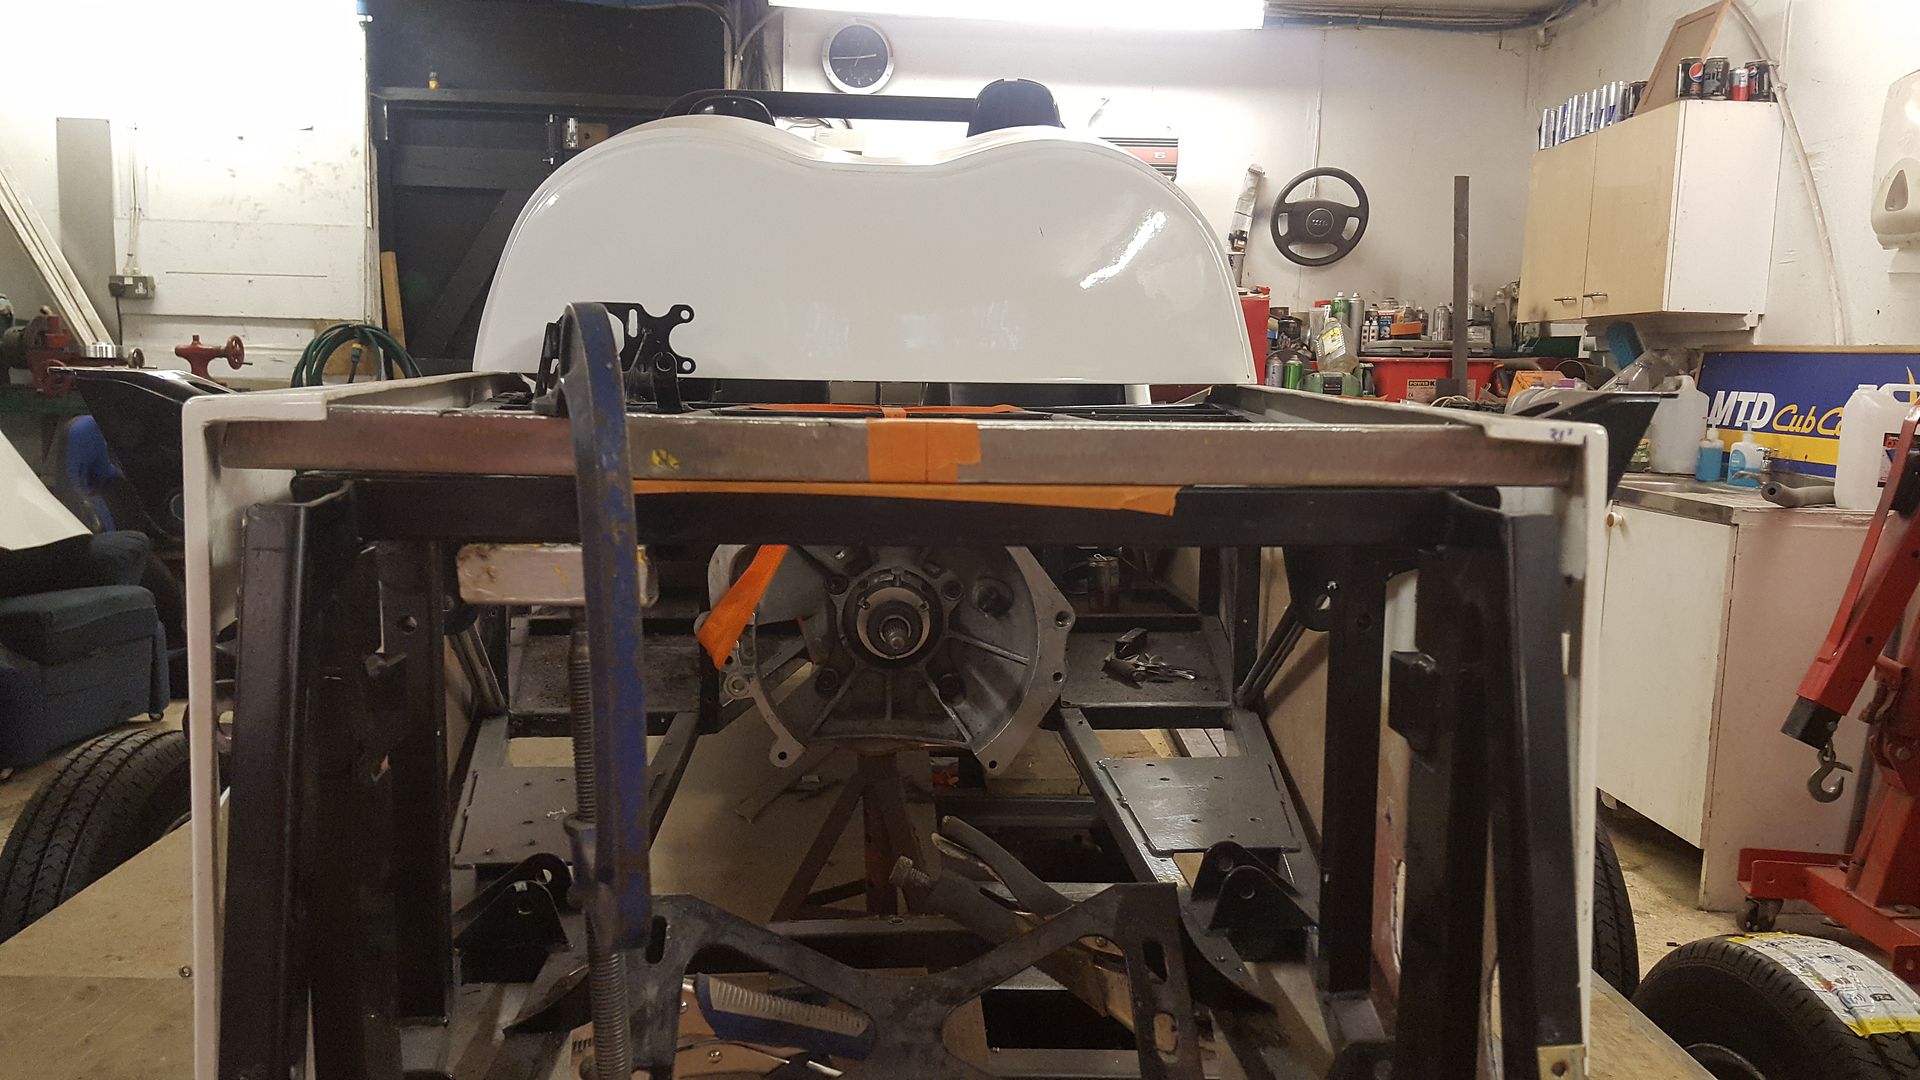
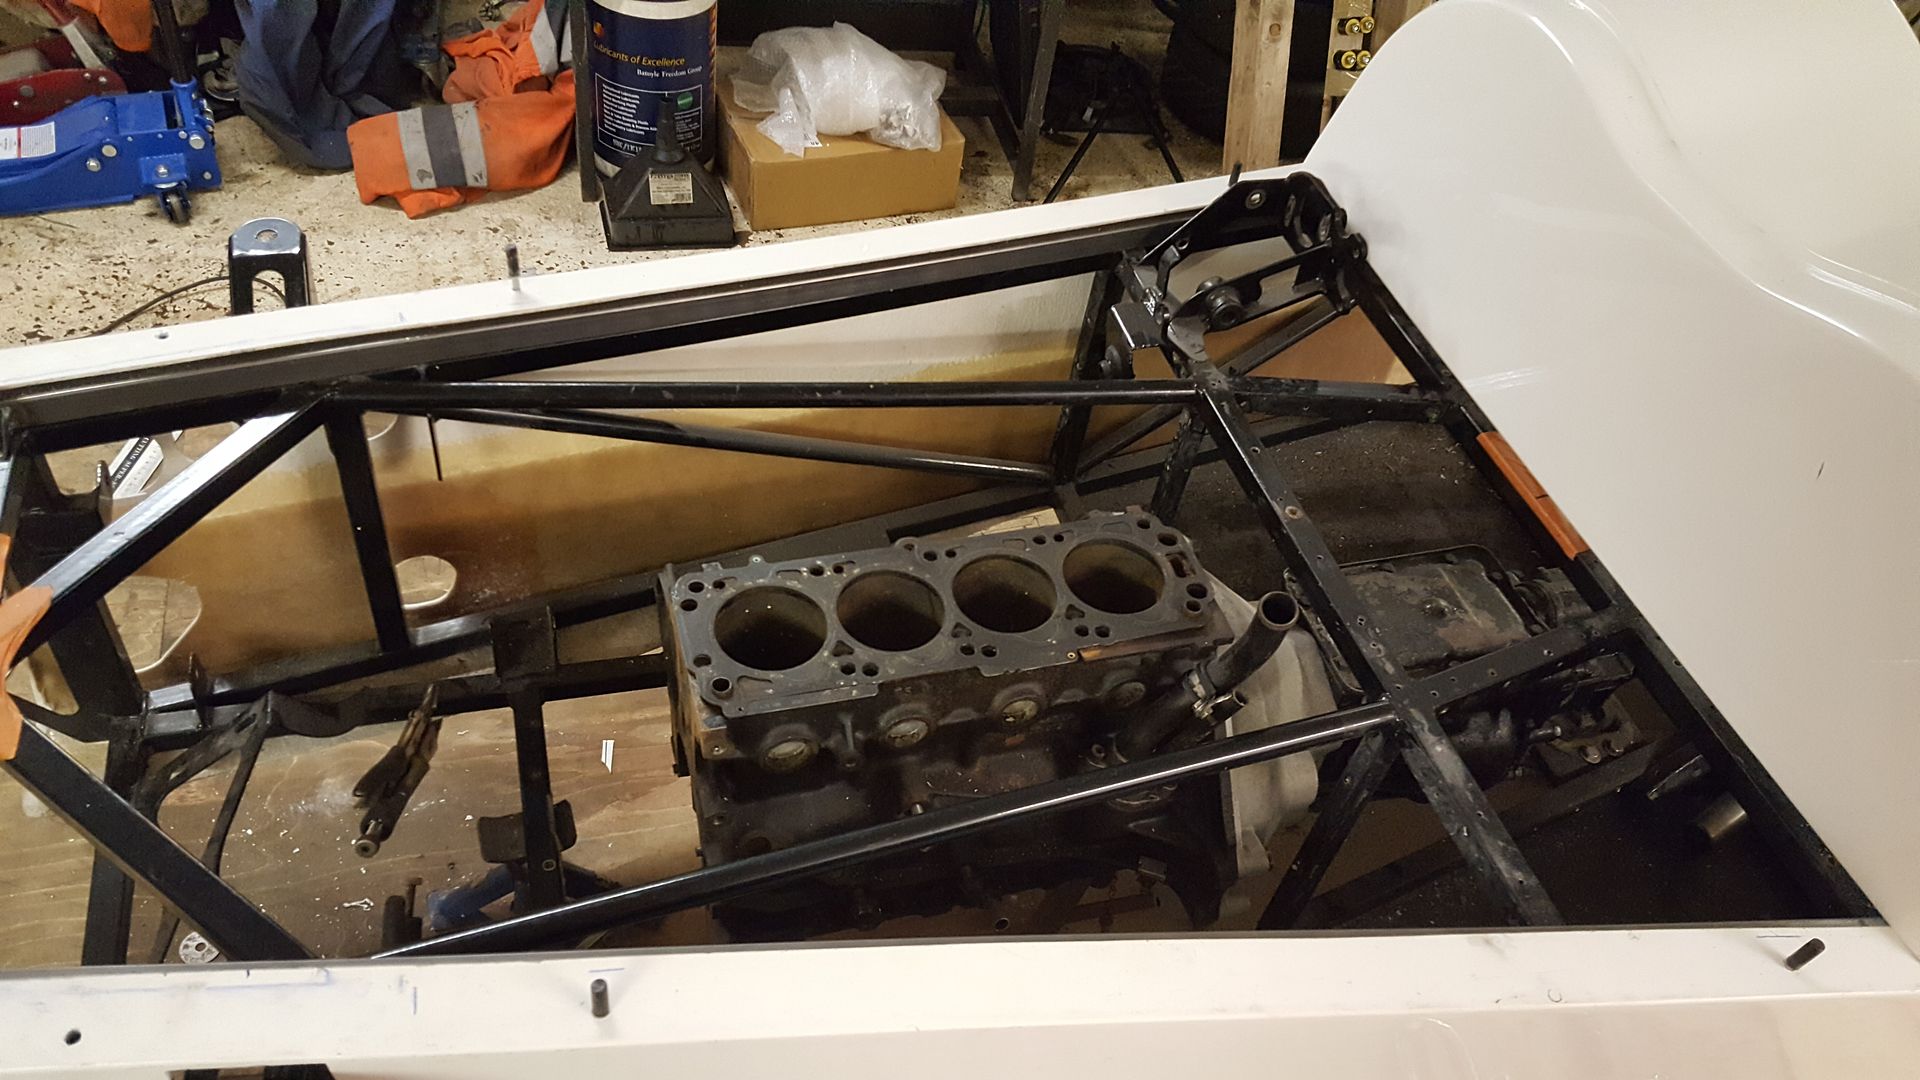
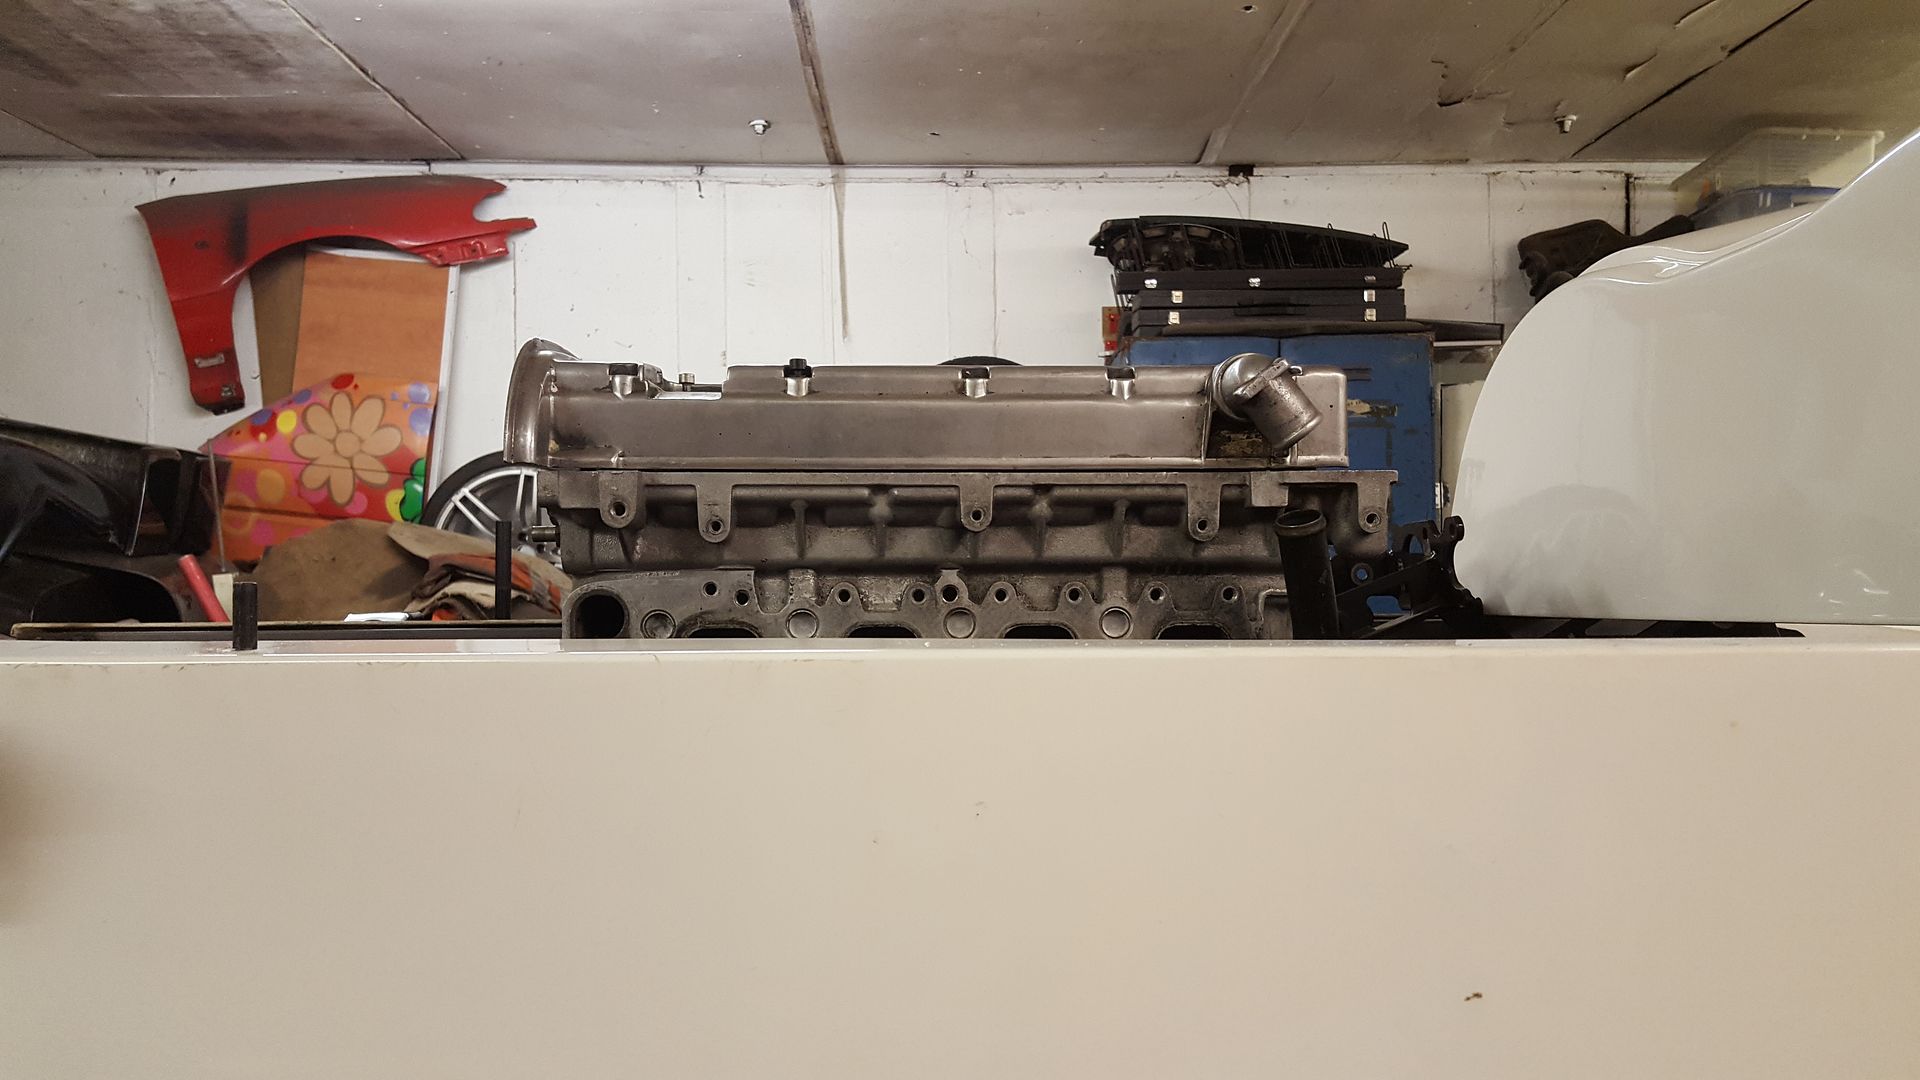
next i thought id uncover the mock up c20xe > a-frame engineering bellhousing > cosworth T5 thats been sitting under the drill bench for 8 plus
years and tried it in, i had no idea if the massive T5 will even fit in the tunnel
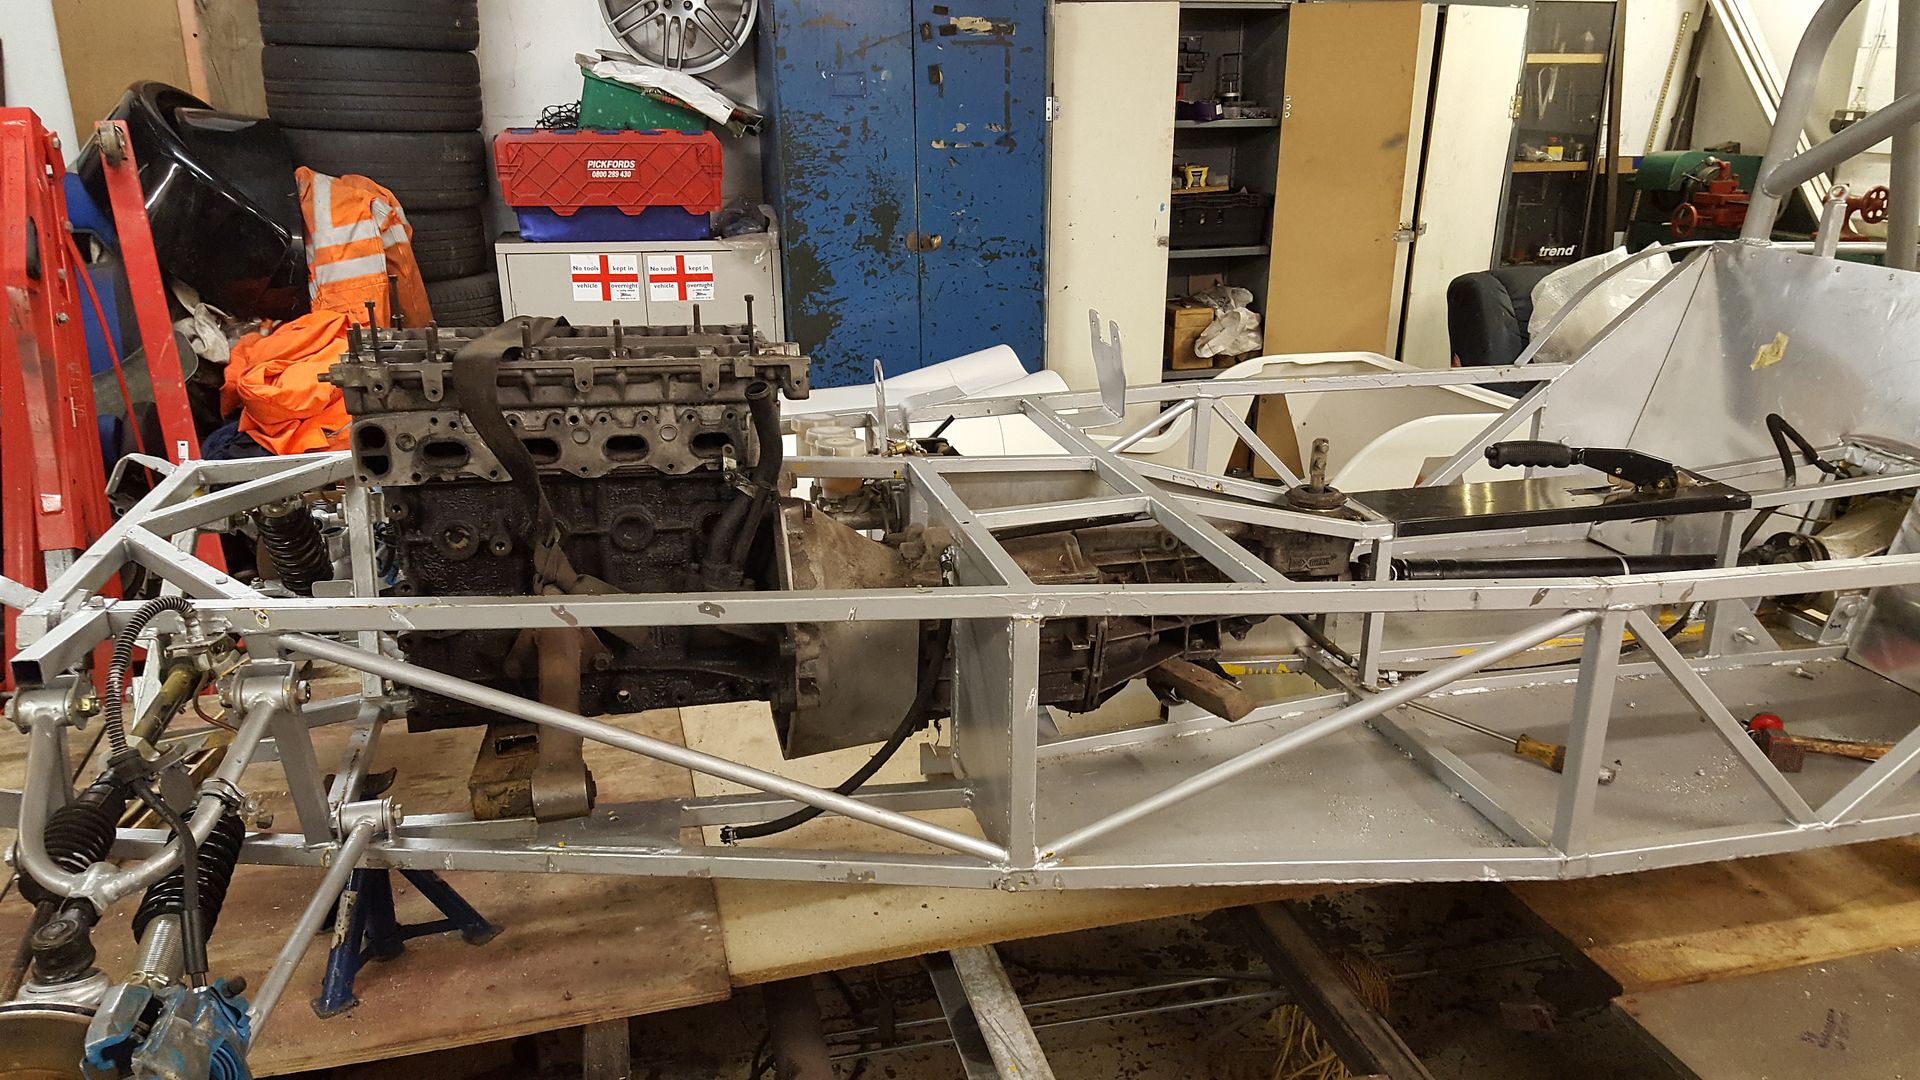
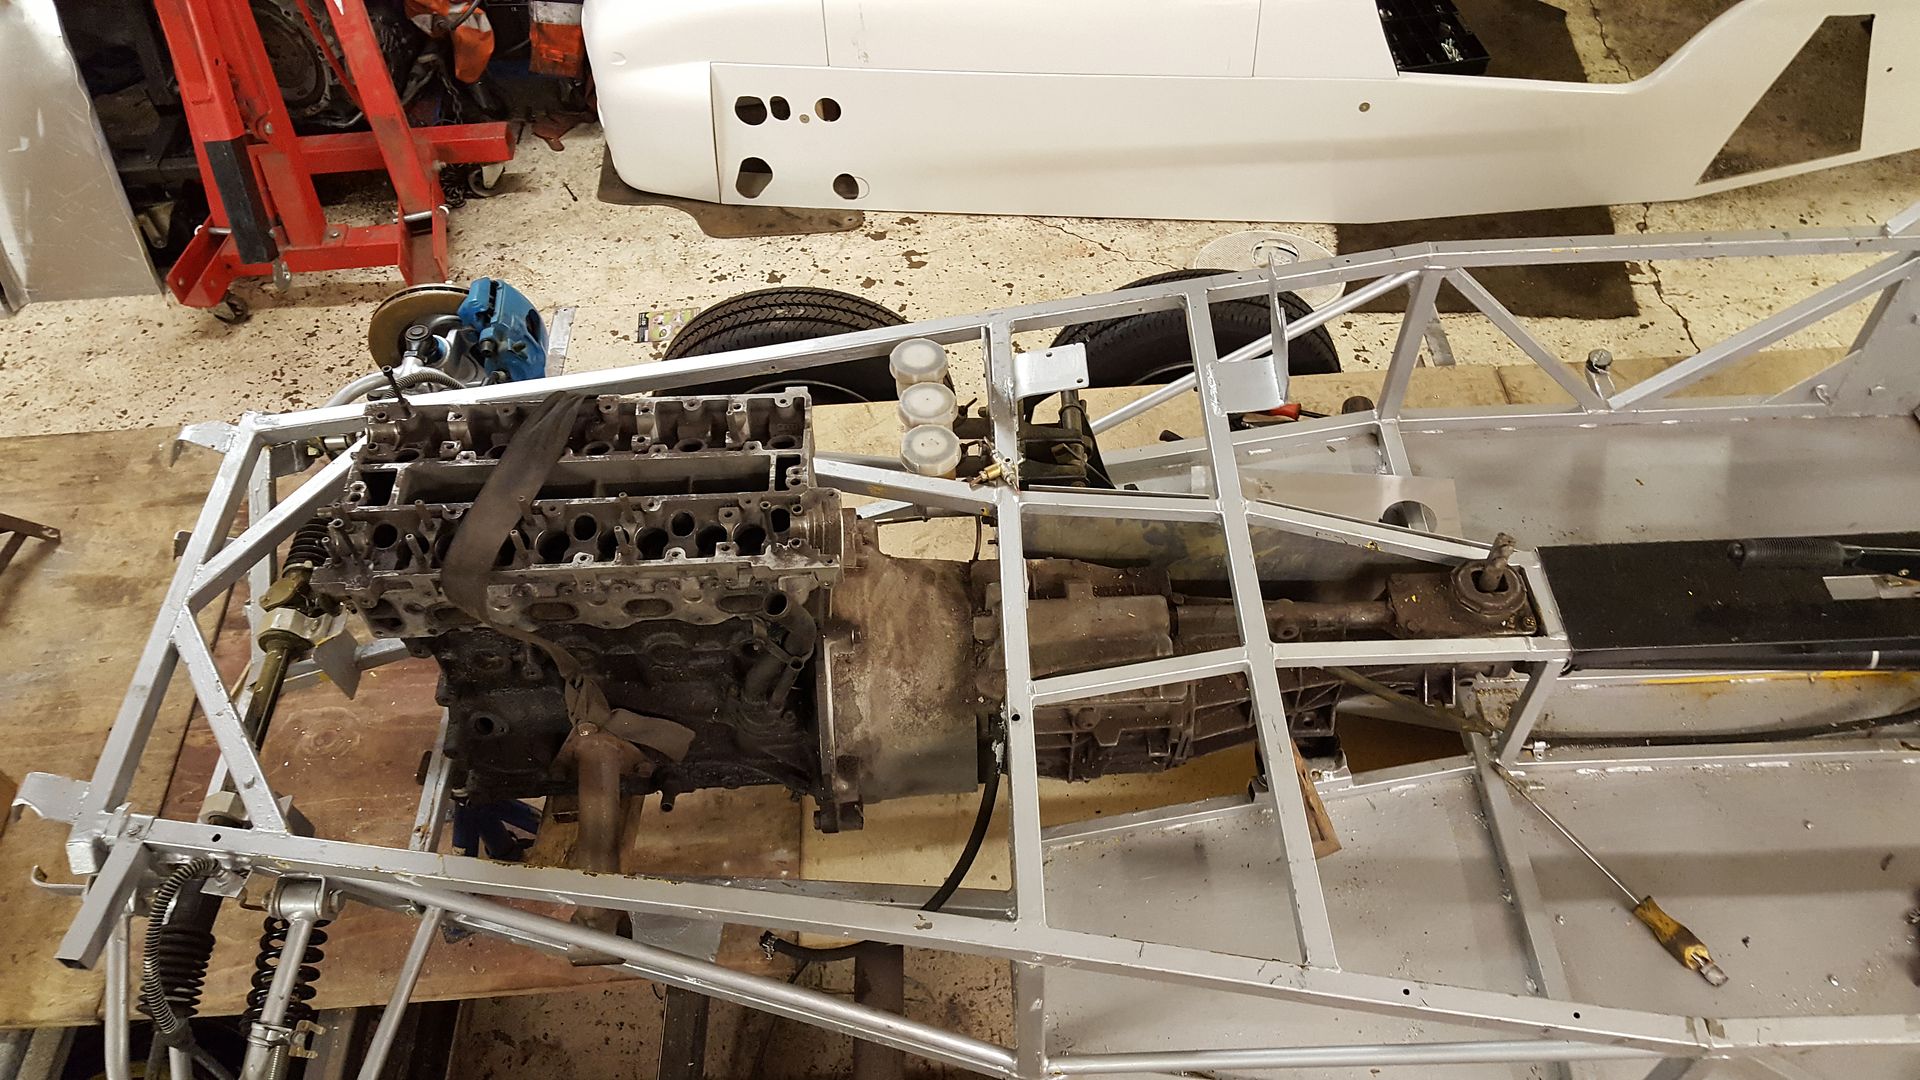
It does foul the tunnel on the drivers side. but it should clear with modifying the lower rail
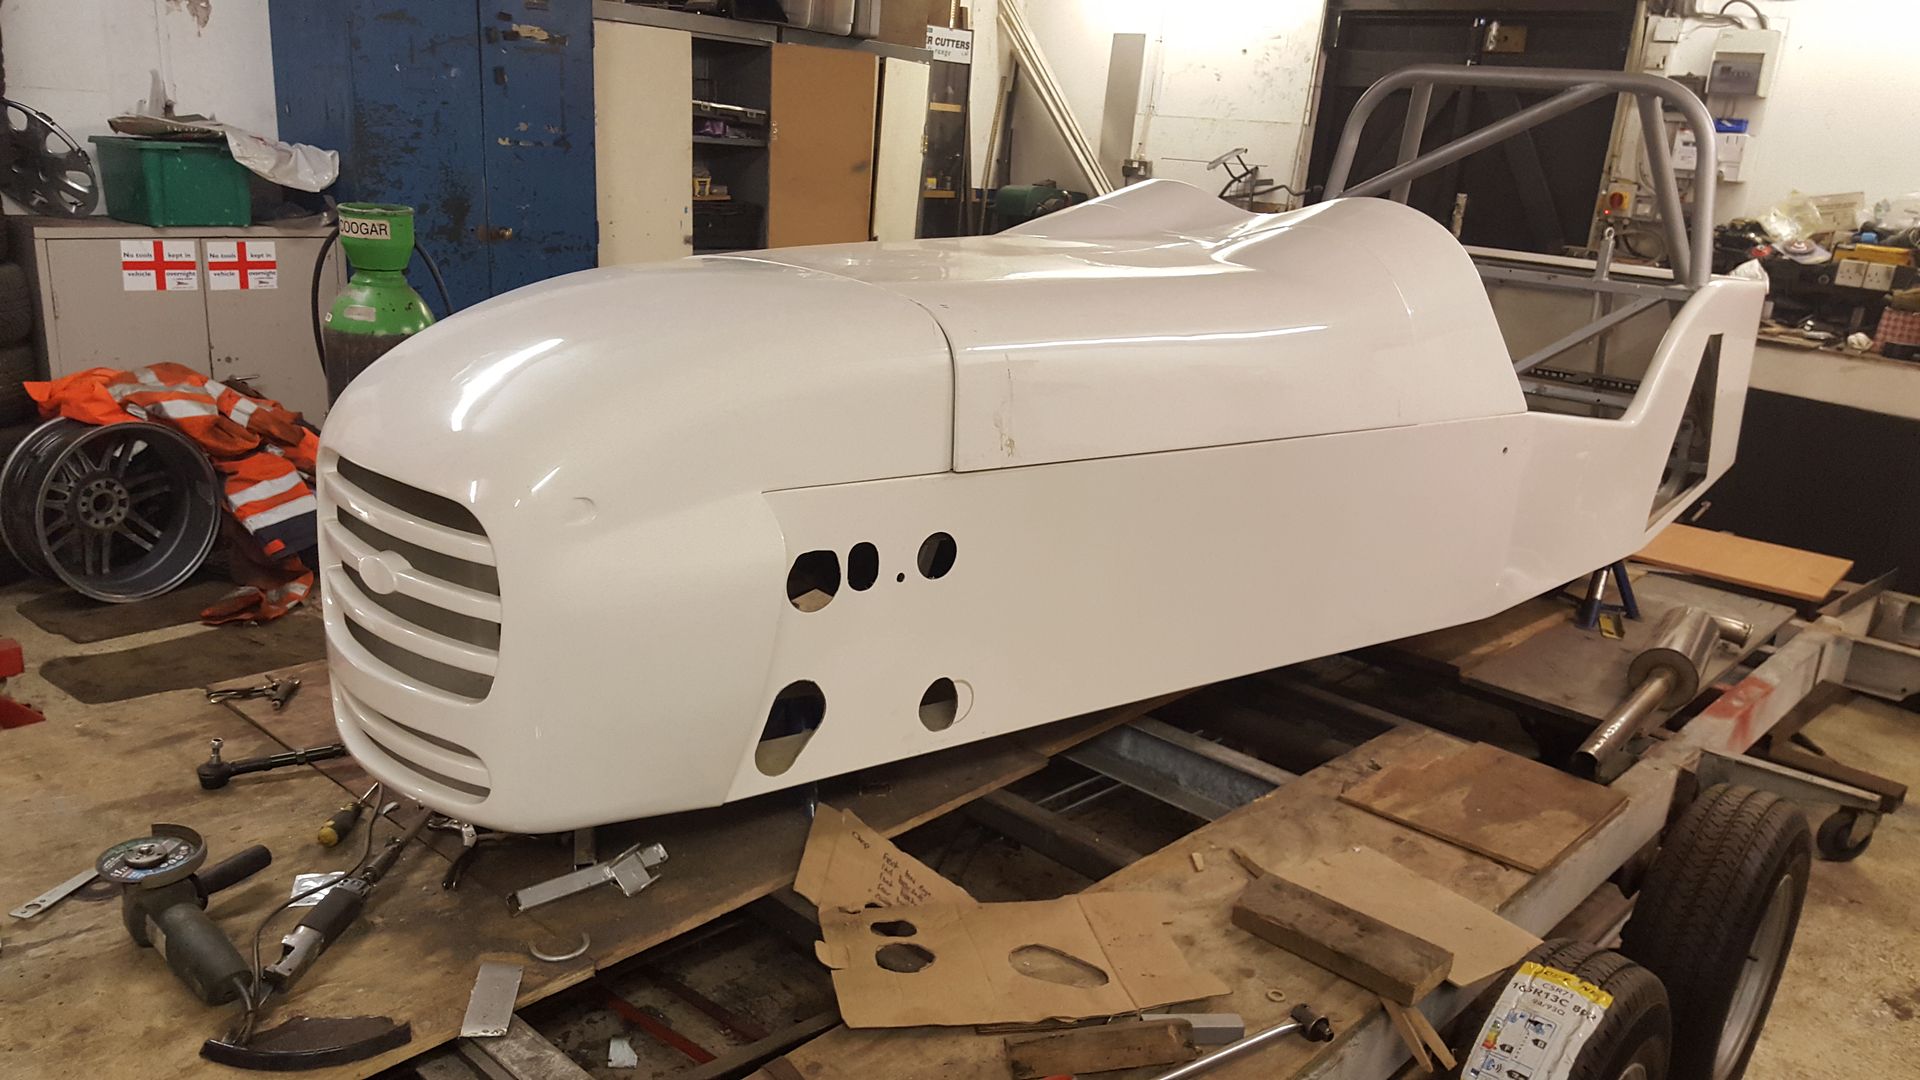
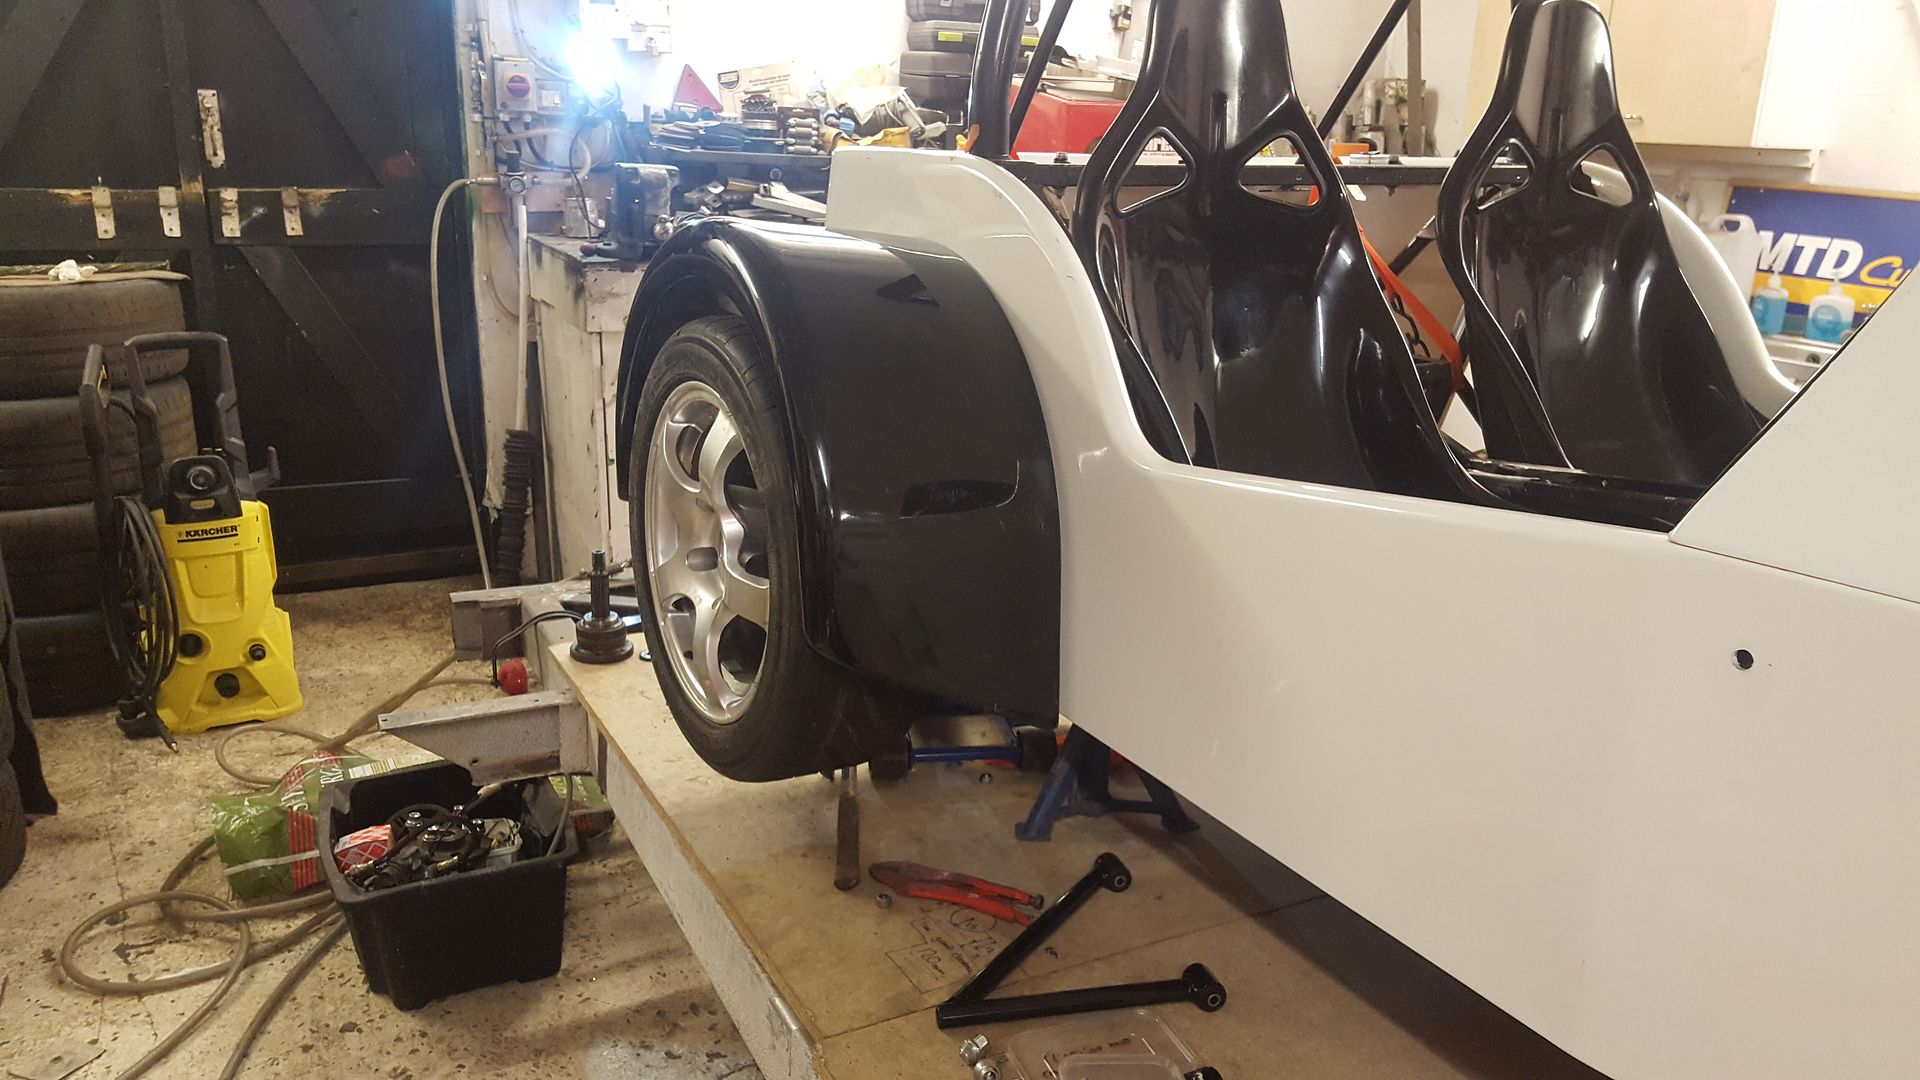
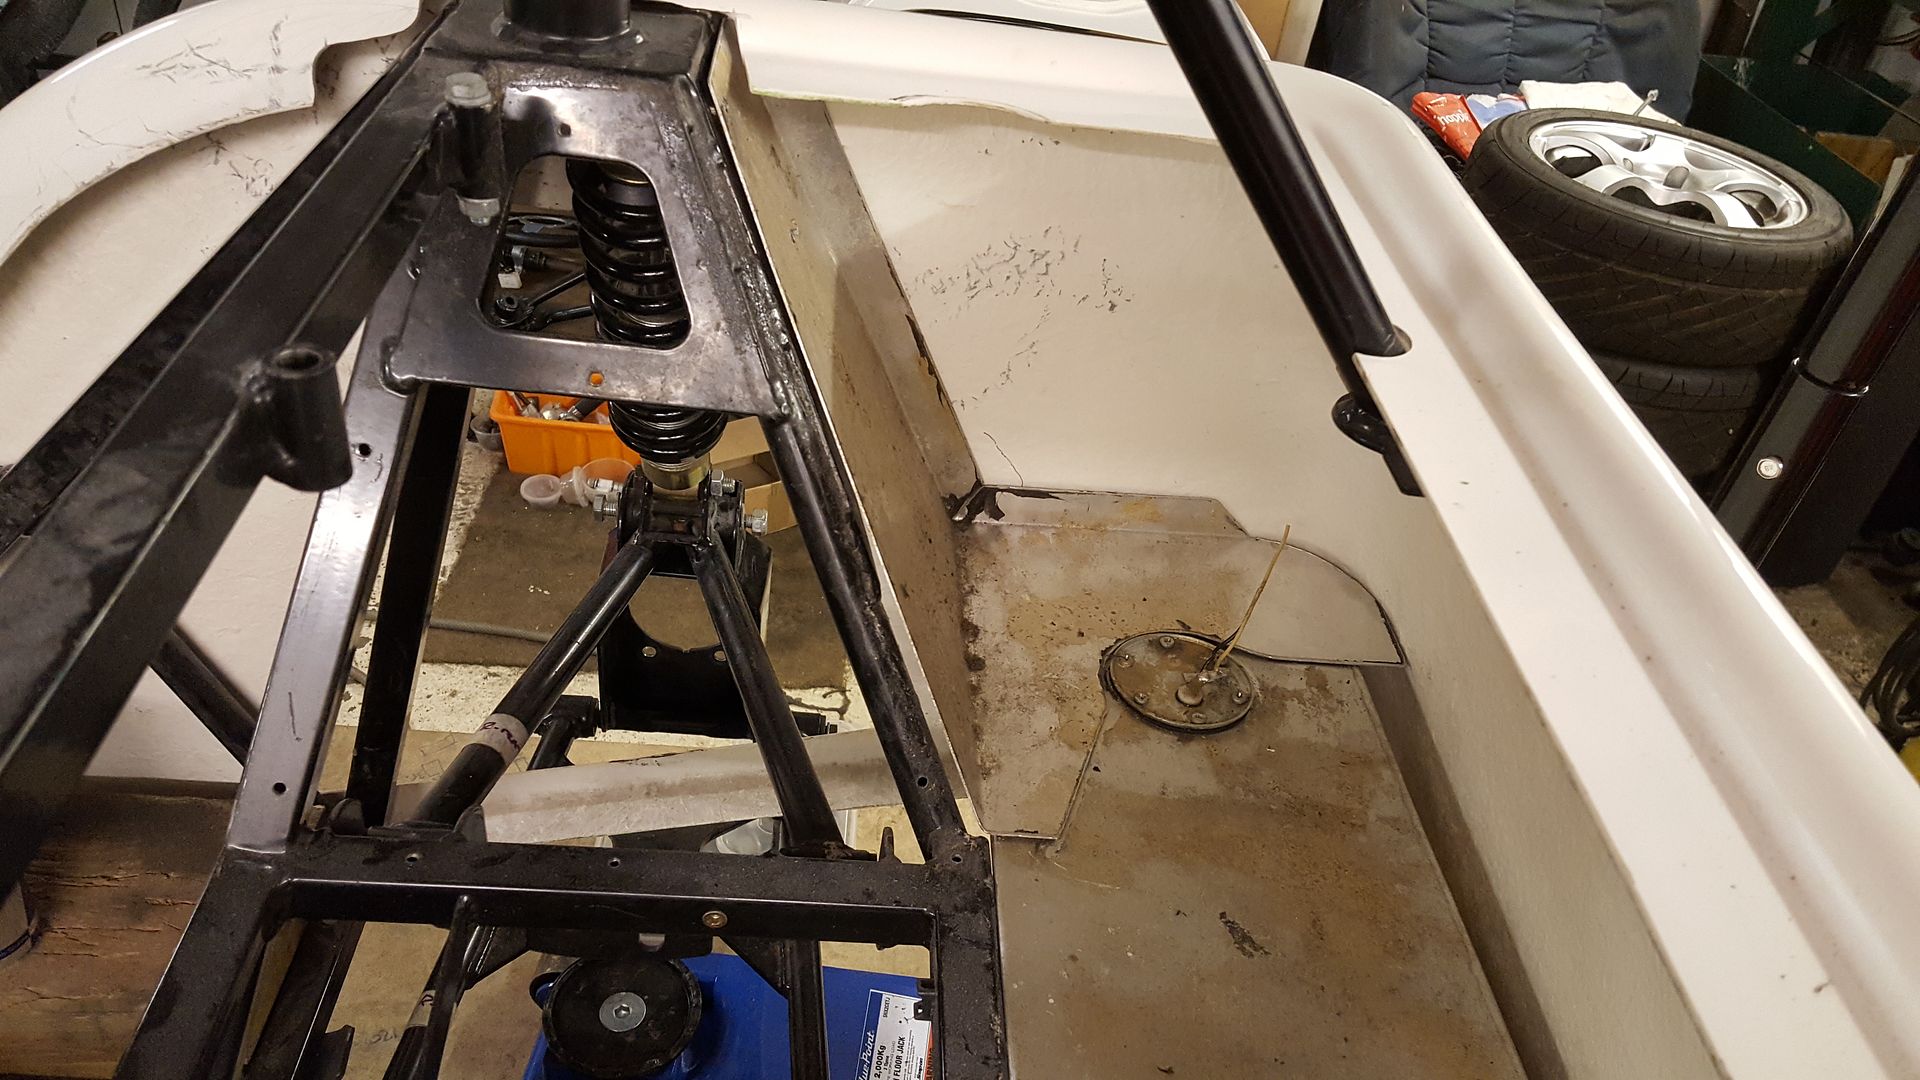
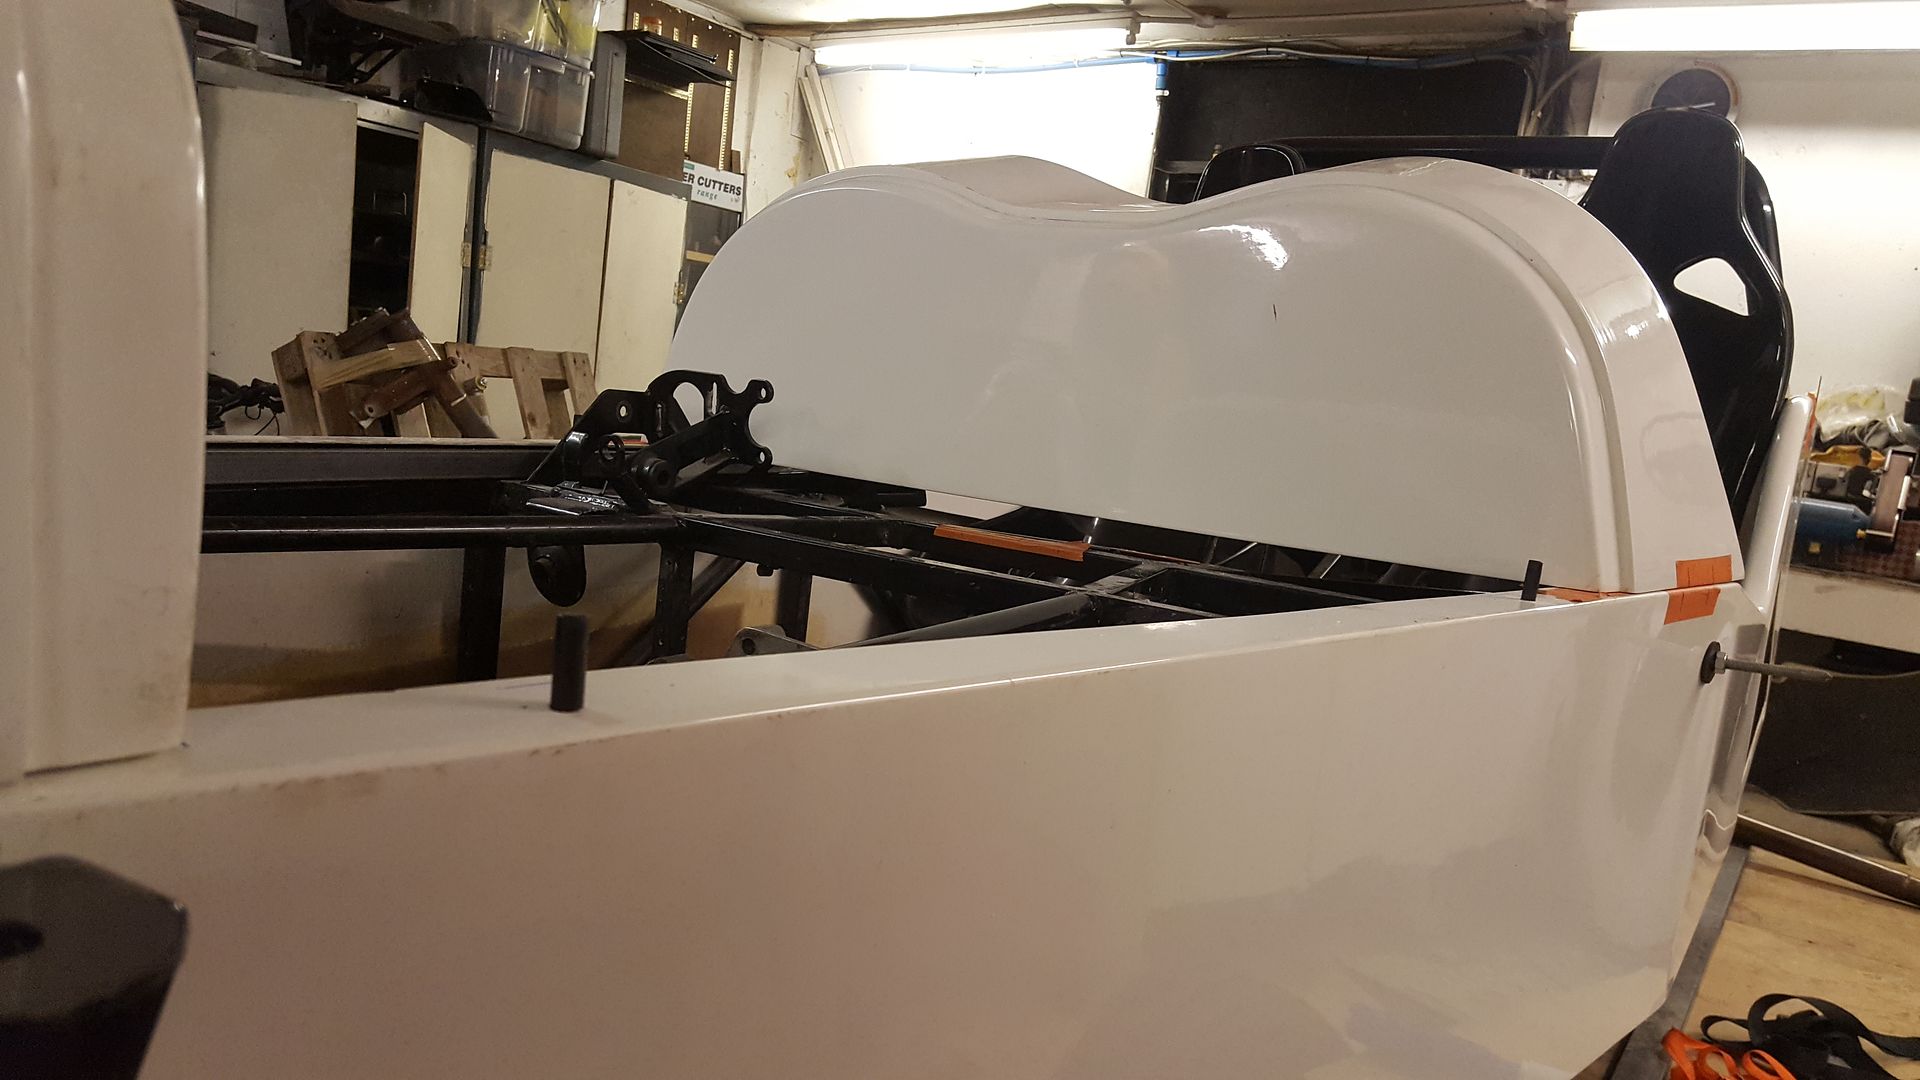
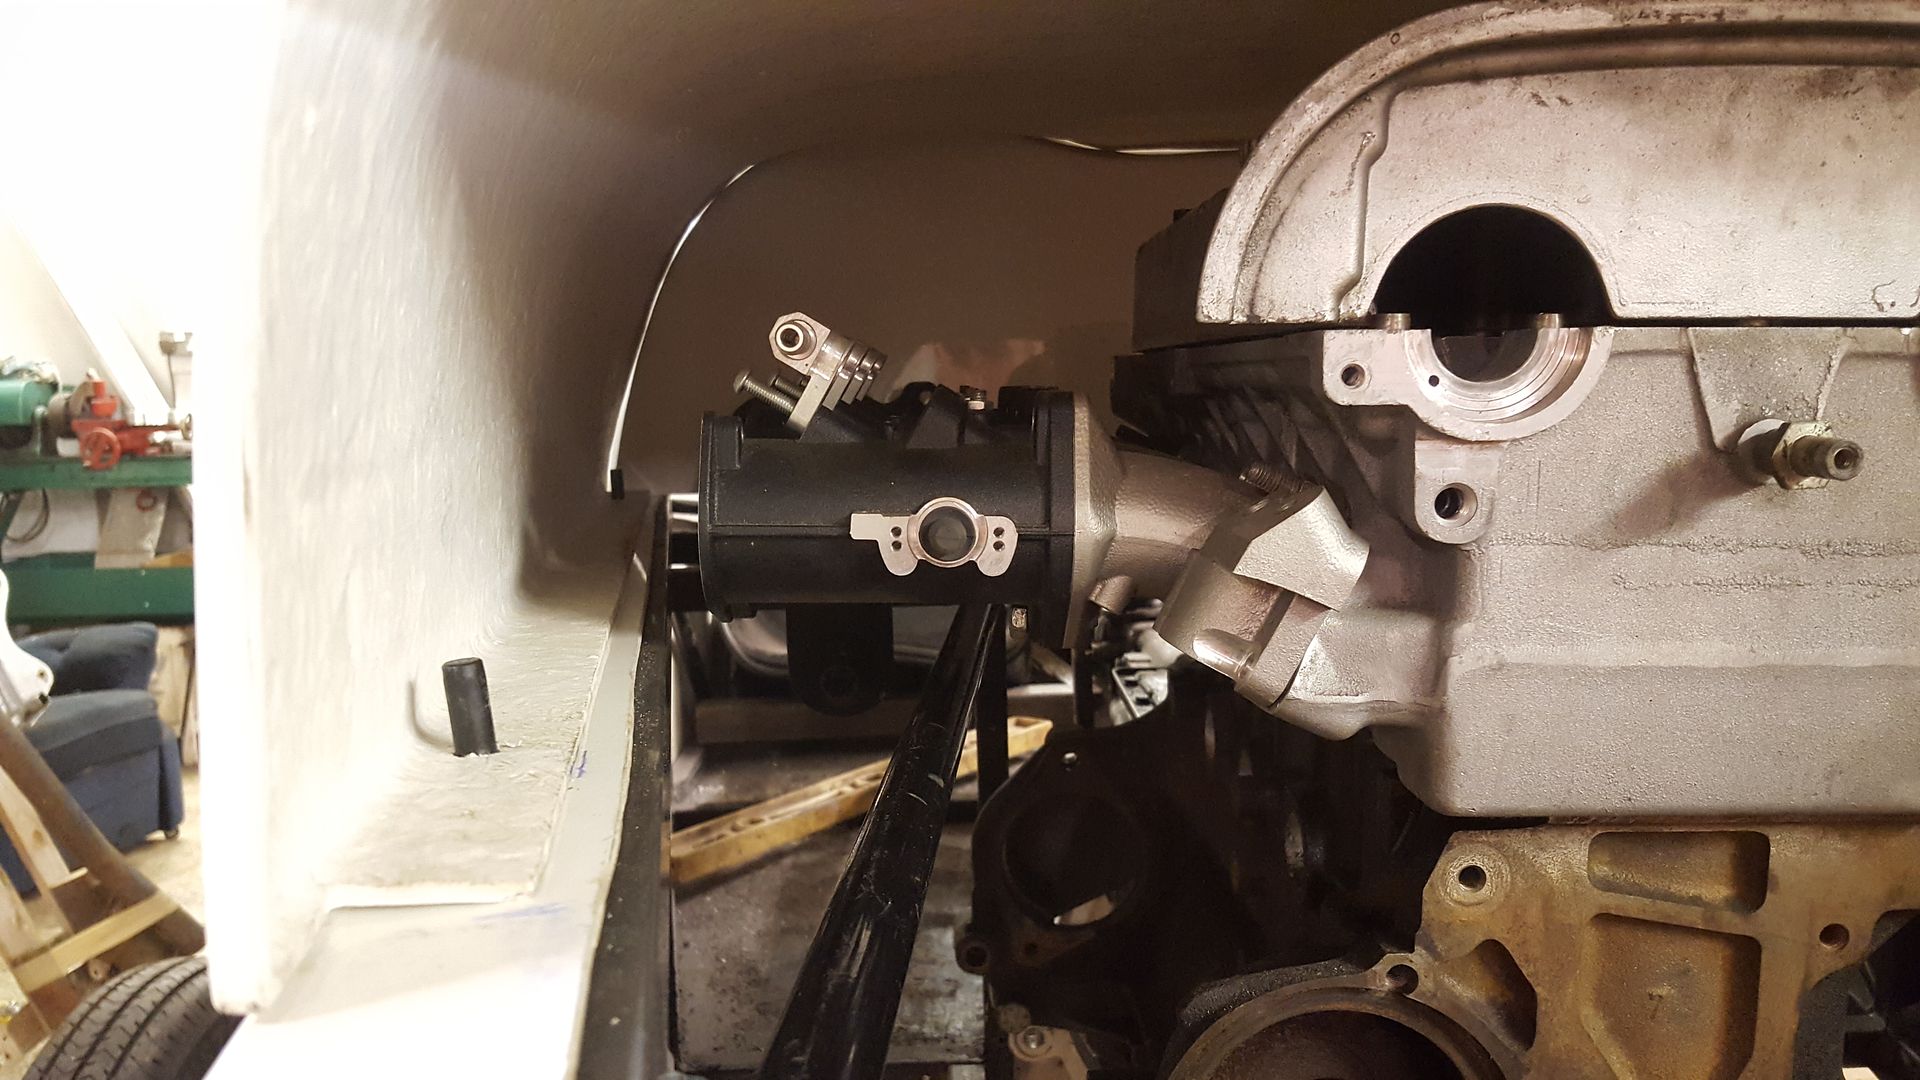
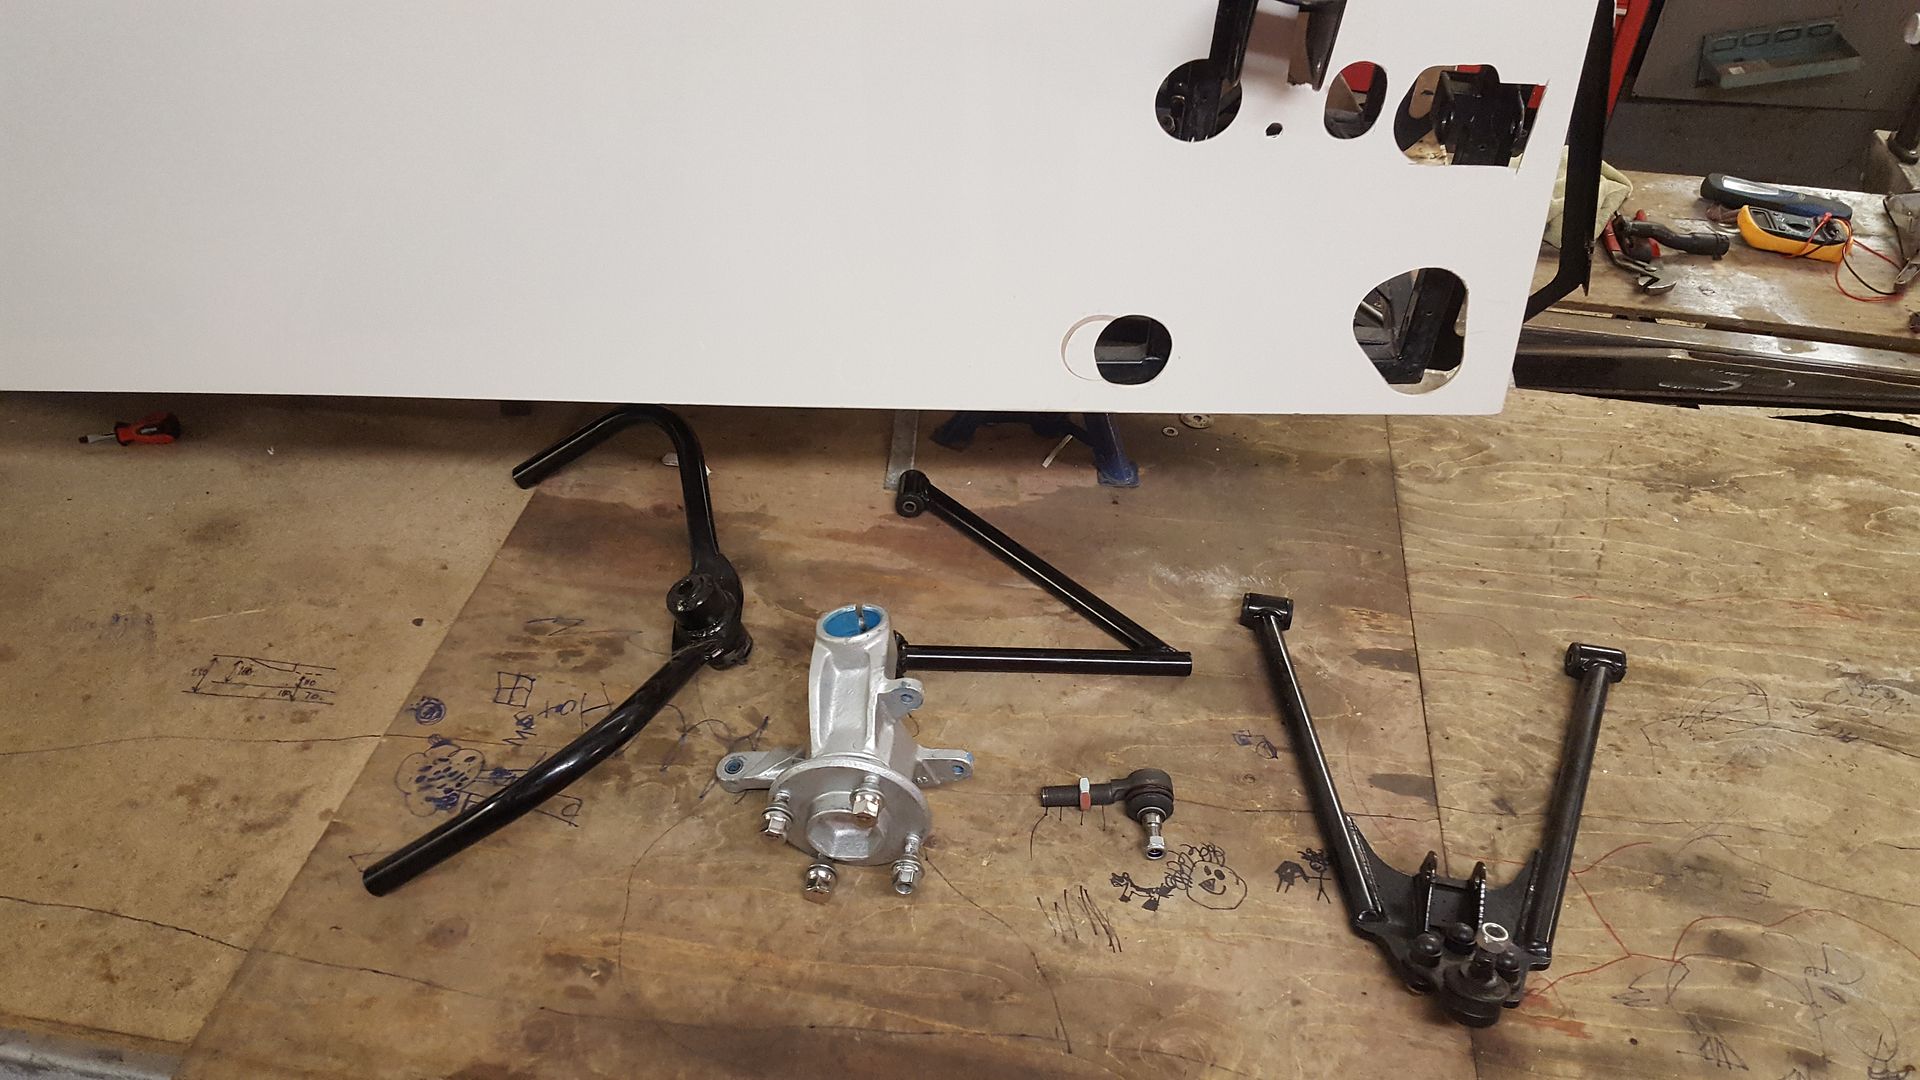
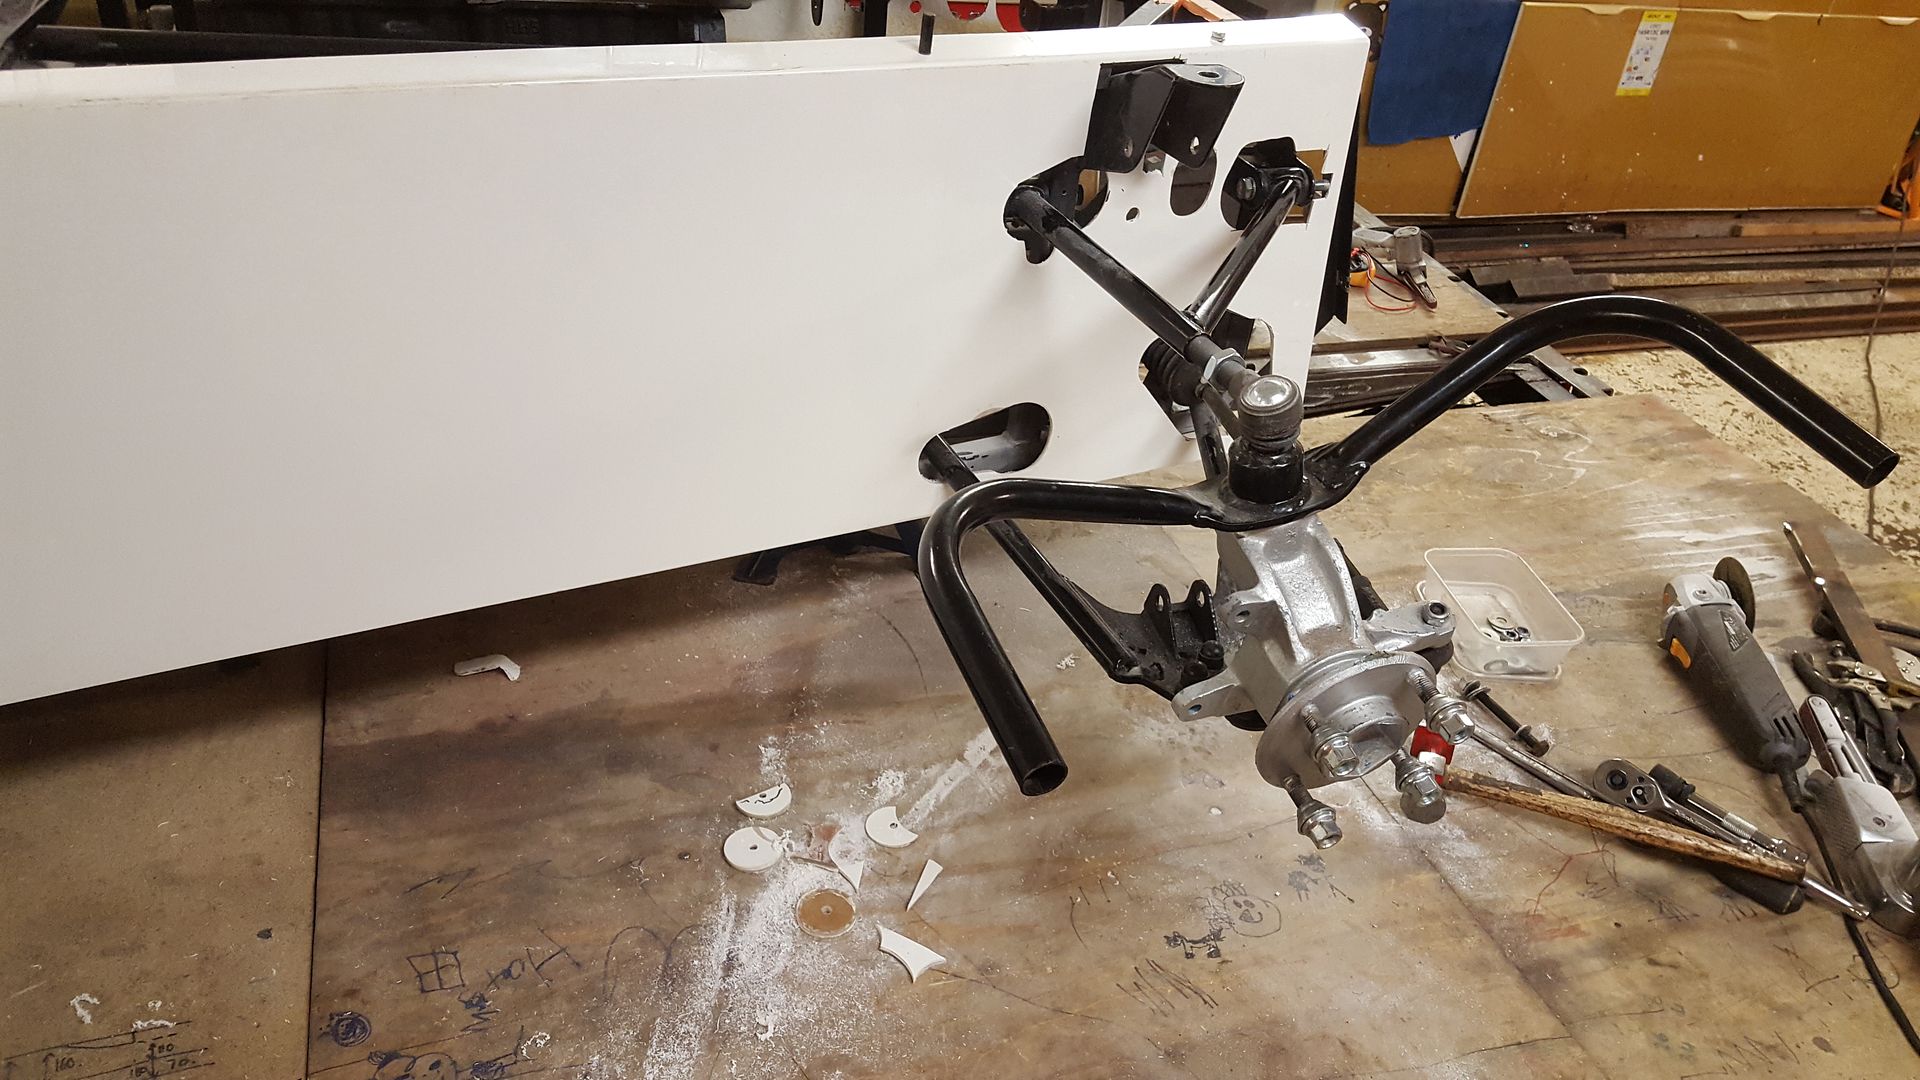
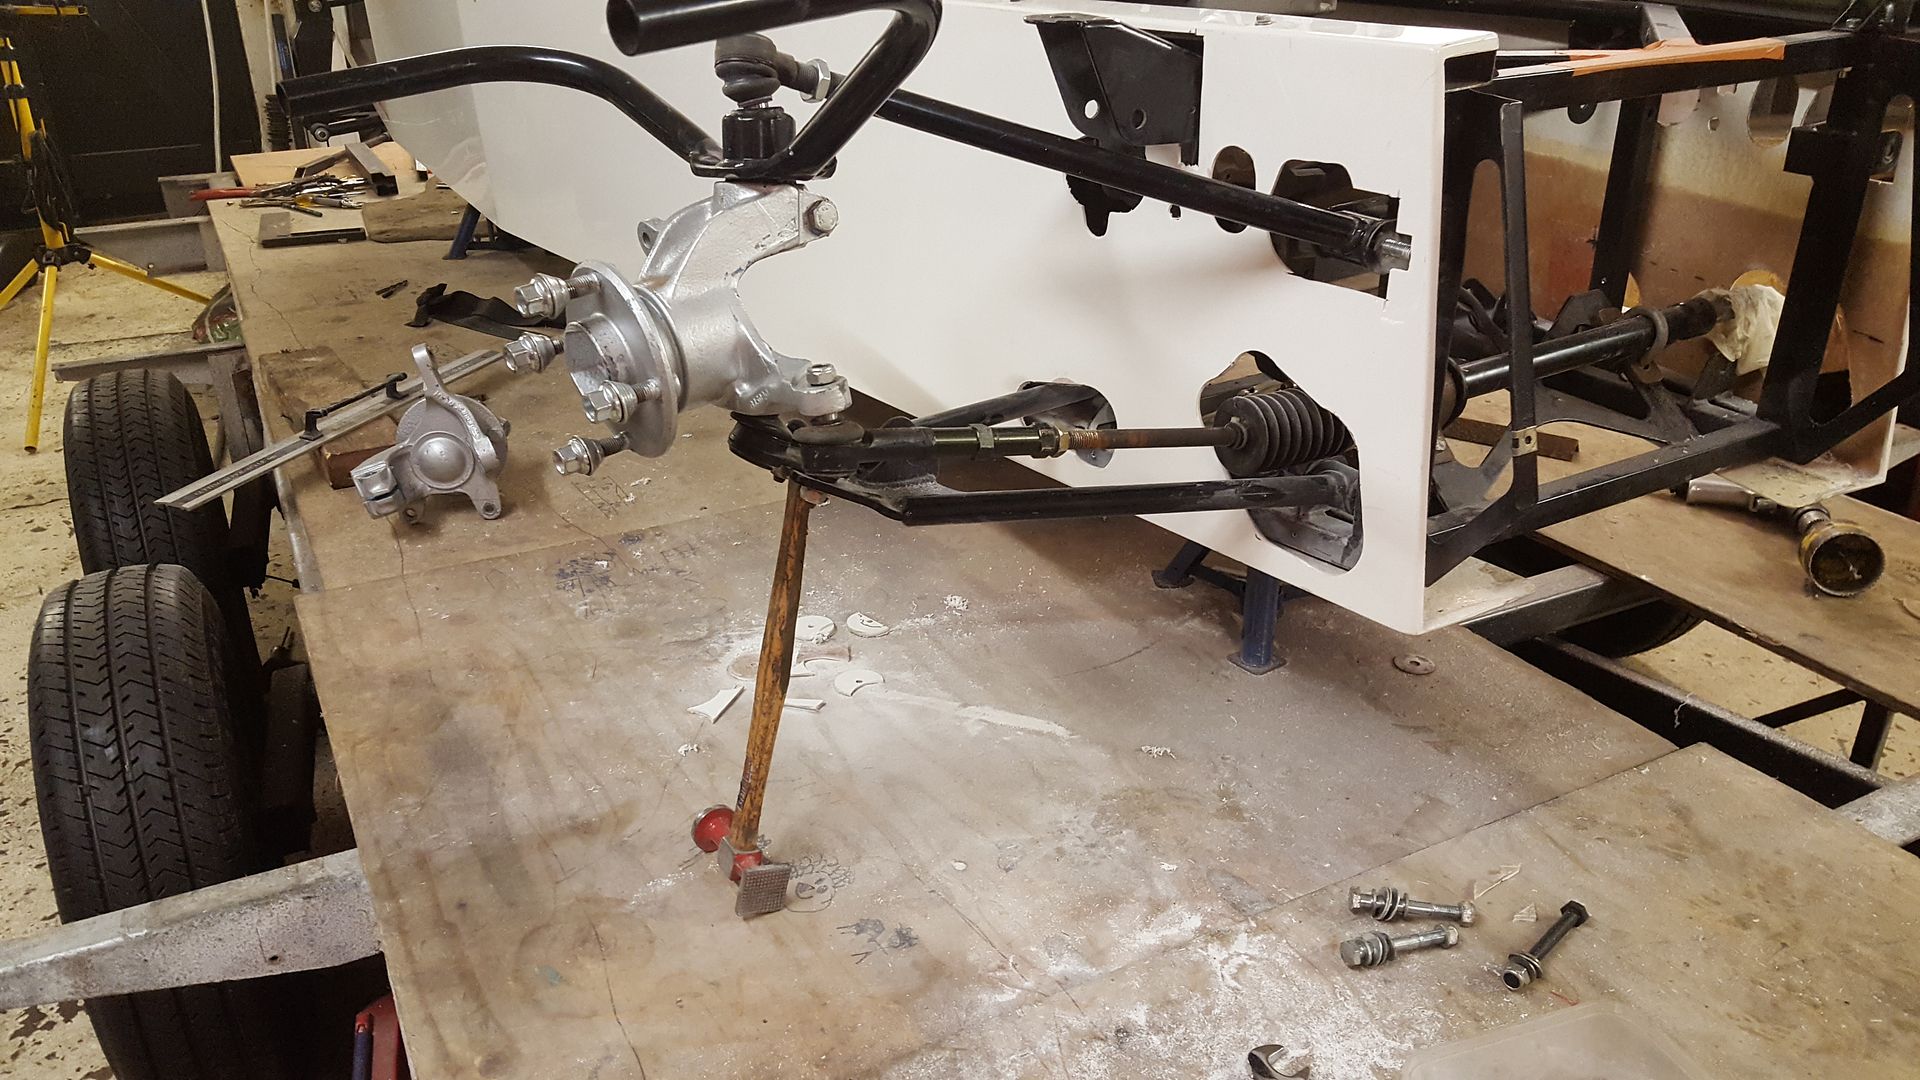
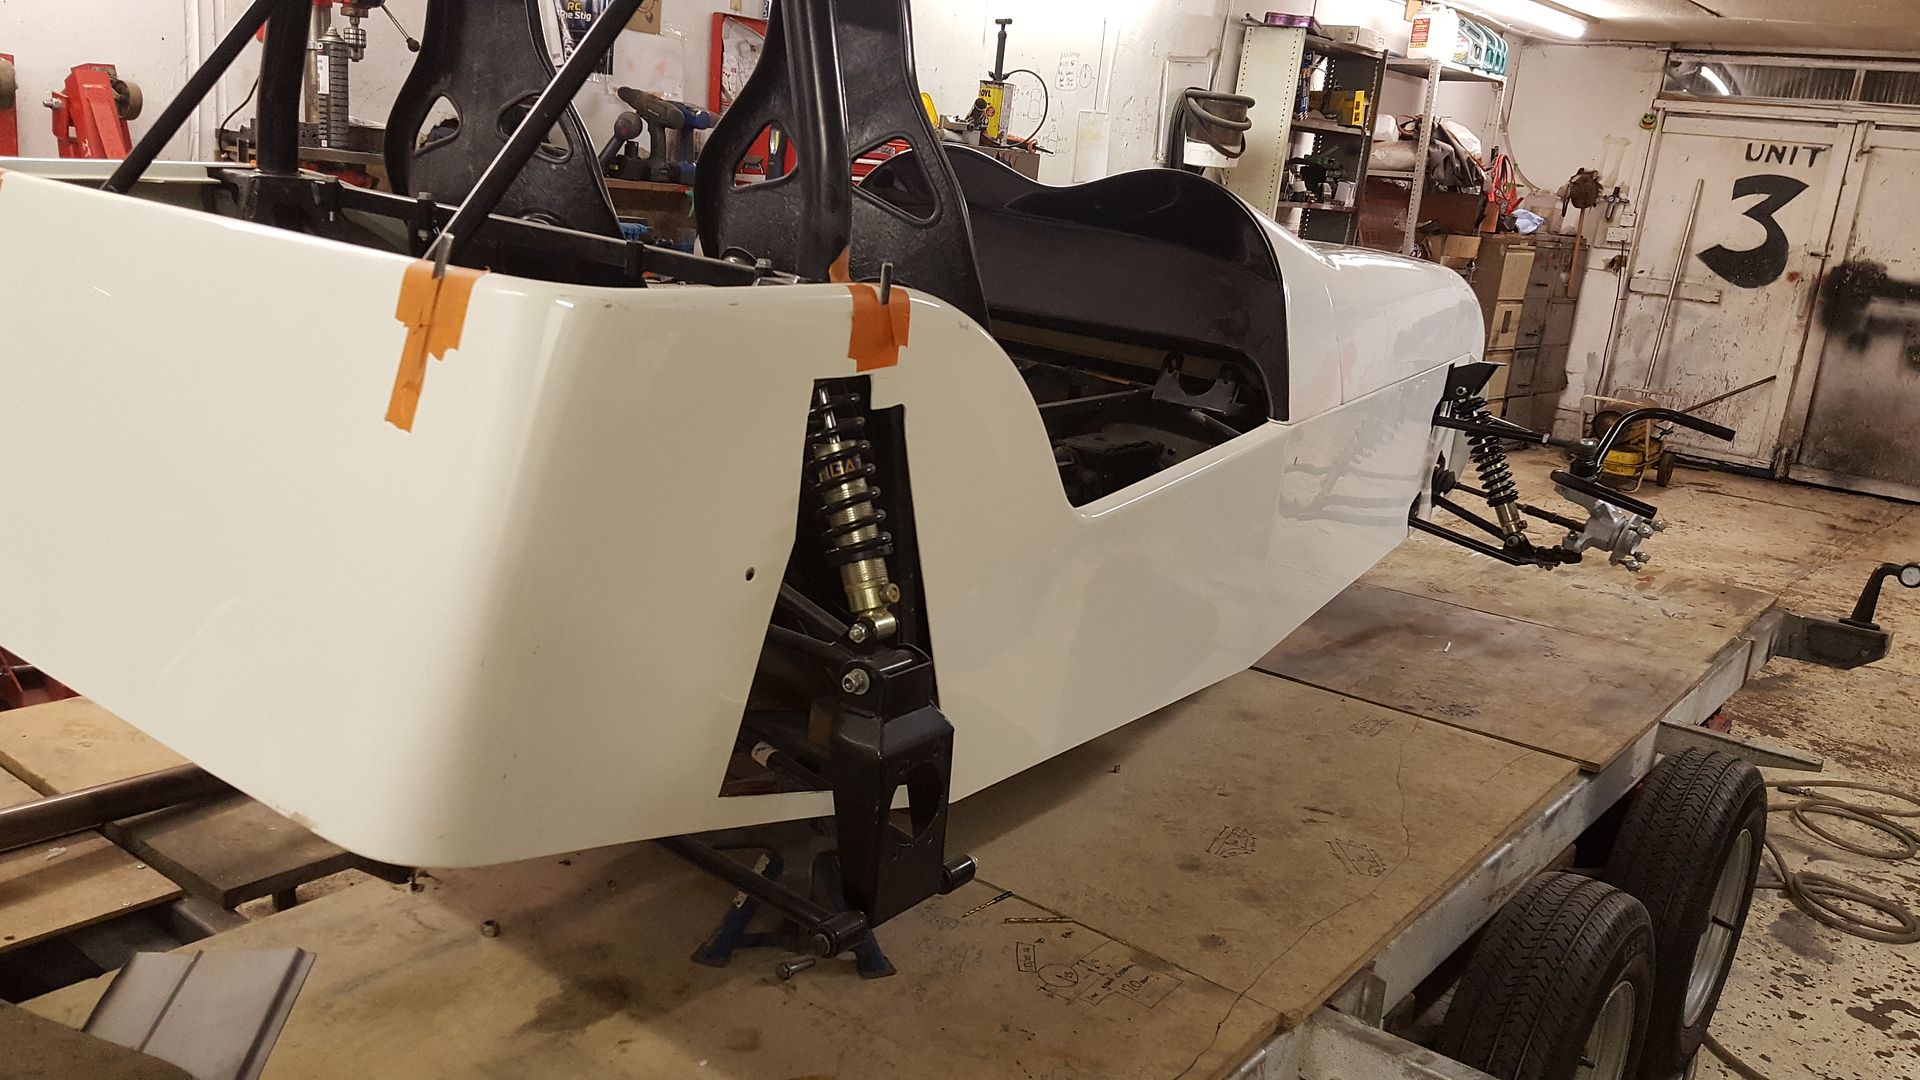
Next i really wanted to try the one piece MNR fibreglass body on. for that i needed to take all the suspension off
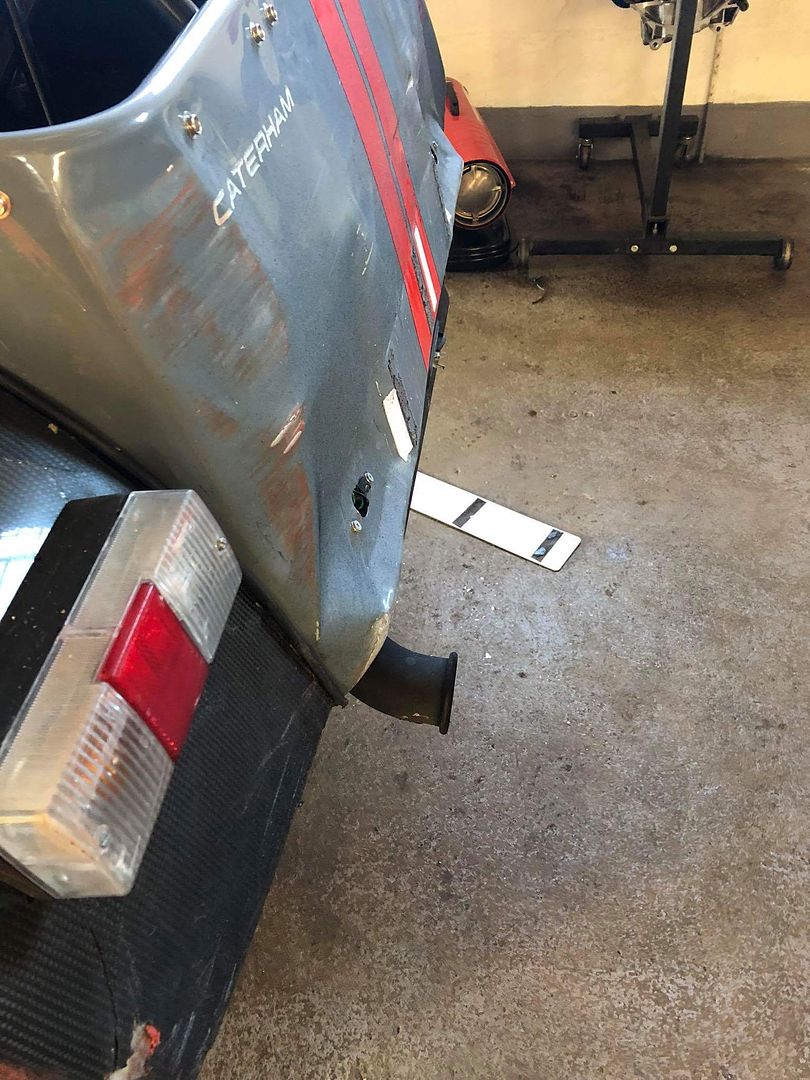
chopped the old exhaust hanger off as its on the wrong side
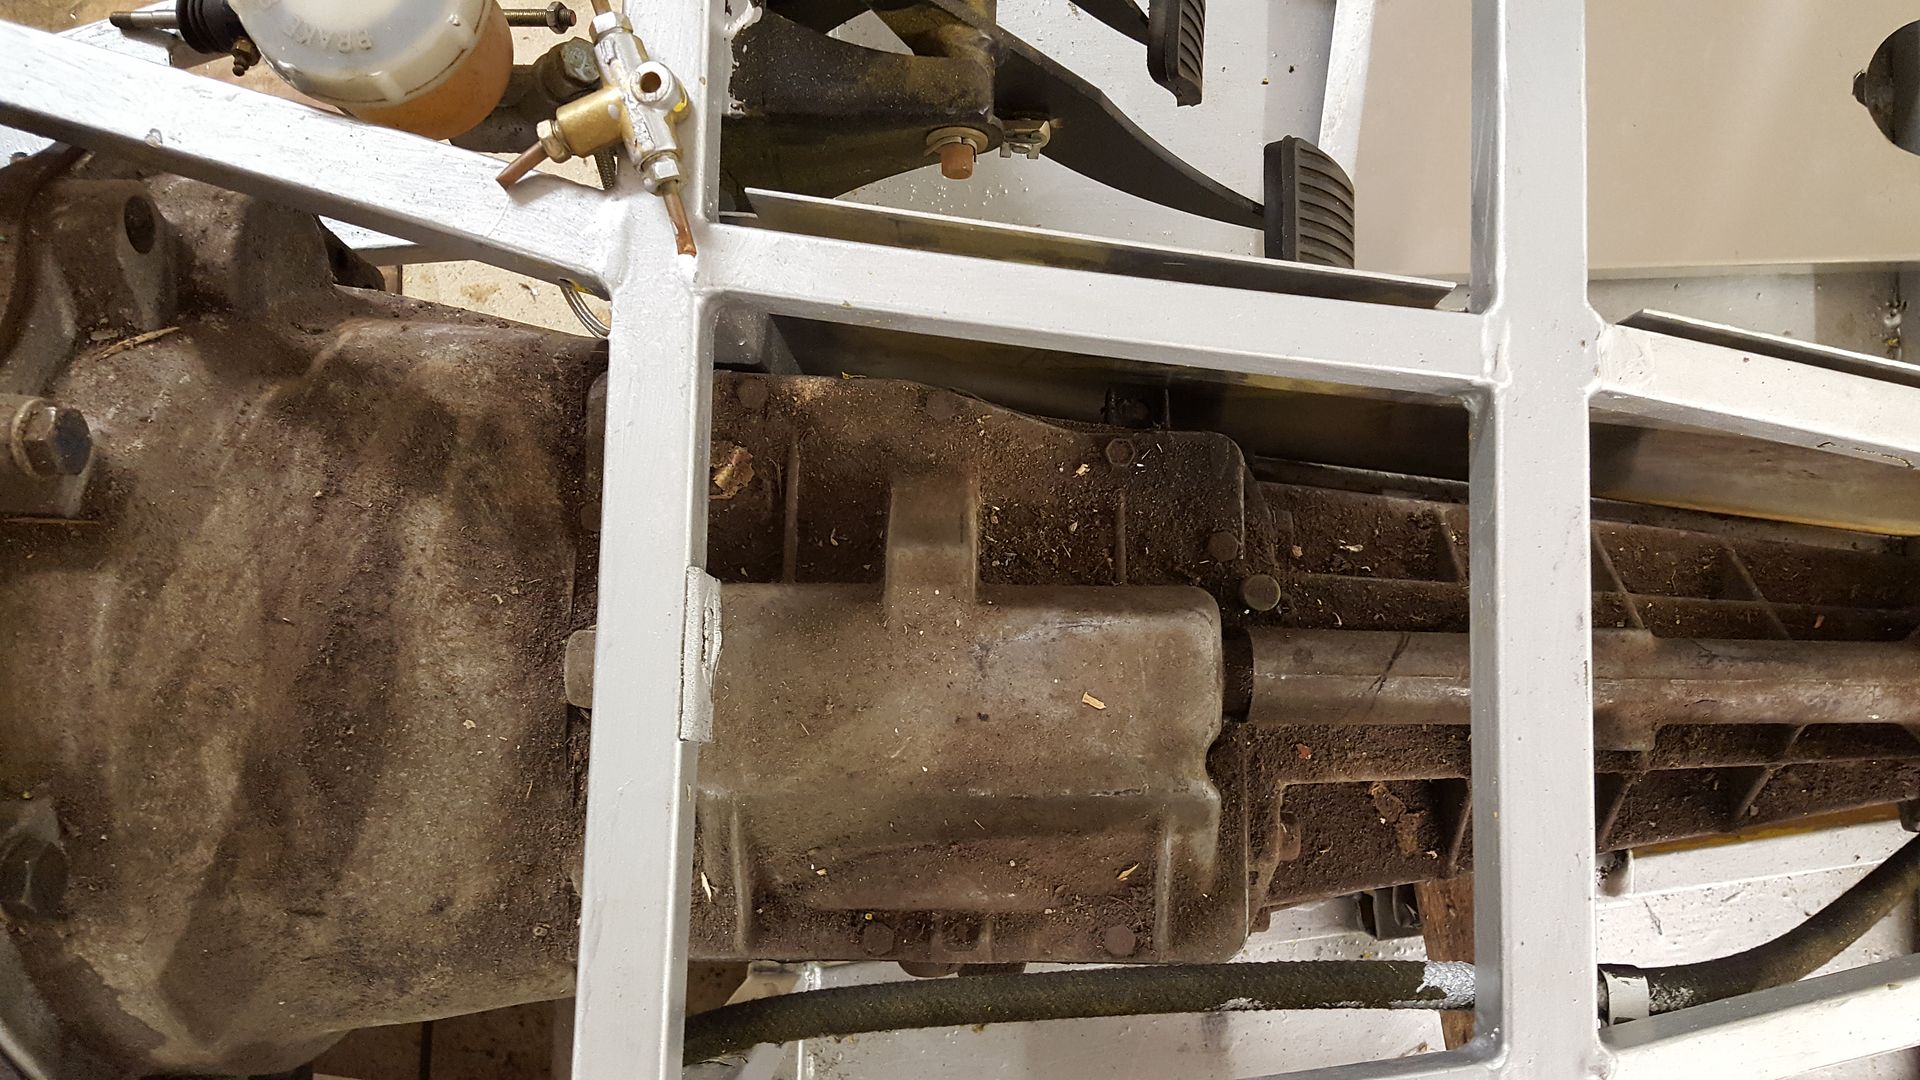
went to take the rear off and found they must have welded the panhard mount on while it was assembled, as you now cant get the bloody bolt out as it
hits the cage!
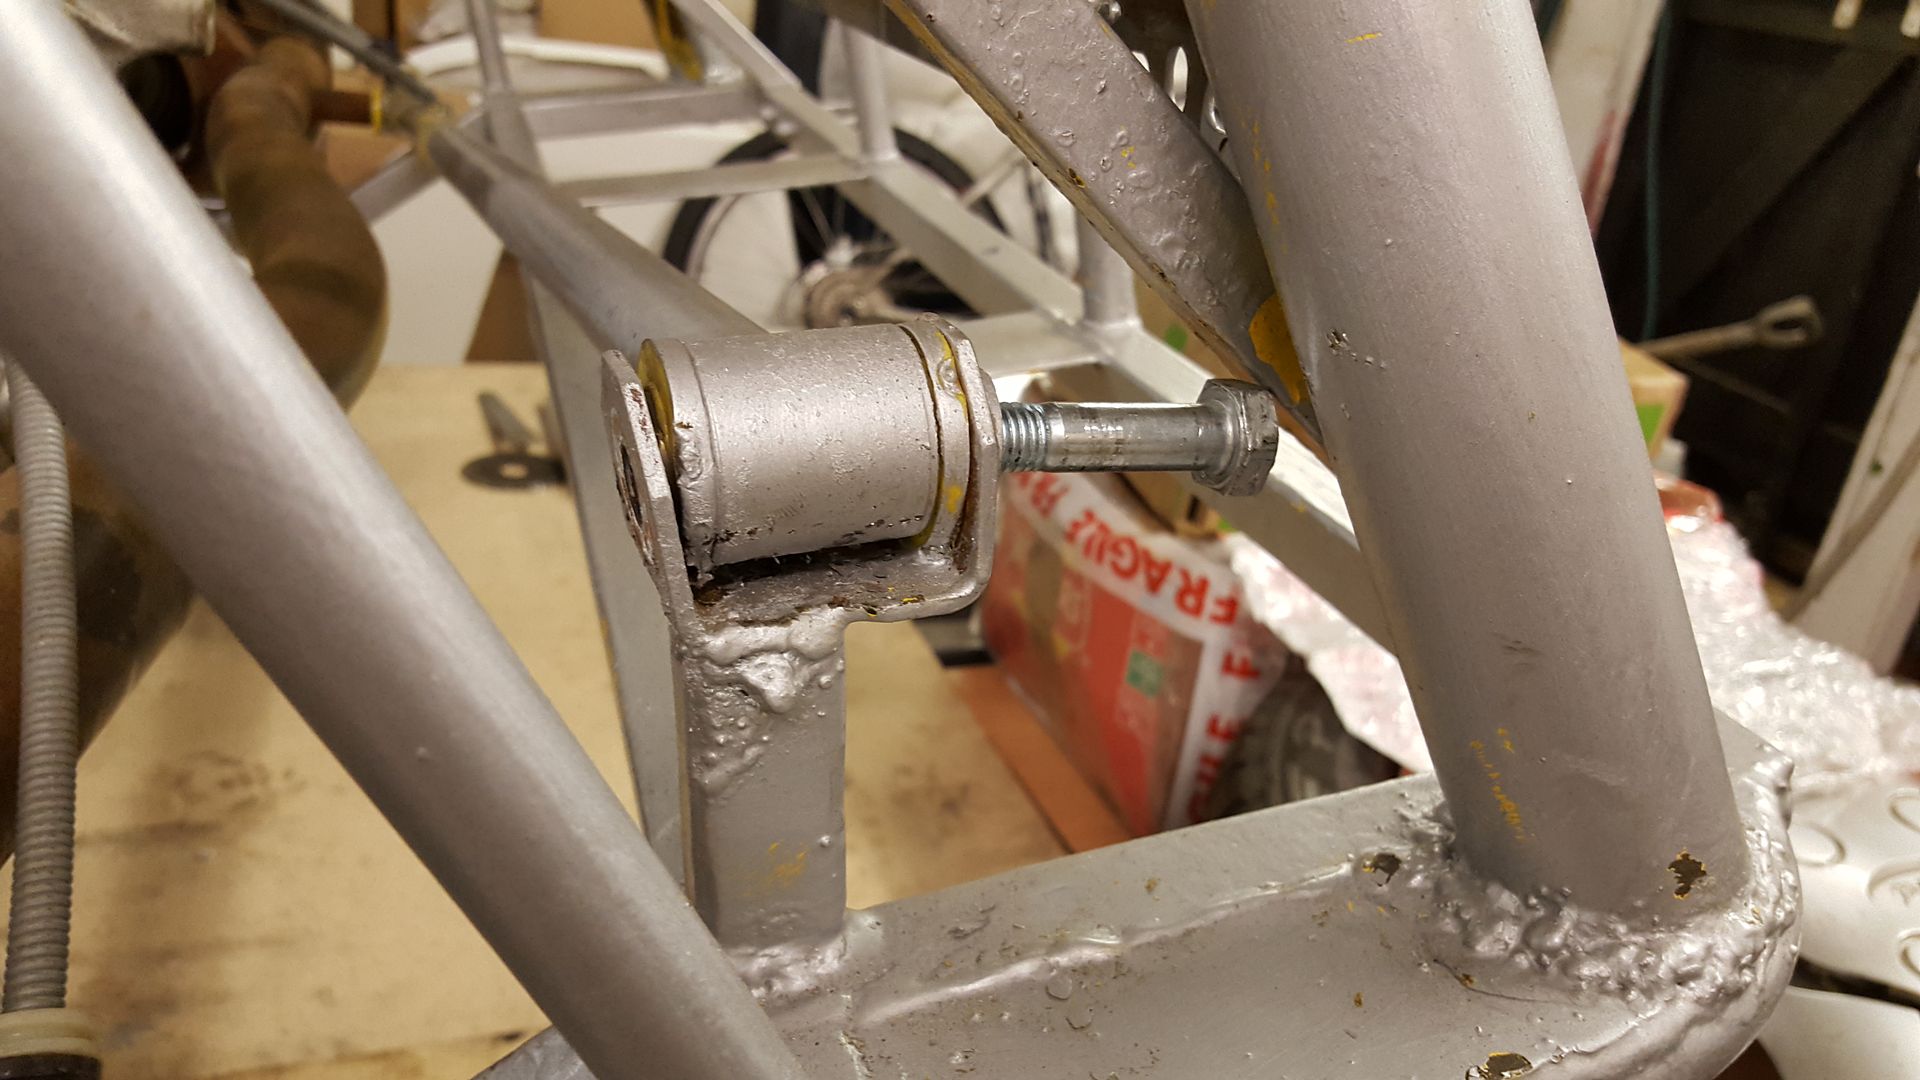
so cut it off.
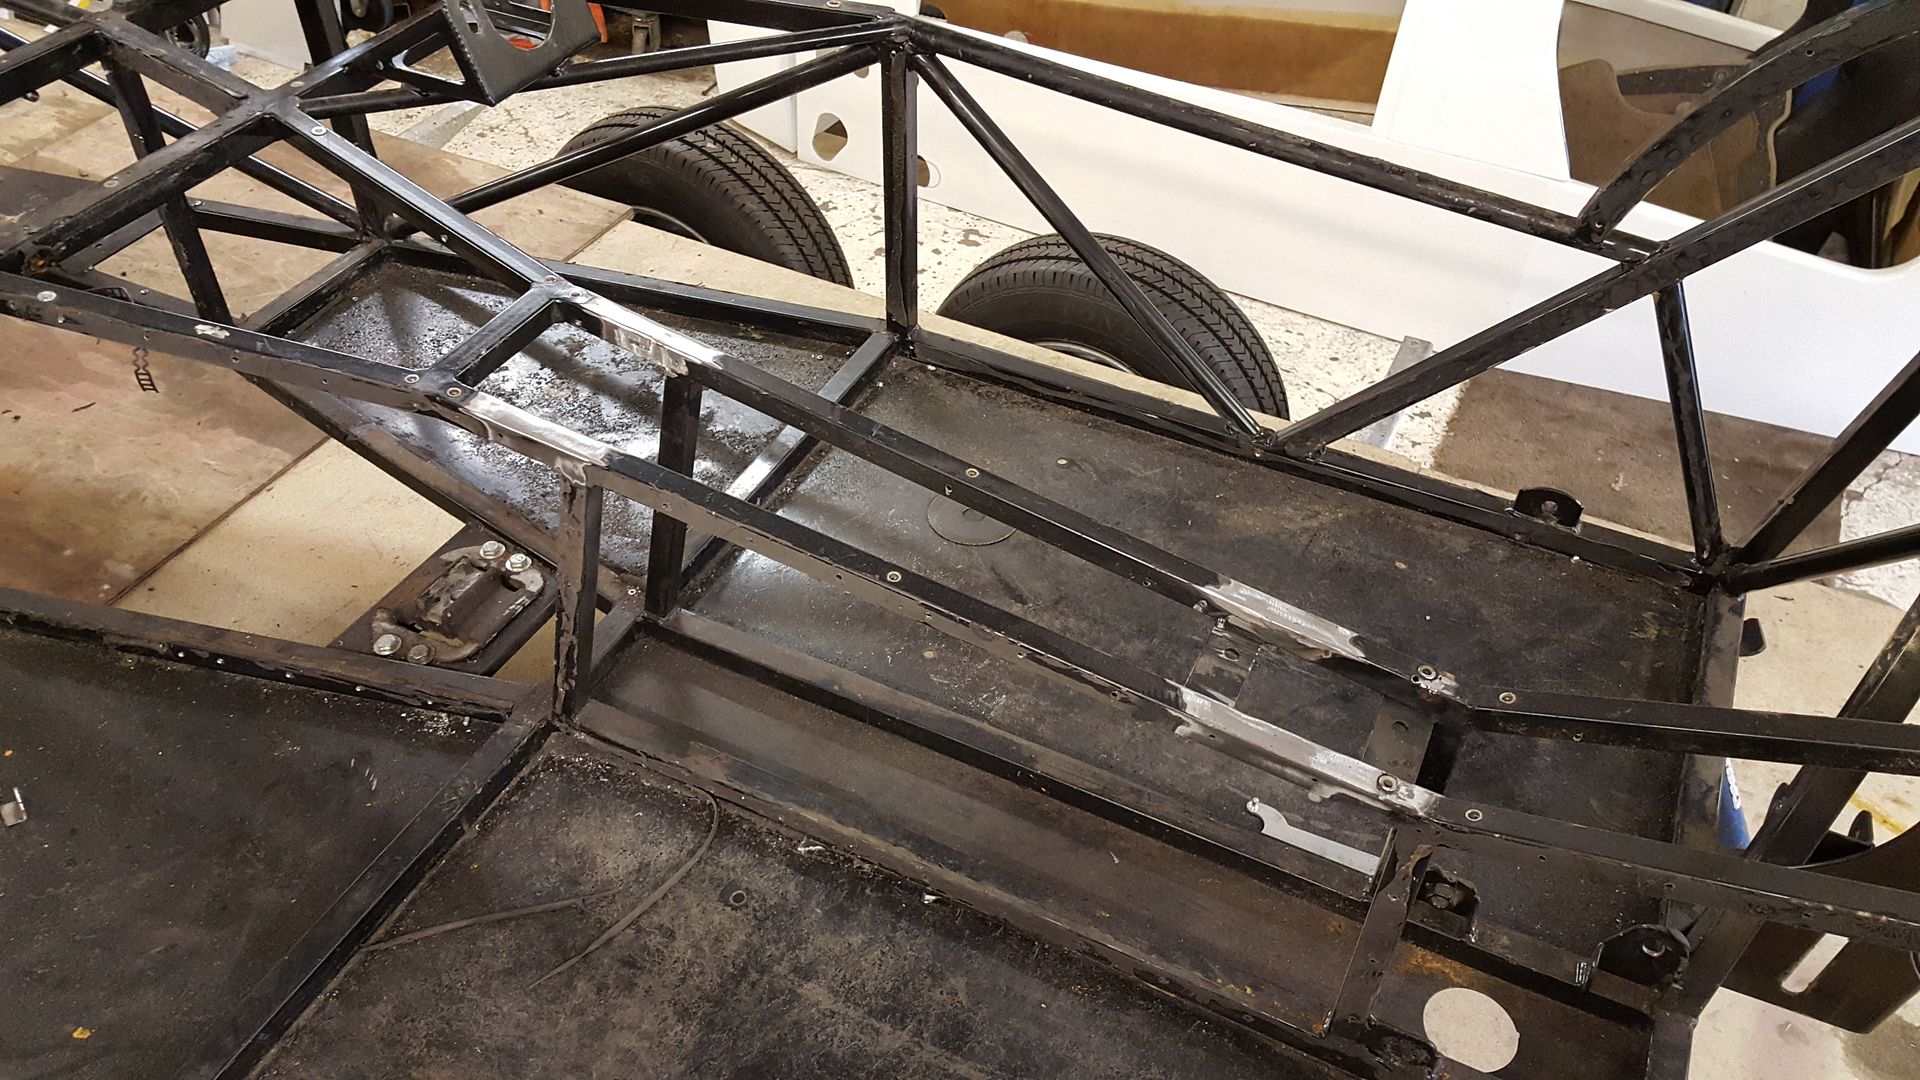
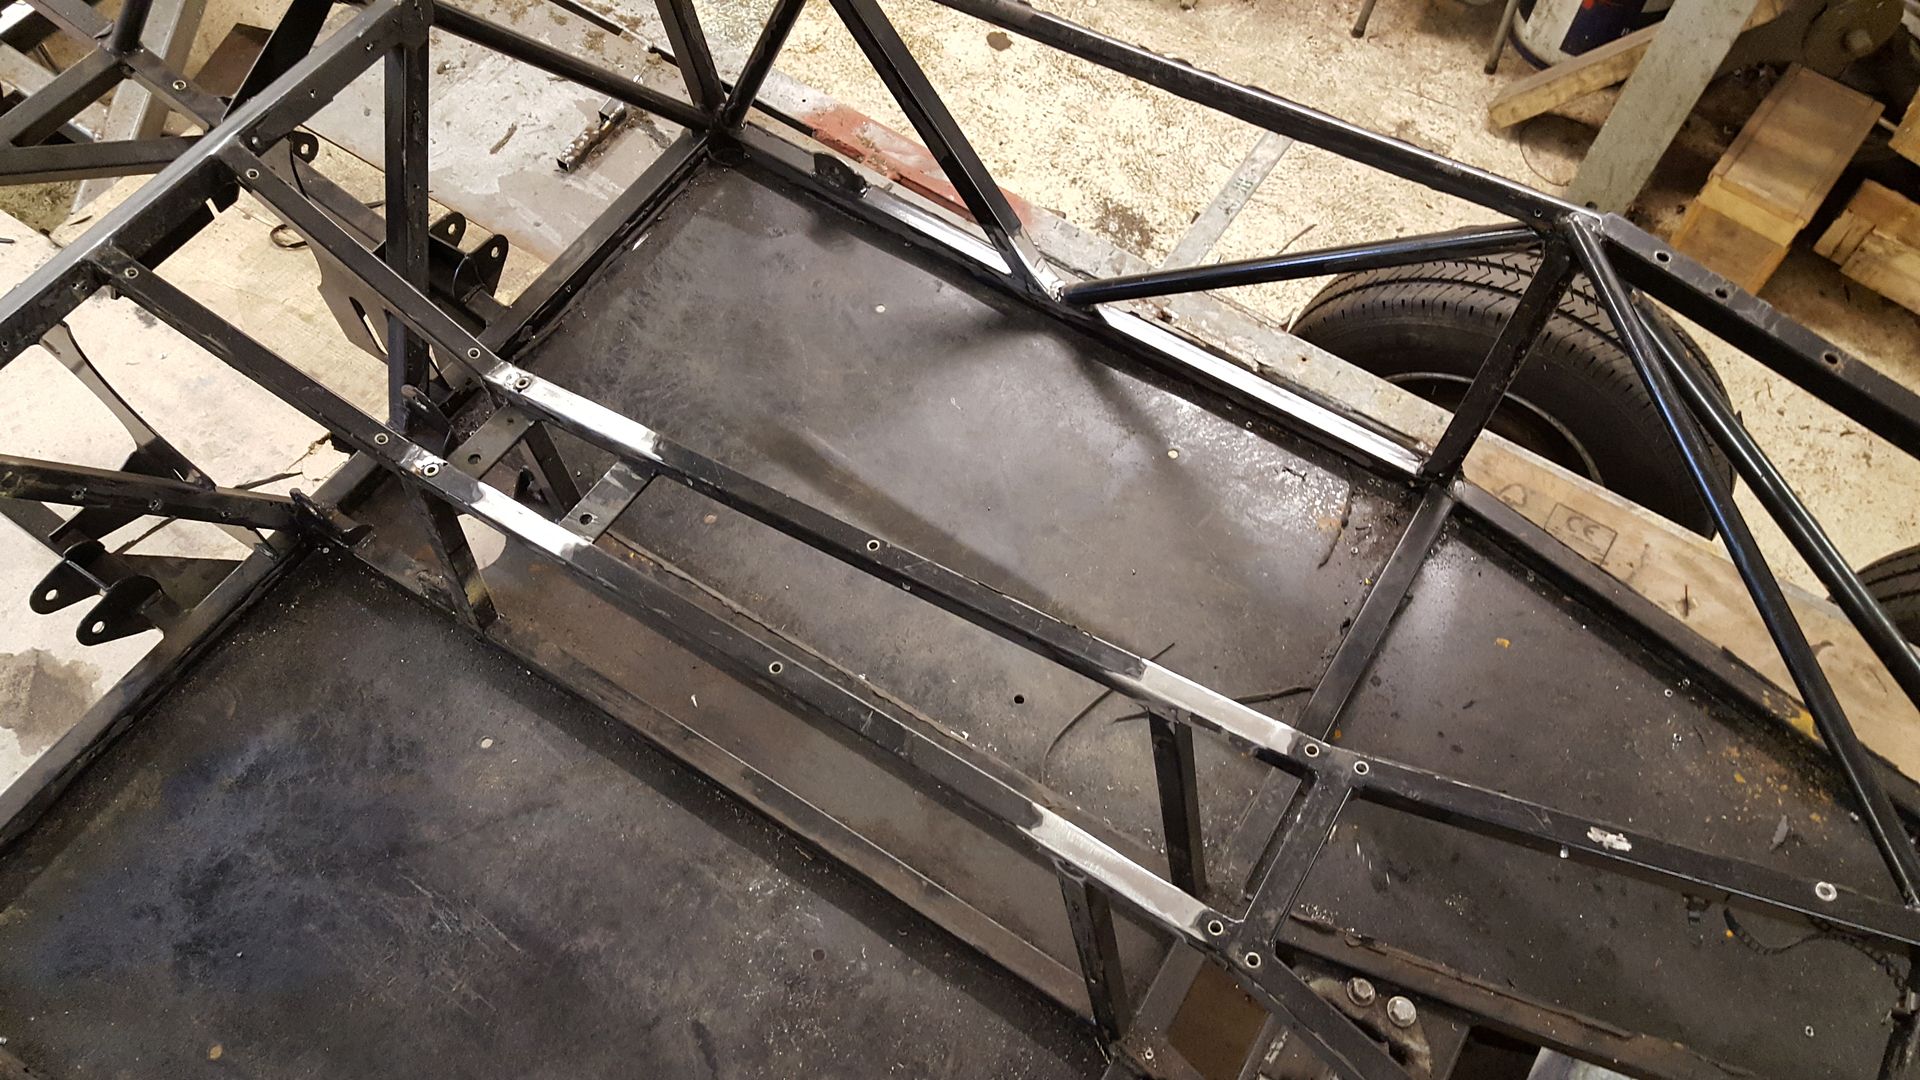
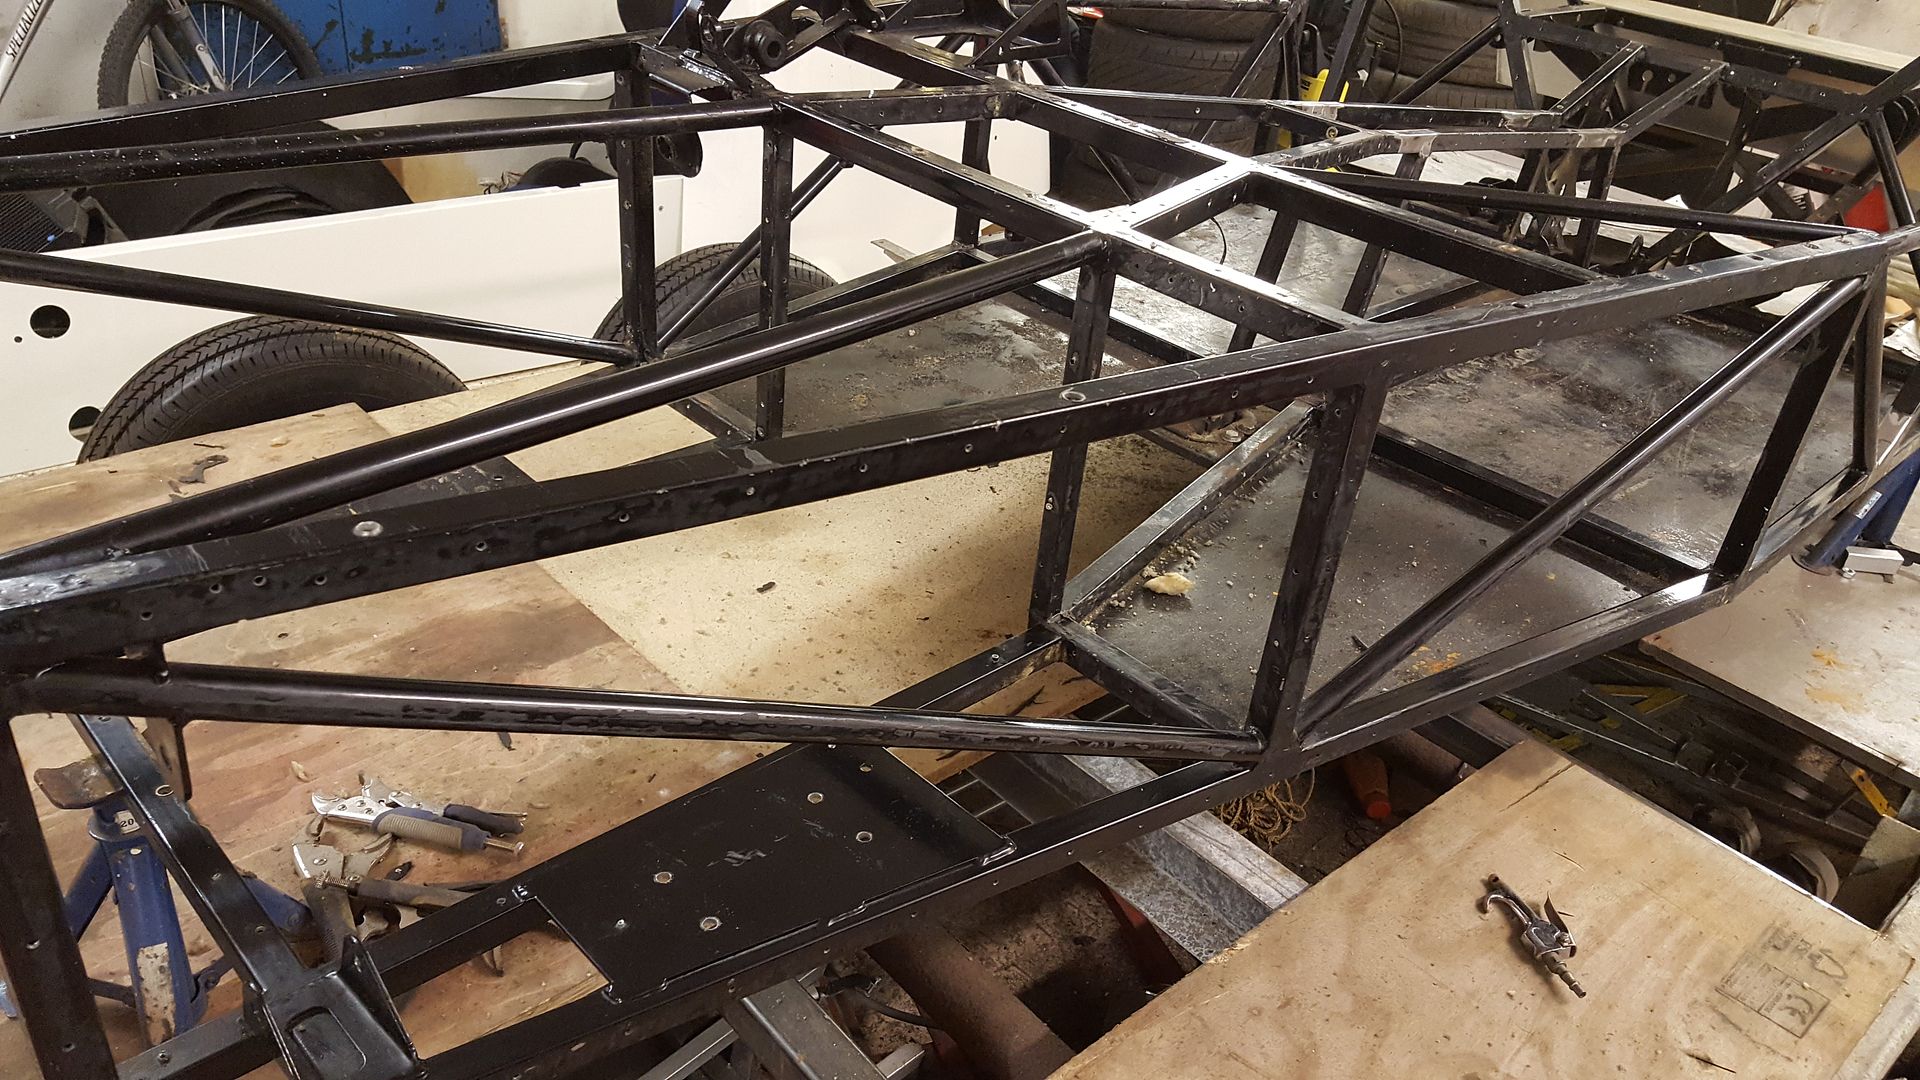
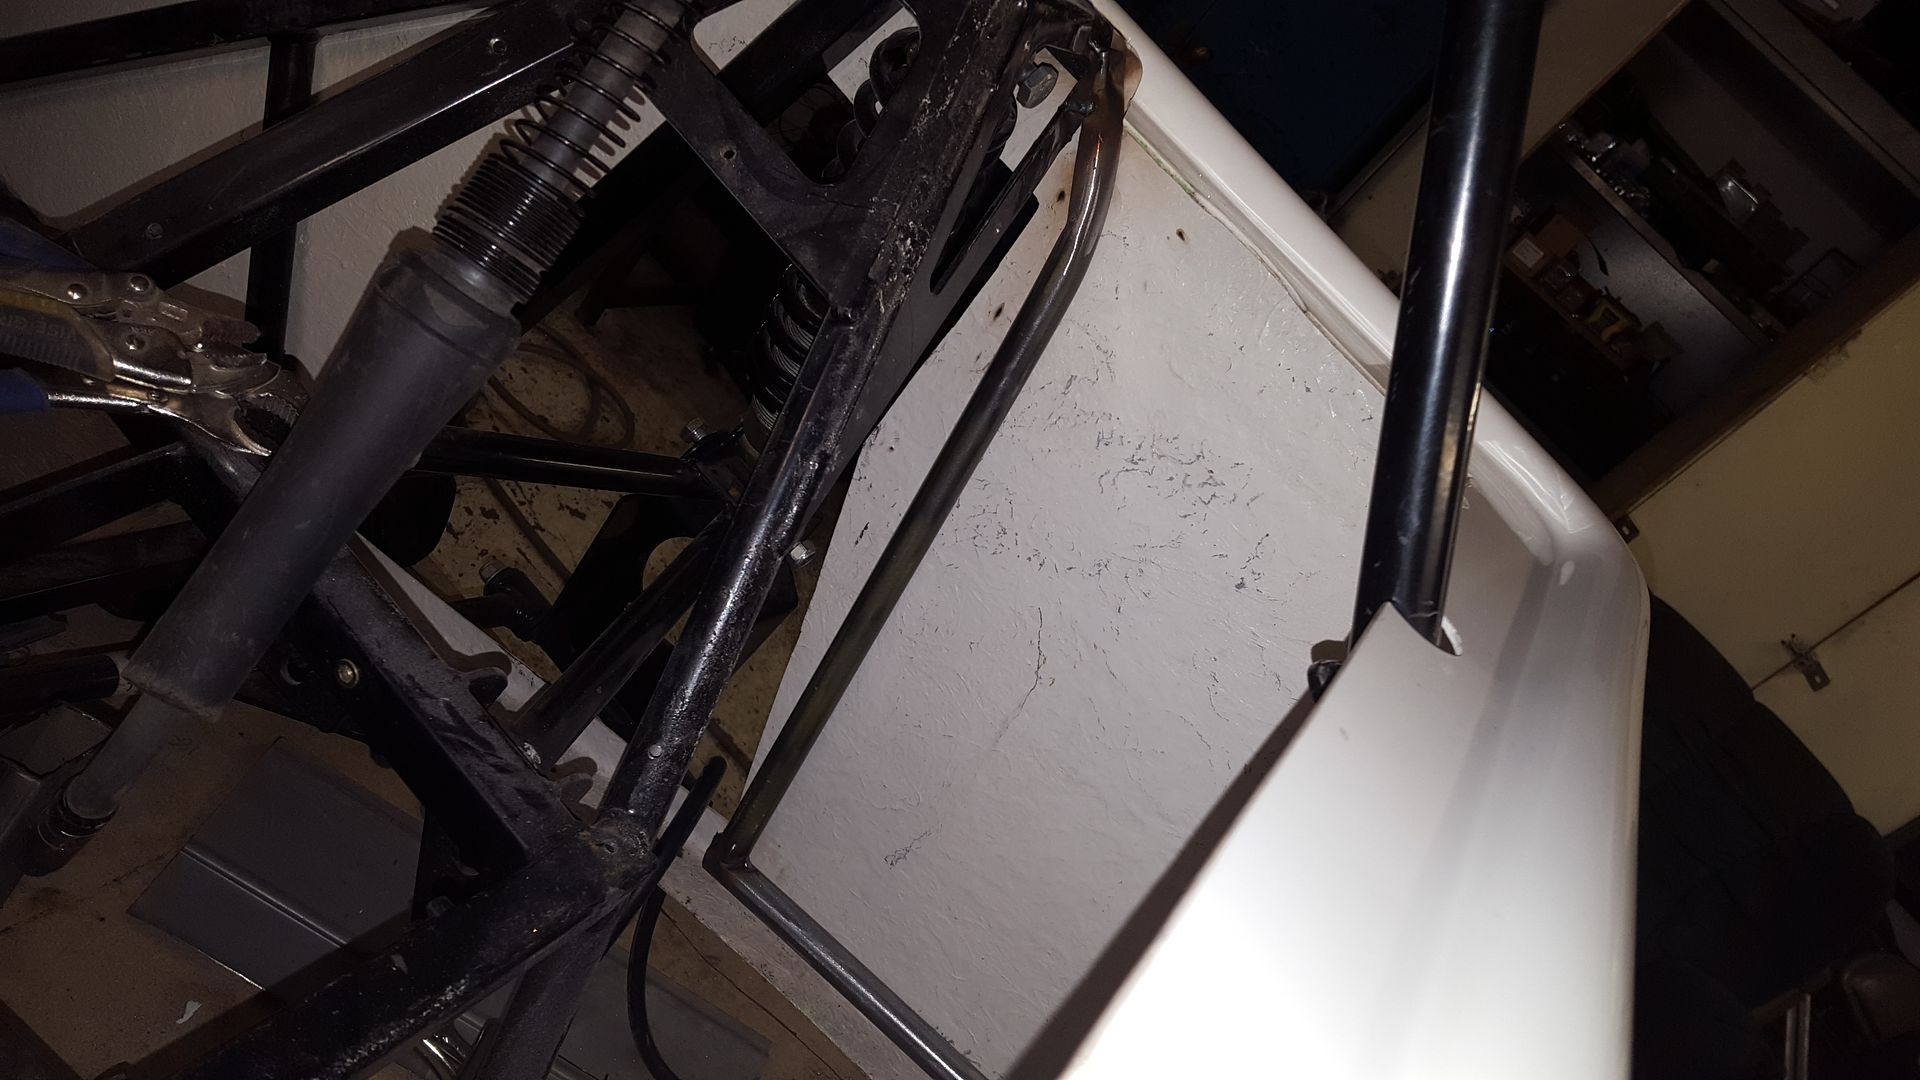
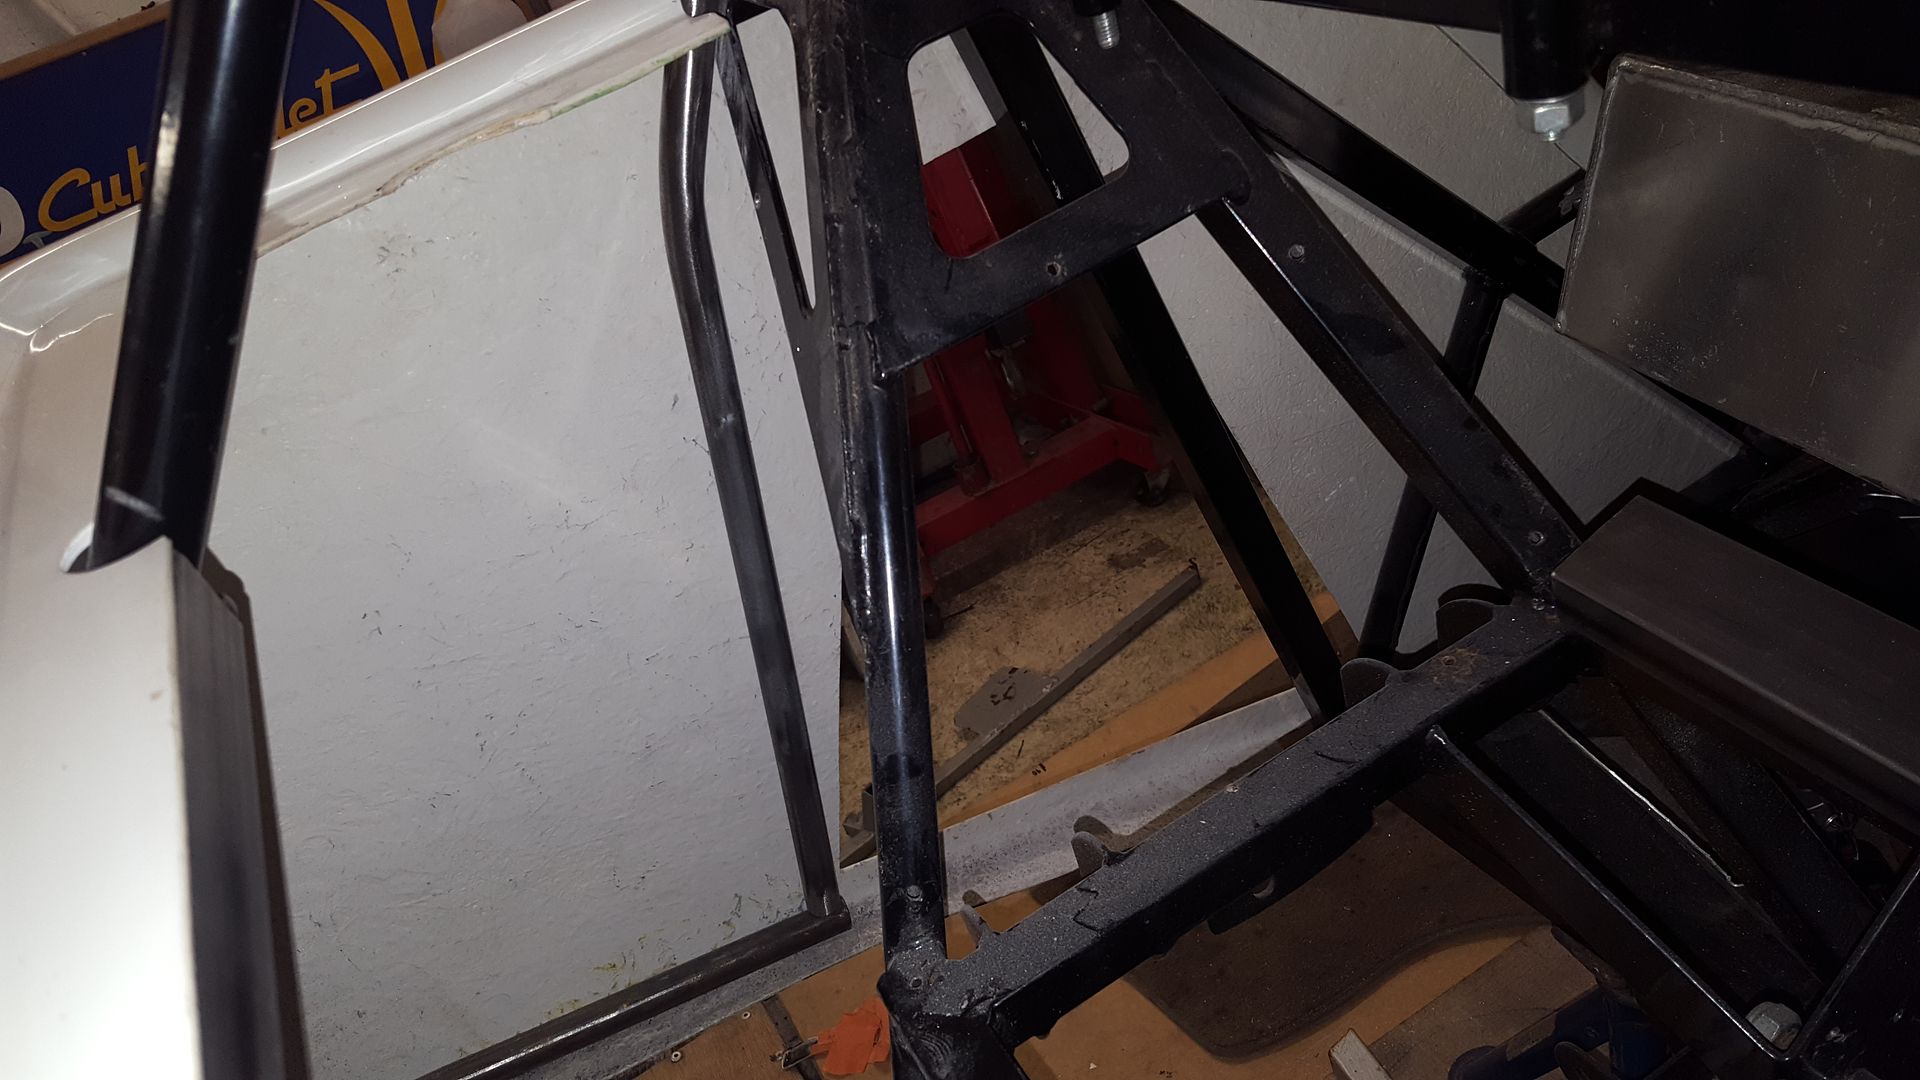
took all the panels off, and now have a nice big stock of stainless

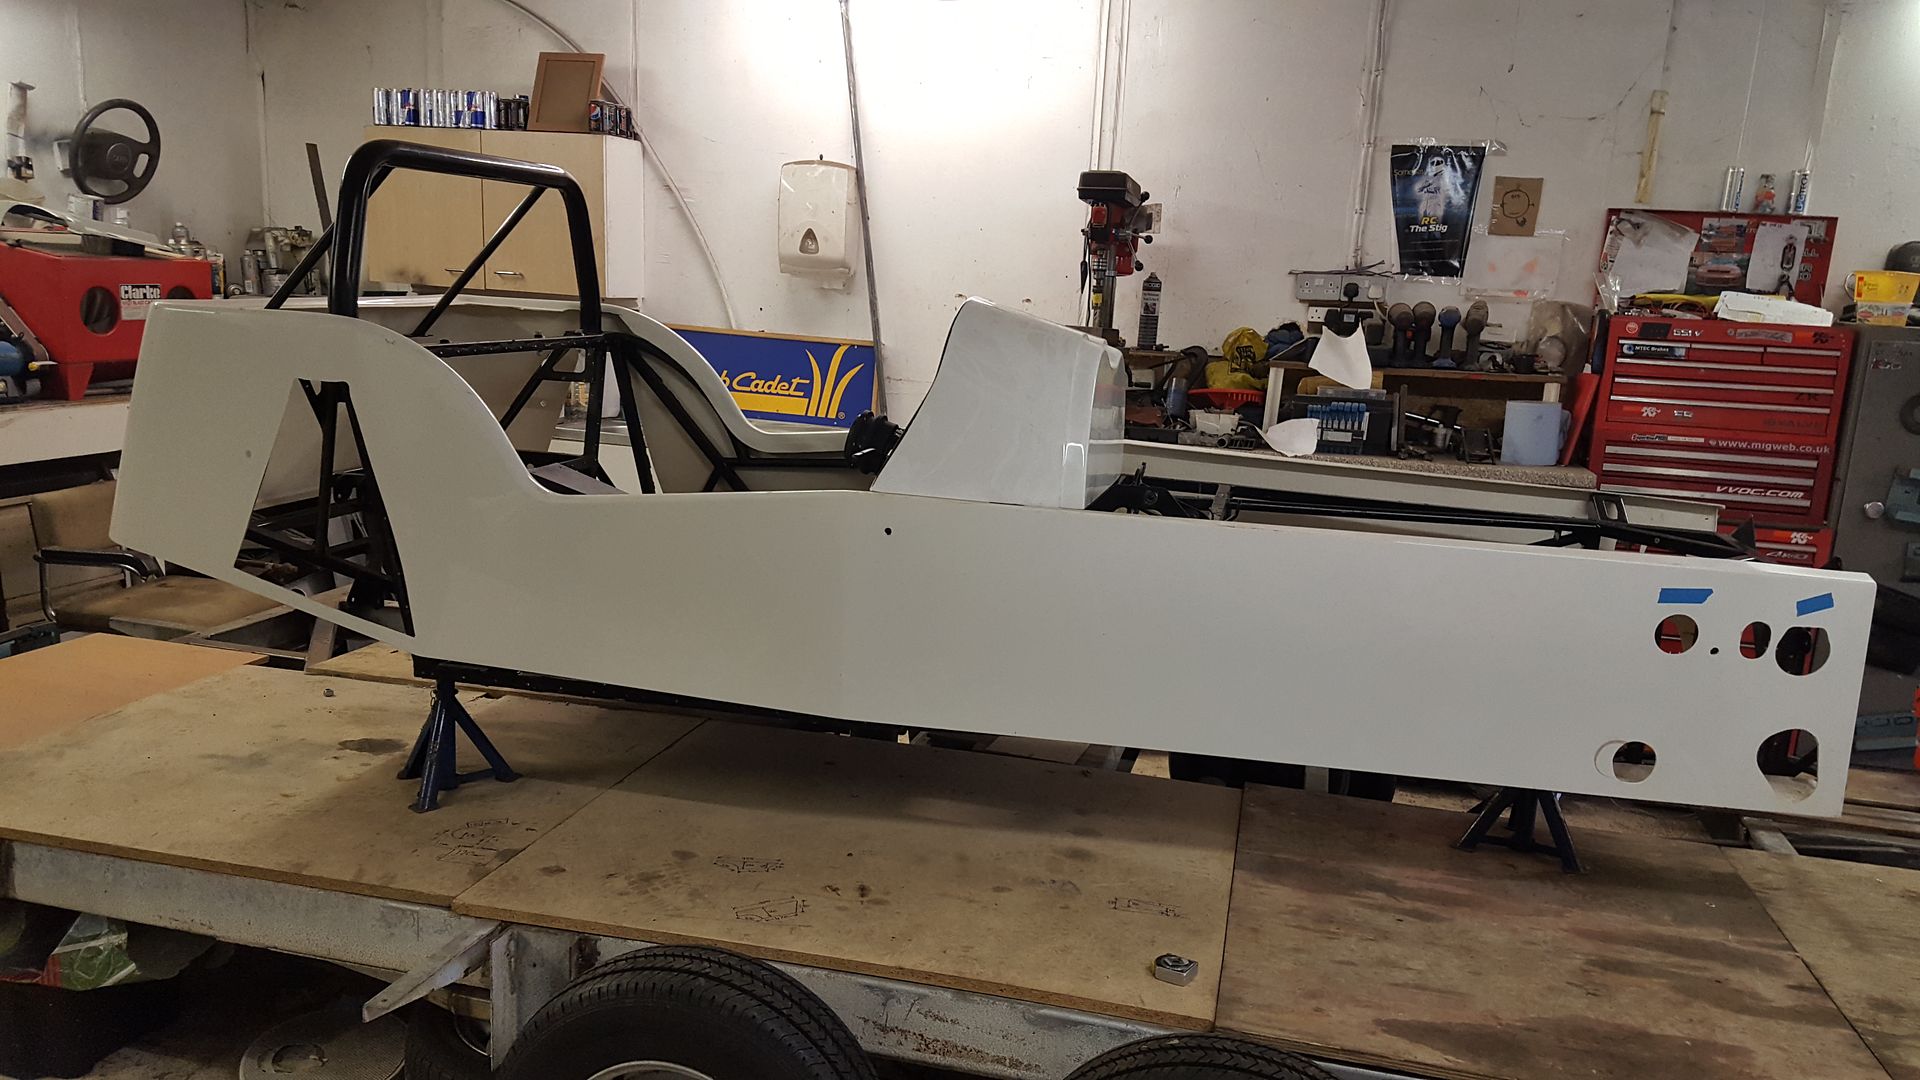
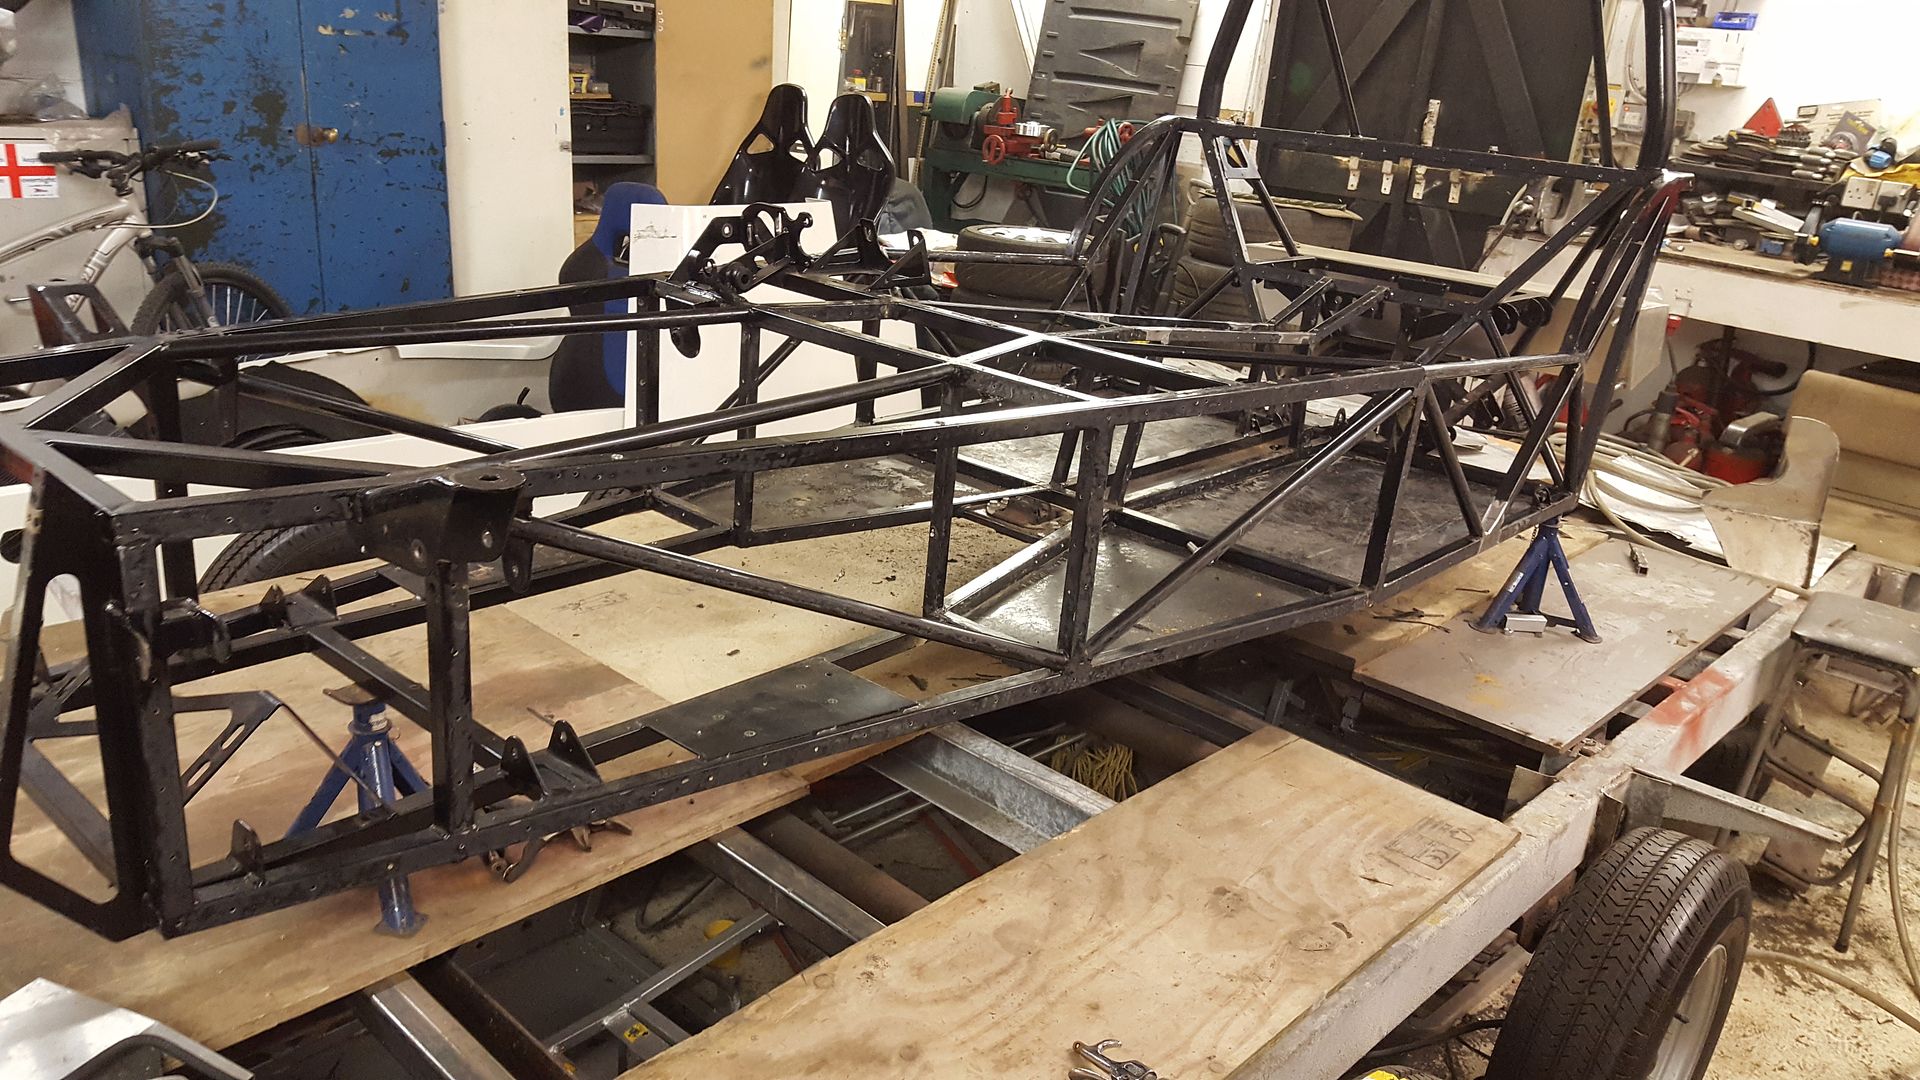
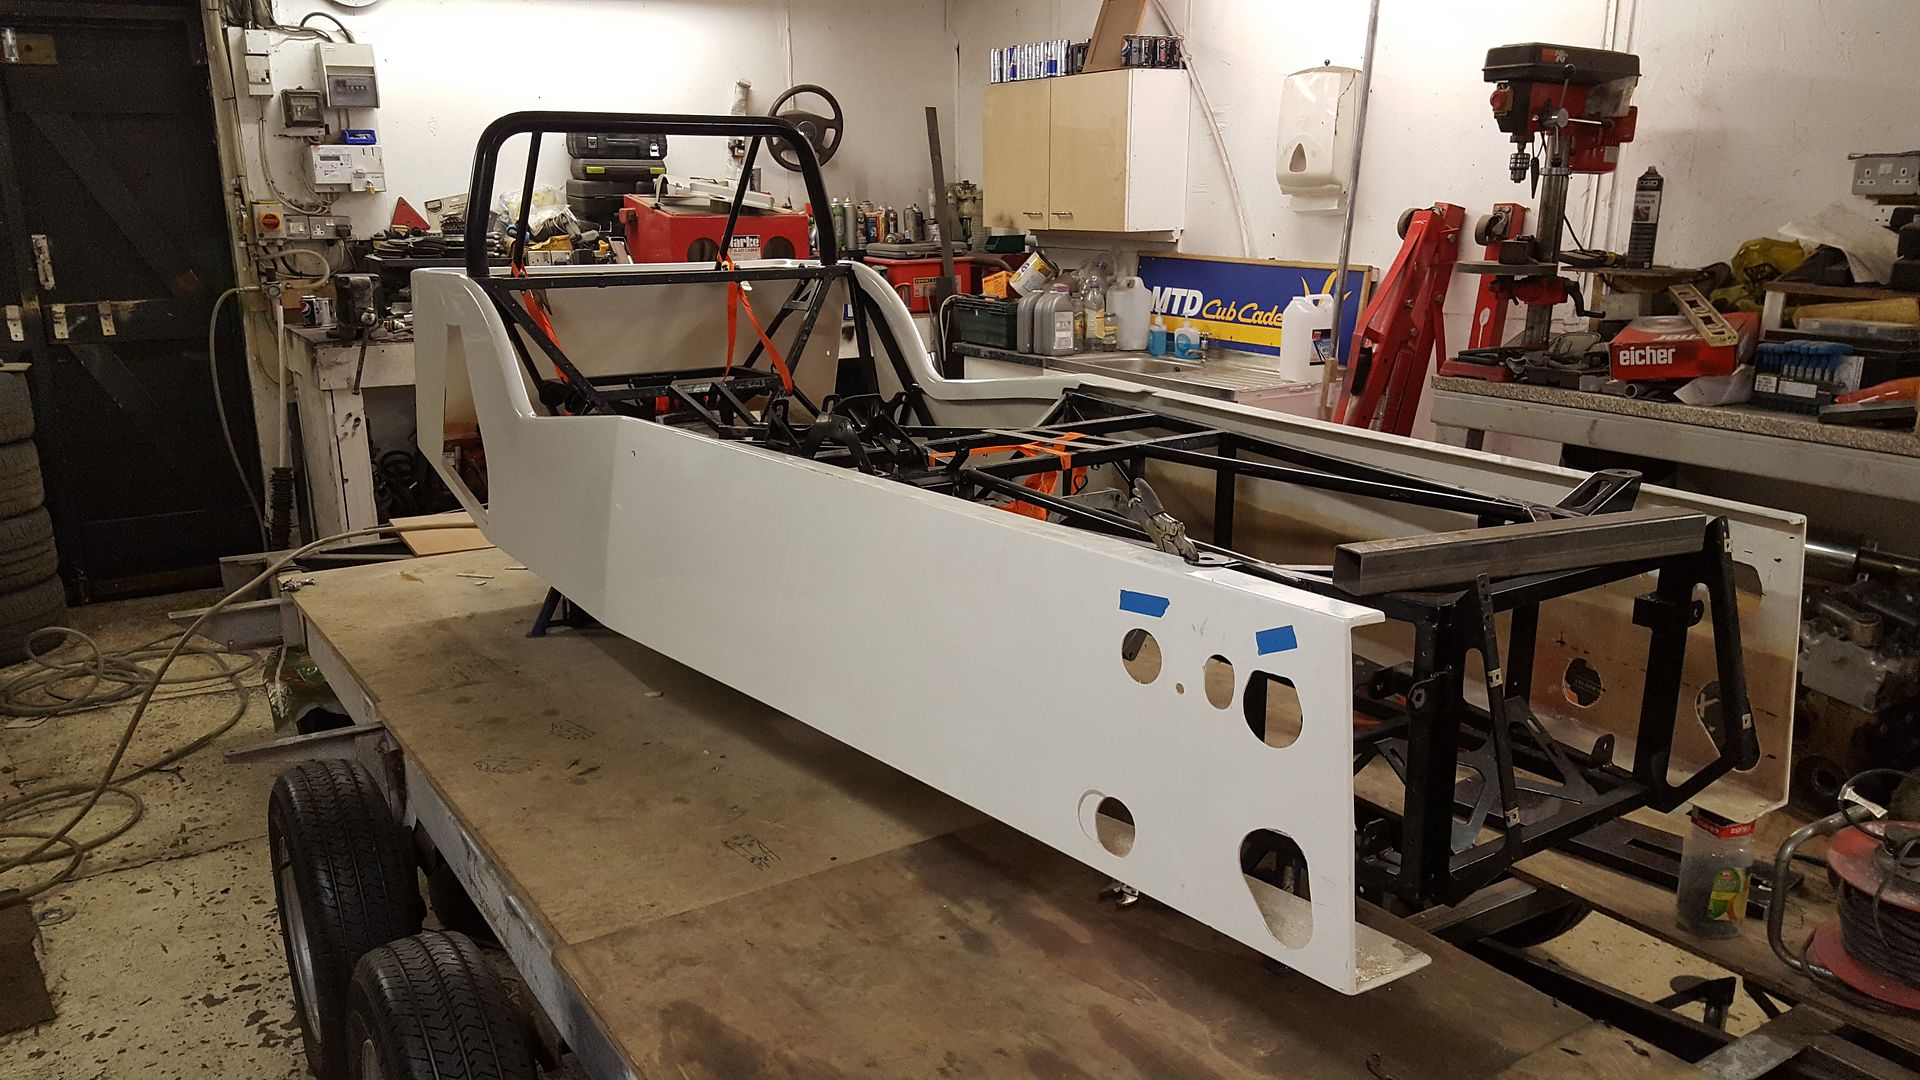
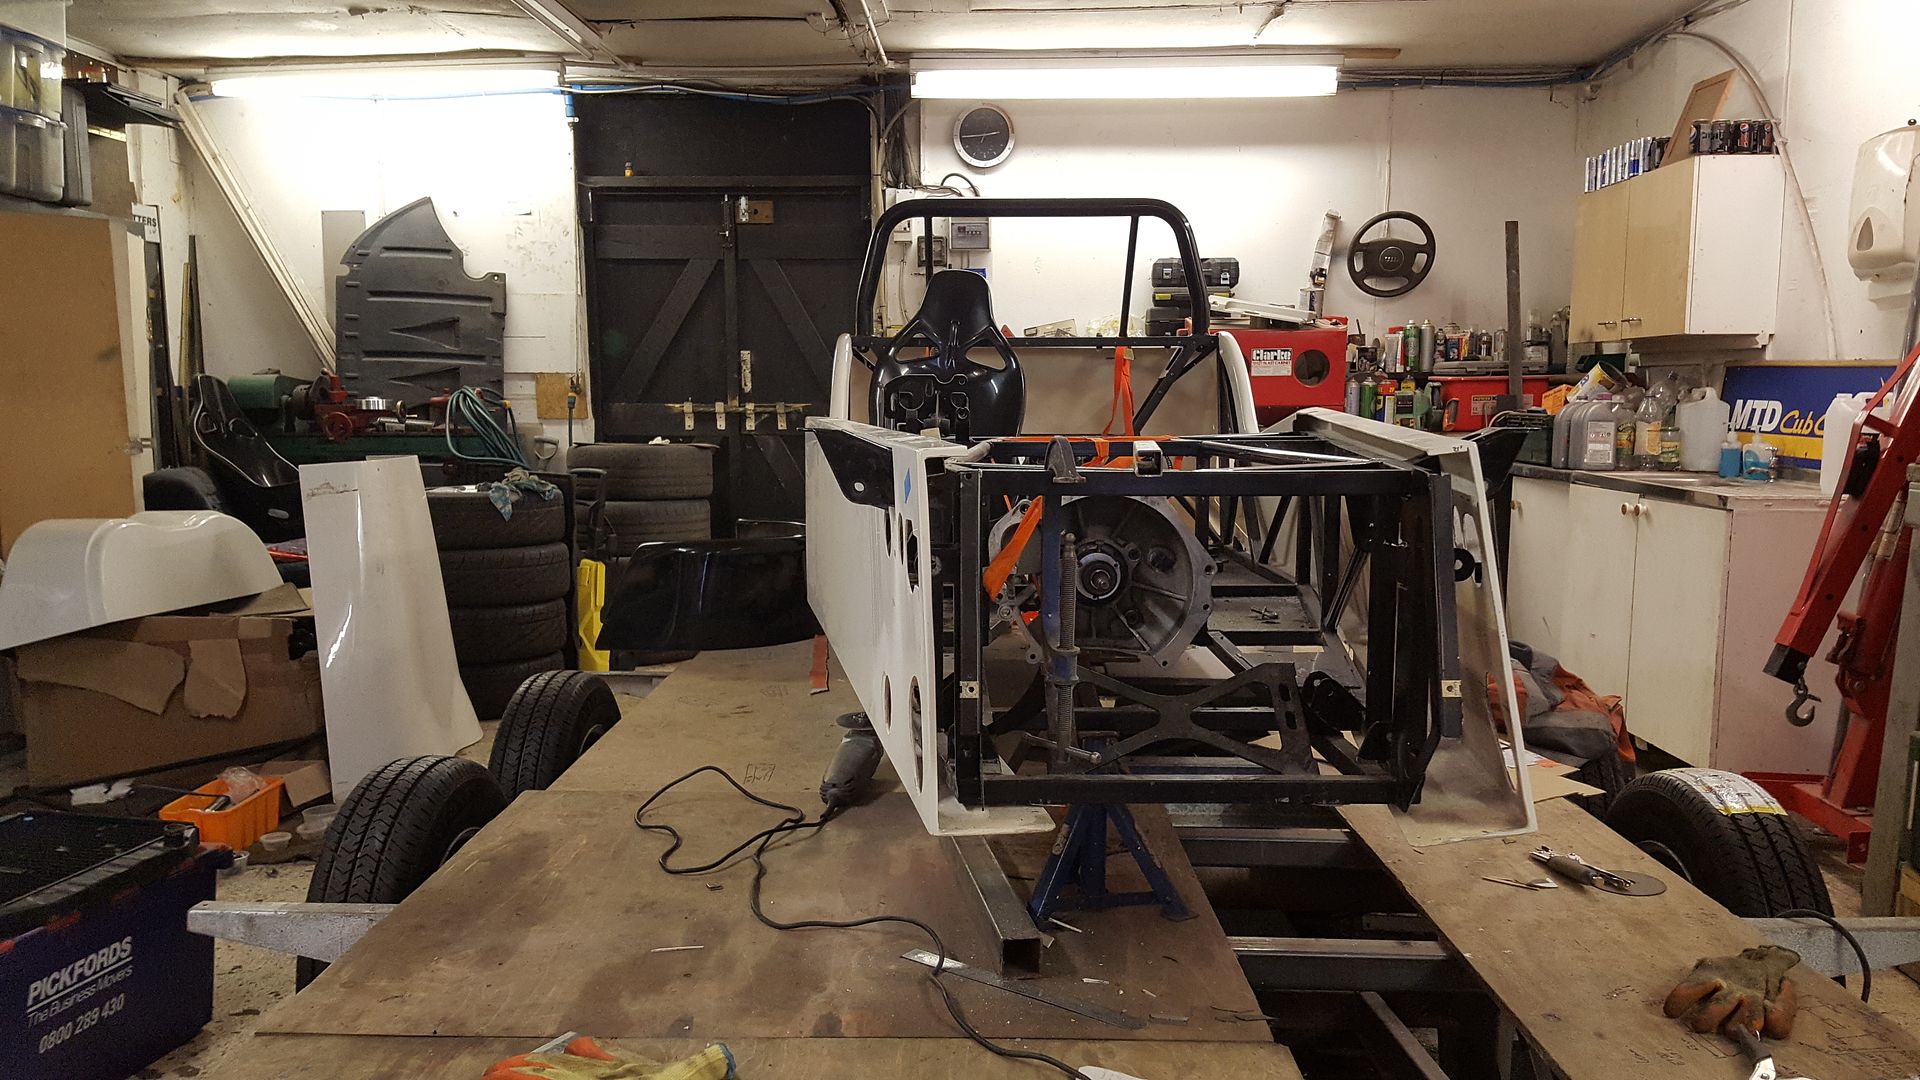
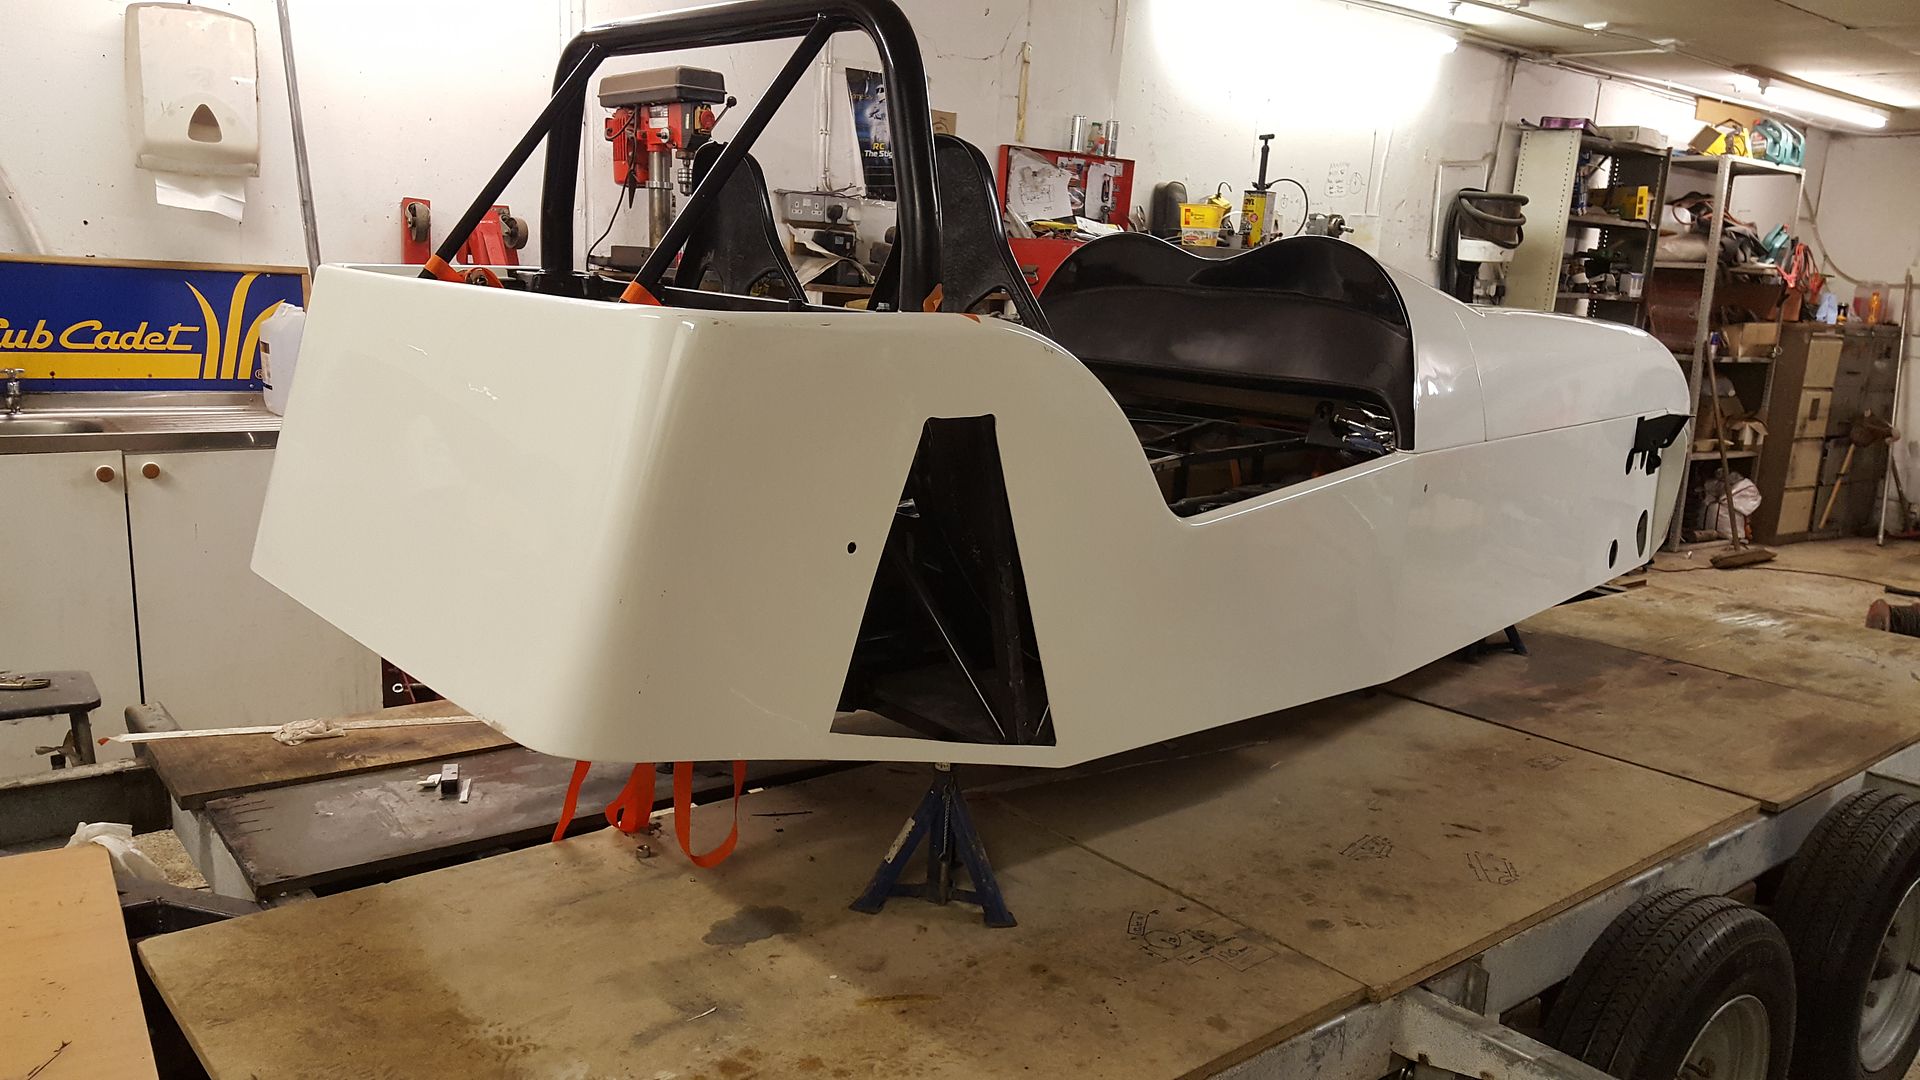
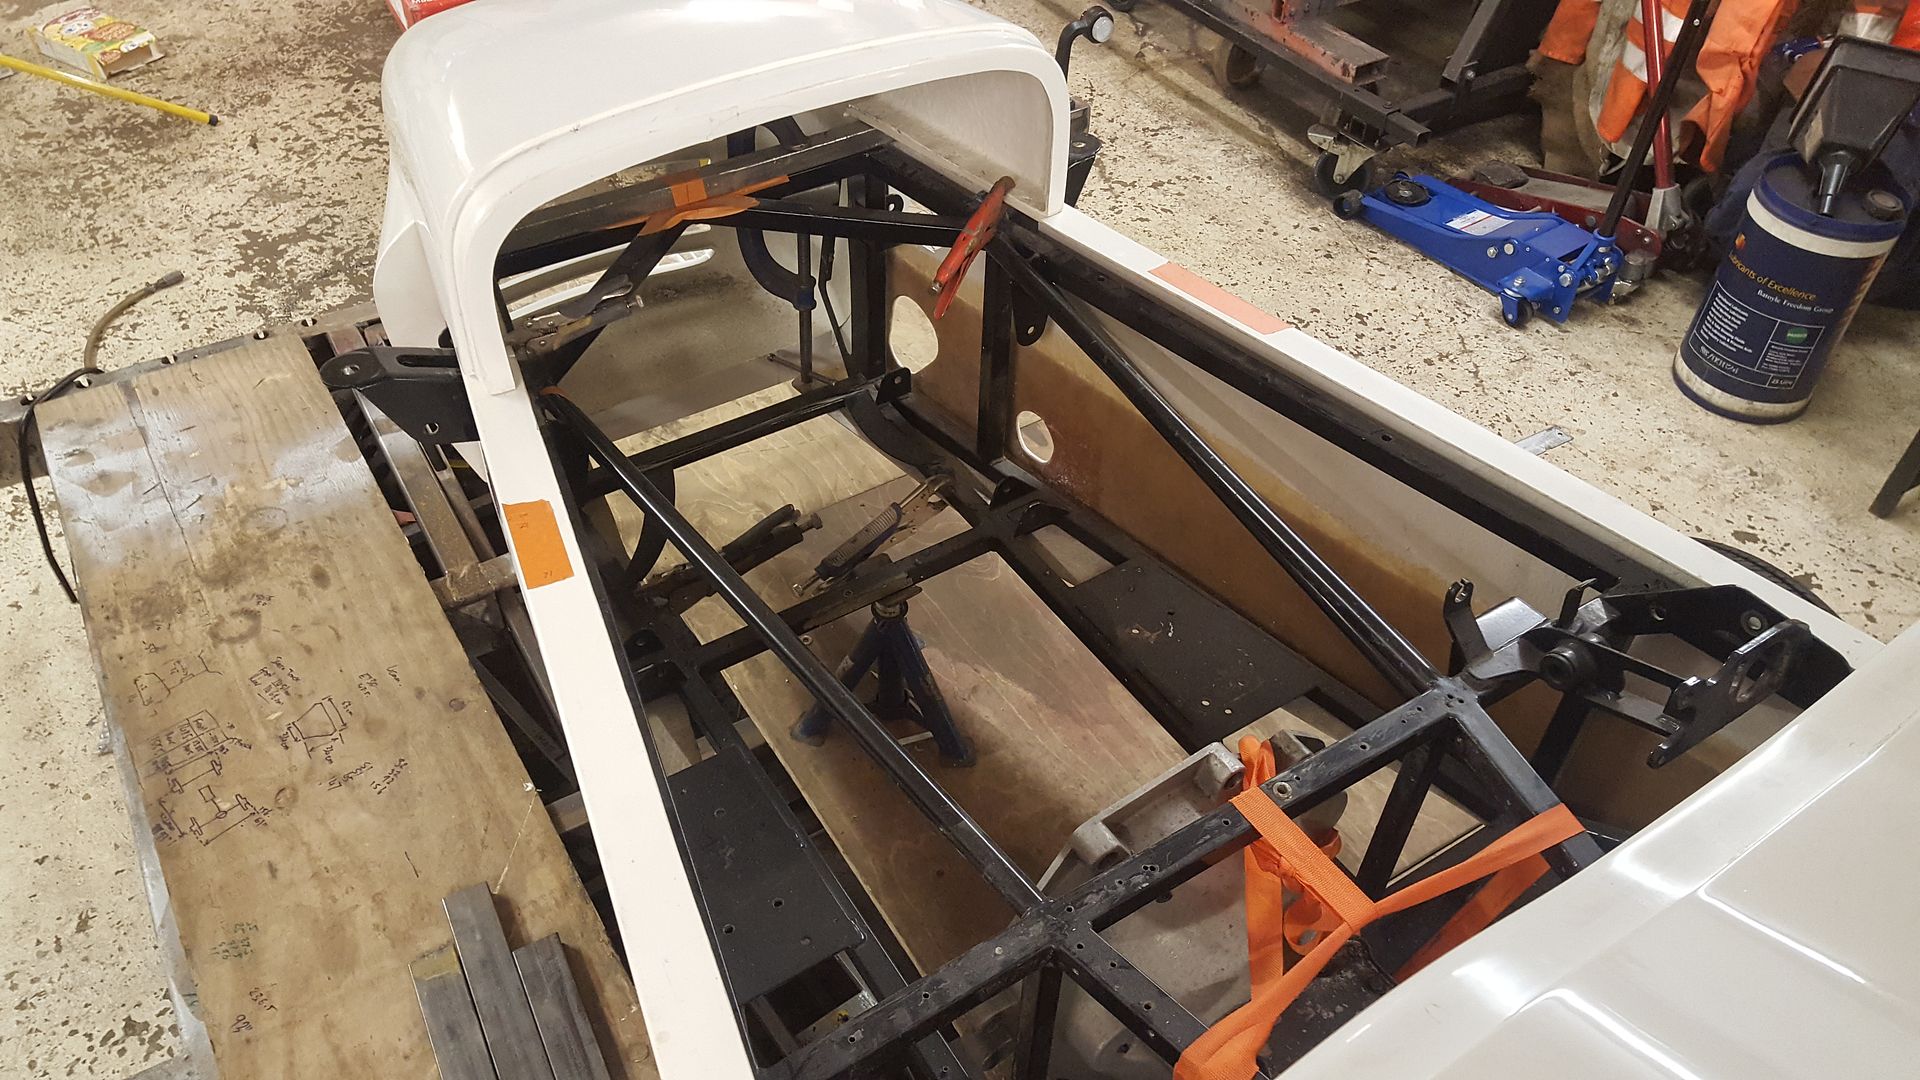
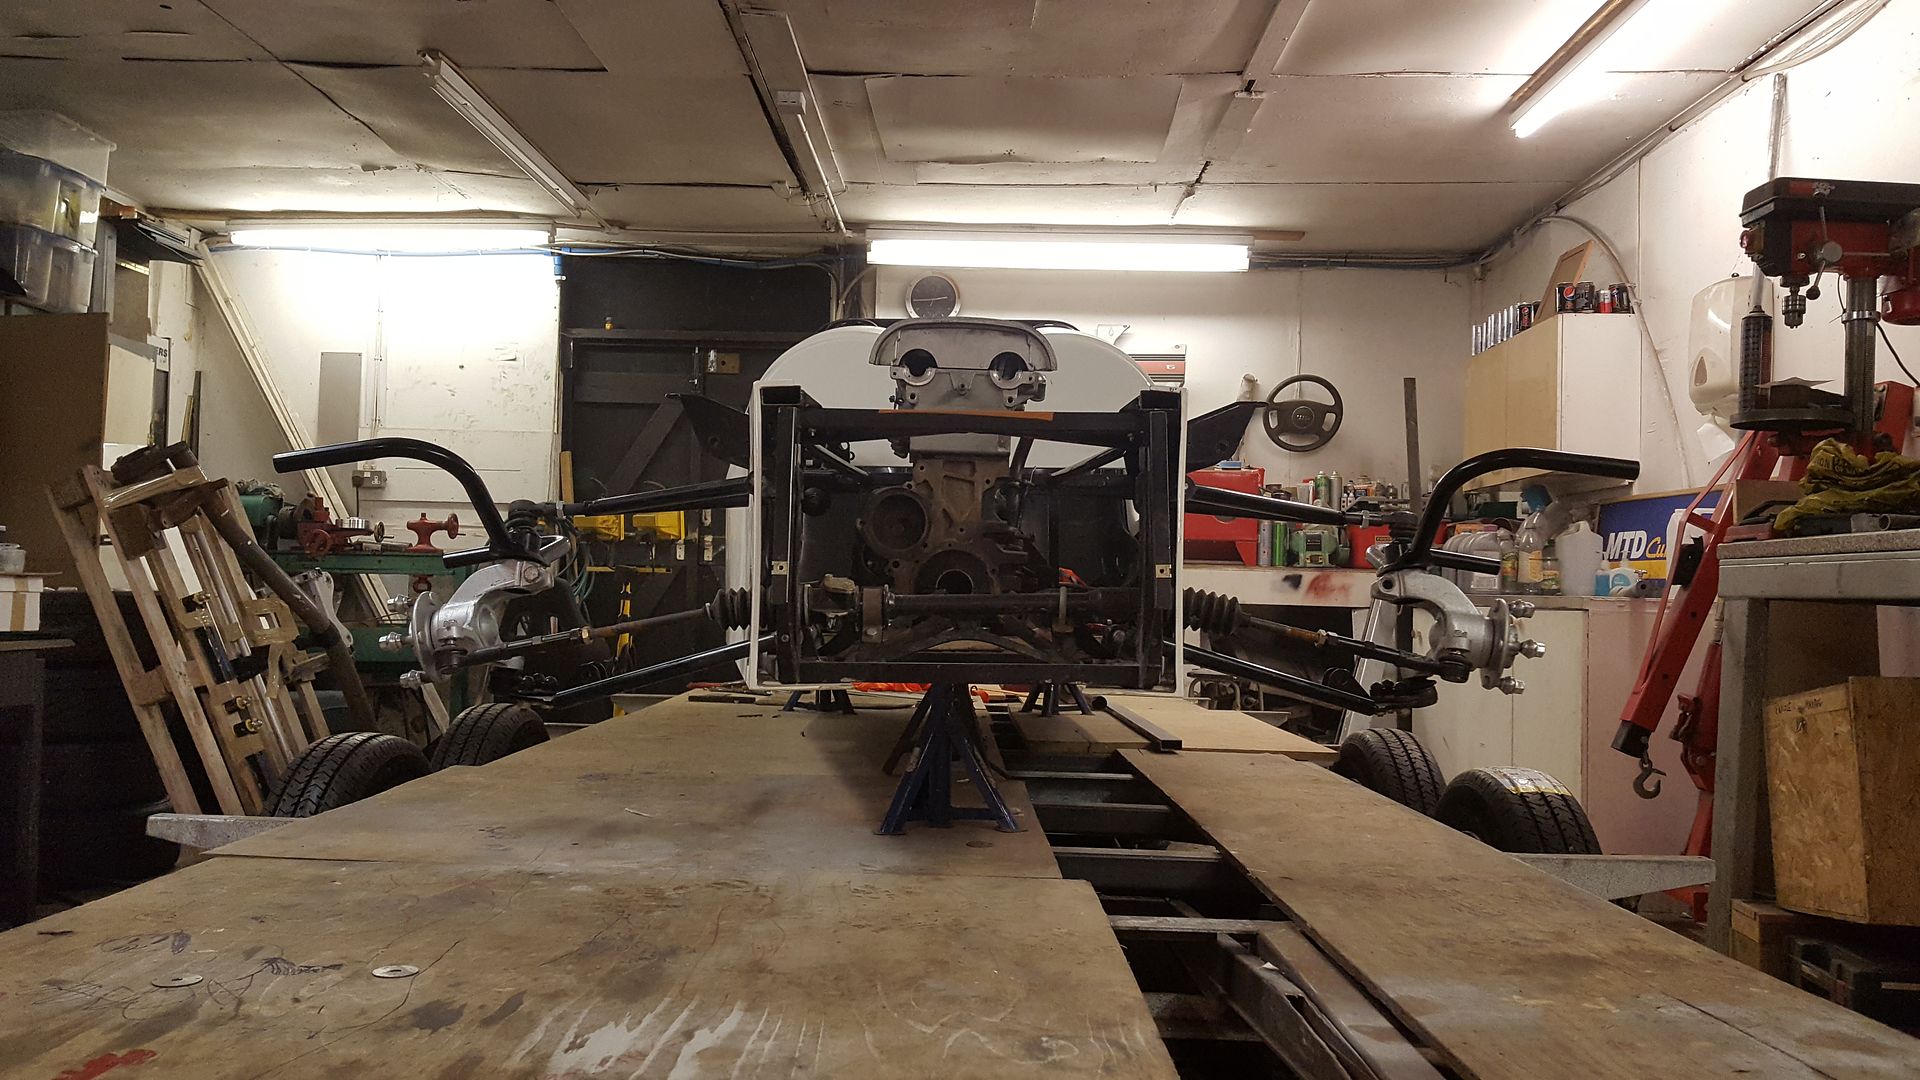
and a naked locost (ish) chassis
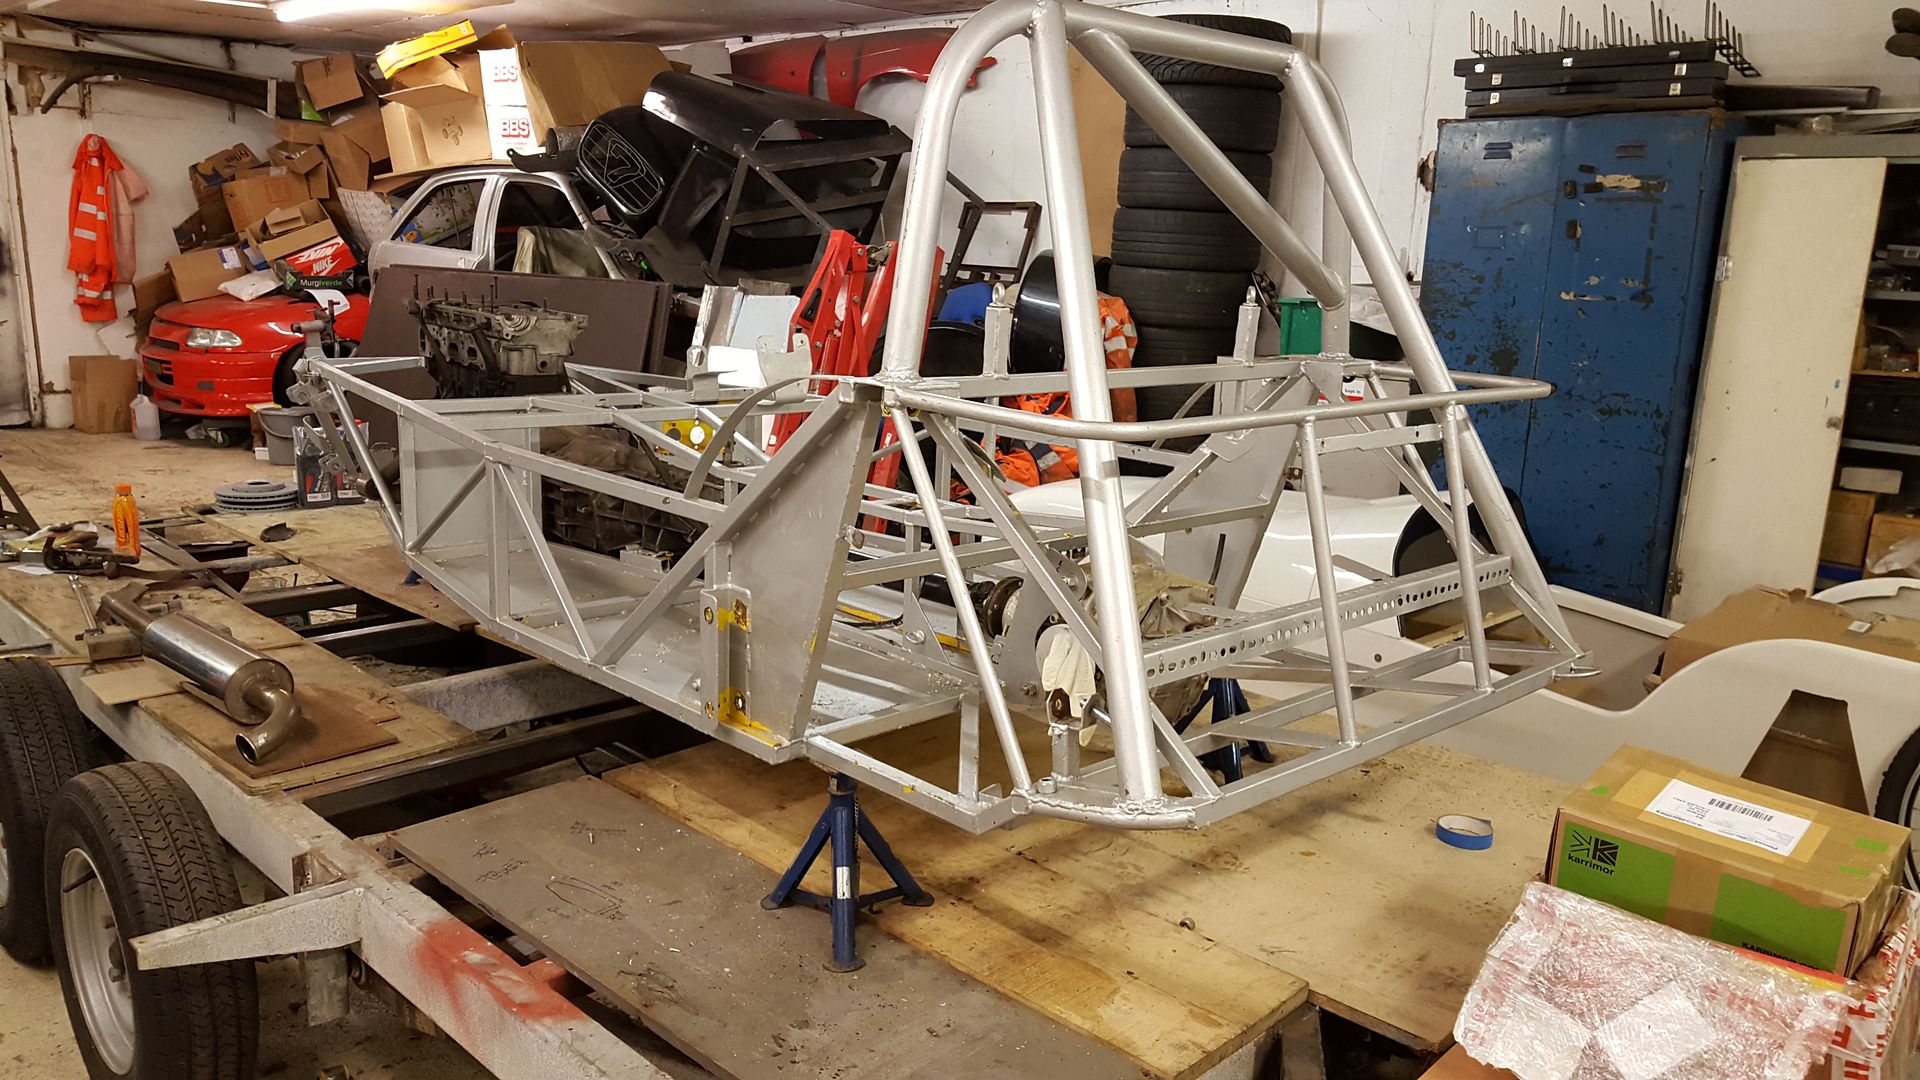
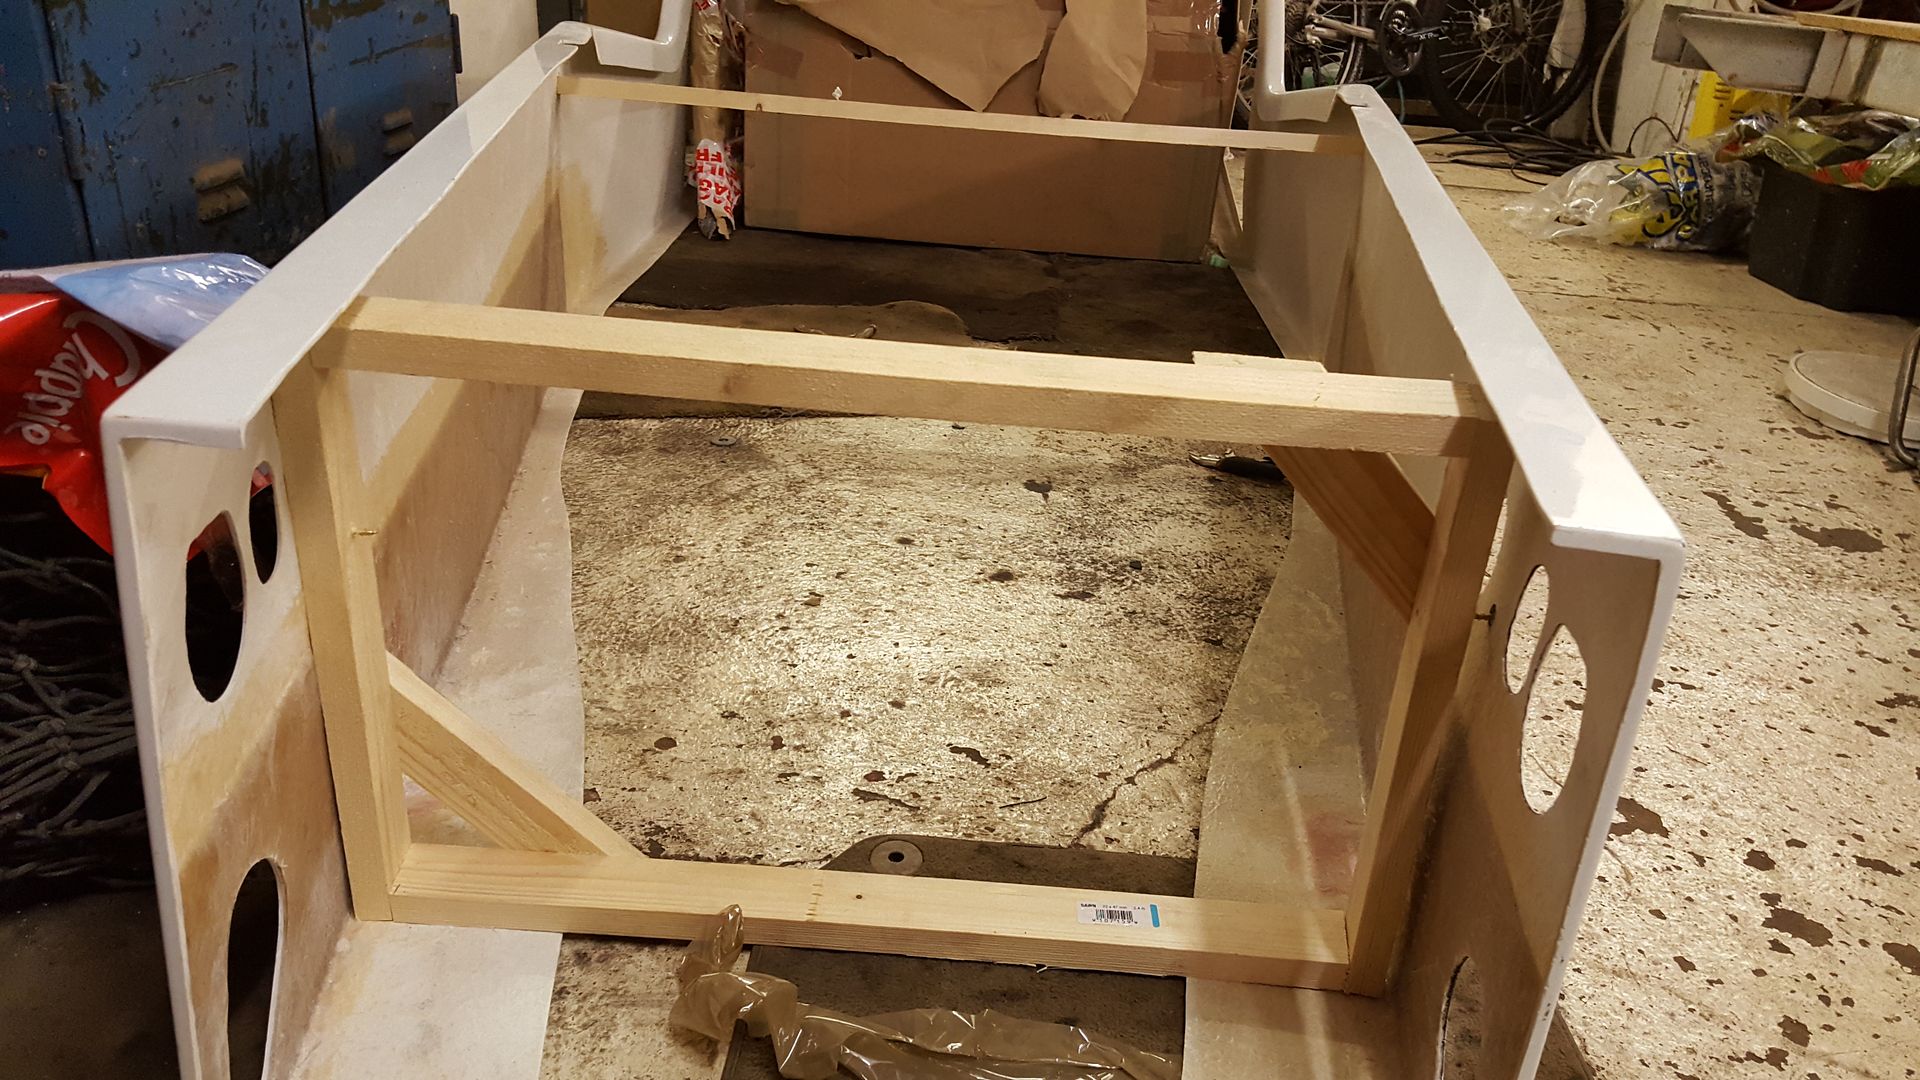
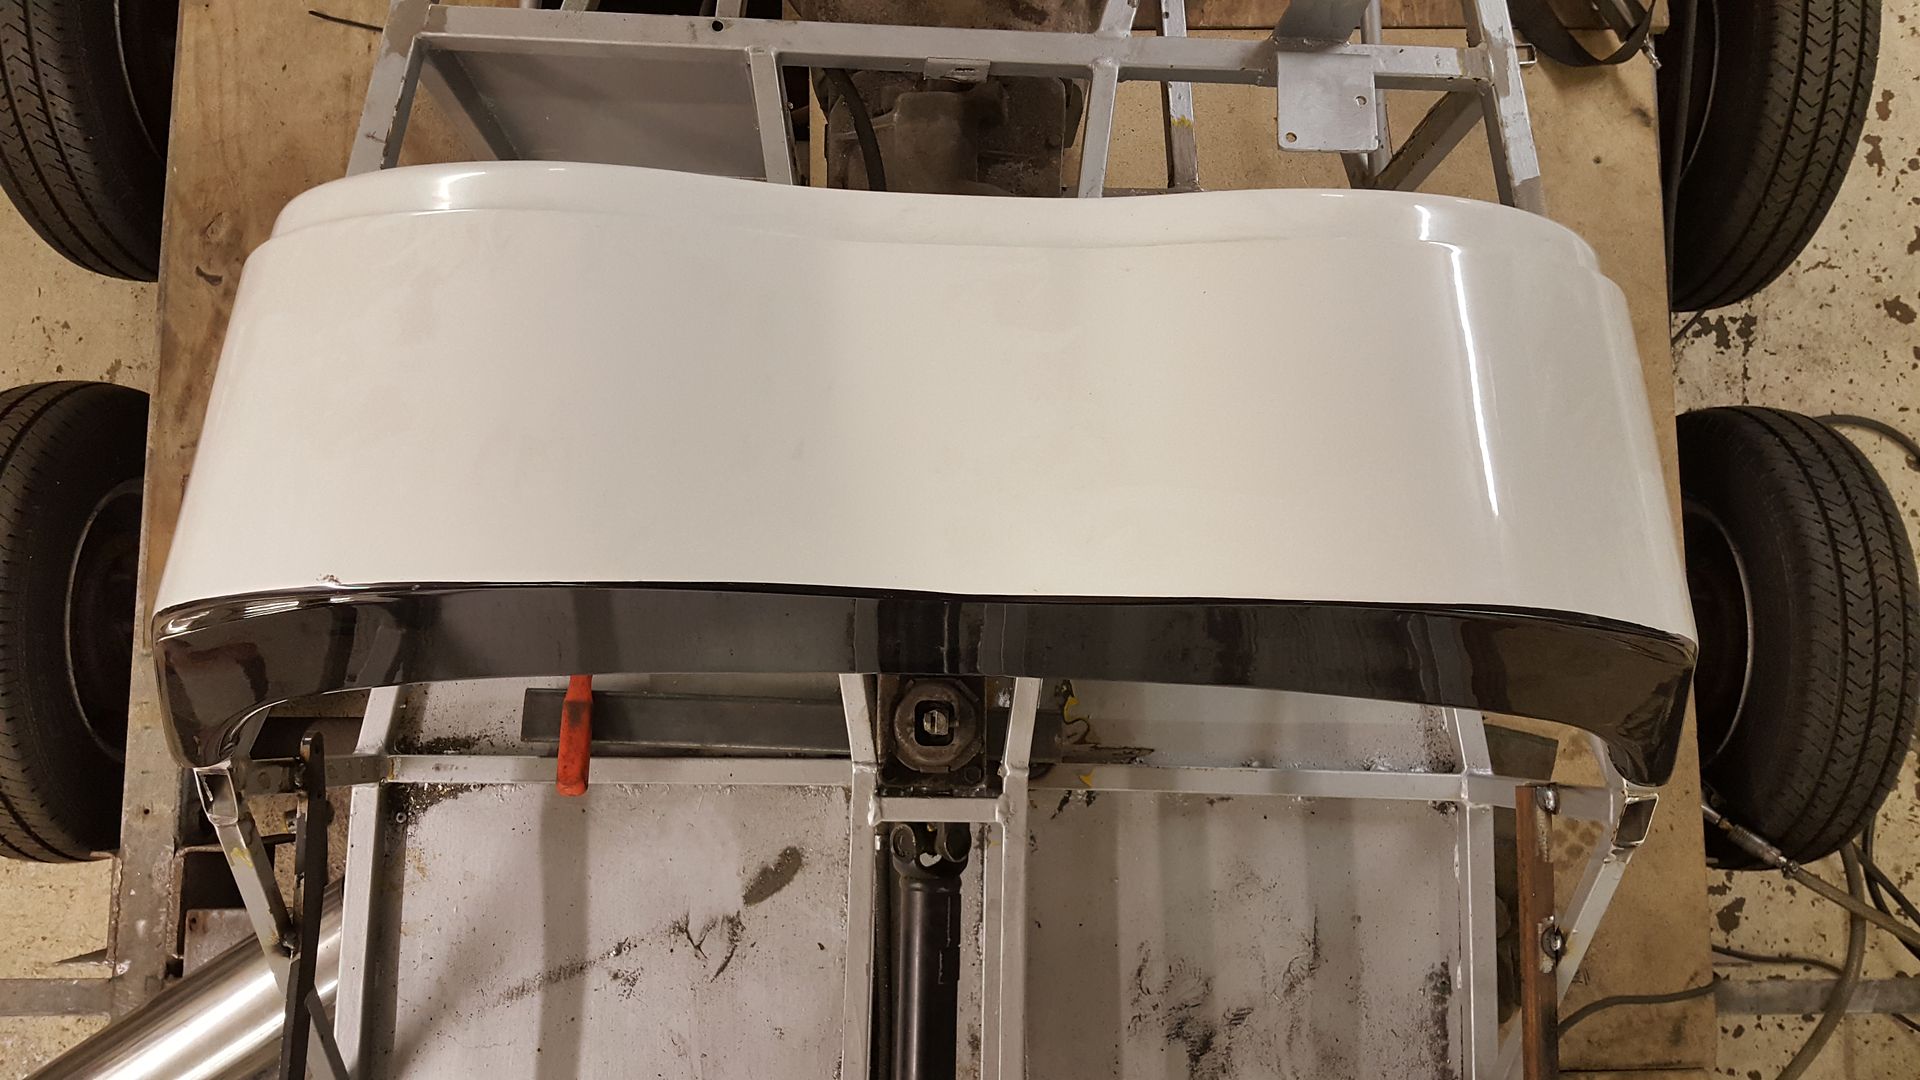
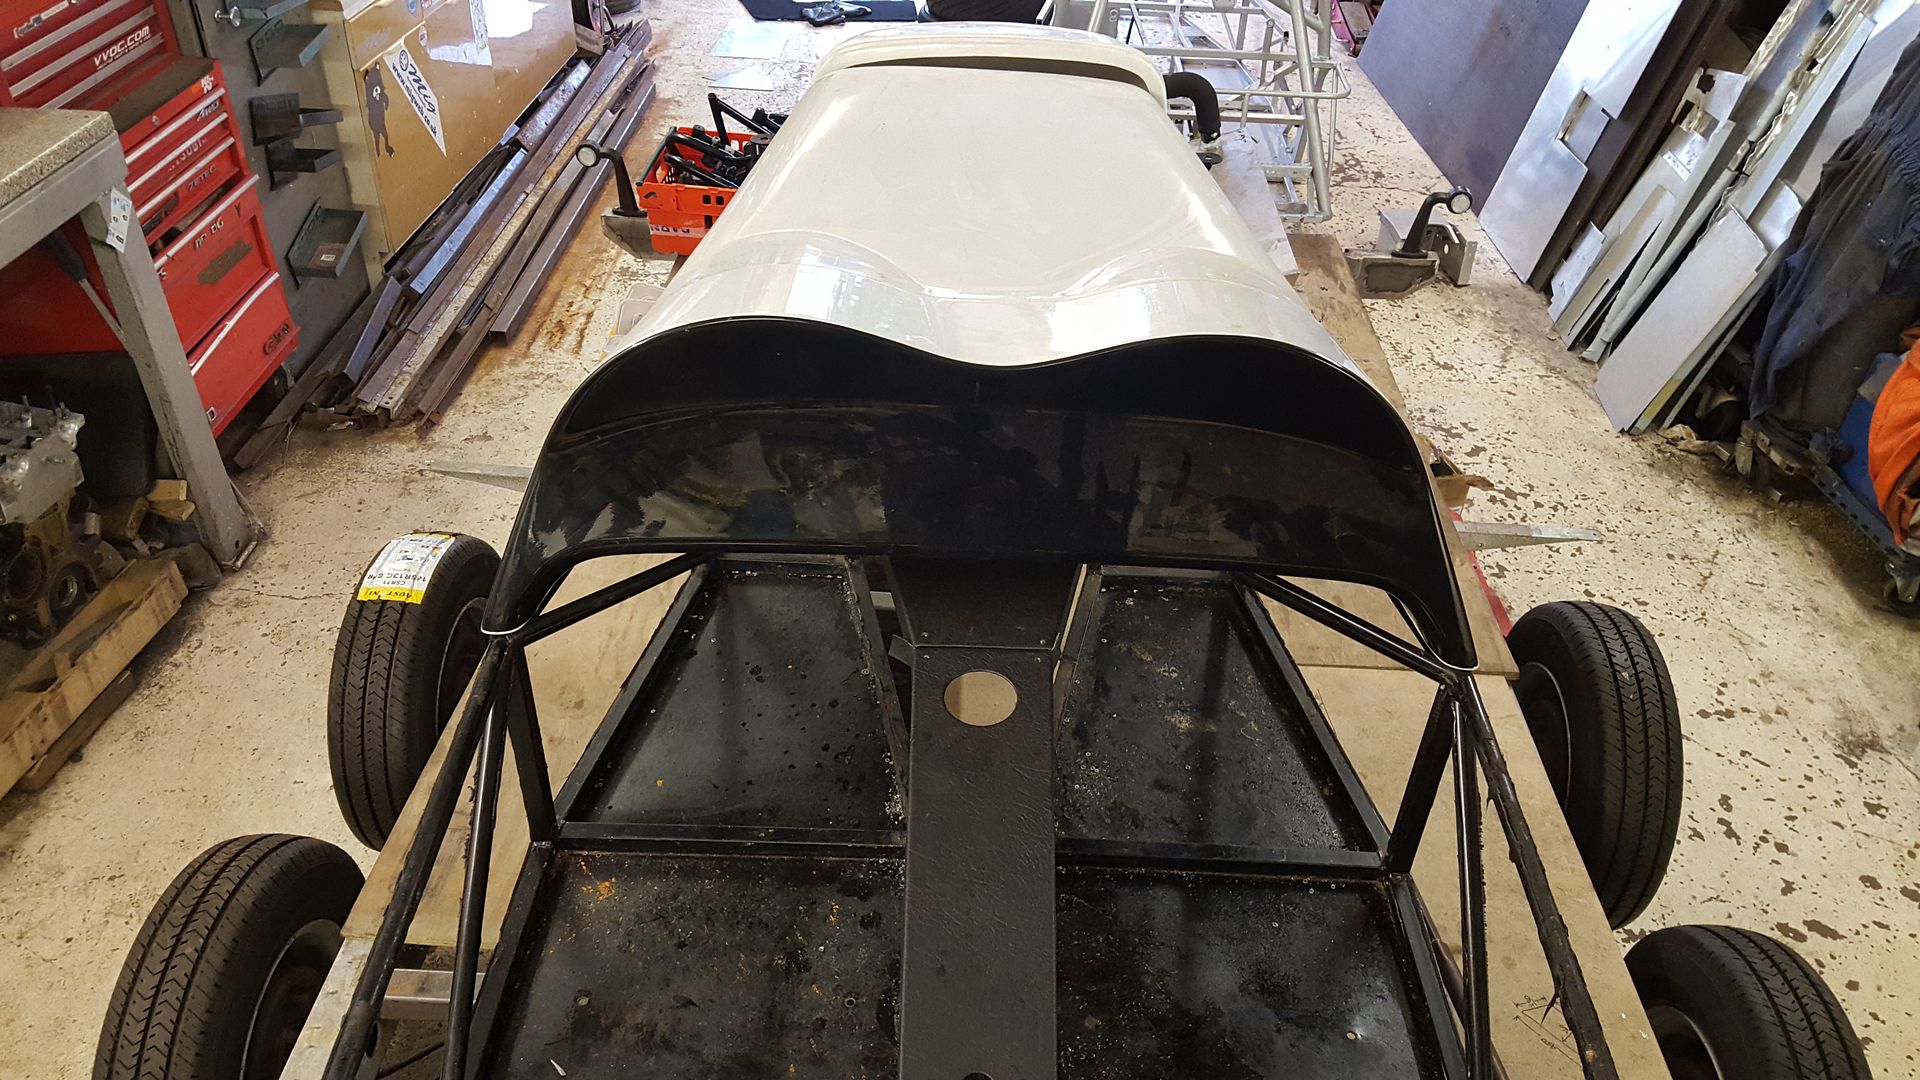
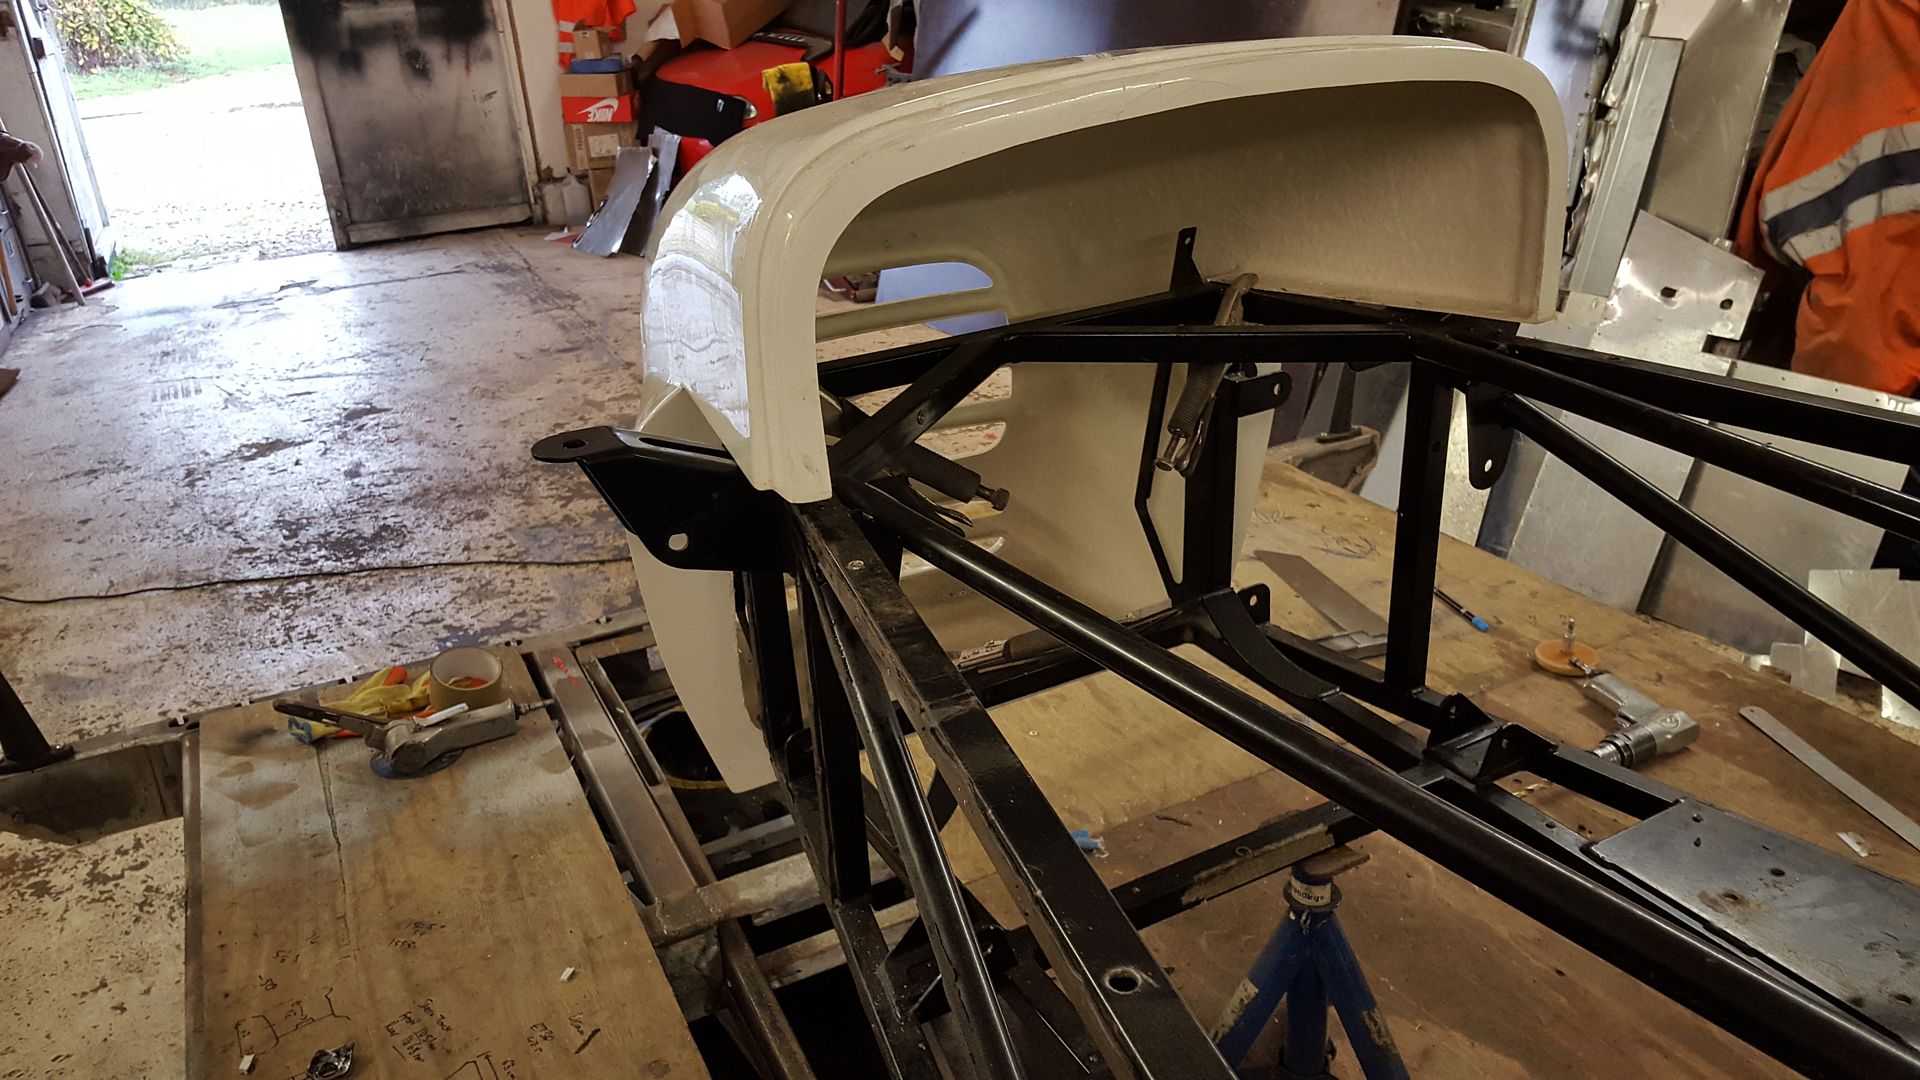
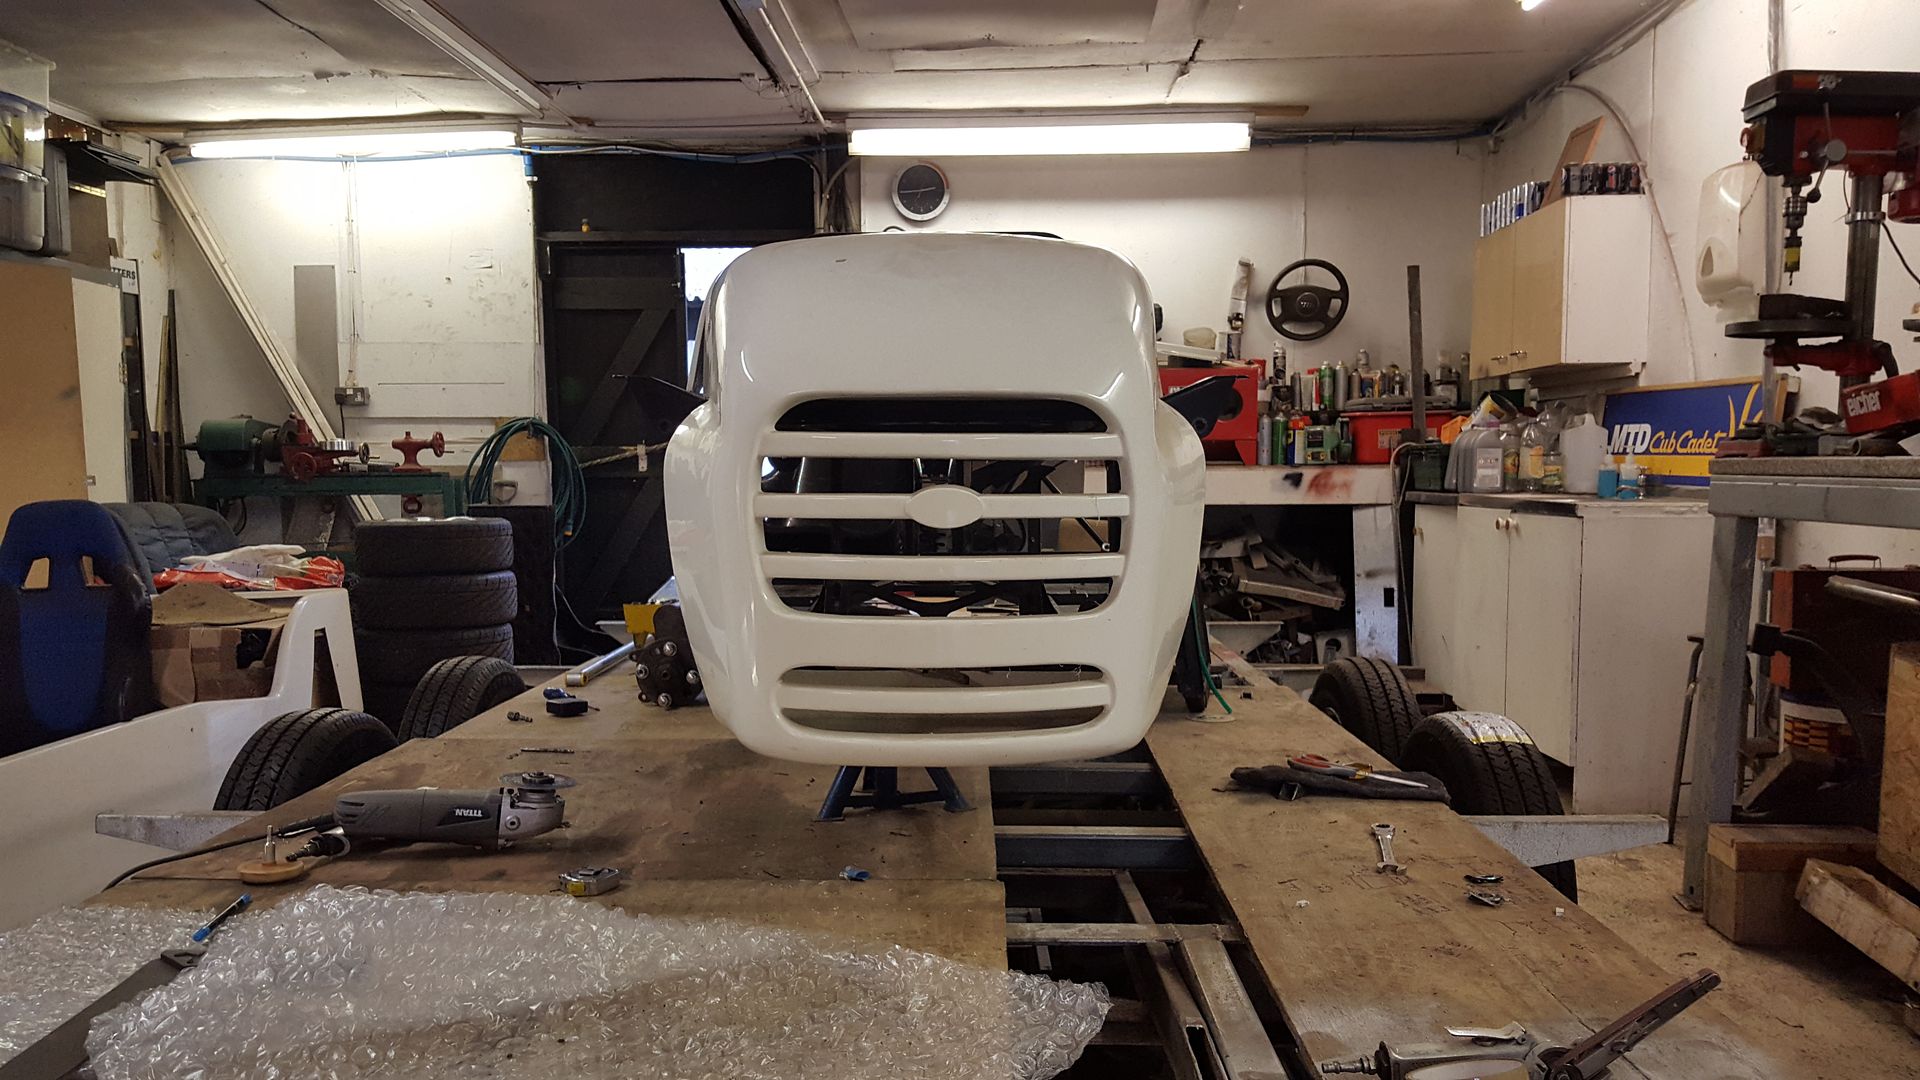
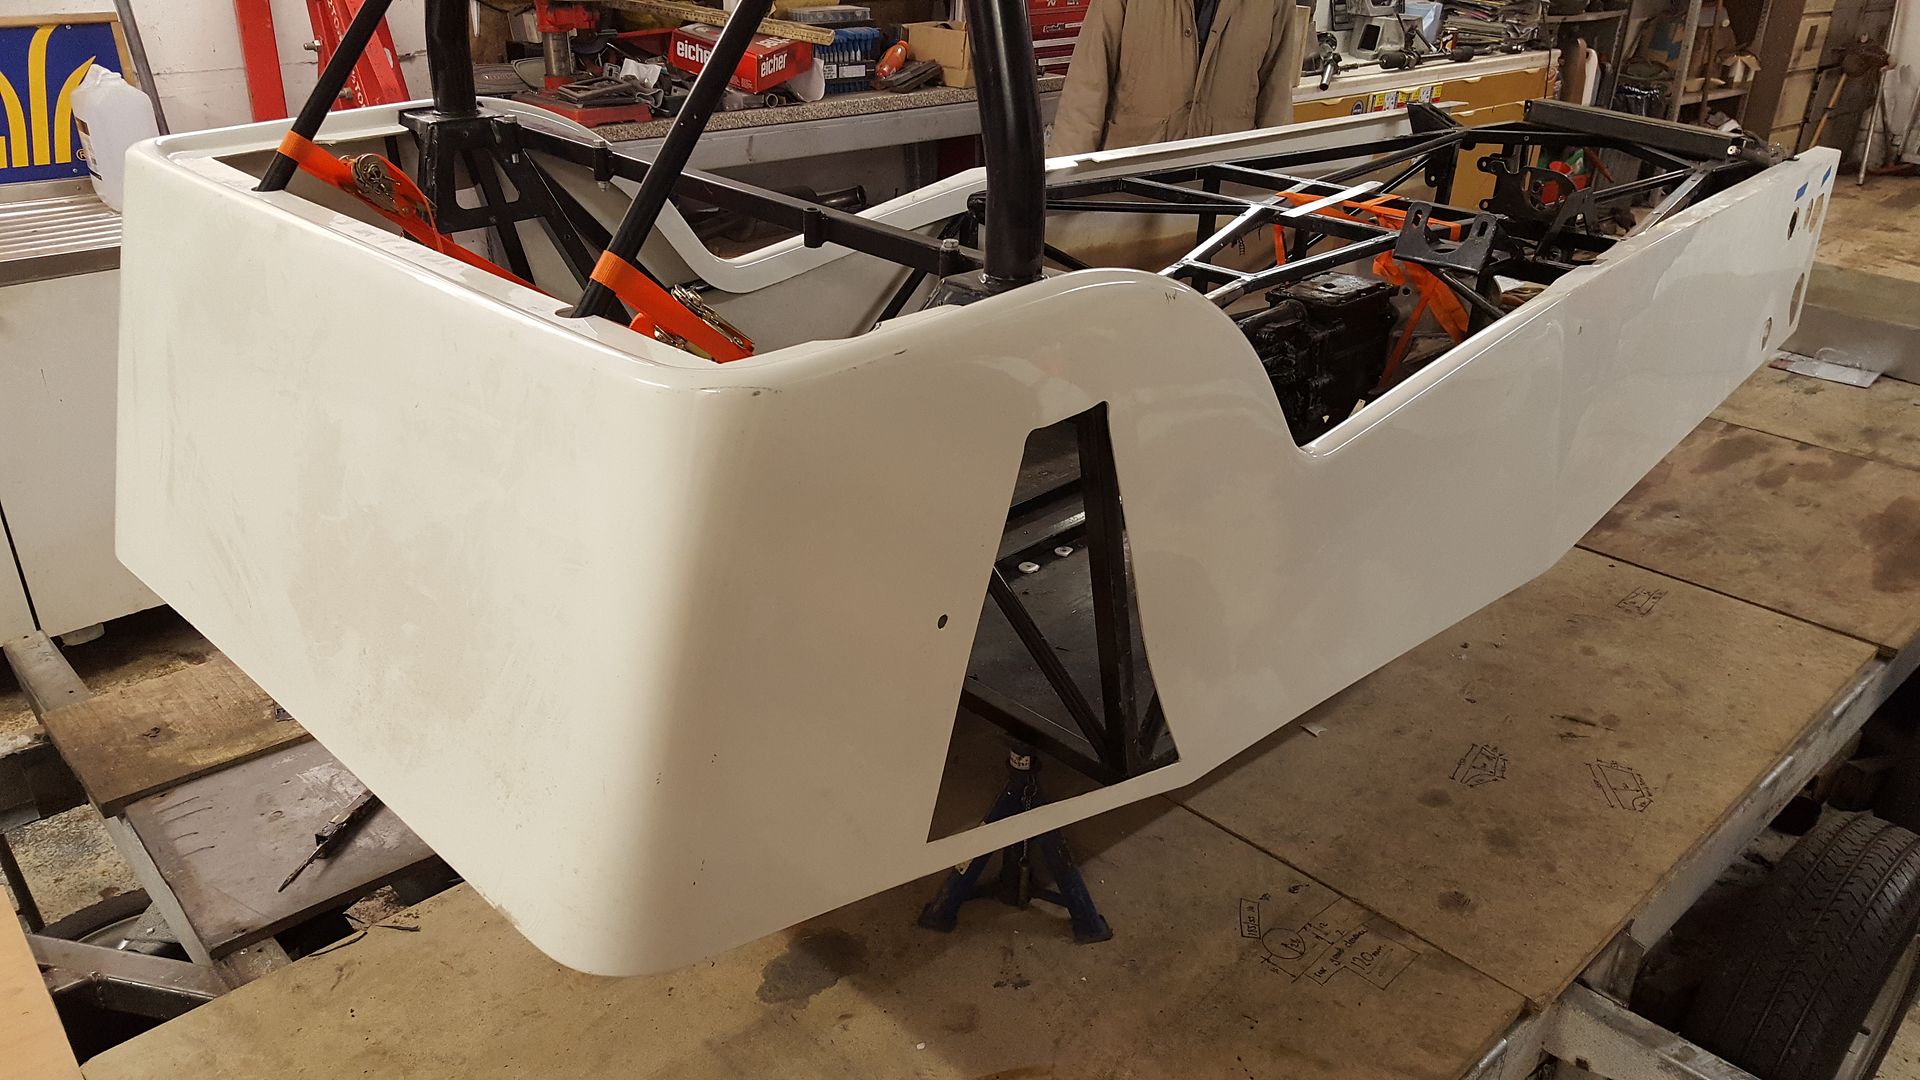
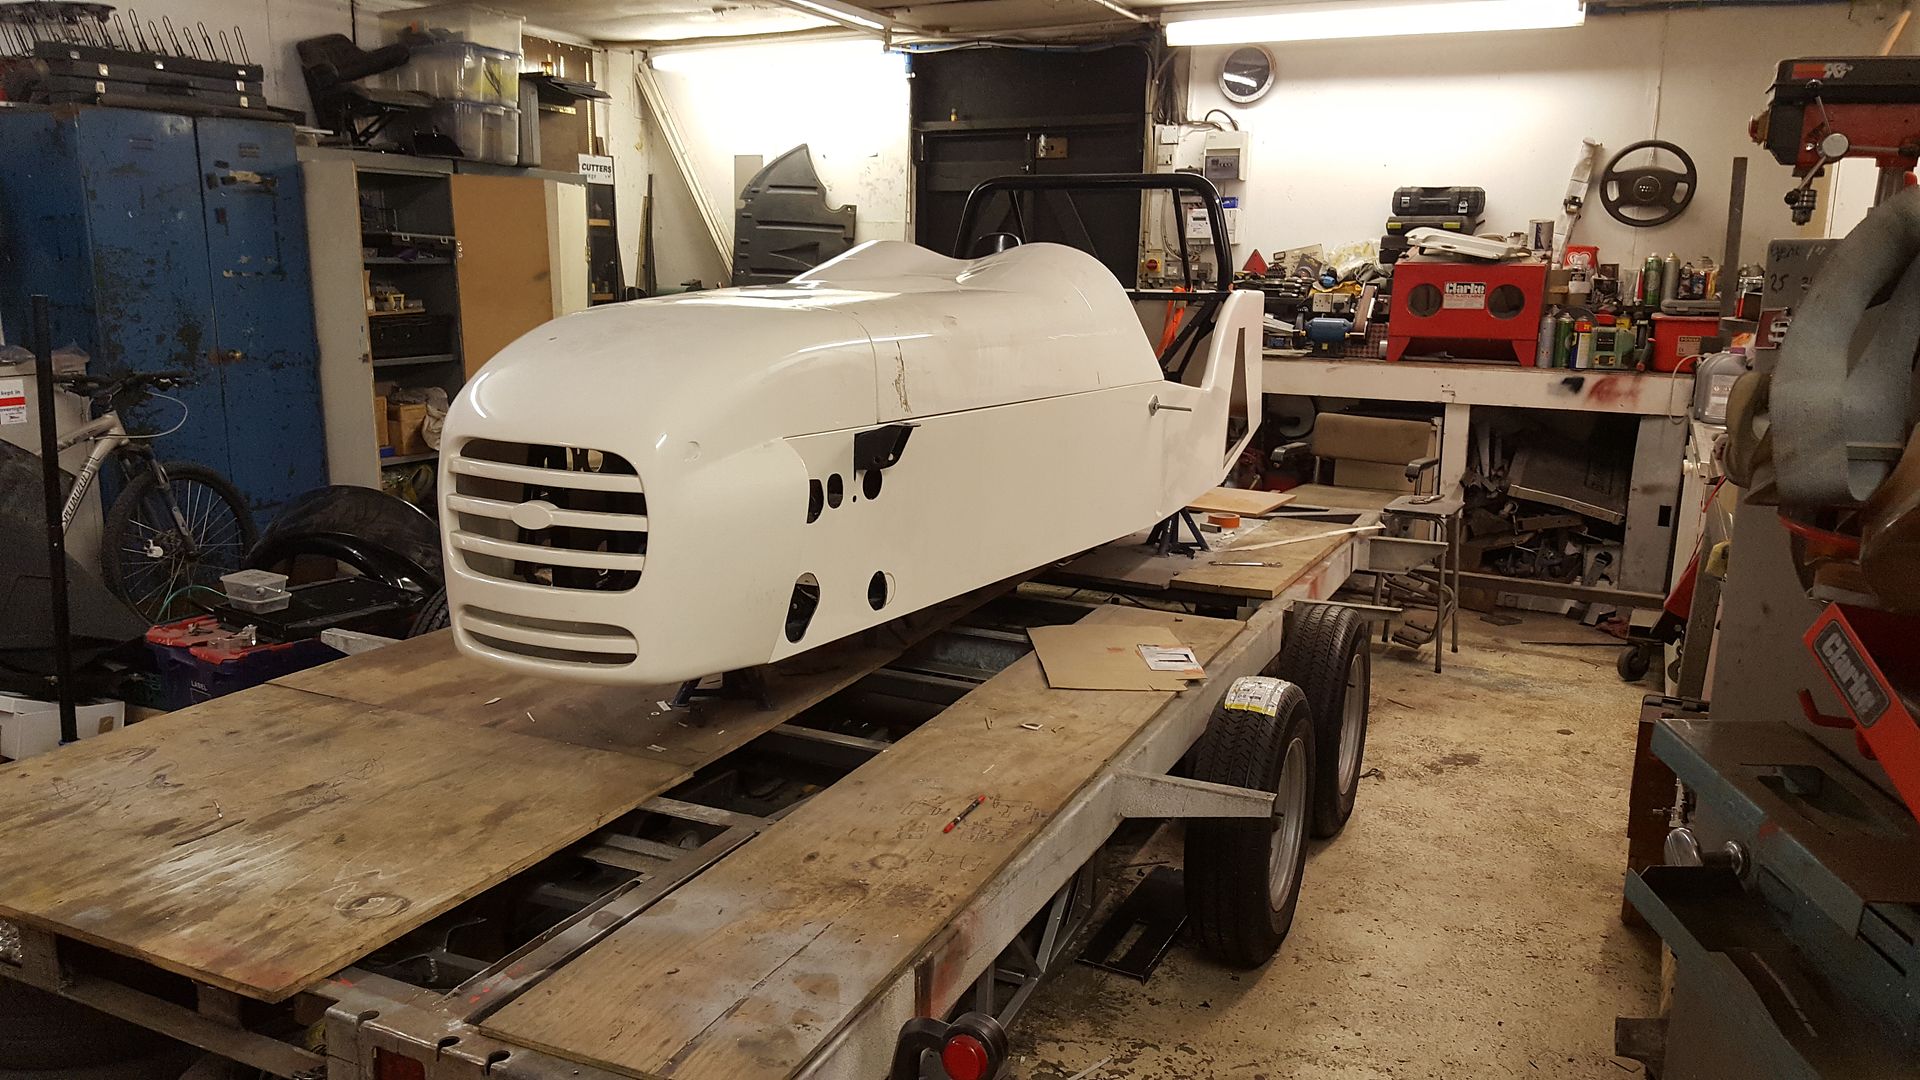
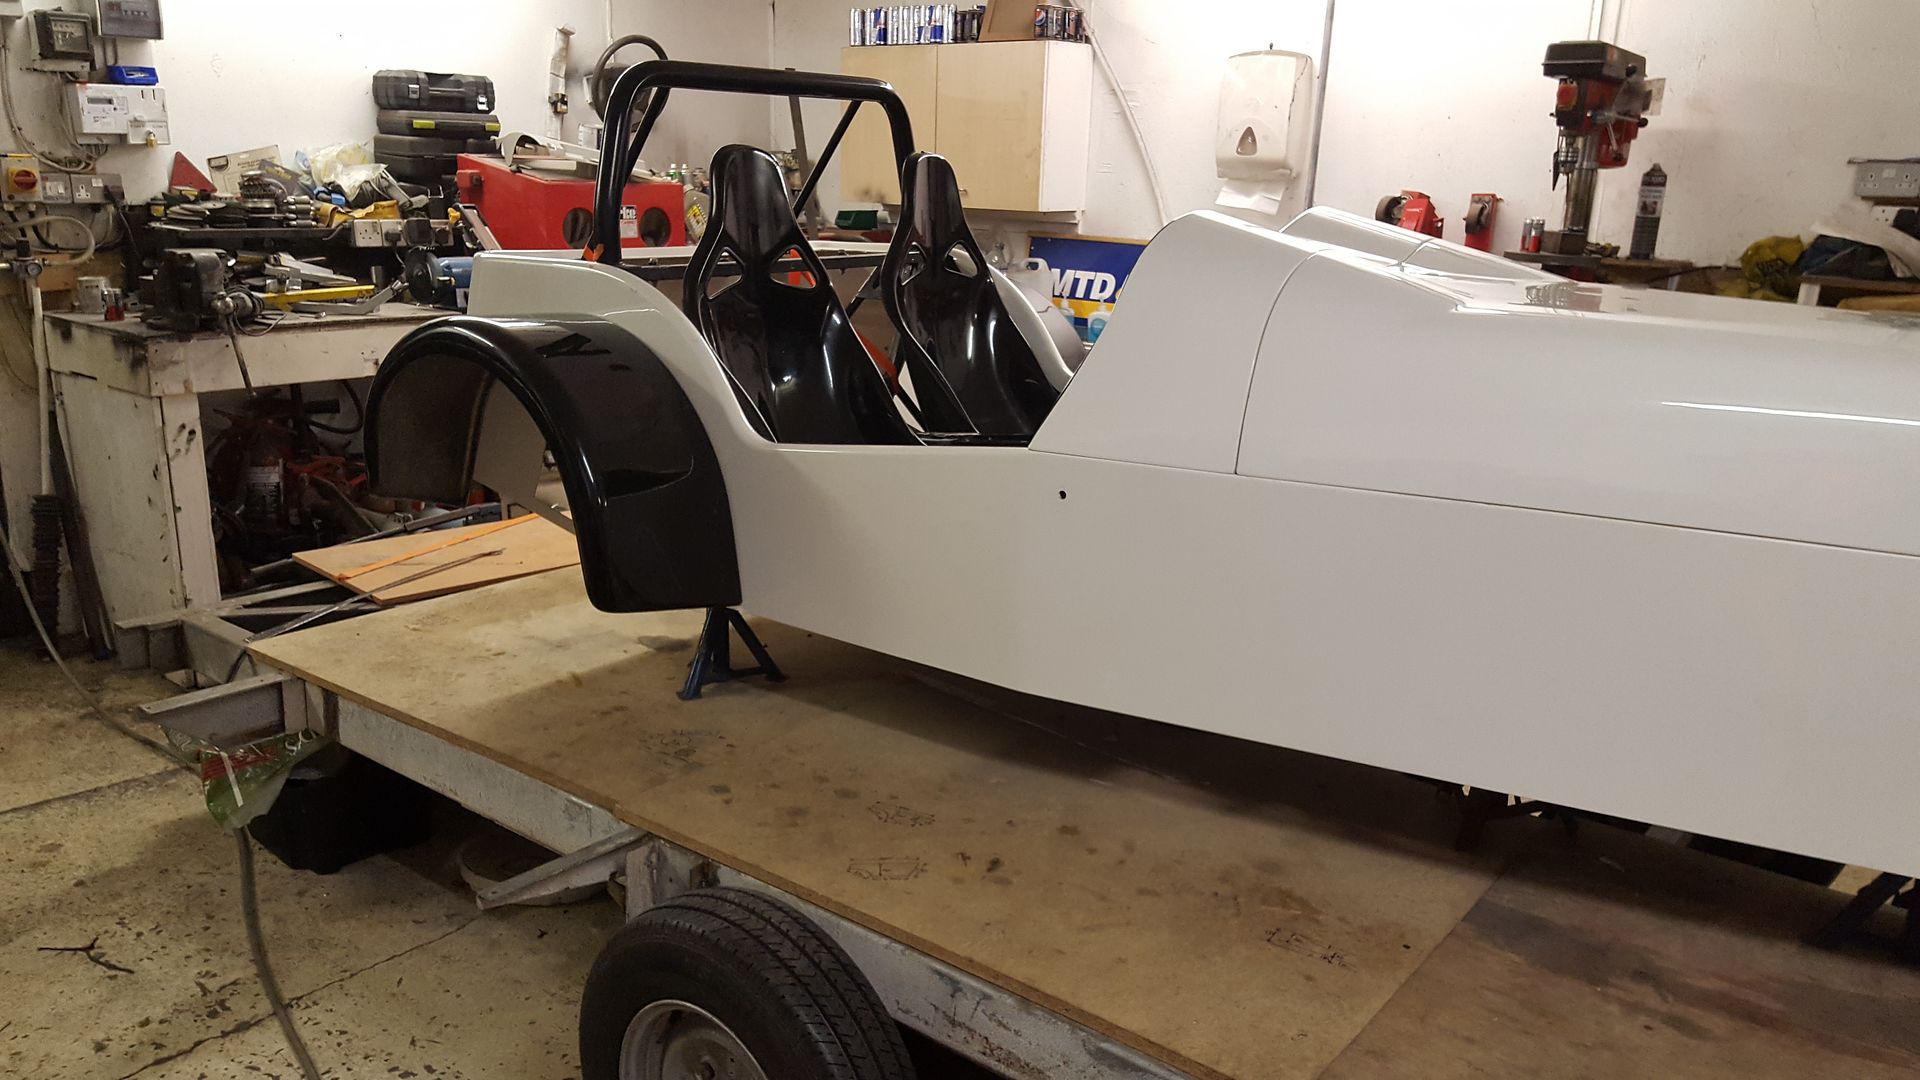
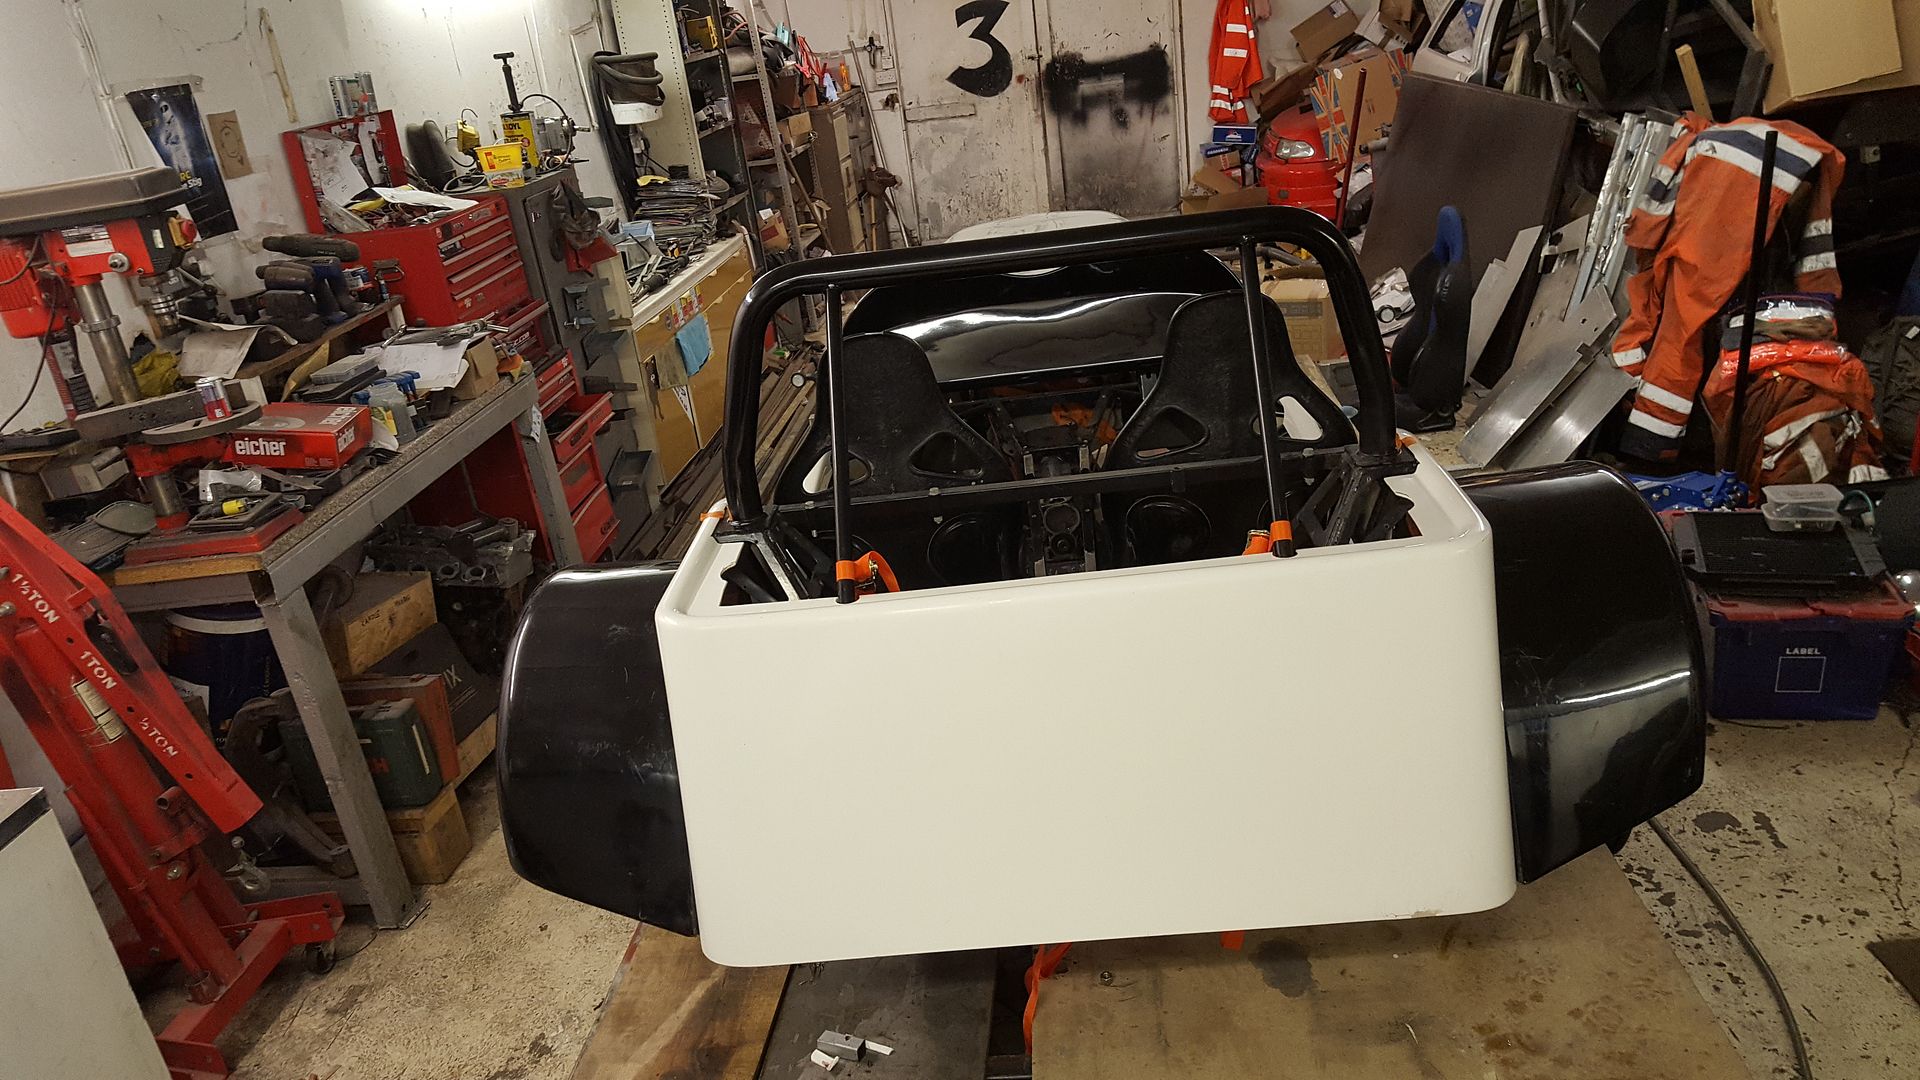
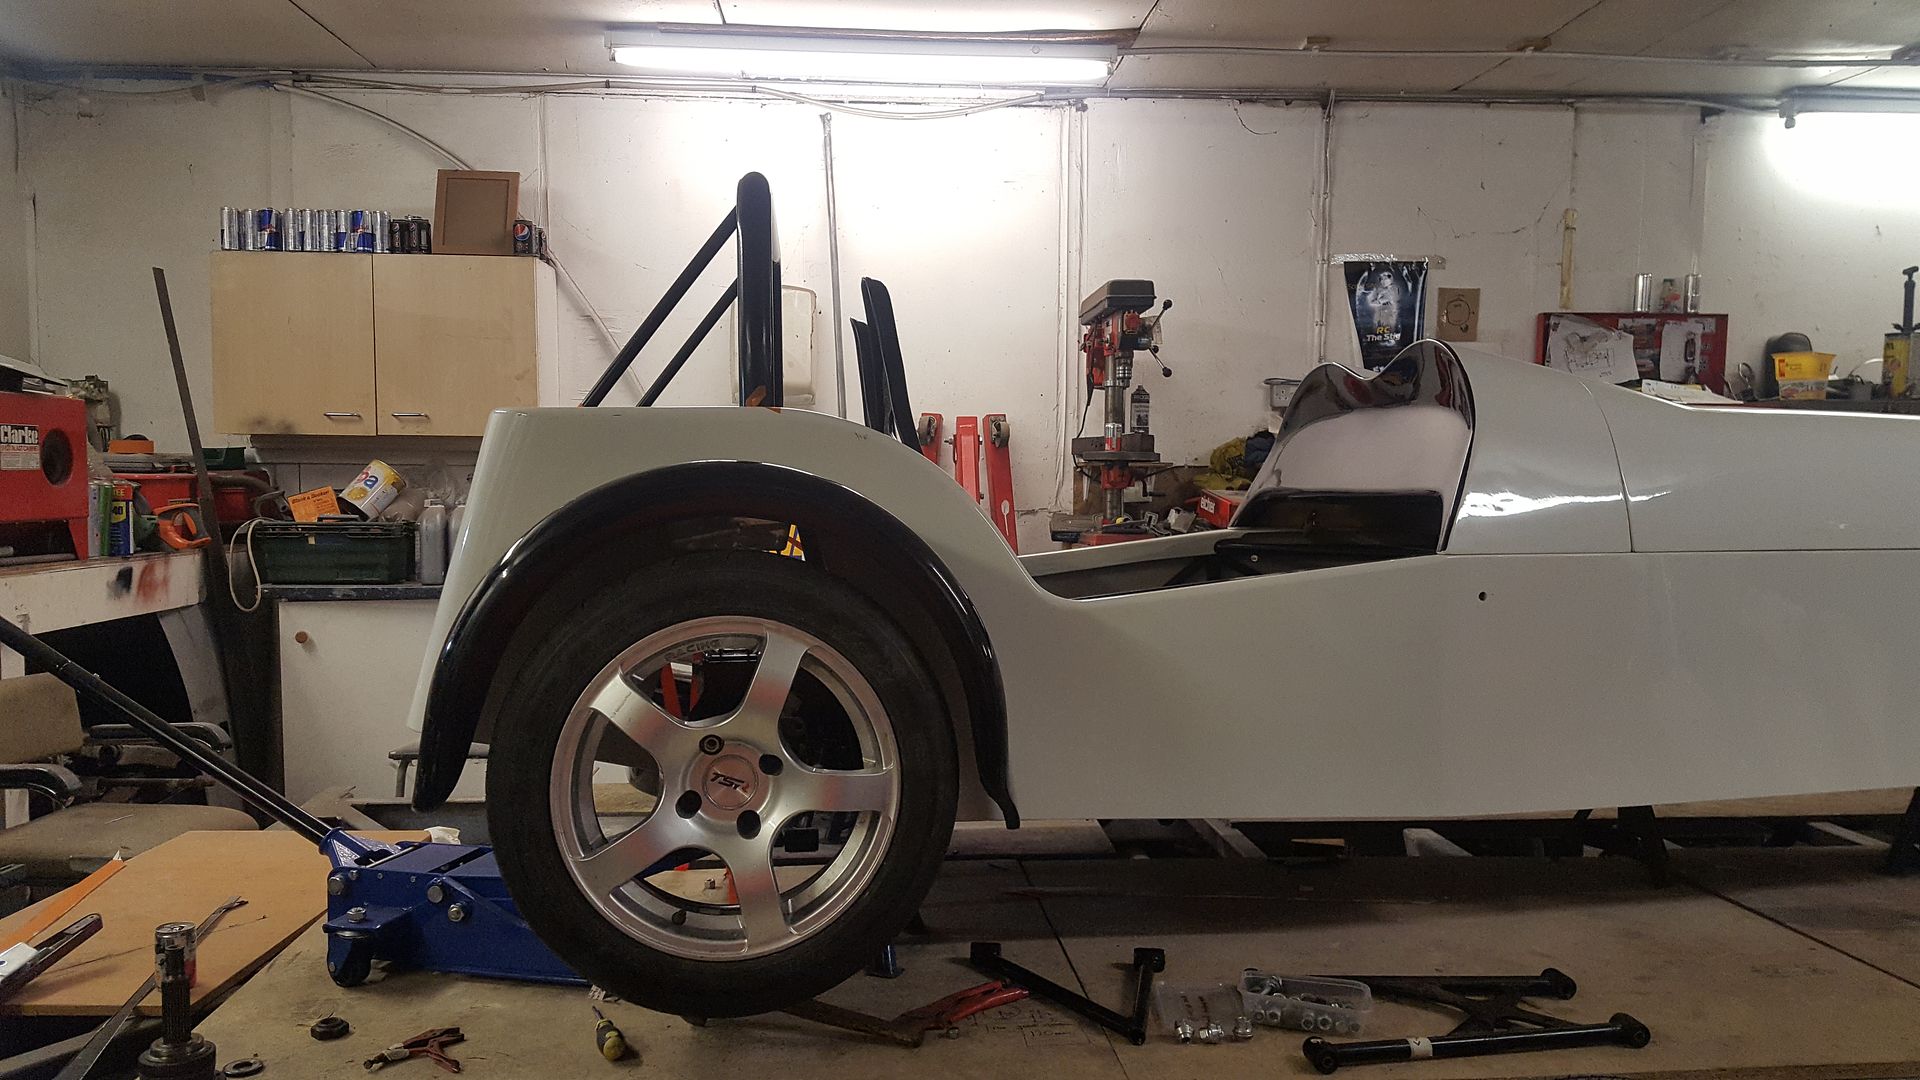
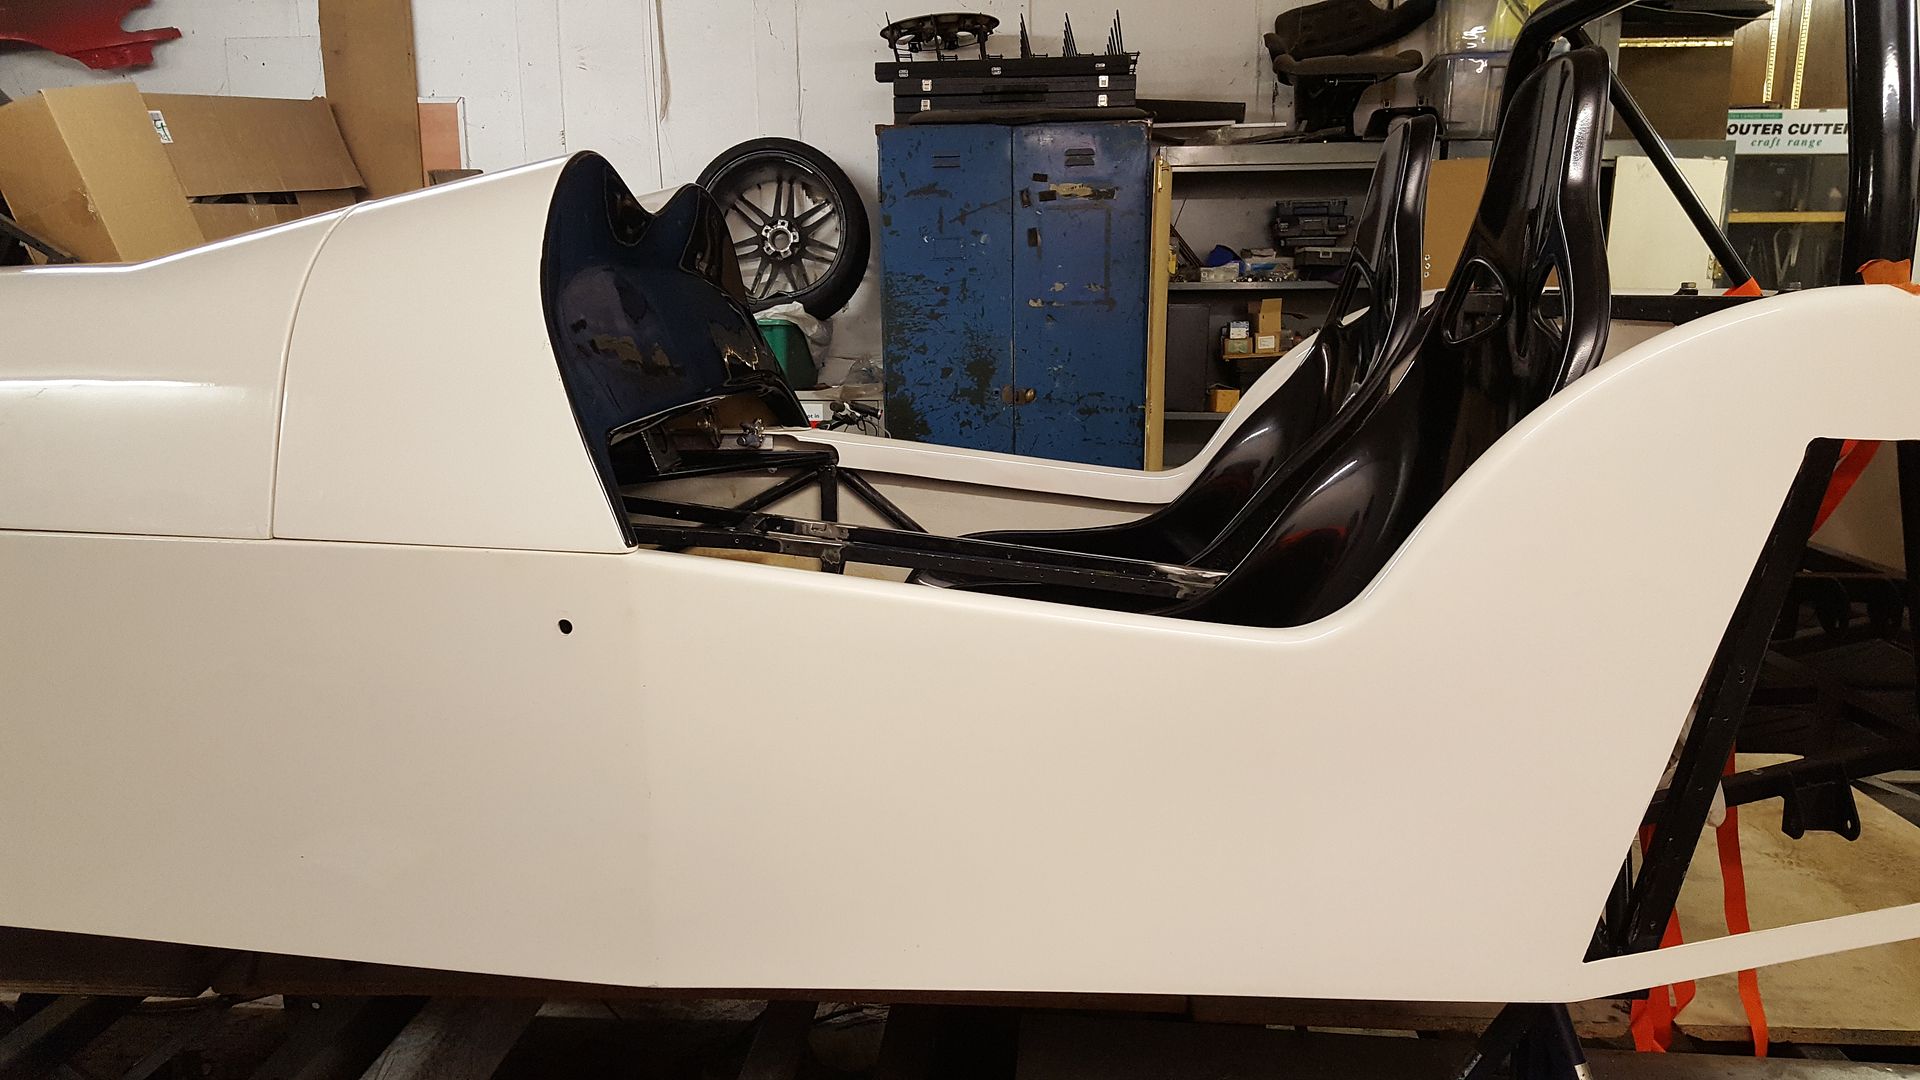
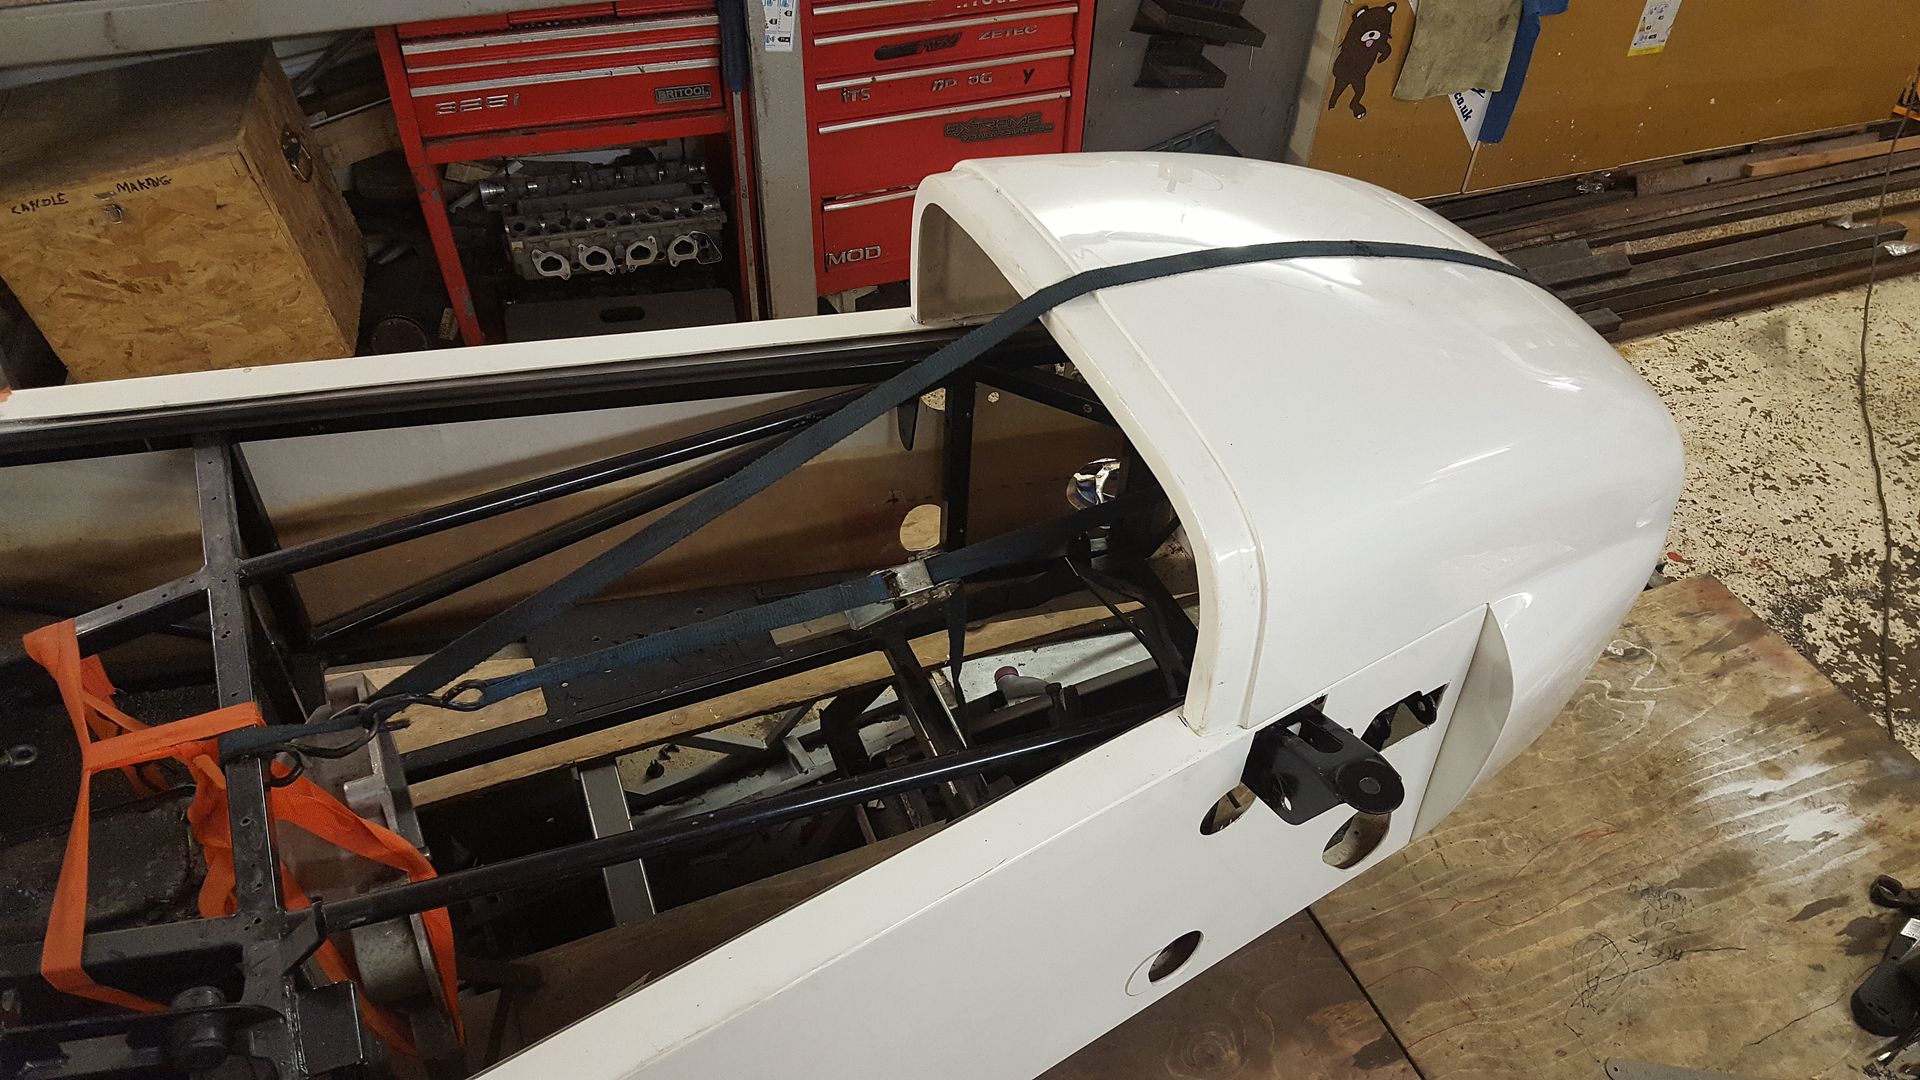
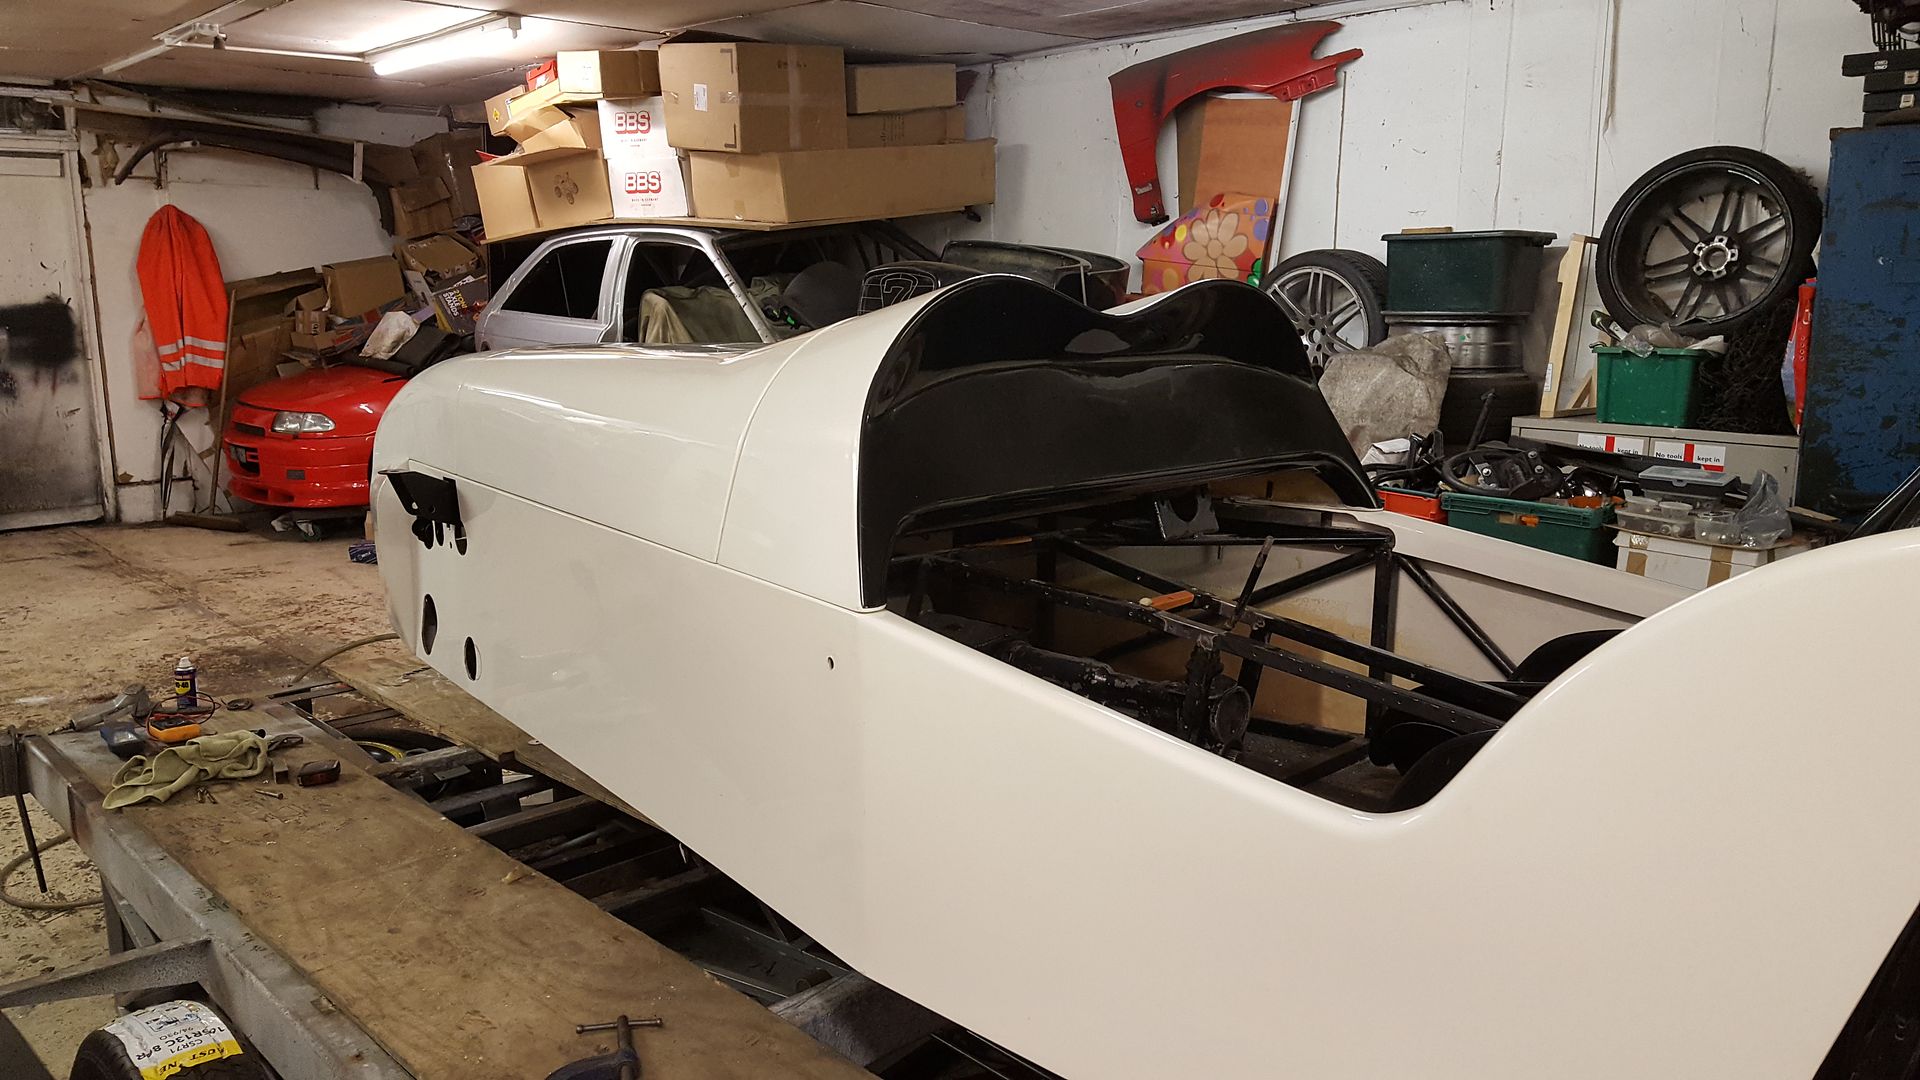
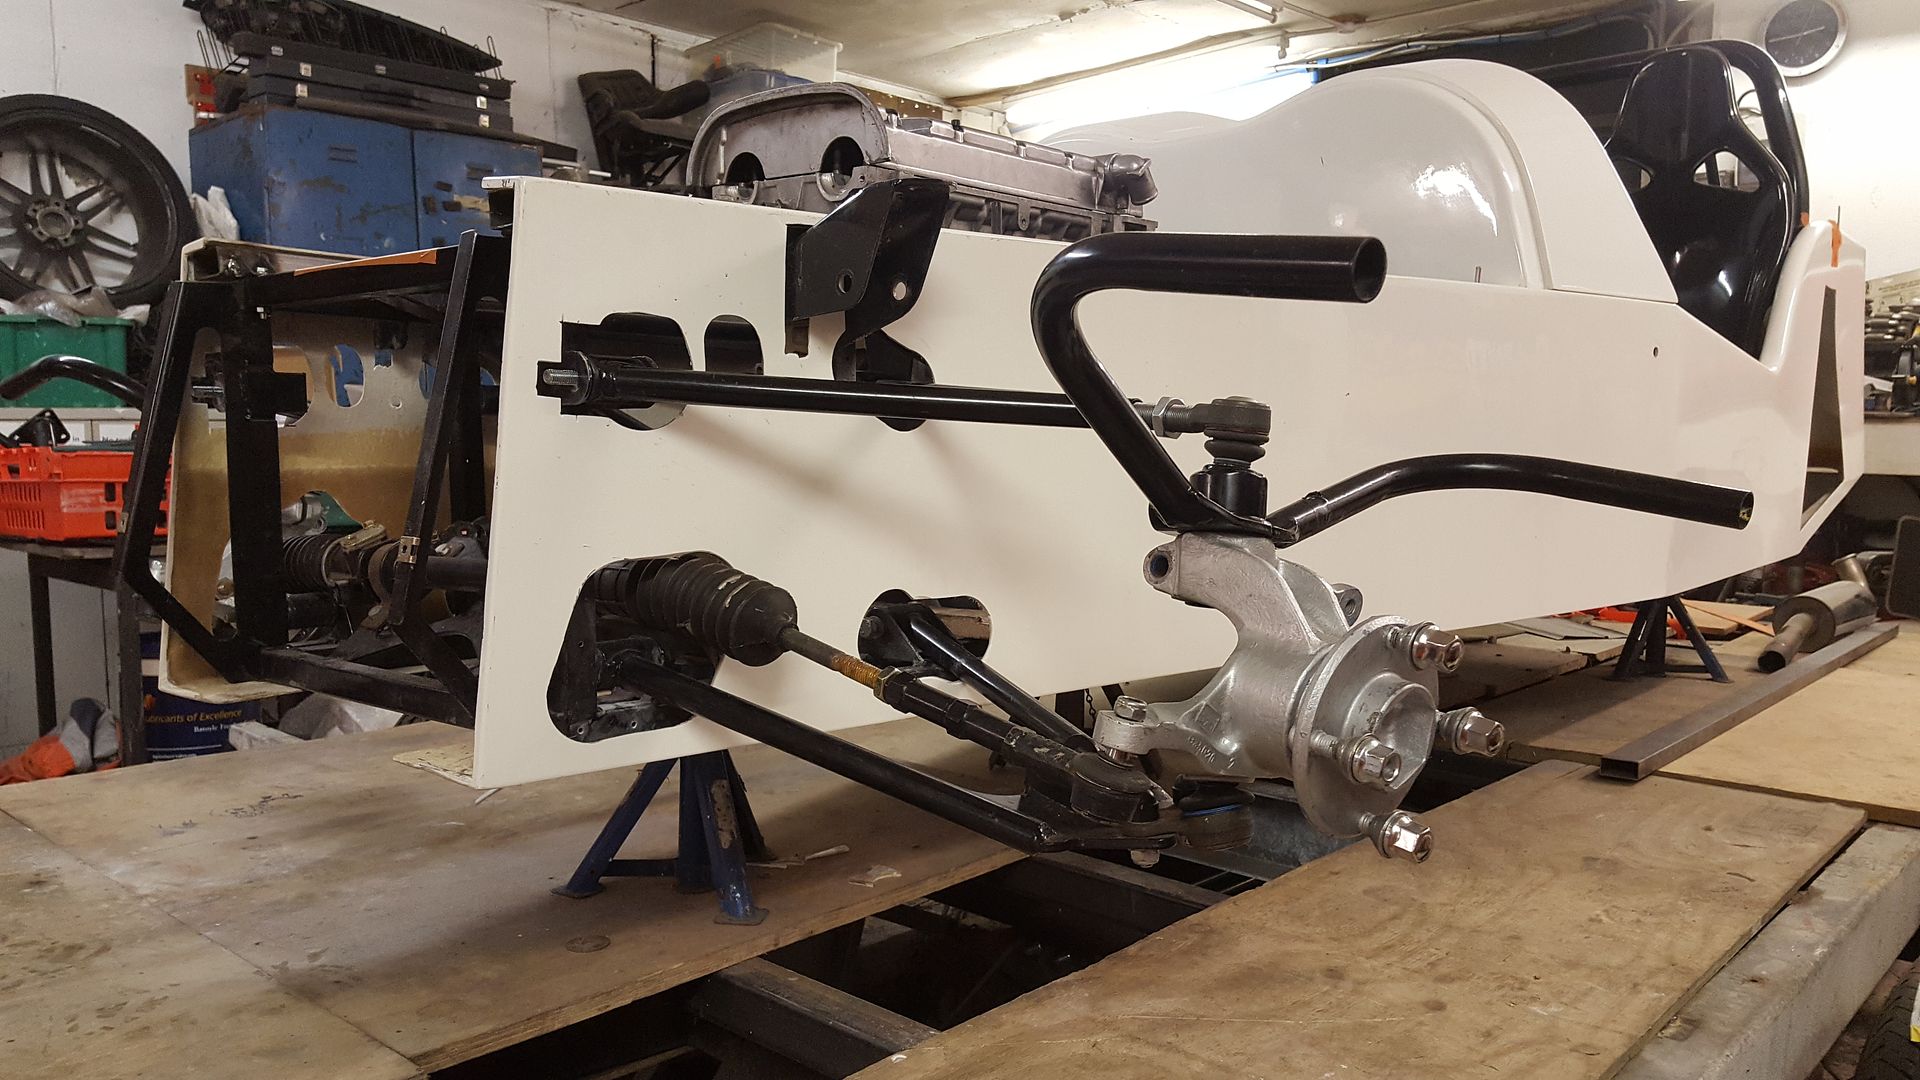
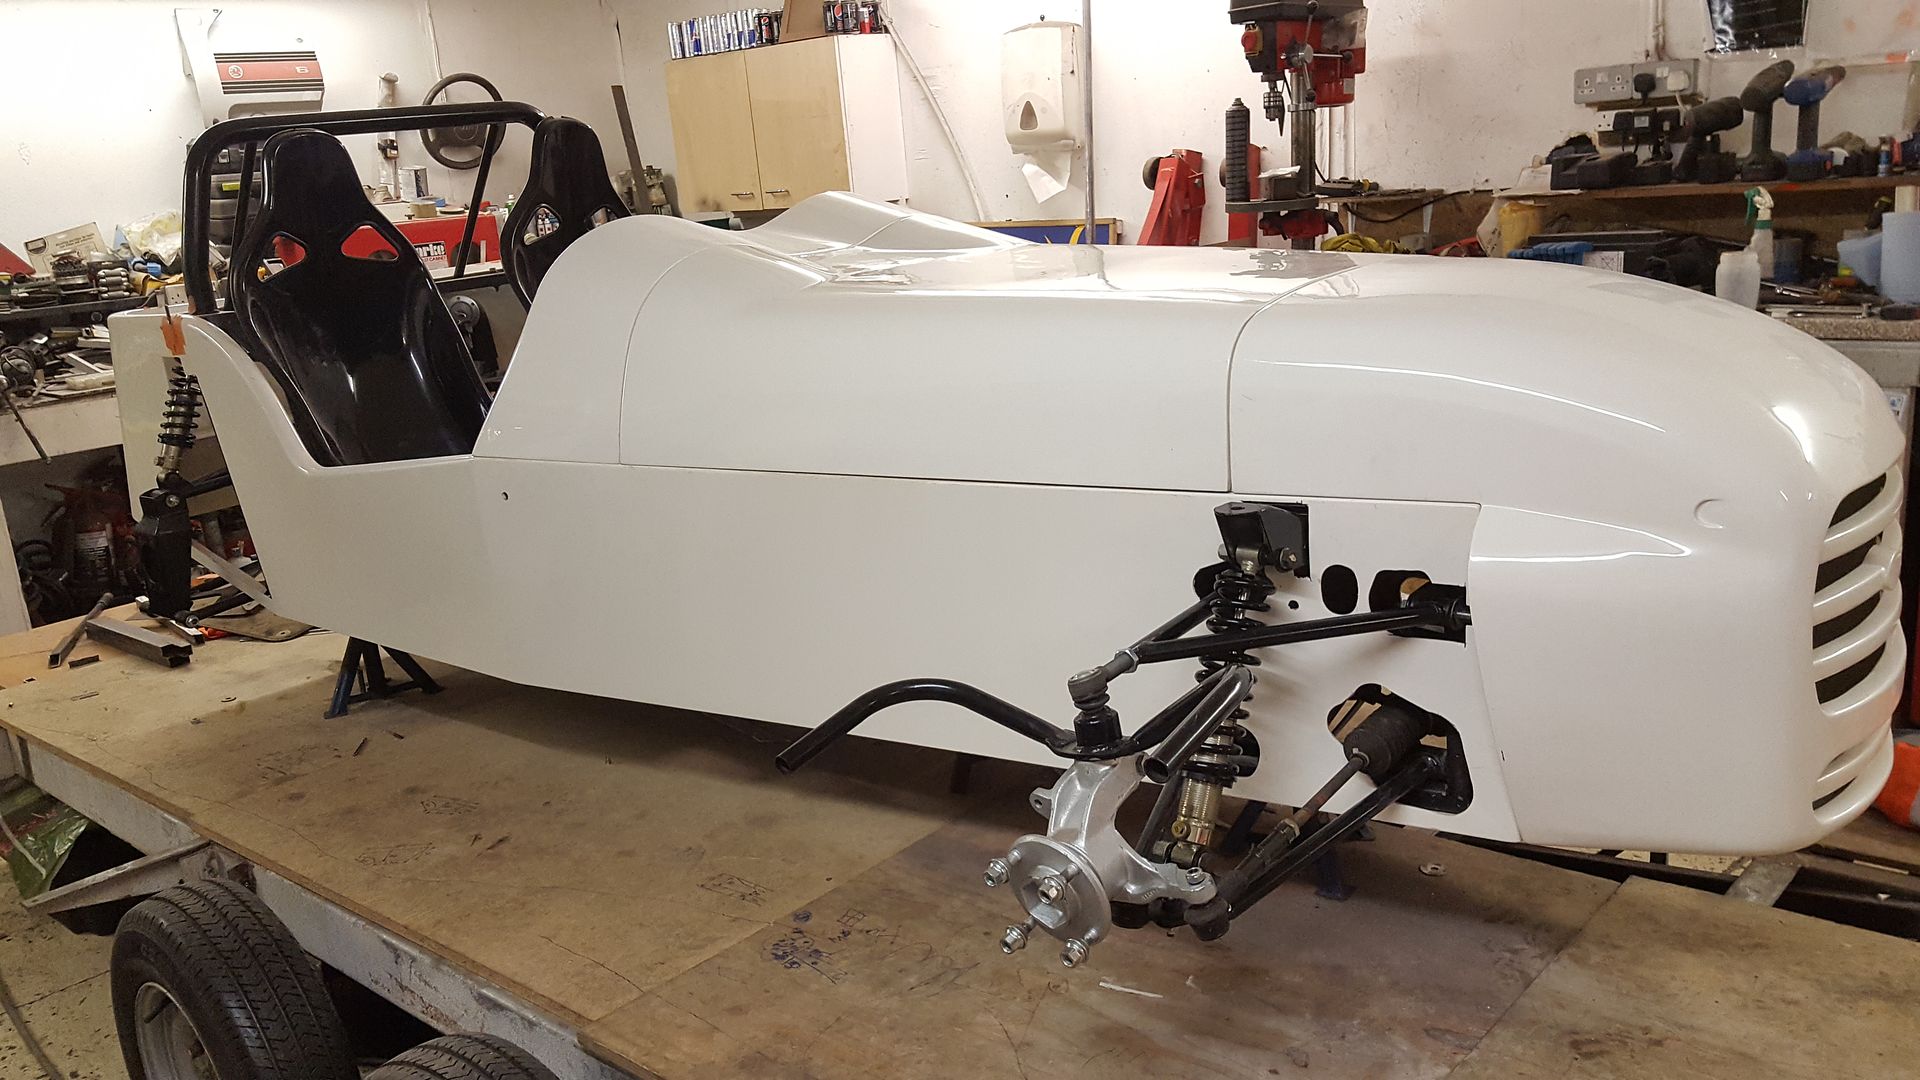
still in love with the shape!
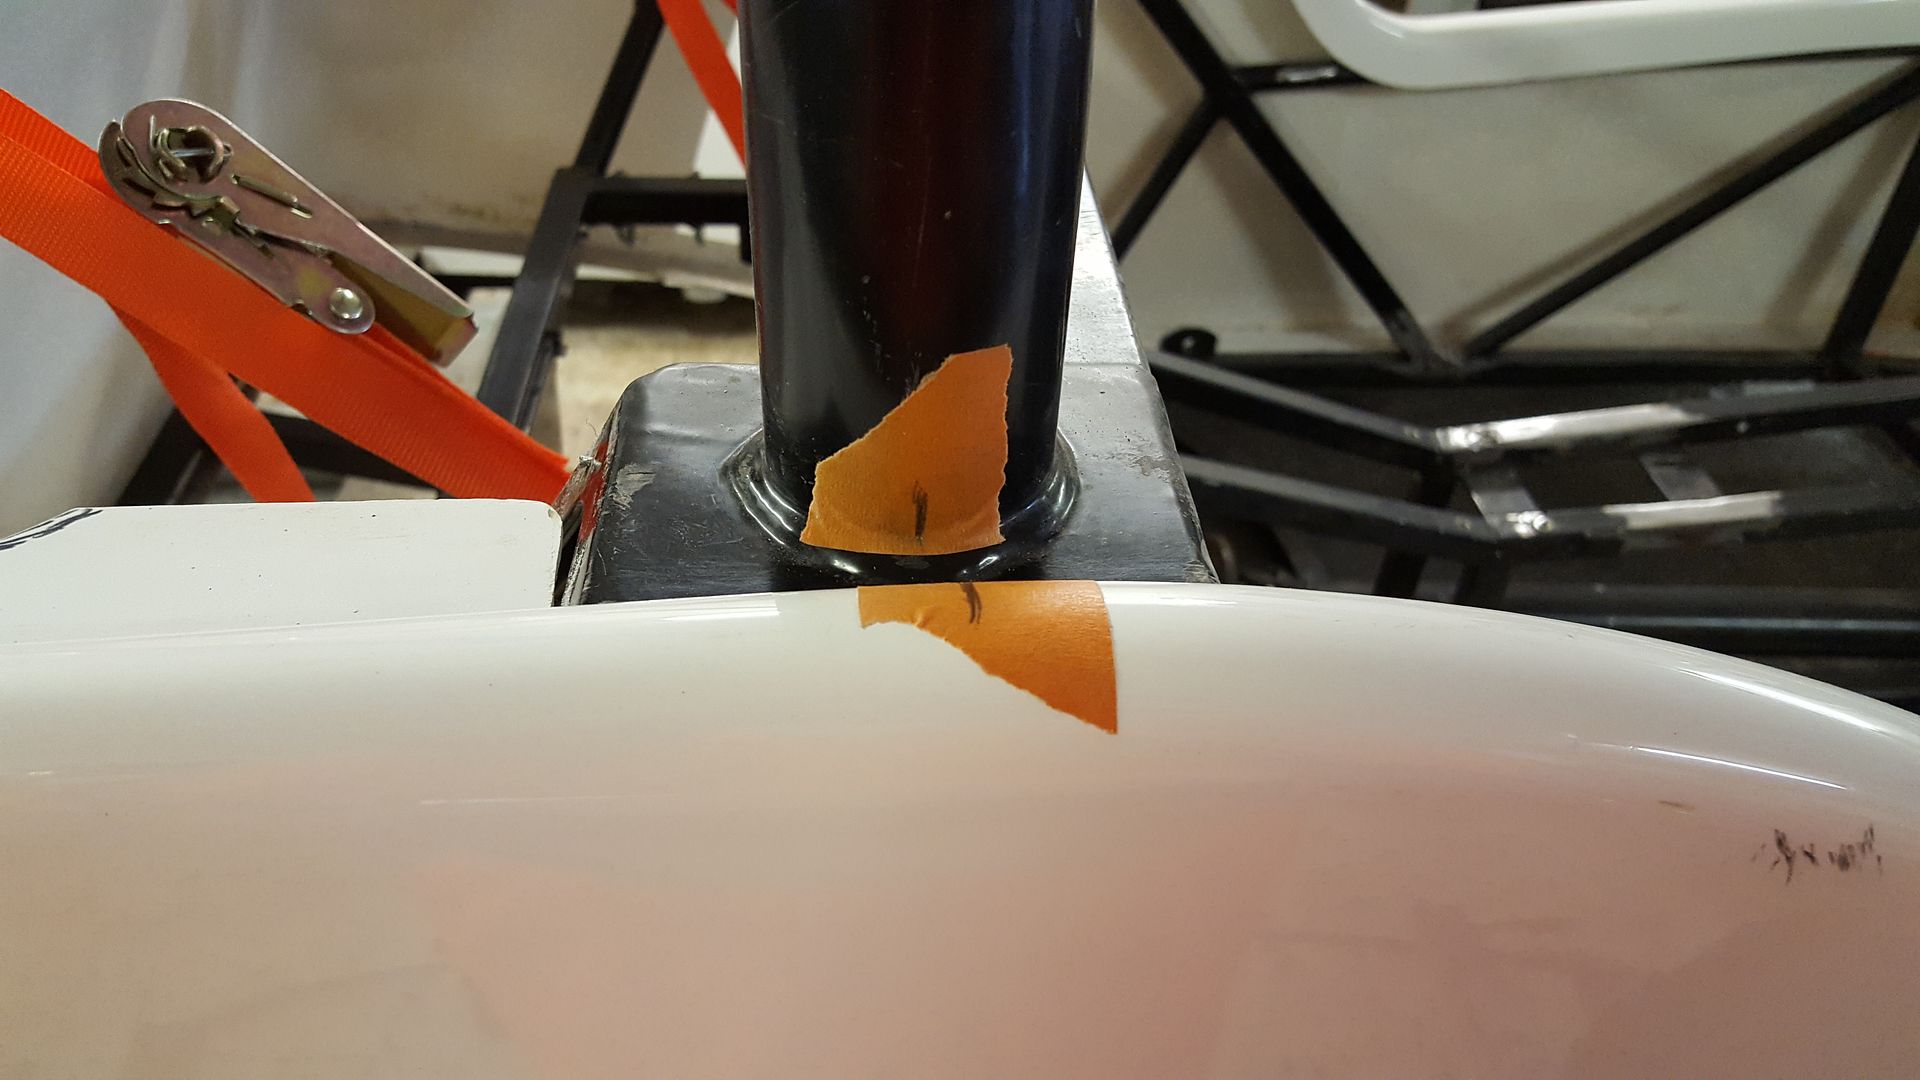
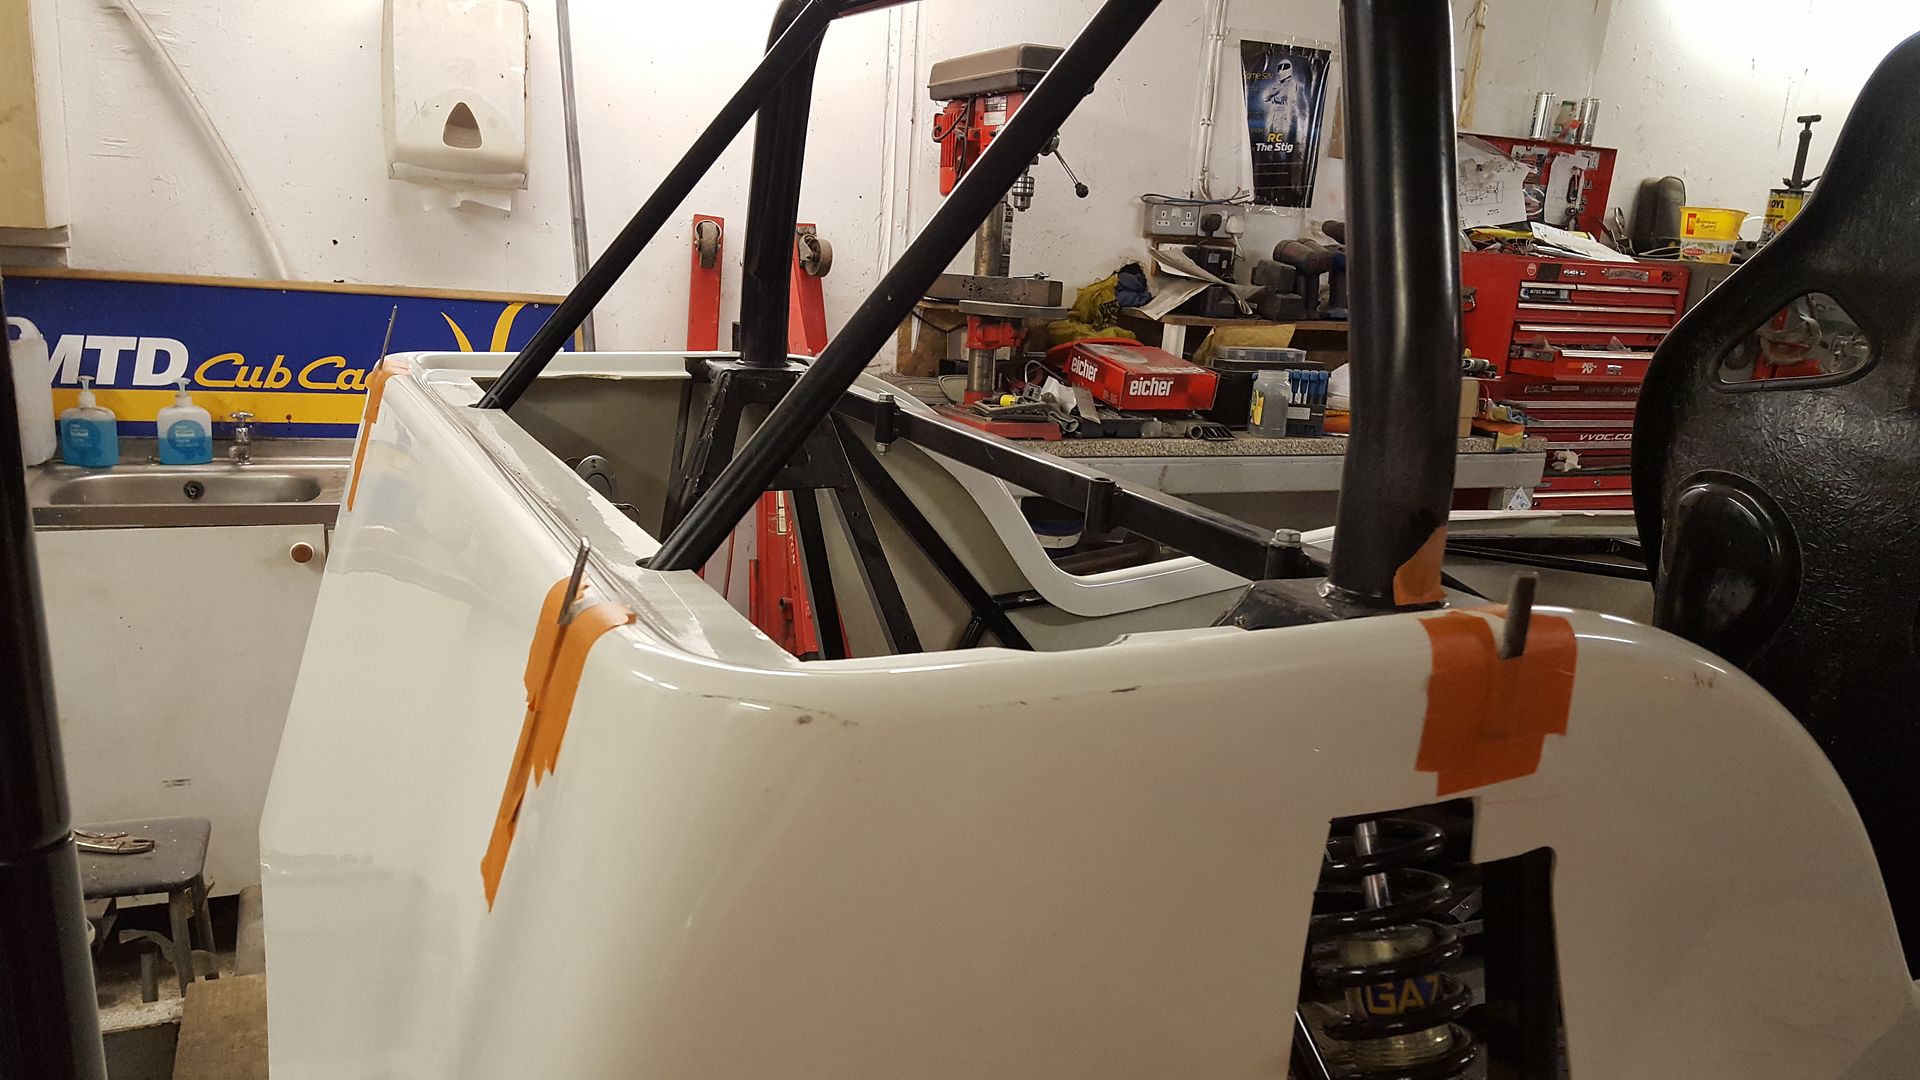
the guy i got if from had made a wooden frame inside so it didn't get out of shape whilst in storage
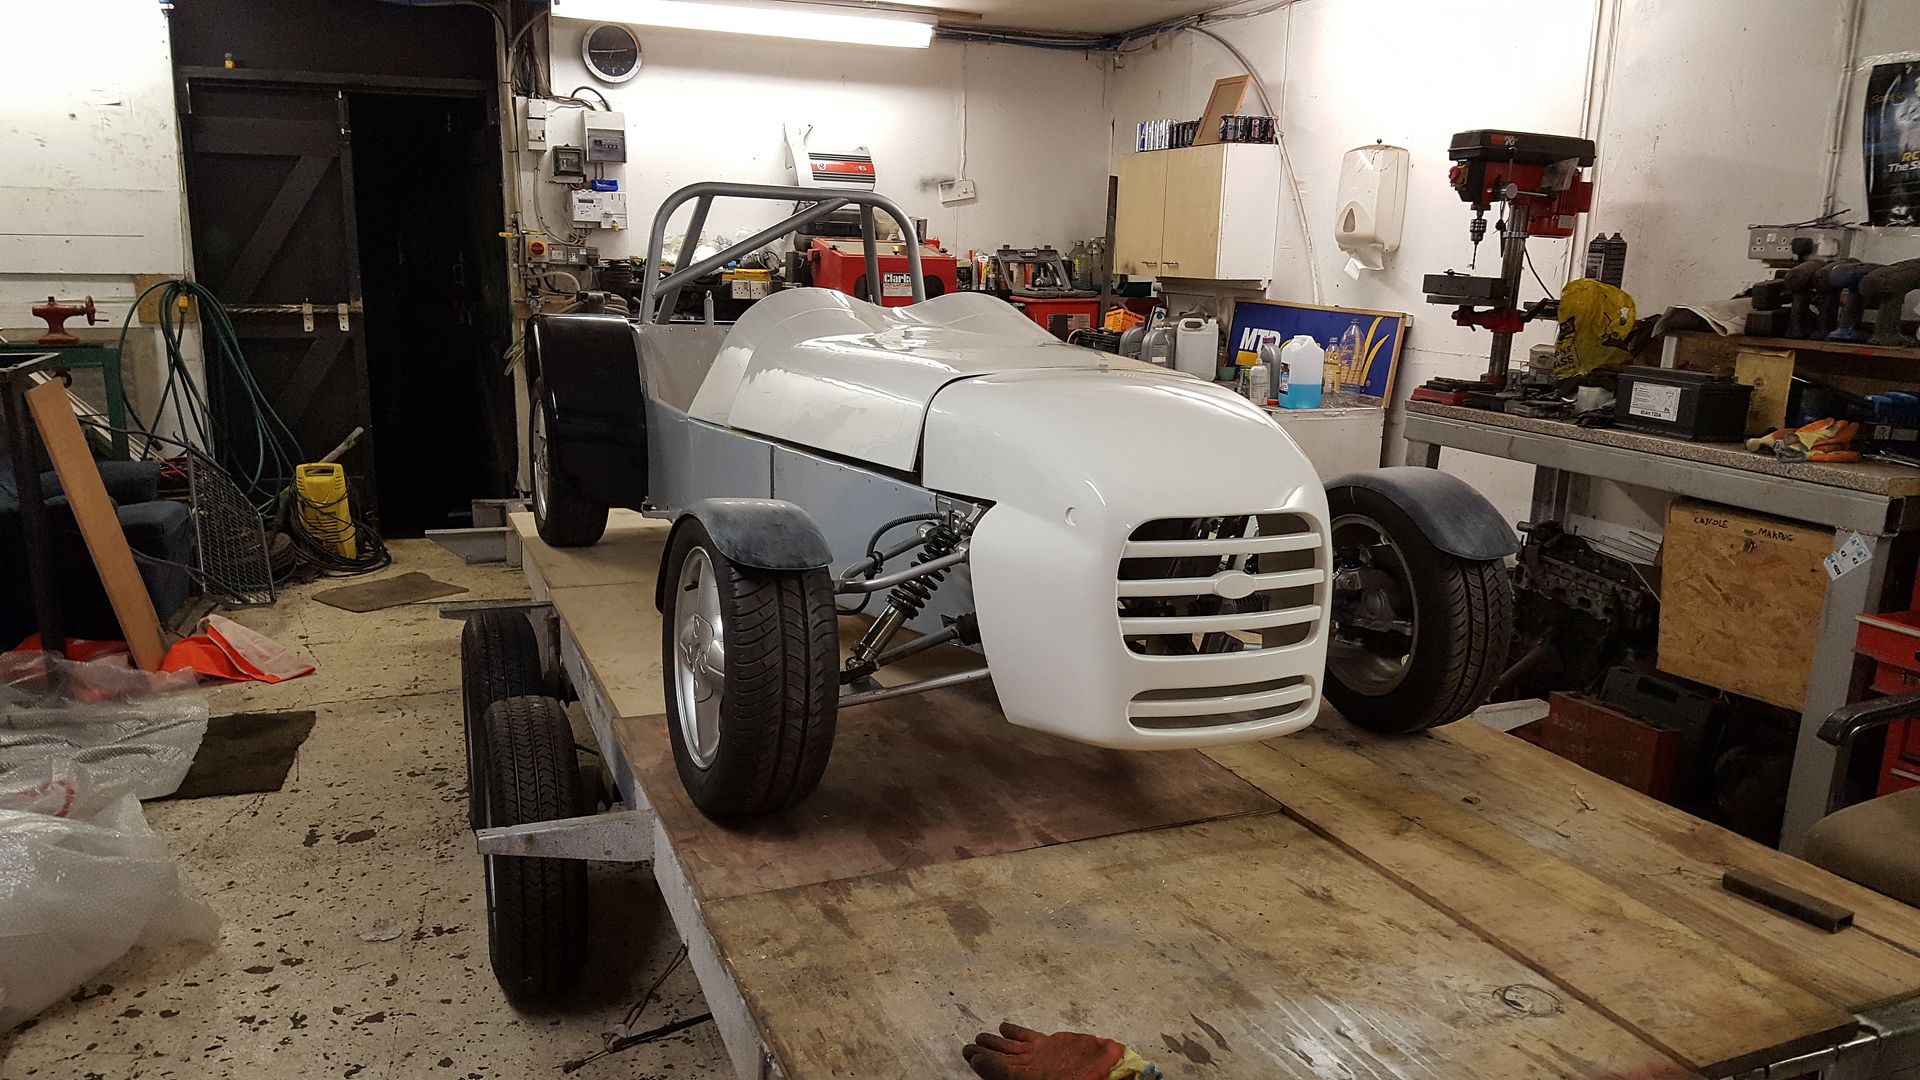
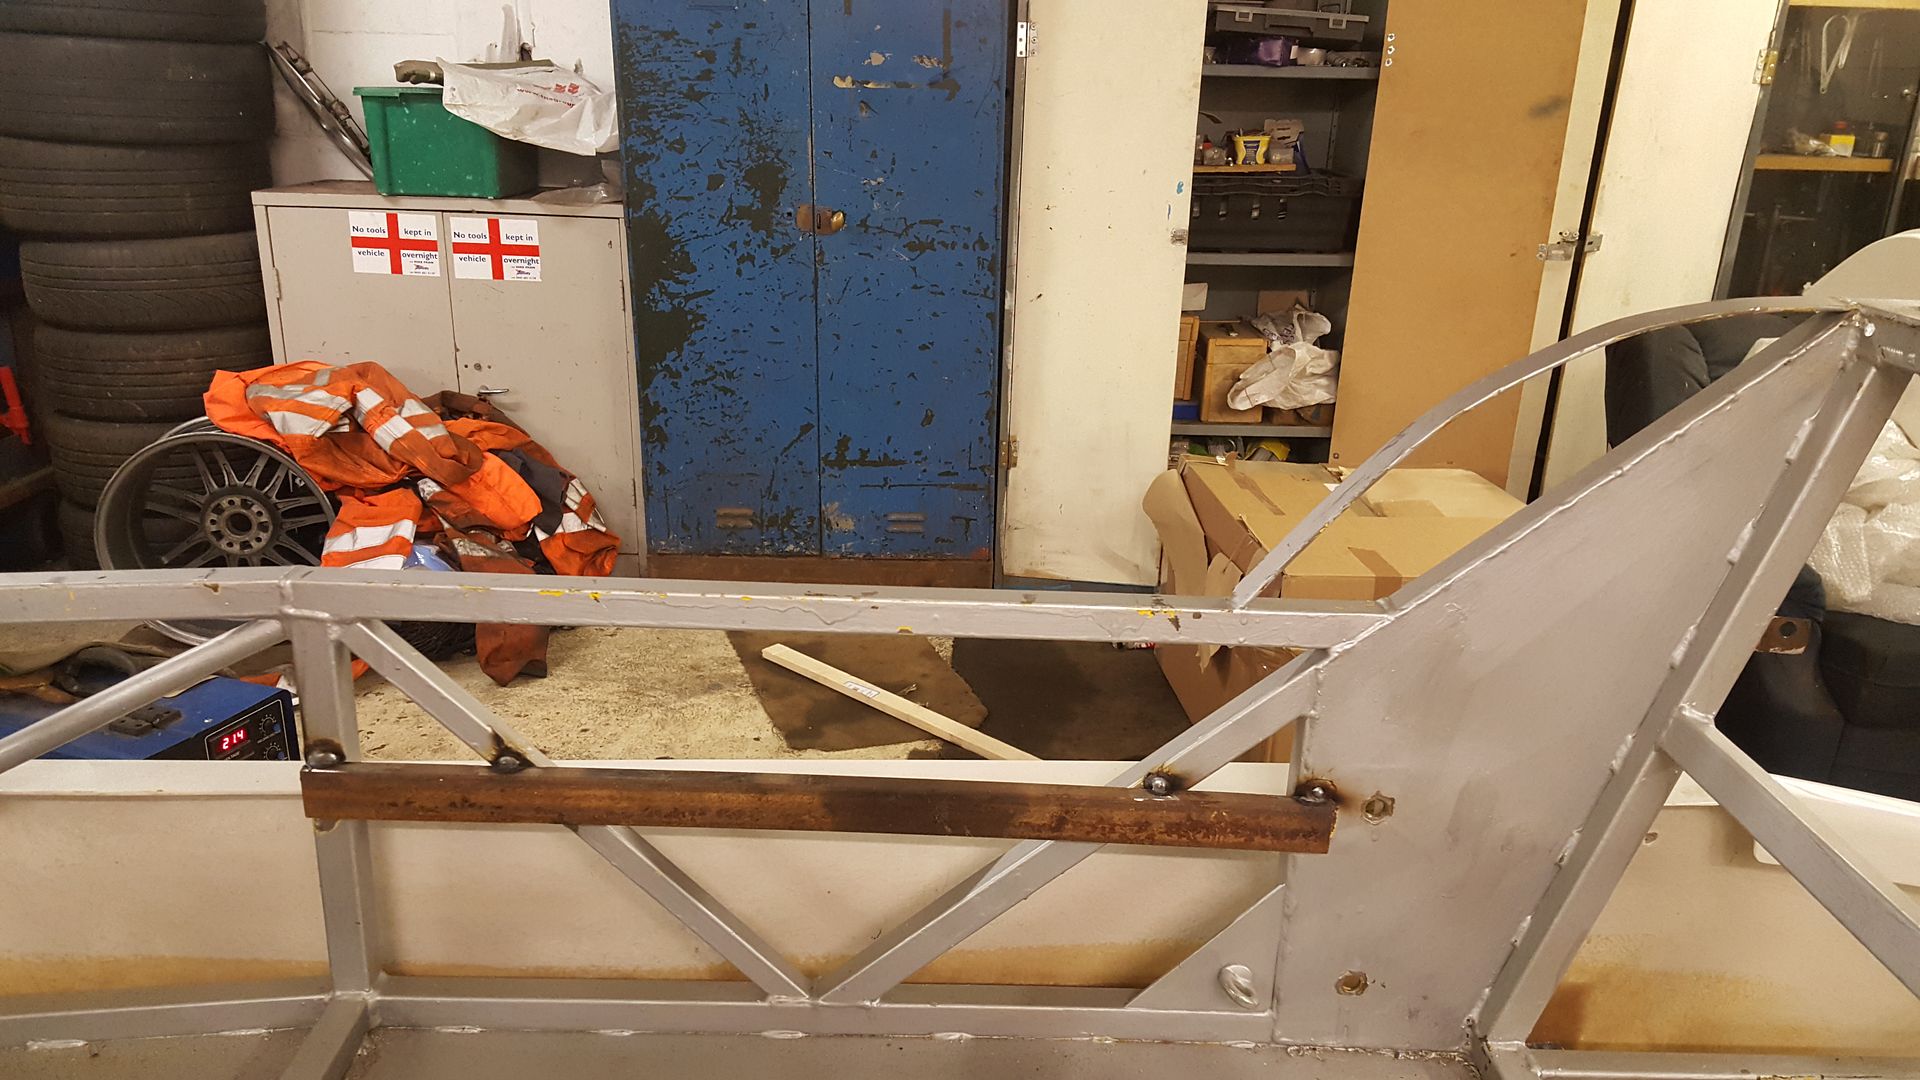
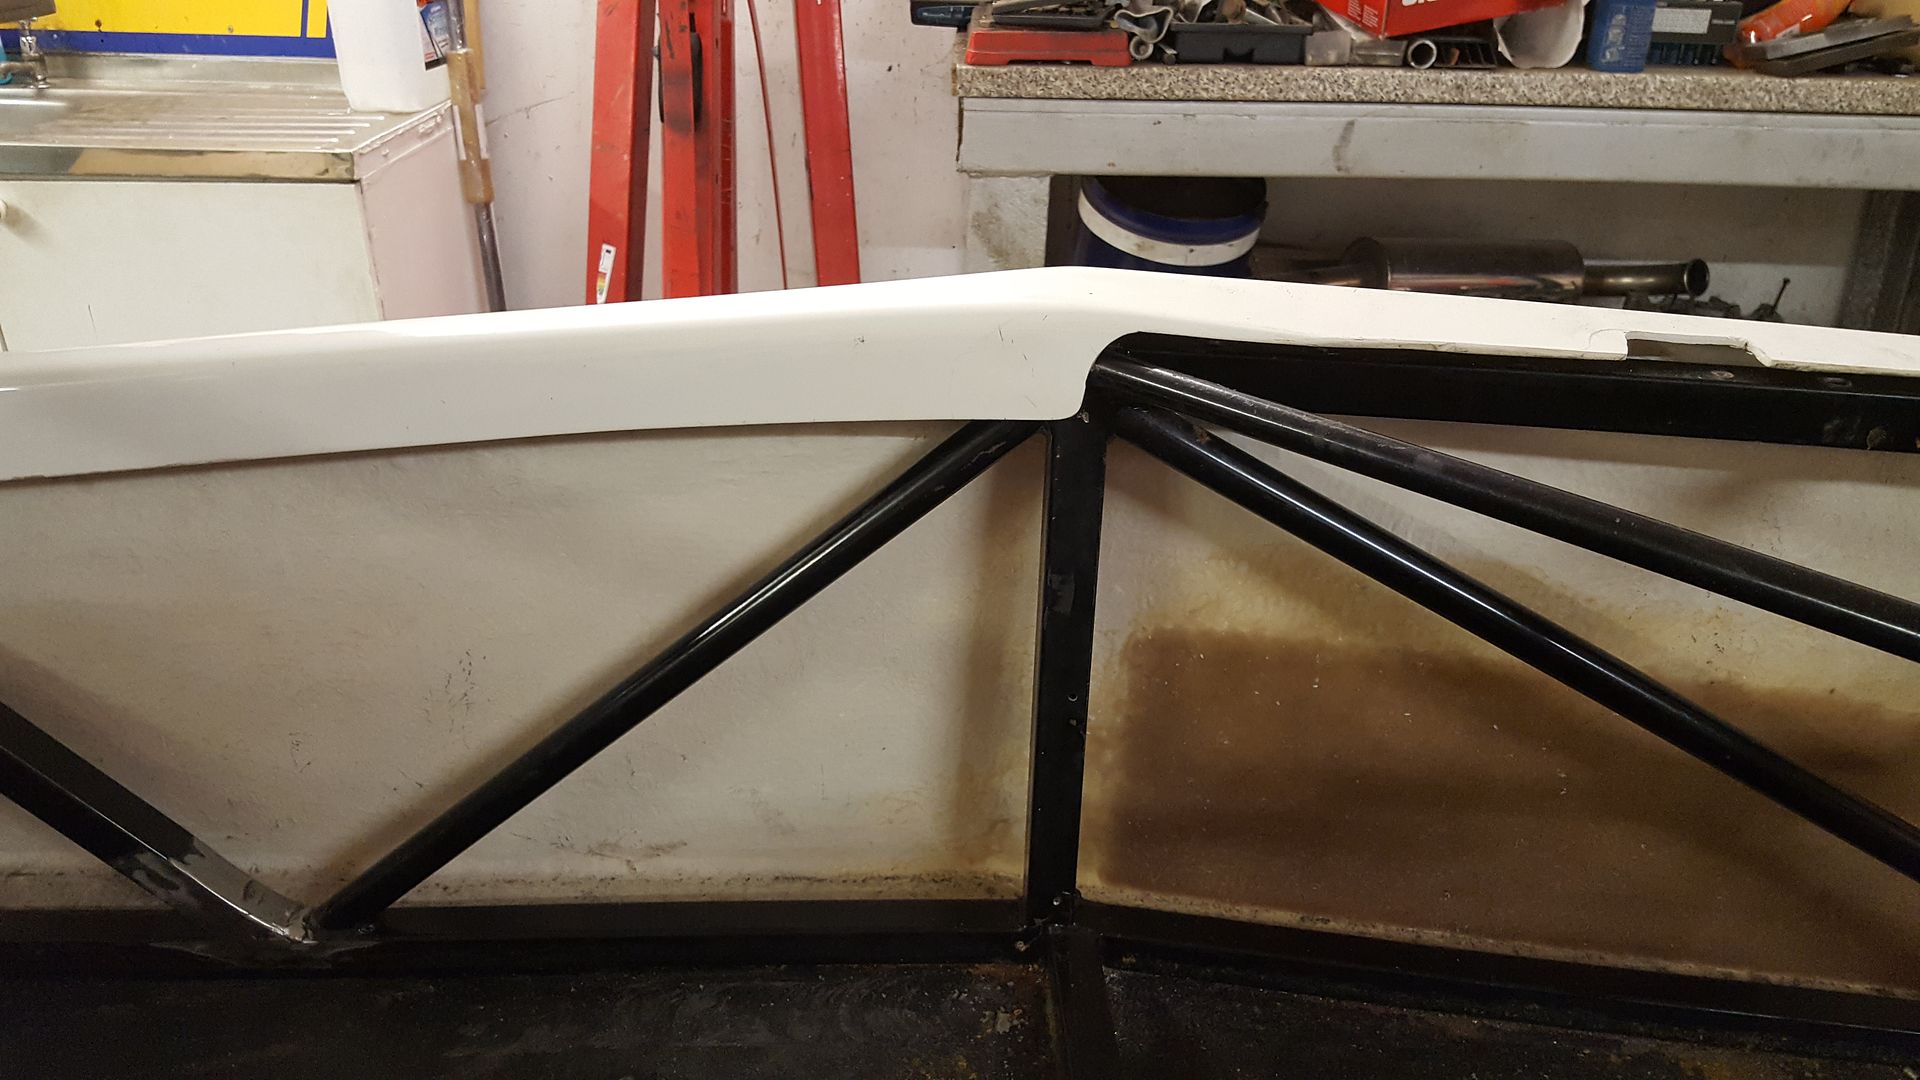
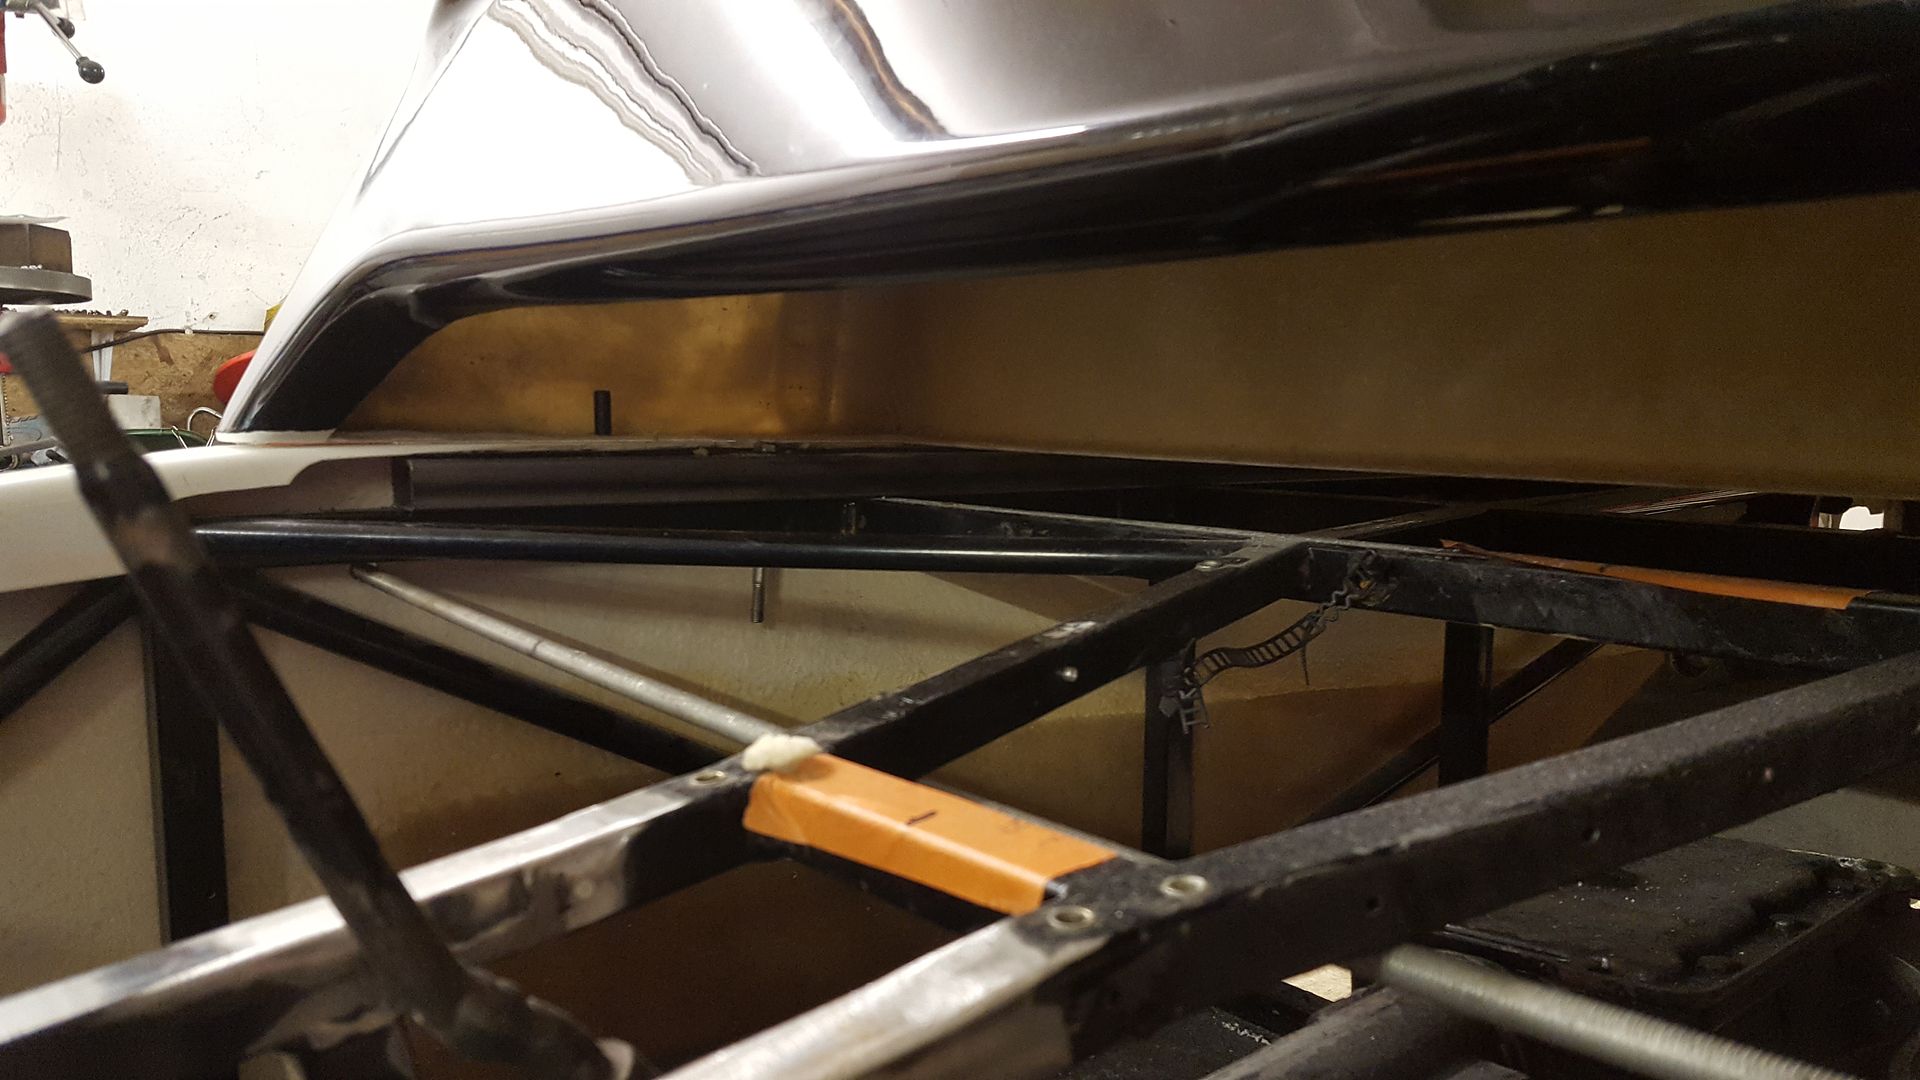
and lifted the body on, width wide its pretty spot on it drops right down at the cock pit compared to the locost so it wouldn't lower right
down

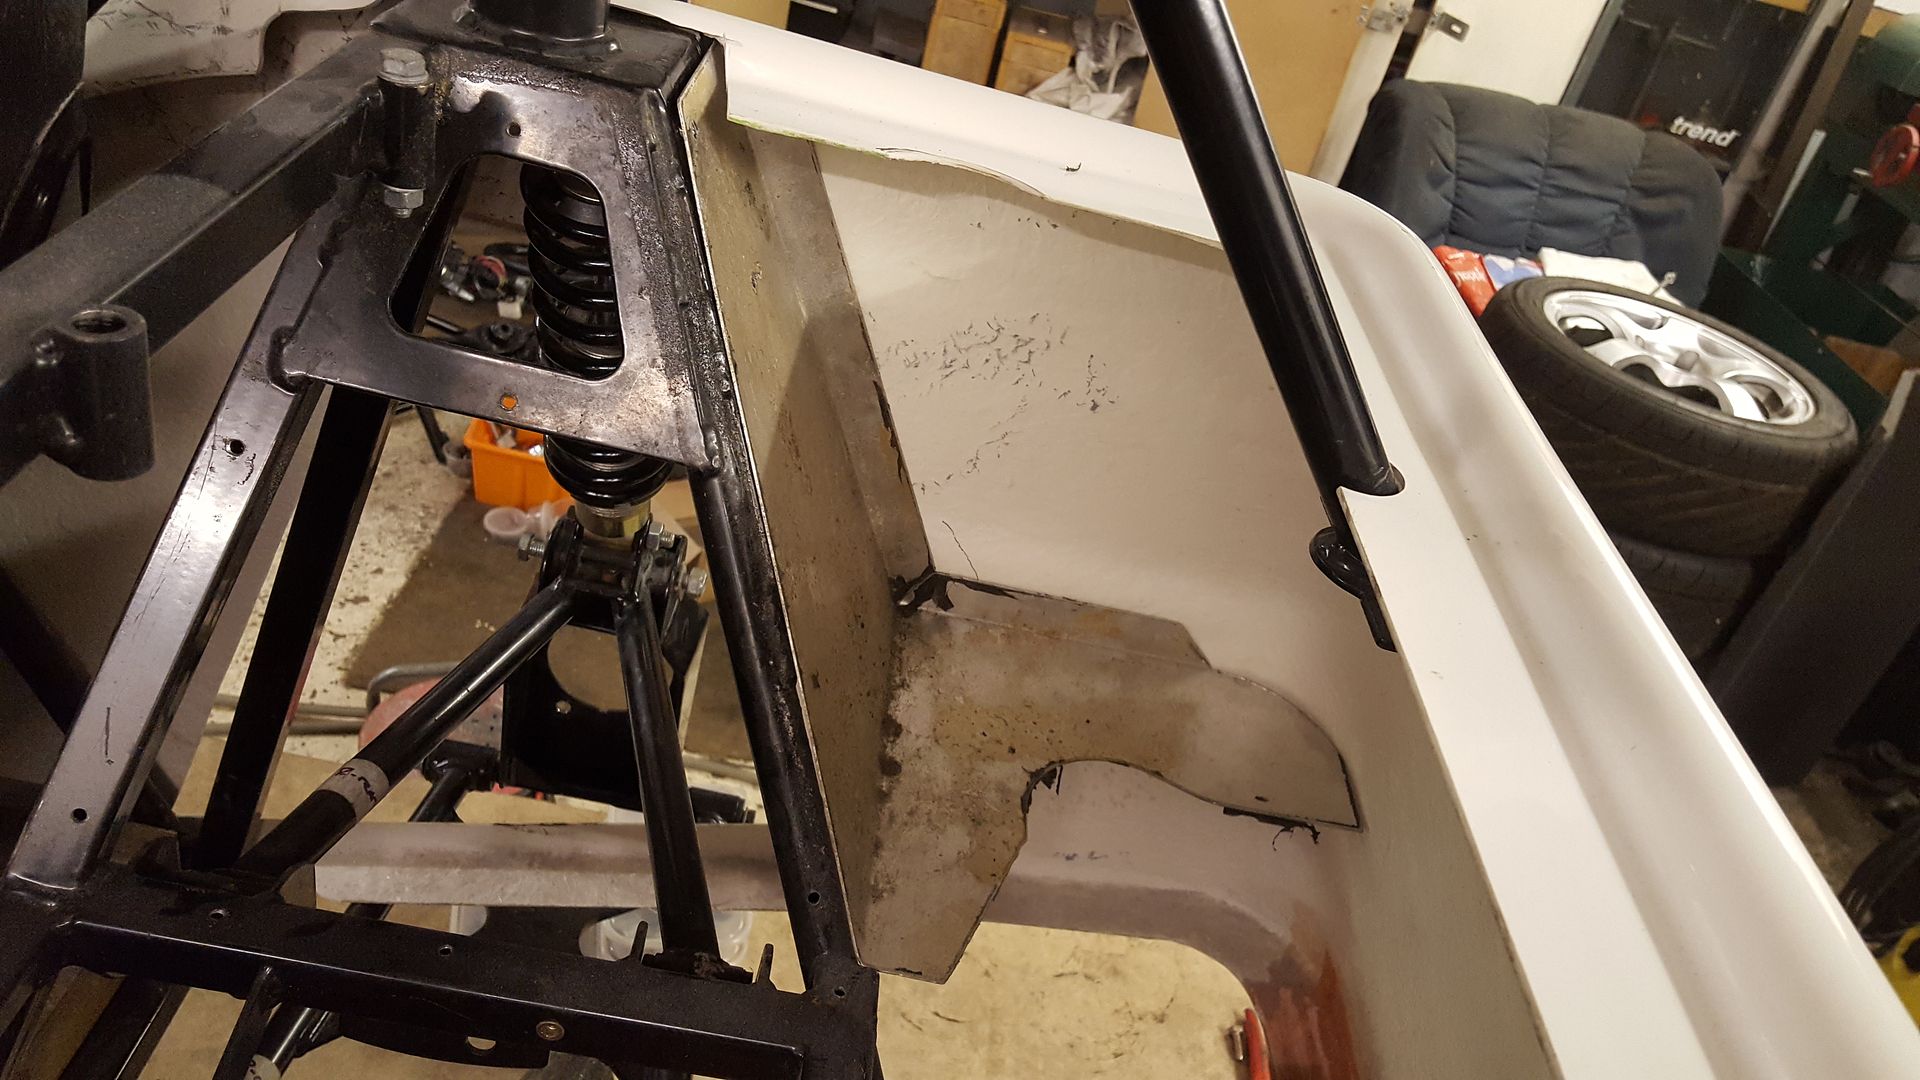
so i welded a temporary brace in
and top chopped out
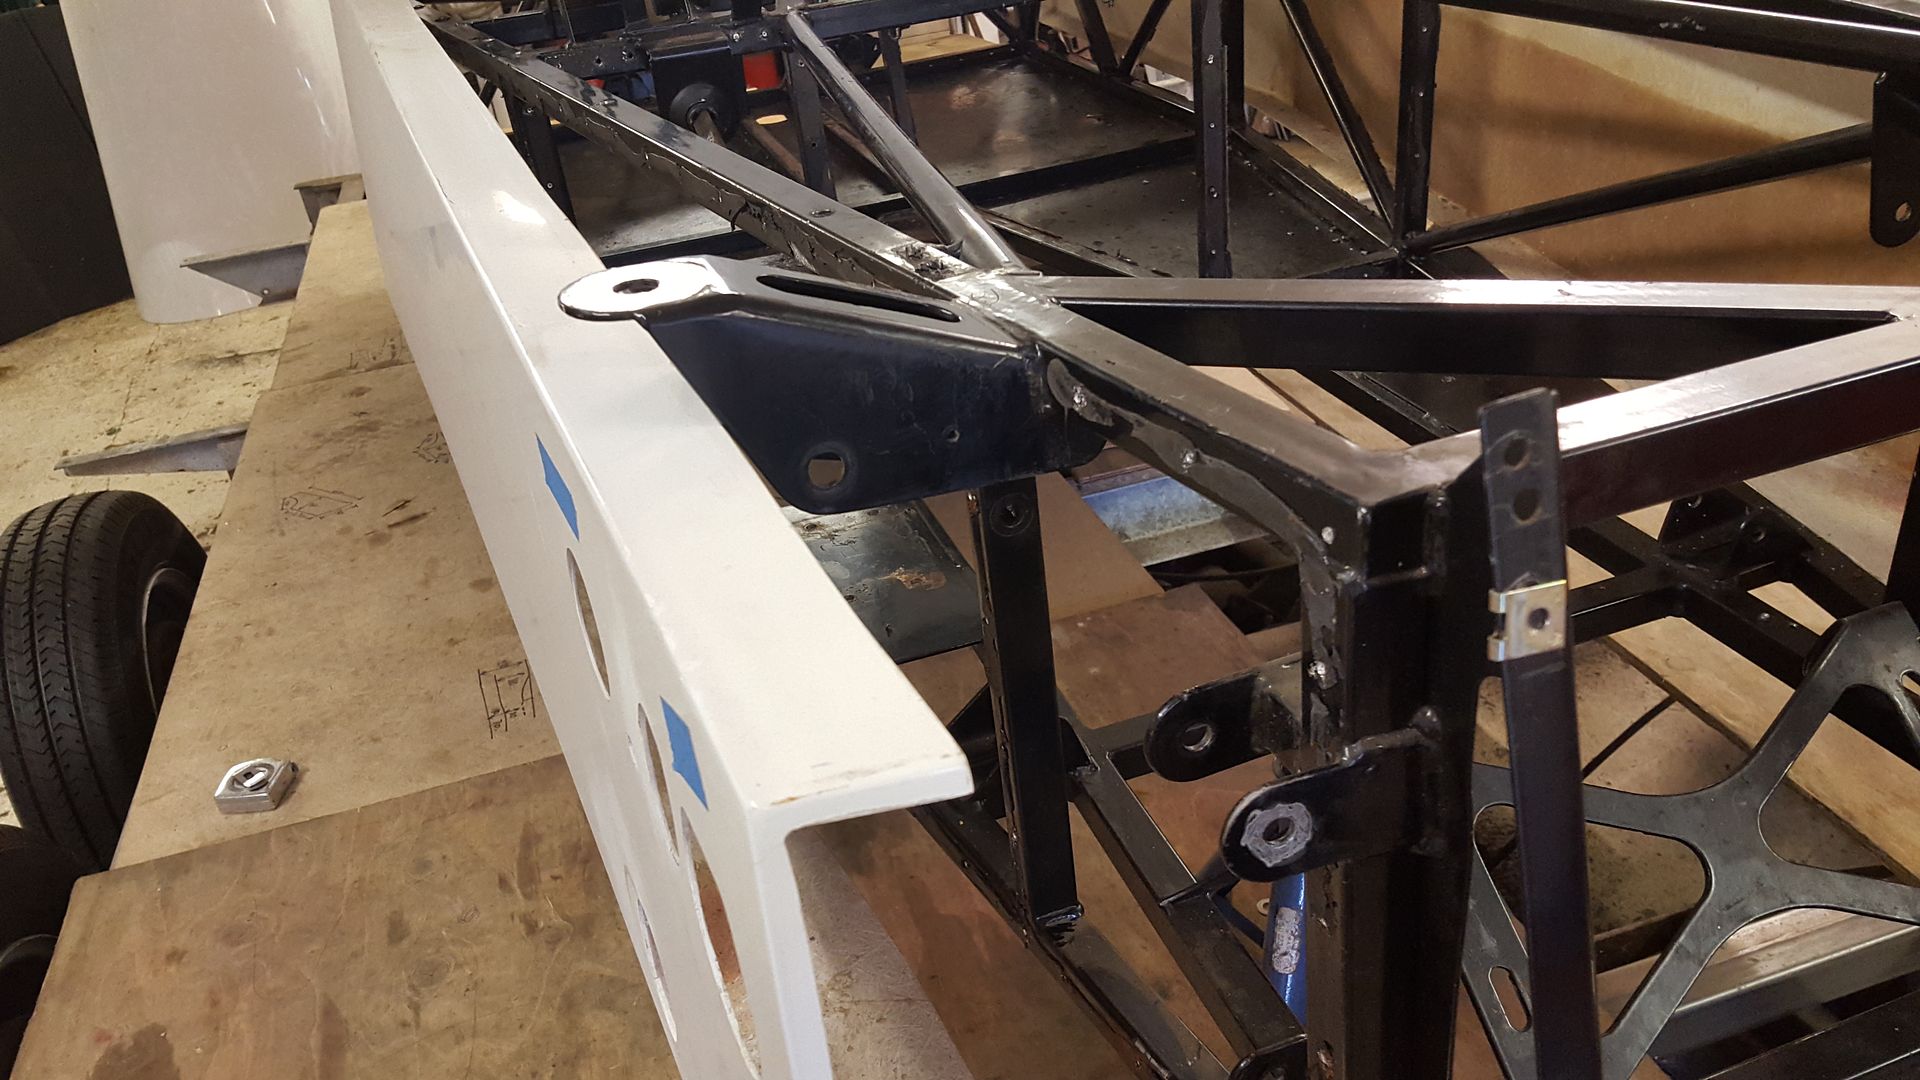
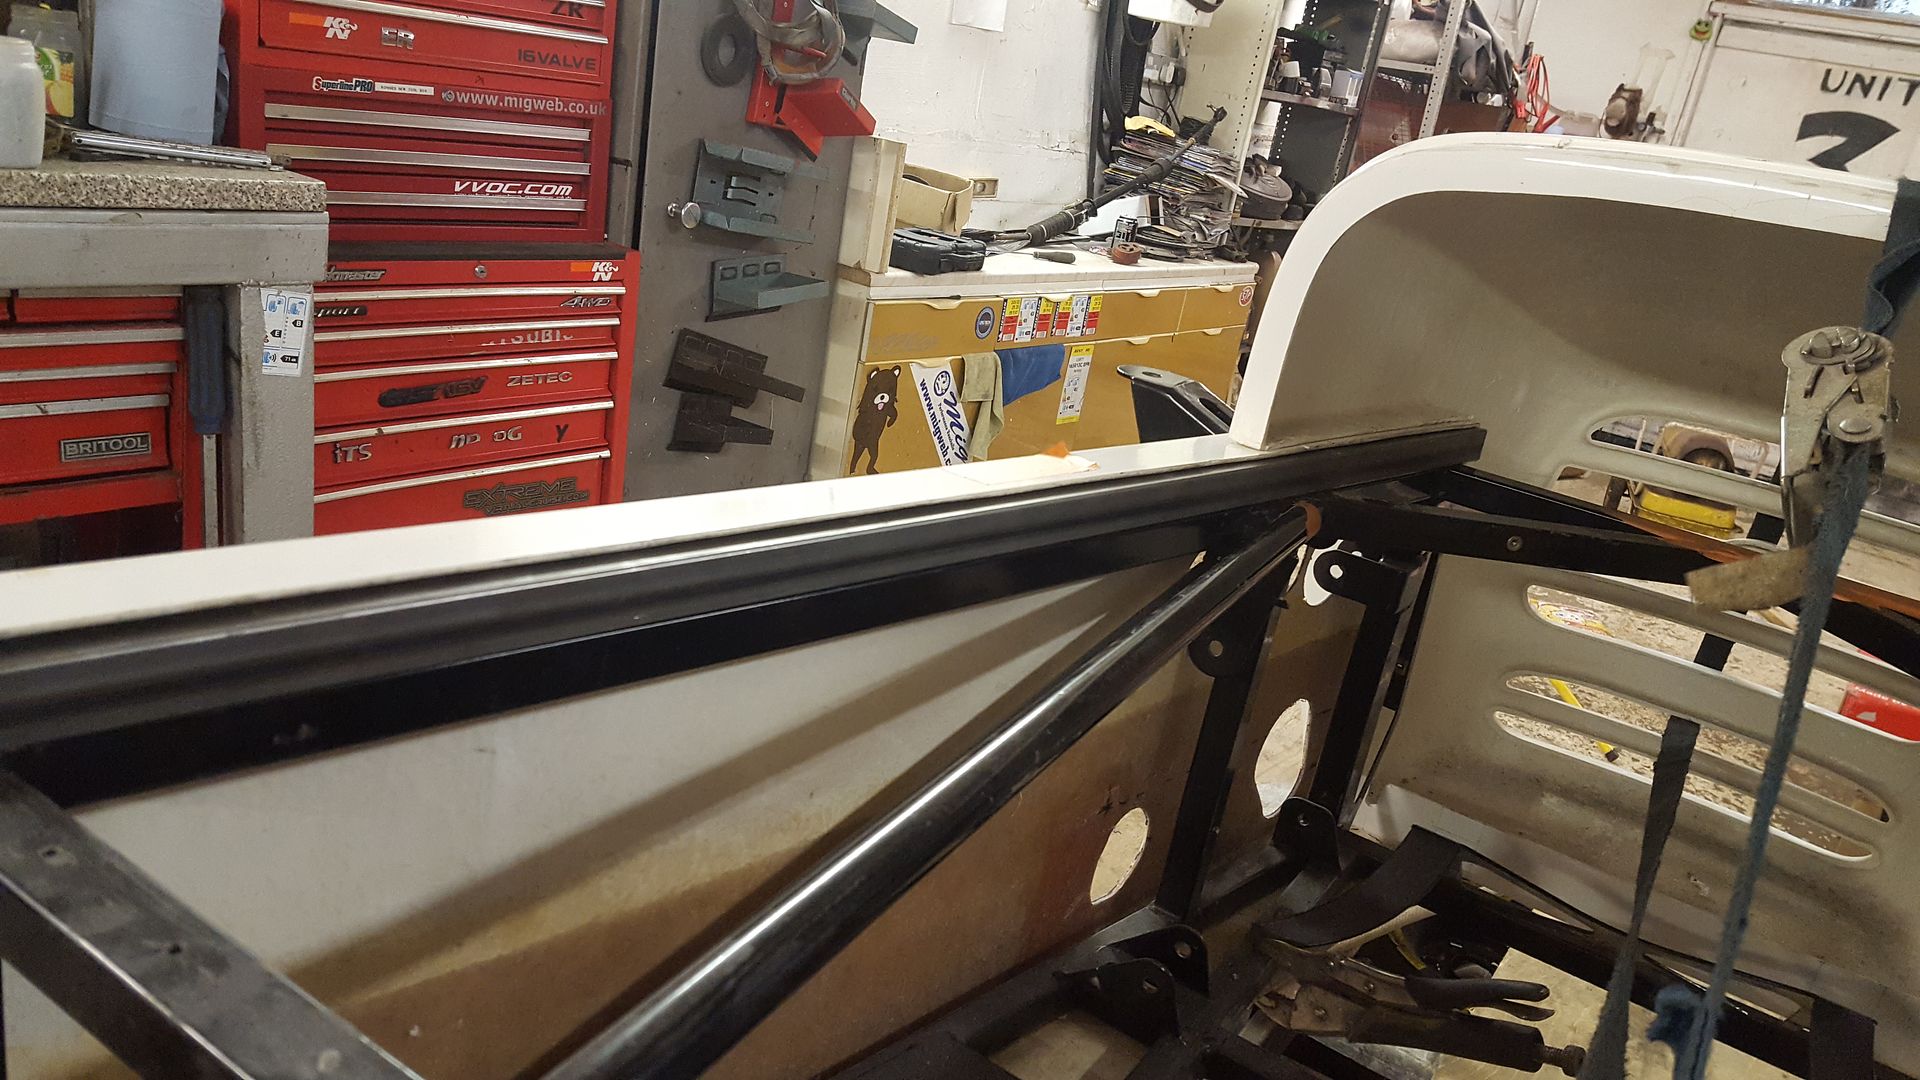
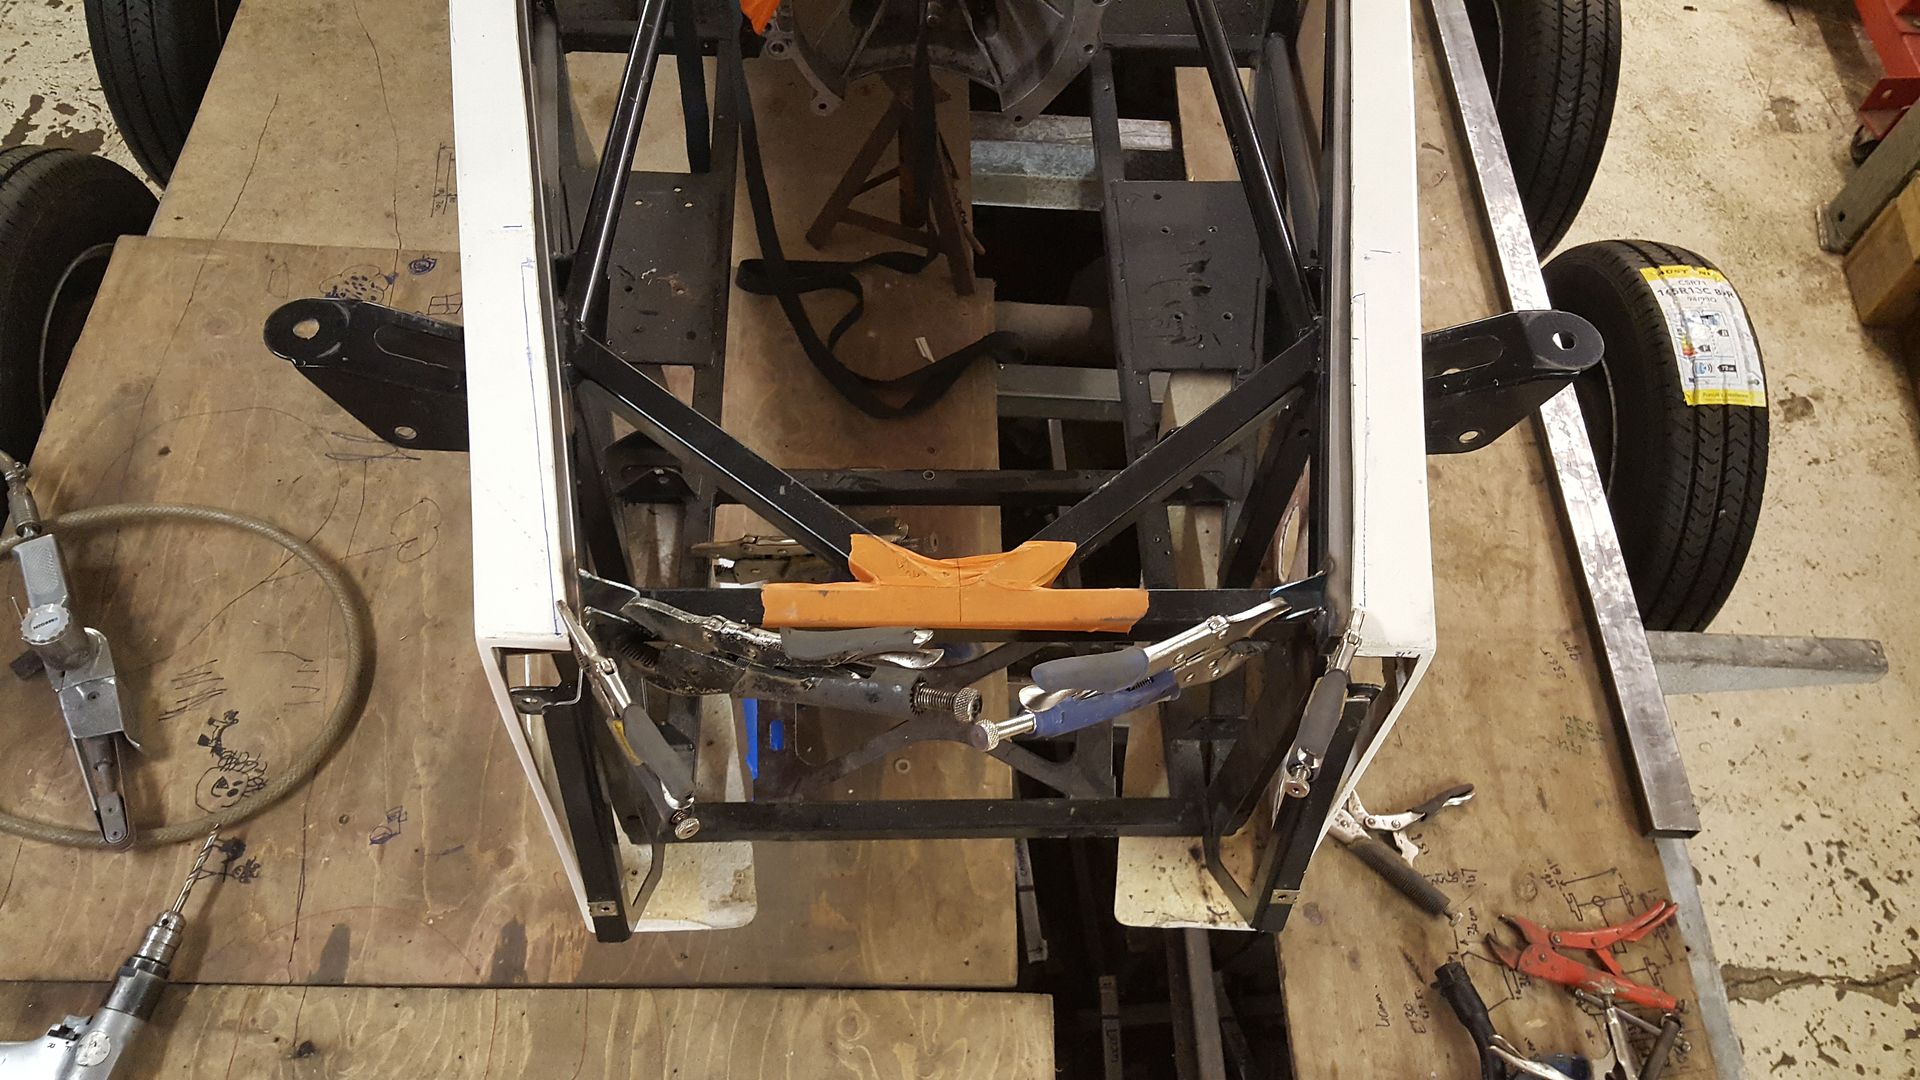
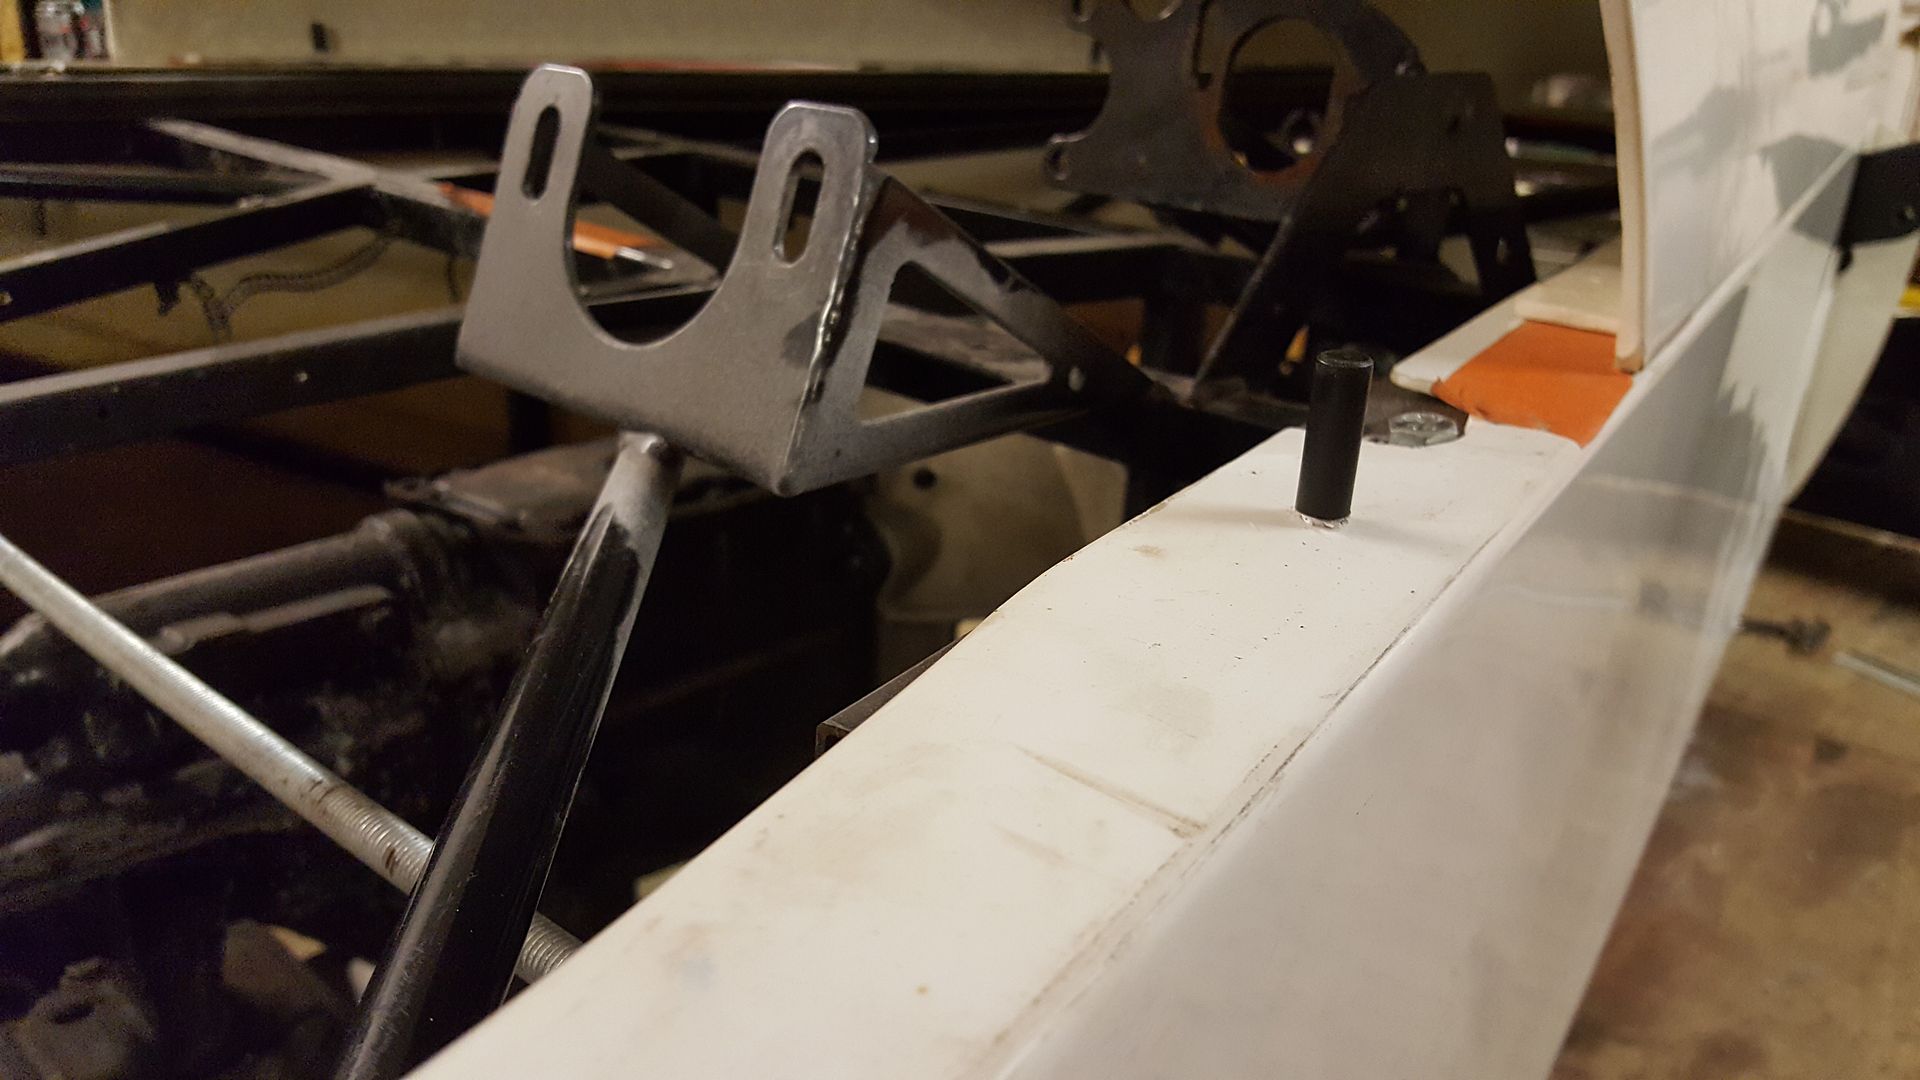
it also fouled on the rear trailing arm mounts as they stick out further than the chassis. so slimmed them down for now, will come back to this once
the body is on
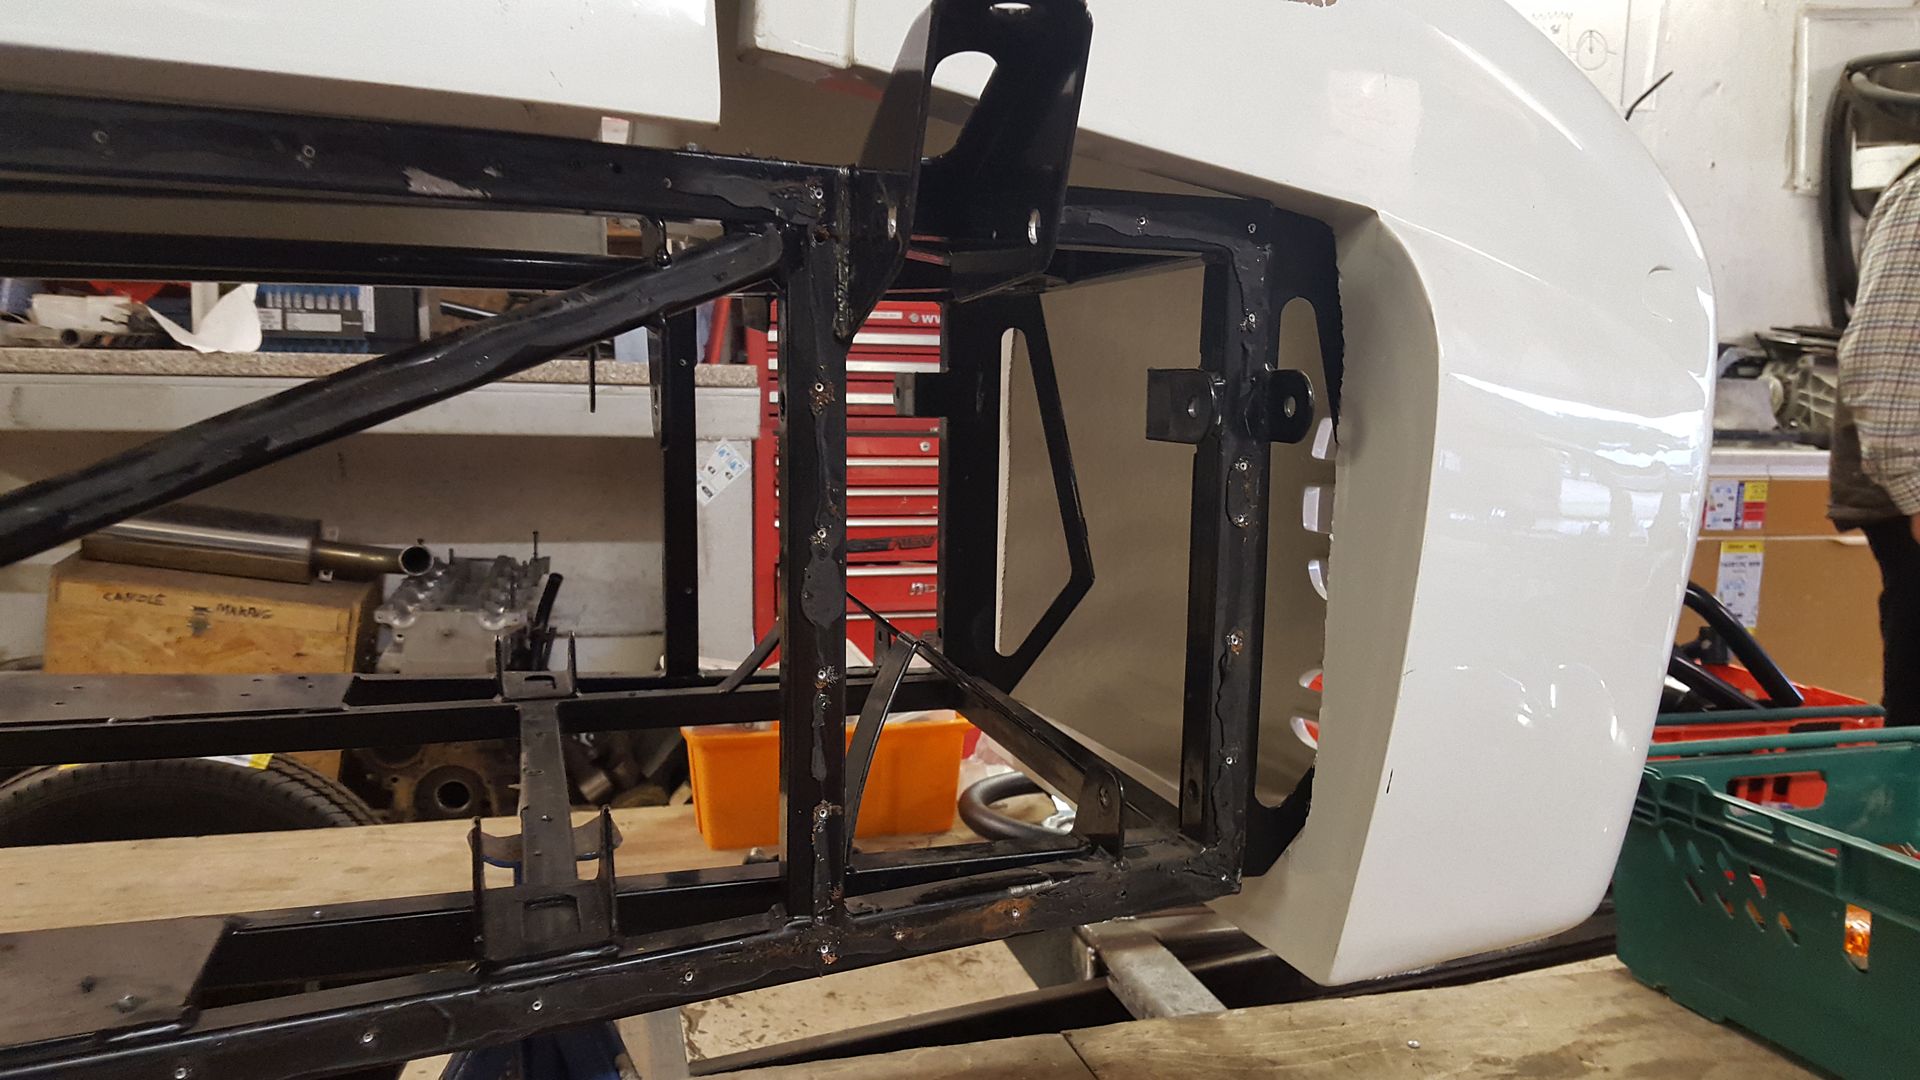
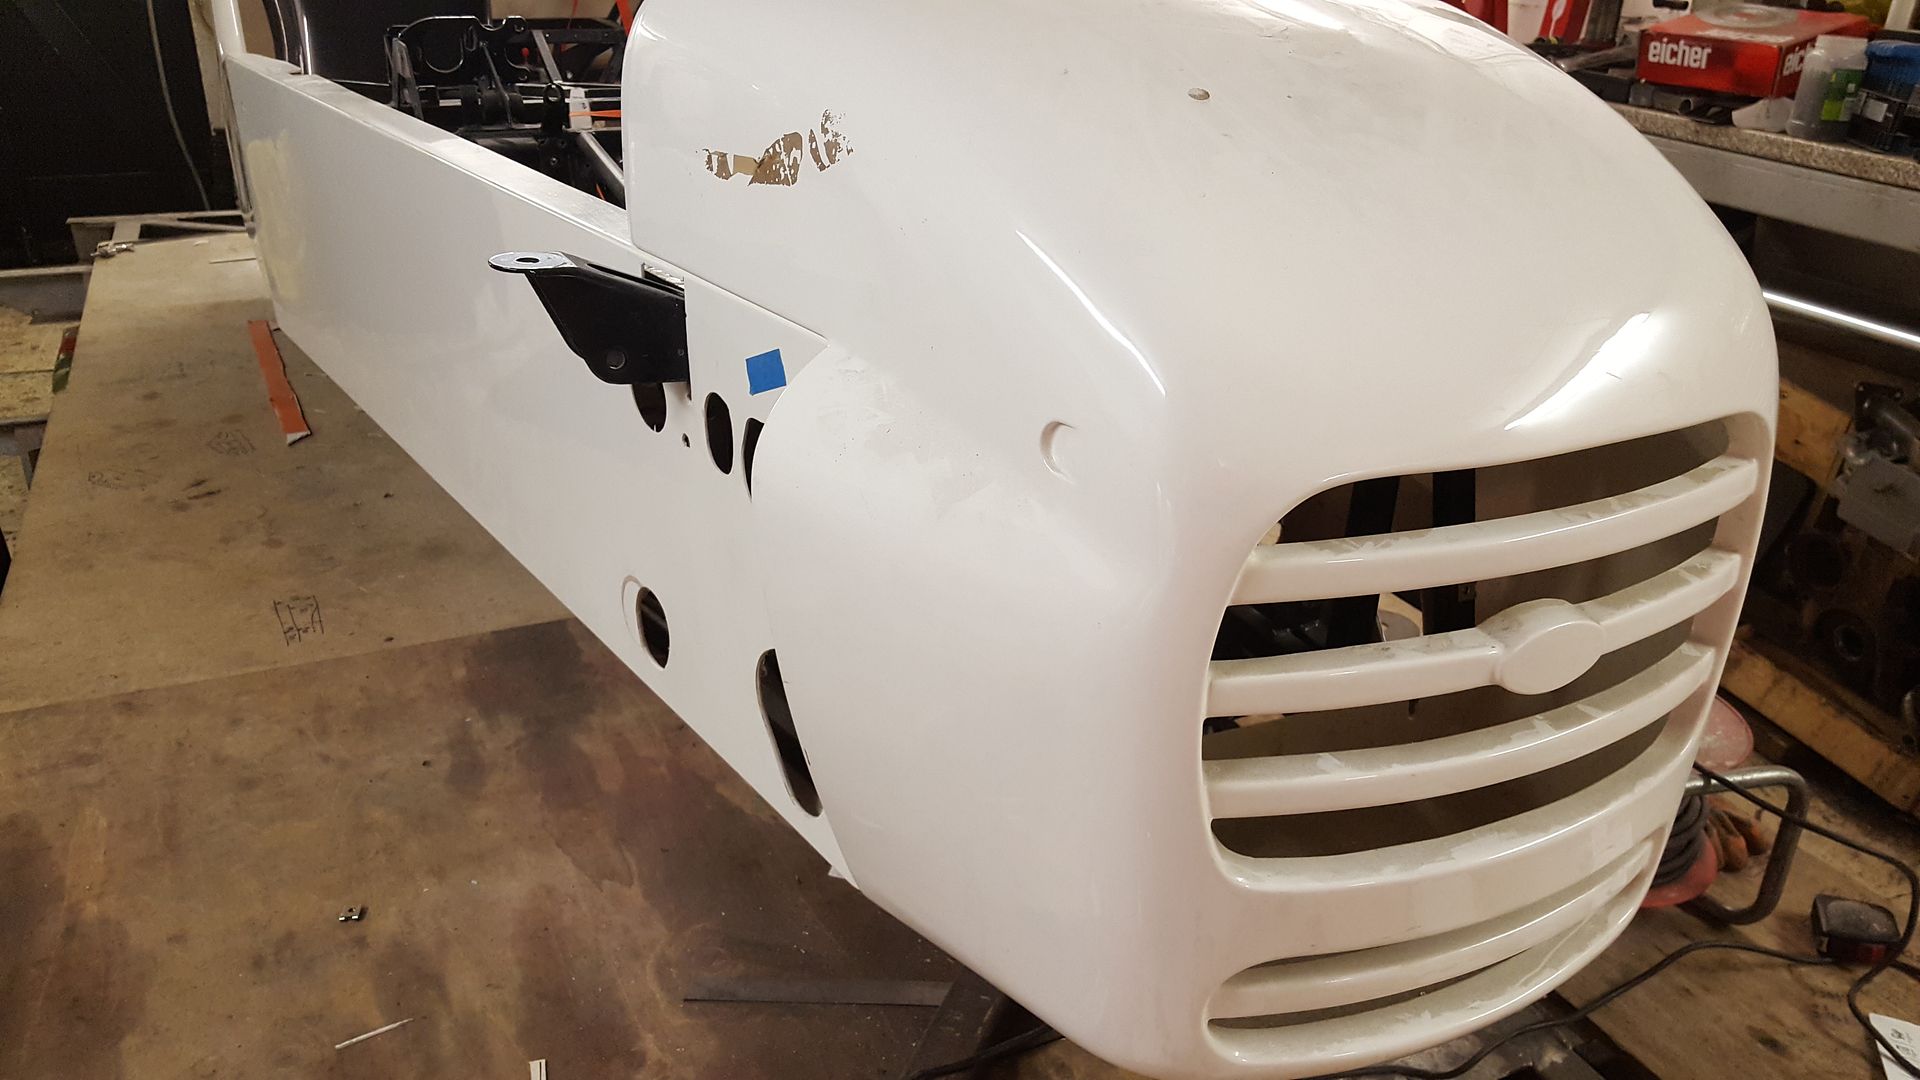
also chopped off the gash radiator mounts and towhook as they fouled the nose cone
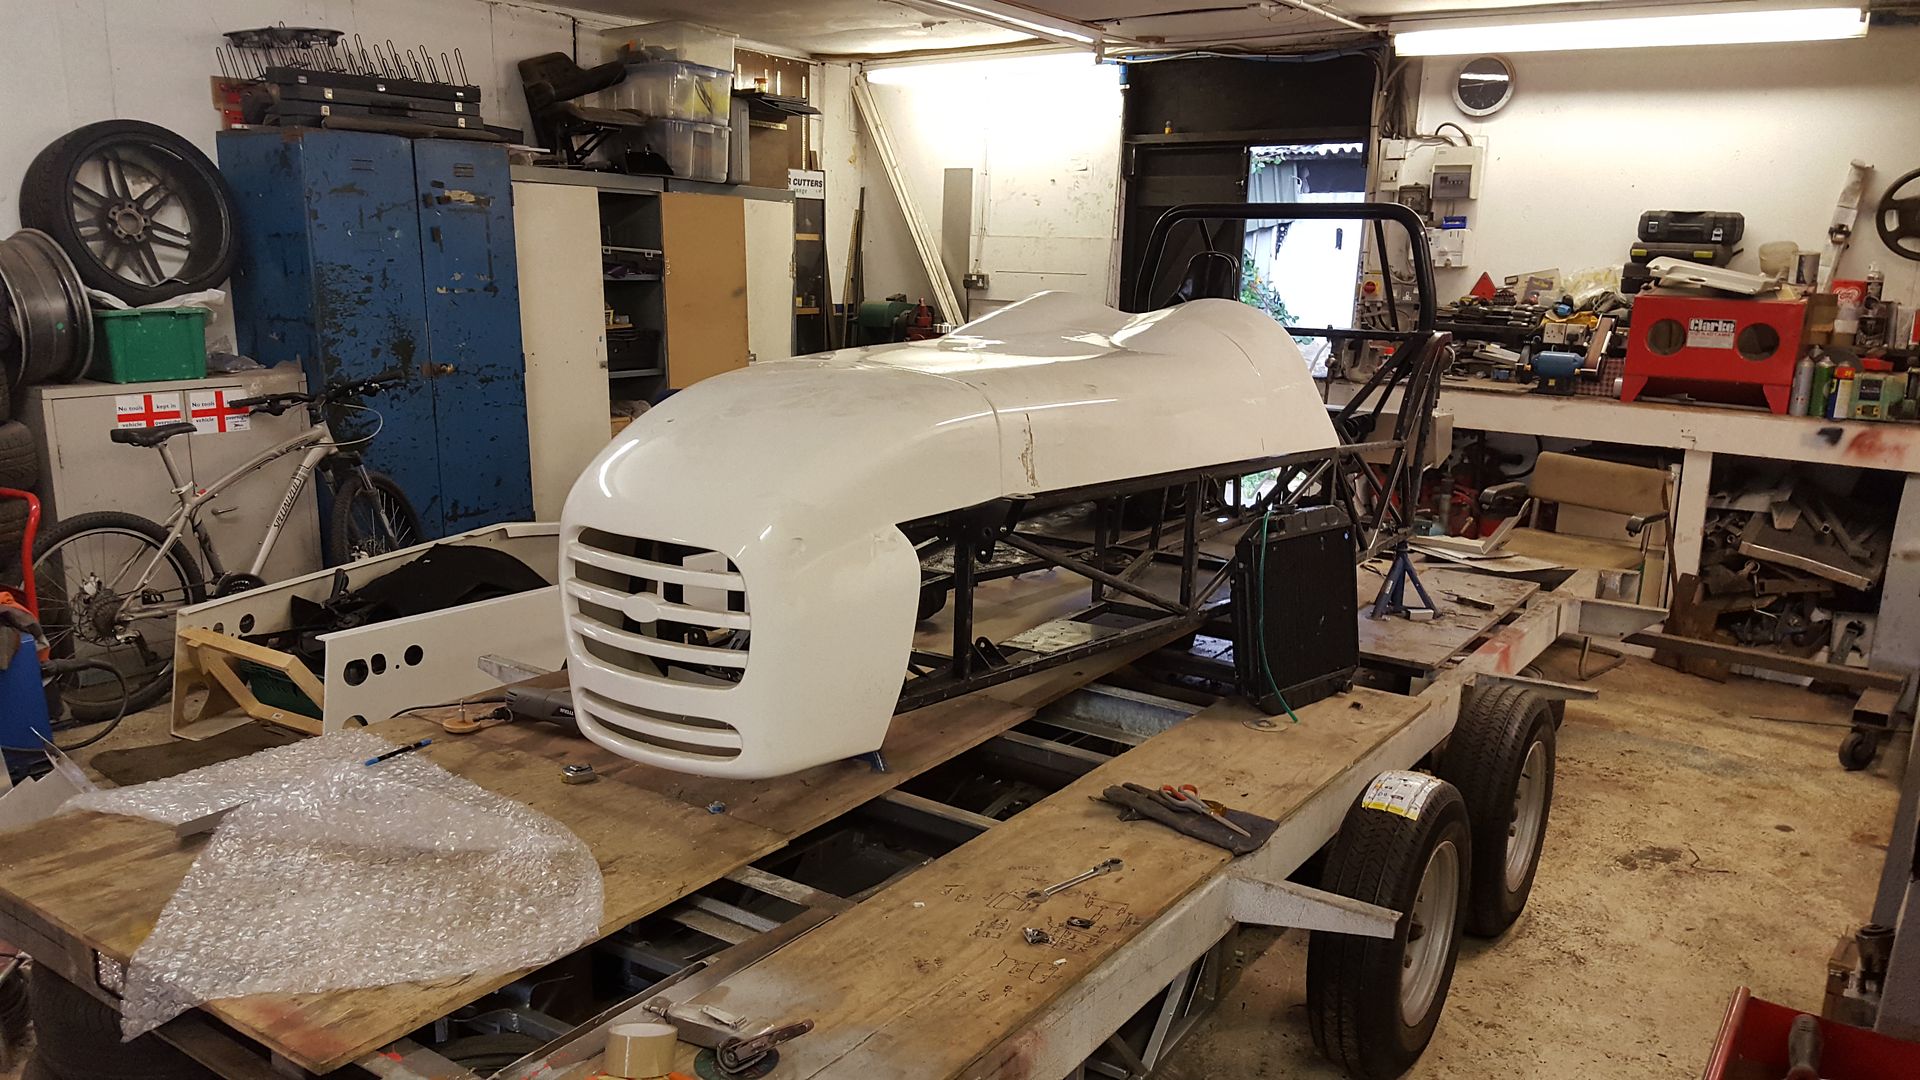
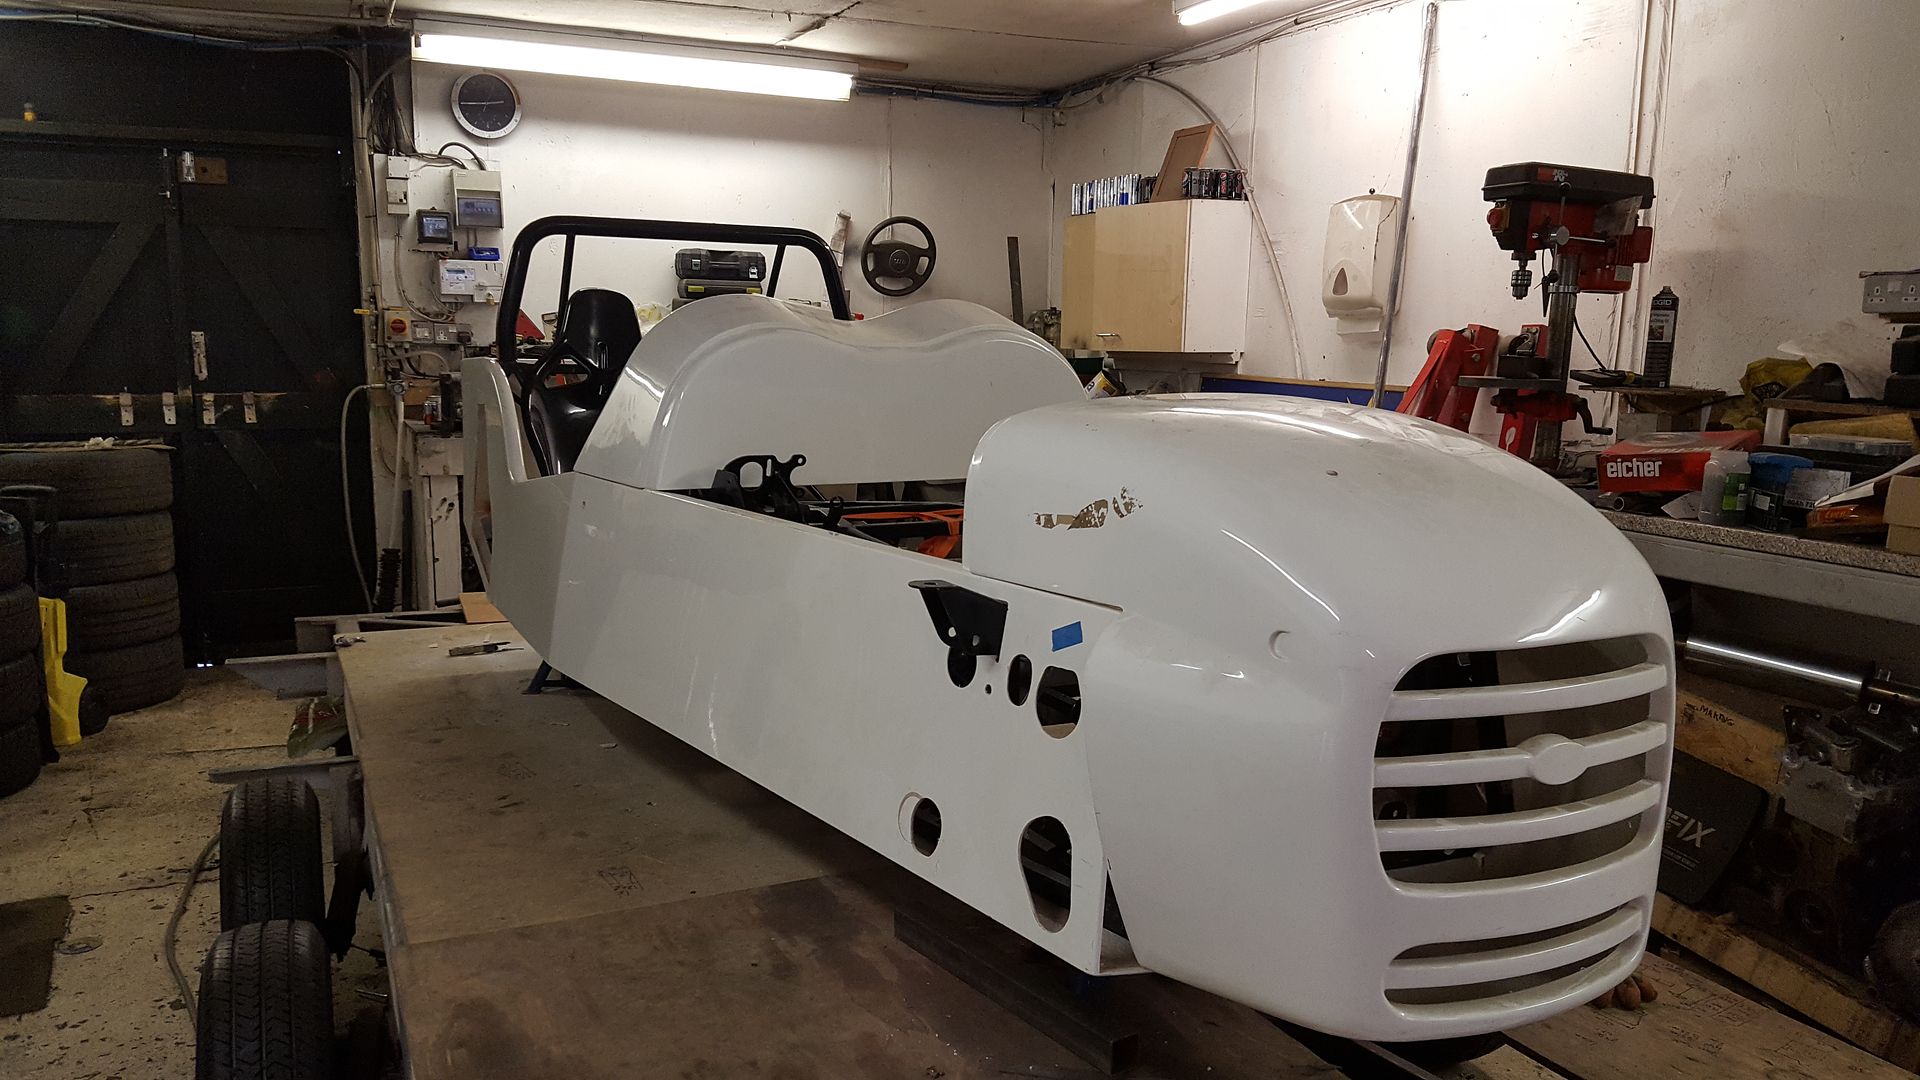
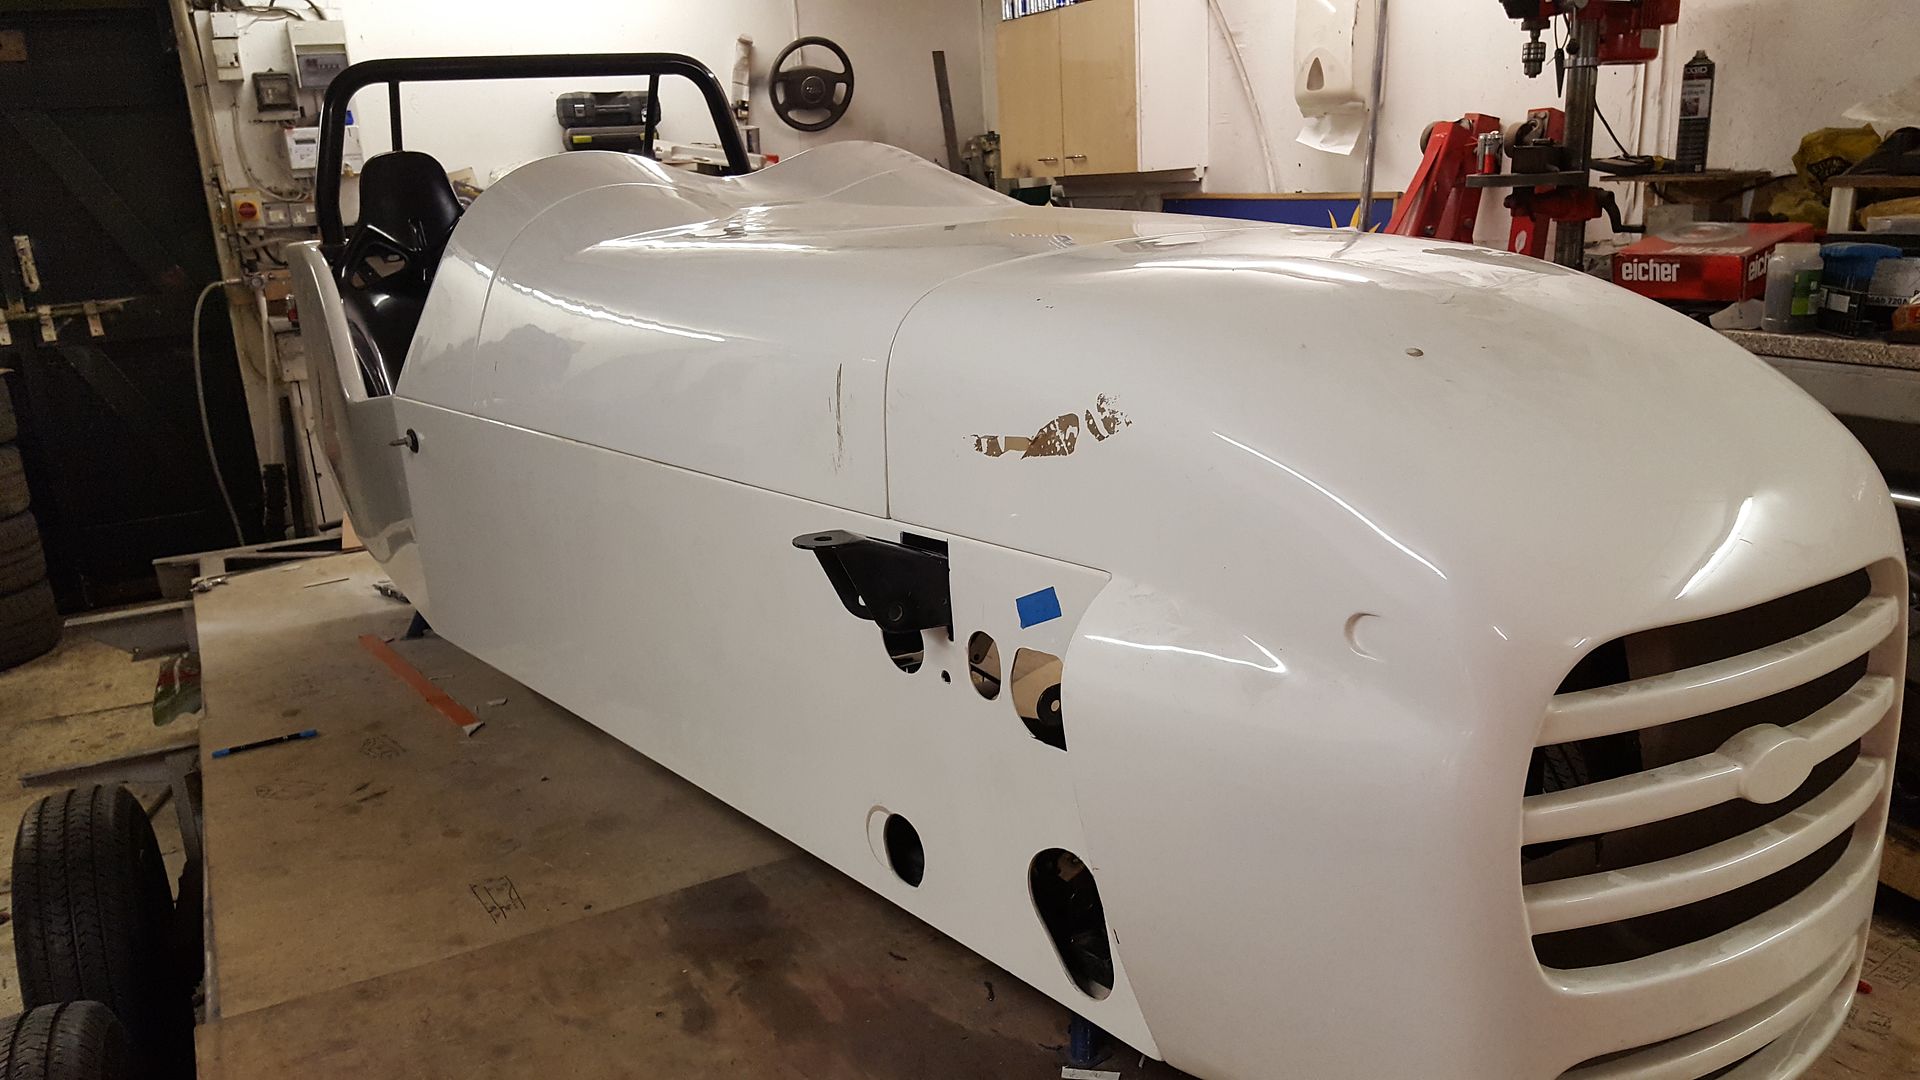
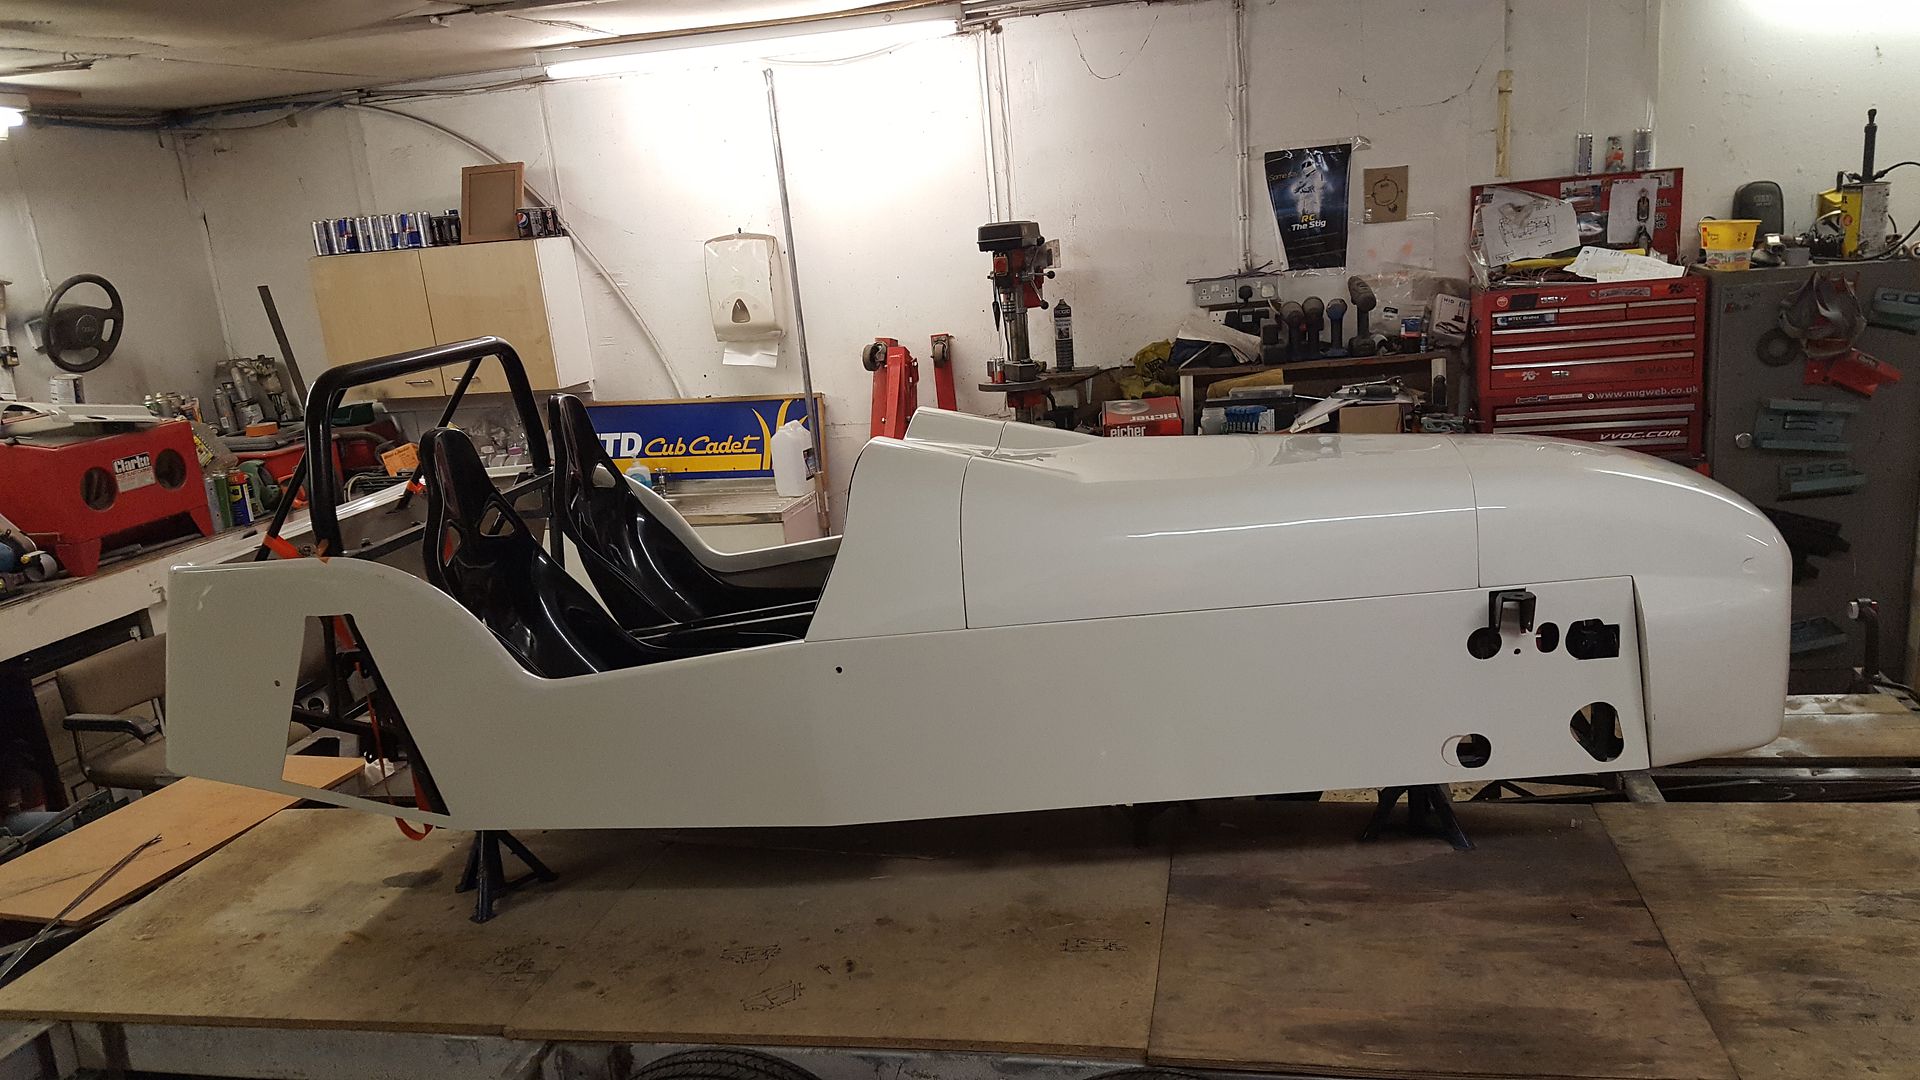
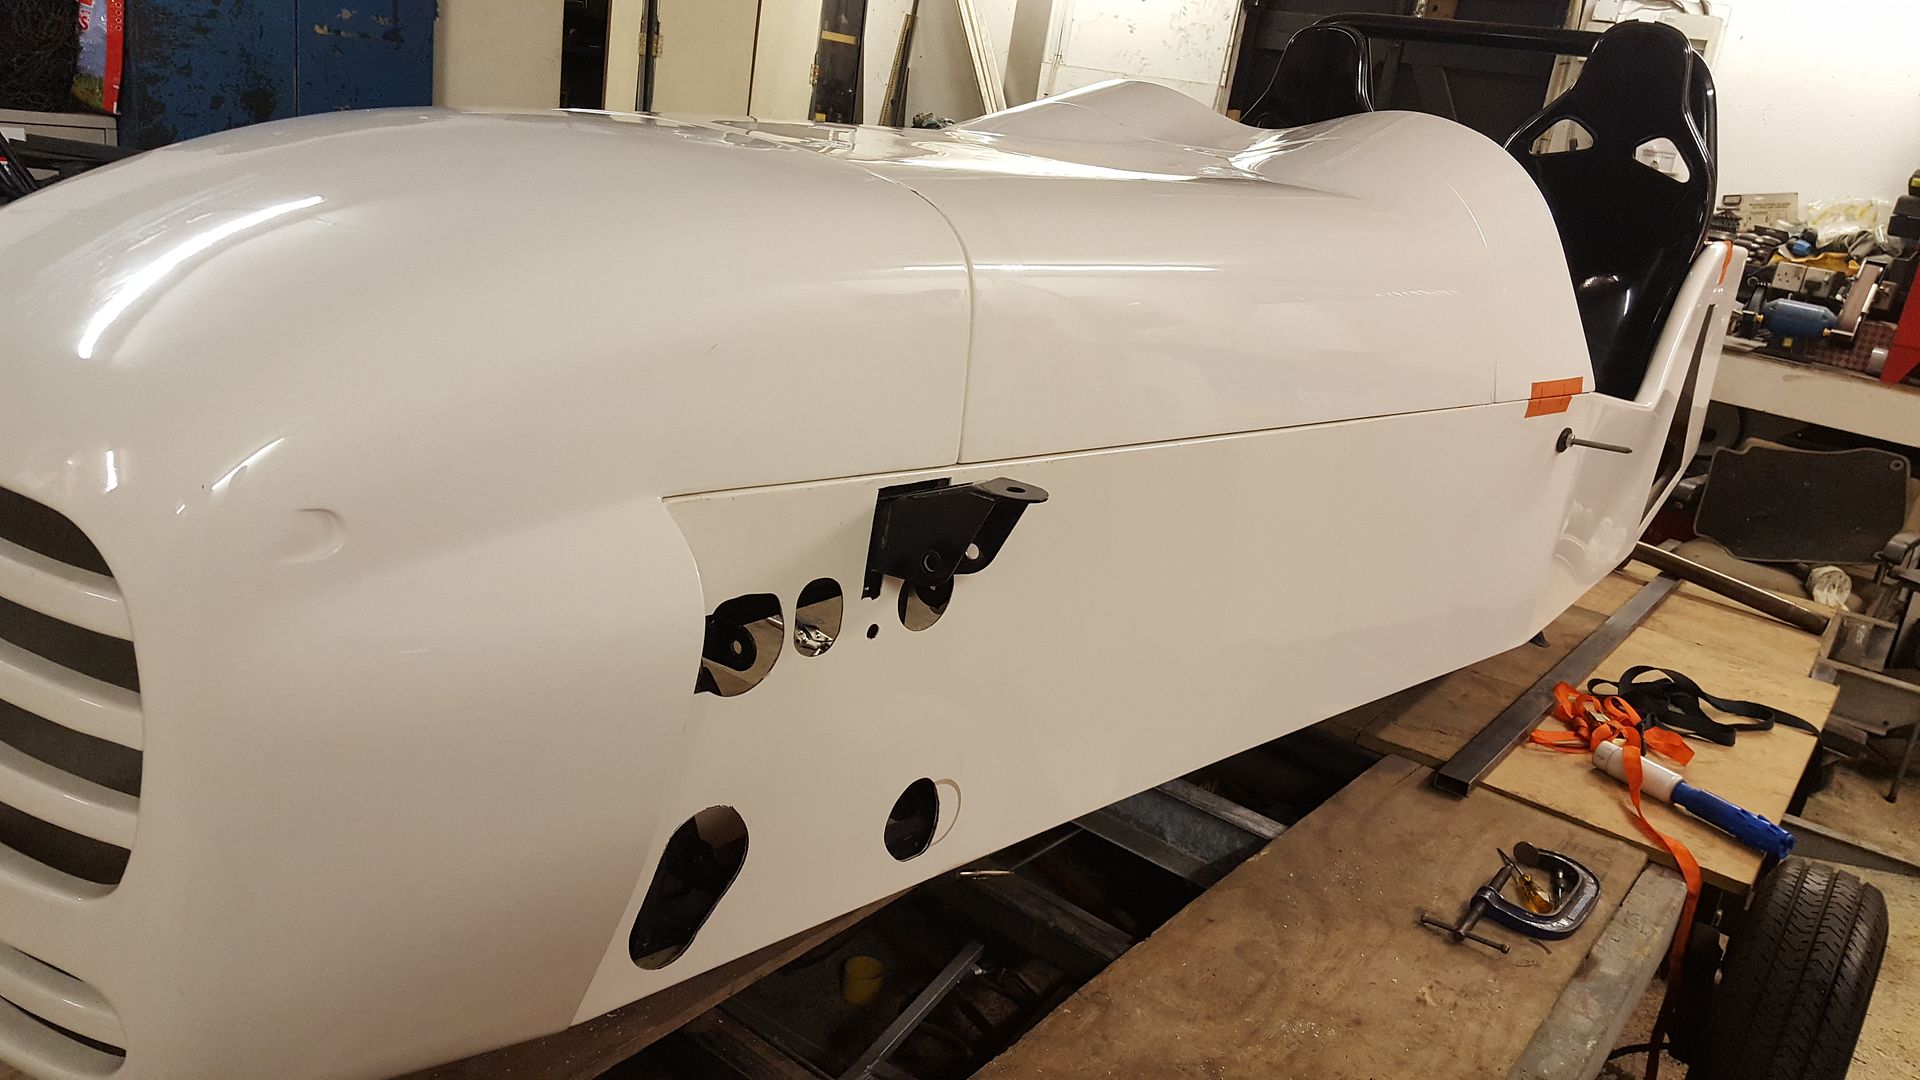
and the body slots on nicely

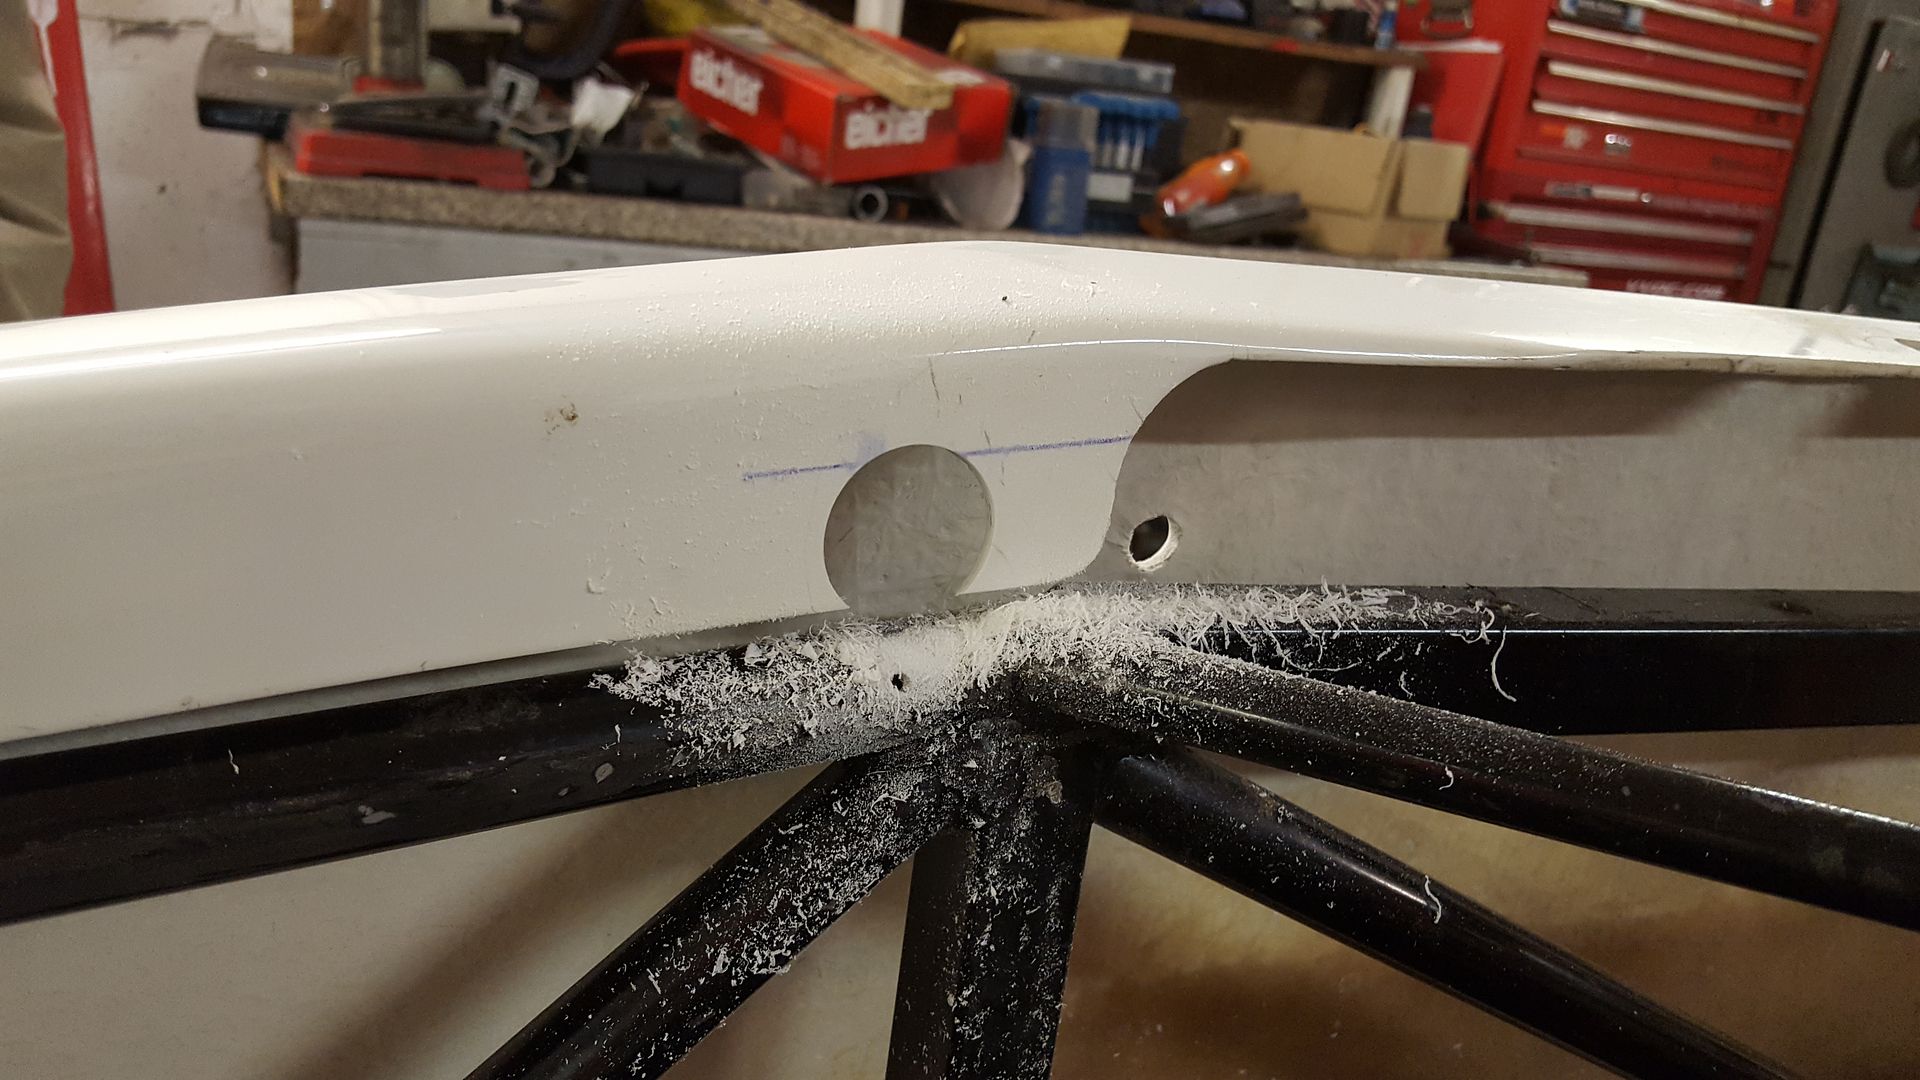
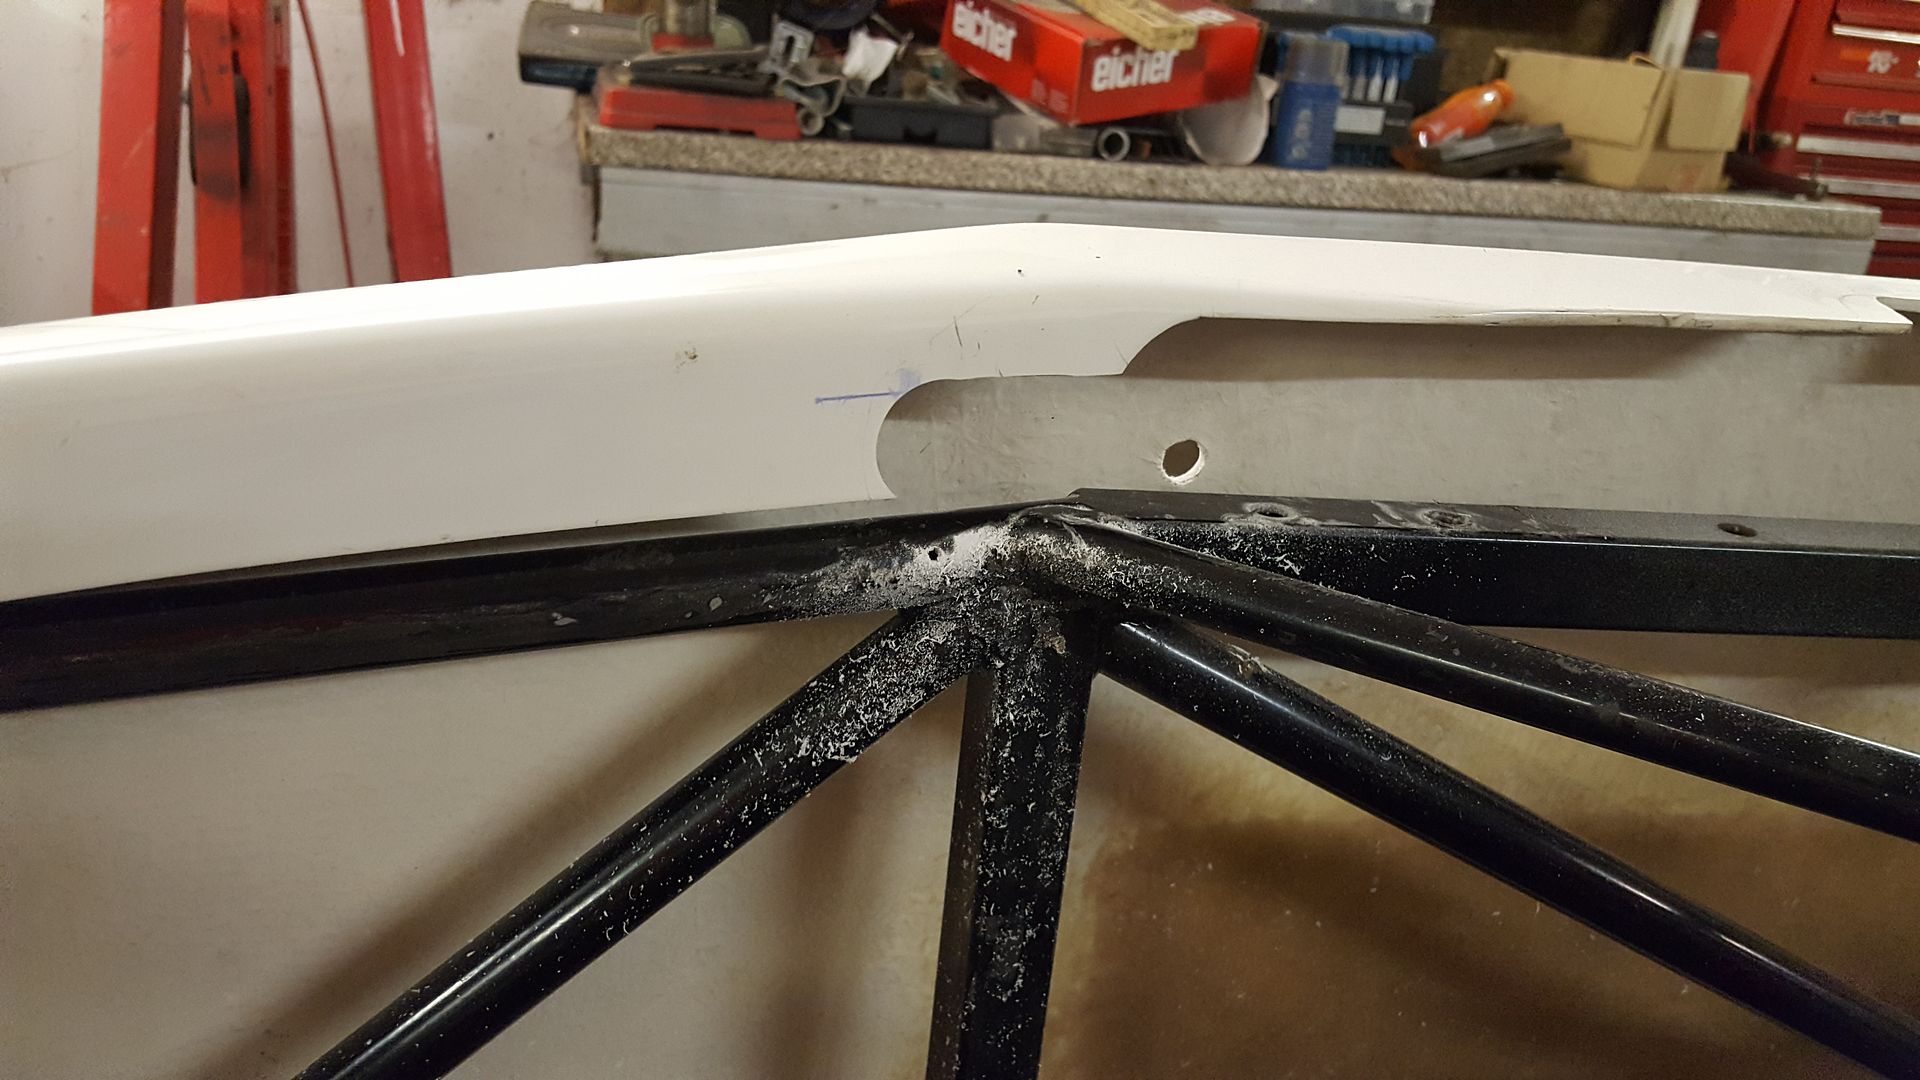
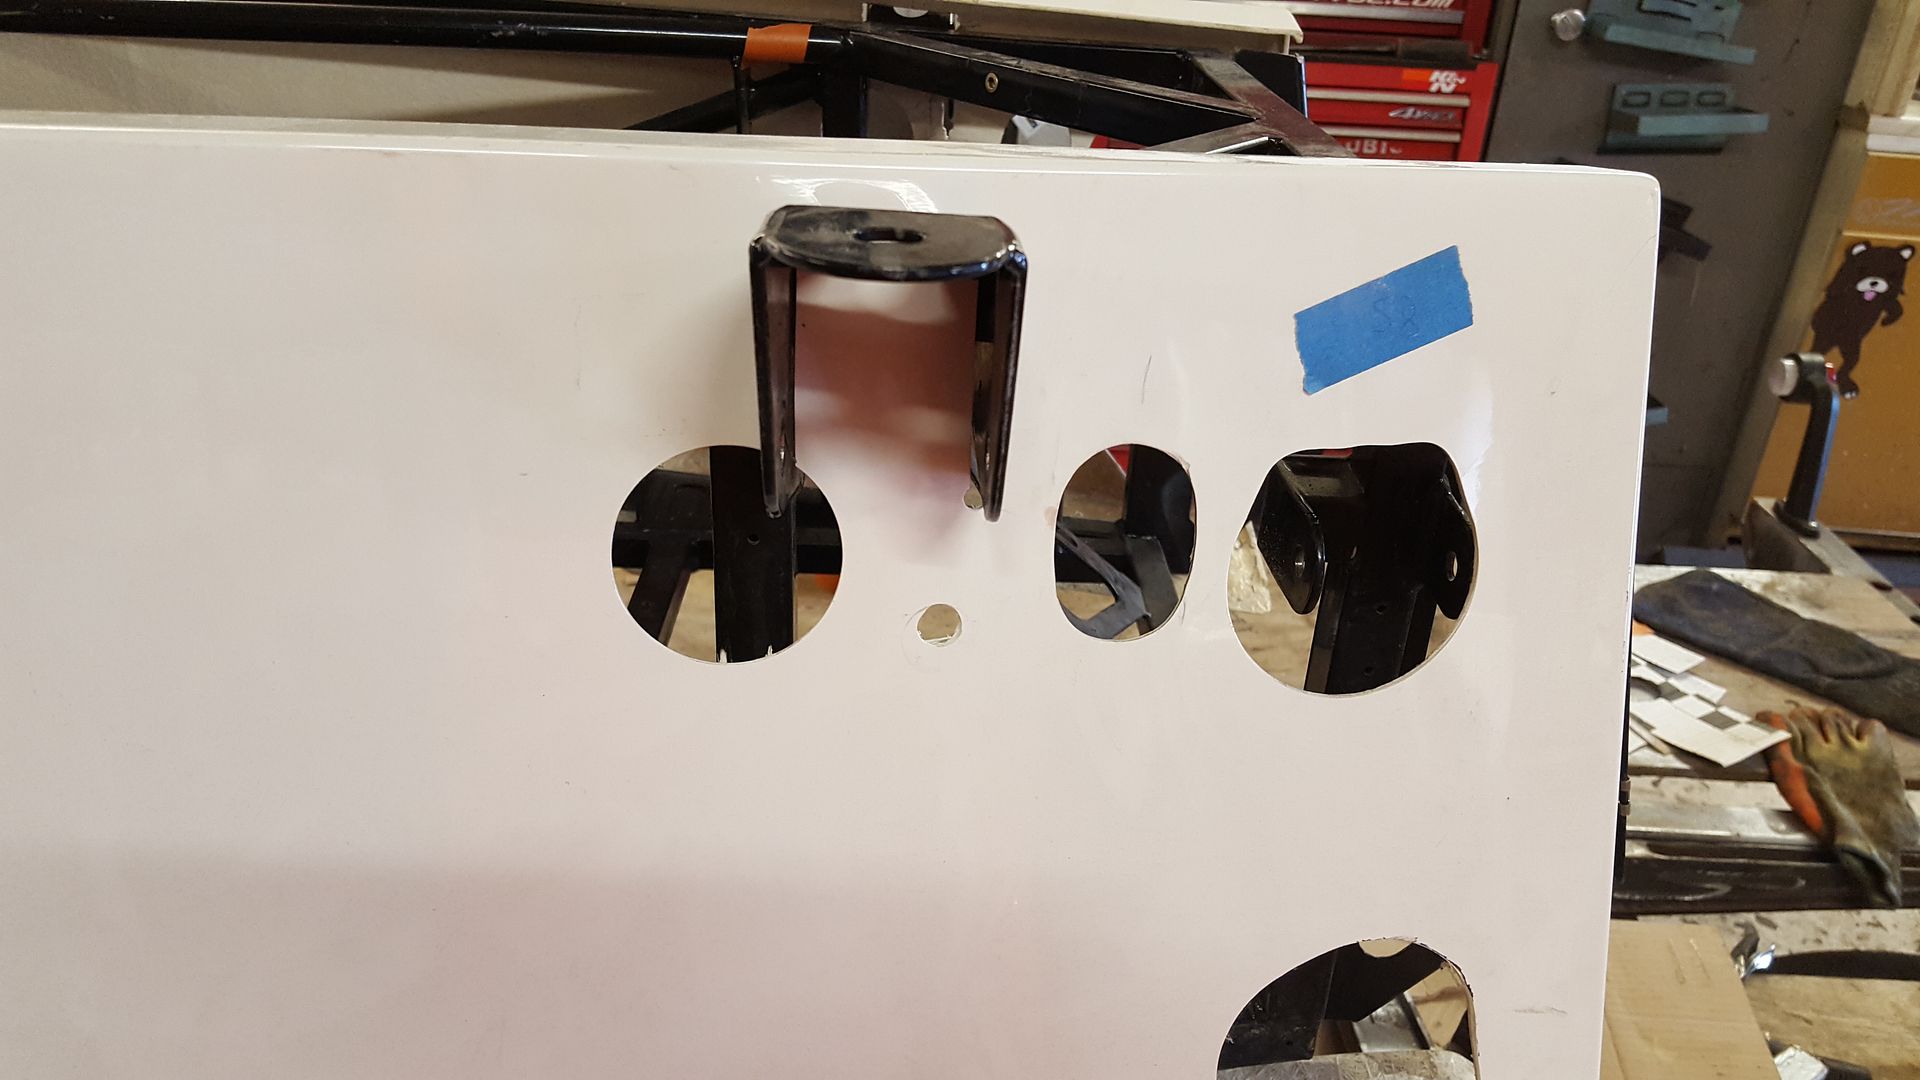
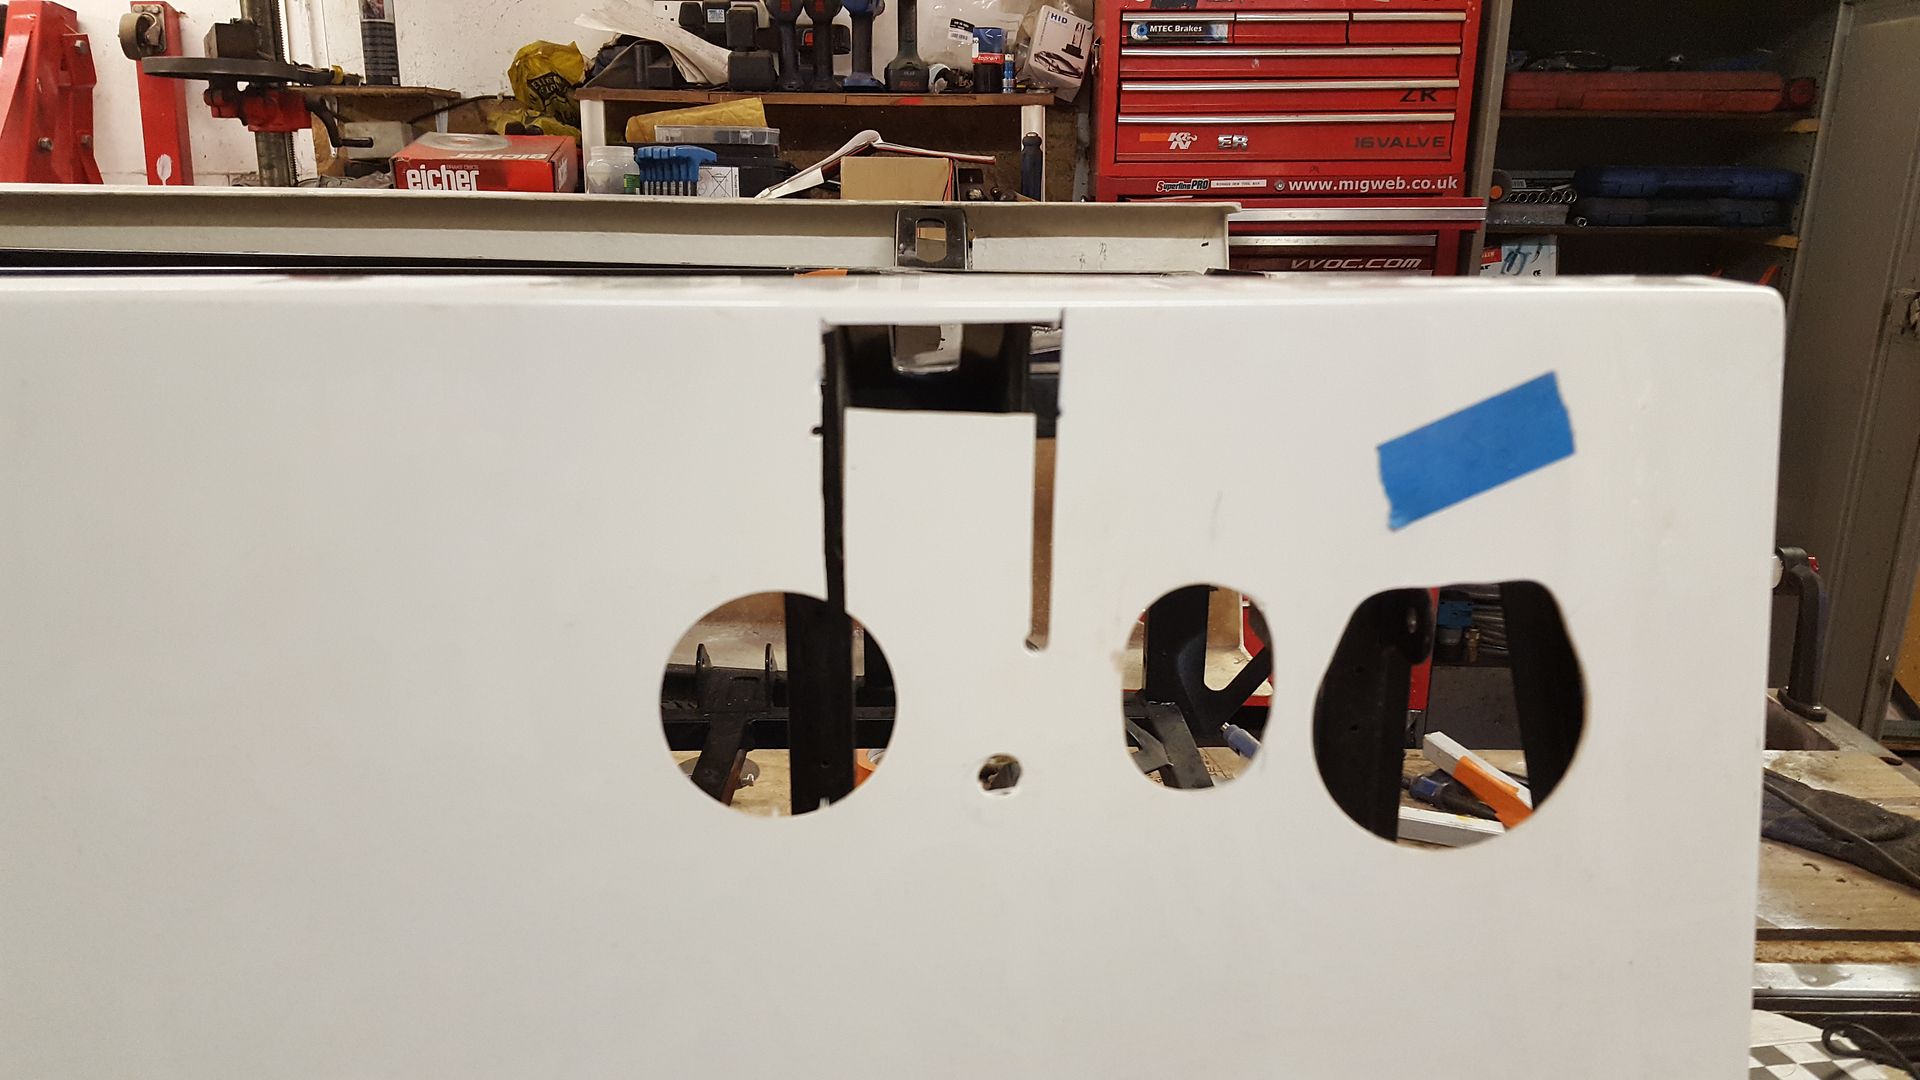
the holes sadly dont line up, they are close, but not quite

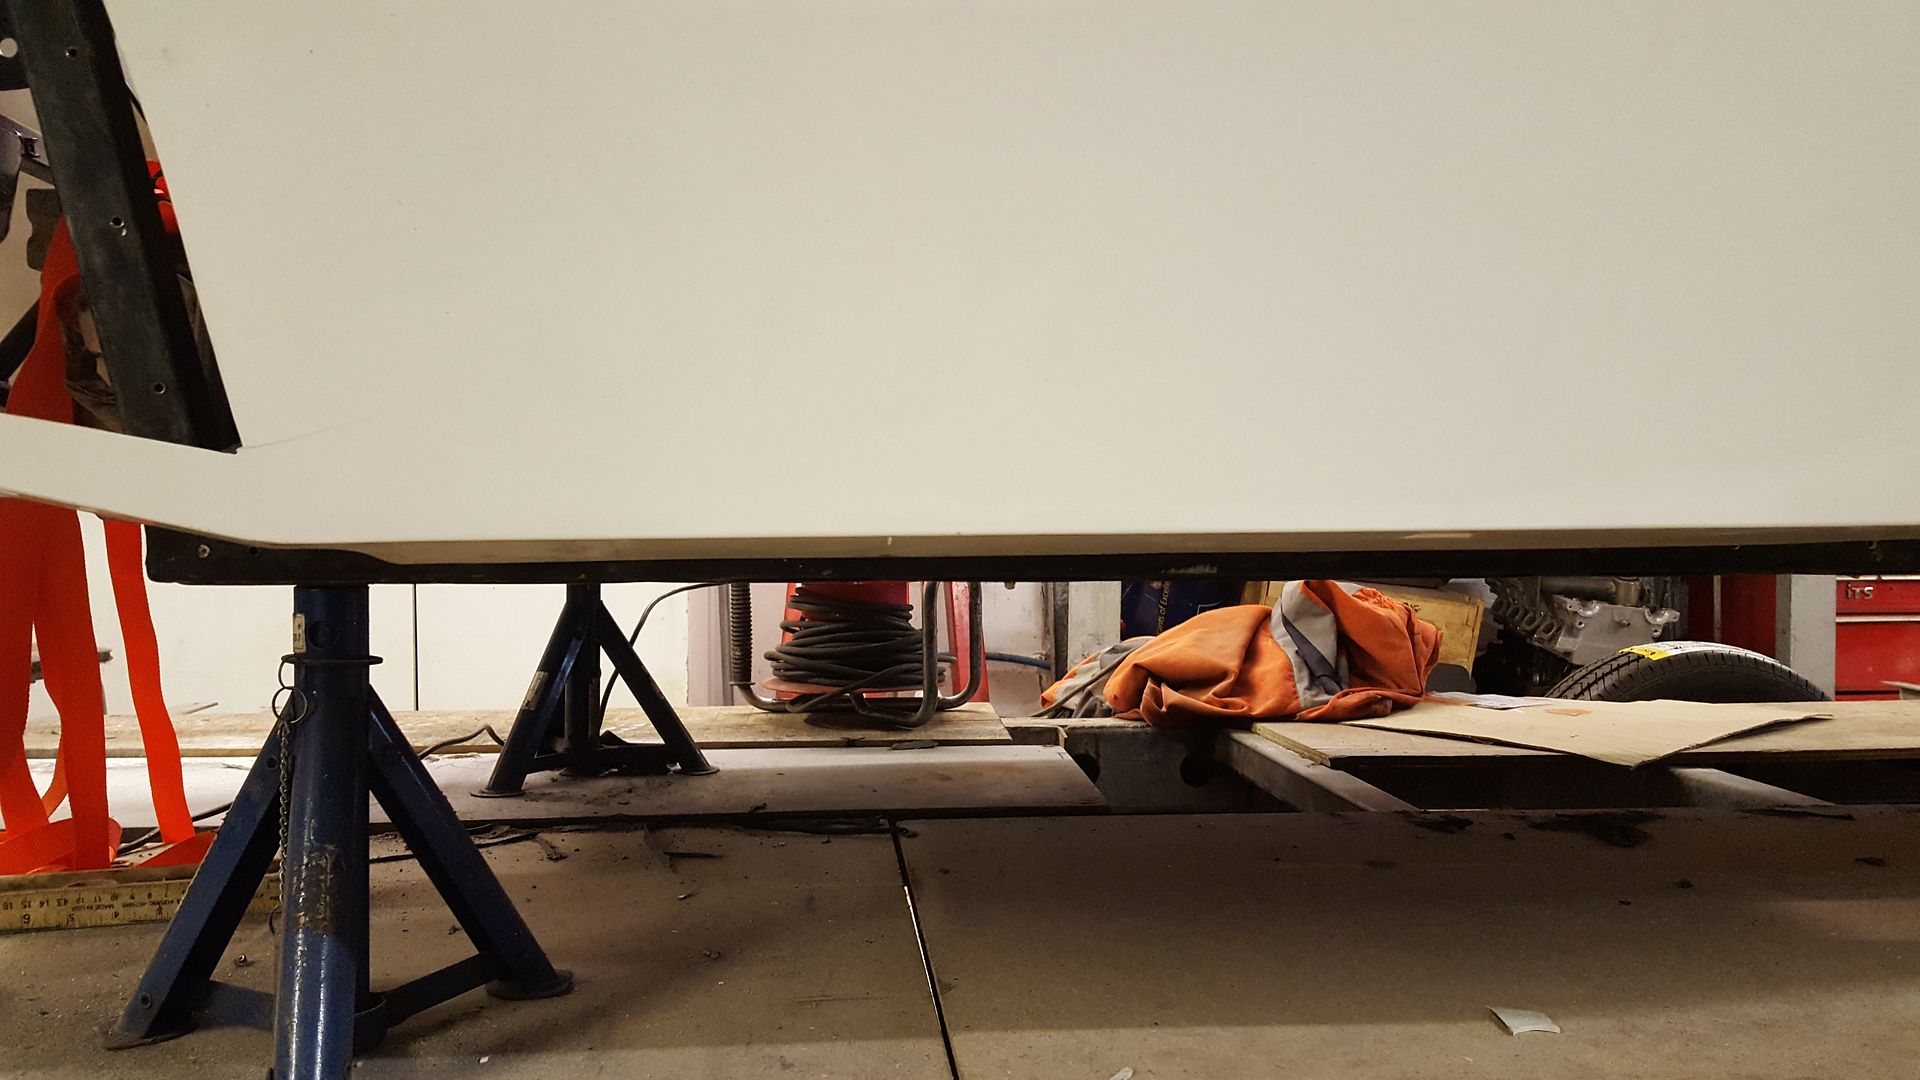
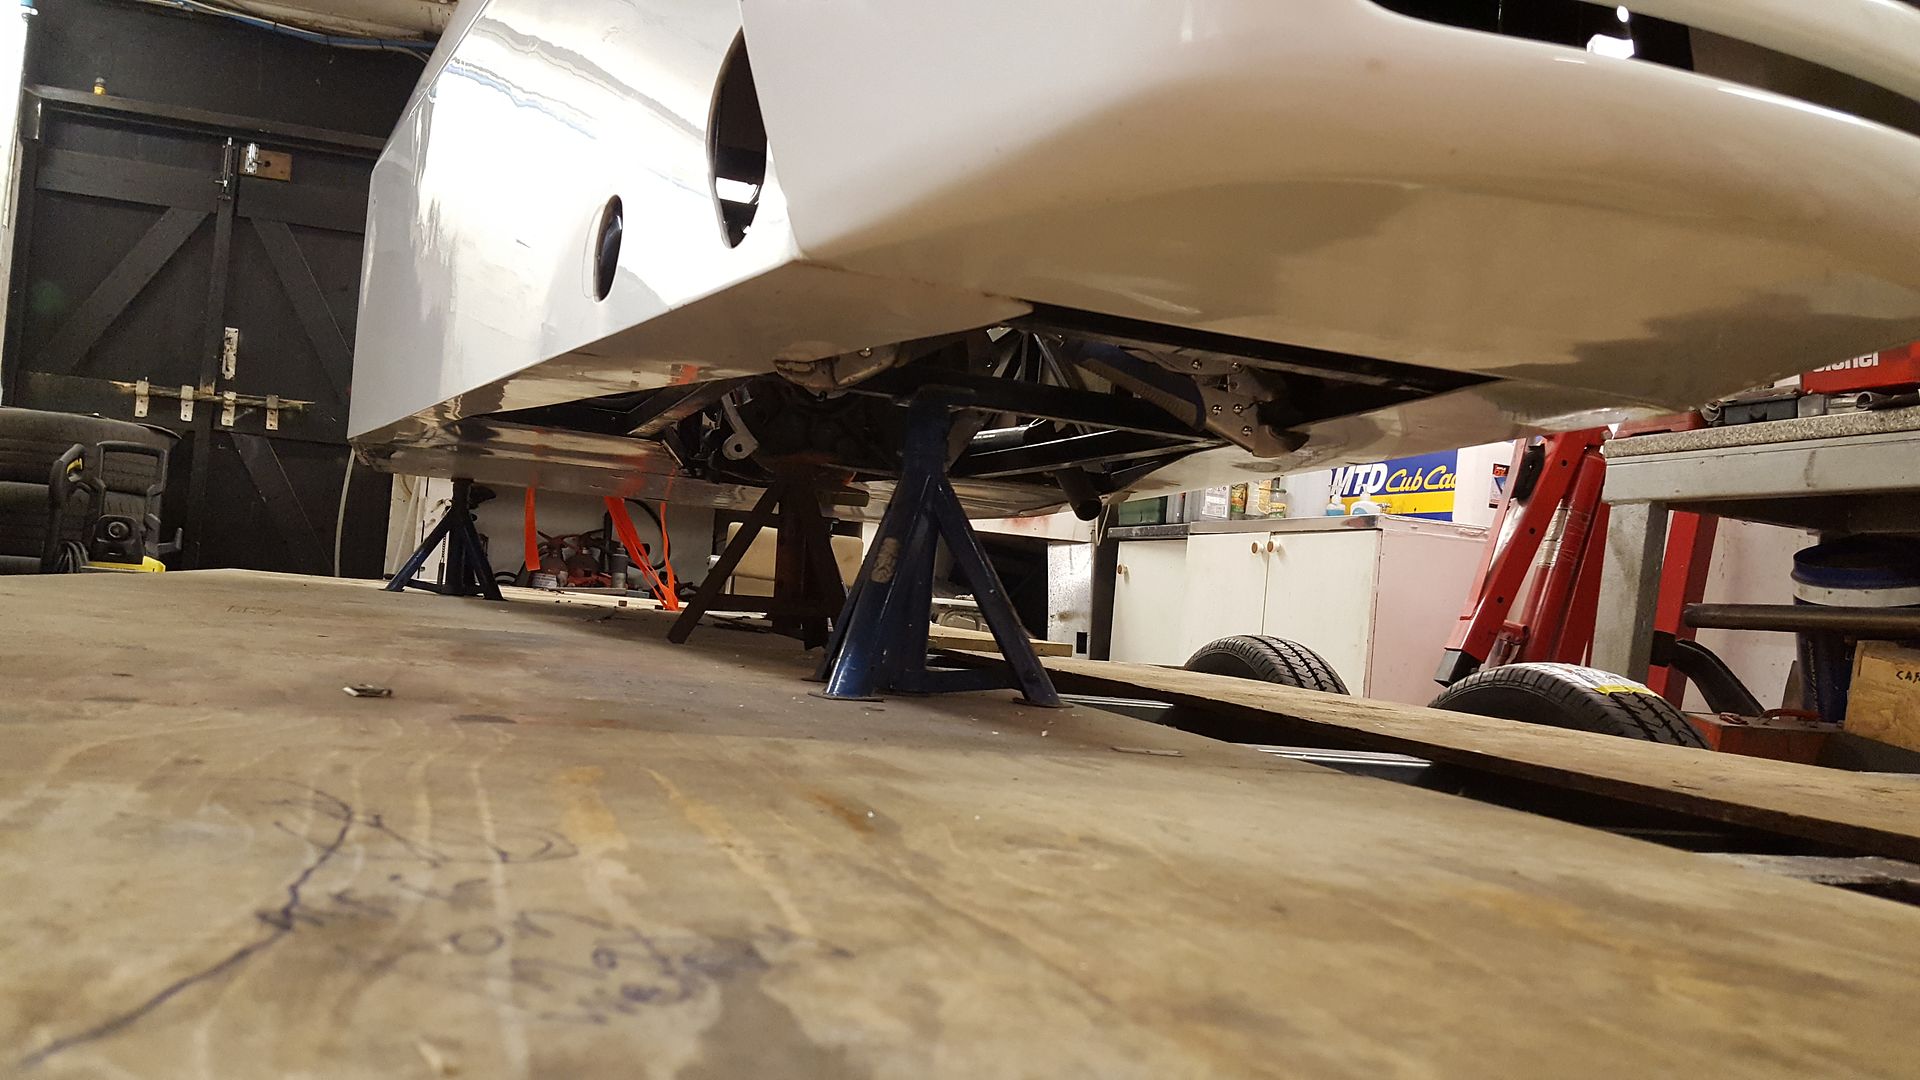
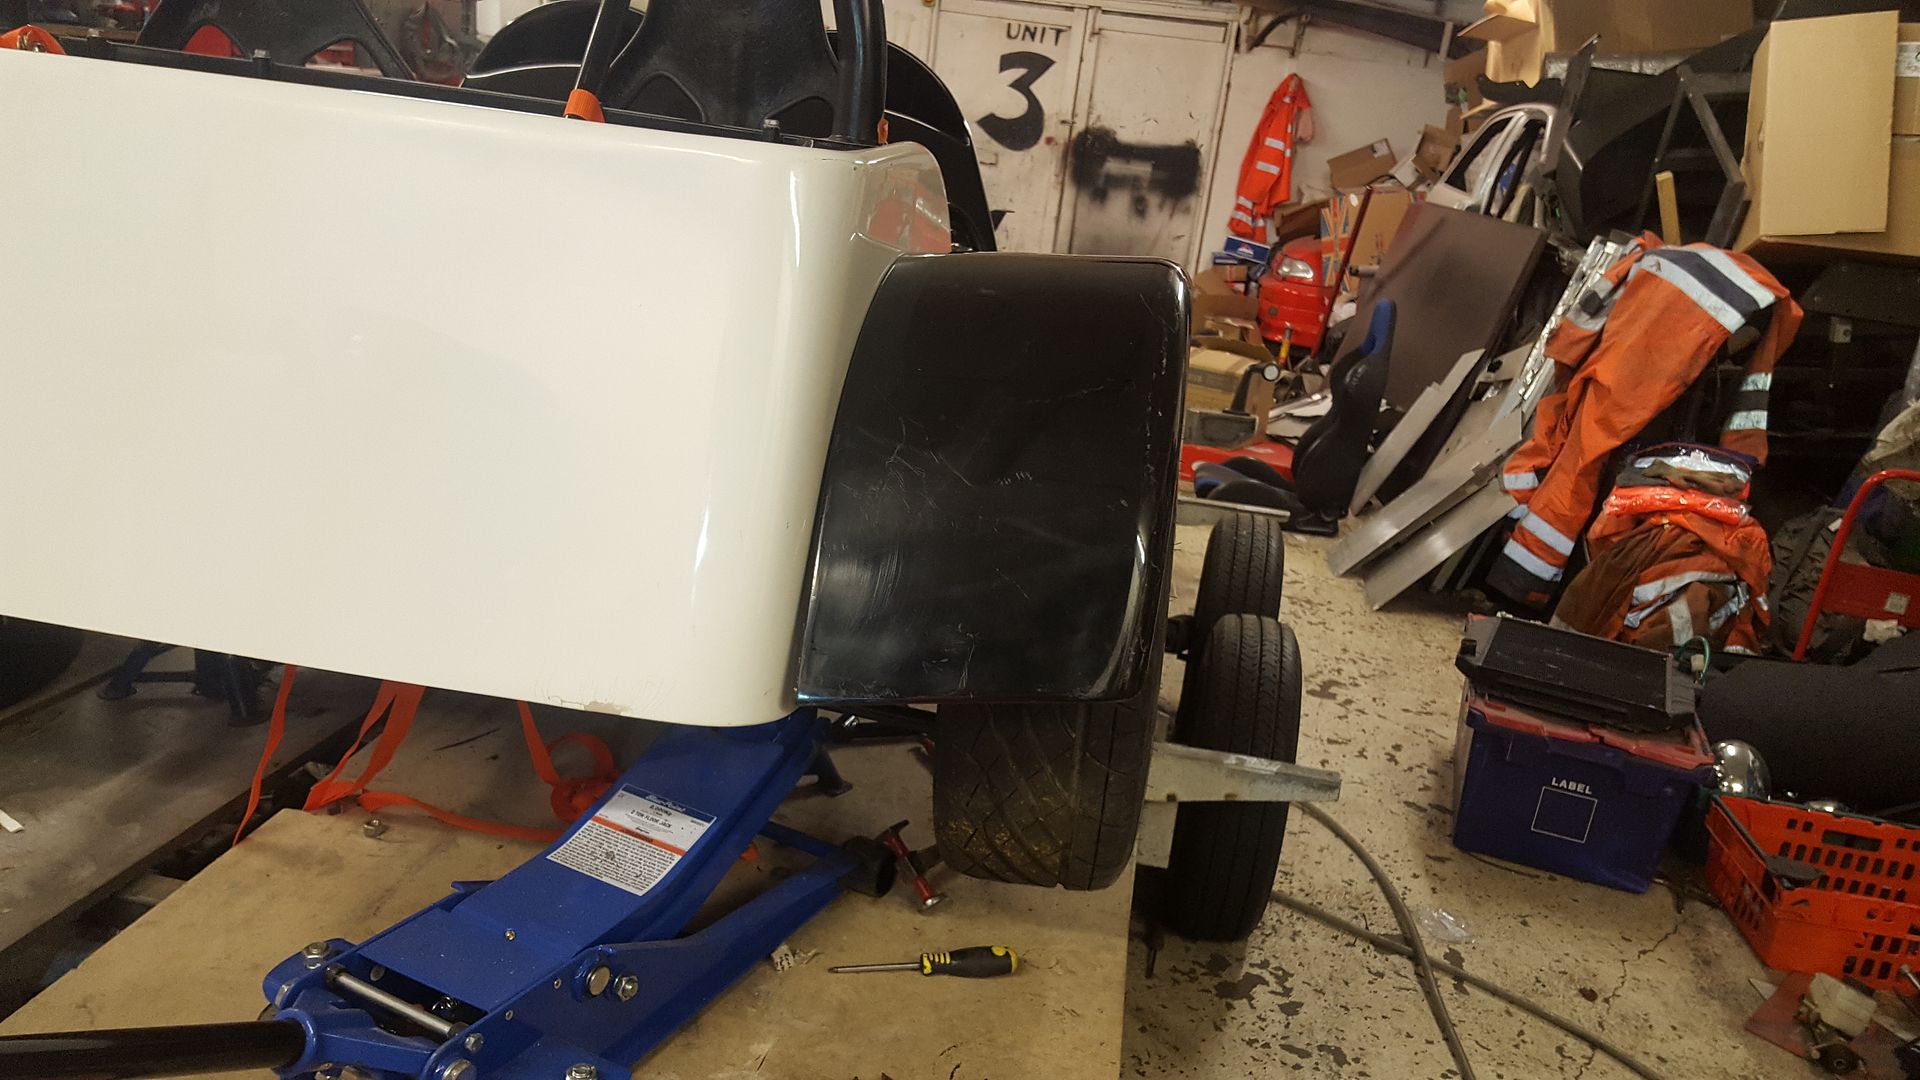
and the it hangs down a few inches under the floor too which i knew it was going to
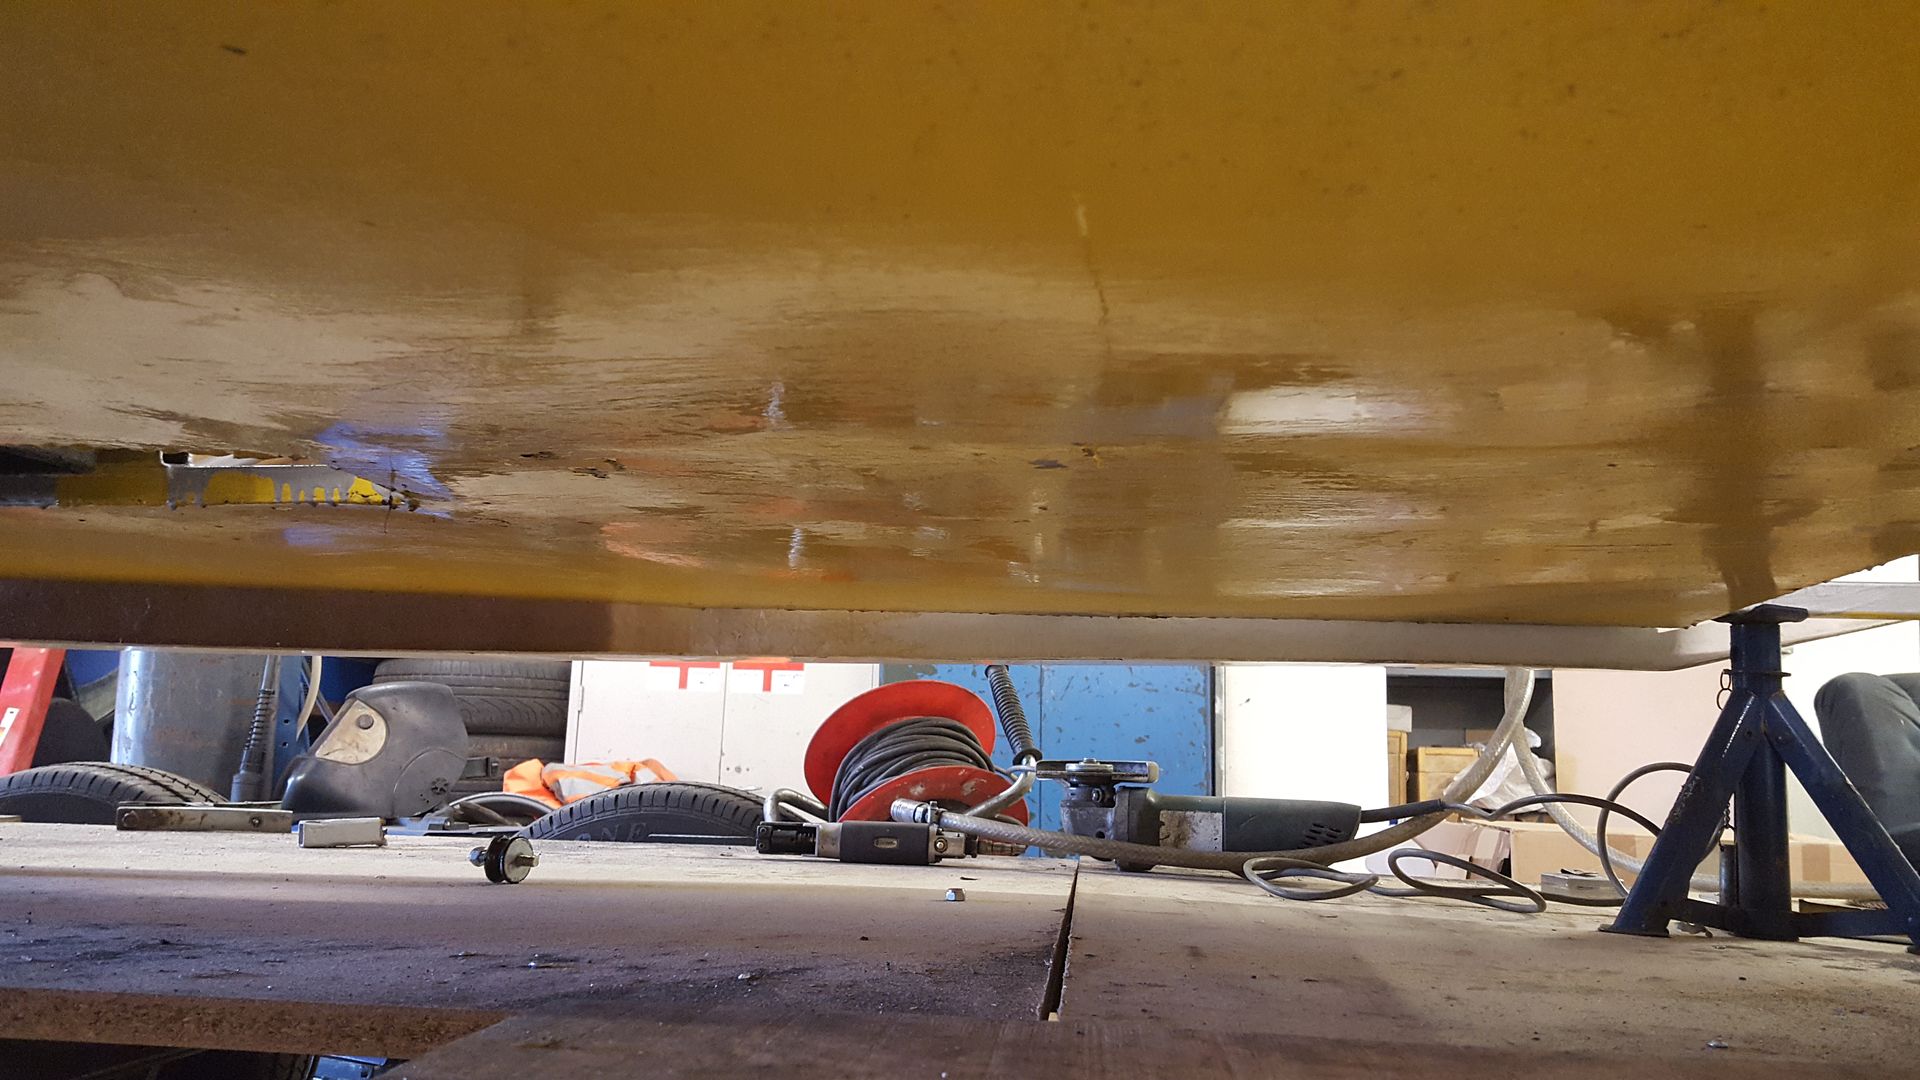
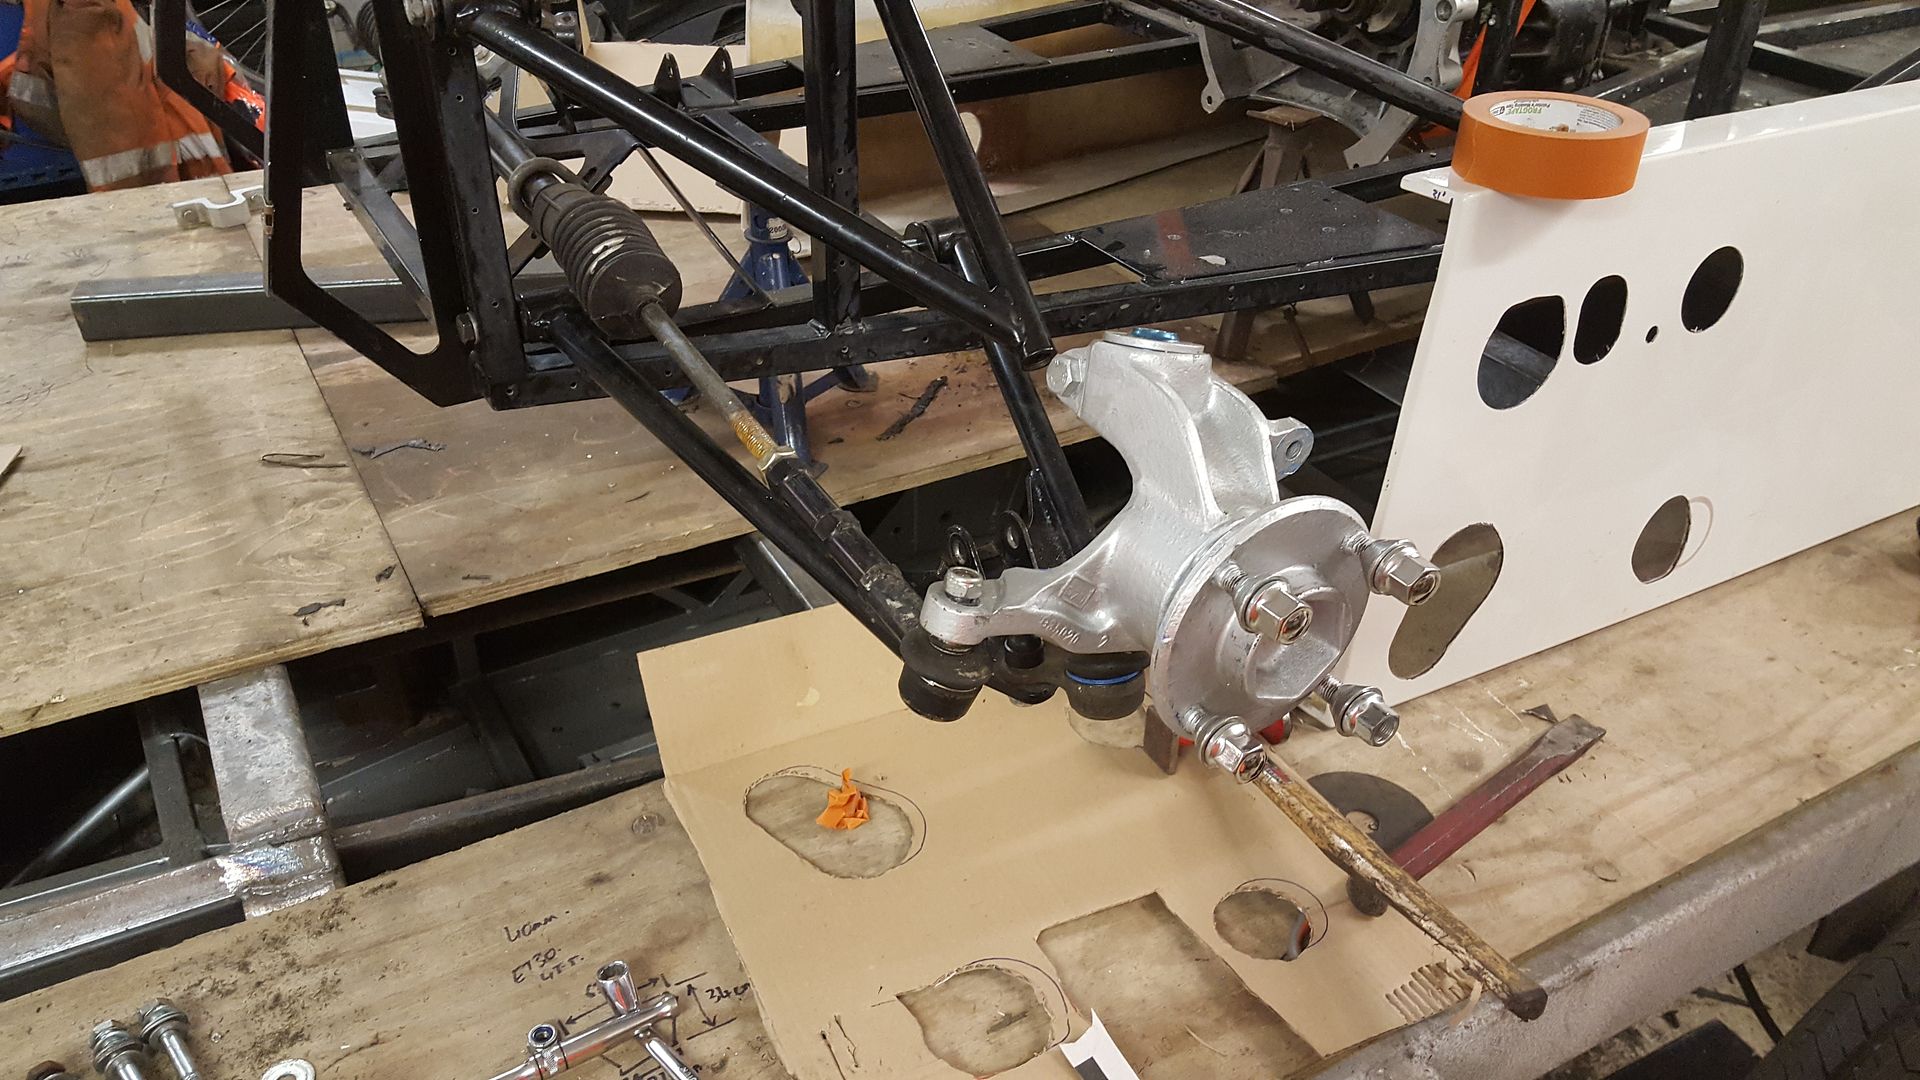
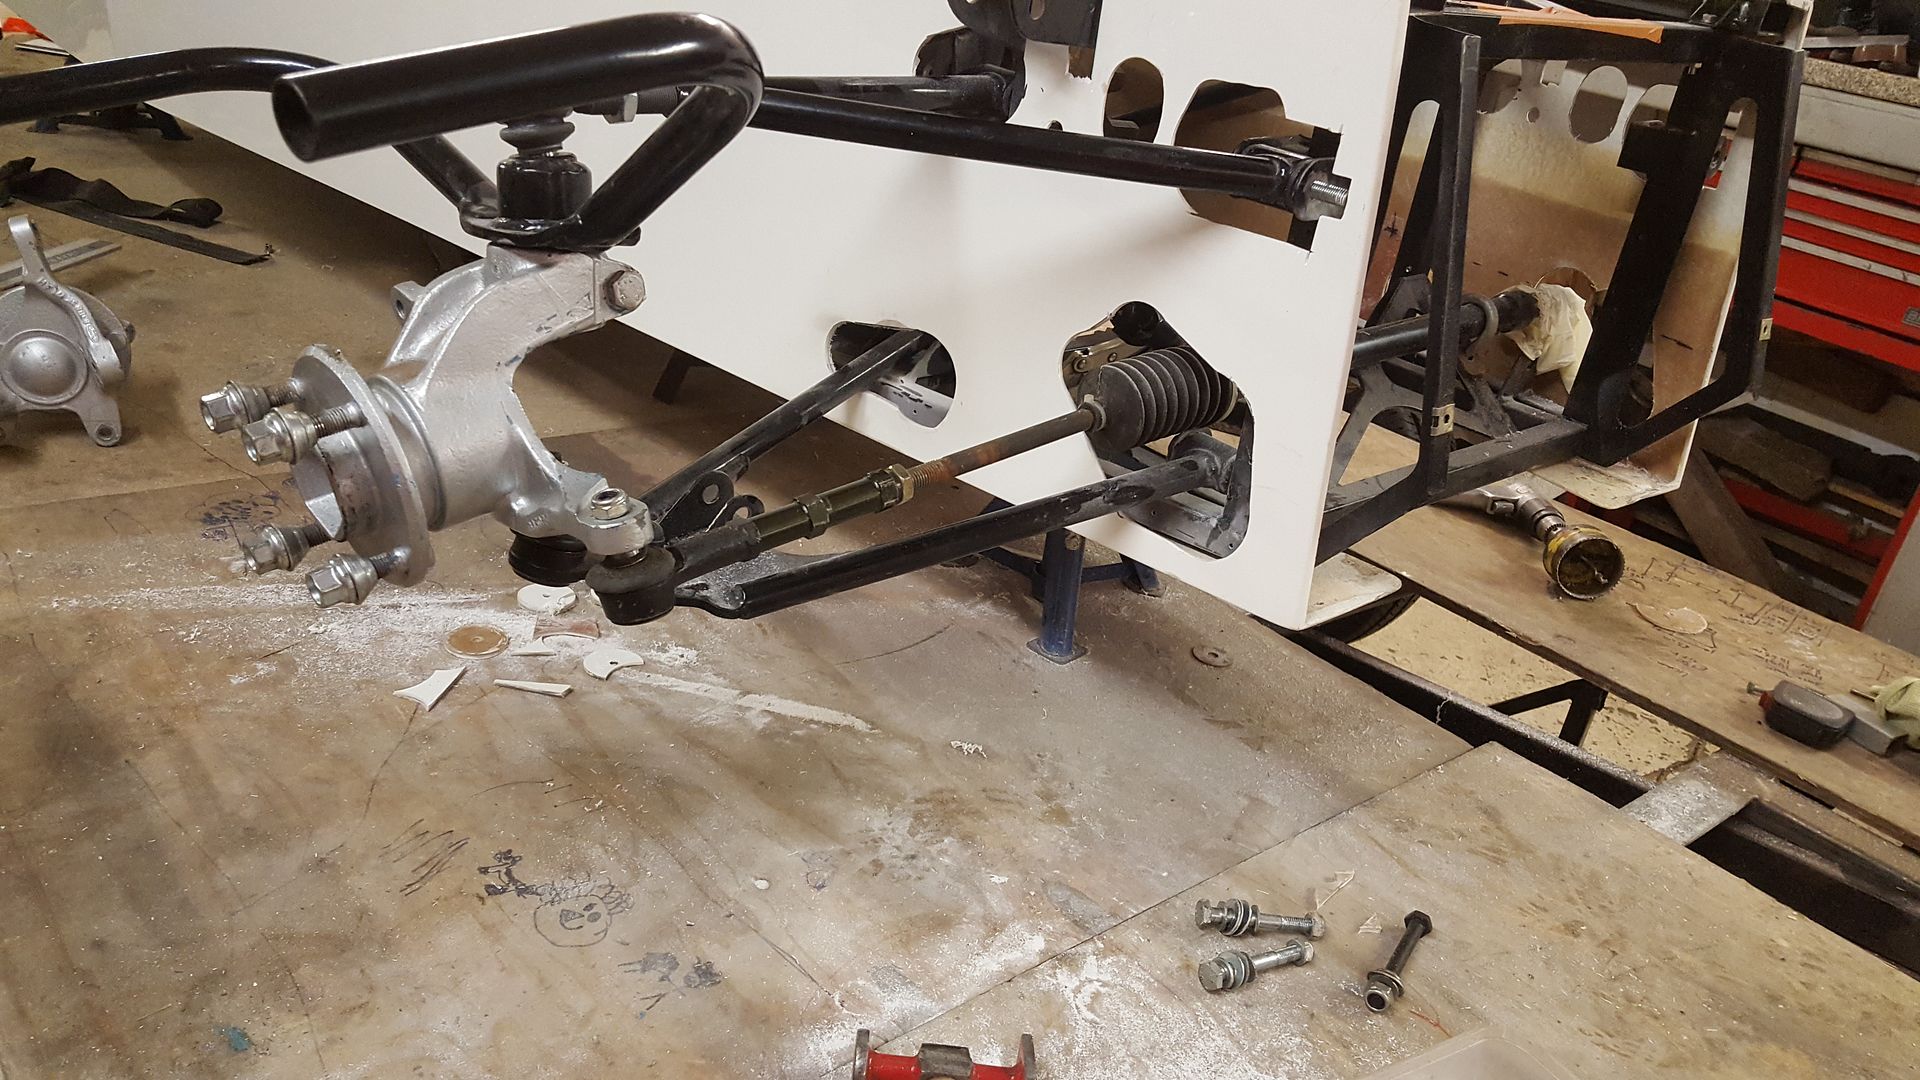
it fouled the front suspension as the holes dont line up so the body didnt fit flush to the chassis

I'd already decided with all the problems the book spec locost has with no self centring of the steering due to no castor, and bad bump steer due
to the steering rack being alot wider than the suspenion mounts.
but the locost design with the mk2 escort rack is miles off
The 'mk2 locost' the haynes roadster sorted out alot of problems at the front with steering bumpsteer and castor, so got book 2
So i am going to be basing all my front suspension on the Haynes Roadster. it uses the sierra front hubs and mk2 rack all of which i have. the whole
width of the body of the Roadster its a lot wider than the Locost so if i build a front subframe to weld on the front of my chassis it wont fit in the
MNR nosecone. i have it worked out don't panic, it just doesn't come across very well :lol: wait and see how its done, bur basically it will
be using book spec front Haynes Roadster suspension and steering.
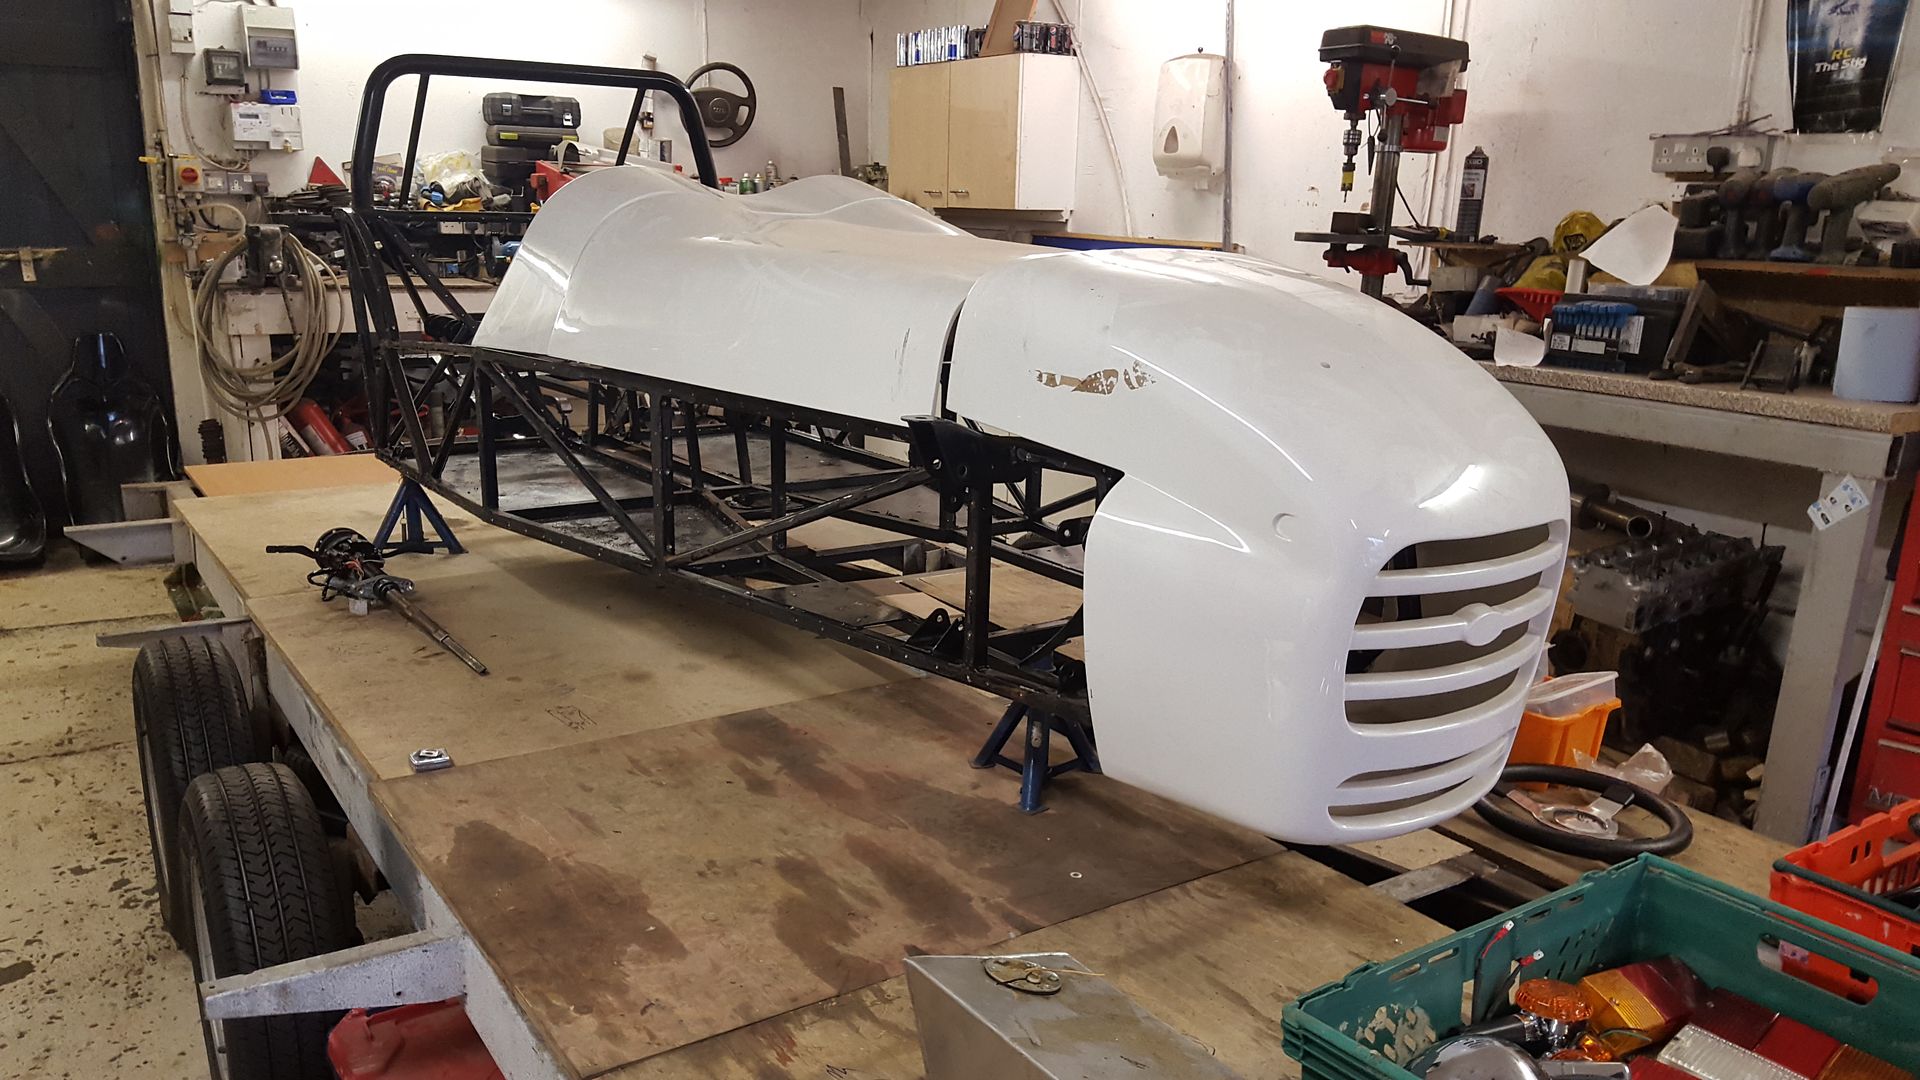
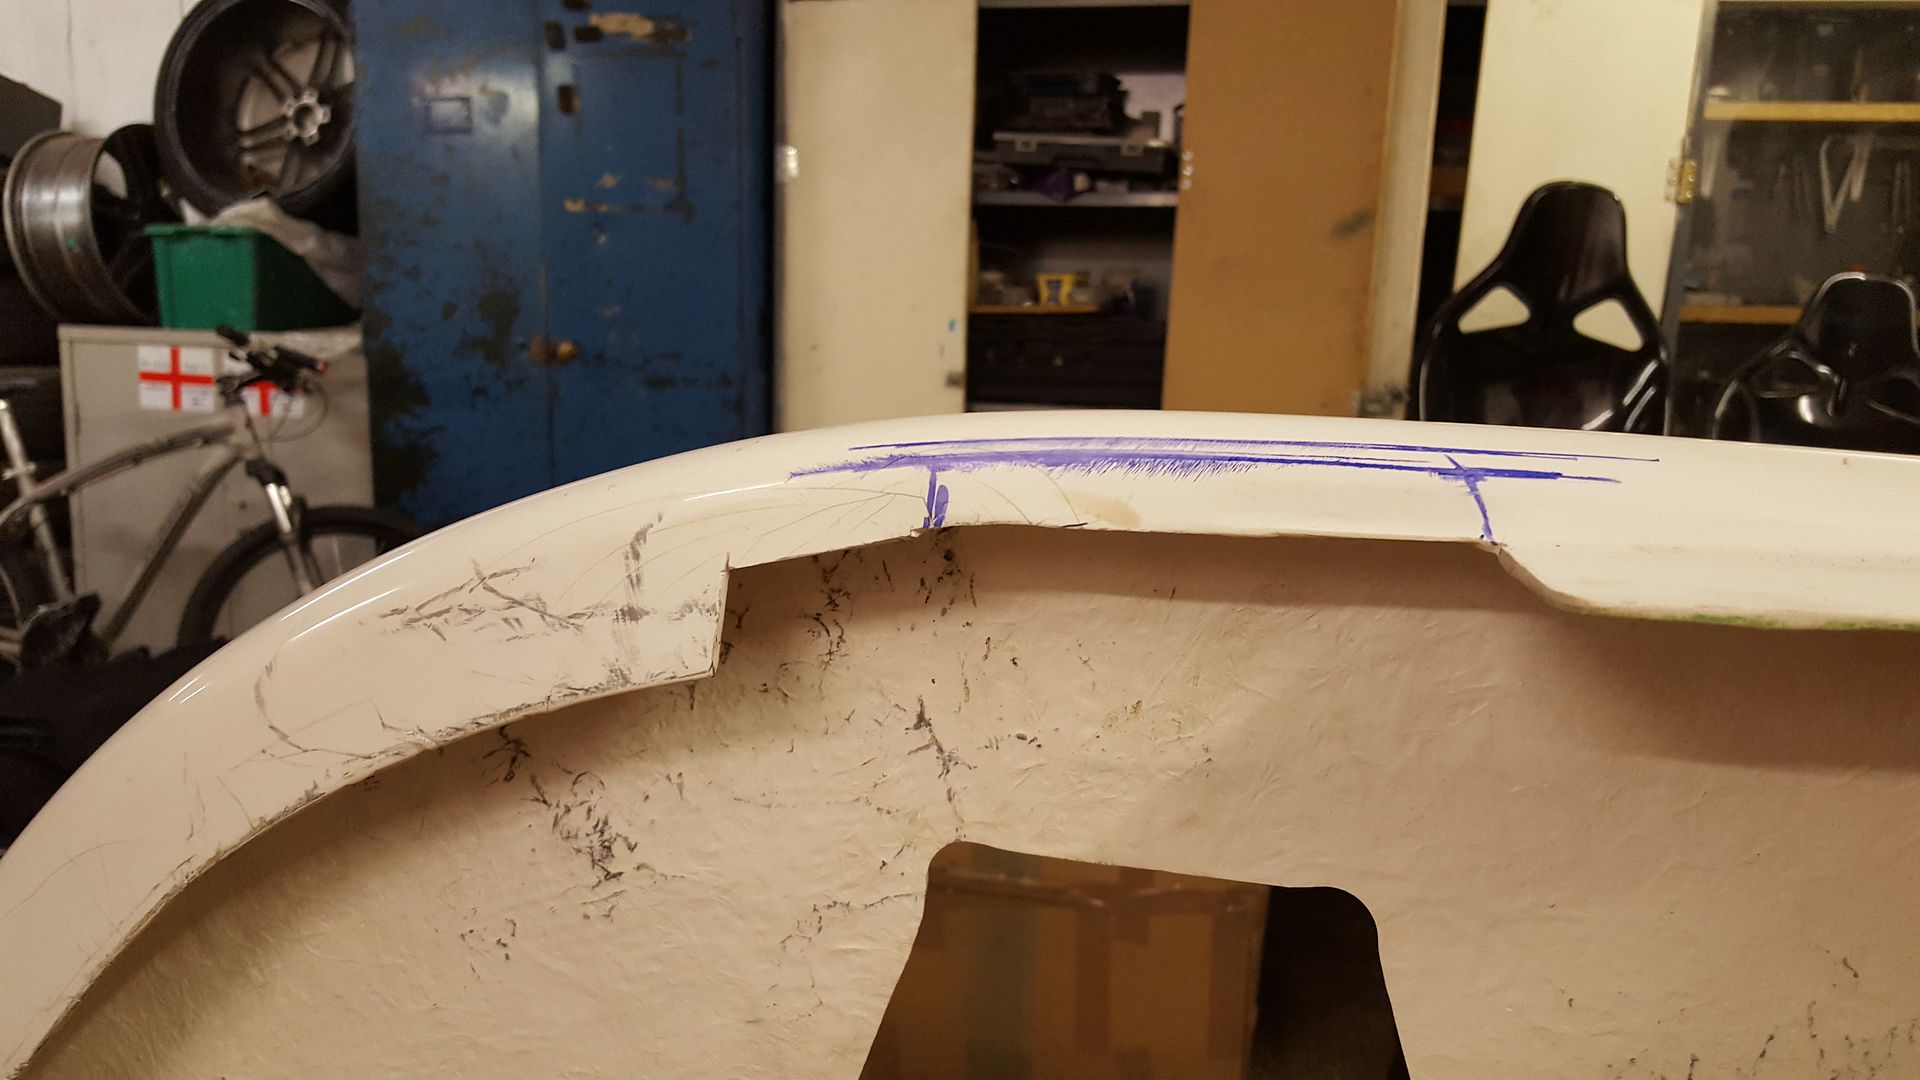
so for now i can loose the original Locost front panel to fit the MNR body
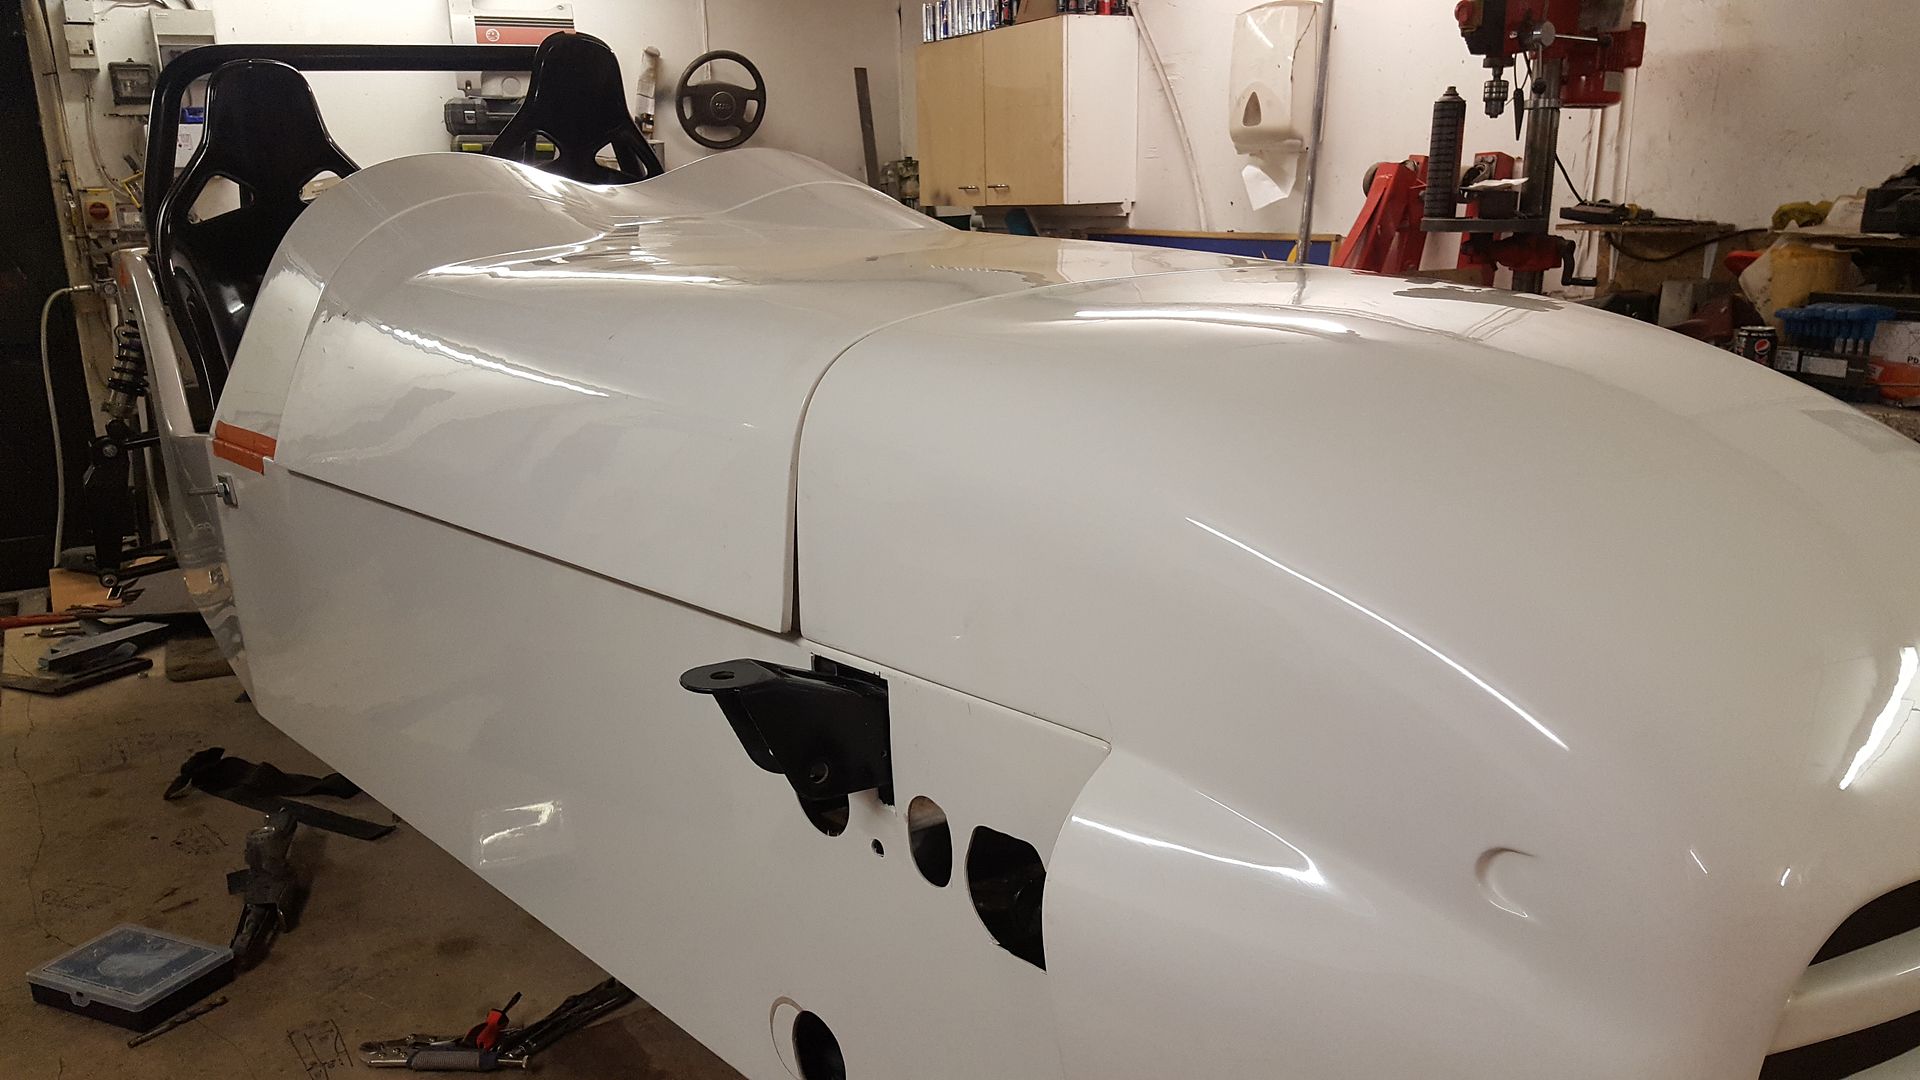
and the MNR body fits! forgive the flappy bonnet, it will fit spot on when clamped down with clips. over all i am very happy!
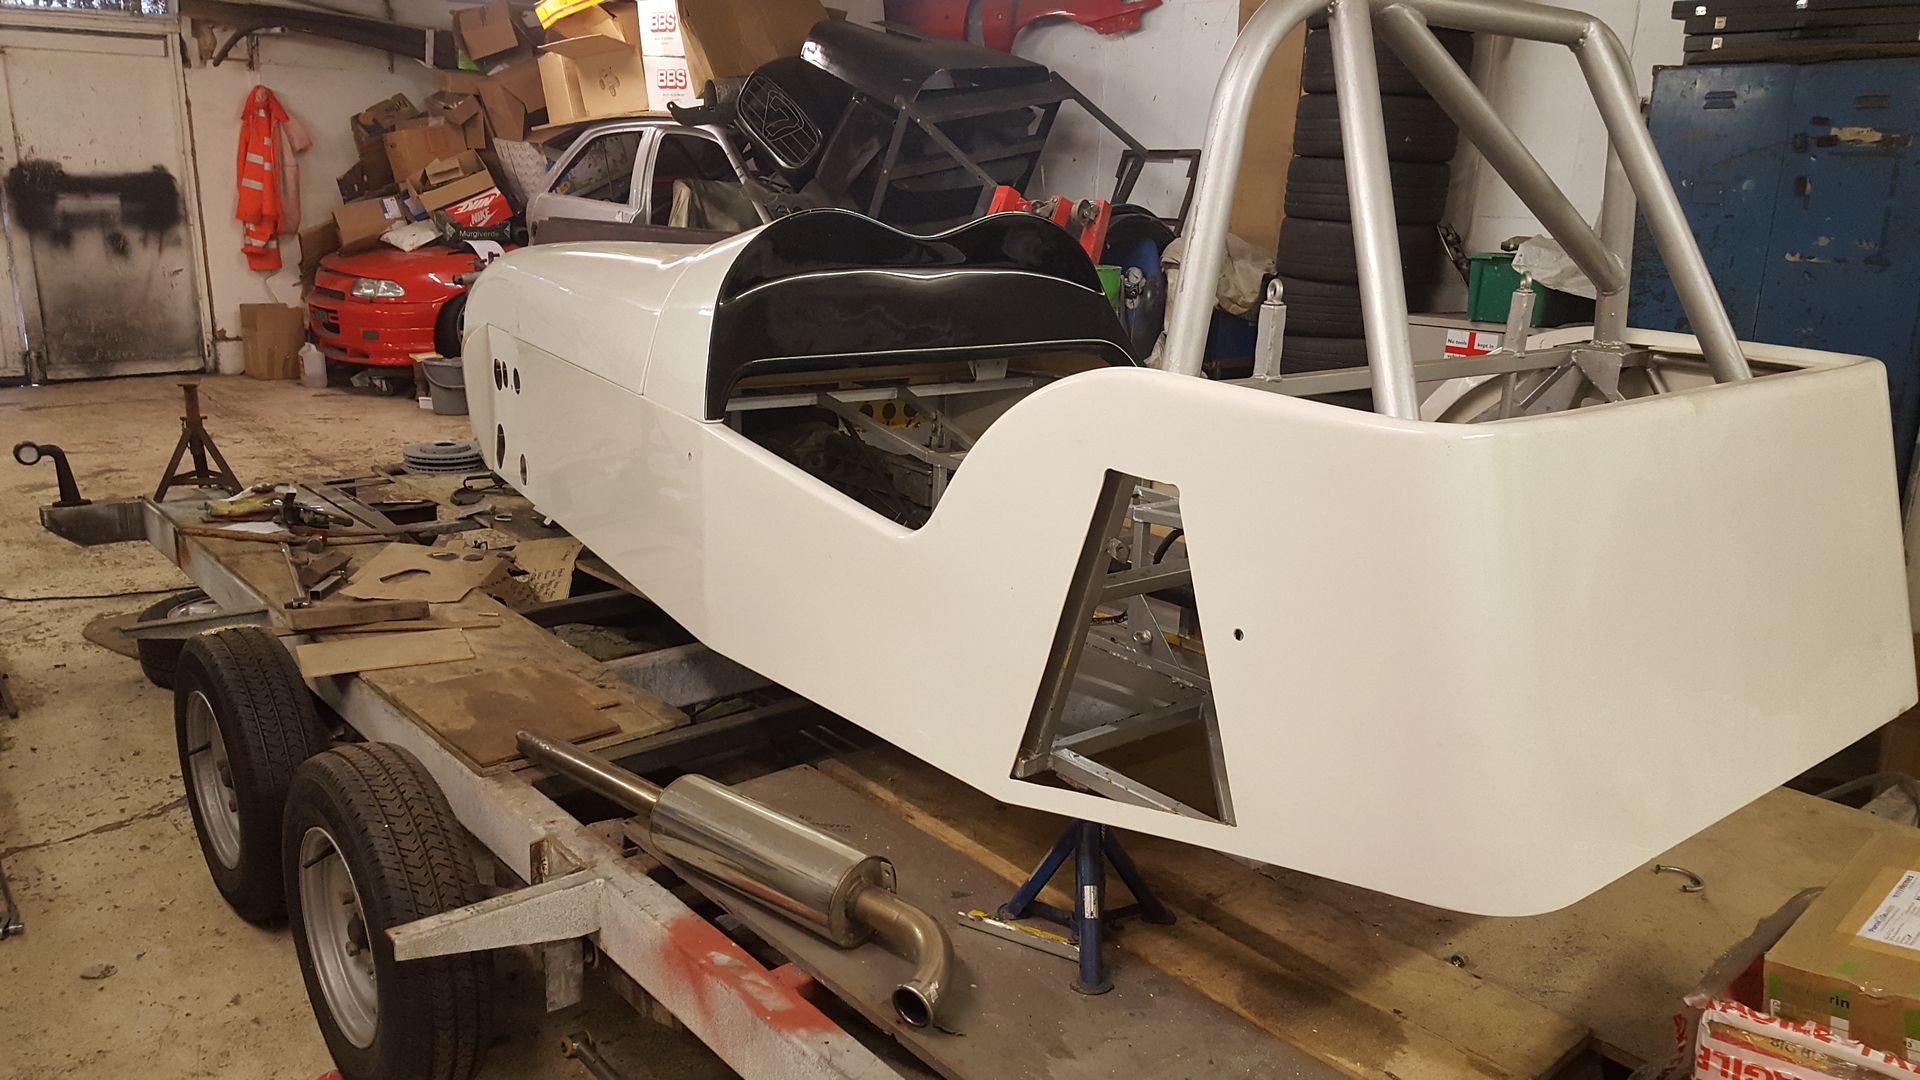
with that question answered, yes the body will fit, i moved back onto the engine
i really want it to fit under the bodywork, i really dont want to put a bulge in the top as i think it will ruin the double bouble sleekness that
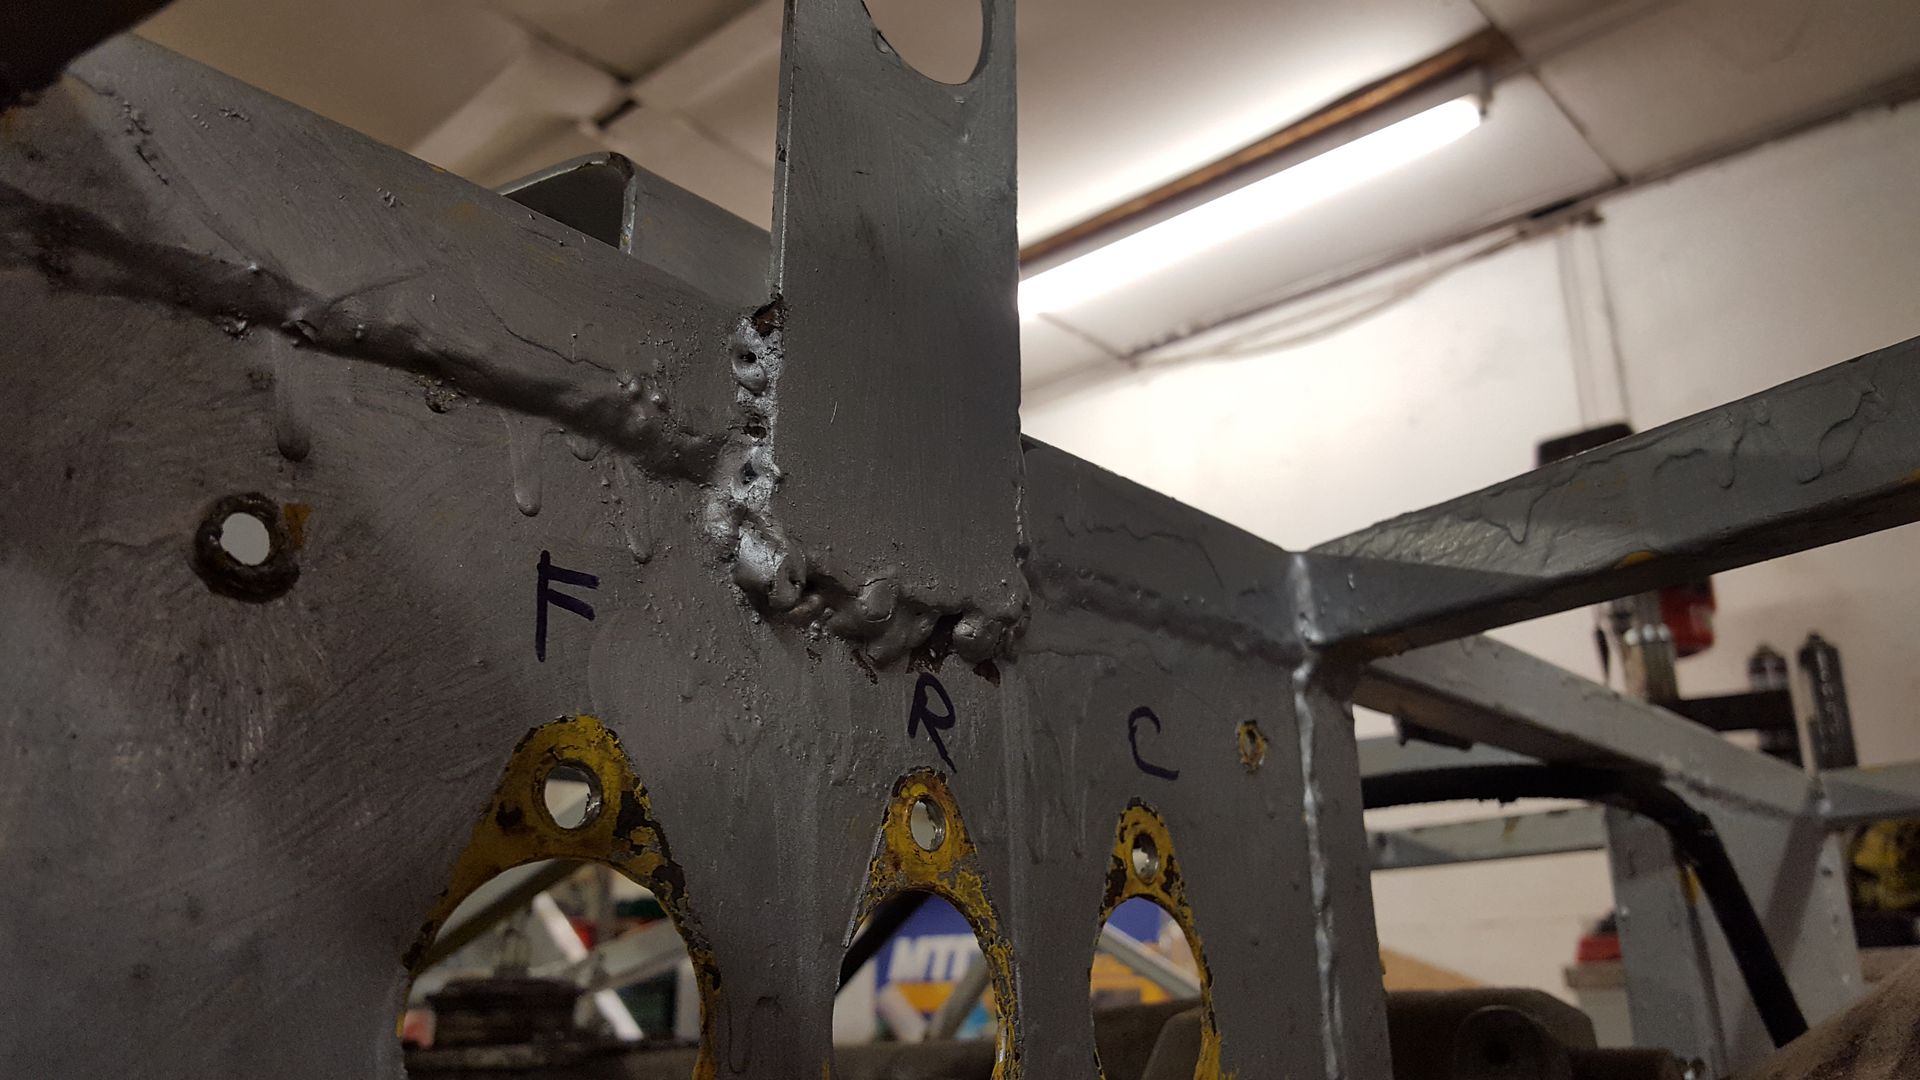
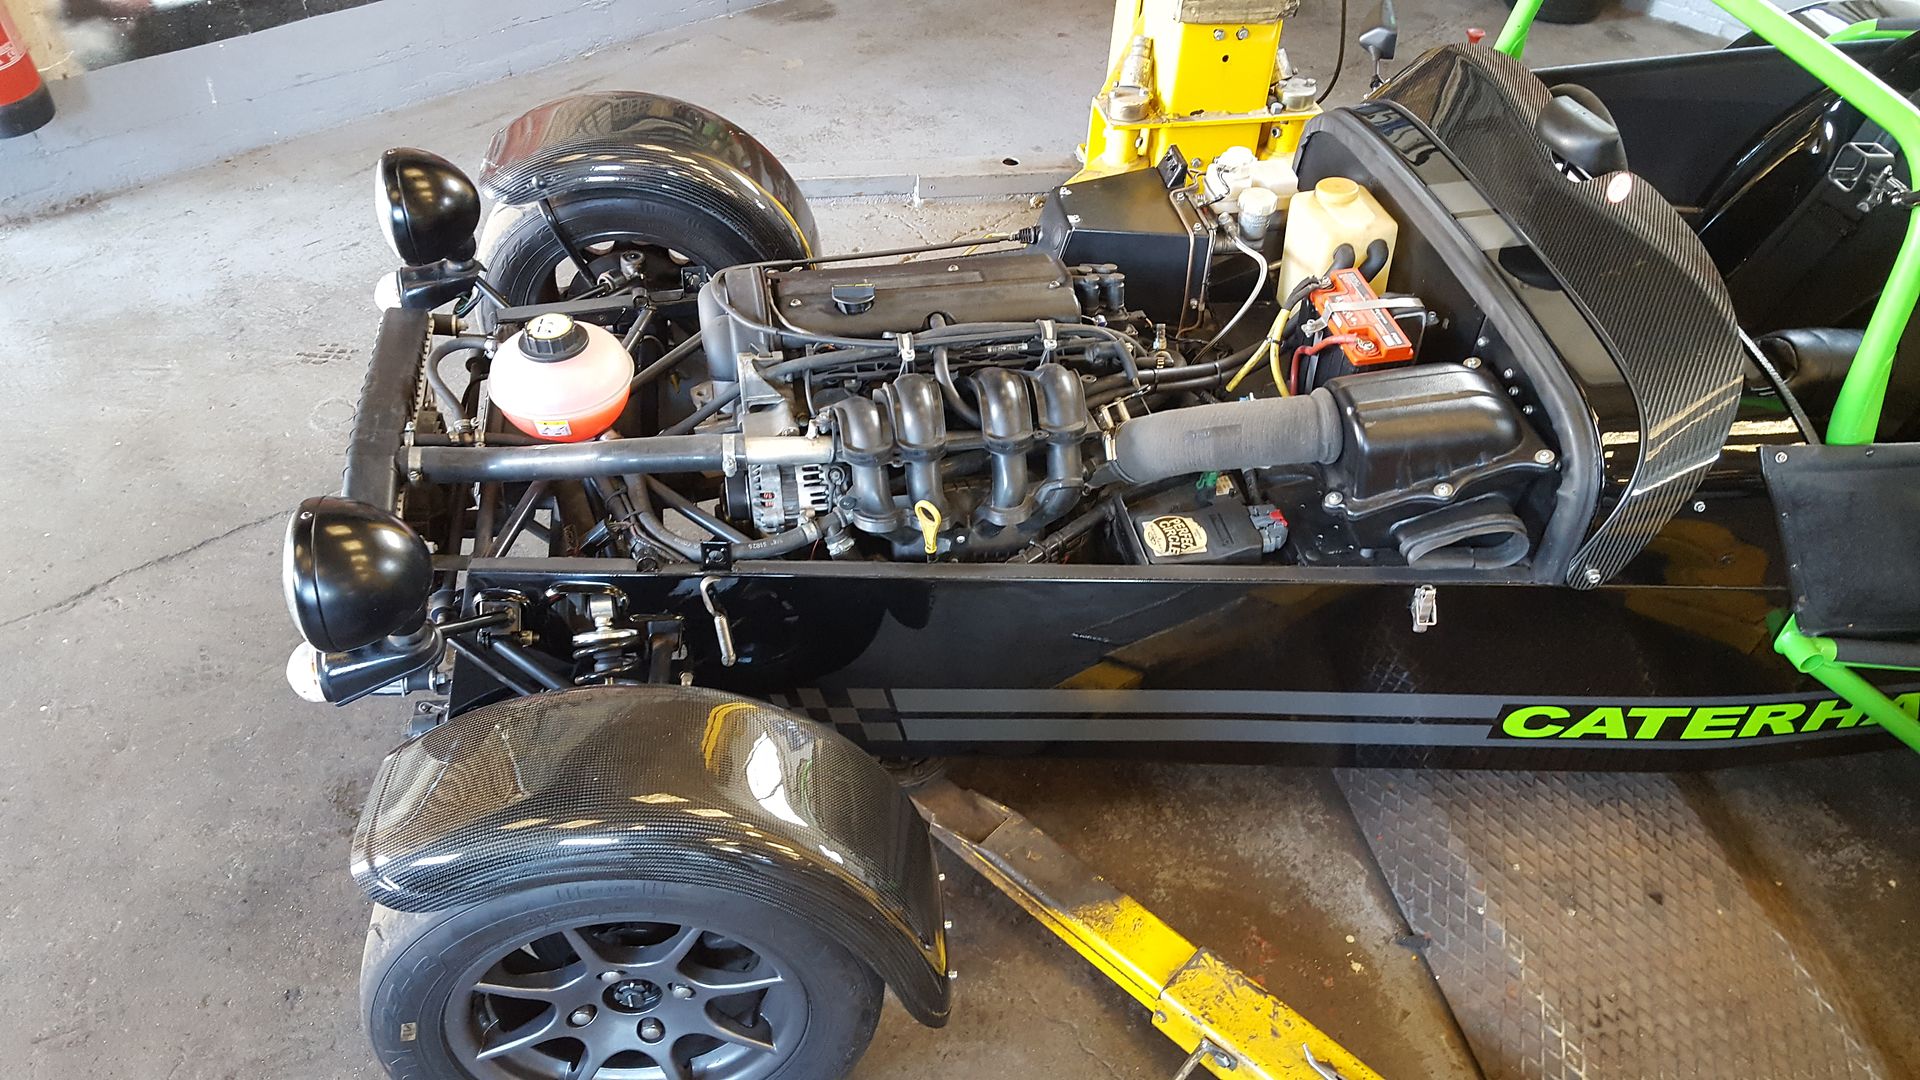
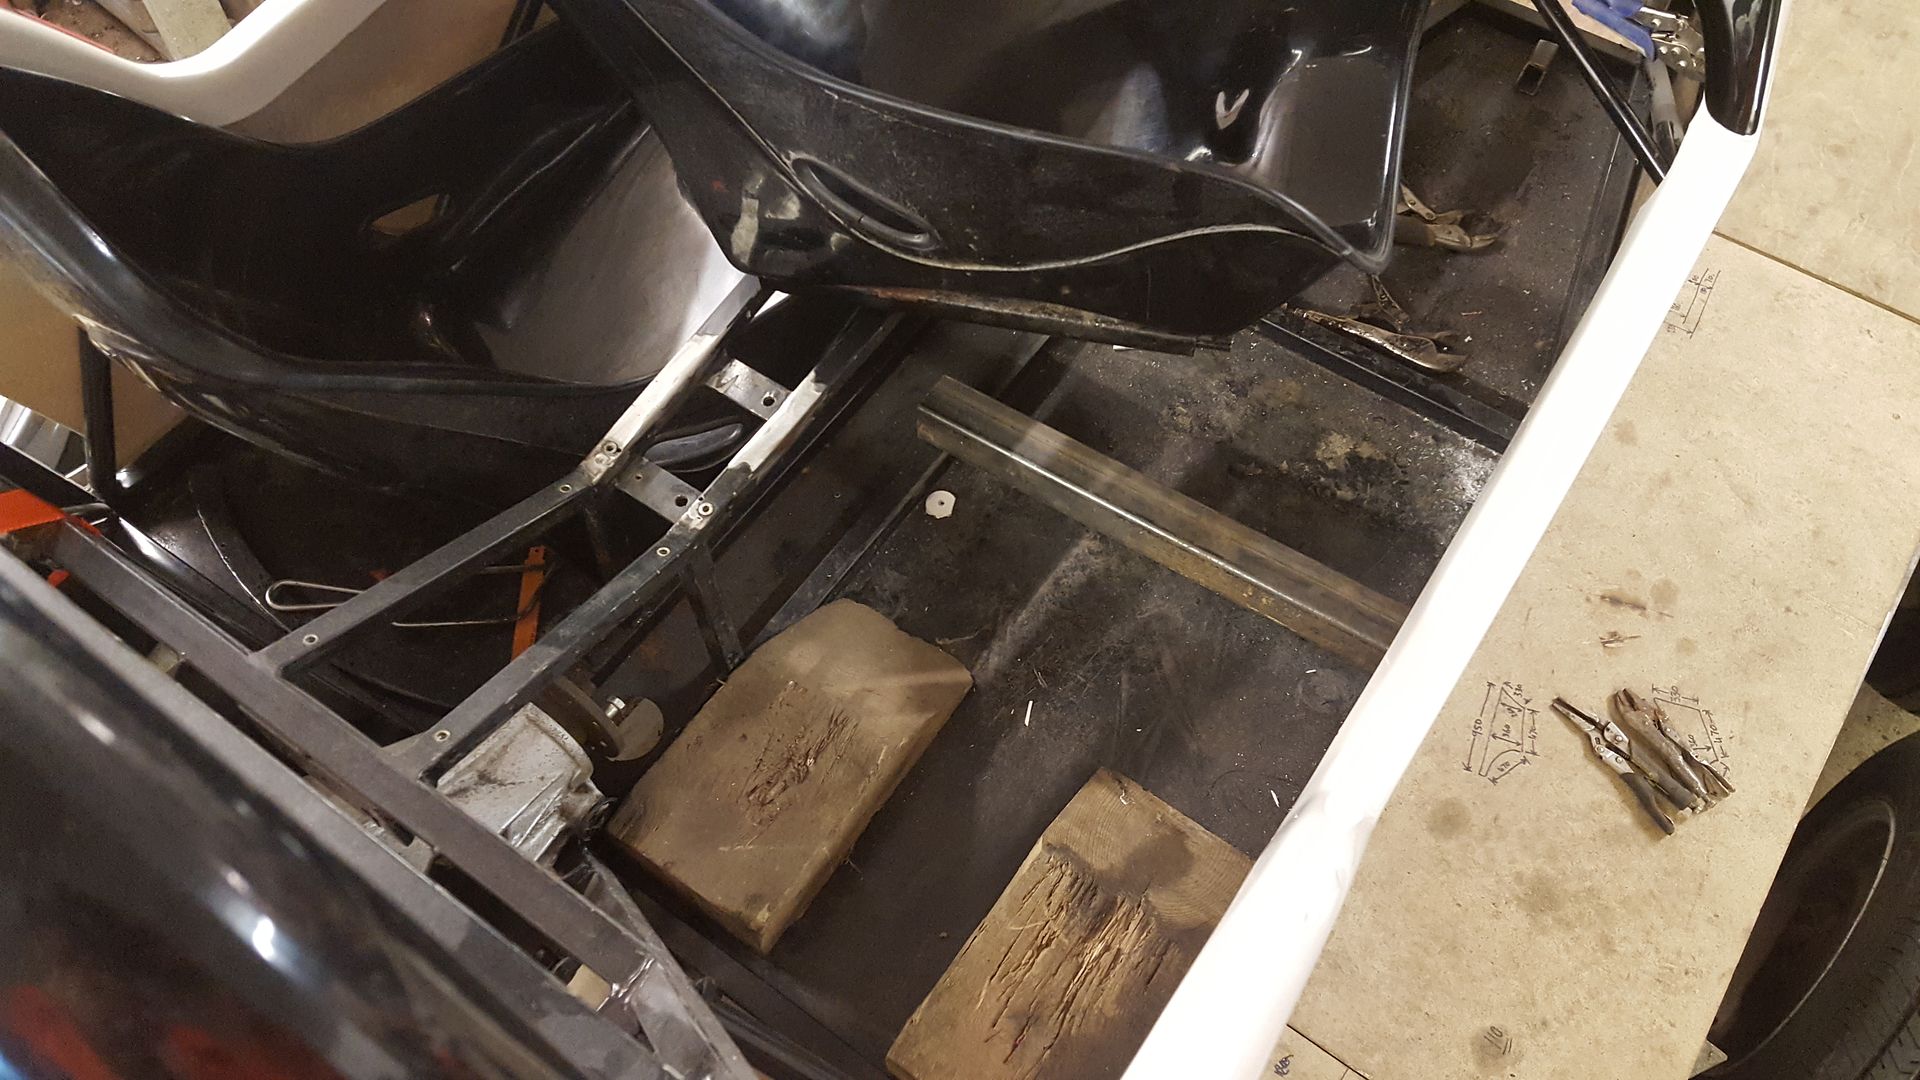
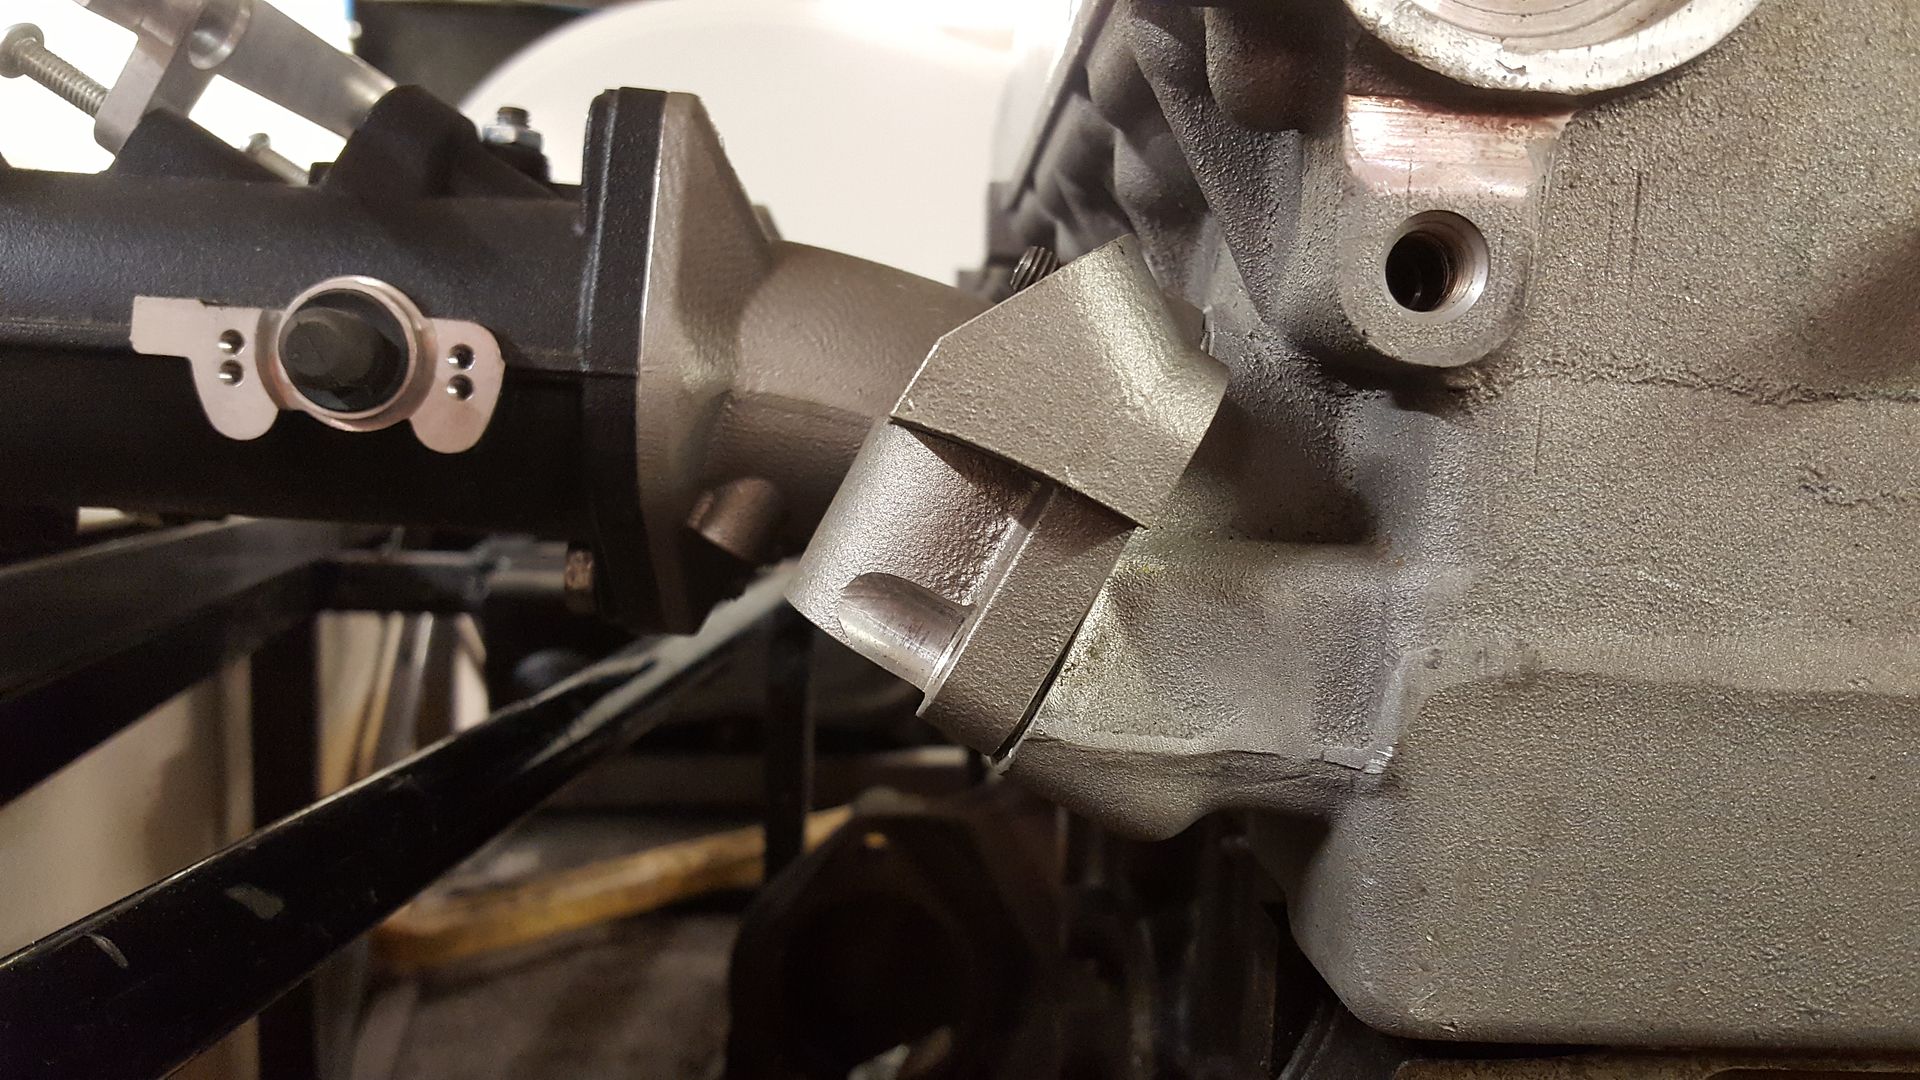
makes it look so different to the caterhams. but i have no datums of where to actually put the engine??
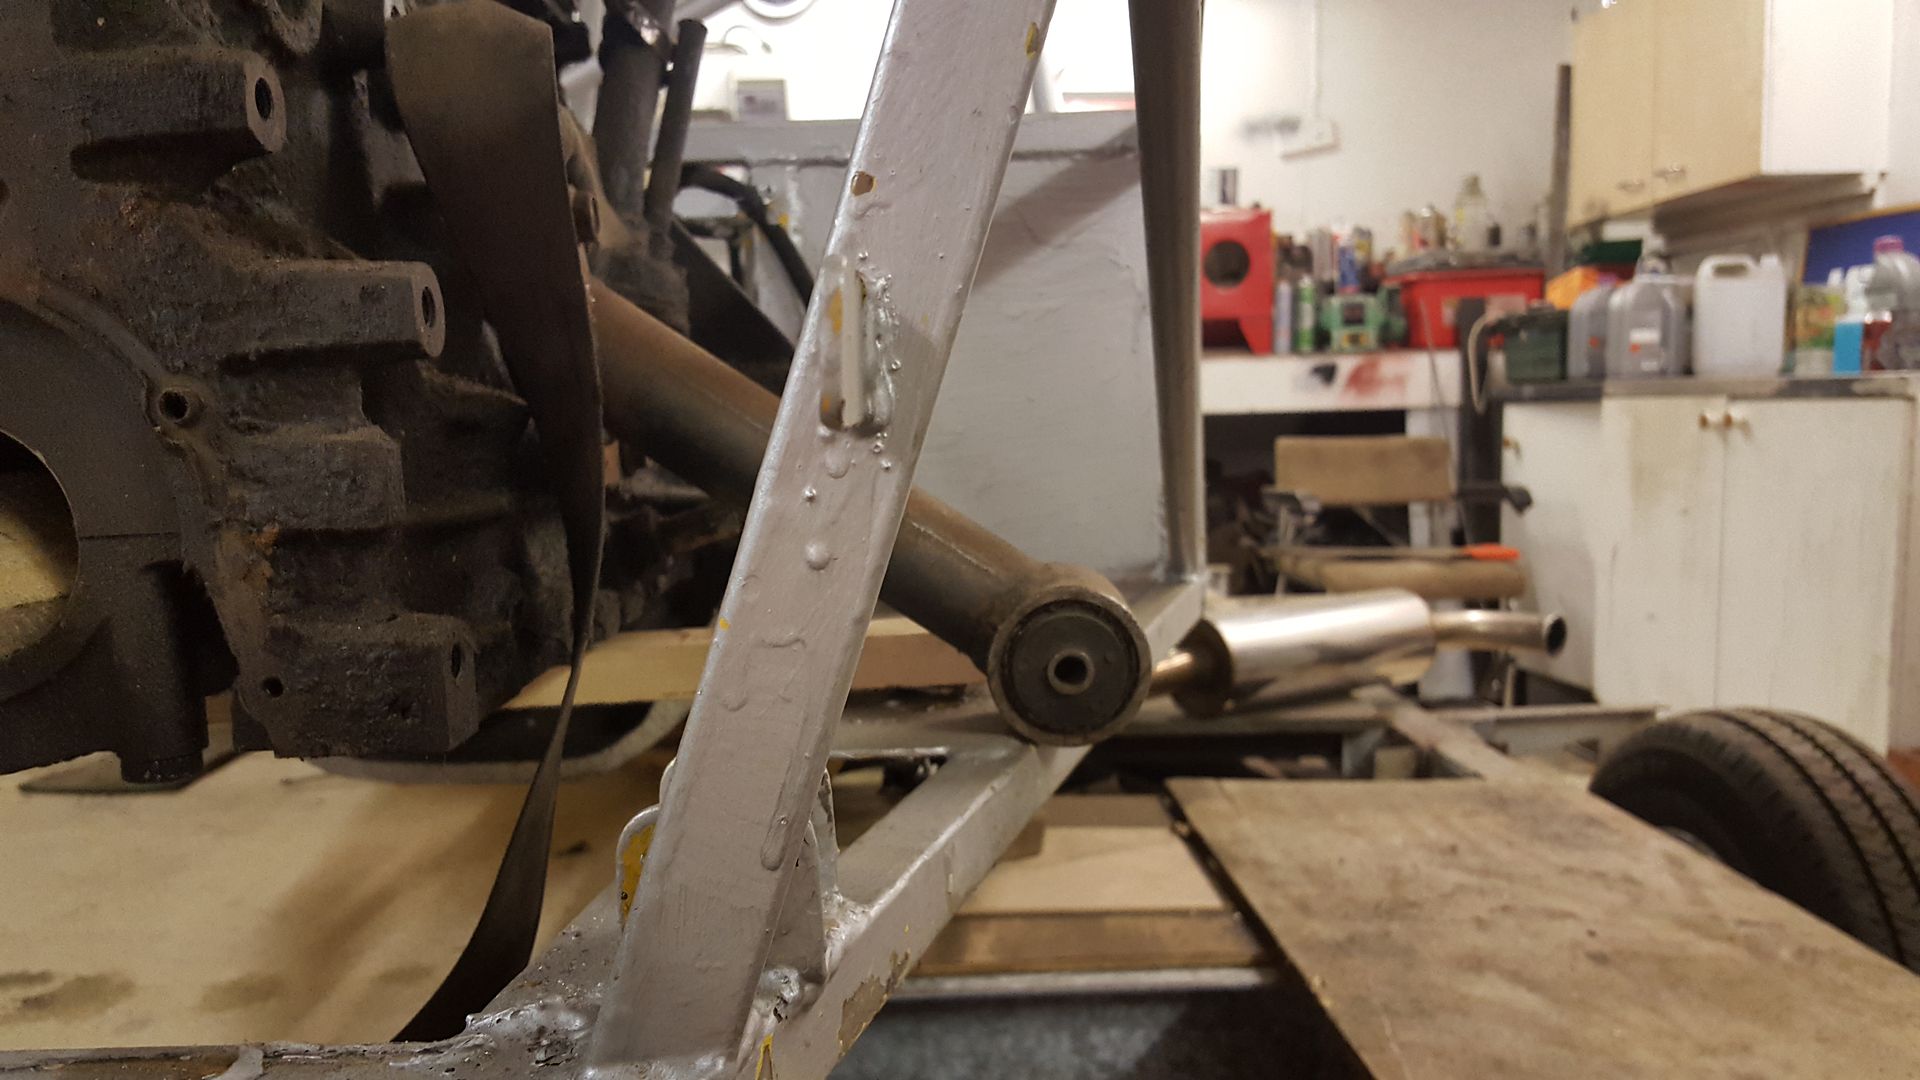
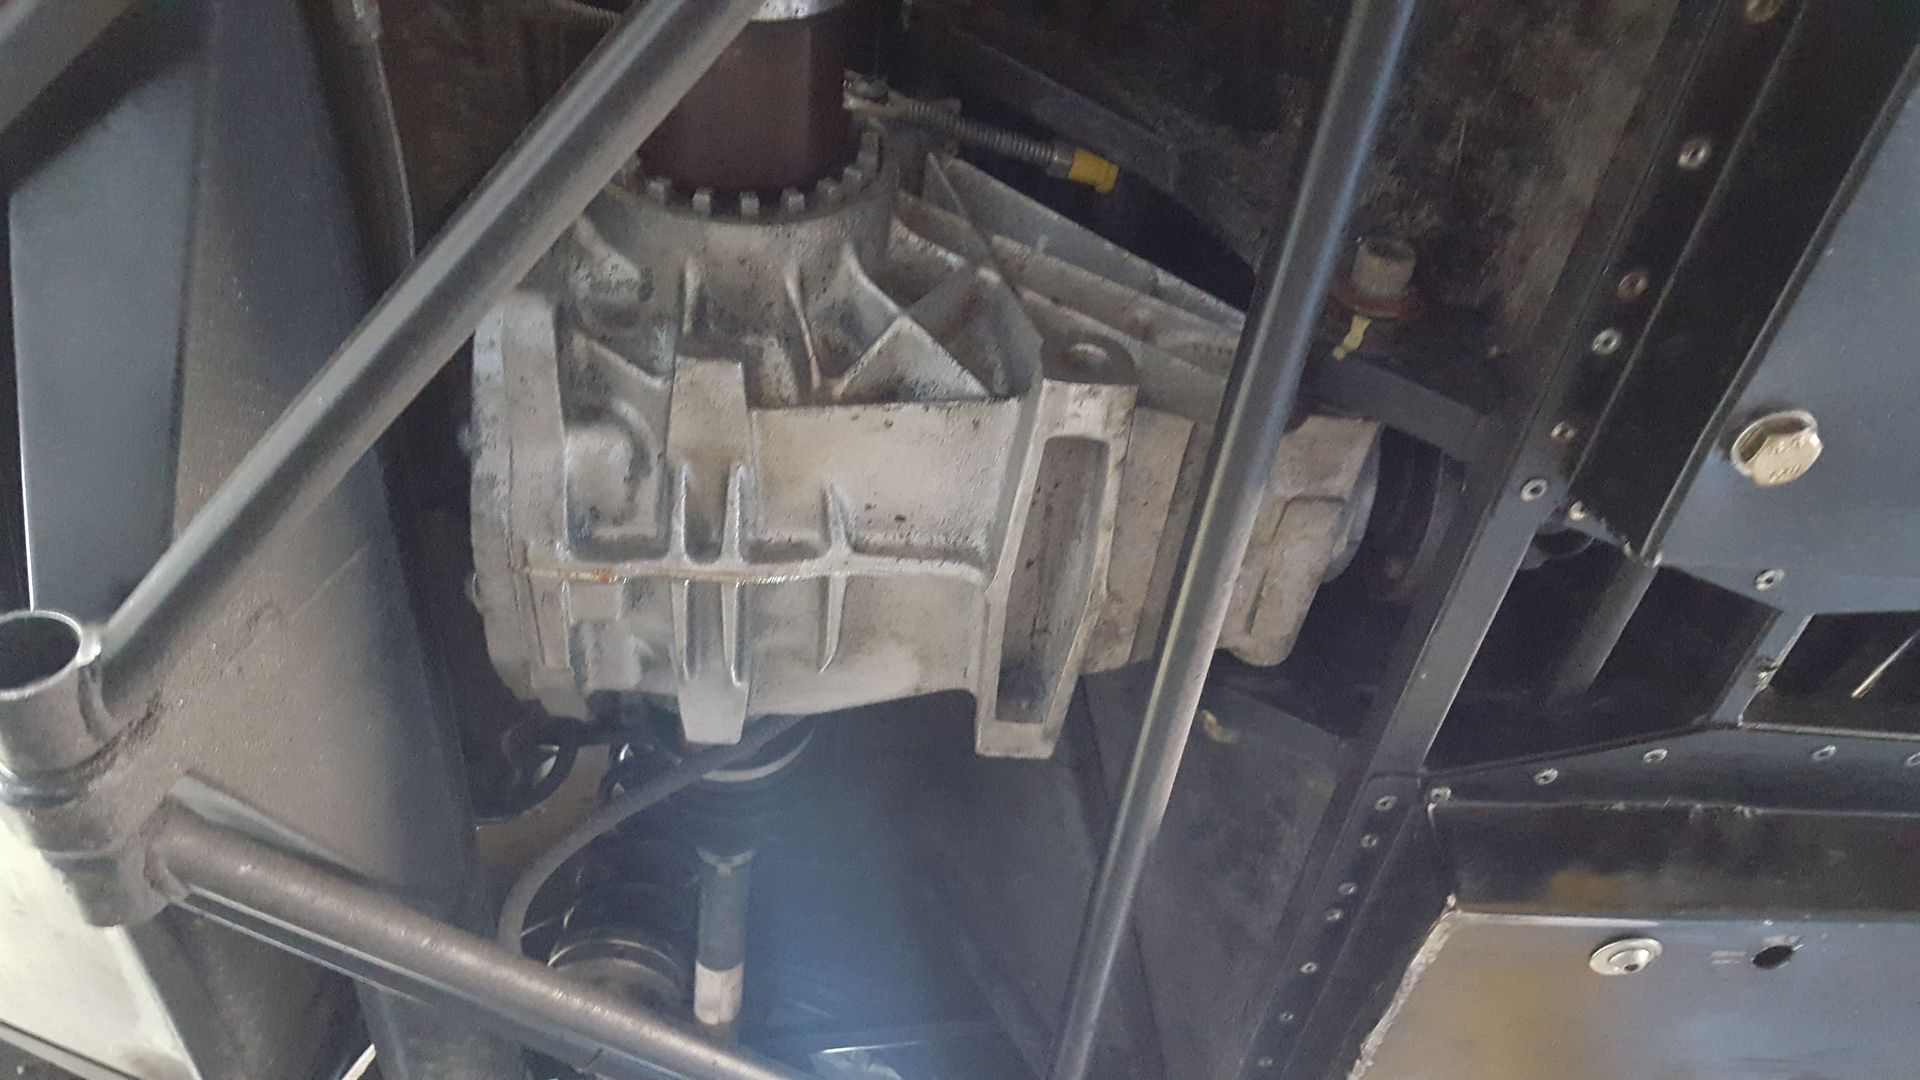
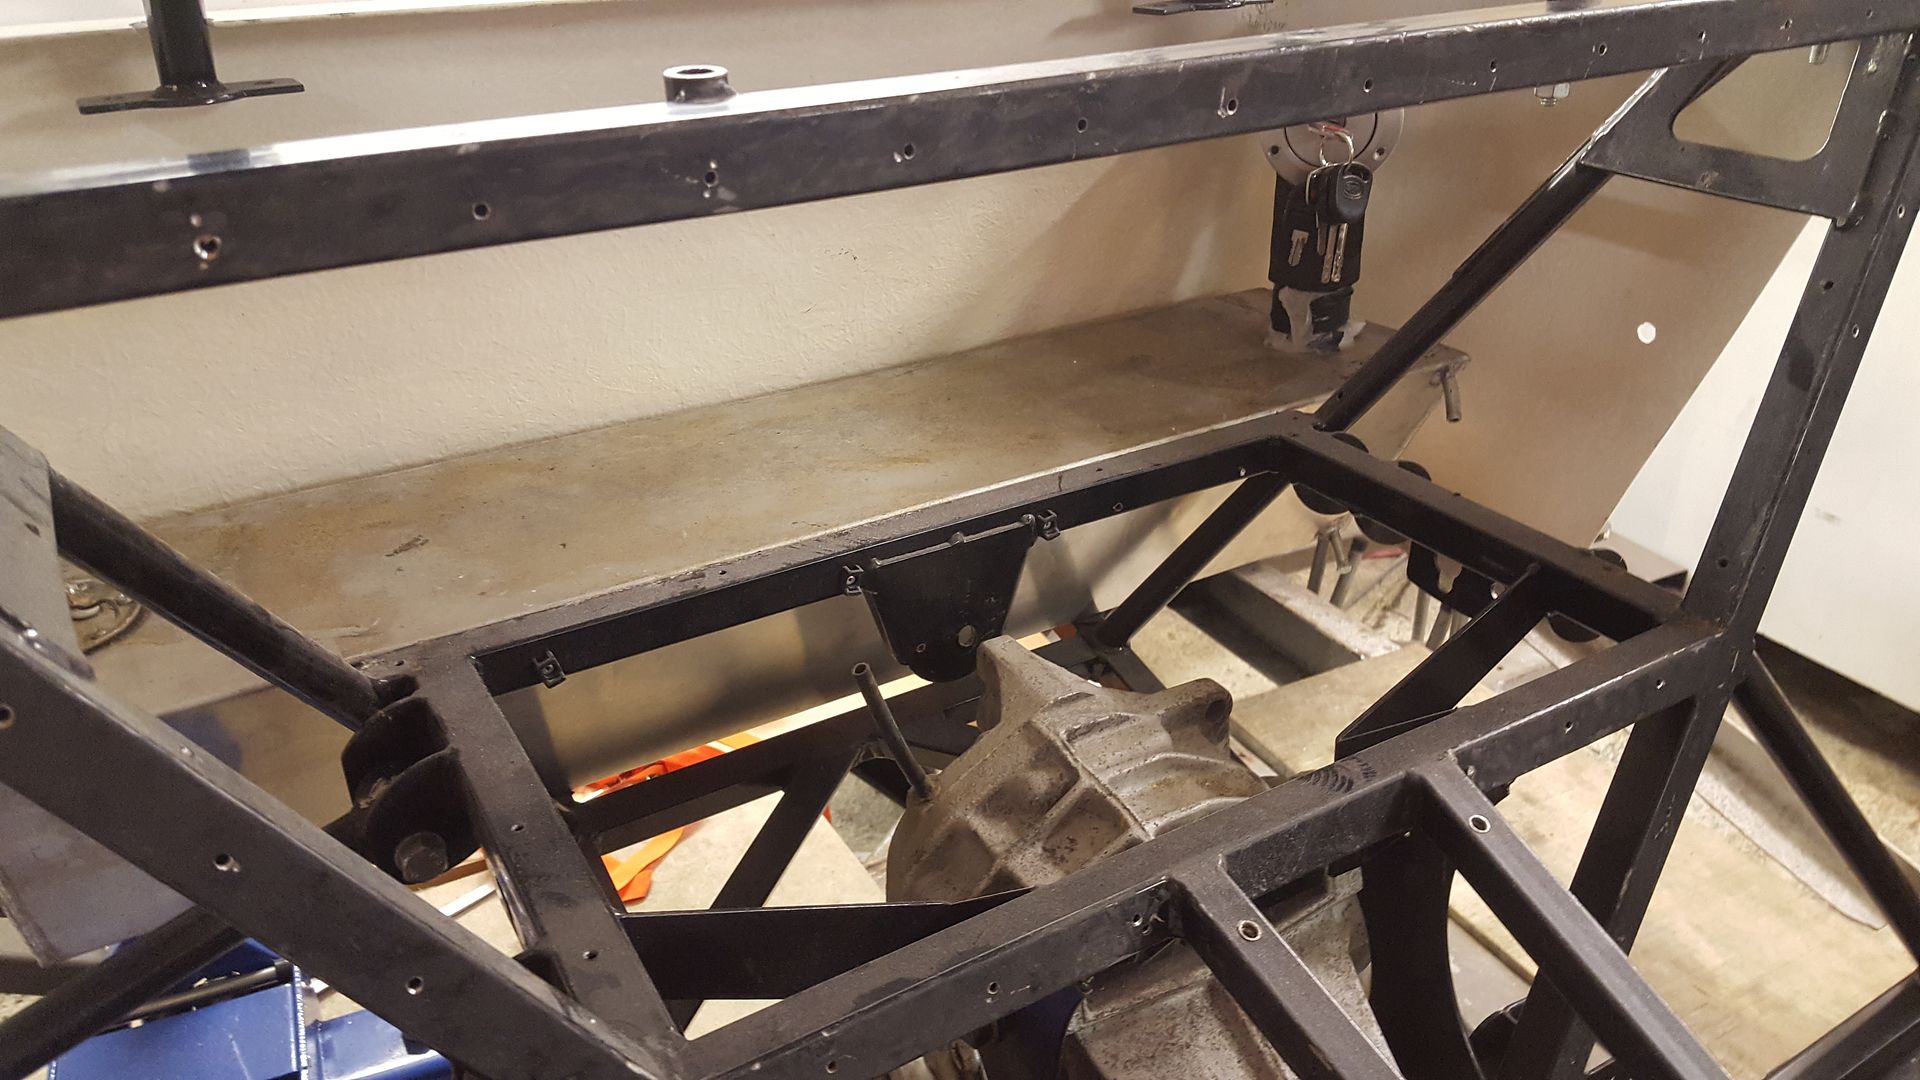
the only datum i have on the chassis is the rear diff is fitted (and i assume in the correct position as this chassis design should not have a diff,
it was designed to have a live axle. So starting at the diff i have the kit car prop, which will govern where there gearbox goes forwards and
backwards, but i have no idea on up or down.
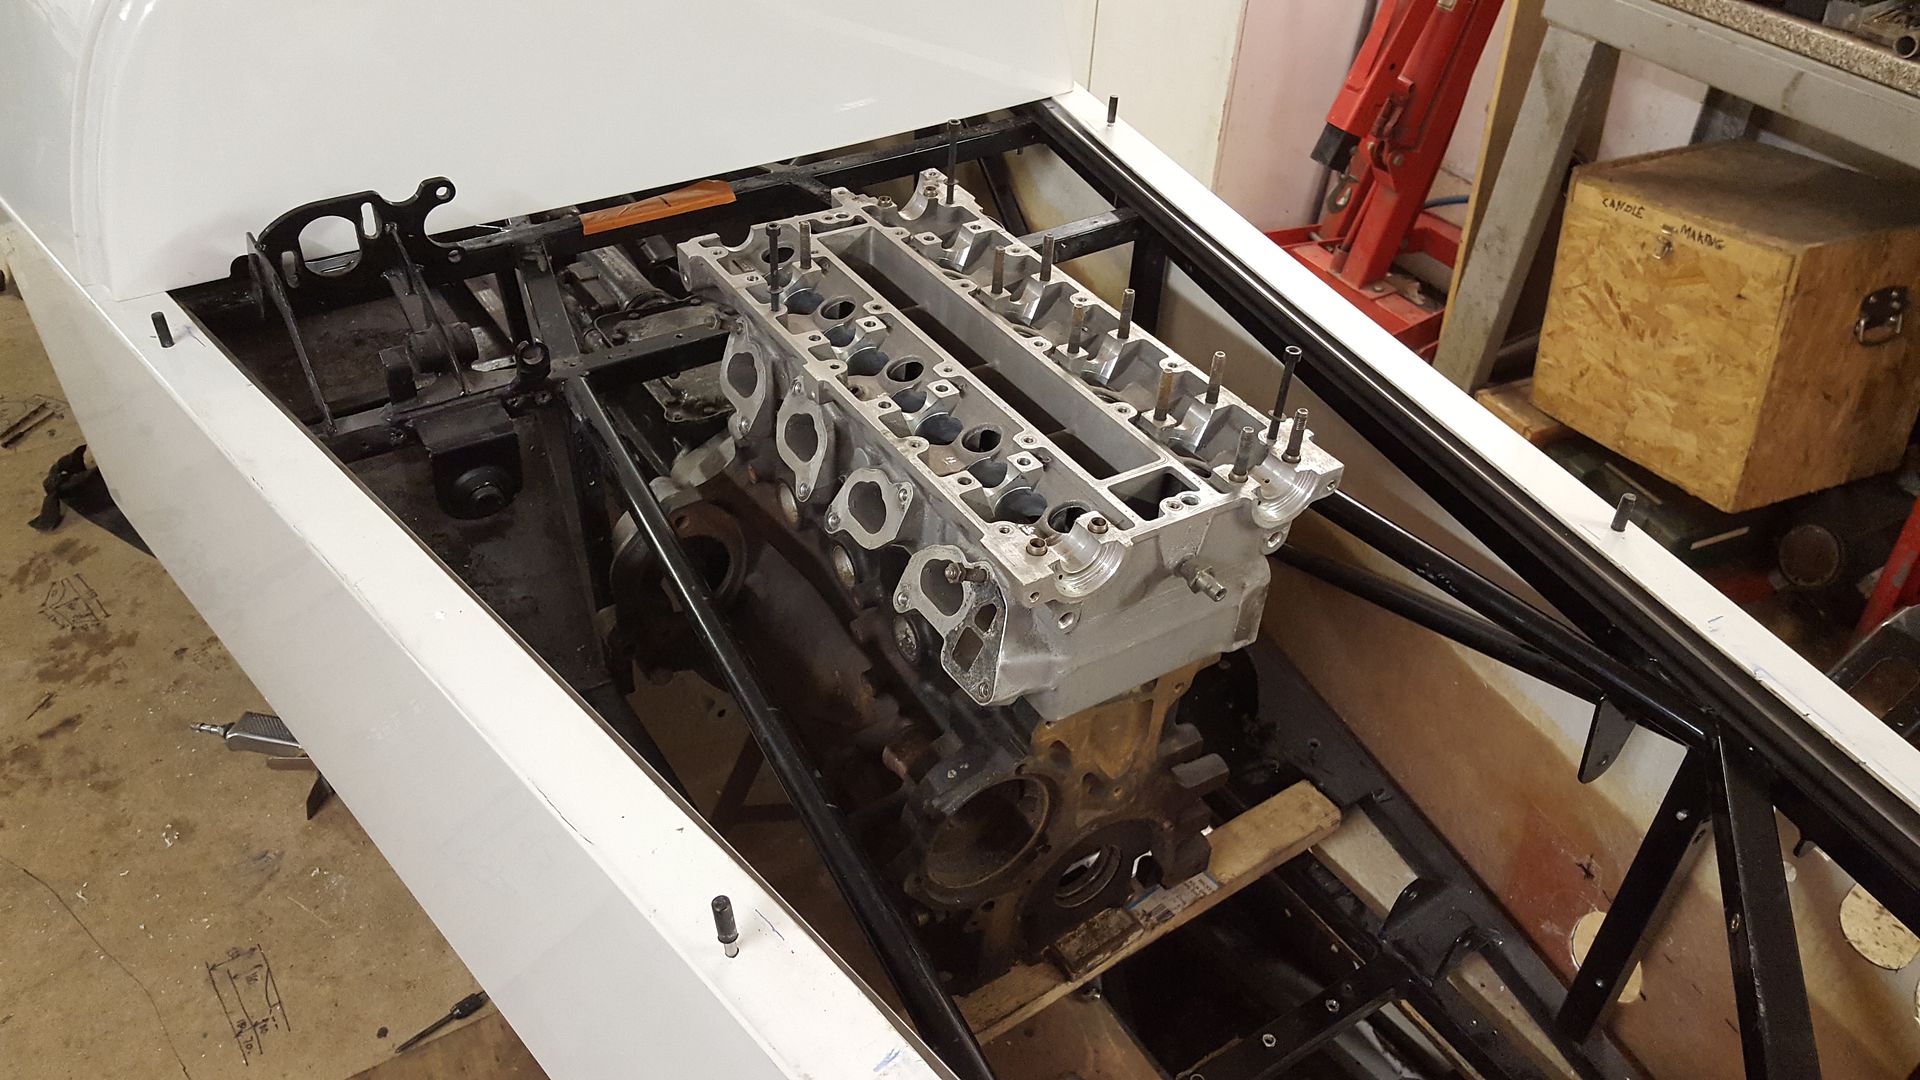
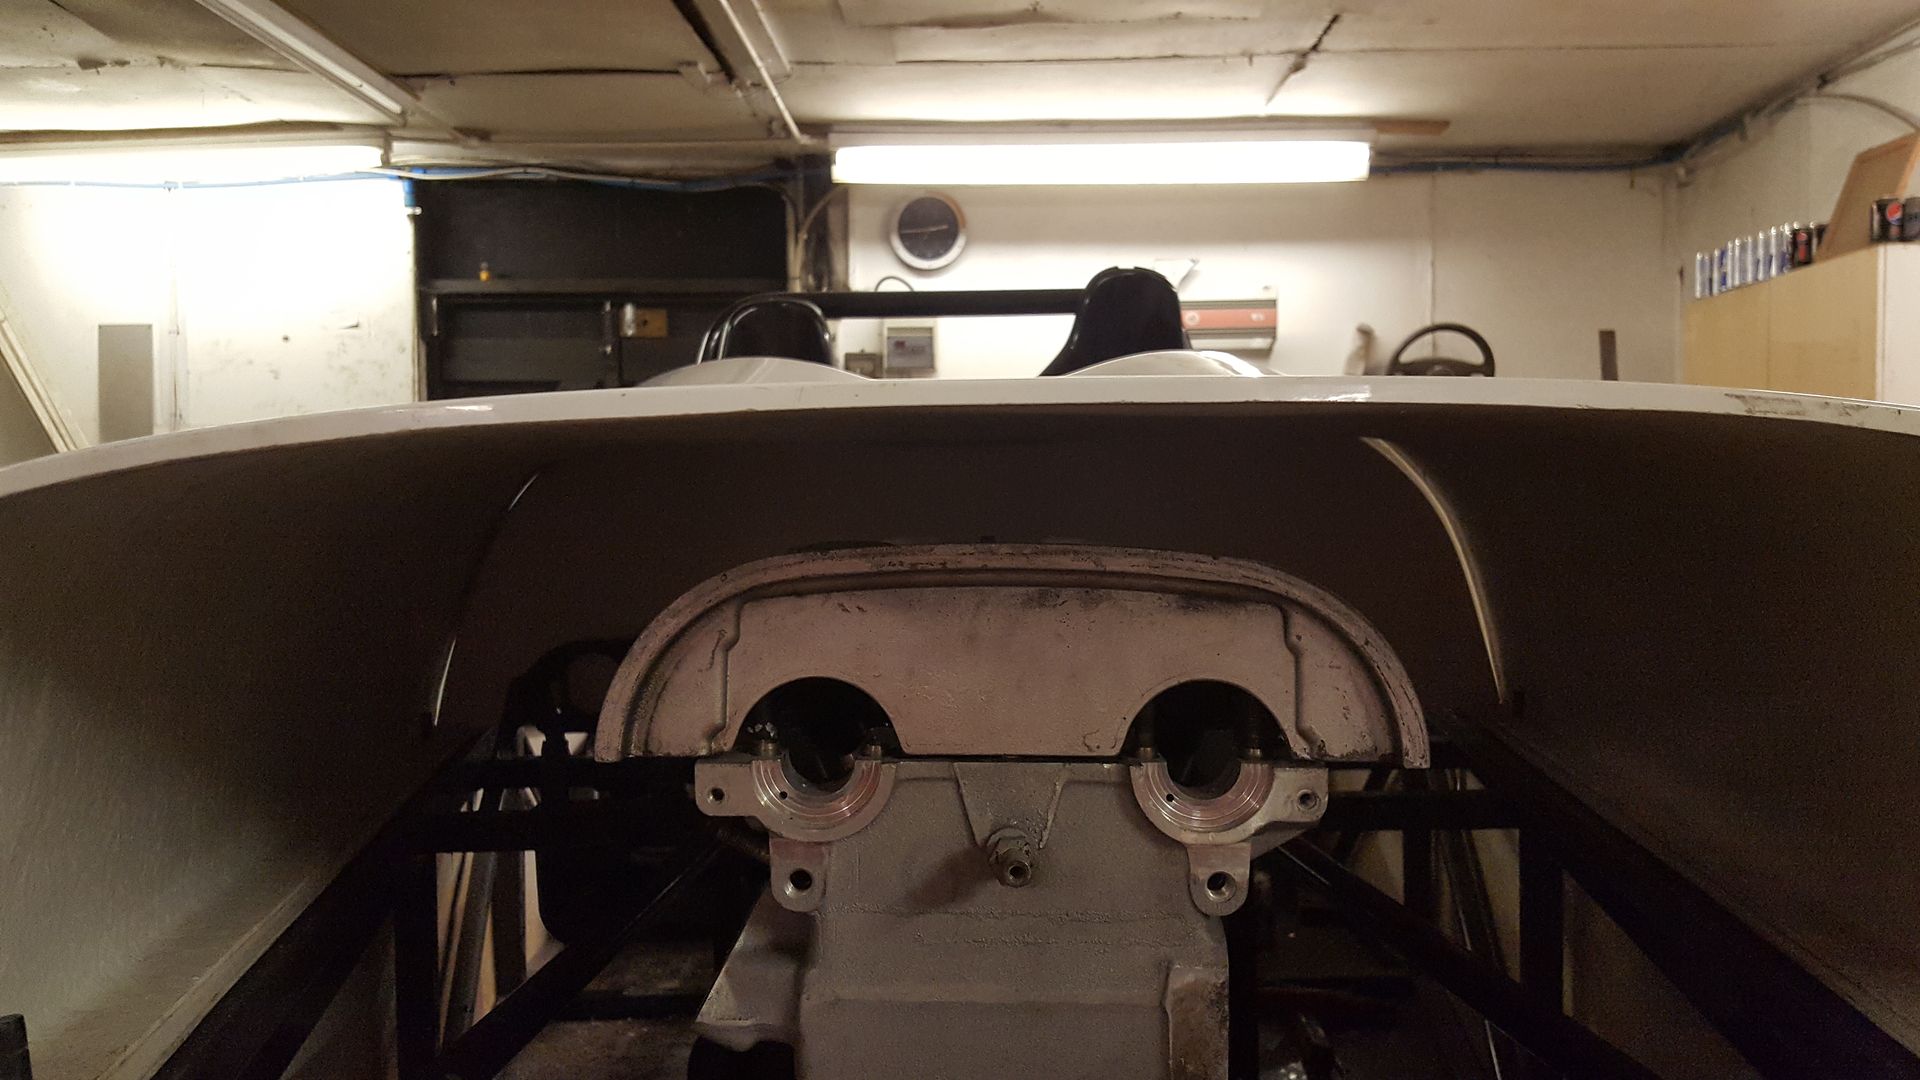
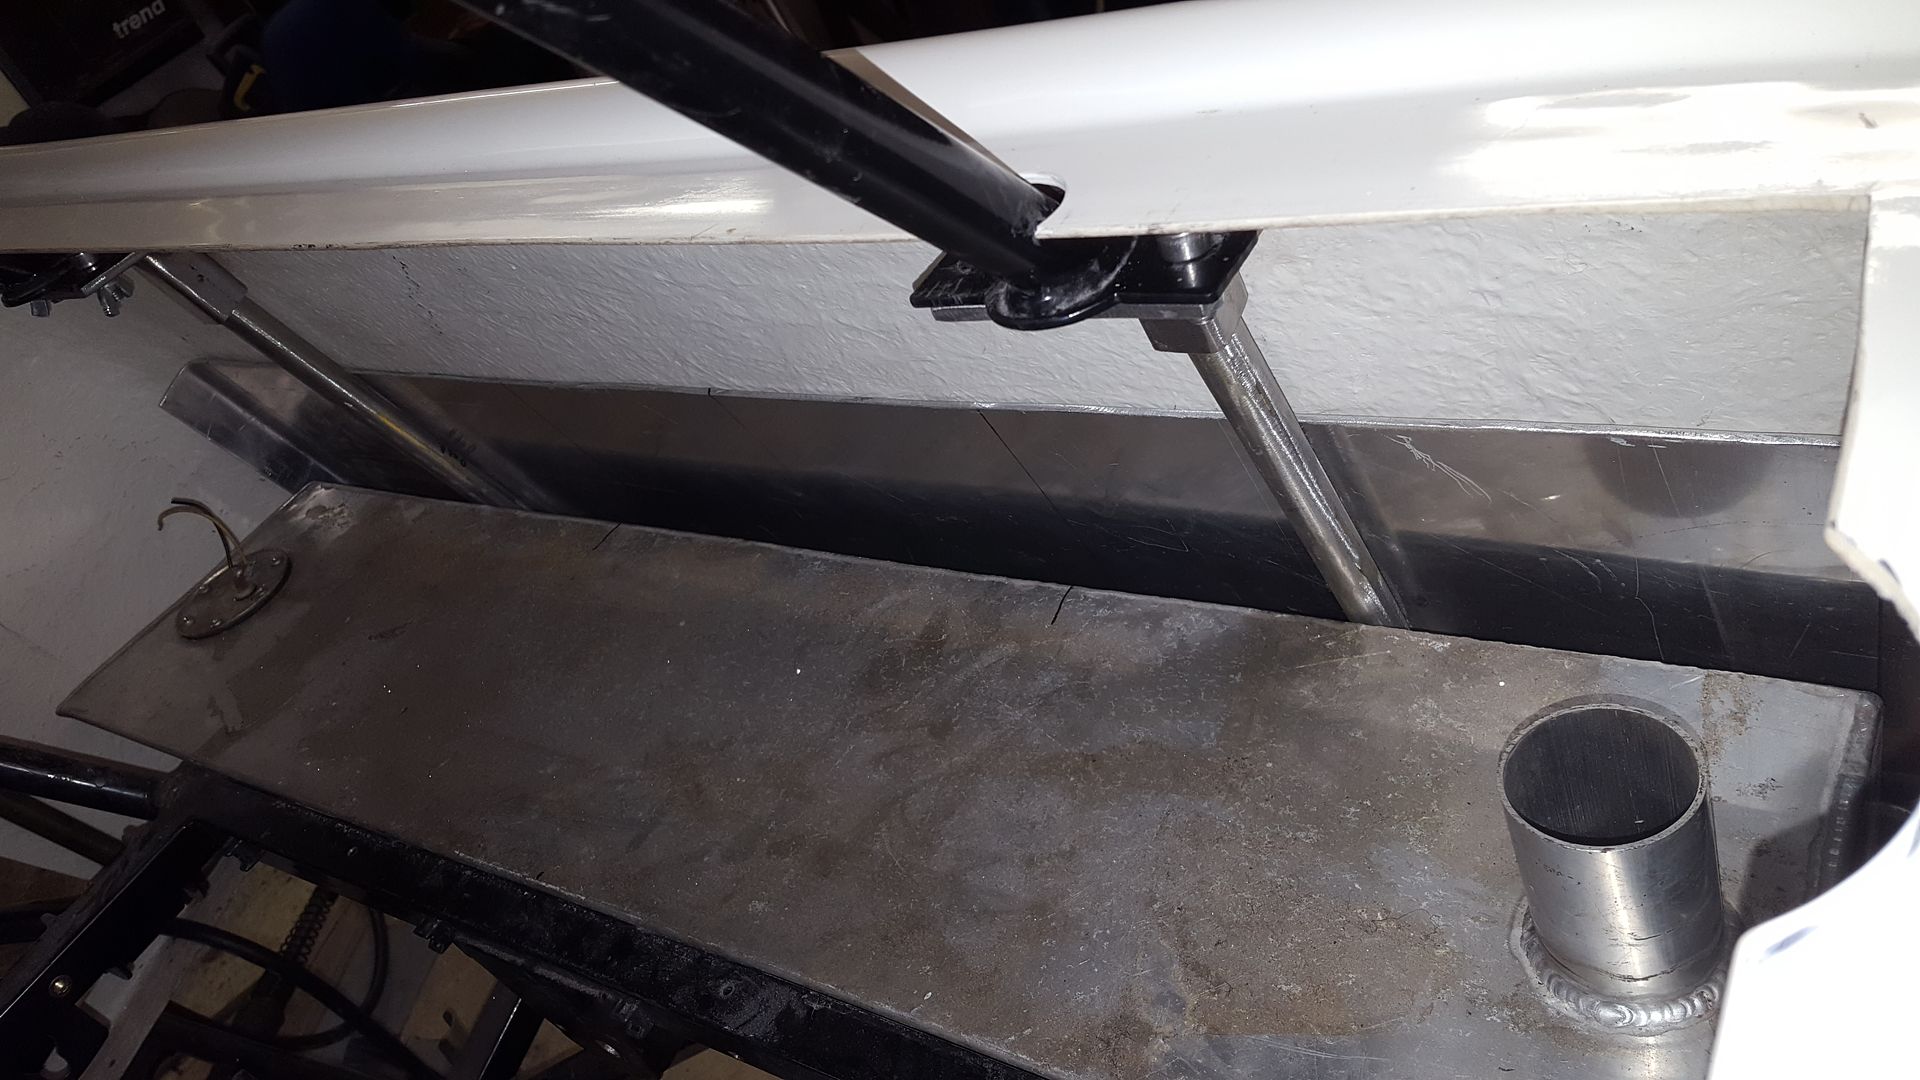
here's my theory, tell me if i'm wrong....
I set the chassis up level

i positioned the engine up and down untill the propshaft was level
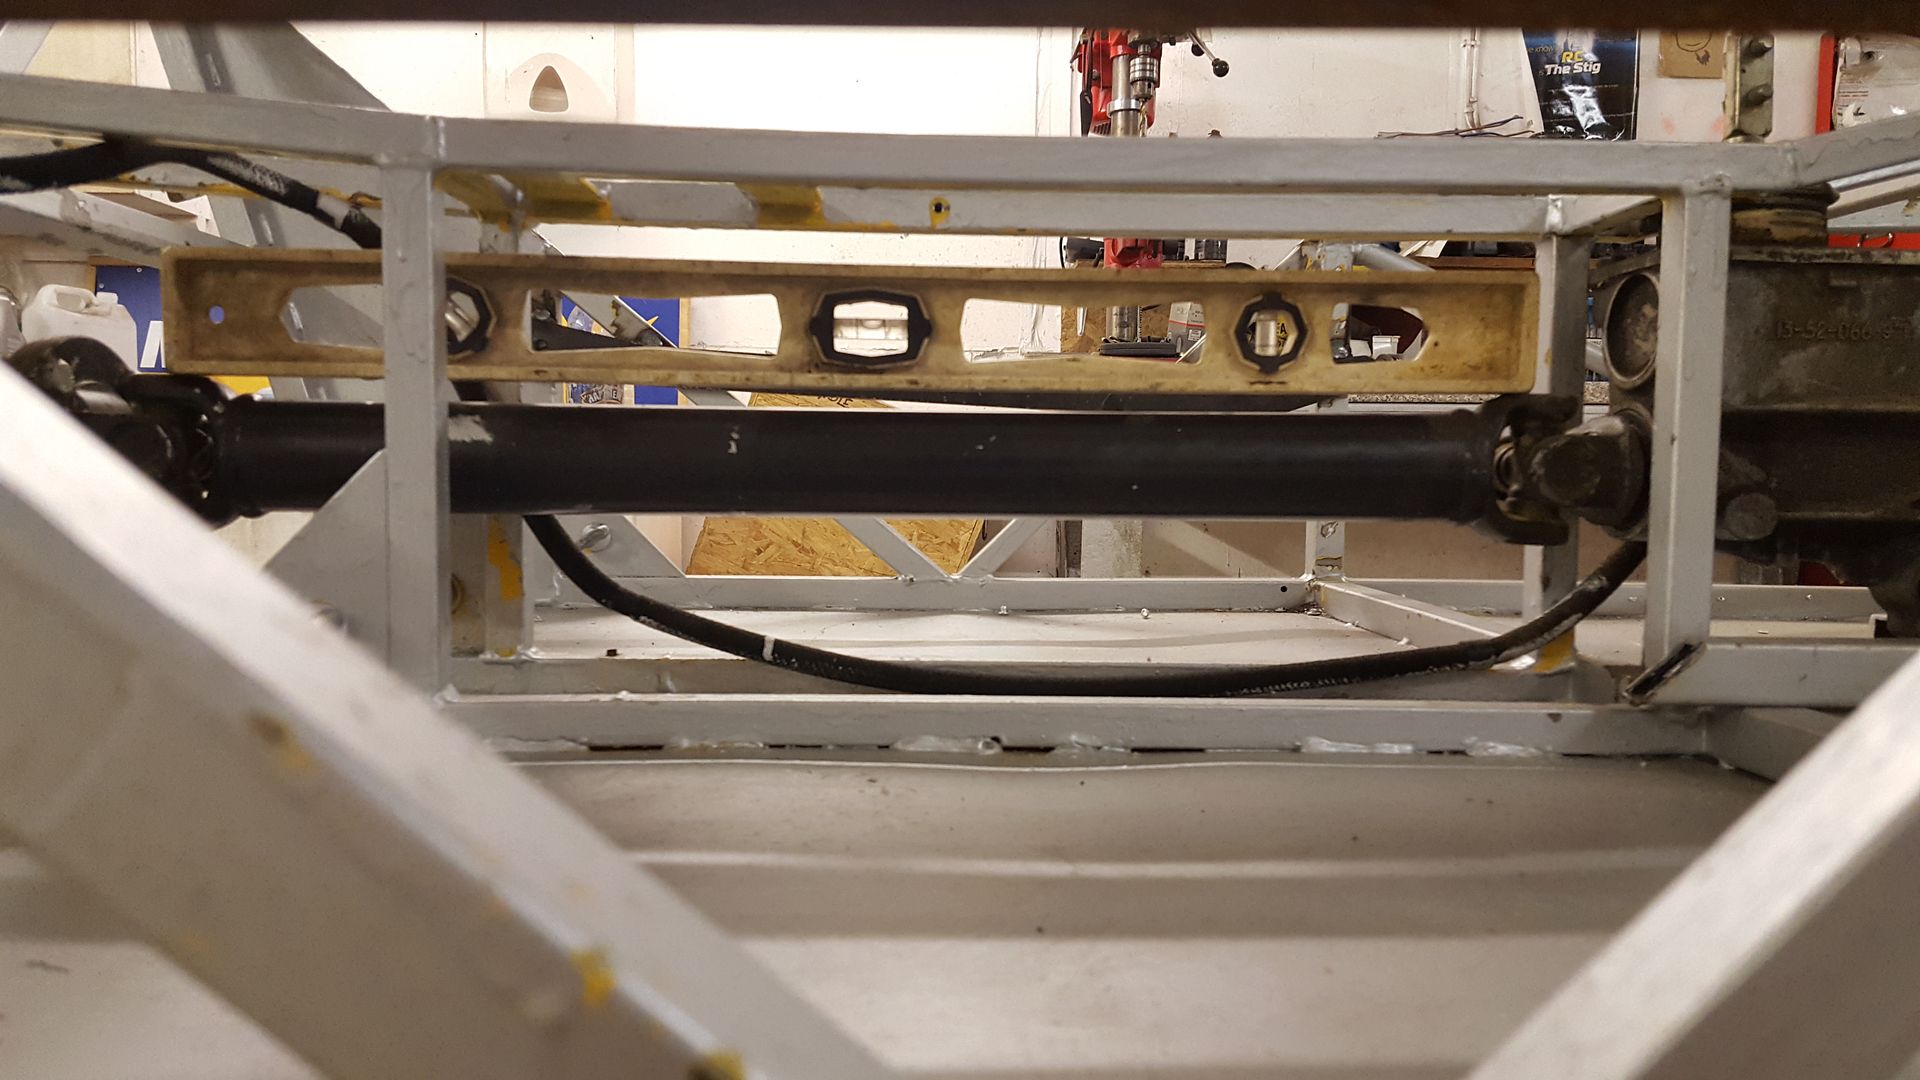
and then the engine level
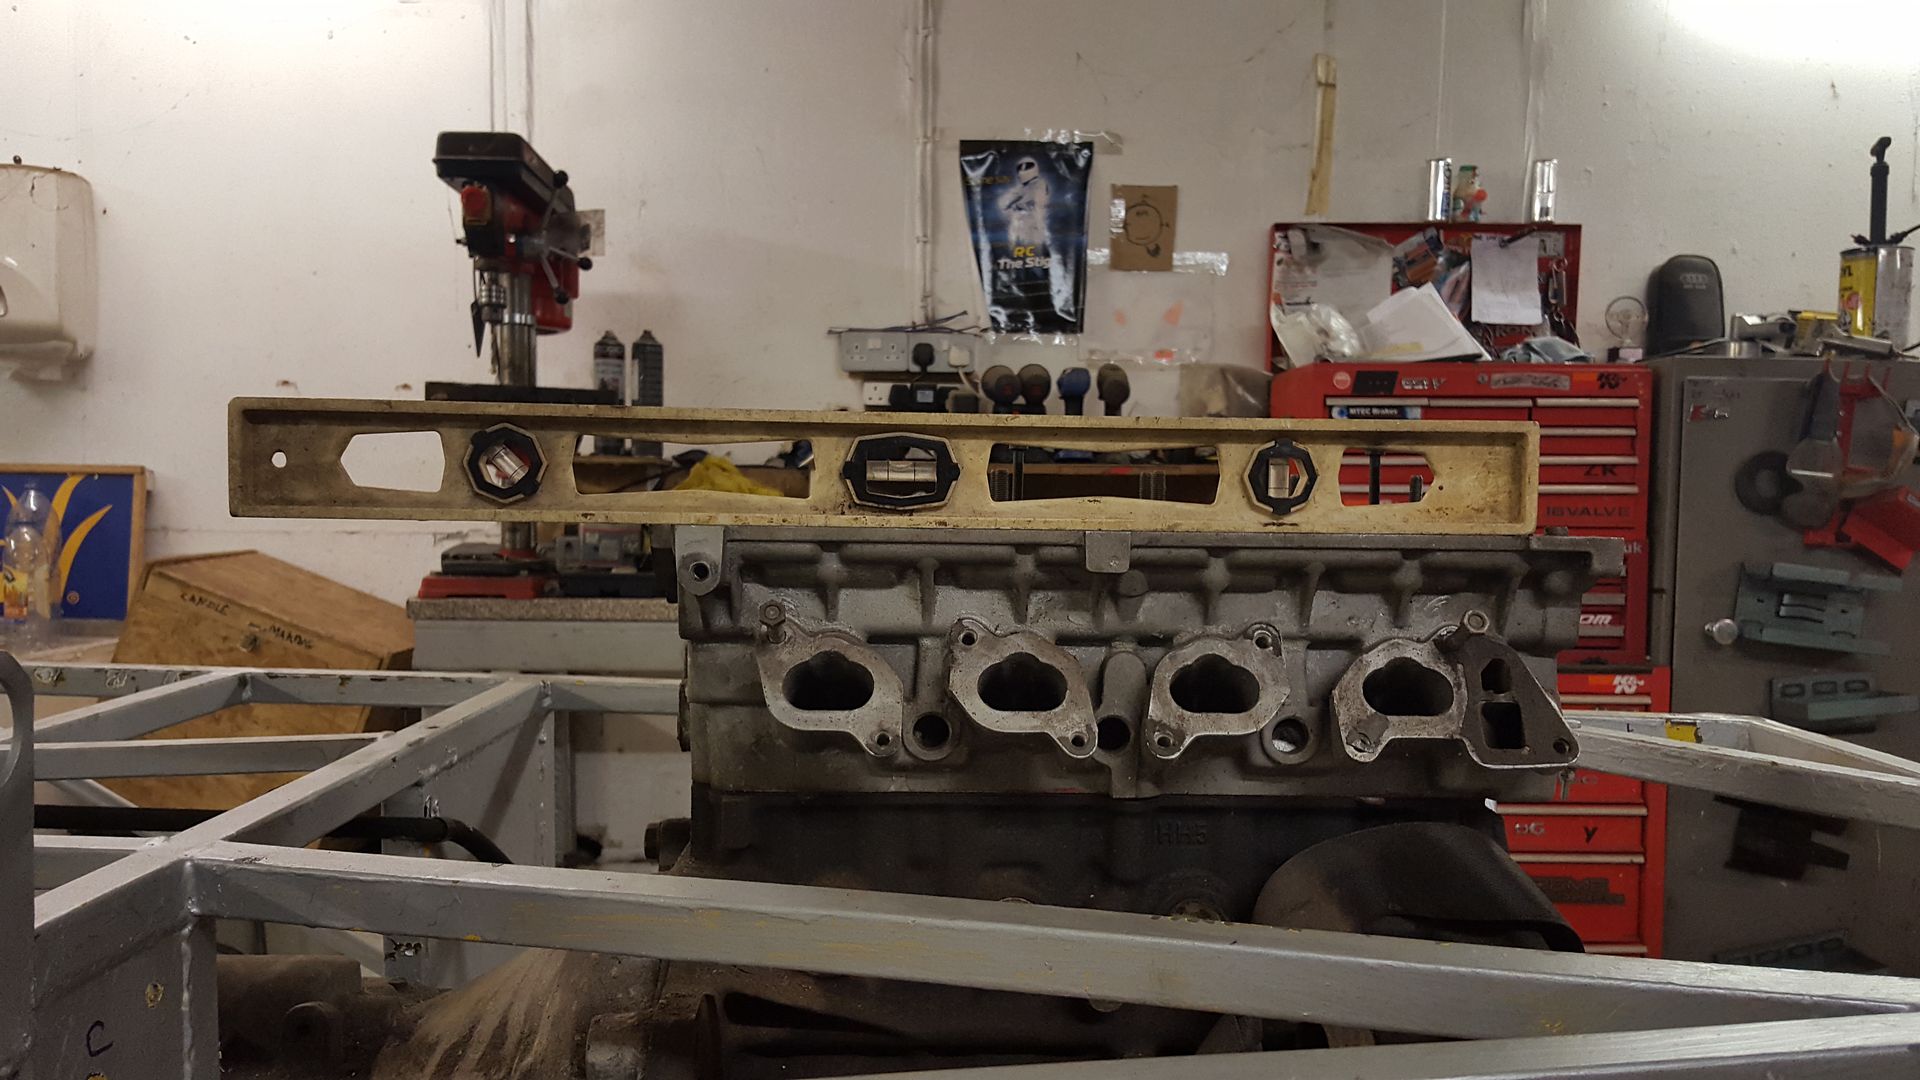
So the crankshaft, gearbox main shaft, propshaft, and diff input are all completly inline?
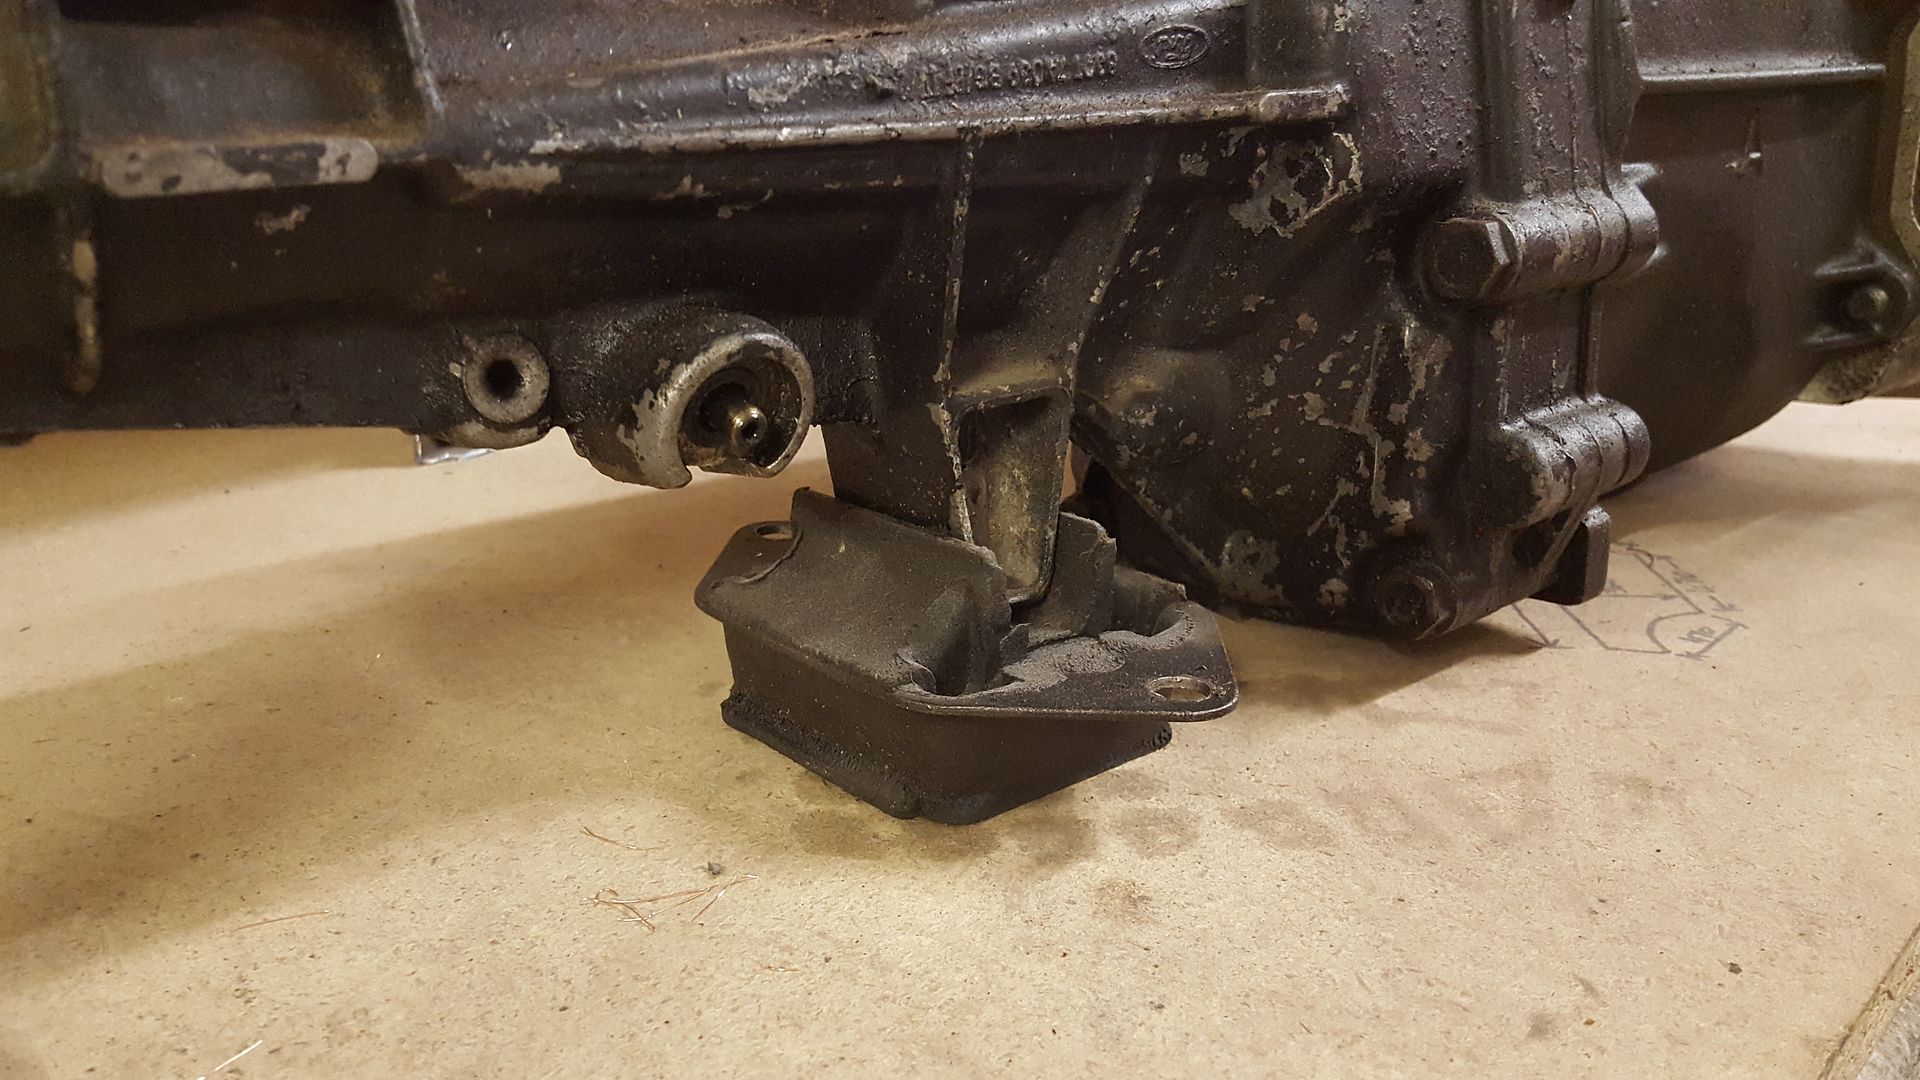
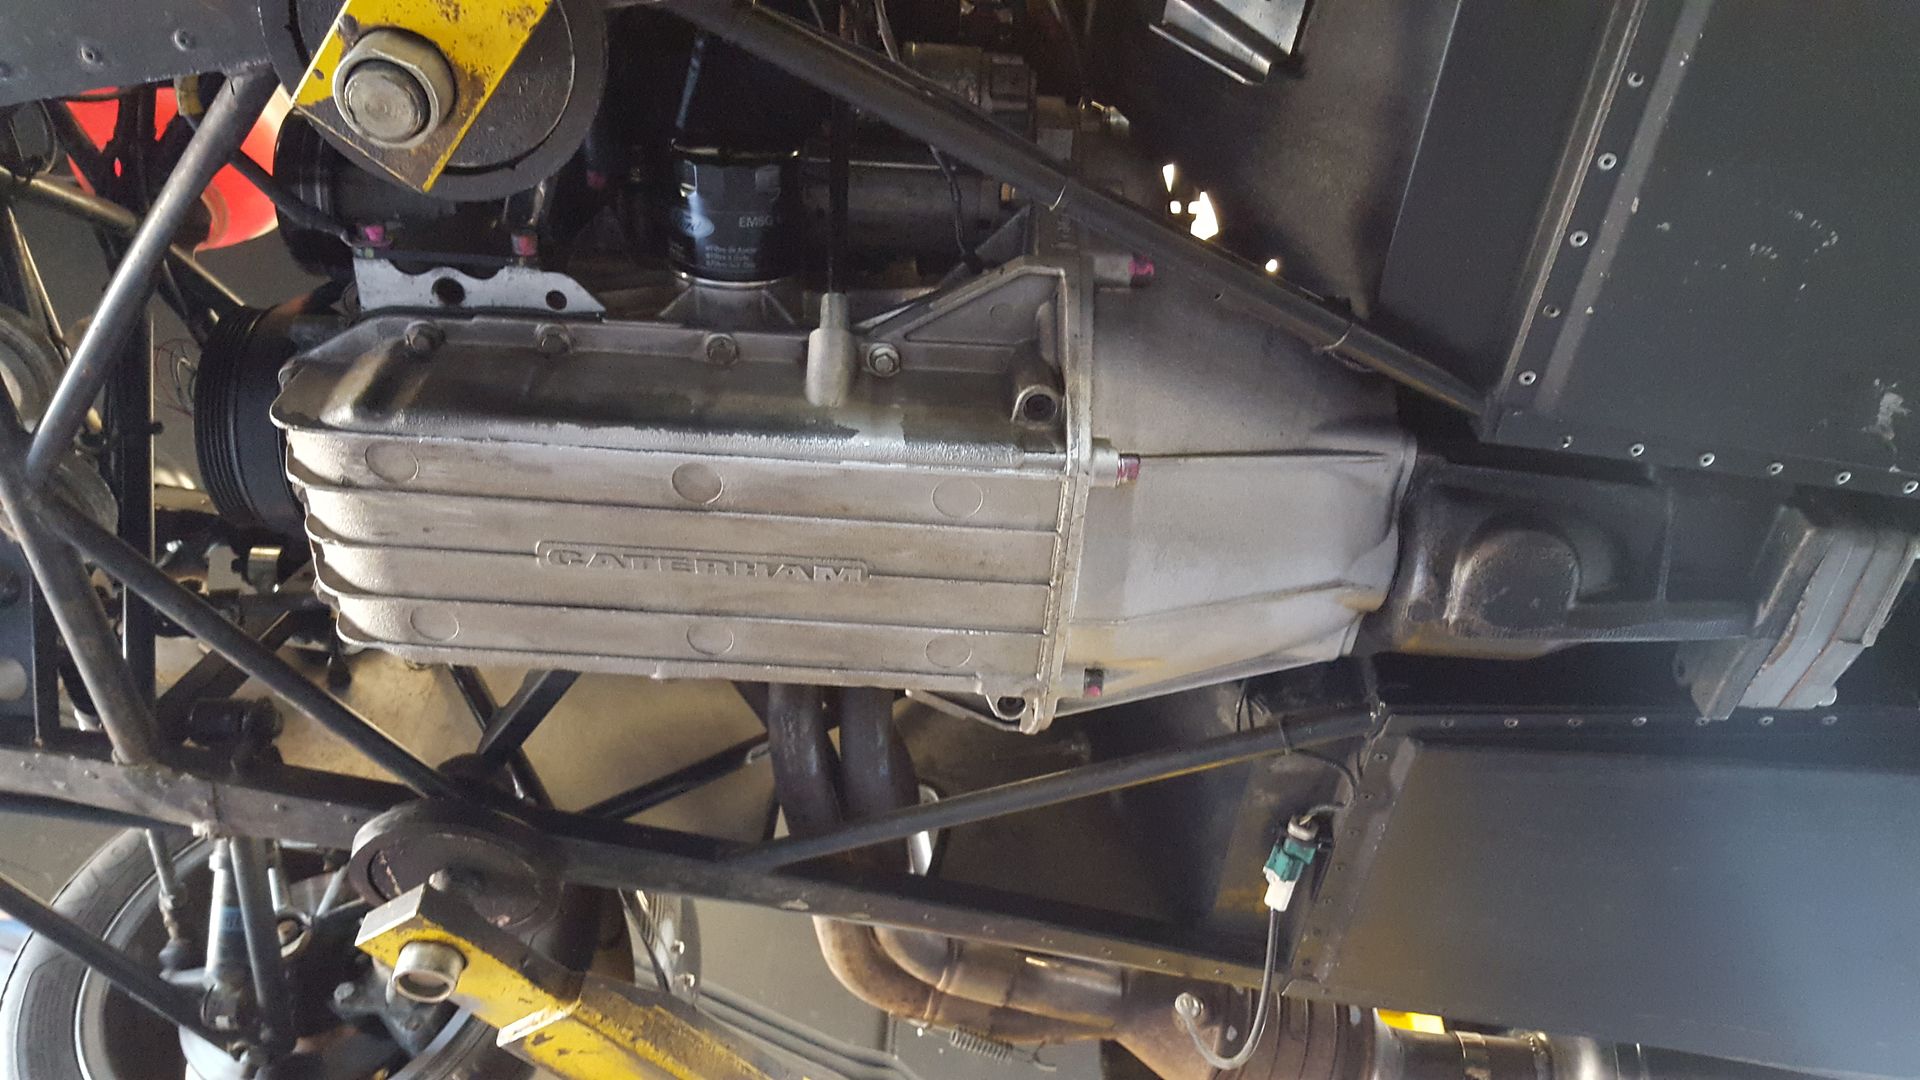
which leaves the bellhousing about this much lower than the chassis, the sump will be at the same height

this leaves the rocker cover almost touching the bonnet, so ideally could do with going a few cm down if thats possible?
let me know what you think?
other new, ebay bargains purchases include this i picked up for Ł30 ( not 100% a go on this as its only 2inch bore, too small?)
a Caterham A frame for Ł20! to replace the panhard rod,
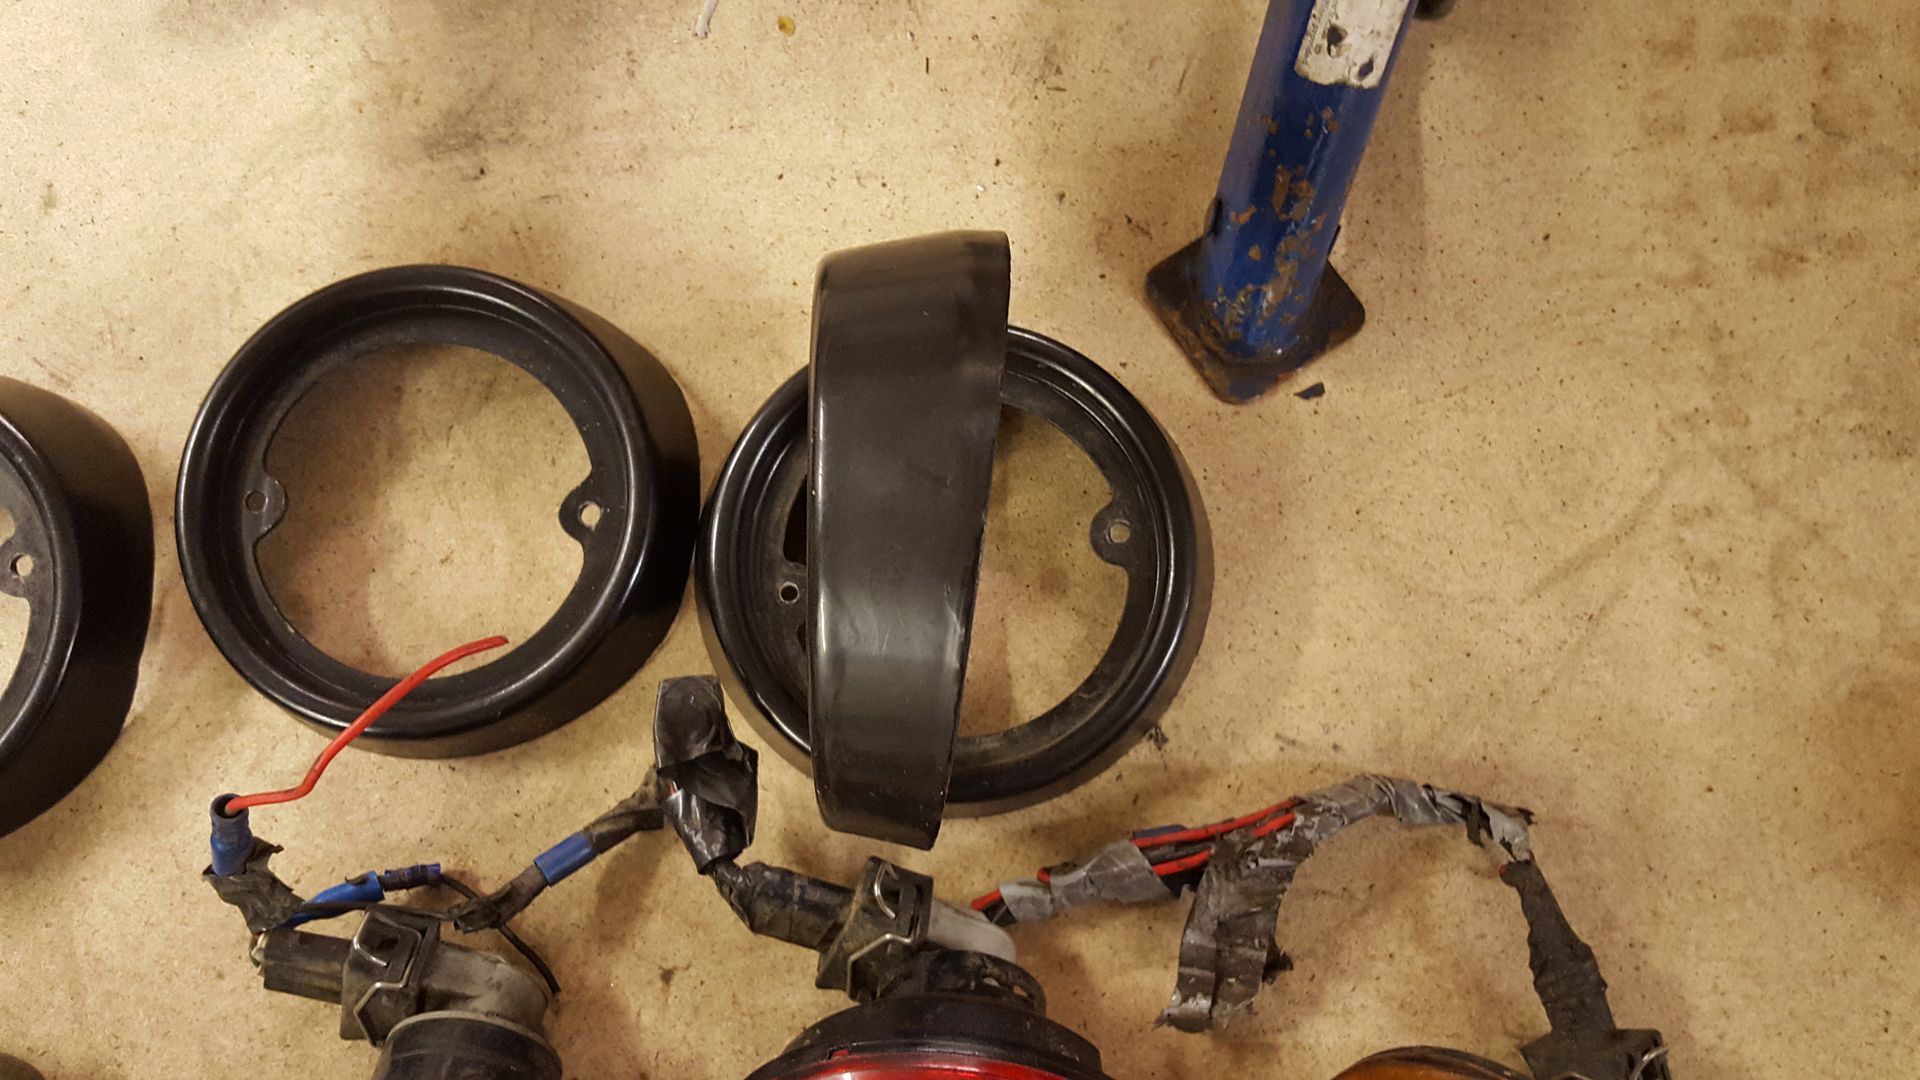
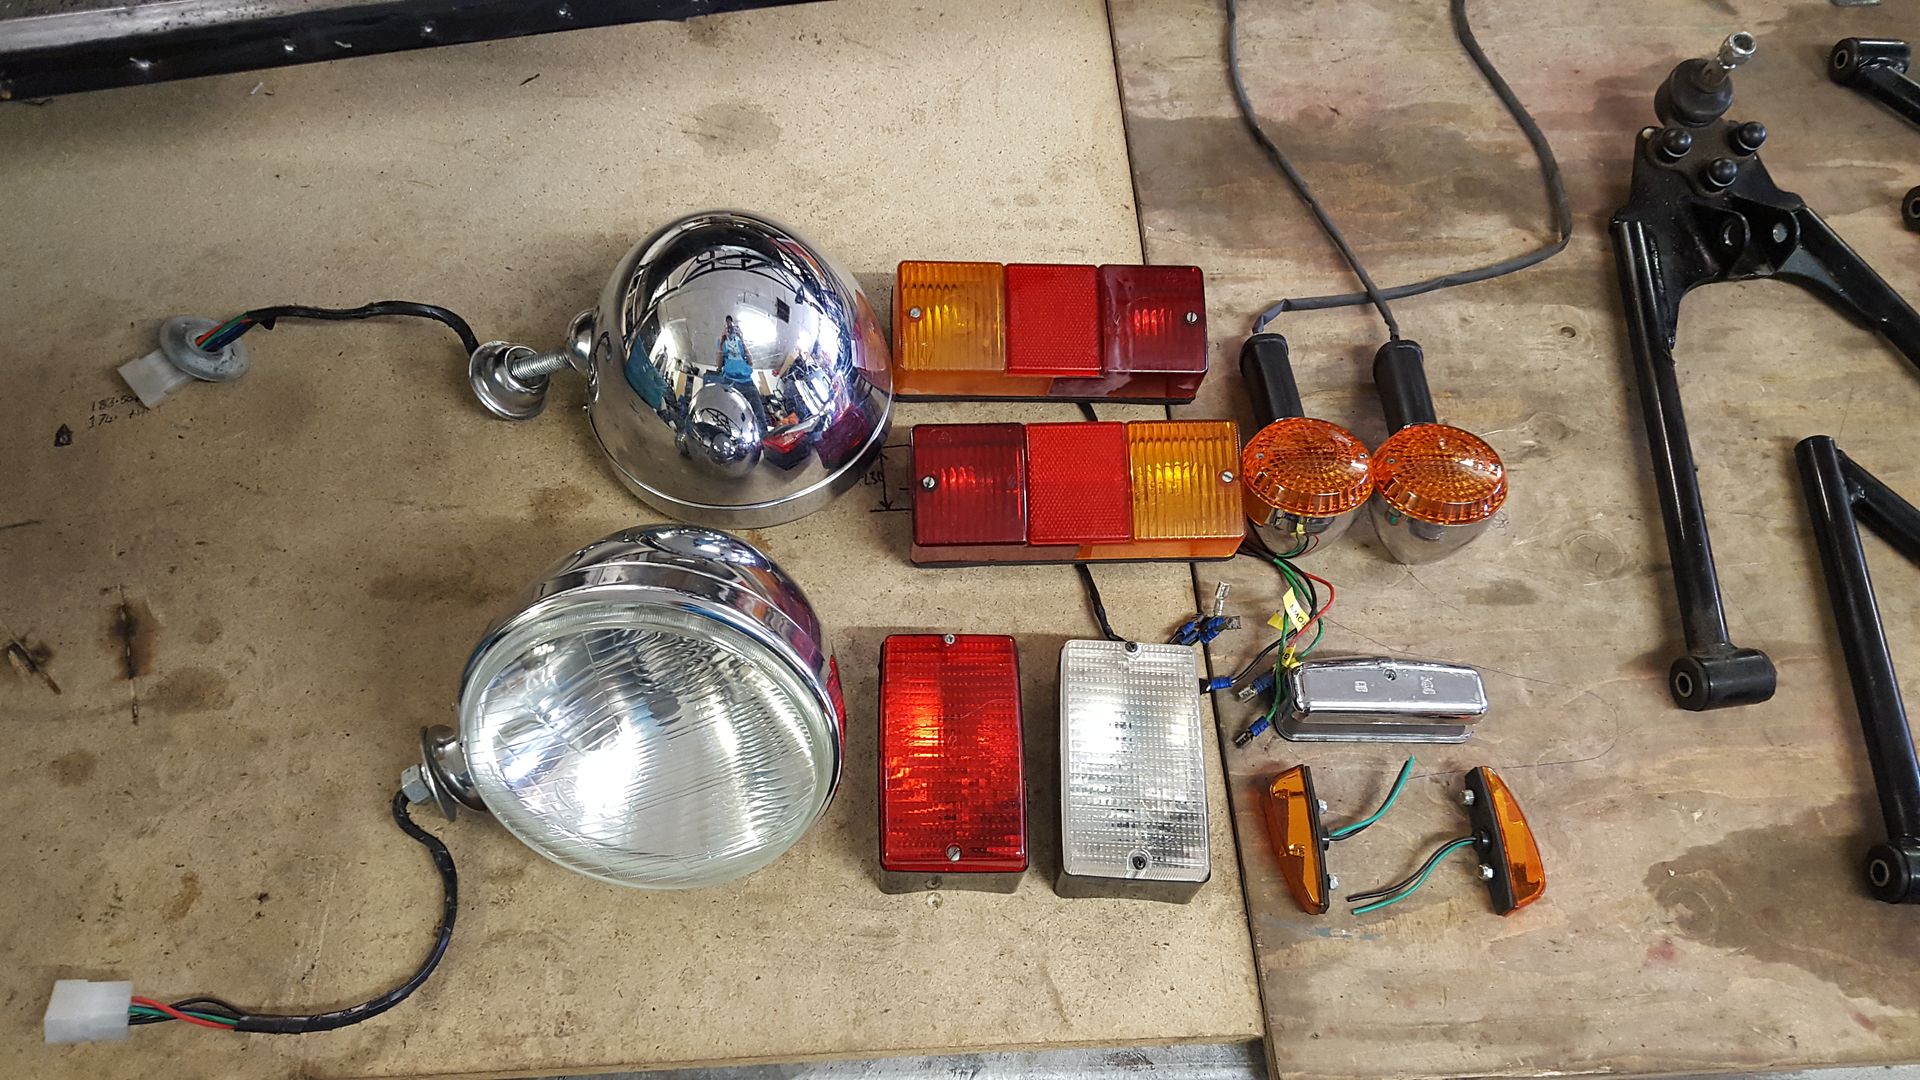
picked up these rear lights for 99p each
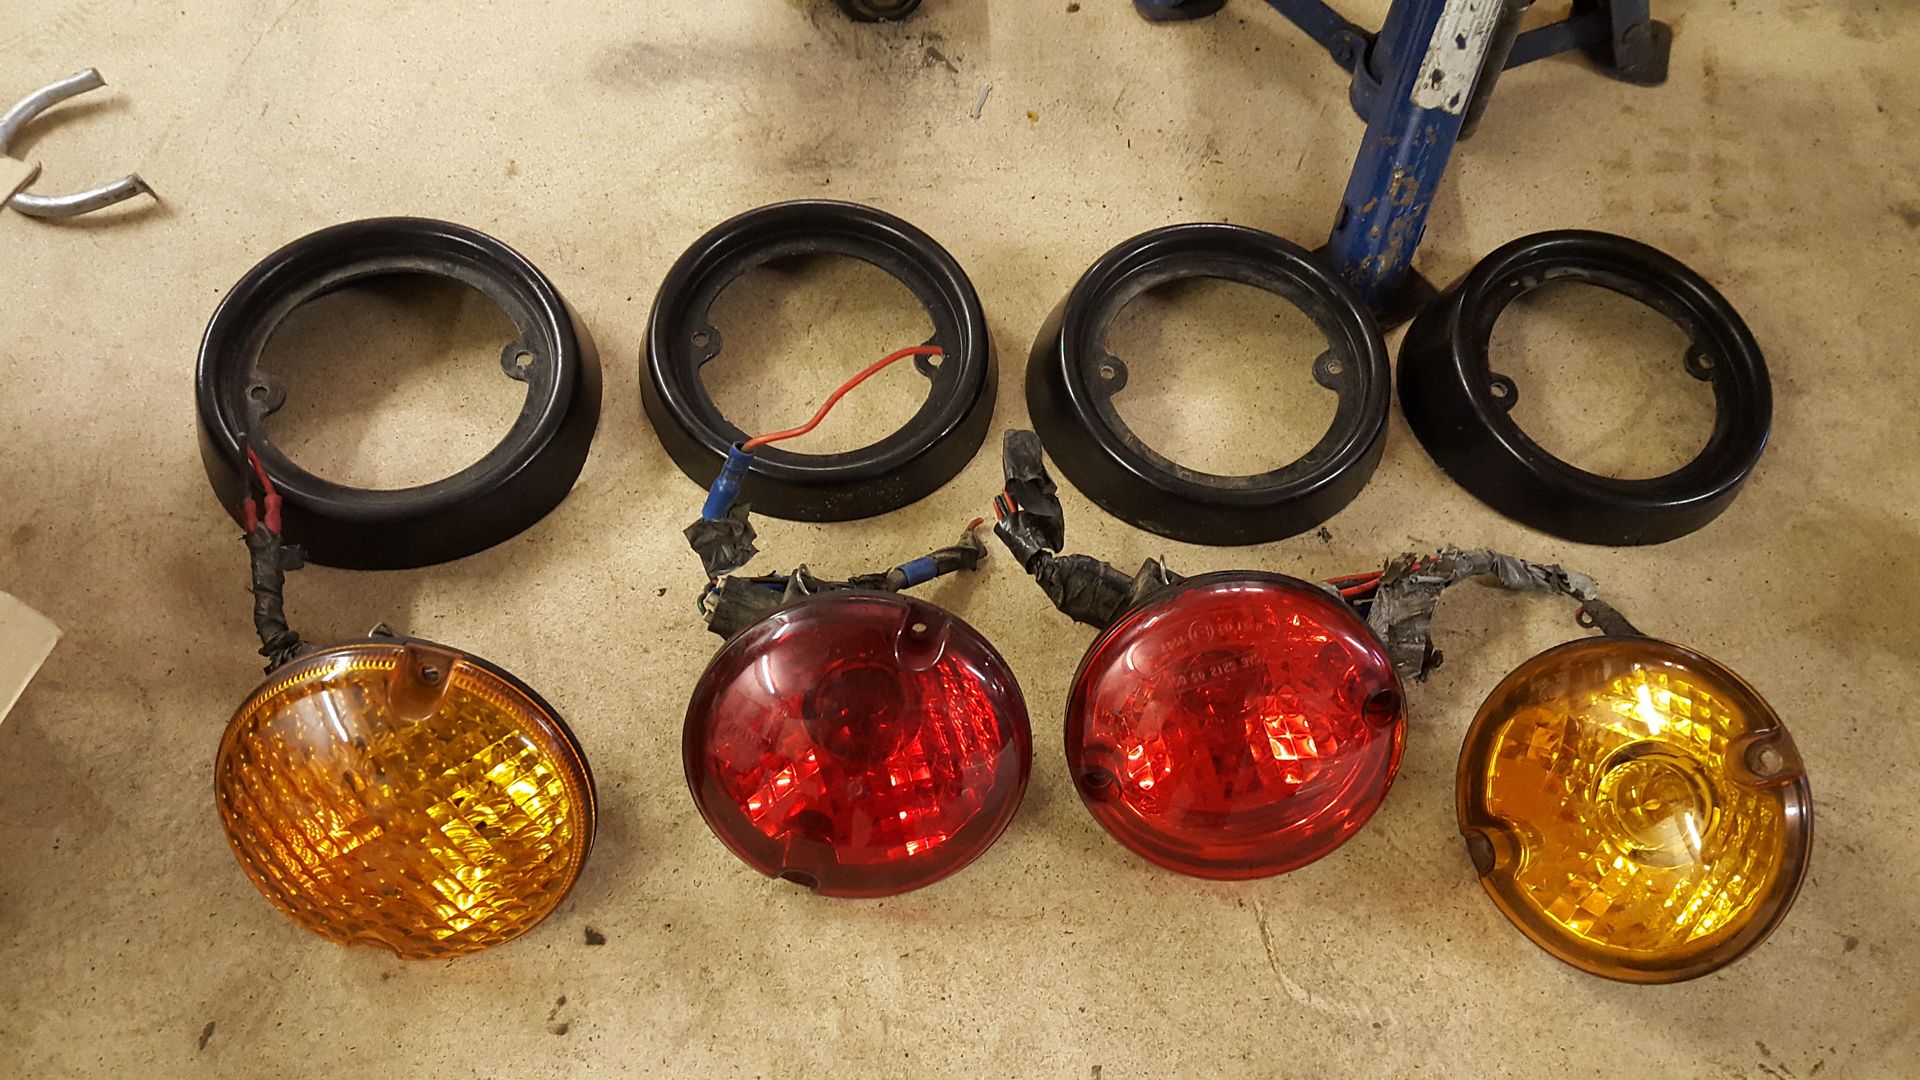
already cut to a angle for IVA
and going on with other necessities, some Caterham real carbon fibre front mud guards! Ł280 each new, weigh 600g, and ebay bargin of Ł41 for the pair
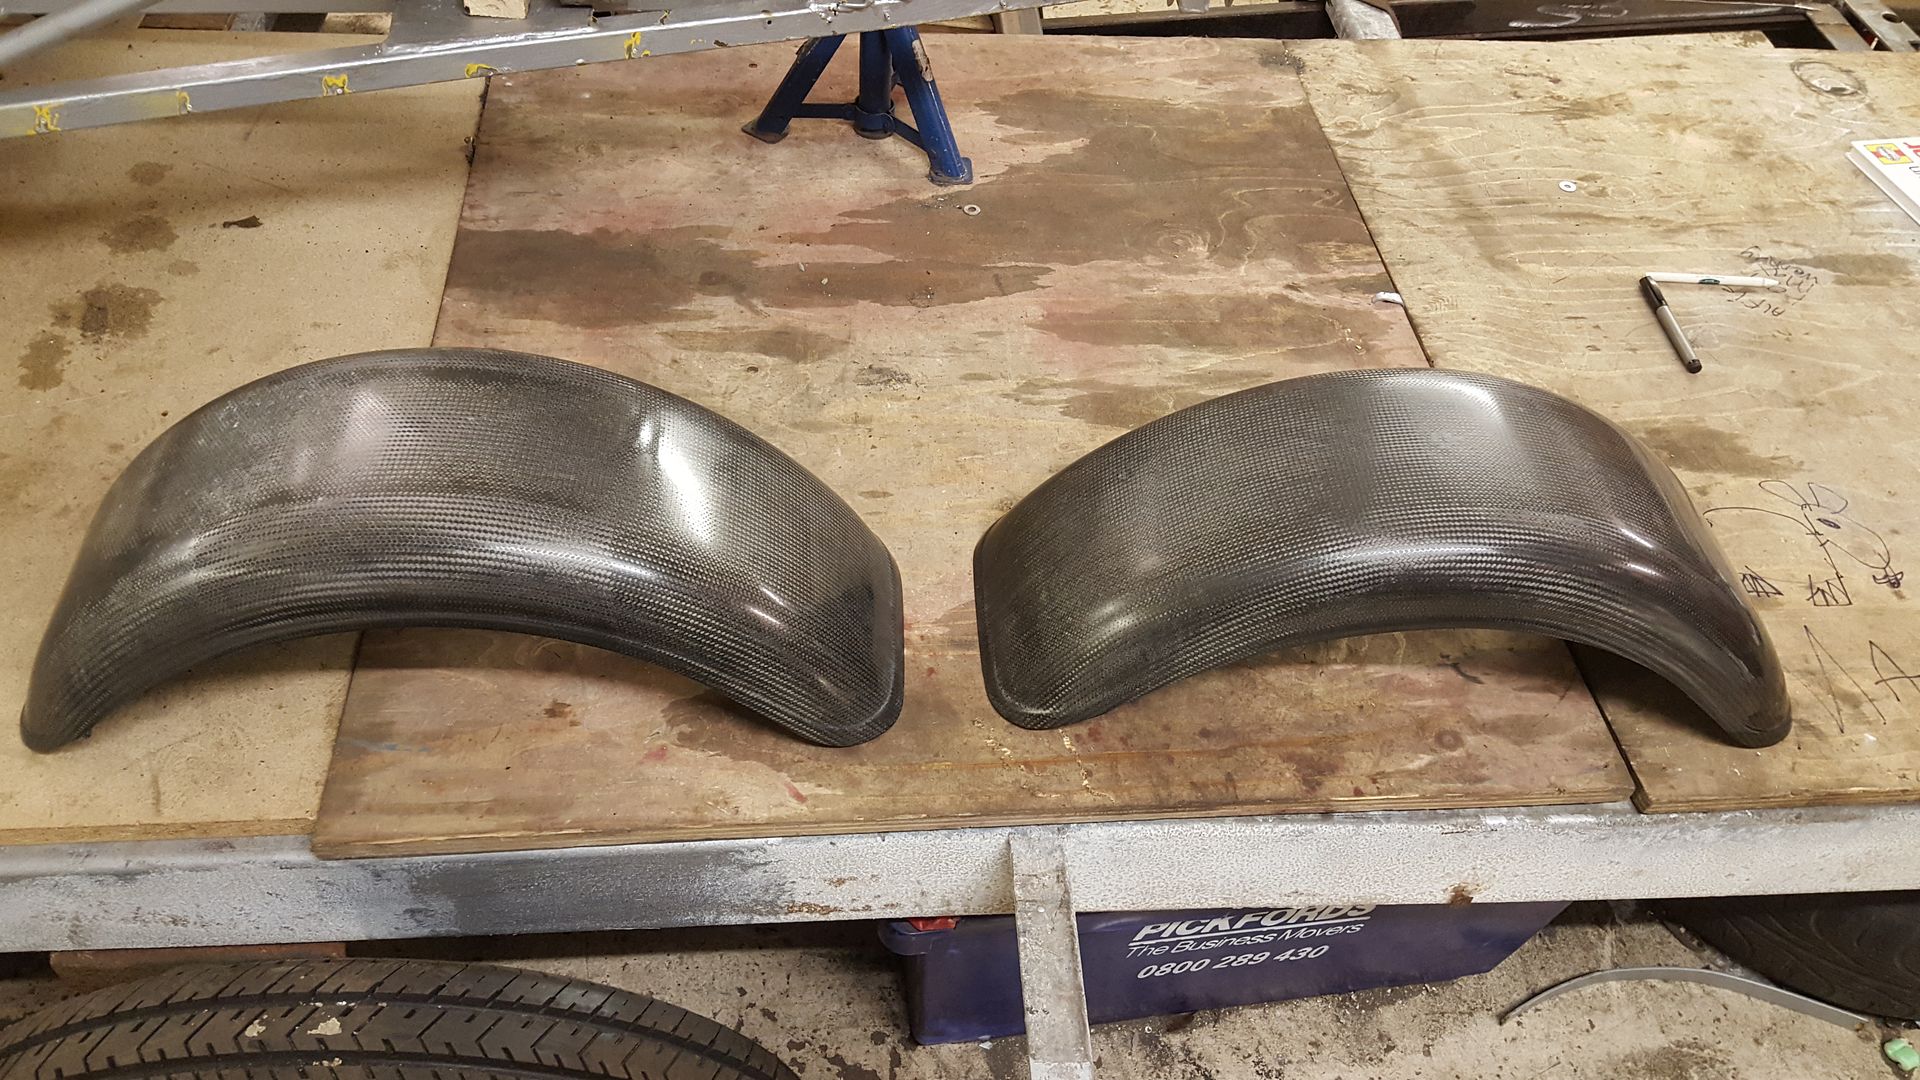
the gell coat has gone cloudy,
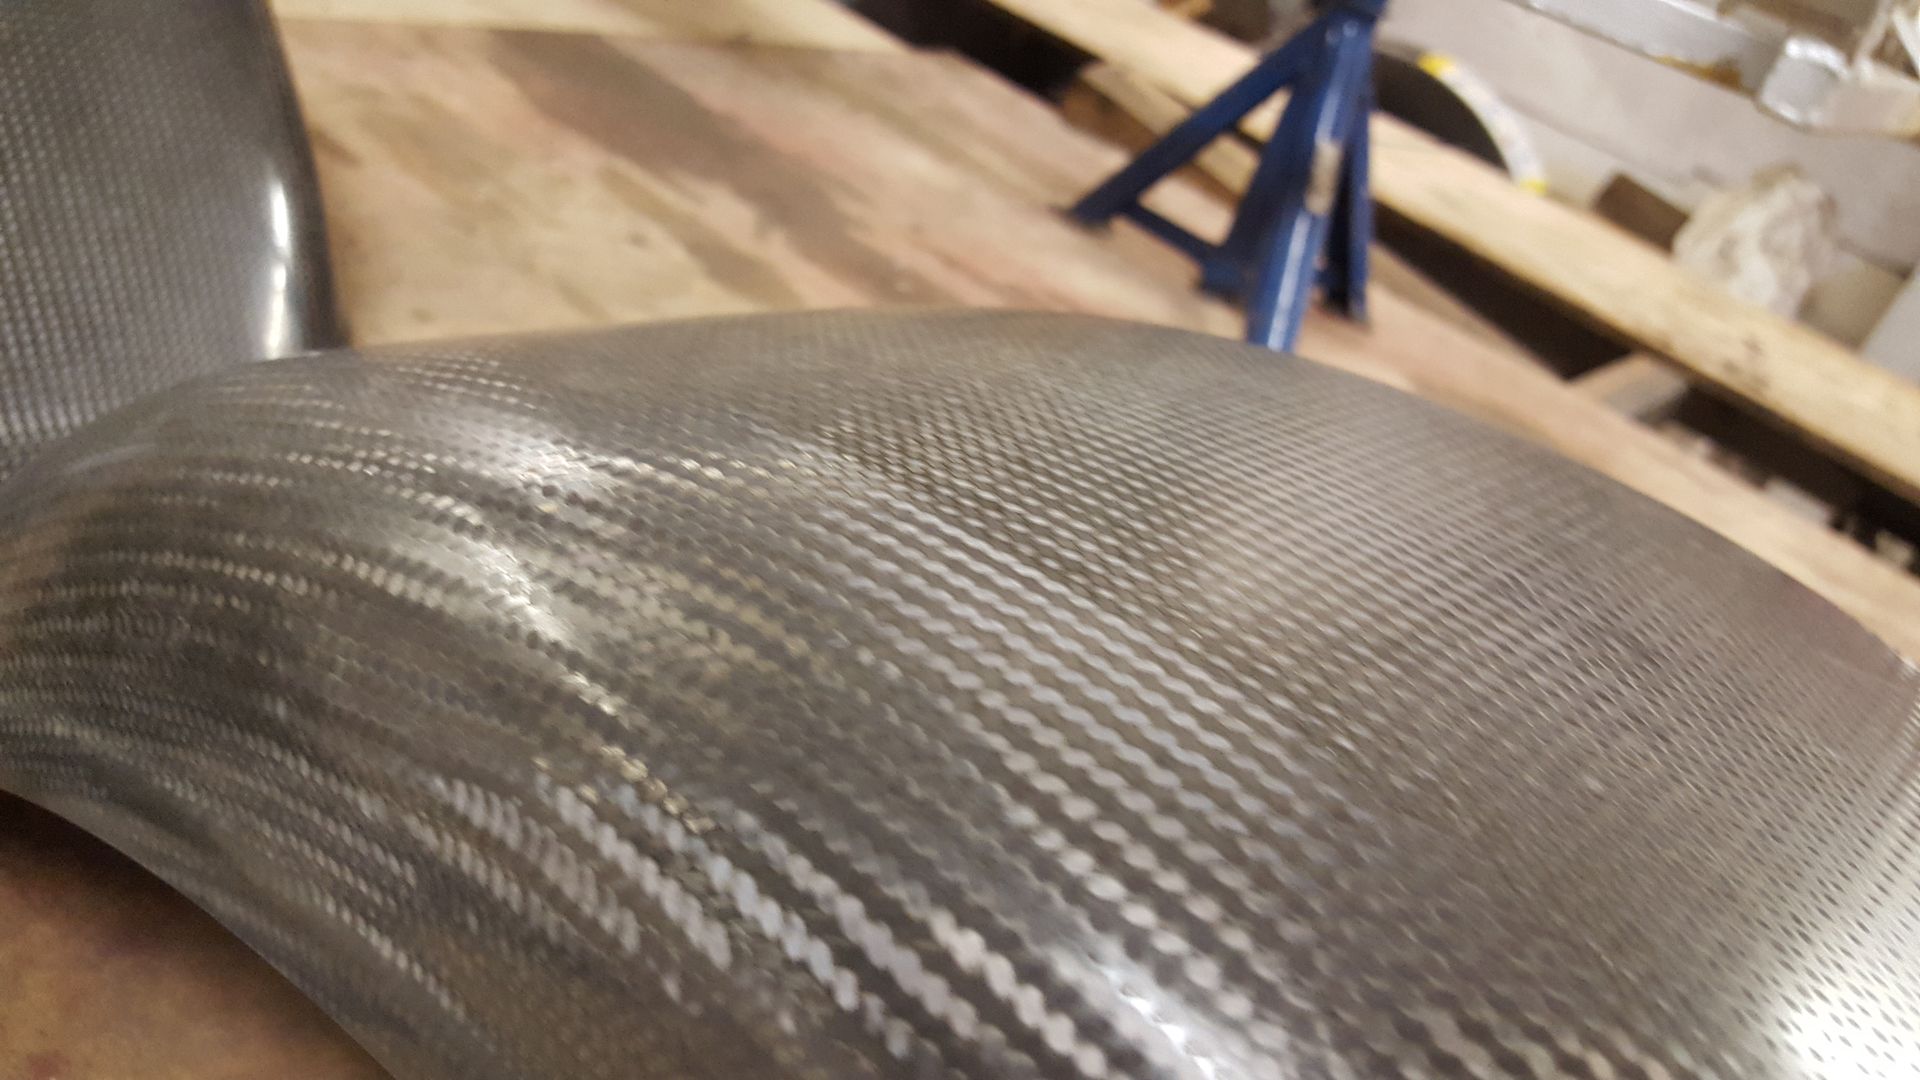
but i've had experience with this before and if you re lacquer this it looks like brand new
i also picked some Caterham fibreglass doors for Ł16
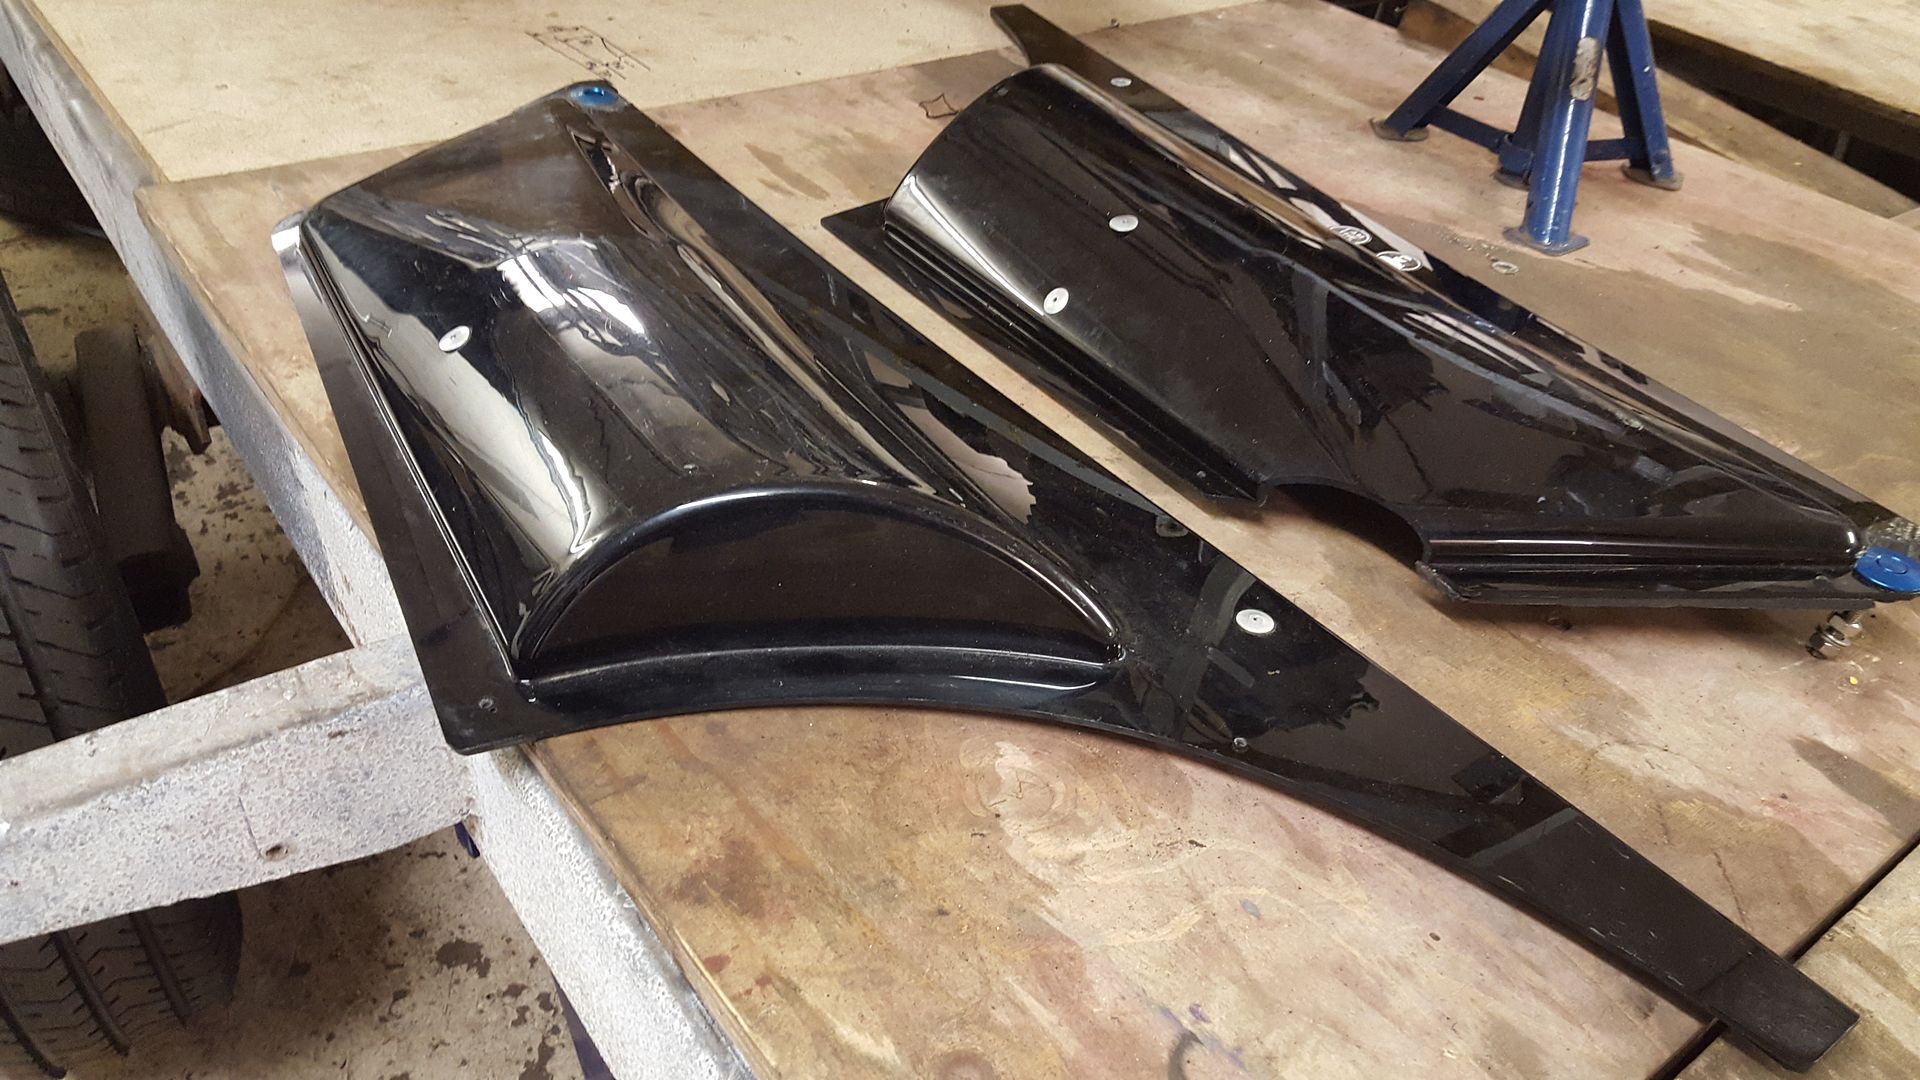
but as it turns out my cockpit is obviously longer so these wont fit
happy with progress so far
Quinten - 7/5/17 at 09:31 PM
Loving the 'can do' attitude! Keep it up!
super-ron - 8/5/17 at 08:01 AM
quote:
Originally posted by Quinten
Loving the 'can do' attitude! Keep it up!
Glad you're enjoying progress, I know noone really knows who I am as a new member and it might just seem like I'm chopping the crap out of
everything as I go.... but hopefully my workmanship will speak for itself once the modifications starts 
[Edited on 8/5/17 by super-ron]
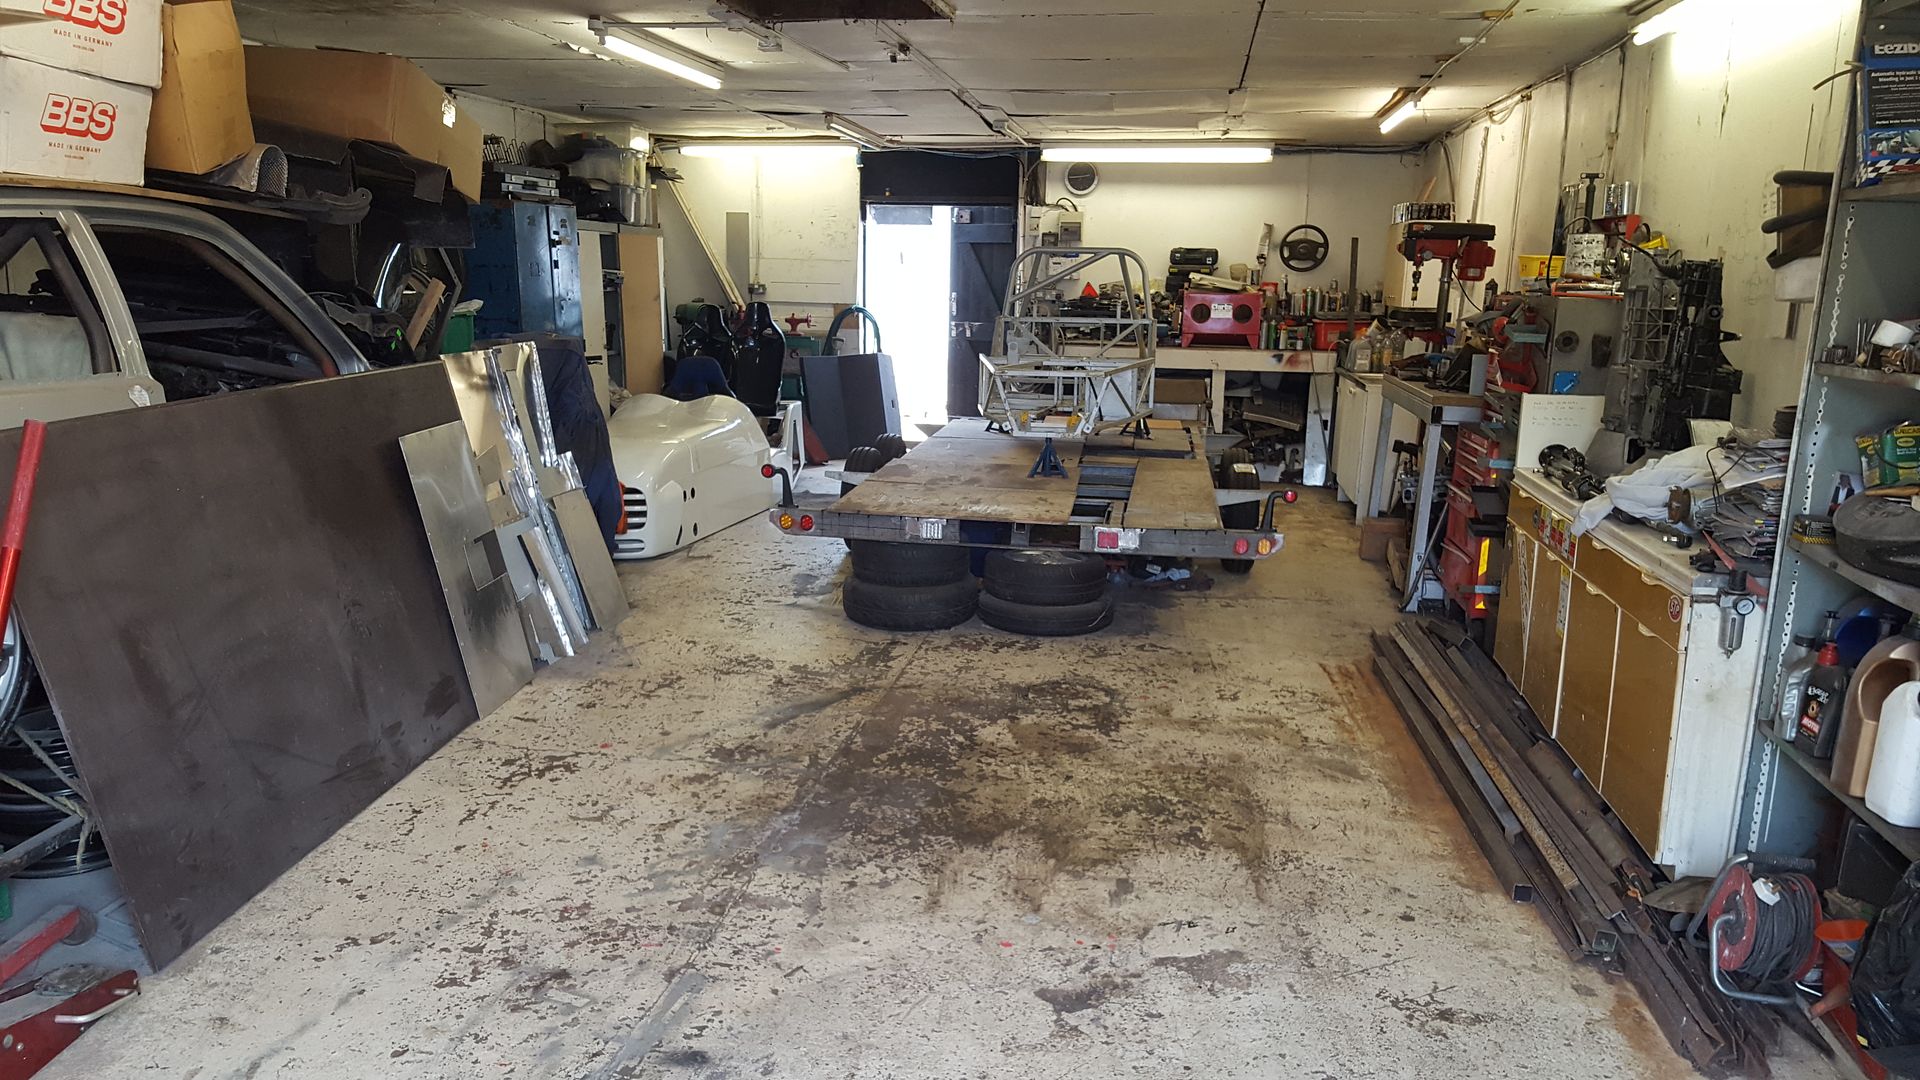
Dick Axtell - 8/5/17 at 08:46 AM
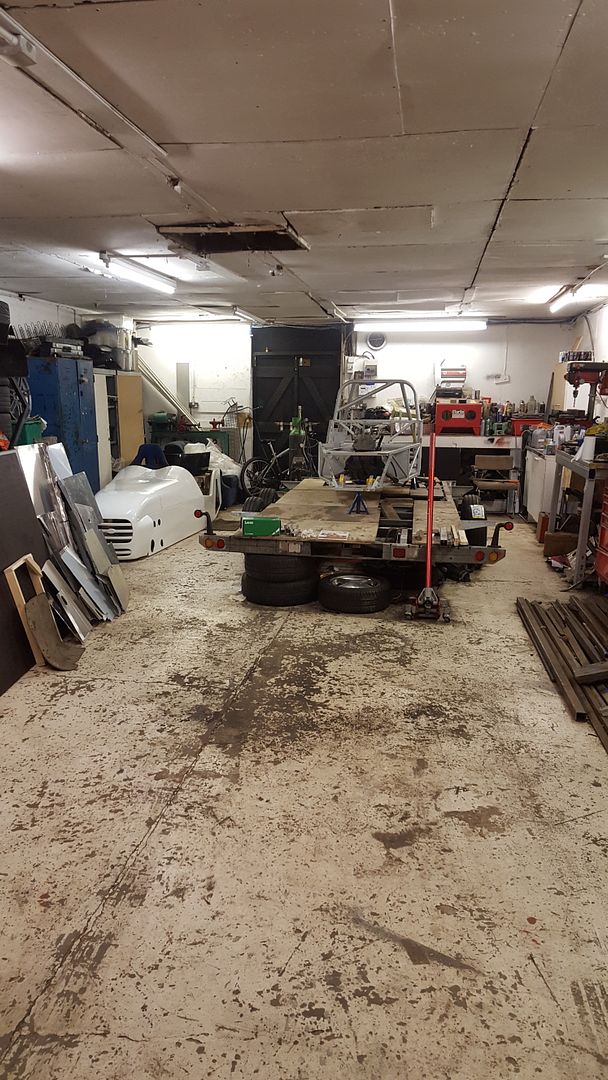
Am very envious of your workshop. You seem to have plenty of room - and the right equipment (which really helps!!). Nonetheless, great job, thanks for
posting some very interesting pics.
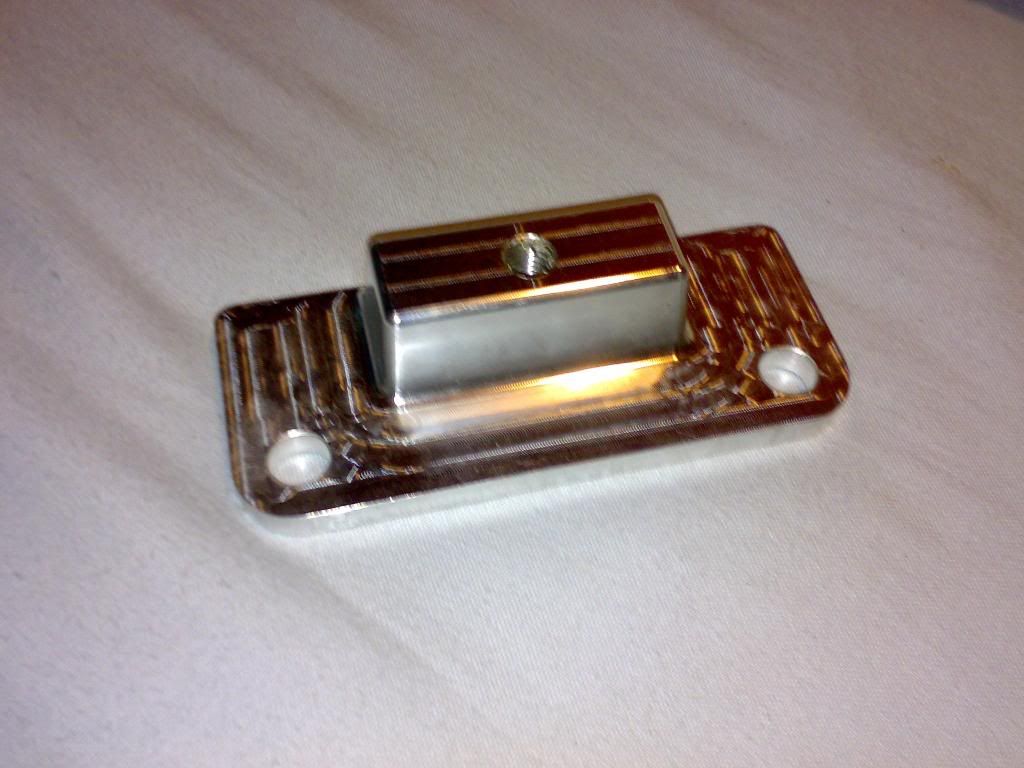
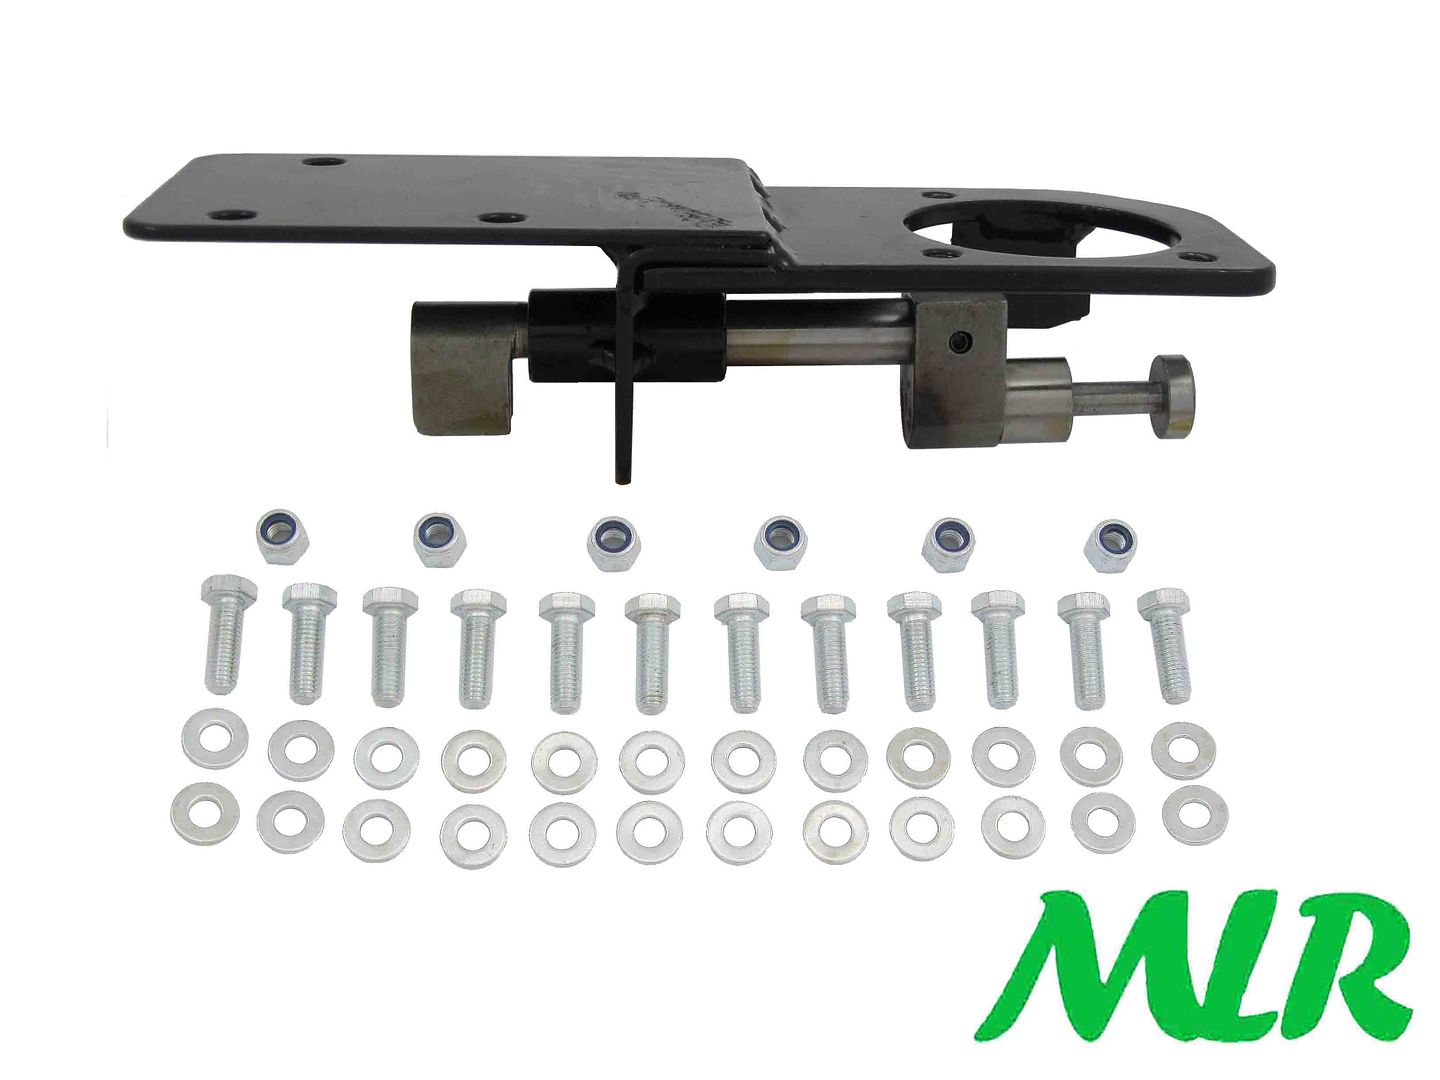
Looking at your preliminary engine/box installation, I reckon you'll need to get the it approx. 5 inches further back. That gearchange needs to
be behind that trans tunnel cross-piece. I had to use one of those "remote" gearchange adaptors -
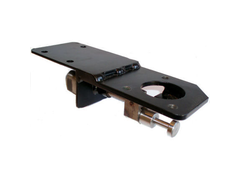
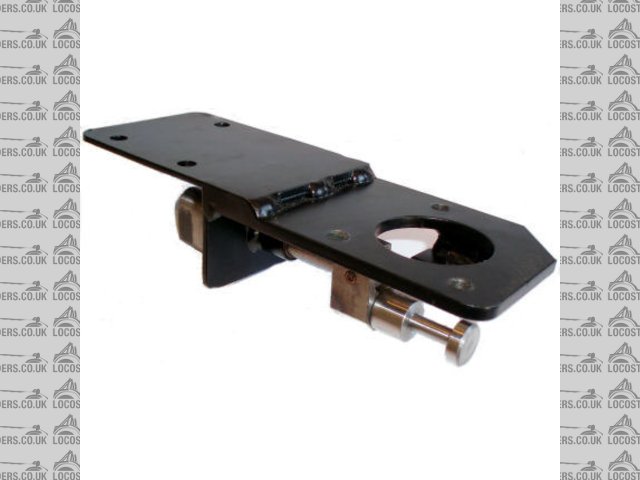
Gear_Lever_Extn
[Edited on 8/5/17 by Dick Axtell]
[Edited on 8/5/17 by Dick Axtell]
super-ron - 8/5/17 at 11:10 AM
quote:
Originally posted by Dick Axtell
Am very envious of your workshop. You seem to have plenty of room - and the right equipment (which really helps!!). Nonetheless, great job, thanks for
posting some very interesting pics.
Looking at your preliminary engine/box installation, I reckon you'll need to get the it approx. 5 inches further back. That gearchange needs to
be behind that trans tunnel cross-piece. I had to use one of those "remote" gearchange adaptors -
Gear_Lever_Extn
[Edited on 8/5/17 by Dick Axtell]
[Edited on 8/5/17 by Dick Axtell]
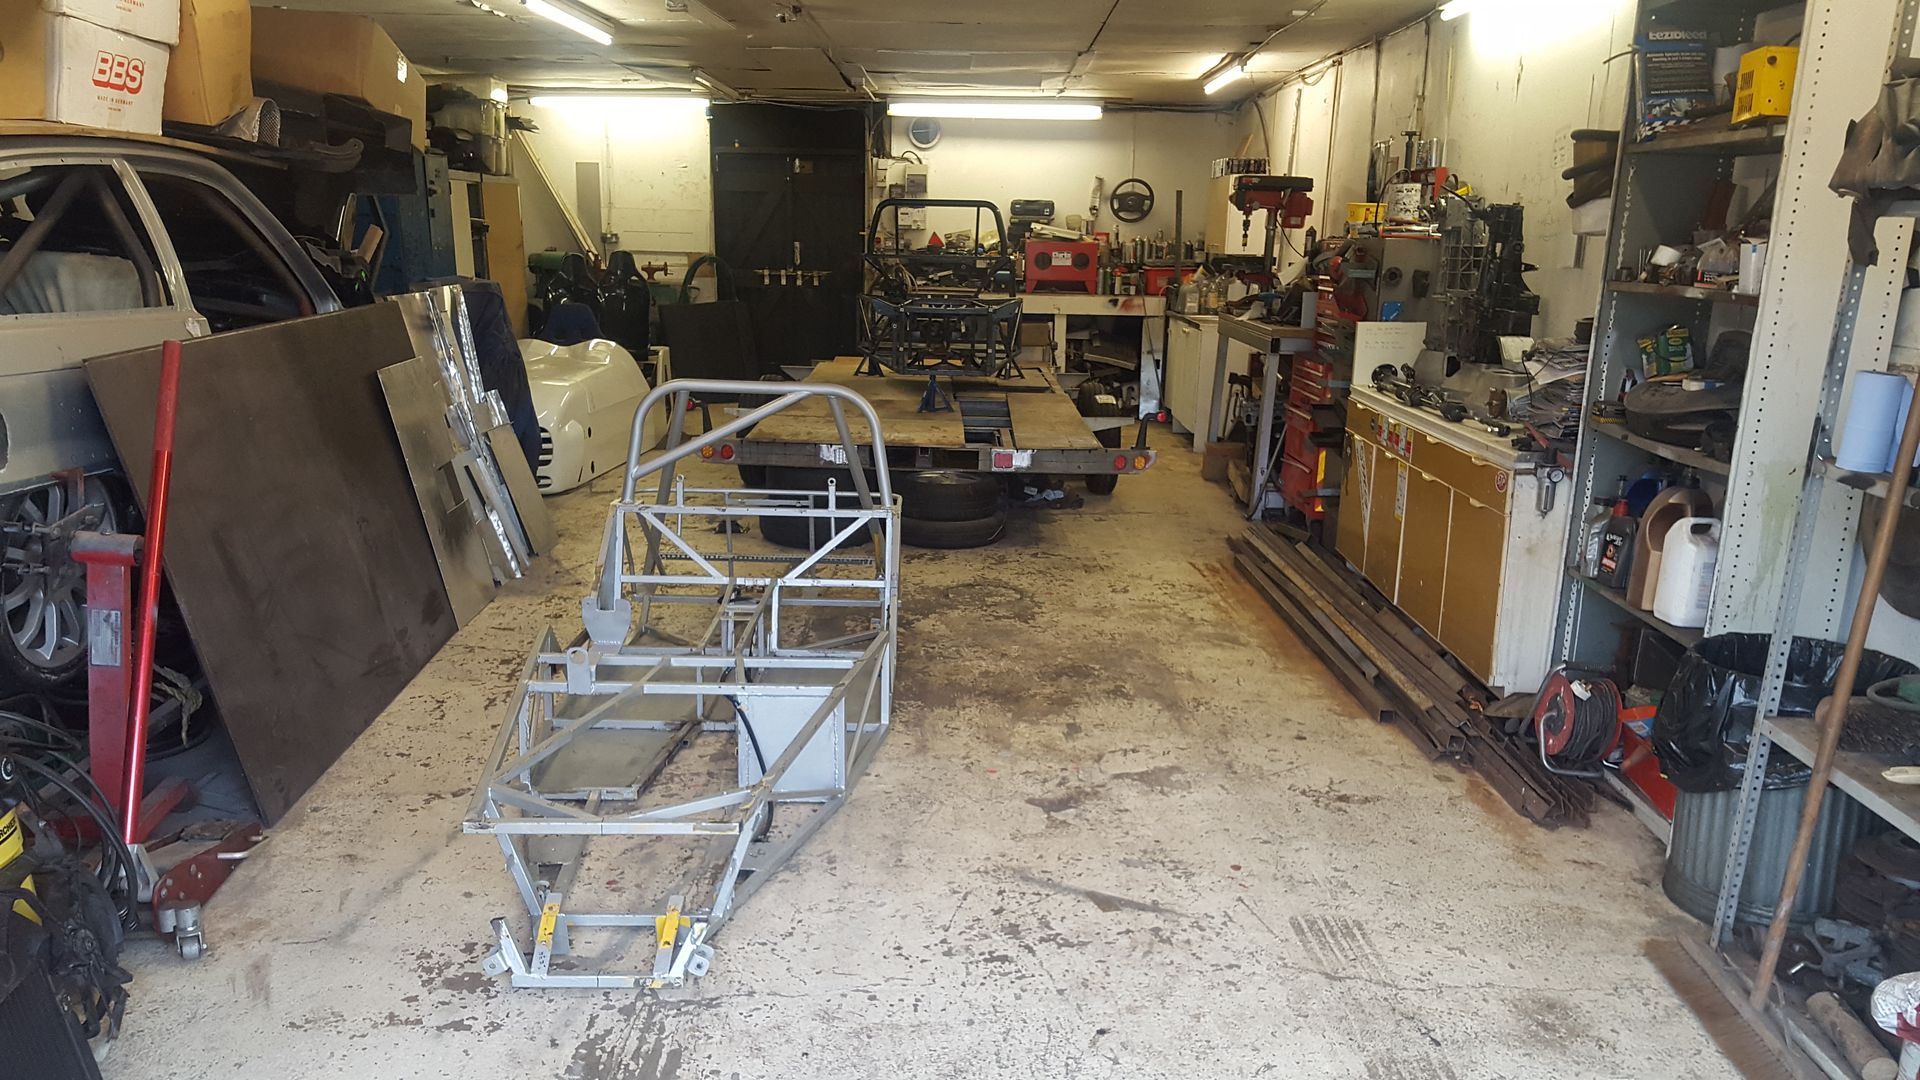
Thanks, it is my little paradise, it's about 1000sq feet and fully loaded workshop all for me
I did think the gear stick was a little far forward when I was sitting in the car, but looking at other locost's they all seem to be a bit under
the dash. and curiously the pre cut pieces lined up with the hole
But I like the look of that extension piece.
Angel Acevedo - 8/5/17 at 03:23 PM
Hi Super-ron...
Welcome to the forum, congrats on your buying perofrmance.
regarding your Propshaft, you may want to have a little angle on both engine and diff, this to avoid wearing your UJ´s.
There are several pages on the internet that address this, one example is
http://www.classictruckshop.com/technical/technical-articals/4-drive-line-geometry-101
Hope this helps.
AA
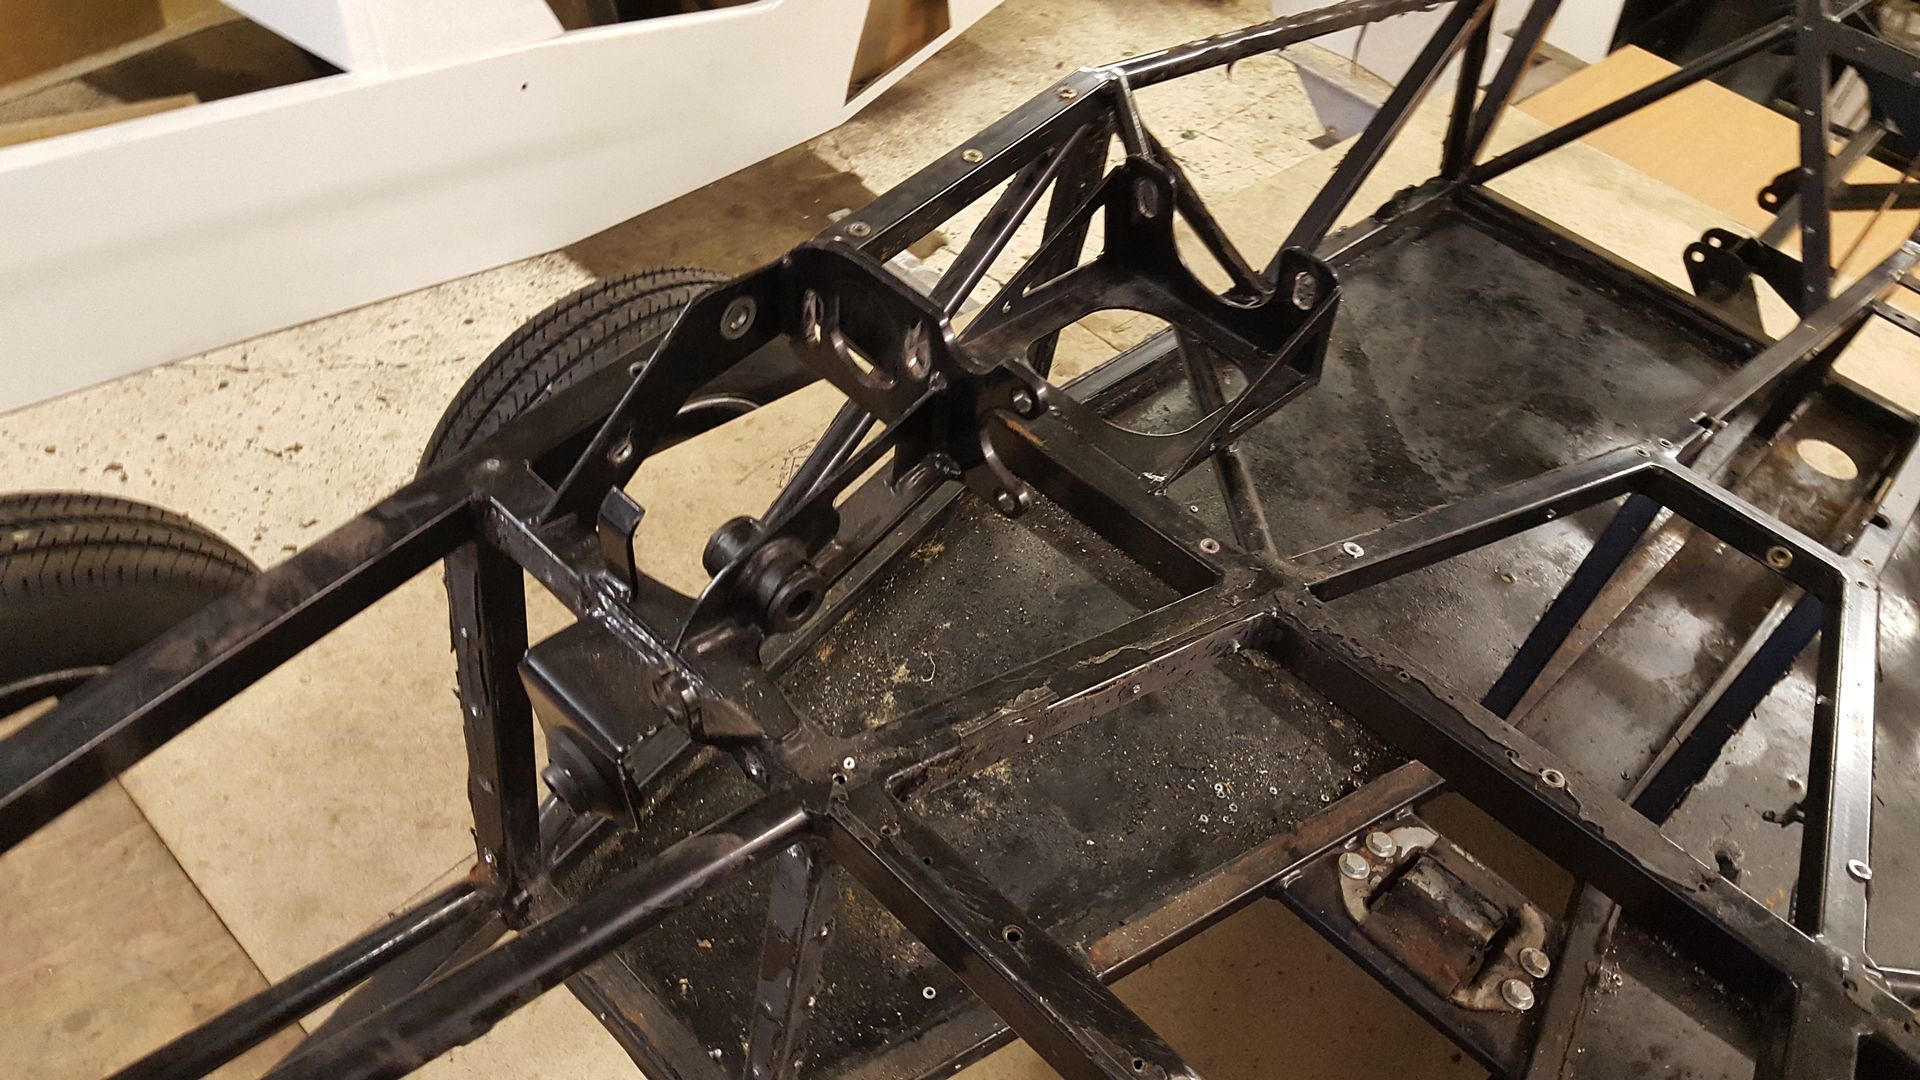
super-ron - 8/5/17 at 09:36 PM
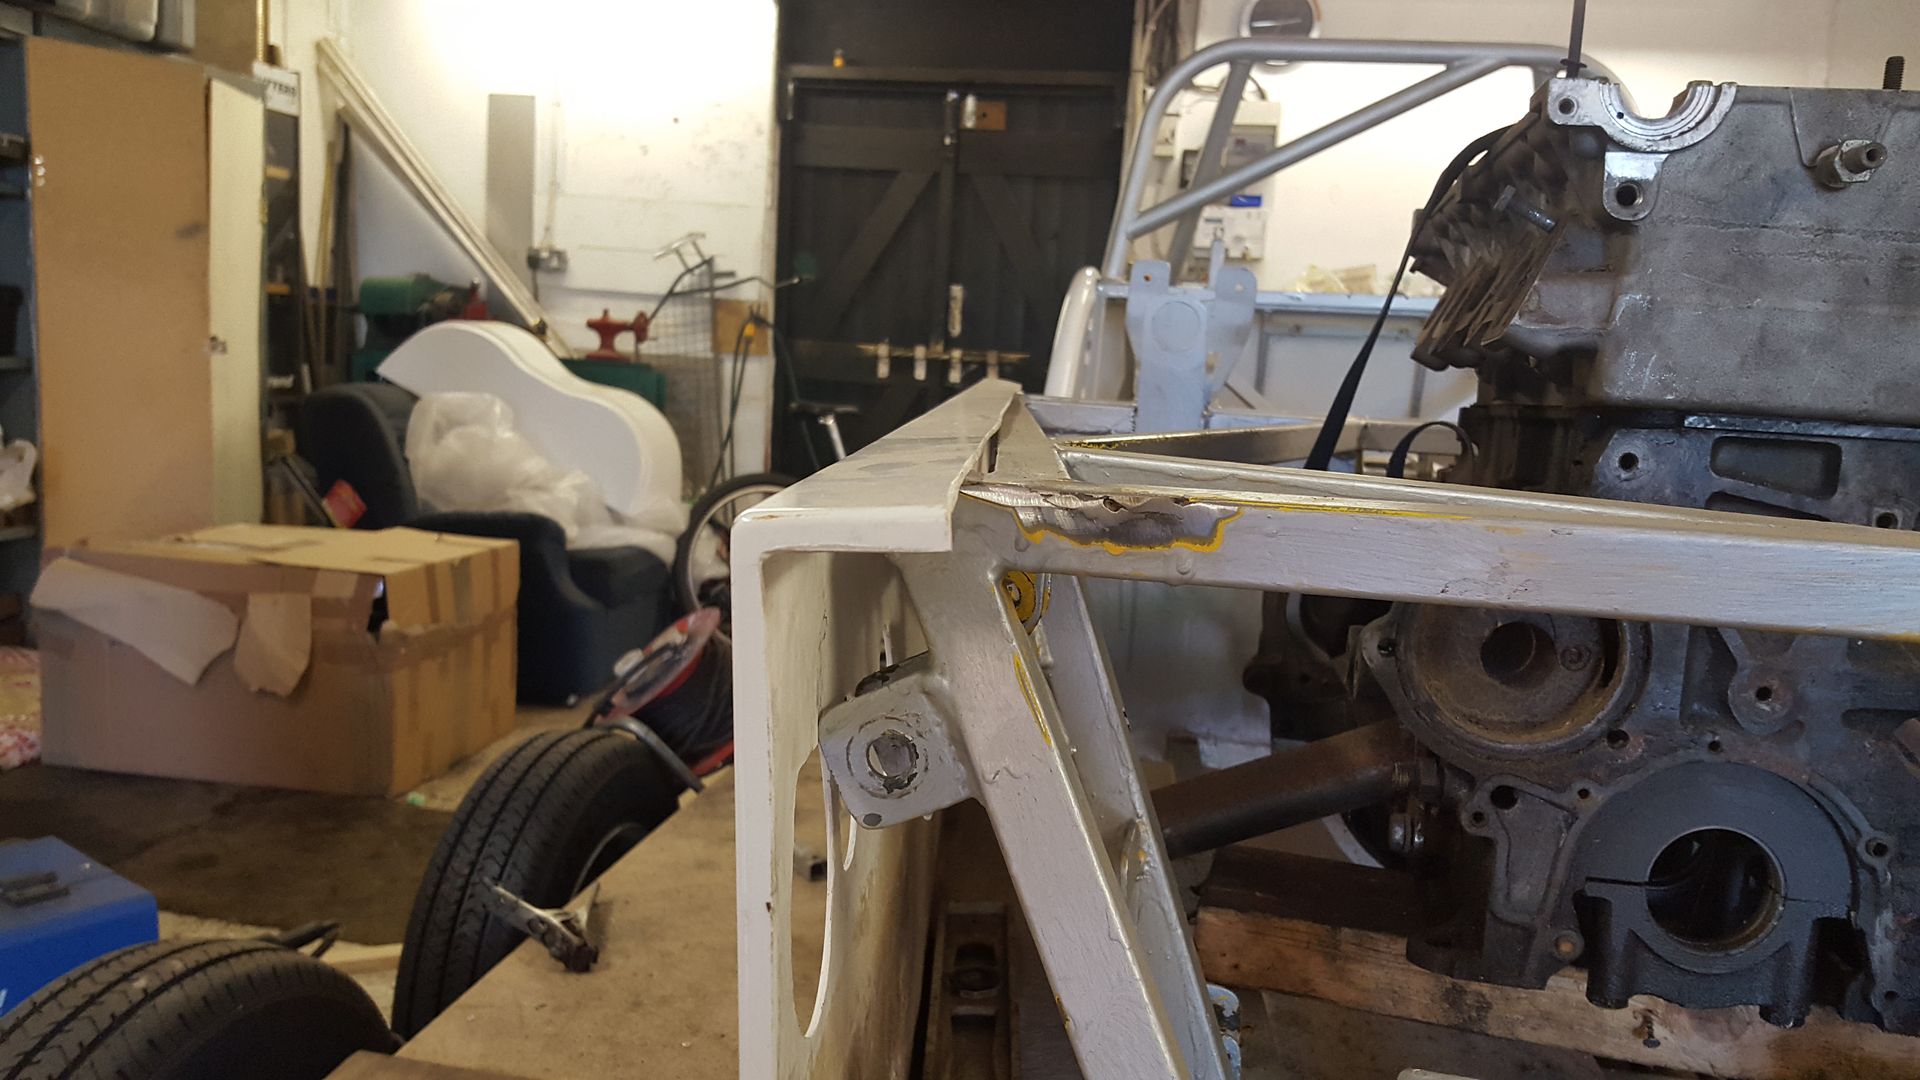
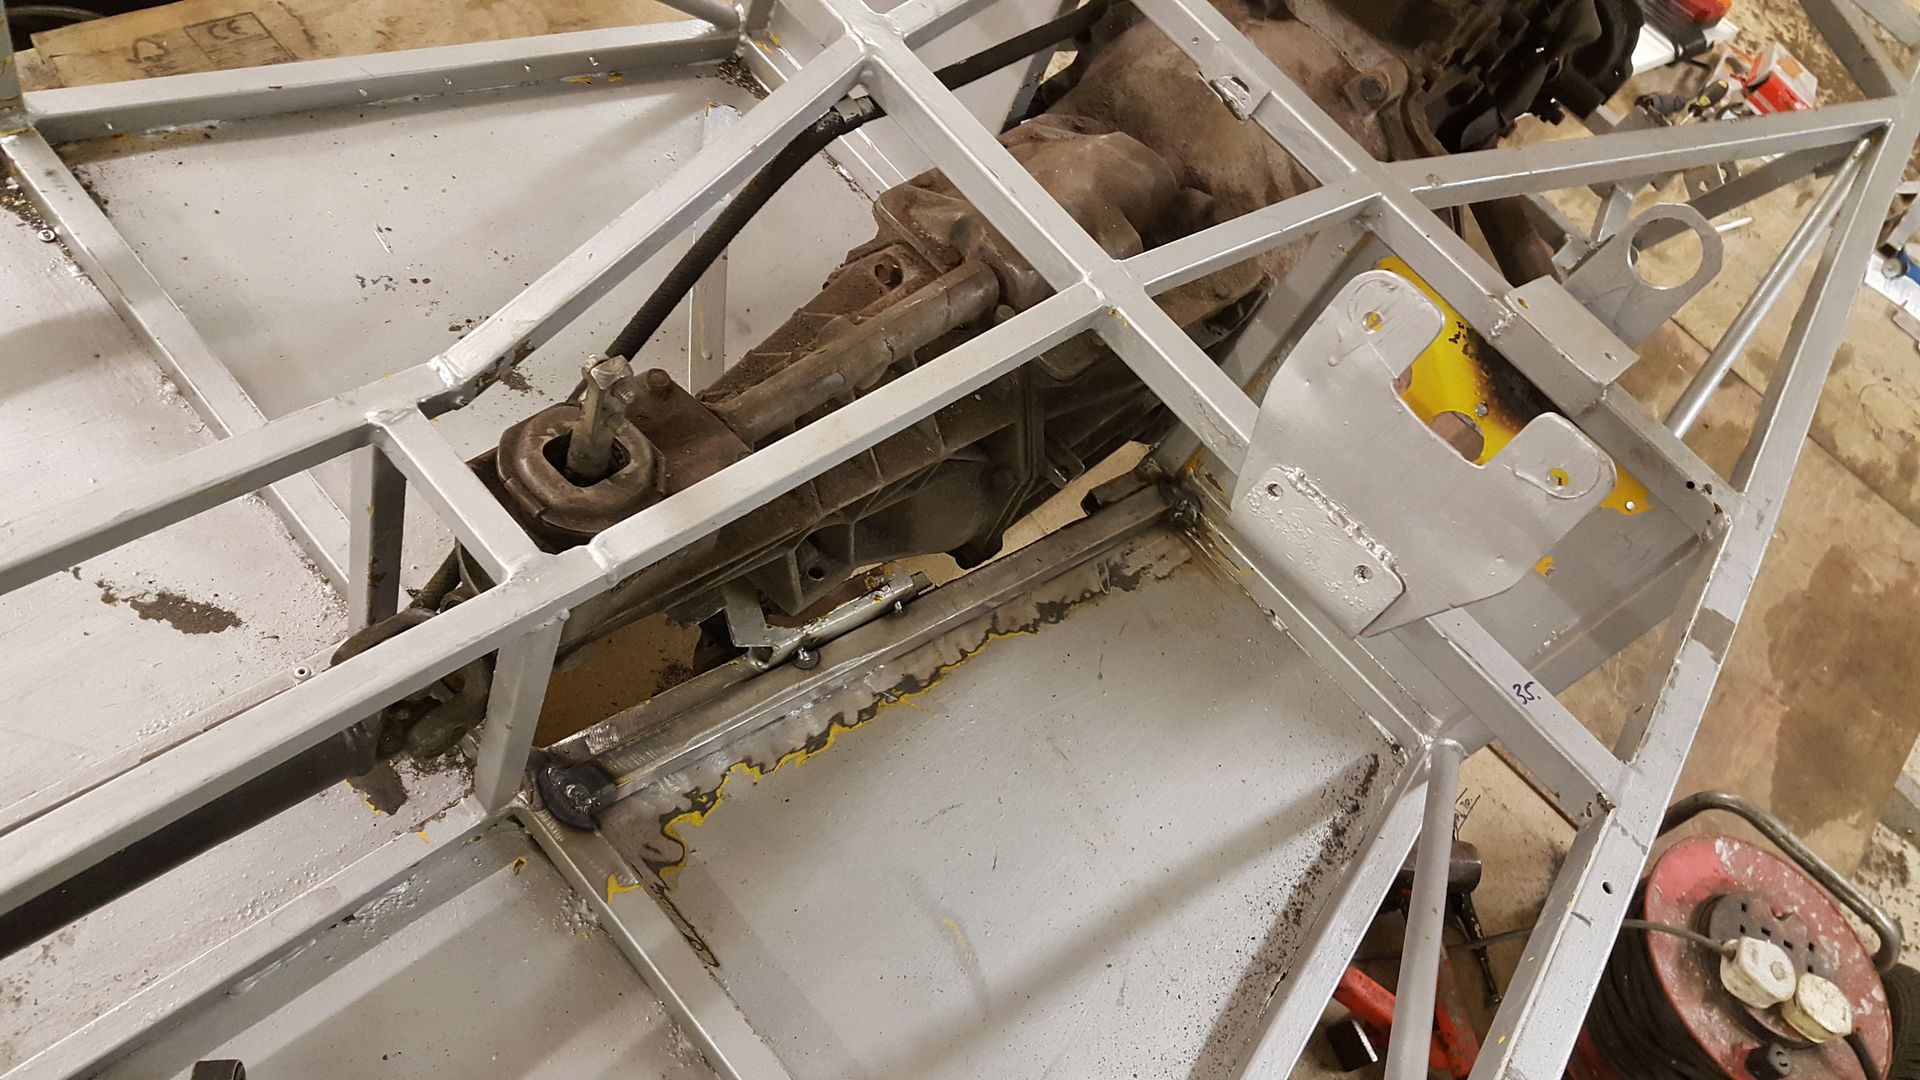
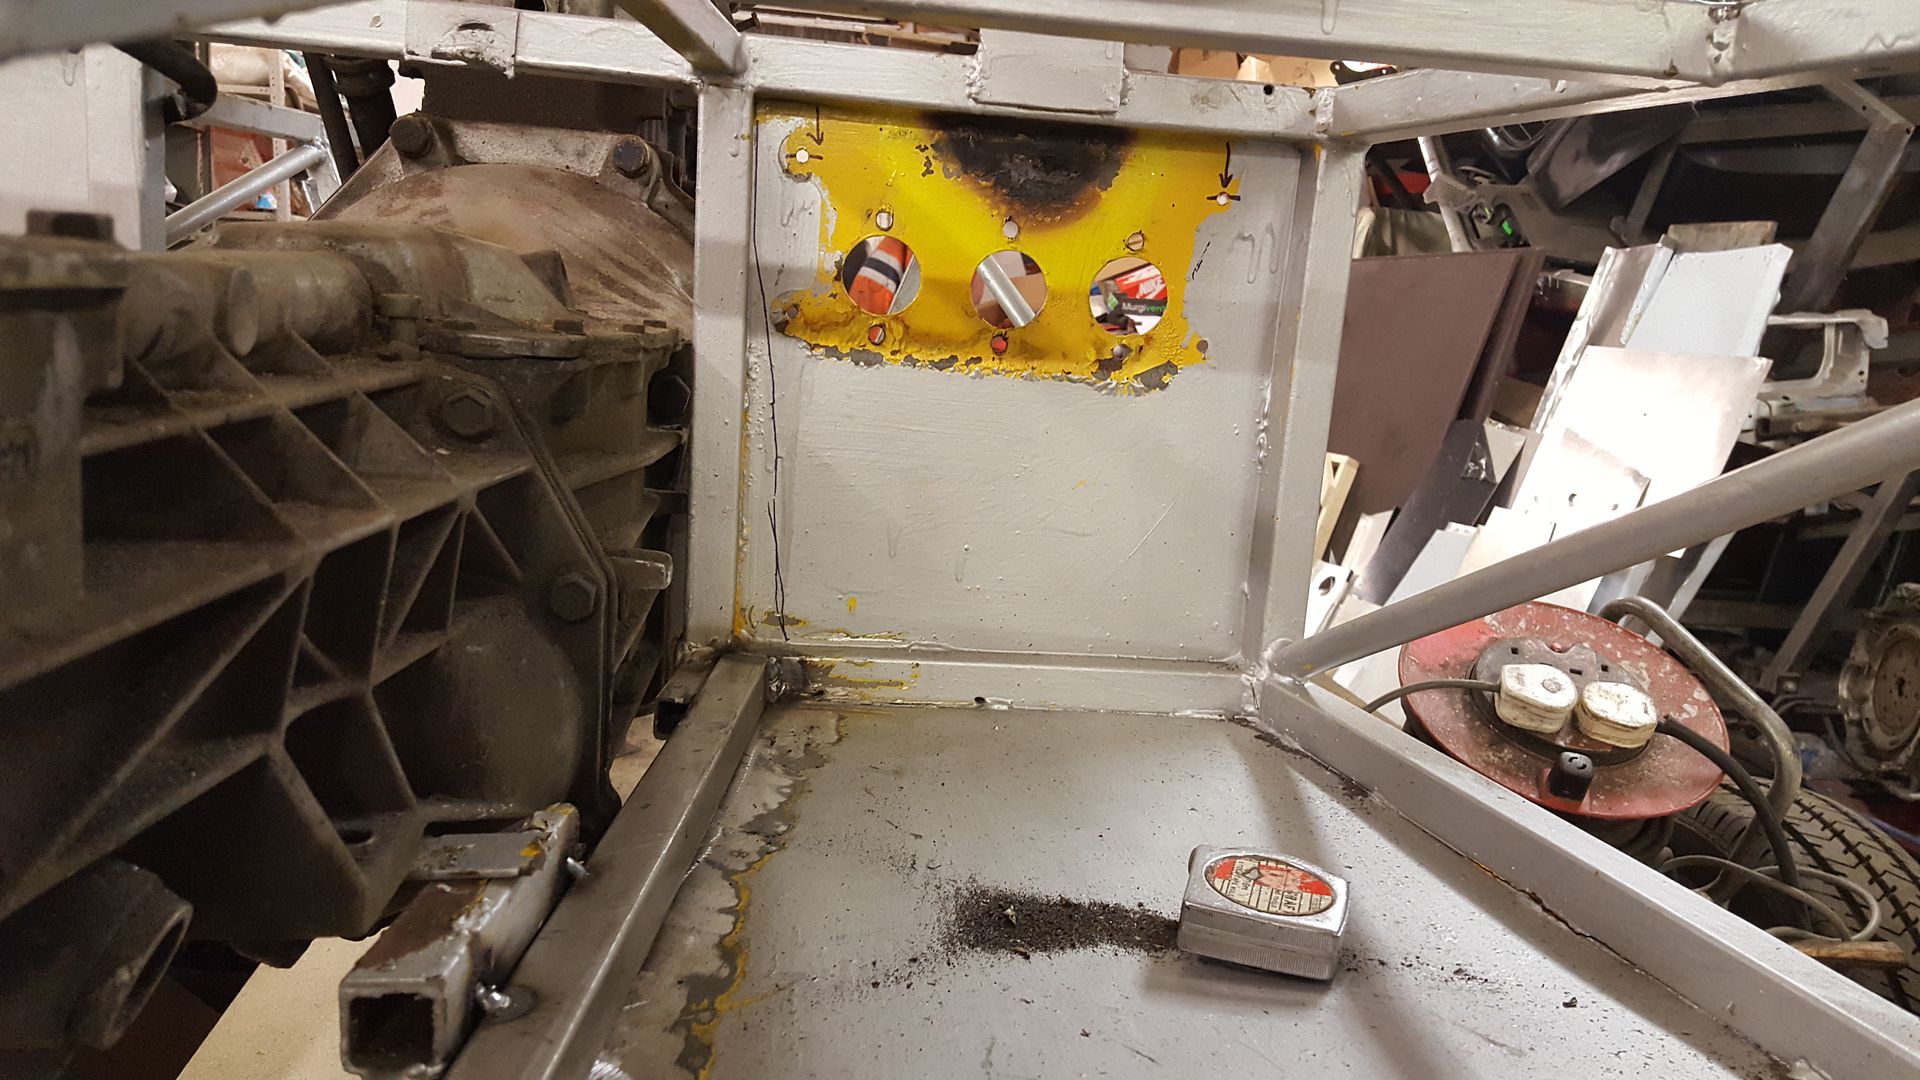
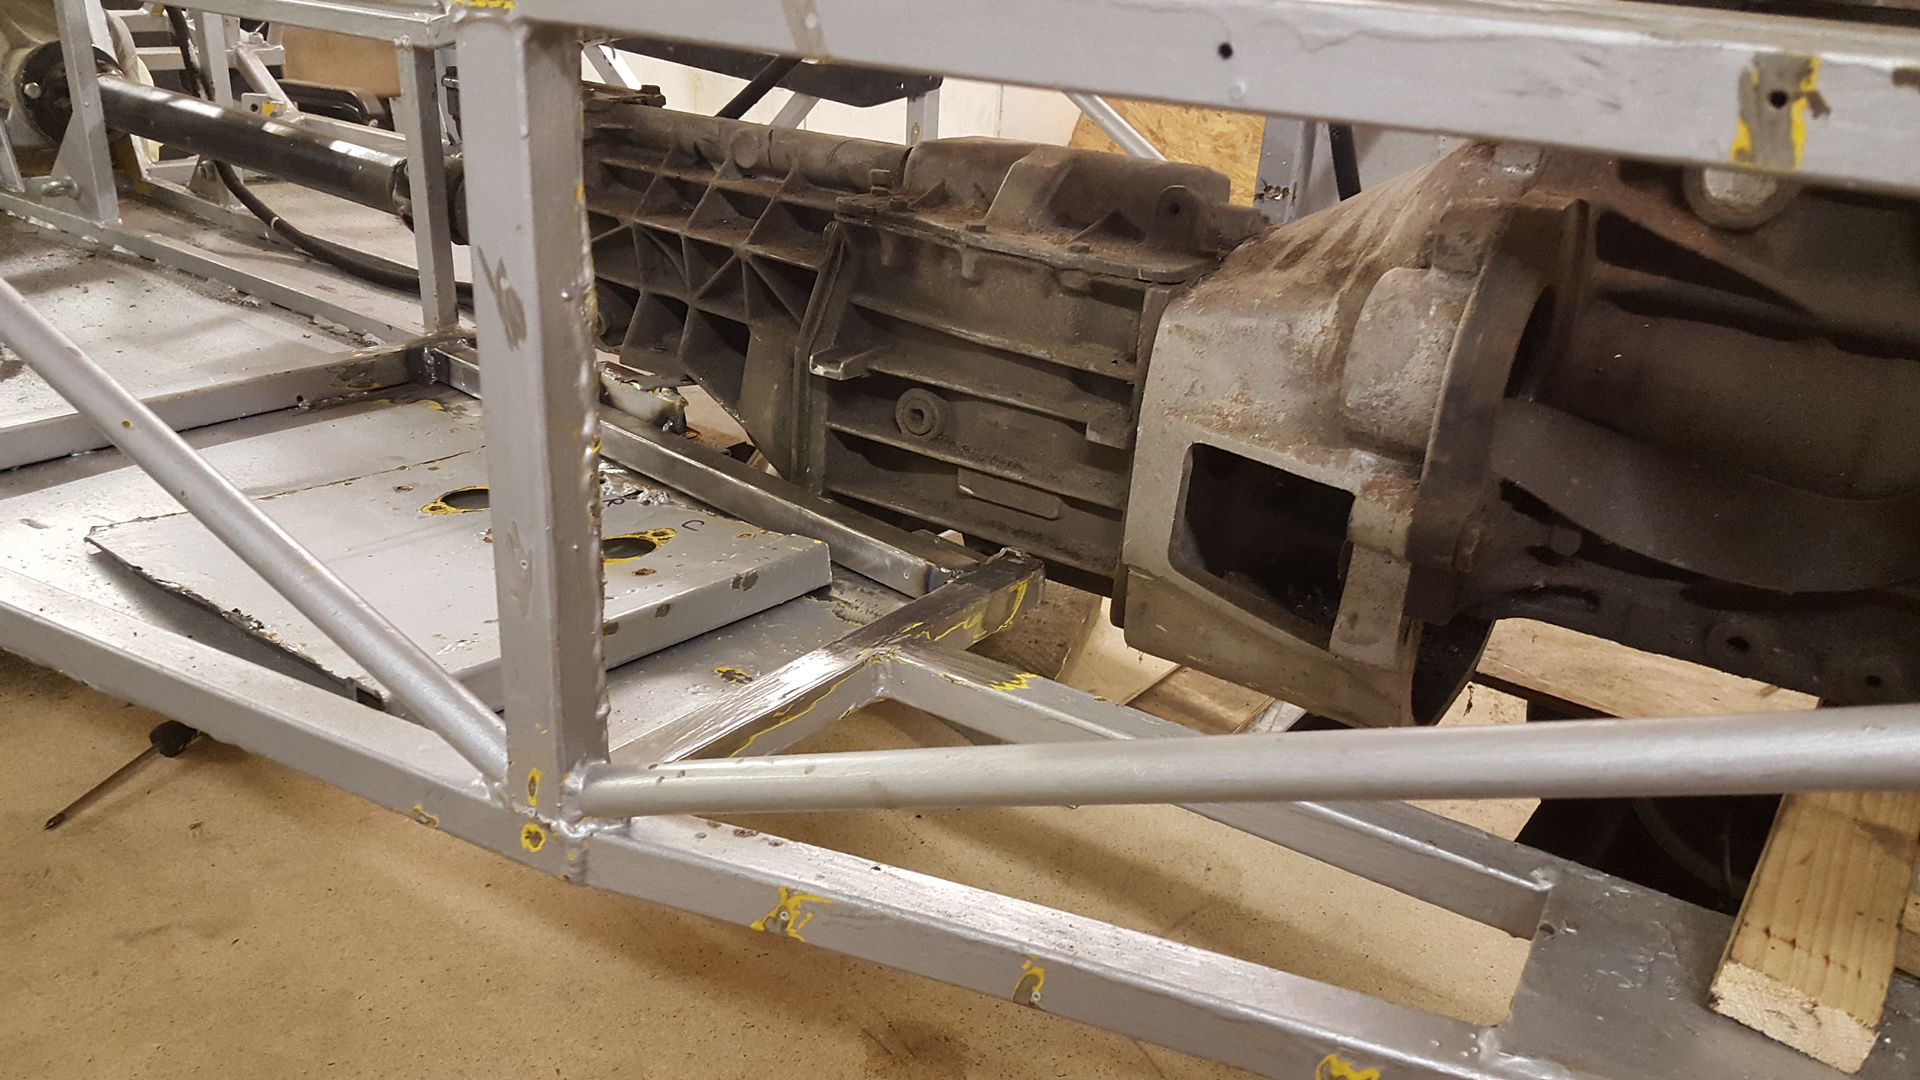
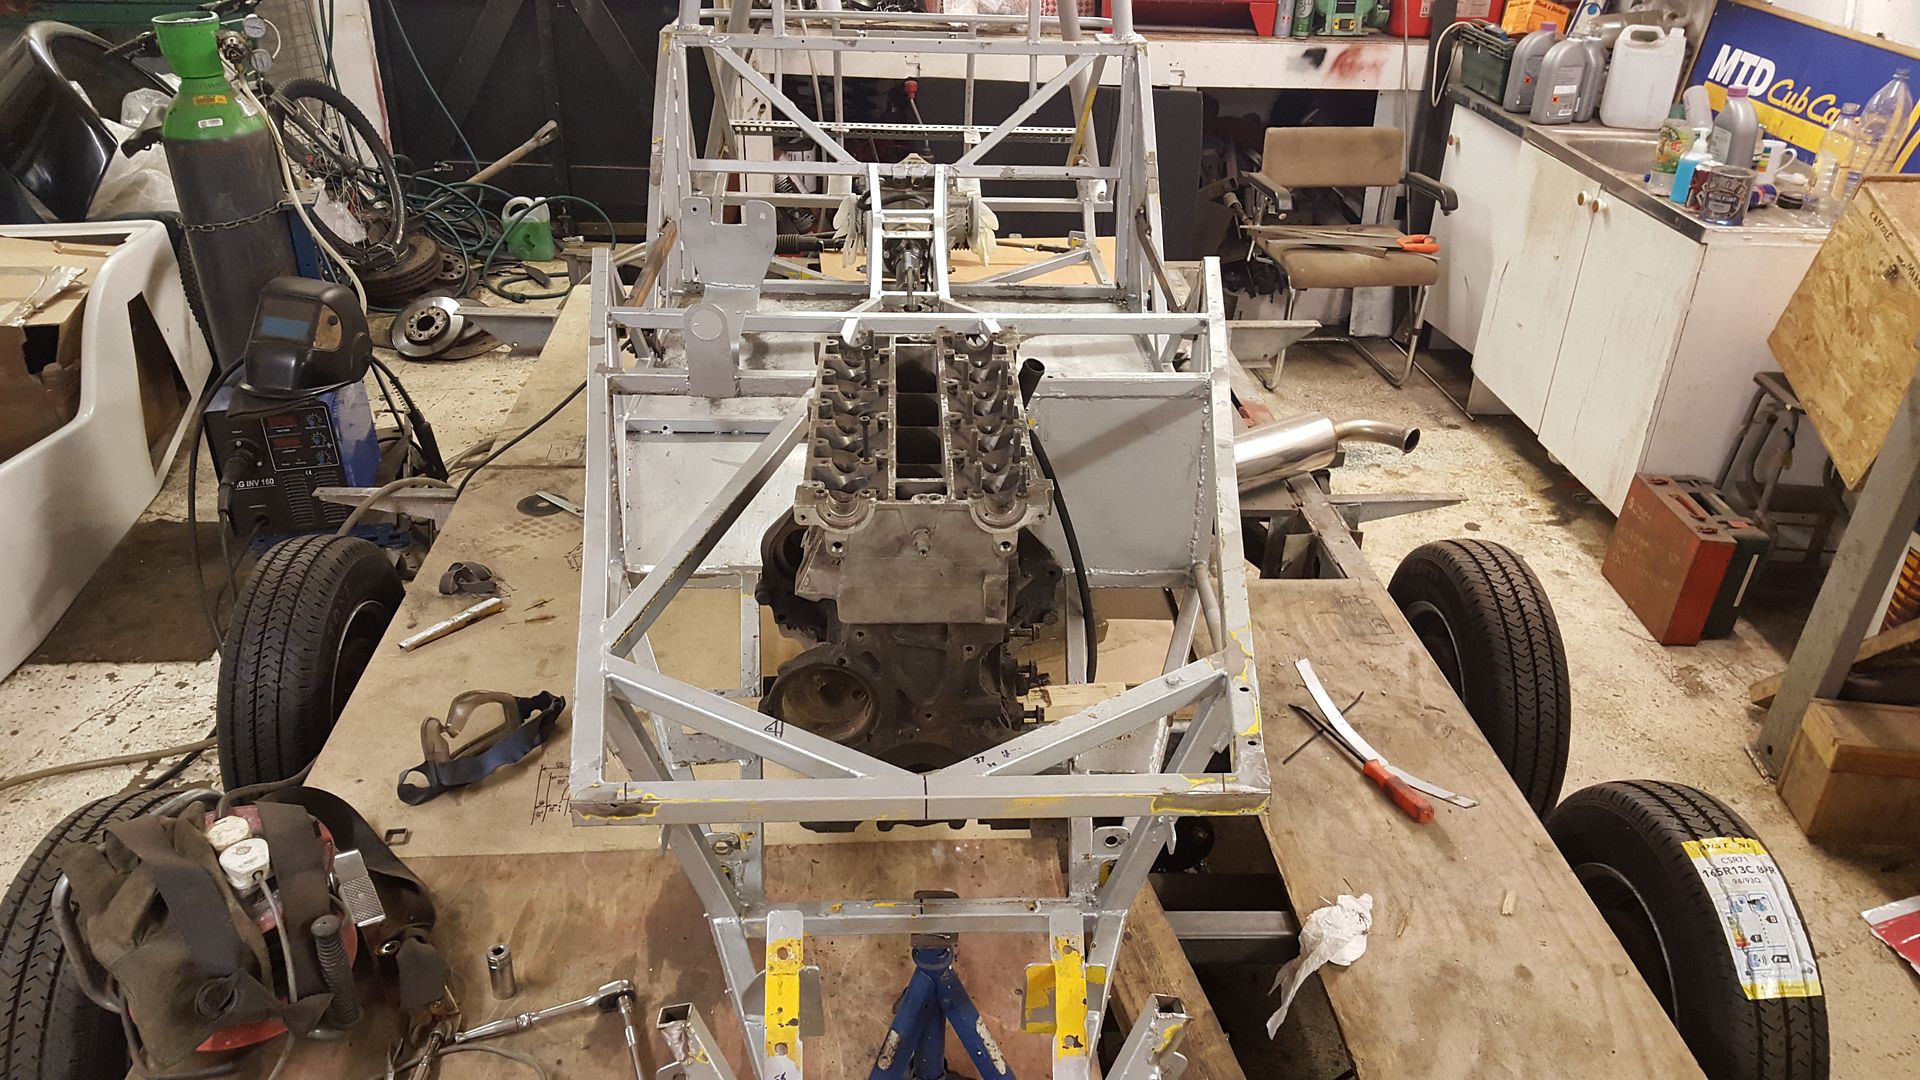
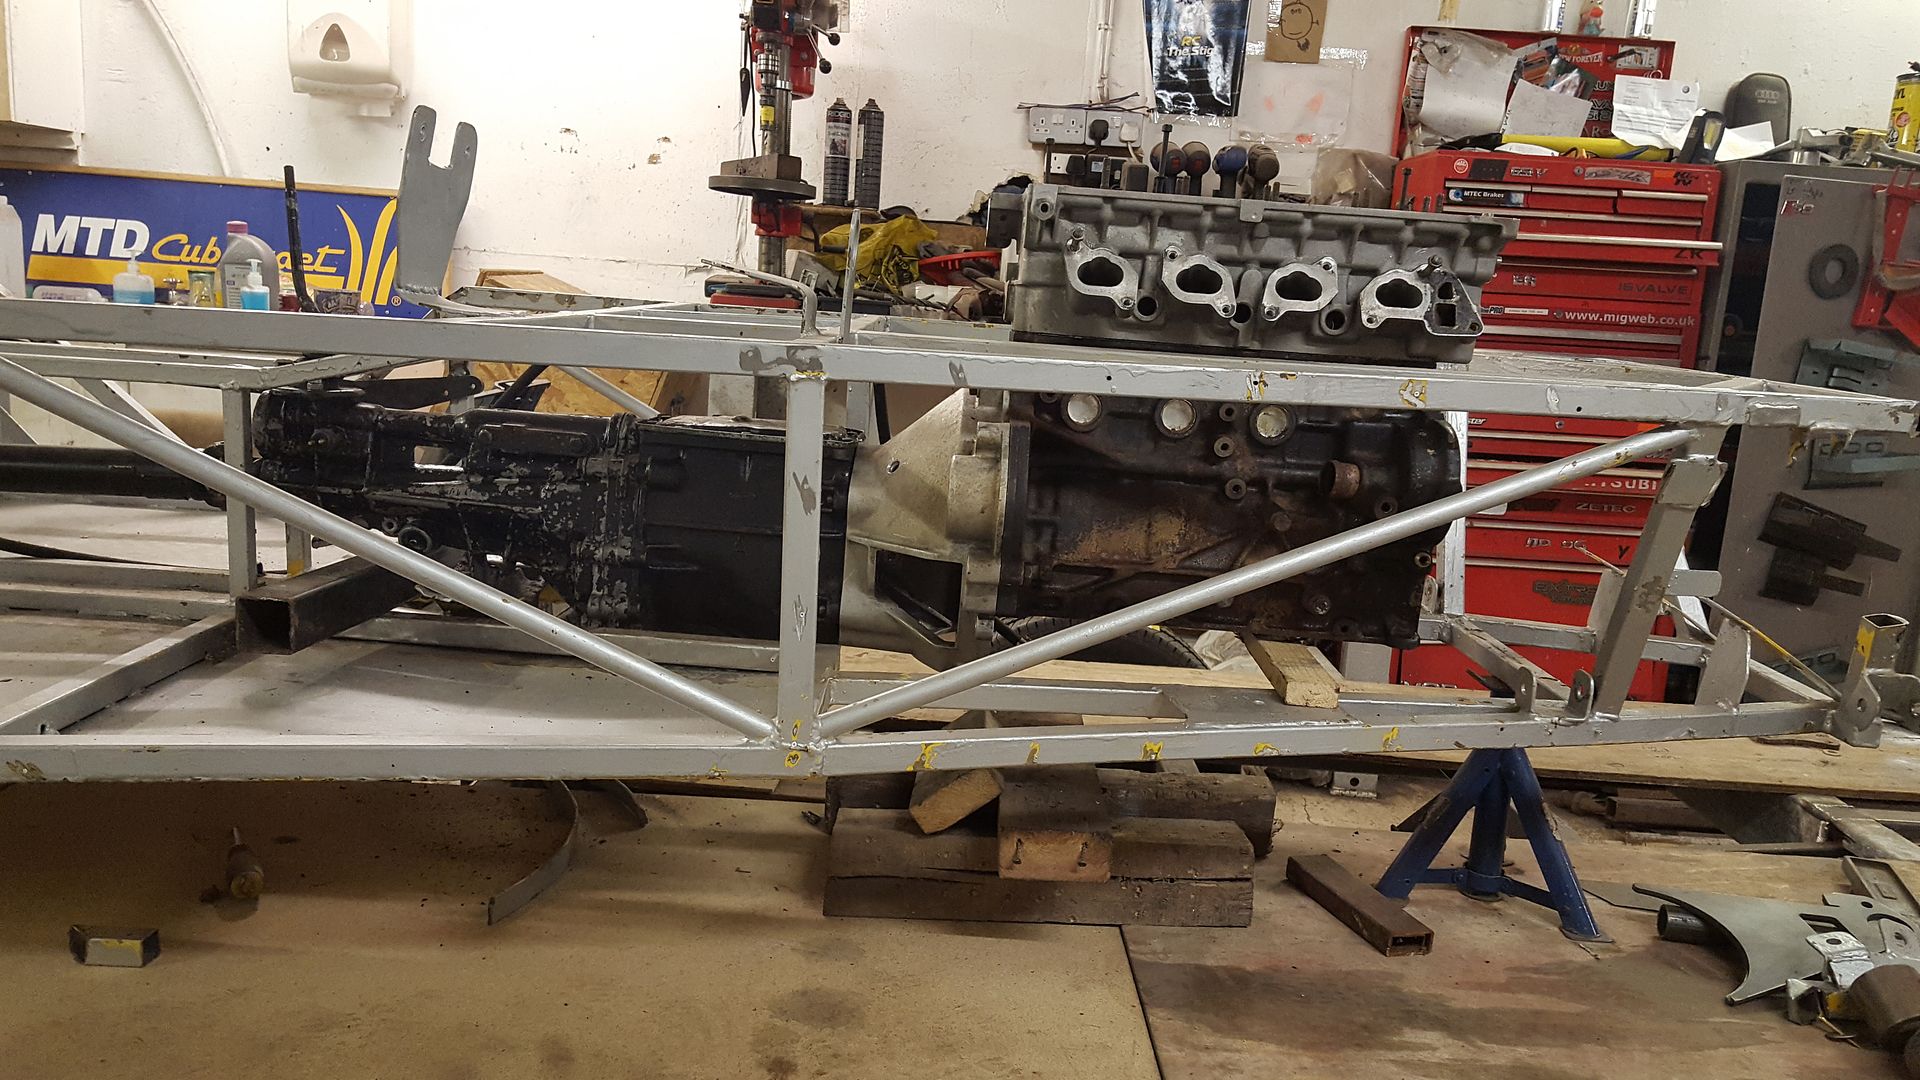
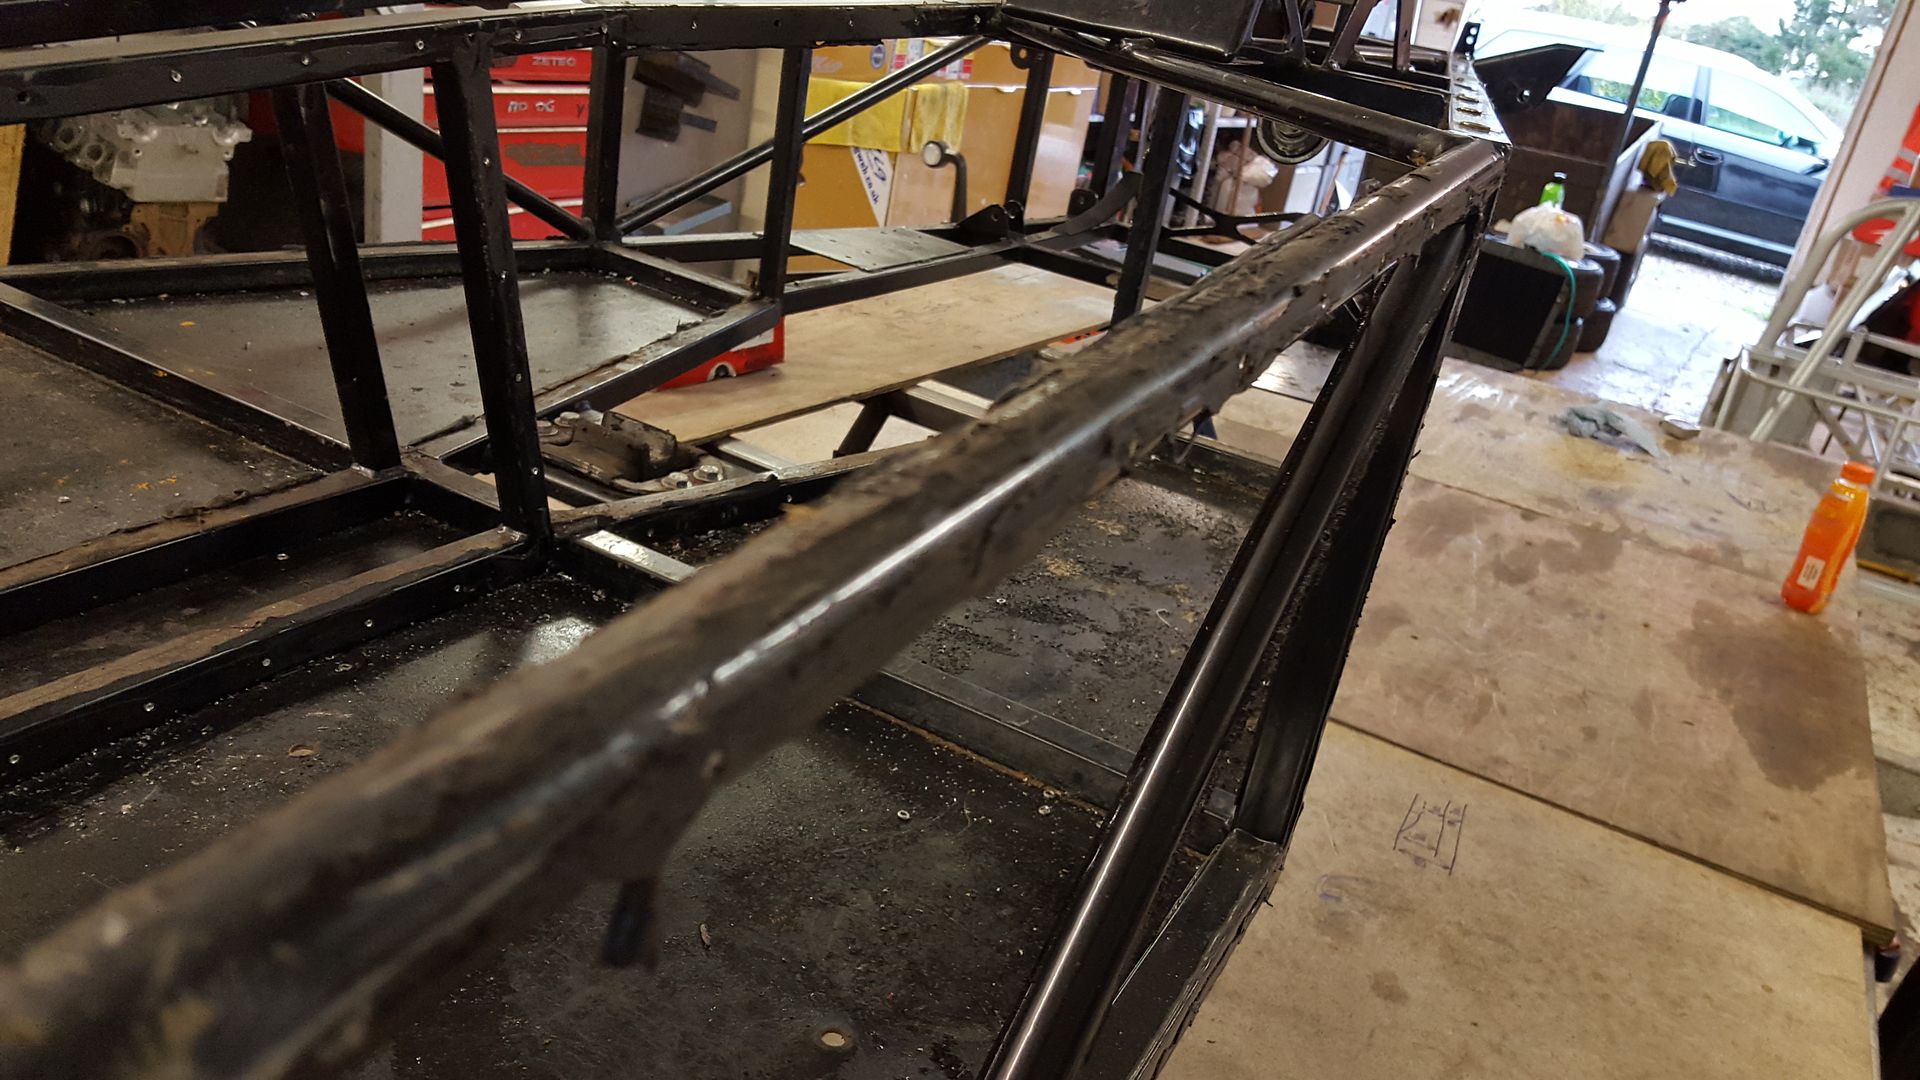
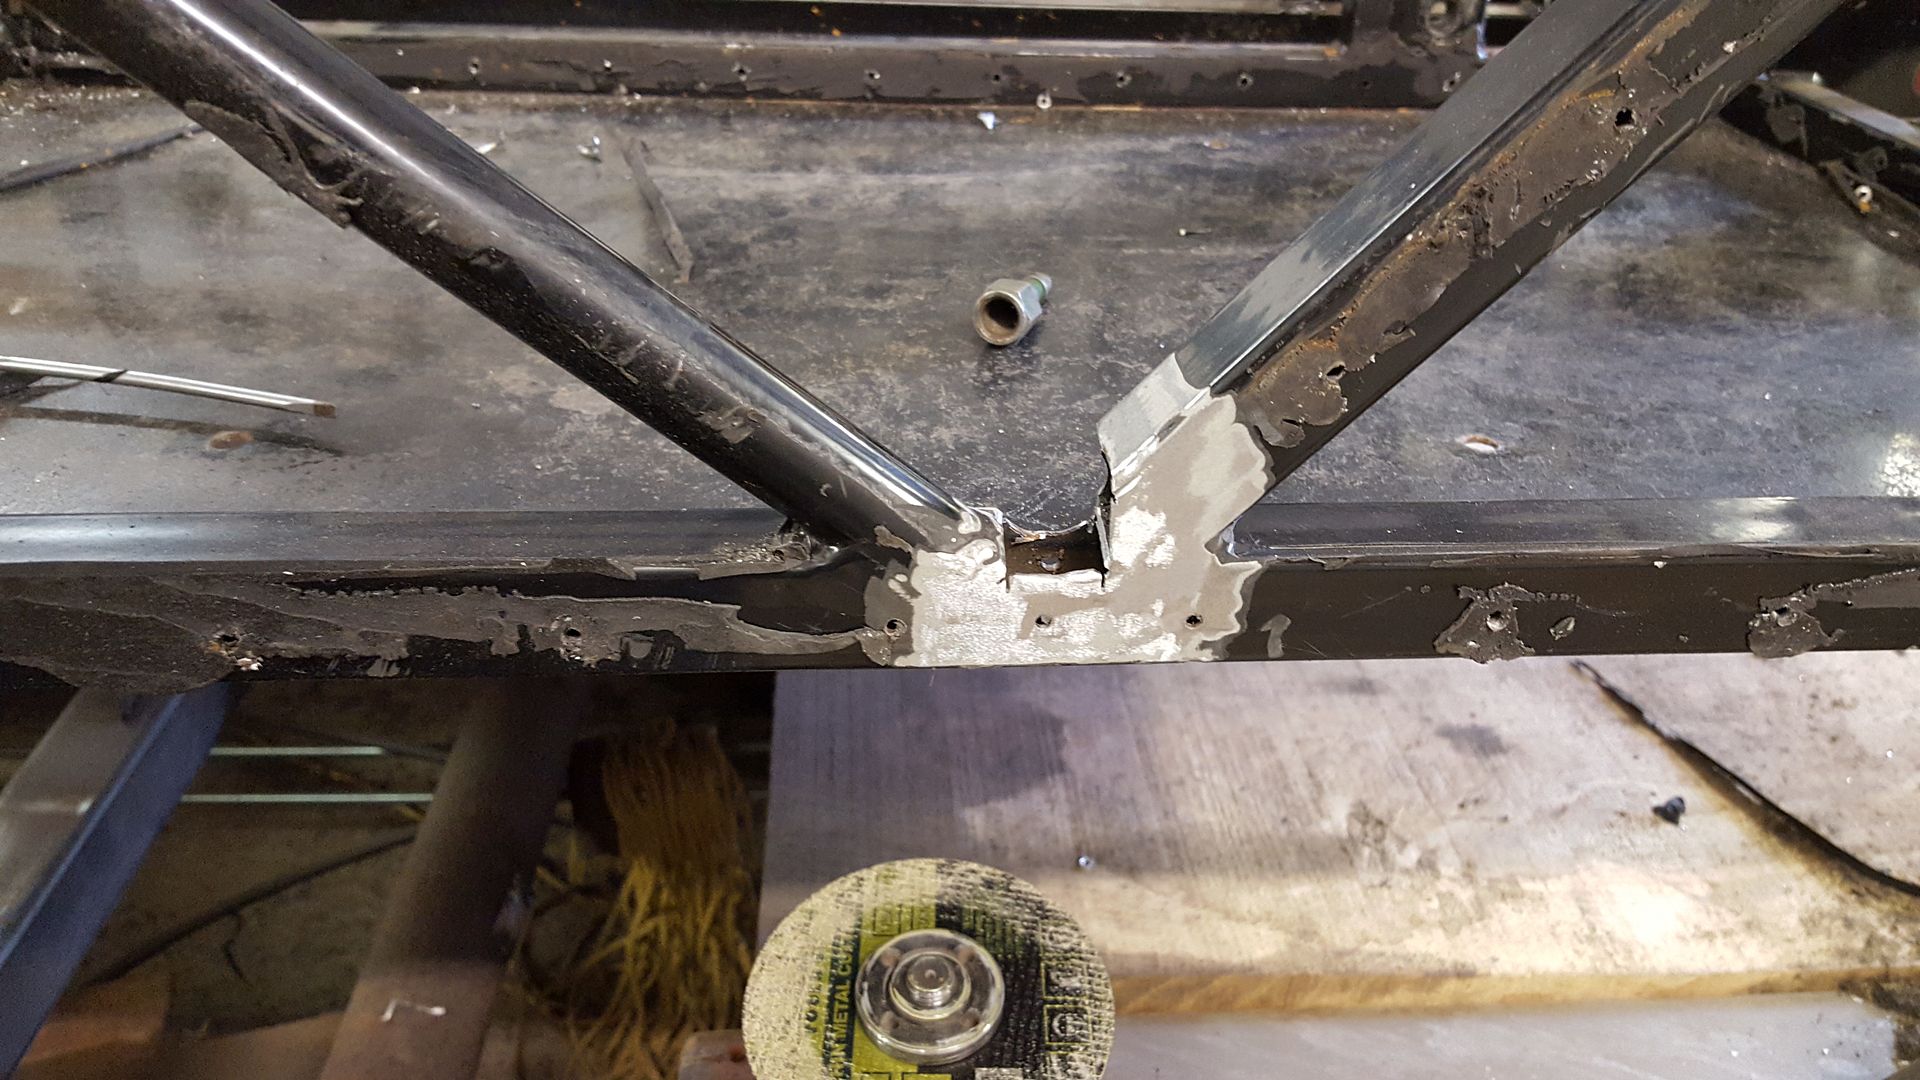
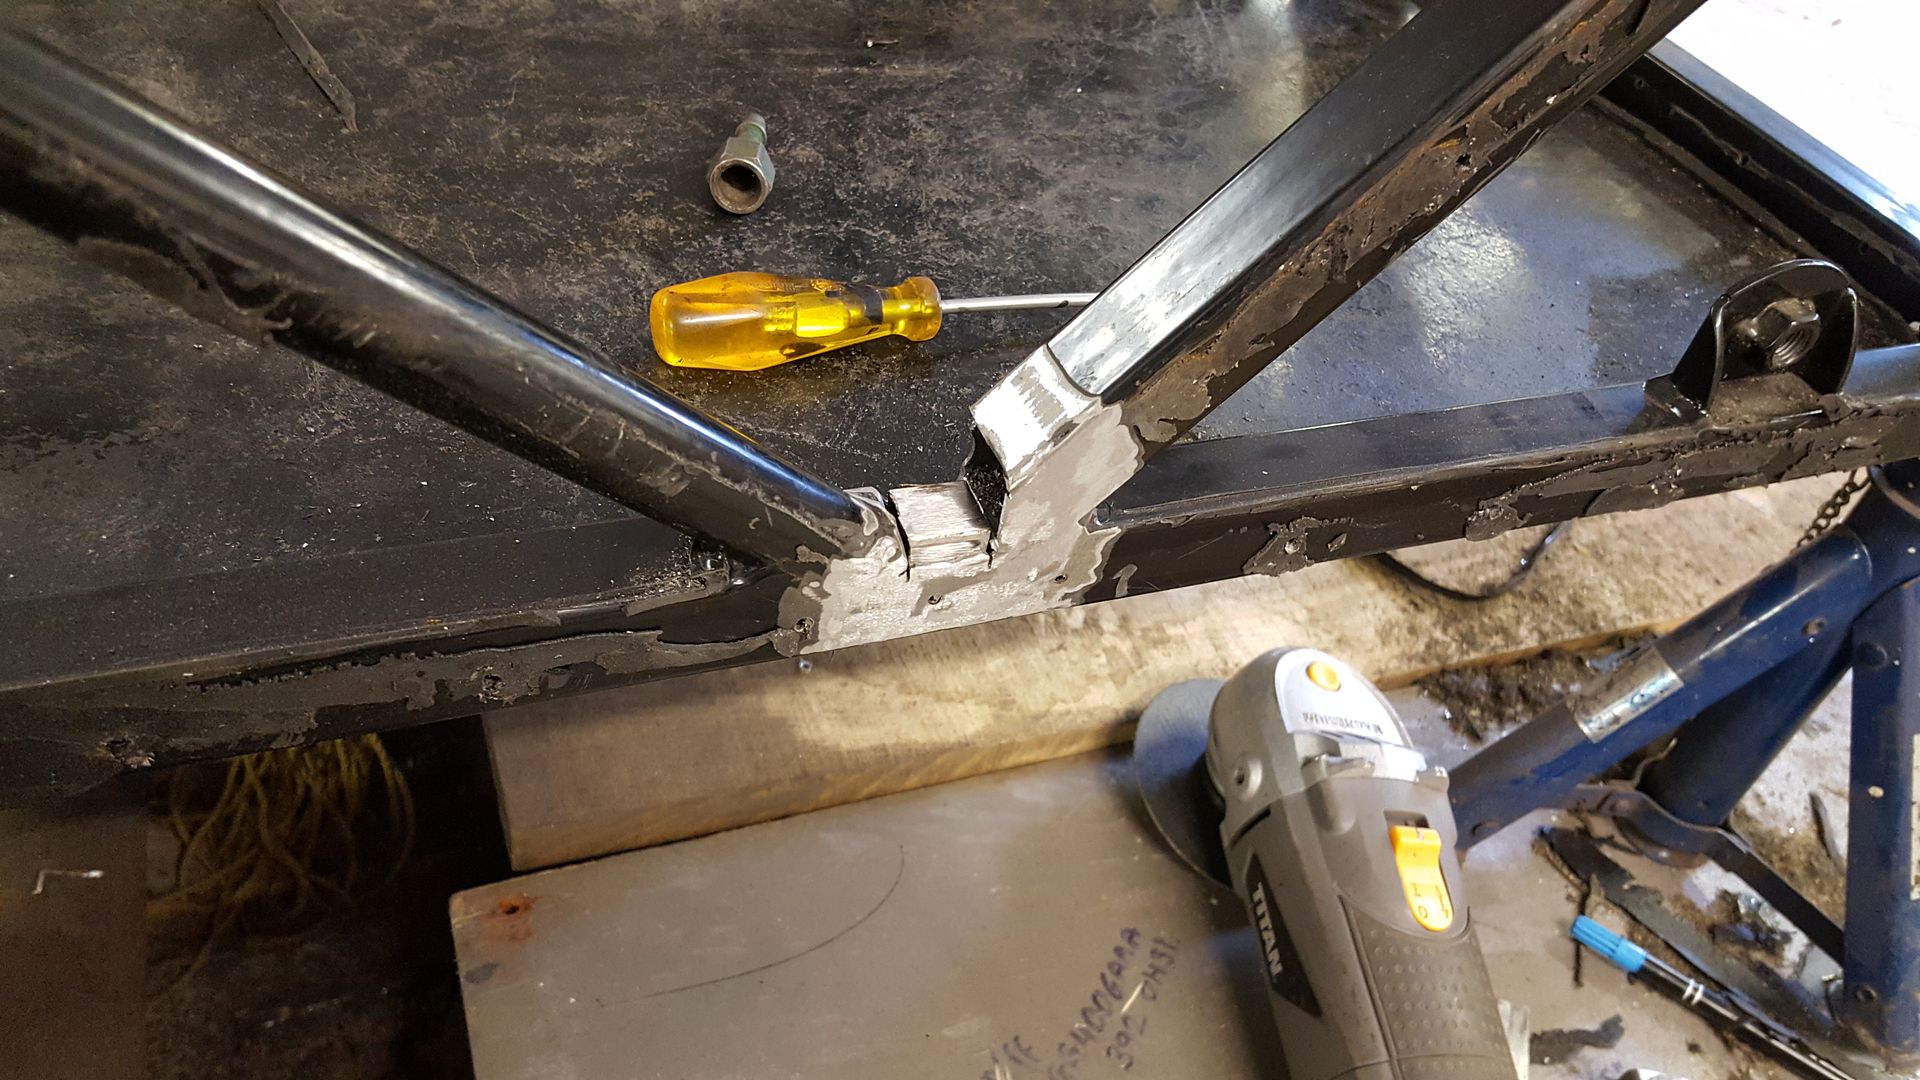
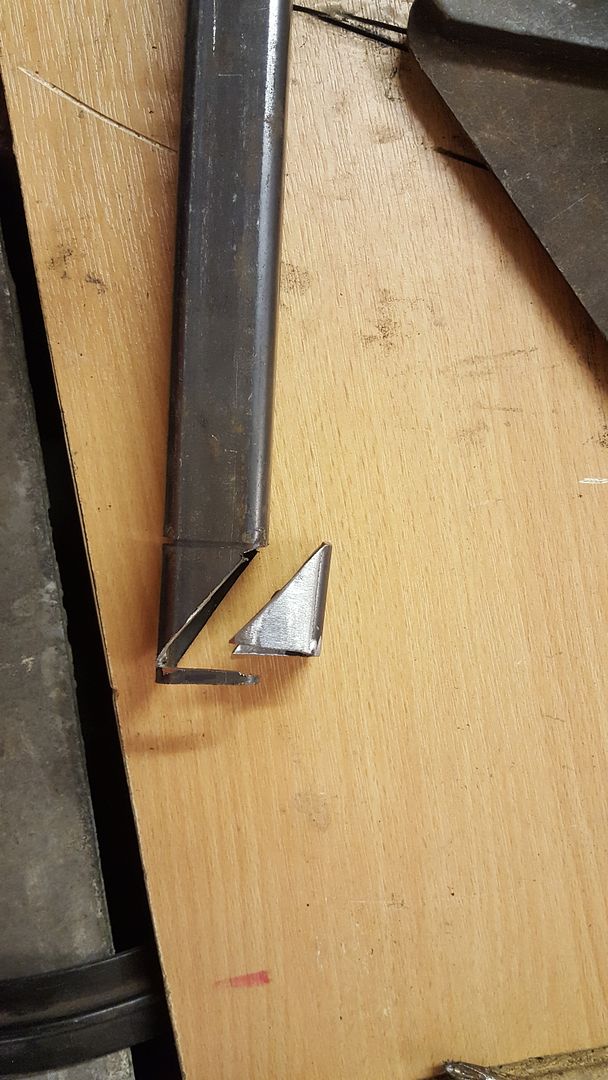
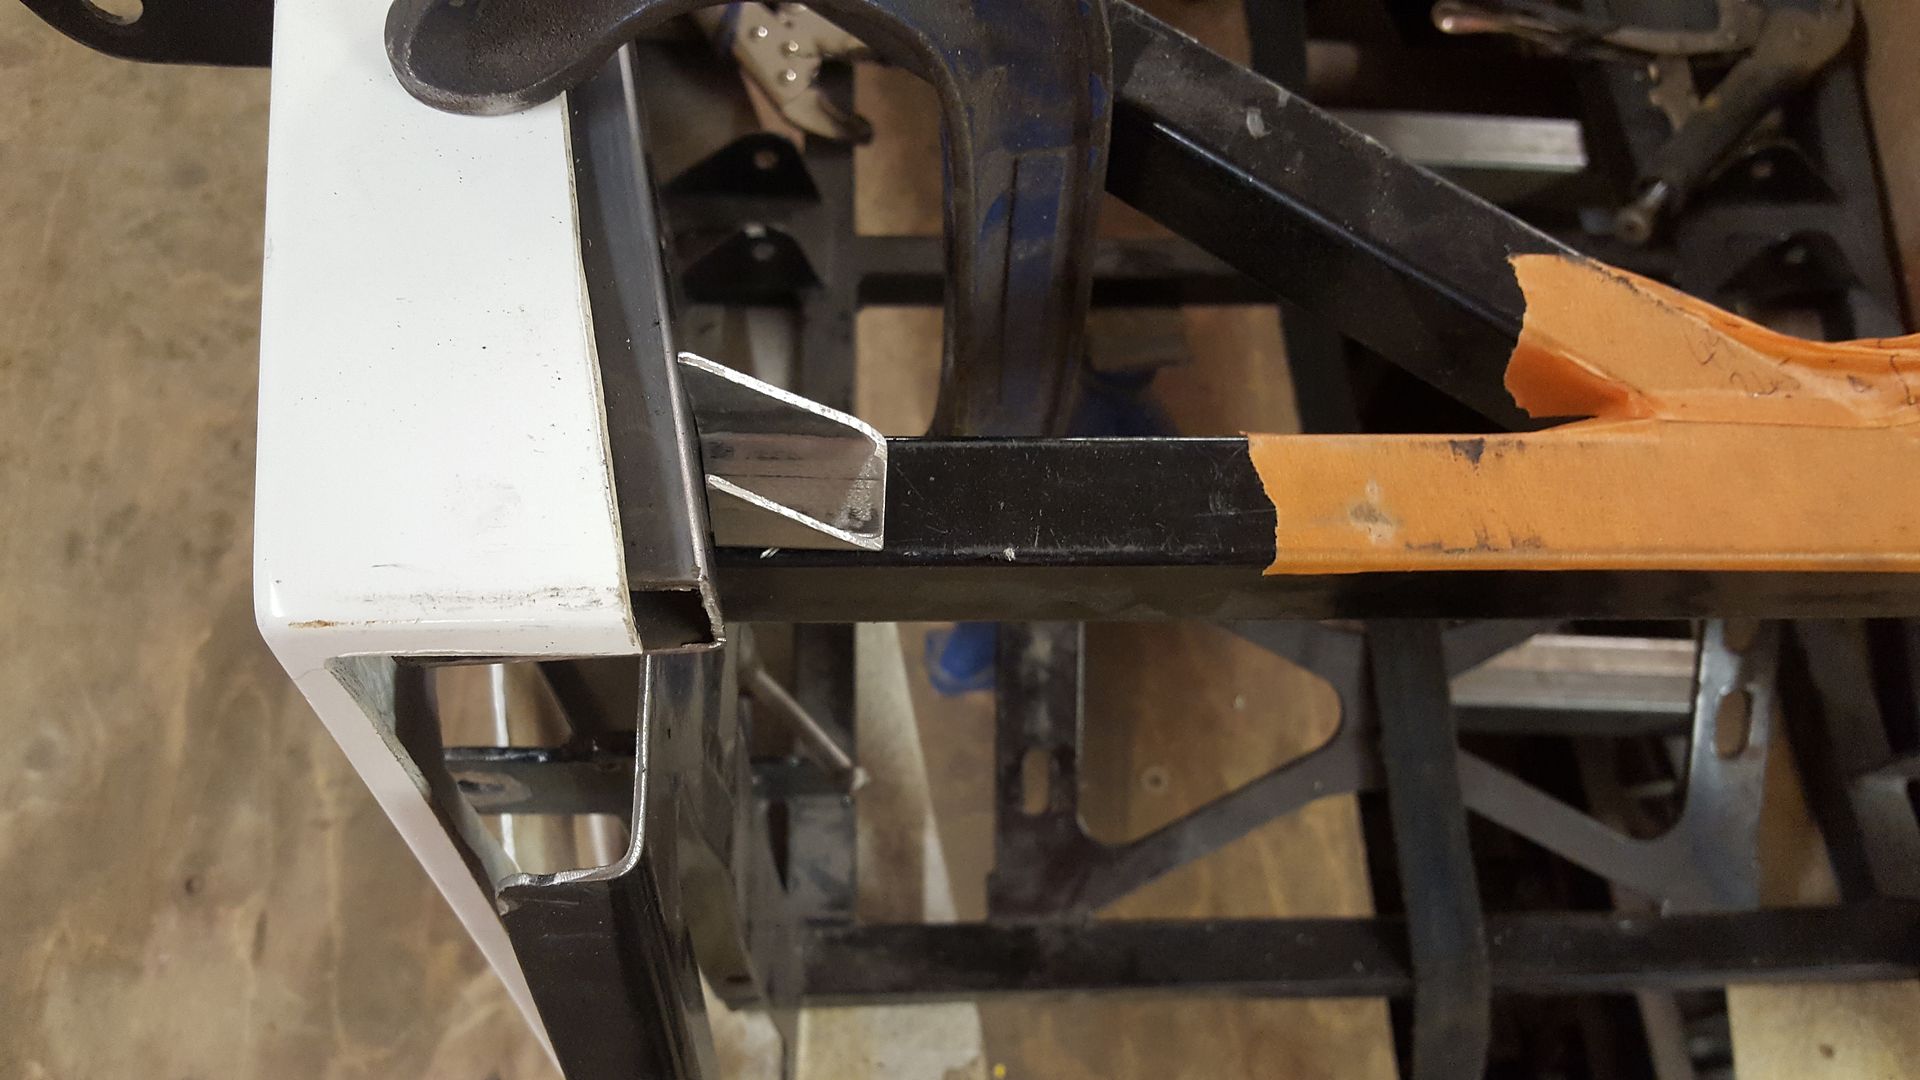
a quick one tonight. i wanted to get the engine central down the car, the massive T5 is loads bigger than the type 9 the tunnel was designed but it
only fouls in a couple of places. this is as central as the engine can get though
because it fouls here
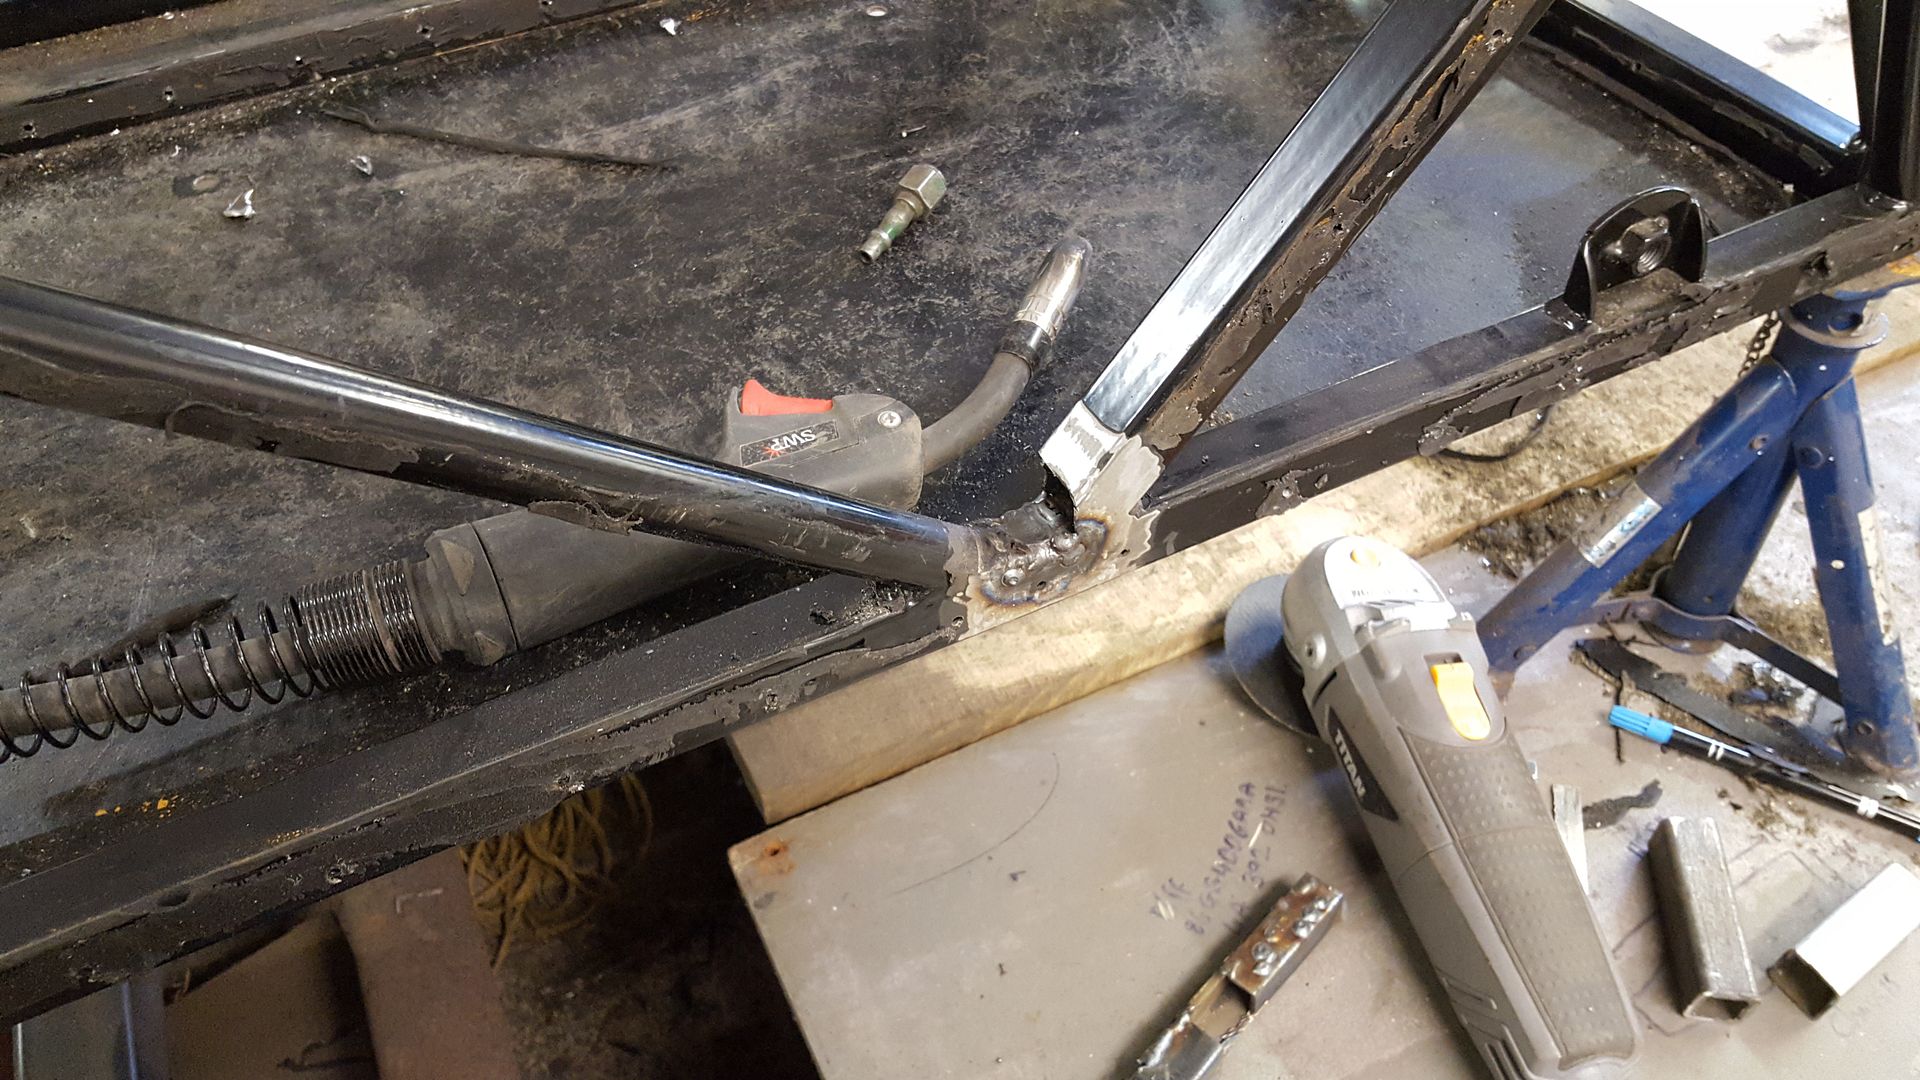
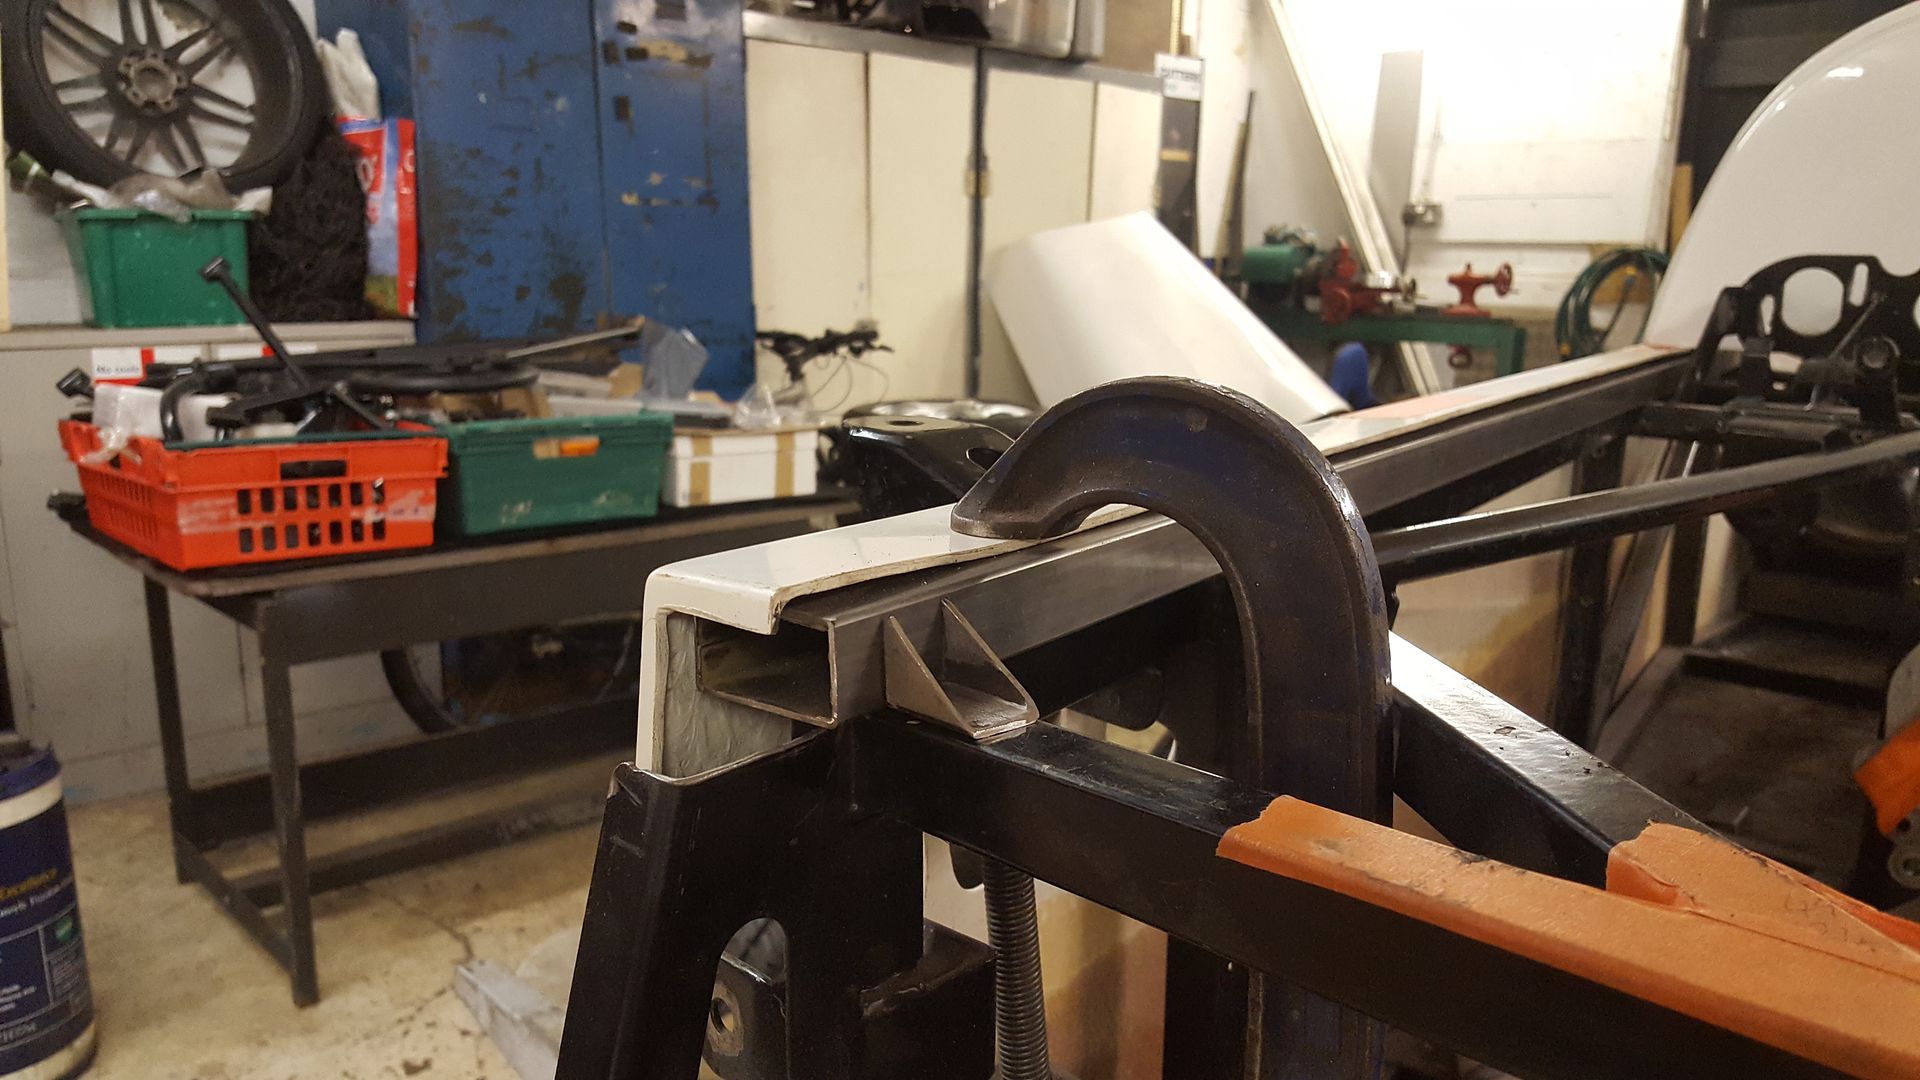
grinded all the paint back and cut a piece of 25x25 box to length to move that rail inboard
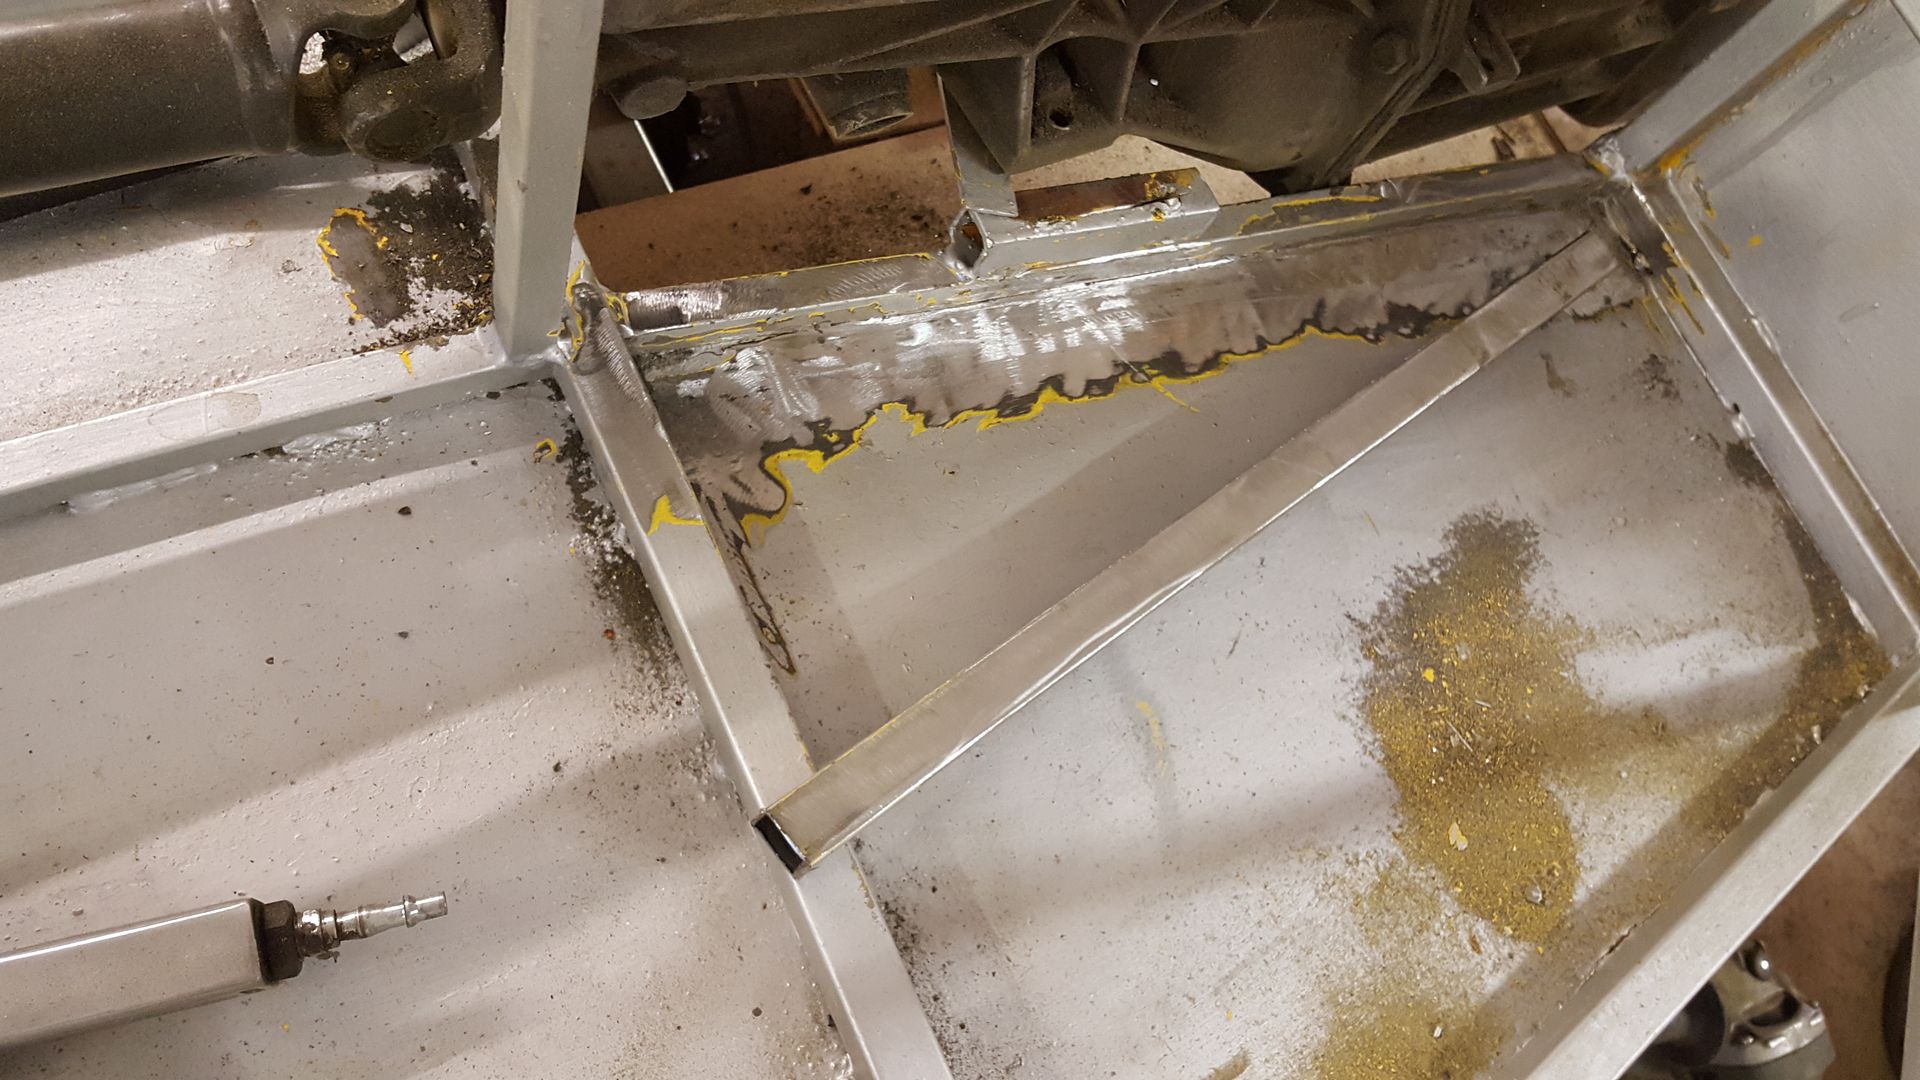
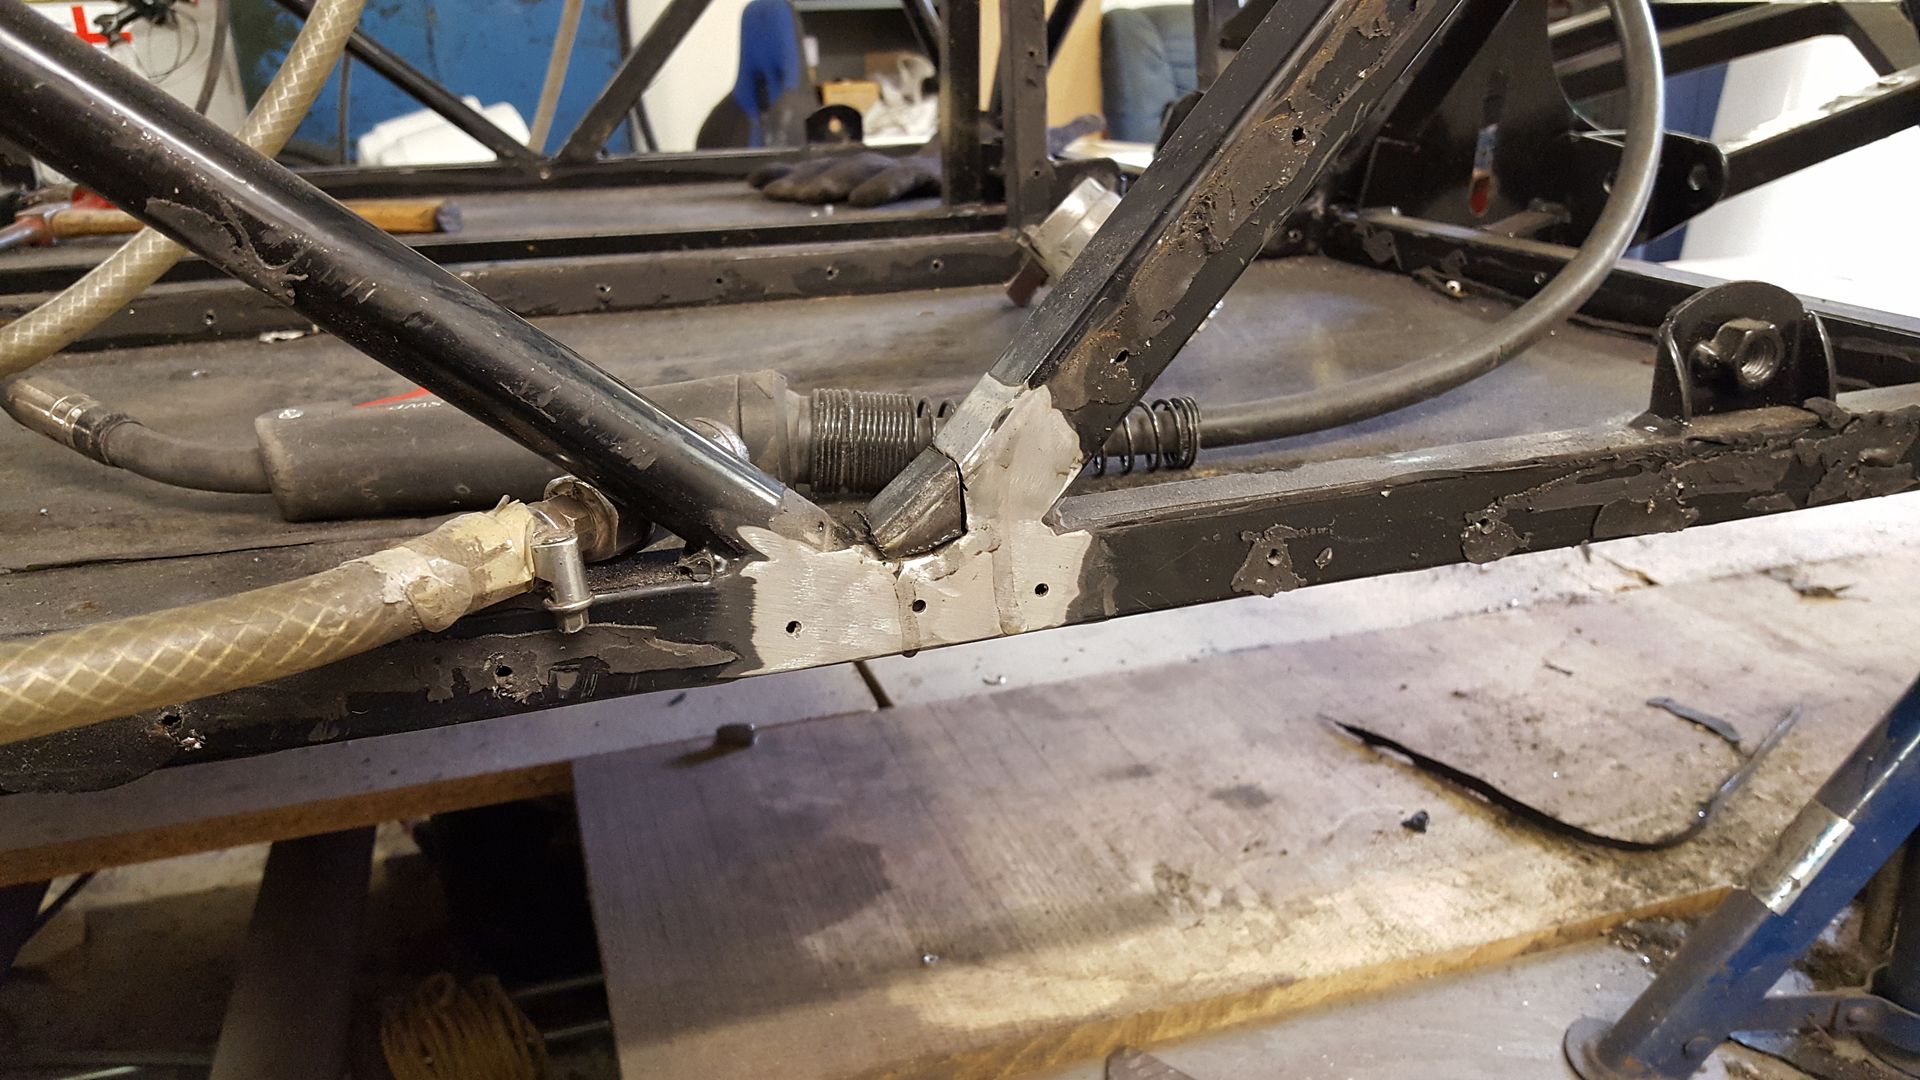
welded it in and cut the old rail out, i will be cutting it completly out and welding it up properly when the gearbox is back out
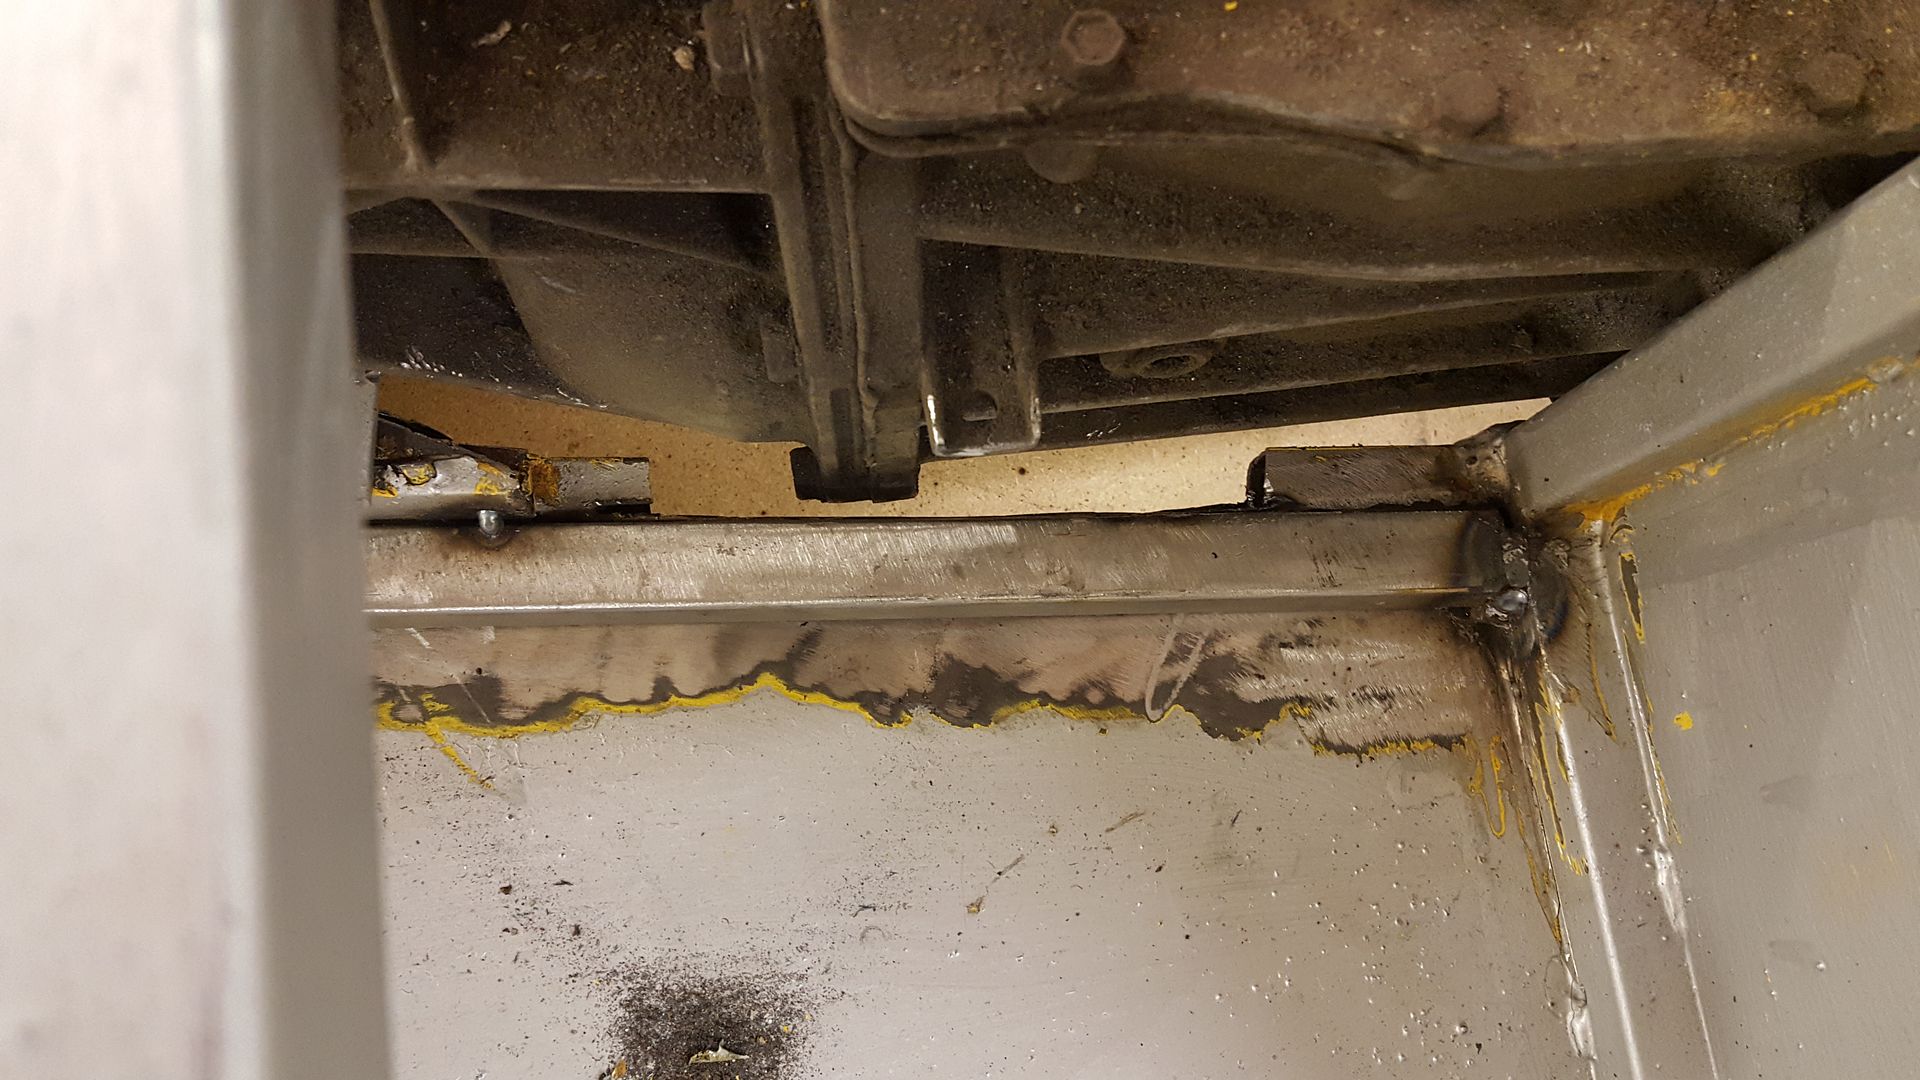
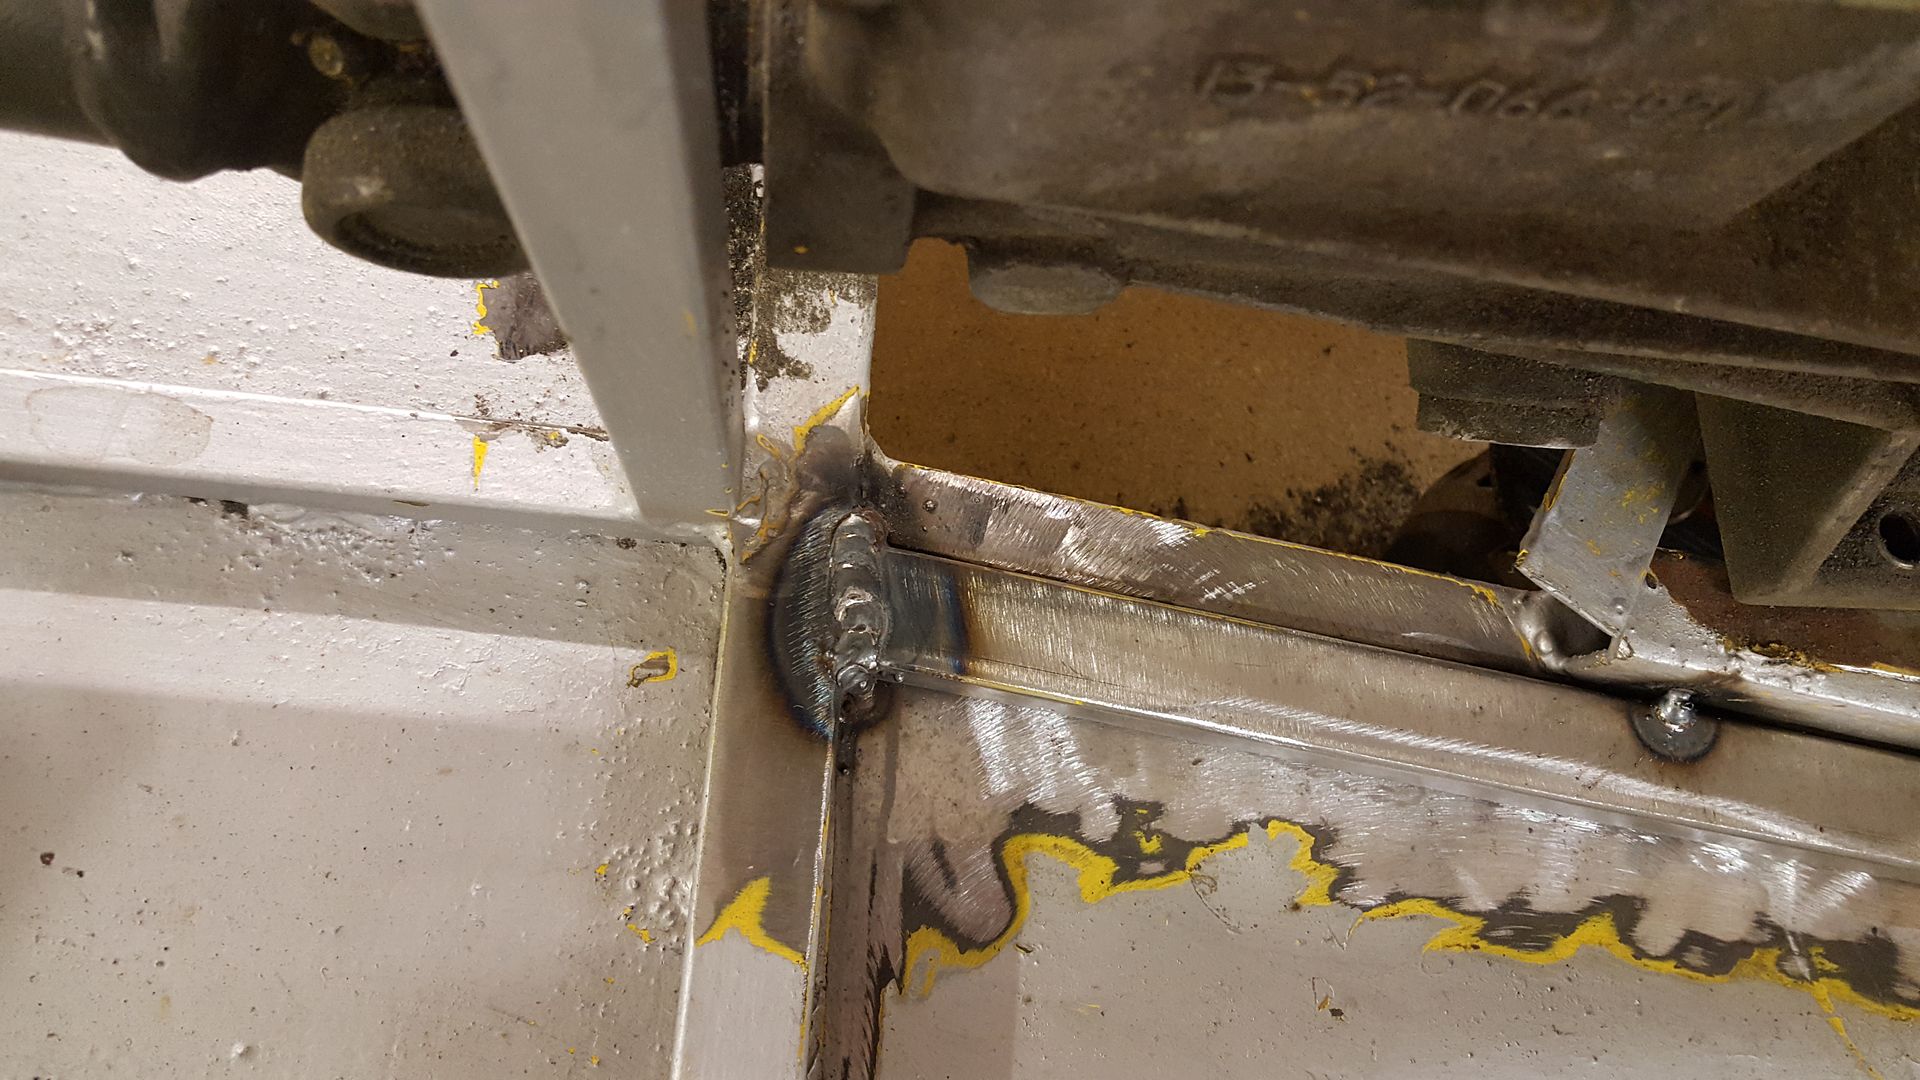
theres one point it just touches on the upright so i might move that upright over the same amount as the horizontal and all will be fine
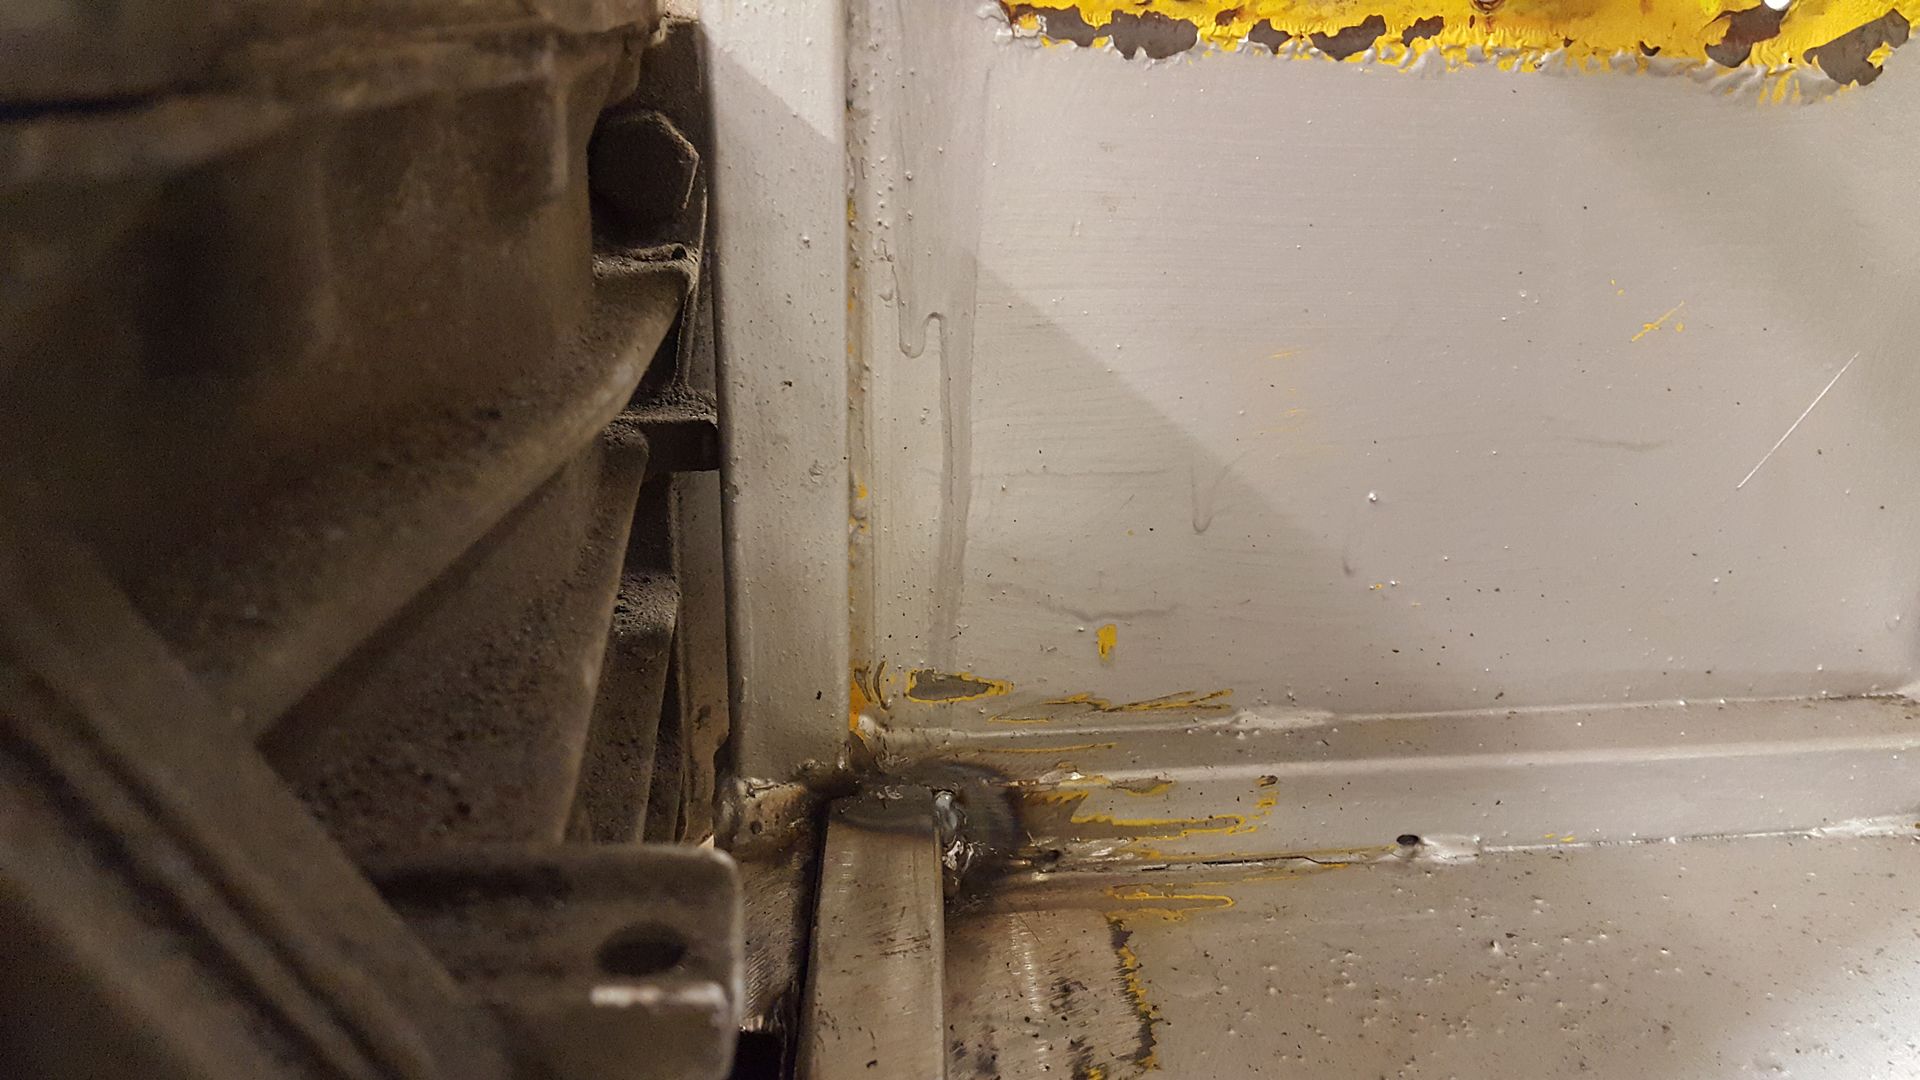
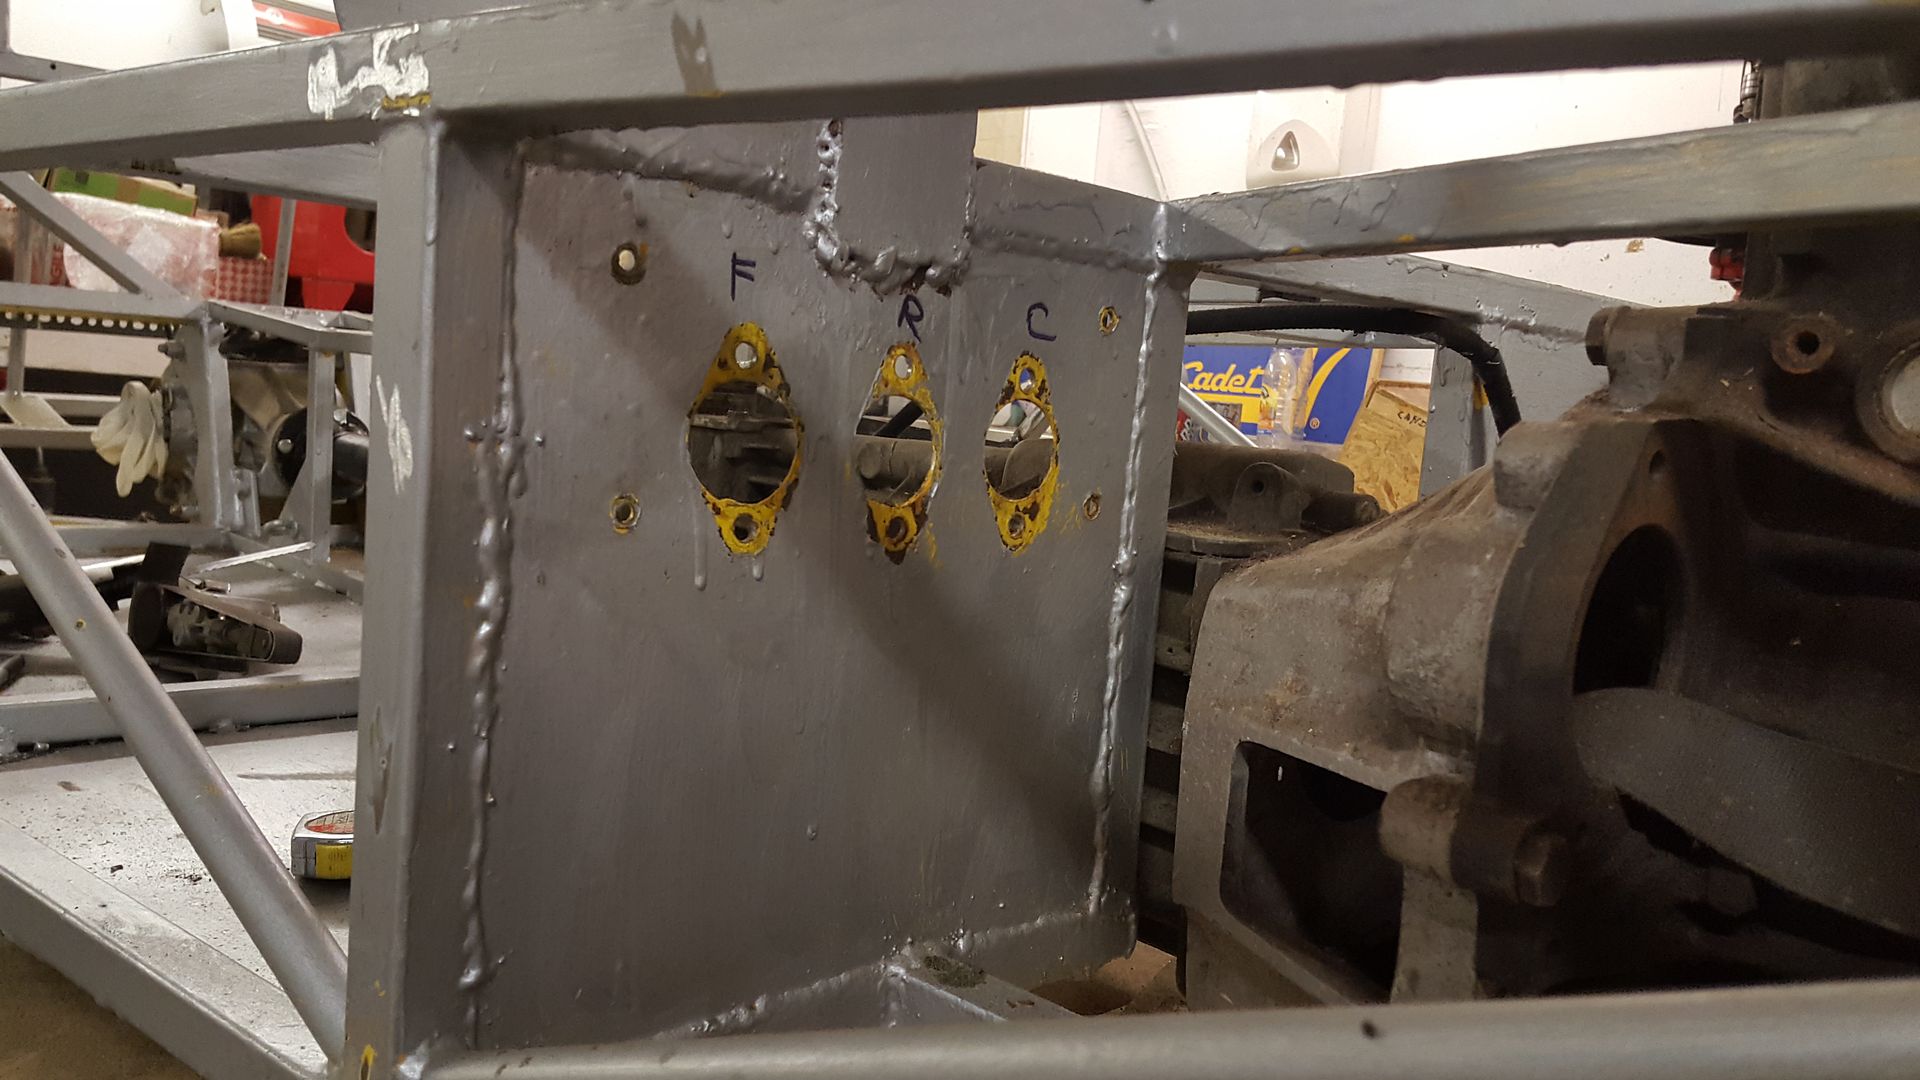
i think i will cut this whole plate out as all the holes for the pedal box are all on the piss, and i want to move the inner vertical outboard by
25mm, and the welding needs cutting out anyway.
Andybarbet - 9/5/17 at 05:37 AM
To sort the problem of front wishbone holes not lining up with those side panels, you could fit some flared sides from the front running up the sides
of the engine bay.
Like this:

Description
(Photo shamelessly stolen off this forum)
super-ron - 9/5/17 at 06:44 AM
quote:
Originally posted by Andybarbet
To sort the problem of front wishbone holes not lining up with those side panels, you could fit some flared sides from the front running up the sides
of the engine bay.
Like this:
Description
(Photo shamelessly stolen off this forum)
I have seen those flared sides on a few cars, although greatly functional I'm not a fan personally. I really want to keep the smooth sides of the
one piece body. I could chop it off just behind the front suspension and make another plate for just the front 12 inches, this would allow taking the
body off without removing the front suspension, but would also mean a visible join. I think I will fibreglass the MNR holes up and re-drill.
super-ron - 11/5/17 at 09:27 PM
ok so back onto that ghastly plate
Got my chop on
The rwd mounts I had made for the astra were starting to get in the way for this application
And could now get the engine in straight
But I still feel the gear stick is too far forward.
This is where all locost's seem to sit, but just seems too far forward. I tried taking the property off and moving the whole lot back, but it
didn't go alot further before hitting the bellhousing
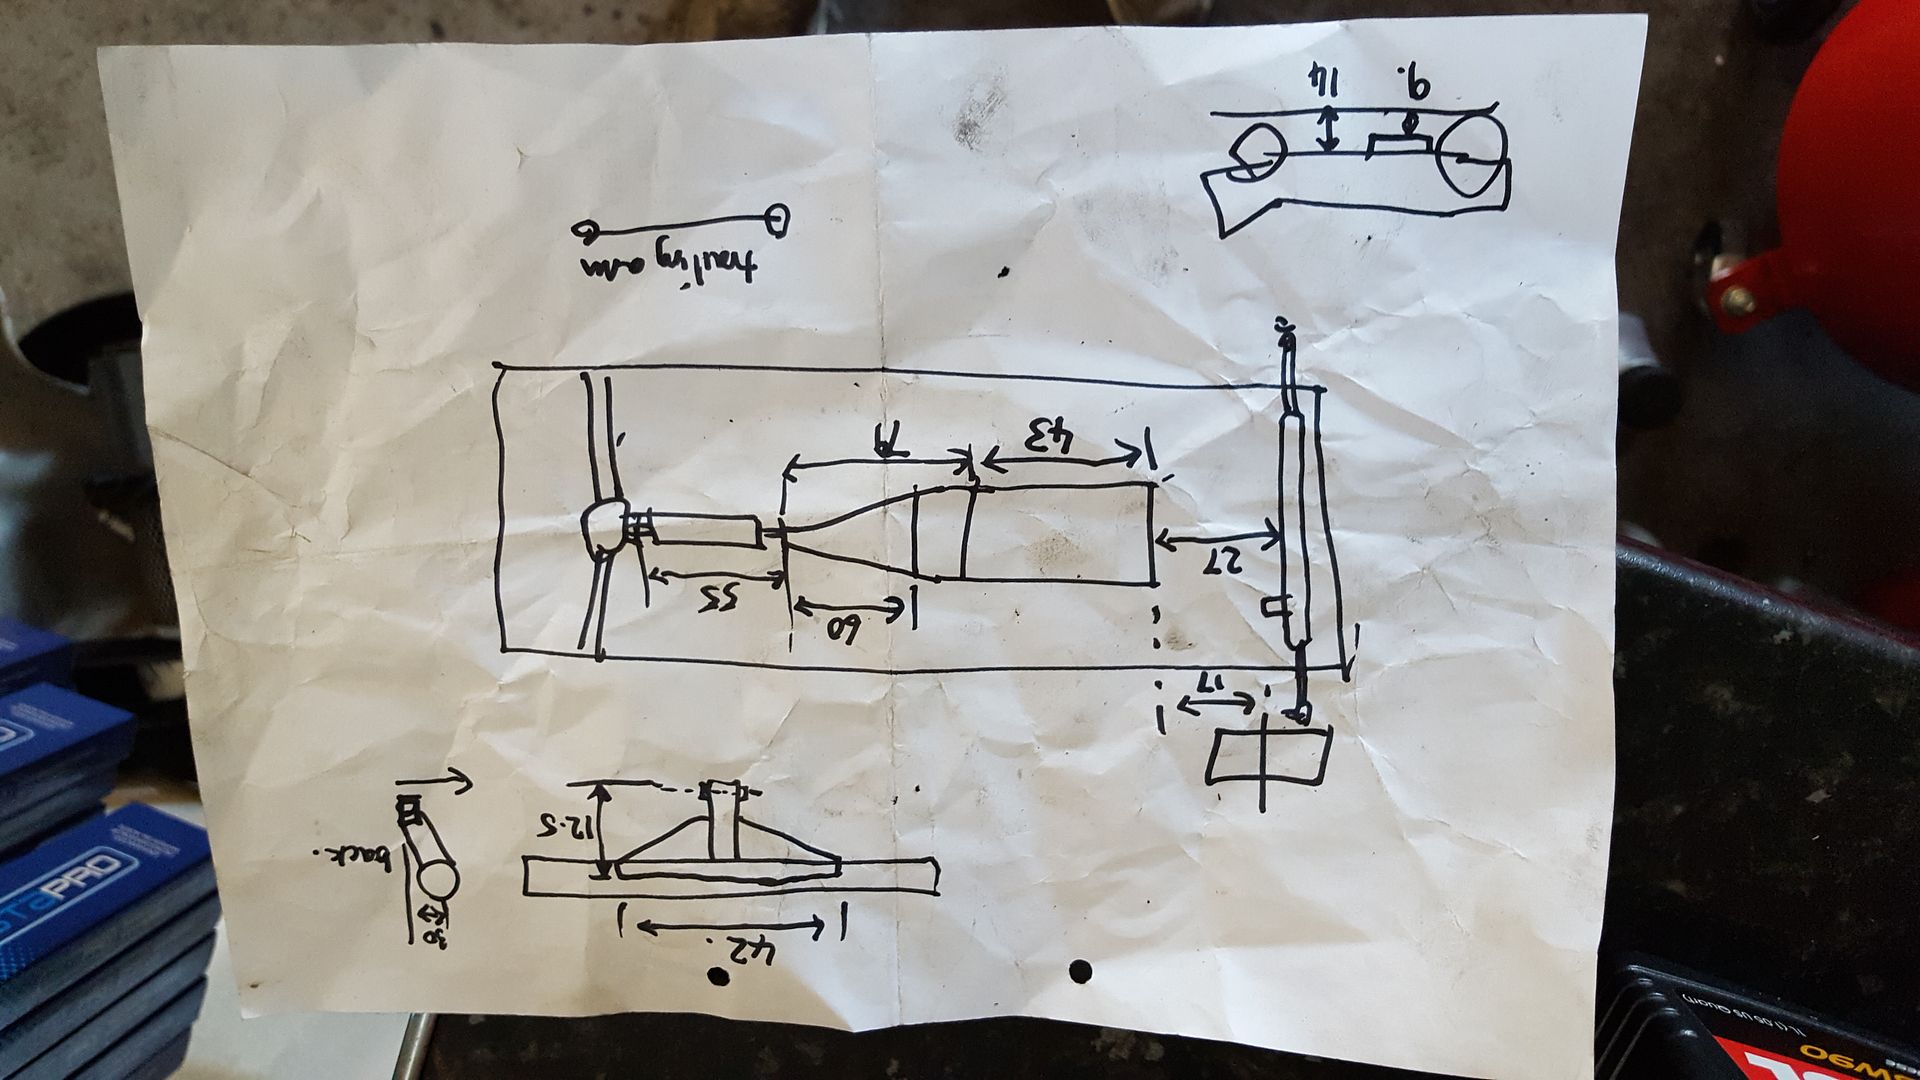
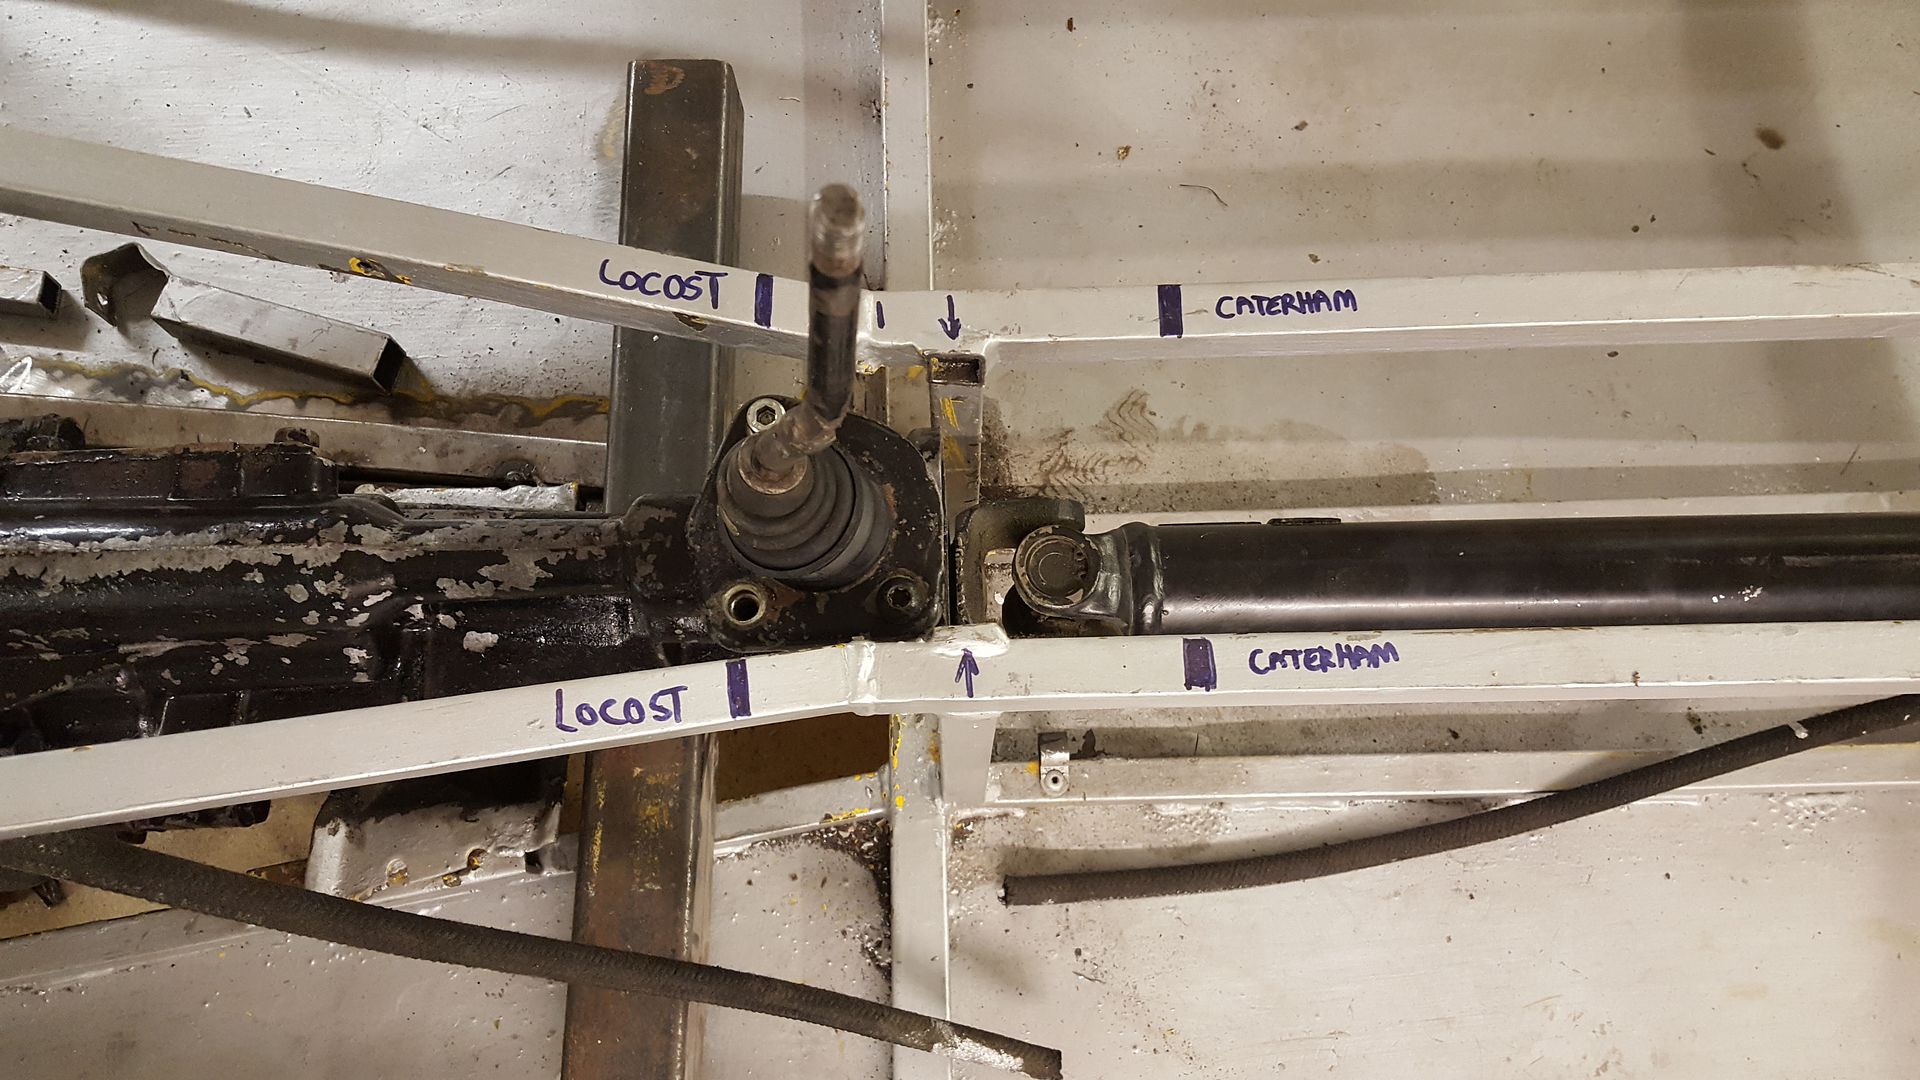
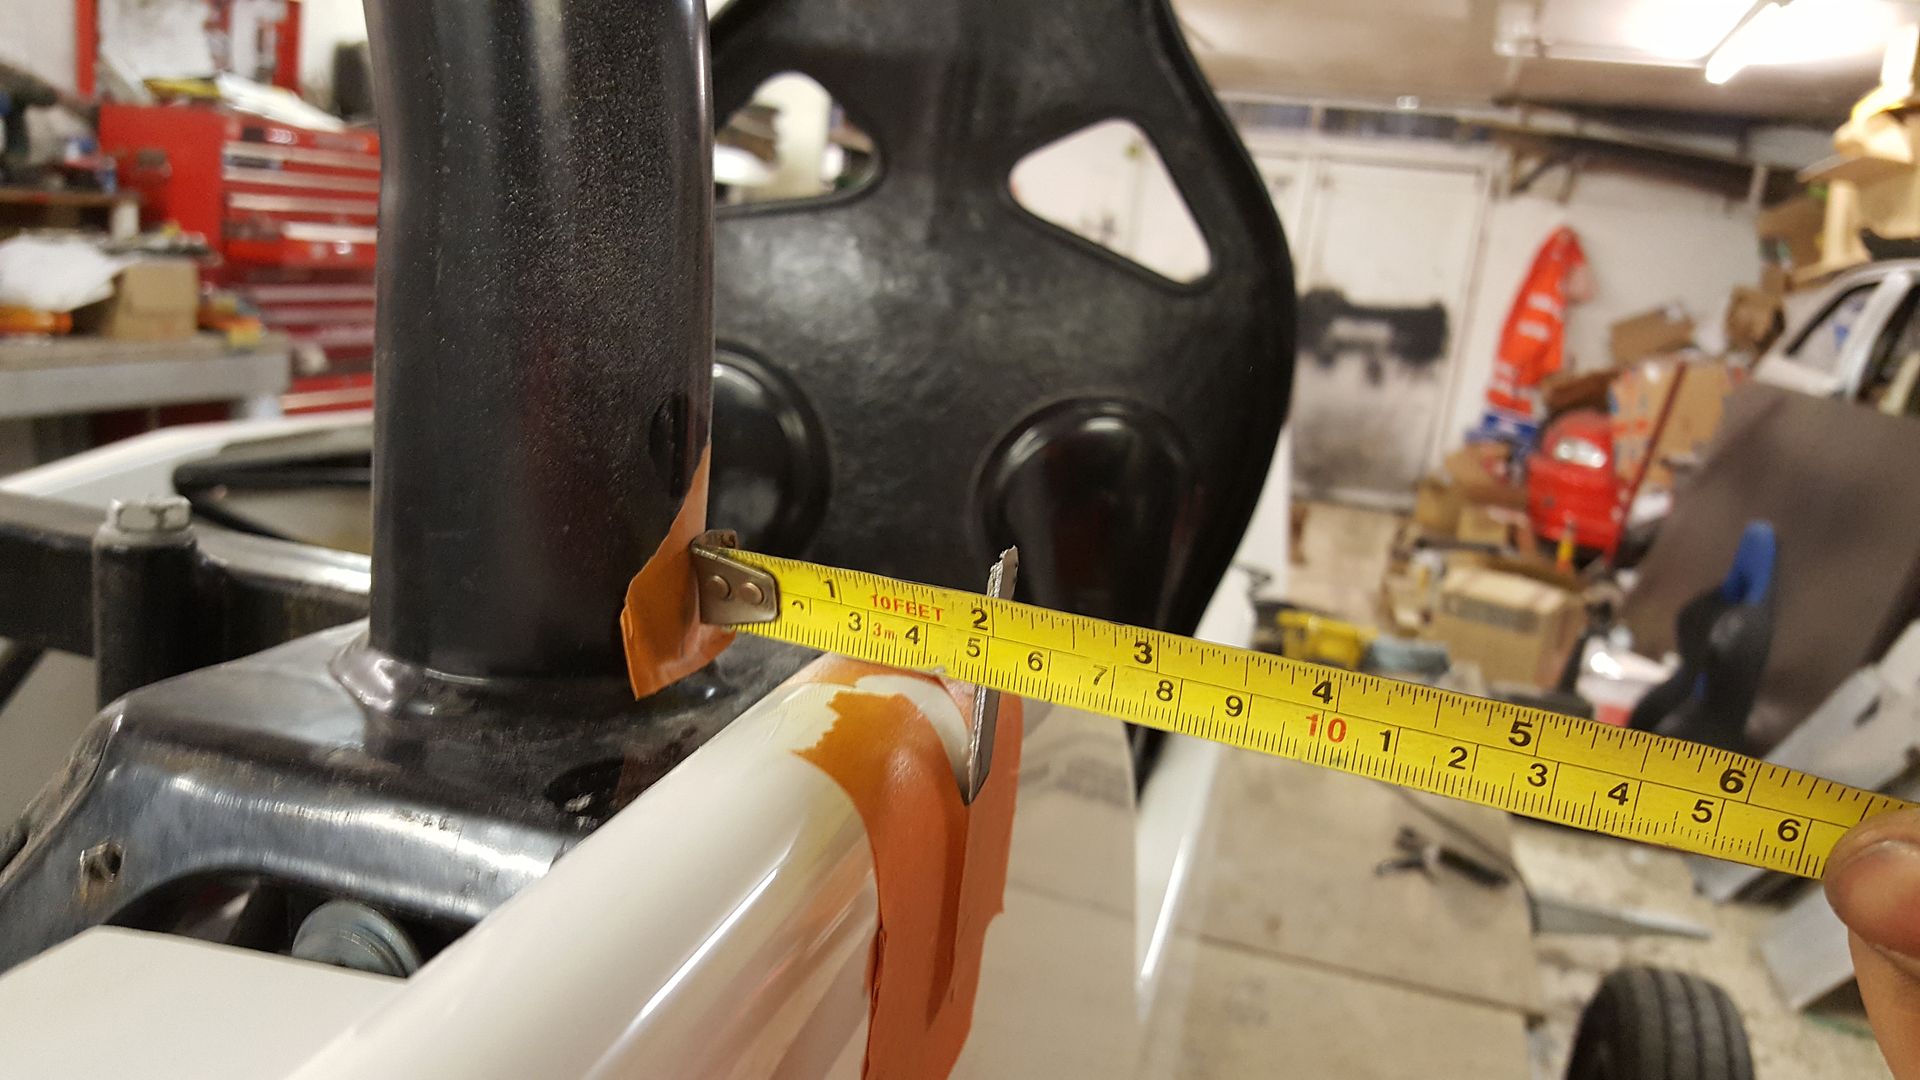
So I went to my mates with a tape measure to see where the caterhams sit controls wise

measured everything everywhere using the bulkhead behind the seats as the datum
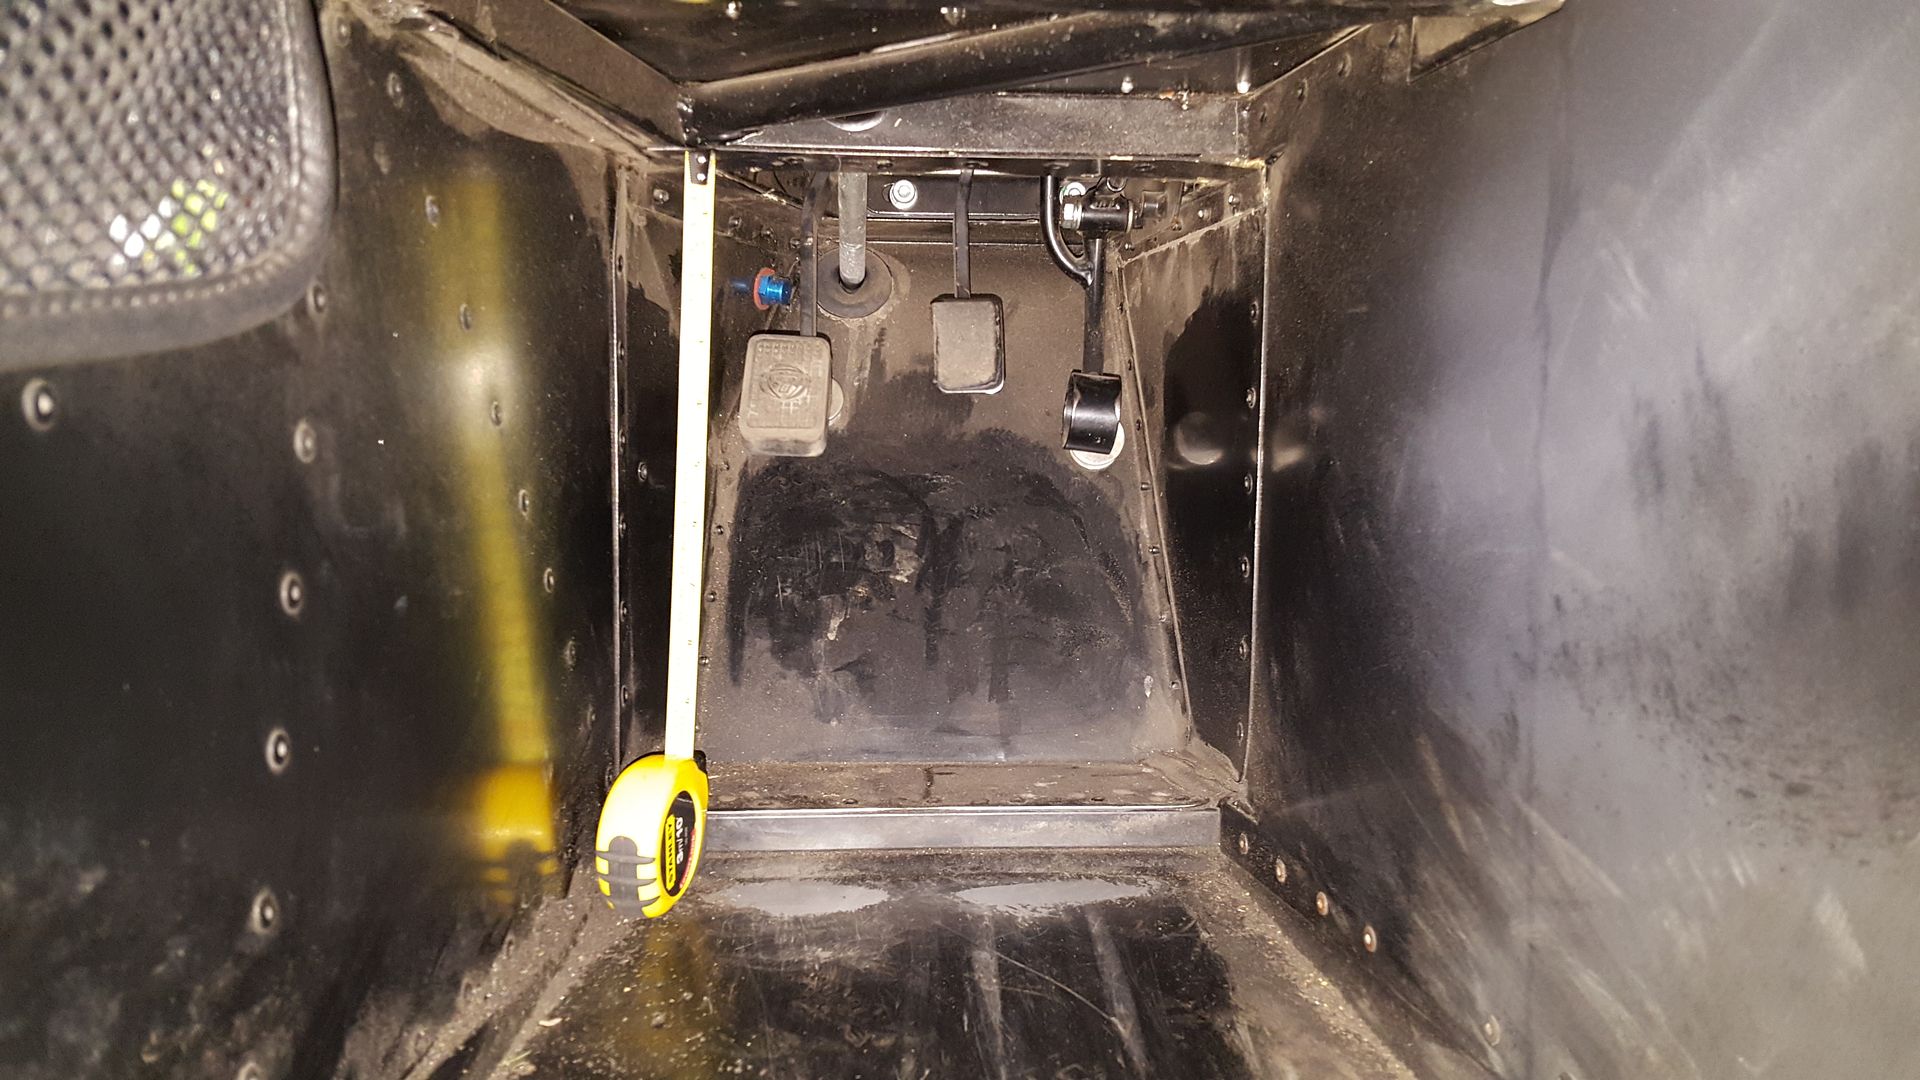
And mapped it out
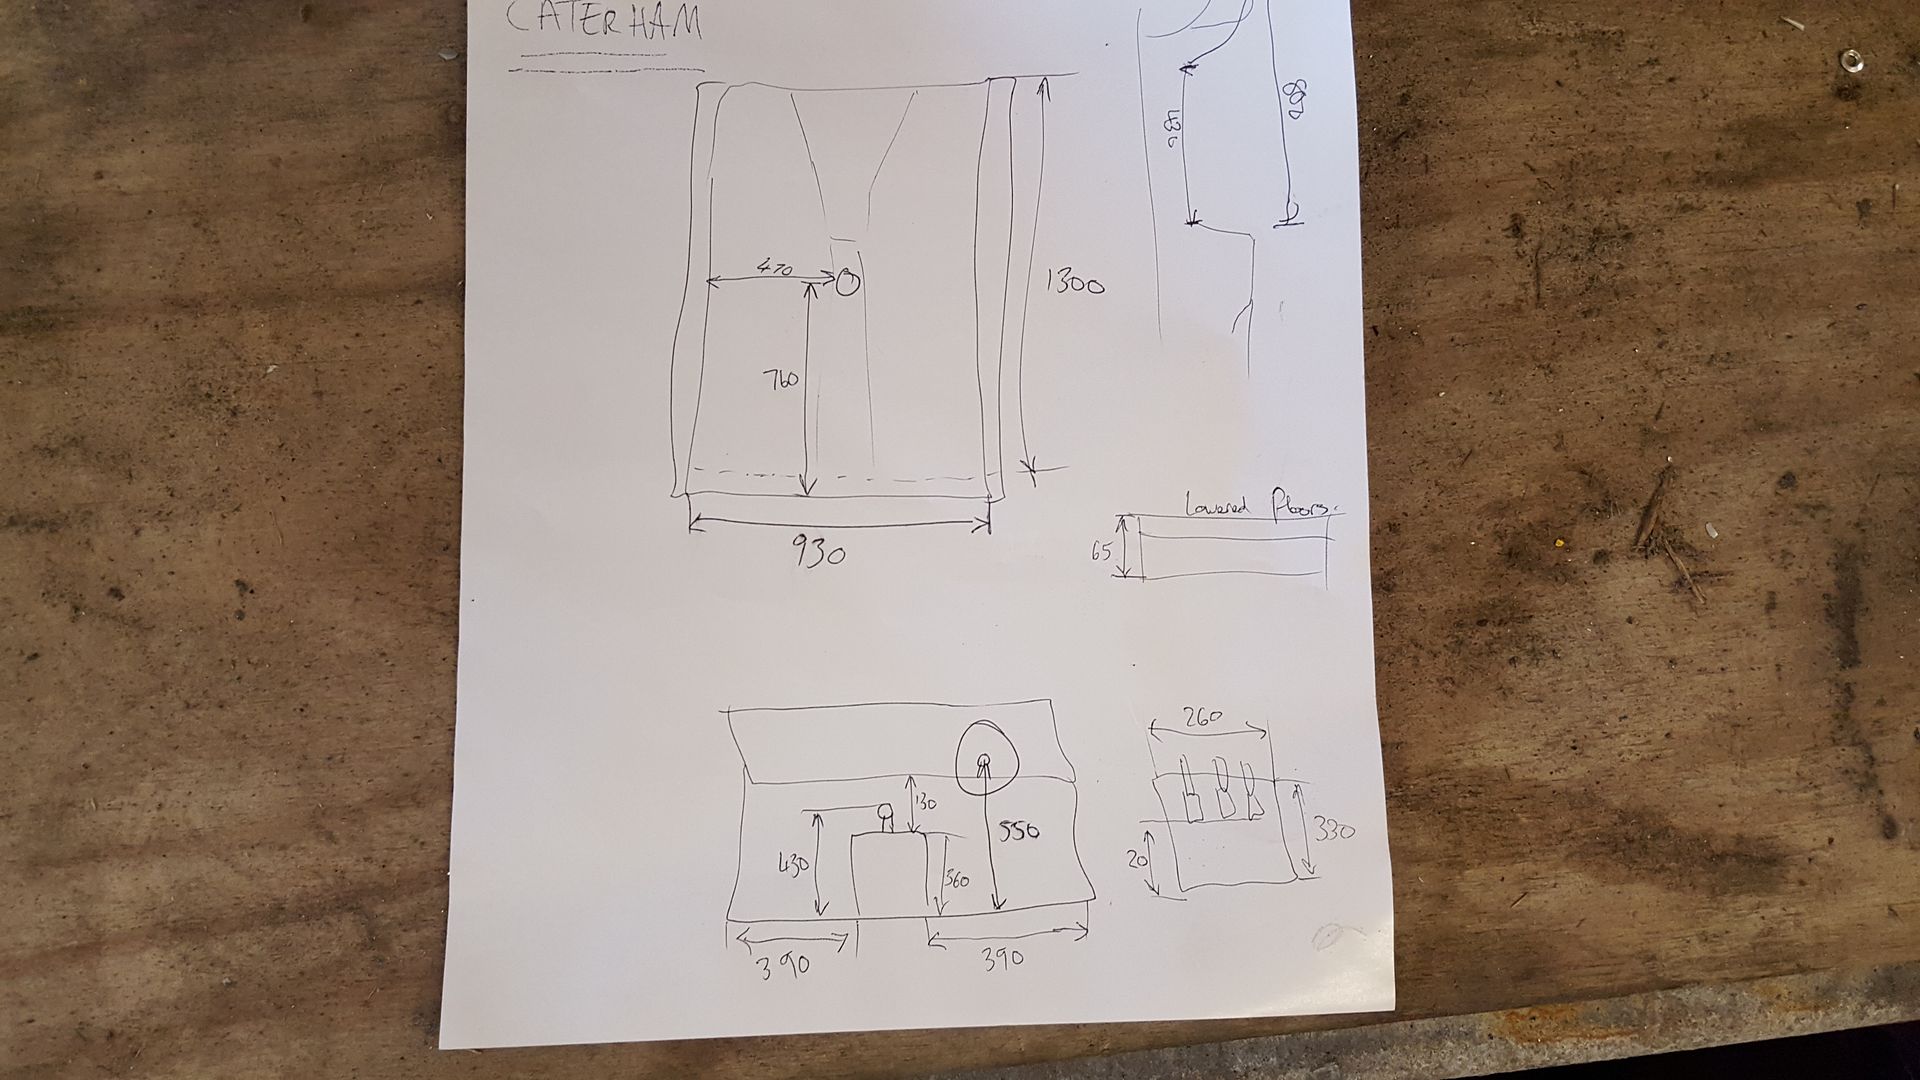
The length and width of the two cabins are almost identical! from front to back is exactly the same. the tunnel is a bit taller but that could be down
to the fact the Caterham has lowered floors.
the only thing different, as suspected was the gear stick was 5.5 inches too far forward.

as it turns out the turret extensions are 135mm offset, which is exactly the distance I need
however these are only available for the usual type 9 gearbox, not for the T5 cosworth box. the turrets and rods are completly different.
we are still extremely tight to the rail
some people have made their own turret extenders externally, it is possible. but they're quite big.
Here's the thread
http://www.locostbuilders.co.uk/forum/9/viewthread.php?tid=208857
which brought up the question why am.i even using a T5. as it turns out they have gone through the roof in value. everything cosworth has. checked on
eBay and there's ones for Ł800-1000!!!!
so I'm wondering if I should just cash in and sell the T5 and get a type 9 and have money to spend on other stuff. hmmmmmm
you can get the c20xe to type 9 bolt on adapters and the flush turret extenders.
food for thought......!
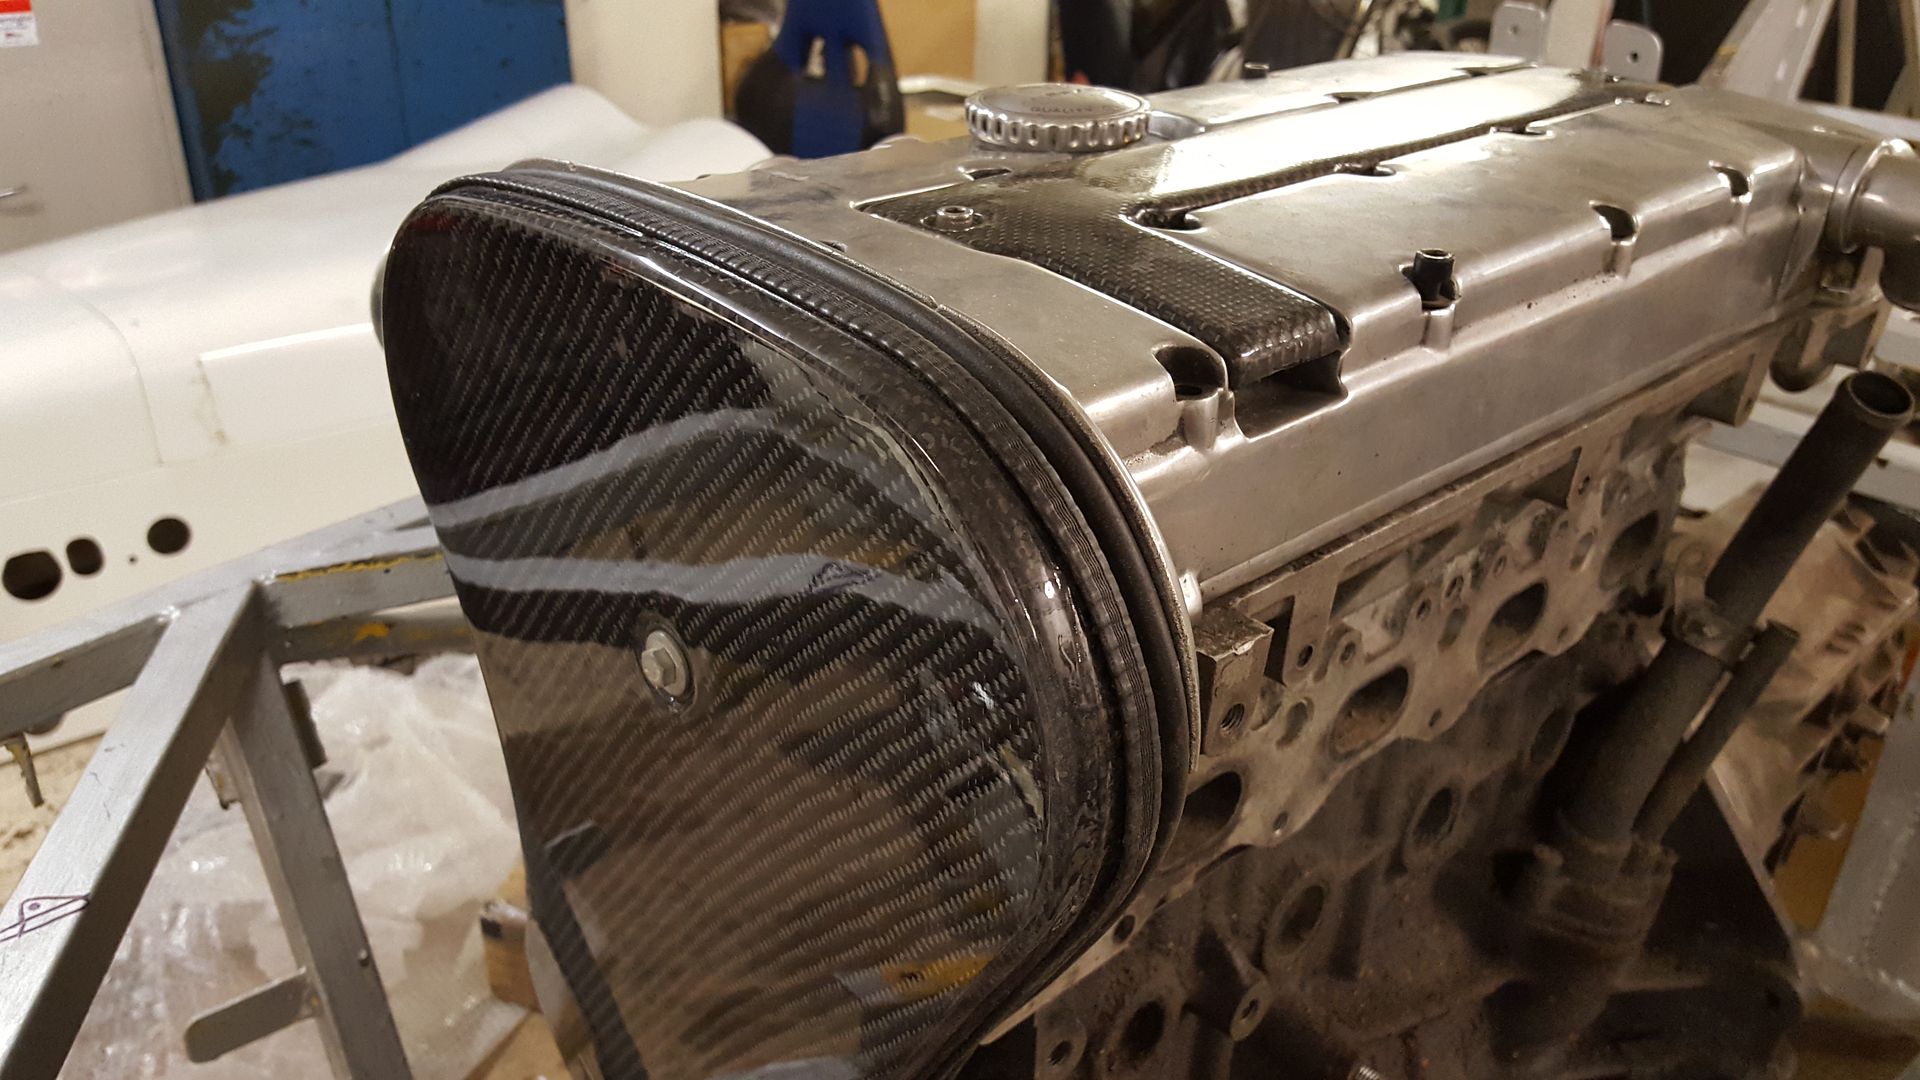
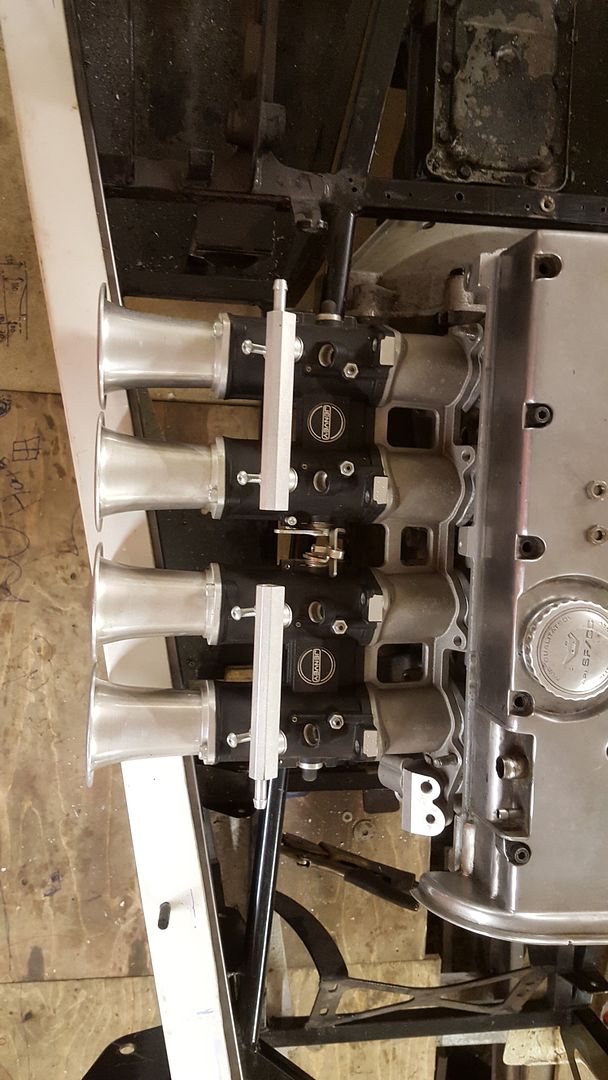
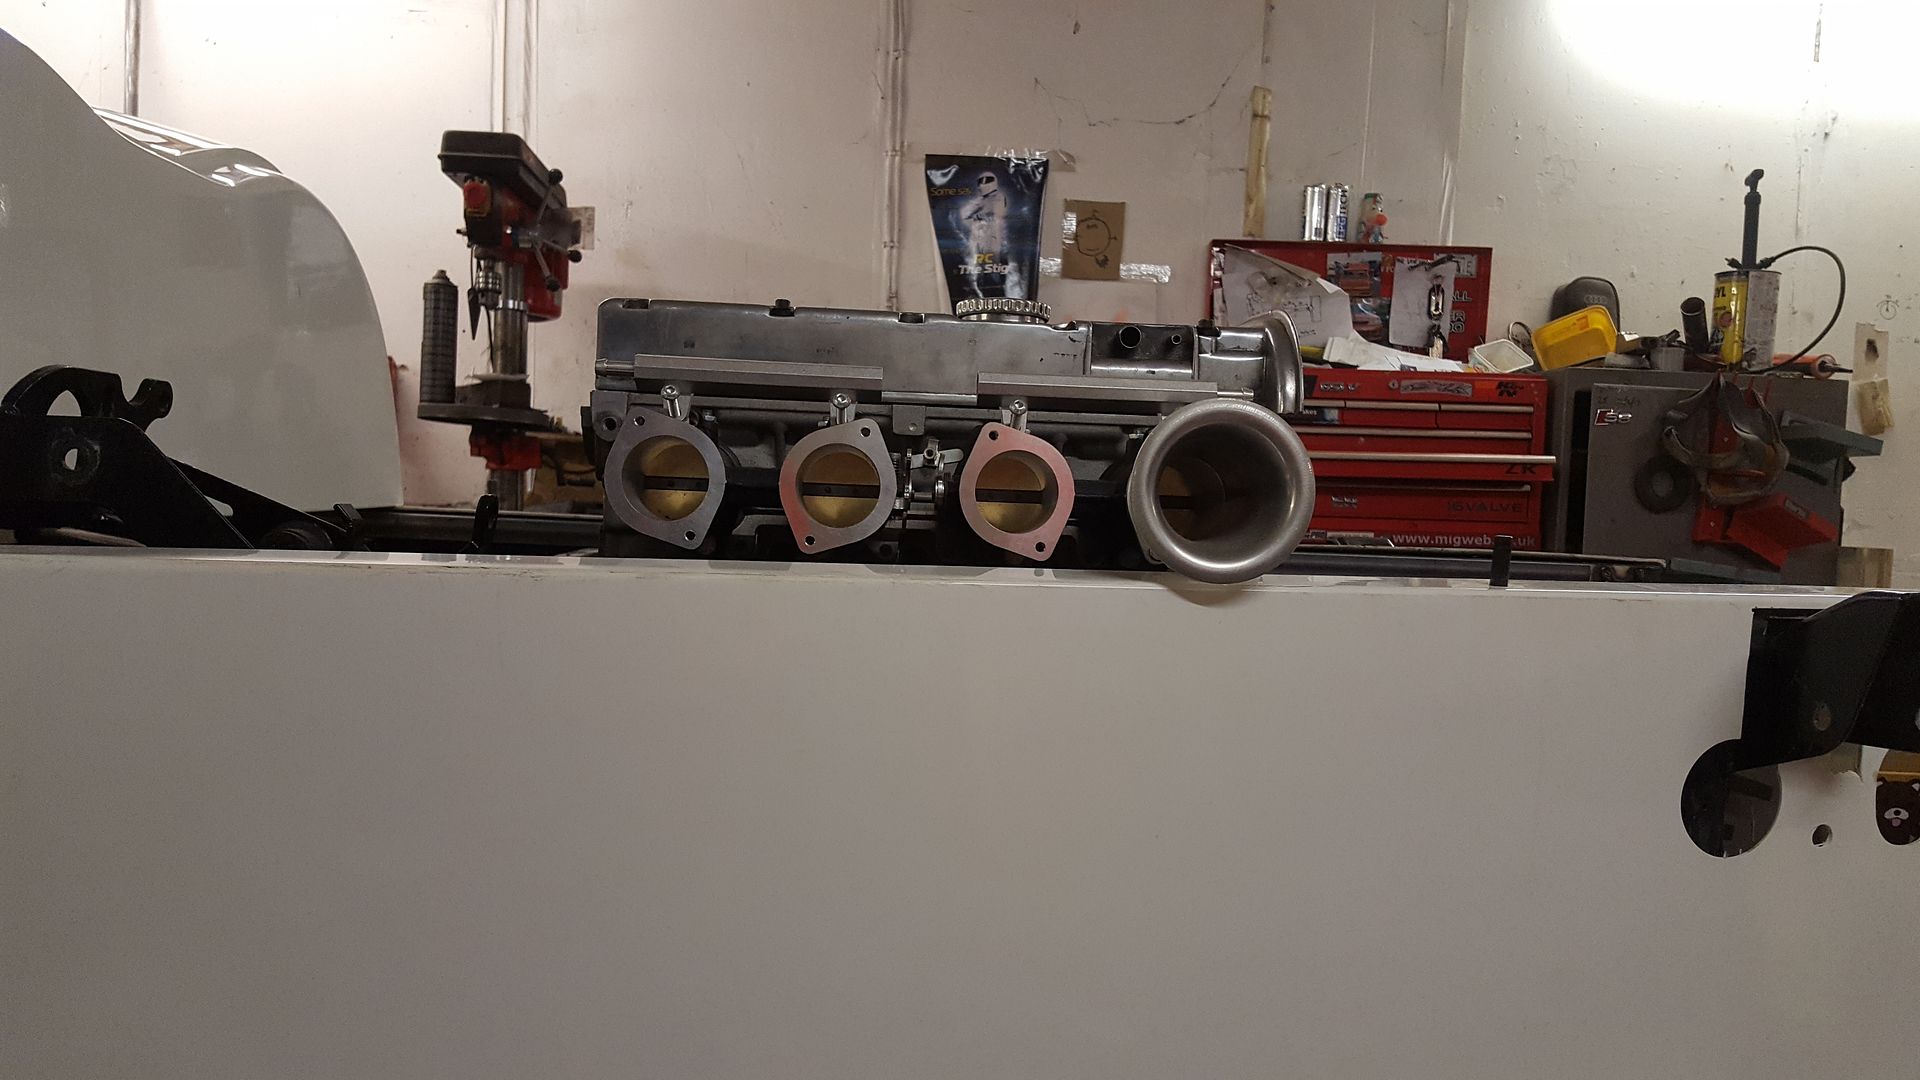
while I was pondering I thought I'd try on the throttle bodies and carbon I had sitting in the cupboard.
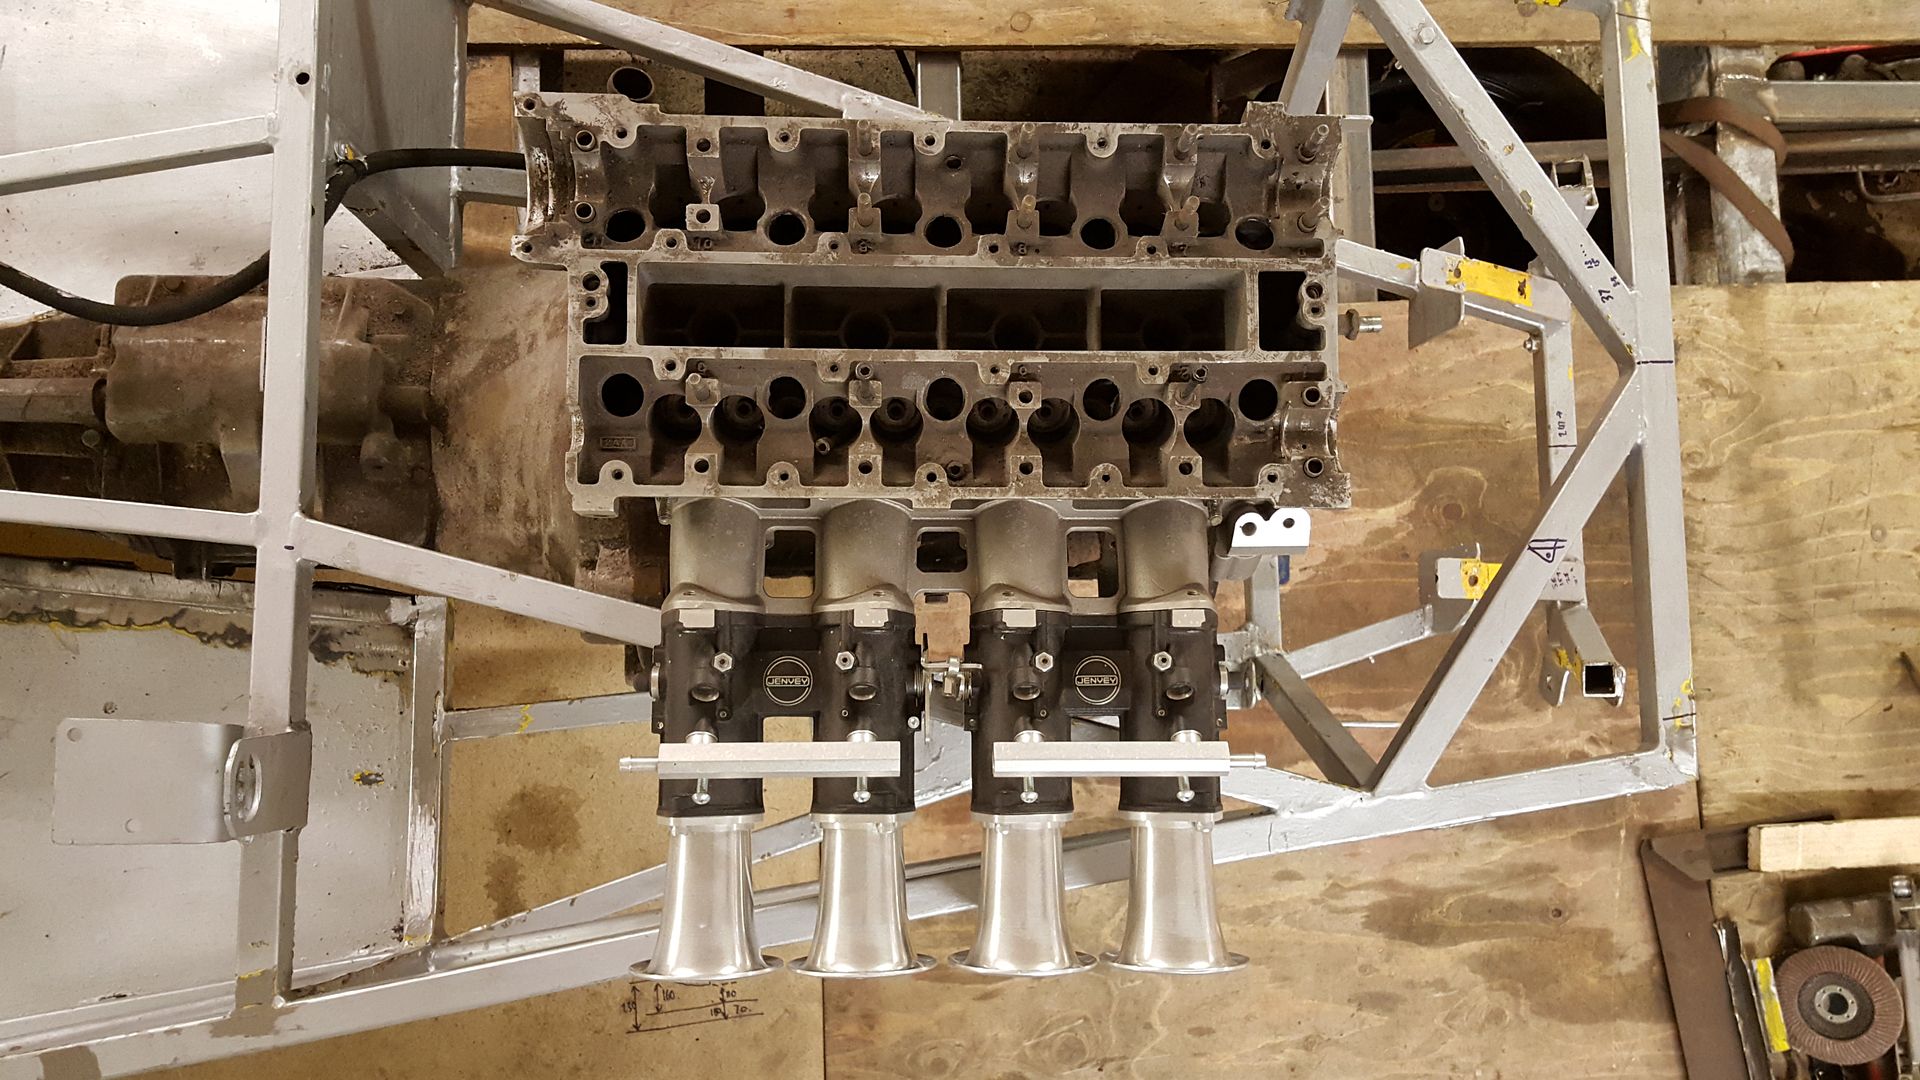
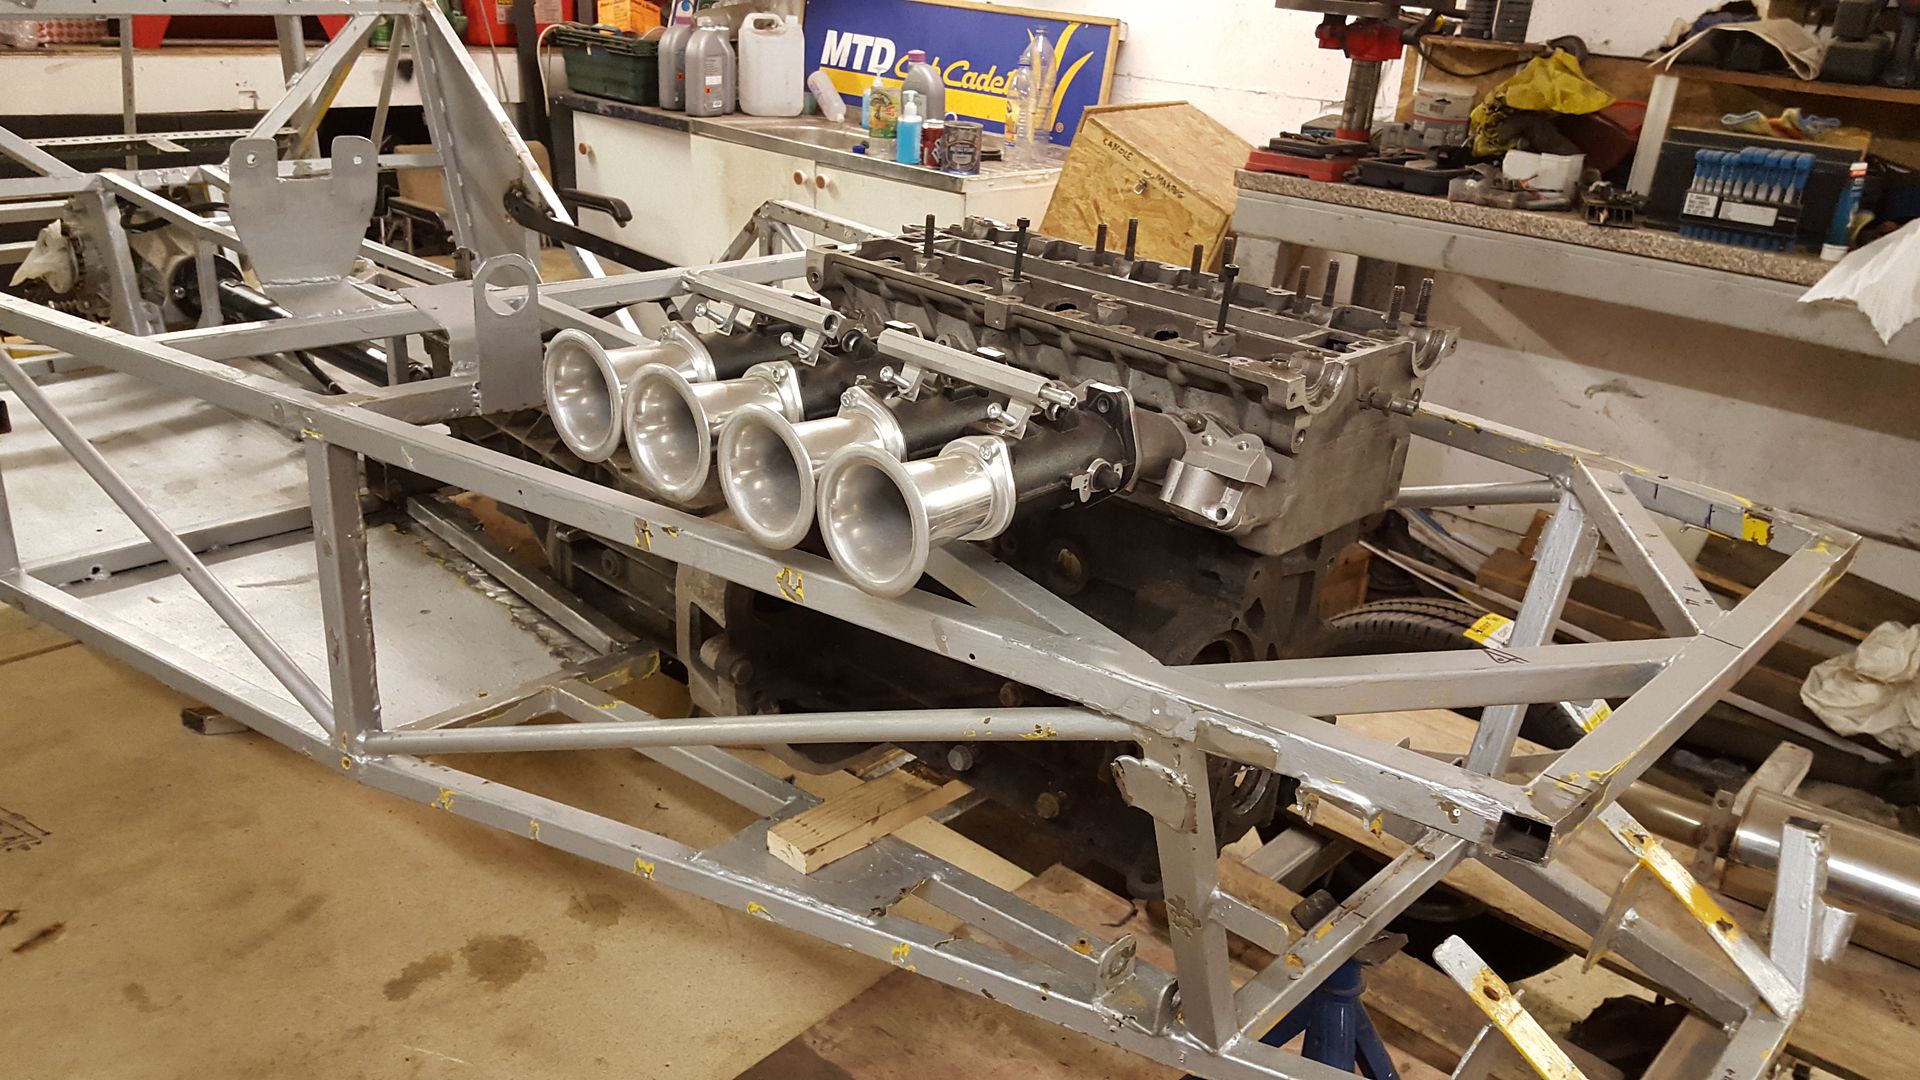

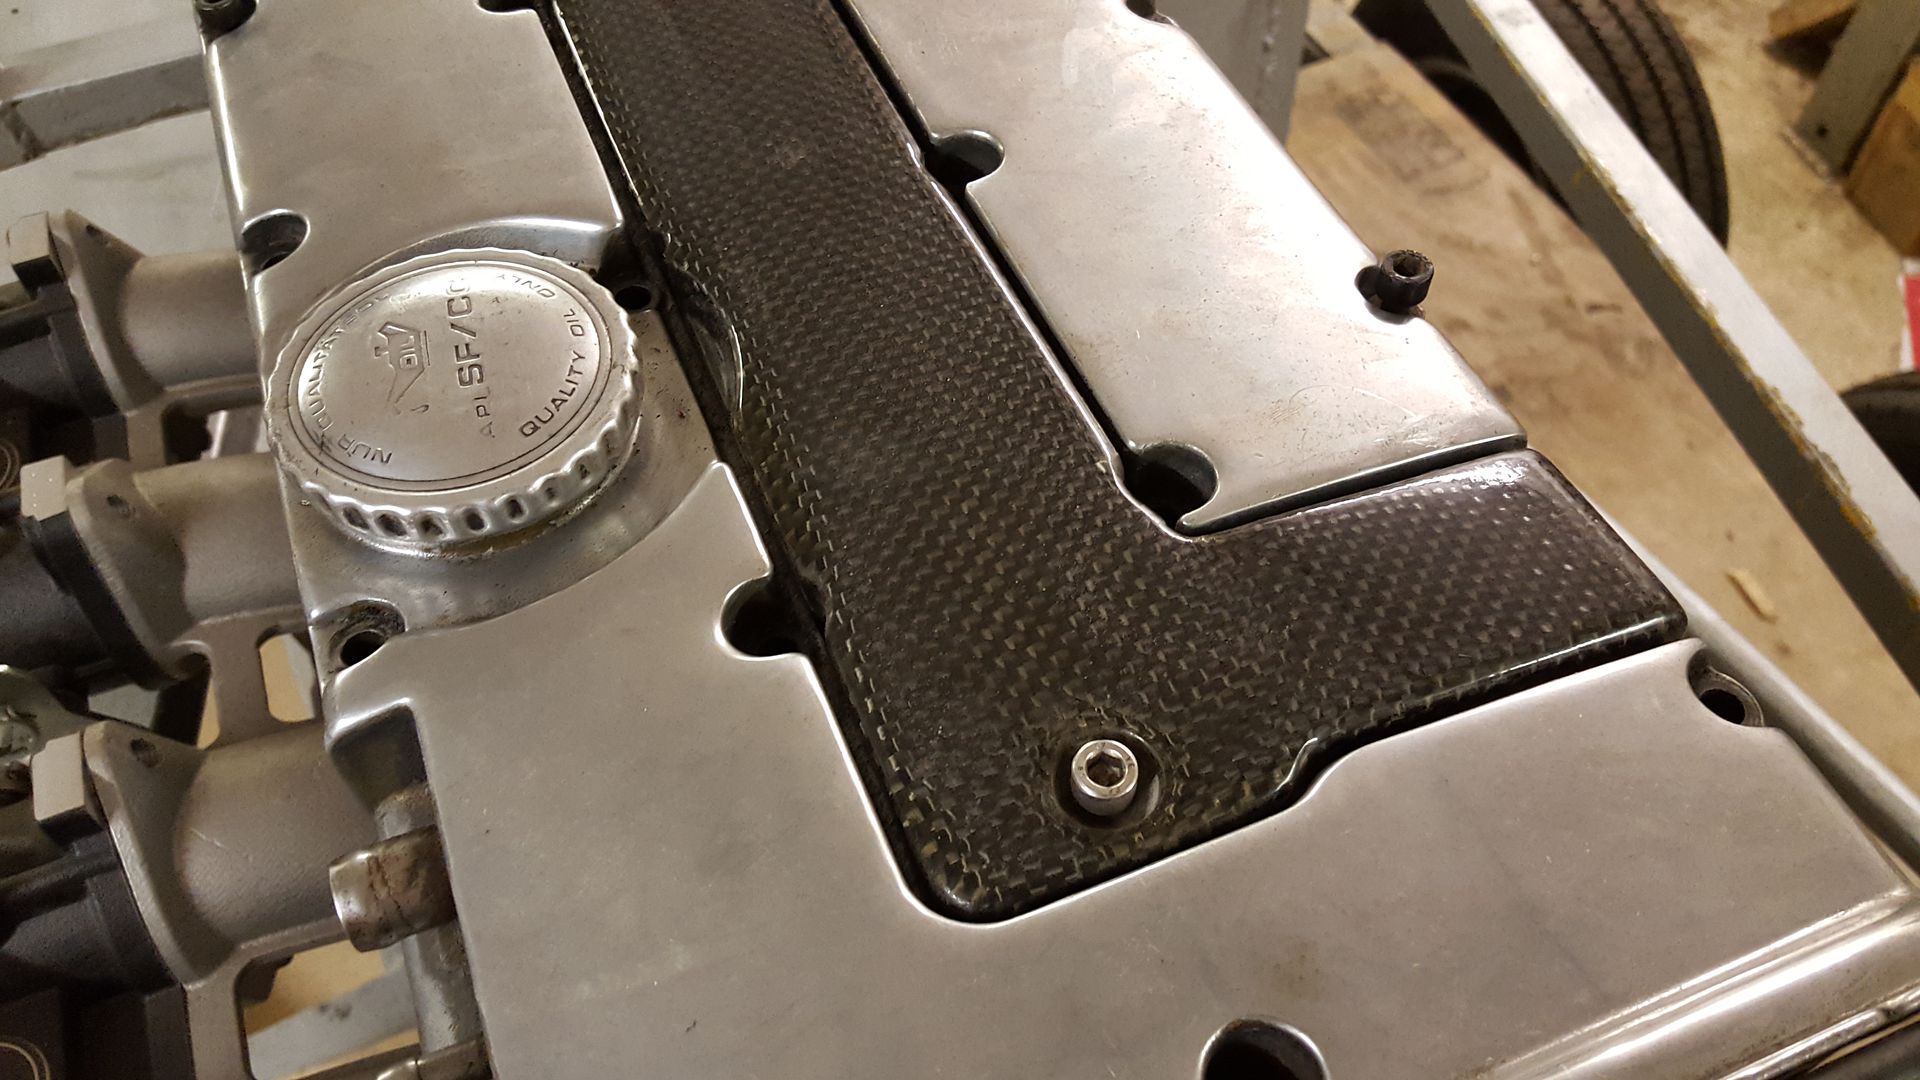
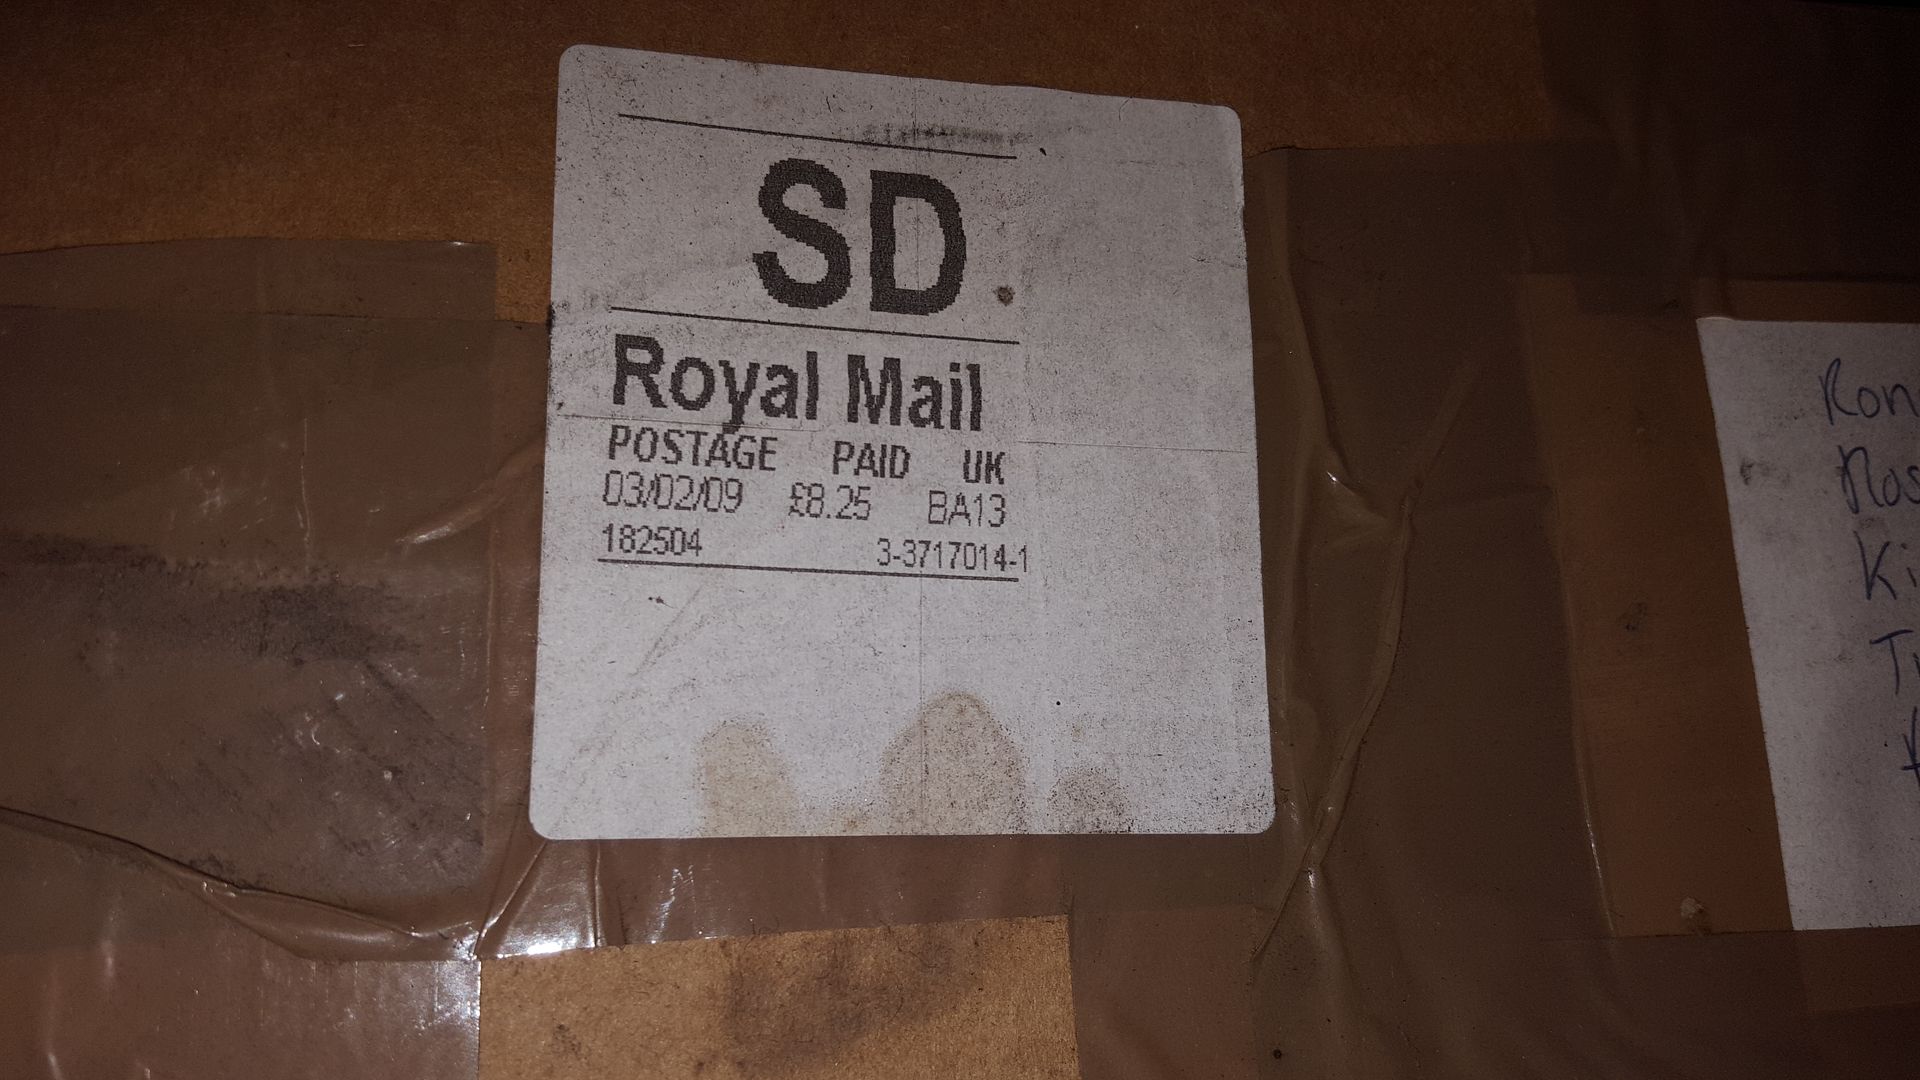
It's depressing when I have brand new parts in the packaging with date stamps like this on!
Mash - 12/5/17 at 07:35 AM
Have you thought about using an RX8 box? Just to give you more things to mull over
super-ron - 13/5/17 at 06:56 PM
so I've been thinking gearboxes. I could get the T5 with very little more work, and fabricate a turret extender with not too much hardship, but
it is major overkill being able to handle more than double I the power I am aiming for, and it is worth a bloody fortune! so I think I will change
plans.
Type 9 is the obvious choice, pretty much every kit car and caterham ever uses this box. they look to be Ł200-300 for the box, plus I need another
adapter bellhousing as the t5 one won't fit, which is about Ł200. plus the gear shift extender Ł60. it will be around Ł500 all in.
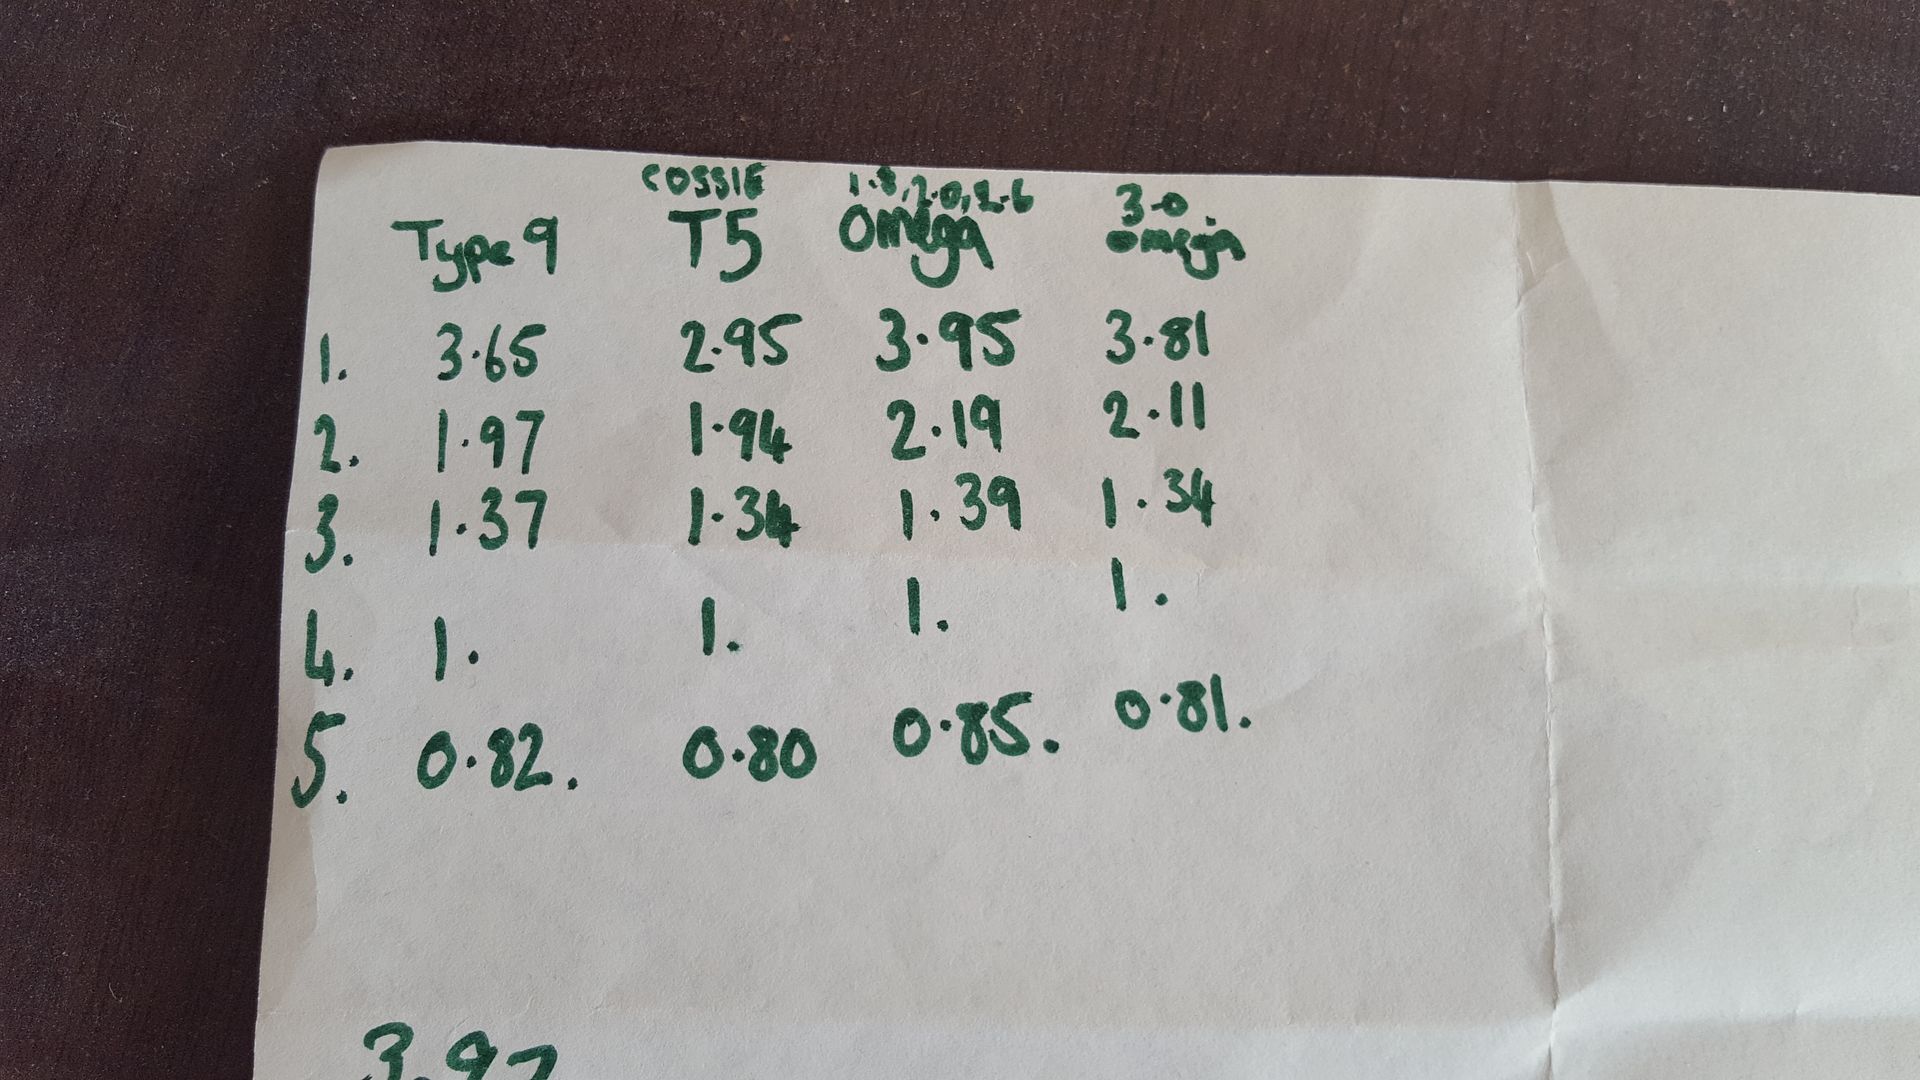
the other option that's a possibility is a Vauxhall Omega box. although I've not seen one used in a kit car before. they are really short
gearboxes compared to the Ford's, but do look a bit wide. They bolt straight up to the c20xe so no bellhousing required. they have an external
great linkage so very easy to move the gearstick where ever i want. and theyre hydraulic cluch as standard. only thing is the prop won't fit, so
would need to have that made. boxes are cheap as chips from Ł100, and I guess having a omega end put on my prop be around Ł100. so alot cheaper (if it
fits)

RX8 6 speed boxes seem really popular as a direct Type 9 swap as they're the same size and input and output shafts are the same size, but bell
housings are a bit of a problem as the try aren't bolt on. hydraulic clutch and cheap boxes too.
opel manta 1.8 boxes used to be the normal xe rwd box but getting rare and expensive now.
I had a quick look at ratios, and this is well out of my expertise, but the omegas don't look great, well to be honest I have no idea what
I'm looking at? I'm running a 3.92 rear diff.
Omega would definatly be the cheapest by far. but I am planning for going for an age related plate at the IVA so would it be best to keep as much
sierra as possible?
Partofthechaos - 14/5/17 at 07:31 AM
Have you tried filling in a final drive calculator like this one?
http://www.catherineandken.co.uk/sti/tyres.html
Bear in mind you won't want to red line every gear change (unless it is a track car).
fantastic build by the way!
[Edited on 14/5/17 by Partofthechaos]
sdh2903 - 14/5/17 at 09:00 AM
The type 9 1st is hopelessly short in a kit and the omega is even worse. Hence why people tend to go for a 2.4 or 2.8 long first when going for a bgh
or spc type 9. I would def look at the rx8 box. There are a few people now sorting adapter plates for the bellhousings.
CosKev3 - 14/5/17 at 10:18 AM
Some of the welding on that chassis is awful  (not yours!)
Didn't you fancy building a chassis from scratch rather than trying to sort out someone else's bodge?
As you obviously have the tools and skills to weld properly.
Selling the T5 is a good idea,as I suggested in your other thread which you didn't like!
sdh2903 - 14/5/17 at 10:30 AM
quote:
Originally posted by CosKev3
Some of the welding on that chassis is awful (not yours!)
Didn't you fancy building a chassis from scratch rather than trying to sort out someone else's bodge?
As you obviously have the tools and skills to weld properly.
Selling the T5 is a good idea,as I suggested in your other thread which you didn't like!
I was actually going to suggest starting from scratch with the chassis but didn't want to offend. If you are chopping the tunnel for gearbox,
sides for the body and tweaking the suspension points then is it worth saving? Starting afresh will give you what you want and with piece of mind that
it's done properly. And all for the sake of a couple of hundred in fresh steel. As said some of the welds leave a little to be desired.
sdh2903 - 14/5/17 at 10:51 AM
In fact sorry. The rx8 box has an even shorter first! I'd thought it was 3.1 the same as the mk3 mx5 box but looks like it's 3.9 which is
pretty useless. Looks quite decent from 2nd onwards though so you could use 2nd as your first!
super-ron - 14/5/17 at 07:55 PM
Thanks everyone. I had no idea of the value of the T5, hence just using it for the sake of it as it's just sitting there under the bench. I think
I paid Ł100 for it 8 years ago nice investment I am only really using it half of its capacity bhp wise, and although it does have really nice
ratios it will give a ton of money to go on other things on the build.
I did look at the rx8 box but like you say 1st is just as bad. but I think a car as light as this you could start in 2nd and use it as a dog leg
gearbox.
I think the route I'm going to go down is the type 9. it's not perfect, but tried and tested on pretty much every kit car ever. there are
tons of bolt on/together upgrades to rectify the faults, and I am going to be going down the age related plate so will be good to keep as much sierra
as possible. I will start it as standard, if I find it is really that bad in areas I will develop it as it goes.
Chassis wise it has escalated a bit! origional plan was just to bash the engine in, iva and zoom zoom. This always seems to happen with me, I'm
just too much of a perfectionist  I am glad I got the car i did, the new parts are worth triple what I paid for the whole thing, so I'm happy
with that part. I've got to this stage and I could easily make a chassis from scratch to suit this hybrid plan that is emerging, well within my
skill set.
I am glad I got the car i did, the new parts are worth triple what I paid for the whole thing, so I'm happy
with that part. I've got to this stage and I could easily make a chassis from scratch to suit this hybrid plan that is emerging, well within my
skill set.
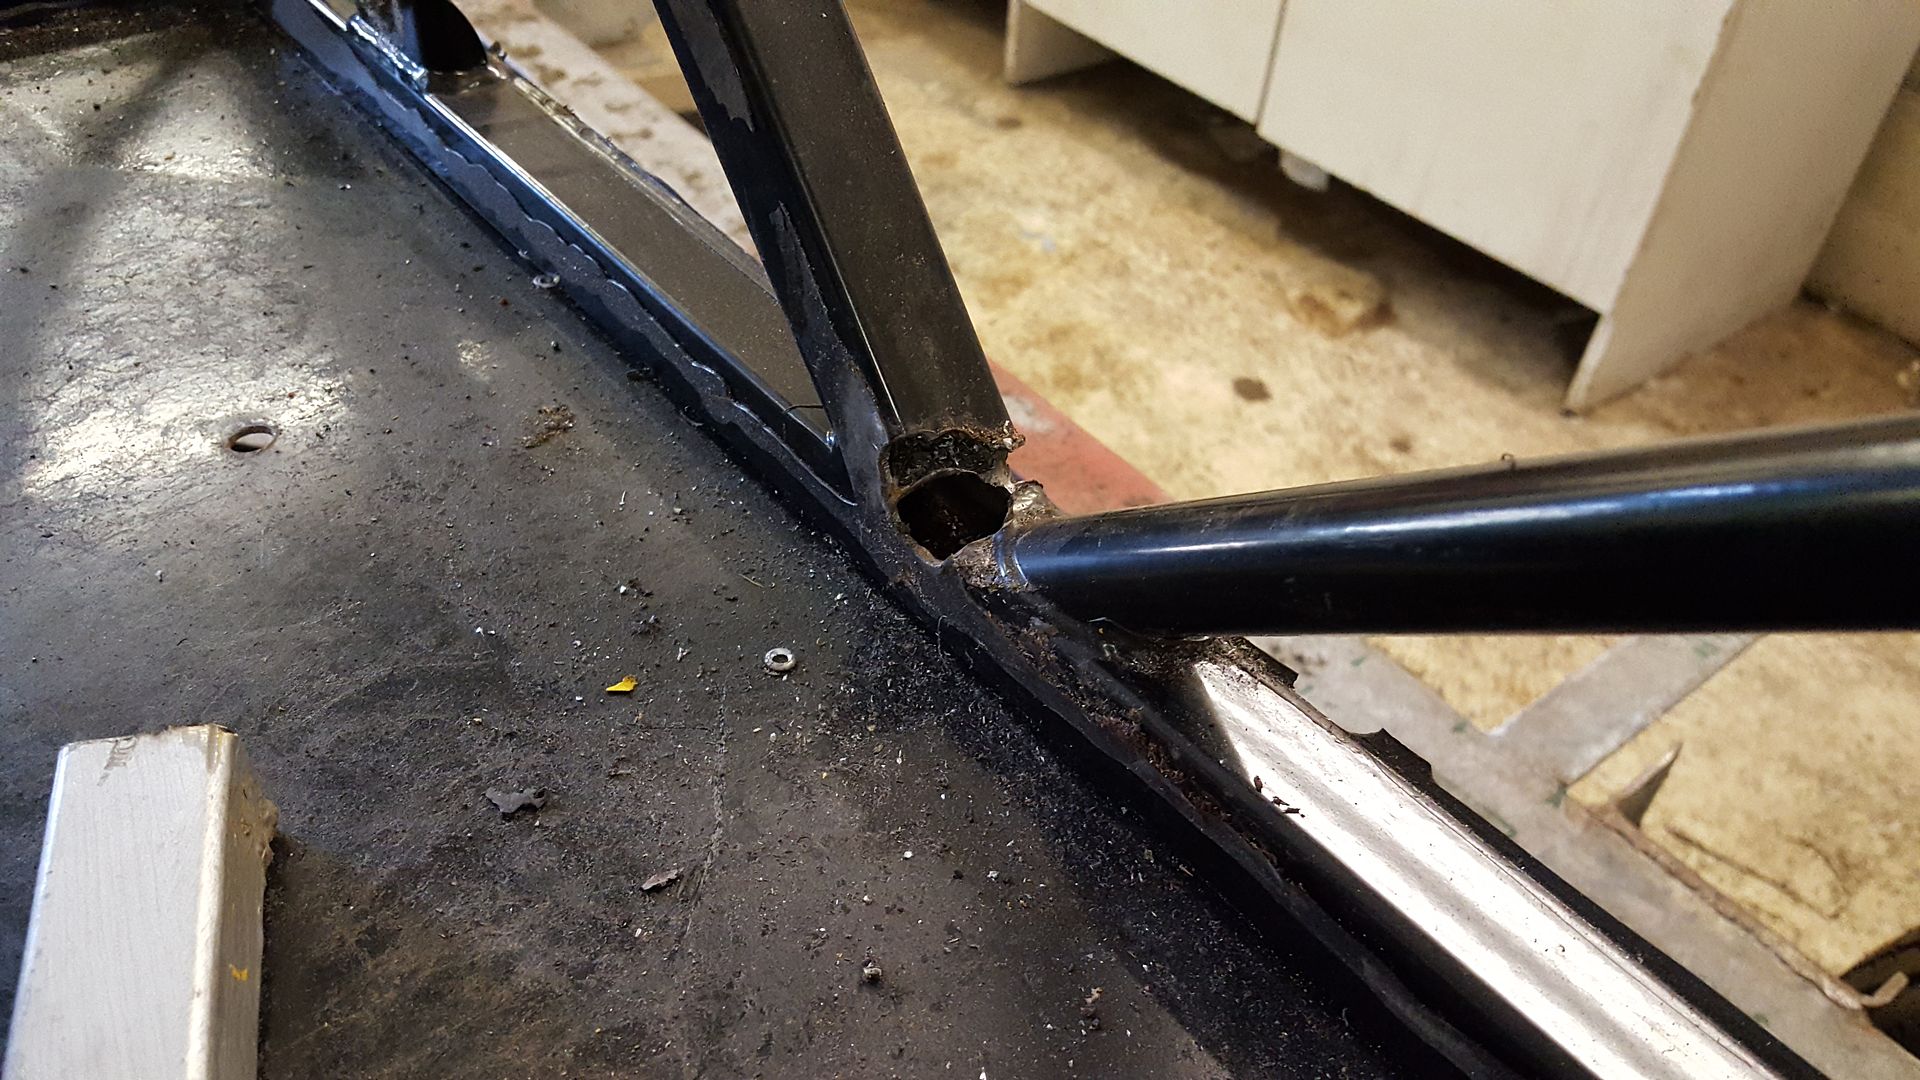
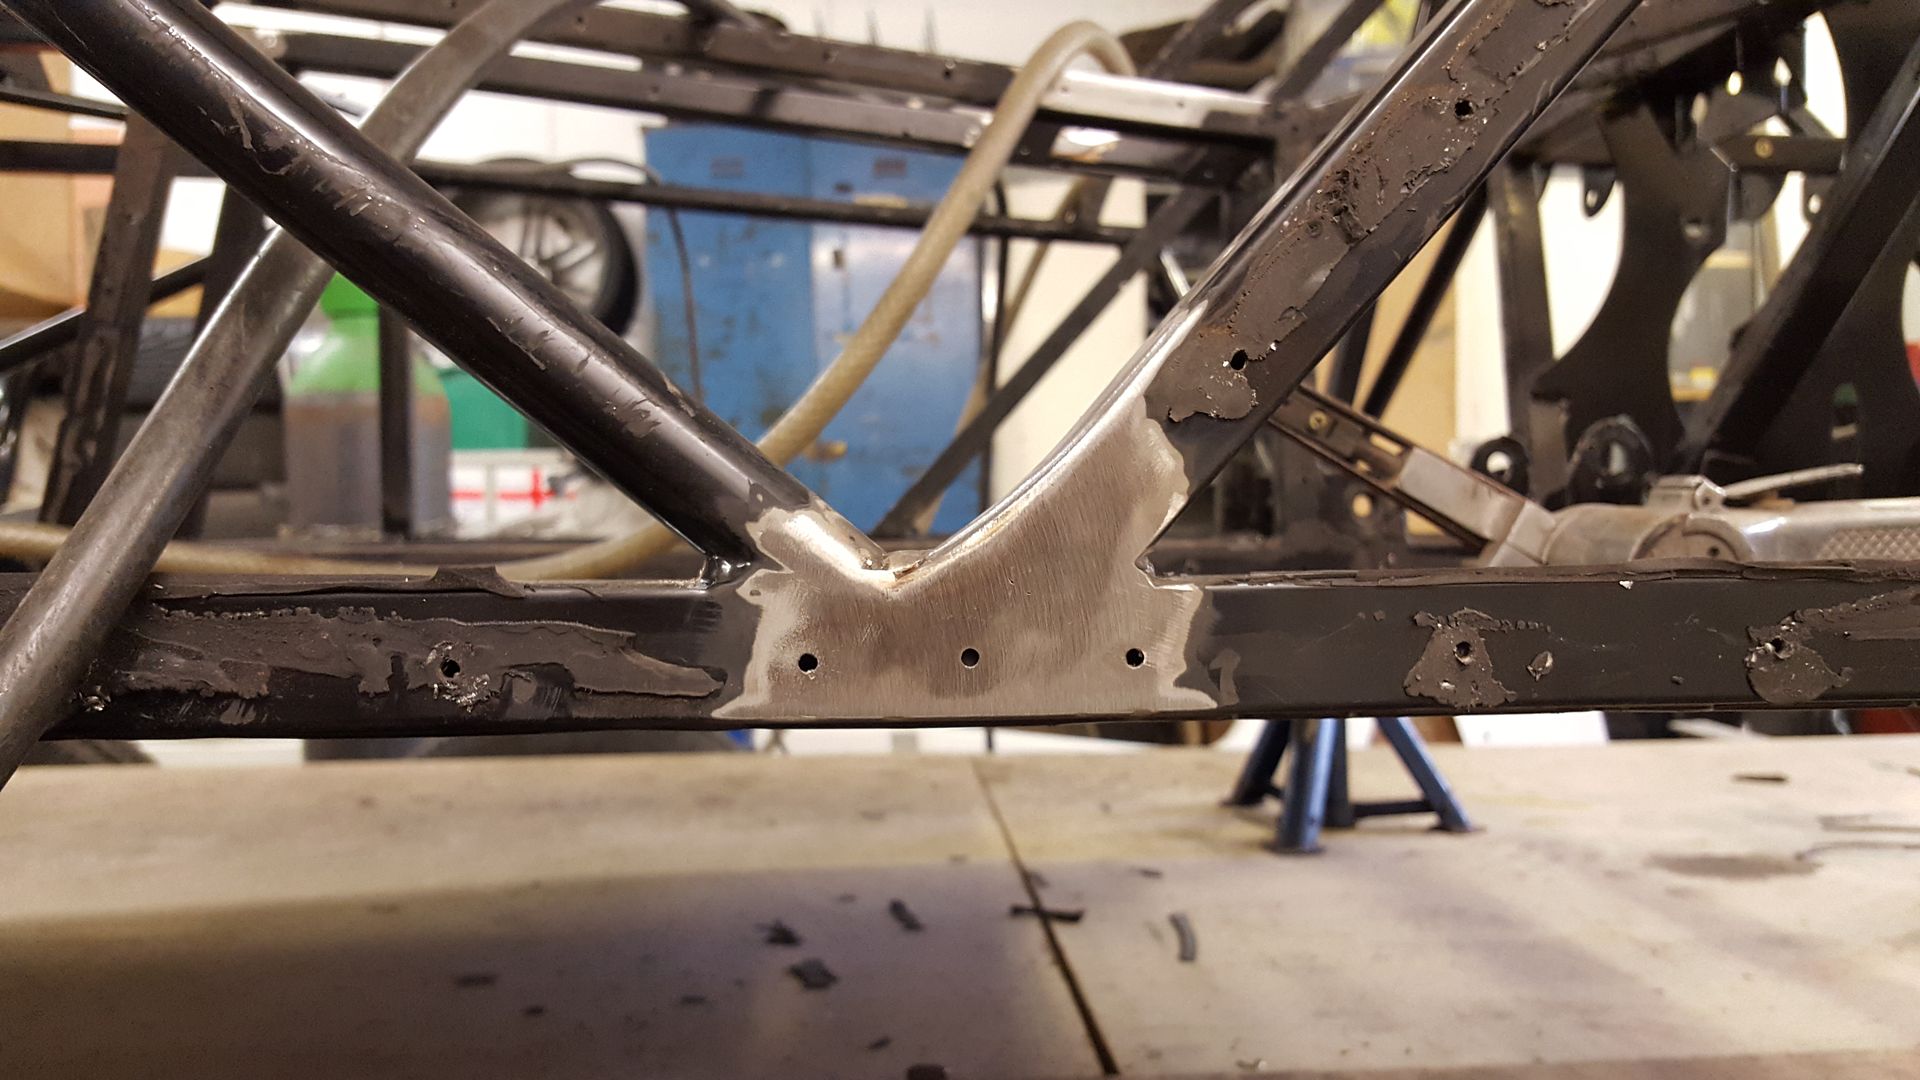
The actual origional box chassis is done very well, the joint are nice and square, the welds are good, straight and neat, even professional! the
problem is I think then it went to another owner who continued the build as all the plate work was then added by a completly welder, the floors,
bulkhead, all plates etc. structurally sound, but not pretty. Then the skill of the welder changed again for the rollcage, steering mounts and rad
brackets, these aren't done to a structural standard in my opinion.
if i was really taking it to perfectionist level I could make a chassis from scratch with the alterations I desire, but I know this will spiral even
further to a full F1 spec chassis lol. end up taking years and years and costing thousands. I am going to continue with it as it is, re doing the bad
plates, scrapping the cage (just leaving it on at the moment as it braces it nicely) and modify the front end to suit the front suspension components.
using a type 9 I now won't need the extra room in the tunnel so I might move the rail I altered back in to regain the foot room.
All suggestions and crittisms welcome. I've been building fast cars and fabricating for years and years but this is my first kit car. Glad
you're enjoying progress so far
[Edited on 14/5/17 by super-ron]
[Edited on 14/5/17 by super-ron]
[Edited on 14/5/17 by super-ron]
Myke 2463 - 15/5/17 at 12:04 PM
Check out the ratios on the RX8 5 speed box, much better than the type 9 and all usable. need adaptor plate and make your own gear lever ext as
stick to front of bellhousing is almost the same as type 9. I paid Ł100 for 30k box.
Mudchute - 15/5/17 at 03:56 PM
My 2p, an MX5 box is virtually identical to the rx8 and can be had for free in some cases (I've bagged and passed on a couple when searching for
one) and will likely fit with an adaptor plate. There is a chap on ebay making adaptor rings for all manner of combos for the mazda boxes.
The Mx5 box fits perfectly in the Haynes chassis. Not sure if that applies to the locost tunnel but mine has bags of room all around it (in my Haynes
chassis).
ettore bugatti - 15/5/17 at 08:58 PM
Stick to the T5 and enjoy that you got a bargain with that. Furthermore, the right gear ratios will make it a nicer drive too.
An BGH E6 Type 9 might do the trick ratio wise (similair to the T5), but that's 1320 pounds (although similar type 9s are offered on Ebay for
less). A Type 9 from a V6 does have a first gear of 3.36 but they probably do a premium over a 4 pot Type 9.
Besides, isn't a std Type 9 a bit marginal for a 2l 16V on itbs? Surely you close to 200hp with that setup?
Just keep the T5 and upgrade the engine to turbo spec...
Cost more, but seems very logical to me. Using parts to their capability etc.
super-ron - 8/6/17 at 08:39 PM
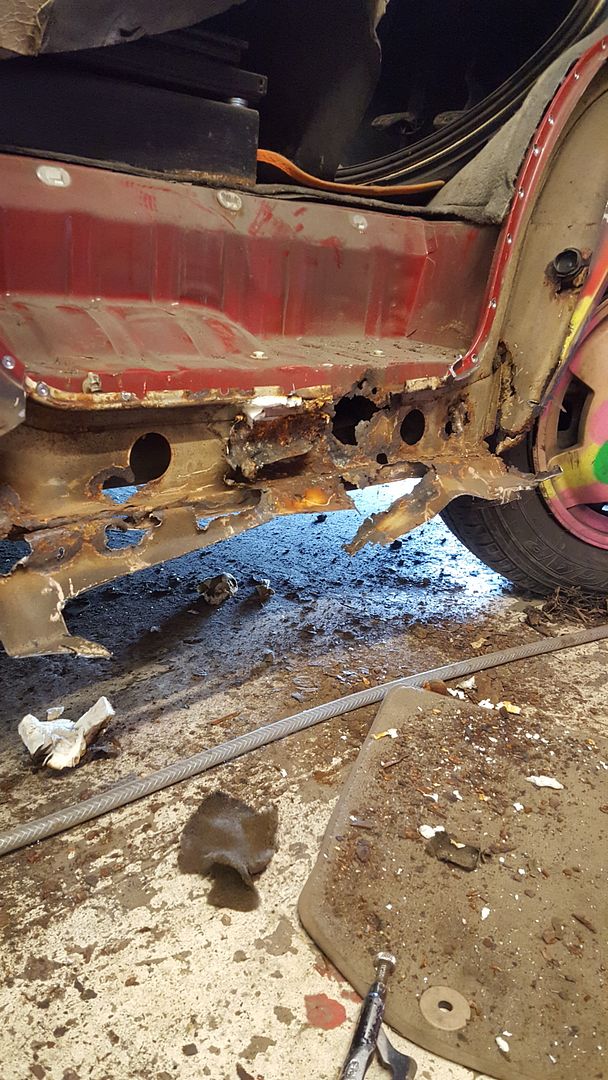
ok update time. there has been a bit of a gap as i got involved in a quick restoration on my friends T4 camper van. which turned into a balls deep 50
plus hours resto,
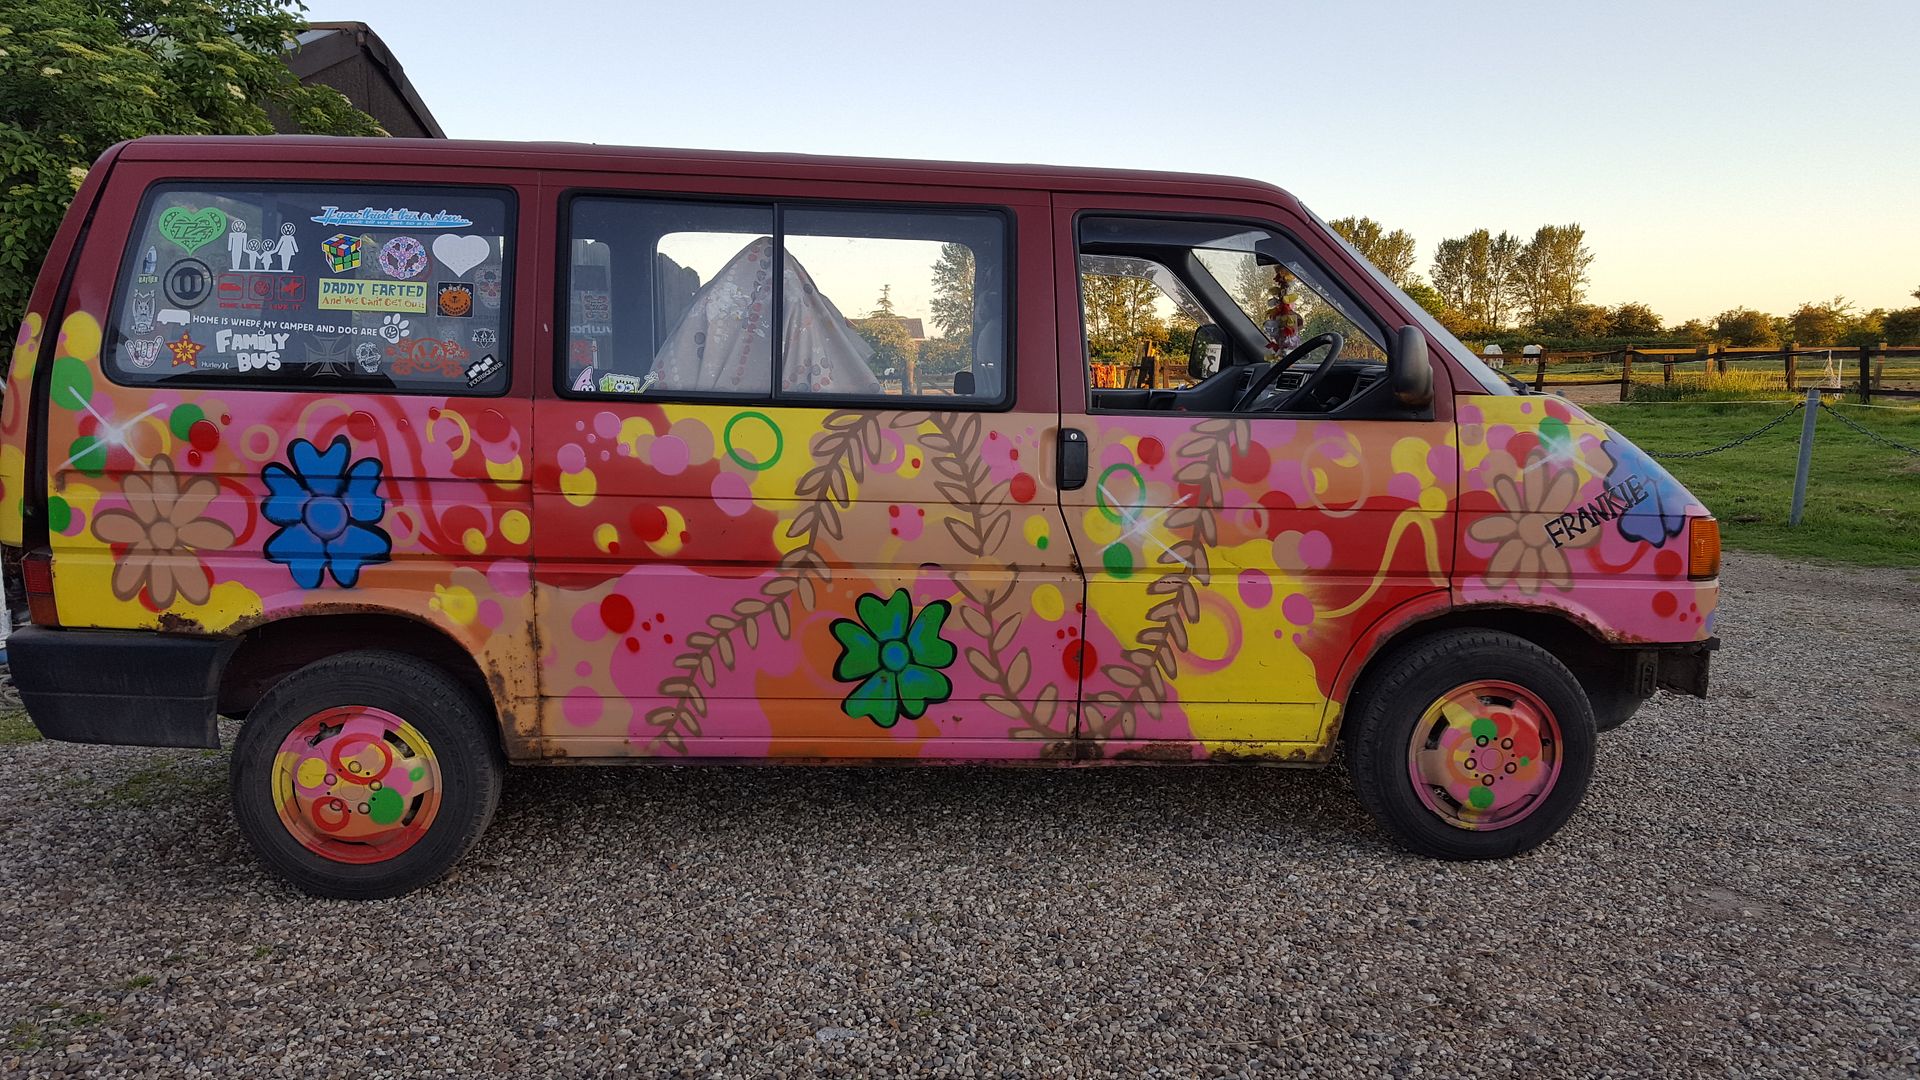
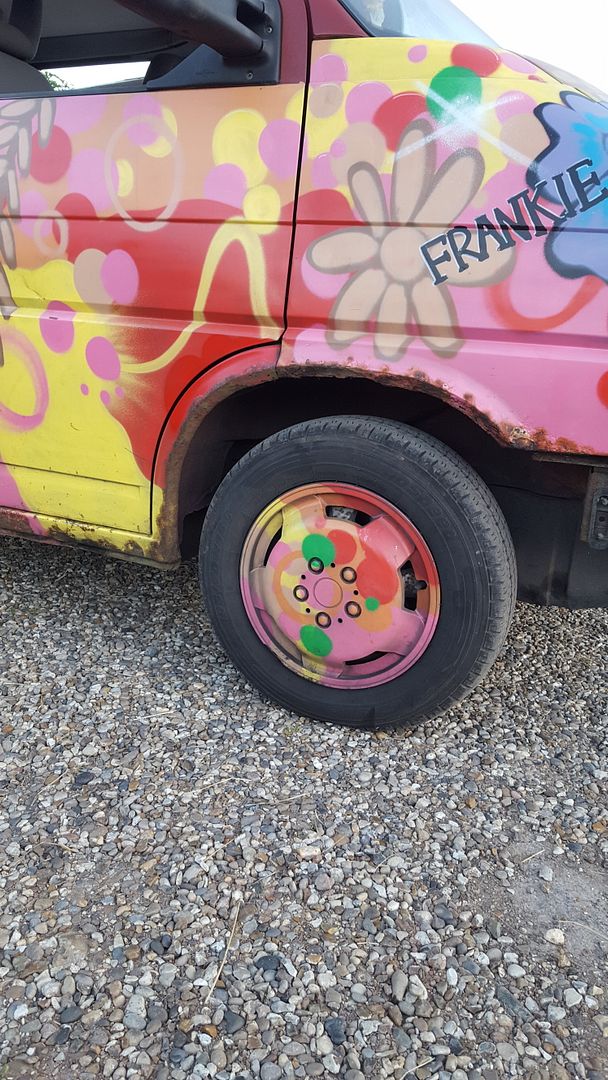
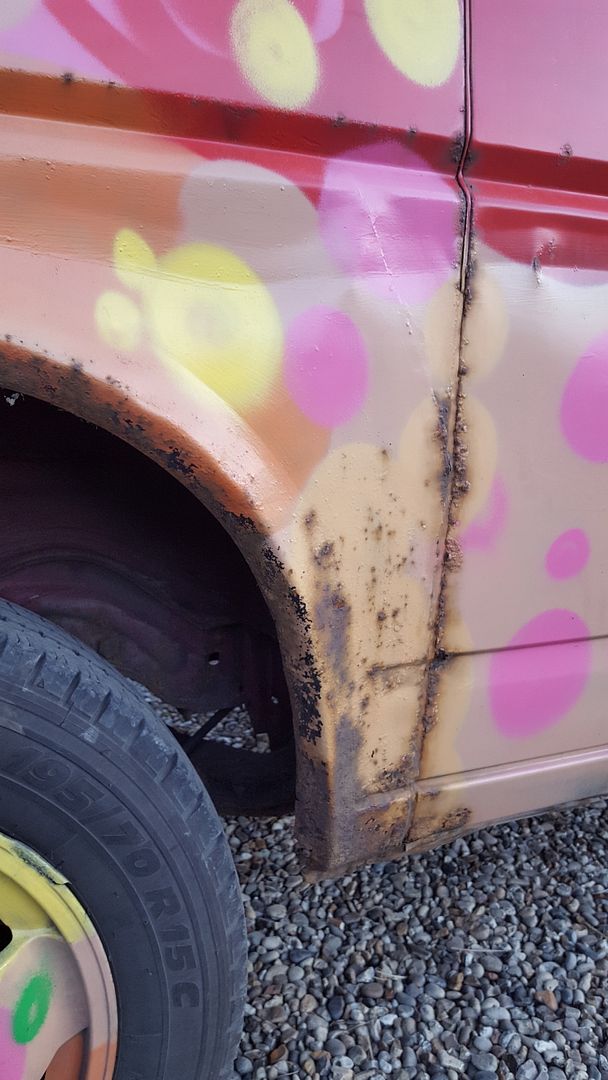
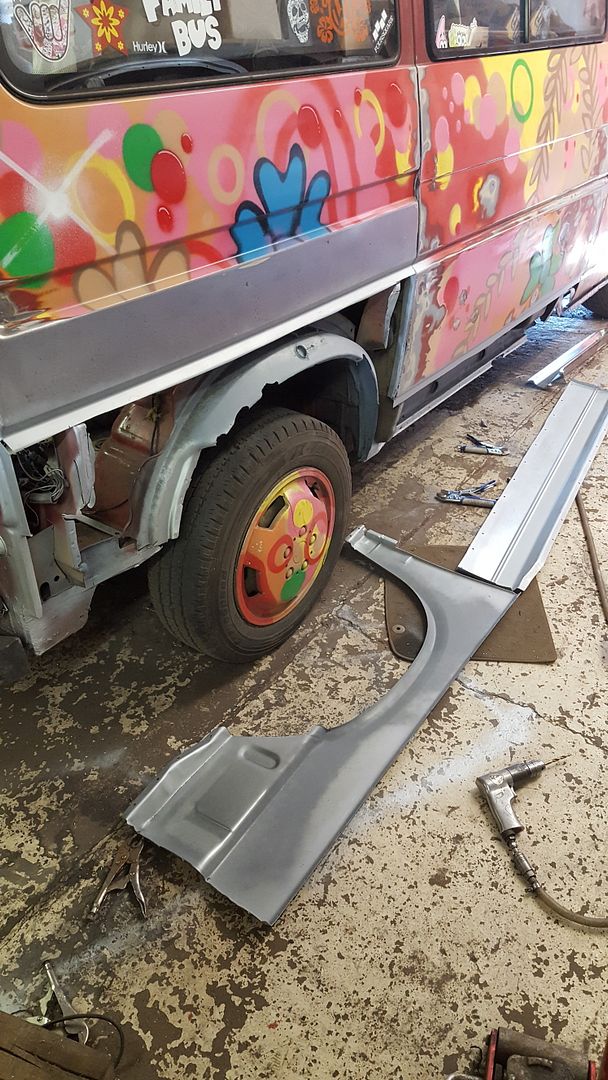
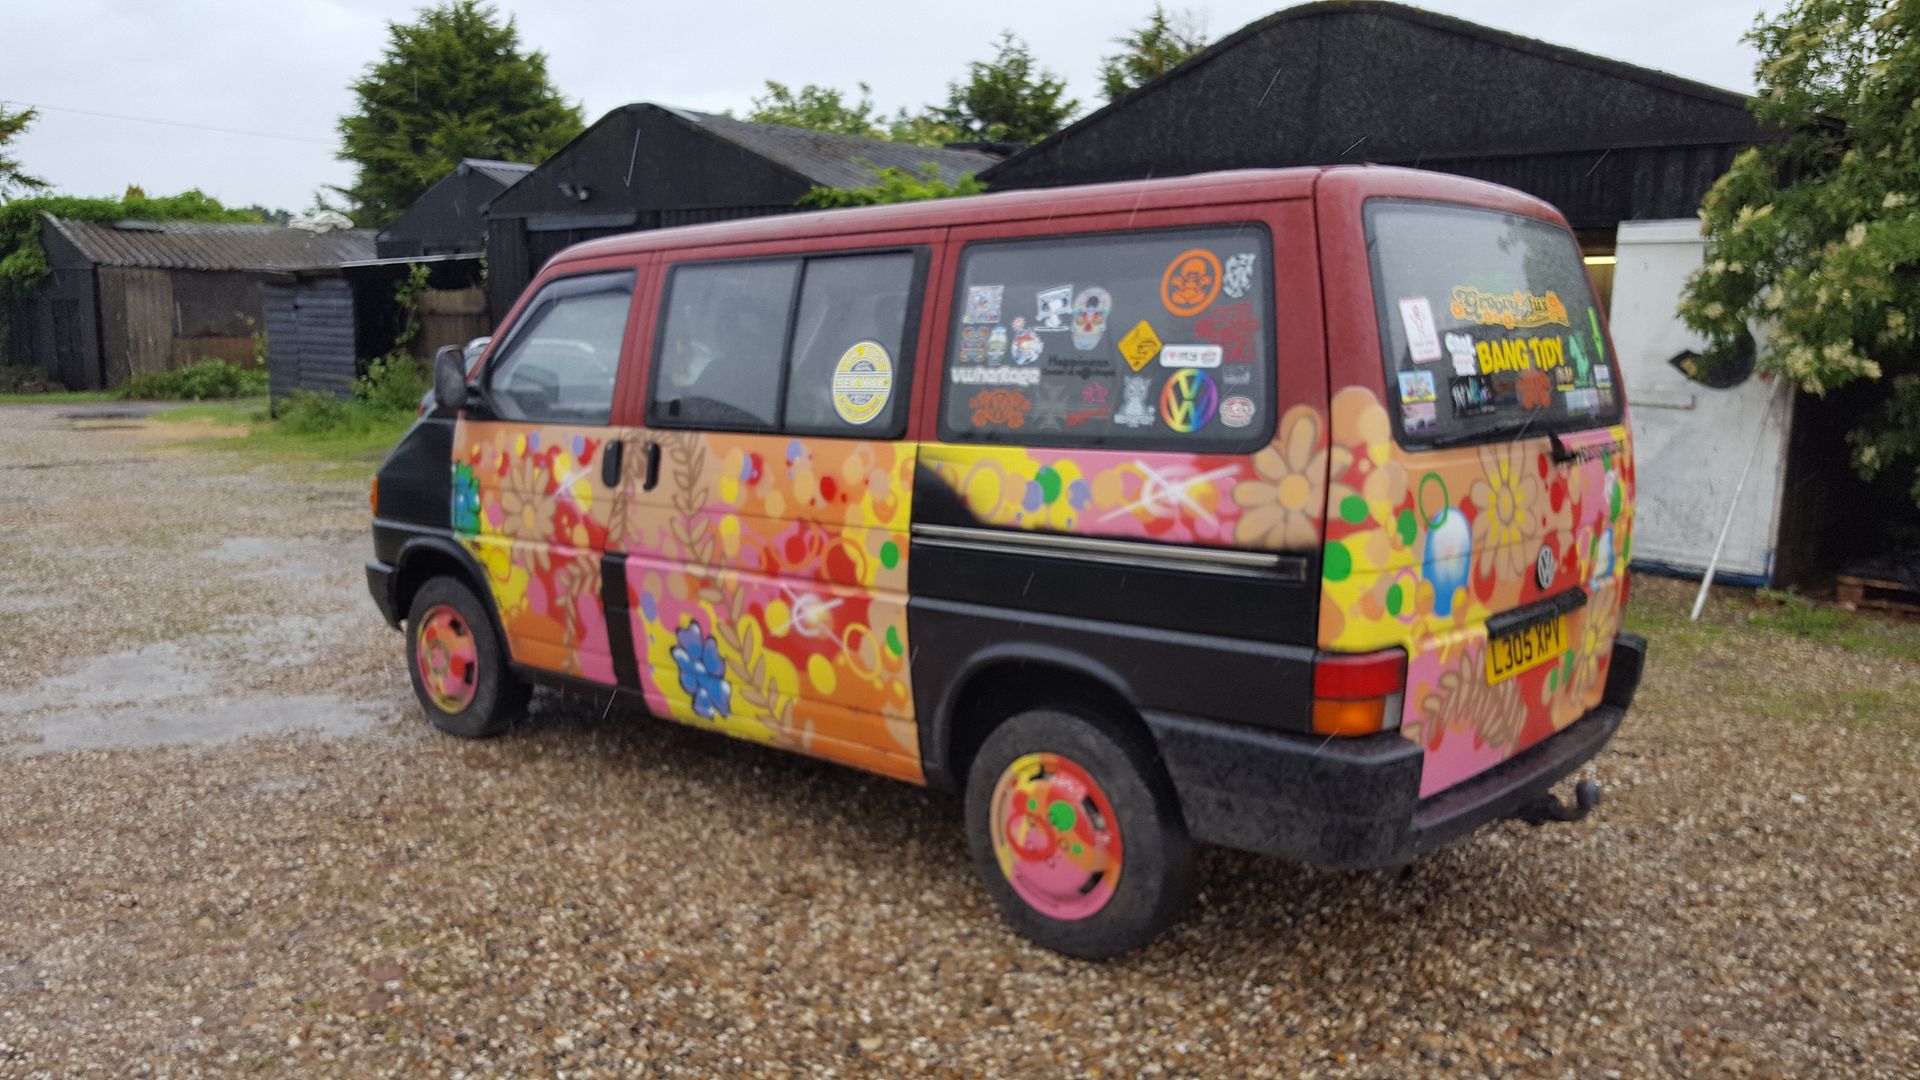

and he got it graffiti'd up this week. he's not shy of being noticed LMAO
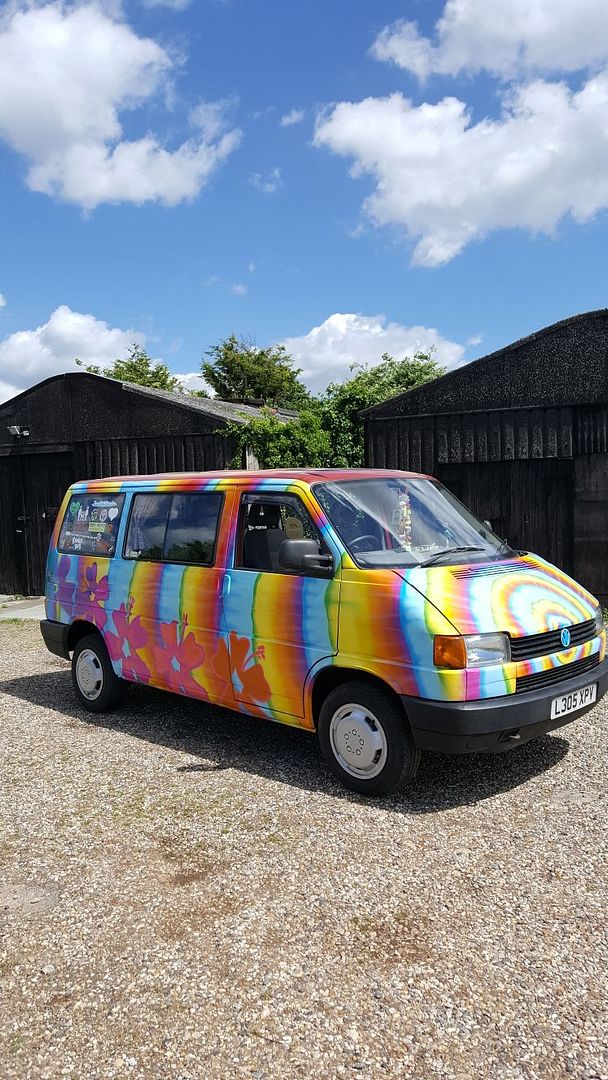


so that is out of the unit and it back to playing kit cars
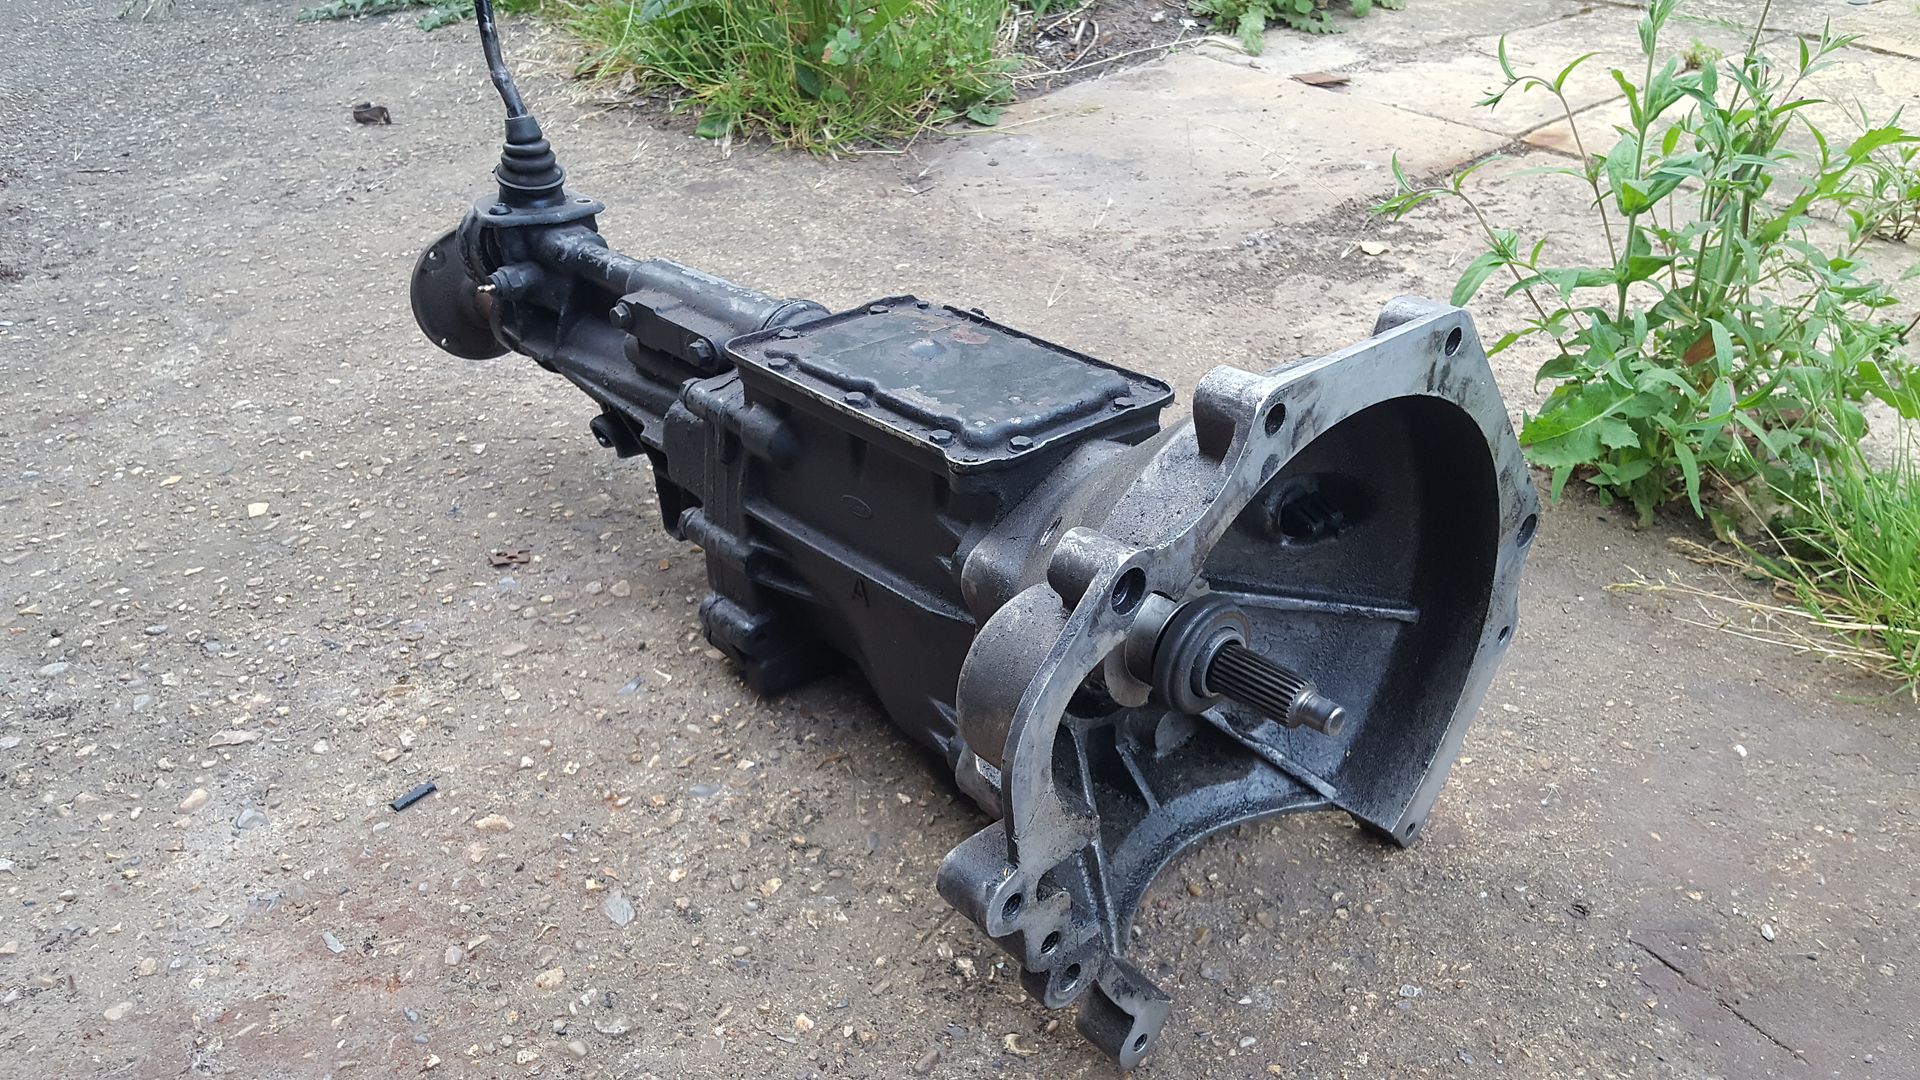
I have been browsing gearboxes on eBay and forums over the last few weeks. I decided to keep it ford and go with a type 9 as i really do want to try
and get a sierra age relate plate when I go for the IVA. it may all change in the future as i do like the look of the mazda boxes, or even dropping
the ratios in the type 9, but this will be the starting point. I spotted this one on eBay and came to a deal.
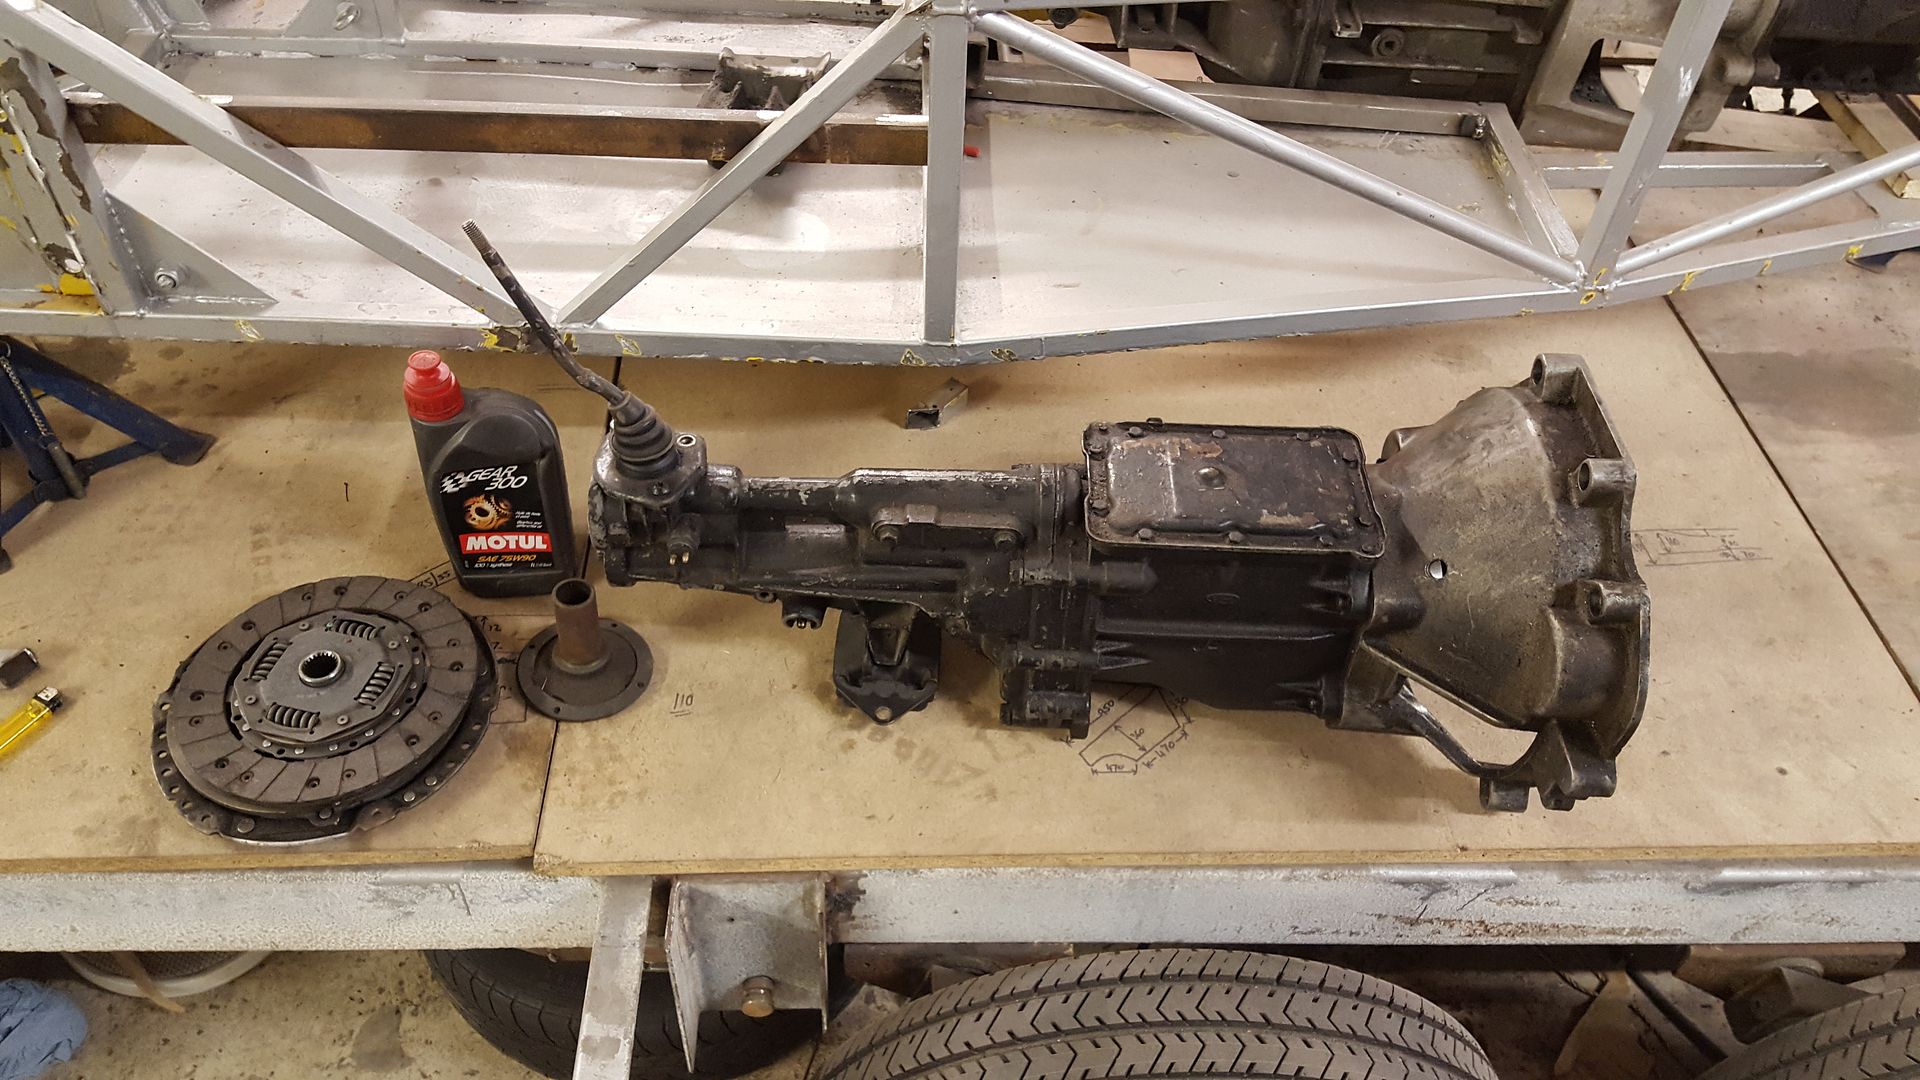
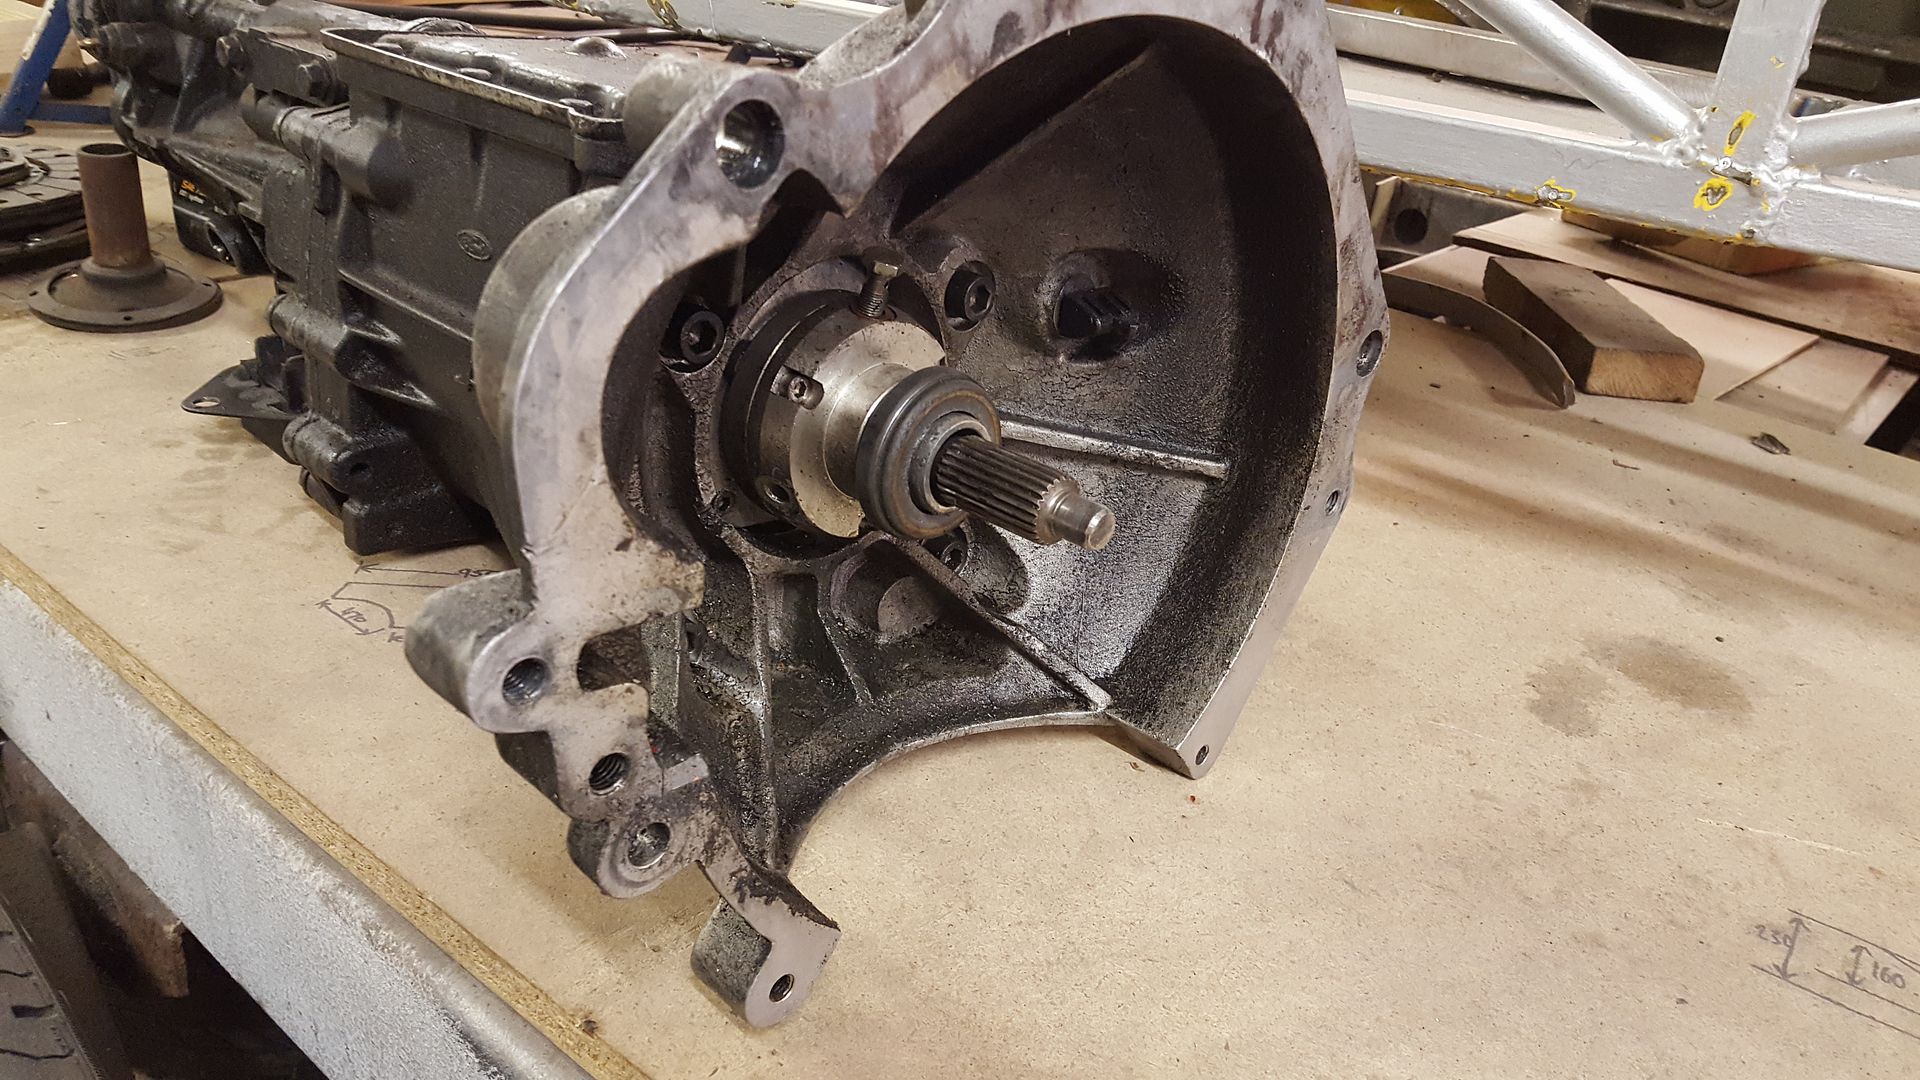
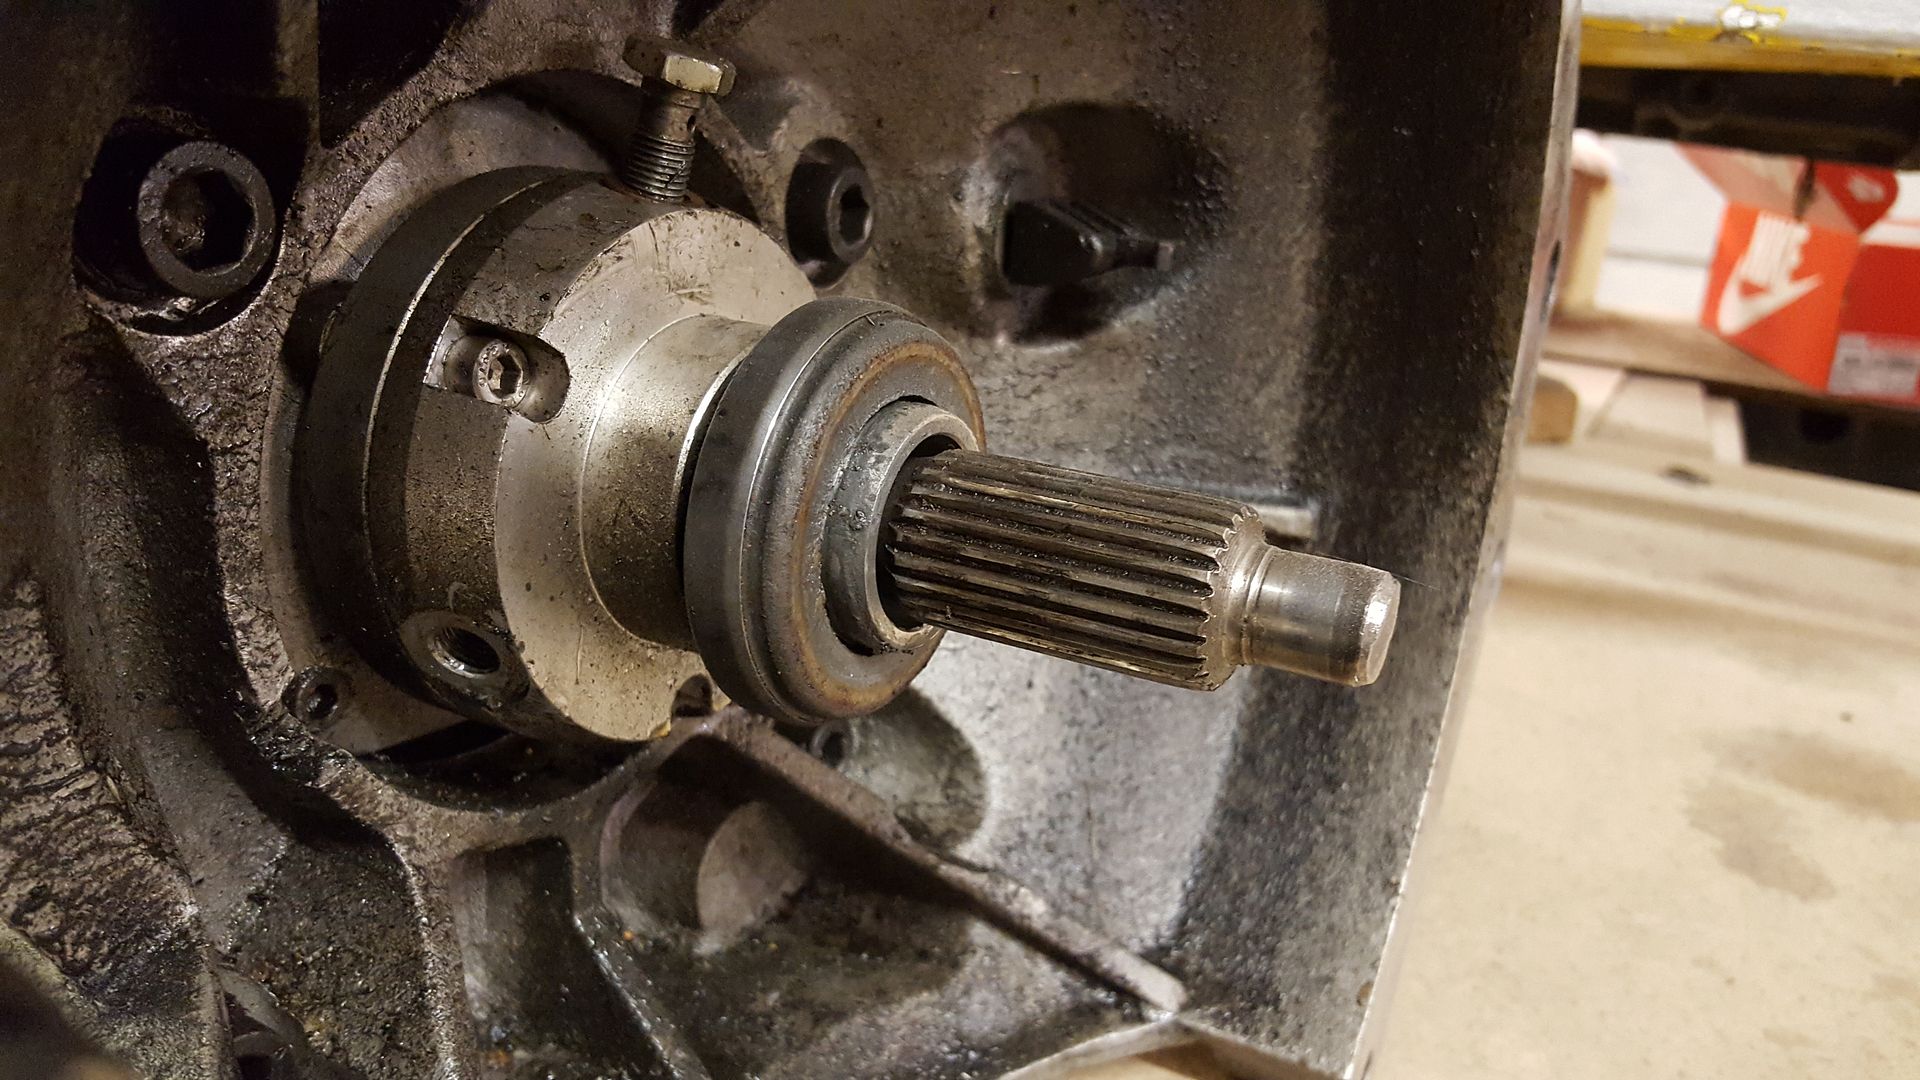
It's a V6 type 9 gearbox that's been modified to fit a 4 cylinder. usually the V6 variant of the gearbox can't be used due to the fact
they have a longer input shaft suited for a much deeper bellhousing compared to the 4cylinder. this one has had the input shaft machined down to the
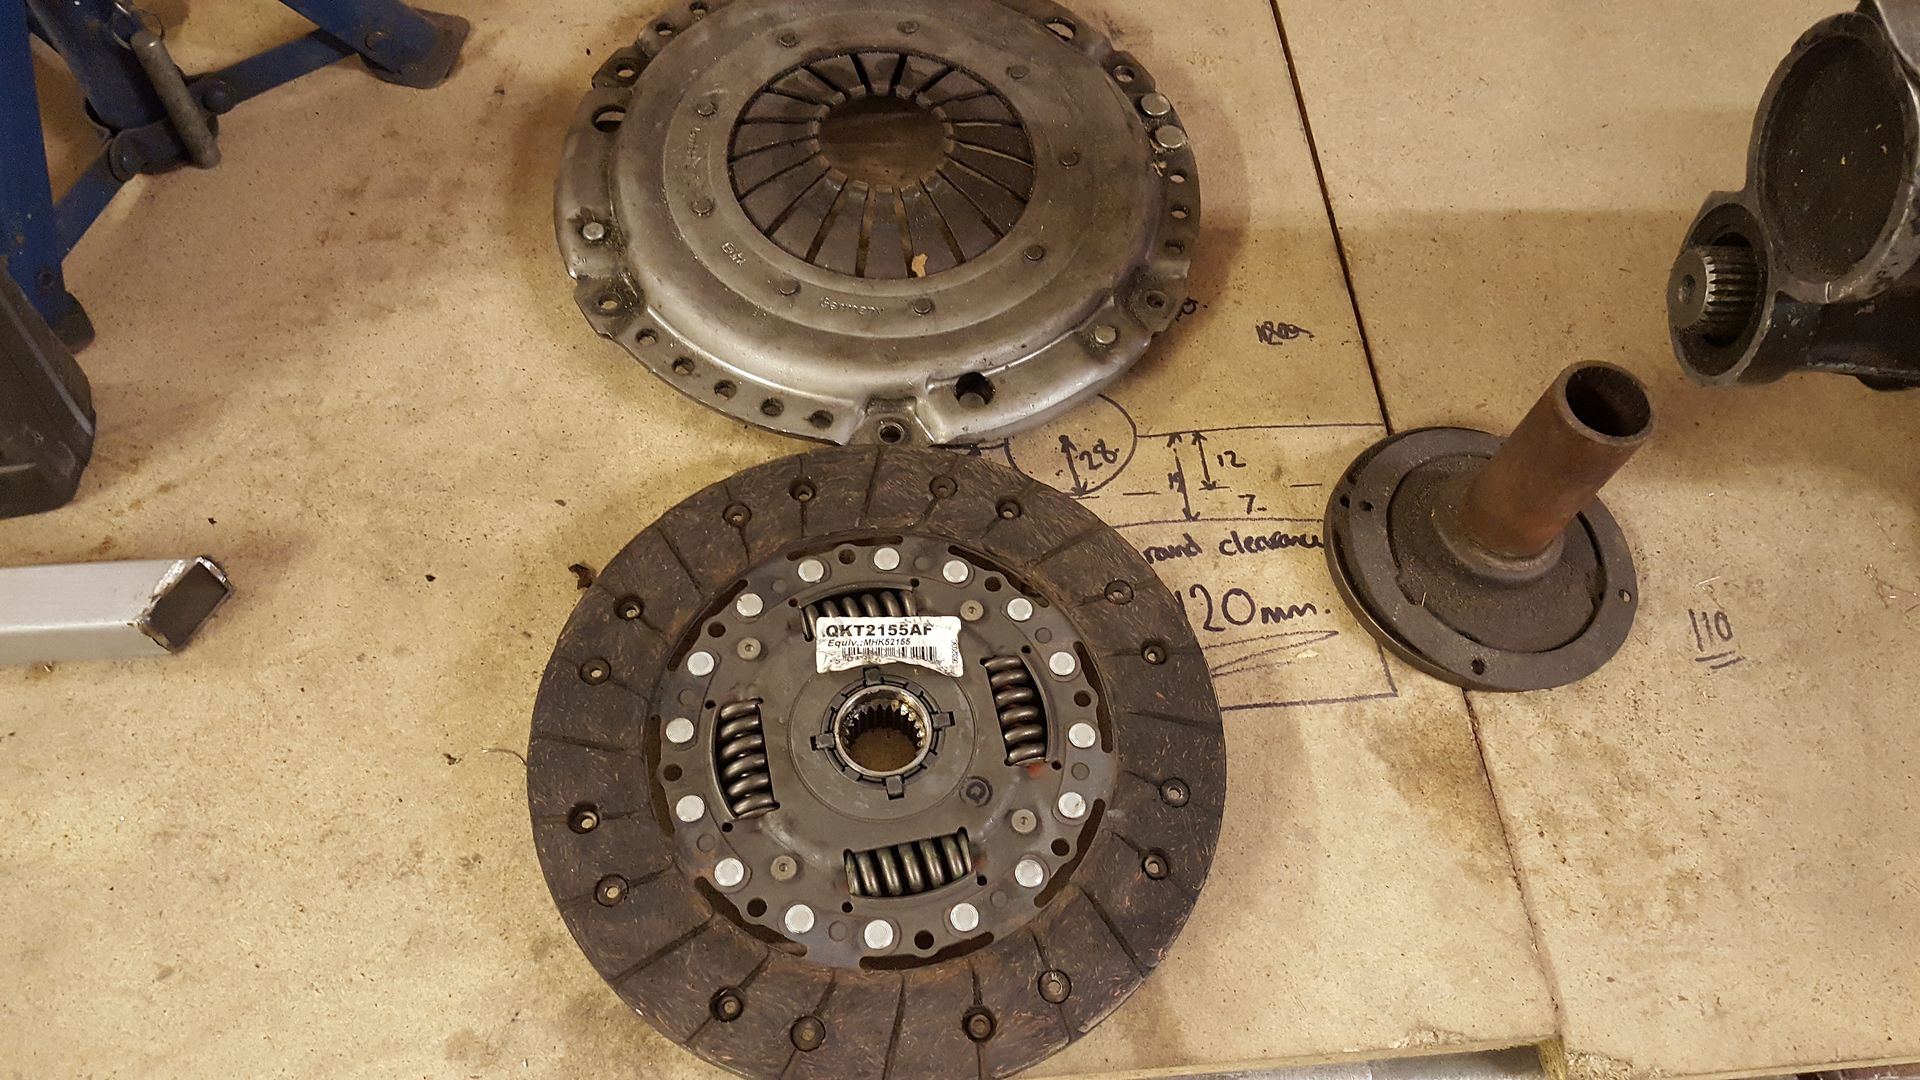
same dimensions as a 4 cylinder one, and has the C20XE conversion bellhousing. it has a hydraulic clutch release bearing (favoured over the external
hydraulic clutch lever that's on the car) and came with a mix of vauxhall and ford clutch plates for the conversion to all work. I think he said
the friction plate is ford galaxy. it has a modified gearstick to move the lever further back (will see if I keep this or do the original plan of the
relocator) and an uprated rear mount. The advantage with it being a V6 gearbox (it seems) is they have a better ratio in 1st than the 4cylinder of
3.36:1 compared to the 3.65:1. if it makes a great deal of difference I don't know, but it's better. it's been in a haynes roadster for
the last 2000 miles so the configuration all works well together.
I paid Ł400 for the lot and he chucked in a bottle of fluid too 
next step will be to get the T5 out cleaned up and sold and this will bolt straight in.
there's quite a size difference :lol:
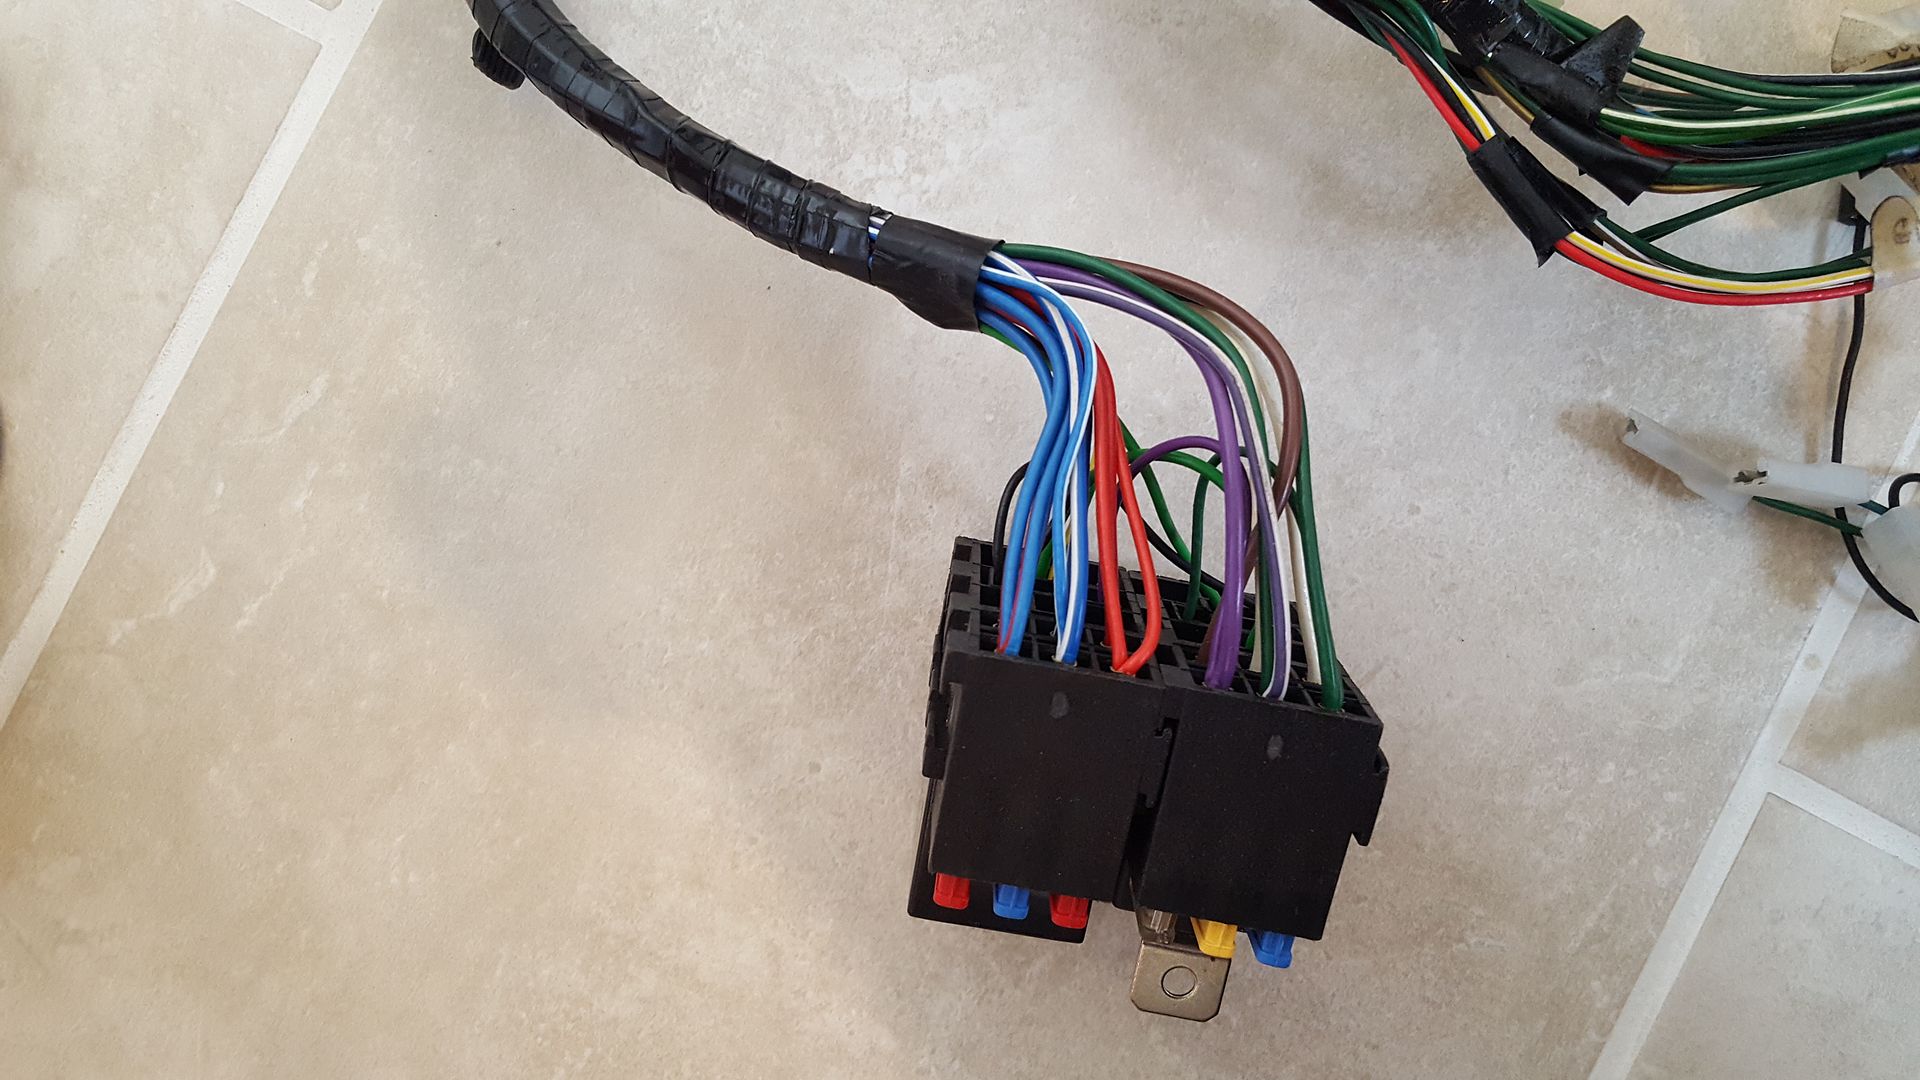
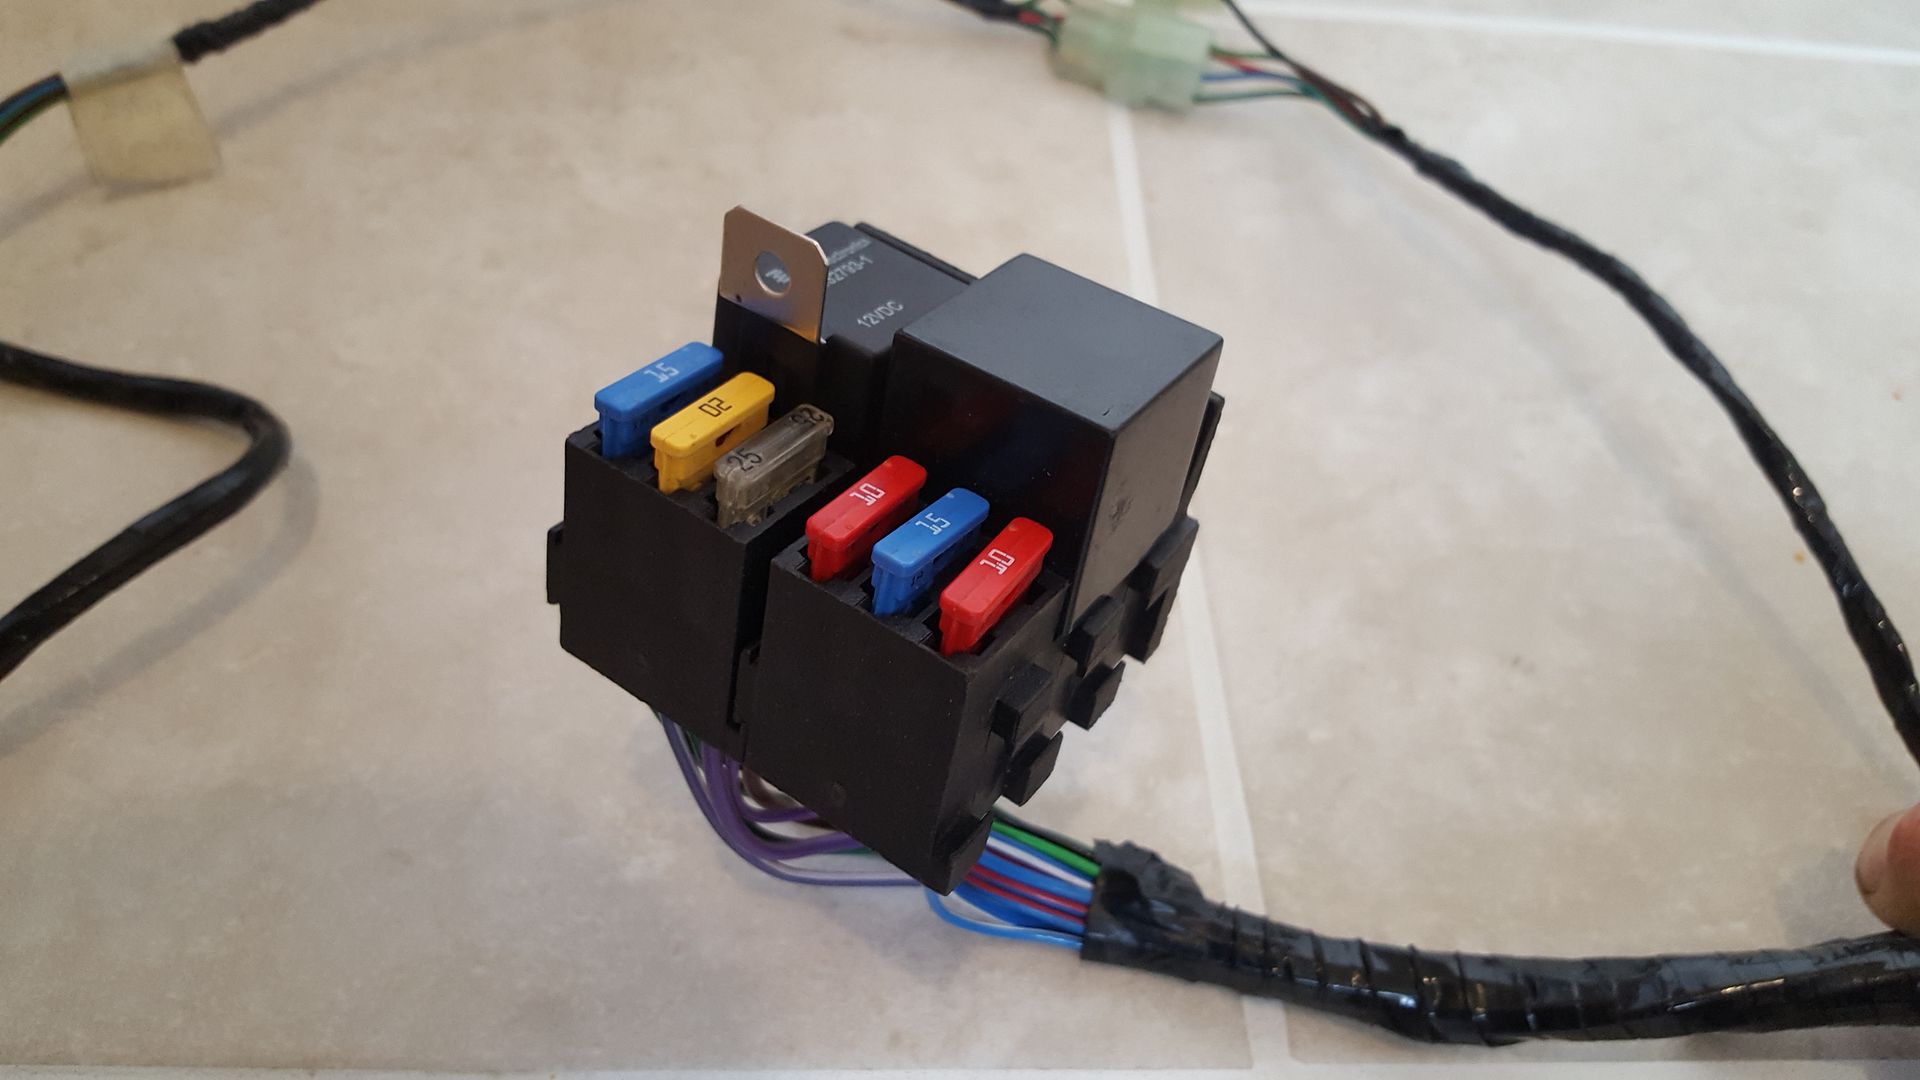
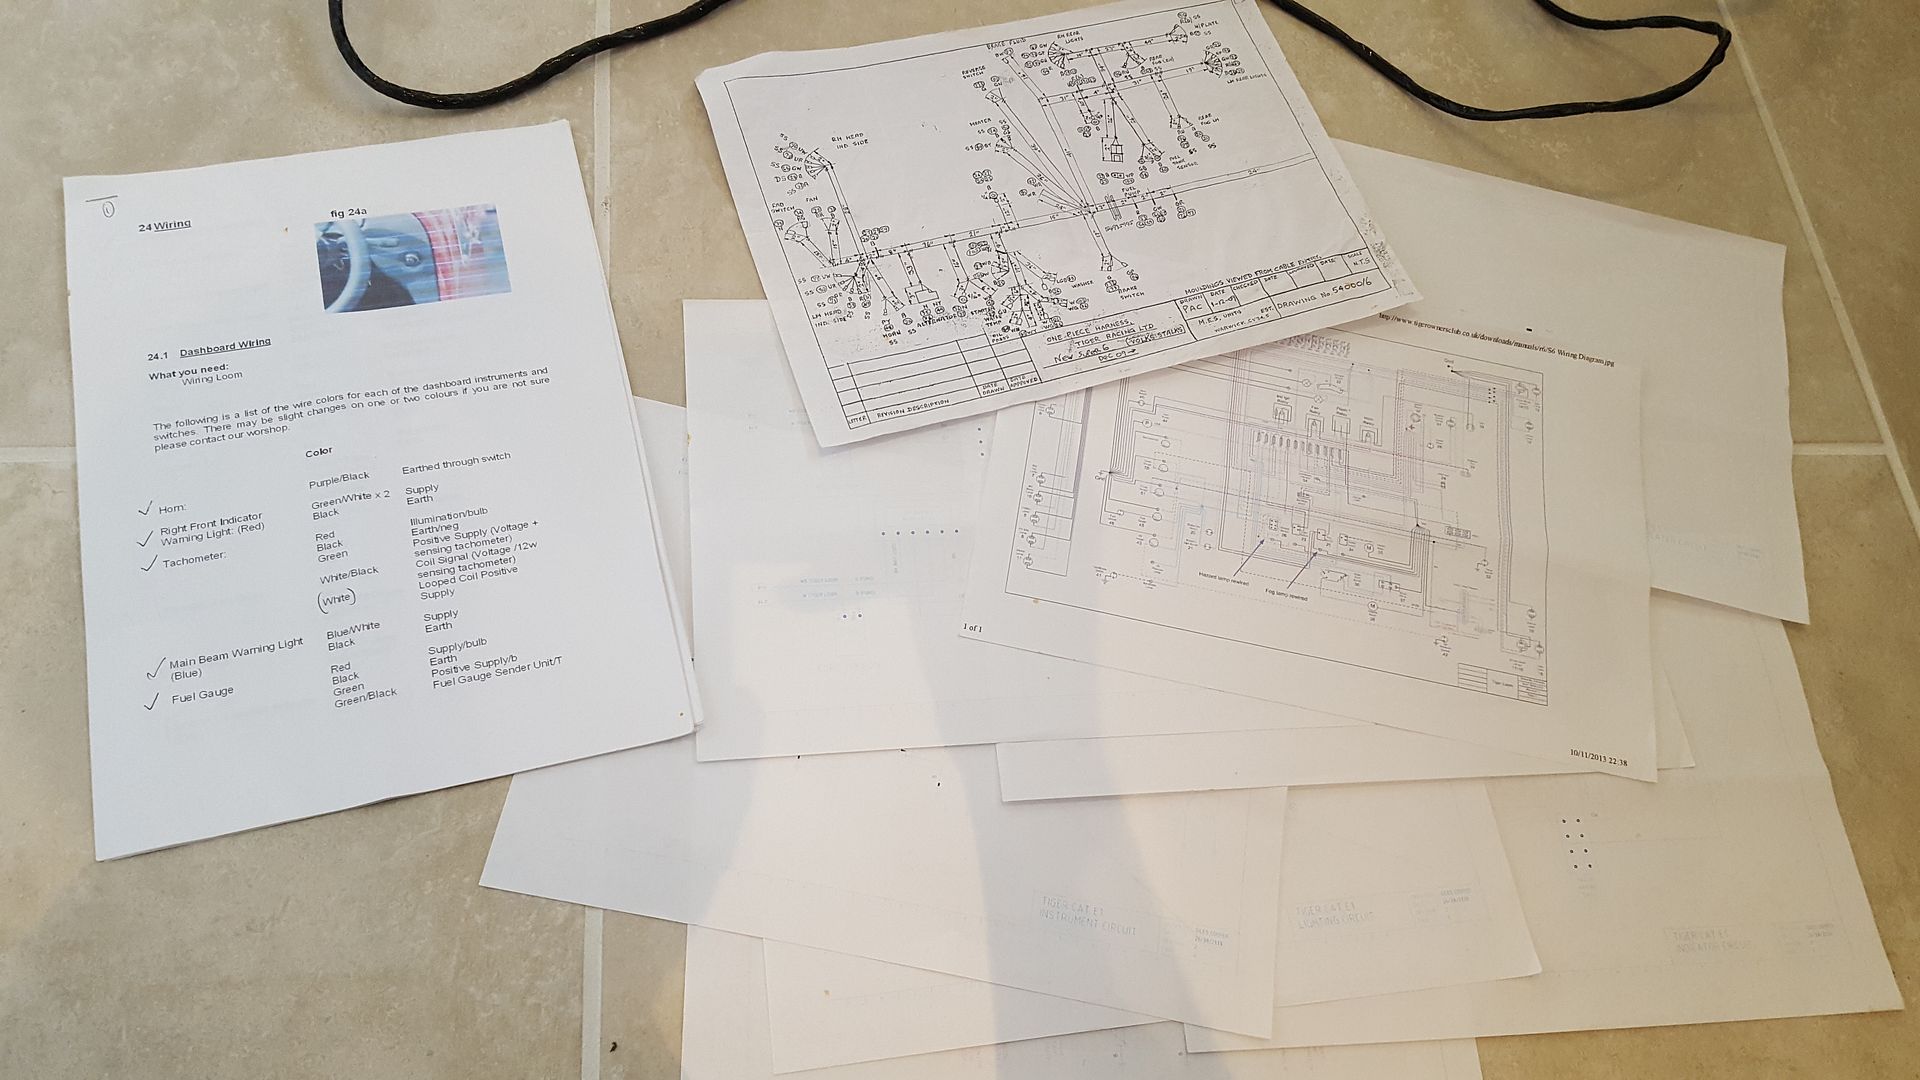
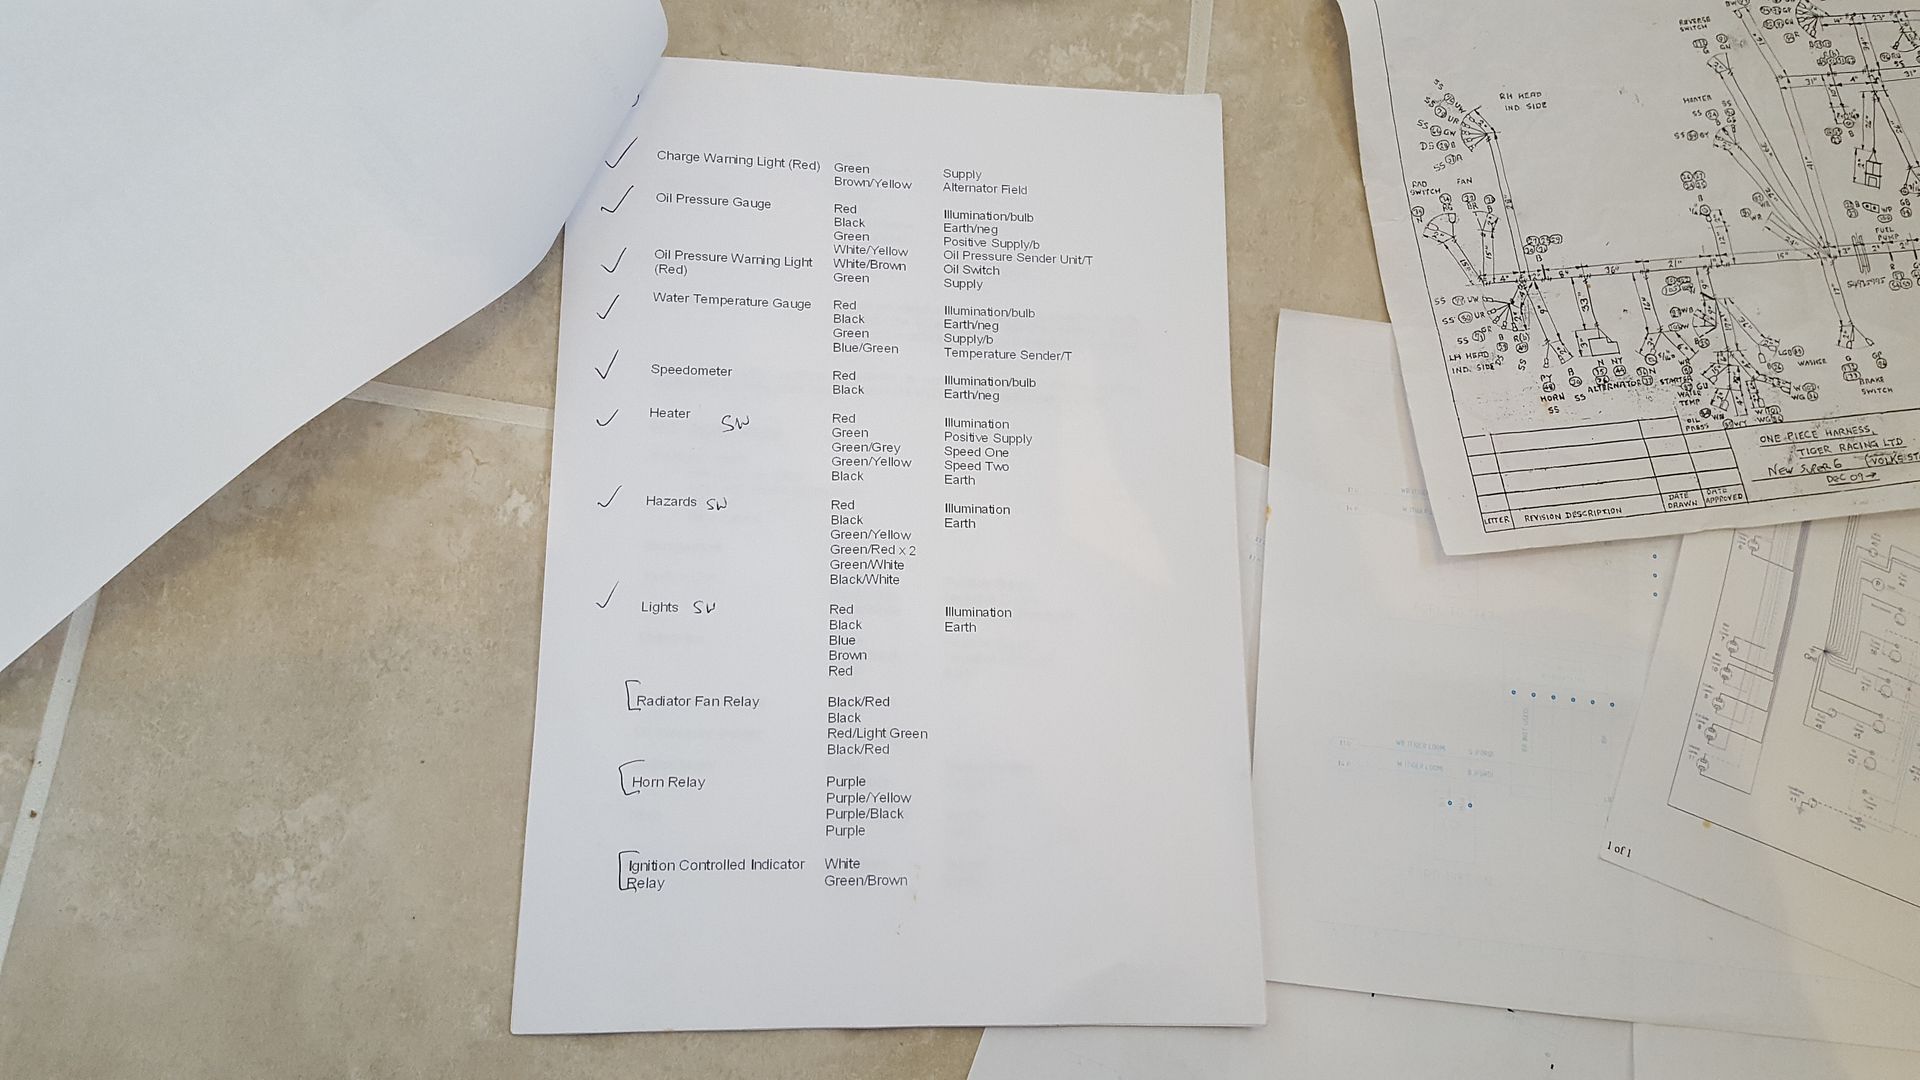
made some other purchases, I spotted a full brand new seven'esqe type loom (suposedly a Tiger) for sale on locost builders so came to a deal. I
was going to make my own loom from scratch, vehicle electrics is a bit of a speciality of mine, but this came up for Ł100 delivered and I would have
easily spent that on parts. I'm sure some bits will need modifying but it's a start, its very nicely made and has everything, lights,
indicators, horn, fan, fuel pump, dash, switches, charging, starting, even has wipers.
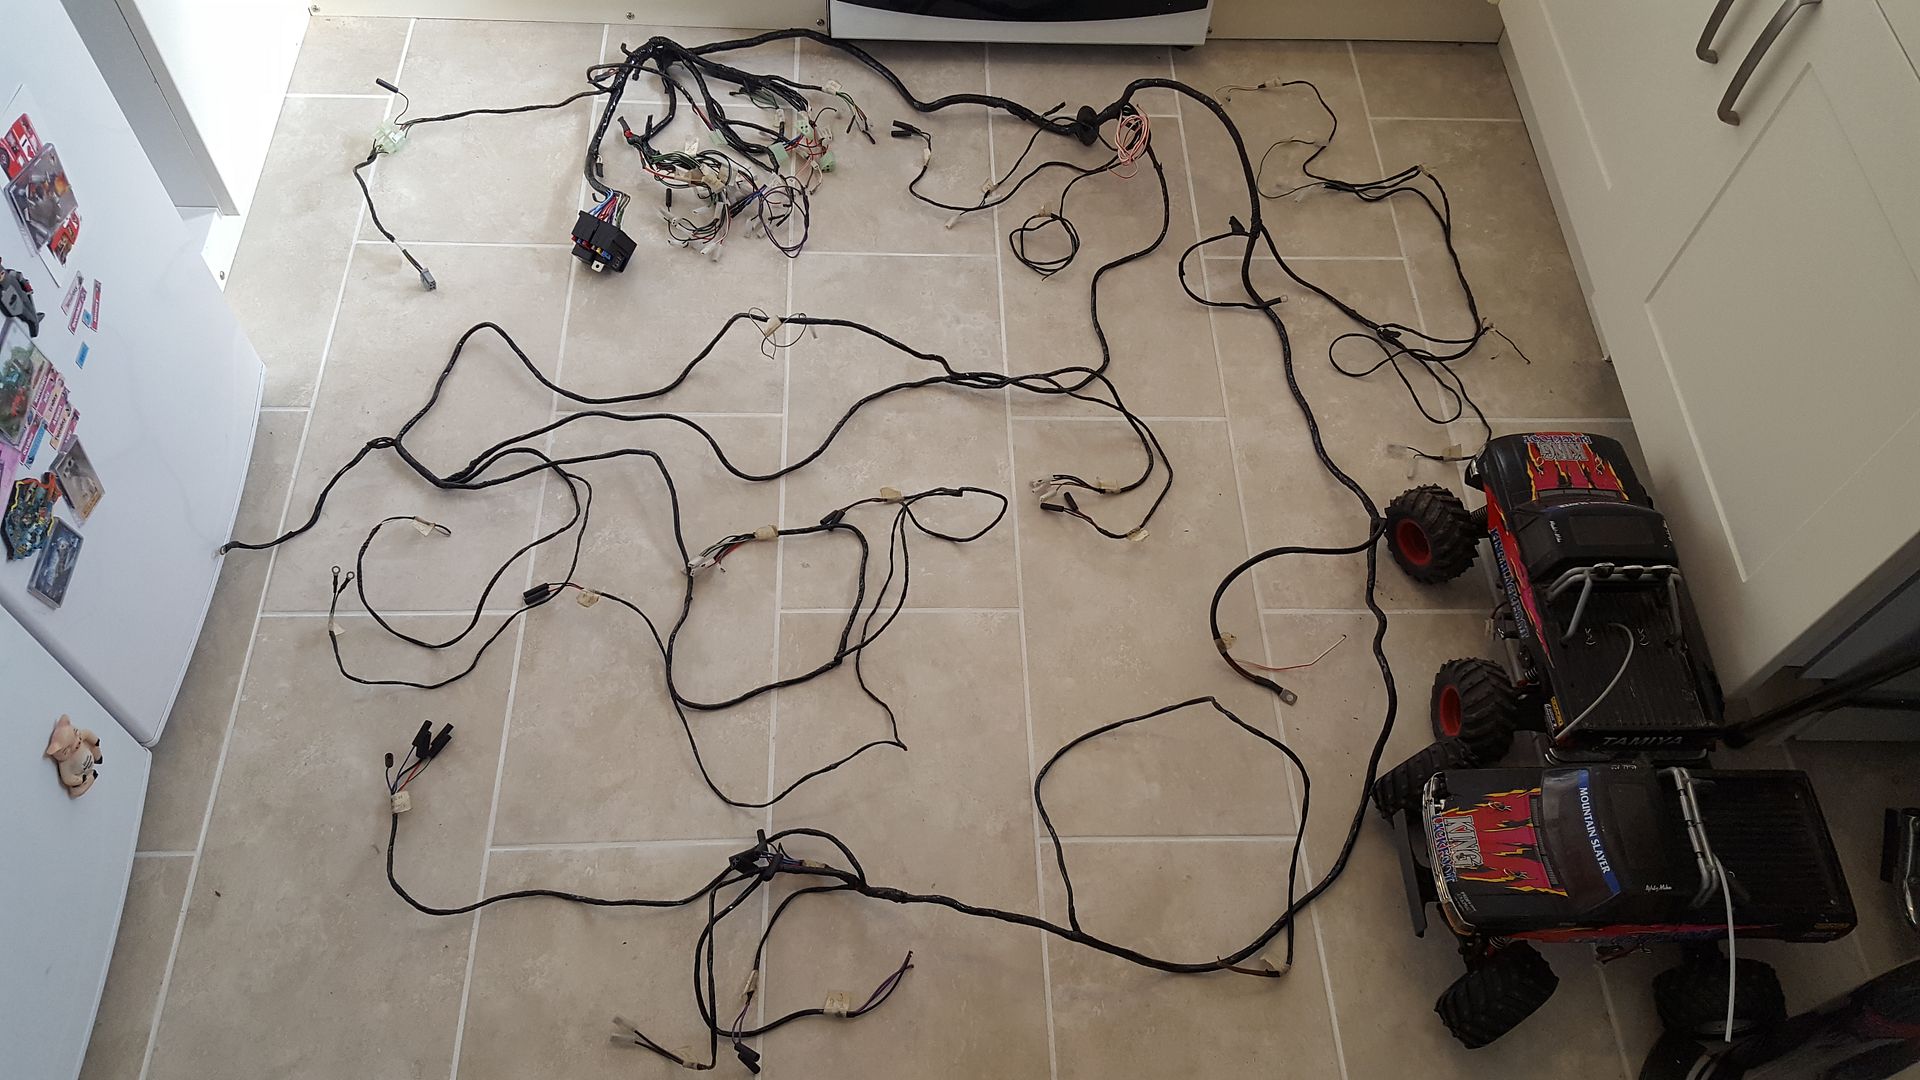

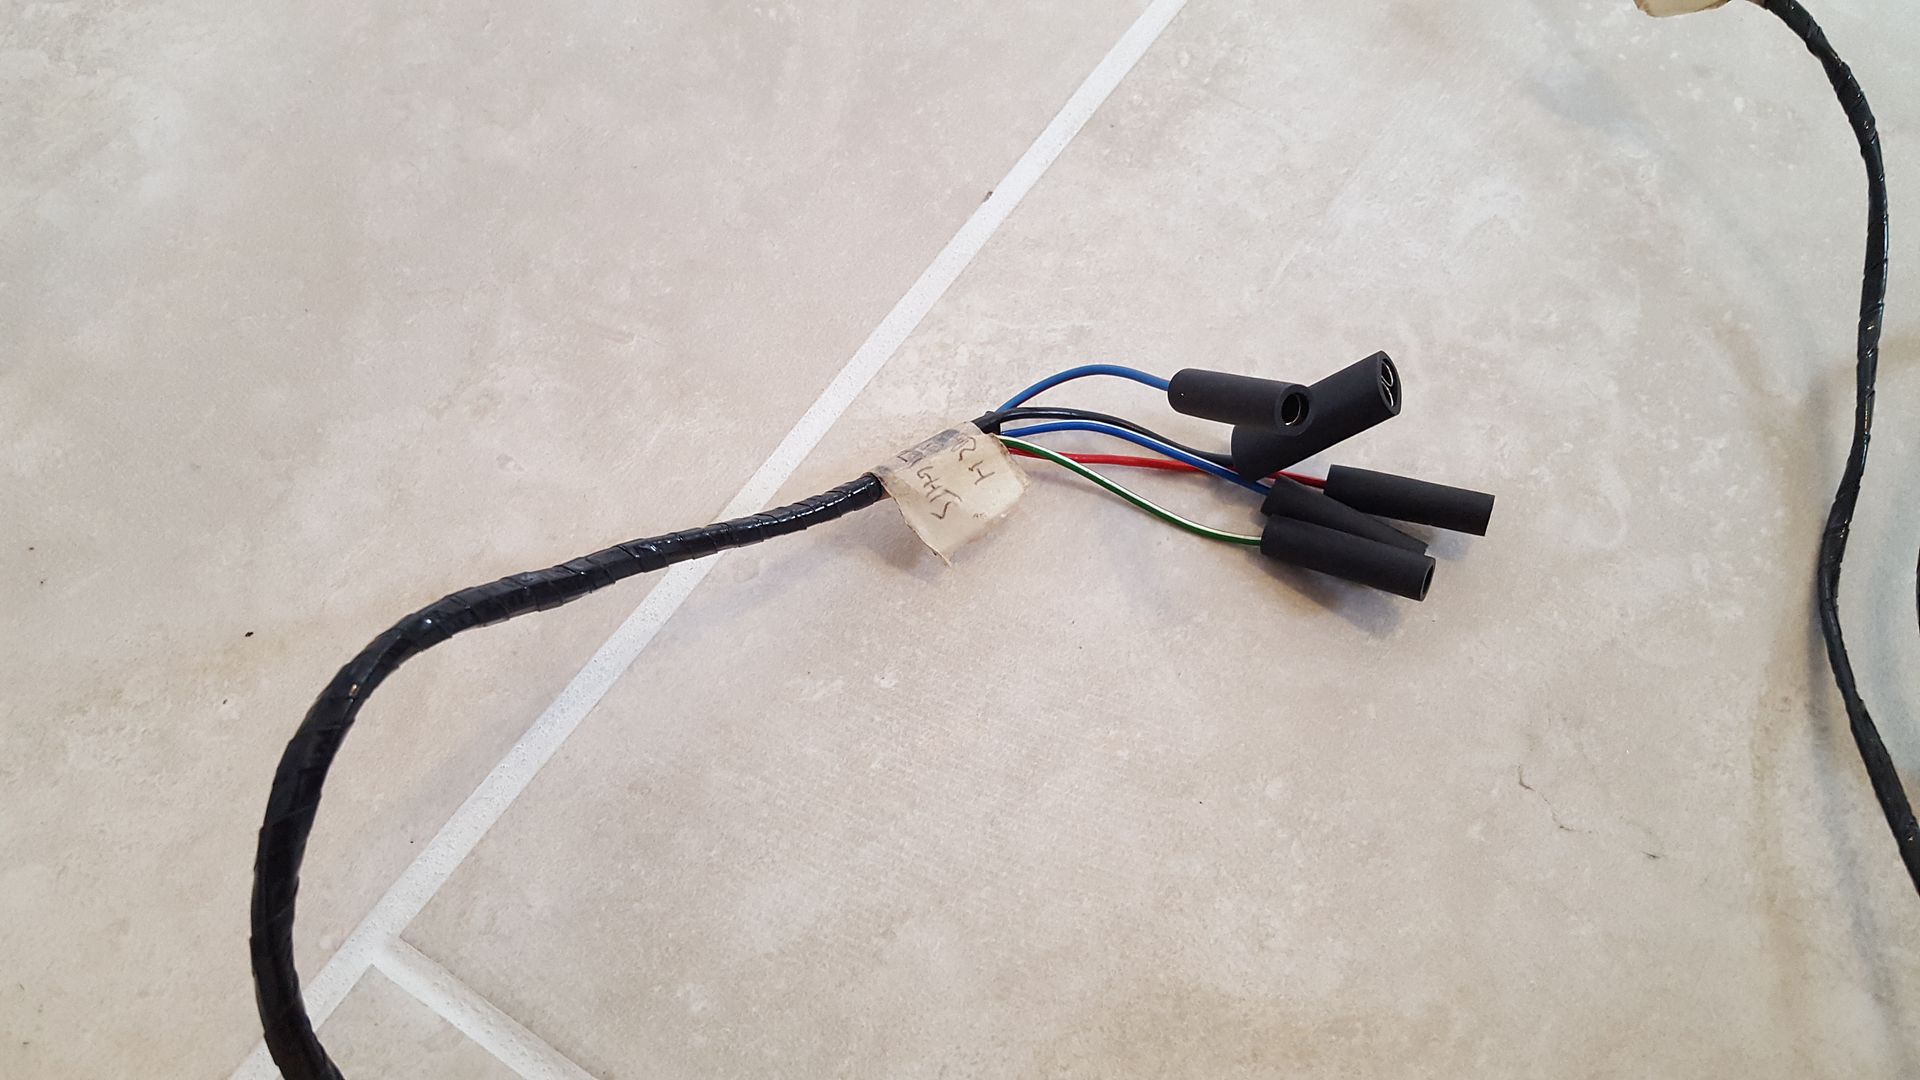
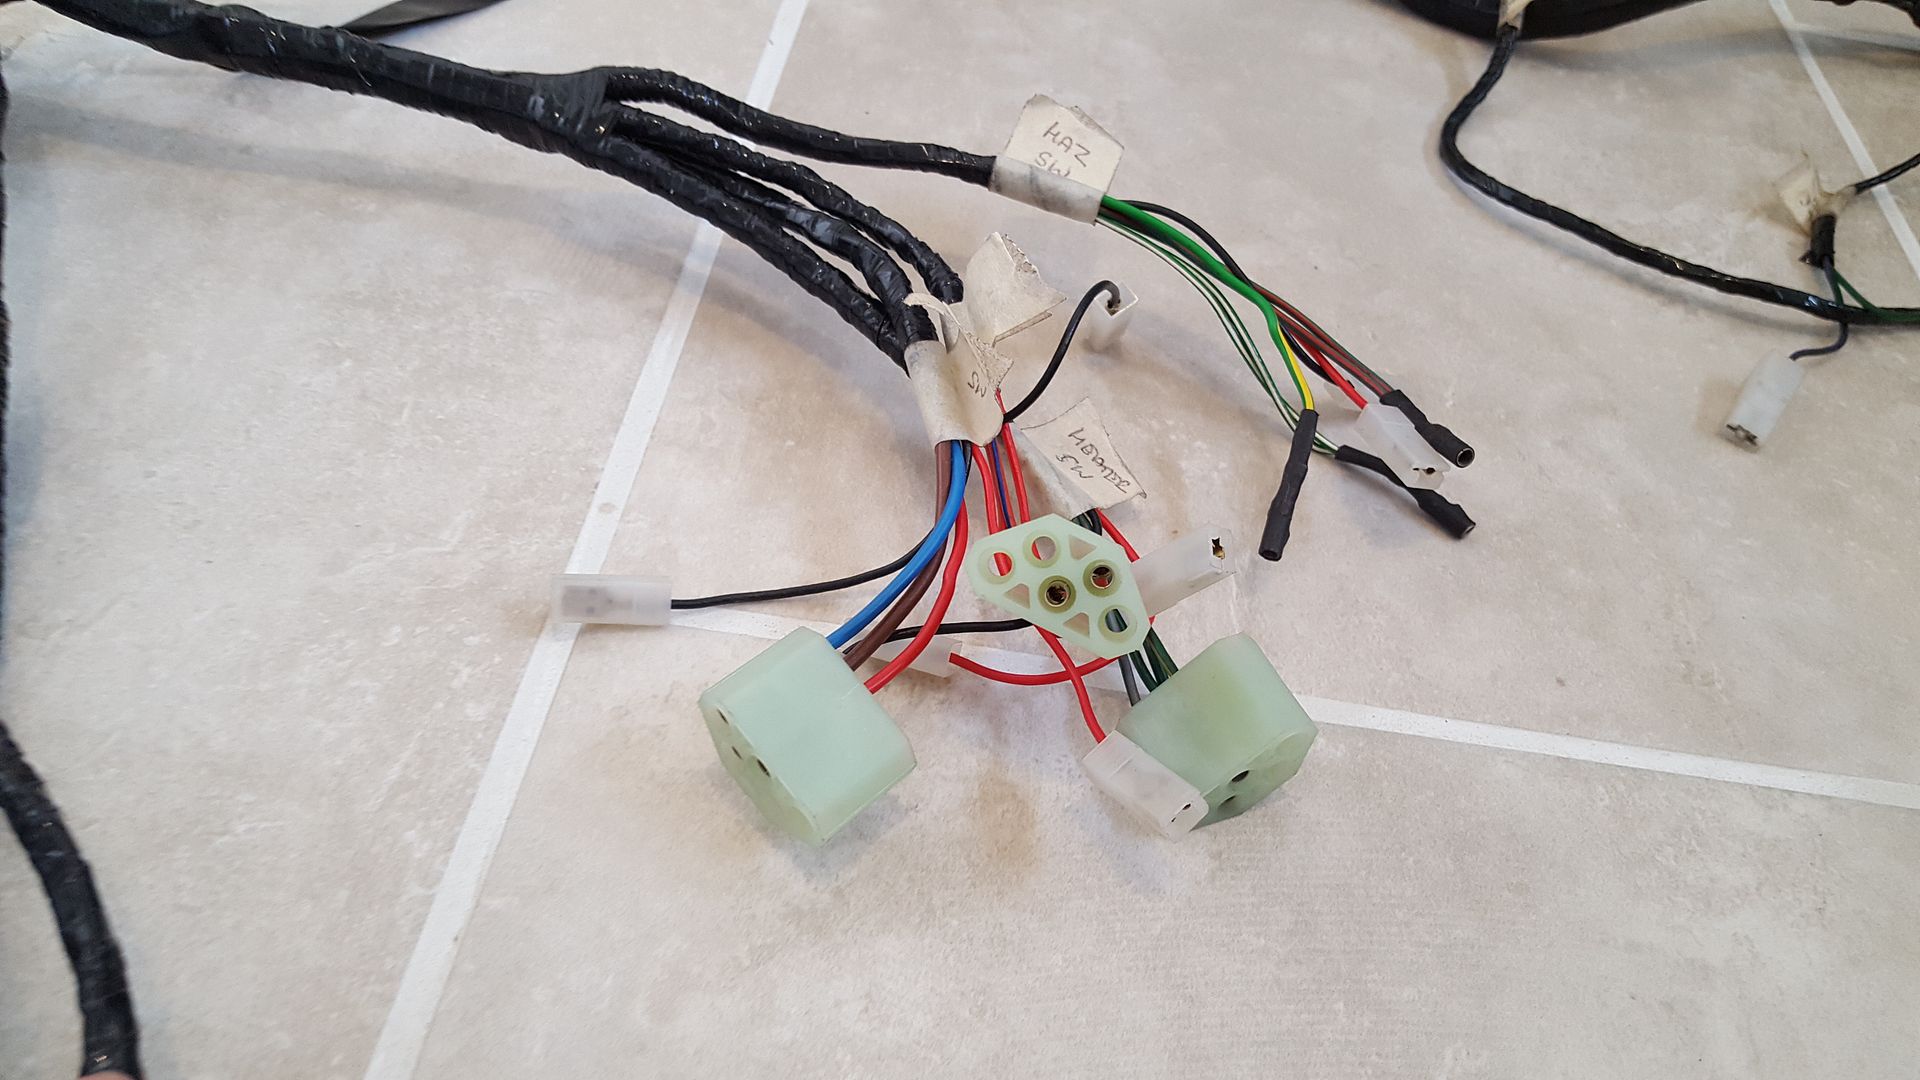
these must be for some marques indicator wiper stalks
came with all the wiring diagrams too which is super helpful!
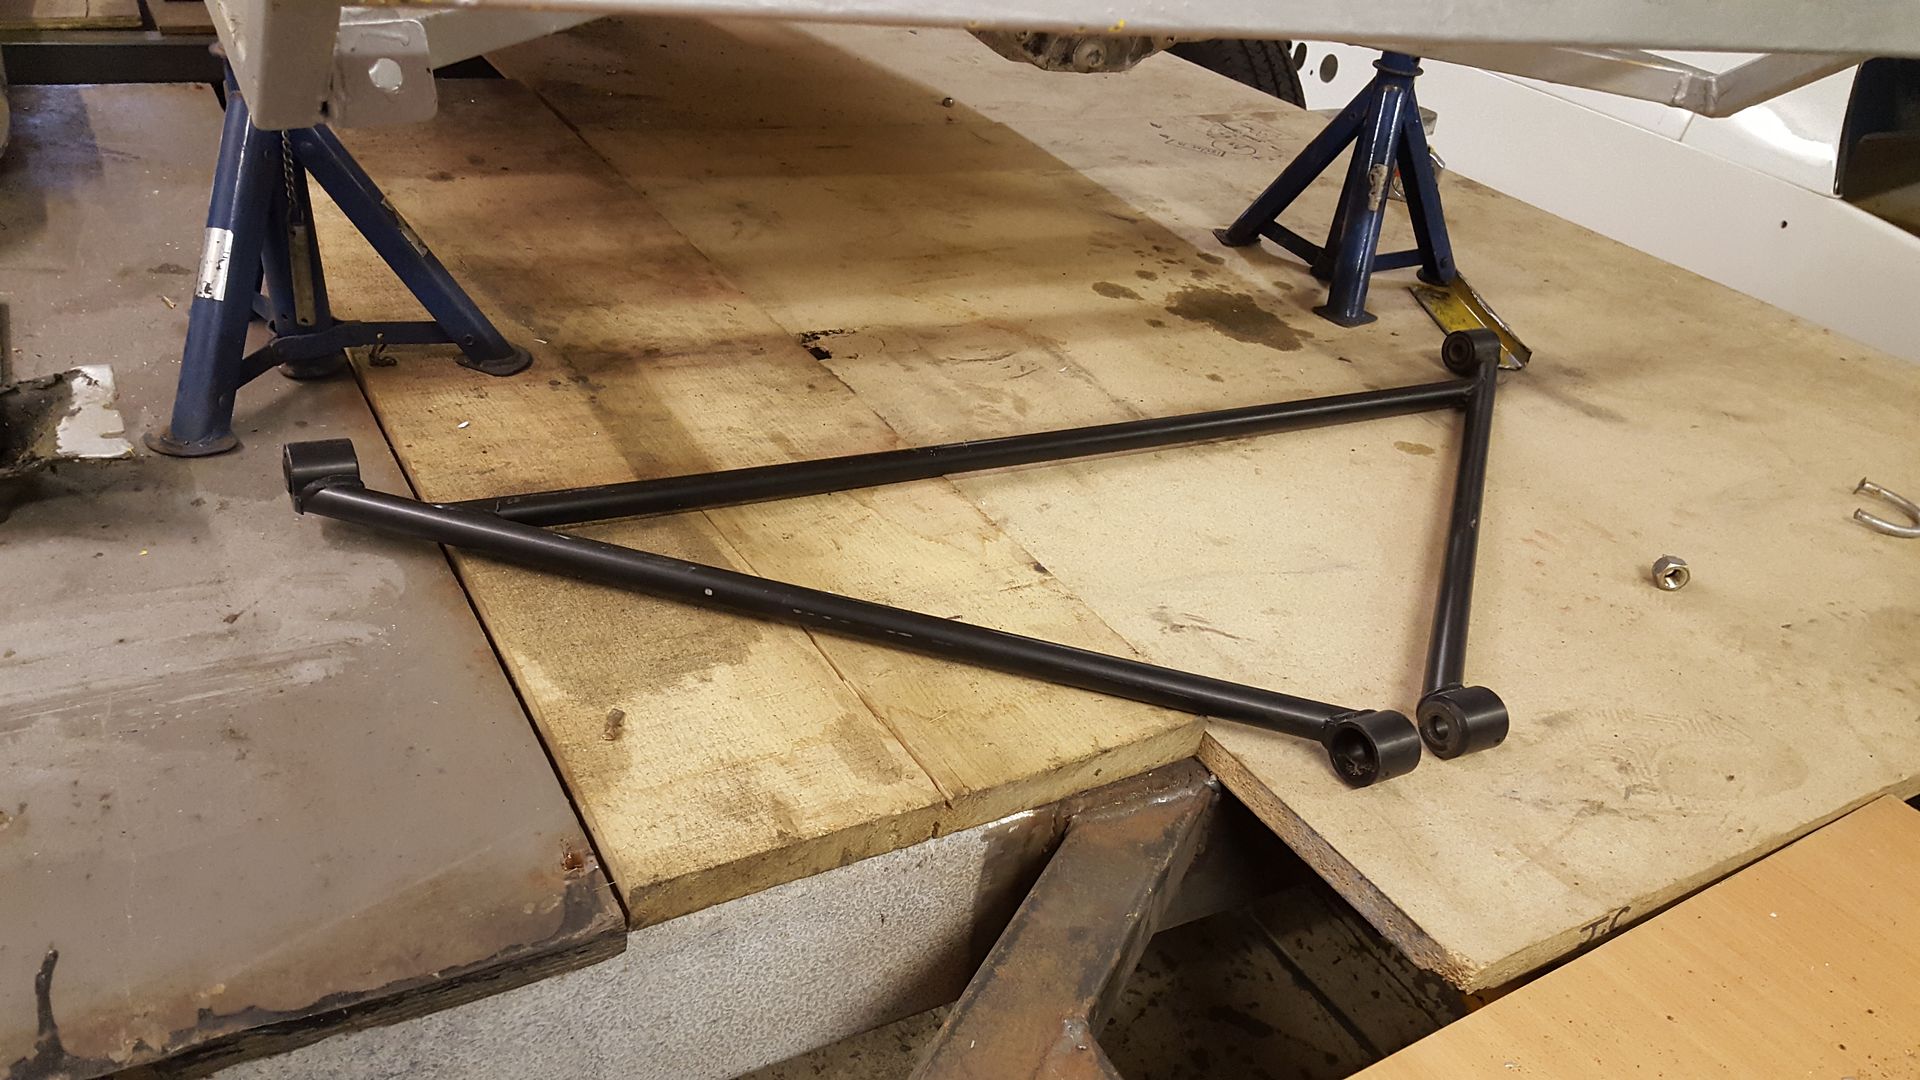
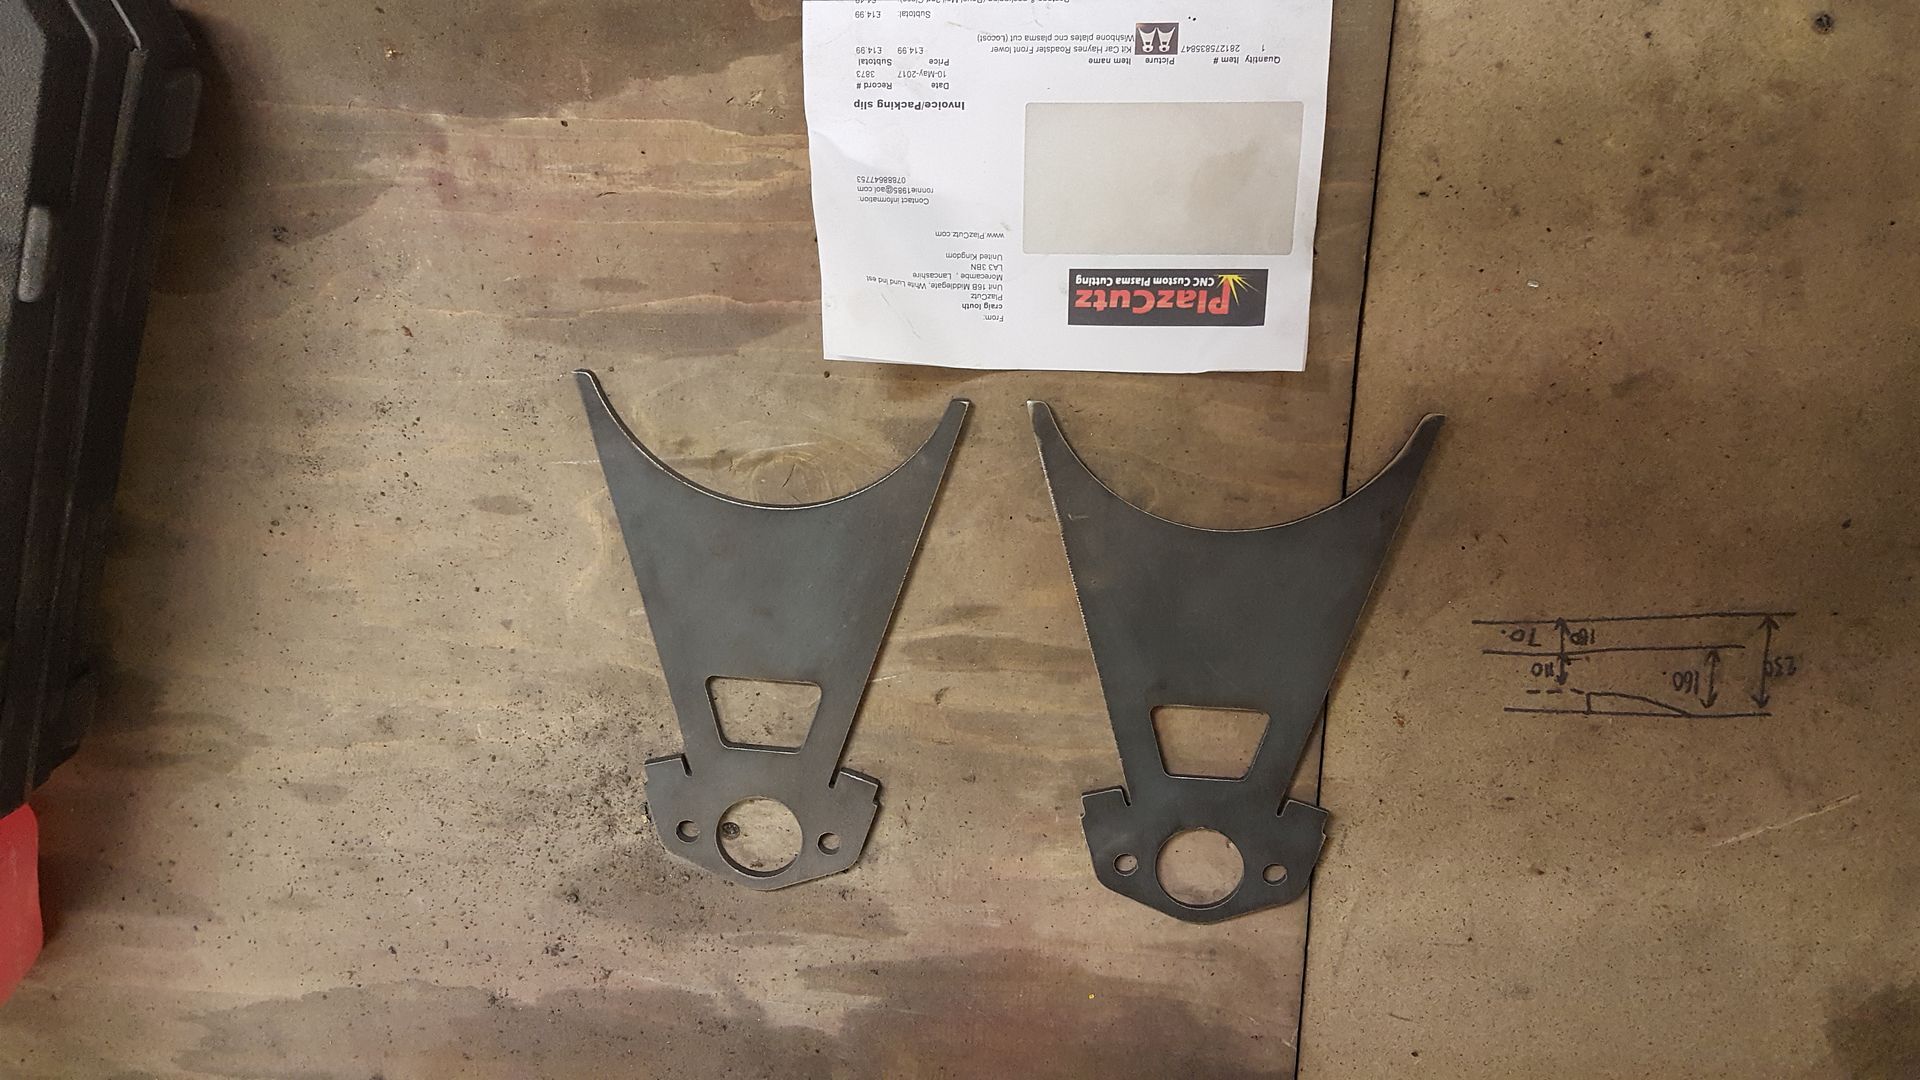
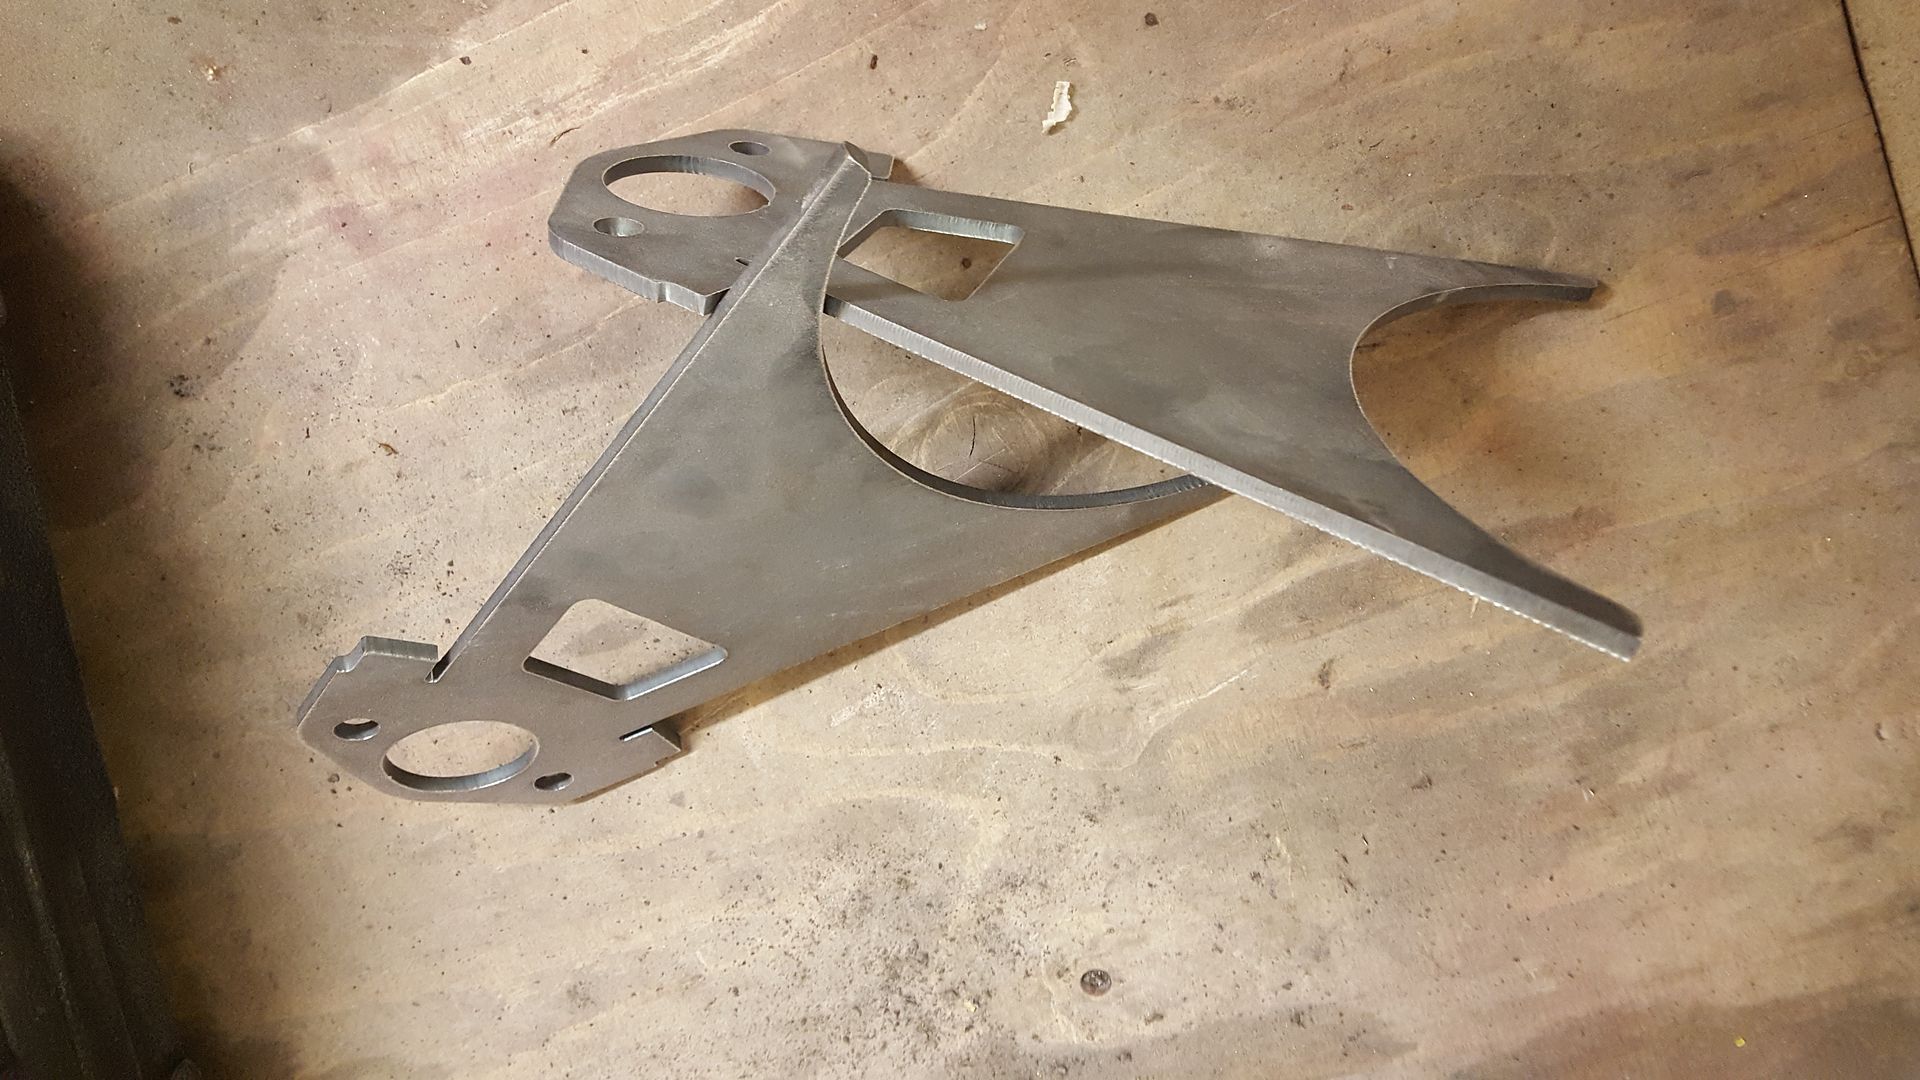
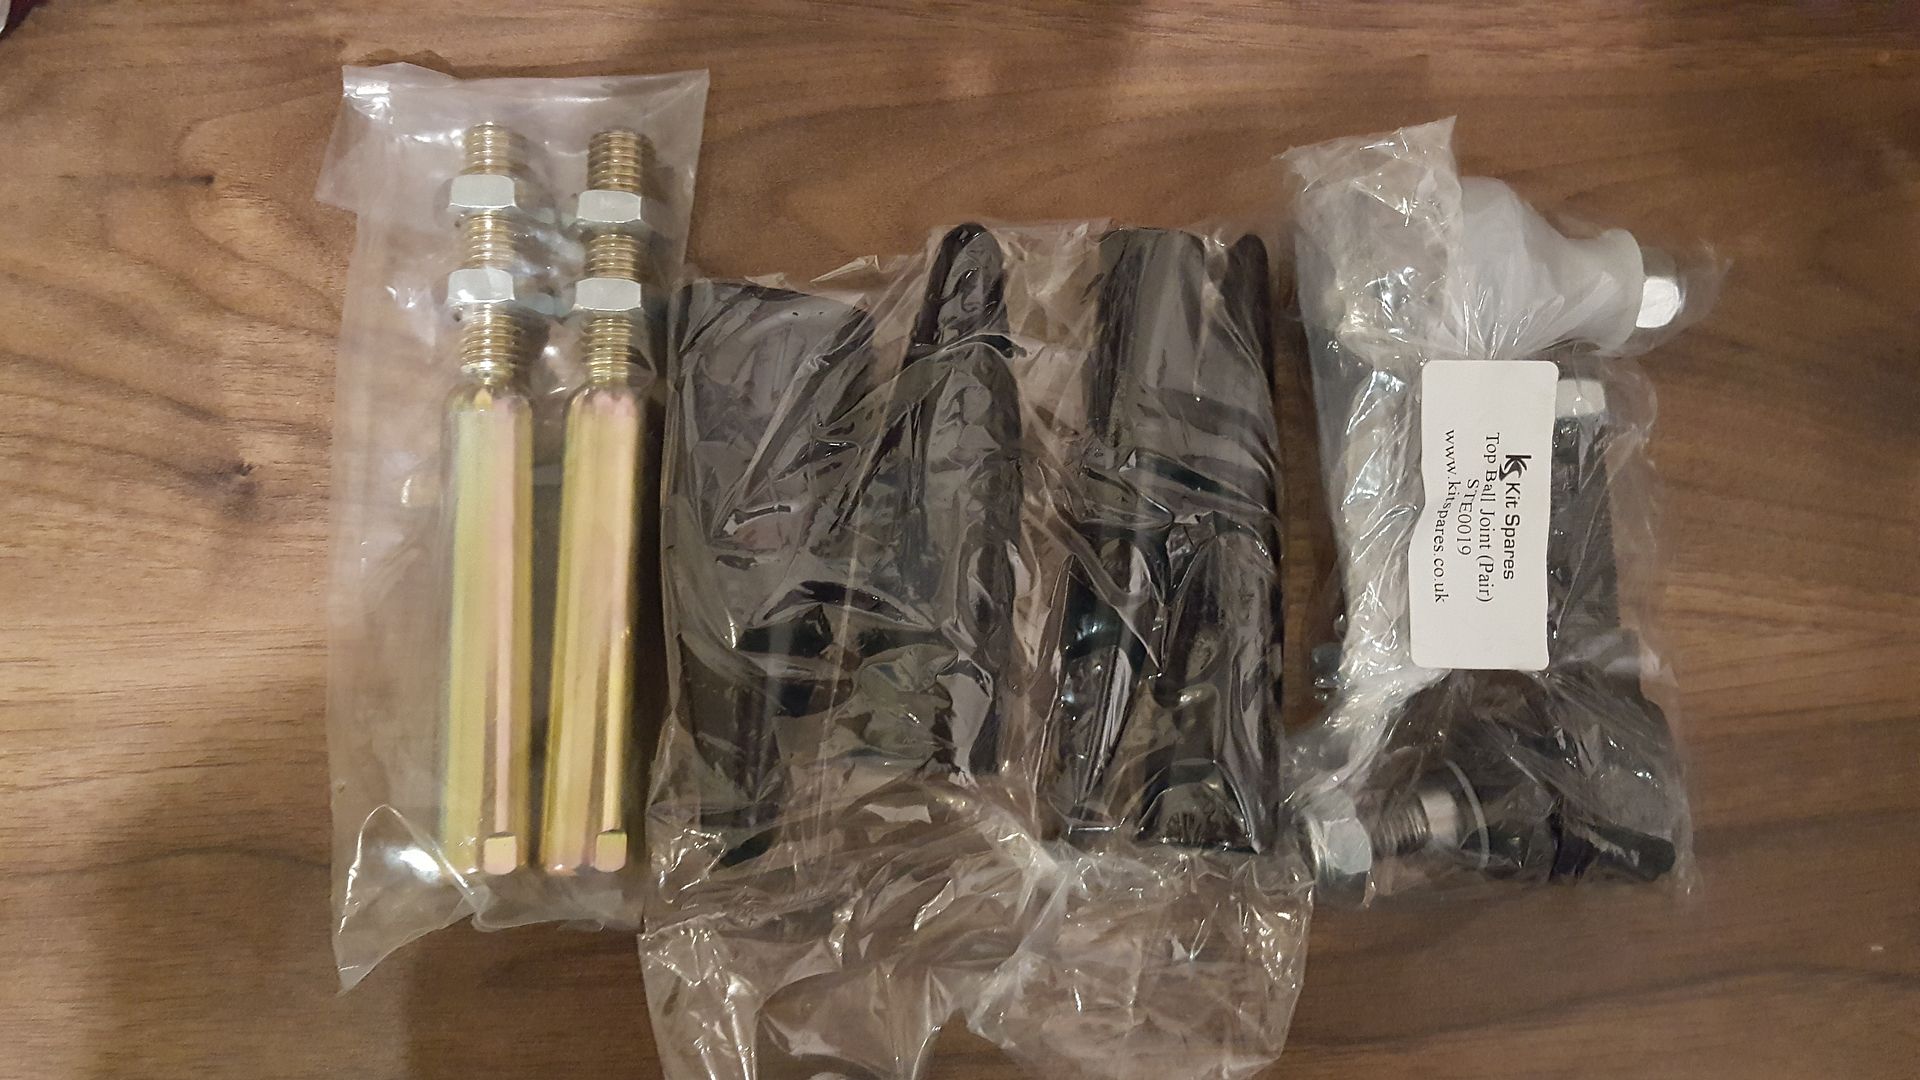
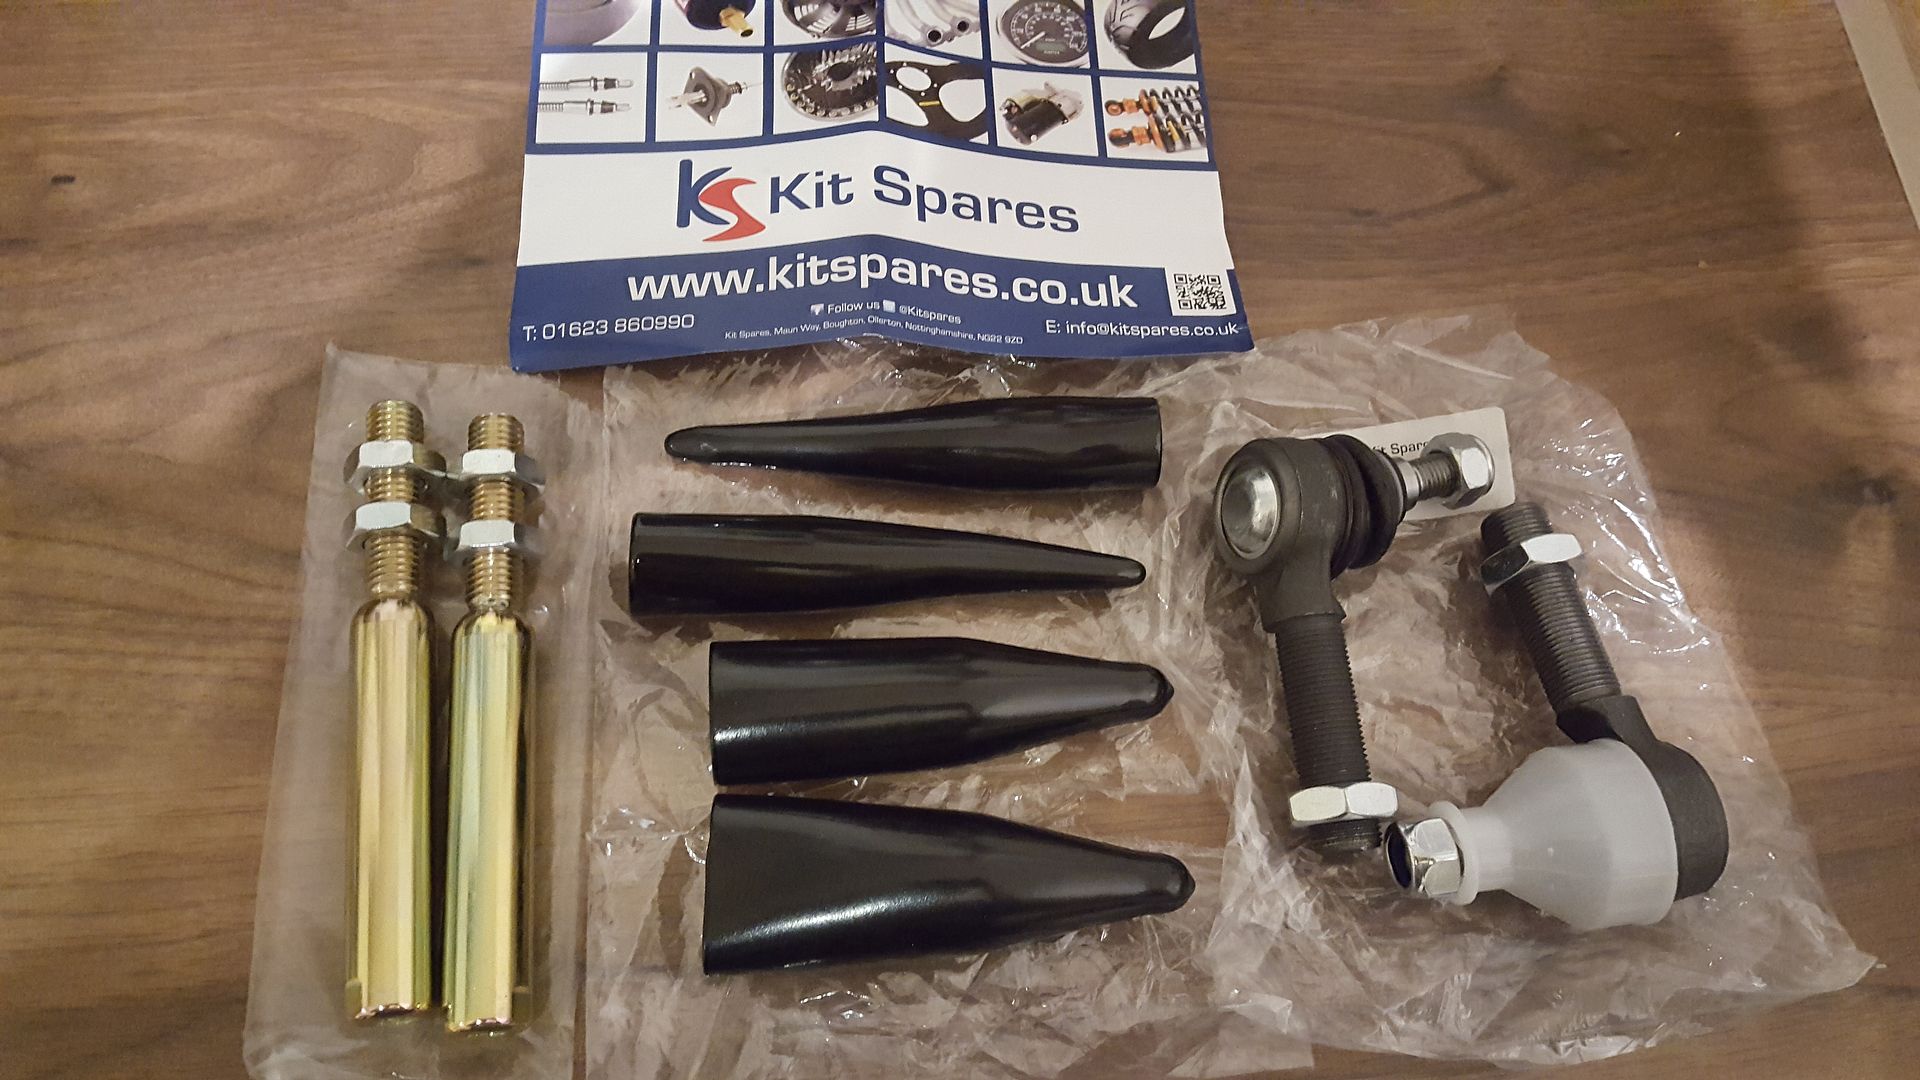
I will basing my front suspension on the haynes roadster, I saw these on eBay for Ł14.99 for the pair. it would have taken me a whole day to make
these using an angle grinder and they still wouldn't have looked as good as these. great quality and only Ł7.50 a side!
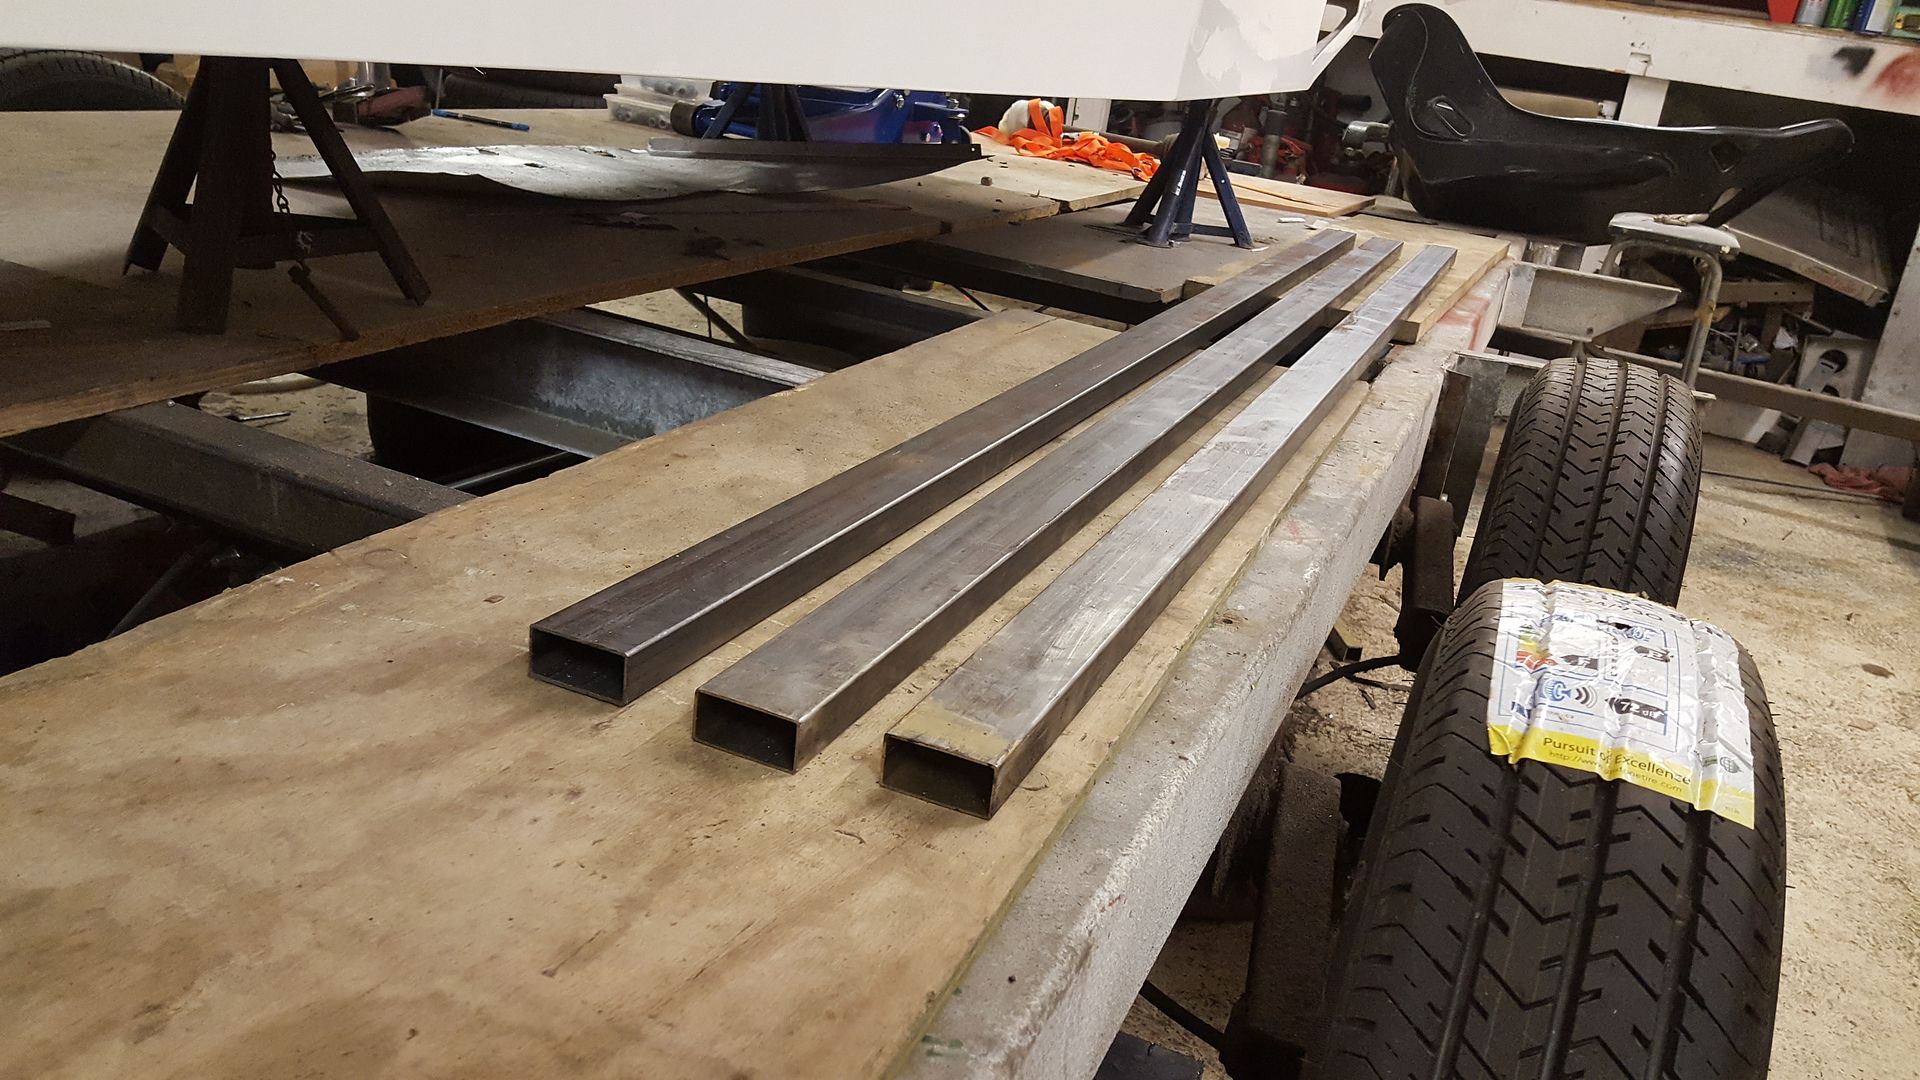
and bought some tube to cut down for the bushes, you have to get a wierd size for the bushes to fit. 33.7mm od with 2.6mm wall.

will chop it into the 4 lower Bush tubes (i plan to rosejoint the top)
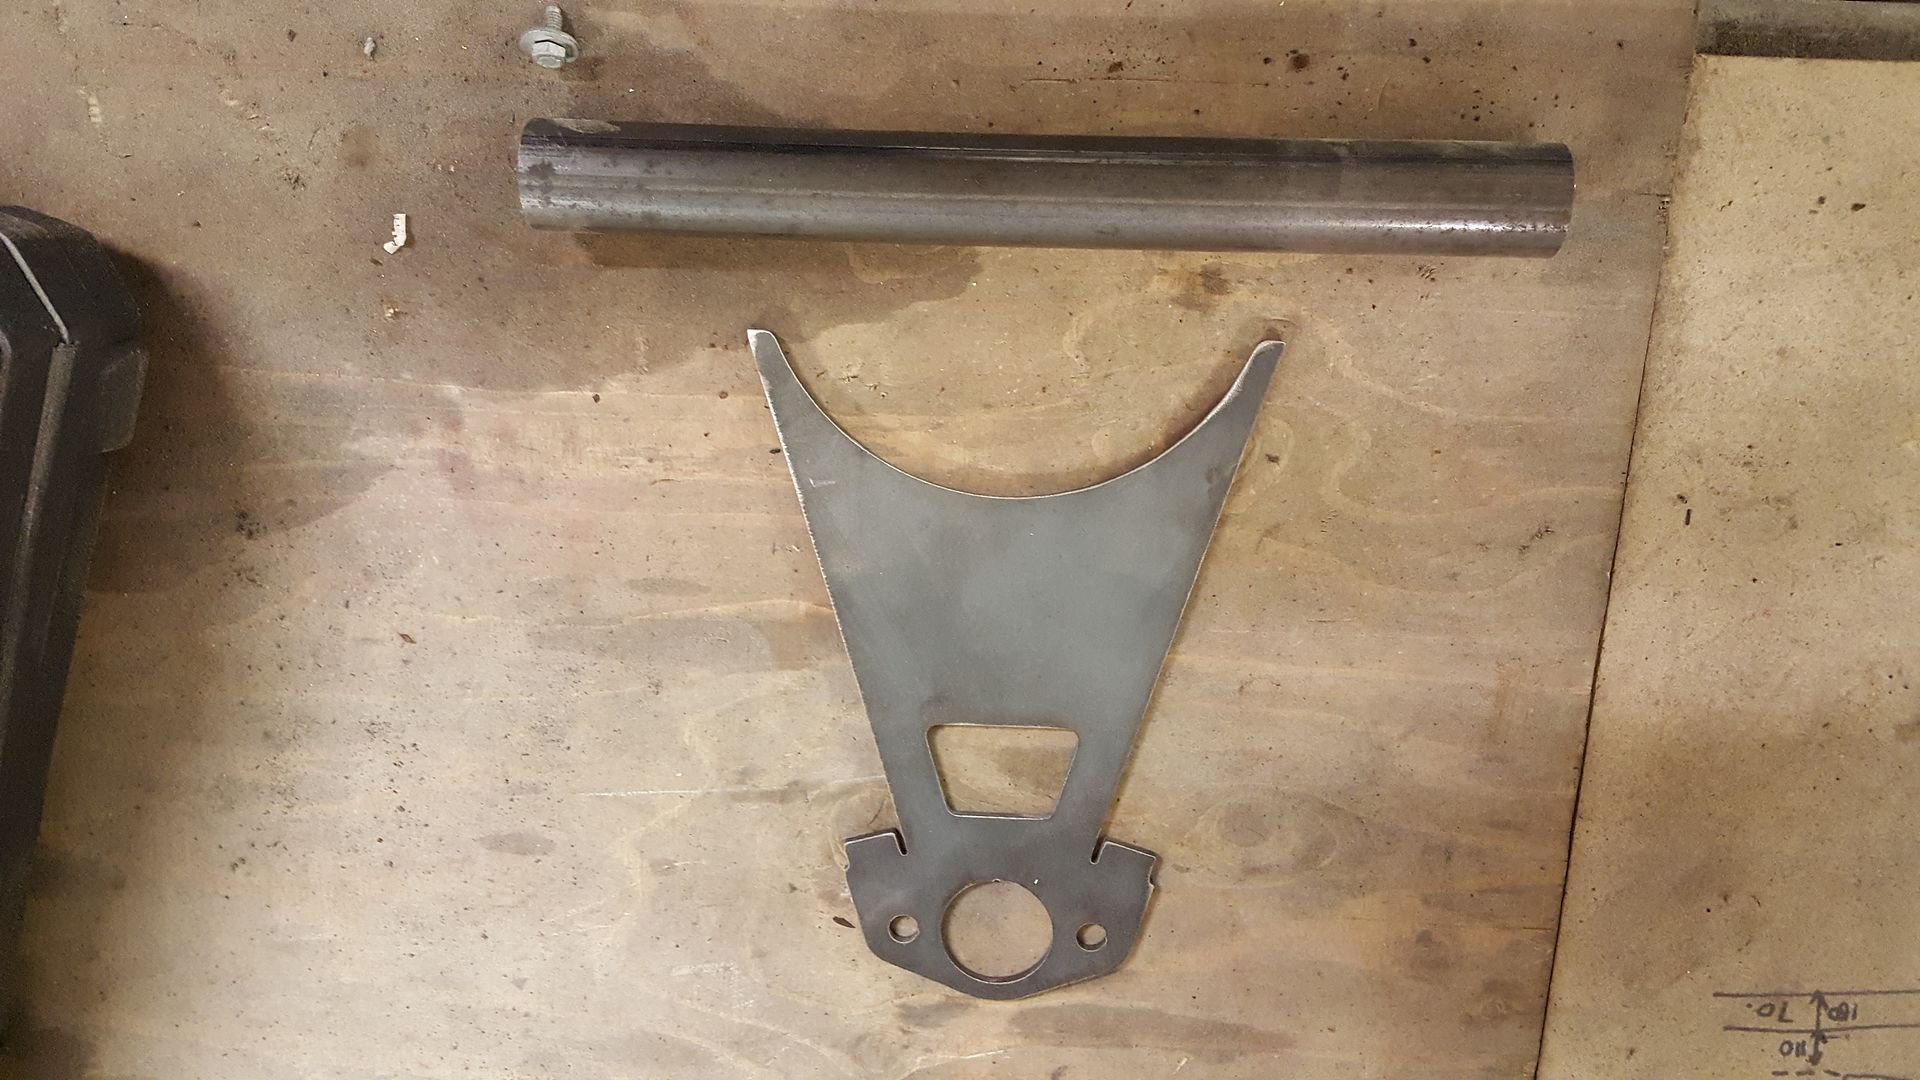
the thing I'm stuck on and can't really get an answer on is the long main wishbone tubes. book spec says use 25mm od tube for them. I really
like the look of the newest kit cars that use oval wishbone tubes rather than round, but a lot of older theads through Google suggest that this is not
a good idea as they will bend. still trying to look for a difinative answer because I'd really like to use oval tube. it is only a looks thing
and I will use 25mm round if that's the only answer.
Charlie C - 9/6/17 at 08:03 AM
Morning
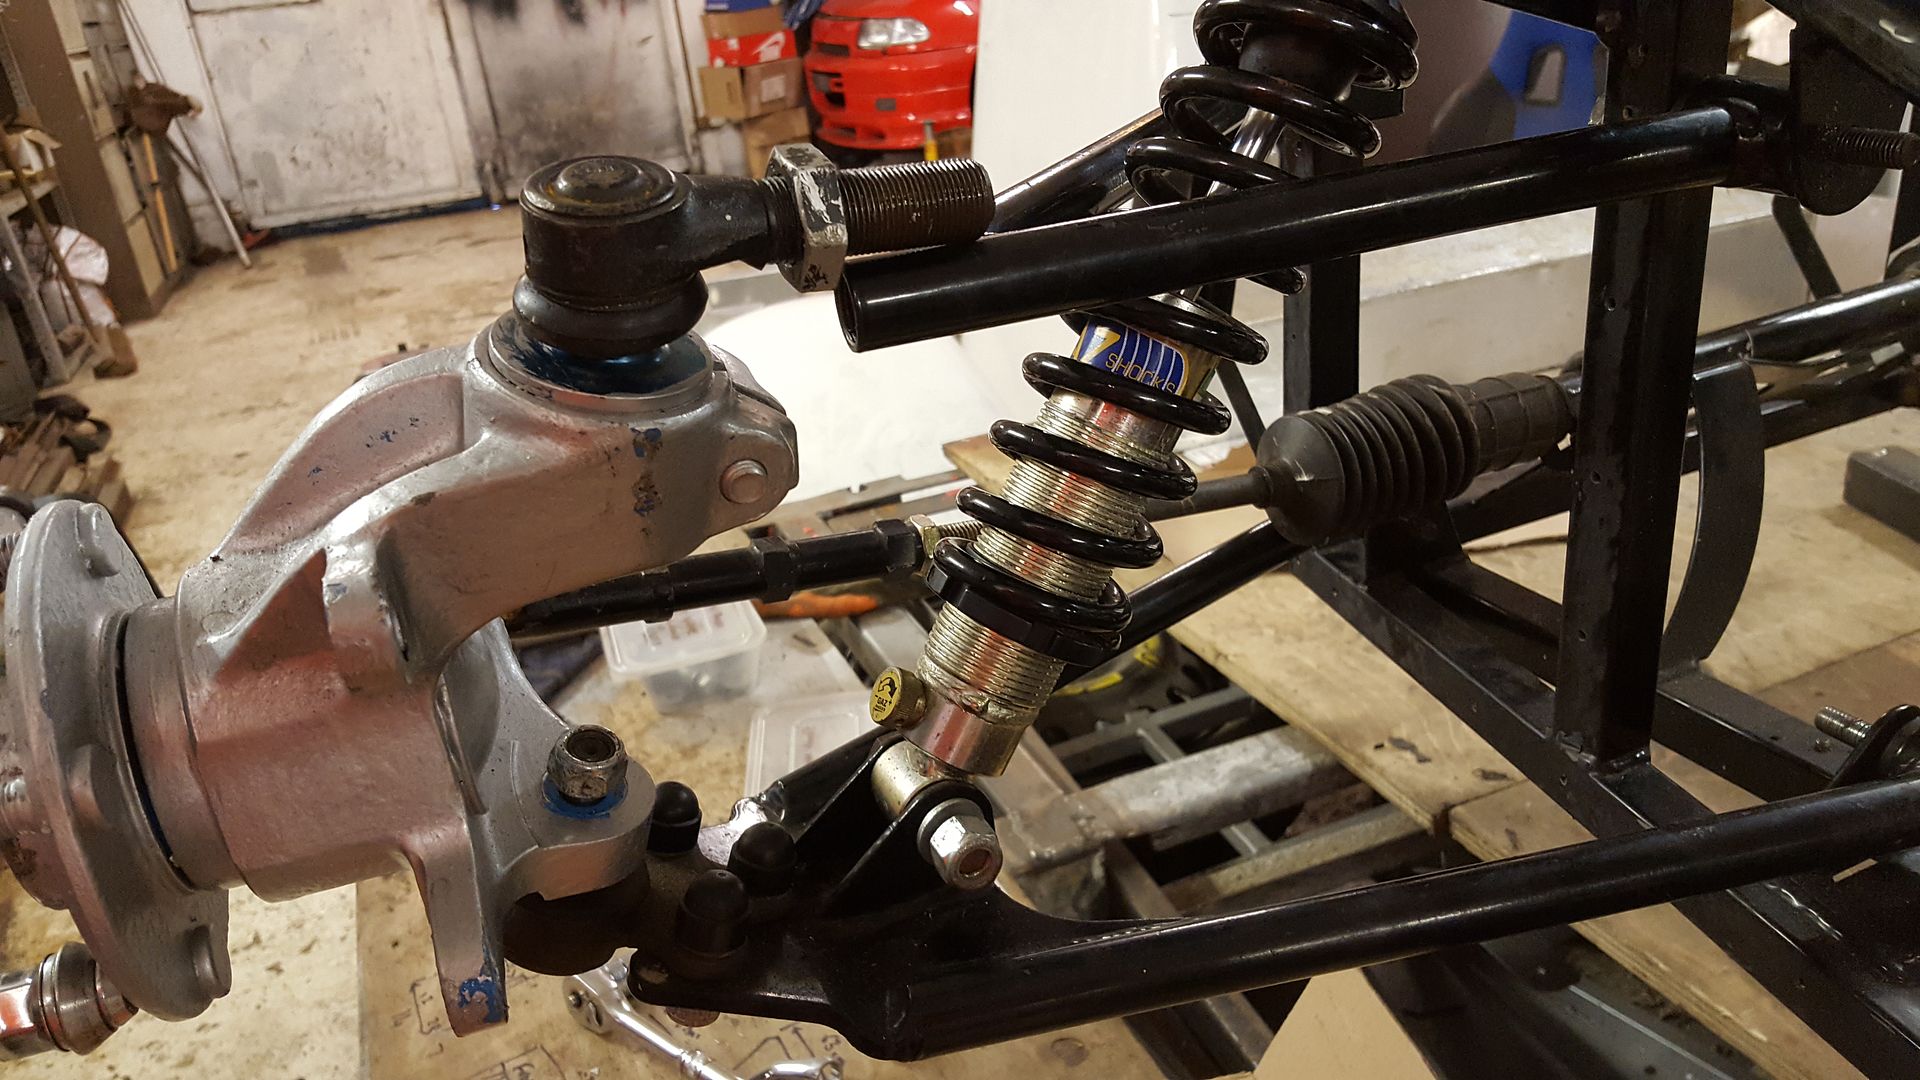
Not long ago I had my Haynes roadster suspension set up Procomp and I was told (i know very very little about suspension design) that the cast angle
isn't great and the top front wishbone would be better 10mm backwards. I'm over coming this by having the top wishbone rose jointed and
spacing the rose joint towards the back of the suspension brackets, I've got the wishbone I just need to save up for the rose joints.
The other issue with the front suspension is the angle of the front shock, it would be better more vertical by either move the top mount out or the
bottom in, or a mixture of both i suppose. I've got quite high poundage springs on the front to counter the angle of the shock.
You mentioned that you wanted to keep the sierra gearbox to get and age related plate, I have to admit that on the IVA application i put my car was
MX5 based and I had the V5 from a scraped MX5 but in reality i had a sierra front, rear axle and diff, no one checked or appeared to care as I had the
V5 and a proof of age letter for the engine.
Regards
Charlie
super-ron - 9/6/17 at 12:13 PM
quote:
Originally posted by Charlie C
Morning
Not long ago I had my Haynes roadster suspension set up Procomp and I was told (i know very very little about suspension design) that the cast angle
isn't great and the top front wishbone would be better 10mm backwards. I'm over coming this by having the top wishbone rose jointed and
spacing the rose joint towards the back of the suspension brackets, I've got the wishbone I just need to save up for the rose joints.
The other issue with the front suspension is the angle of the front shock, it would be better more vertical by either move the top mount out or the
bottom in, or a mixture of both i suppose. I've got quite high poundage springs on the front to counter the angle of the shock.
You mentioned that you wanted to keep the sierra gearbox to get and age related plate, I have to admit that on the IVA application i put my car was
MX5 based and I had the V5 from a scraped MX5 but in reality i had a sierra front, rear axle and diff, no one checked or appeared to care as I had the
V5 and a proof of age letter for the engine.
Regards
Charlie
Thanks very much for the input Charlie. That is also my plan to use rose joints on the upper arms so I can fine tune the castor forward and back.
also with the finer thread it will give better camber adjustment over than a full turn of the drag link every time. I may consider moving the upper
mounts 10mm back as well then if that's what yours showed. what size rose joints are you using out of interest?
IVA tests seem to vary so much, I've read threads on people having so much trouble getting through, and others like yours who flew through.
I'd rather be over prepared than under.
[Edited on 9/6/17 by super-ron]
Charlie C - 9/6/17 at 01:22 PM
Hi
I spoke to Autosport bearing and they said most 7 type car use M12 or 1/2inch rose joint, they were
really helpful and recommended that at least 2/3 of the rose joint thread should used.
I'm using rose joints with m14 thread and m12 bore, all the Haynes suspension bolts are m12 and I wanted the threads to be a bit thicker at M14
as my car is a road car all be it a few sunny days a year but a bit of over engineering wont hurt.
Charlie
[Edited on 9/6/17 by Charlie C]
super-ron - 10/6/17 at 04:51 PM
I'm wanting my wishbones (the upper at least) to look like the real MNR Vortx ones. need to find suitable tube if anyone has any suggestions on
size and thickness. book haynes roadster uses 19mm tube for the upper and 25mm for the lower with a wall thickness of 2-3mm I think I read
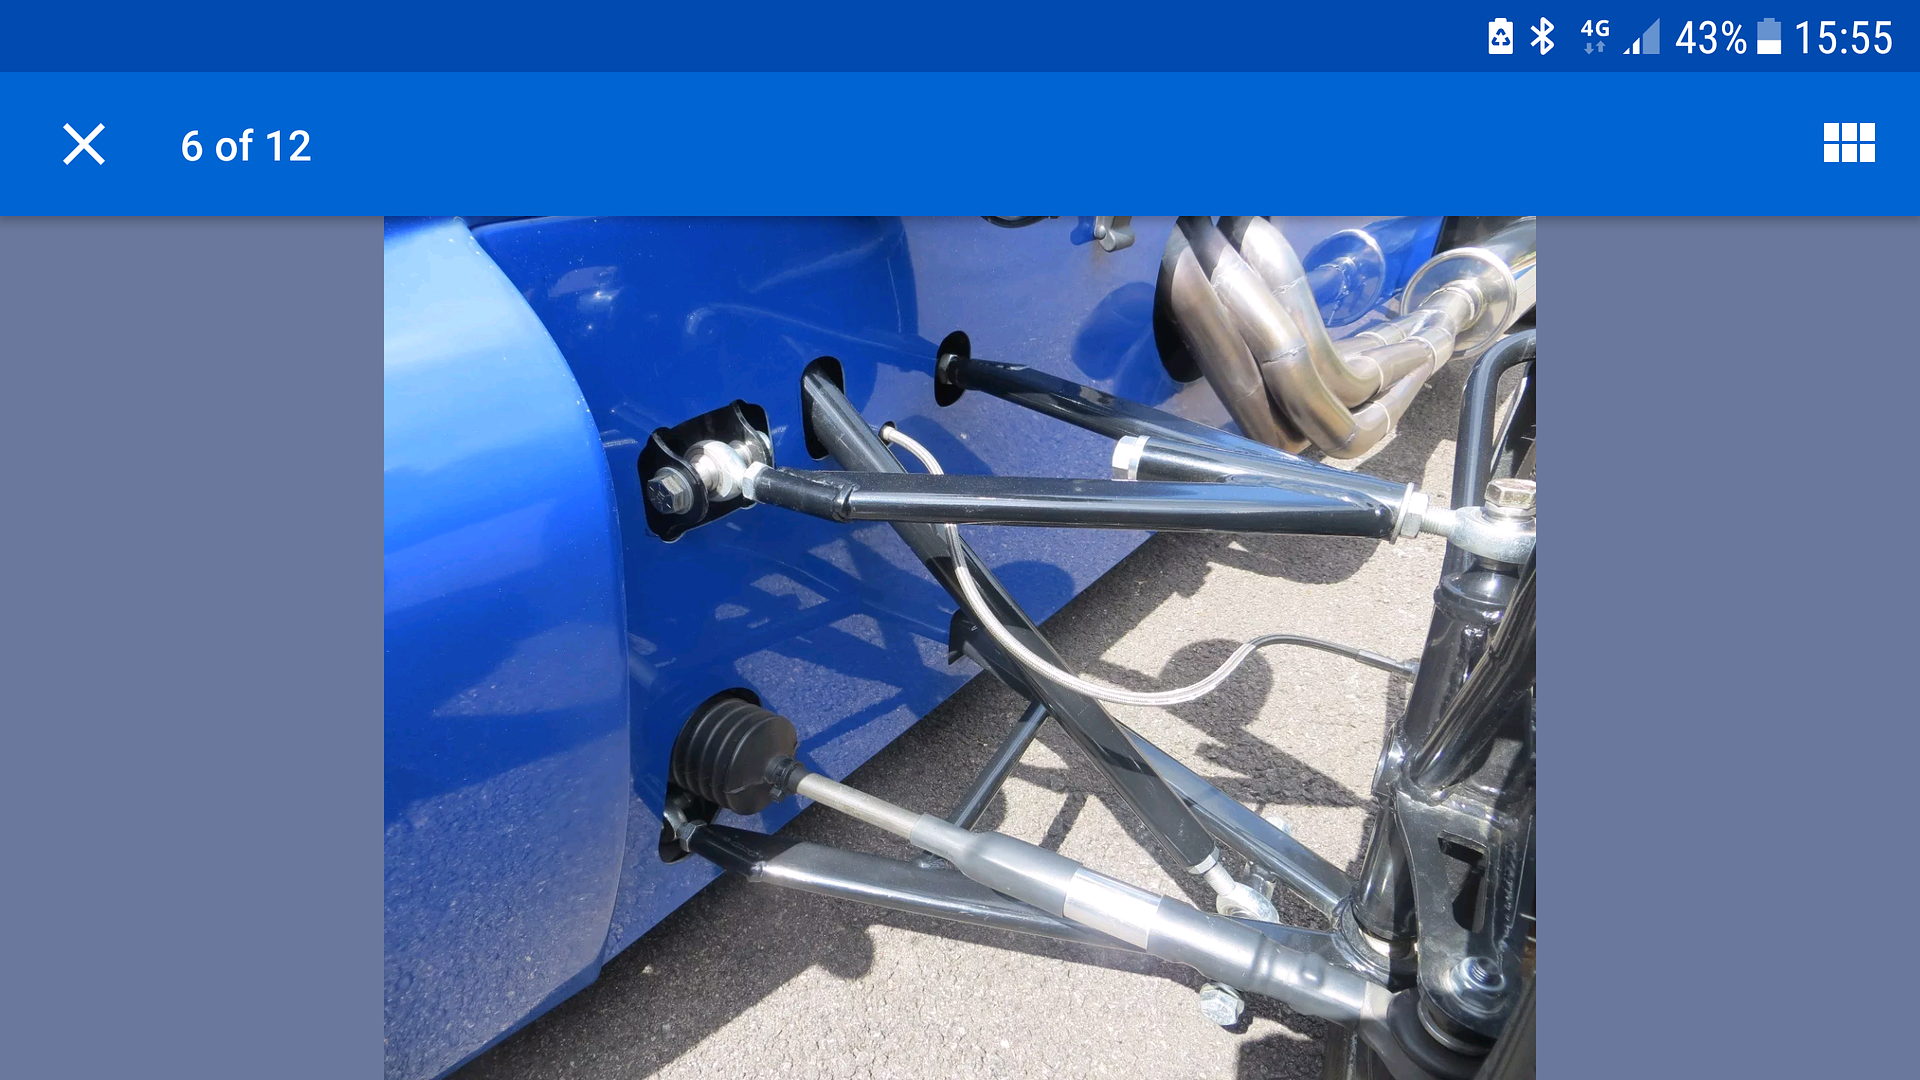
so mine will pretty much look like this with the MNR body and wider track
super-ron - 27/6/17 at 08:54 PM
I did a service on a proper Caterham supersport today so I could have a poke around a proper one to see how they do it.

the A'frame and dedion I plan to copy.
it is a sweet car!
took a load more measurements too
My pressure washer dies a few weeks ago so had a little upgrade, K2 to K4
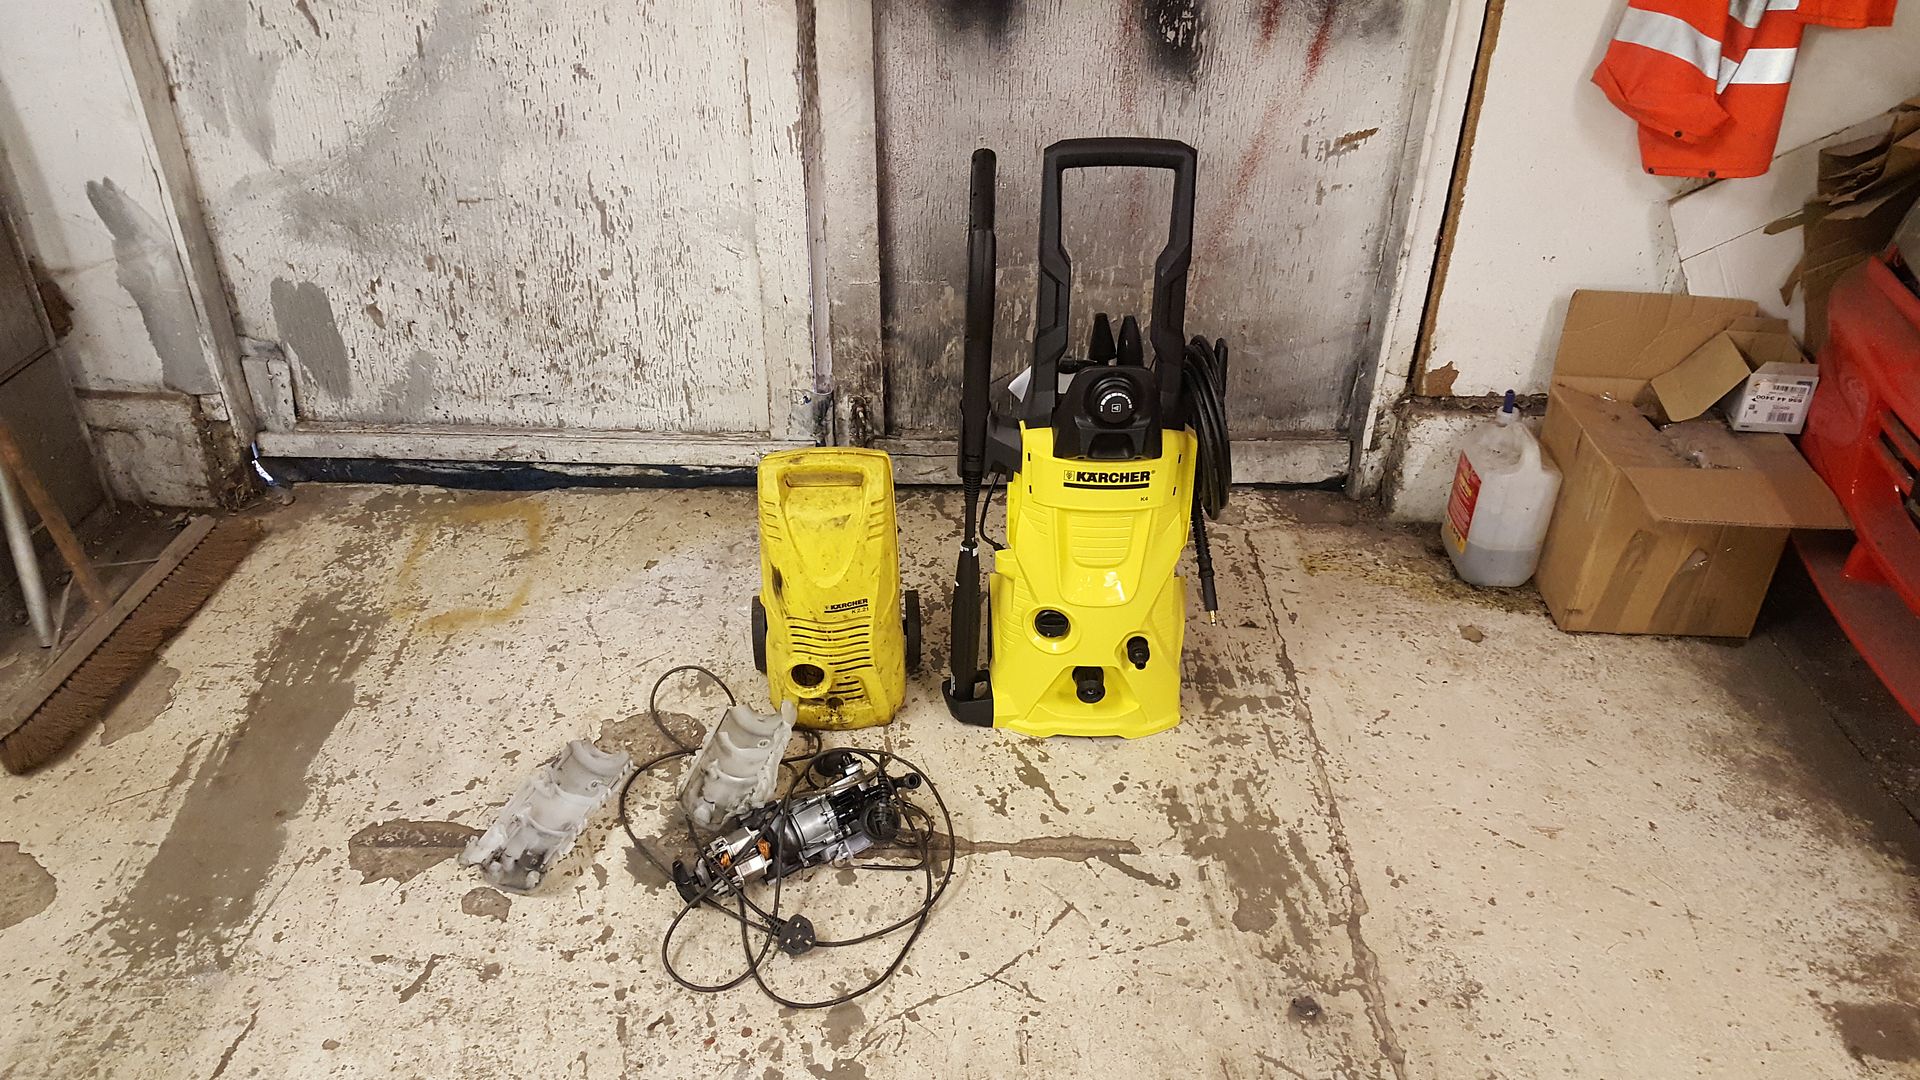
everyone like to test a new pressure washer out so I thought I'd clean up the new type 9 of bought.
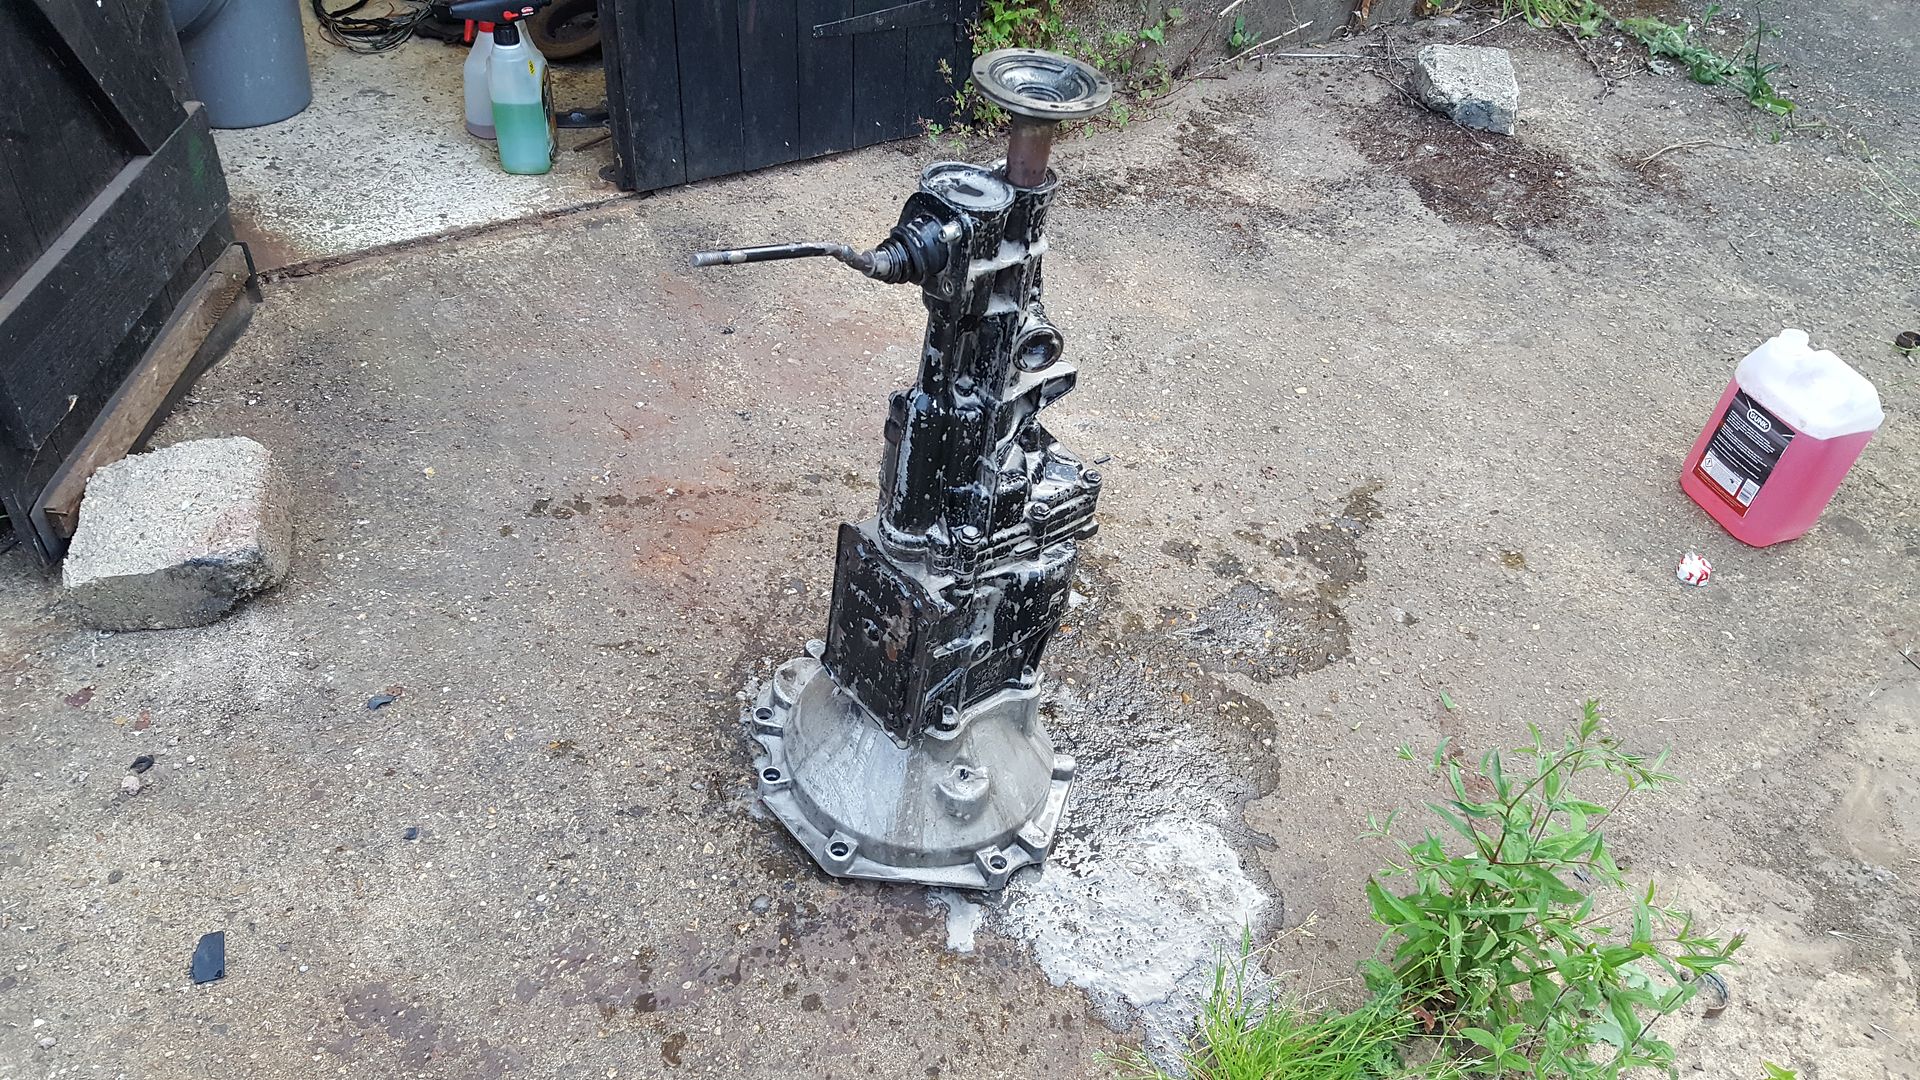
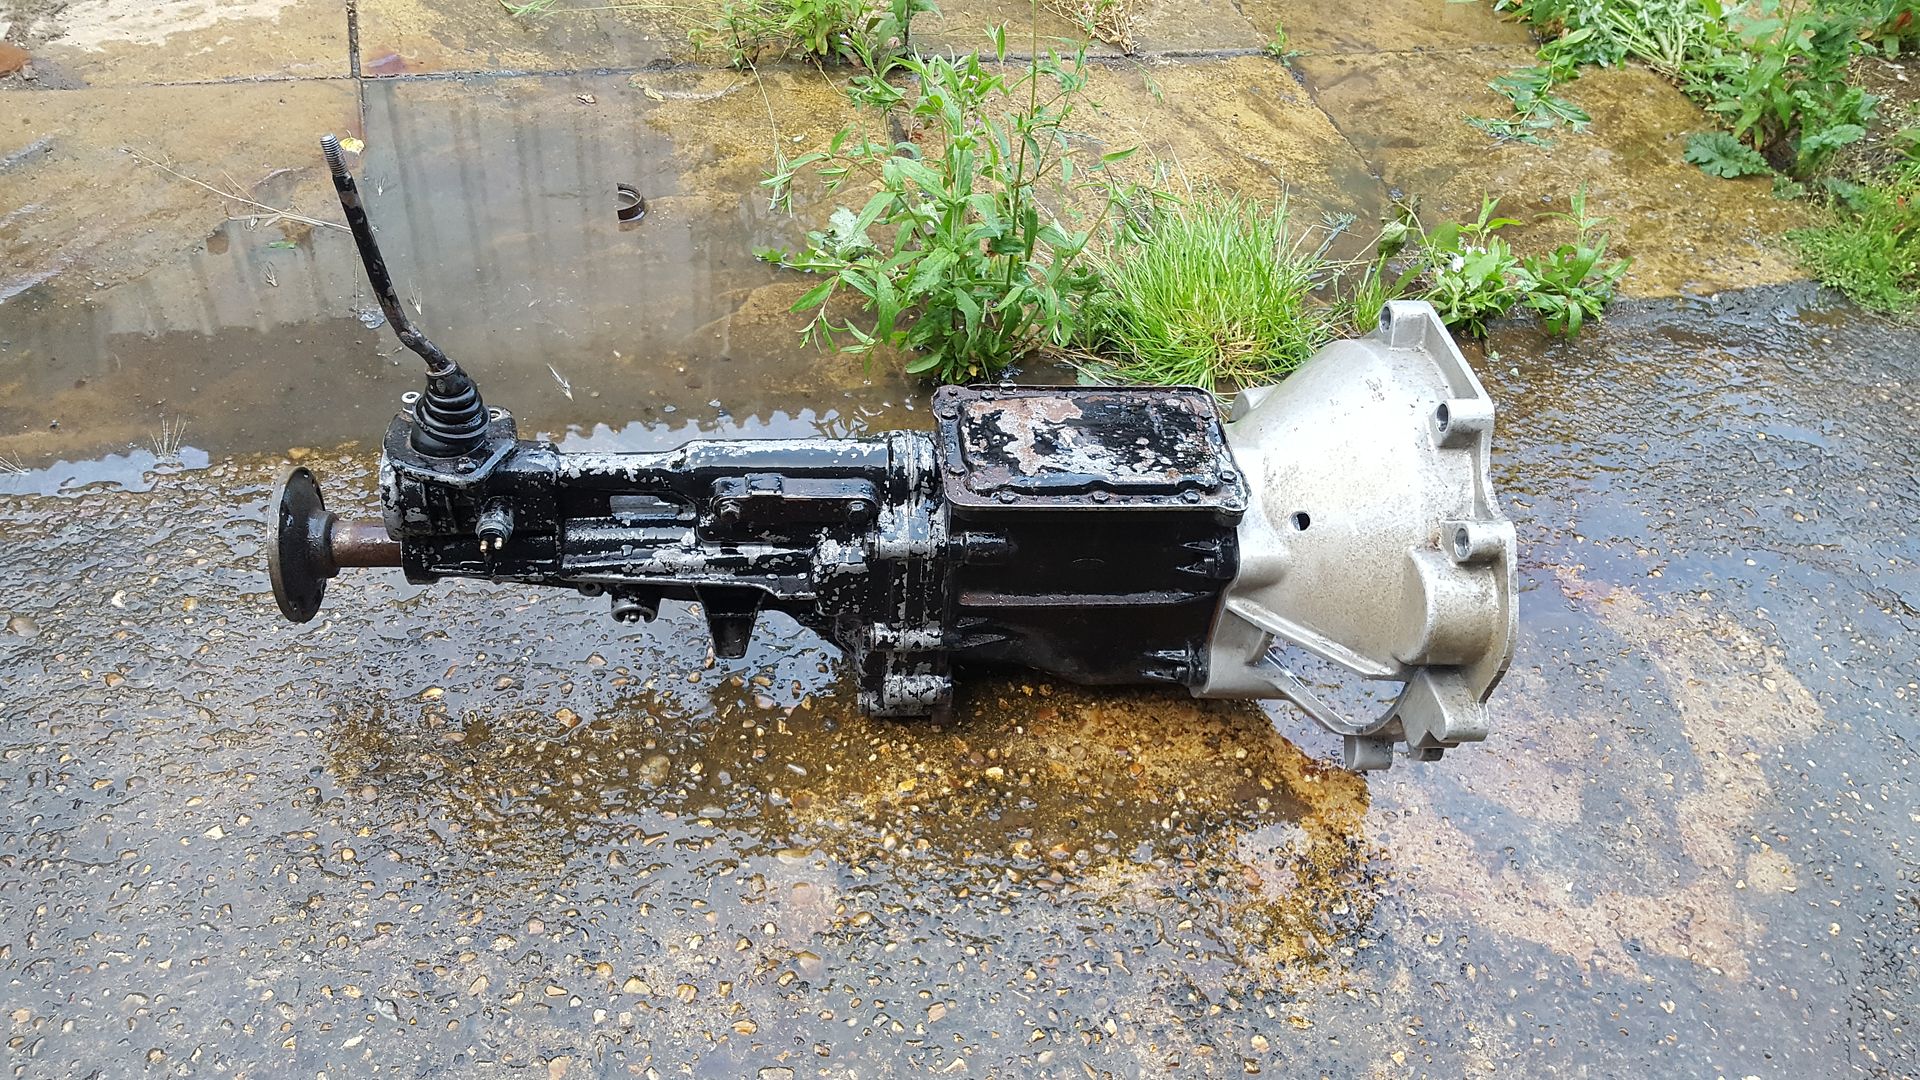
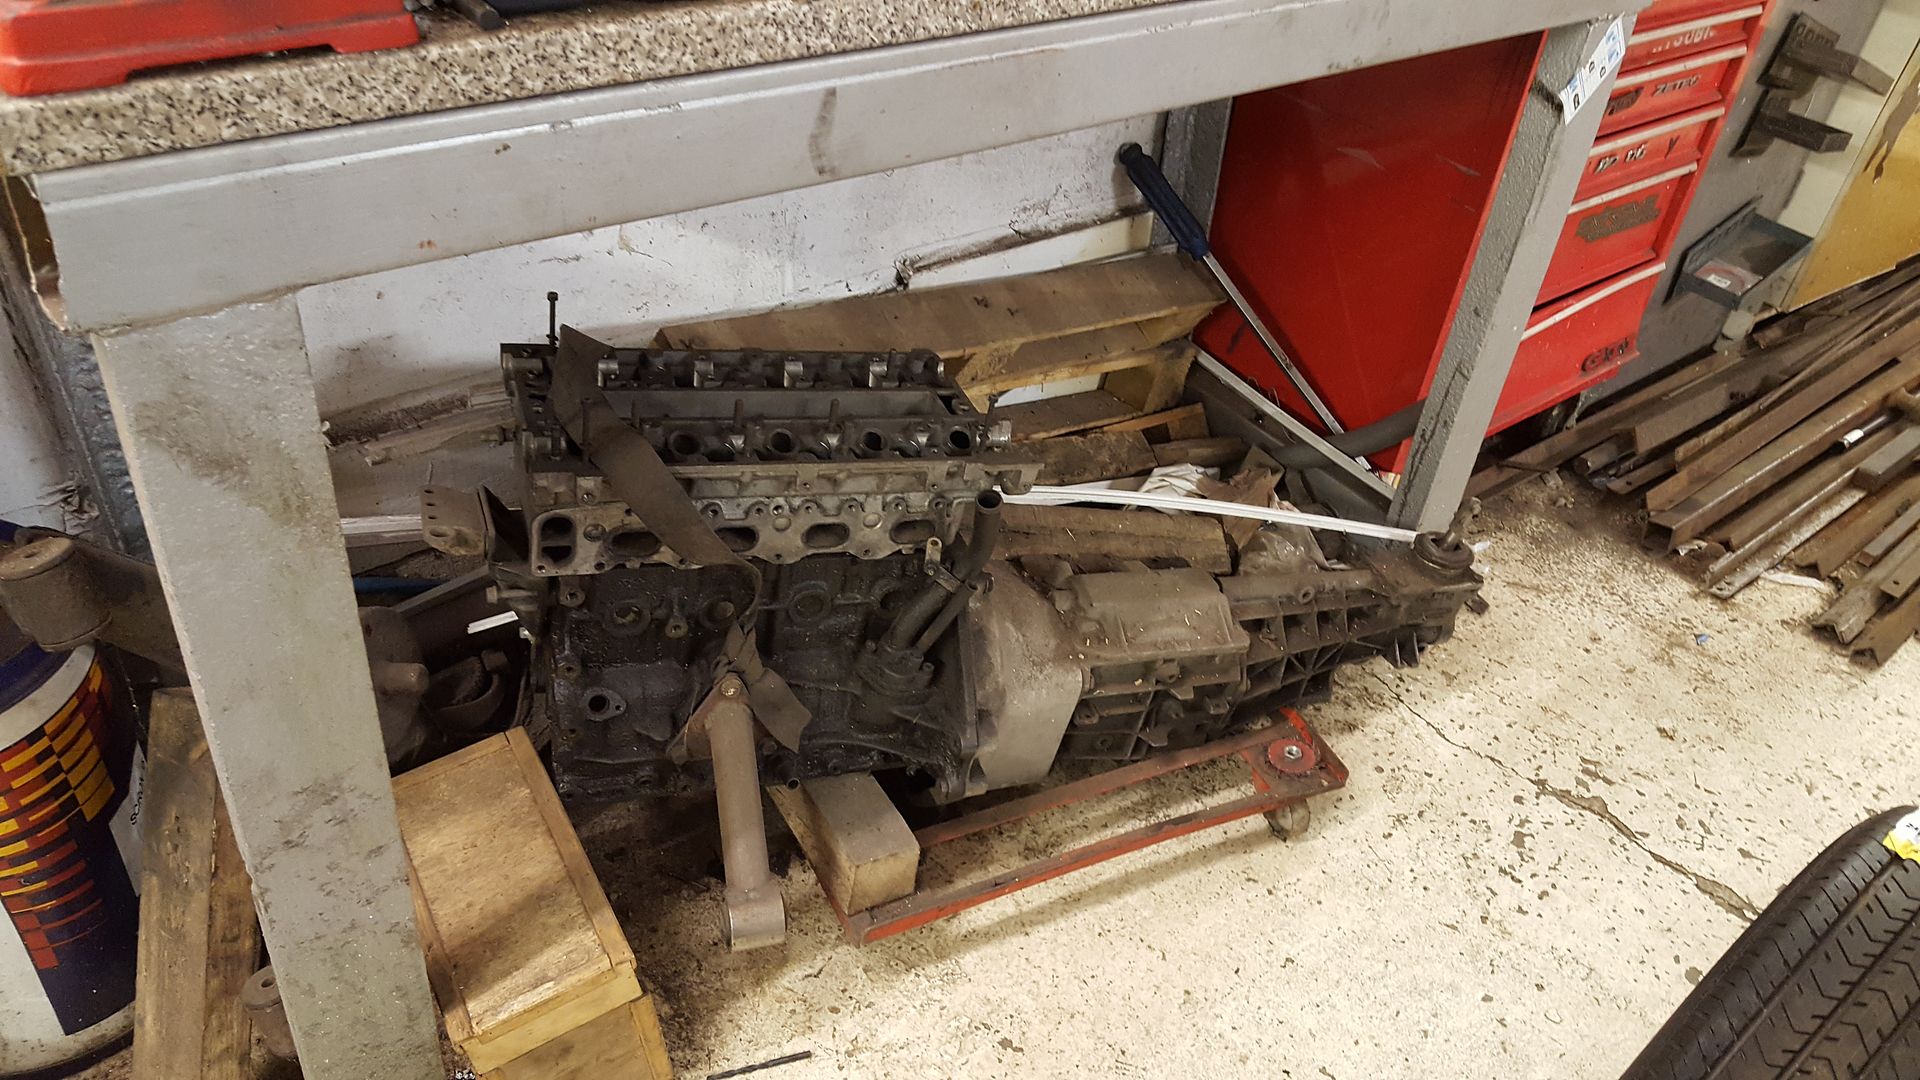
still with the pressure washer bug I took out the mock up engine and the T5 out and asperated them
they've been bolted together for 8 years sitting under the bench both with no oil in them, but still filthy :lmao:
dug out the sierra cosworth bellhousing, transmission mount and clutch fork too and got scrubbing!
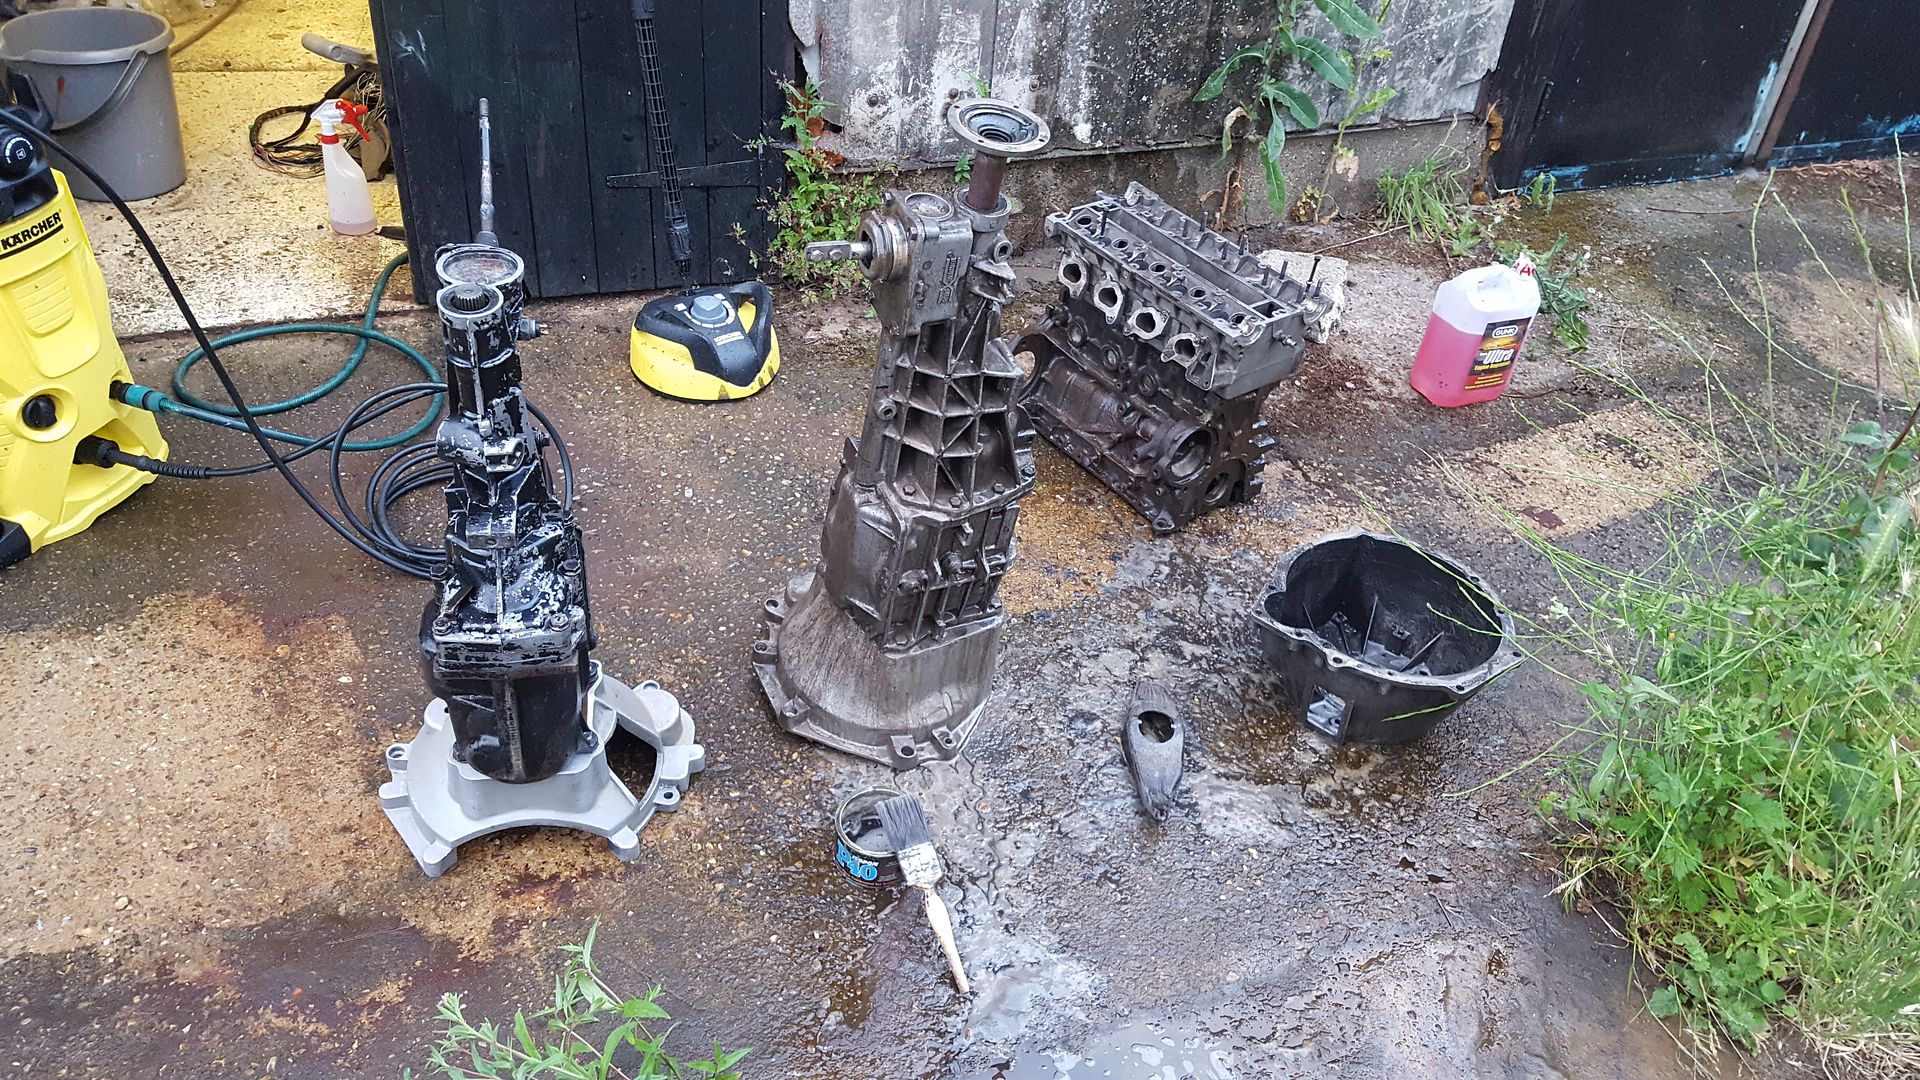
all came up like new genuine cosworth oil is a great preserver! hope it hasn't knocked the value by washing it off
even the vauxhall oil did ok!
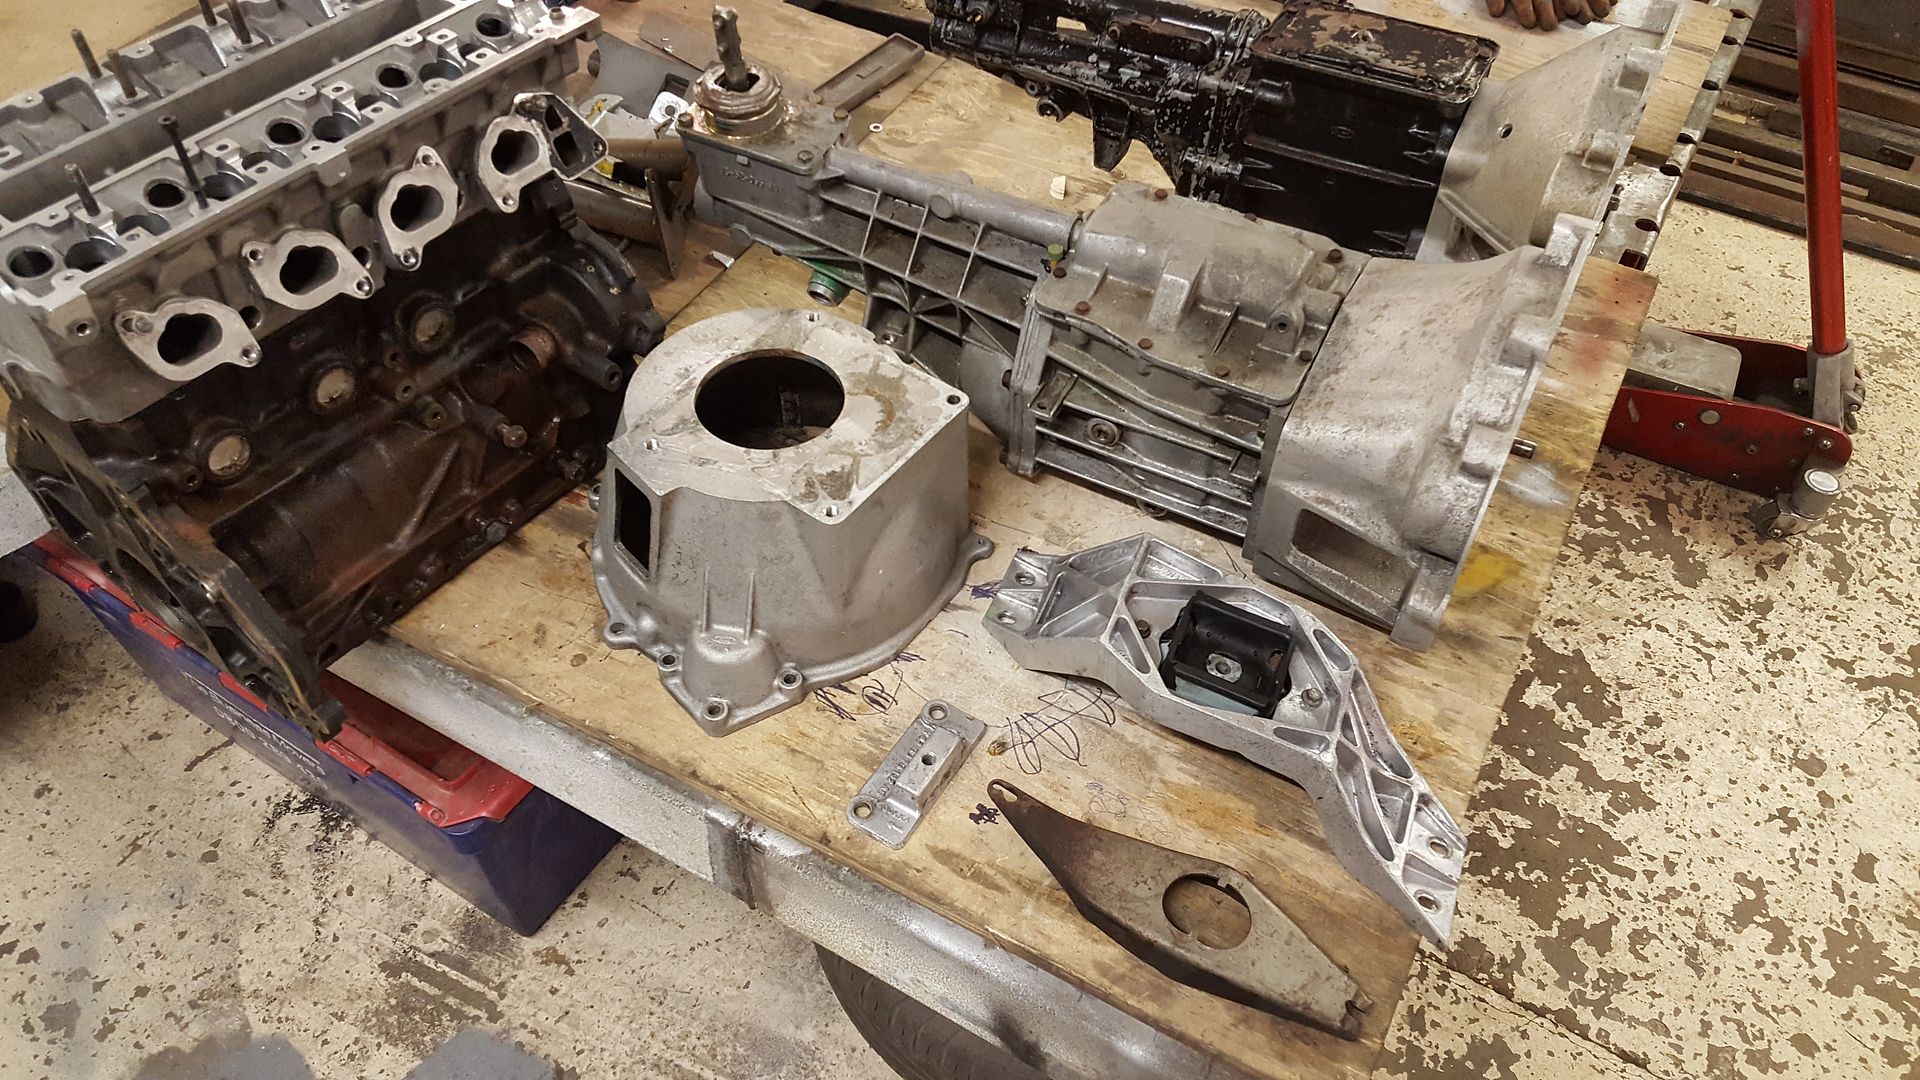
actually got a c20let block and COSCAST head, but both no good.
so ford stuff all pretty much ready for eBay unless anyone needs one?
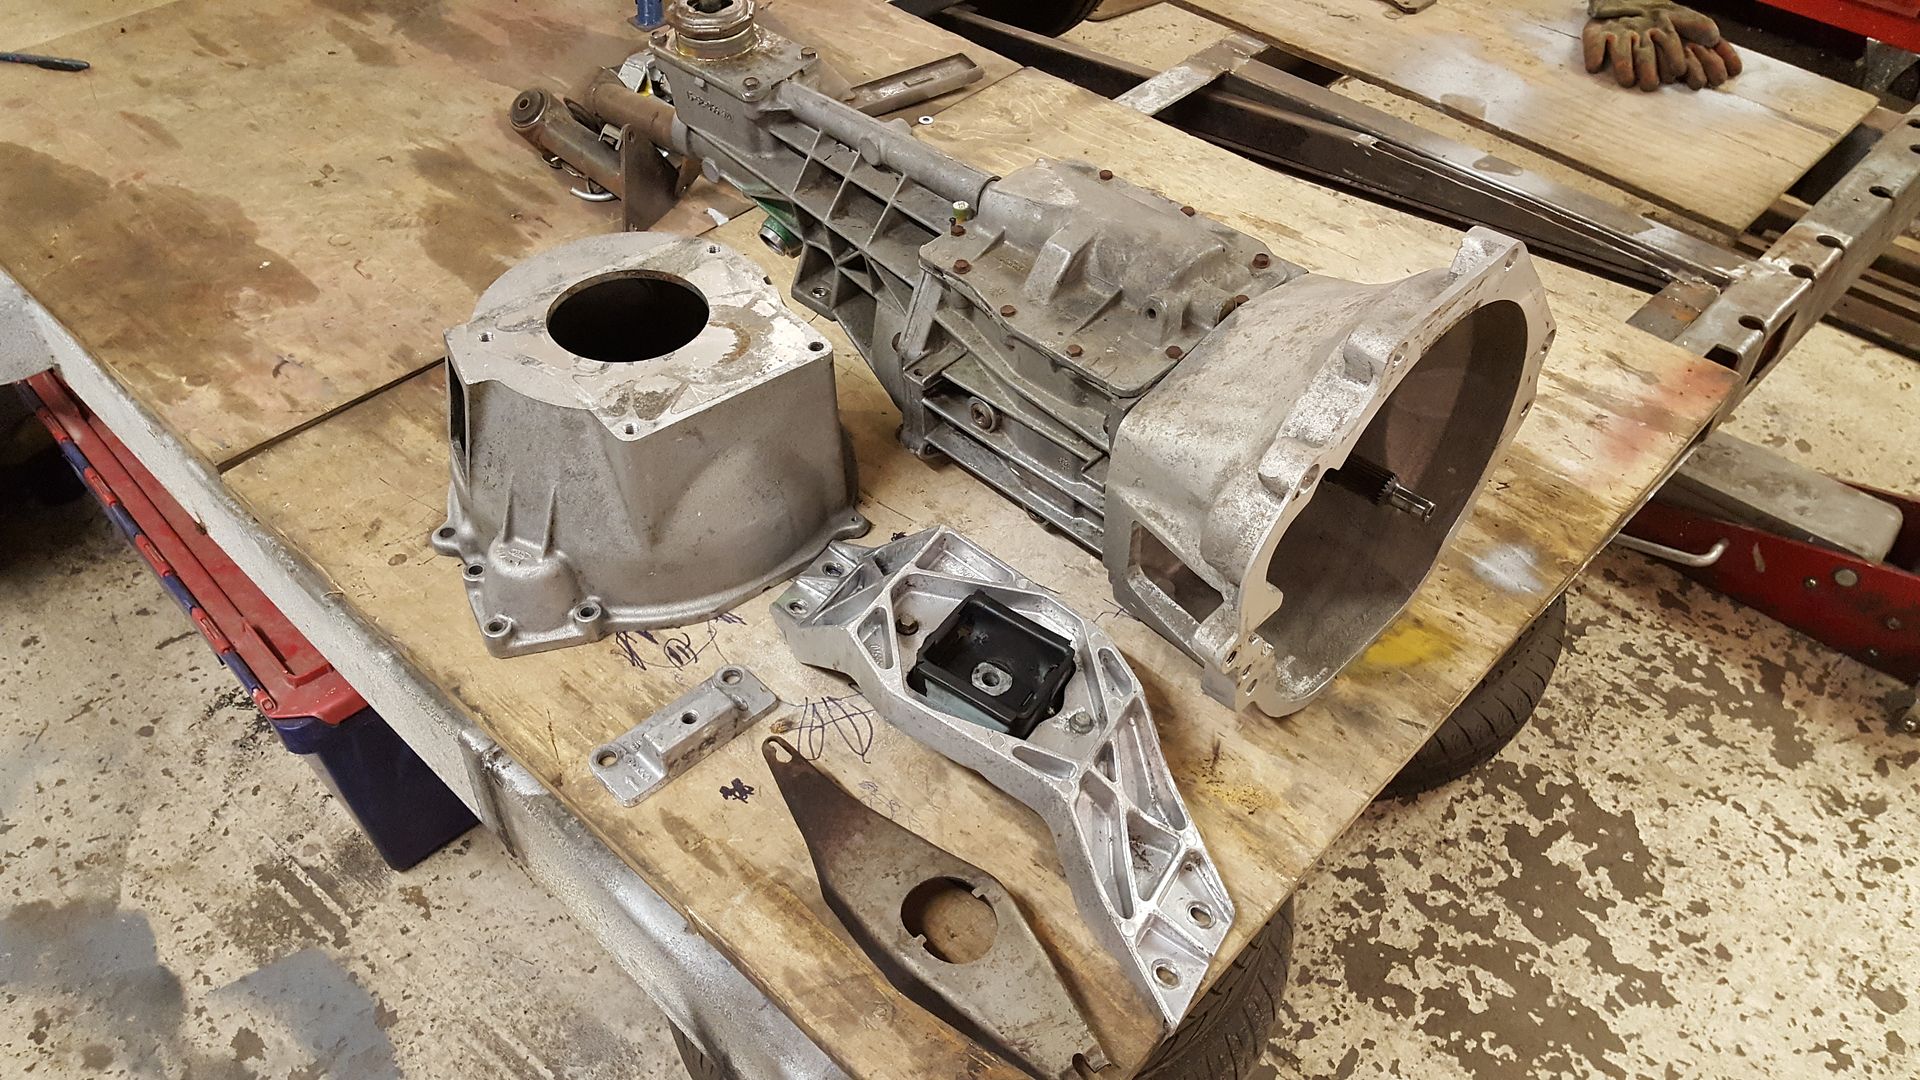
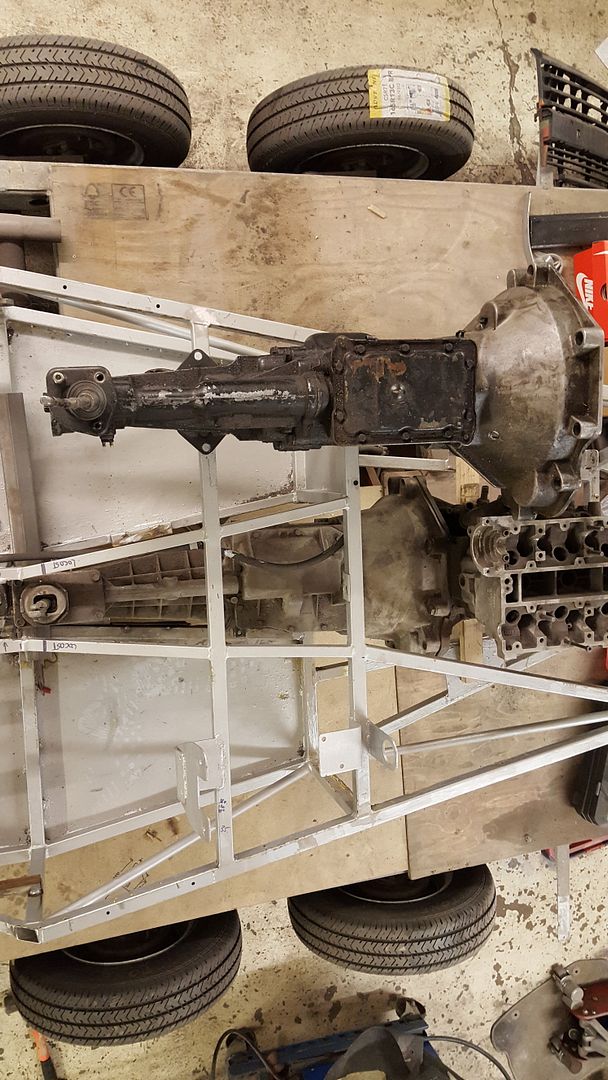
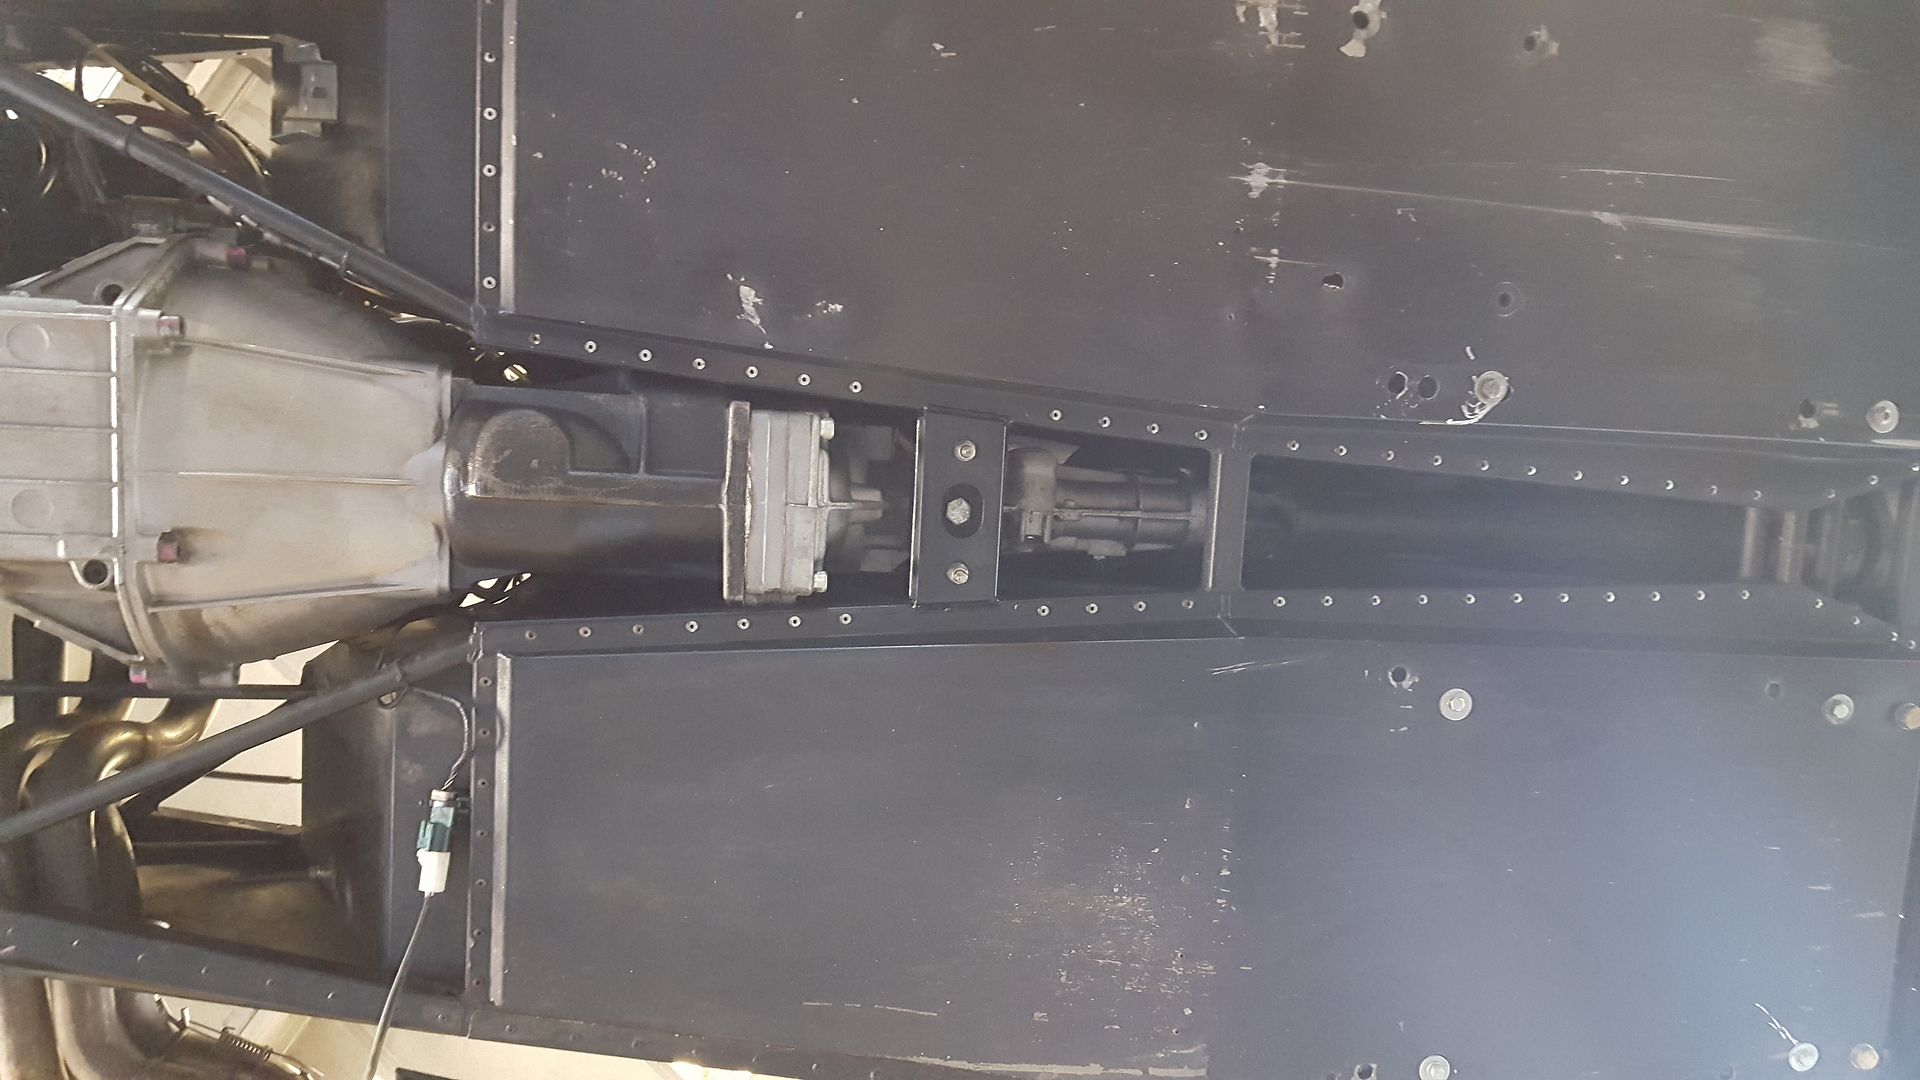
the difference between the T5 and type 9 is now apparent! no wonder it was a squeeze!

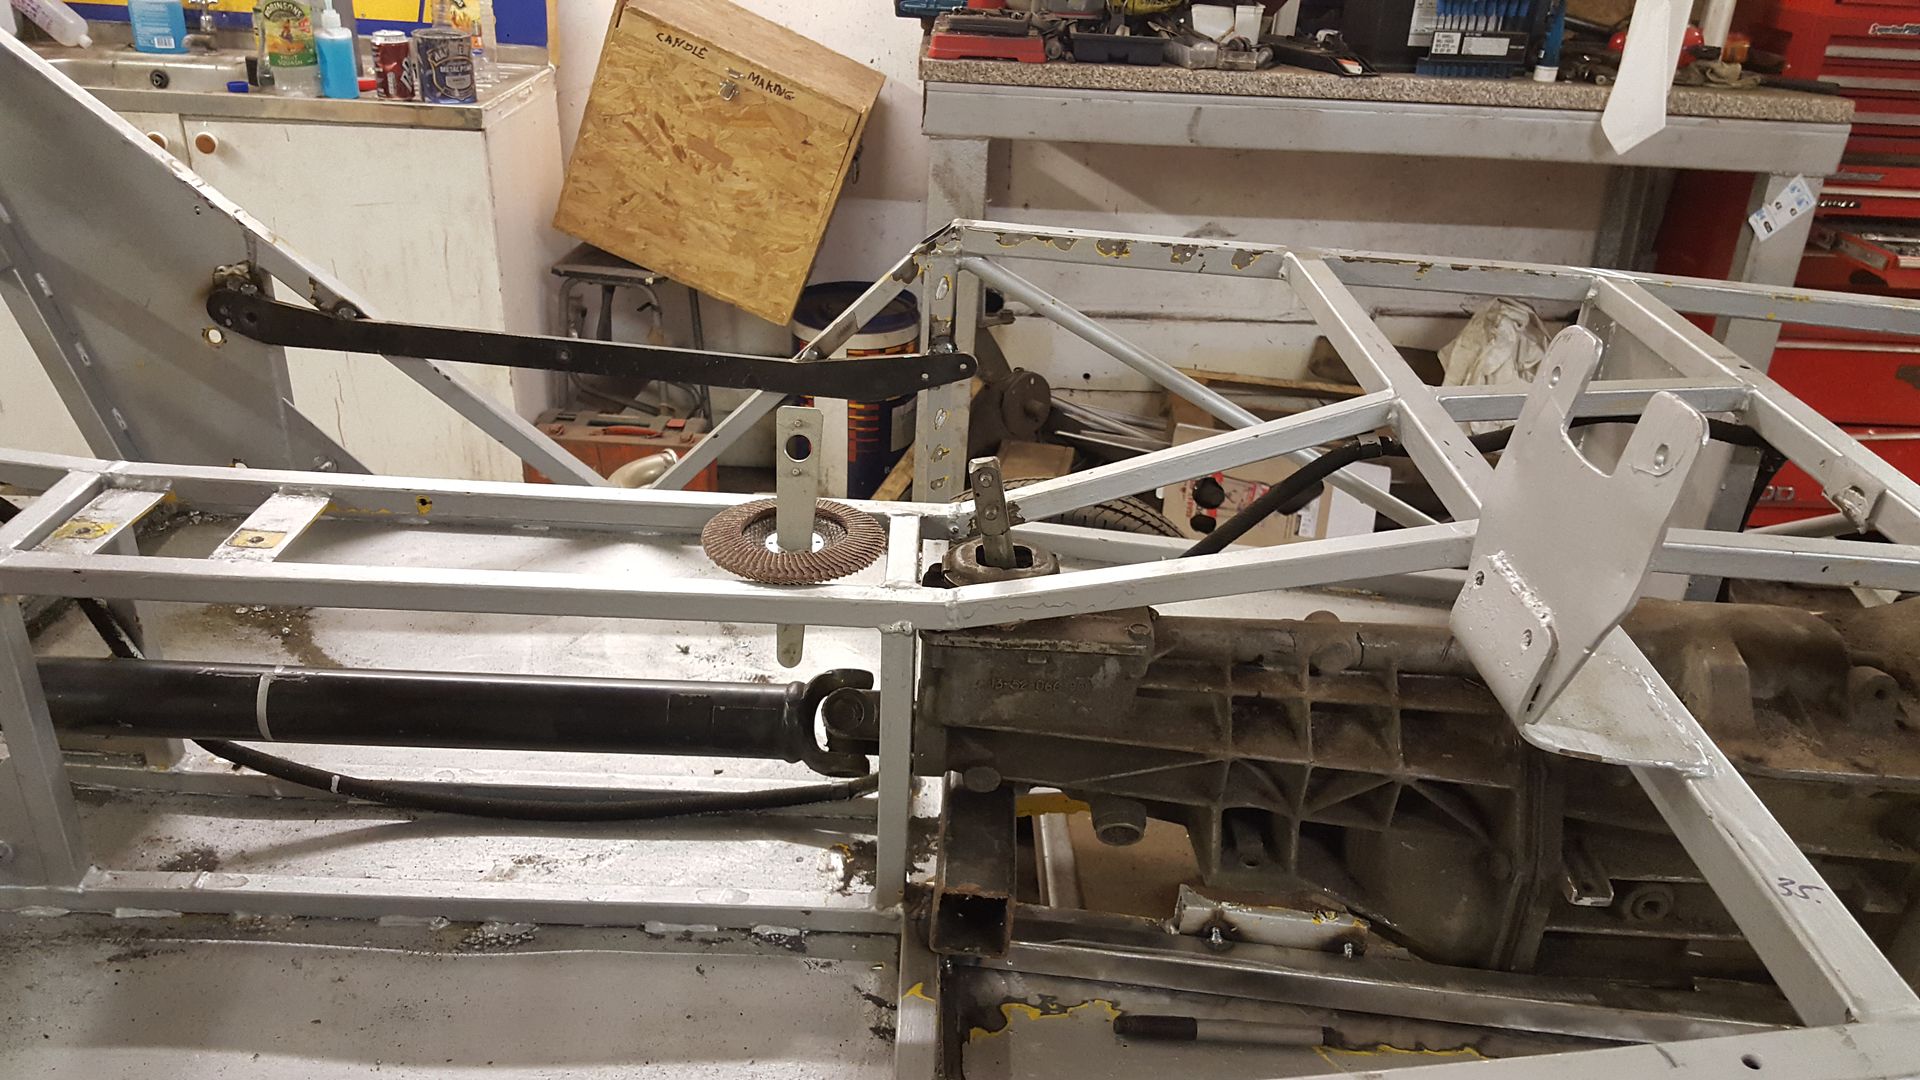
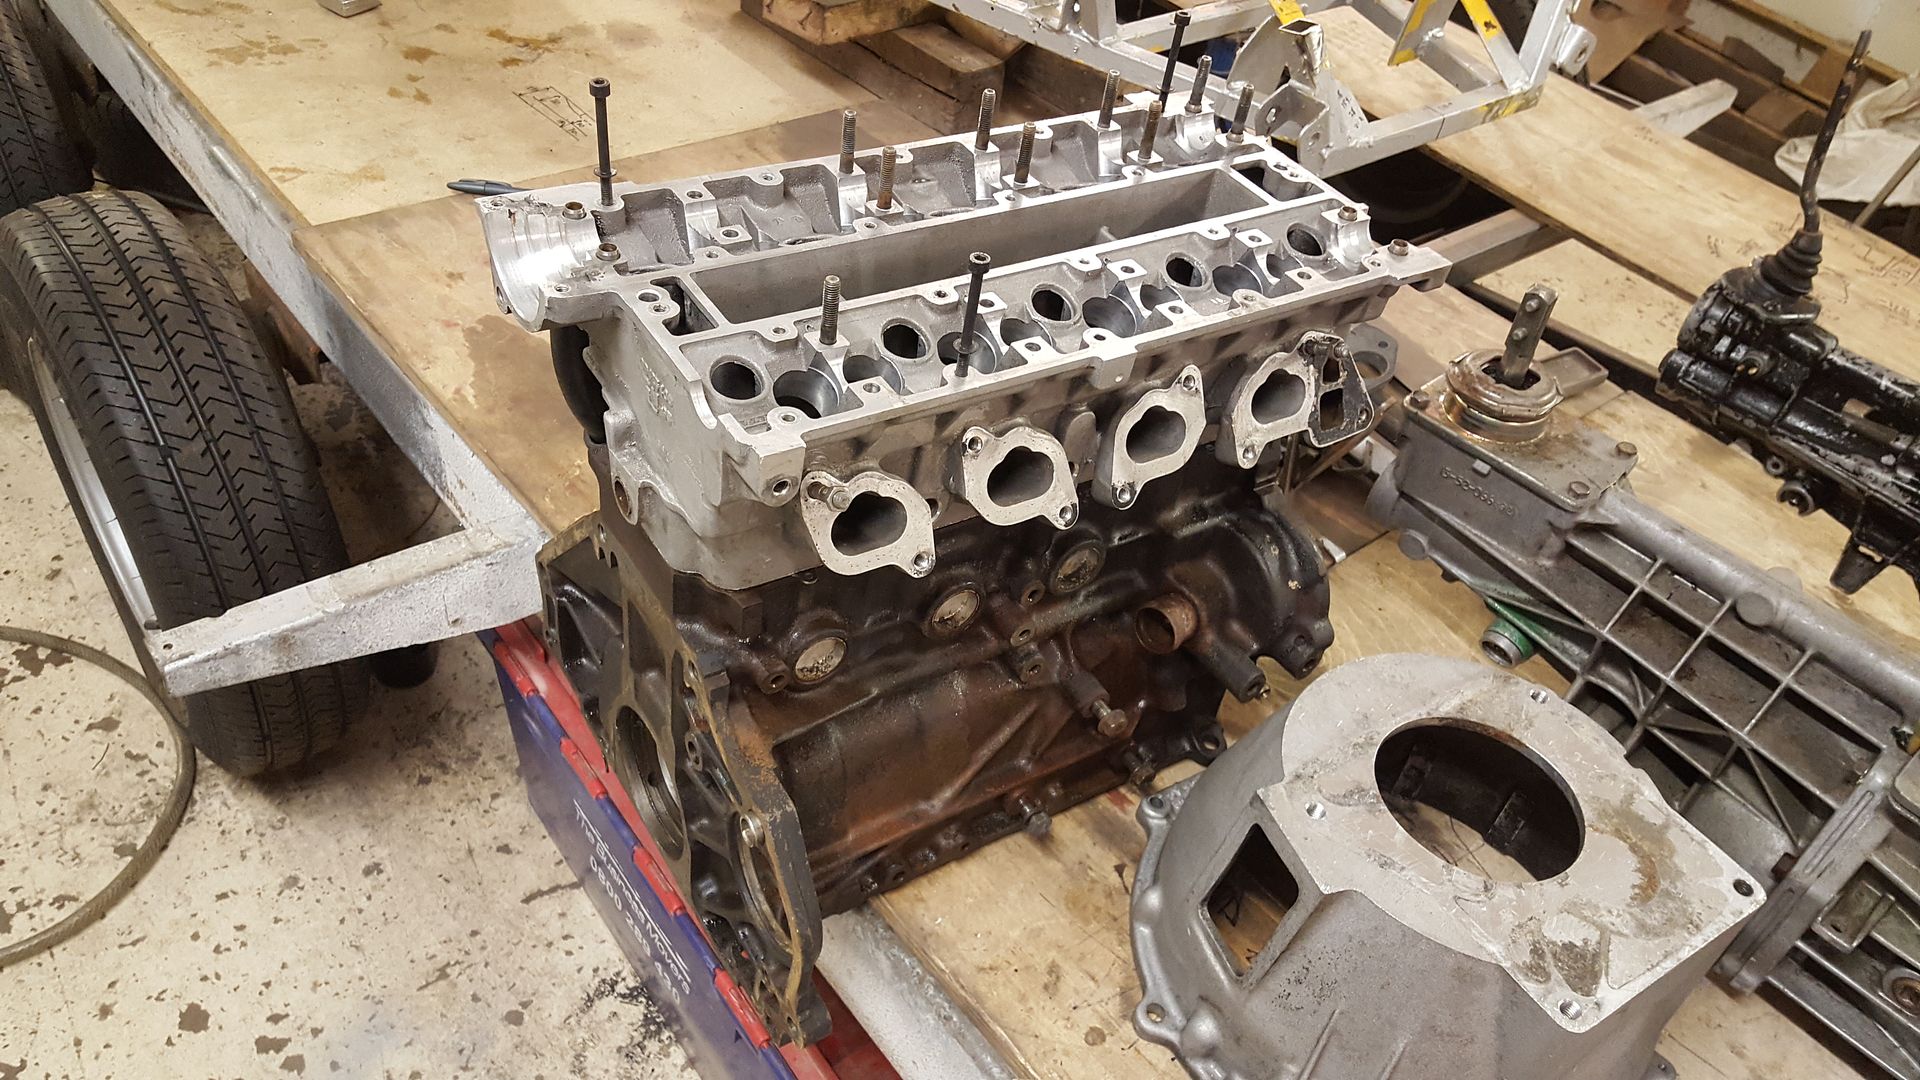
so put the mock up c20 back in with the new Type 9 and as the chassis already had a type 9 in it mounted before I bought it I put the mount it came
with back in the same place as a datum
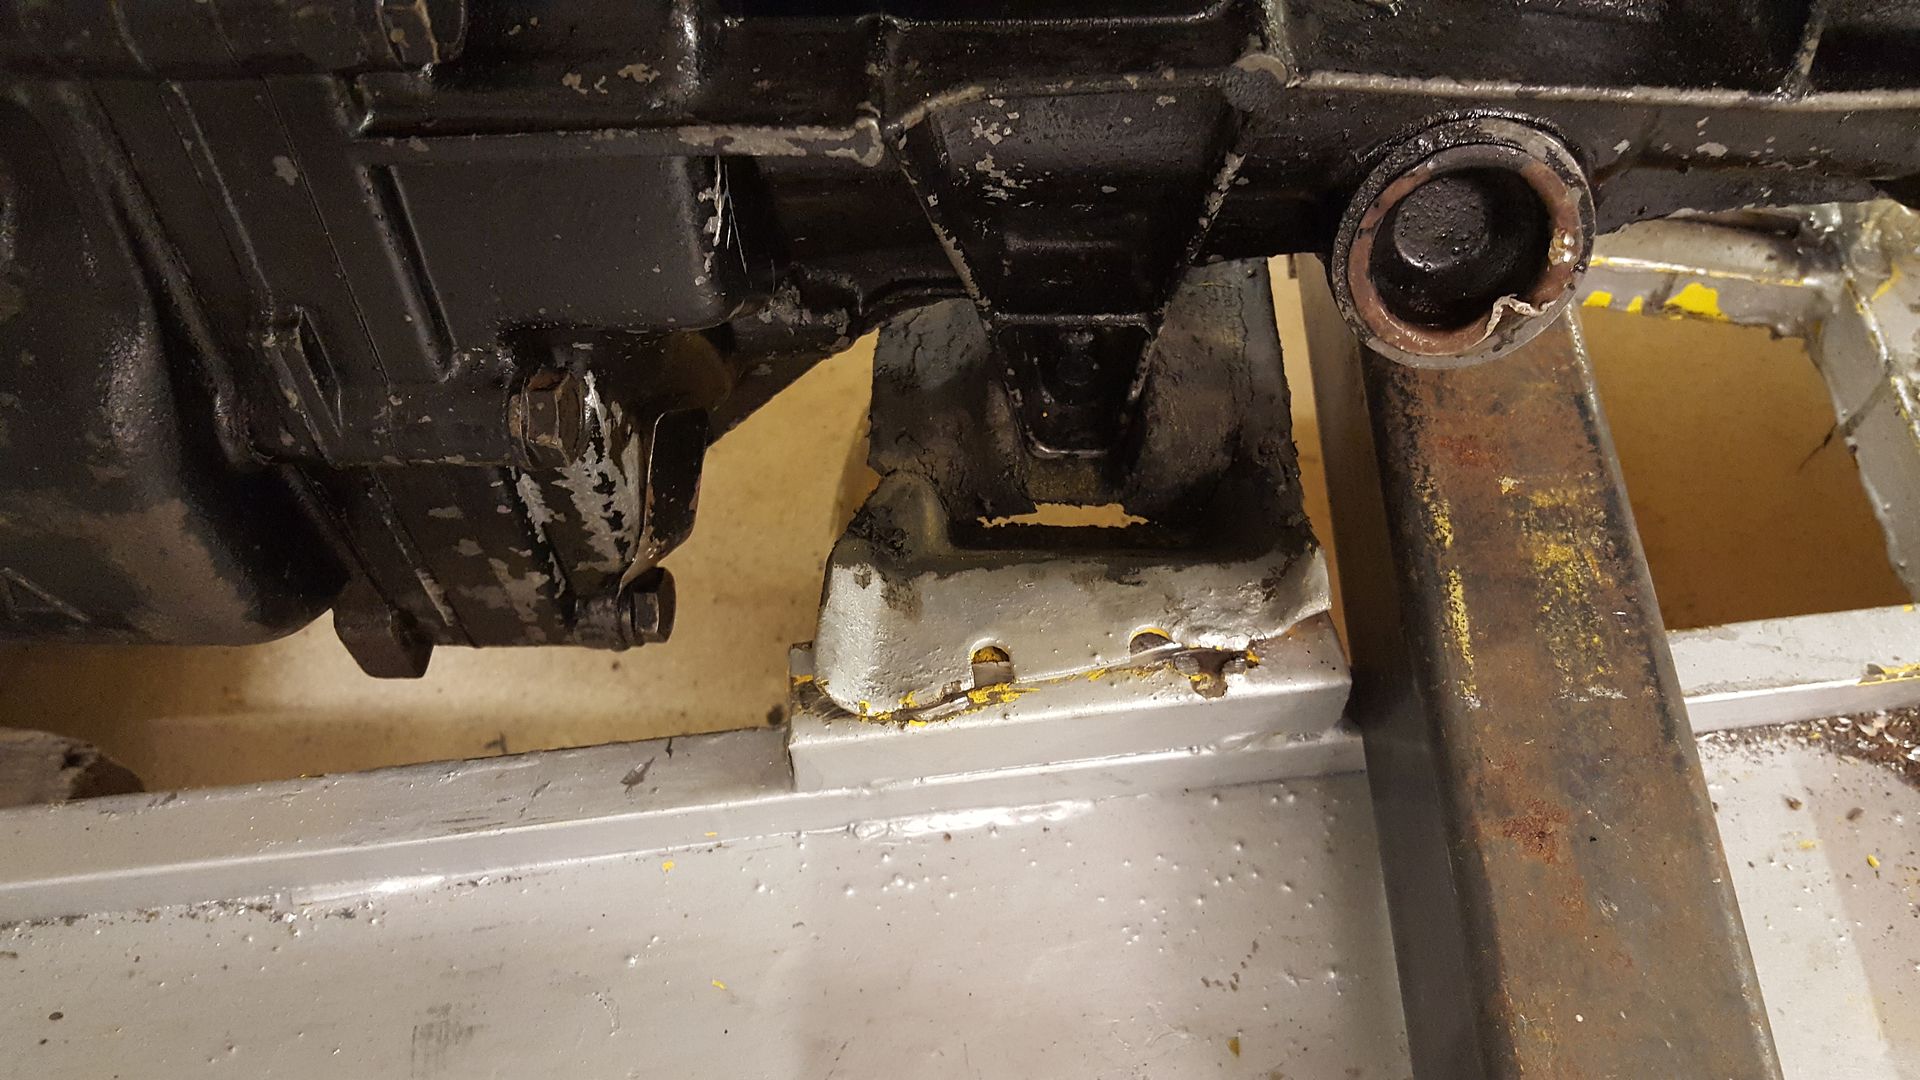
but this left loads of prop hanging out?? surely all of the clan bit of the prop should be in the tail section?
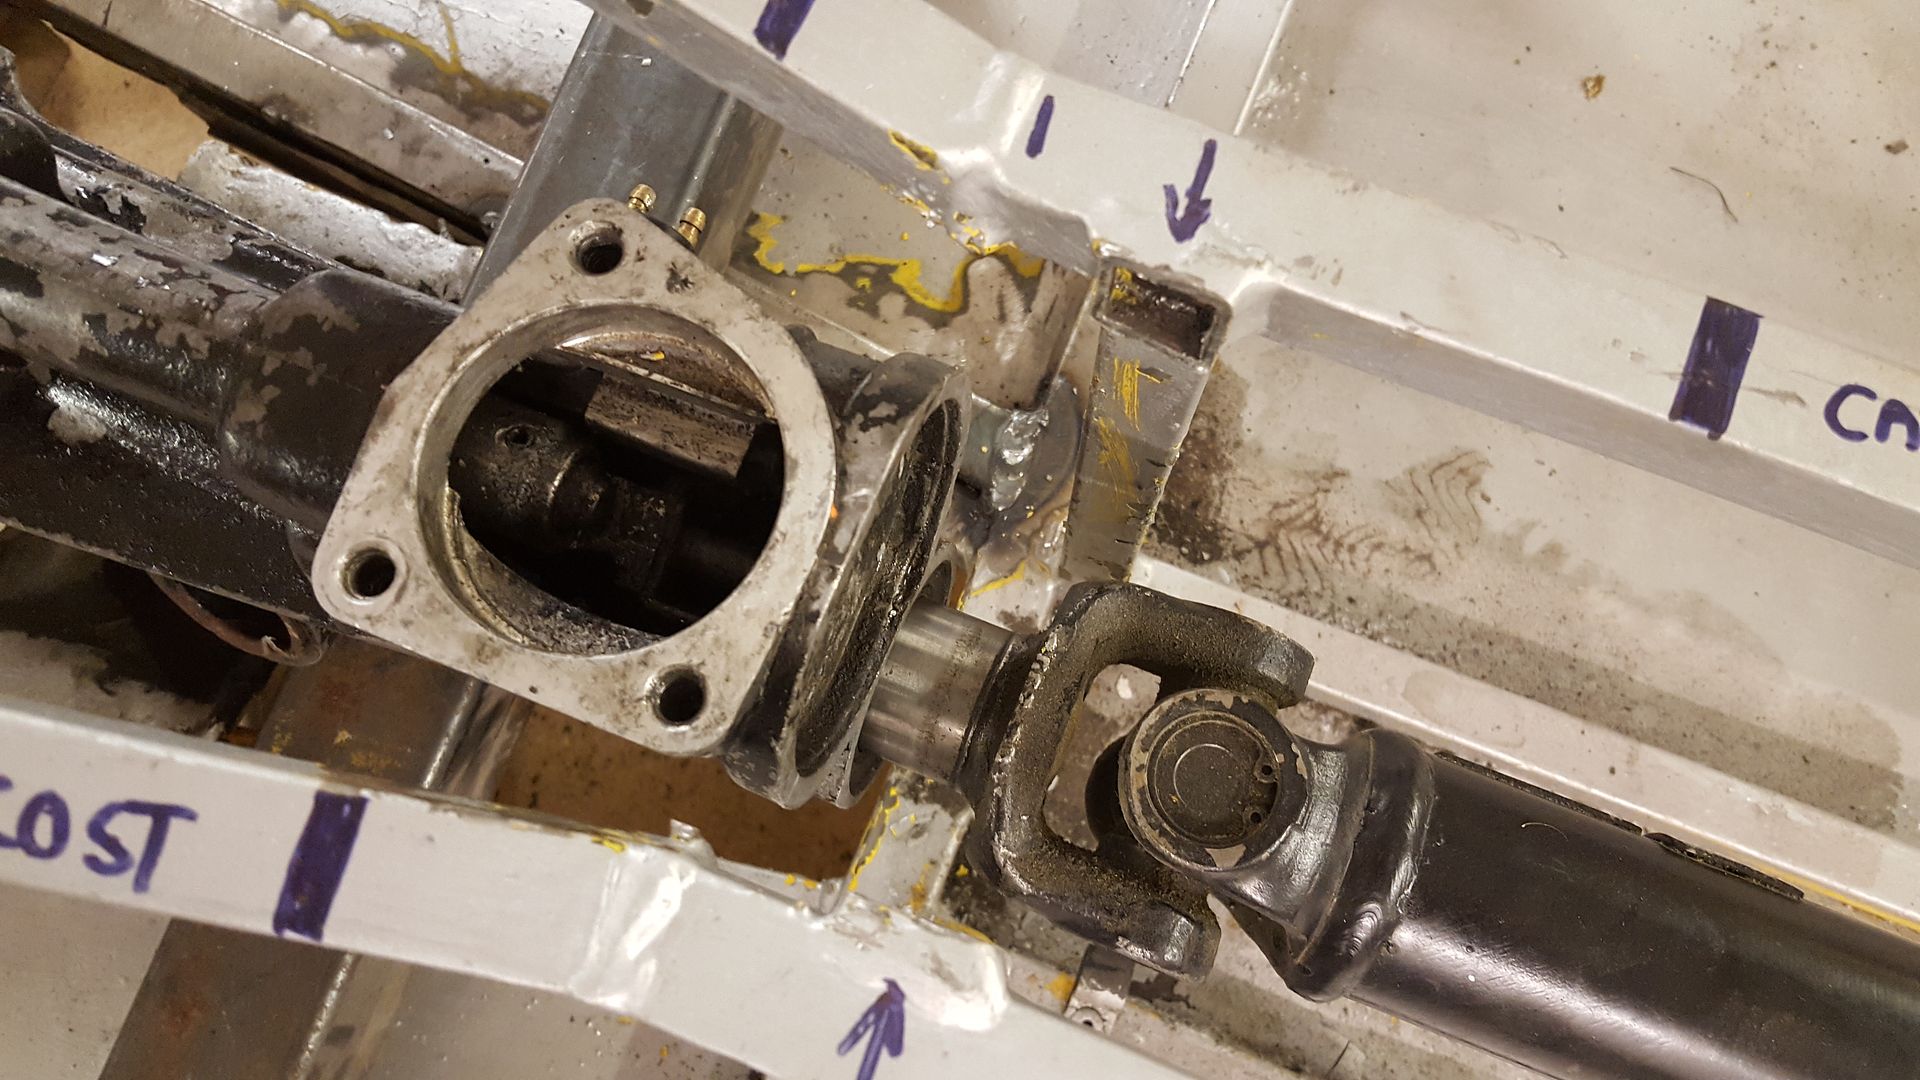
so moved it back in till the prop sat nicely
Soooooo much room for activities on the drivers side now!
even with the modified gear stick it's still not back where I'd like it to caterham spec
but there is is, back in and level
next will be to think about position of the engine for ground clearance vs bonnet clearance, then make some mounts.
Schrodinger - 28/6/17 at 12:20 PM
ISTR that there should be room for some movement in the engine and dif so the nose of the propshaft should not be all the way into the gearbox.
Gre3D - 8/7/17 at 07:53 PM
nice work man!
loving this!
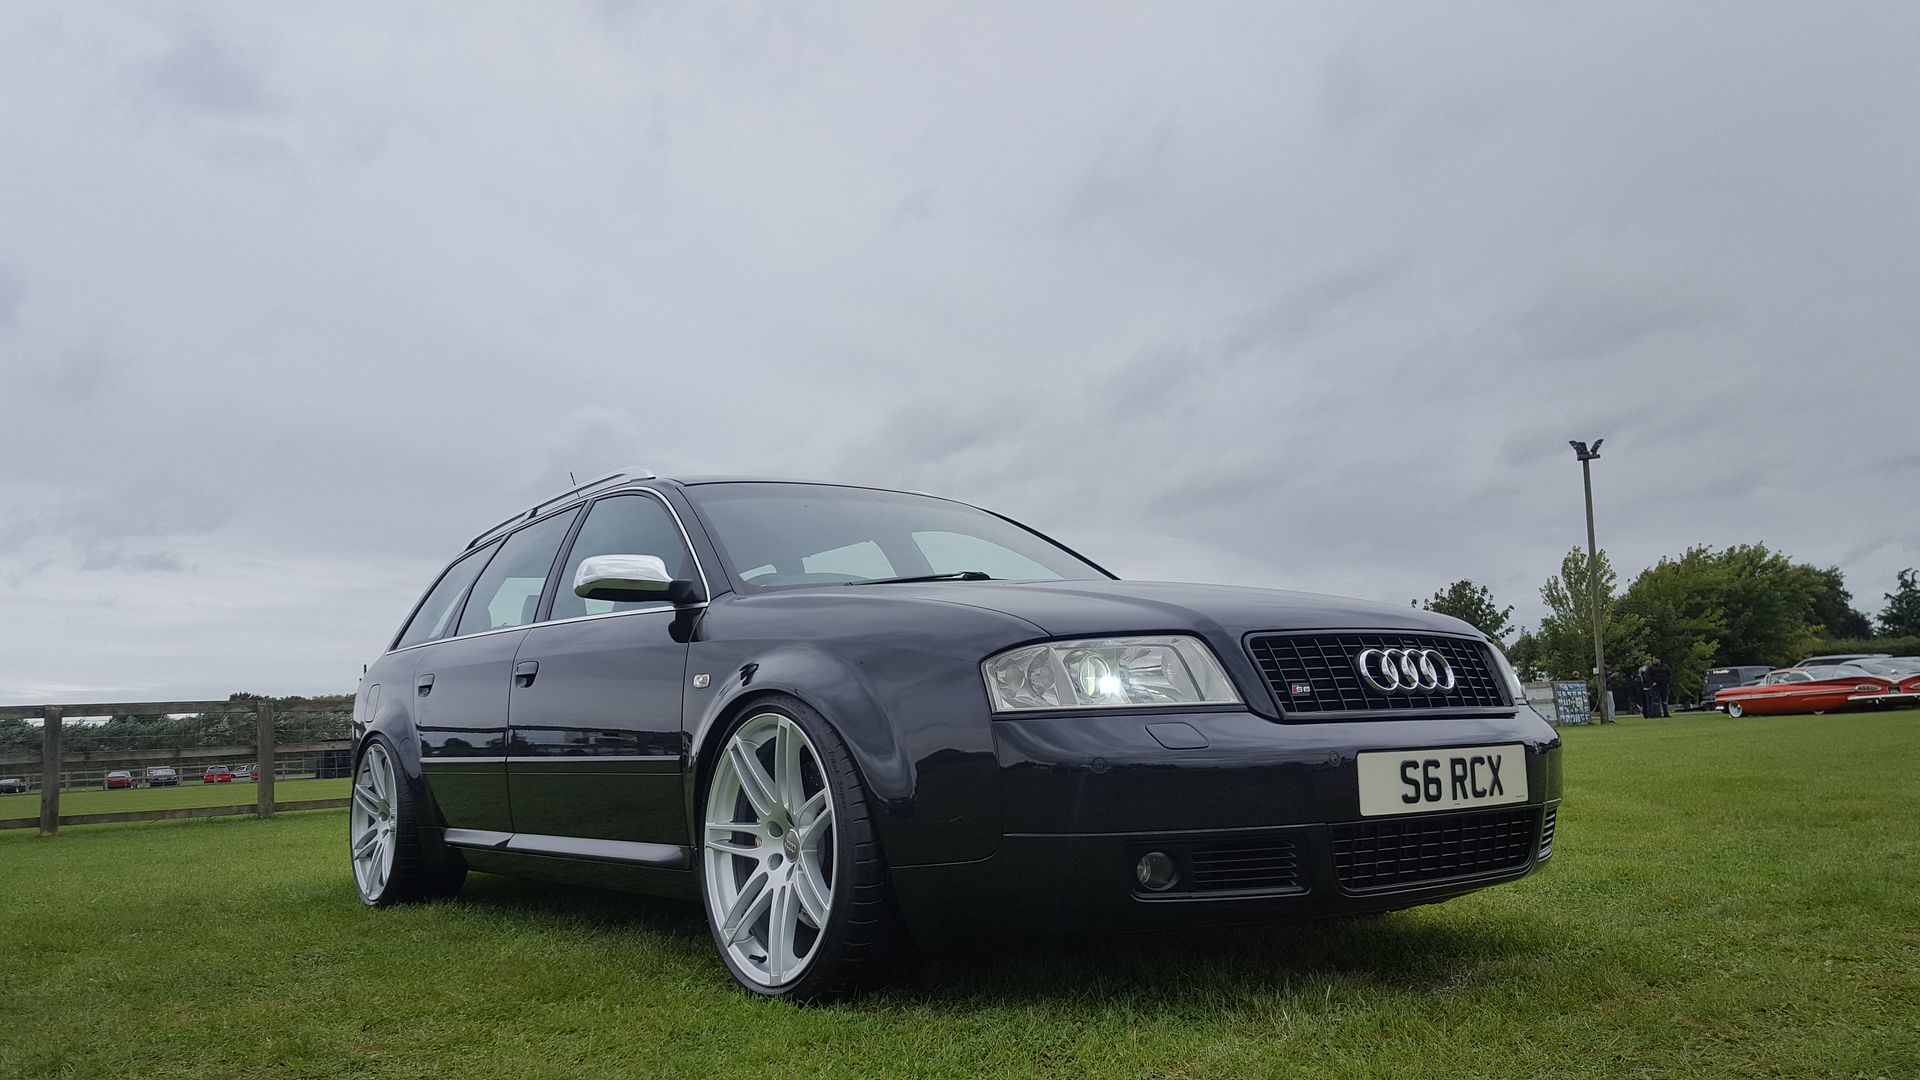
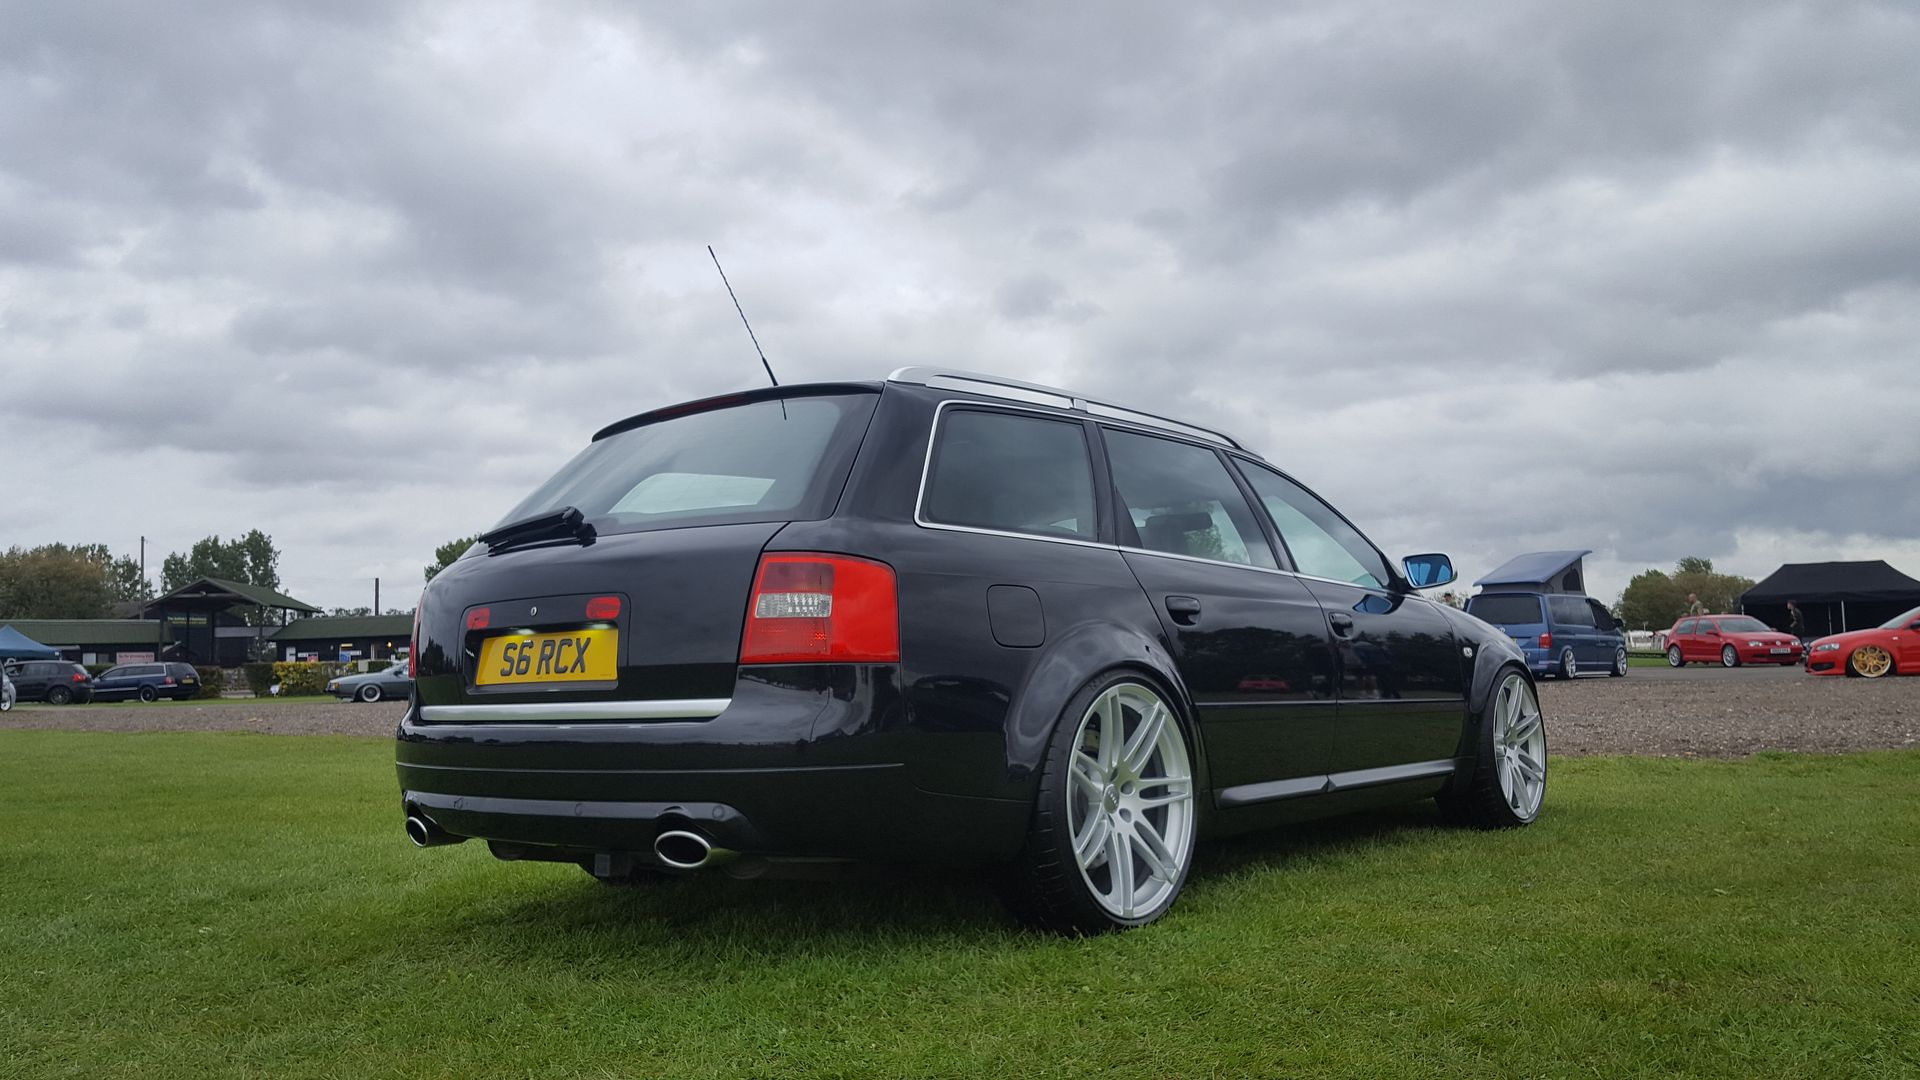
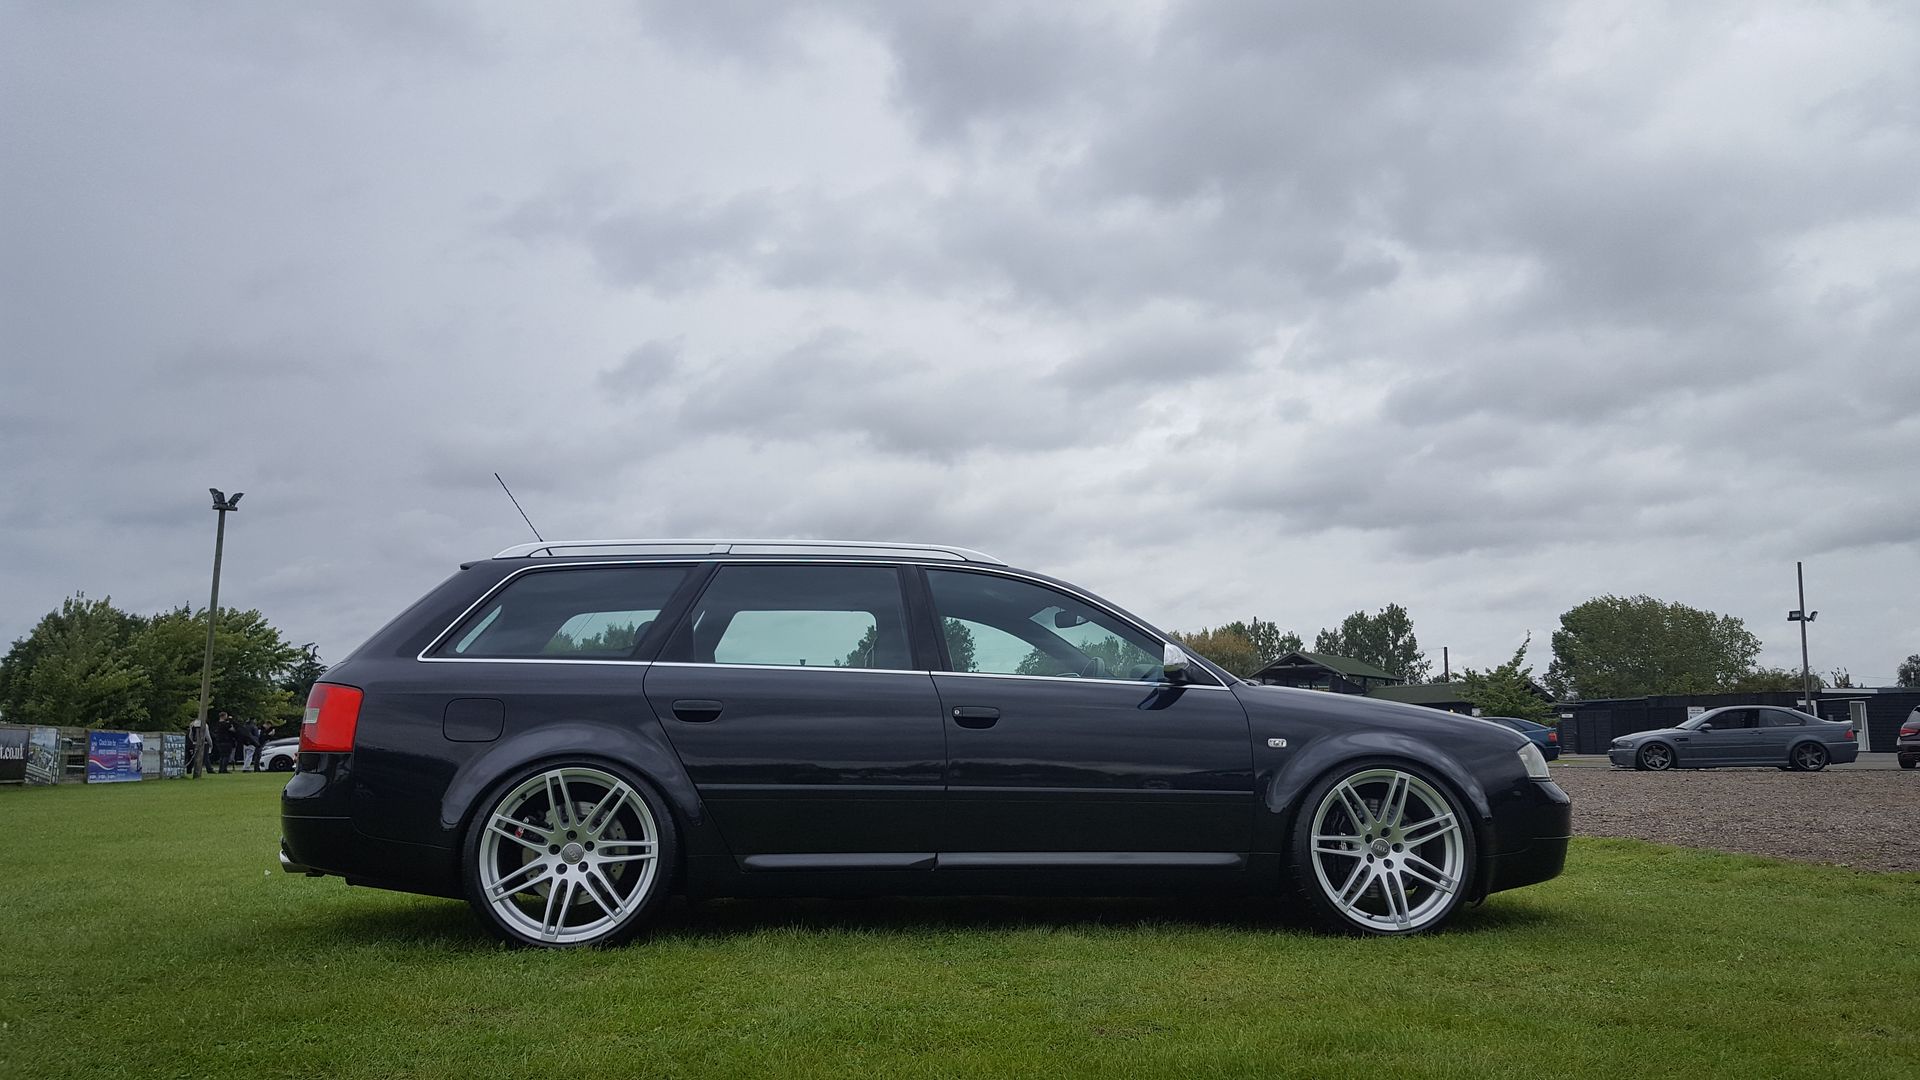
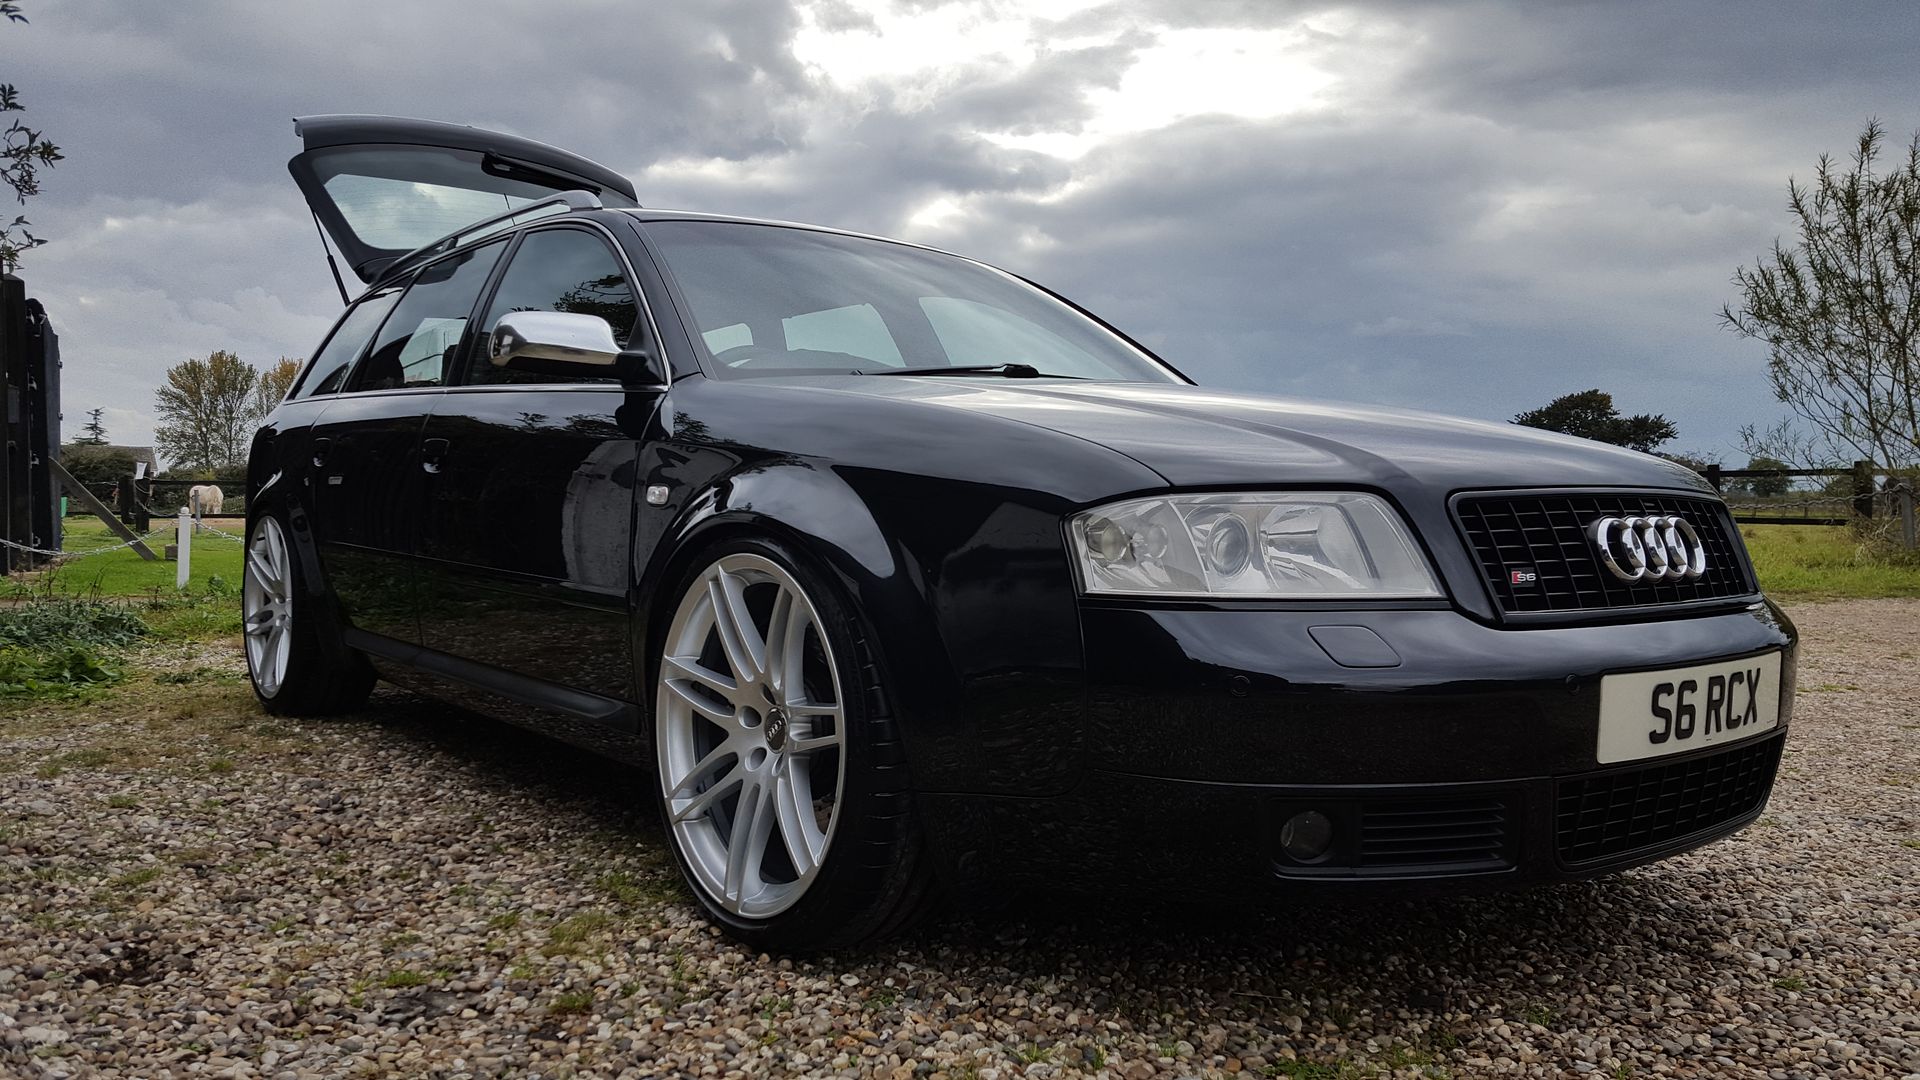
super-ron - 28/9/17 at 06:19 PM
so this had to take ANOTHER back seat while I did the resto on the S6, but now that's finished and looking bad ass

so it's back on the kit car
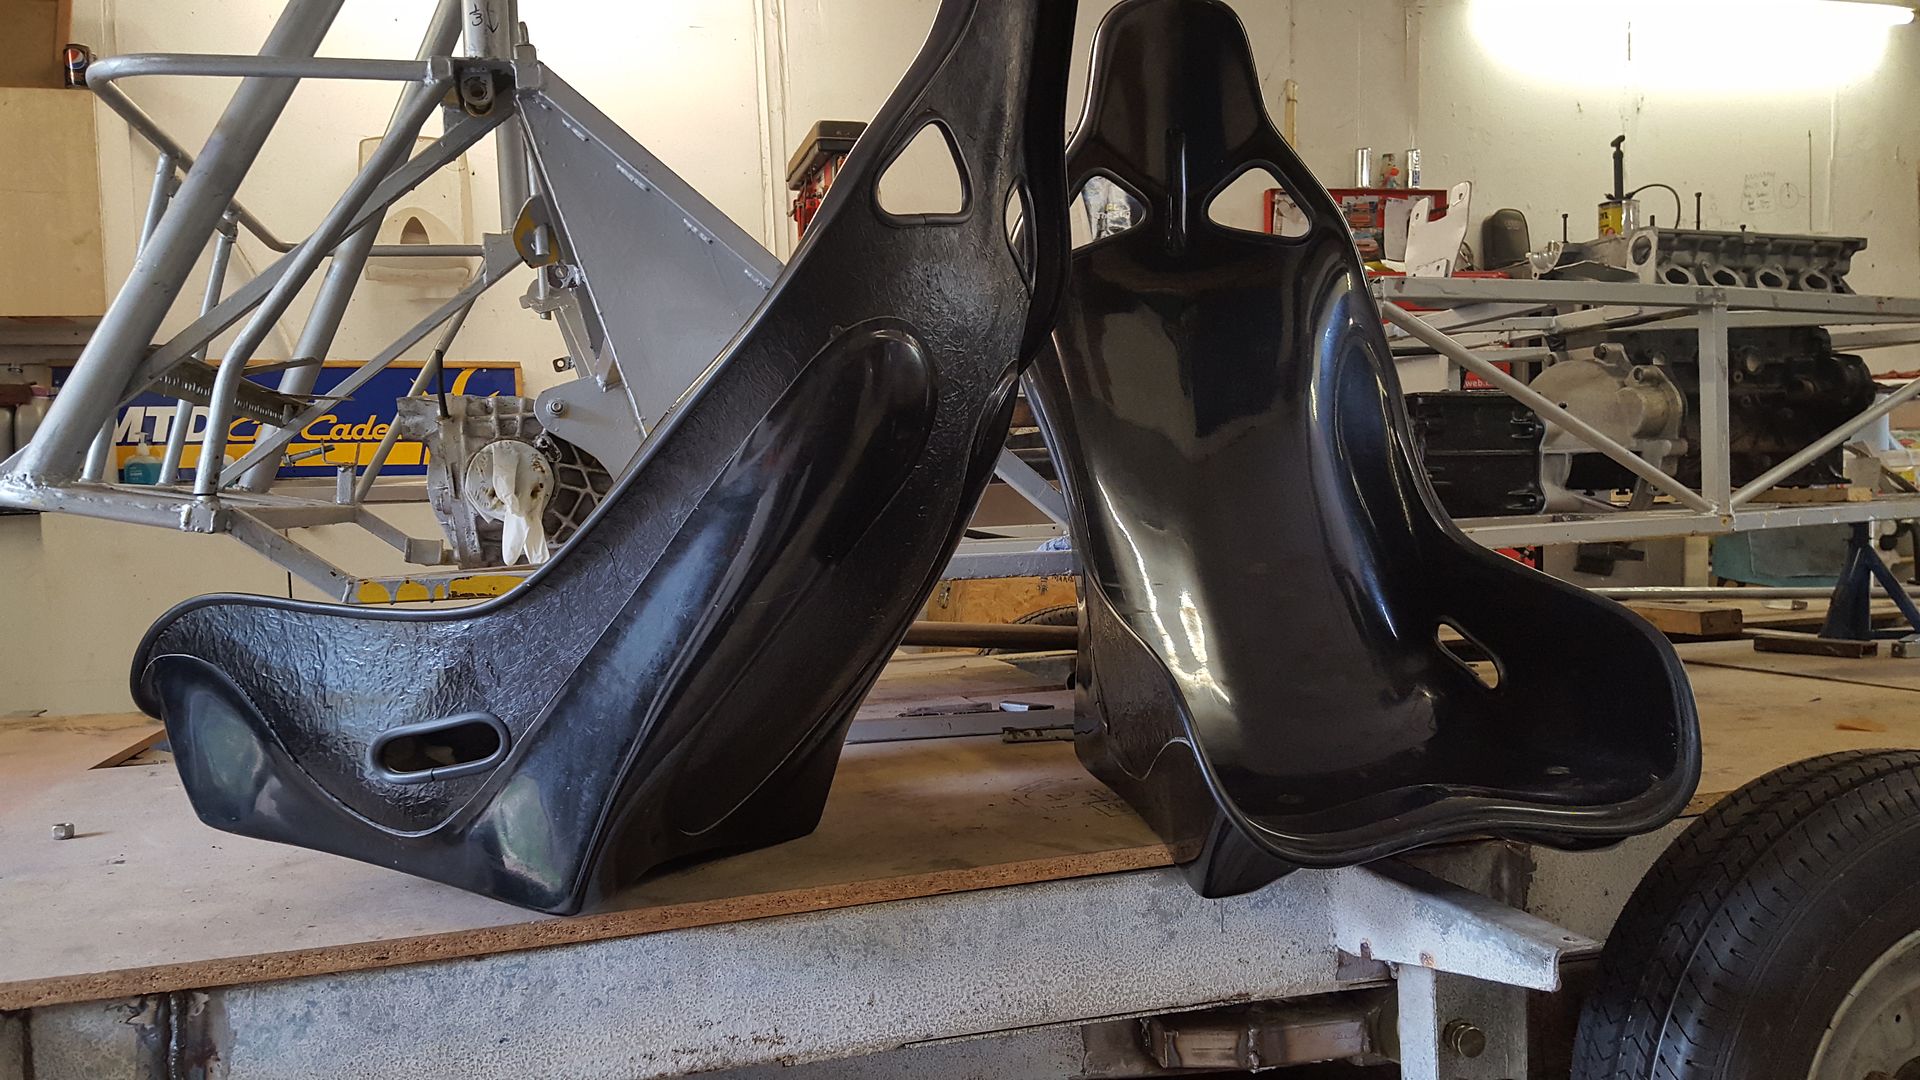
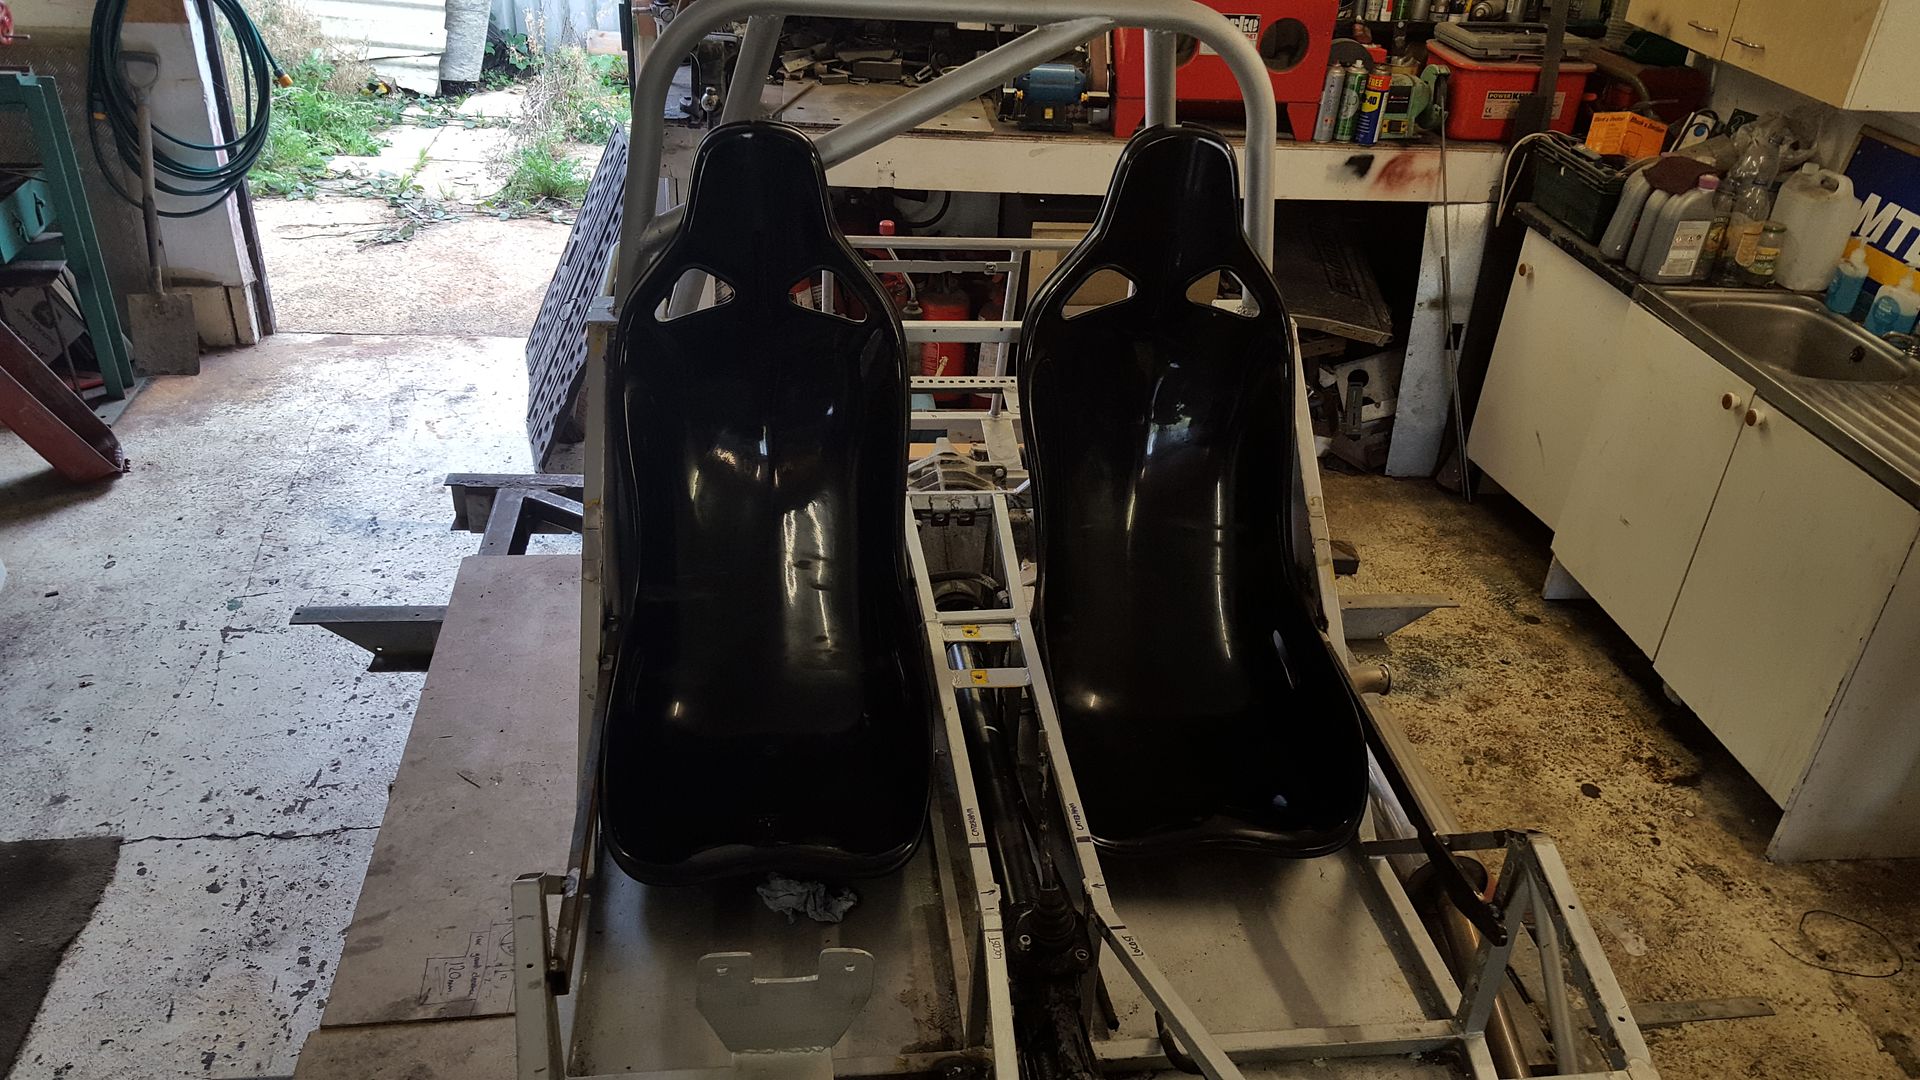
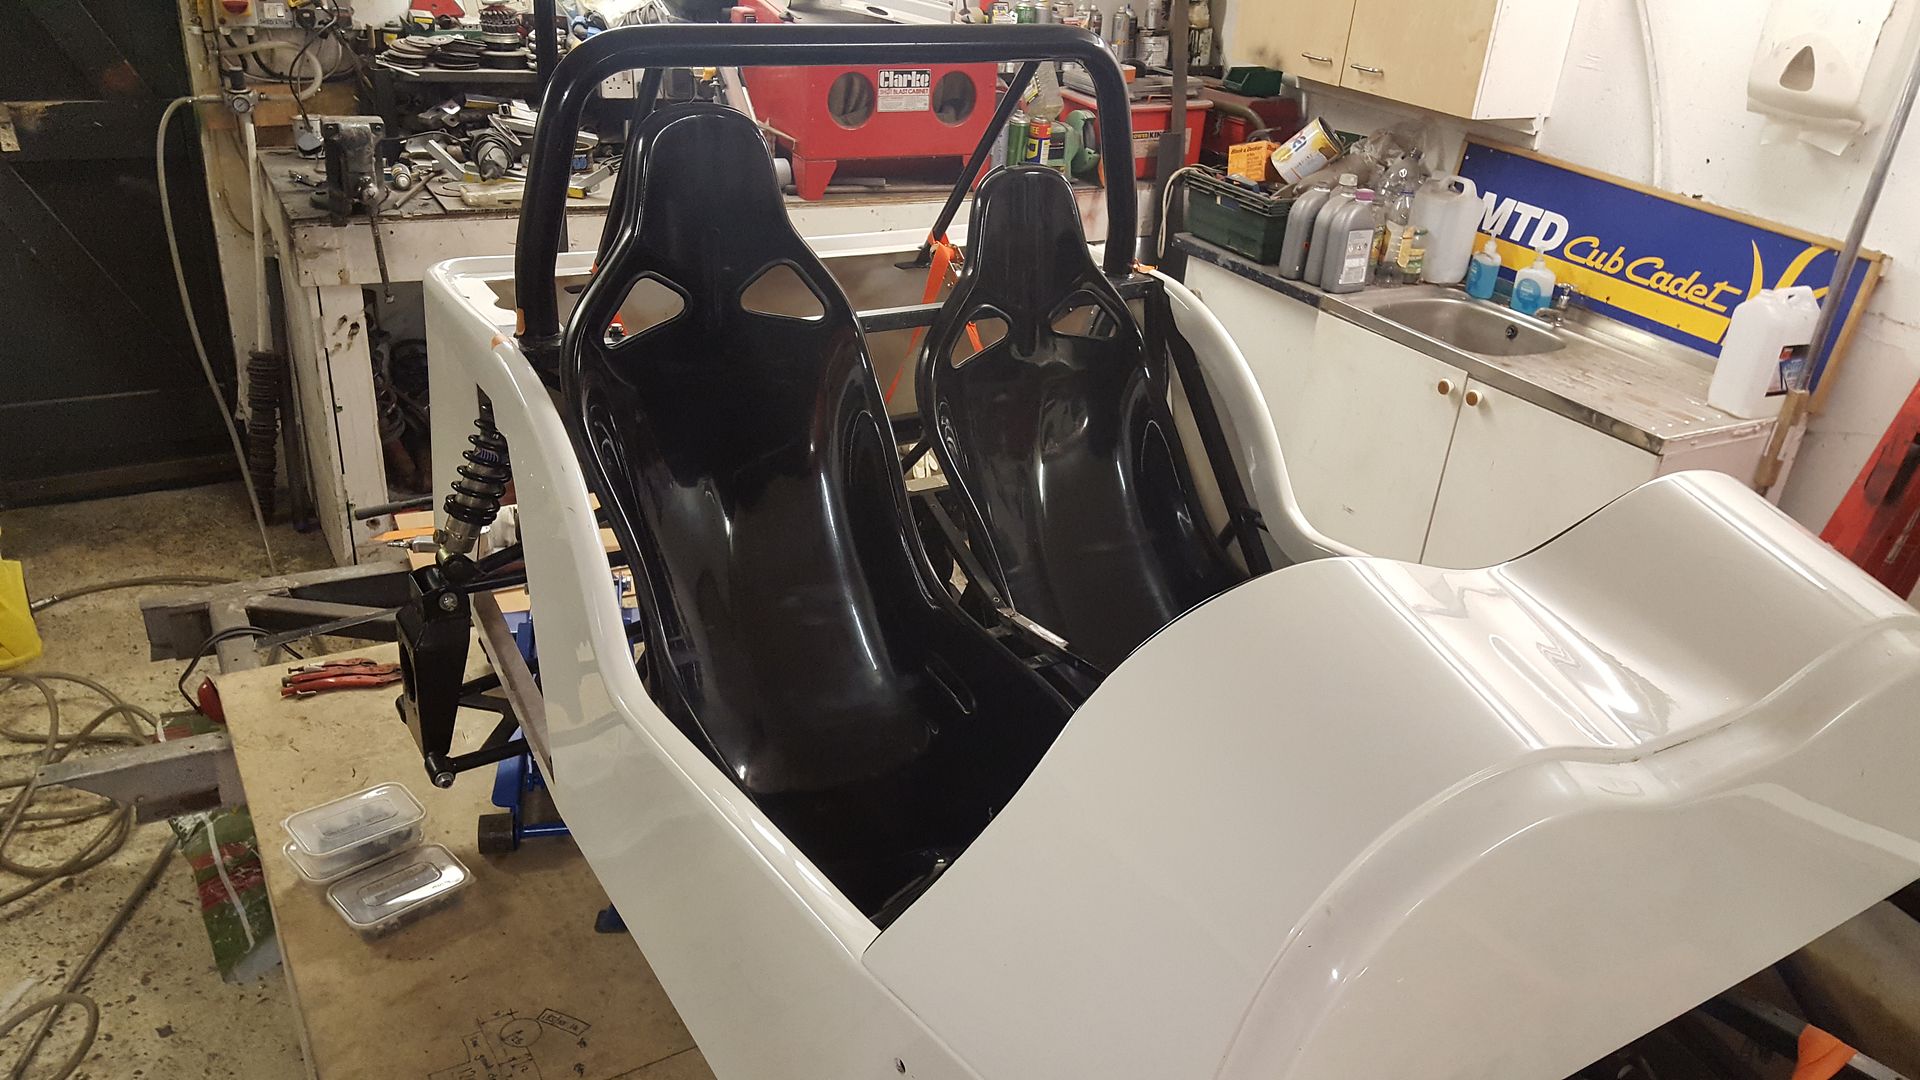
I bought some seats the other day
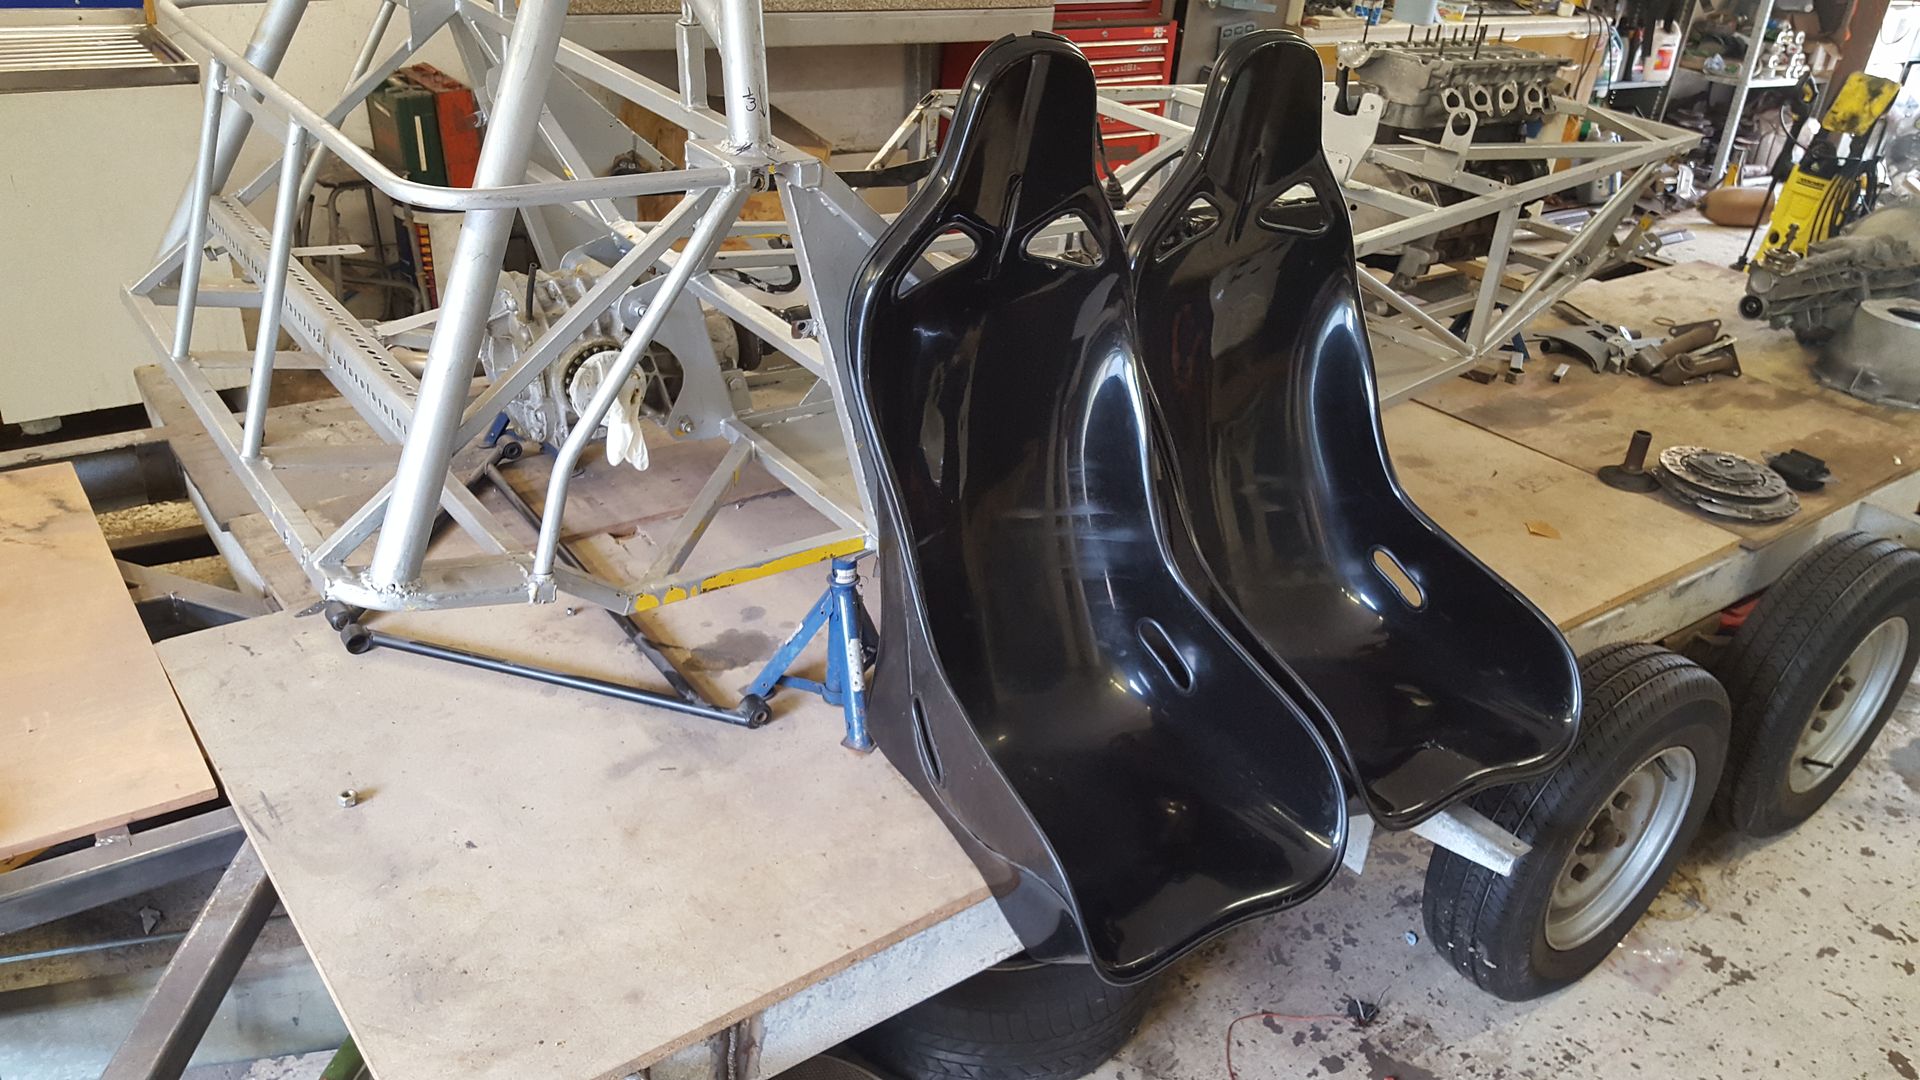
but now there has been a bit of a change of plan............
everything off!
a big pile of ford bits removed, and the T5 still sitting there
and a bare bare chassis
cryptic!
super-ron - 1/10/17 at 07:05 PM
ok, so the situation is I got into conversation with a guy called Ron on the locost builders forum, cool name, cool guy. he had lost the love so
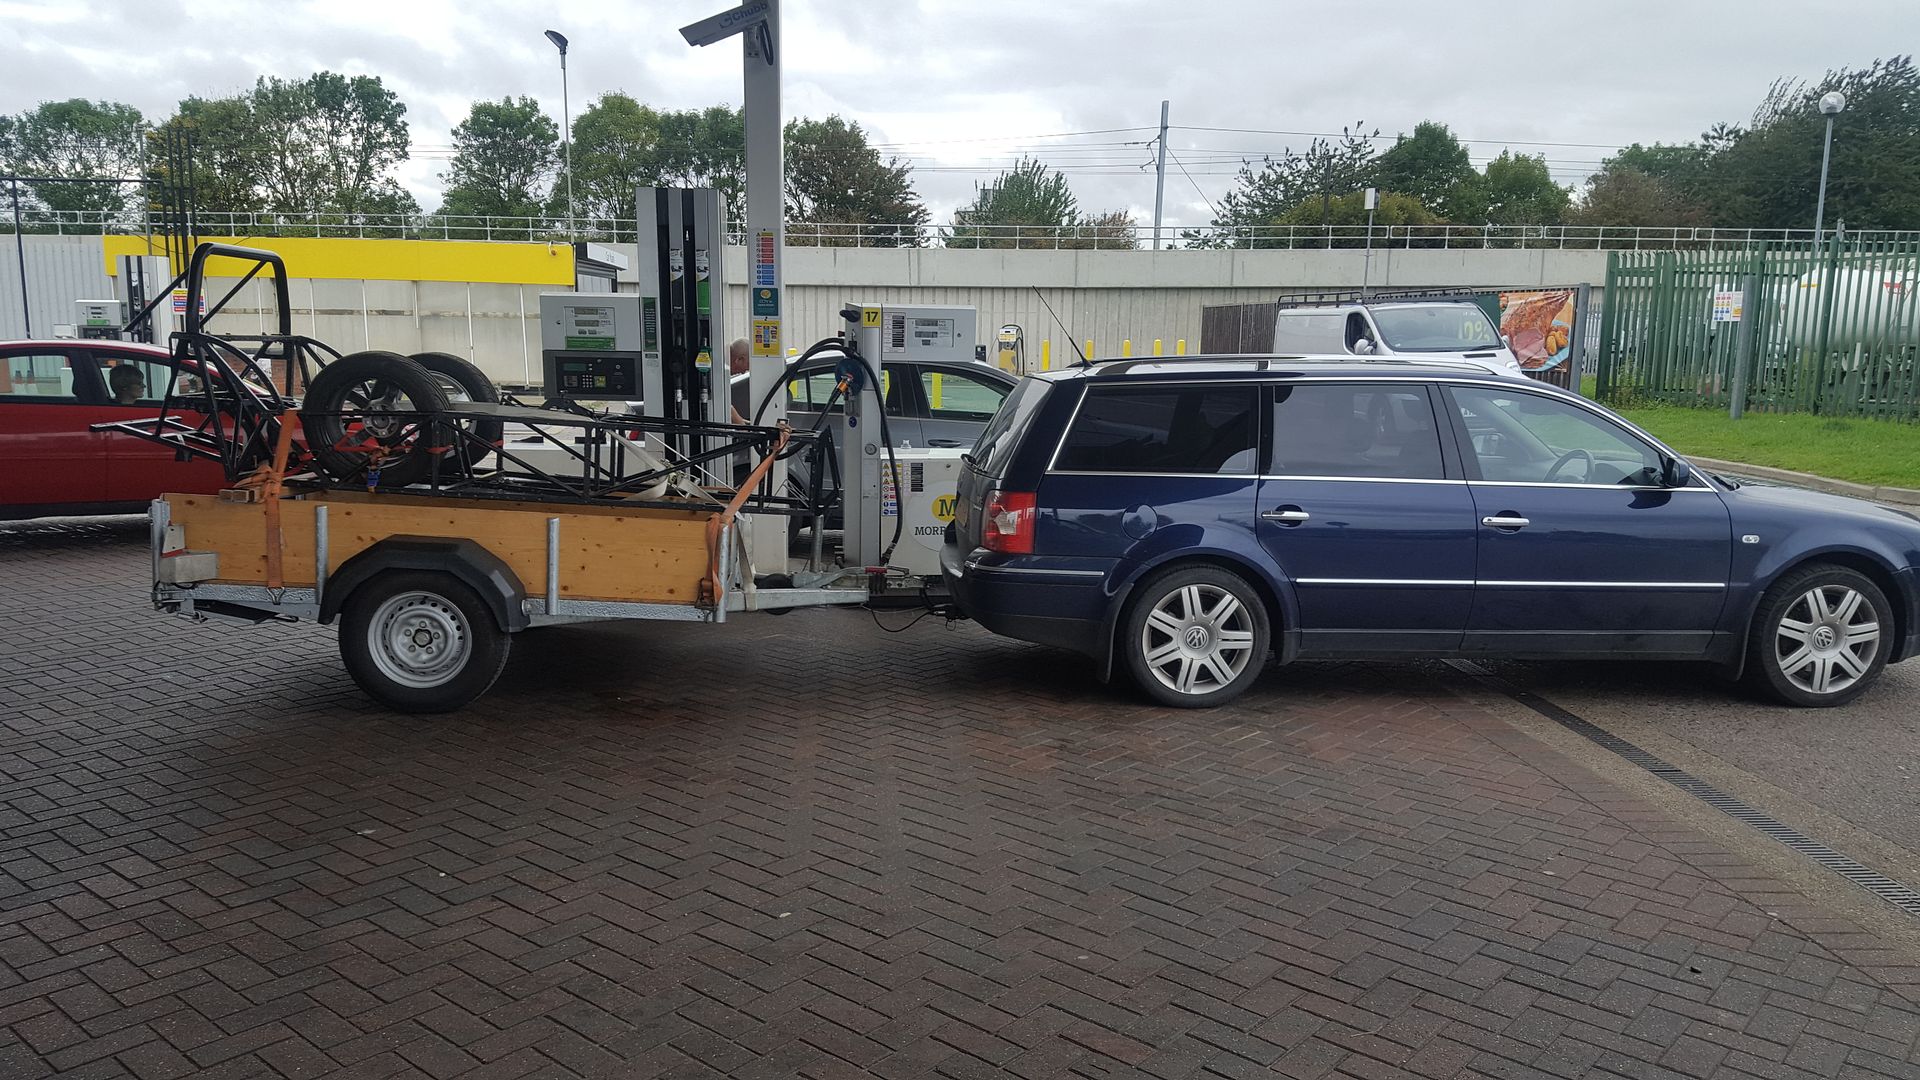
cutting his losses with his project and breaking it. a deal was made and me and my dad shot up to Leicester in the stealth Passat (2.8 V6 4motion
tiptronic highline) with the trailer to pick up my purchase.
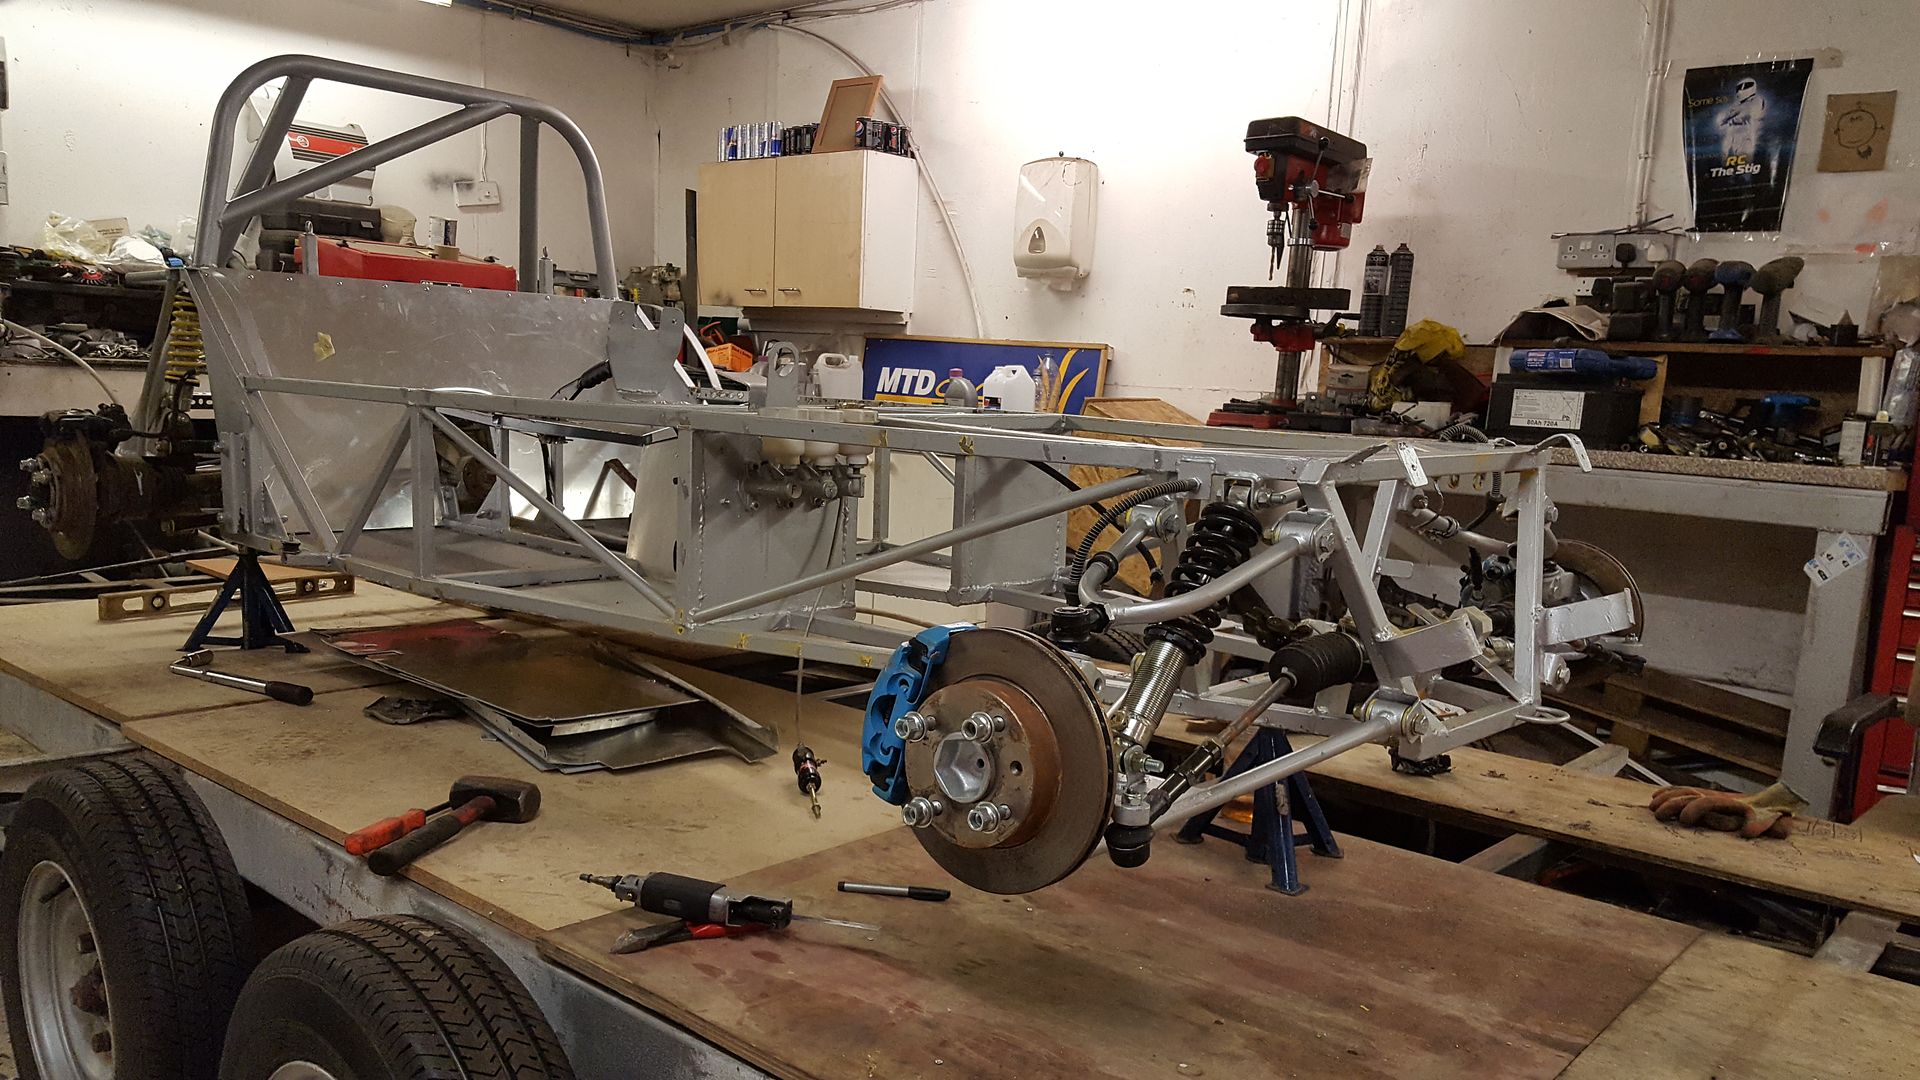
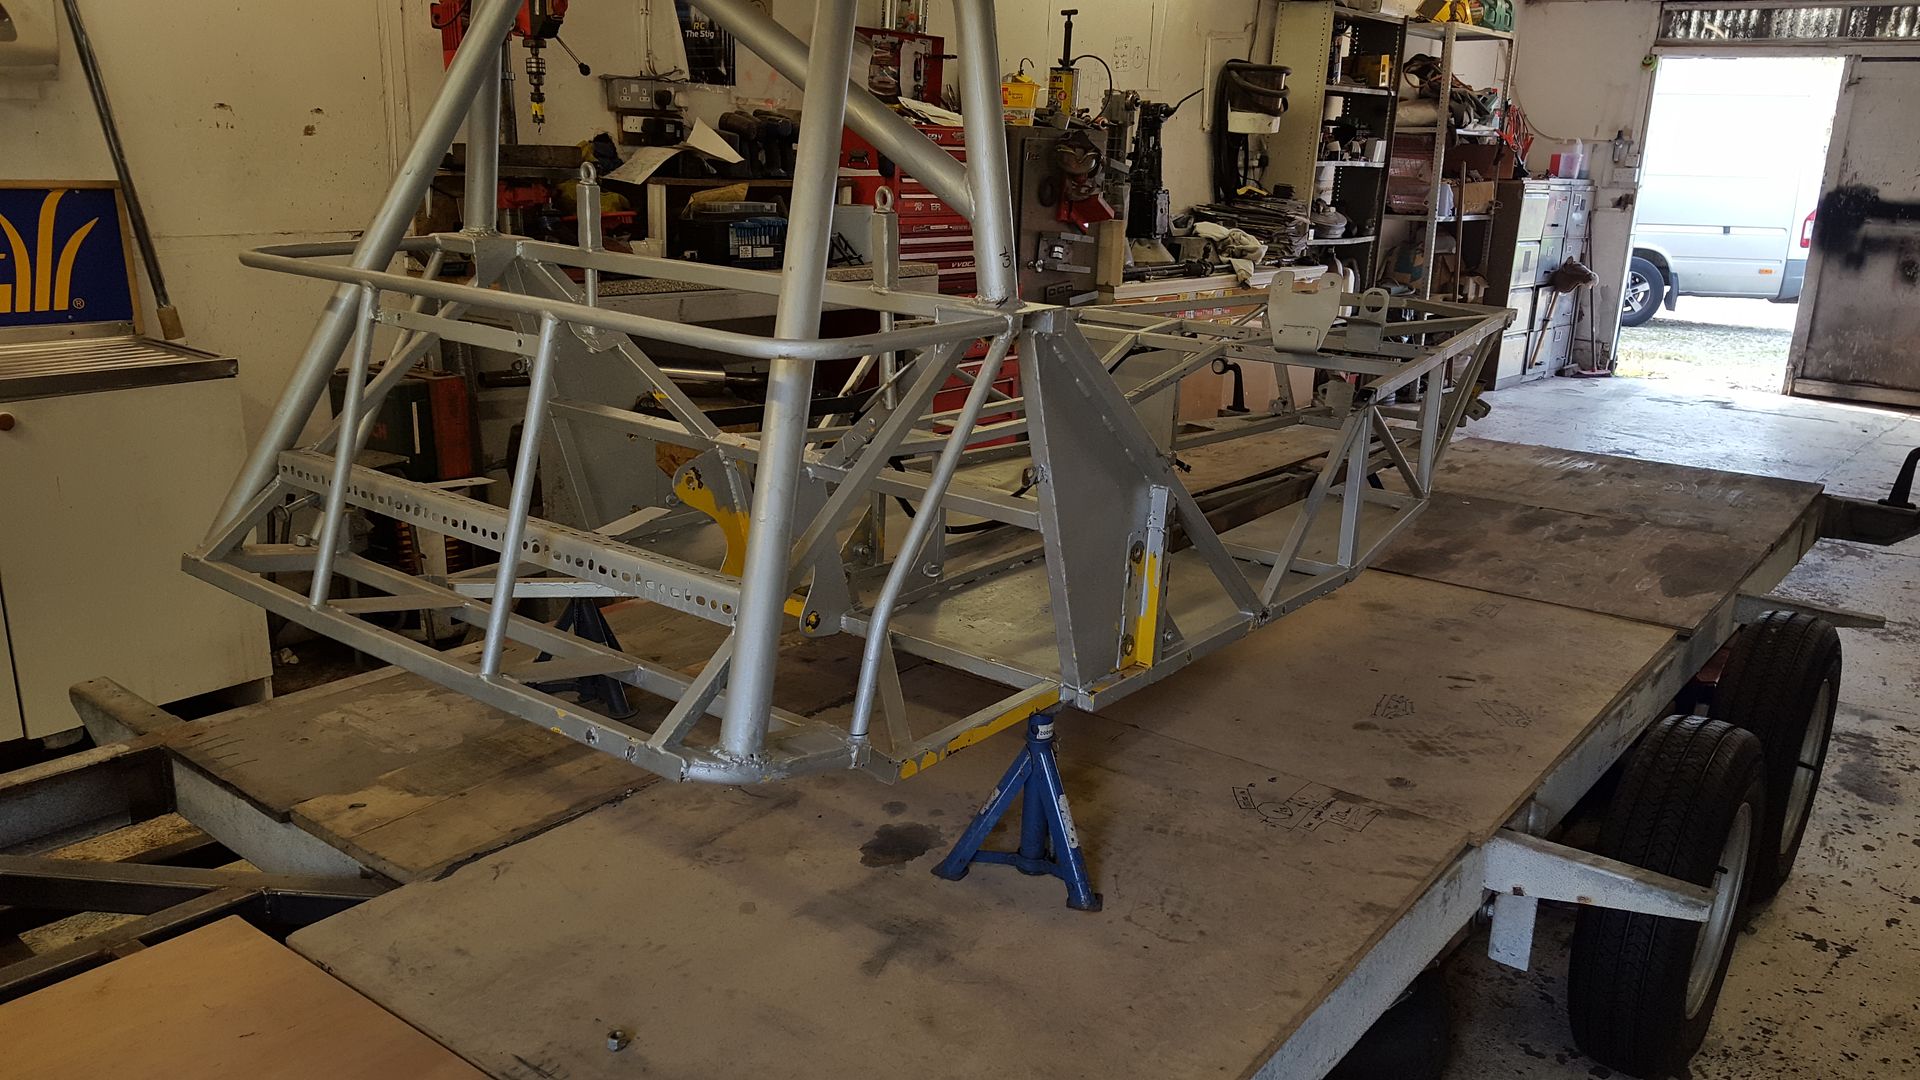
it's a GBS ZERO chassis, i did a bit of googling and they are very well respected as being fantastic all round, handling and build quality. we
took the trailer and I was very happy when we picked it up
round trip of about 6 hours was well worth it. the chassis is very very well made. everything fits nice, the welding is perfect! not even I would have
got it that nice. came with all the suspension arms, cycle wing arms, engine mounts, pedal box , all powdercoated, and fuel tank, and all the bits and
bolts..... for Ł400.

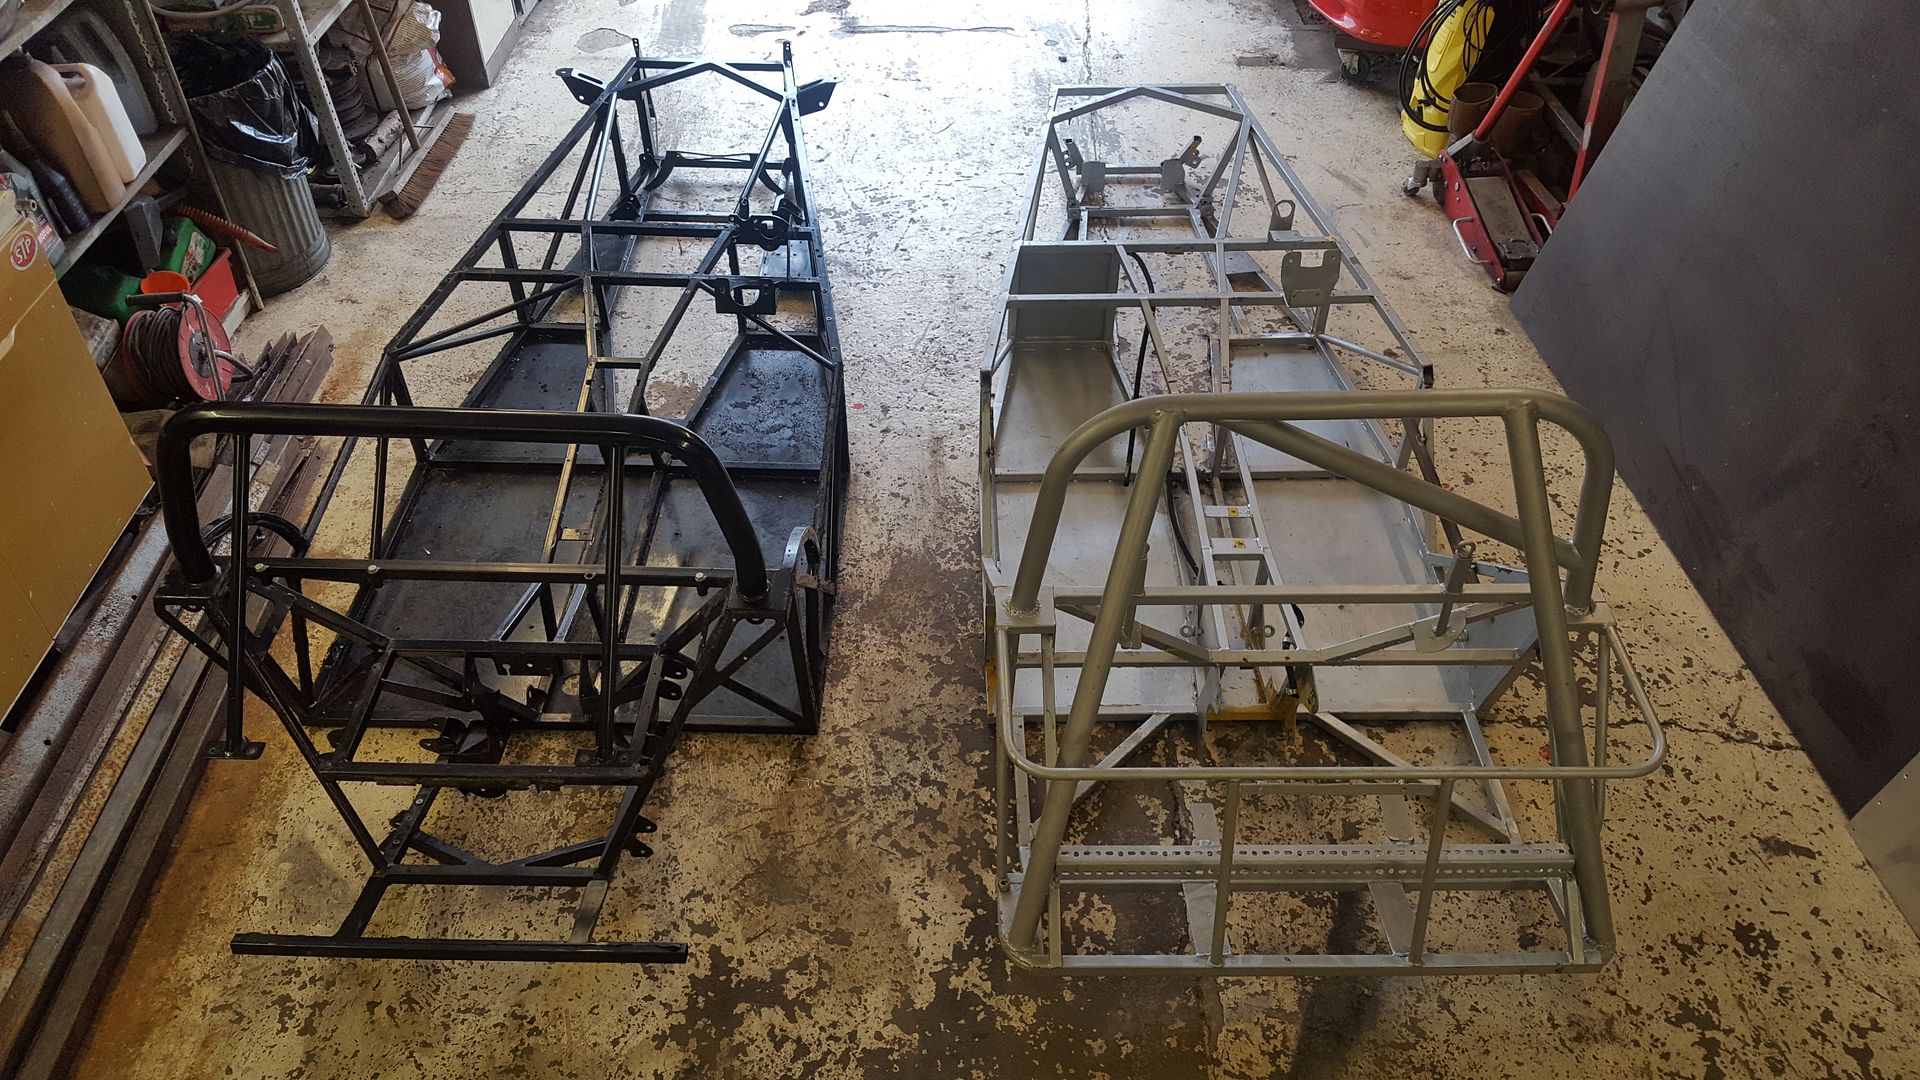
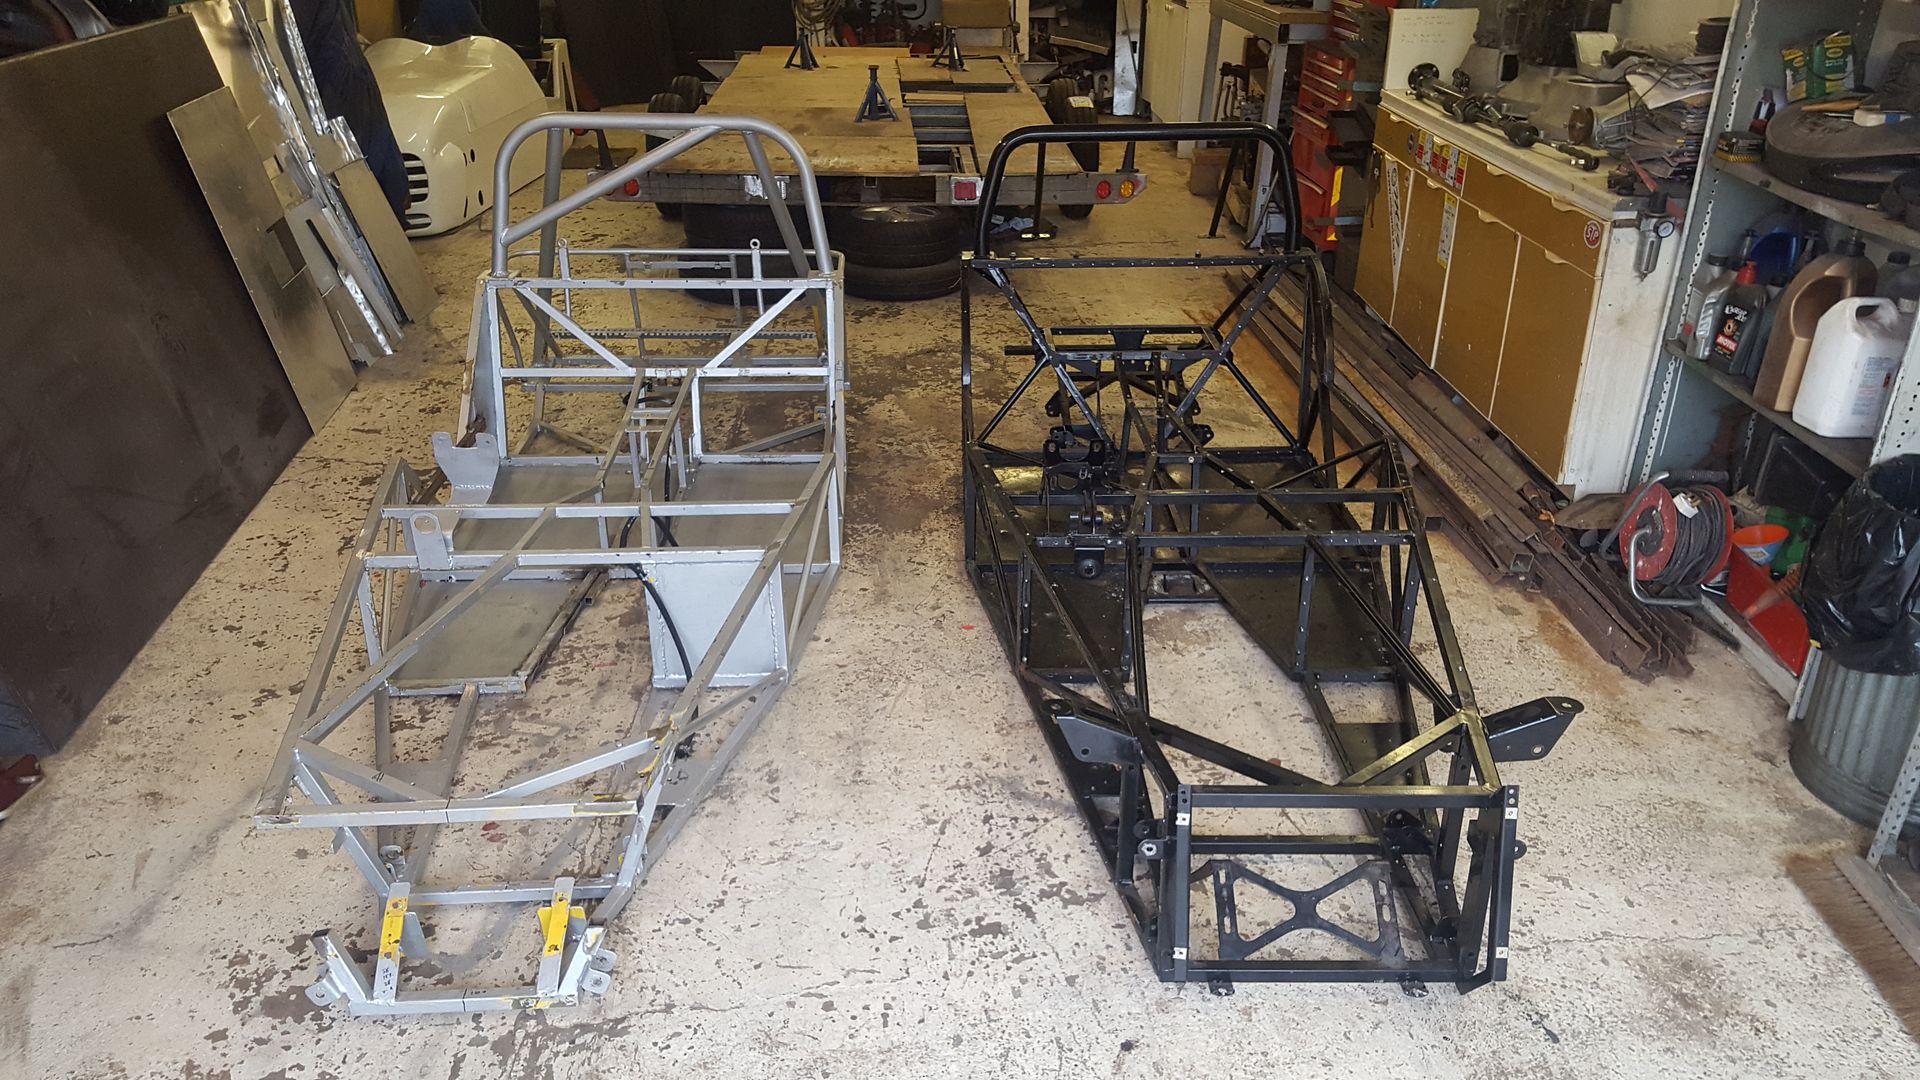

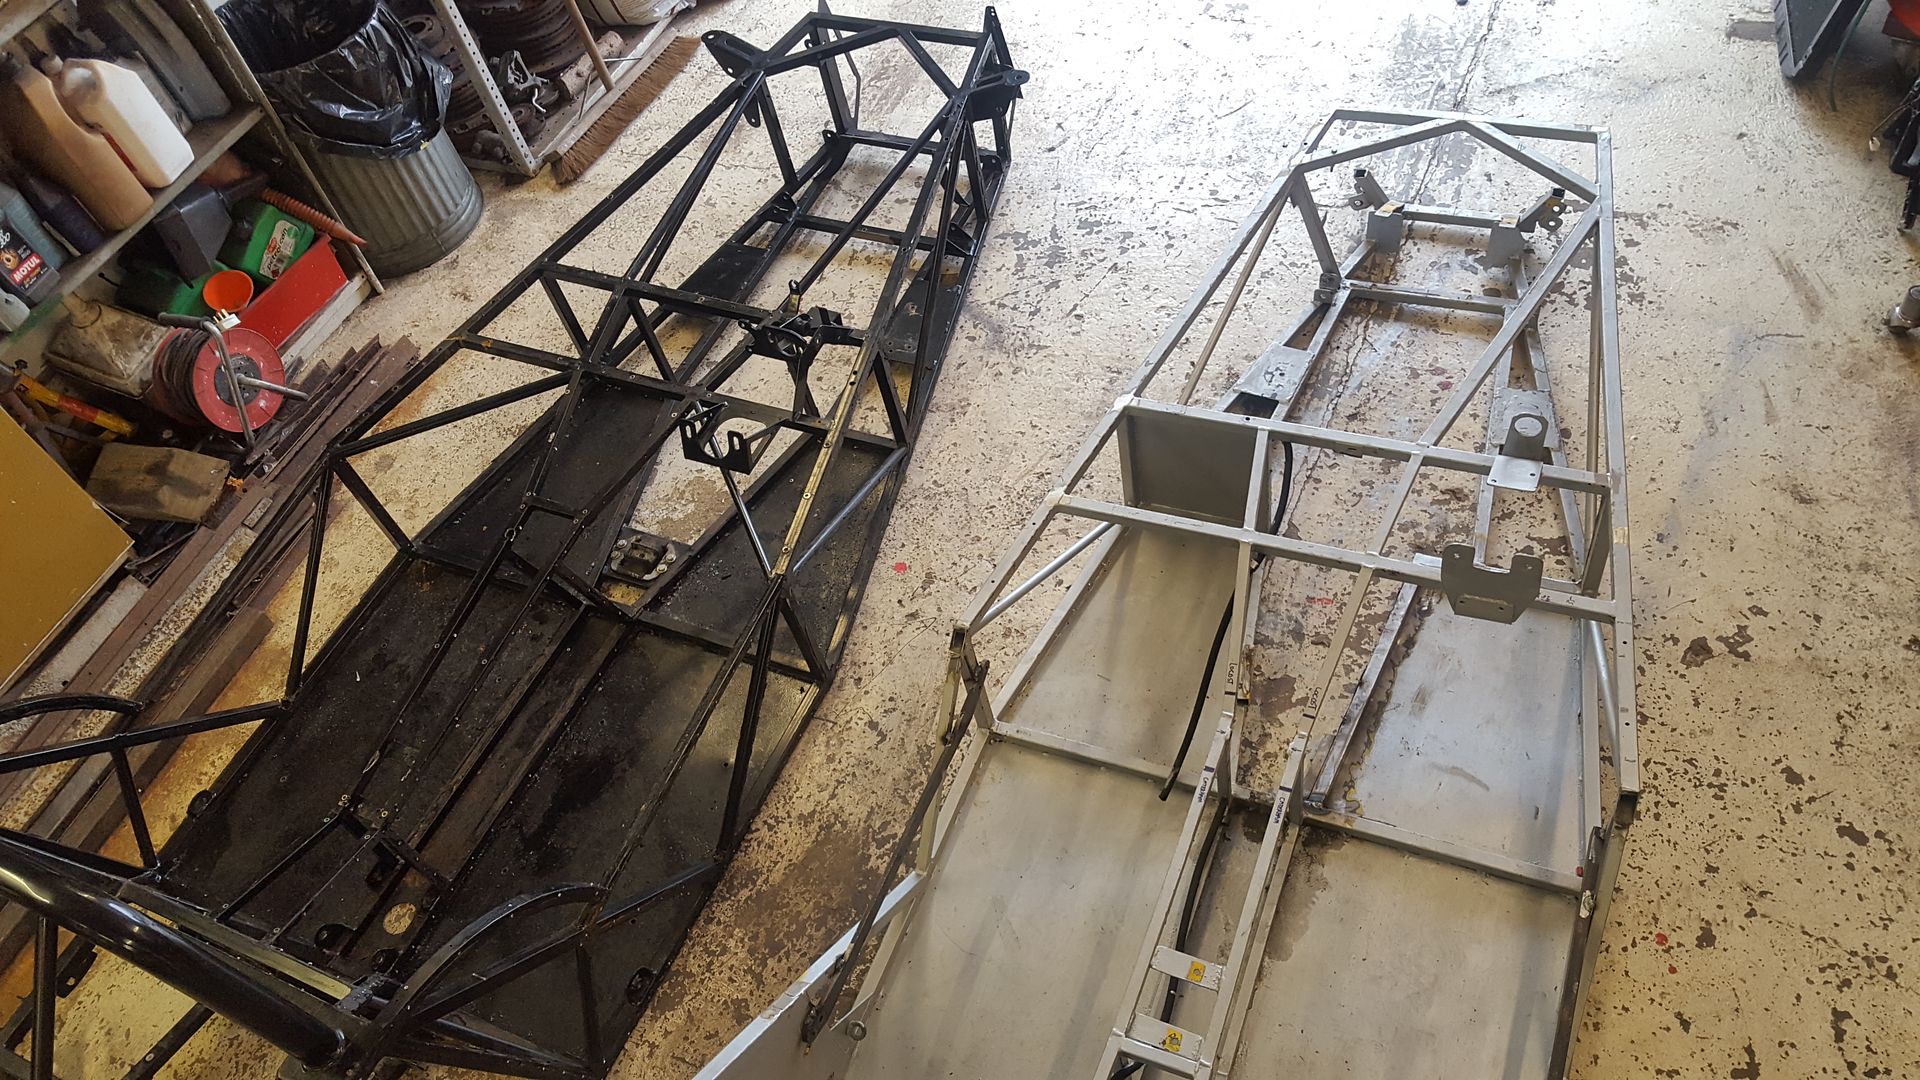
so side by side they don't look much different, they're pretty much exactly the same size, but it's all on the detail, all the
suspension mounts are better positioned and better designed, everything is stronger where it needs to be, all the pieces are nicely laser cut and
true.
got it up on the 'tressle'
and then unloaded all the other bits I bought whilst up there :lol:
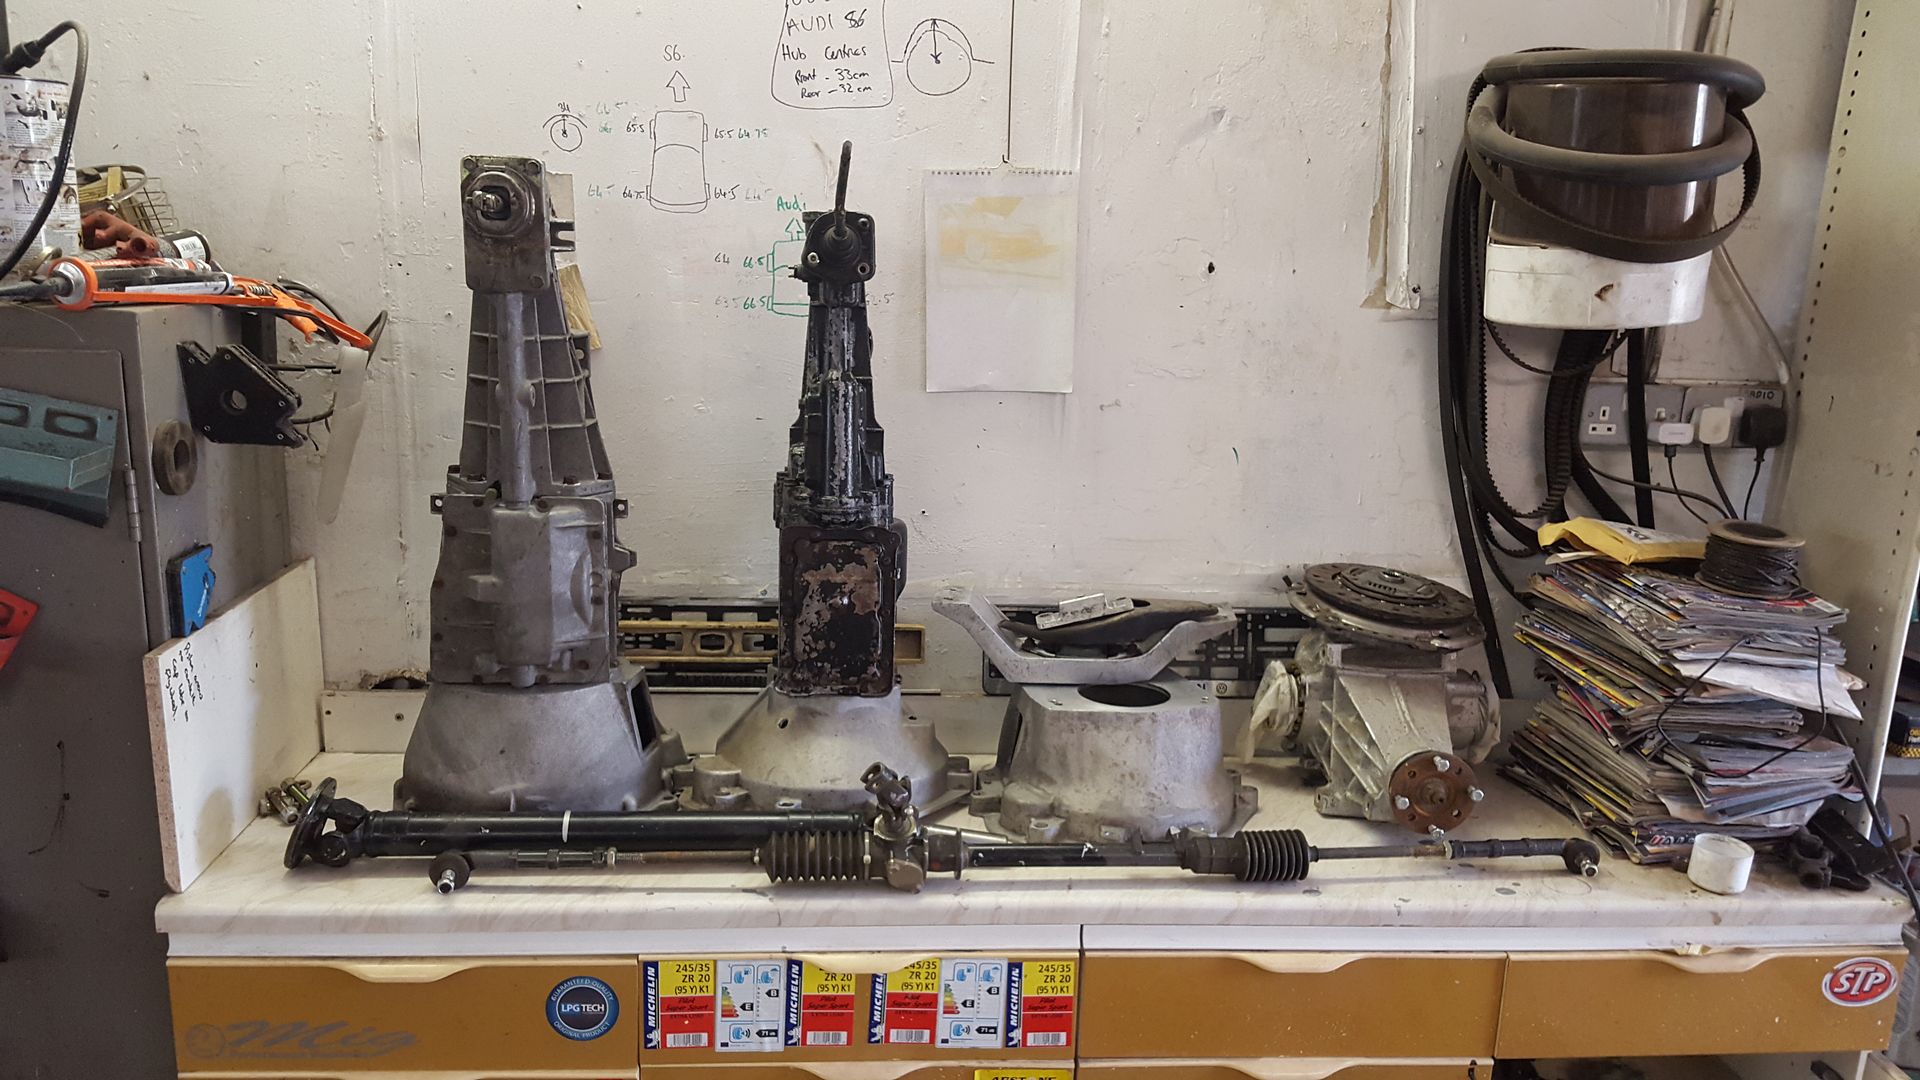
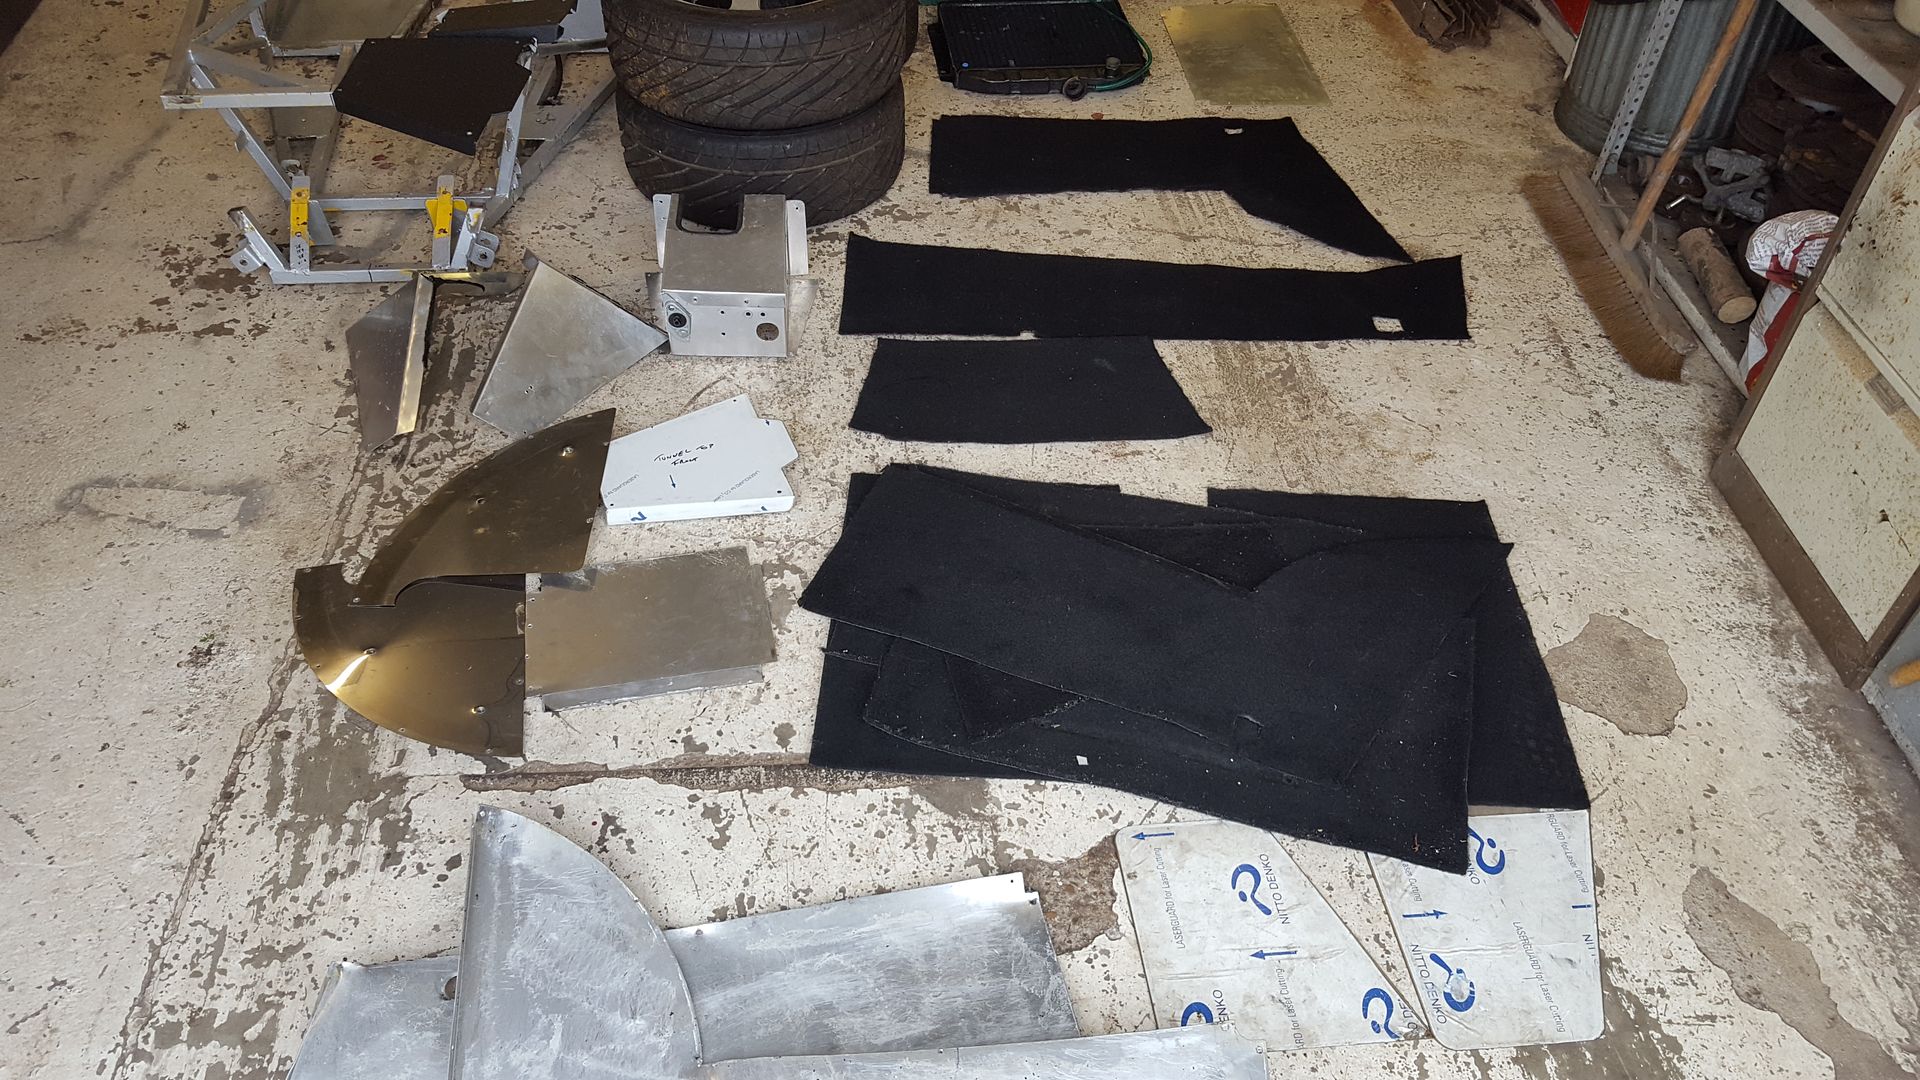
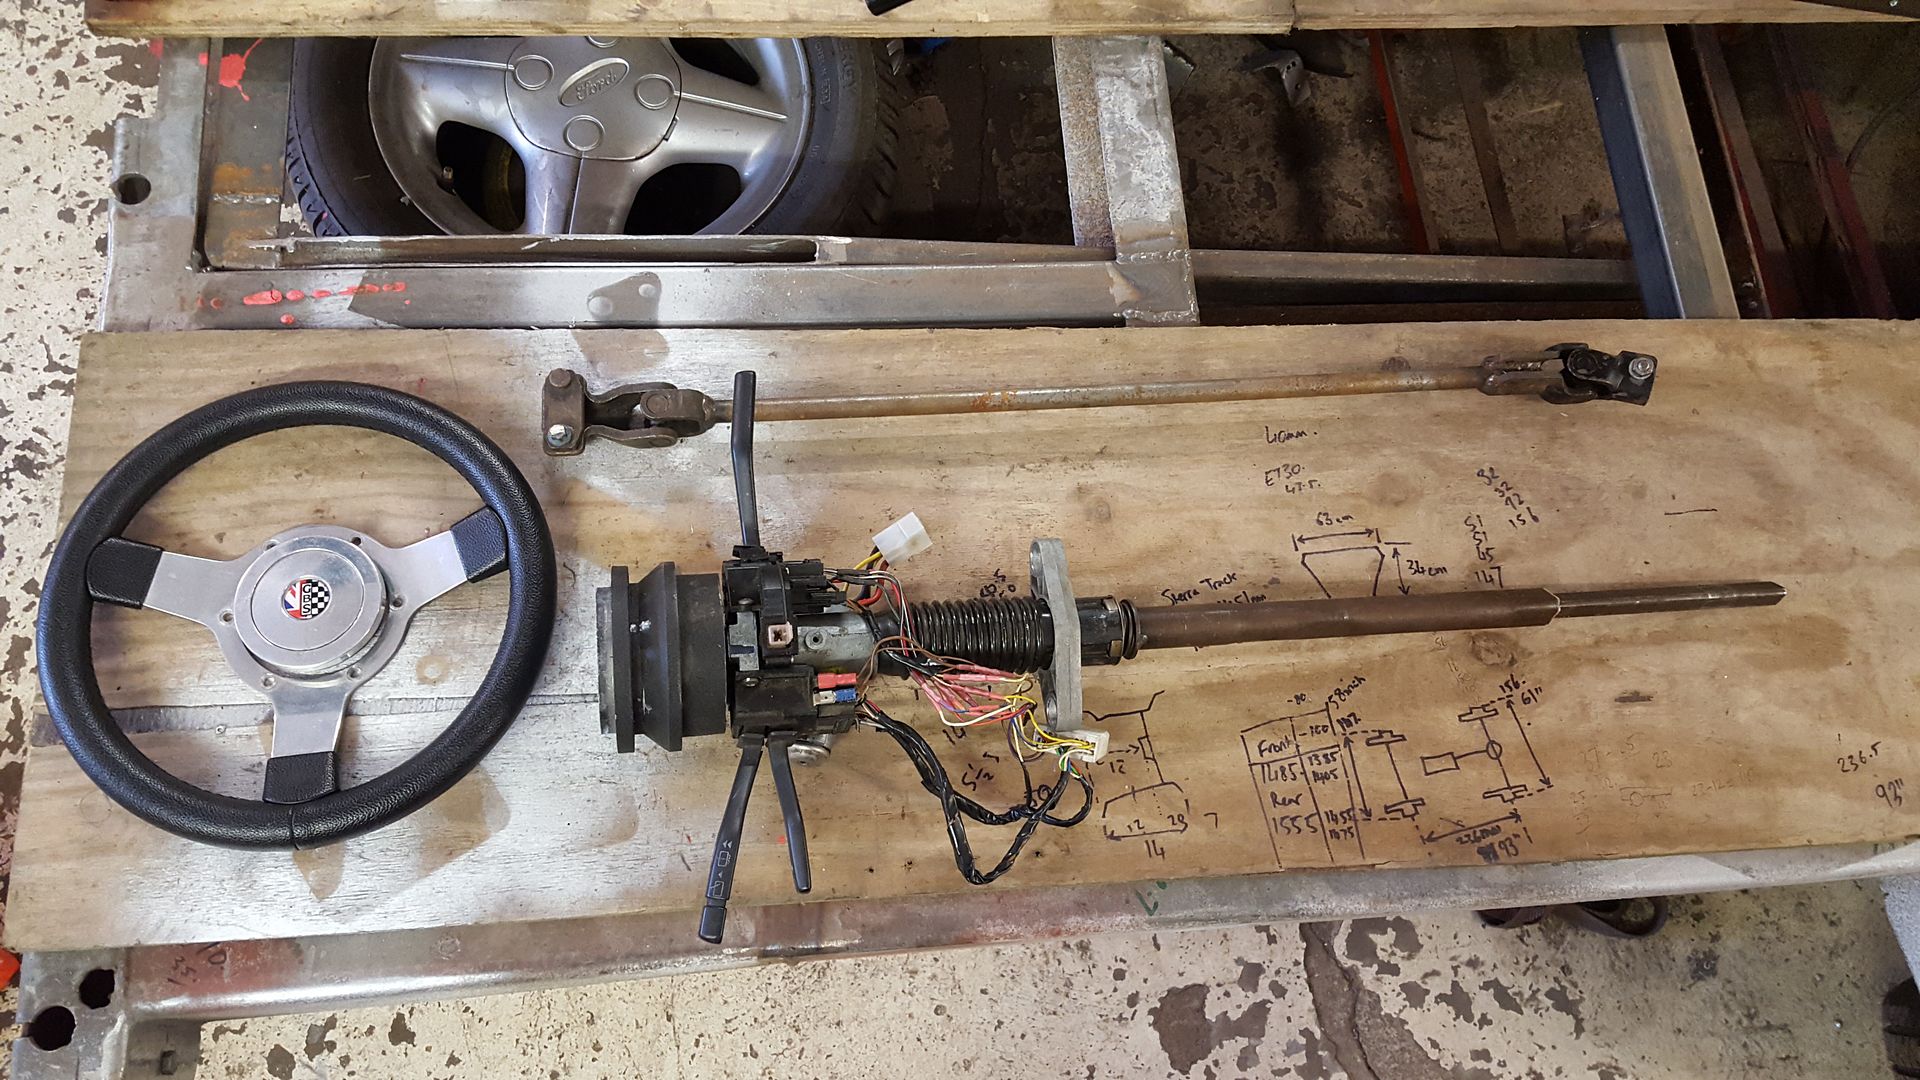
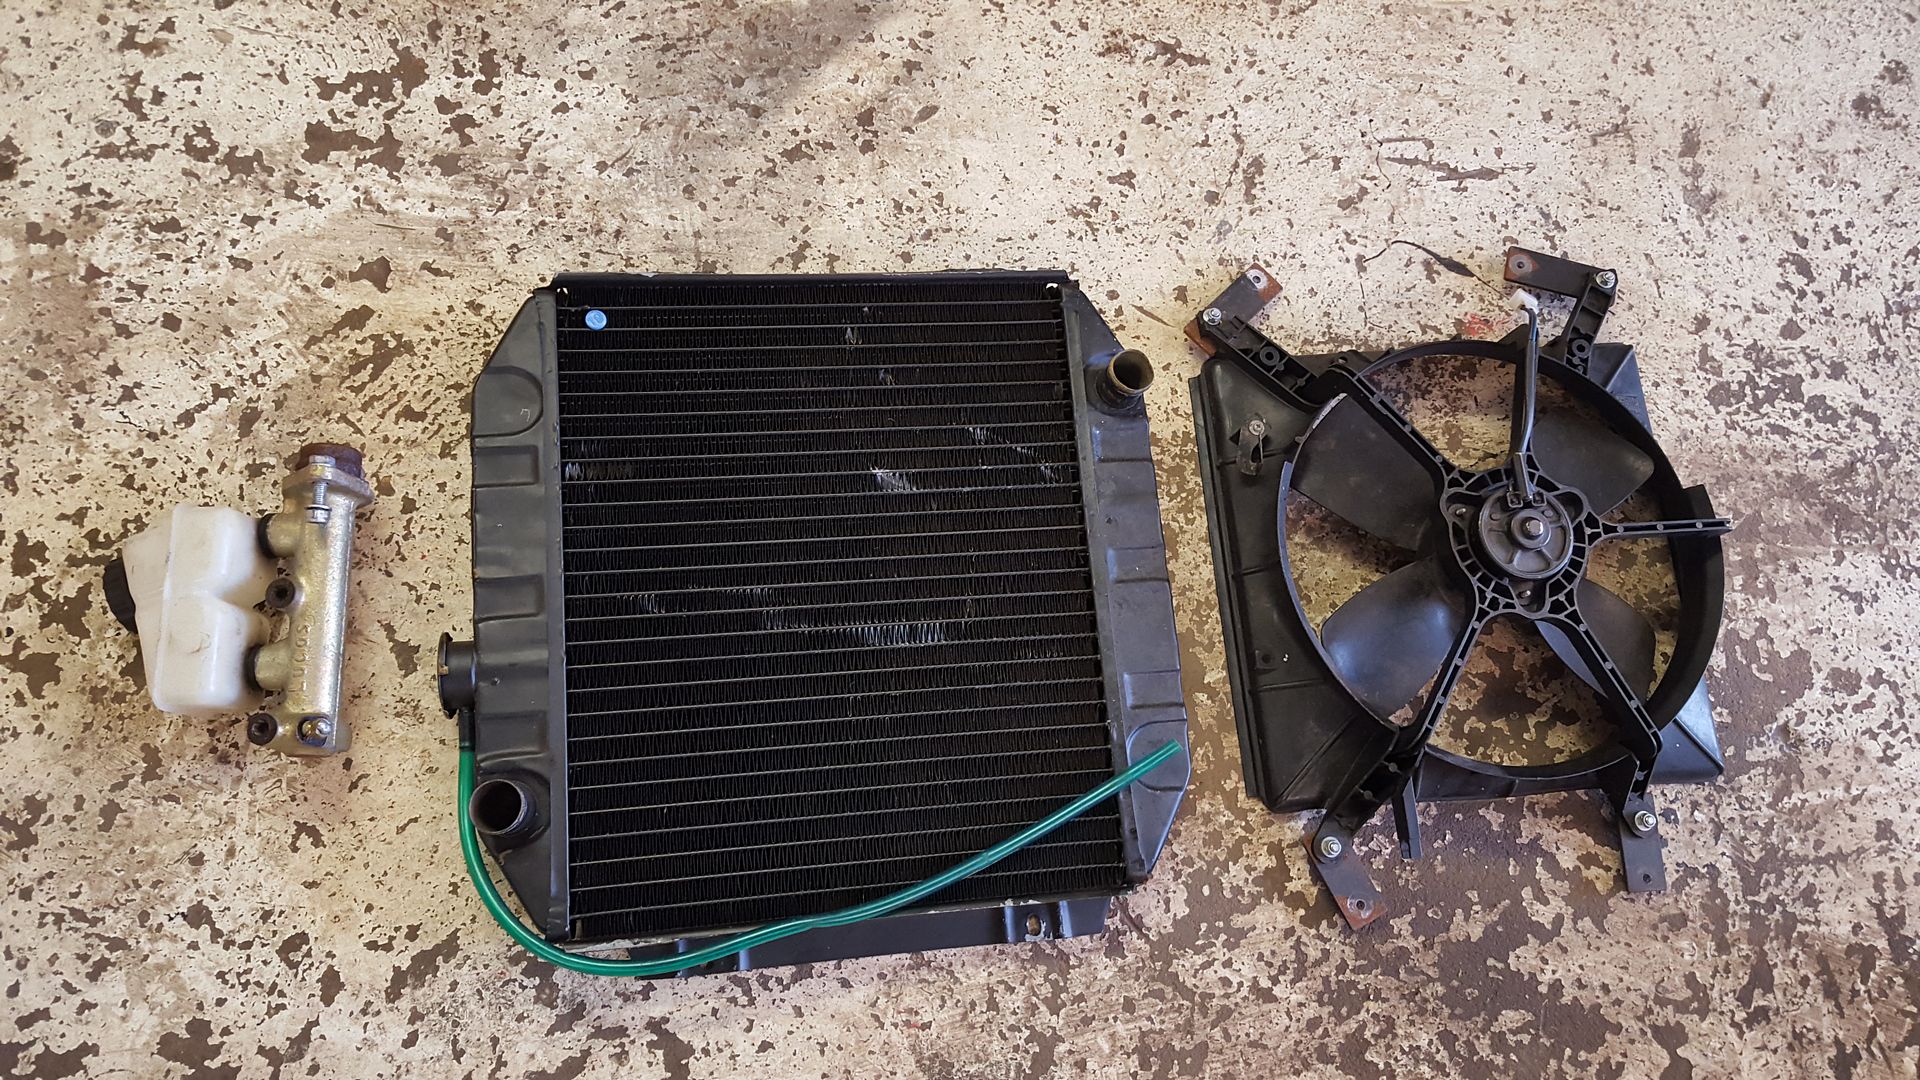
full sierra steering coloum with keys and switches, extended steering bar, steering wheel, brake master cylinder, radiator, fan, full light set, fuel
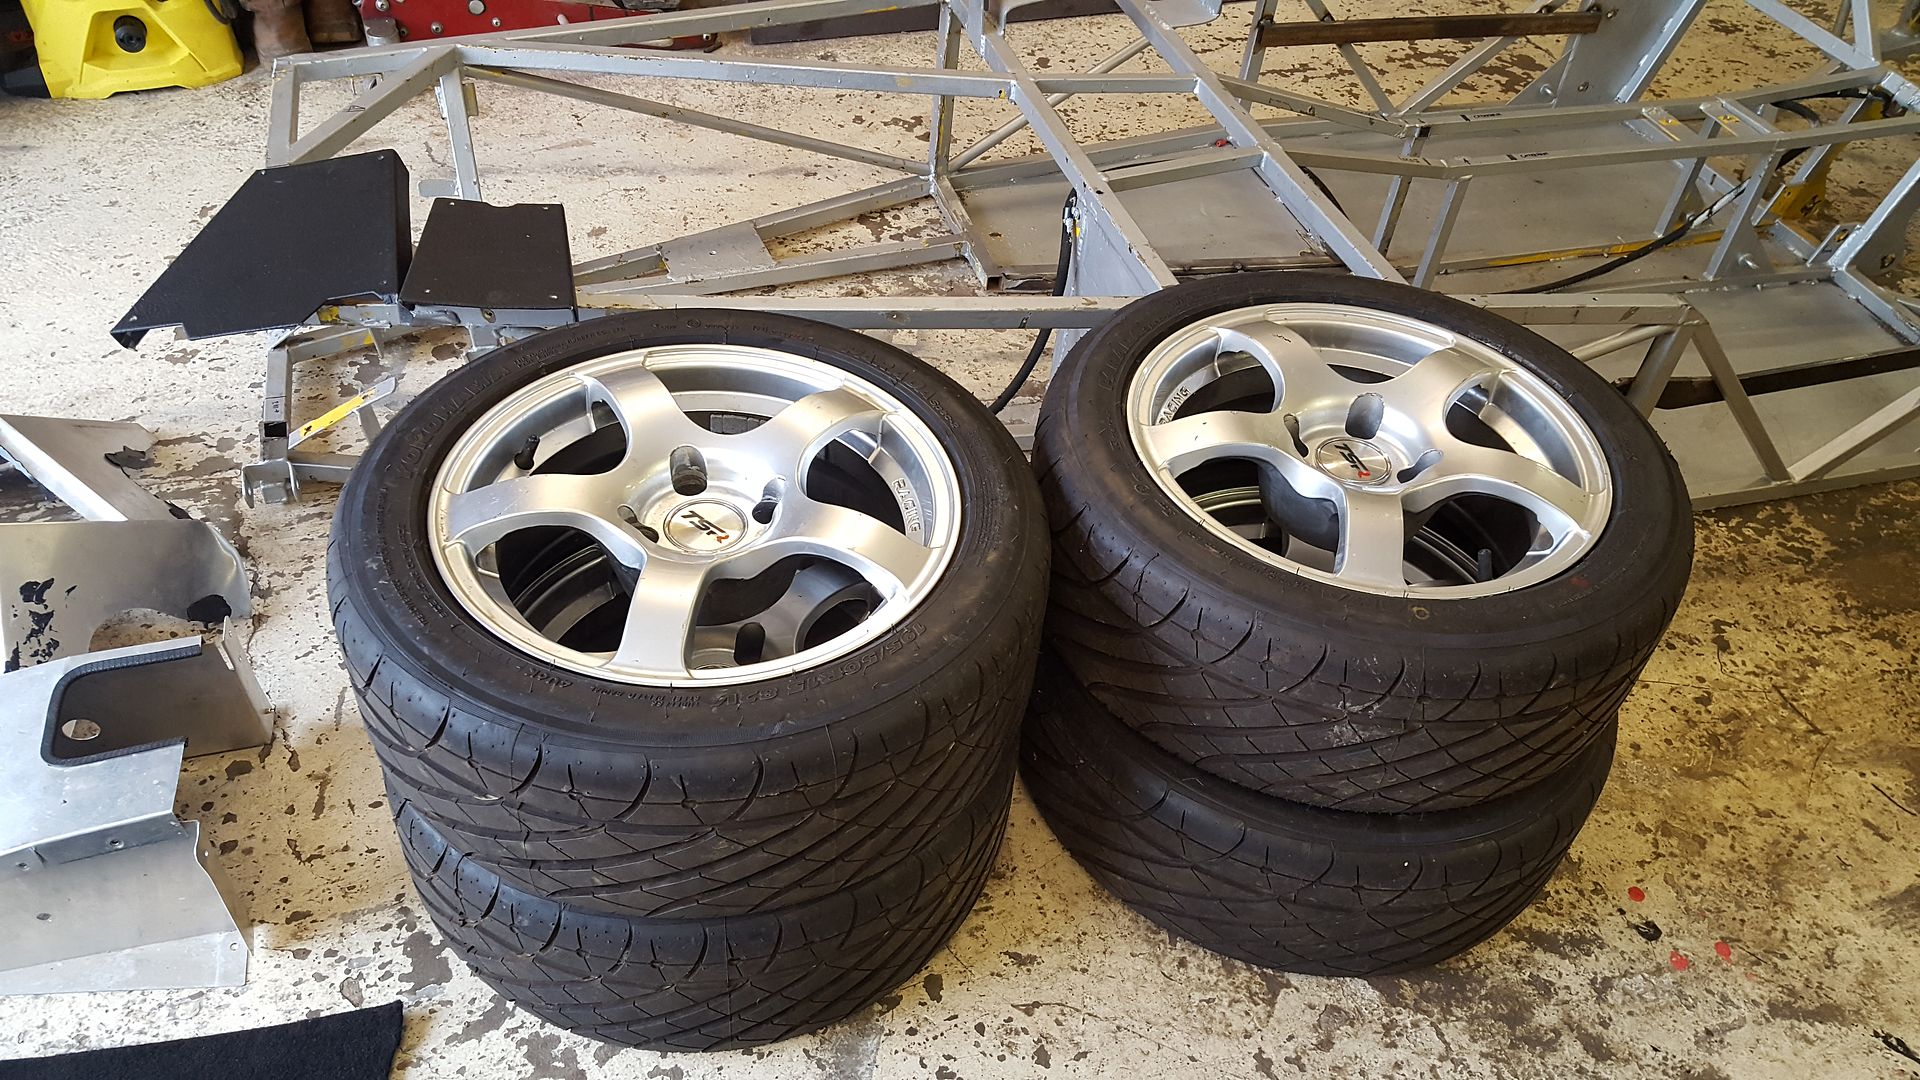
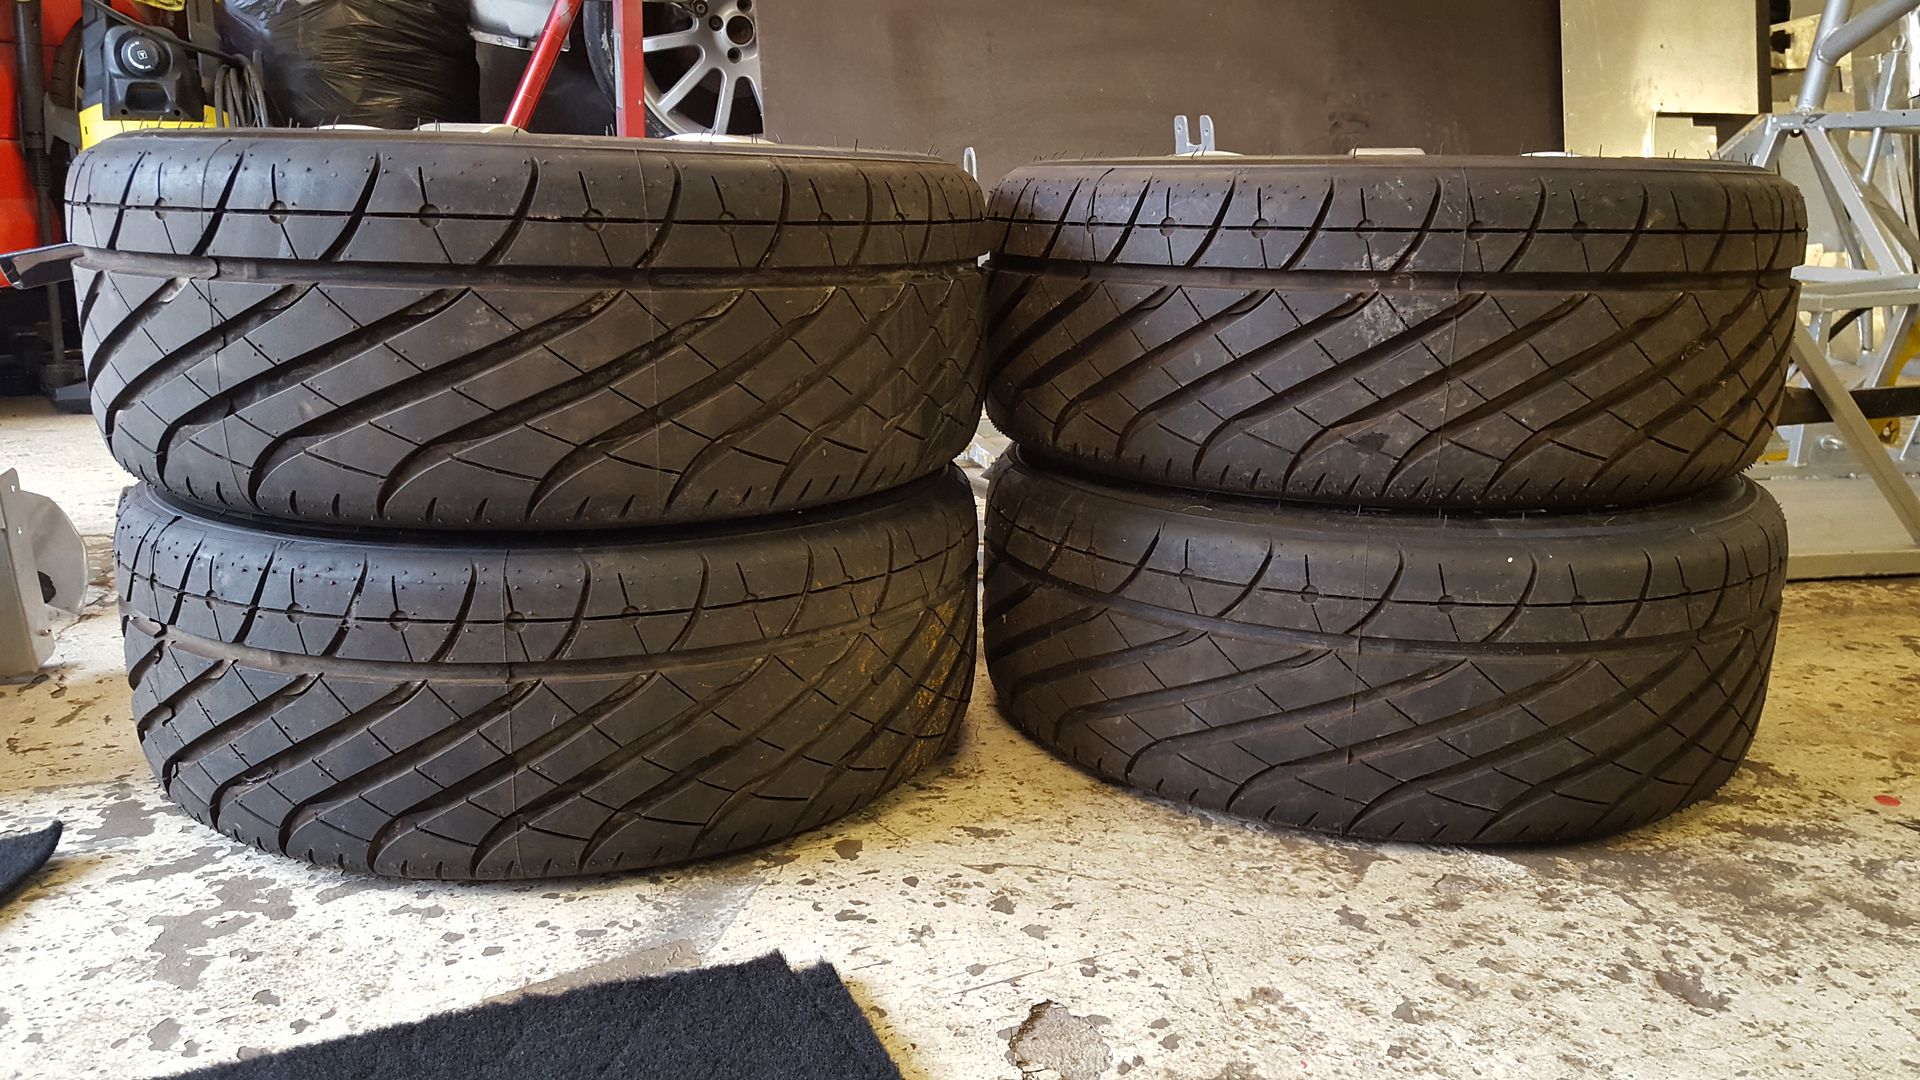
tank, fuel filler cap, loads of interior panels, full carpet set, set of wheels and new yoko prada tyres..... for another Ł450.

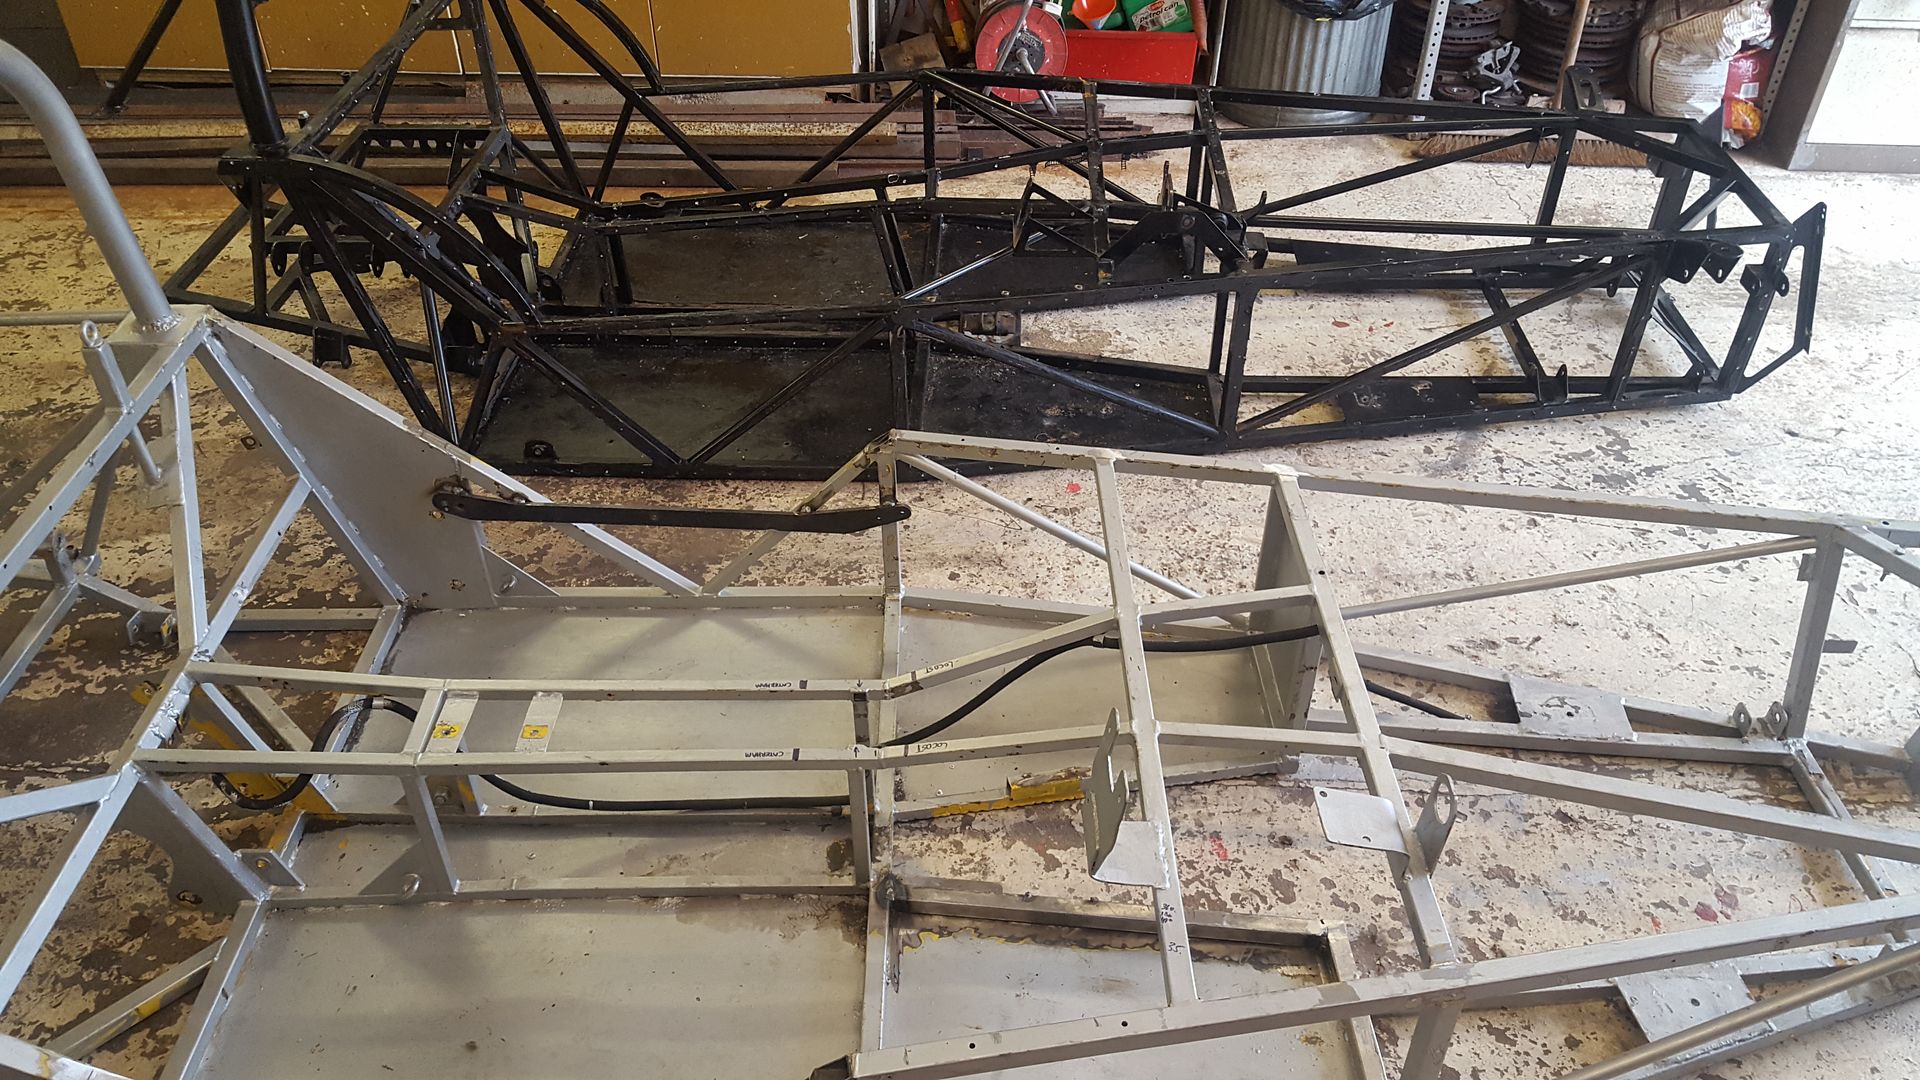
all the welding and plates are so nicely done


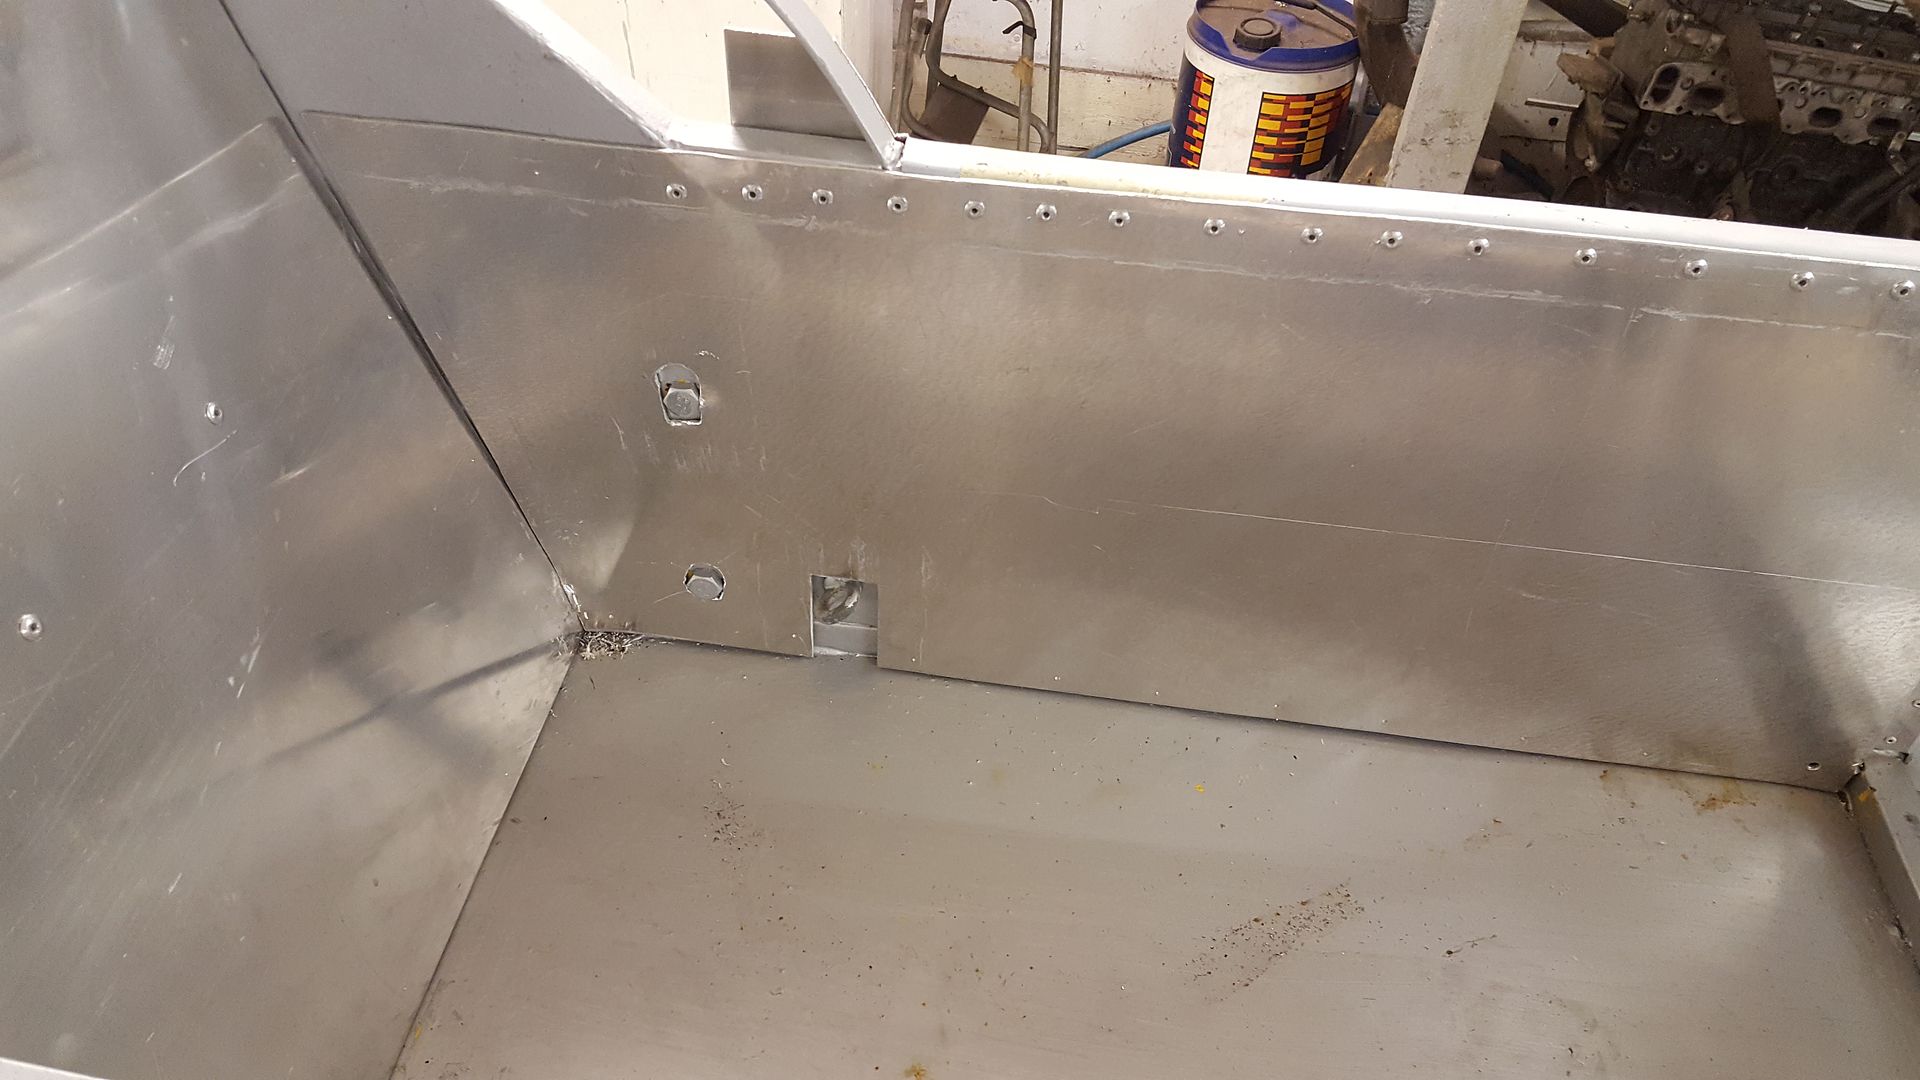
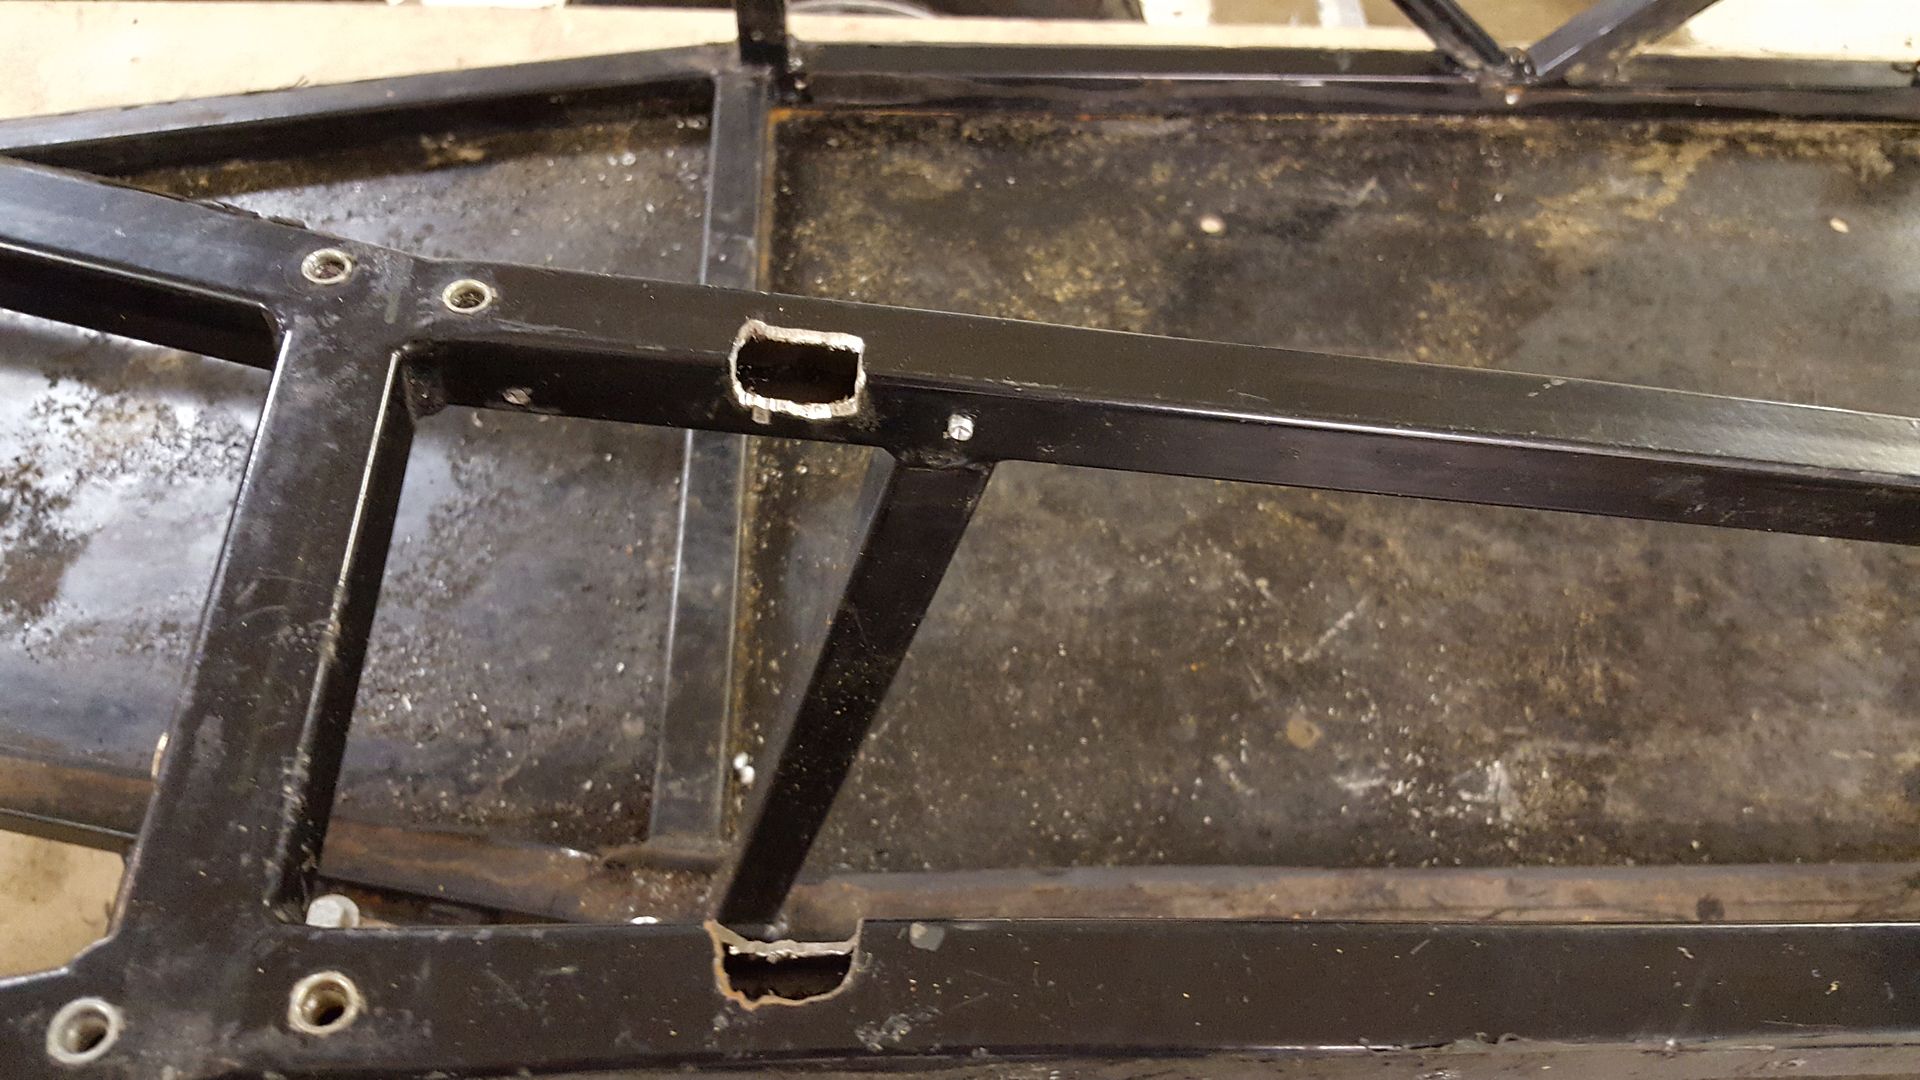
the only bits that need a quick buzz of welding are here where I think someone's tried getting the wrong handbrake fitted
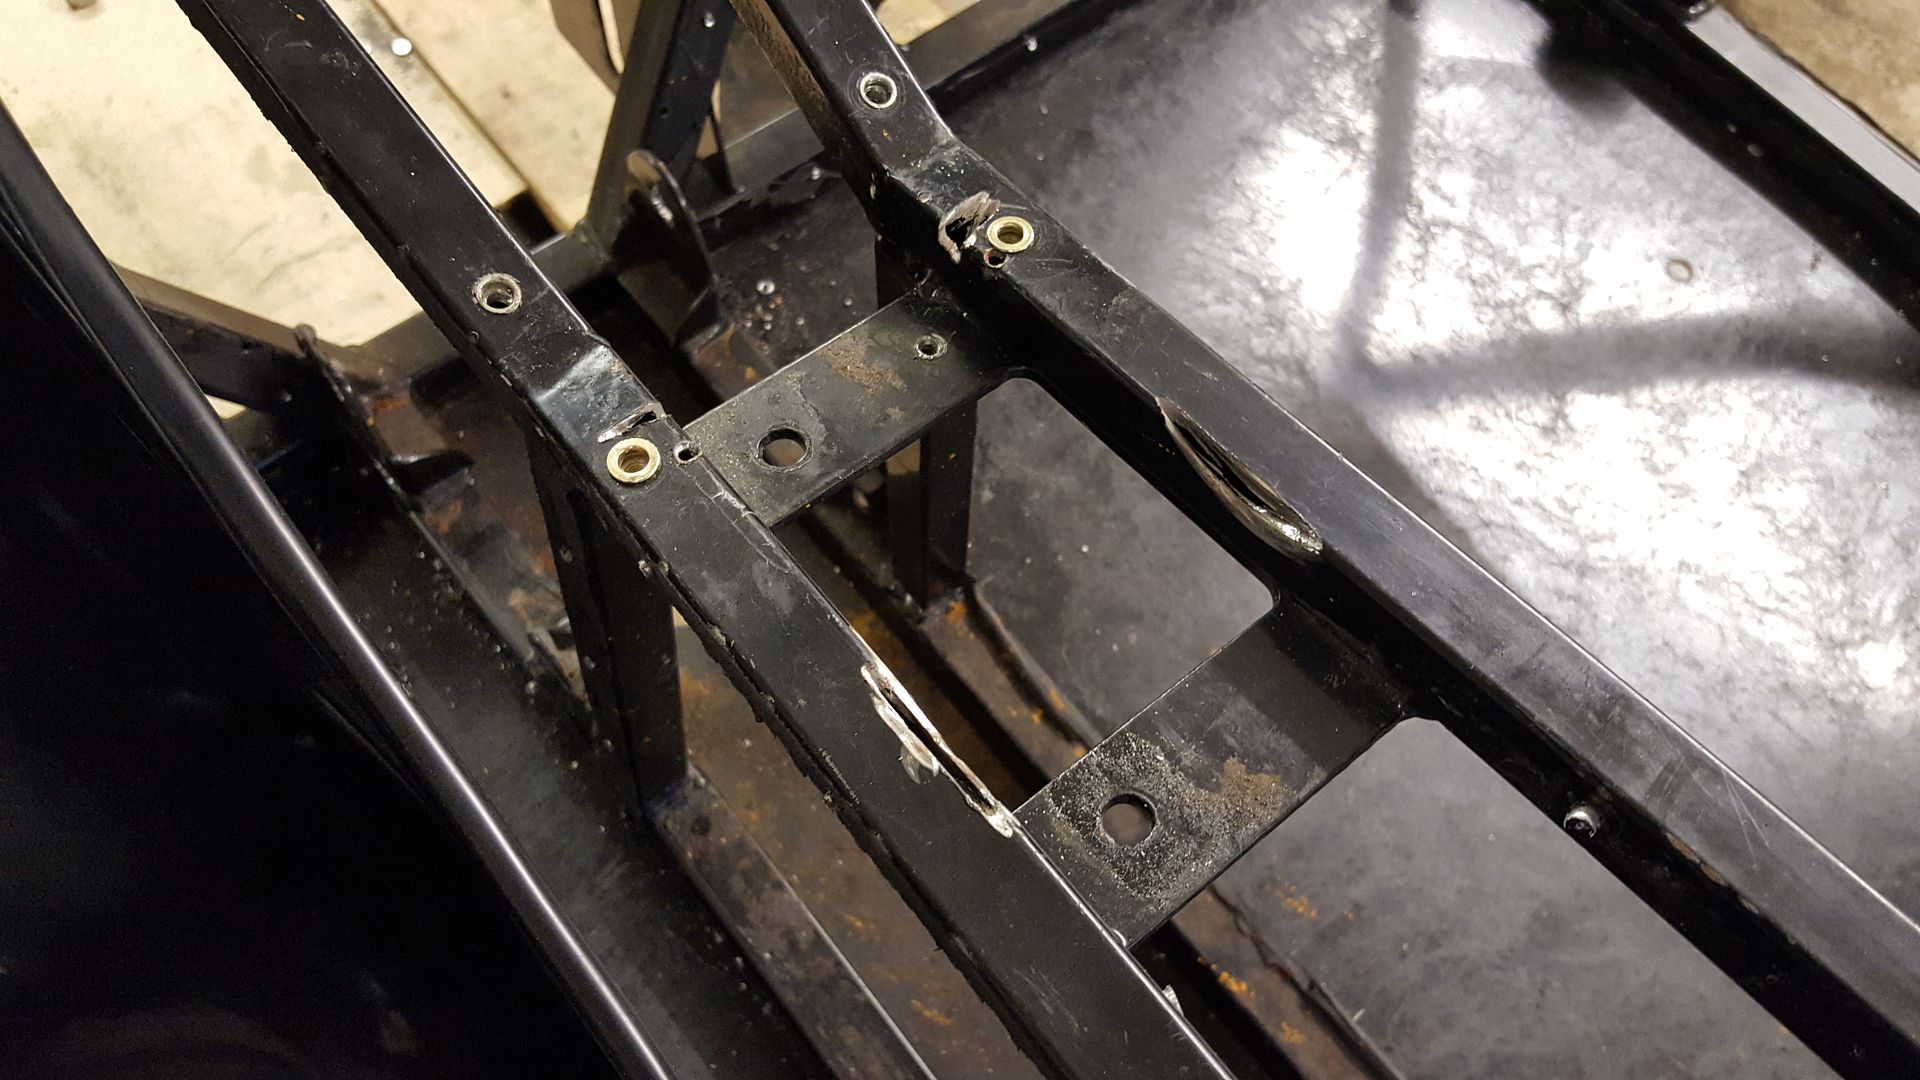
here where they've tried getting a different shifter or something
and here where they've bolted the exhaust on
nice and easy
as you can see all the panels were bonded and every pole is covered in sealer
but a quick whizz with a toffee wheel and comes off nice and easy
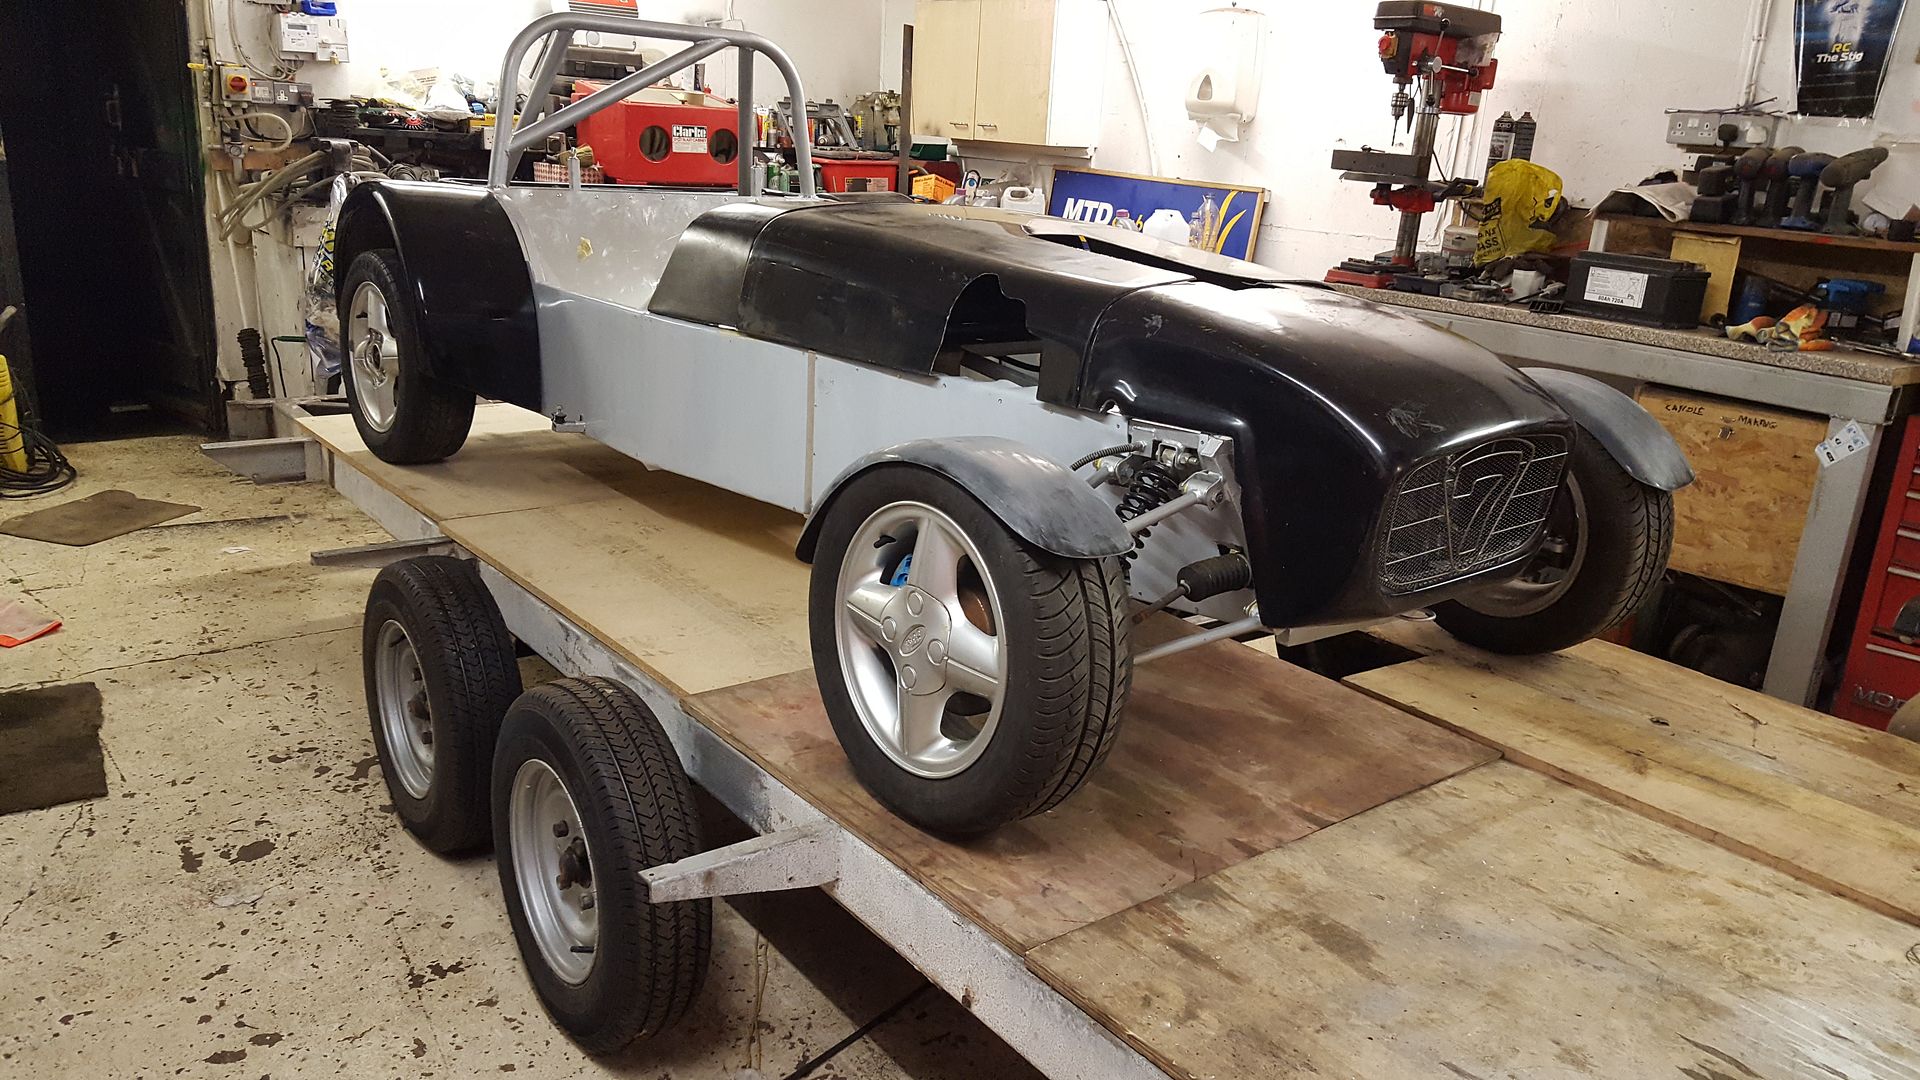
so all my mechanical bits from the locost will all bolt on to this as it's also sierra based and will still be using all the white MNR VORTX grp
body. laid the body on and it's pretty close, just need to trim it around the front shock mounts and radiator brackets.

, very happy
[Edited on 1/10/17 by super-ron]
super-ron - 2/10/17 at 06:42 AM
I guess the build needs a new name now. can someone change the title?
GBS ZORTX
super-ron - 2/10/17 at 07:47 PM
popped in to pick up some keys and couldn't resist having a quick tinker. started trying to work out where all the panels go, it's actually
a lot trickier than it looks lol. seems the these have quite a practical boot!
daveb666 - 2/10/17 at 07:59 PM
hello Ron. Nice to see you on here (DaveB )
I have a 300bhp ca18det Locost. Yours is going to be a monster
Schrodinger - 2/10/17 at 09:11 PM
Some good buys there, do you know what model the wheels are? They look similar to the TSW Big Deeps that I had on my Tiger.
Bluemoon - 3/10/17 at 08:16 AM
looks good, the chassis mods photos on here some were. would consider adding some rear protection in case someone runs into the back of the car GBS
zero has nothing there at all...
super-ron - 10/10/17 at 07:19 PM
quote:
Originally posted by daveb666
hello Ron. Nice to see you on here (DaveB )
I have a 300bhp ca18det Locost. Yours is going to be a monster
fancy meeting you here
super-ron - 10/10/17 at 07:21 PM
quote:
Originally posted by Schrodinger
Some good buys there, do you know what model the wheels are? They look similar to the TSW Big Deeps that I had on my Tiger.
they're TSR Racing wheels, apparently they came with the GBS ZERO kit, they're very light.
super-ron - 10/10/17 at 07:21 PM
so a little break in Aiya Napa getting over a divorce

came back much happier :lol:
the audi was pretty grotty sitting for a while

so first job was to give that a bling up
then it was straight back onto the kit car
first up the old chassis was getting in the way, so made it into more manageable pieces, I'll keep it around for when I need some metal box.
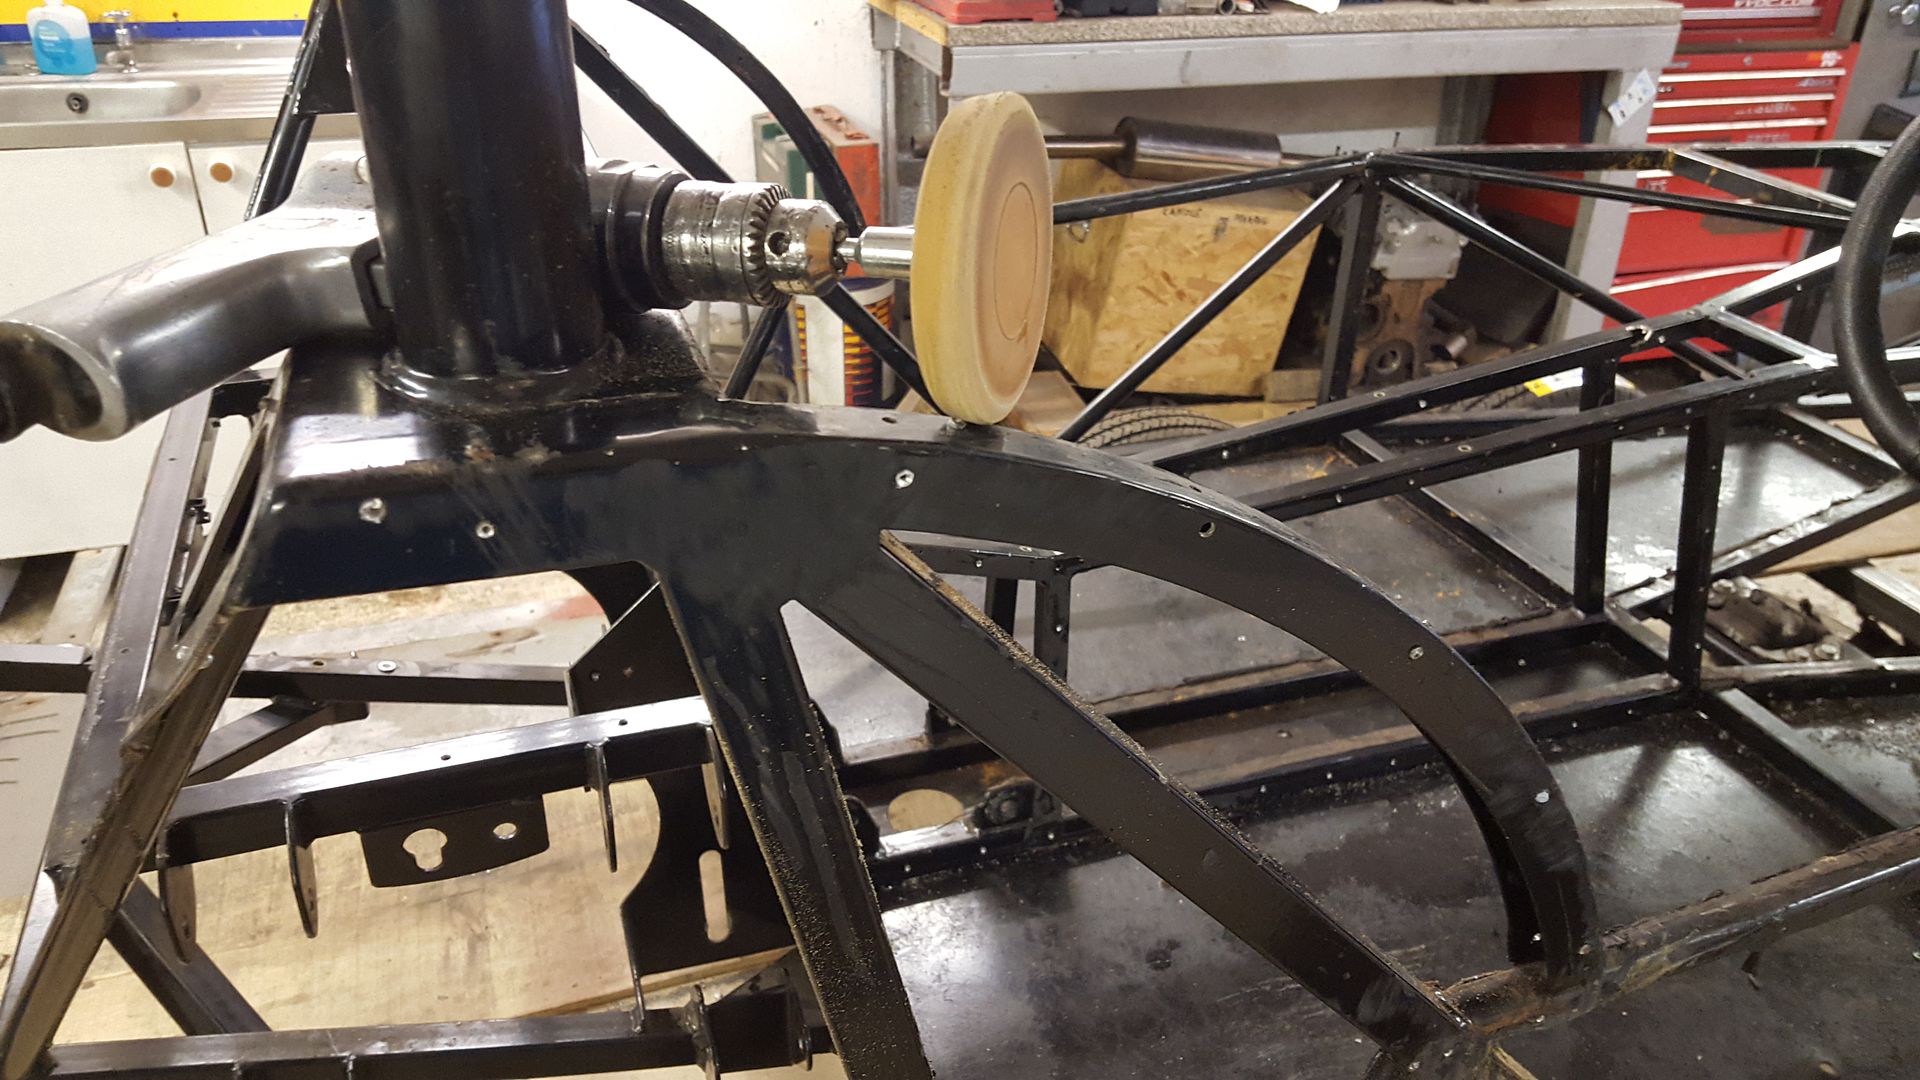
where all the old zero body panels were bonded on there is sealer on pretty much every piece of box section
I don't want to scrape it and off and cut through all the powder coating as the chassis is in great condition, so used a toffee wheel on a
drill
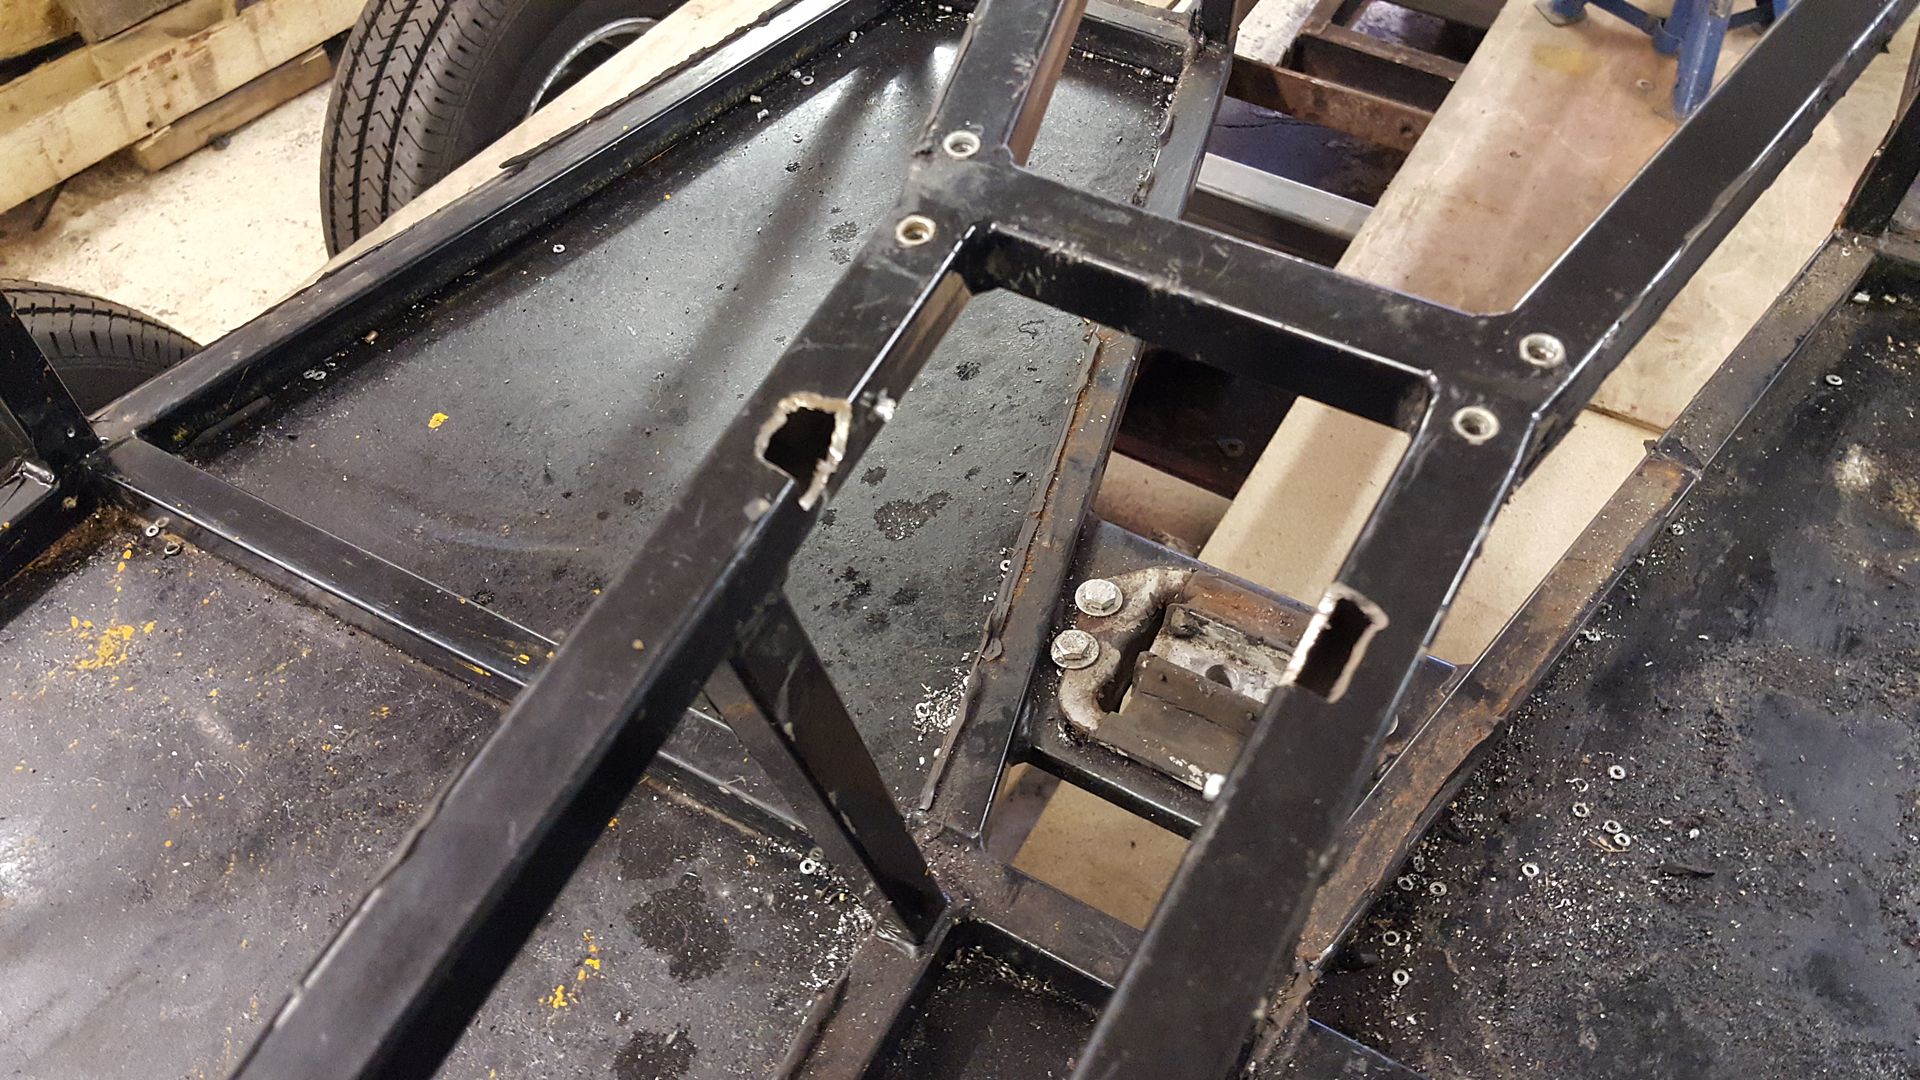
that corner took about an hour so was truly bored of that, i moved onto the metal work that needed fixing
the very poorly chopped out sections here
and the cuts at the back
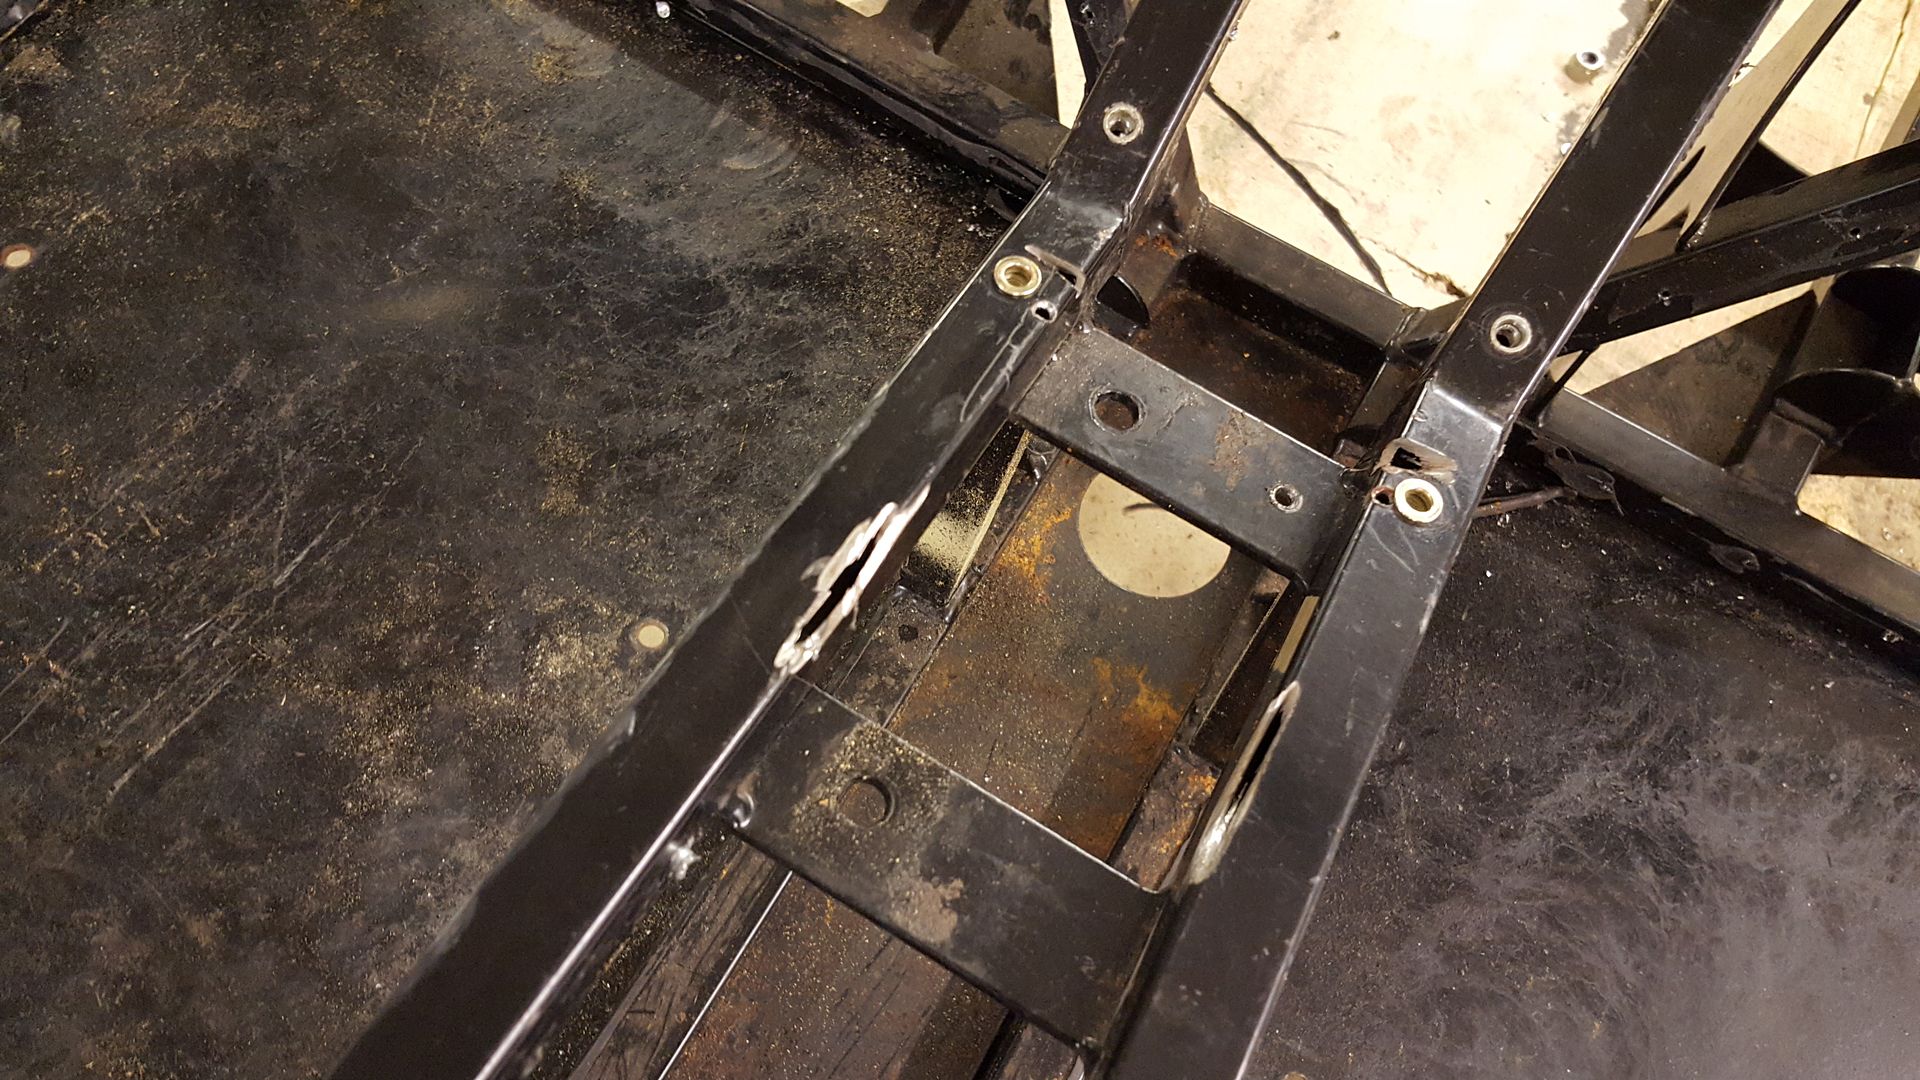
I squared up the holes
made up some infill pieces
and welded them in

and migged up the rear
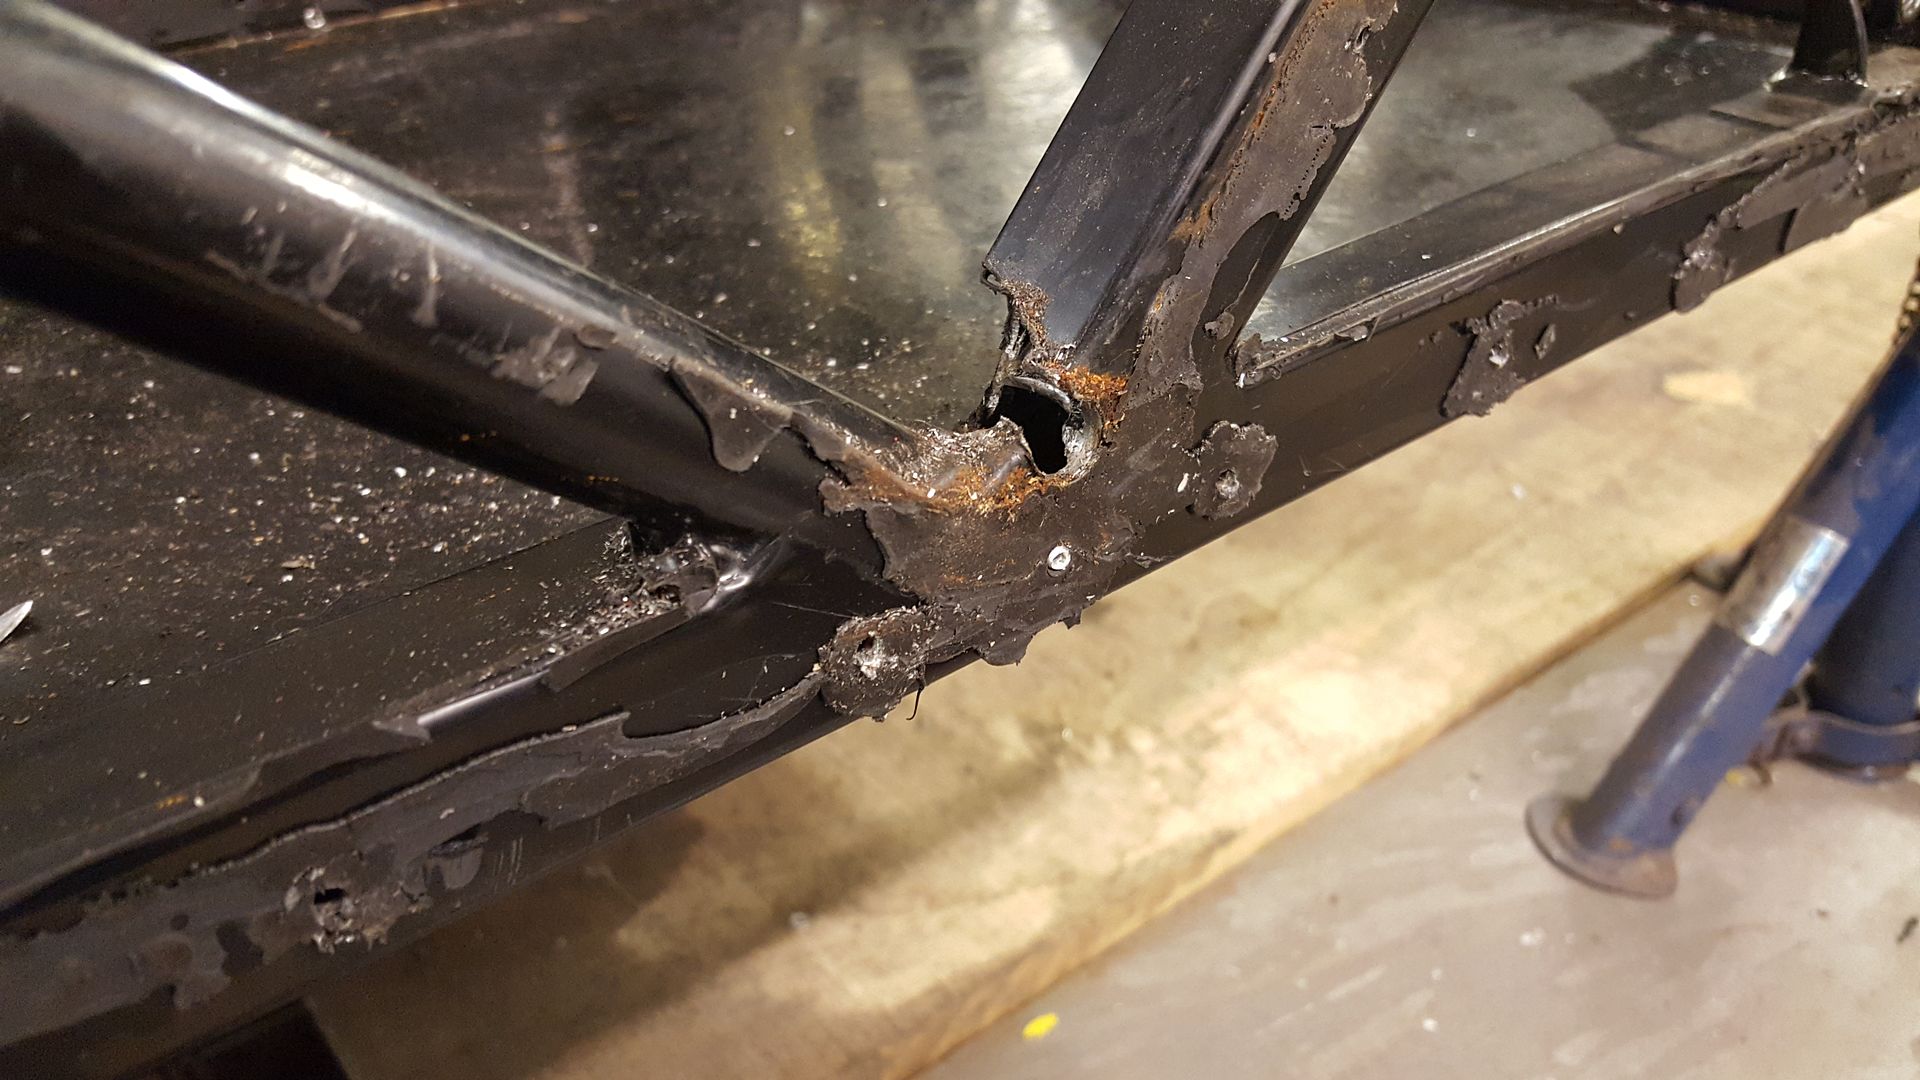
next was the mess they'd made bolting the exhaust on
squared it up first
made up a piece to infill the lower rail
welded that in
then made an infill for the diagonal
welded that in
and ground everything down
Will just be painting those sections.
got to carry on getting all that sealer off next, then try on the body properly
super-ron - 18/10/17 at 06:57 PM
when I picked up the chassis the guy did have some brand new gaz coilovers for the gbs zero which he offered me, but I already had the new ones that
came with the locost at home. I did a little research and found the fronts are a inch shorter on the locost and the rear springs are a different
length, but I was going to make do as they were pretty close so was going to see if they work.
Then I spotted someone asked Ron86 if his gbs zero gaz coilovers would fit a locost.... a plan was hatched, I'd sell my locost coilovers to him,
then buy the gbs coilovers, all for the money. result
so popped down there today to pick up my locost coilovers to send out.
while I was there I couldn't resist a little tinker, i wanted to try the nose cone on a bit better, but it fouled the radiator brackets at the
bottom
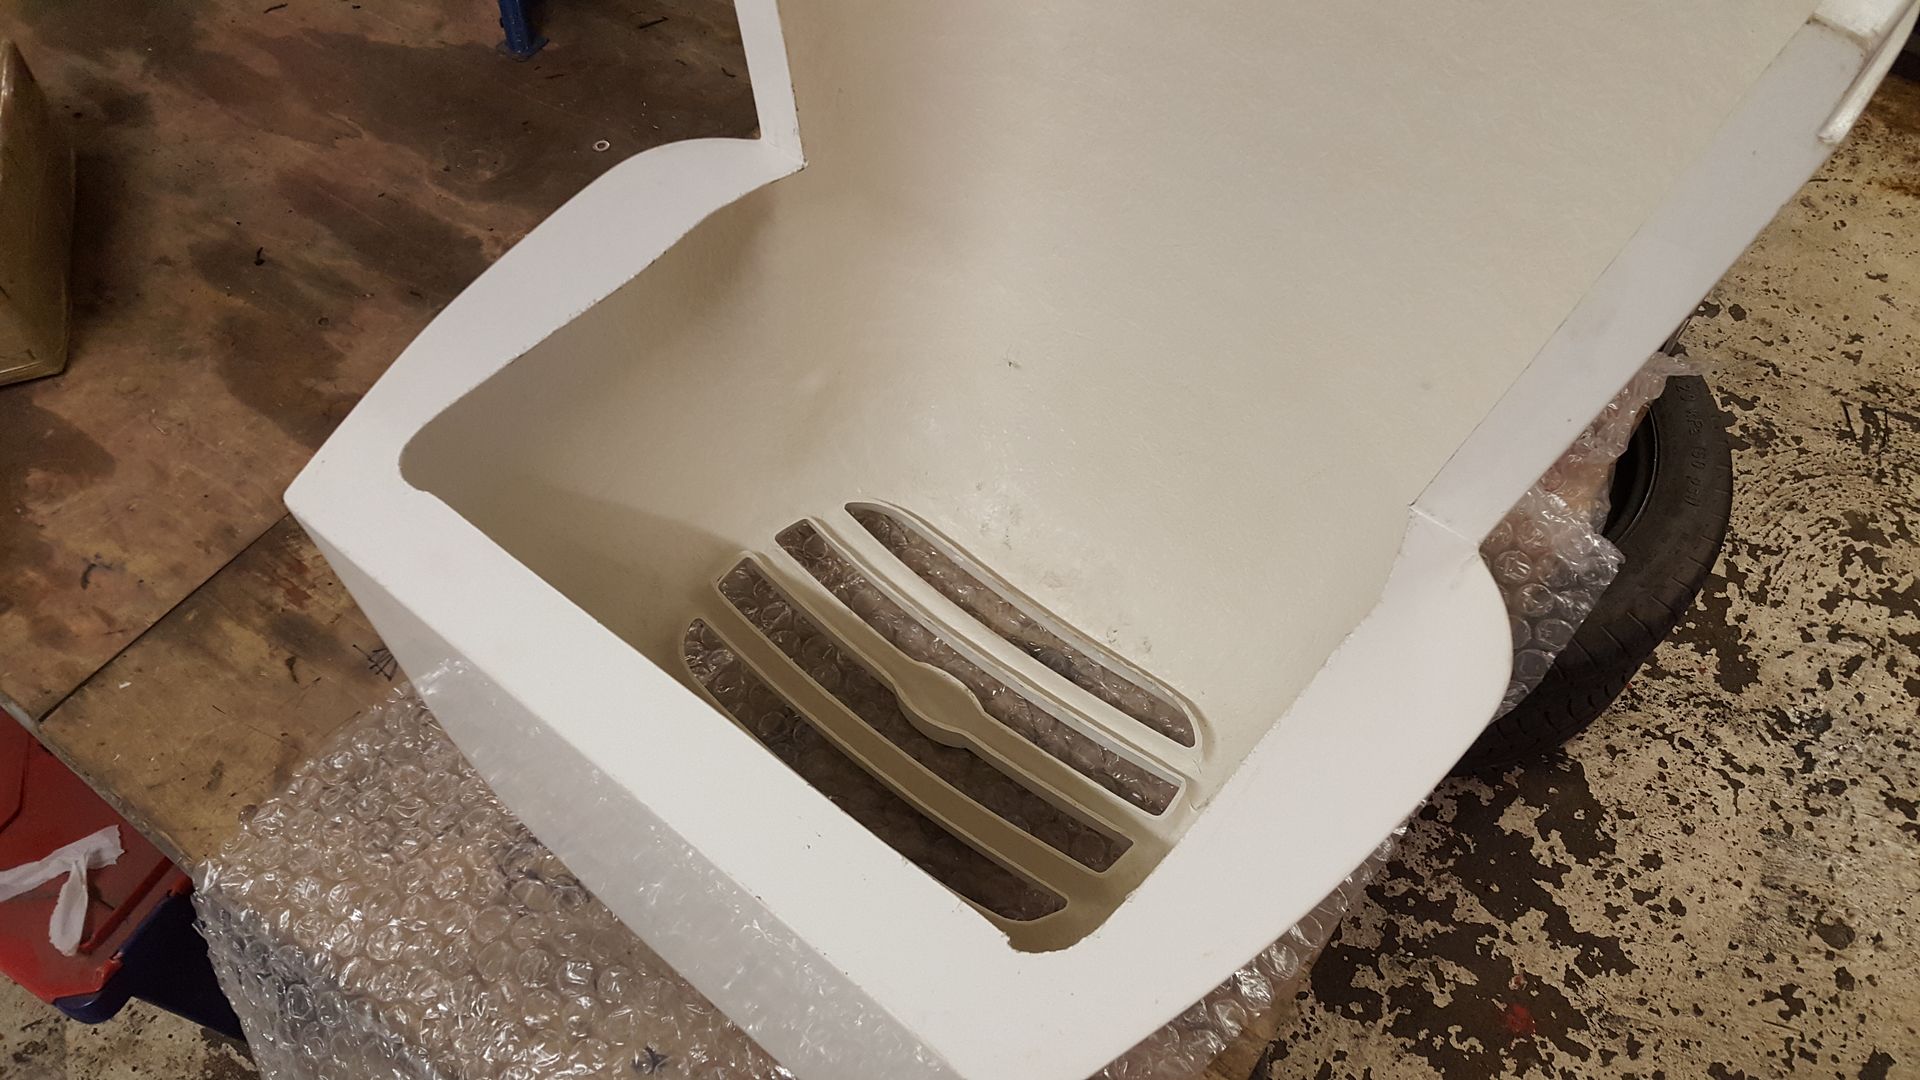
so did a little measuring and chopped a slot
and it slides right on now
I do love the vortx scuttle
in fact I do love the whole vortx kit. it is a bit marmite, especially as all the other kits copy the caterham very closely (including the Gbs
Zero).
I'm going to need to make a cut out in the nose cone to fit over the headlight brackets, not very much, it just sits up on them a few mm
but I want to get the cut as tight as possible, so before I do I will put the full body on so I can get the forward and back measure spot on.
all in all its not going to be too hard to get it to fit well and look just like a Vortx the front suspension holes don't look like they will
line up, so once I get the body on the right place I'll make new holes for my wishbones then fibreglass the old ones up.
before all that happens I need to get the rest of this sealer off with the toffee wheel
super-ron - 9/11/17 at 01:34 PM
My old locost gaz coilovers arrived in america within a few a few days, and the GBS spec gaz coilovers arrived from the guy I bought the chassis from
a few days later.
Also someone was looking for a dedion beam on the locost forum so got mine all packed up ready for them, result
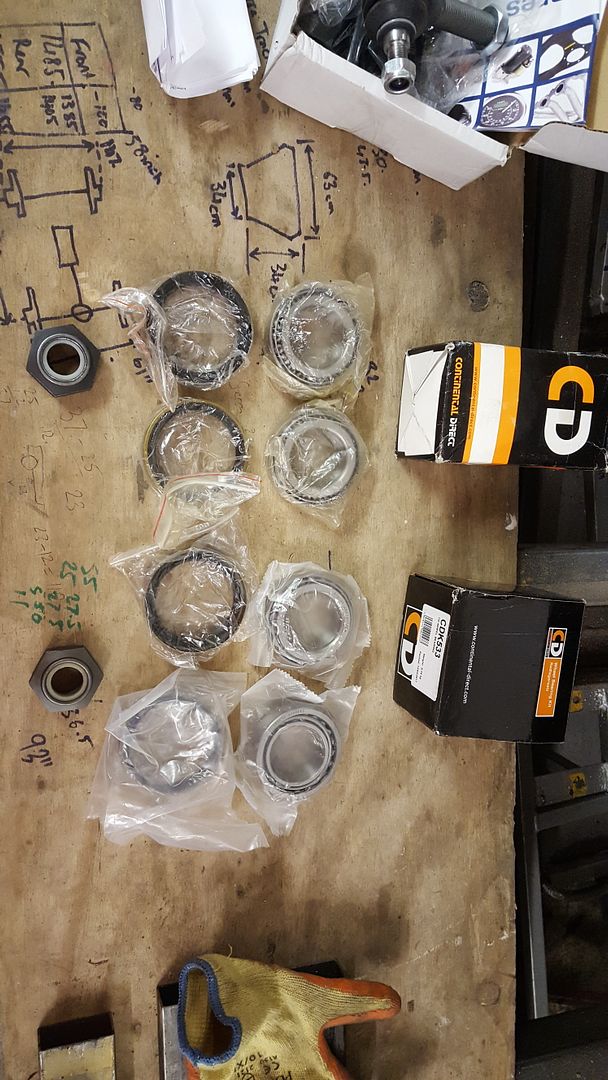
One of the wheel bearings fell apart when I unbolted the beam so will have to get a new one before bolting them to the GBS uprights. Had a measure up
and Sierra cosworth ones like up
Not had a lot of progress, took a bit more of the sealer off the chassis
super-ron - 13/11/17 at 09:31 PM
Had a bit of tinker time. Finally got all the sealer off the chassis. I got some toffe wheels off eBay, just the cheapest unbranded ones, and I had a
few old half cut 3M ones. The 3M ones were so much better. The cheapo's left it all smudgy where it had started to melt itself, but still got it
all off anyway.
And a good blow off and clean up
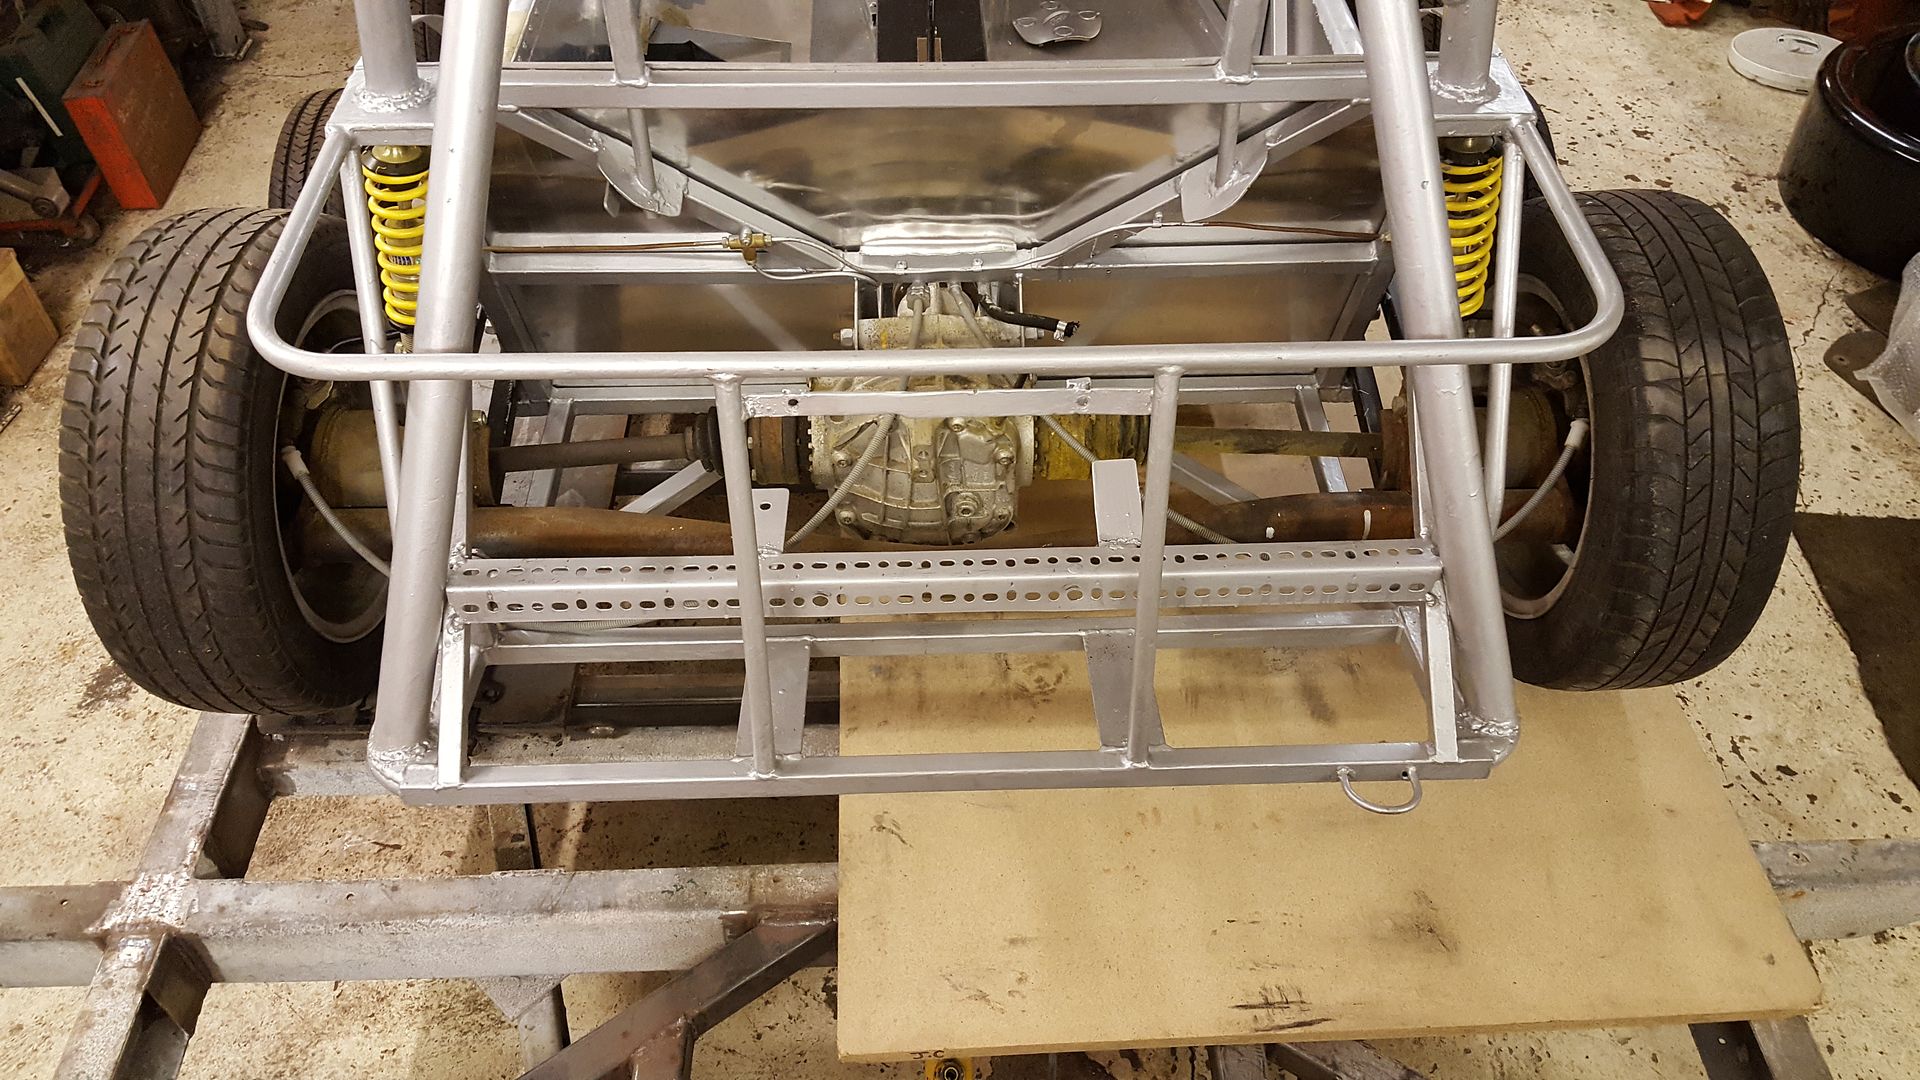
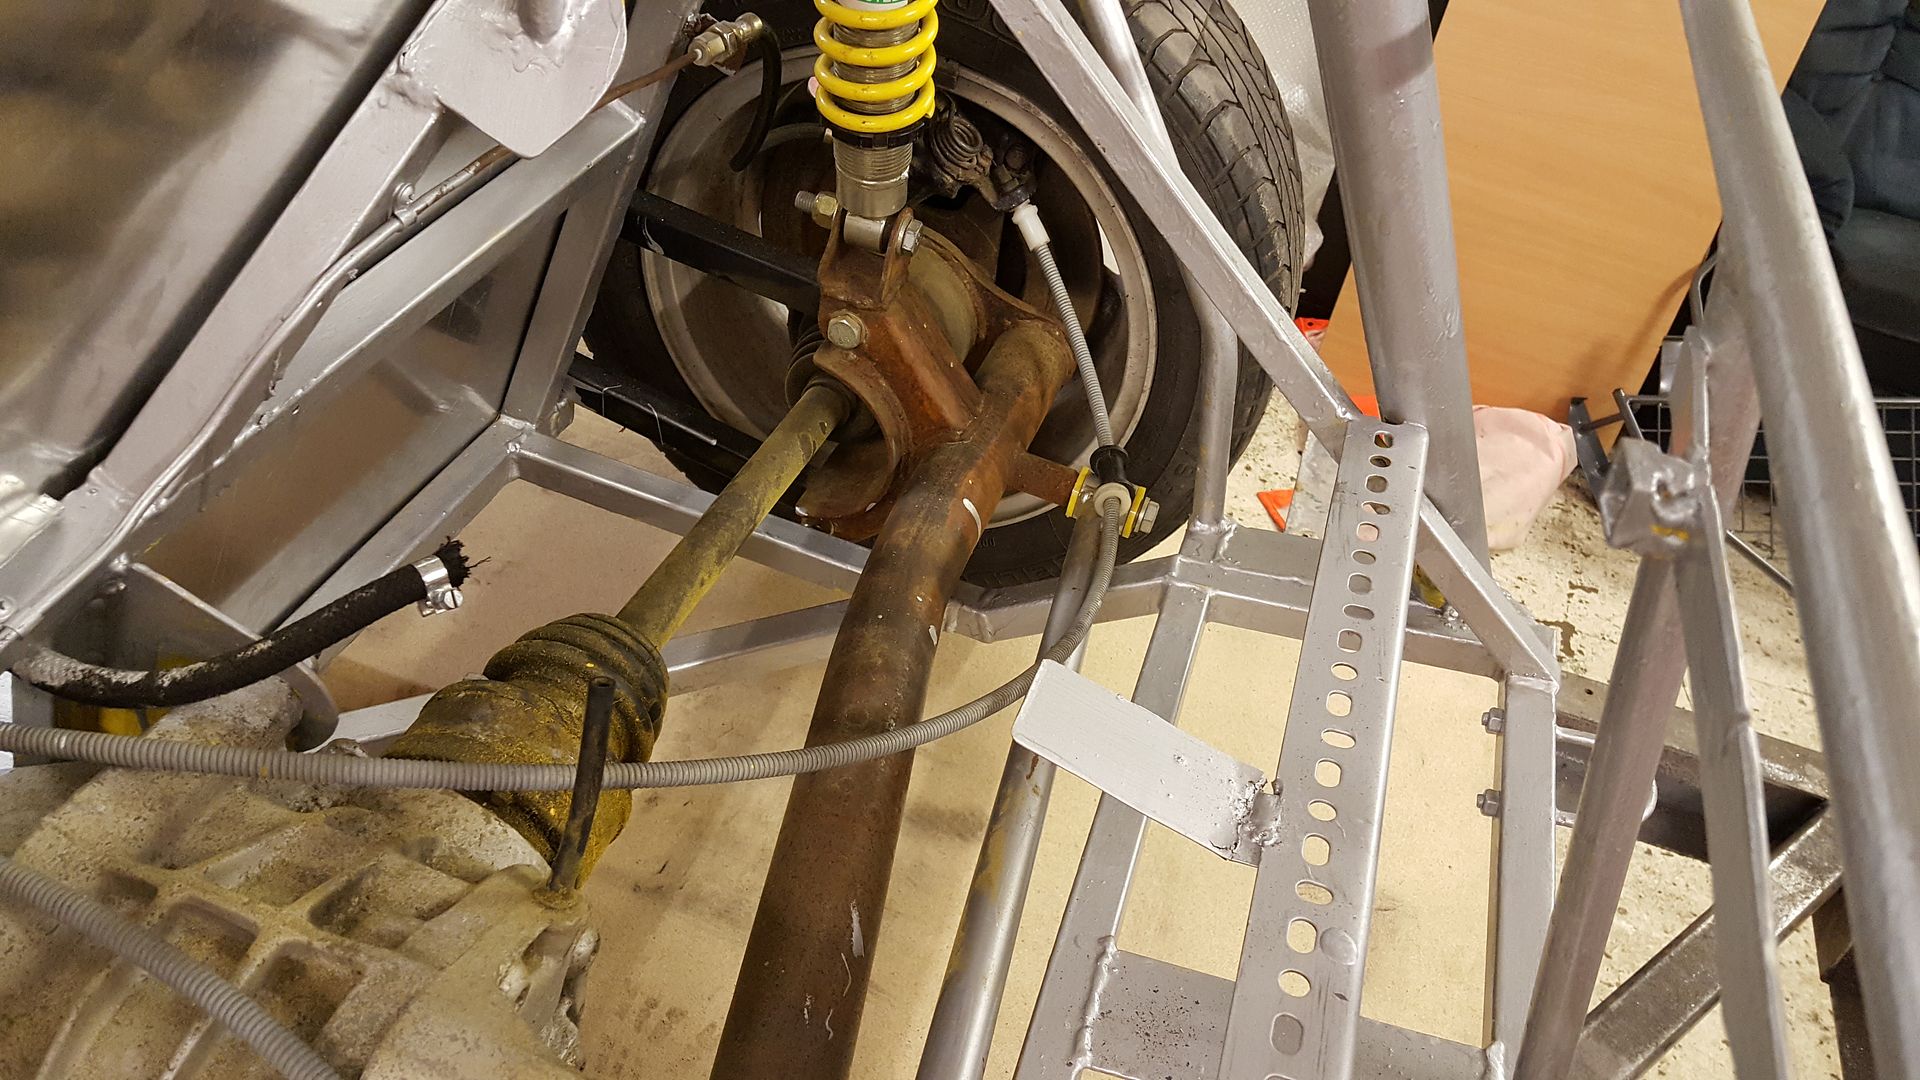
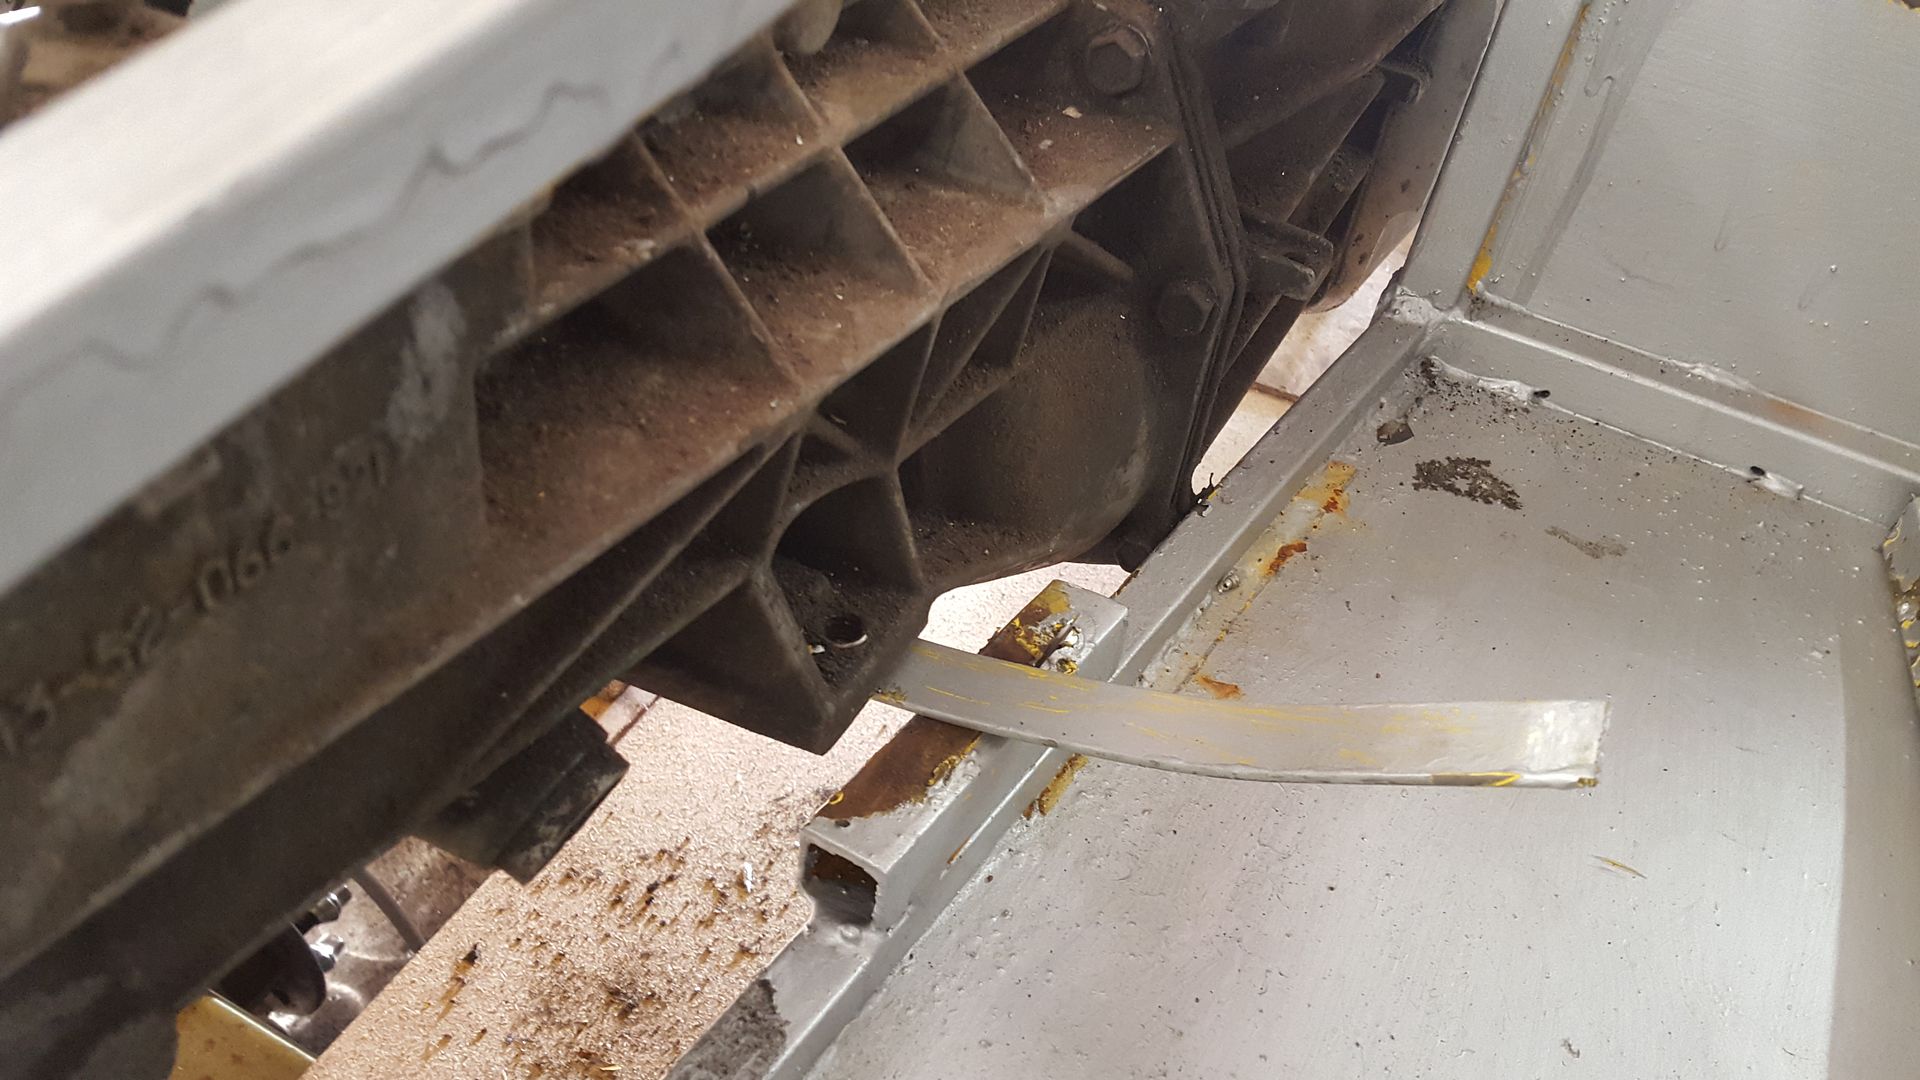
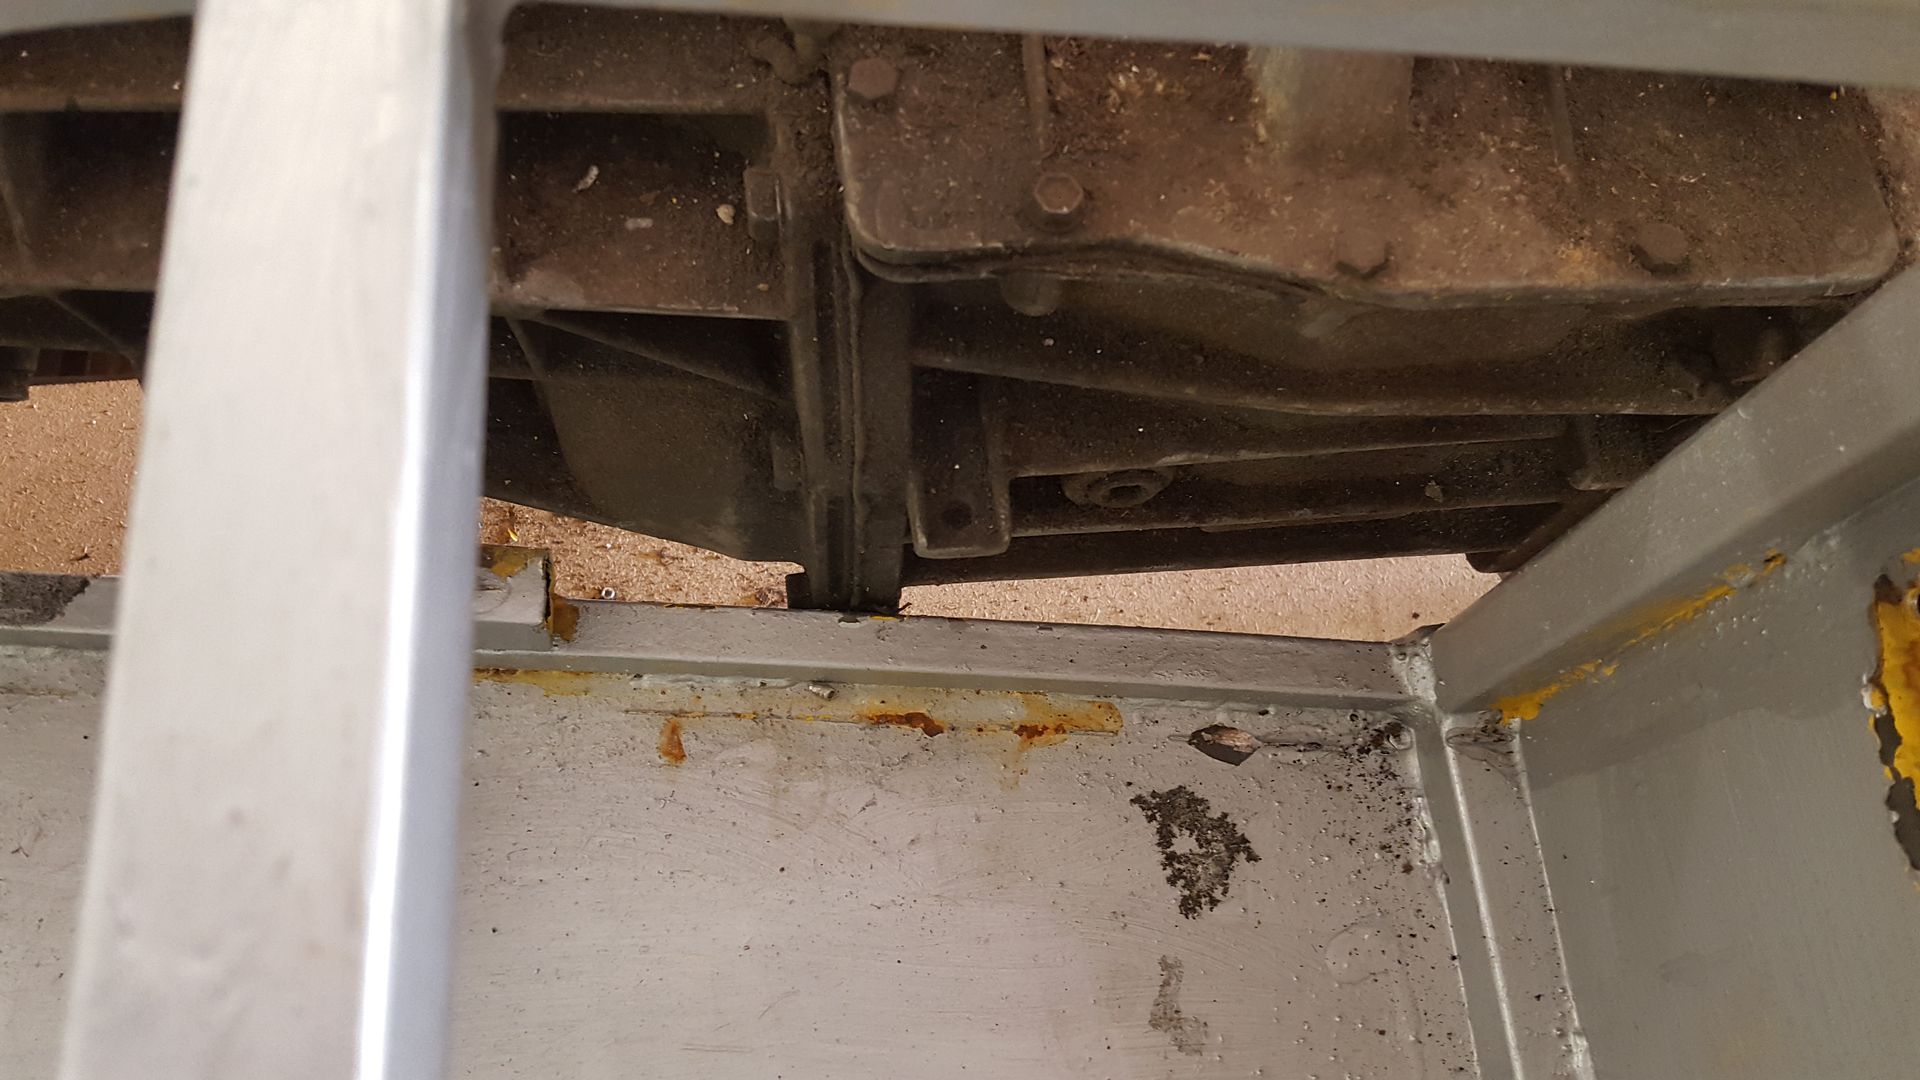
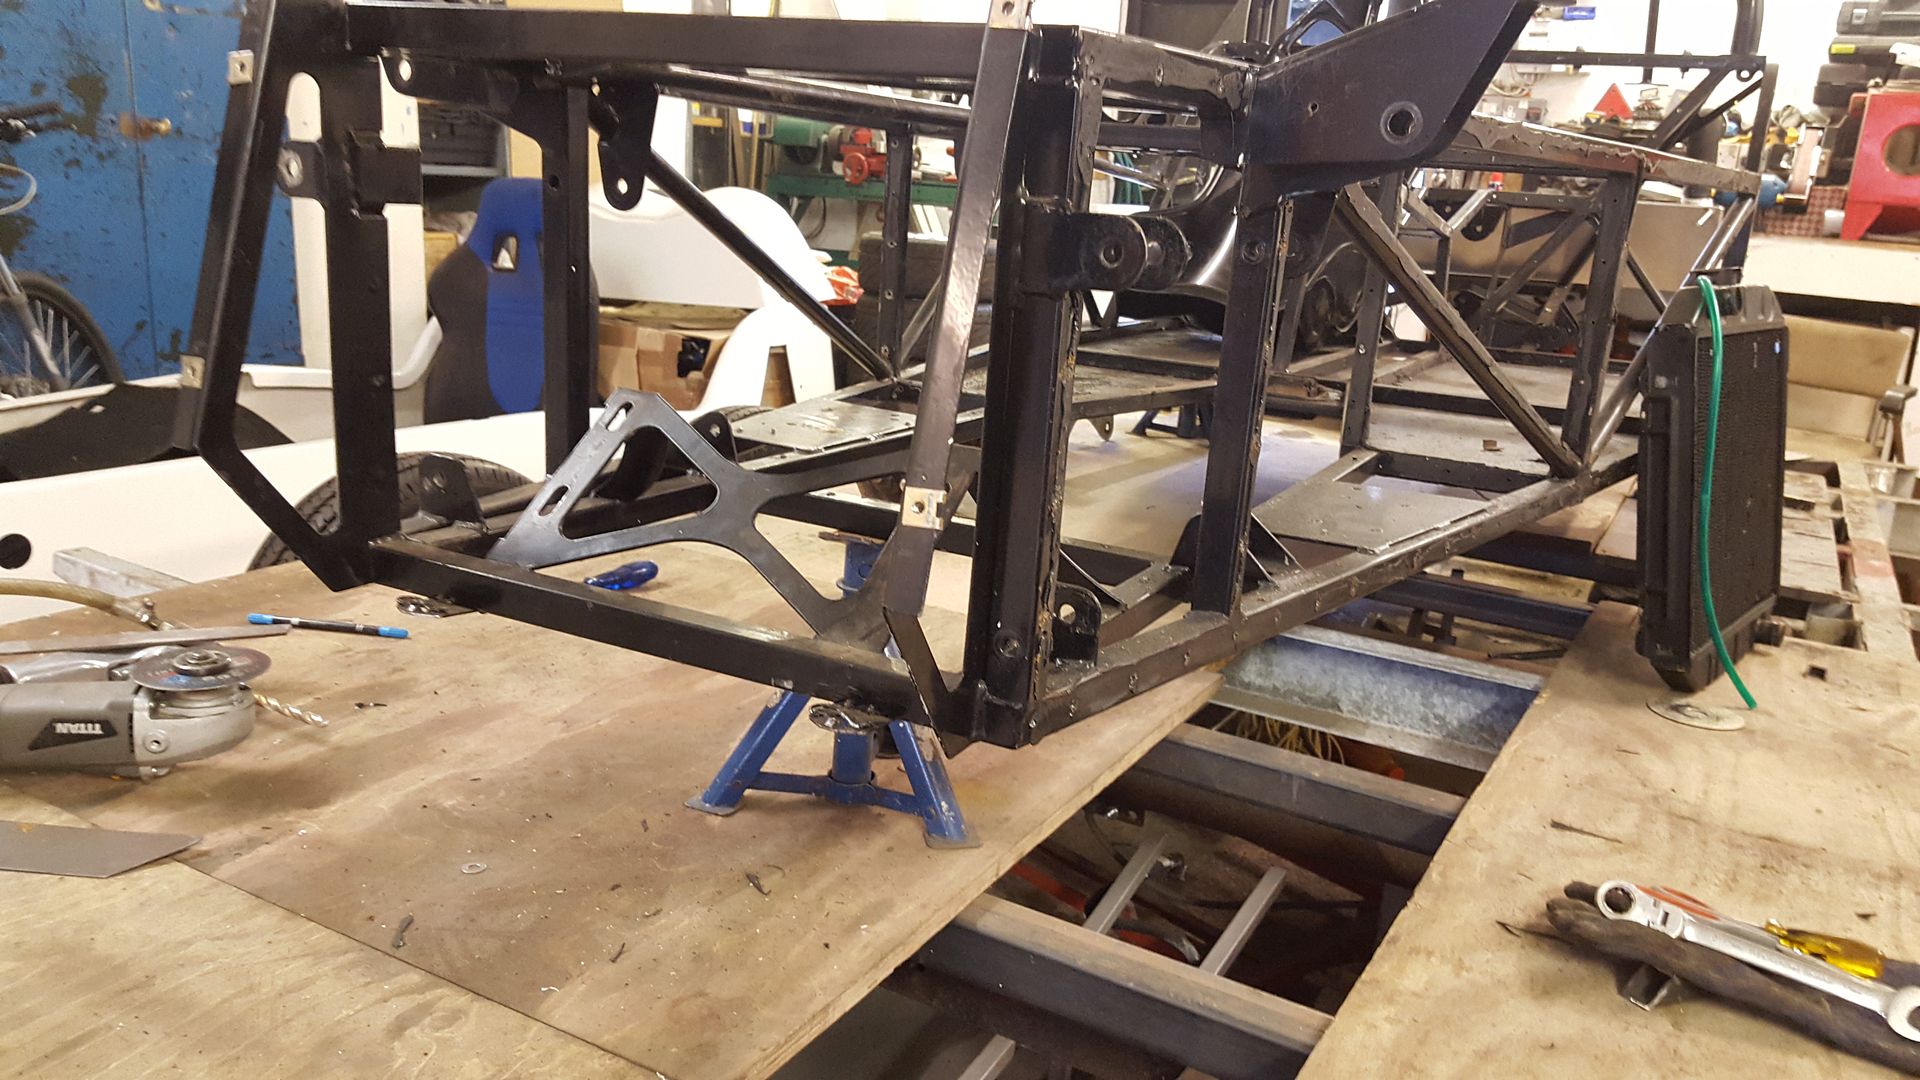
Next I tried the diff and gearbox in to see how much hangs below the the chassis and where the rear wheels will sit. This also confirmed that the prop
I have is 2inches too long. So will either have to get a proper GBS one or get this shortened, which ever is cheaper

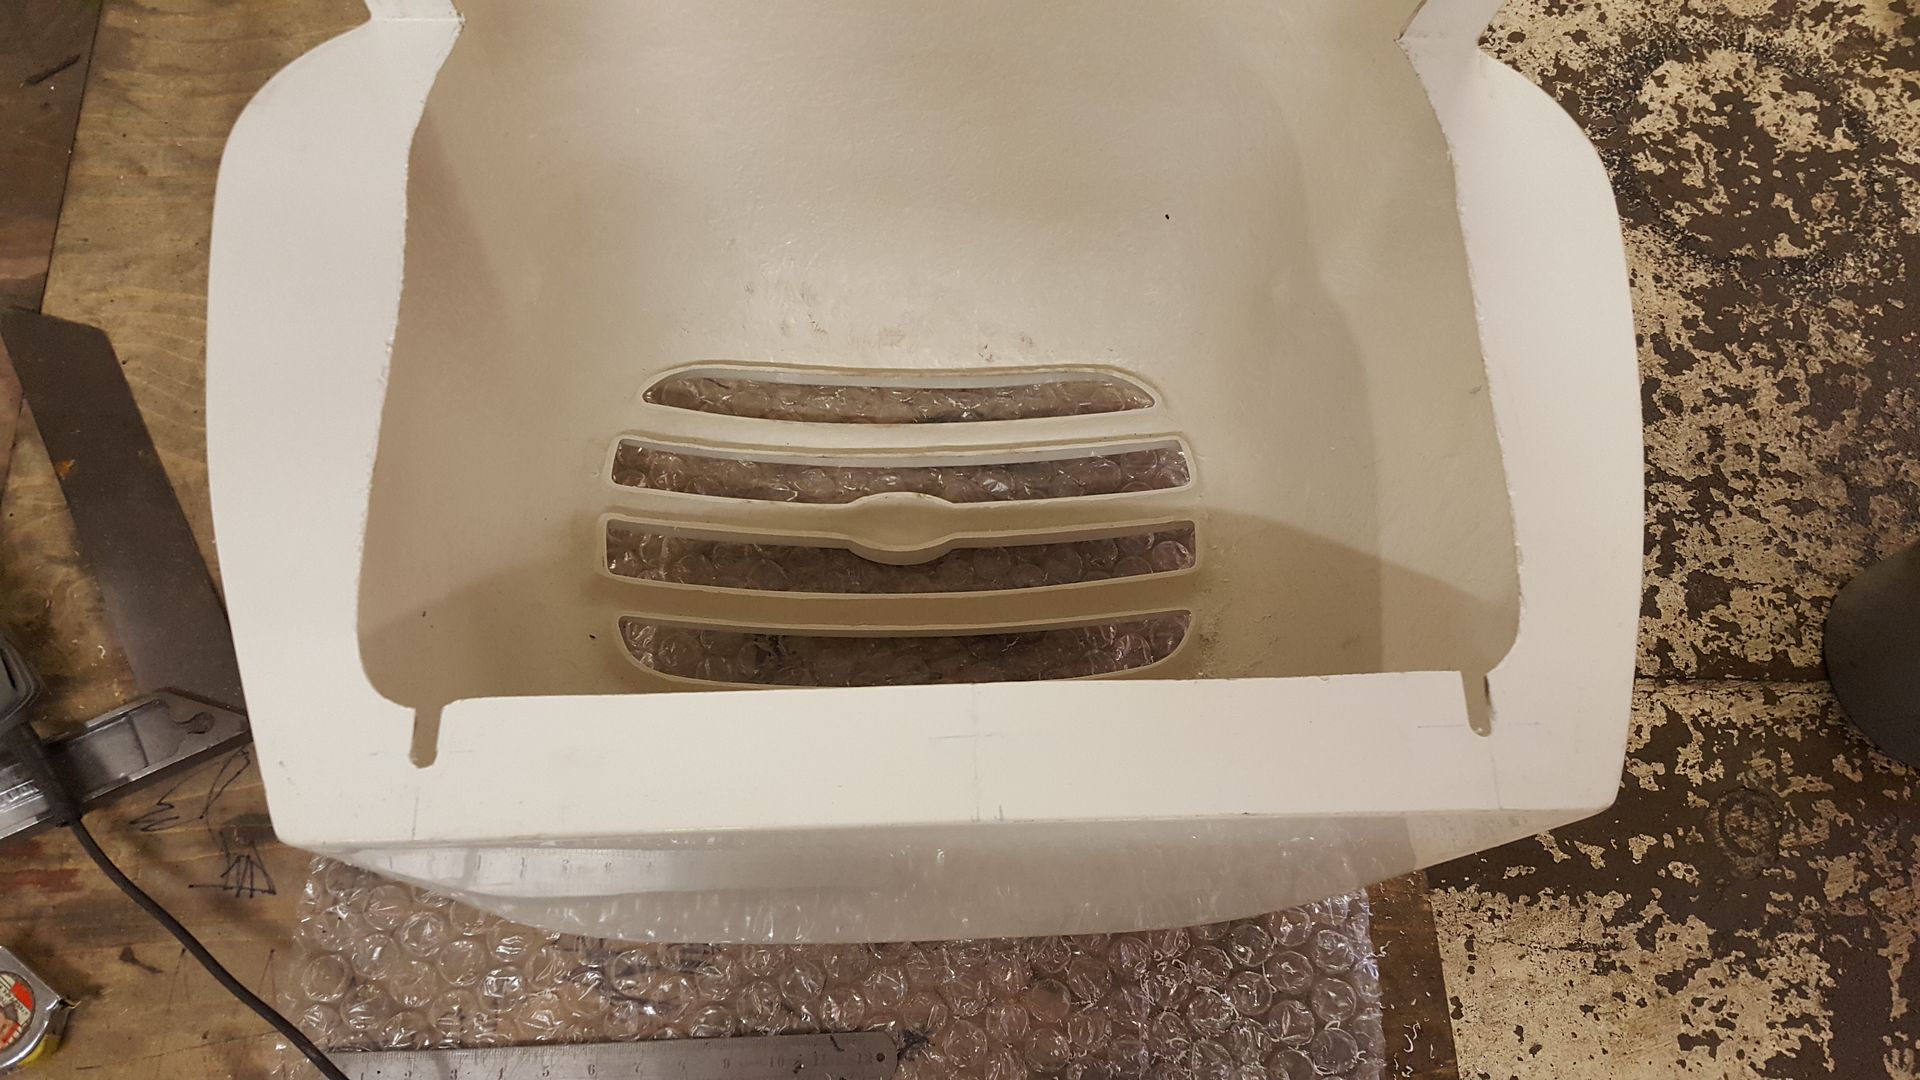
Next was trying to get the MNR VORTX body to fit. First off the GBS has it' roll cage in a different place to the MNR so needed some cut outs
Check
Next was these curved supports were fouling the inside of the tub. They are only there for the sheet metal work of the GBS body.
And off
It was also fouling on the extra diagonal the GBS has
So a little trimming of the fibreglass
And had to shave a bit more off around the turrets
And whalla the rear of the body is On!
The front though was being held out by the headlamp/shock mounts still
I wanted to see if any of the MNR holes in the body lined up with the GBS suspension, so out came the CAD
with a bit of jiggering you could maybe get one to line up, but not really.
Tried on the rest of the suspension
With the Ford bits from the locost
But the top ball joints are smaller so will have to find what GBS use
Loosely assembled it all and looked at a quick template
I think I'm pretty much just going to fiberglass the whole front and cover it all flush then start again.
Next was to cut out the headlights brackets. I could have cut a great big hole and just slotted it over but I wanted it to tuck in nice and snug.
Out came the CAD again
And that just slides over
And down
Next was to transfer this onto the body. Tricky because the headlamp brackets are slant up, so the cut out is in a different place depending how wide
the body will sit and at what height. And you can't get the body anywhere near the chassis to offer it up in the right place
Lots of measurement later I committed
And chopped
And it fits perfectly!
Exactly what I wanted. The only thing it's
done is because the front of the car is narrower than the rear, as the front has gone in over the headlights brackets it's pulled the whole body
forward a few mm.
So will need a bit more trimming here and there. But it's nearly there now I love the one piece body compared to what it should have.
CosKev3 - 14/11/17 at 11:47 AM
Looking really good
Nice job on cut outs for headlight brackets !
super-ron - 16/11/17 at 01:48 PM
Bit more fettling and trying the bonnet and scuttle on to gauge the widths
Still struggling for height at the rear, can' get it to slot under the floor
The turrets are defiantly taller and wider on the GBS chassis compared to the VORTX. I've trimmed out as much as I can from the top without the
turrets showing and it's wedged
(View up from under the turret)

As none of the front suspension holes line up I'm going to fibreglass matt it all up im not so worried about elongating holes to get it to
fit.
So I needed to adjust the front down a bit to fit under the chassis
And could then get it to slot under, drivers side fits nicely straight now
Lines up nicely with the nose
Needed to do the same the other side
And got the panels on with loads of mole grips
Nice and flush underneath
It's not perfectly placed, still needs lots of trimming, but it's getting there, chuffed with myself I gave it a good clean up
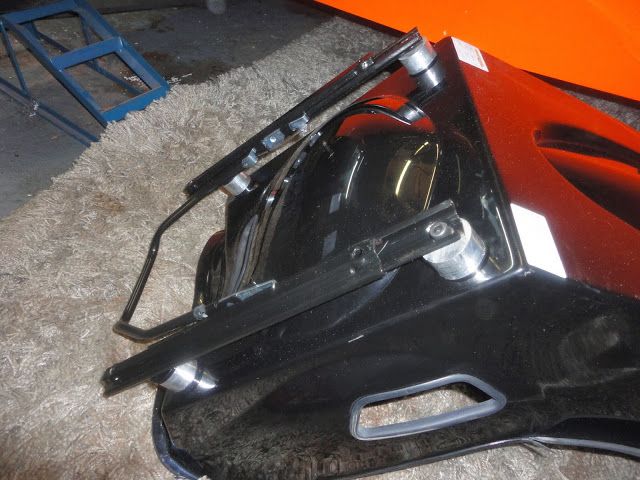
Tried the rear arches on just to see. Think they might be the wrong way round here
CosKev3 - 16/11/17 at 06:17 PM
Yeah rear arches are wrong way around imo
Some people like them that way,but look wrong to me
[Edited on 16/11/17 by CosKev3]
super-ron - 17/11/17 at 09:34 AM
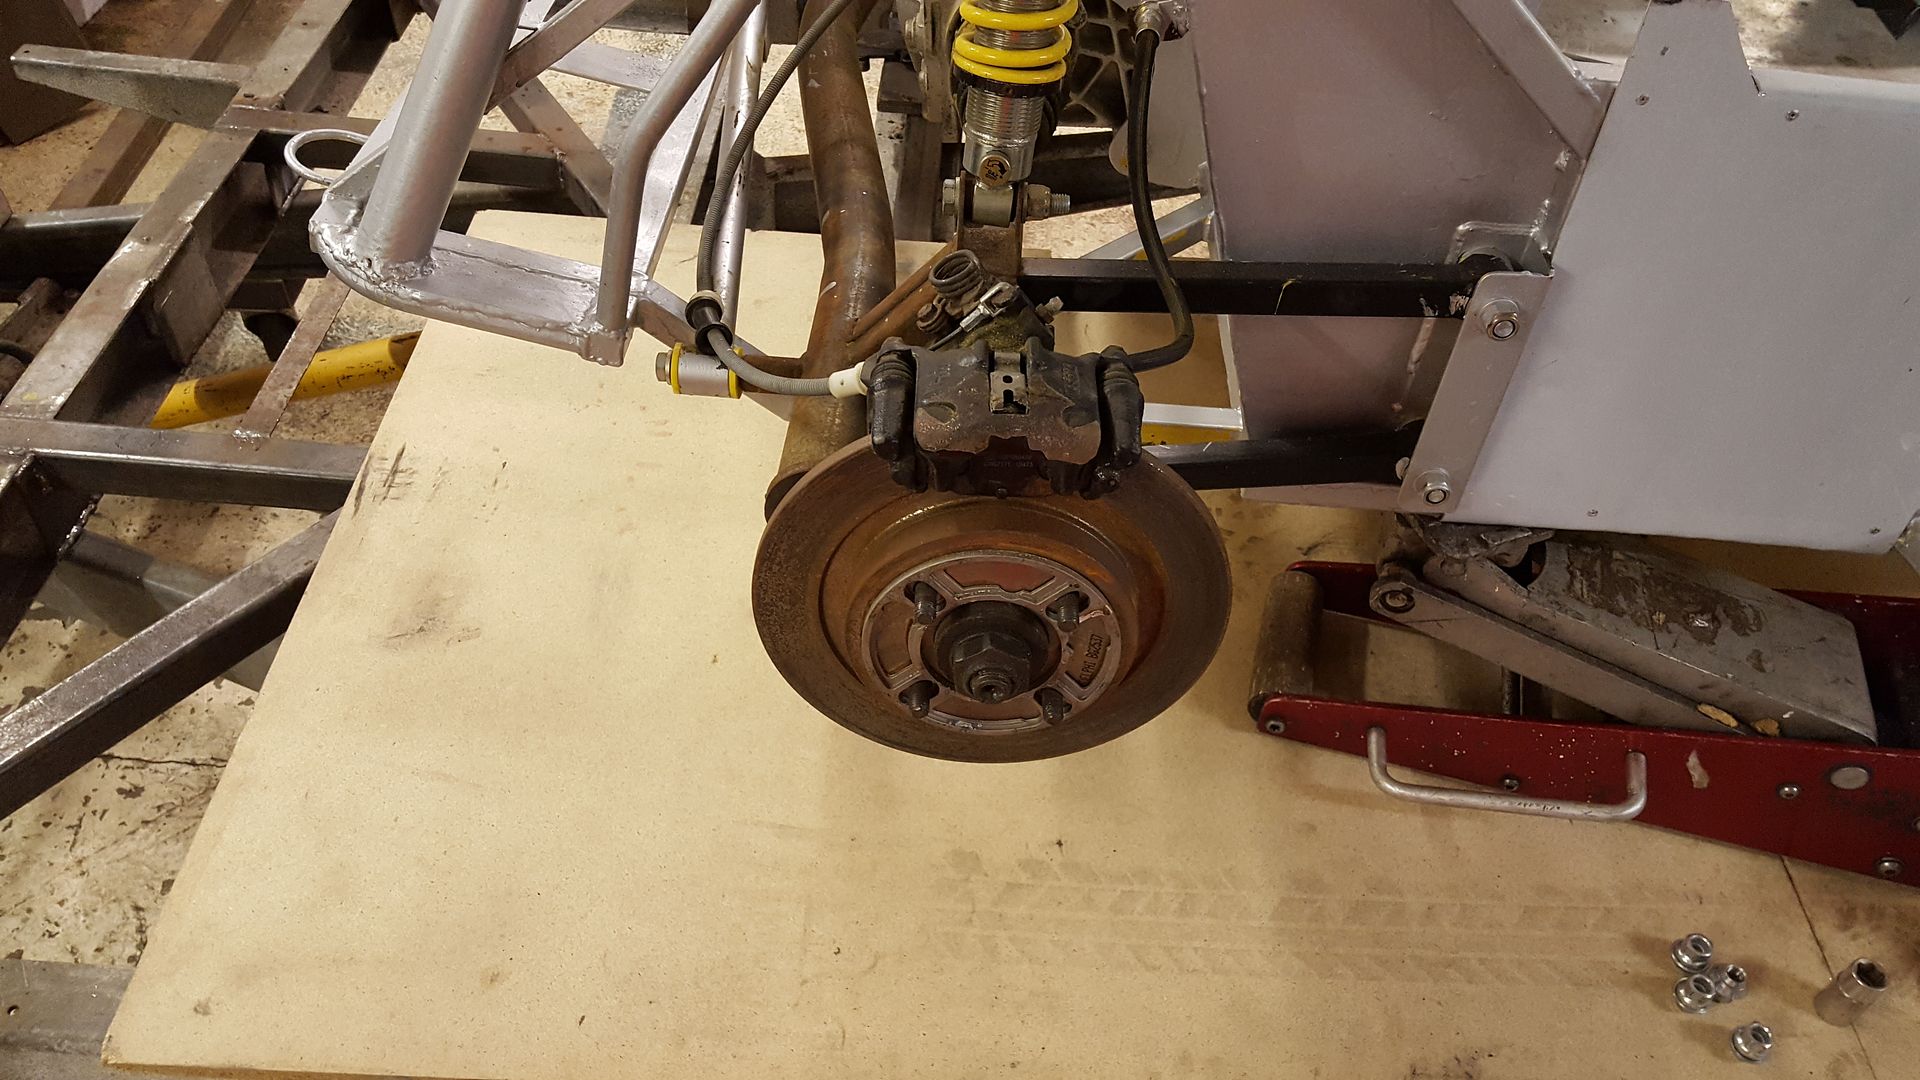
A bit more tinkering, I tried the rear suspension on to see if that cleared the body

It needs a trim to fit the shocks. That lower brace will be chopped off after the final final fit, but needs to stay in for now to stop it all folding
up fitting and removing the body
And on
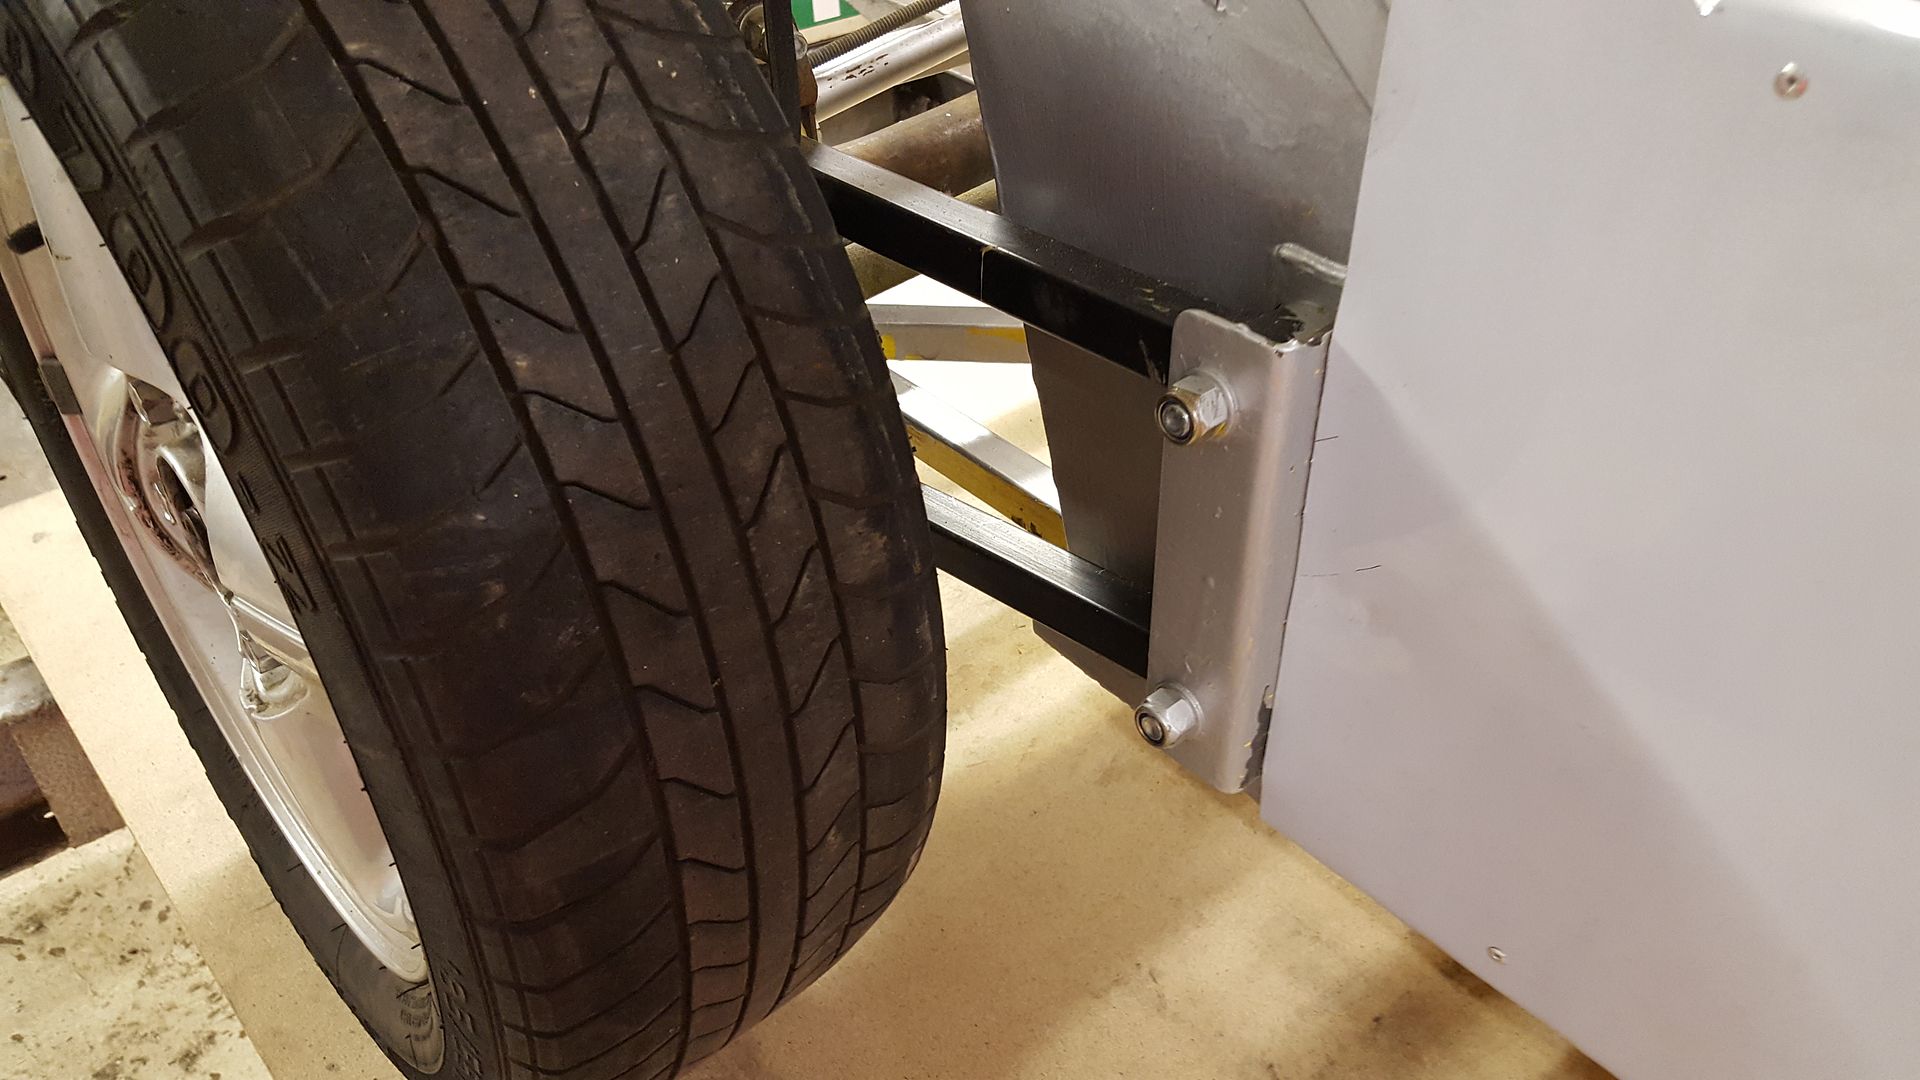
Loosely tried the hub and wheel on to see how the arches fitted to the wheel. The wheel arches are from the original Locost so they could be off
anything. GBS ZERO chassis and suspension, MNR VORTX body and random LOCOST wheel arches, and it actually lines up ok! Everything's just placed
on here so all a bit squeif
Tried one of the boot panels in and it fits perfect, the original holes line up which is good
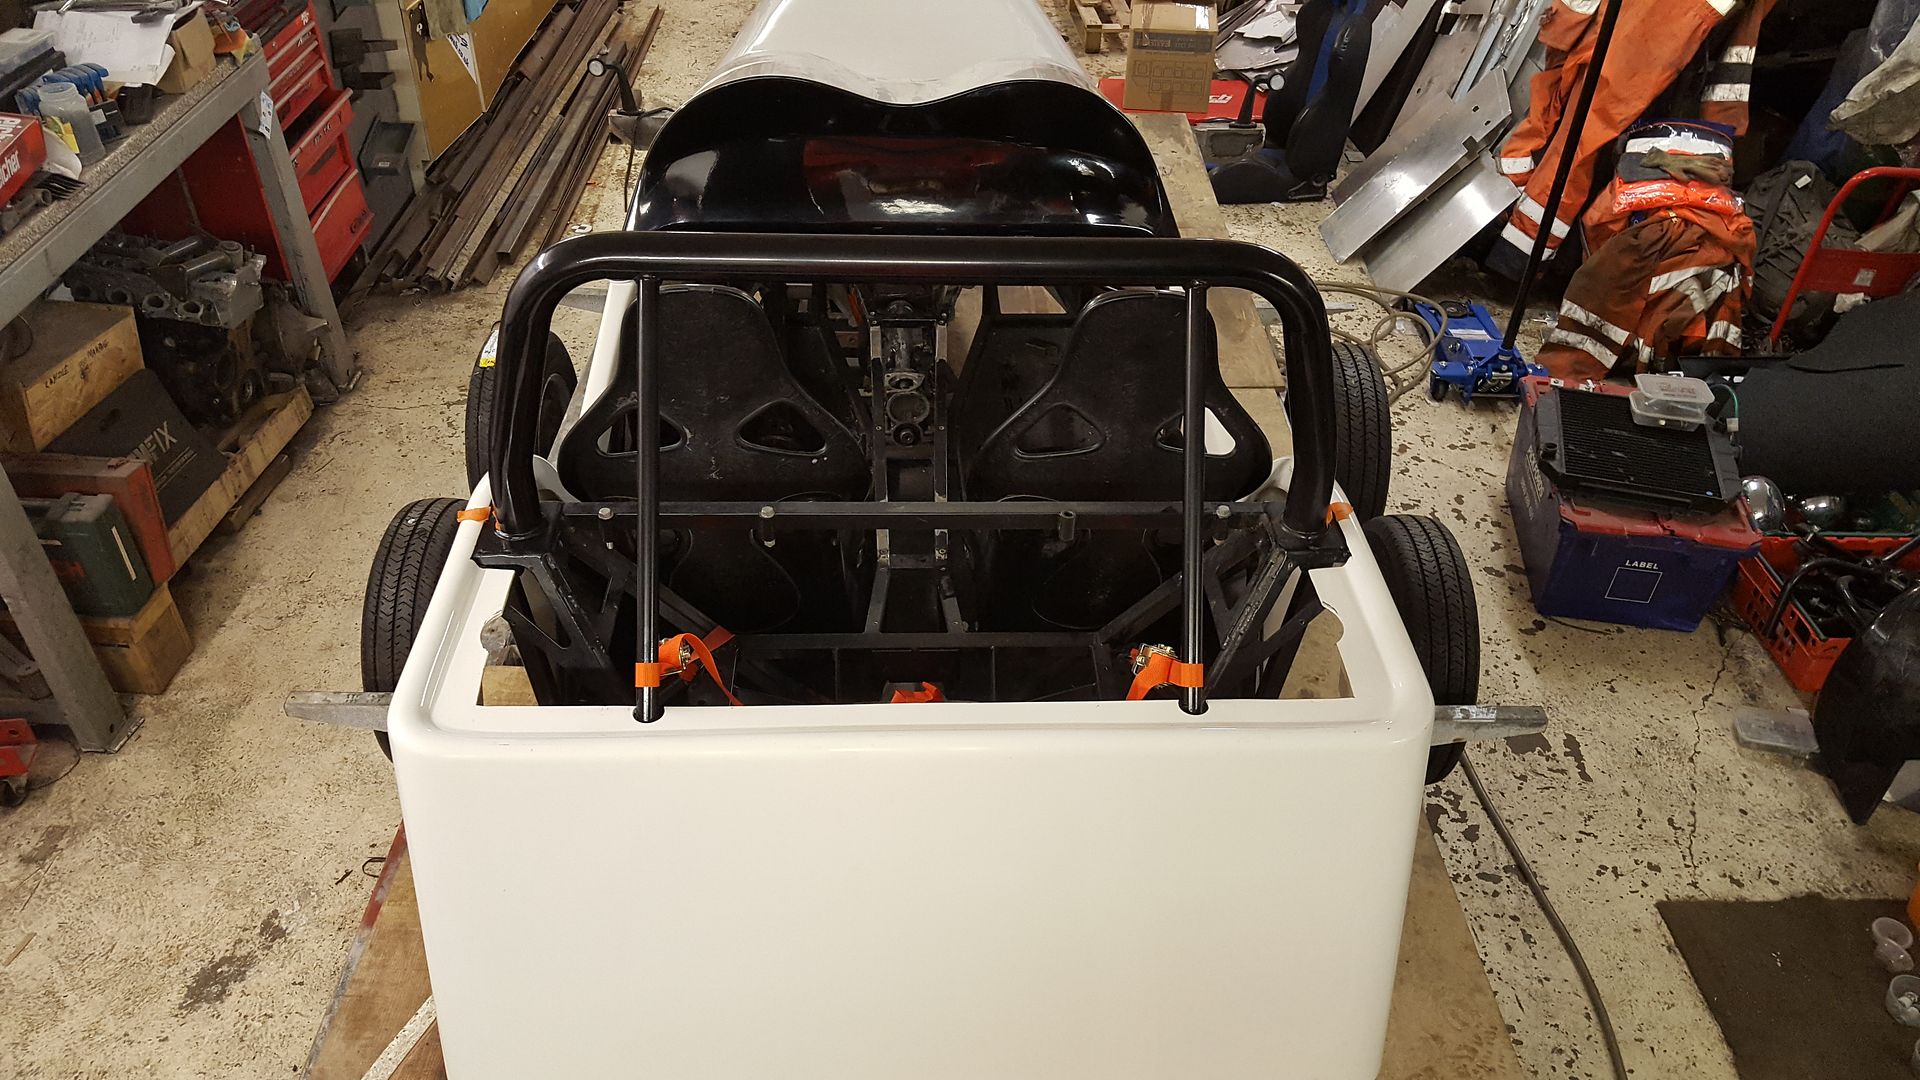
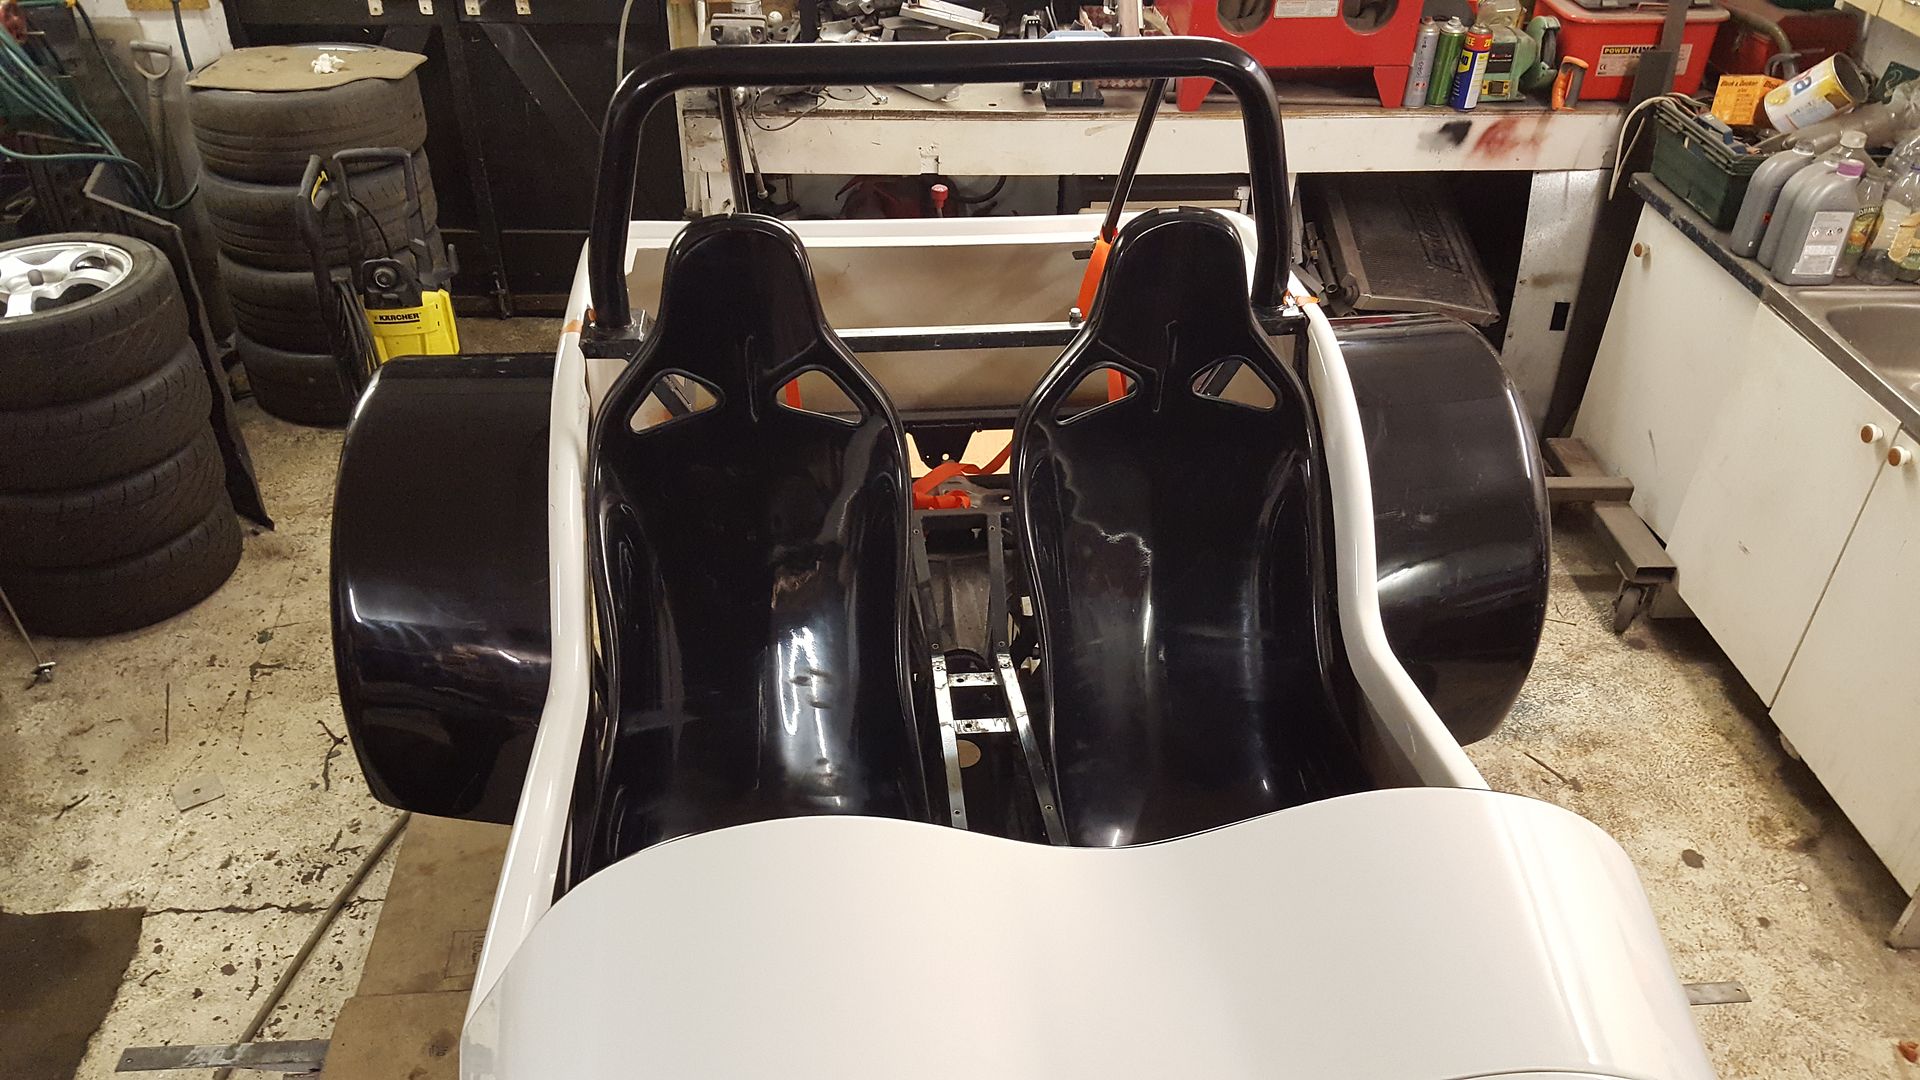
I thought I'd have a little sit in the car to see how it feels and disaster!
This picture is taken at my eyline
You can't see over the dash!!
The seats look right for a GBS ZERO

But everyone in a MNR VORTX sits a lot higher. The sholder holes in the seats are well high of the rear panel and the drivers chin it at the top of
the dash. The top of my head is in mine!

At first I though the body was on too high, and I obviouly can't drop the body down any more as it's on the rear turrets.
Then I realised that it couldn' be too high because the VORTX body sits on the bottom of the chassis..... The same as mine. Here's a vortex
chassis
So looked at some VORTX build threads and they have a lot of cross braces on the floor
And they use huge 50mm spacers, then the runners which are probably 25mm and then ontop of the 25mm chassis section, it means a vortx seat is 100mm
off the floor!!
Not ideal because ideally you want your weight as low as possible, but that' the way it is
So got some testing purposes spacers under my seat
Raising it right up
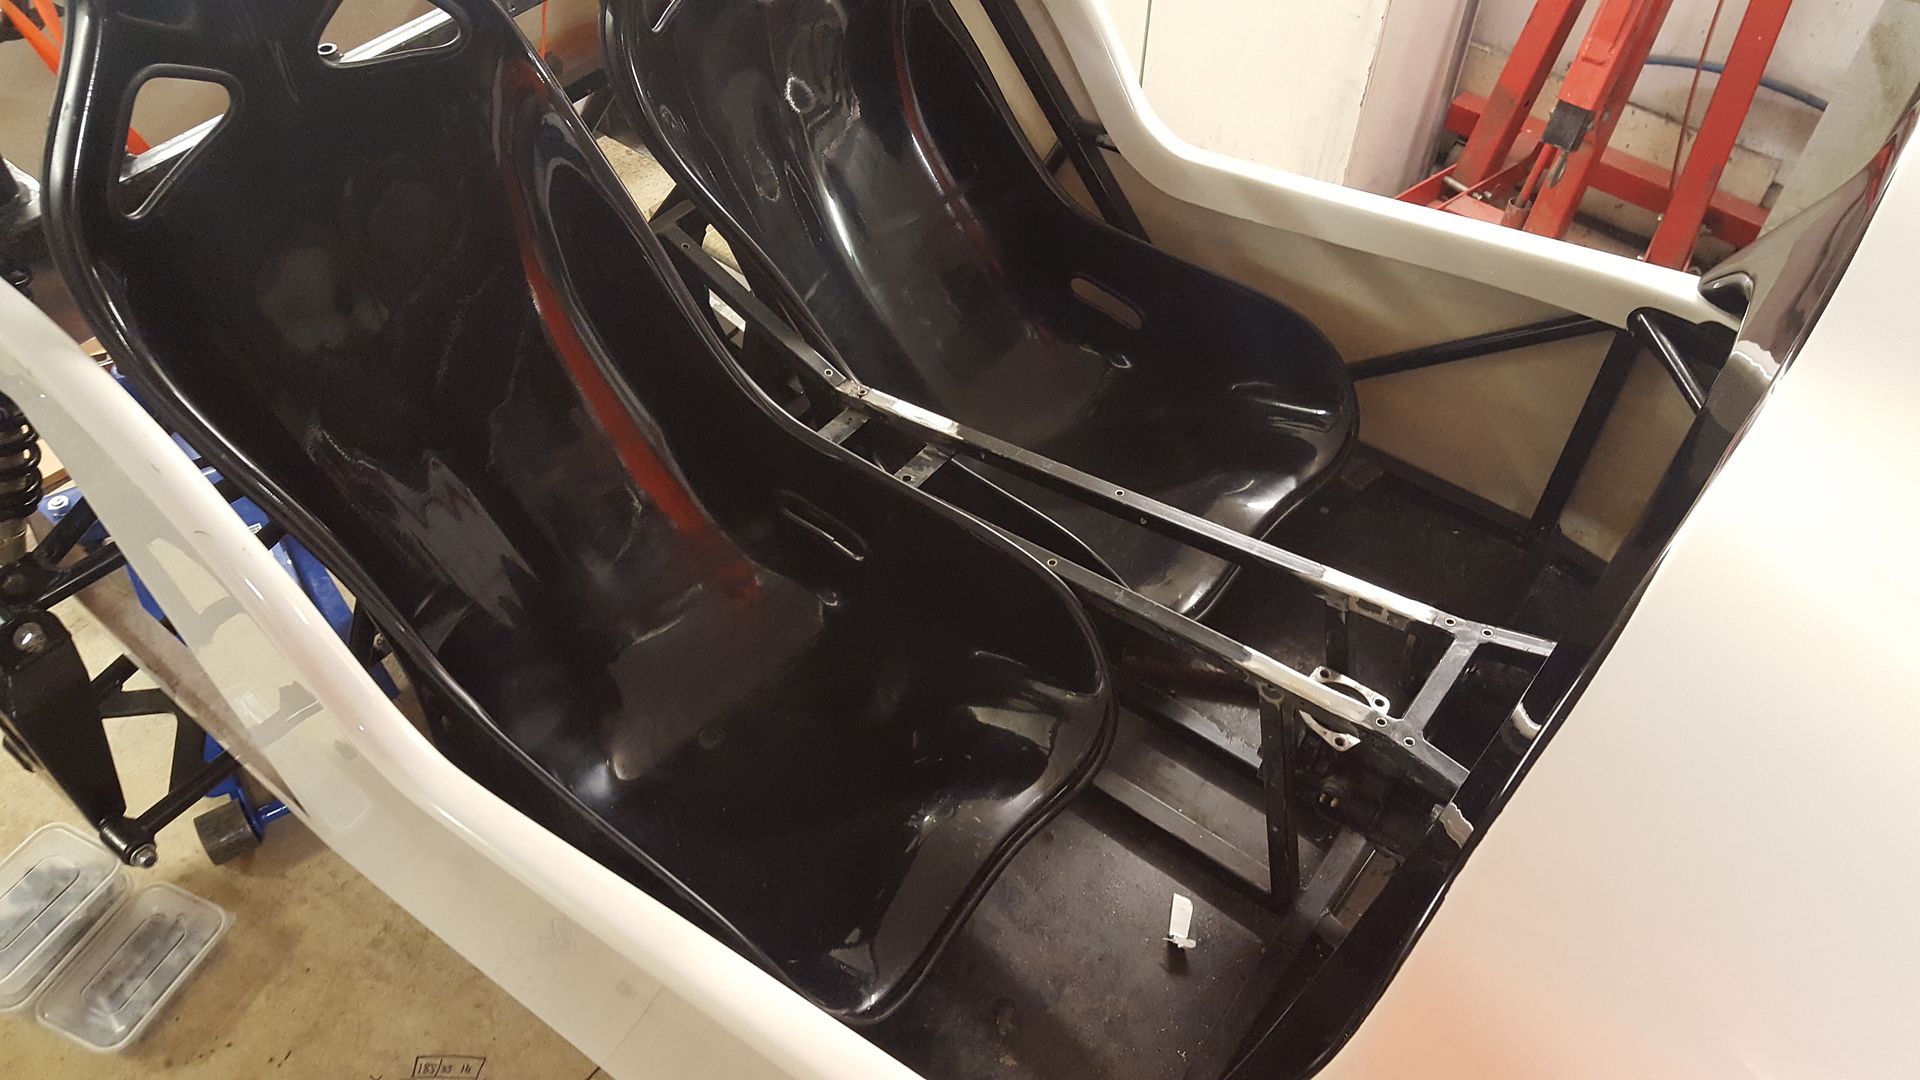
Which results in perfect viability
I tried the wheel in to check that wasn' down between my legs, it' right at the bottom of it' adjustment here but I need to cut the
scuttle to move it up, but is able to go up another 50+mm

So it think it will all be ok.
40inches - 17/11/17 at 09:42 AM
I had the same problem with the MK and GRP seats, needed 25mm box section for mounting, plus 50mm spacers, plus the thickness of the slides.
[Edited on 17-11-17 by 40inches]
CosKev3 - 17/11/17 at 09:43 AM
Don't raise the seat too much,my new seats this year are slightly higher than my old ones and with a aeroscreen my helmet starts to lift at speed
now as the air is getting under it.
From my experience you want your eye line tight on the top of aeroscreen,so you can't actually see the nose cone from your normal seated
position.
You need to sit yourself up in seat when parking etc to see nose cone.
super-ron - 17/11/17 at 02:31 PM
Ah good, I'm glad raising the seat is an actual thing. Now I know it works I can play with the height.
super-ron - 20/11/17 at 01:05 AM
Waiting on some 25x50 box to turn up so I can decide exactly where the body will sit. It's really hard to measure because all the edges are
rounded and curved, and it fits from the mould are done freehand. So it's really tough to get a proper measrement between the chassis and body. I
taped some aluminium strips at certain points from the chassis
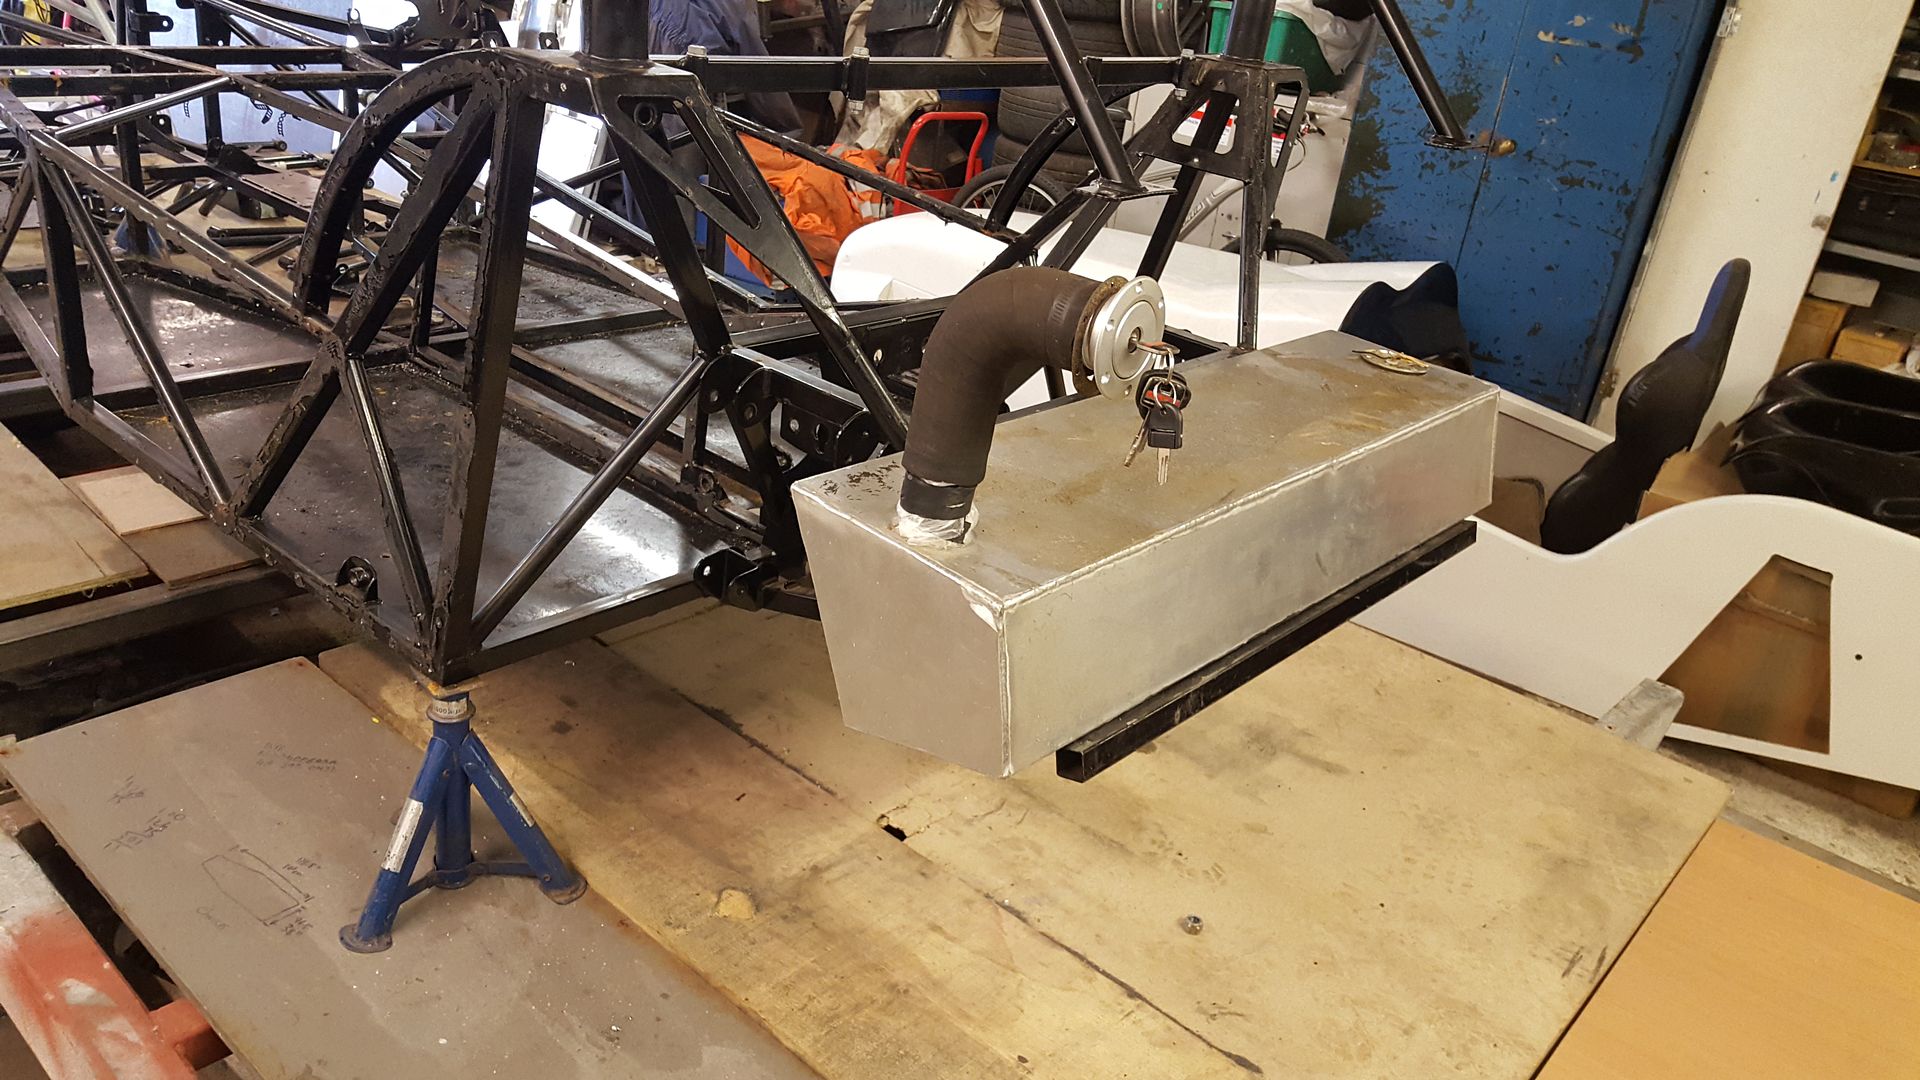
I tried the tank in too to make sure you can get it in and out with the body on, if needed
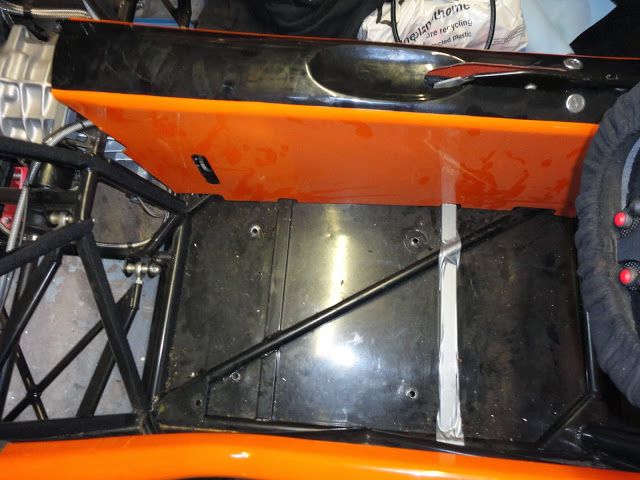
All the GBS boot panels fit perfectly.
I'm going to put some rails down the back as there is very little protection to the fuel tank, even more so with a fibreglass tub instead of a
steel one. It only takes someone to reverse into it with a tow bar and it's through the tank.
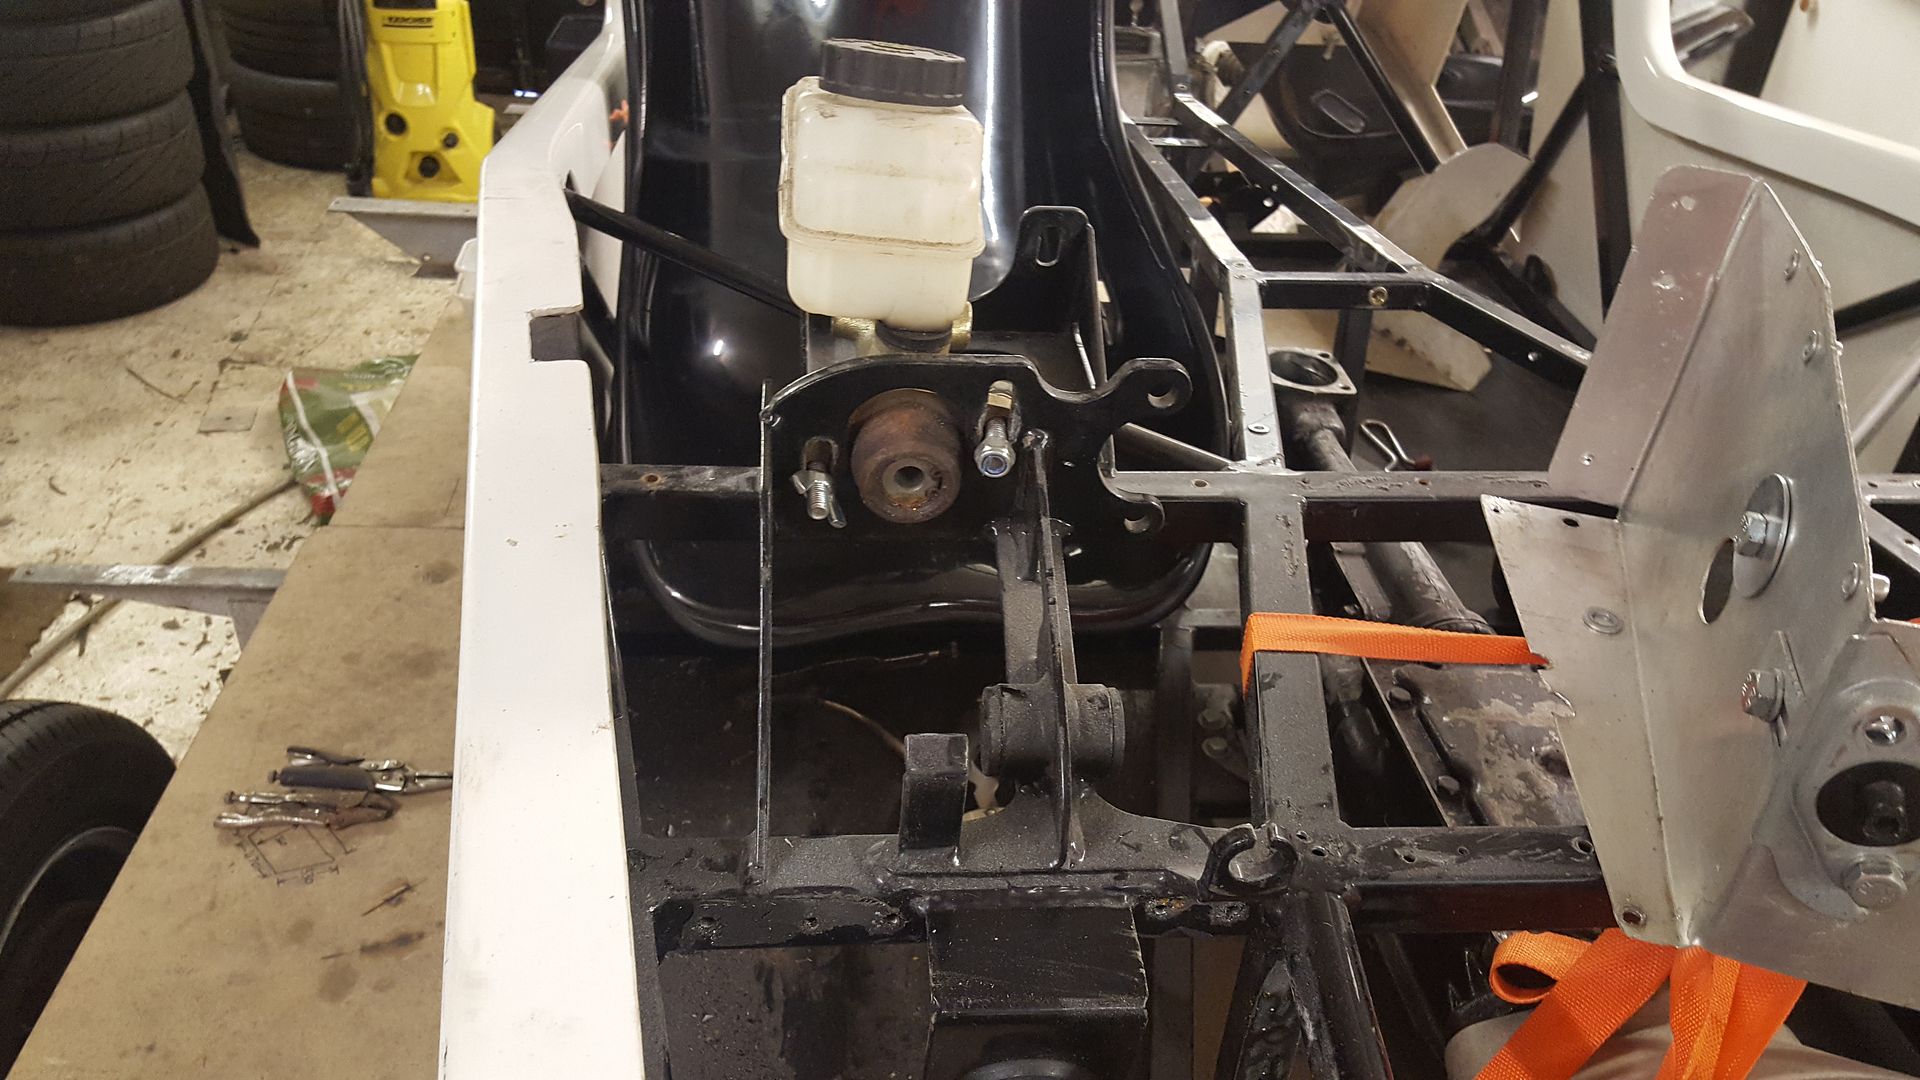
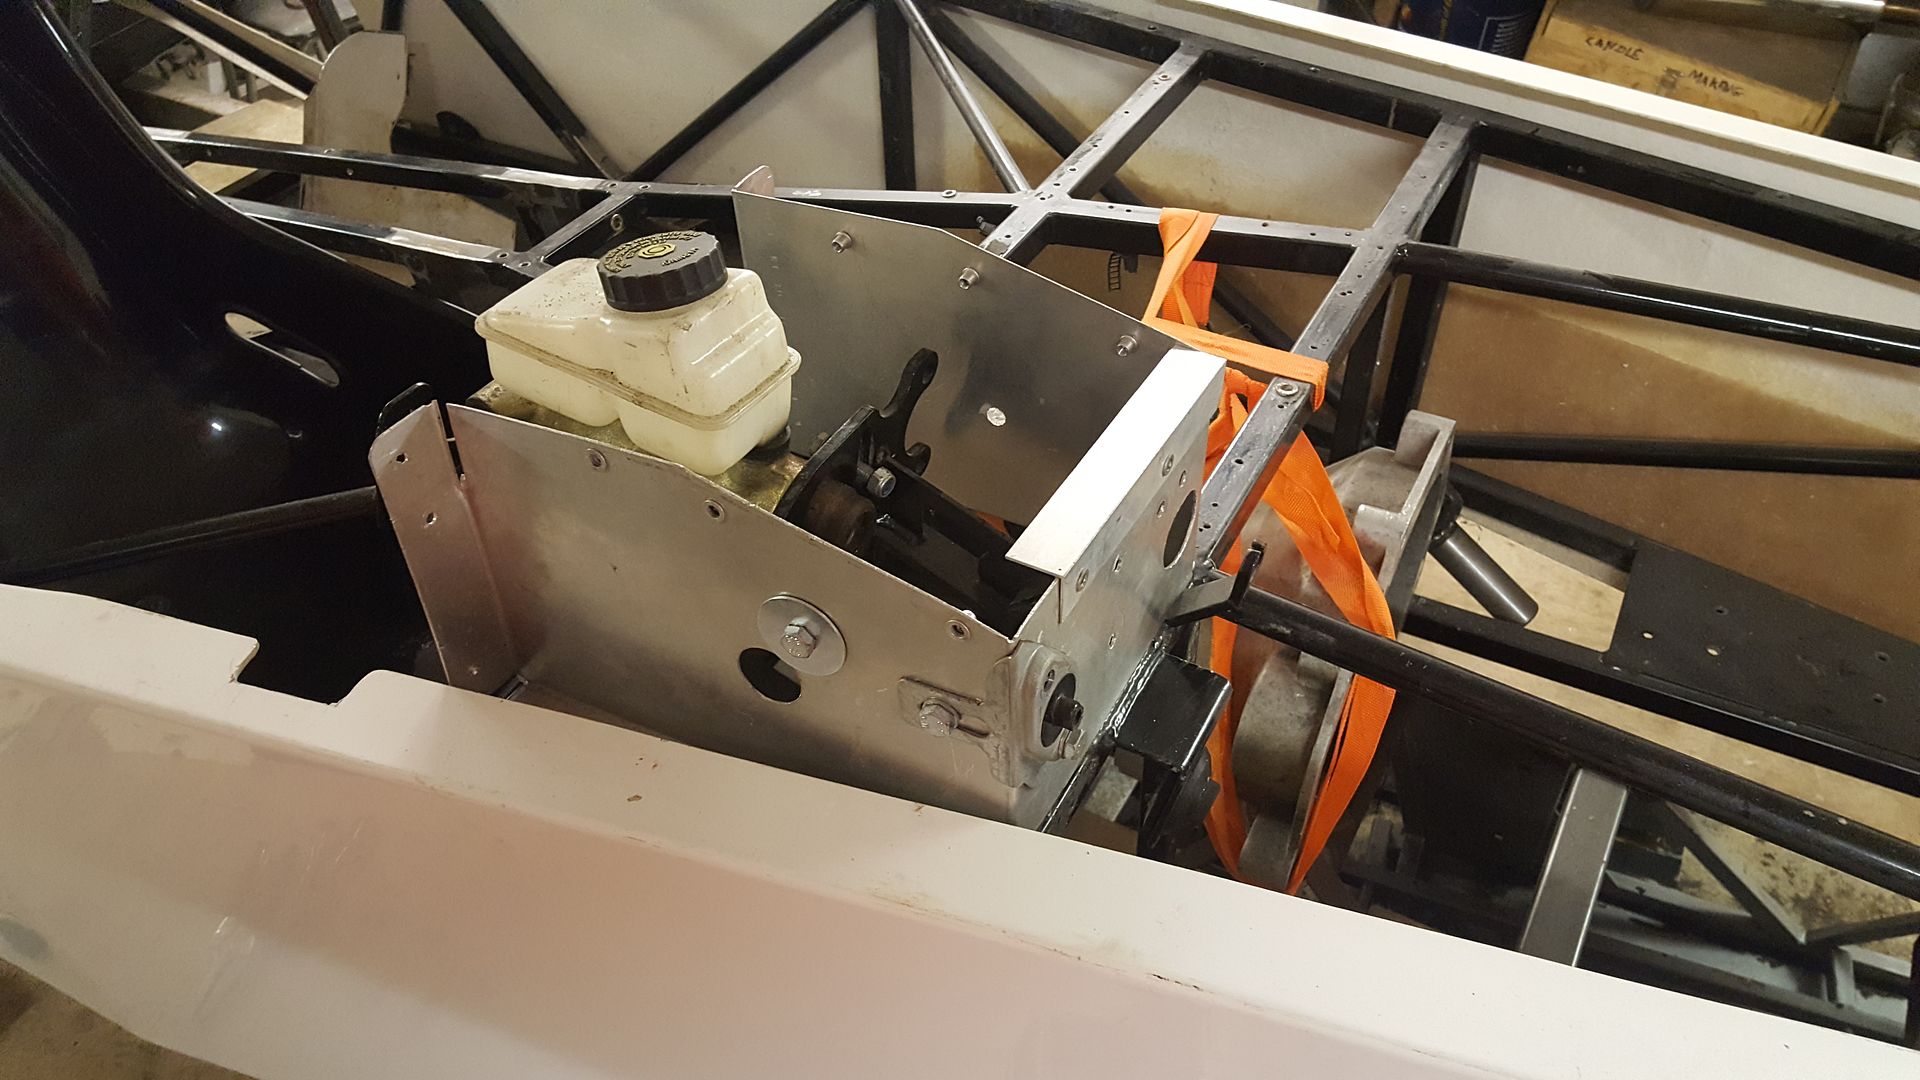
The standard gbs brake set up uses a Sierra 4 port mastercyliner
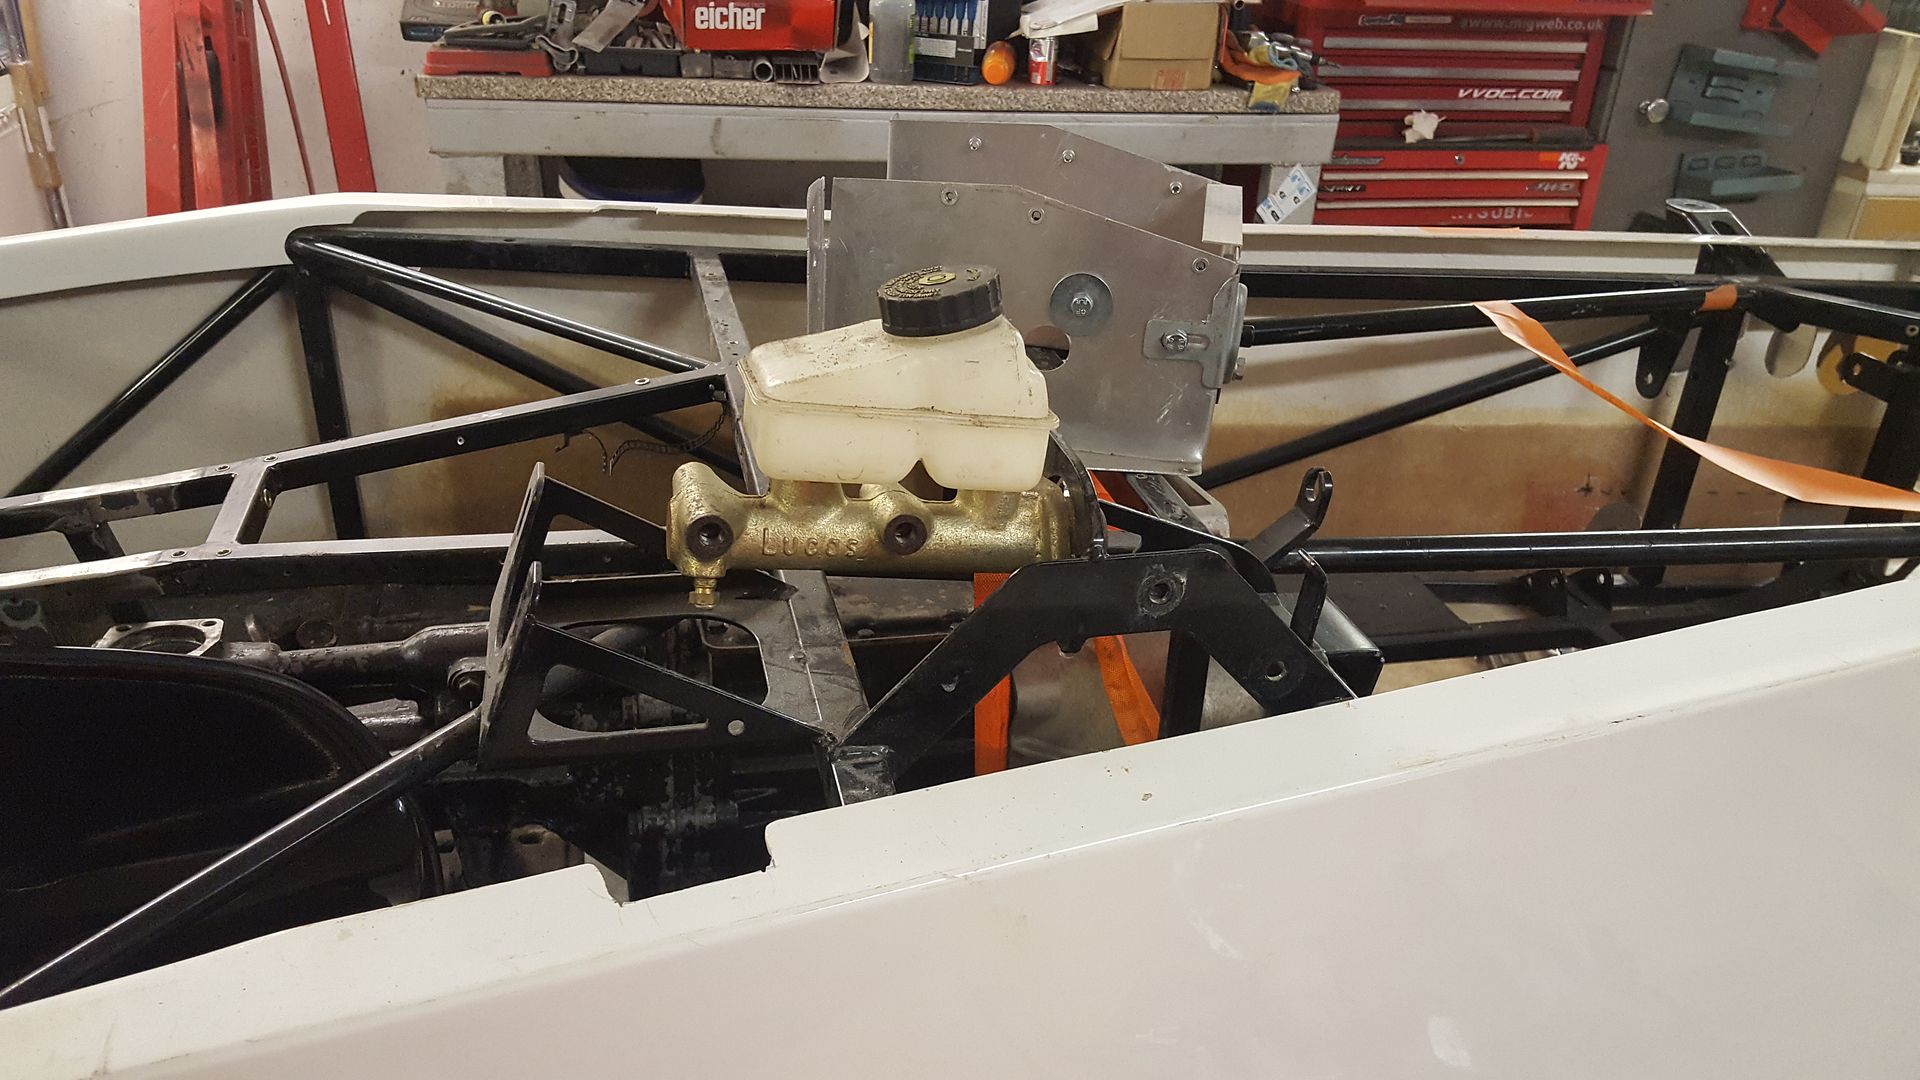
Then they have a little panel around it
And a lid which then keeps your feet and the engine bay separate
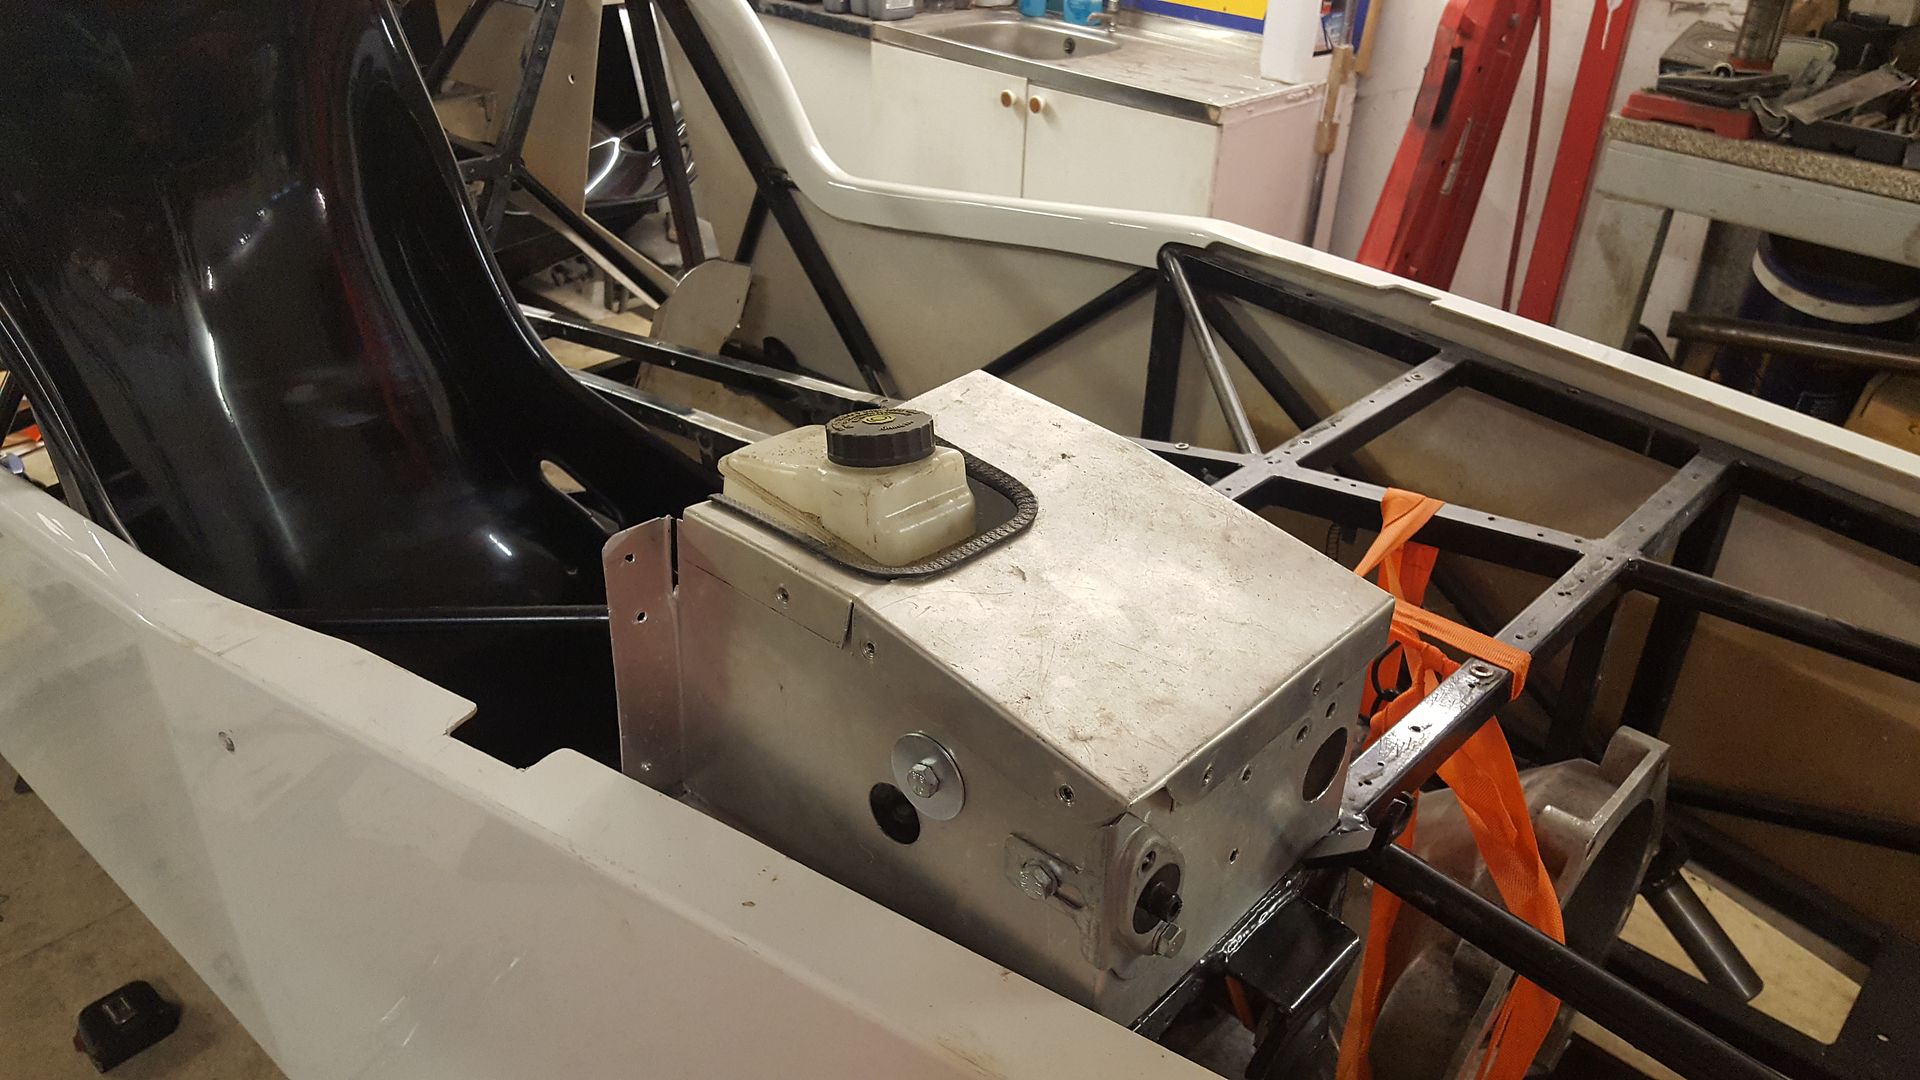
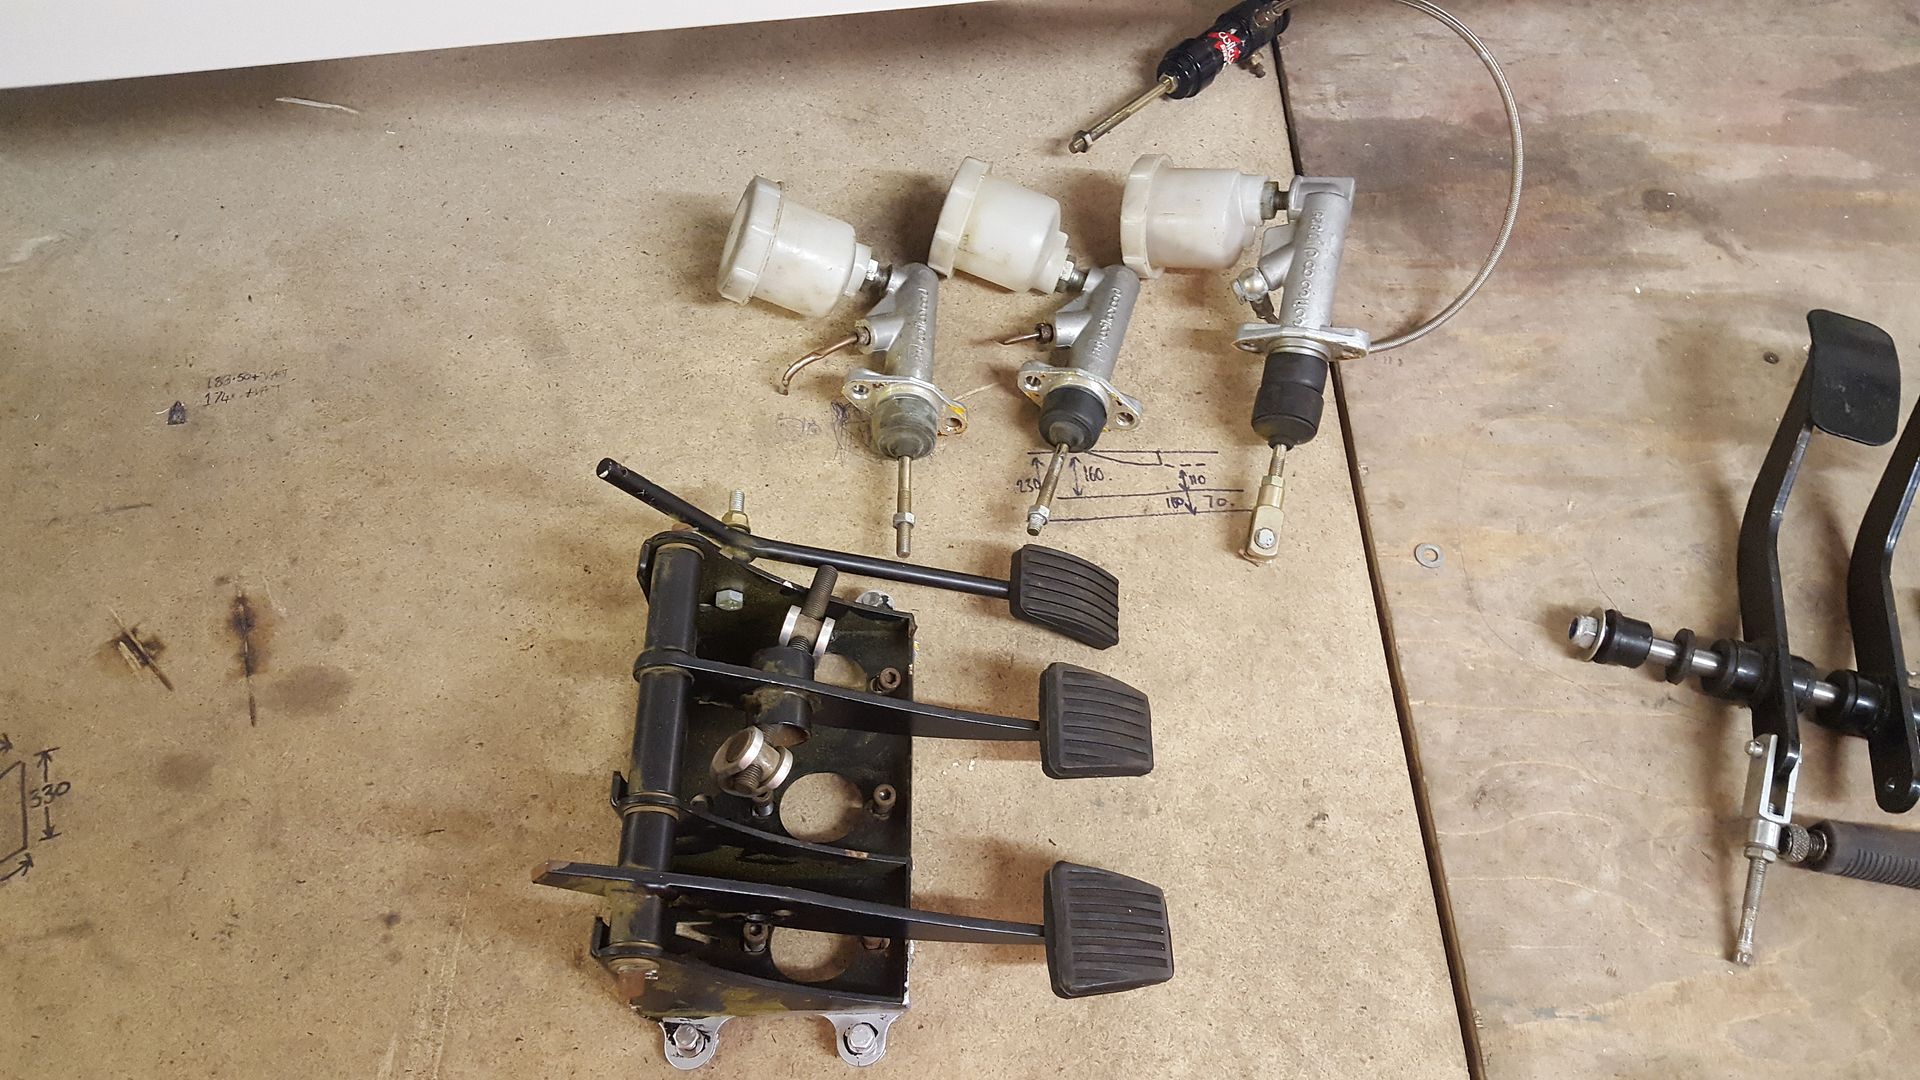
The Locost came with a proper bias set up, with the 3 separate resiviors, so I'm going to have a close look at the race series to see if
I can not that to fit.
Due to where the steering shaft comes through I don't think I can use it as the locost was, but the gbs zero race series has them up where my
Sierra one is facing backwards so I'll have a closer look at the racing chassis to see if much is different in that area to mine besides the
extra holes.
super-ron - 21/11/17 at 09:14 PM
Phoned up GBS yesterday for a nice chat. I had a list of questions I wanted to know and Steve was happy to help.
First off was the front upper ball joints were different to my locost so I needed a pair of those. They had them on the shelf.
Next was the steering arm extenders. We went through our measurements and found the locost ones were shorter, again had these on the shelf.
Next was the propshaft. I knew already my locost one was too long. We compared measurements and it turns out mine is 65mm too long yoke to yoke. They
do have these in stock for Ł175, but as mine is brand new with all tight joints I'm going to look at getting mine shortened locally to see if
it's hopefully cheaper.
We went through the prices of all the interior aluminium panels seperatly as some I need and some I don't. They laser cut them all to fit
straight in. Alhough they aren't horrndously priced I think I will get a couple of 6x4ft sheet of alloy and spend a day making cardboard
templates to make my own to save some money.
The chassis came with a full Zetec engine mount kit, and they do full C20xe fitting kits. I think I will just weld Vauxhall flanges on the mounts I
have.
Like I said above the GBS ZERO Standard uses a normal 4 port Sierra master cylinder, but the ZERO RACE uses the bias pedal box. We had a chat about
the difference in mounts but they said as I'm using Standard Sierra calipers unless it' a focused race car a pedal box is overkill. And bias
boxes are a bit of a pain to get through the IVA test as they need to be locked in position ect. So I will keep the pedal box I have incase I do want
to upgrade at a later date, but I will build it up standard for now.
And finally I asked if they did a template for the front suspension holes, but they said all their panels are laser cut out ready. So again I'll
be getting the templates out.
That was yesterday and the bits turned up today. So my first dealings with GBS are good!
super-ron - 29/11/17 at 06:00 PM
Few more deliveries.
A pair of Sierra cosworth rear wheel bearings
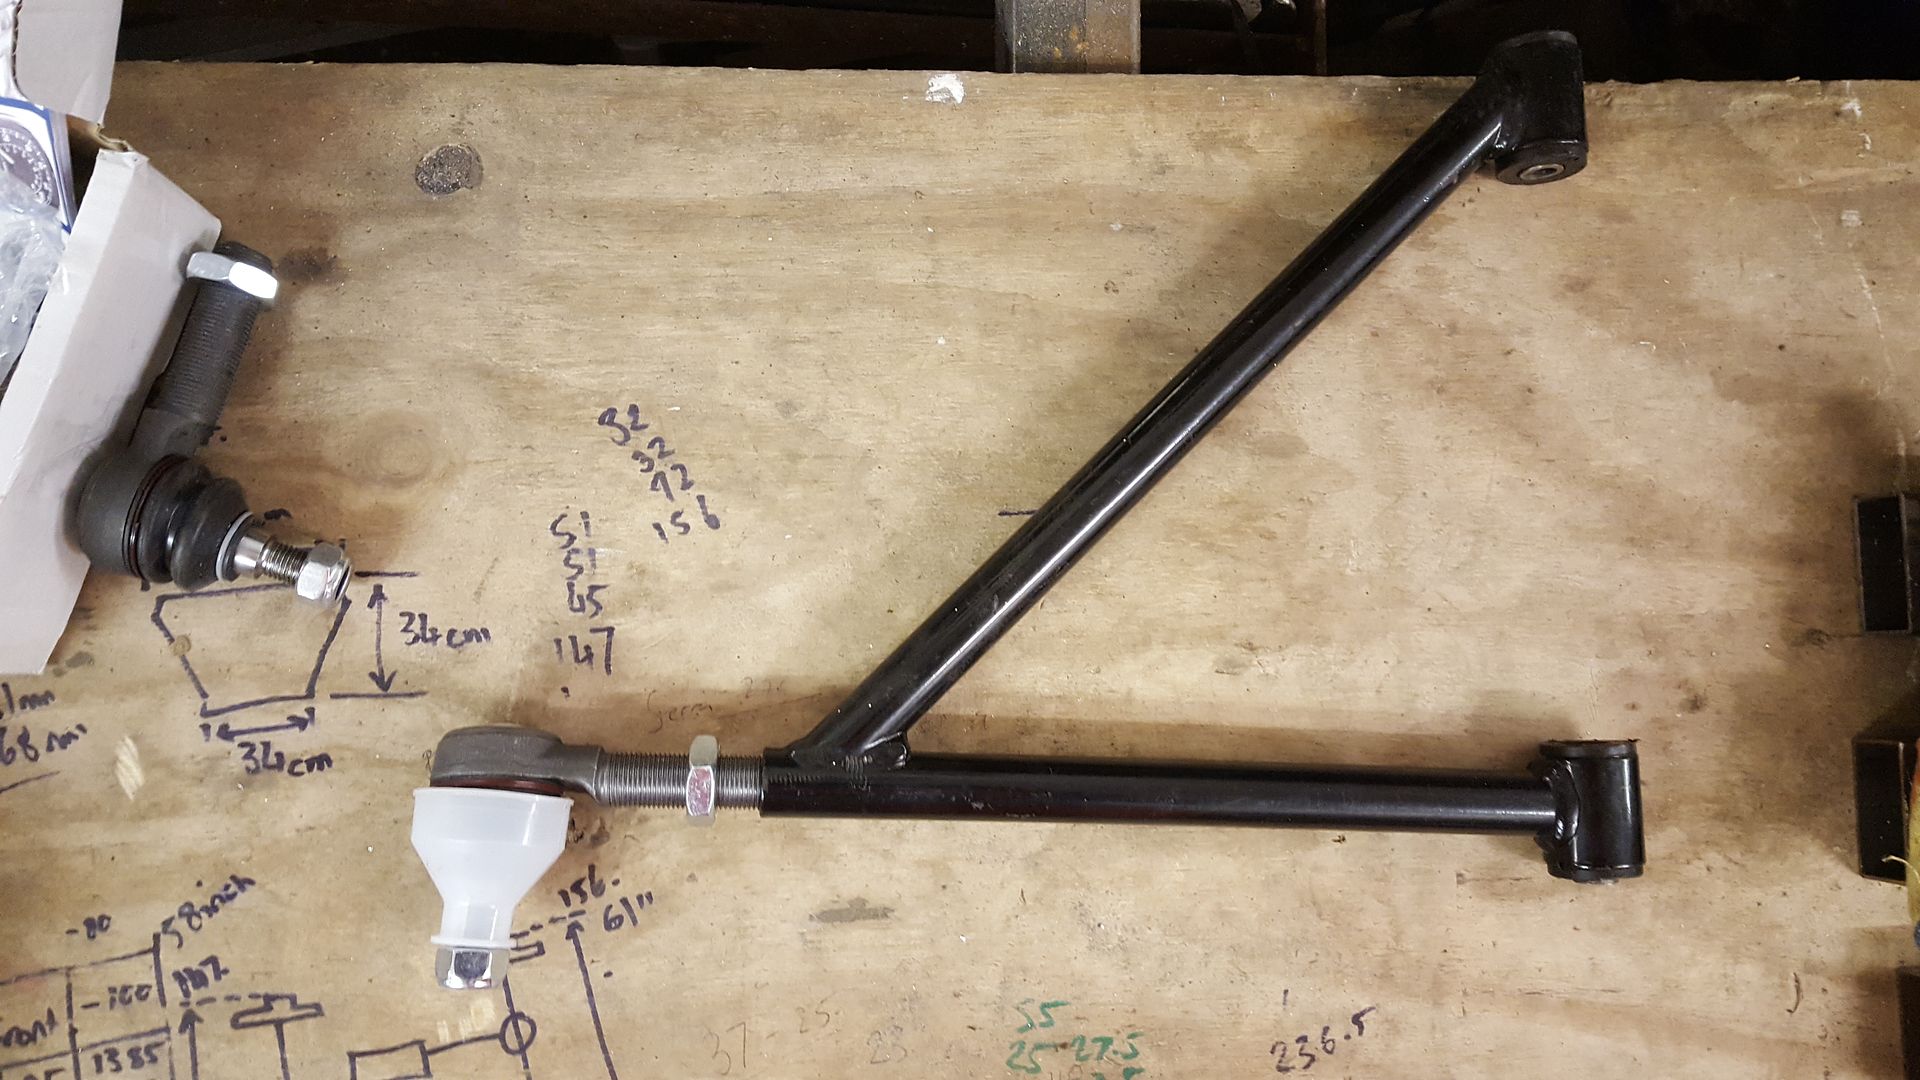
Tried the new track rods in the front arms, perfect fit
GBS sent me some spacers I apparently needed for the rear hubs to stop the c.v. joints locking out. And got the bolts from eBay
And some thin wall 25x50mm box to go on top of the chassis for the body to sit on.
super-ron - 12/12/17 at 10:11 PM
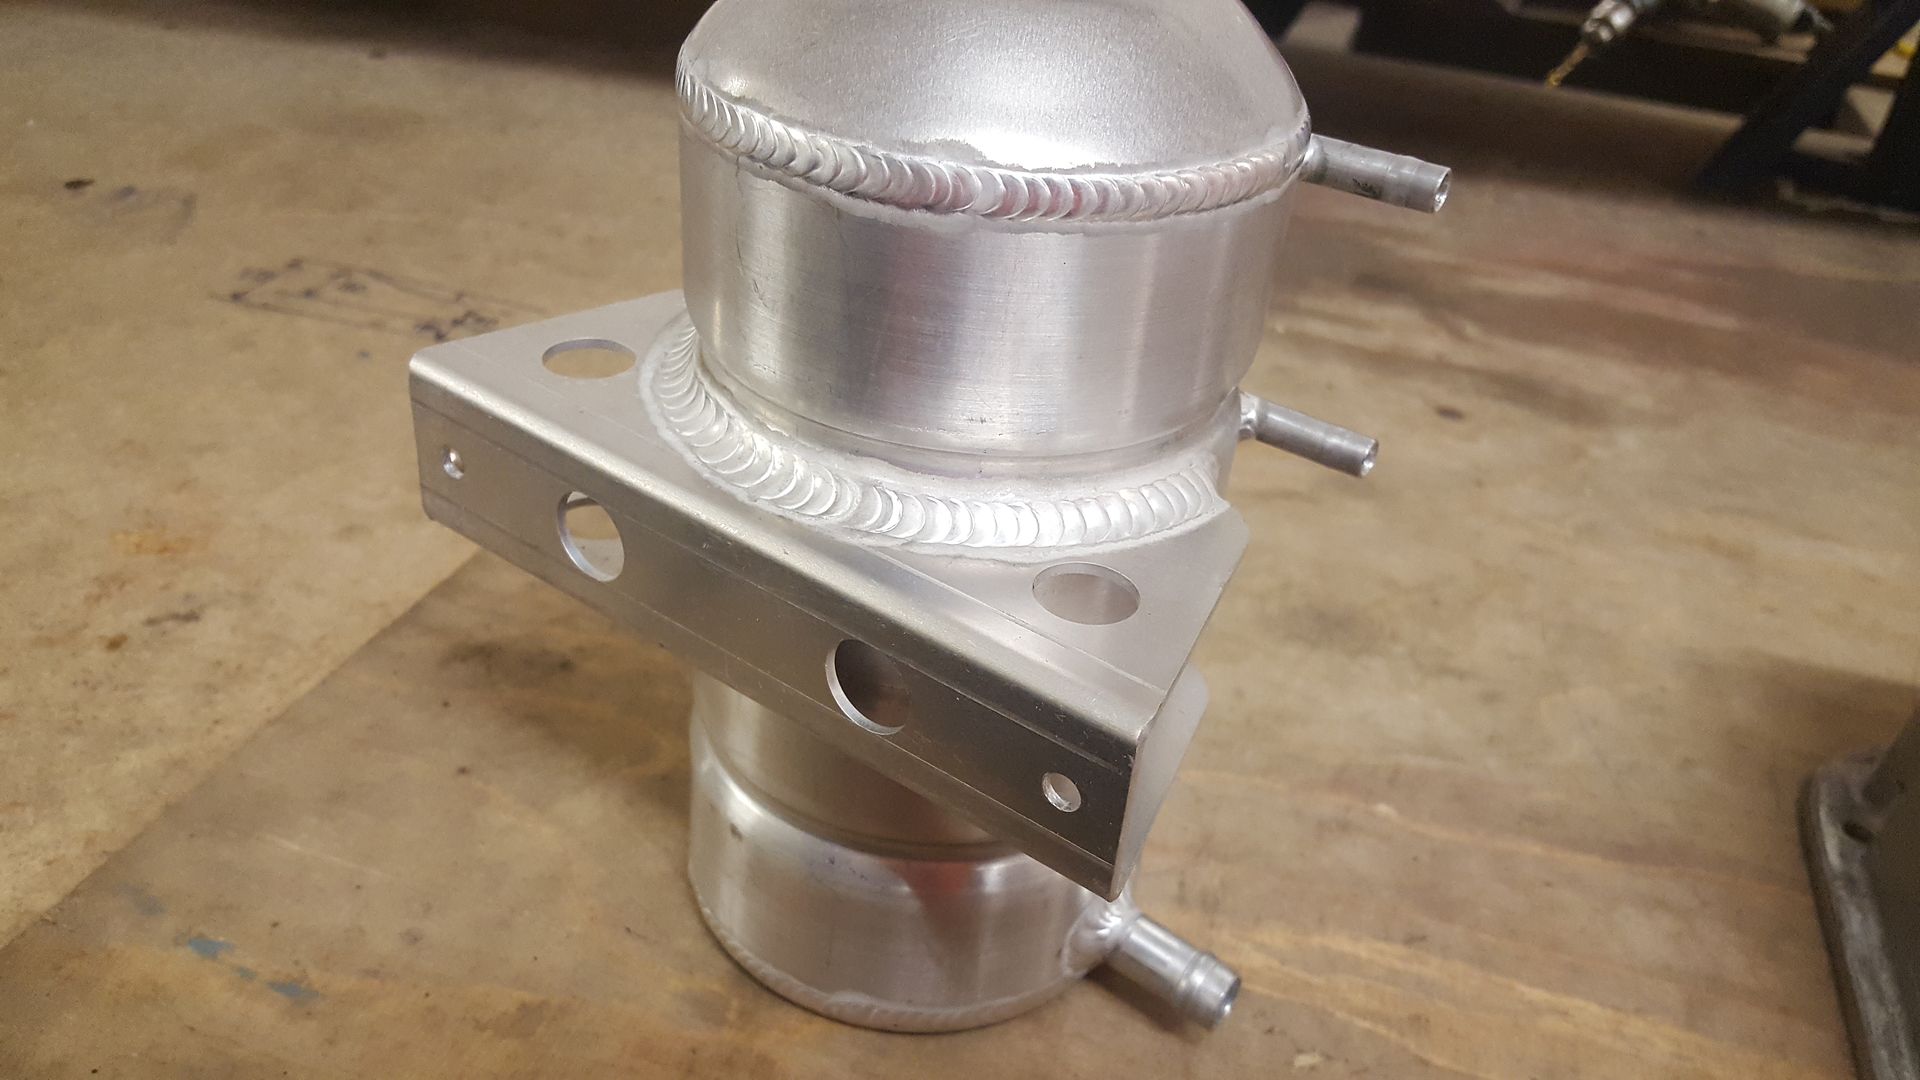
Couple more bargain eBay deliveries.
Won this sexy little number for Ł25. It' about 1.5 litres.

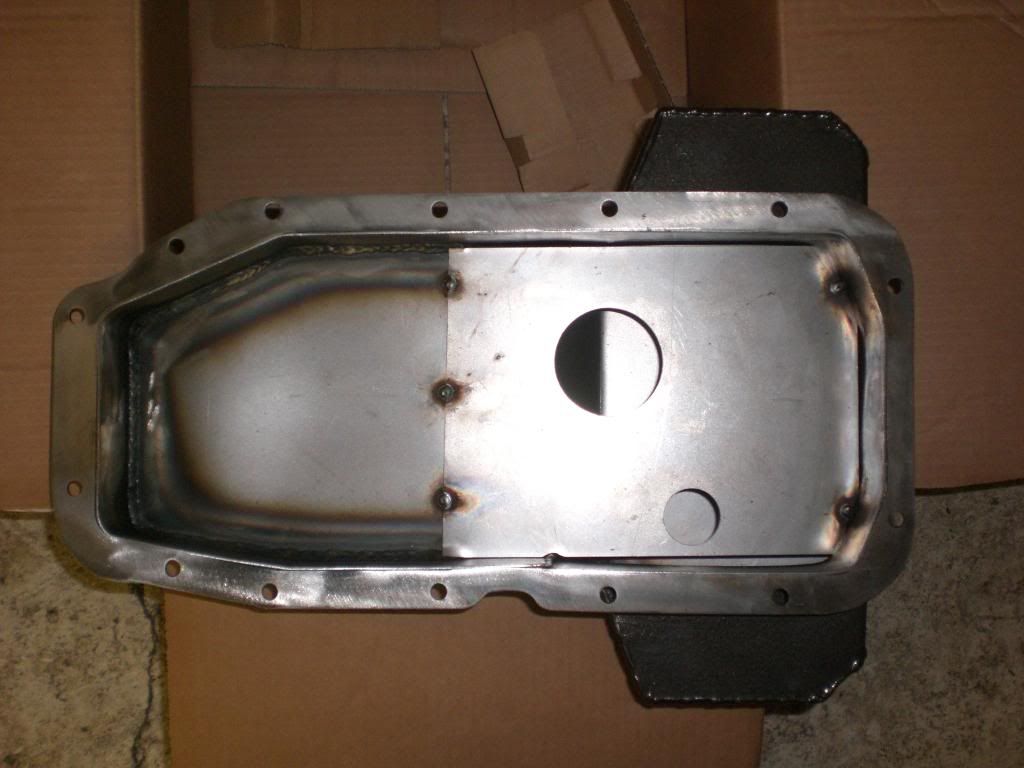
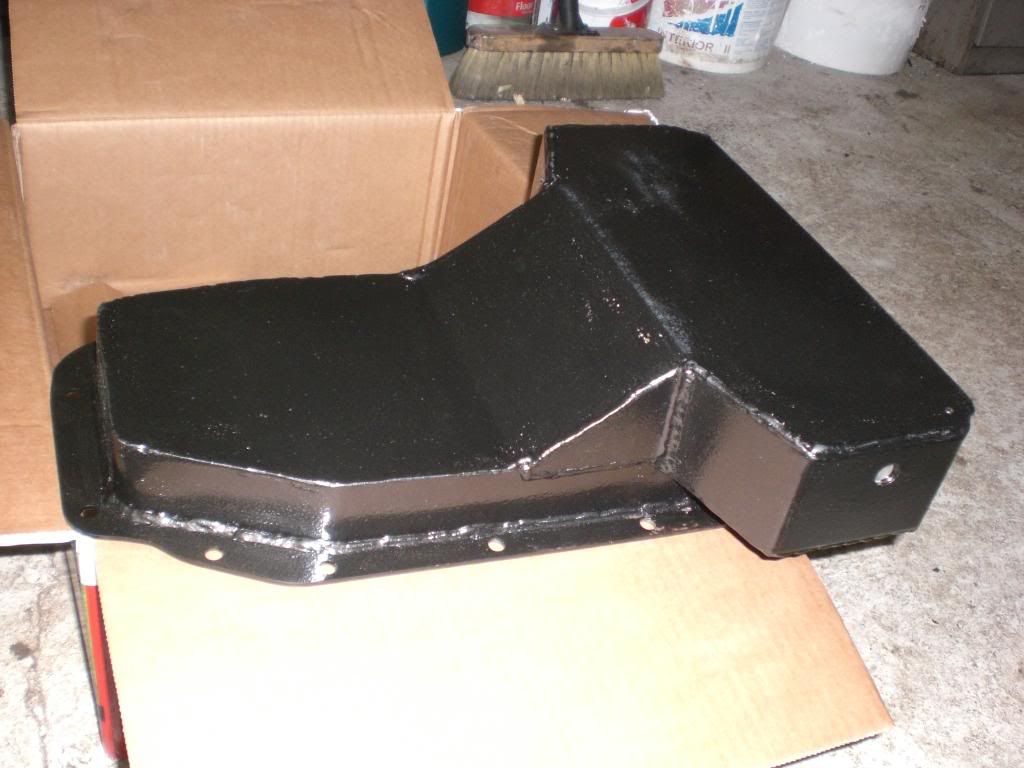
And this c20xe kit car shallow sump for Ł58. It's still got the Ł230 price tag written on the inside
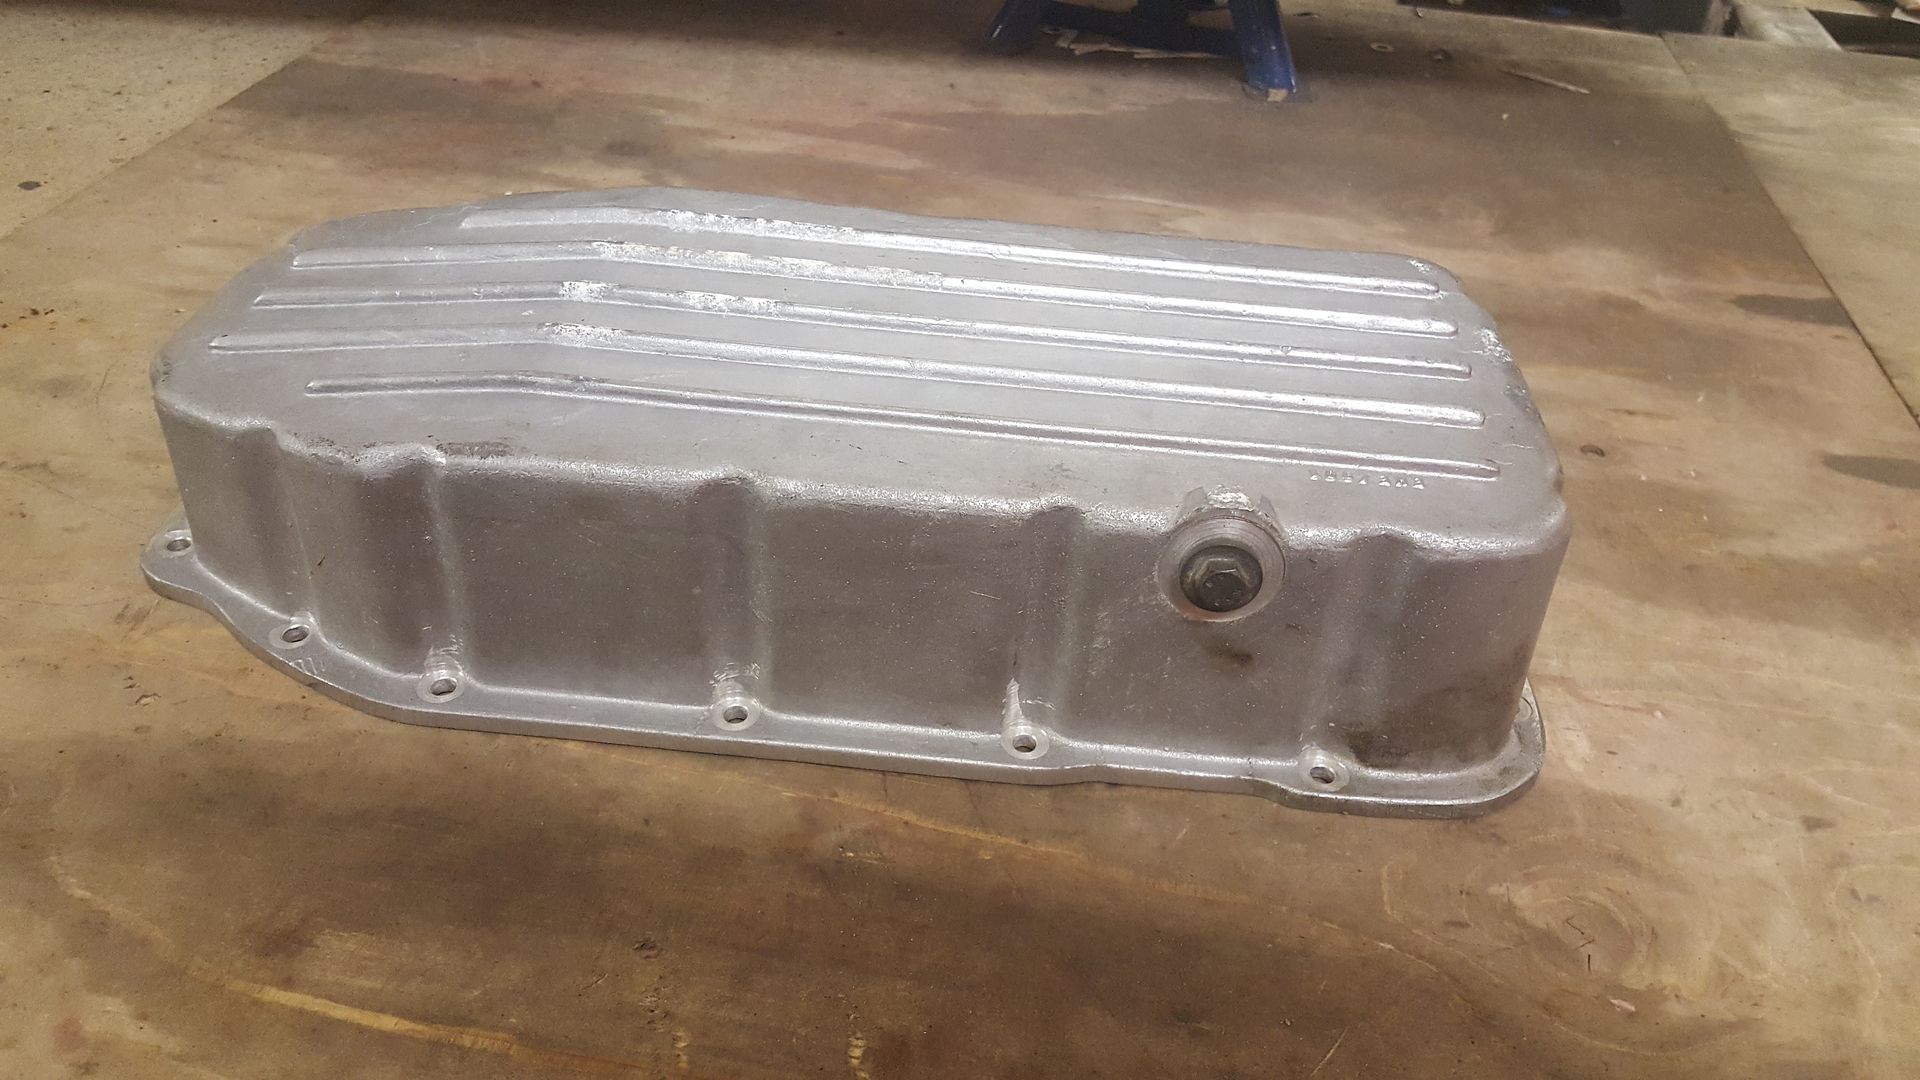

Hopefully I'll find some spare time to actually get some progress soon.
super-ron - 22/12/17 at 10:01 PM
Finally had a bit of free time to get dirty I was at the point where I had to work out how I was going to mount the body. It may not seem like a ot
of progress but there's about 2 days work here. A lot of trying and thinking and re thinking.
All the pictures so far of it all assembled are all just mole gripped together
The other problem is that the MNR VORTX nose cone, and the side panels are around 50mm wider than the GBS ZERO chassis at the front. Meaning at the
front the body wouldn't be sitting on the chassis.
I'd just had a bar going across for now
Annnnnd, the VORTX body is 25mm taller than the GBS chassis (although not really a problem, if you were to lean on it it would be!)
So I got some lengths of 25x50mm thin wall box to take up the height and width difference. So the 50mm wide will span the width at the front then fade
back in flush at the rear
I can't weld these directly to the chassis because I need to be able to remove them to get the body on and off. So the need to be bolt on
So got creative with a bit of 25x25 box
To make a tab
And another
Welded them on
And could now start centralizing the body on the chassis
It' not easy being down here on my own, you need 20 pairs of hands yo keep trying it on and marking, or the odd rachet strap
And got everything fixed to where I wanted it then I could start drilling
There will be more fixtures when I work out the best way to do It, but it's in position securely. The new beams are bolted to the chassis, and
the body and nose are bolted to the beams
I plan on trying to have the nose cone and scuttle quick release so if I'm ever out and about and have a problem I can gain access with out
tools
Because the bonnet is open either end it doesn't hold it's shape as well as the nose and scuttle and flairs out naturally at the bottom
I found these nifty stubs in the box of bits that came with the car
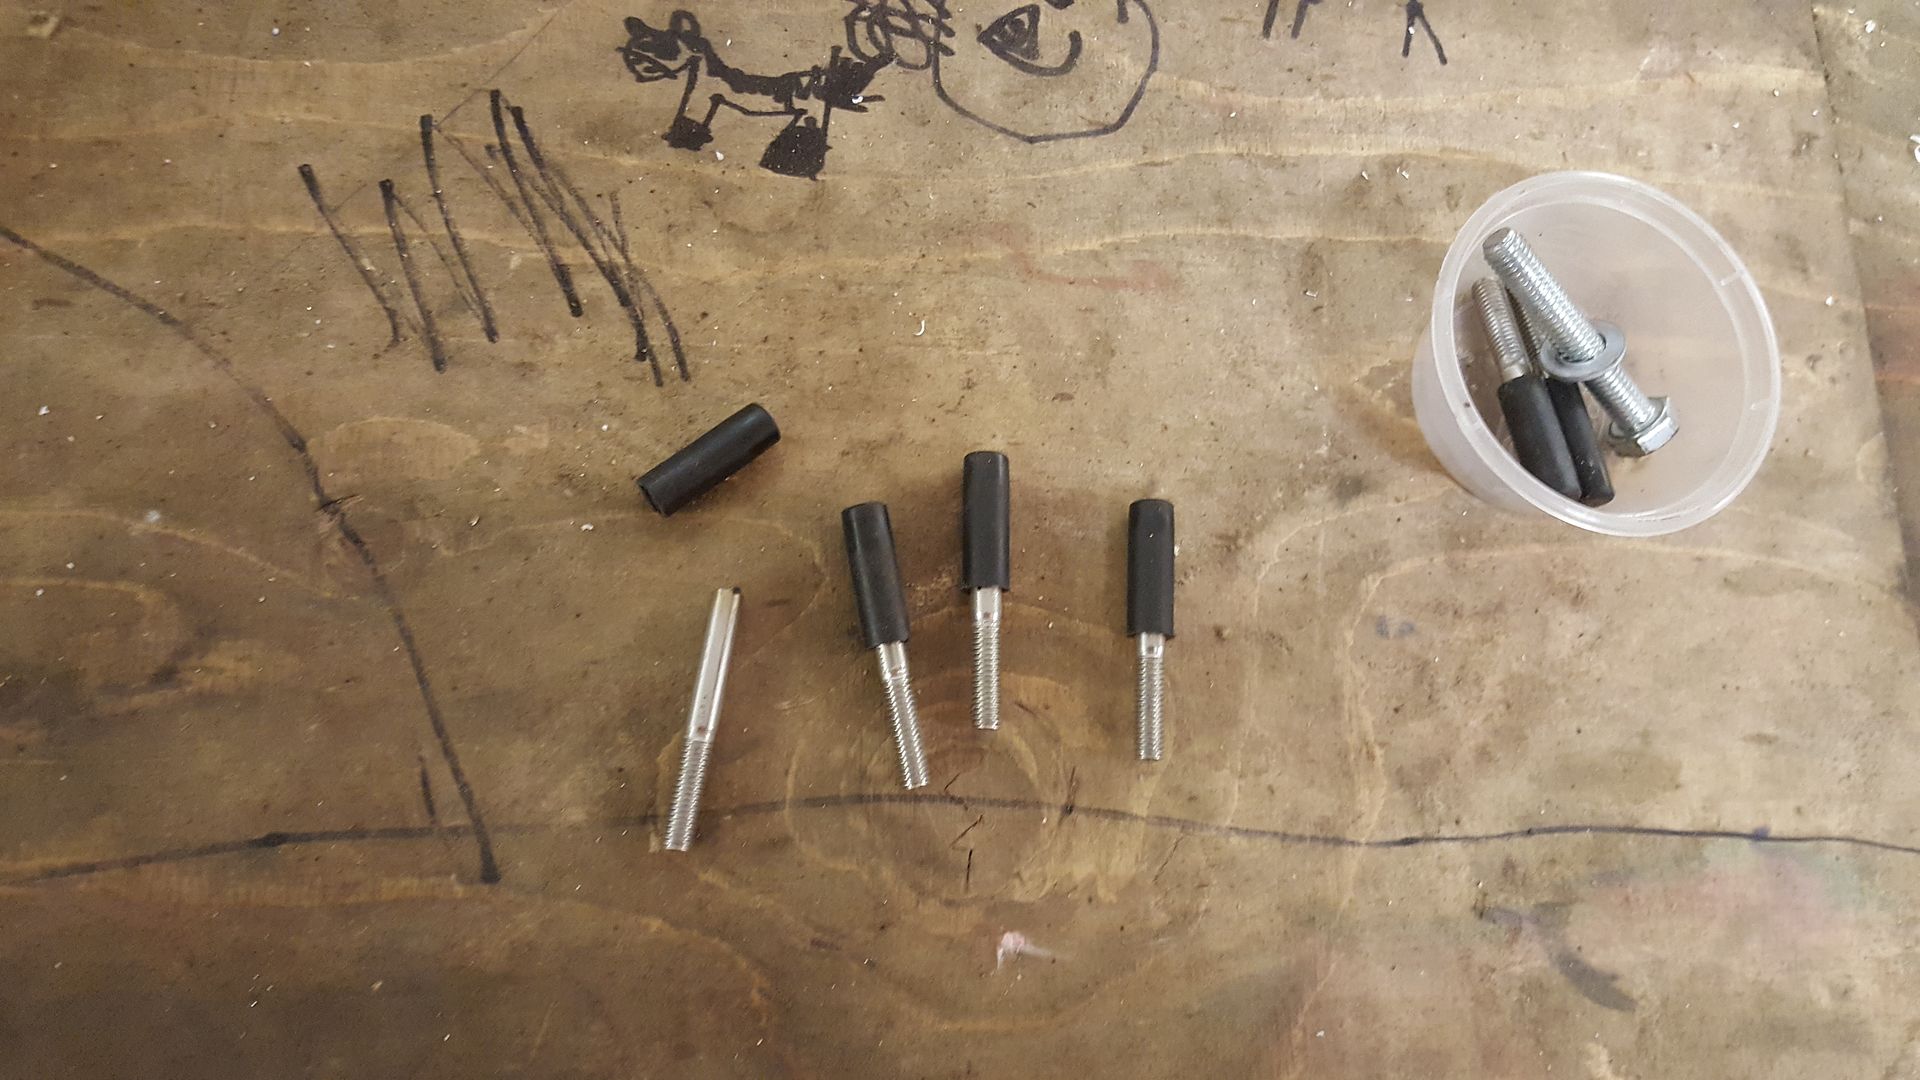
Out came the friendly rachet straps again to keep it in position
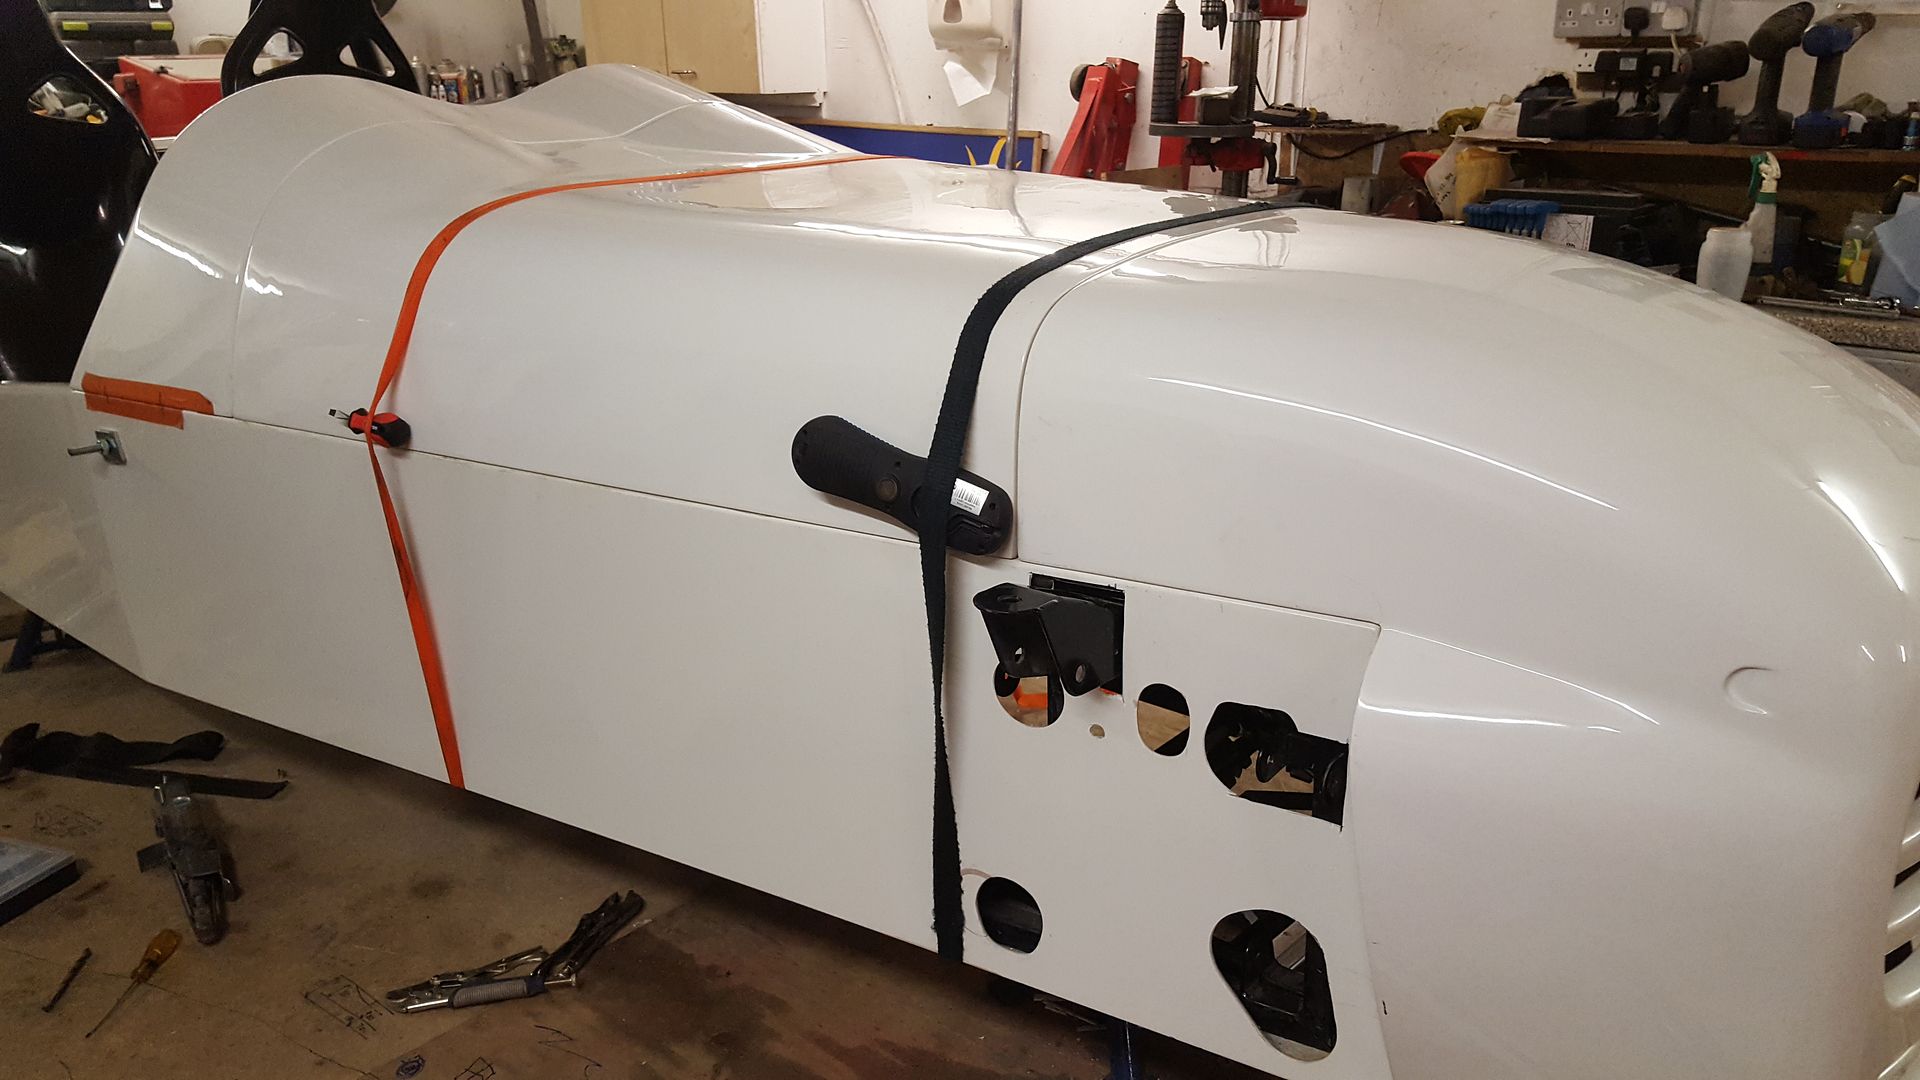
Then I clambered in the bay underneath and marked through the bonnet and body, drilled and tapped the rail and threaded them in
And the bonnet fits great now. Will have IVA over centre catches to hold it down
Just the scuttle to bolt down now but that's nice and straight forward.
I'm happy now I can see a direction it's going in again
super-ron - 27/12/17 at 01:07 PM
I drilled some more pegs on the rear to locate the scuttle.

So I could now take off the threaded bar now the body is fixed in place
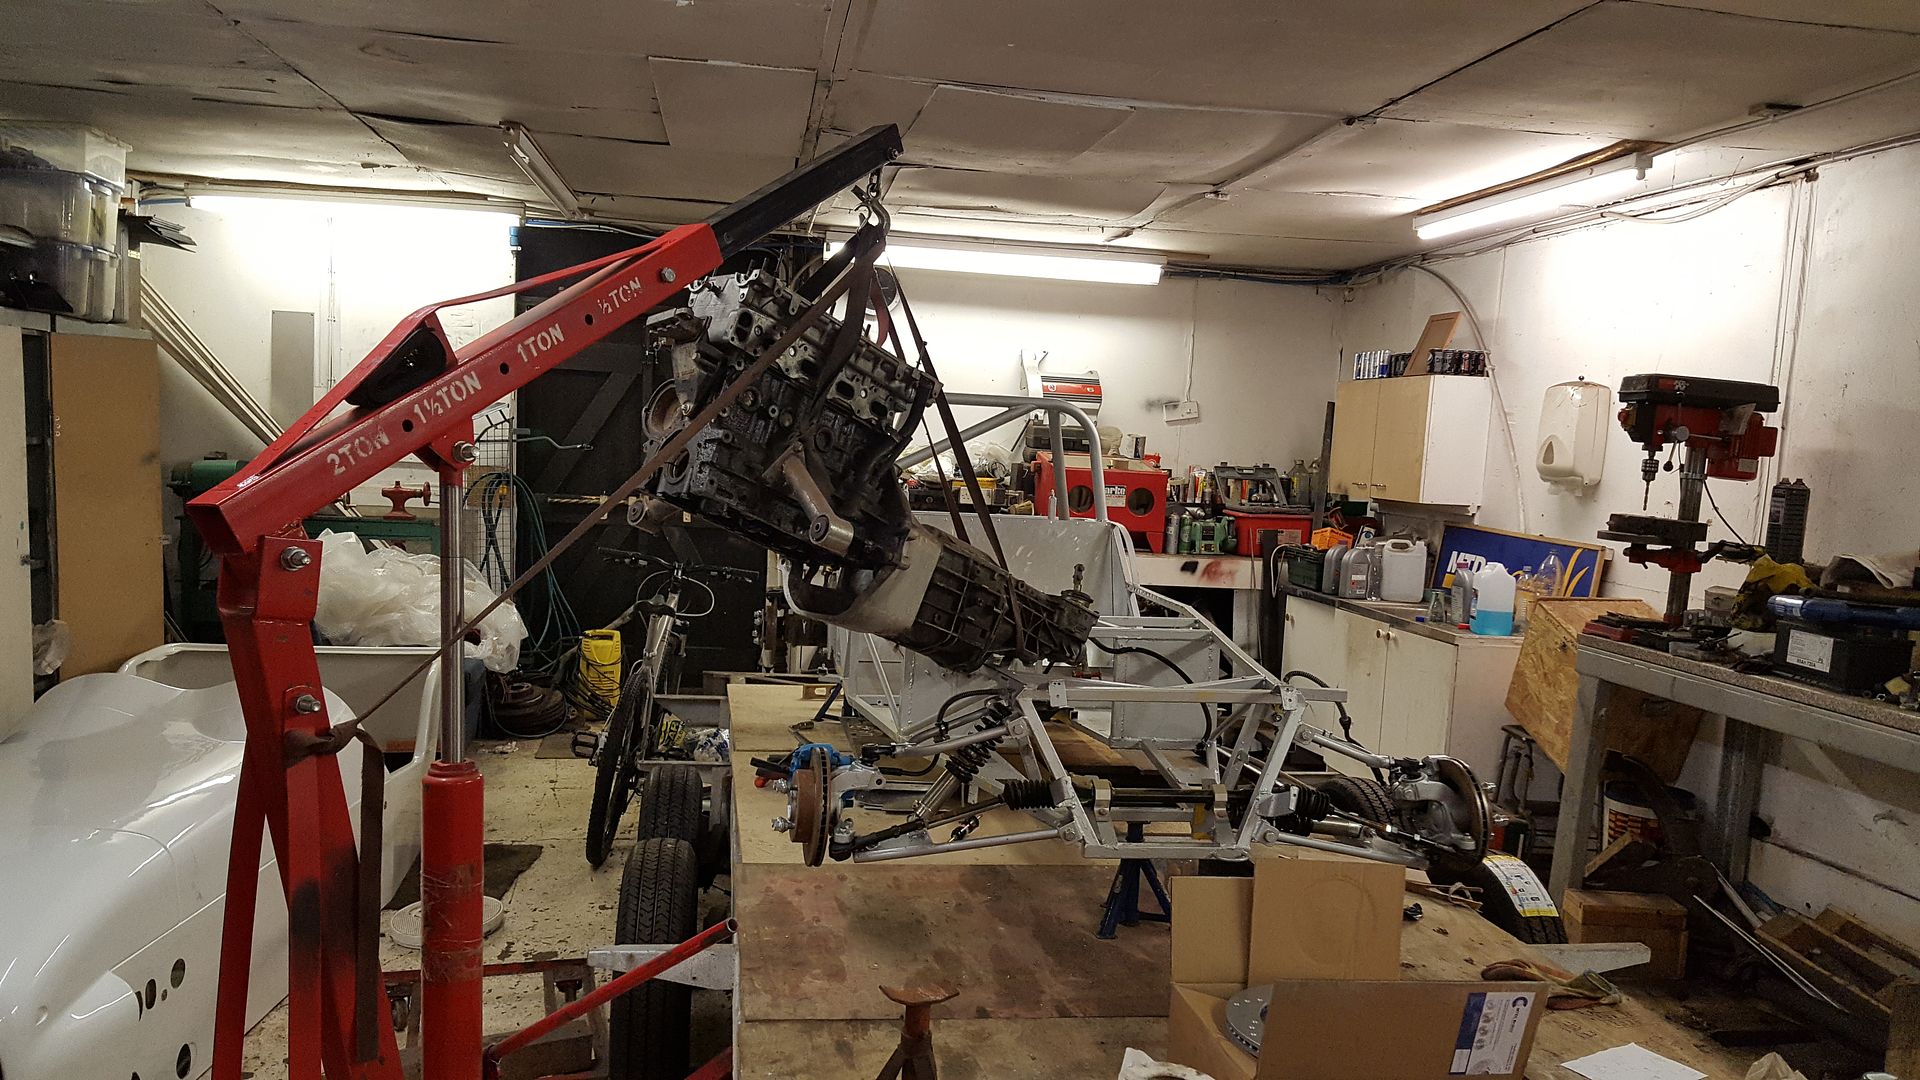
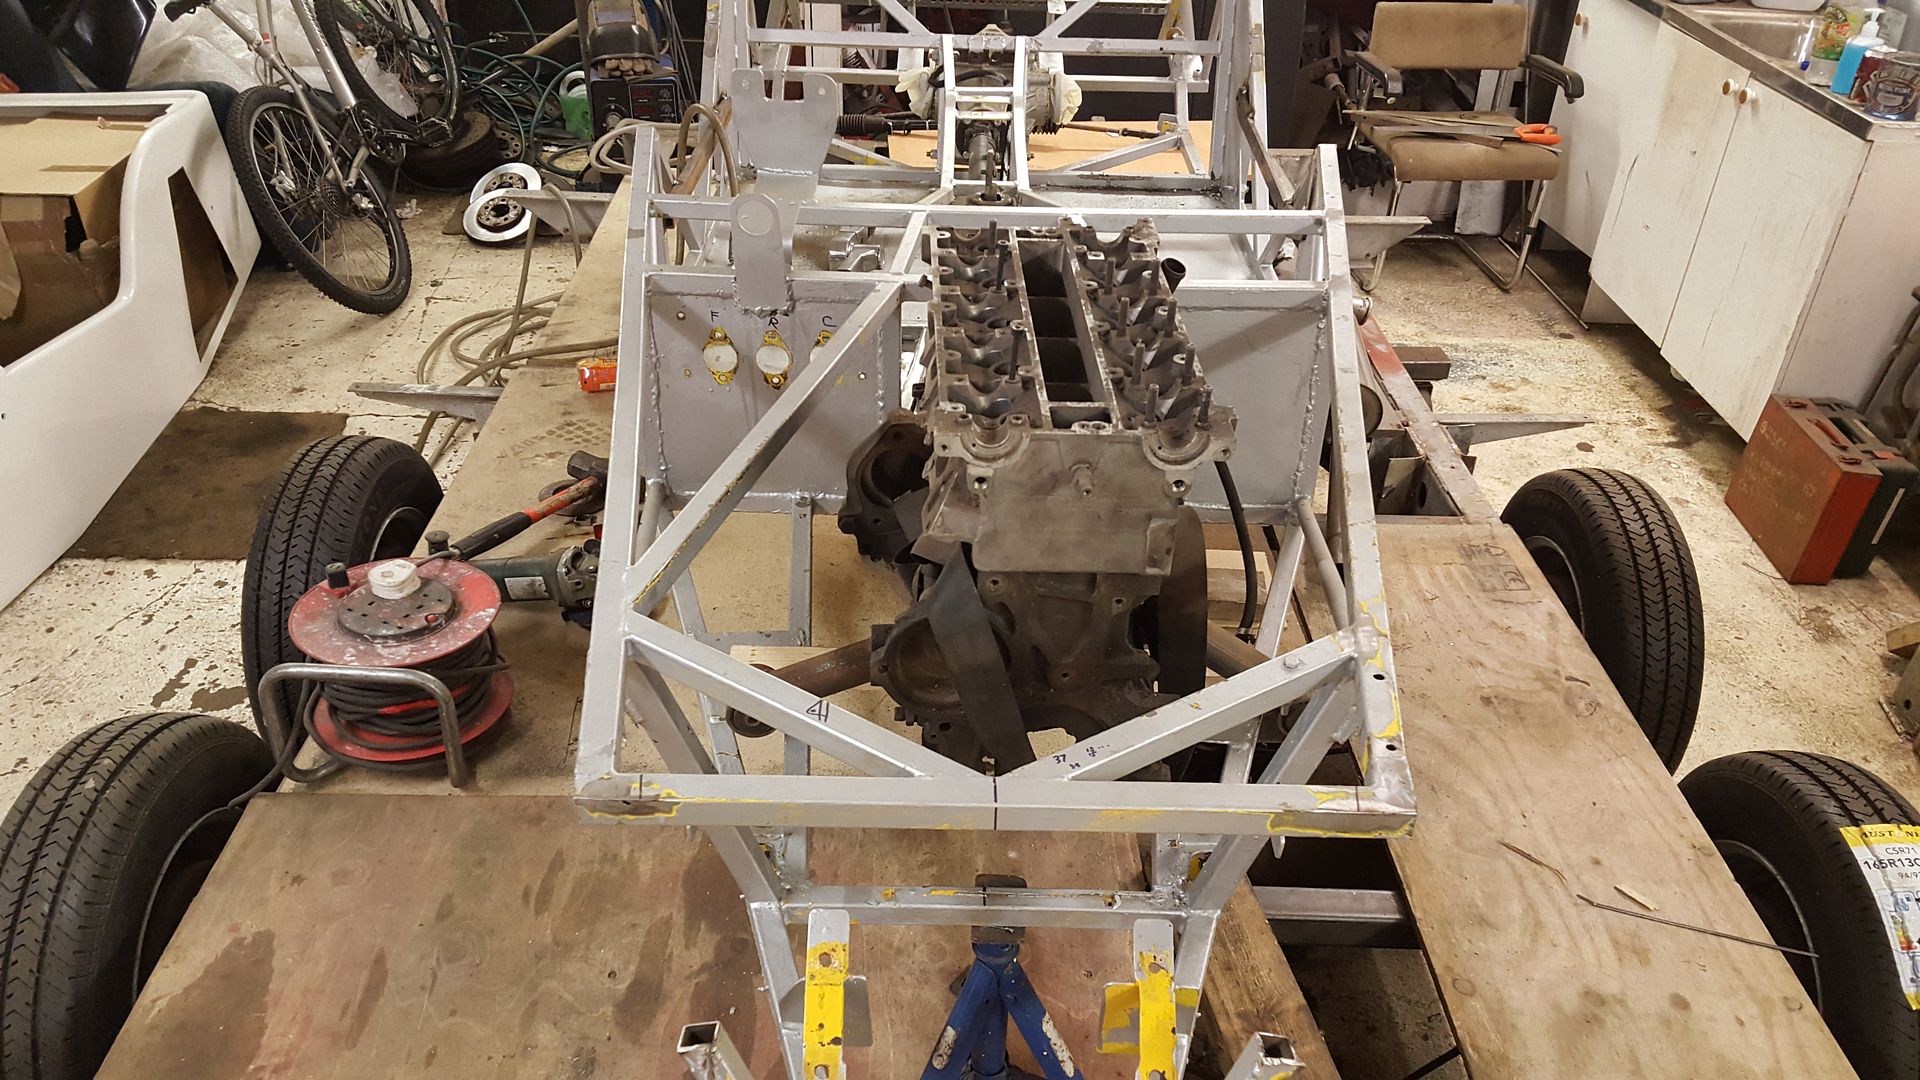
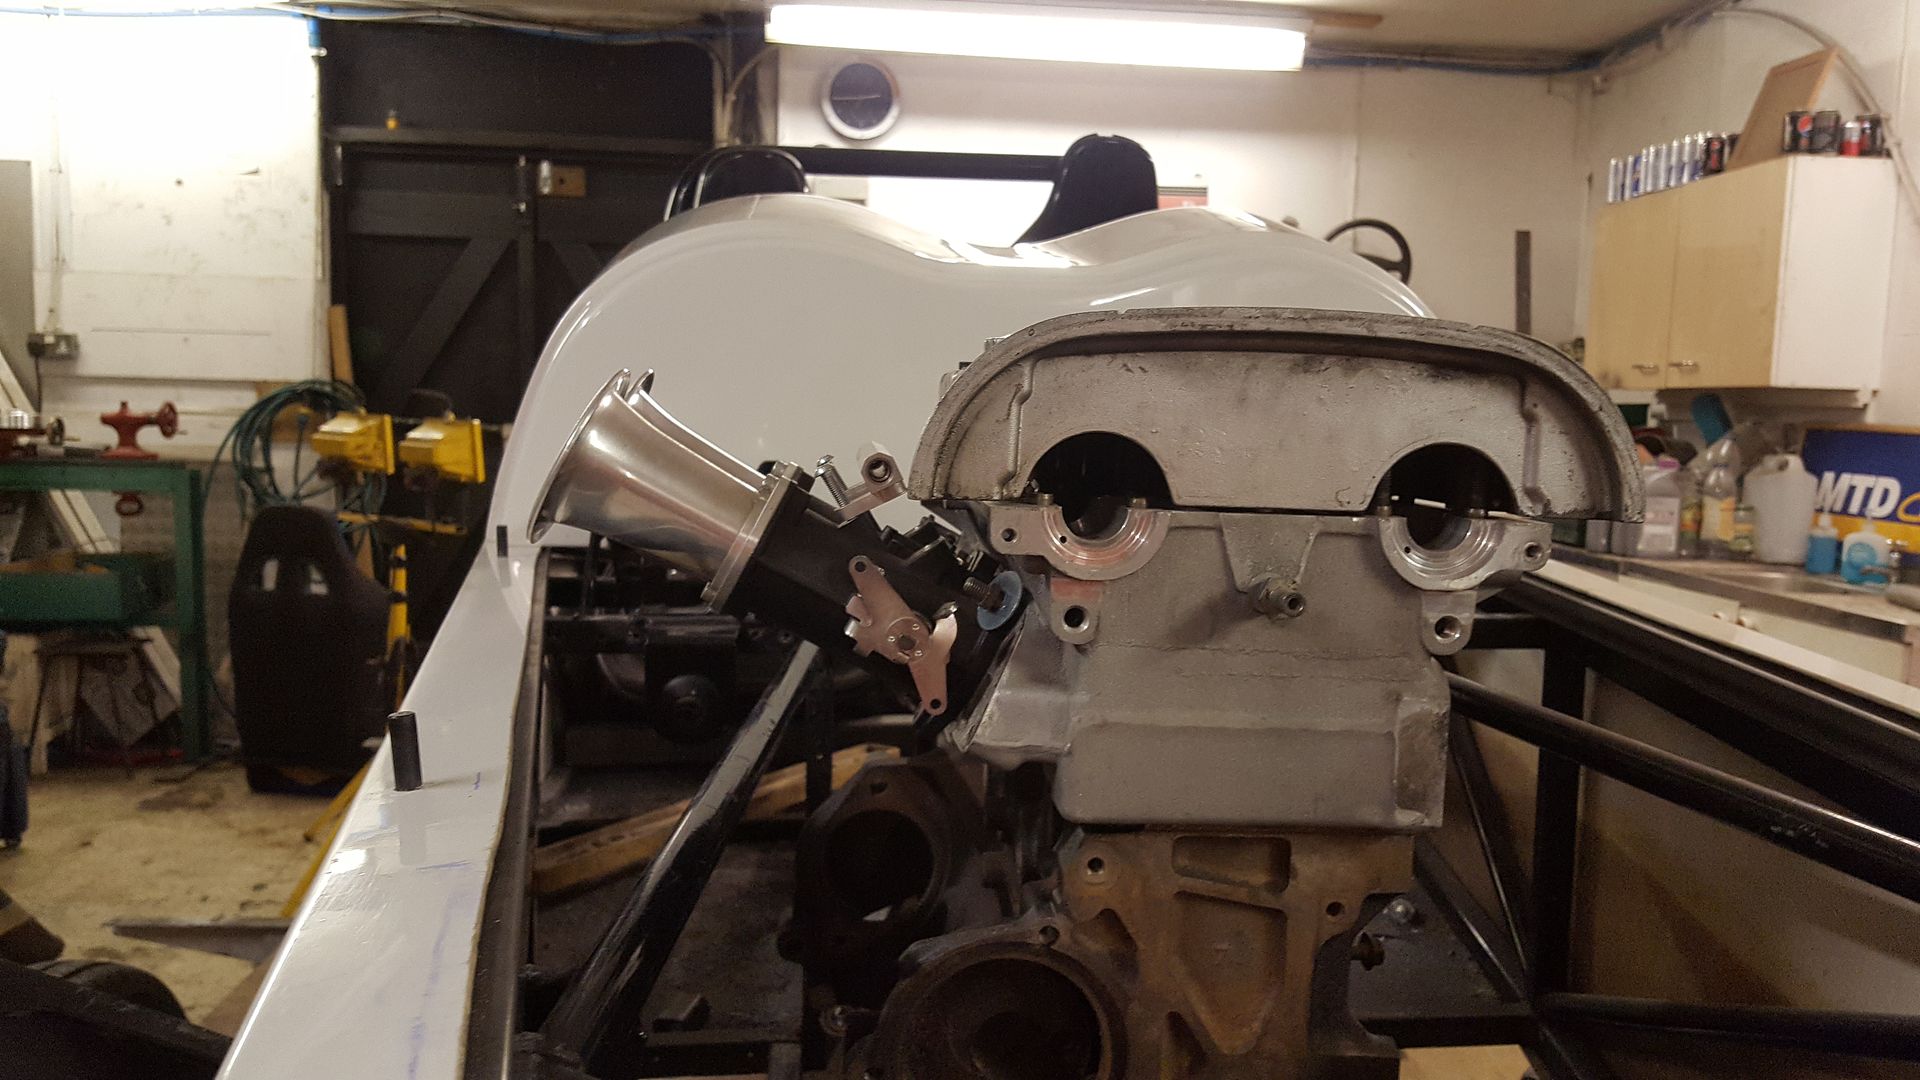
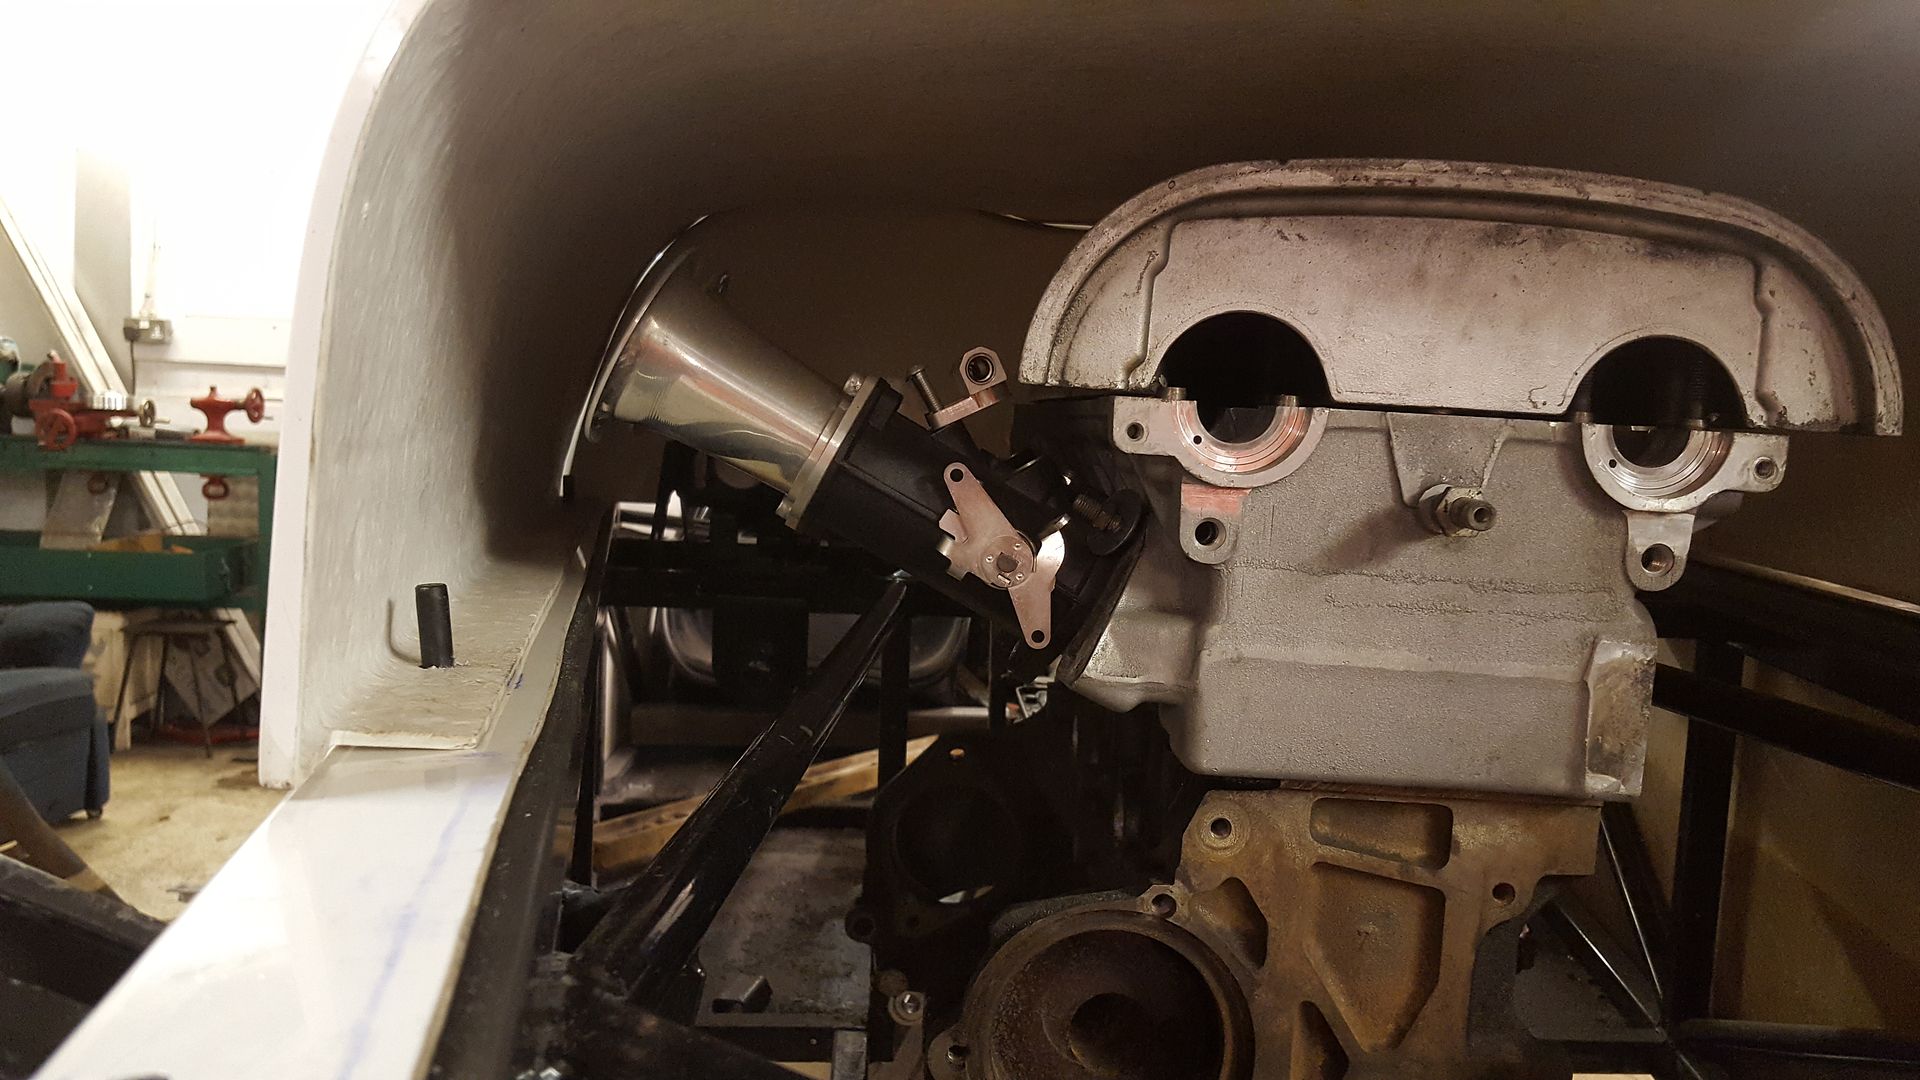
Now the body was fixed in the correct place I wanted to try the engine in to see of it cleared the bonnet. Lifted the block in
And bolted a head on
And got loads of room to the bonnet
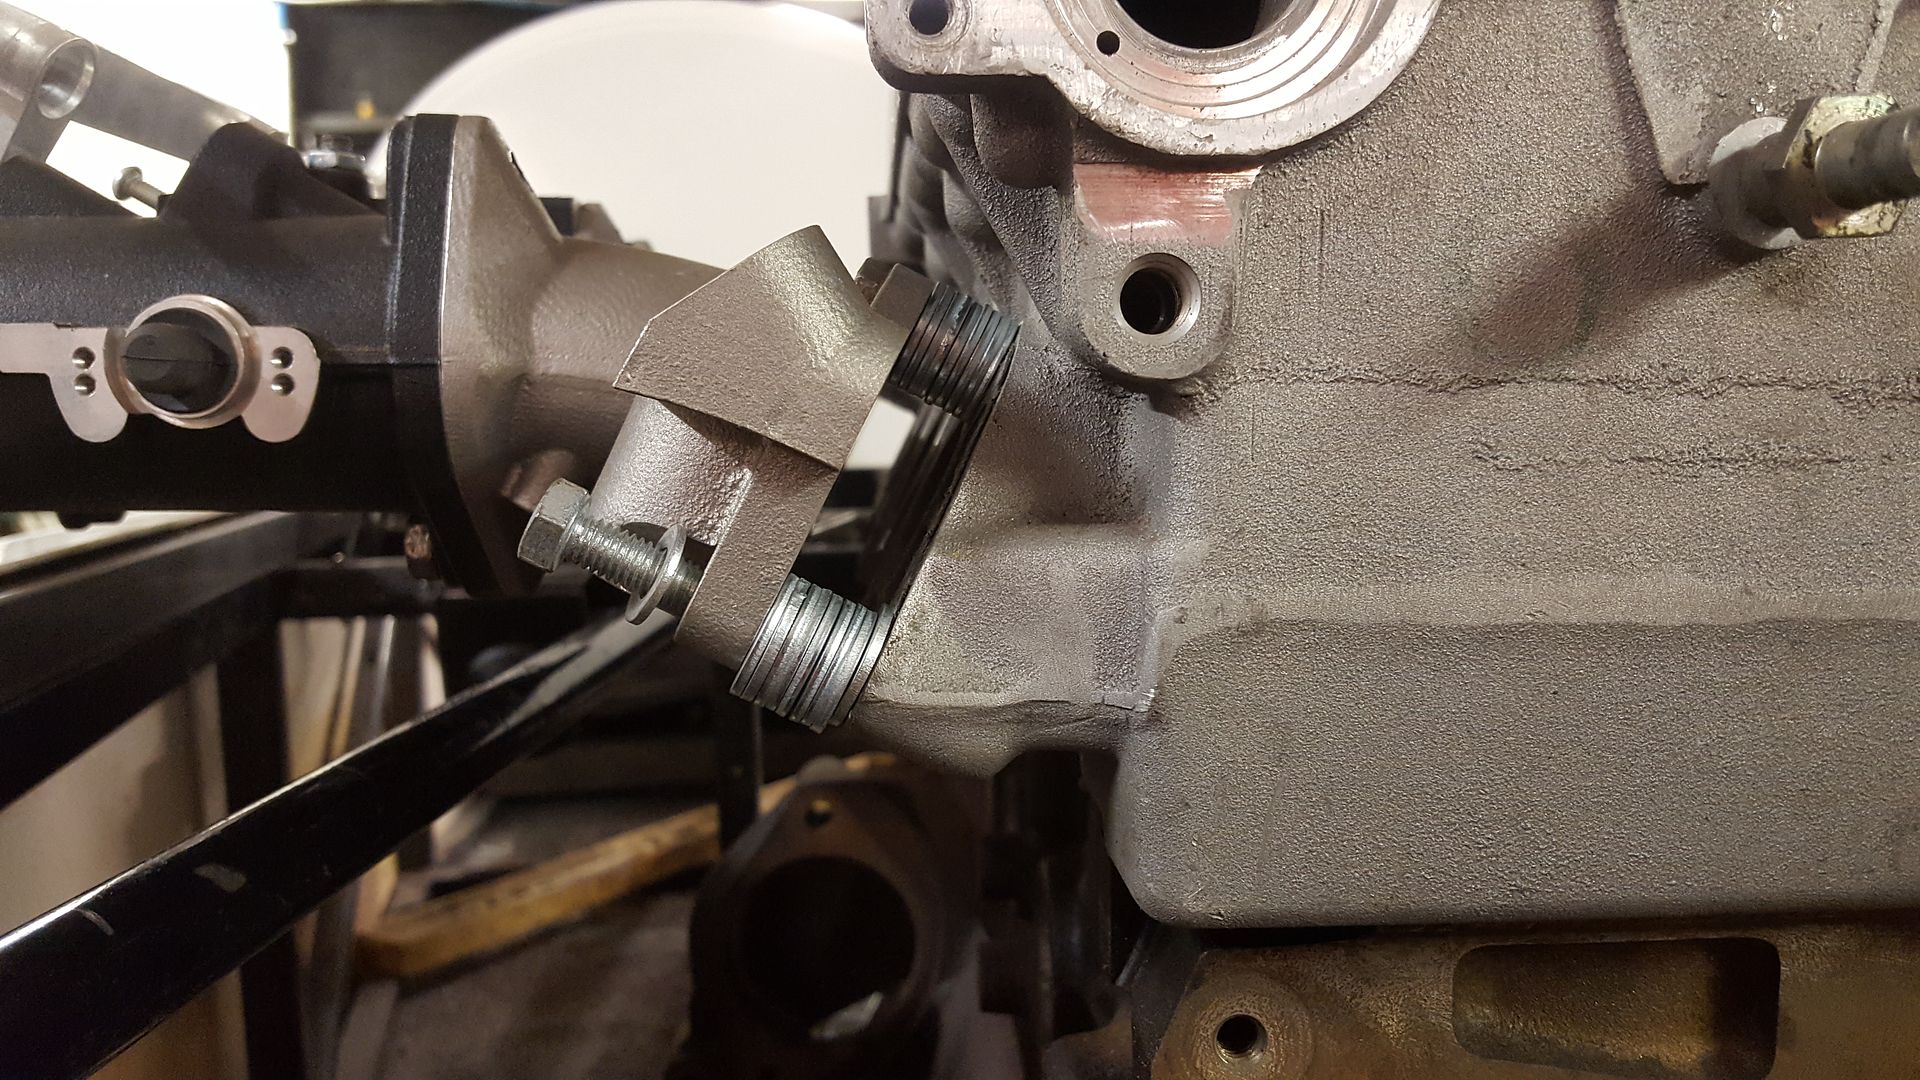
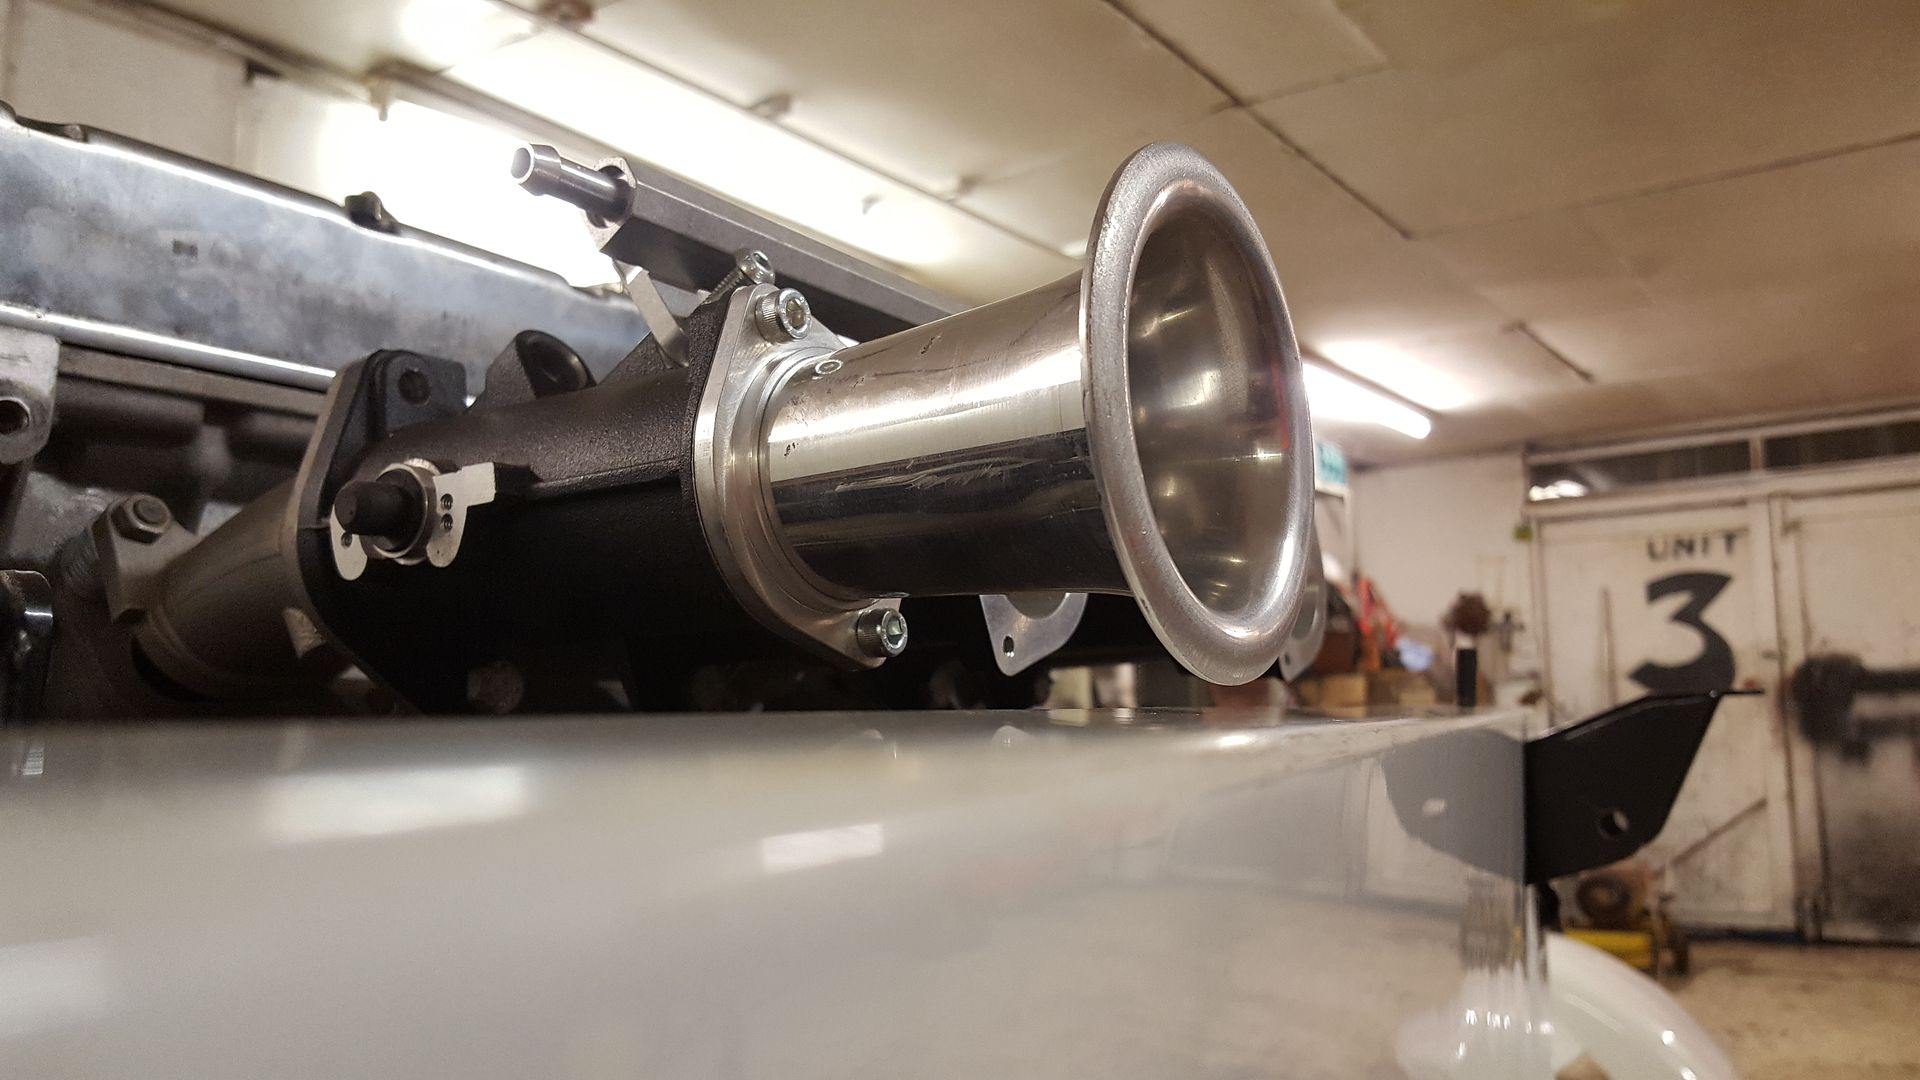
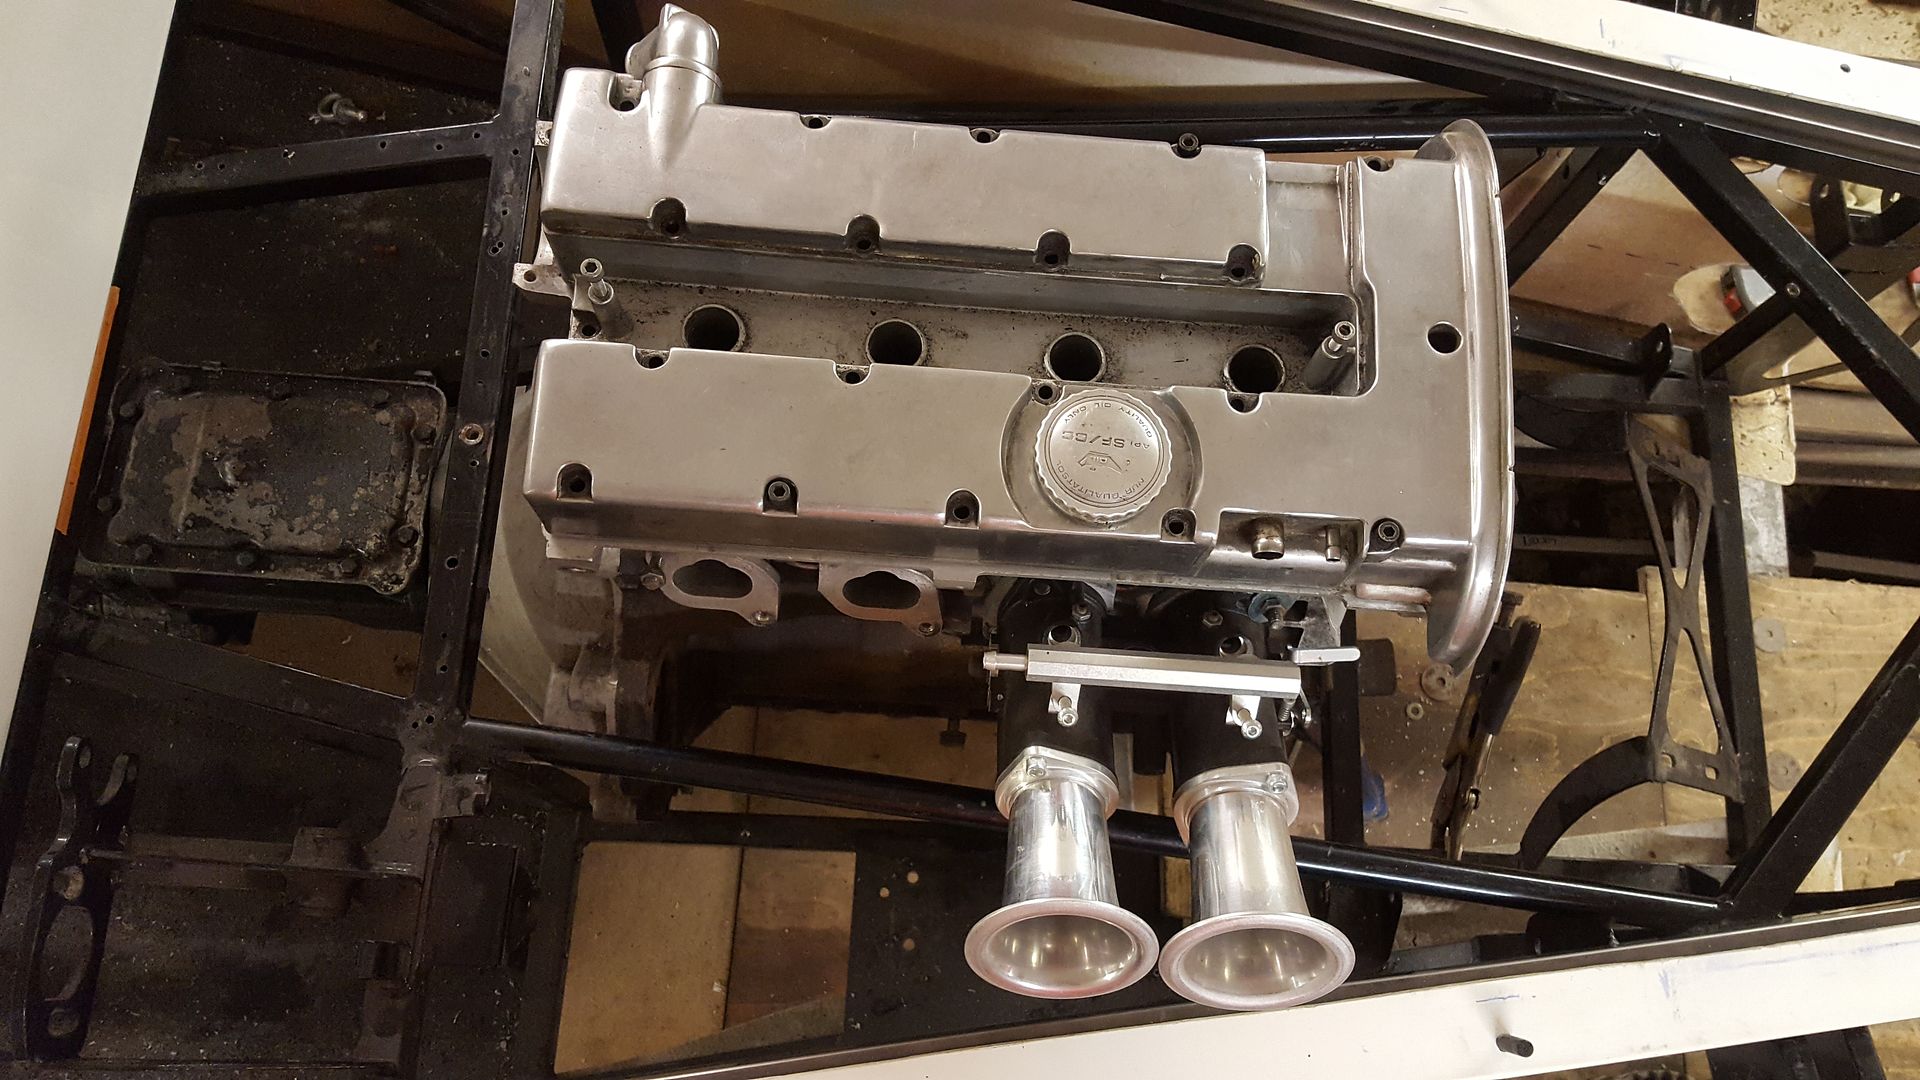
Tried the throttle bodies on
But now the body is raised 25mm plus the fibre glass the trumpets hit the body
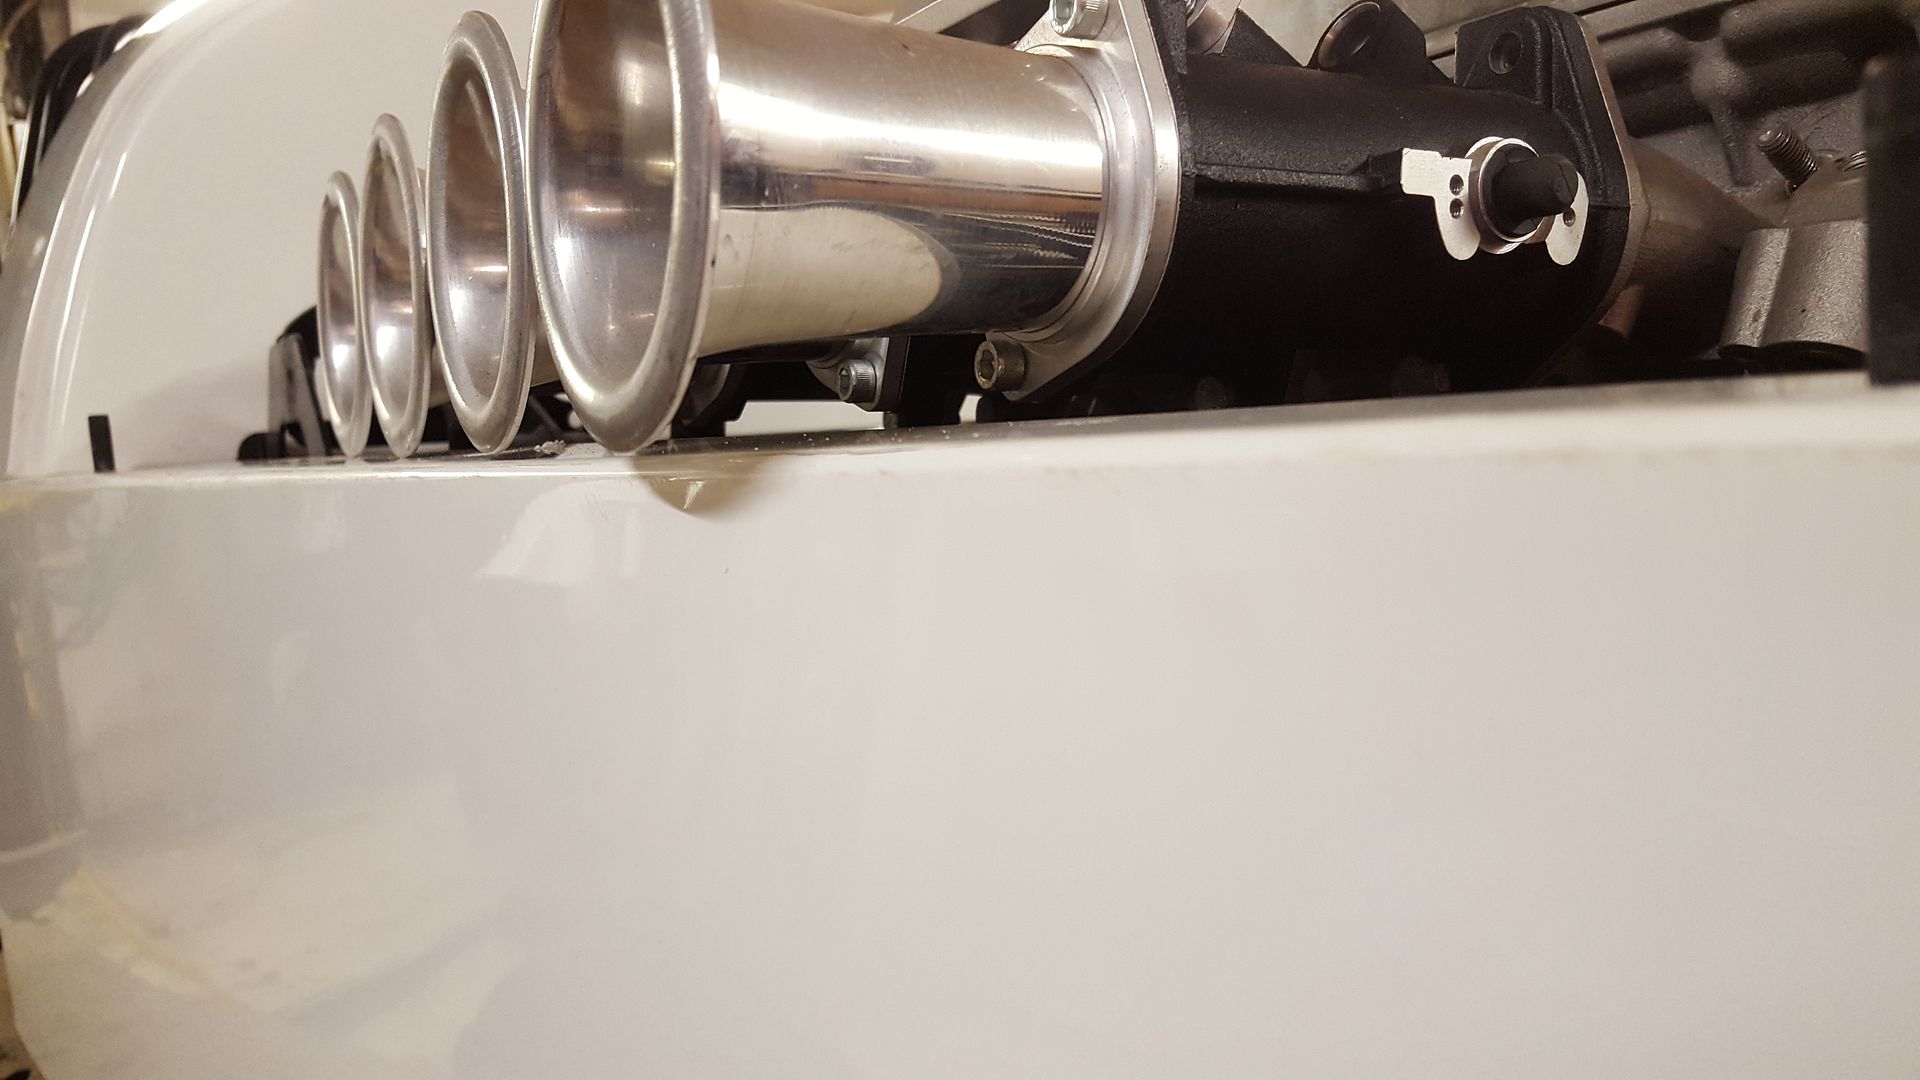
Not allowing them to seat
The exhaust can't come straight out like a GBS it will have to bounce up first, or go down internally like a caterham
It fits on without the trumpets
Without any trumpets it fits in, possibly allowing for a custom inlet
Another option is to put a 25mm spacer between the inlet and the head, because it's at an angle it raises it up, but also spaces it out
Some QED direct to head tbs would be perfect! But out of my price range :lol:
But with my parallel 45s there's no way you'd be able to round the inlet port to match
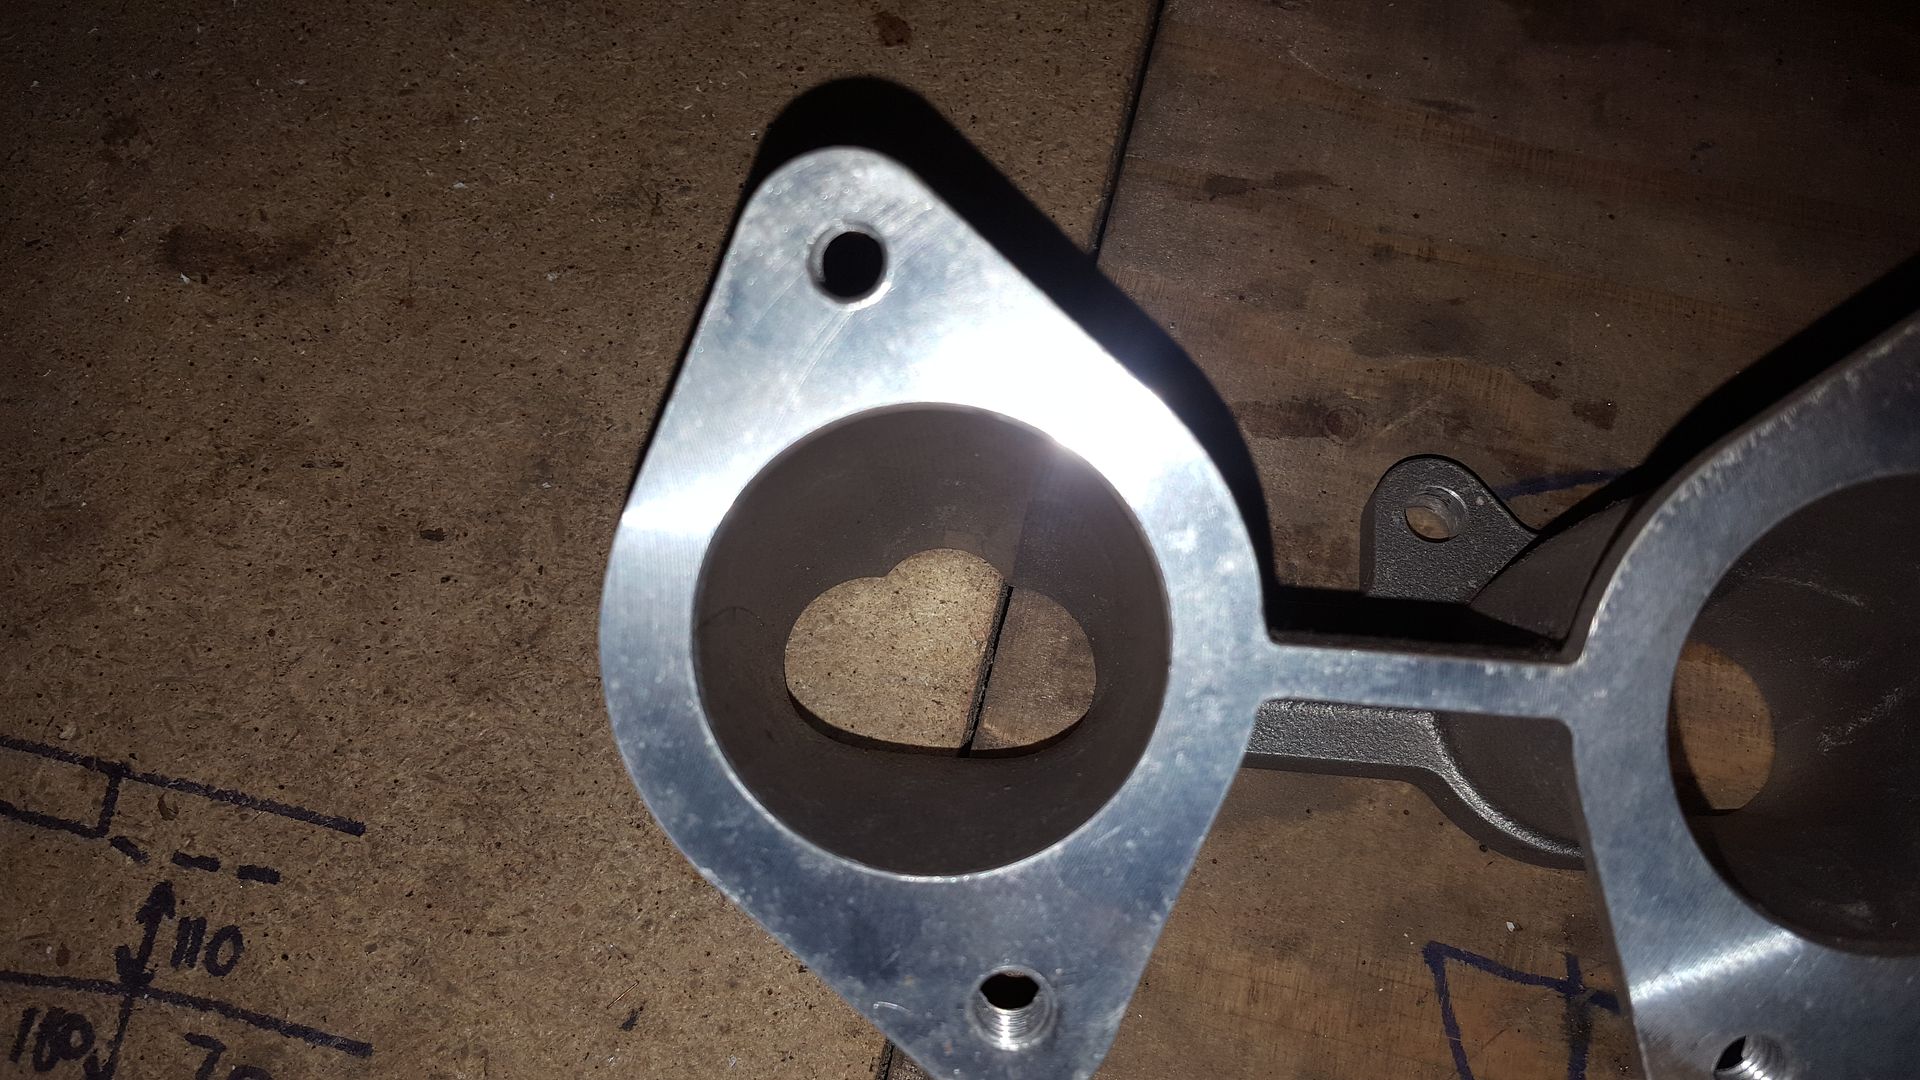

Jenvey do actually do a straight c20xe manifold. This is the one I have
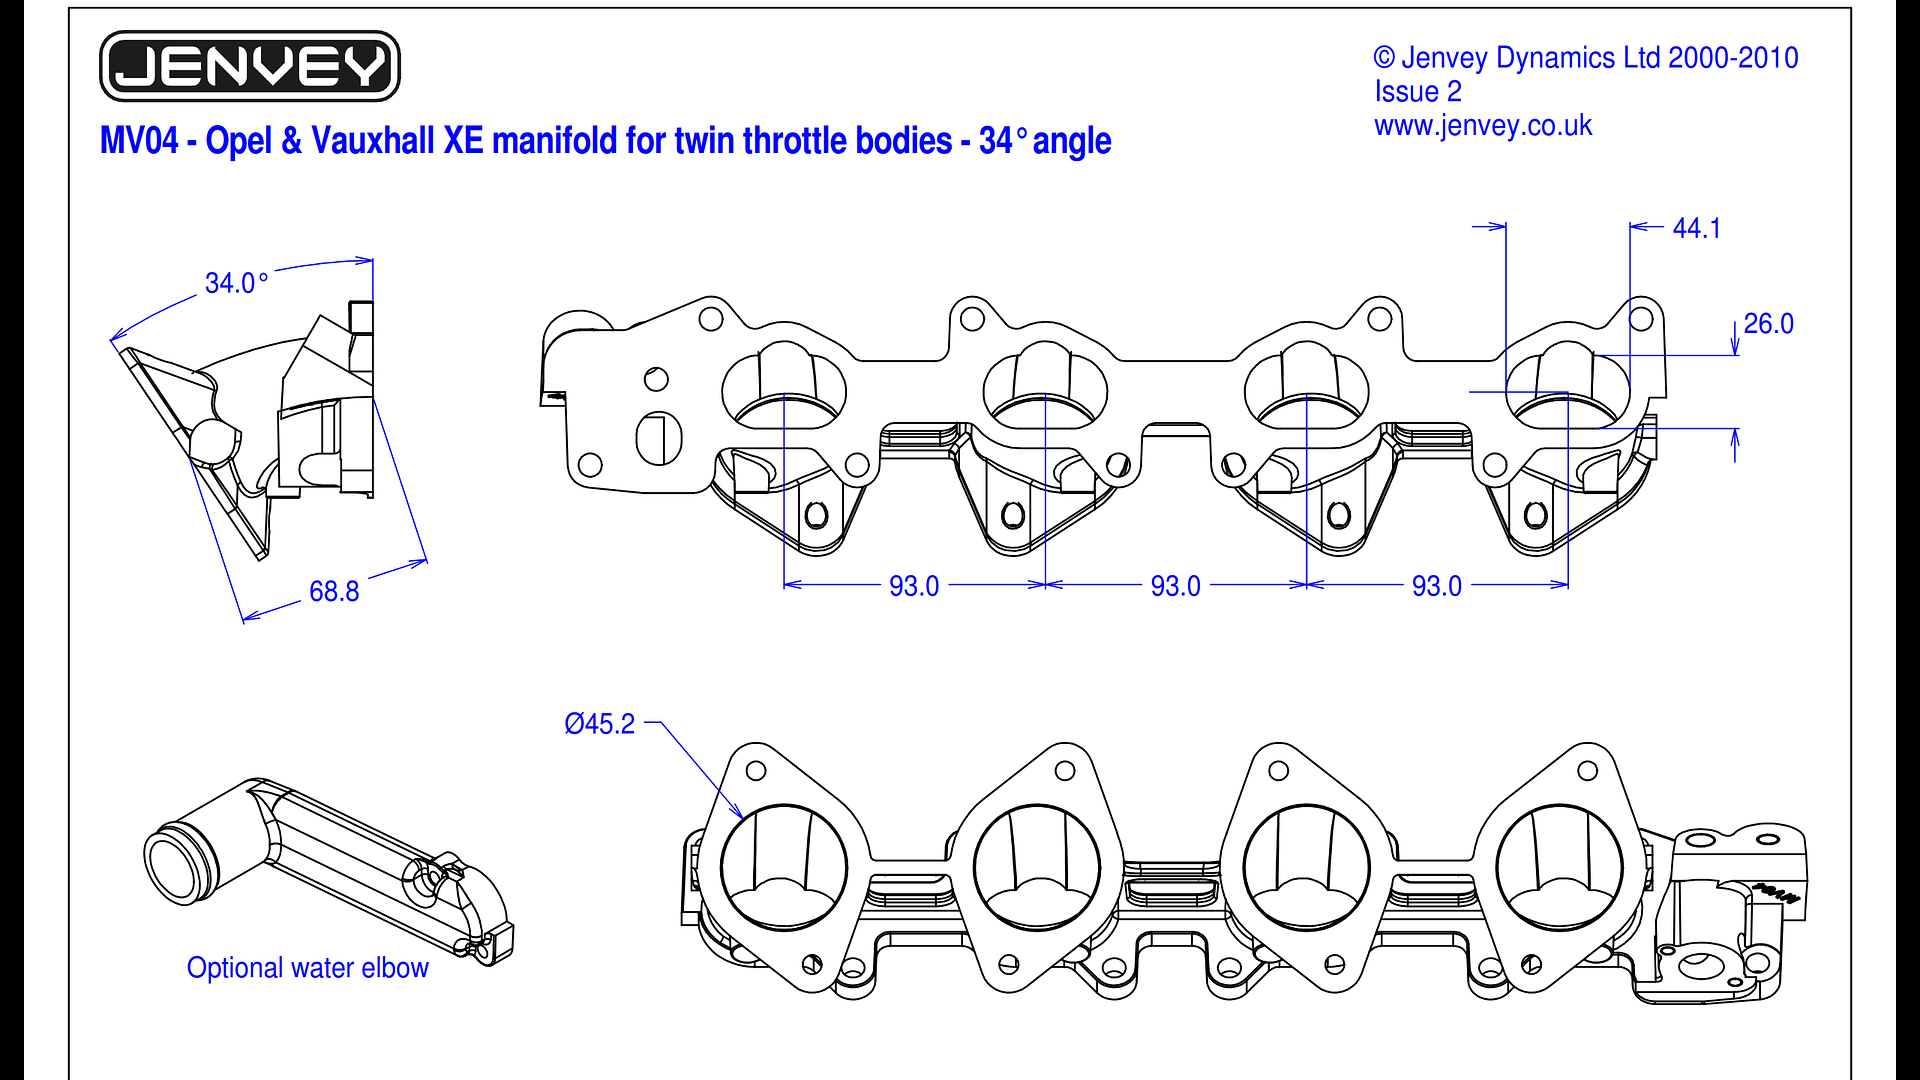
And this is the 0 degree one
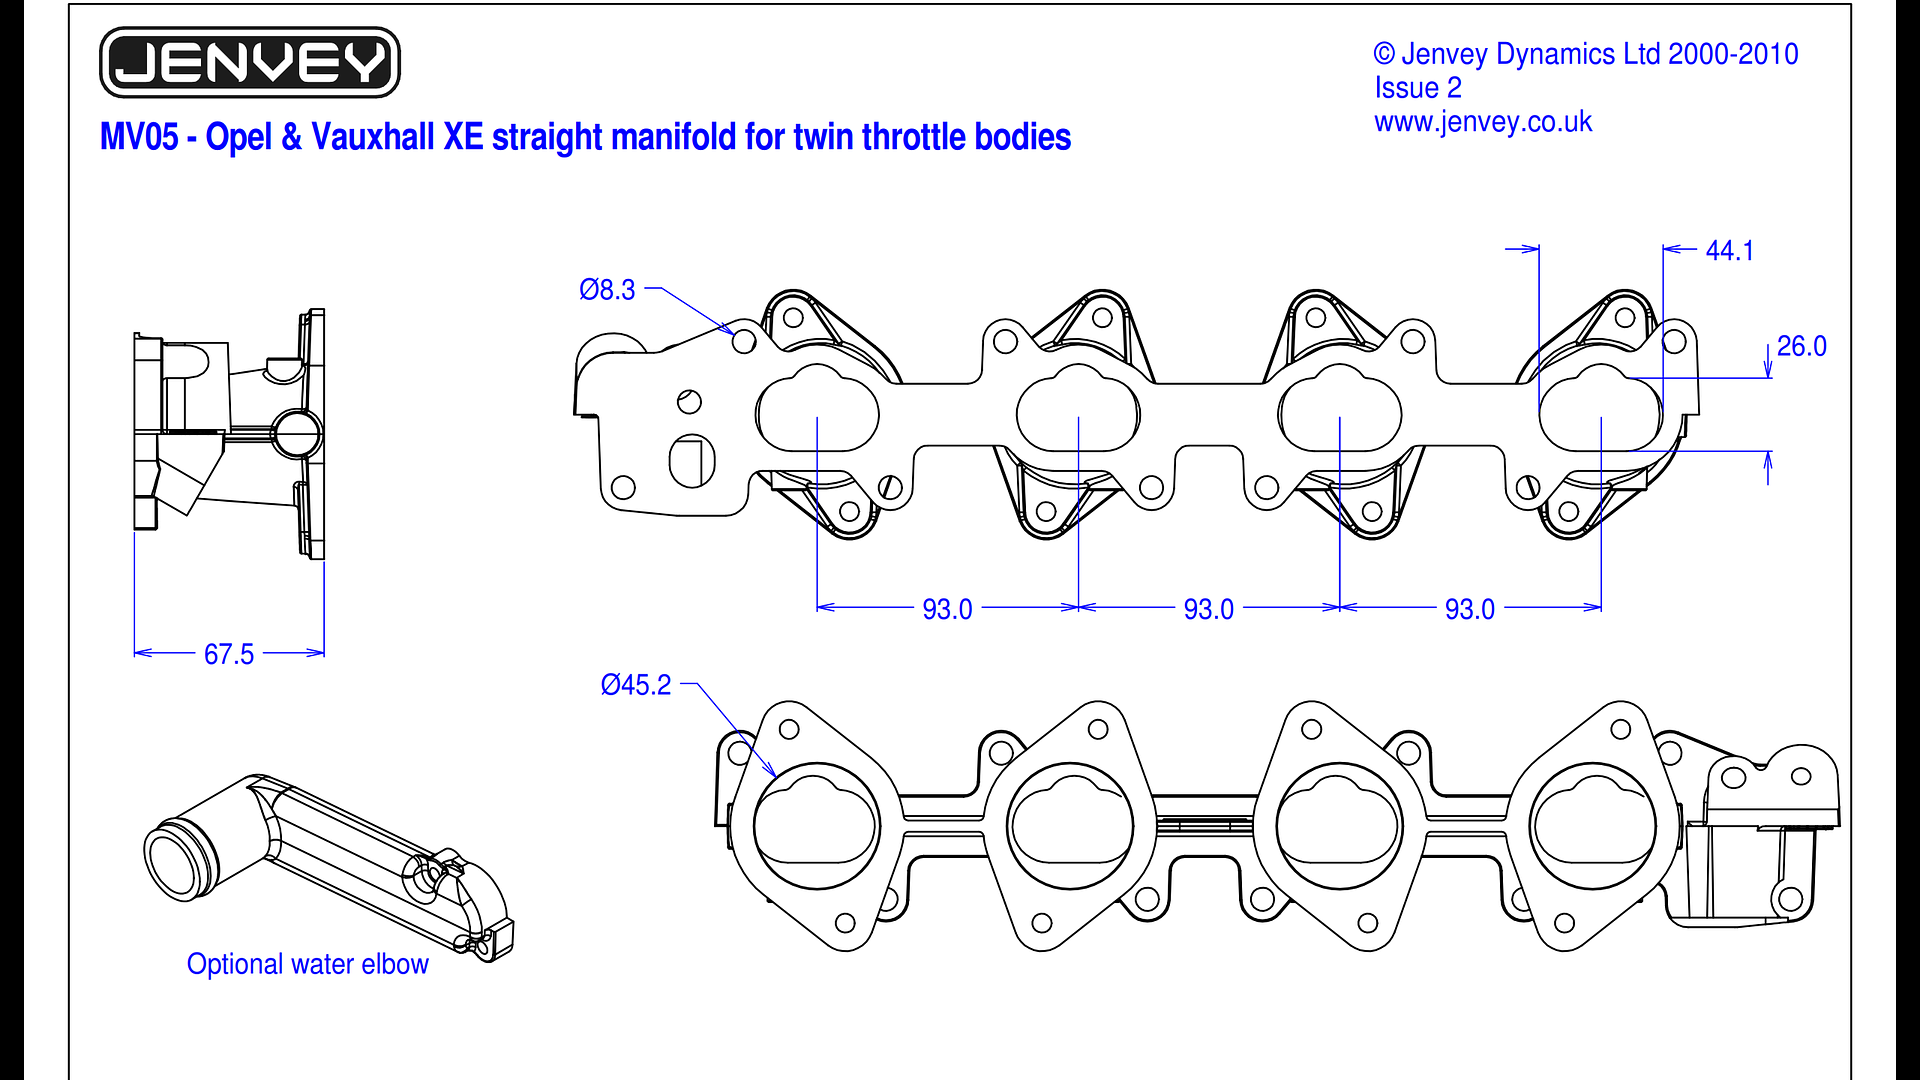
But it's Ł230 eek!
I might think about cut and shutting my manifold with a V making it a straight one then welding it back together. I do like the look of it up at
45degrees
More thinking to do on that one....
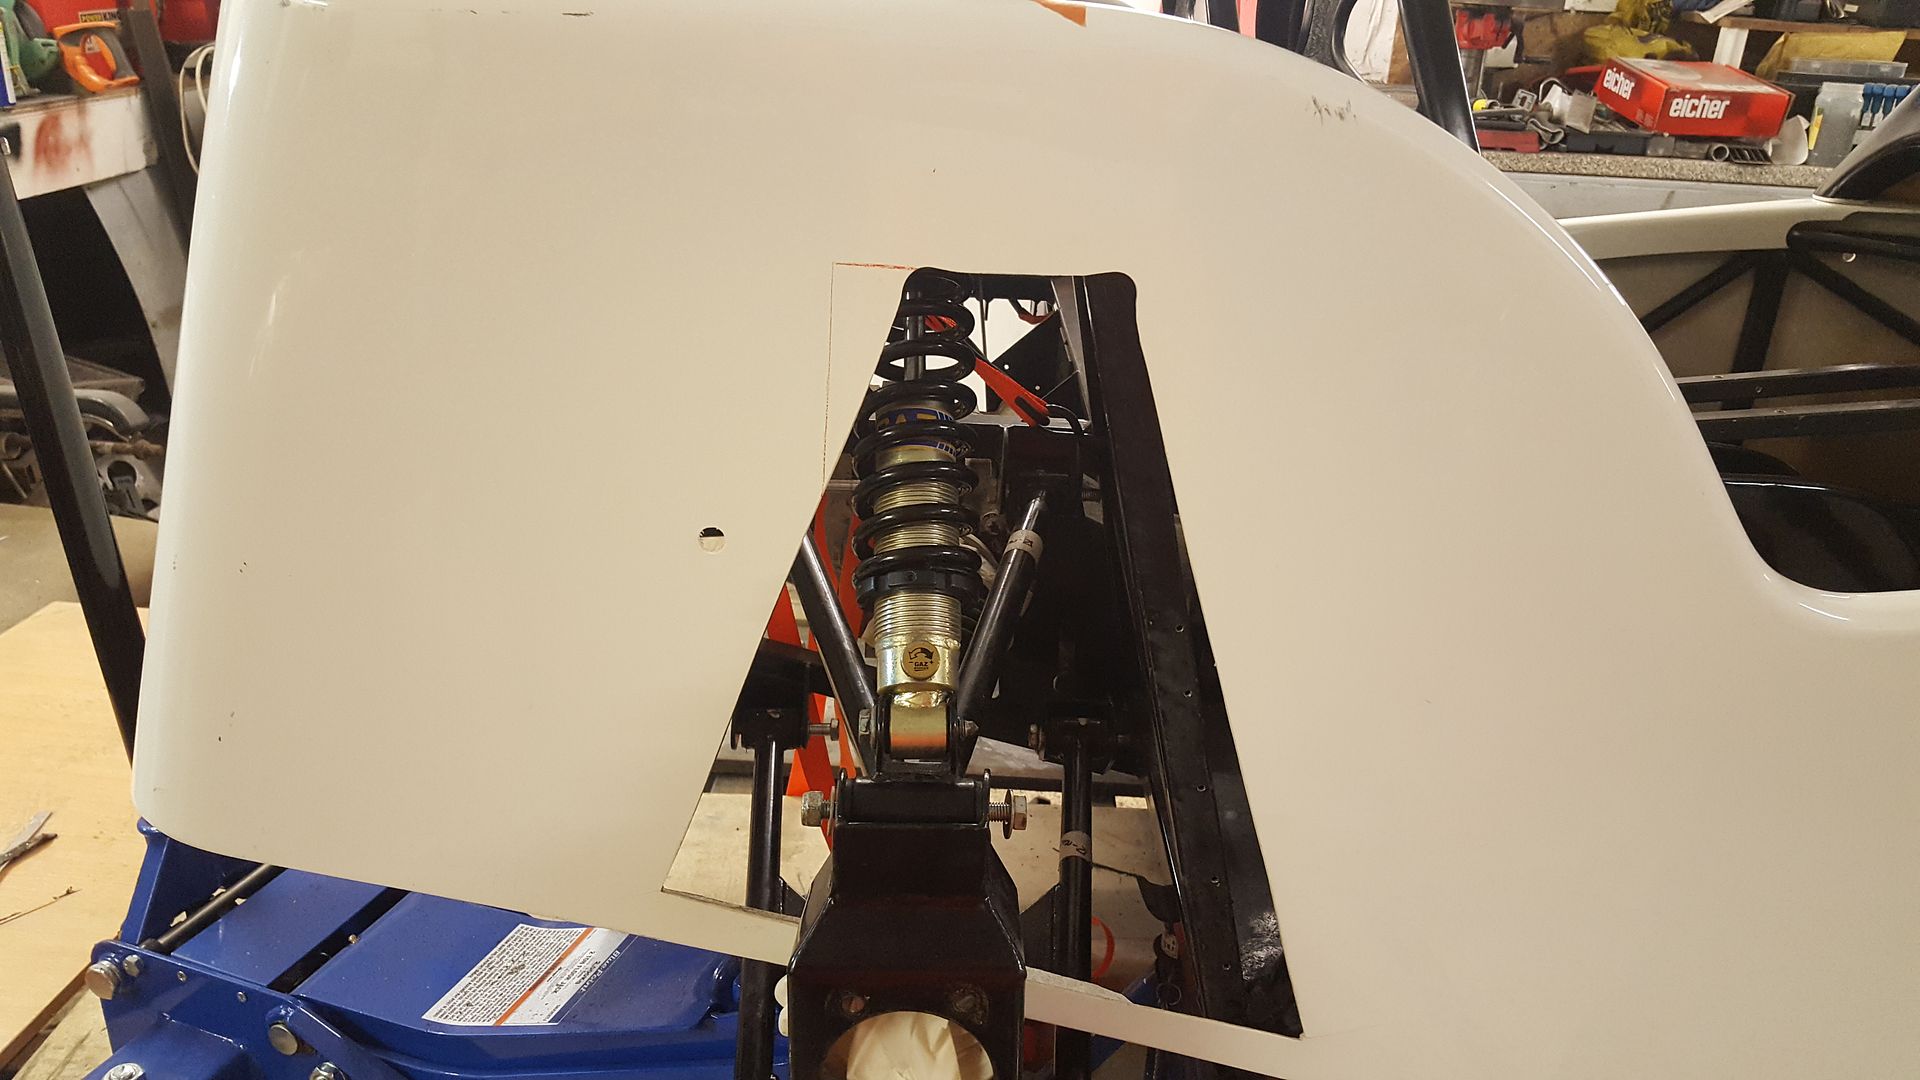
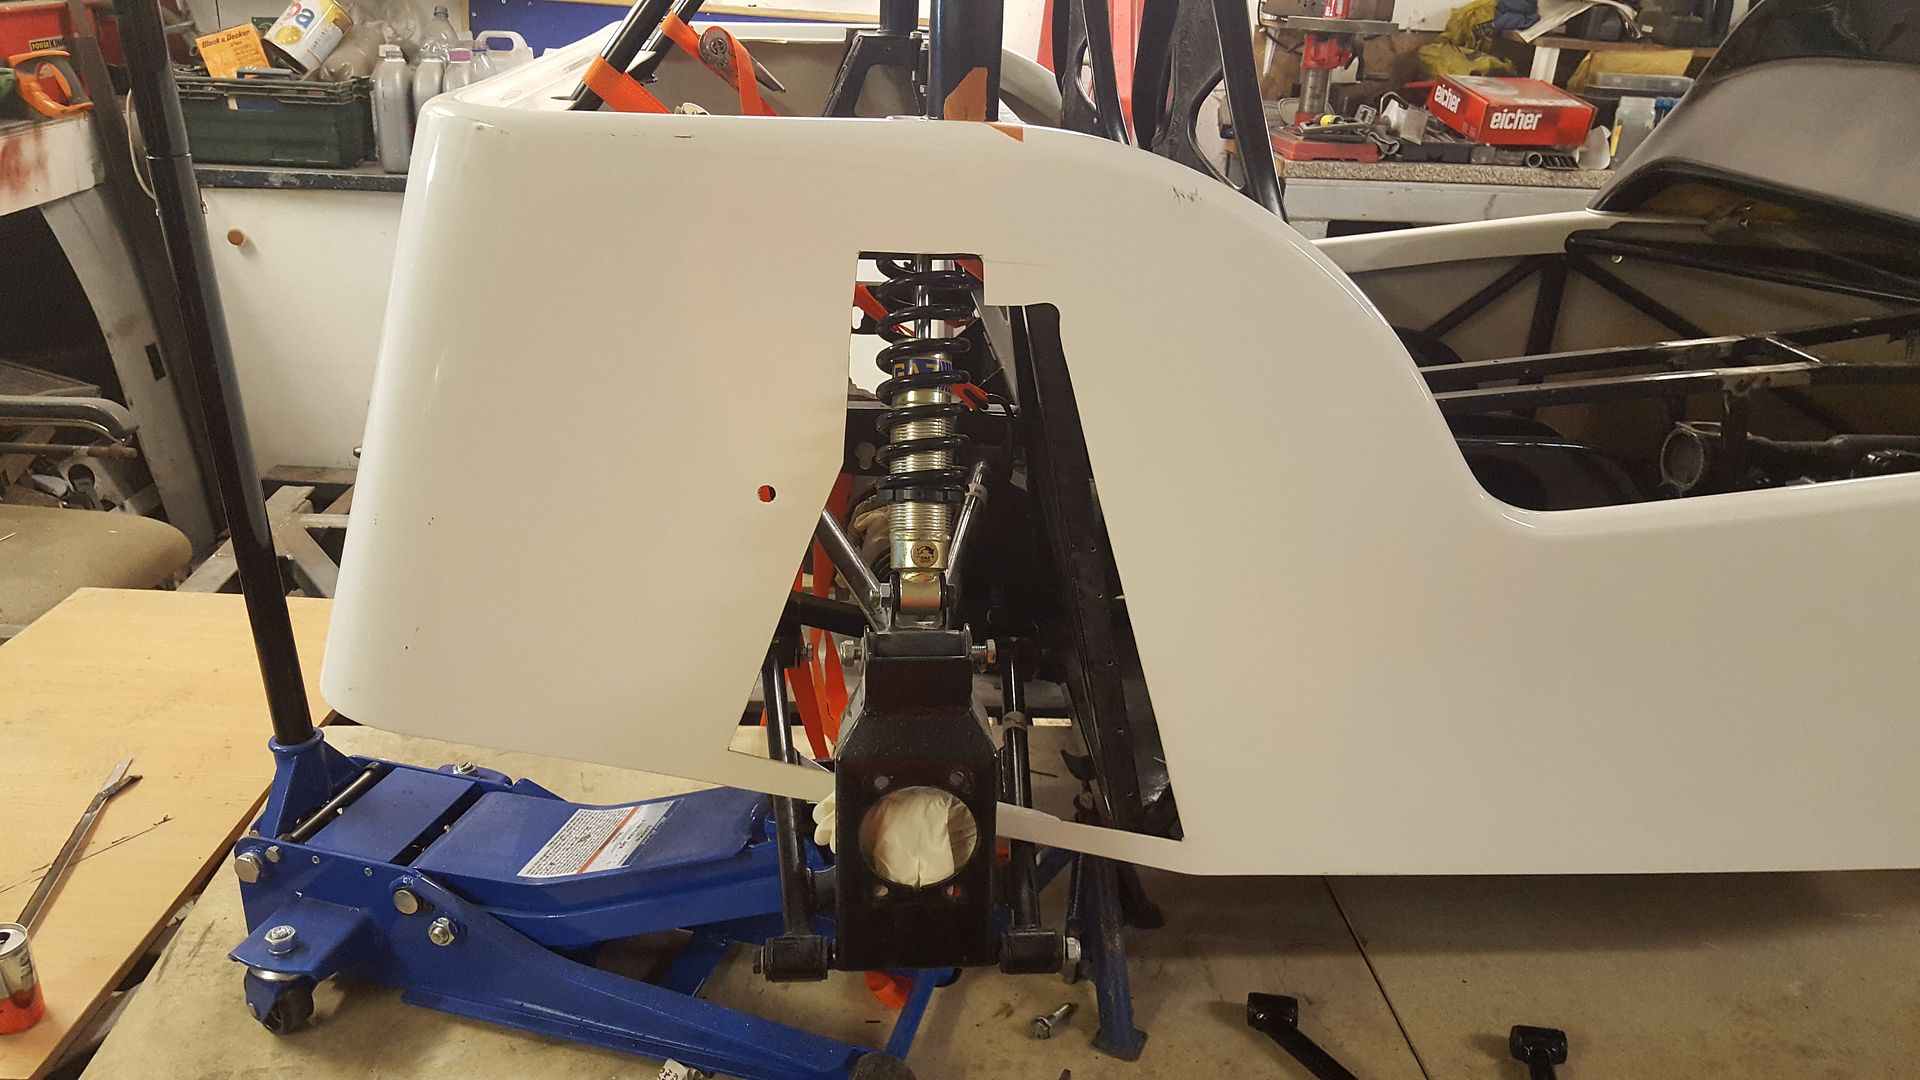
Also now the body's in the right place I could think about cutting out the holes for the front suspension
Got chopping
Until I could get the arms in
At full swing both ways
And the other side.

Tried the nose and shocks on to check clearance with everything


Next job will be to make cardoard templates around the front suspension so it's all nice and tight just allowing enough room to make it's
full swing. Then I'll fibreglass matt all the holes up flush and just cut out what I need after.
For now I just played a bit of dress up


super-ron - 24/1/18 at 08:46 PM
.
Was looking on eBay searching c20xe the other night and a new listing popped up.
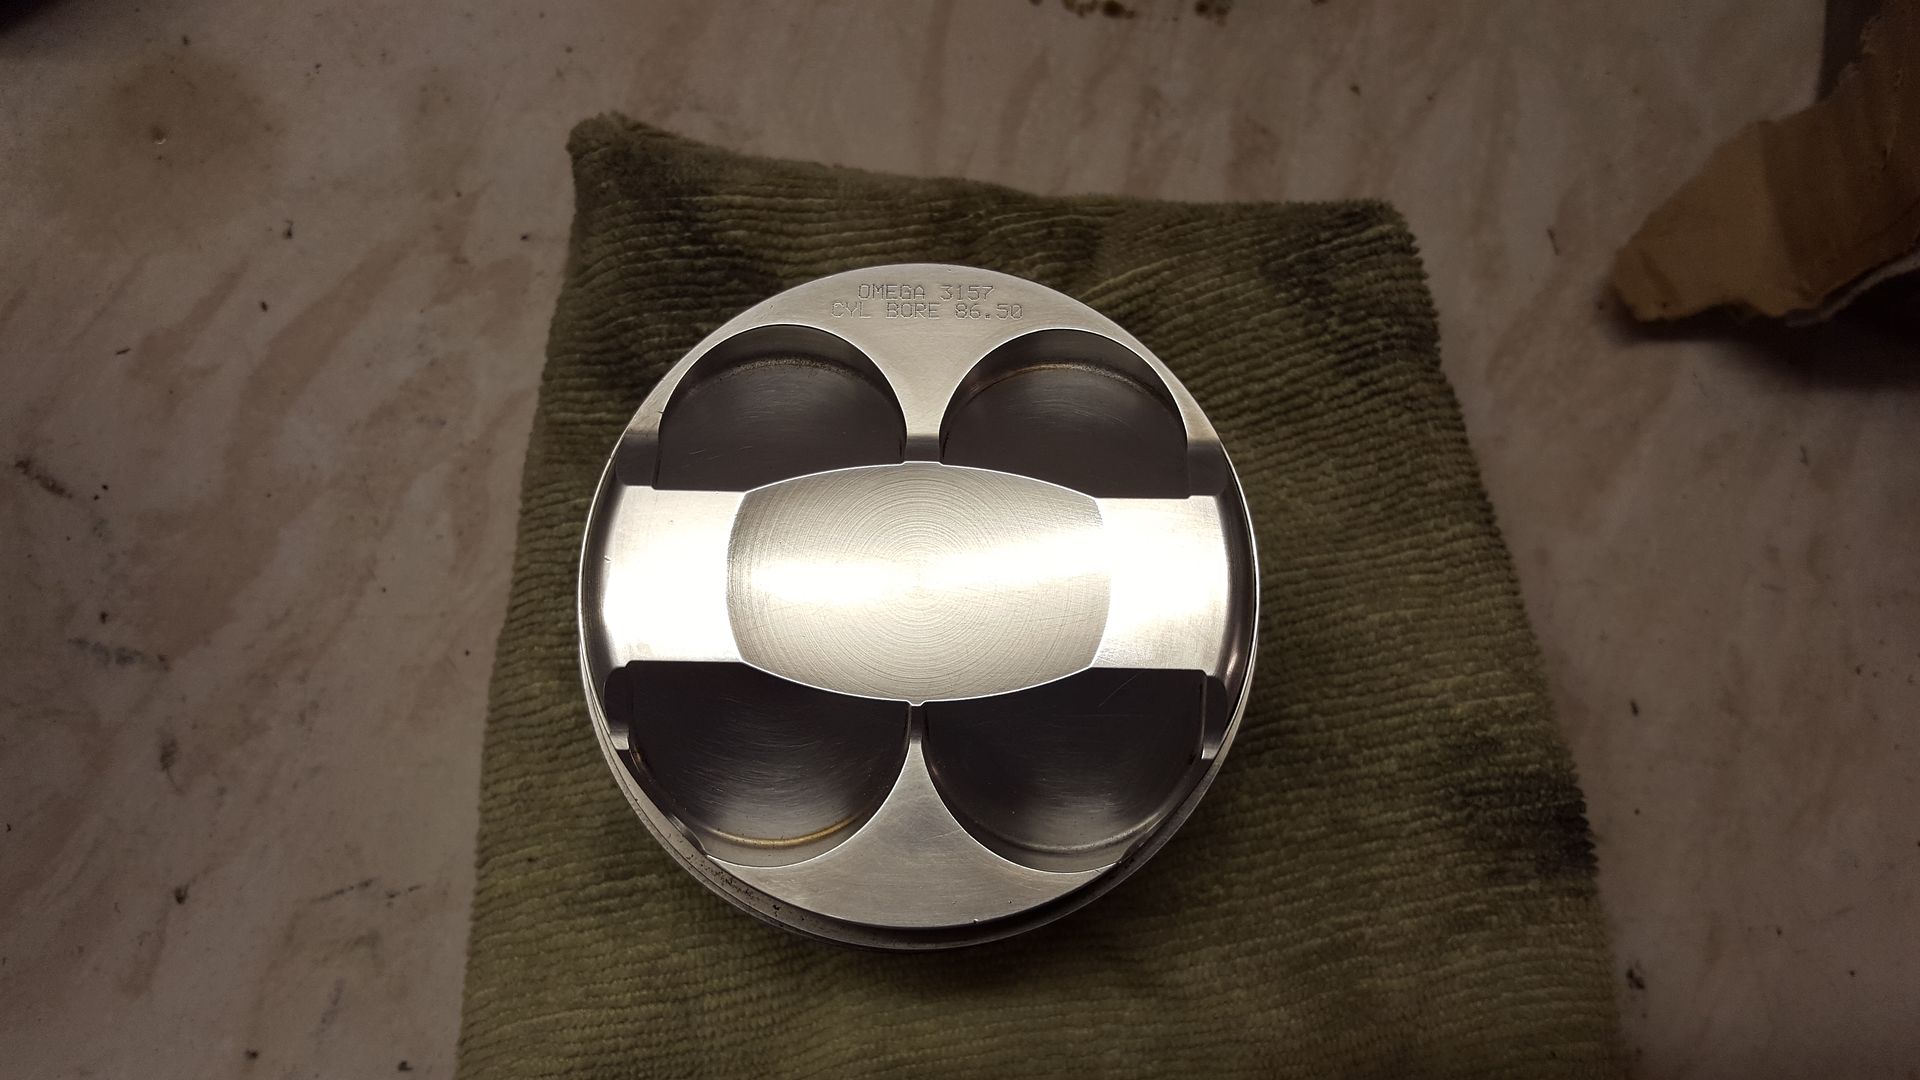
4 Omega high compression pistons ..... buy it now Ł50!
Thought that was too good to be true, or must be each piston or something, but sure enough it was 4 x Omega oversize high compression pistons removed
from a c20xe group 4 mk2 Escort. Clicked the buy it now and they arrved a day later!
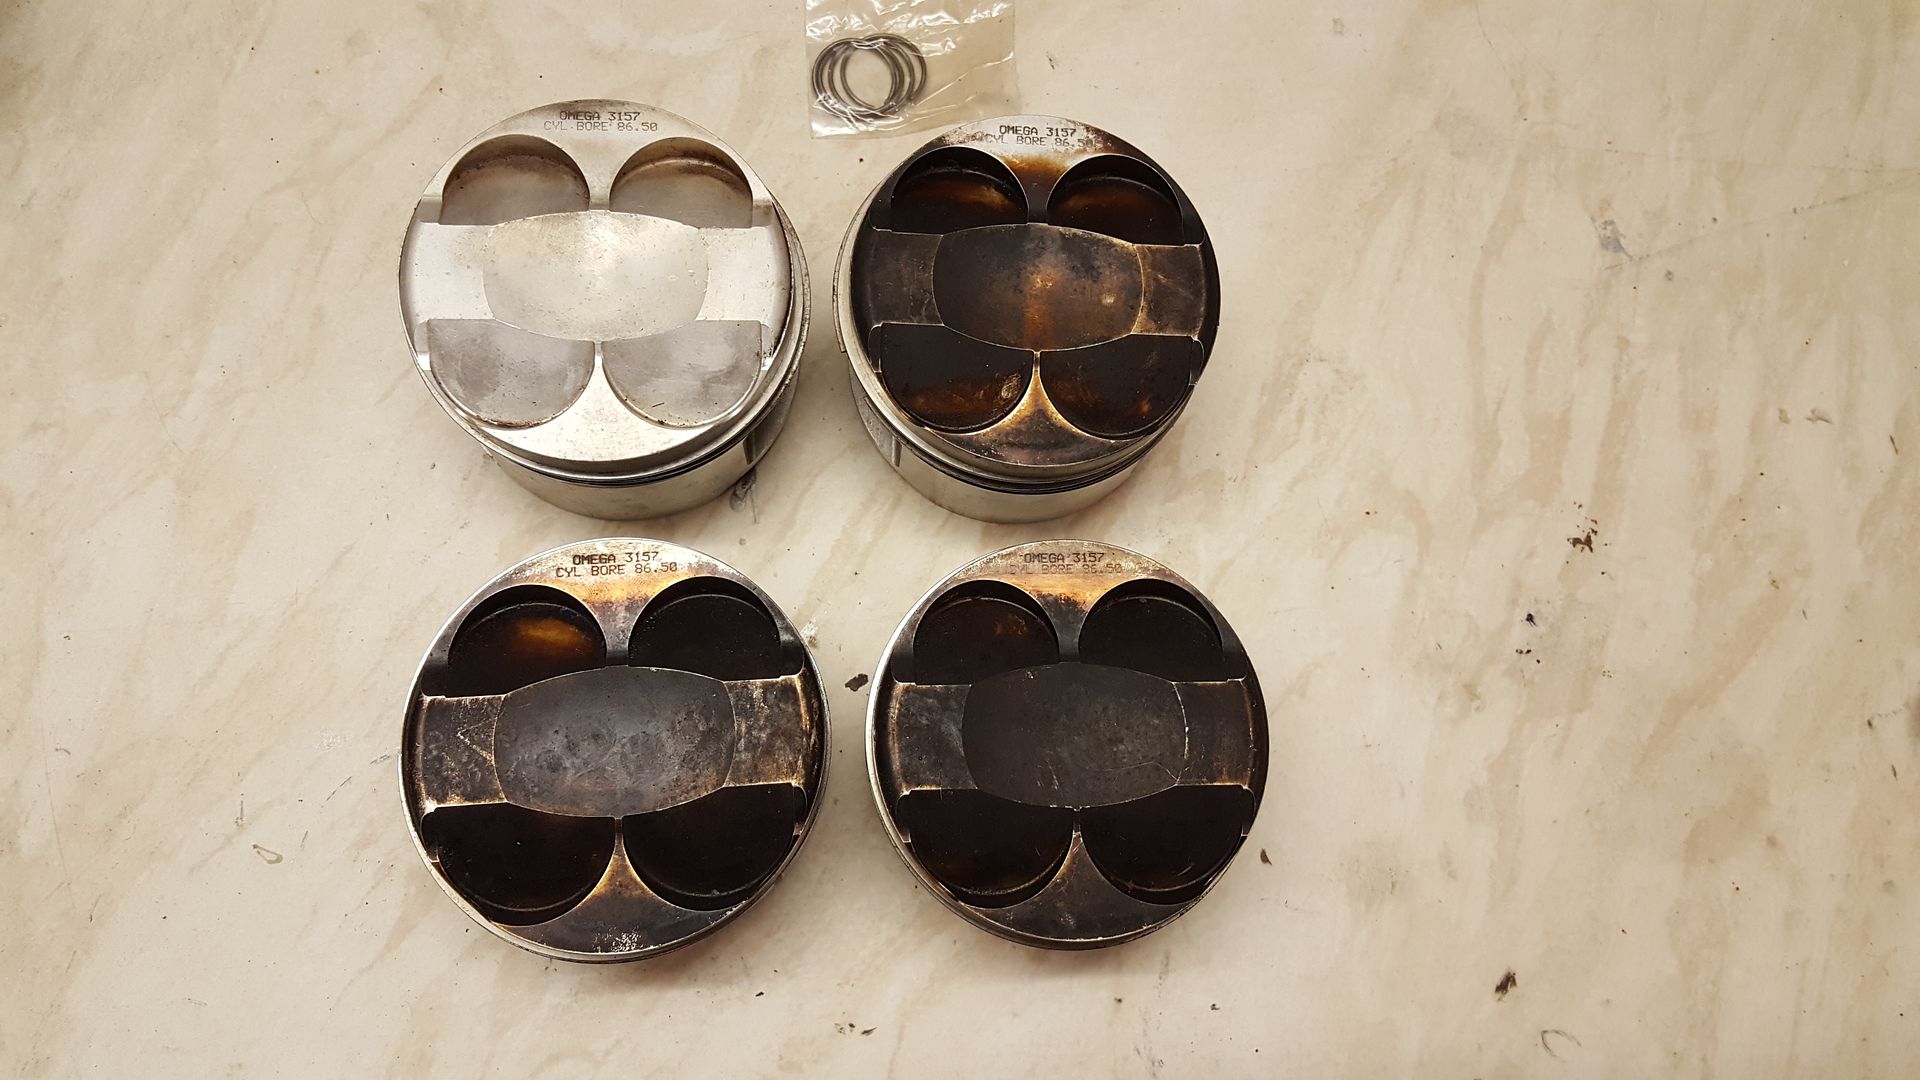
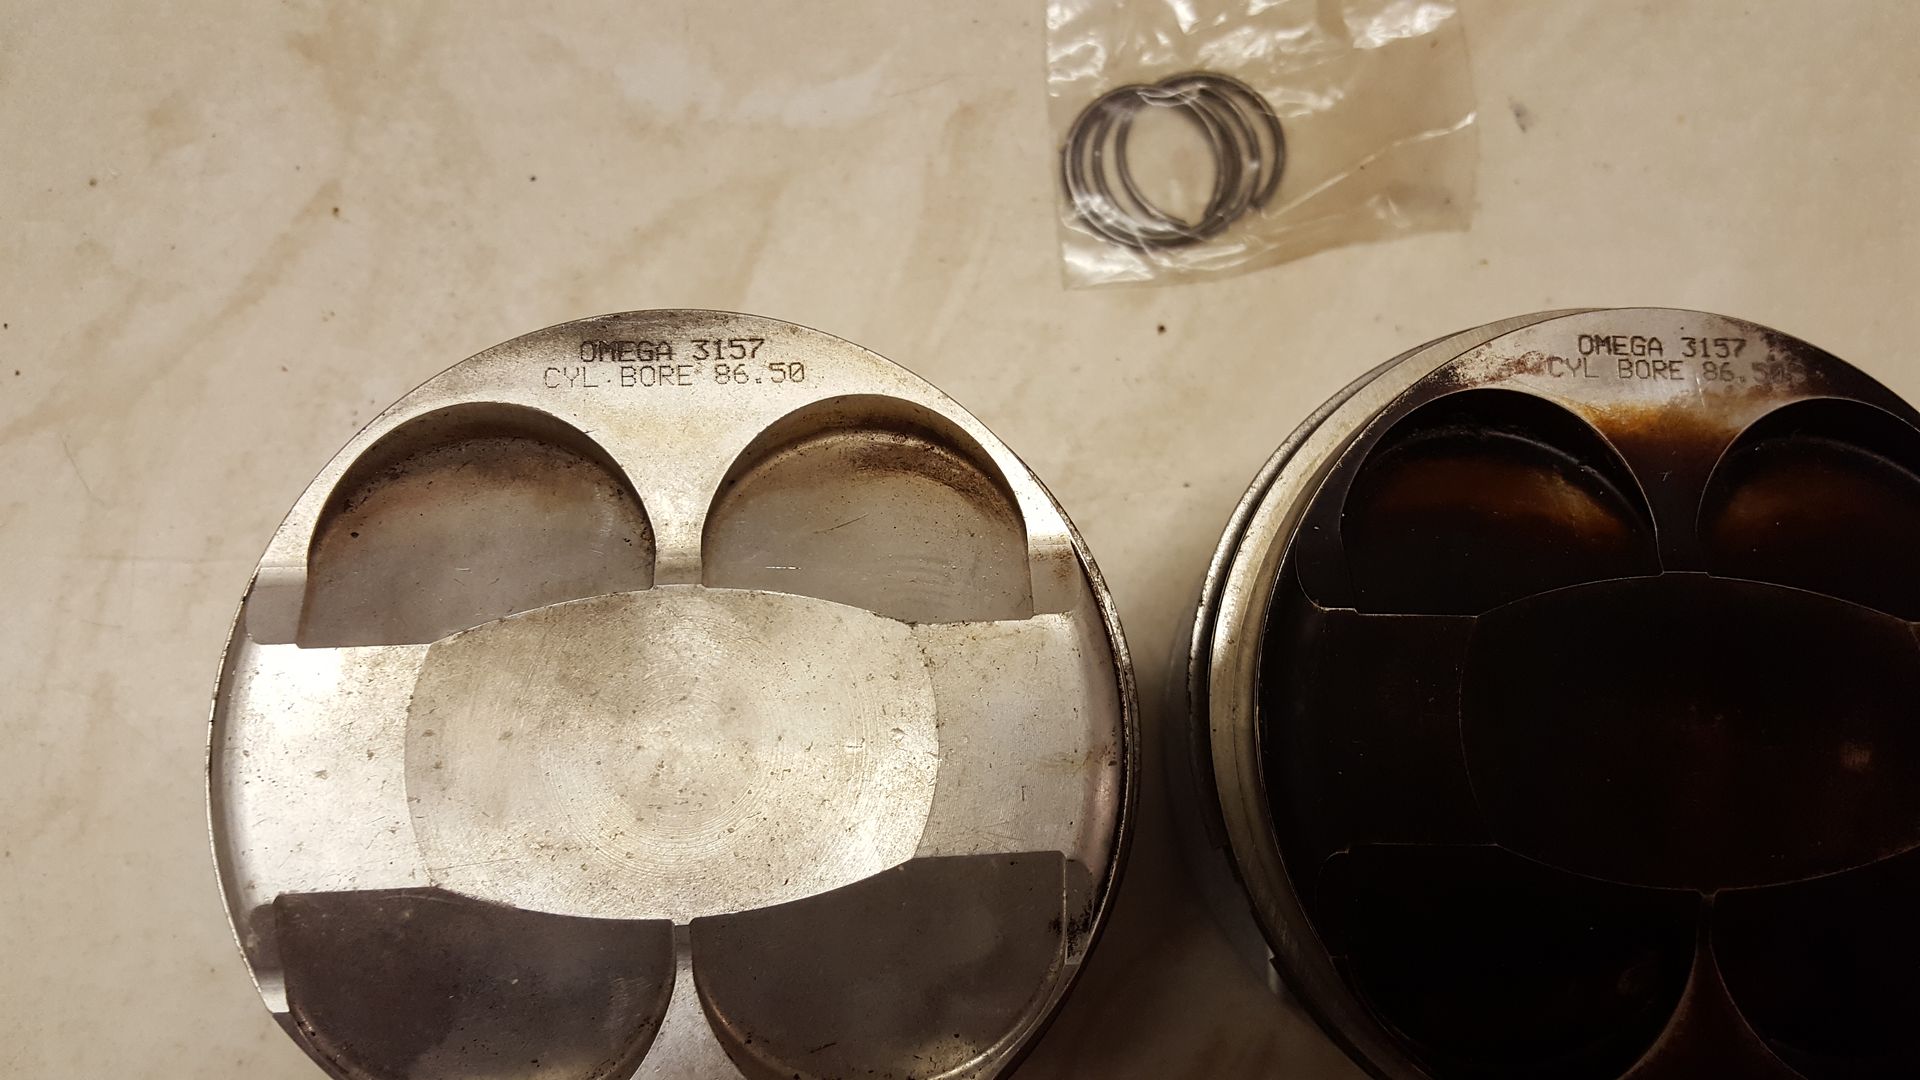

Spotless inside, these certainly haven't done much work

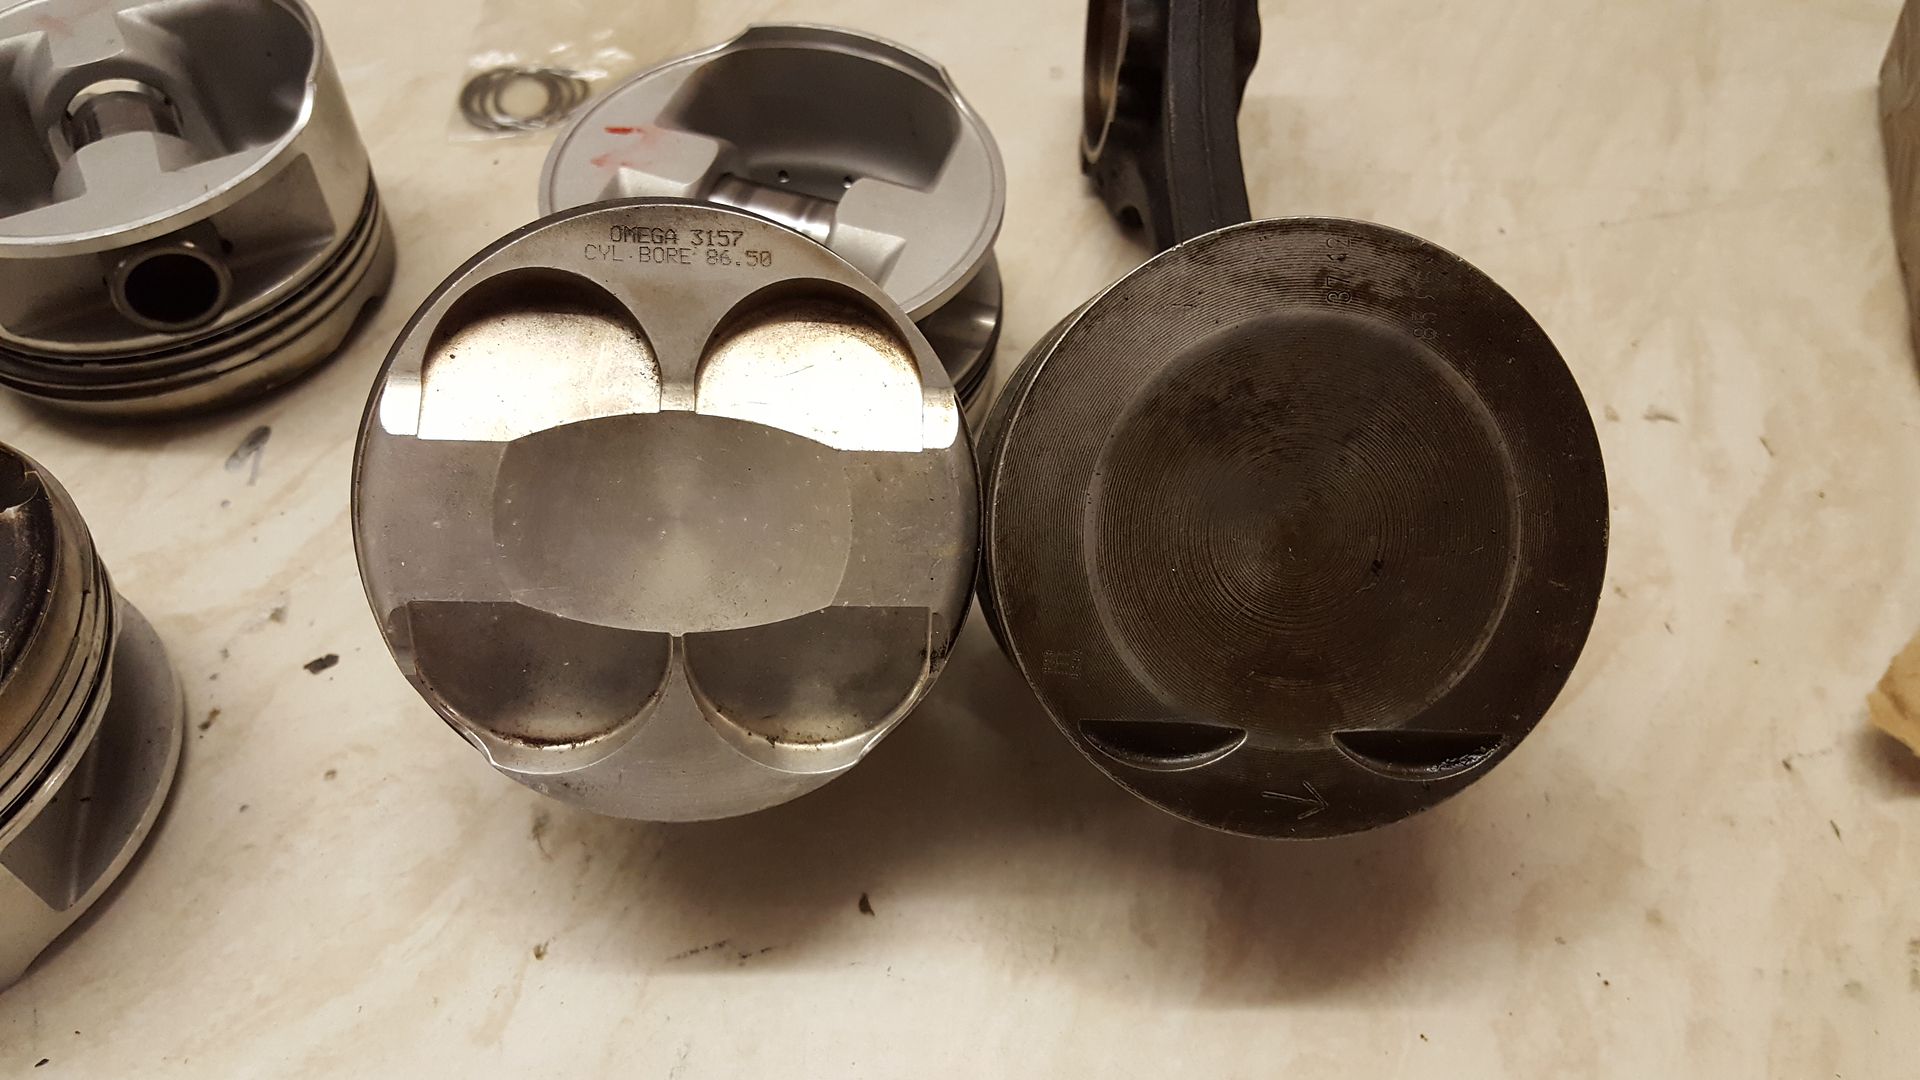
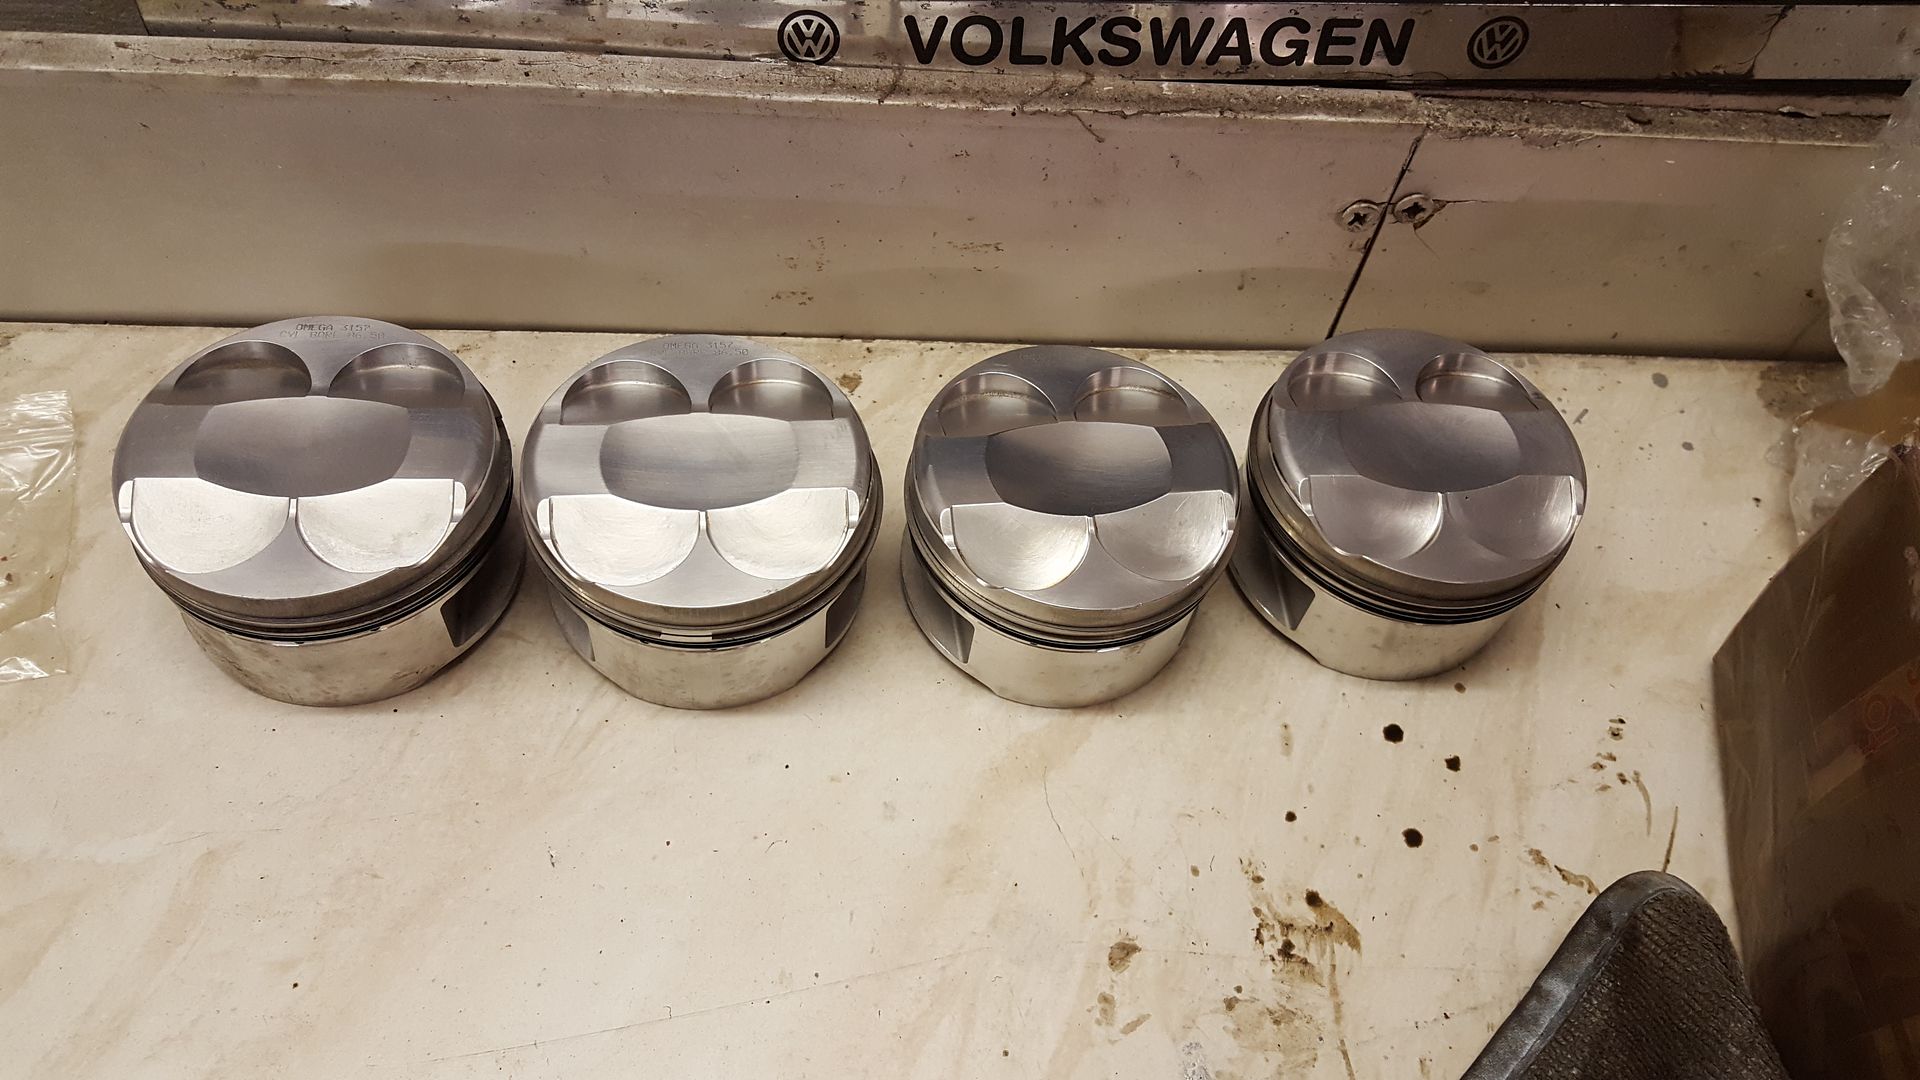
Here it is next to a standard c20xe piston
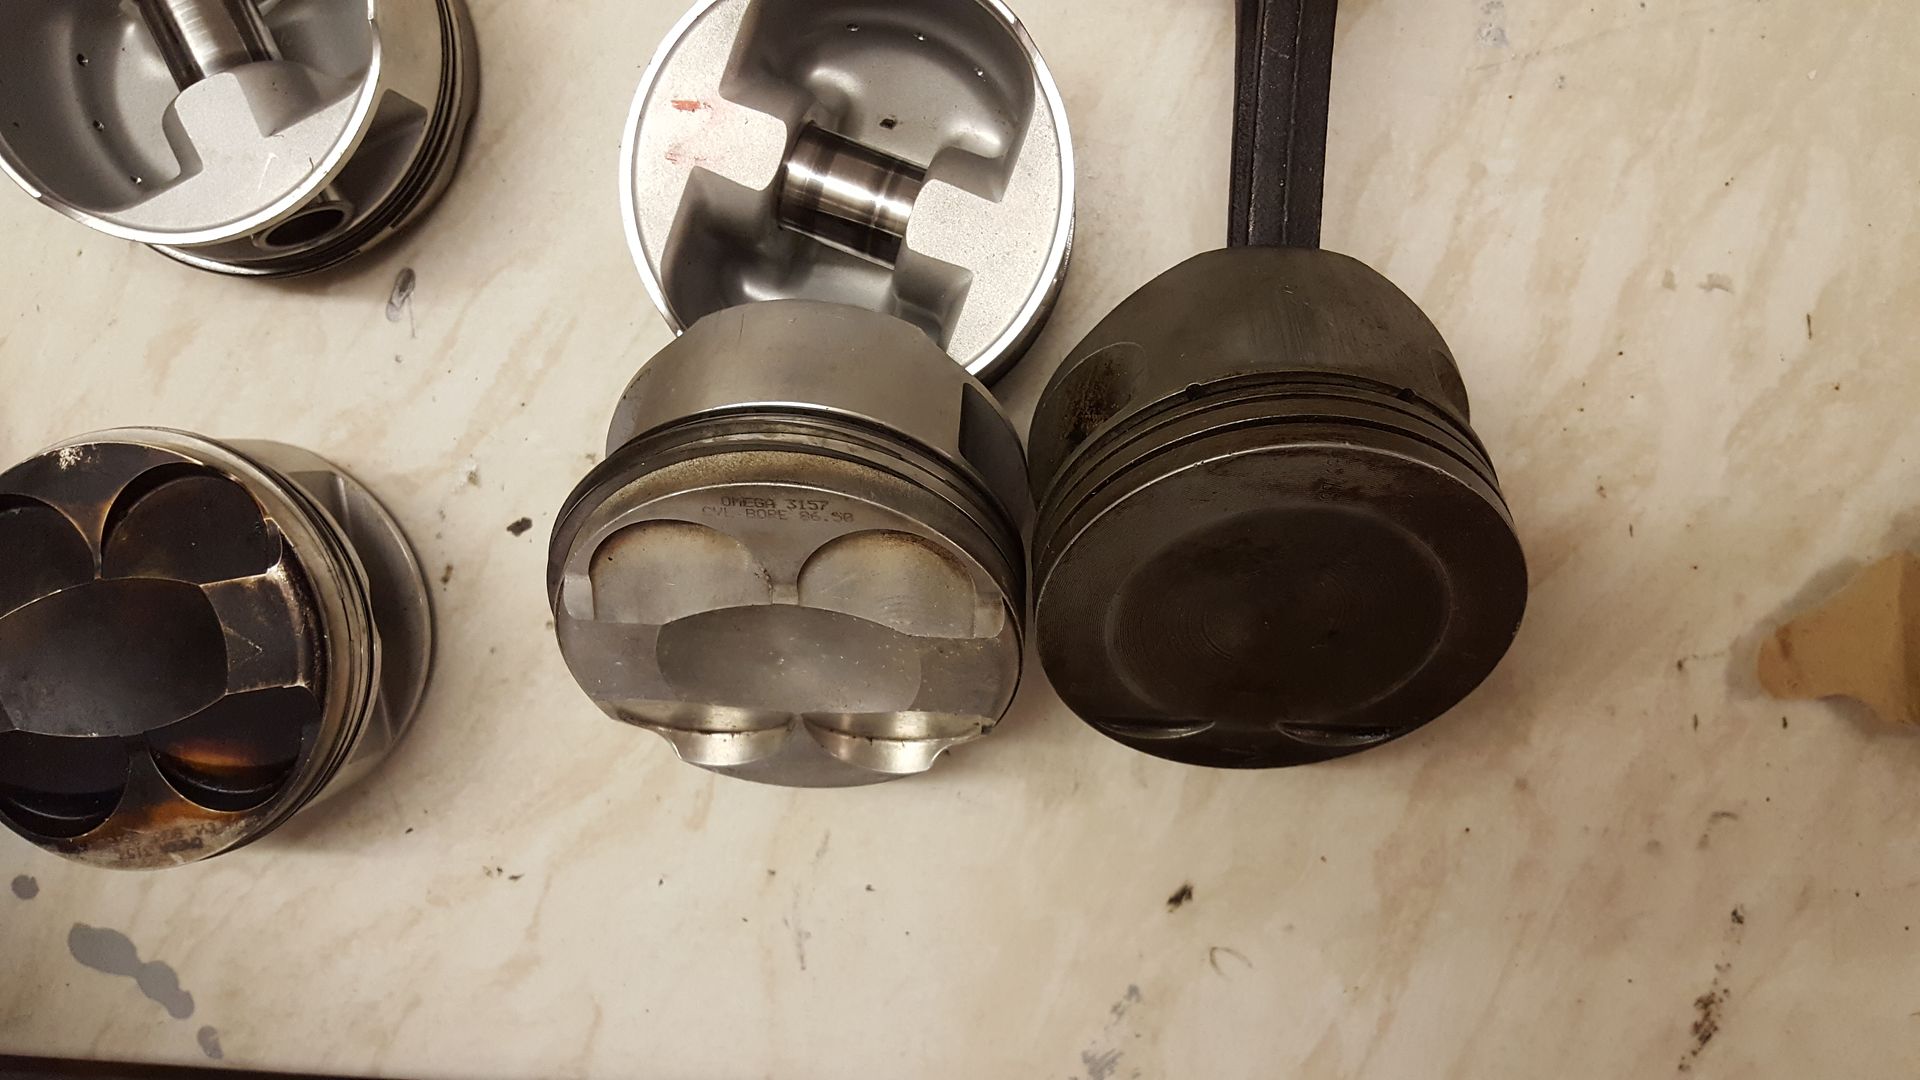
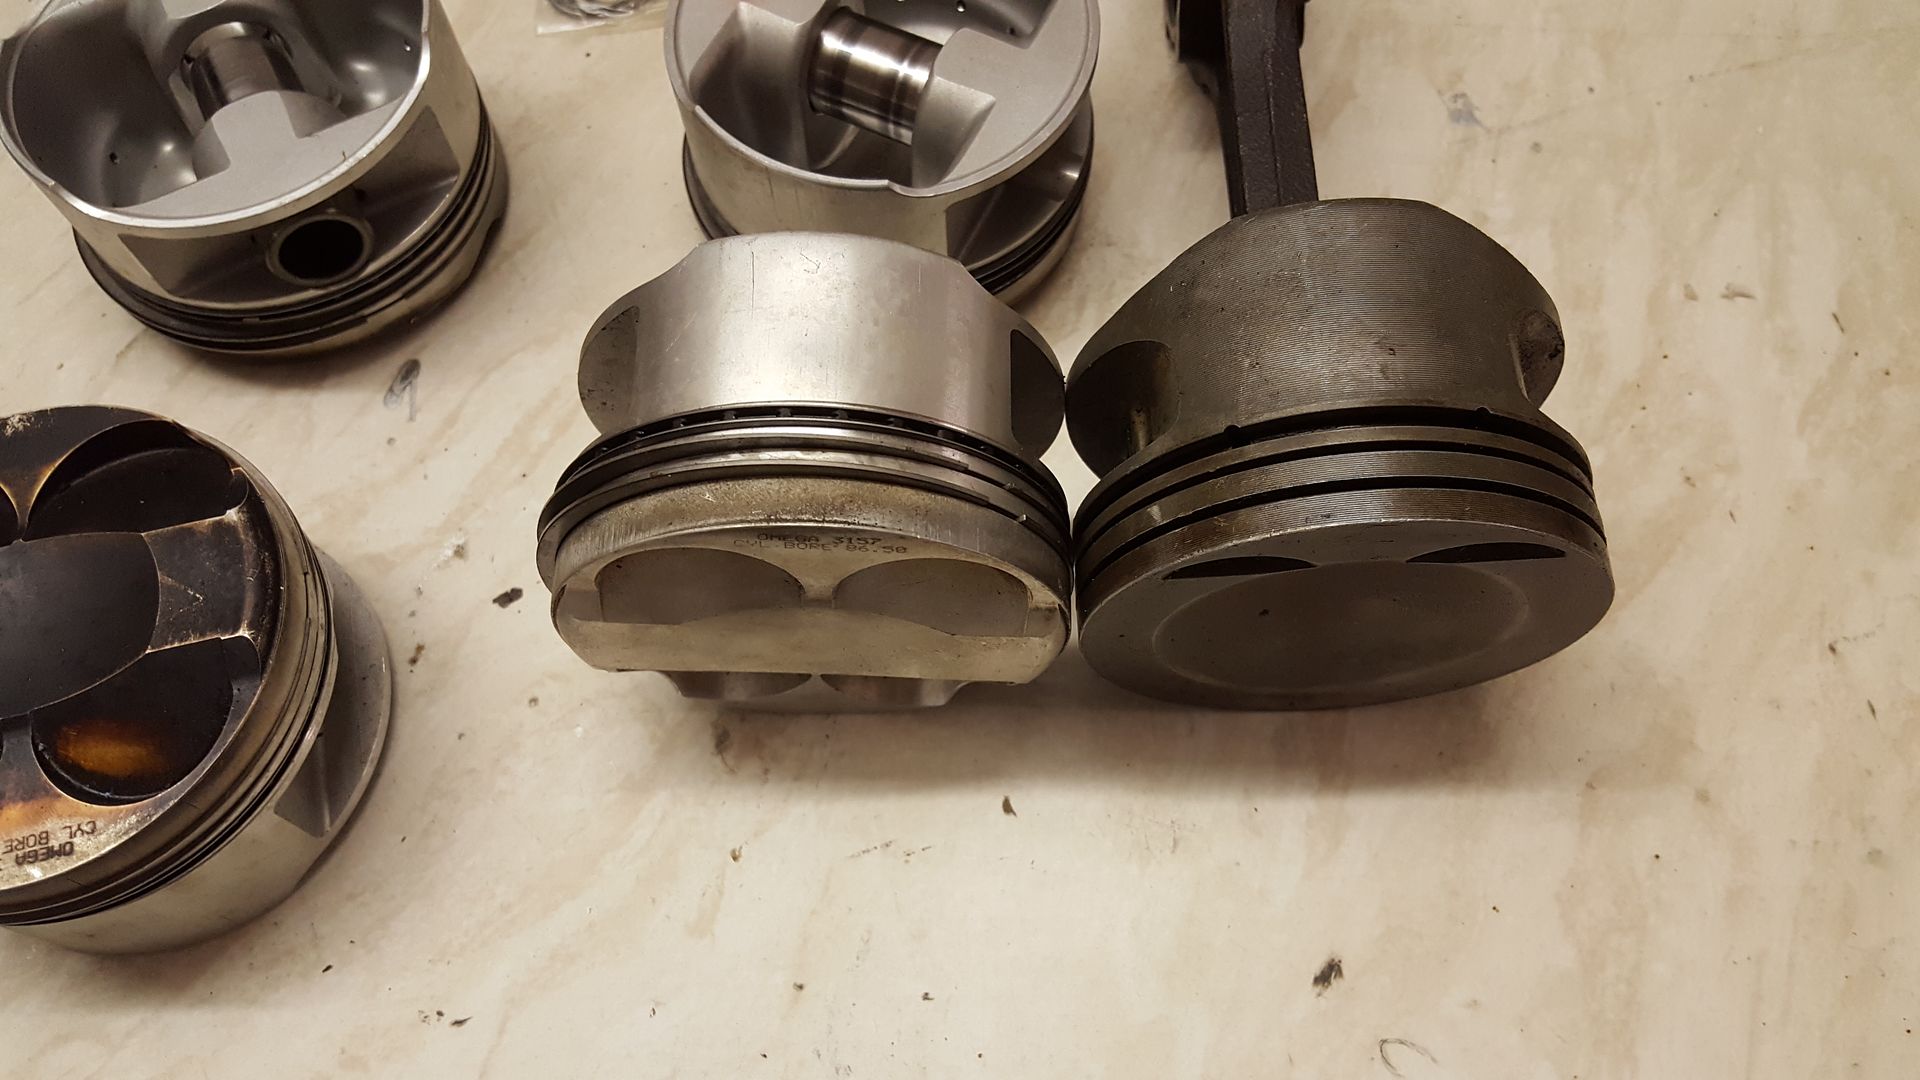
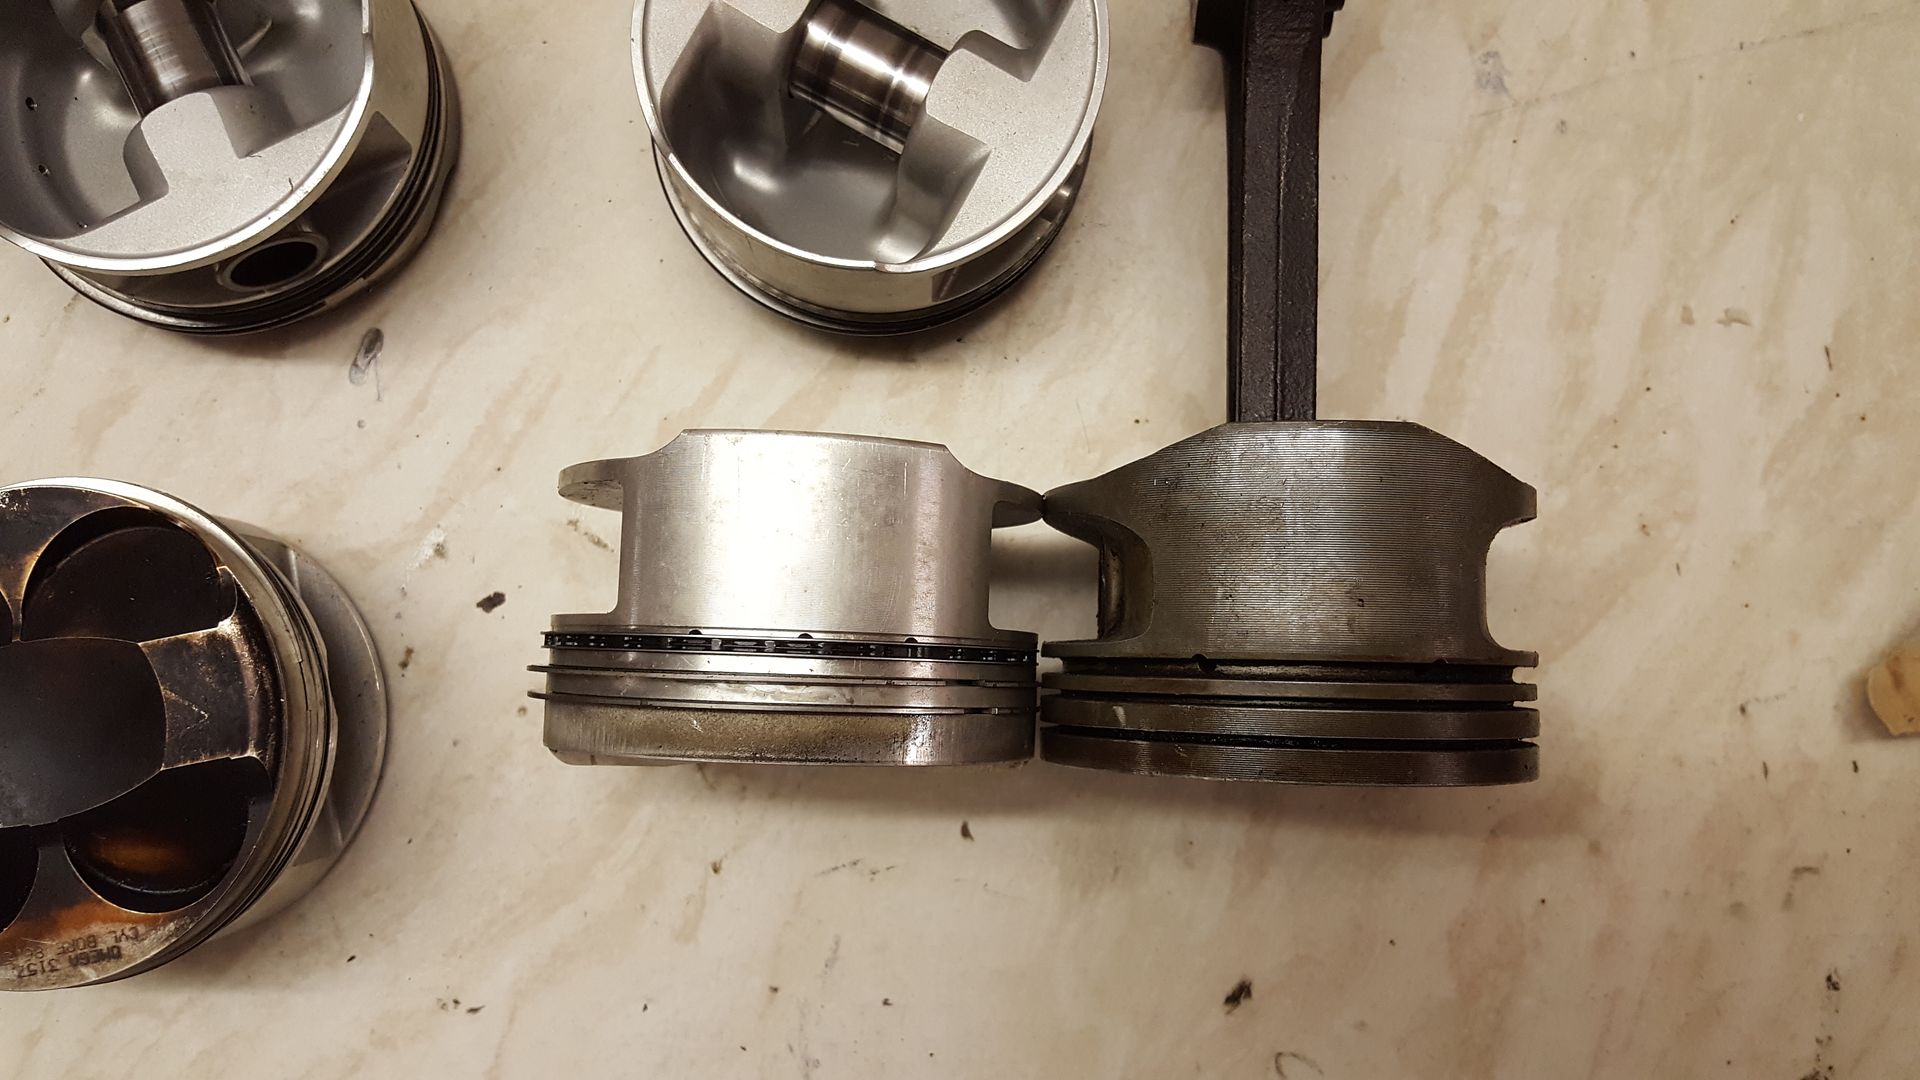
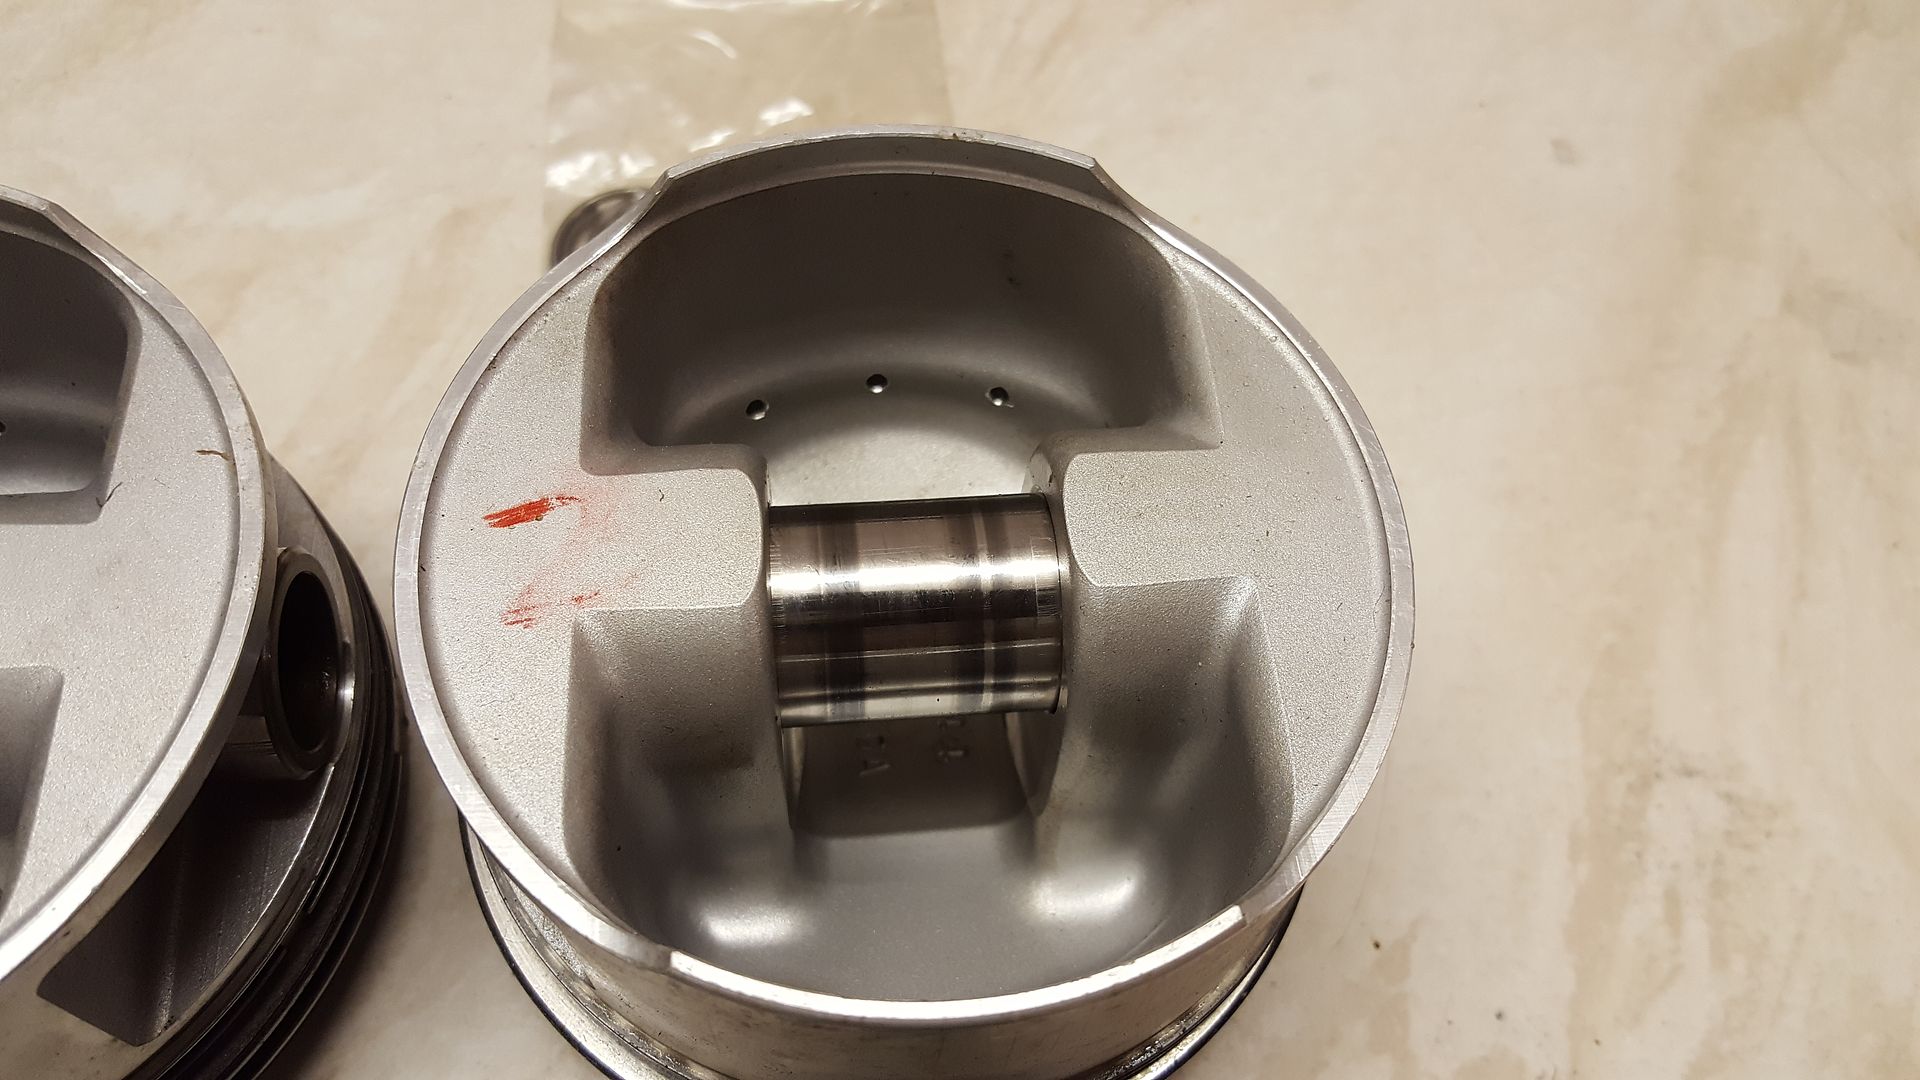
And here's my c20let LOW compression wossner piston in the middle

With the steel rods on the c20let pistons that will now be making their way to this build
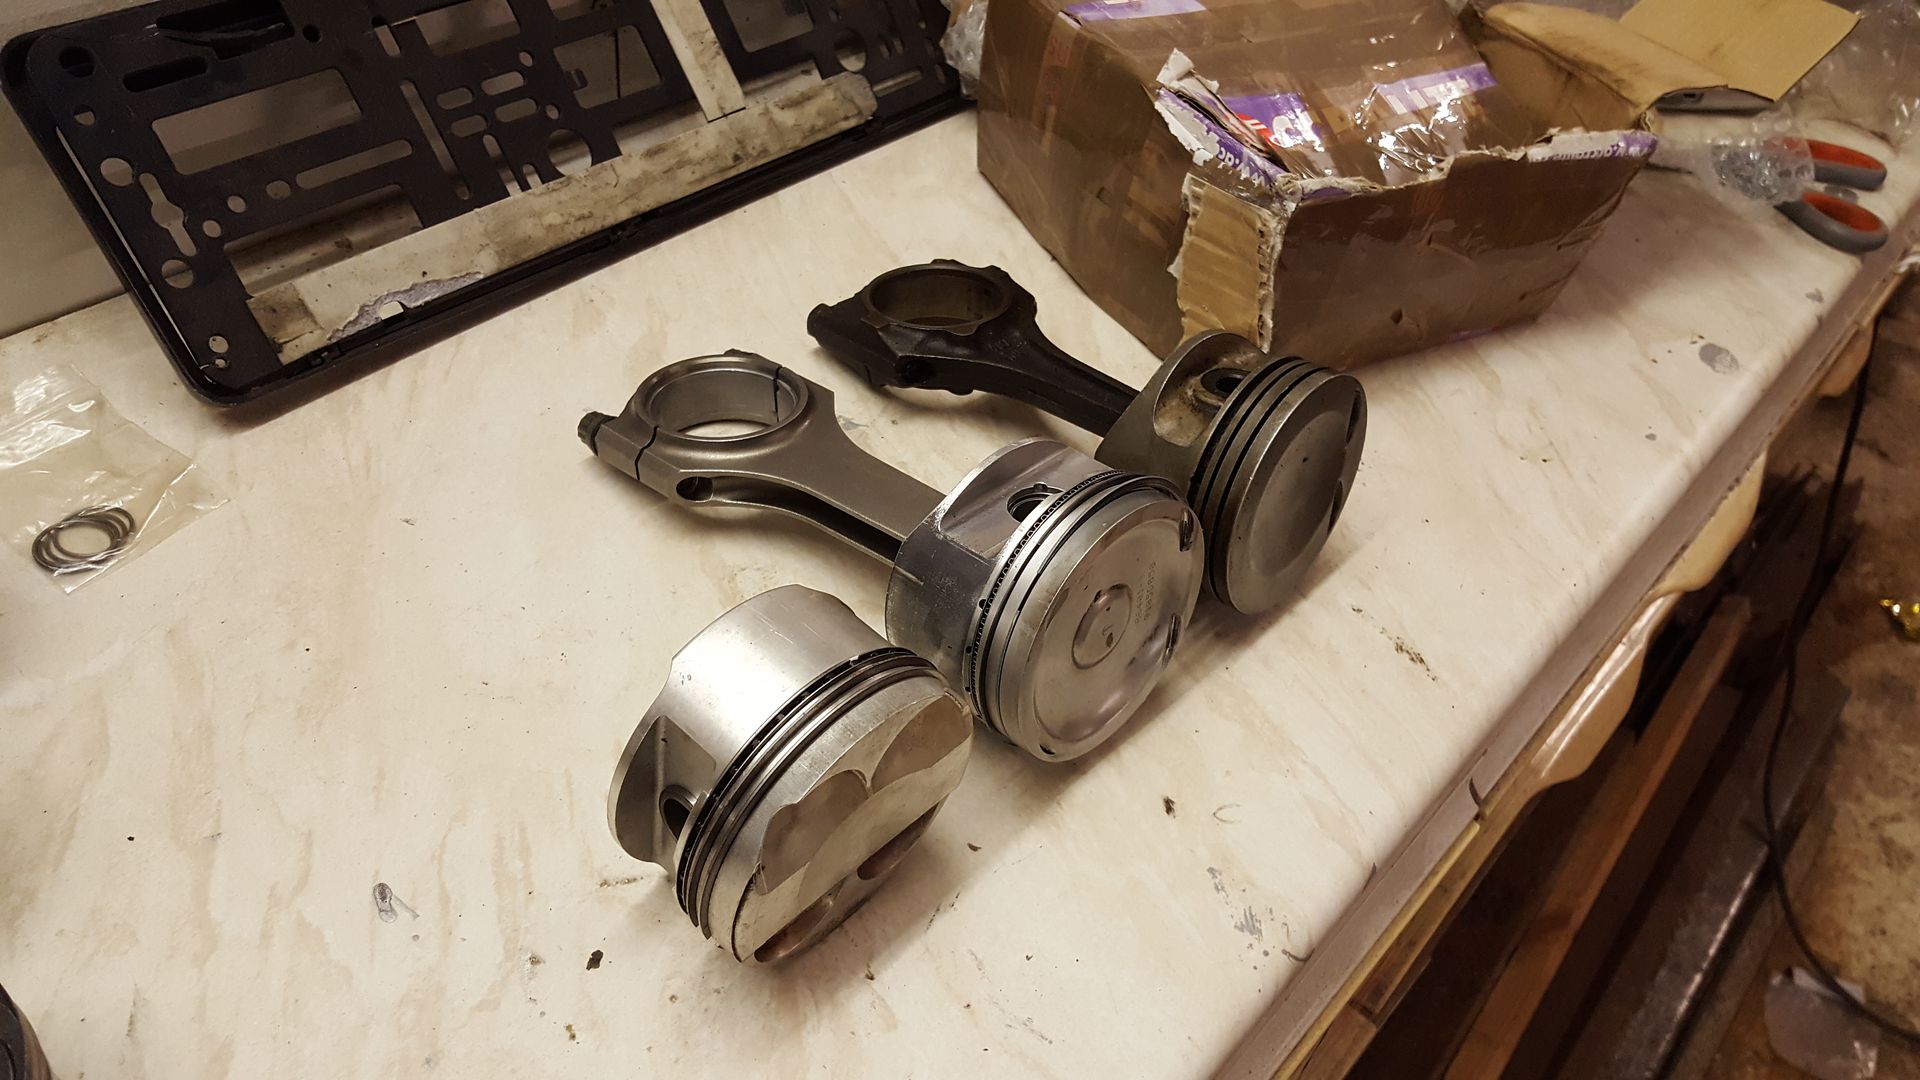
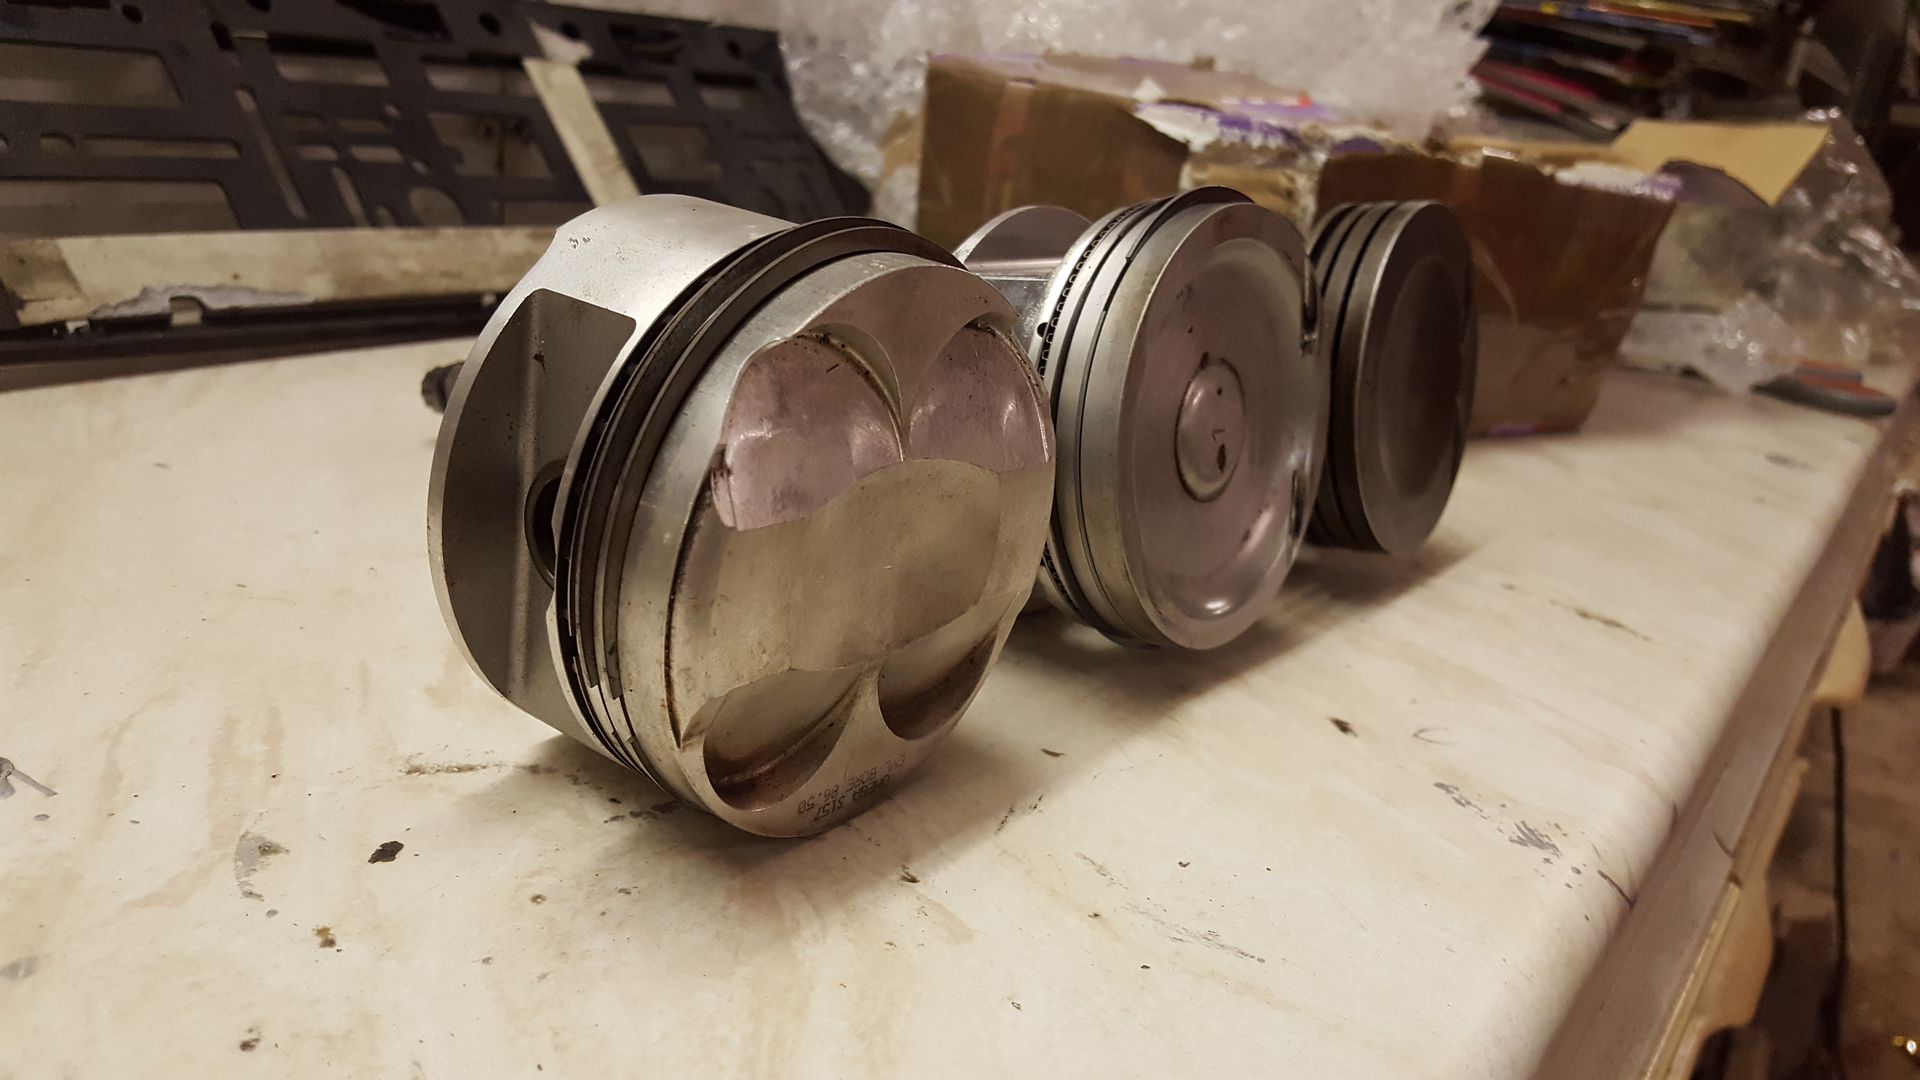
The tops have obviously seen combustion
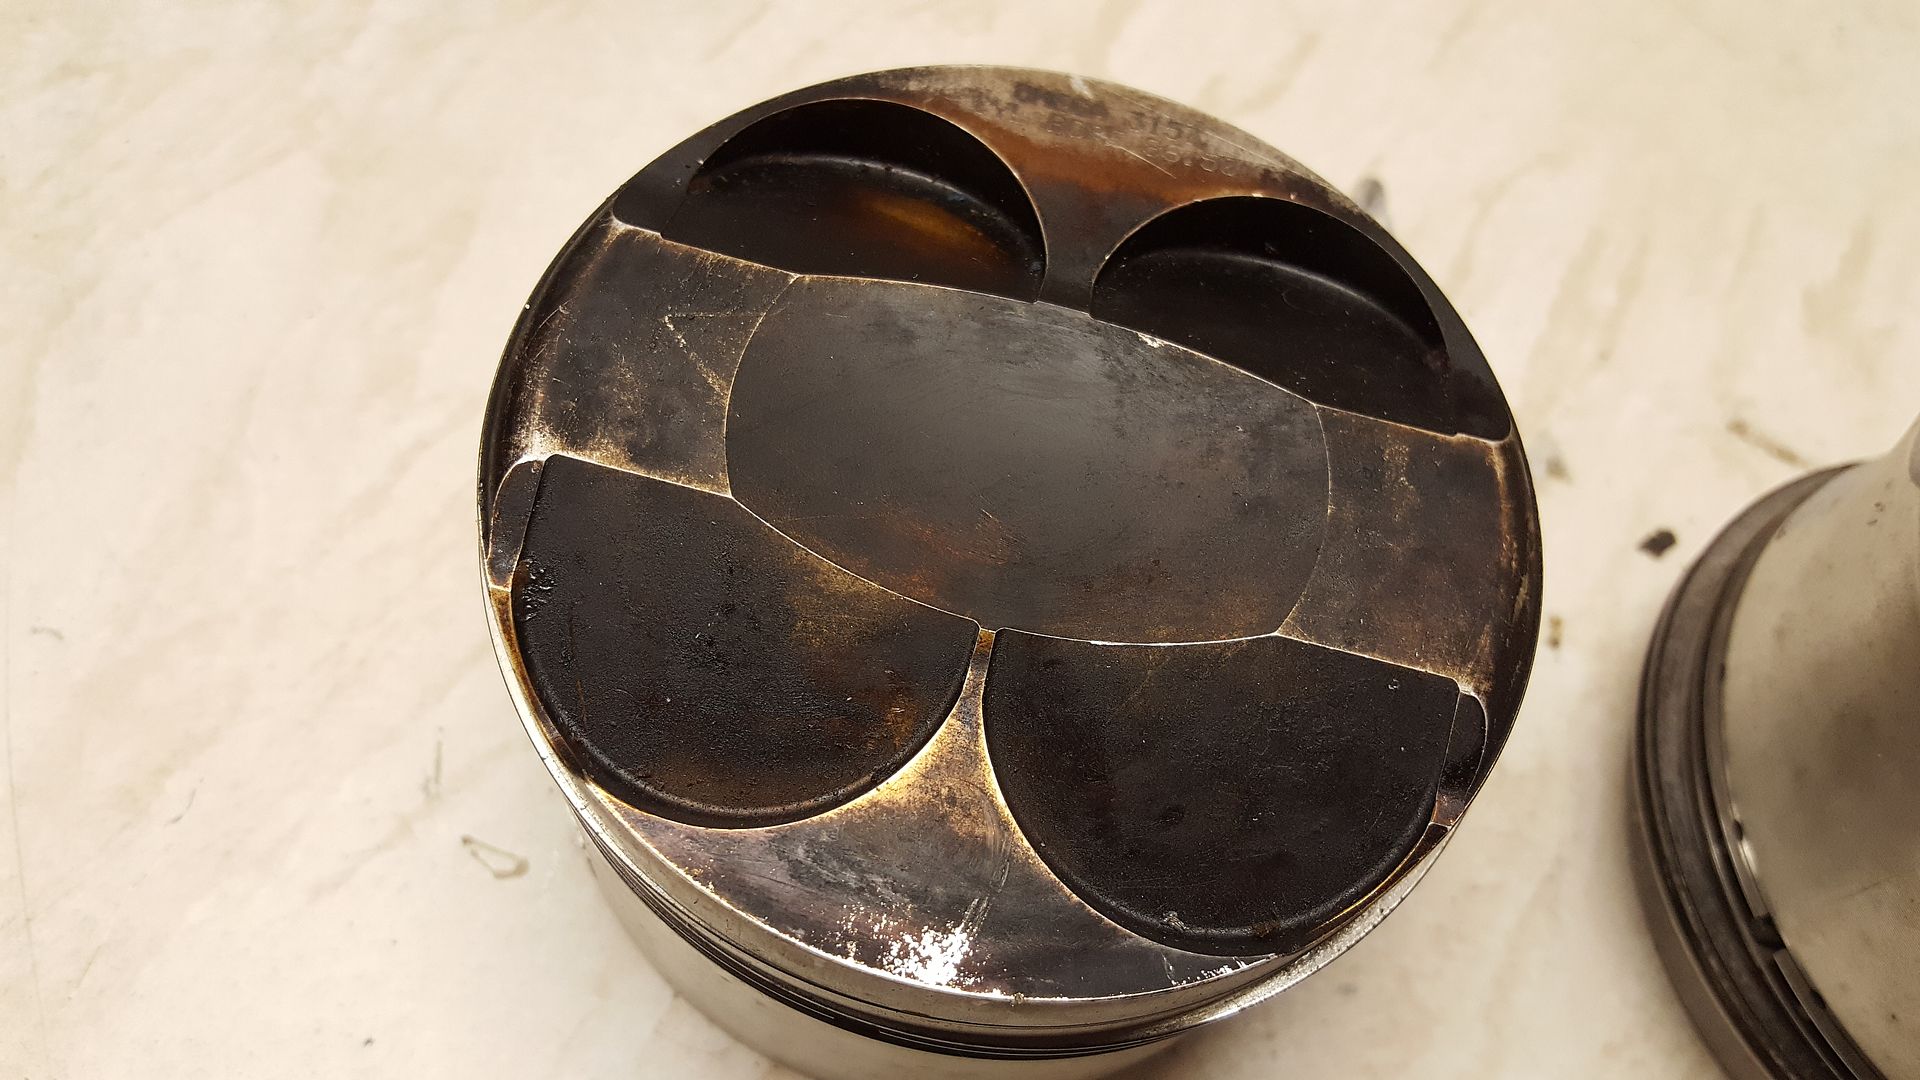
But that pretty much wiped off with some thinners
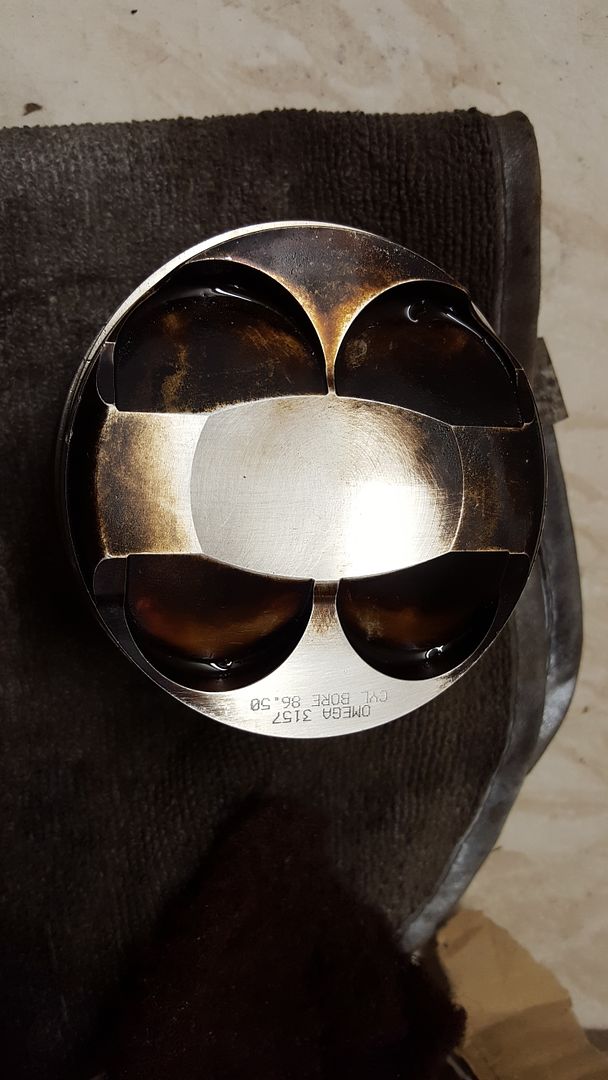
And they came up like new
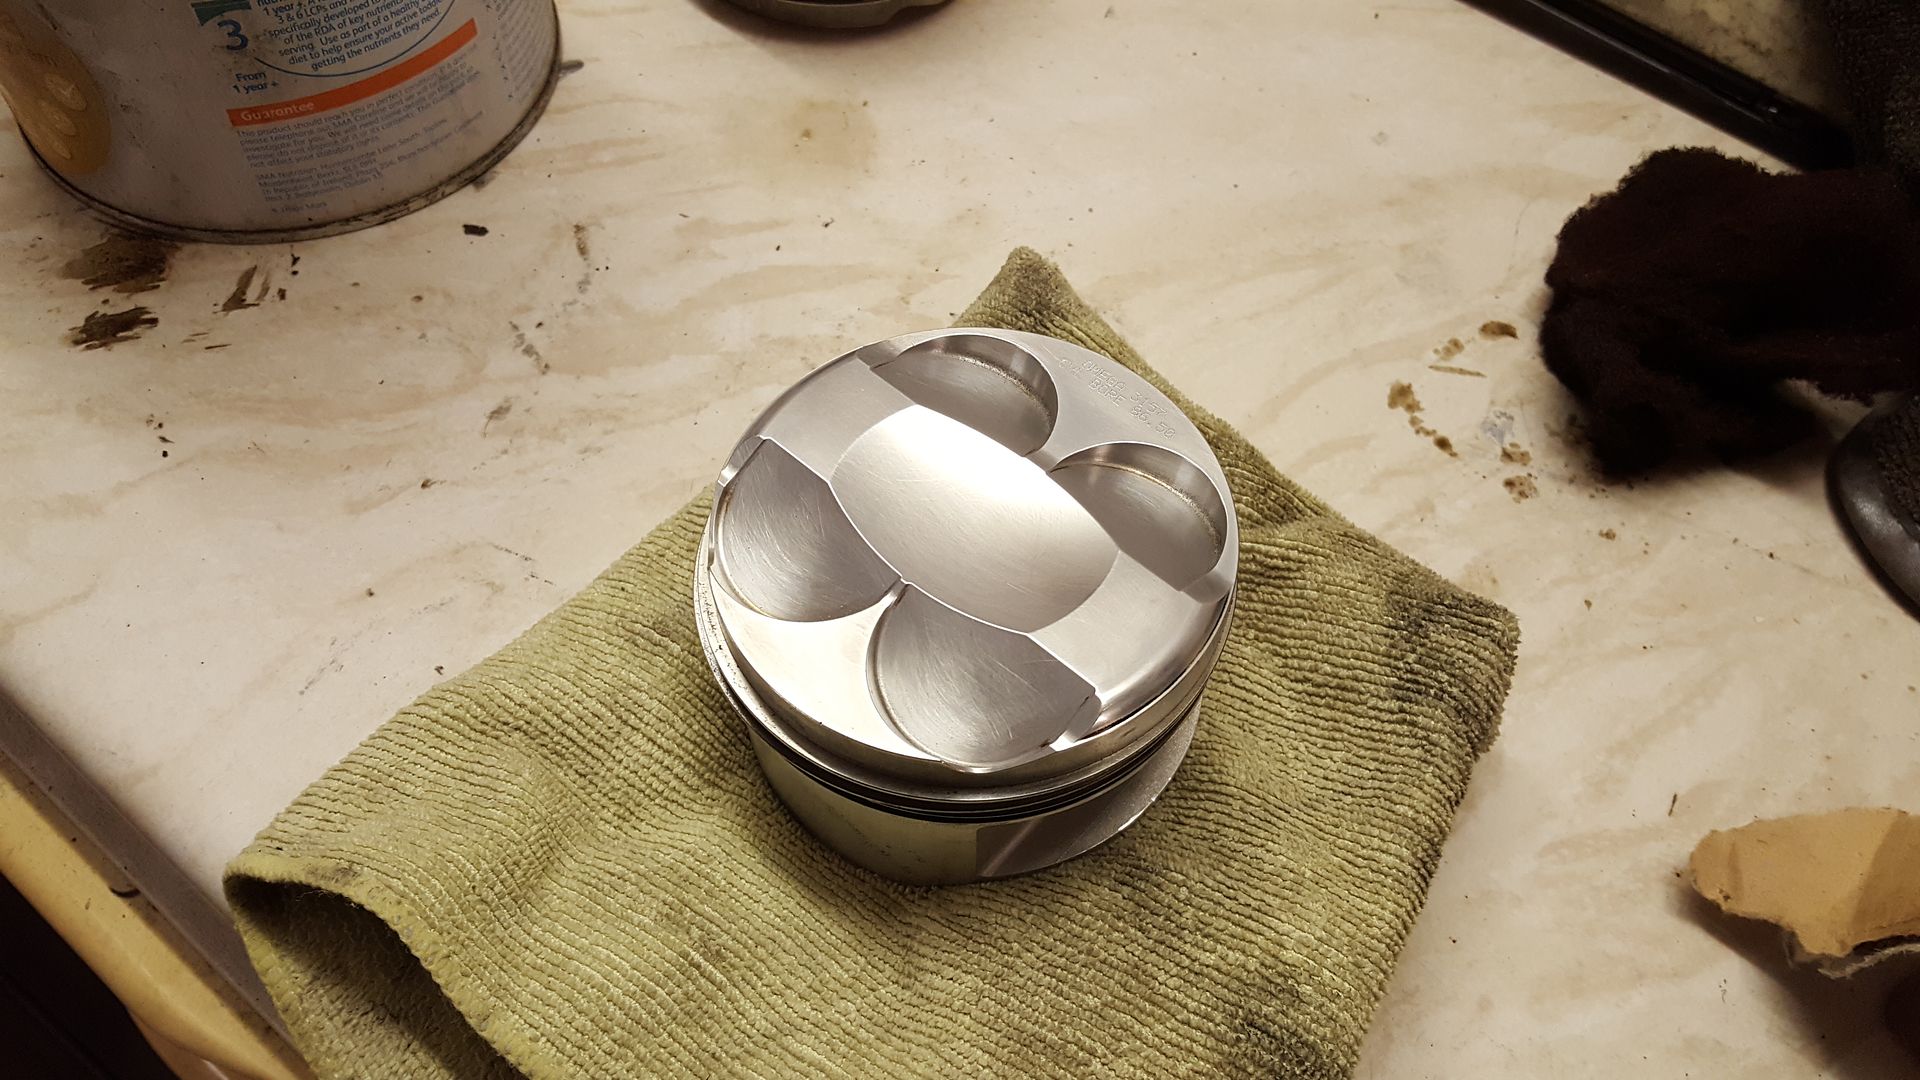
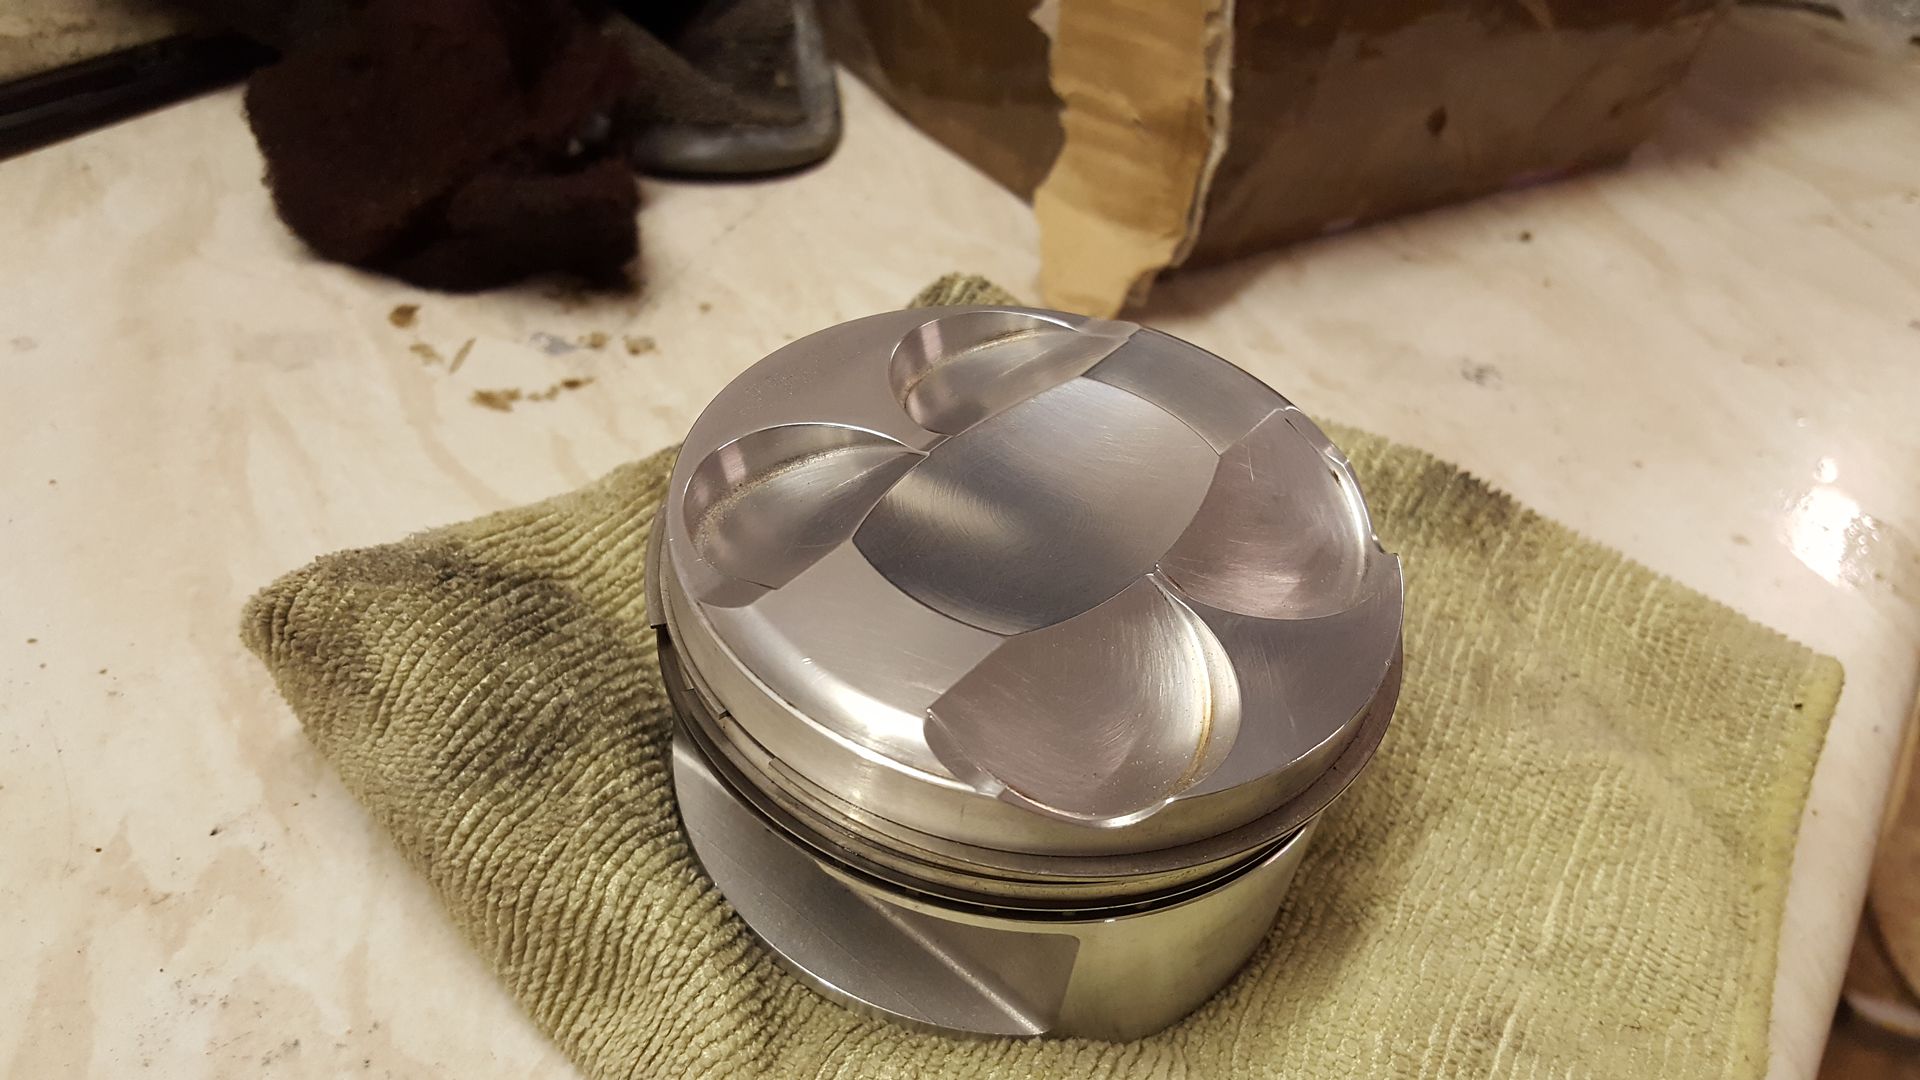
Very pleased with that. These are Ł500-600 new!!
super-ron - 27/1/18 at 03:00 PM
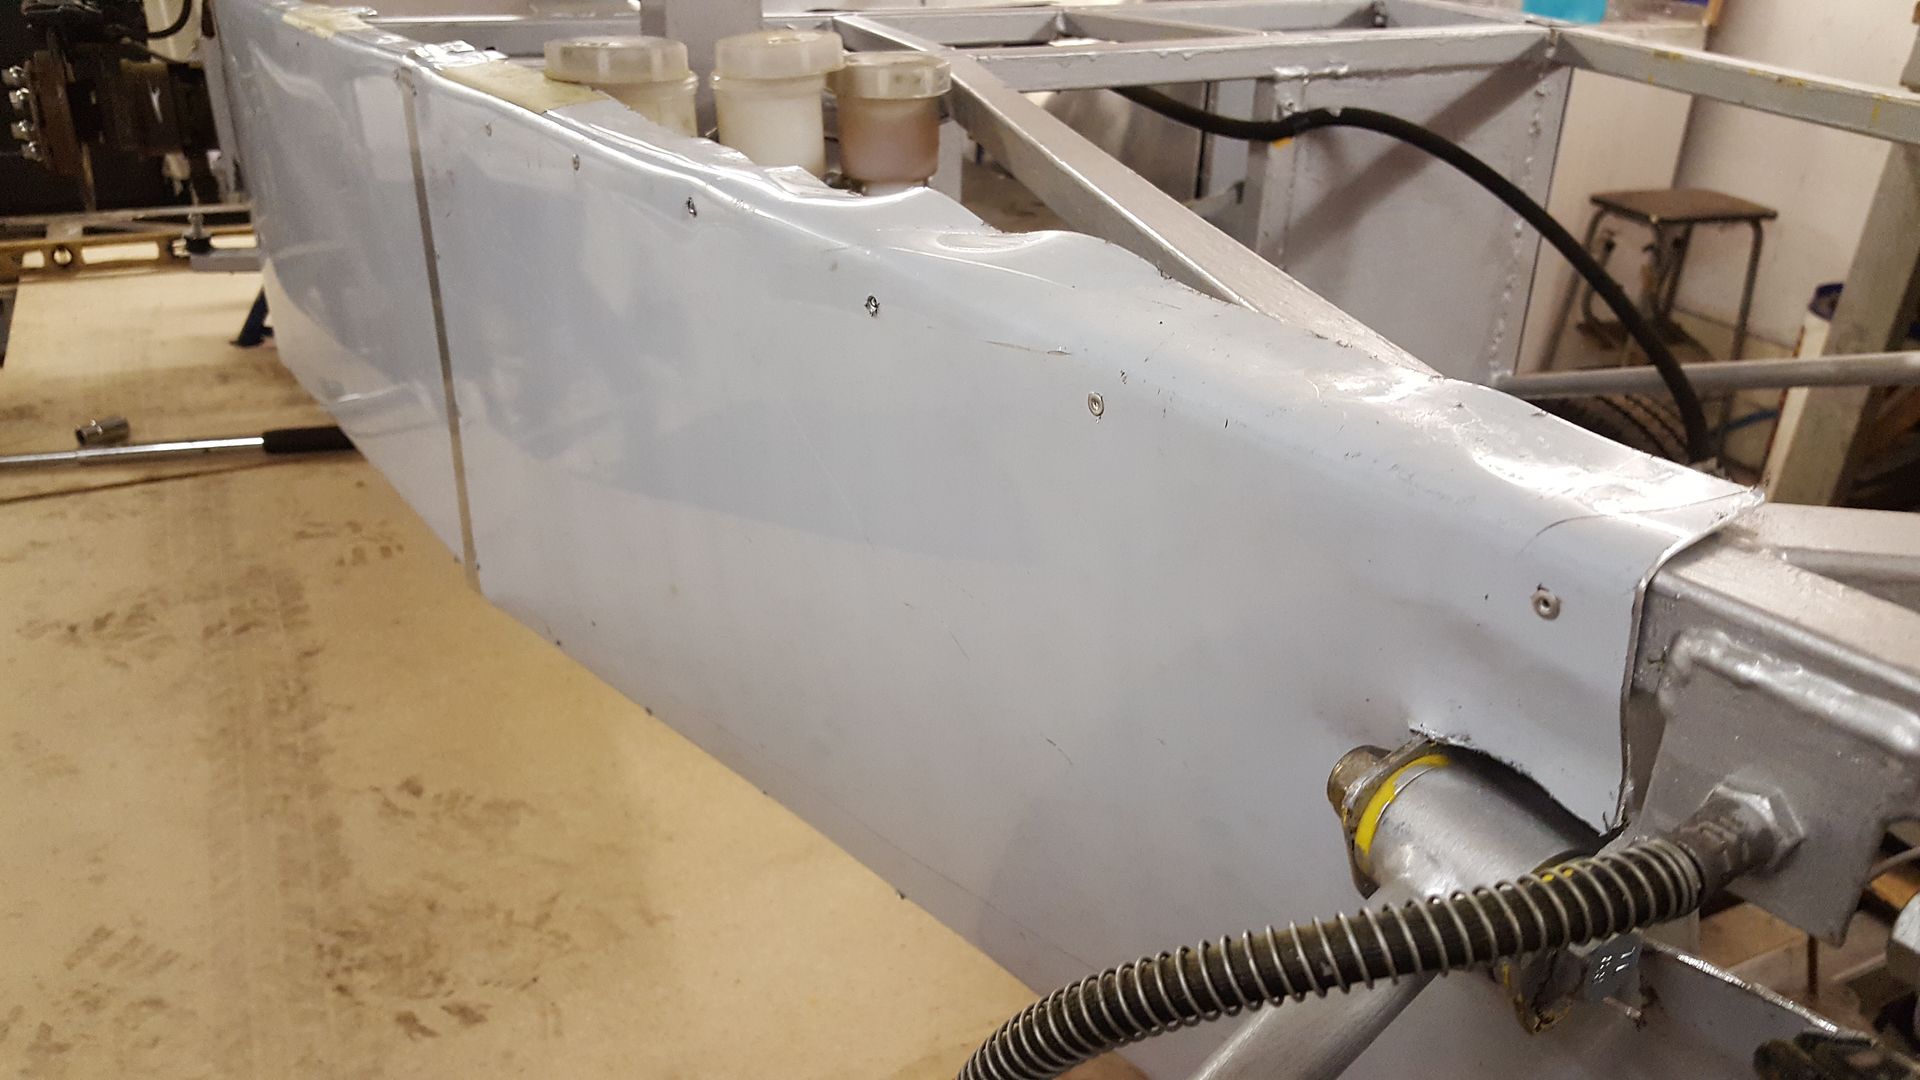
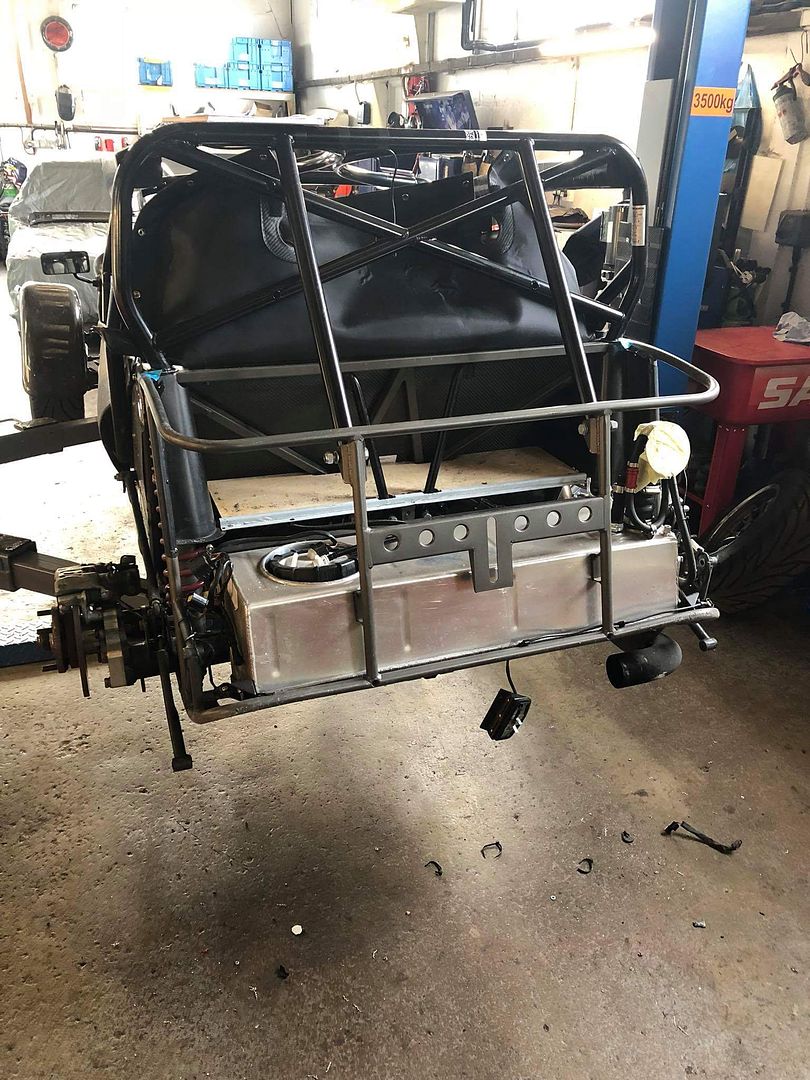
I little bit more done. As this is a GBS ZERO/ MNR VORTX hybrid there's a bit of a problem at the rear with the fuel tank being a bit vunrable.
The GBS has the fuel tank down low behind the diff right at the back. The rear clam on a GBS is usually stainless steel so offers good protection.
The MNR body I have is fibreglass, and on the mnr the tank is higher up and the roll cage goes right over it.
With my configuration though the single skin alloy tank is only protected by a bit of fibreglass. Anyone reversing into it with a tow bar would go
straight through it, or if I have a bit of a spin on the track :lol:
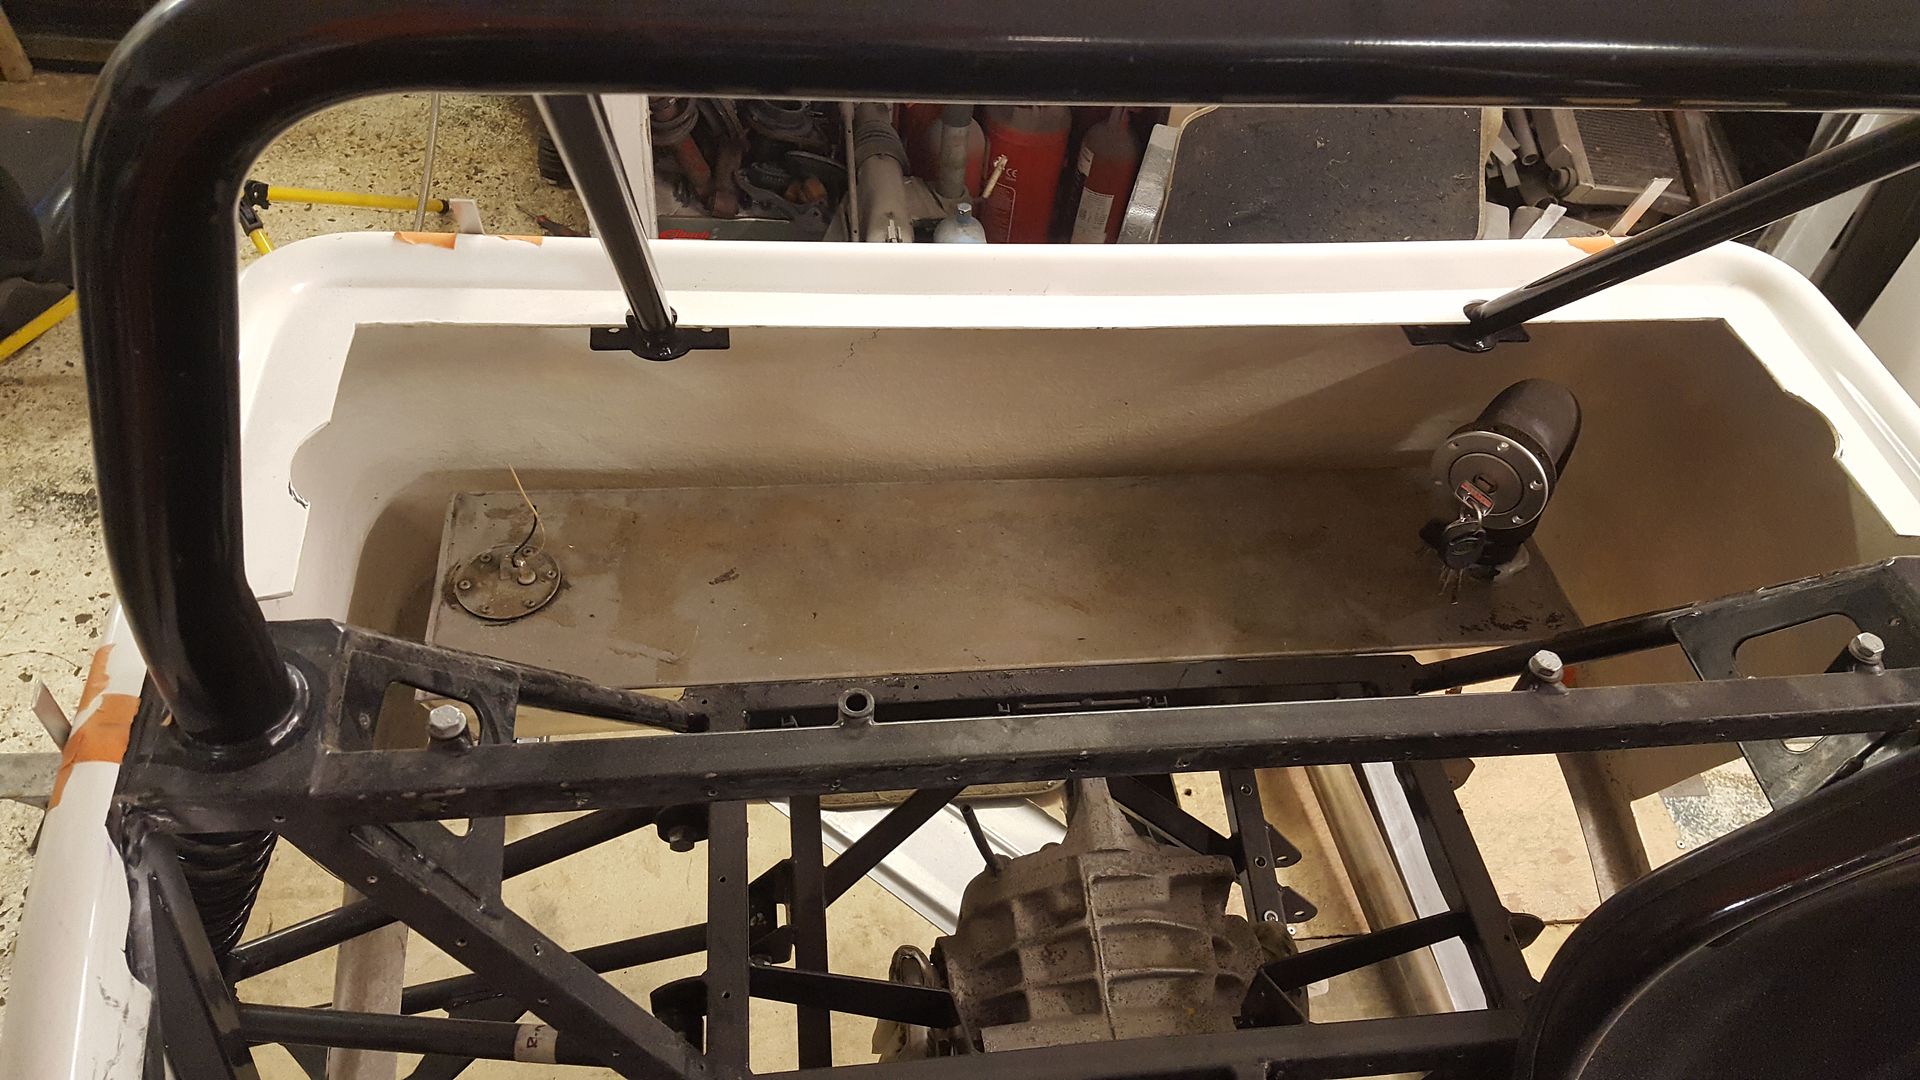
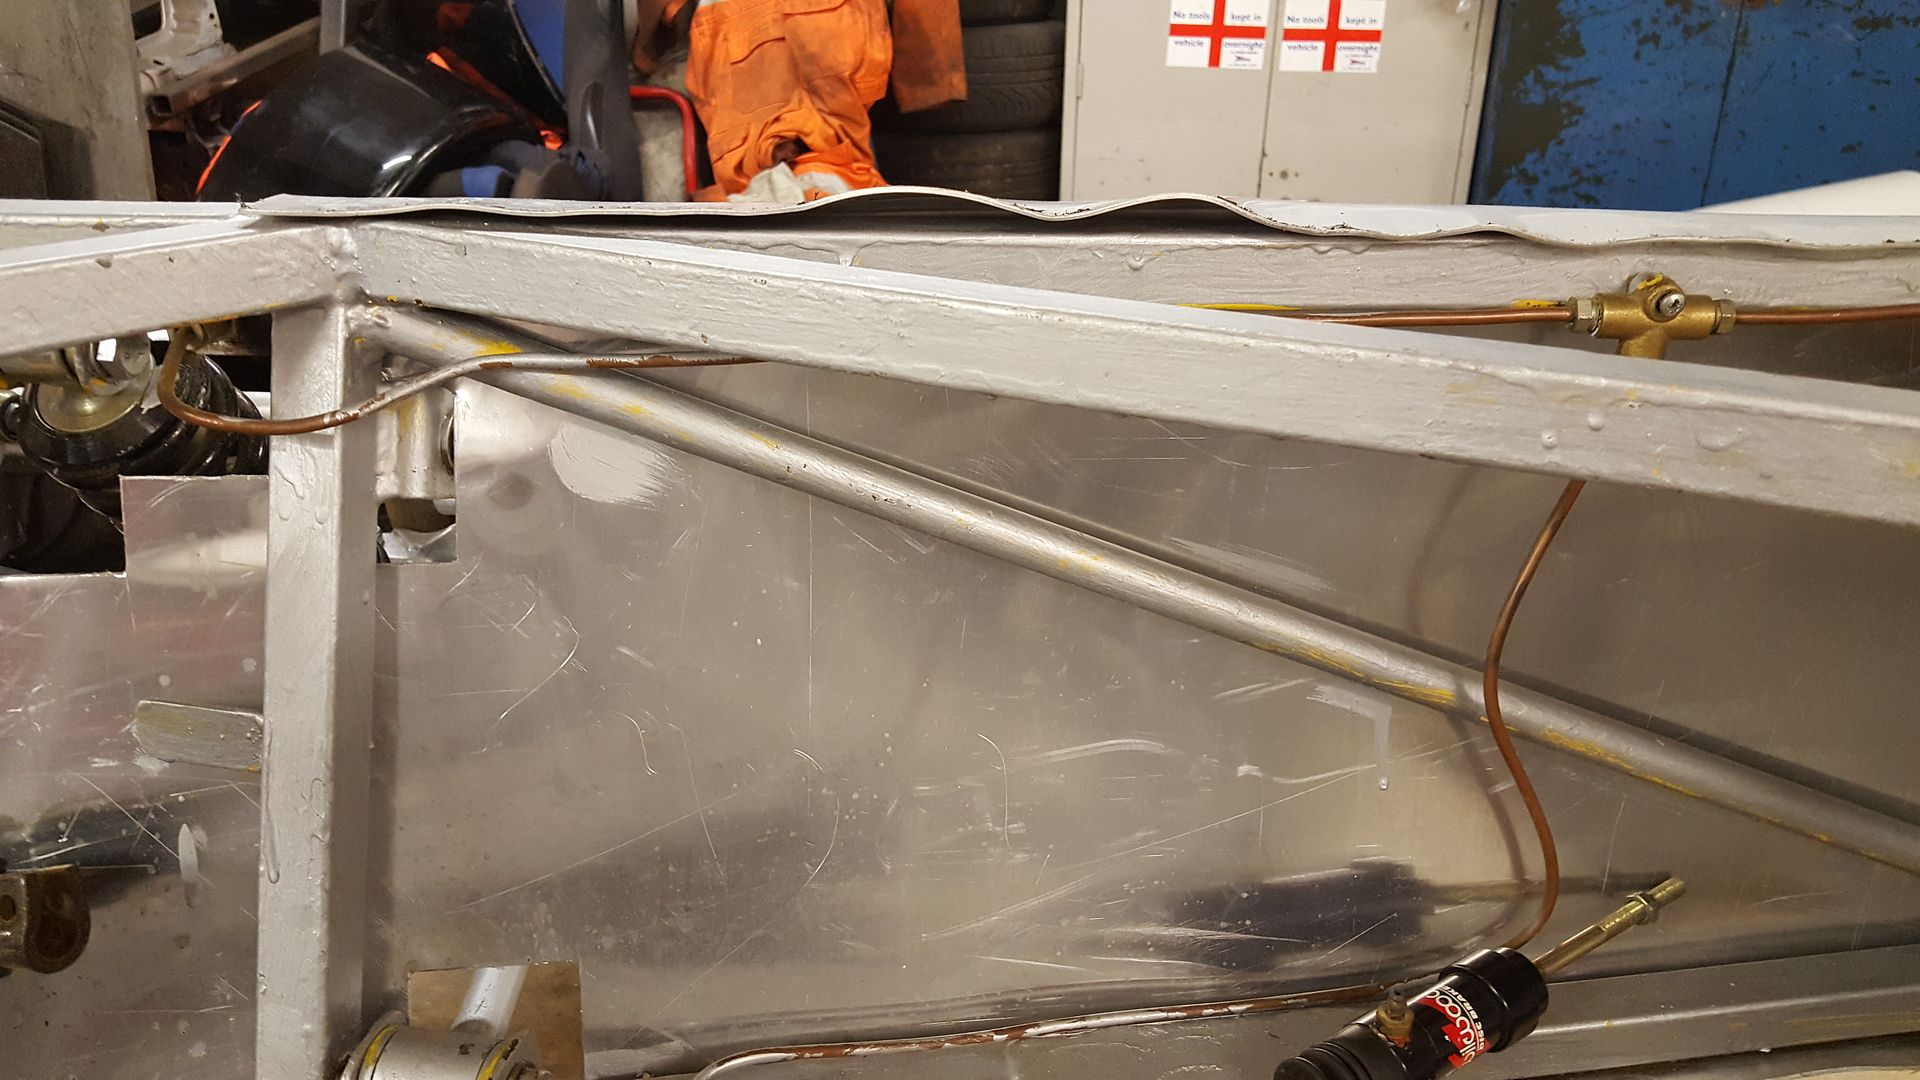
So I chopped up the remains of the locost chassis for some of the tubing
Started making some plates to bolt to the GBS roll bar
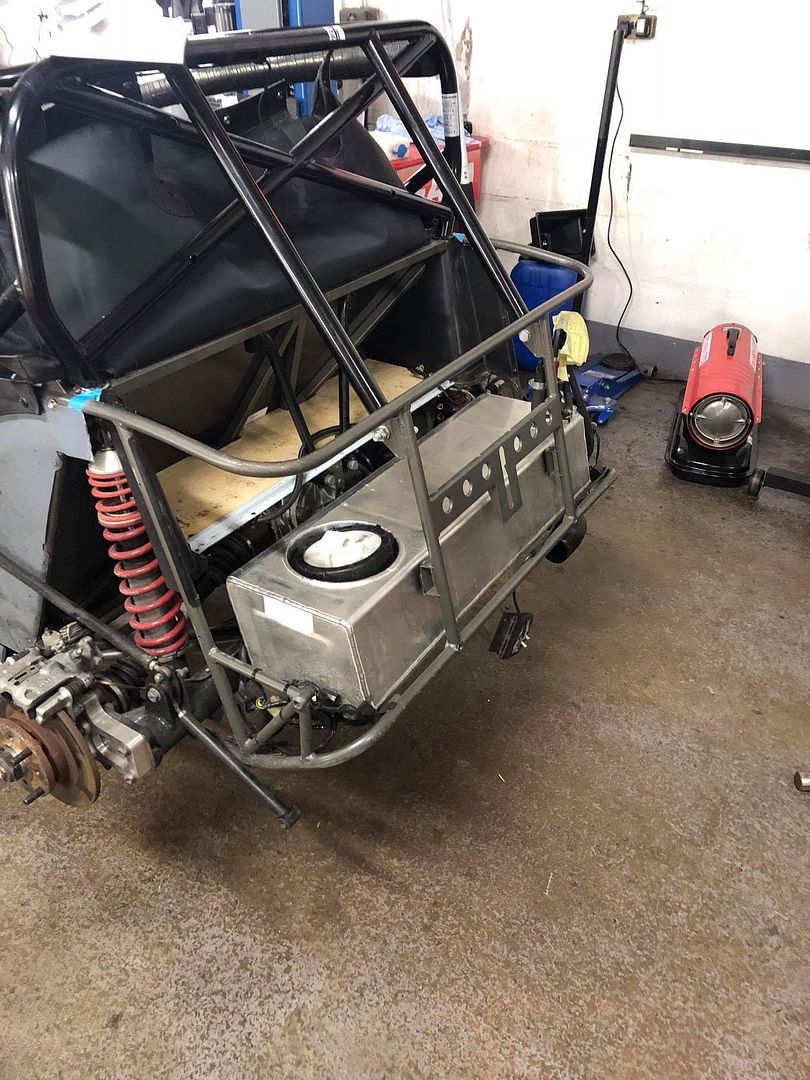
And made a skeleton down to the bottom and round the sides to mount the tub to, and hold the alloy plate in place

Will put some of the corrugated plastic sheeting like you use for car port roofs between the alloy plate and fuel tank.
It's just all tacked at the moment, will weld it and paint it once the body is back off.
CosKev3 - 27/1/18 at 05:45 PM
99% of seven type cars only have the fibreglass rear panel behind the fuel tank!
Looks good what you are making,but will only offer protection at low impact speeds IMO.
super-ron - 27/1/18 at 07:35 PM
quote:
Originally posted by CosKev3
99% of seven type cars only have the fibreglass rear panel behind the fuel tank!
Looks good what you are making,but will only offer protection at low impact speeds IMO.
Completely agree. This is more to prevent anything piercing the tank at low speeds, or me backing in to anything.
If anyone thumps me up the arse at 30mph I have no doubt I'll be sitting in a firey inferno.
super-ron - 28/1/18 at 10:23 AM
I was planning on buying a c20xe for this, but the prices of complete engines have sky rocketed! And most of a complete package I wouldn' be
using anyway, I wouldn't be using the loom or ecu, inlet manifold, exhaust manifold, sump, dizzy, electrics, rocker cover, flywheel.
I have got my complete c20let here out of the Astra to rob for parts, so I started looking for a xe bottom end complete so if have the xe pistons and
a good c20xe engine number for registration.
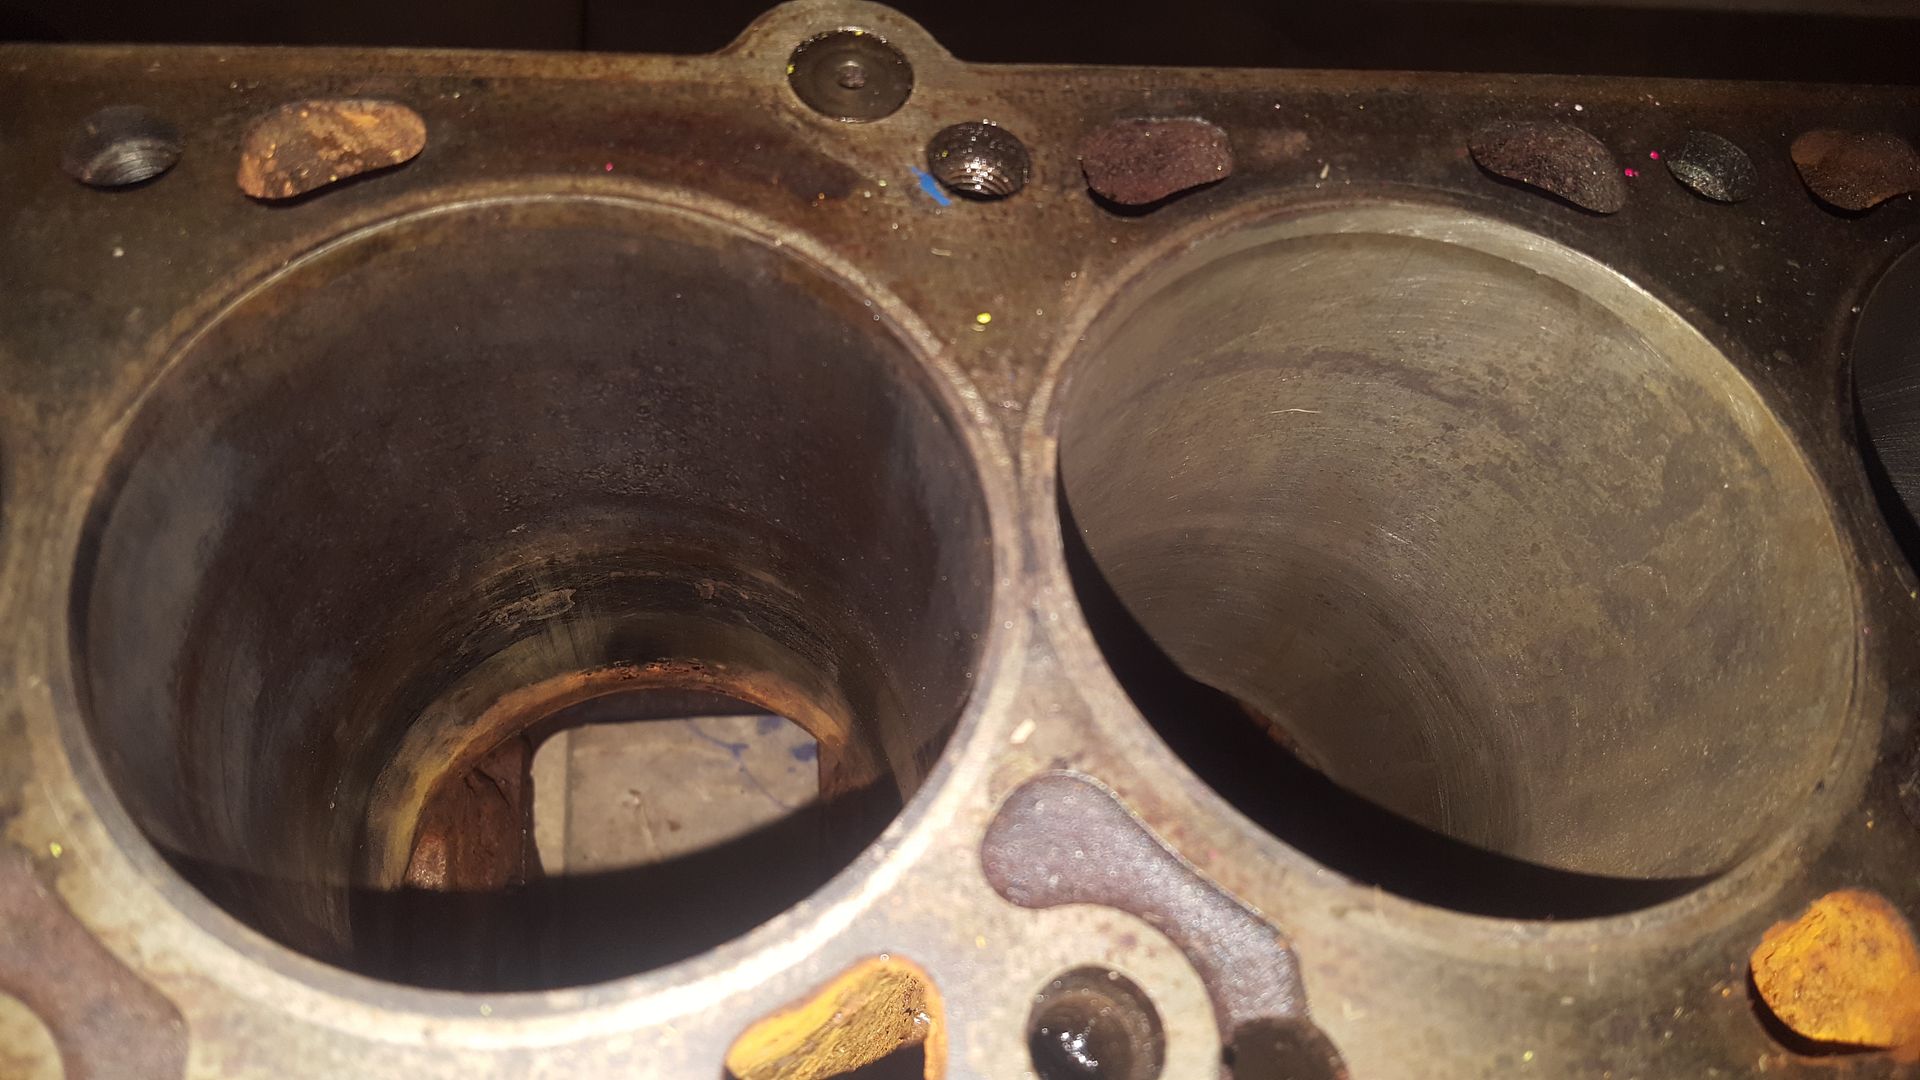
But then things have changed again with the purchase of the new sexy omega pistons. The parts needed has been reduced further more! So all I need was
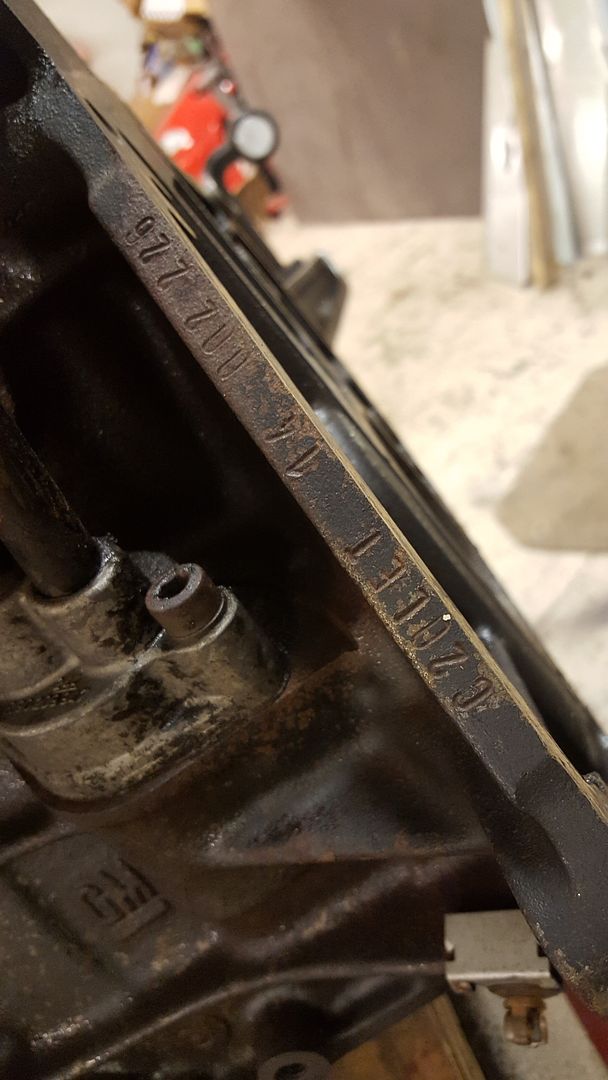
a c20xe block with engine number. I browse on eBay I spotted a bare block for sale, it's obviously been sitting for a while but I'm not too
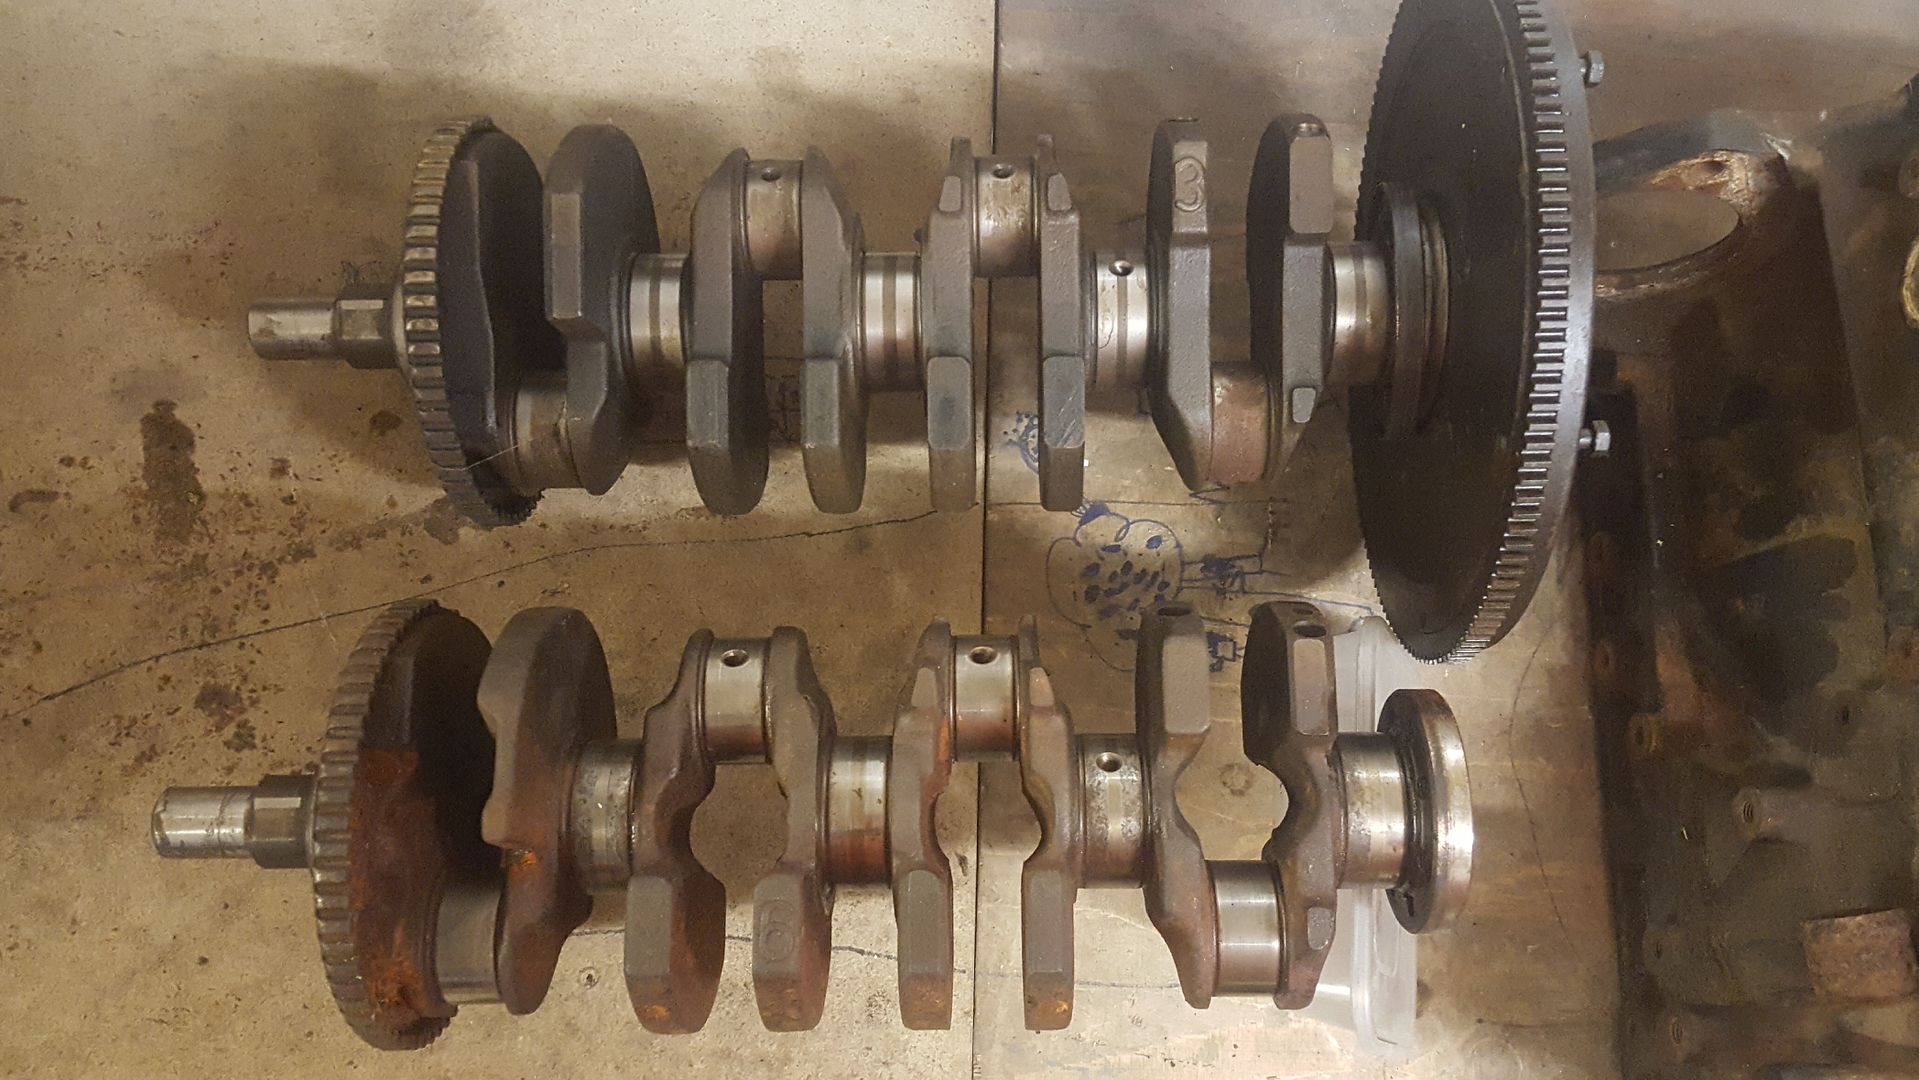
worried as it needs boring out for the 86.5mm pistons. He also had an early lighter xe crank. Again been sitting and will need some machining but that
will be fine too.
Ł50 For the block and Ł50 For the early crank.
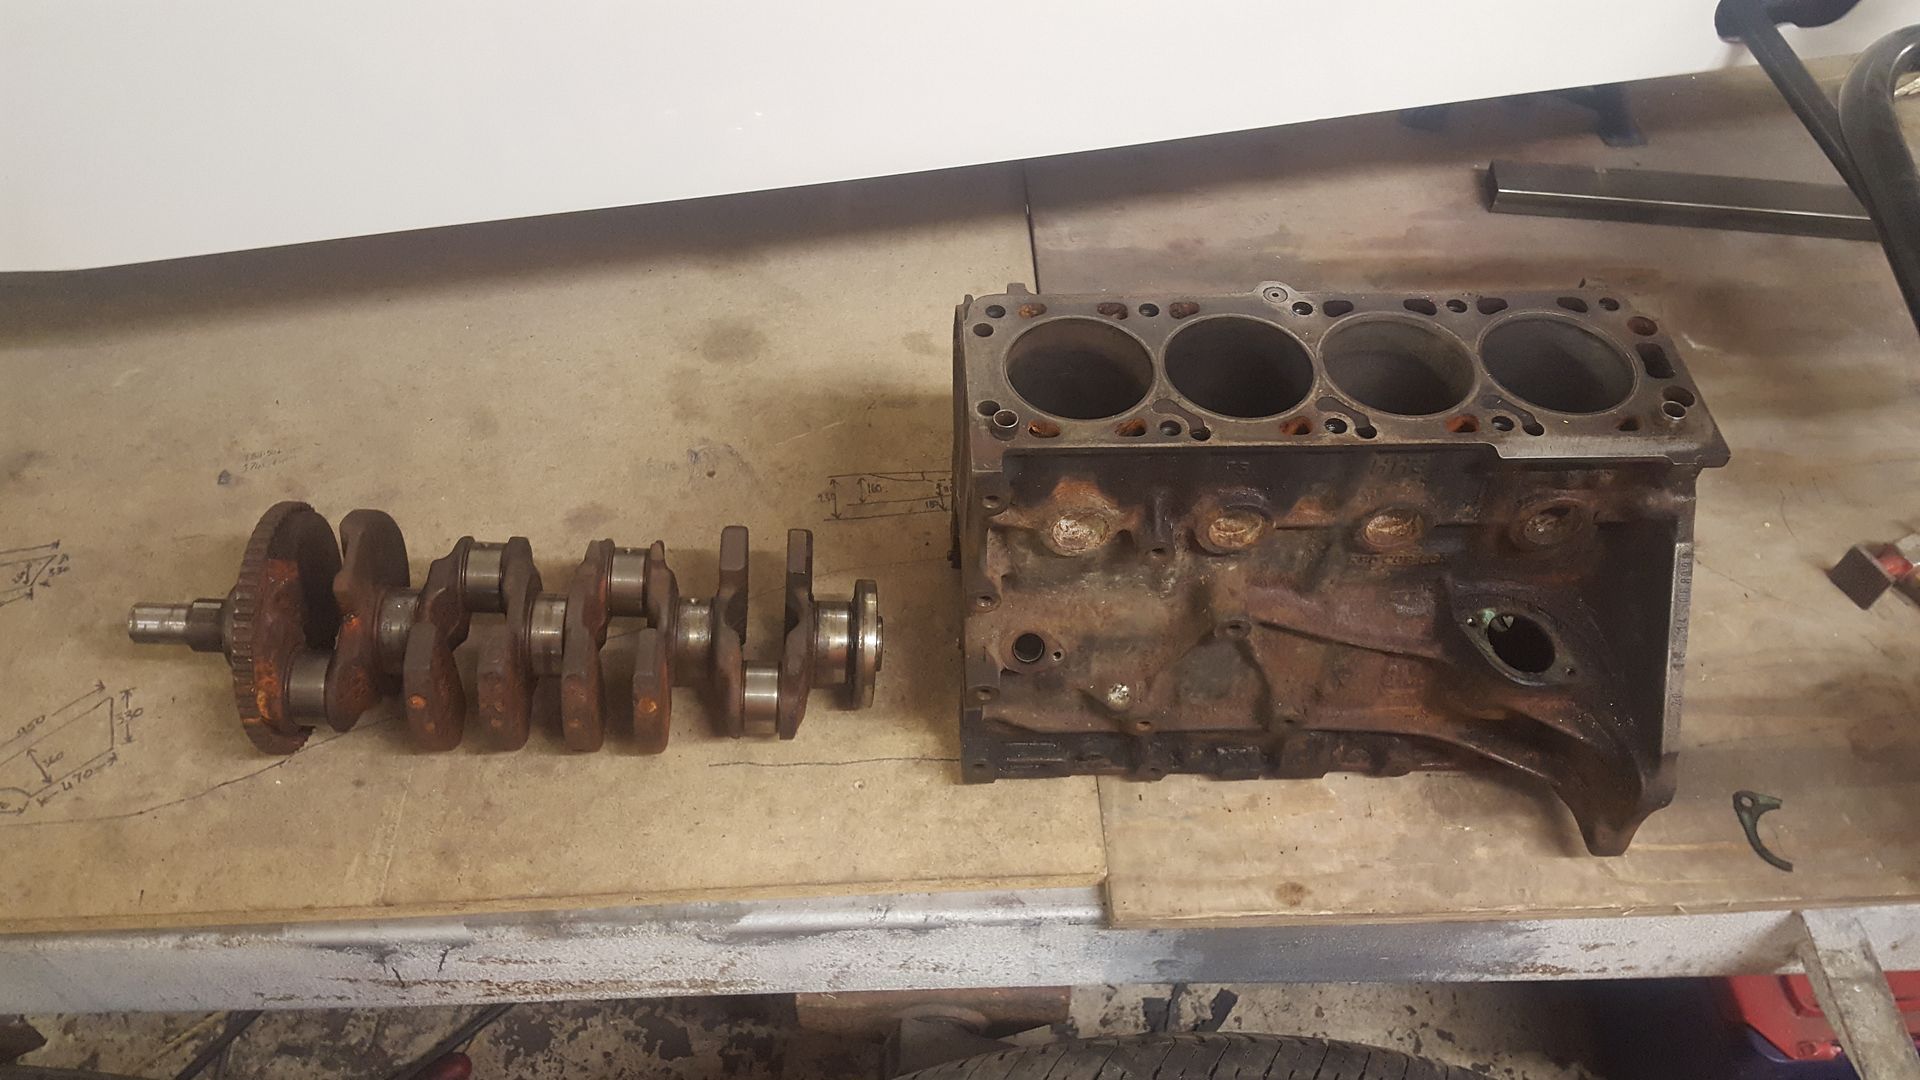
Bores aren't horrendous but need doing, not a problem as I need to take it out to 86.5mm
And it has the engine number. Looks like a 5 year old has stamped the C 2 0 X E, the other ones I've seen have been nice and uniform
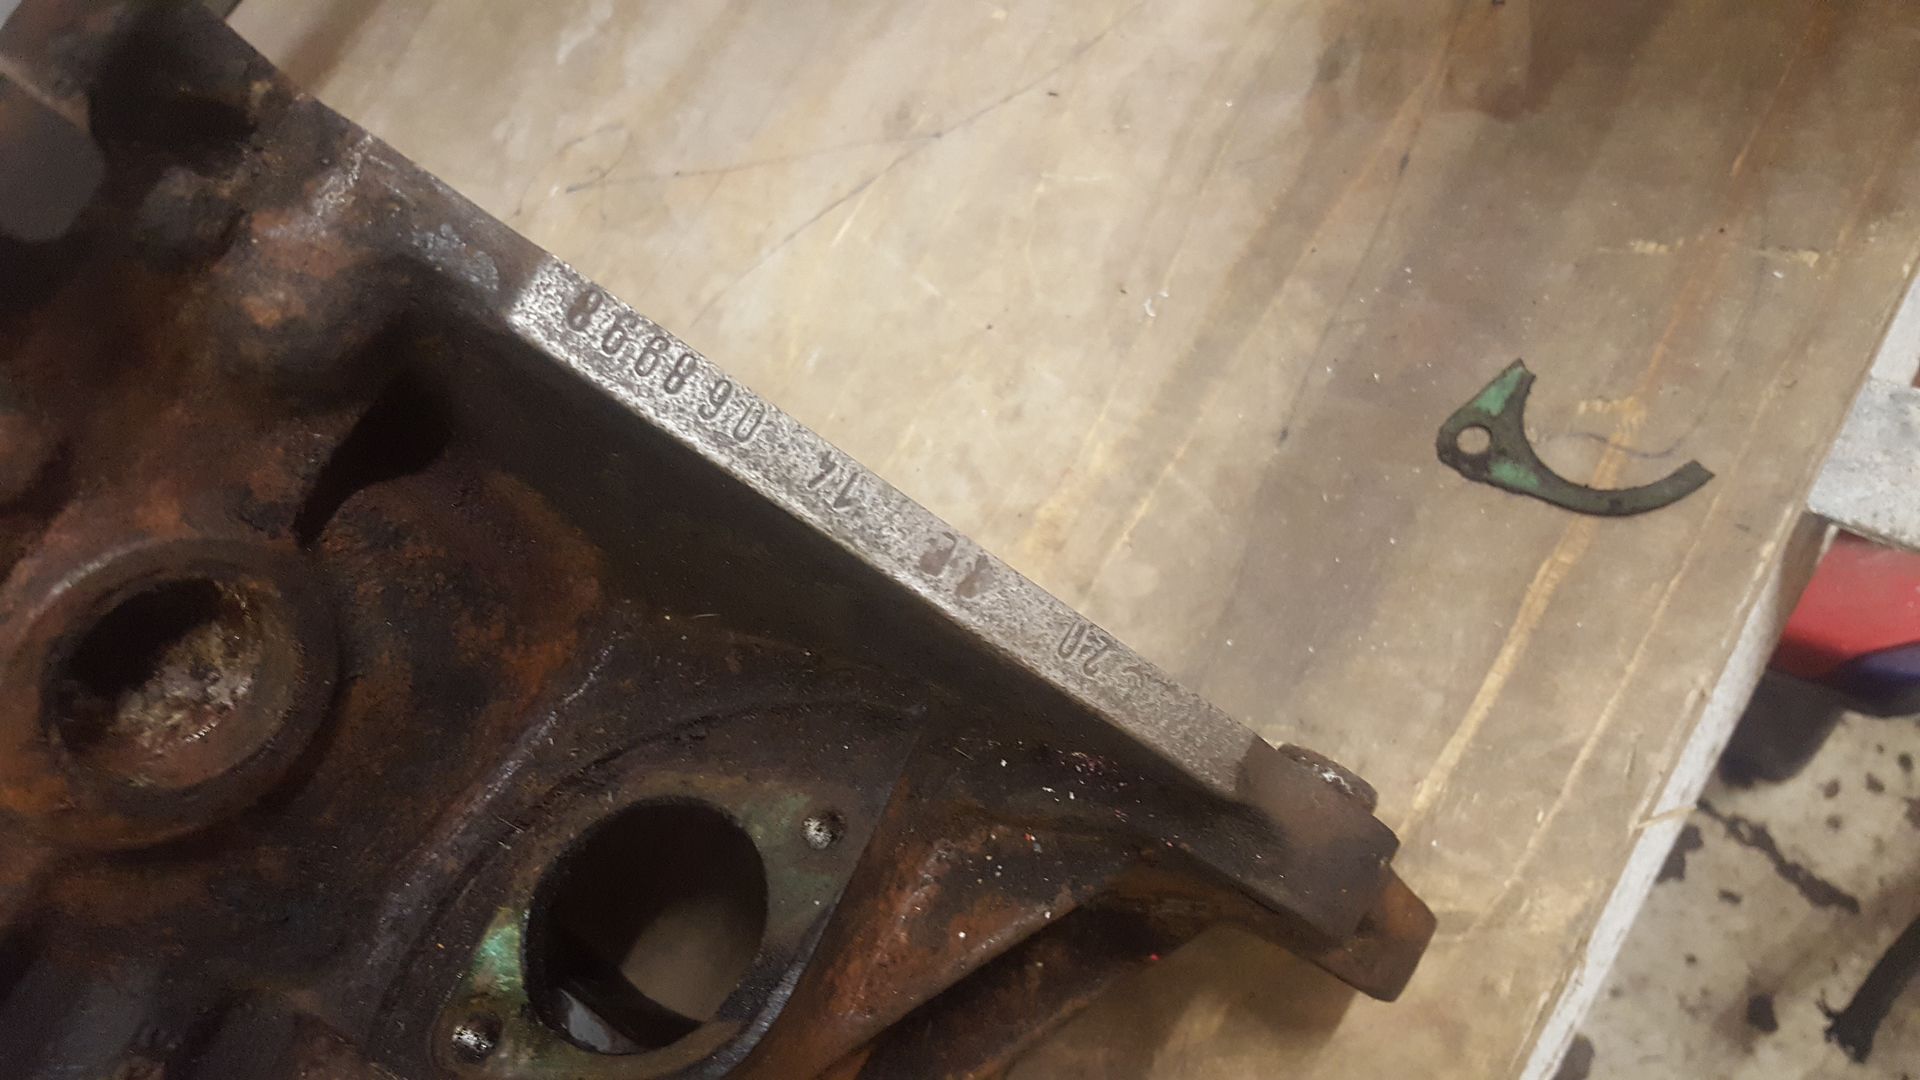
And the big ends look good but the mains will need a grind on the crank
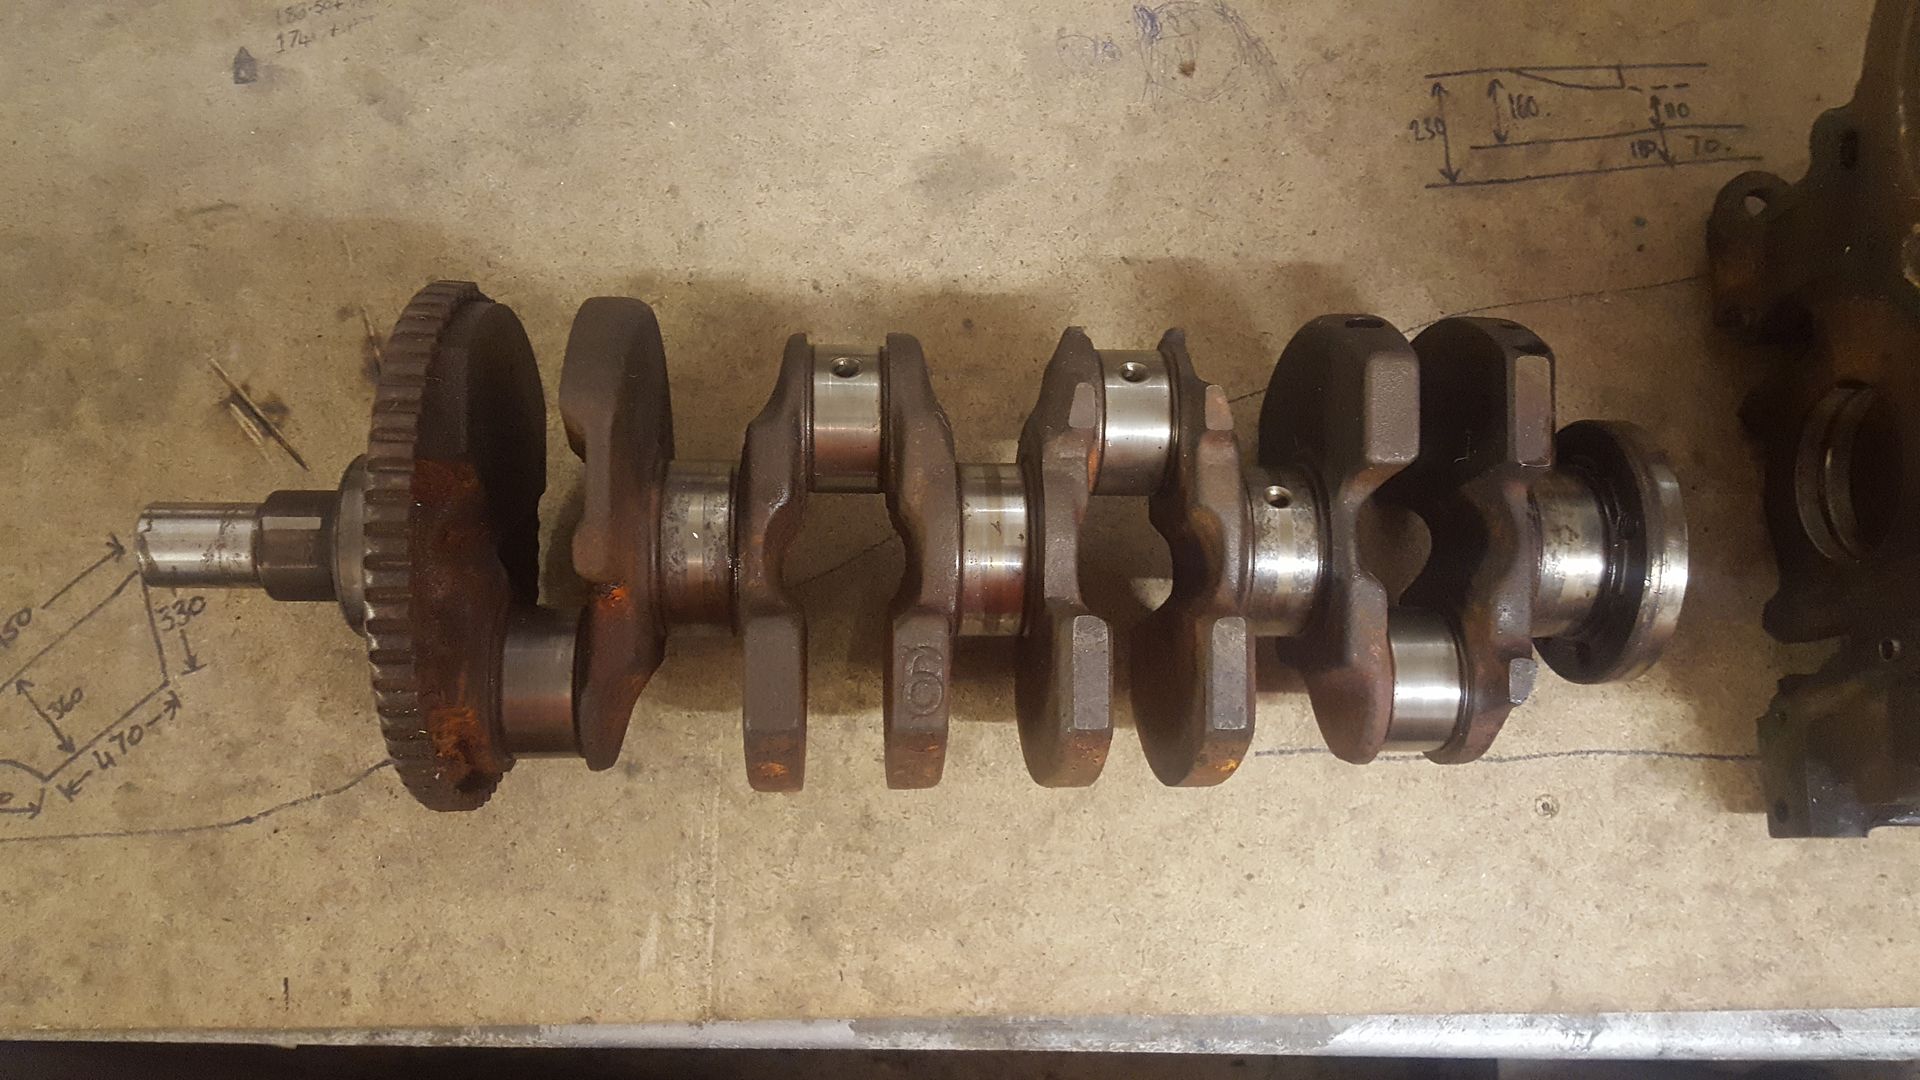
Here it is with a standard crank above. It's obvious how much lighter it is, I'm sure the internet says 2kgs!!
The guy had a load of other bits he was clearing out if I was interested, a compete c20xe that needs a rebuild. Another Gm head, a rocker cover,
cambelt cover and backing plate, cam pulleys and a few other bits. He said Ł200 For the lot!
So now bar bearings rings and gaskets I think i have everything I need. From the bottom up it will be the Westfield shallow sump, this new c20xe block
and early crank. I'l be using the steel rods from my c20let with their arp bolts, attached to the new omega high compression pistons. I have my
TTV lightweight billet flywheel from the c20let. The c20let also has genuine zlet oil pump and nylon valve. Top end I have my coscast head from the
c20let, it's ported and polished and has oversized inlet valves (from memory). I have ARP head studs and nuts from the c20let. I have standard
set of c20xe coil pack cams and dizzy blank, ideally I want some big cams to make the most of the engine but will just play the waiting game for some
to come up cheap. Intake will be the Jenvey throttle body setup and will be running on the Megasquirt V3 from the c20let.
Will just keep the other c20xe as a spare and rebuild if and when.
alistairolsen - 1/2/18 at 01:52 PM
Hi Ron,
I've been following your build on MIG, but sadly my login and the email address with it are long since dead there so I cant reply.
Looks like good progress so far and looking forward to more!
Al
CosKev3 - 1/2/18 at 05:59 PM
What make are the front cycle wing brackets?
super-ron - 1/2/18 at 07:48 PM
quote:
Originally posted by alistairolsen
Hi Ron,
I've been following your build on MIG, but sadly my login and the email address with it are long since dead there so I cant reply.
Looks like good progress so far and looking forward to more!
Al
There's a name blast from the past, would you believe just the other week I searched back to your Volvo project on MIG wondering if it ever got
finished?!
super-ron - 1/2/18 at 07:50 PM
quote:
Originally posted by CosKev3
What make are the front cycle wing brackets?
That's all standard GBS ZERO front suspension. Their cycle wing brackets are part of the front 'mushrooms'. Very very sturdy!
Daf - 1/2/18 at 08:59 PM
quote:
Originally posted by CosKev3
What make are the front cycle wing brackets?
You can buy them with just a hole to weld up to your own mushroom - that's what I've done.
Loving this build, keep it up - nothing better than a thread with good stuff going on and regular updates of interesting stuff.
CosKev3 - 1/2/18 at 09:19 PM
quote:
Originally posted by super-ron
quote:
Originally posted by CosKev3
What make are the front cycle wing brackets?
That's all standard GBS ZERO front suspension. Their cycle wing brackets are part of the front 'mushrooms'. Very very sturdy!
Look good,nice and simple design
Be interesting to see how the arches sit,do they supply different ones for different sizes of wheel?
CosKev3 - 1/2/18 at 09:20 PM
quote:
Originally posted by Daf
quote:
Originally posted by CosKev3
What make are the front cycle wing brackets?
You can buy them with just a hole to weld up to your own mushroom - that's what I've done.
Loving this build, keep it up - nothing better than a thread with good stuff going on and regular updates of interesting stuff.
Ah right that's good to know,got any pics of how your arches sit?
super-ron - 1/2/18 at 09:40 PM
quote:
Originally posted by CosKev3
quote:
Originally posted by super-ron
quote:
Originally posted by CosKev3
What make are the front cycle wing brackets?
That's all standard GBS ZERO front suspension. Their cycle wing brackets are part of the front 'mushrooms'. Very very sturdy!
Look good,nice and simple design
Be interesting to see how the arches sit,do they supply different ones for different sizes of wheel?
Not sure on that one. All the ZERO 's come with 15inch wheels so that's what they're tailored to, don't know if they offer other
options. The carbon fibre wings I got earlier in the build are from a caterham so for 13inch wheels. I offered them up and it looks like they'll
be too small to cover enough tyre, but we'll see....
Here's a pic of ZERO front wings

CosKev3 - 1/2/18 at 09:58 PM
Cheers,sit nicely on that one
Daf - 1/2/18 at 10:36 PM
And this is them over a 13" rim

with some IVA edging on which has now fallen away!
CosKev3 - 1/2/18 at 11:02 PM
Cheers, look good
Where are those arches from?
Daf - 1/2/18 at 11:18 PM
quote:
Originally posted by CosKev3
Cheers, look good
Where are those arches from?
They are gbs ones too so fit the bracket perfectly, I used rubber lined p clips to hold them on - they are available in carbon too.
alistairolsen - 2/2/18 at 09:27 AM
quote:
Originally posted by super-ron
quote:
Originally posted by alistairolsen
Hi Ron,
I've been following your build on MIG, but sadly my login and the email address with it are long since dead there so I cant reply.
Looks like good progress so far and looking forward to more!
Al
There's a name blast from the past, would you believe just the other week I searched back to your Volvo project on MIG wondering if it ever got
finished?!
It's amazing what does and doesnt lurk in the archives, not so long ago I was chasing up numbers from Gavin Worker's orange corsa!
It never got off the build table sadly, moved from Glasgow to Aberdeen and stopped getting home at weekends and a small garage meant tools inside and
a tintop outside, so I had an autotesting corsa, then a 230bhp Hybrid Bora on TT running gear, a clio trackday car and now an E90 330D. I have however
recently unearthed the Jago jeep with a view to finishing it off, MOTing and selling it and bought a BMW E30. I'l' get back to the locost
some day!
fregis - 2/2/18 at 04:41 PM
i saw your engine, have idea. Did not you considered do c22xe? c20xe pistons, head, bottom x22xe. You have alotof space underhood.
Advantages: Block 1cm higher (so better for intake), and will have more torque, timing belt will fit
Disadvantages: belt covers need mod, flywheel 6 bolts, x22xe small con rods
p.s. your c20xe standart piston looks like x20xev piston
c20xe piston: https://qedmotorsport.co.uk/product-images/vauxhall/c20xe/pistons/Standard-size-pistons-A.E..jpg
[Edited on 3/2/18 by fregis]
super-ron - 5/2/18 at 07:59 AM
quote:
Originally posted by alistairolsen
quote:
Originally posted by super-ron
quote:
Originally posted by alistairolsen
Hi Ron,
I've been following your build on MIG, but sadly my login and the email address with it are long since dead there so I cant reply.
Looks like good progress so far and looking forward to more!
Al
There's a name blast from the past, would you believe just the other week I searched back to your Volvo project on MIG wondering if it ever got
finished?!
It's amazing what does and doesnt lurk in the archives, not so long ago I was chasing up numbers from Gavin Worker's orange corsa!
It never got off the build table sadly, moved from Glasgow to Aberdeen and stopped getting home at weekends and a small garage meant tools inside and
a tintop outside, so I had an autotesting corsa, then a 230bhp Hybrid Bora on TT running gear, a clio trackday car and now an E90 330D. I have however
recently unearthed the Jago jeep with a view to finishing it off, MOTing and selling it and bought a BMW E30. I'l' get back to the locost
some day!
I know that only too well. I still have my RWD Astra, not touched it in 8odd years now though....... one day one day!
super-ron - 5/2/18 at 08:03 AM
quote:
Originally posted by fregis
i saw your engine, have idea. Did not you considered do c22xe? c20xe pistons, head, bottom x22xe. You have alotof space underhood.
Advantages: Block 1cm higher (so better for intake), and will have more torque, timing belt will fit
Disadvantages: belt covers need mod, flywheel 6 bolts, x22xe small con rods
p.s. your c20xe standart piston looks like x20xev piston
c20xe piston: https://qedmotorsport.co.uk/product-images/vauxhall/c20xe/pistons/Standard-size-pistons-A.E..jpg
[Edited on 3/2/18 by fregis]
I did actually consider c22xe as I was building everything from parts, but that's a whole project in its self and would just extend the whole
thing into years, it's not as straight forward as bolting it all together.
super-ron - 11/2/18 at 10:16 PM
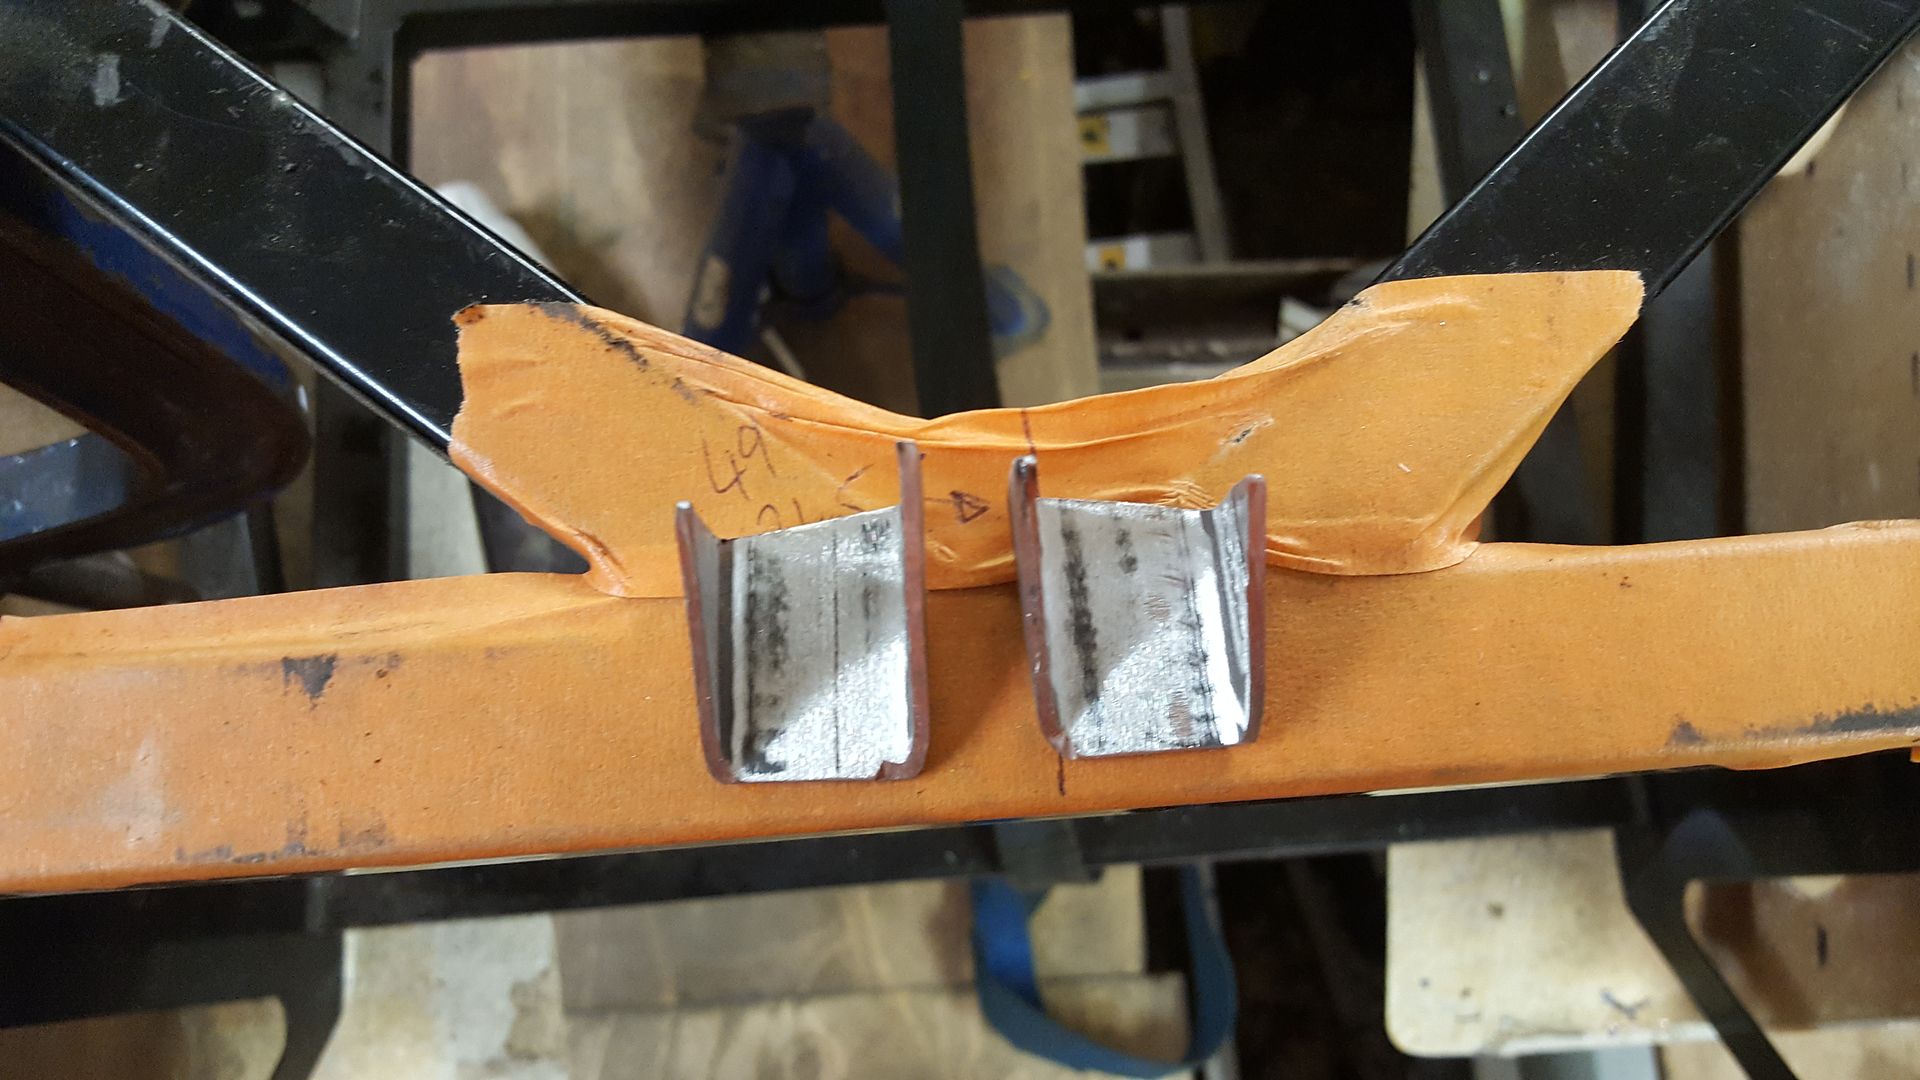
We have a caterham 620r in at the moment as he had a bit of a 'moment' on the track and spun it along a wall
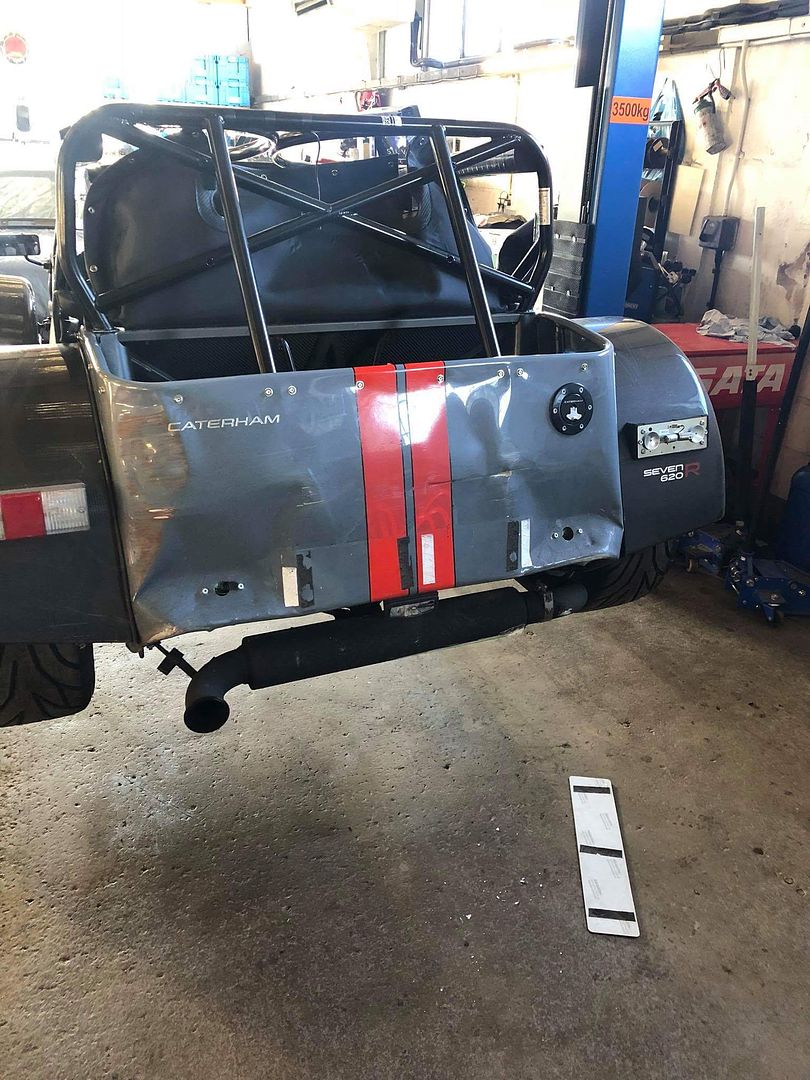
When we got the rear tub off I discovered it's got pretty much exactly what I have just added to mine inside the rear!
So happy about that! If caterham do it then it must be correct lol.
I've been back on eBay again with the lucky Ł50ers
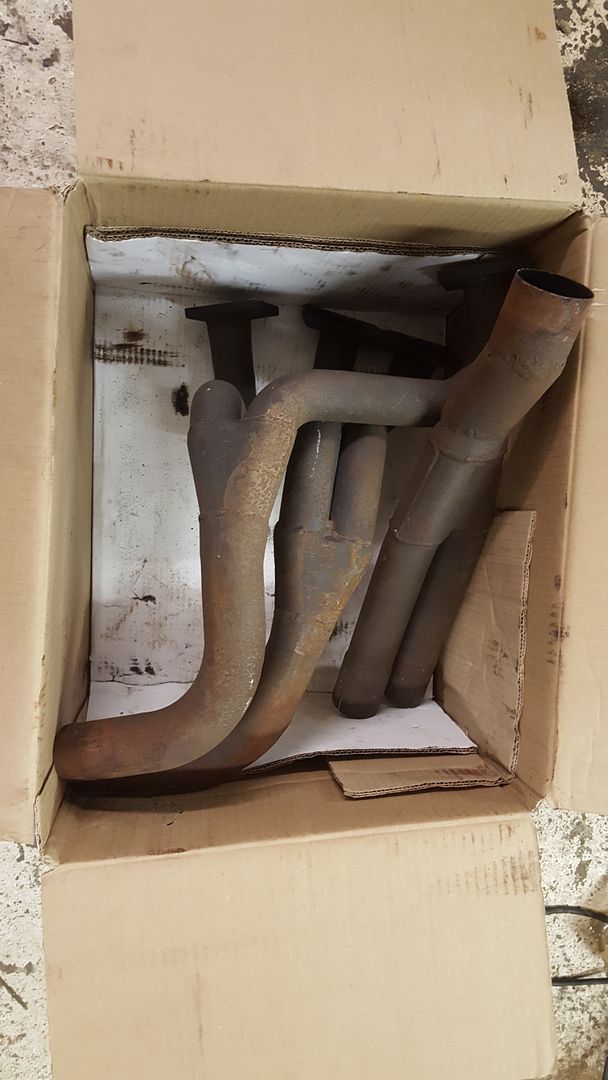
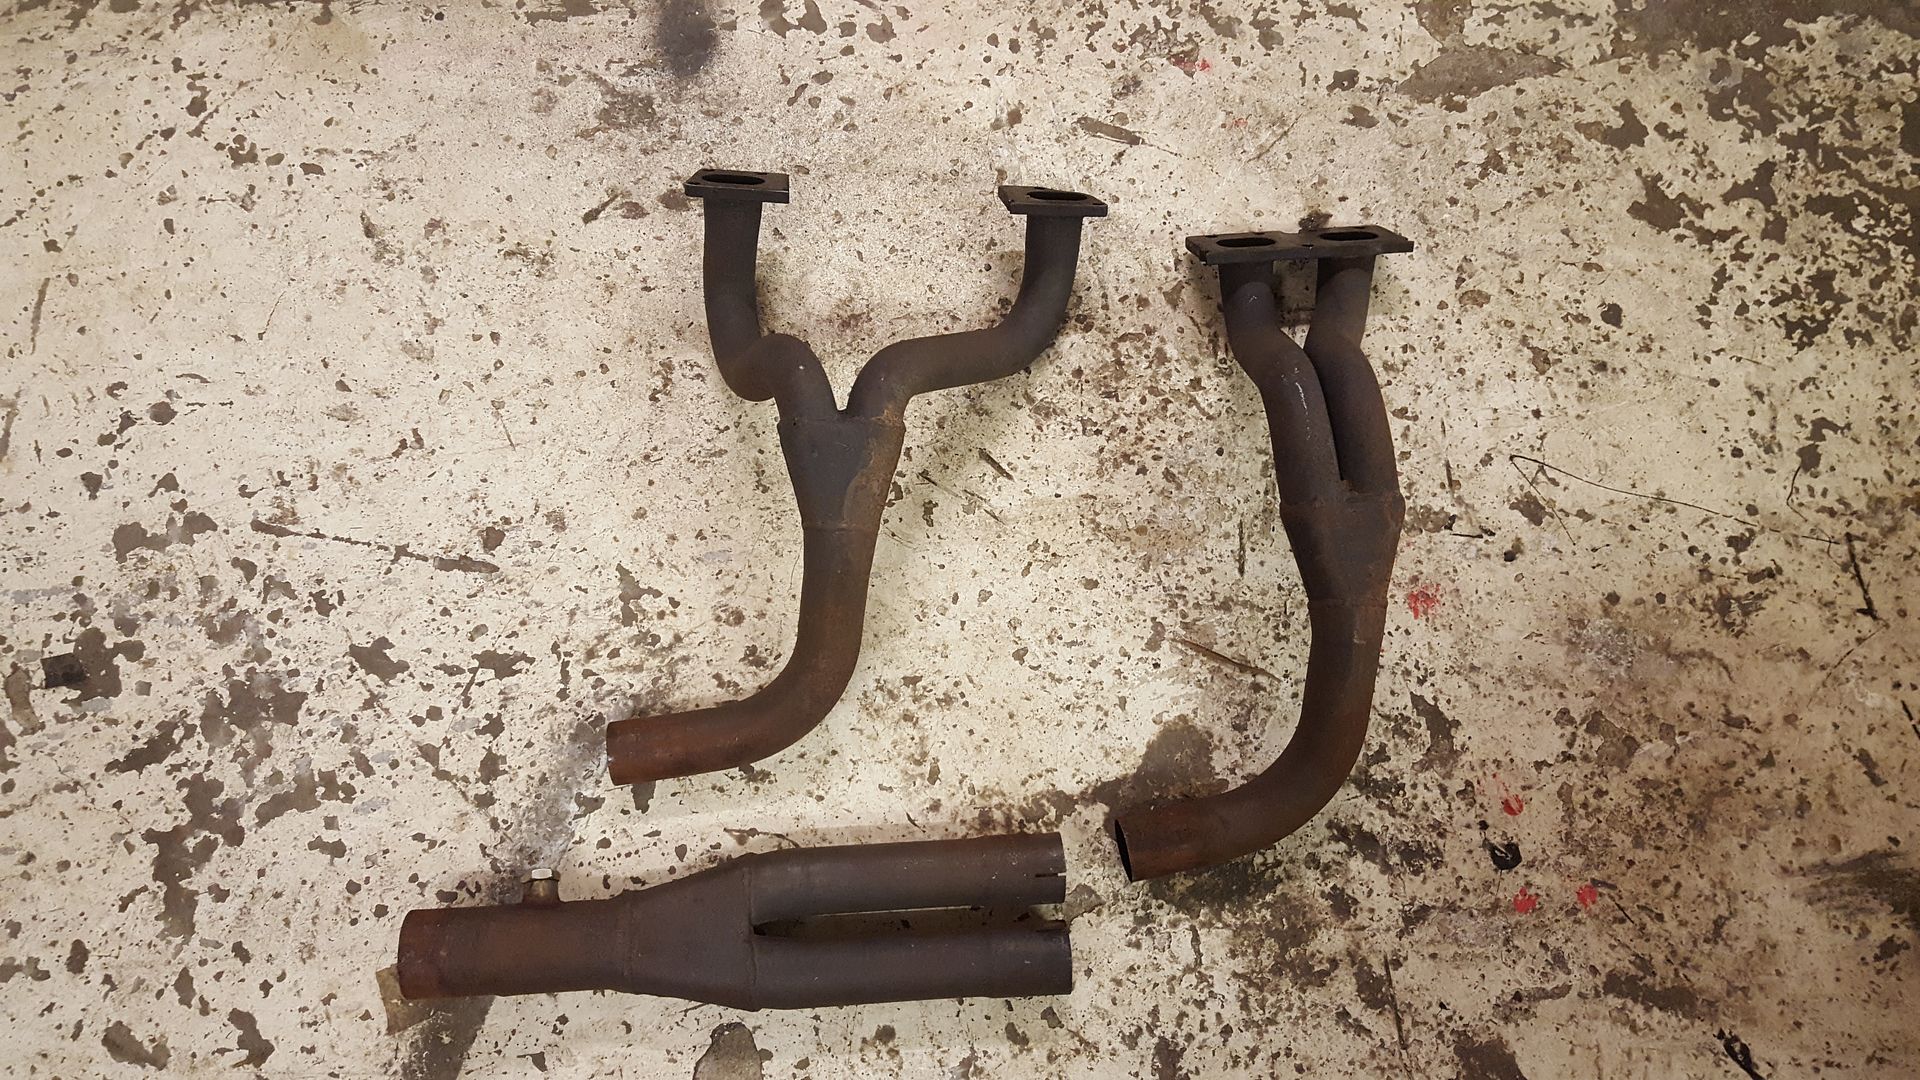
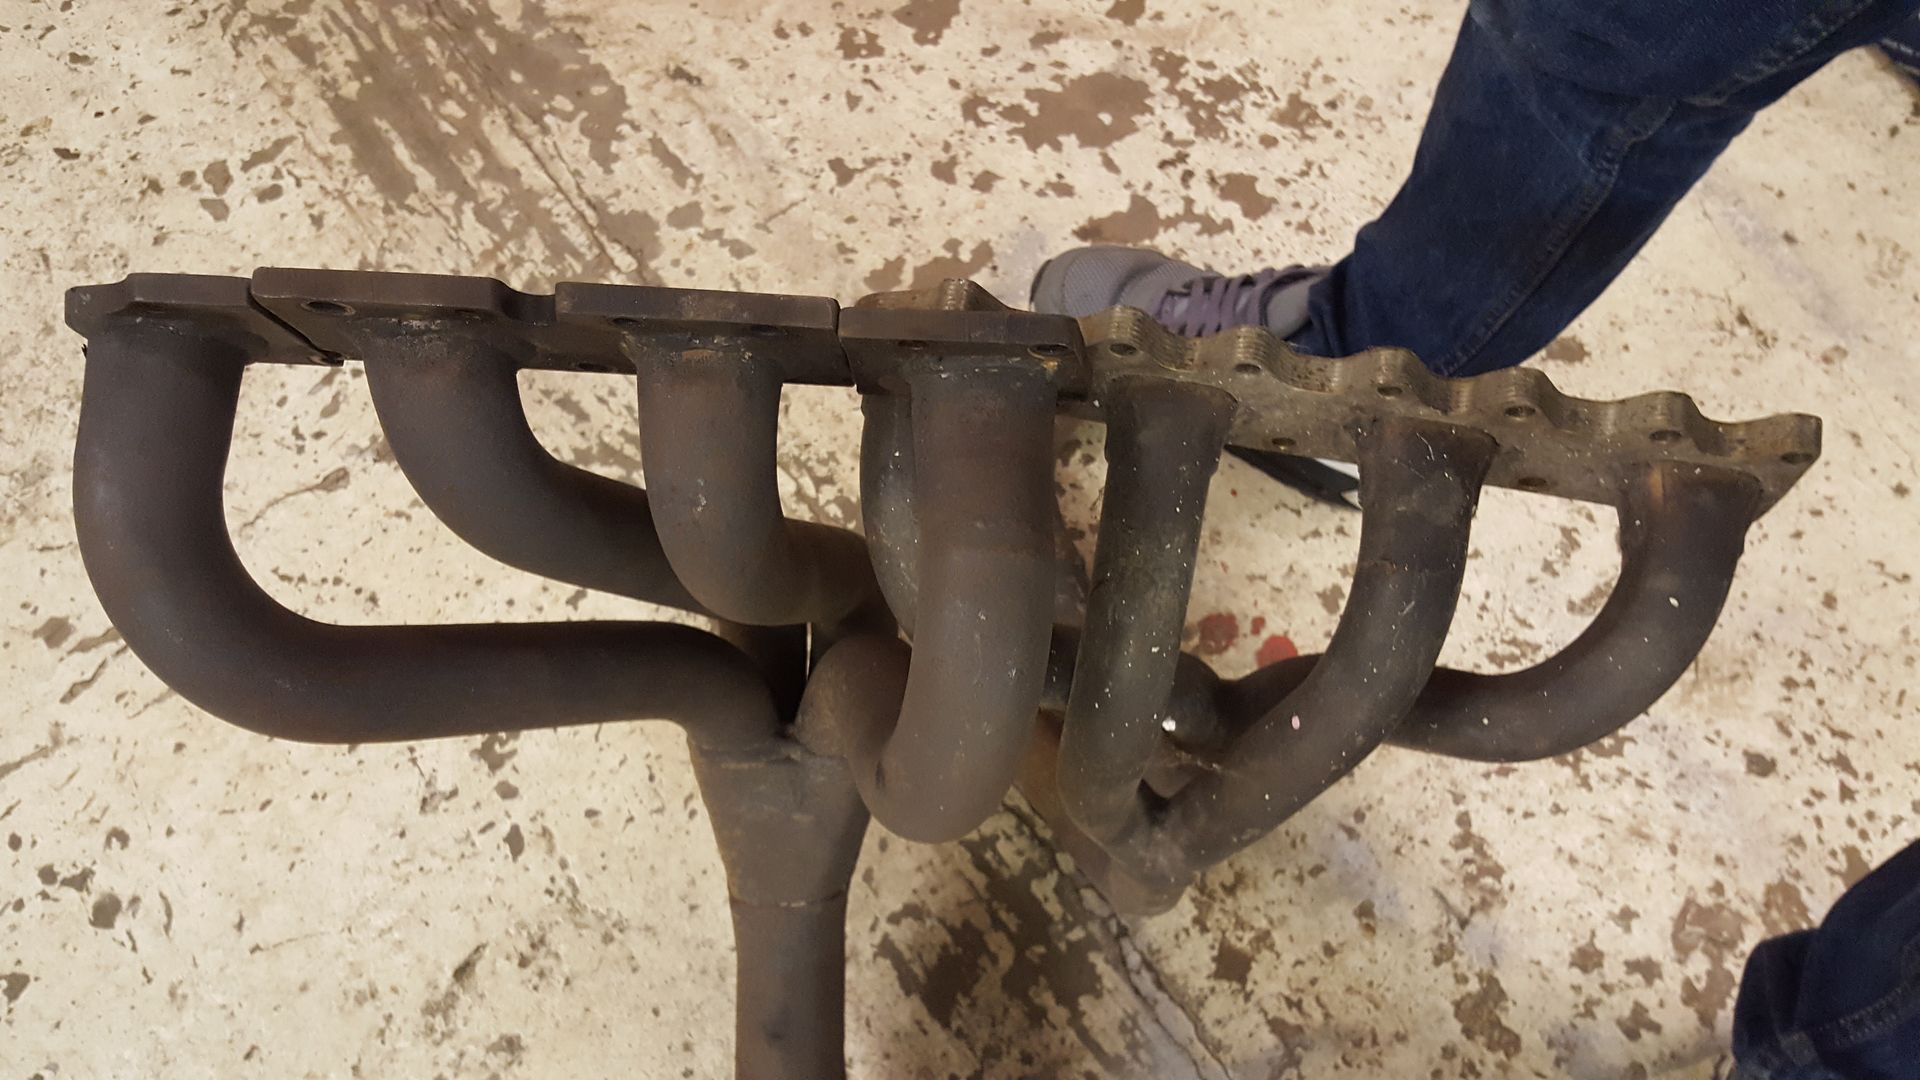
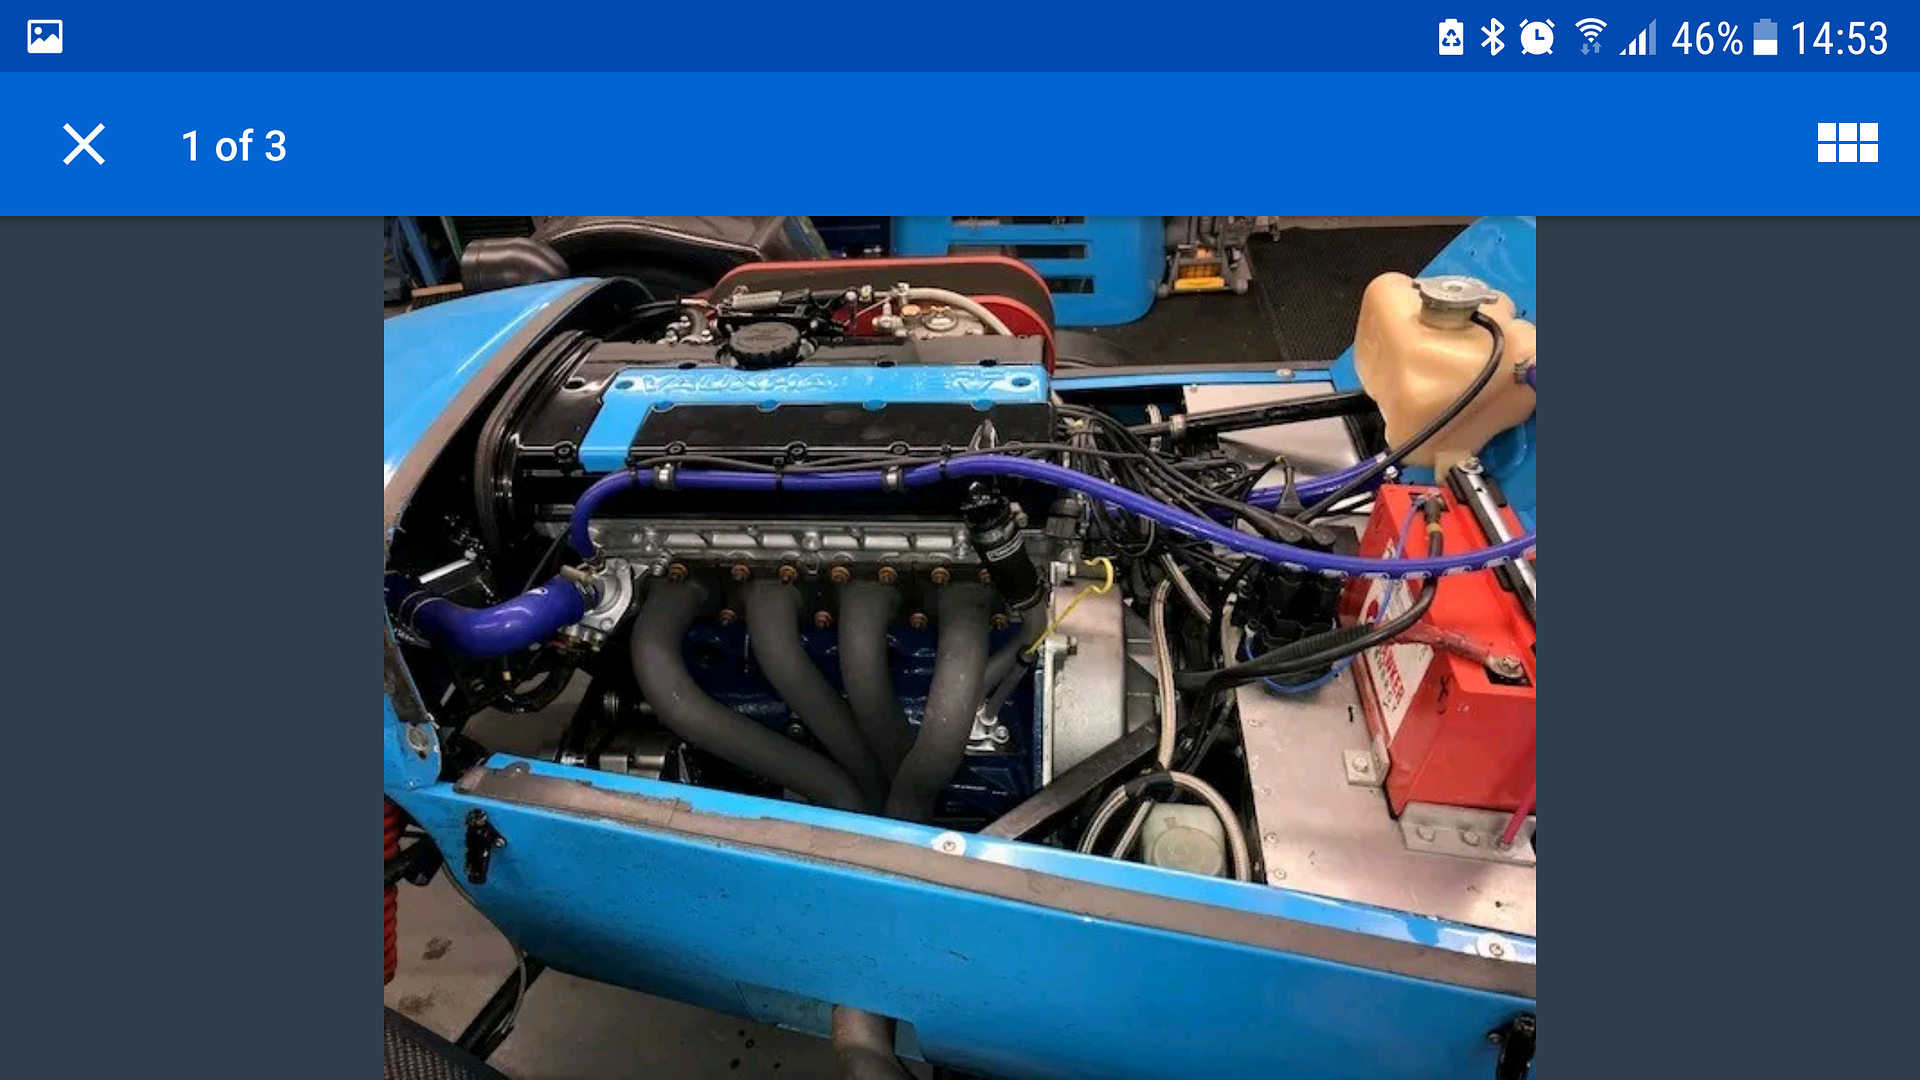
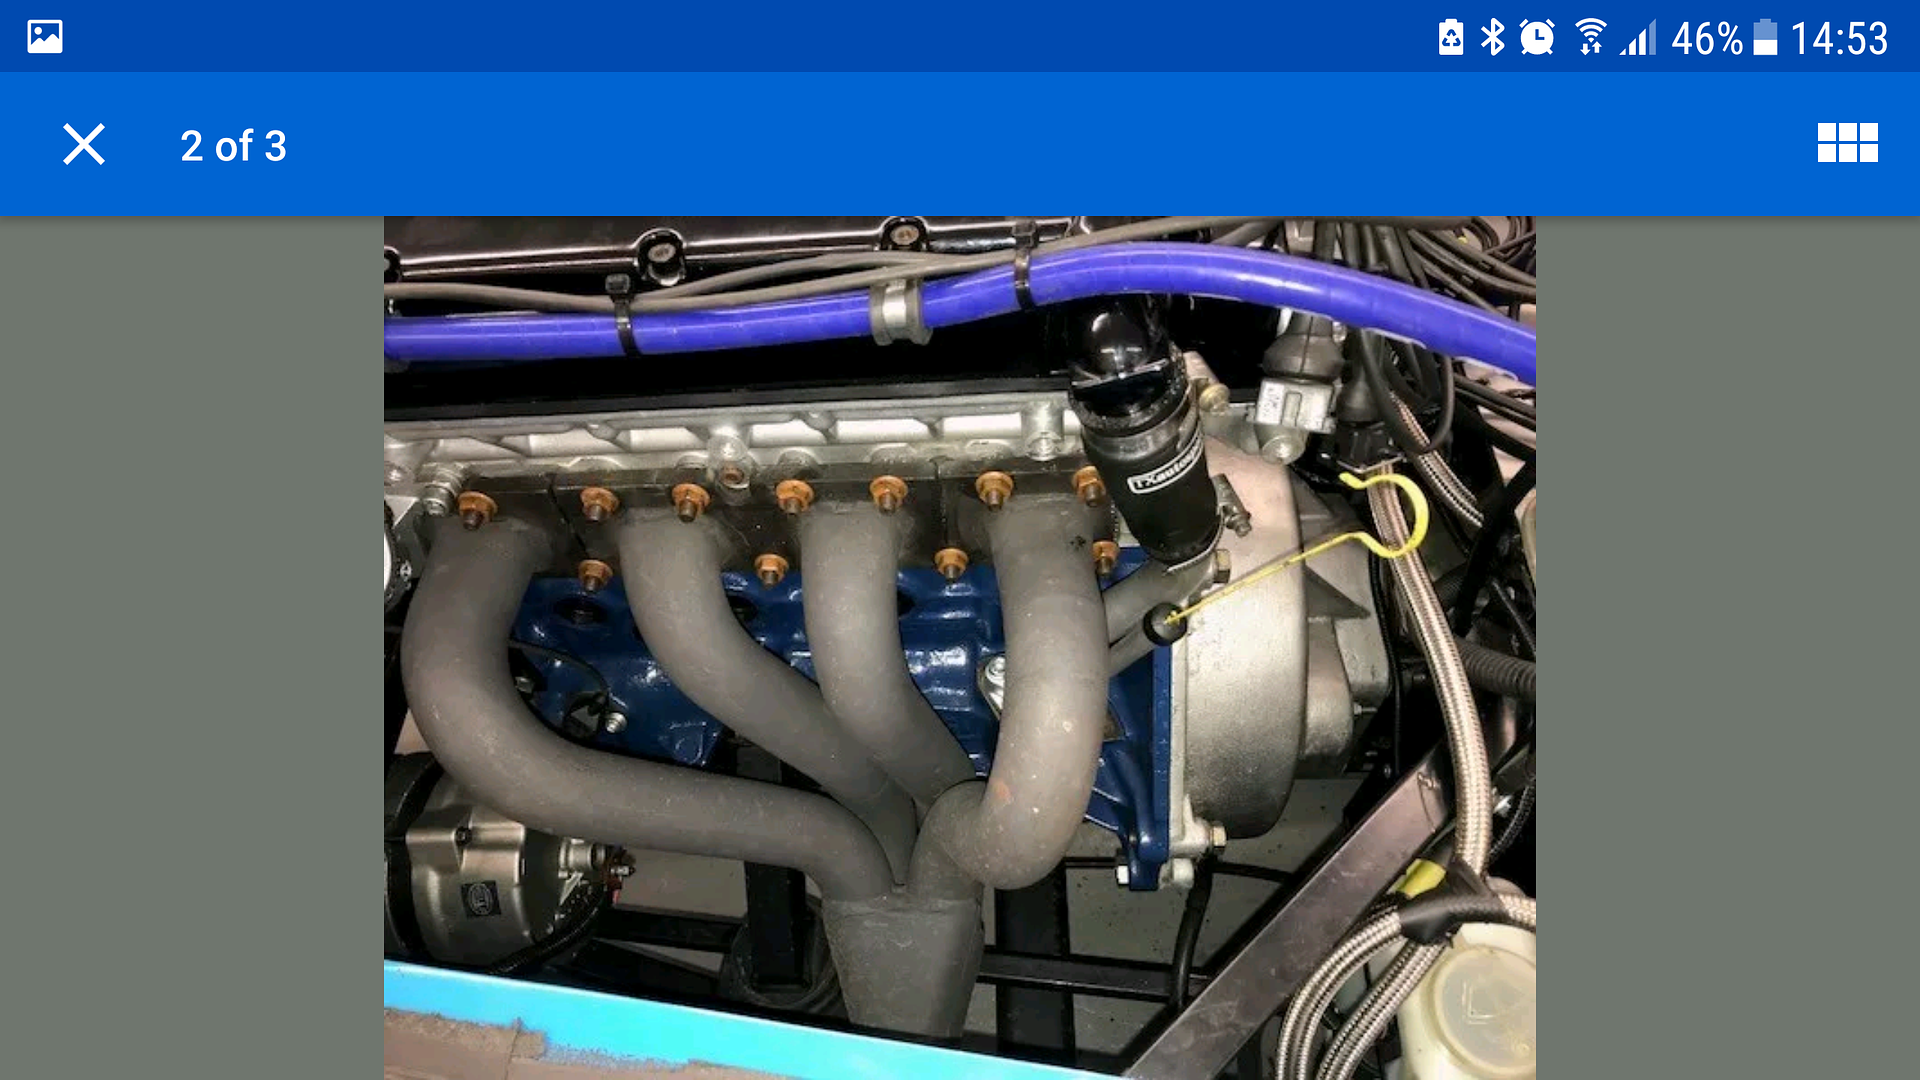
A exhaust manifold off a 240bhp xe Westfield.
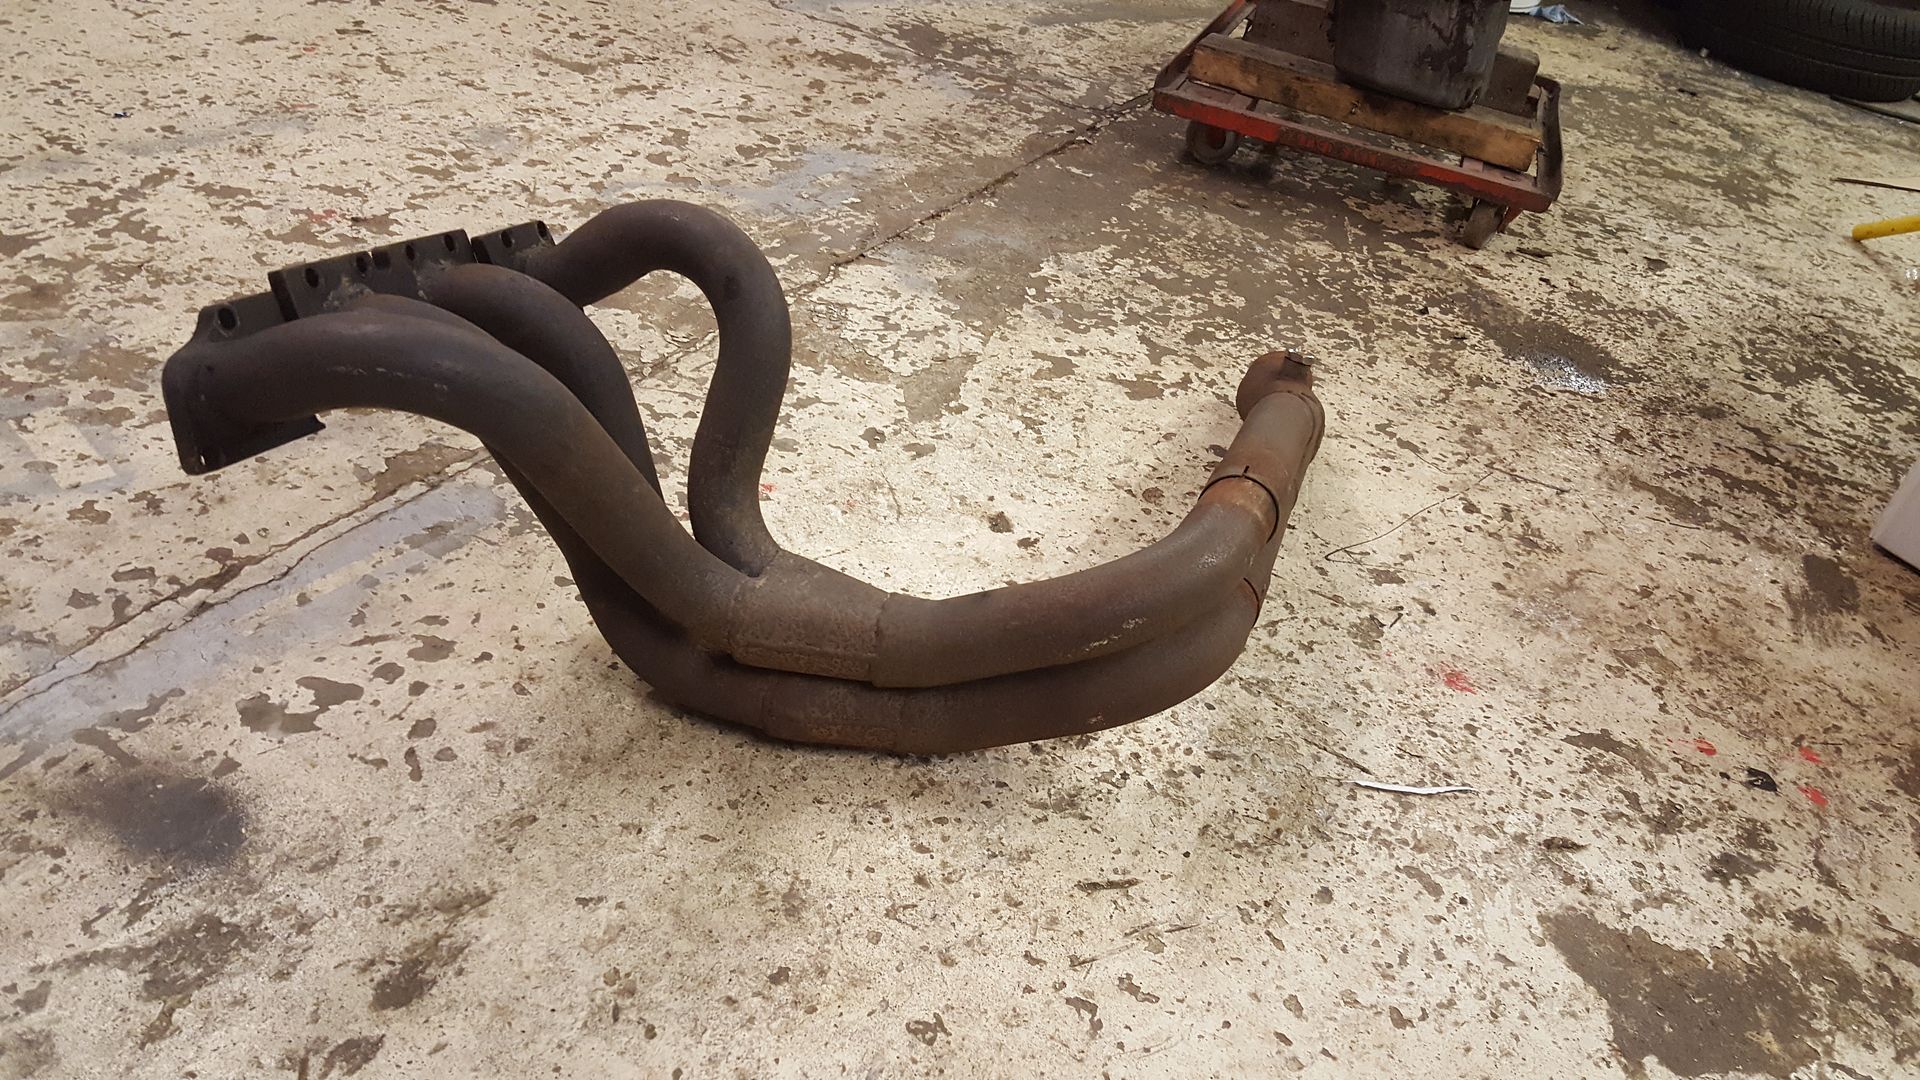
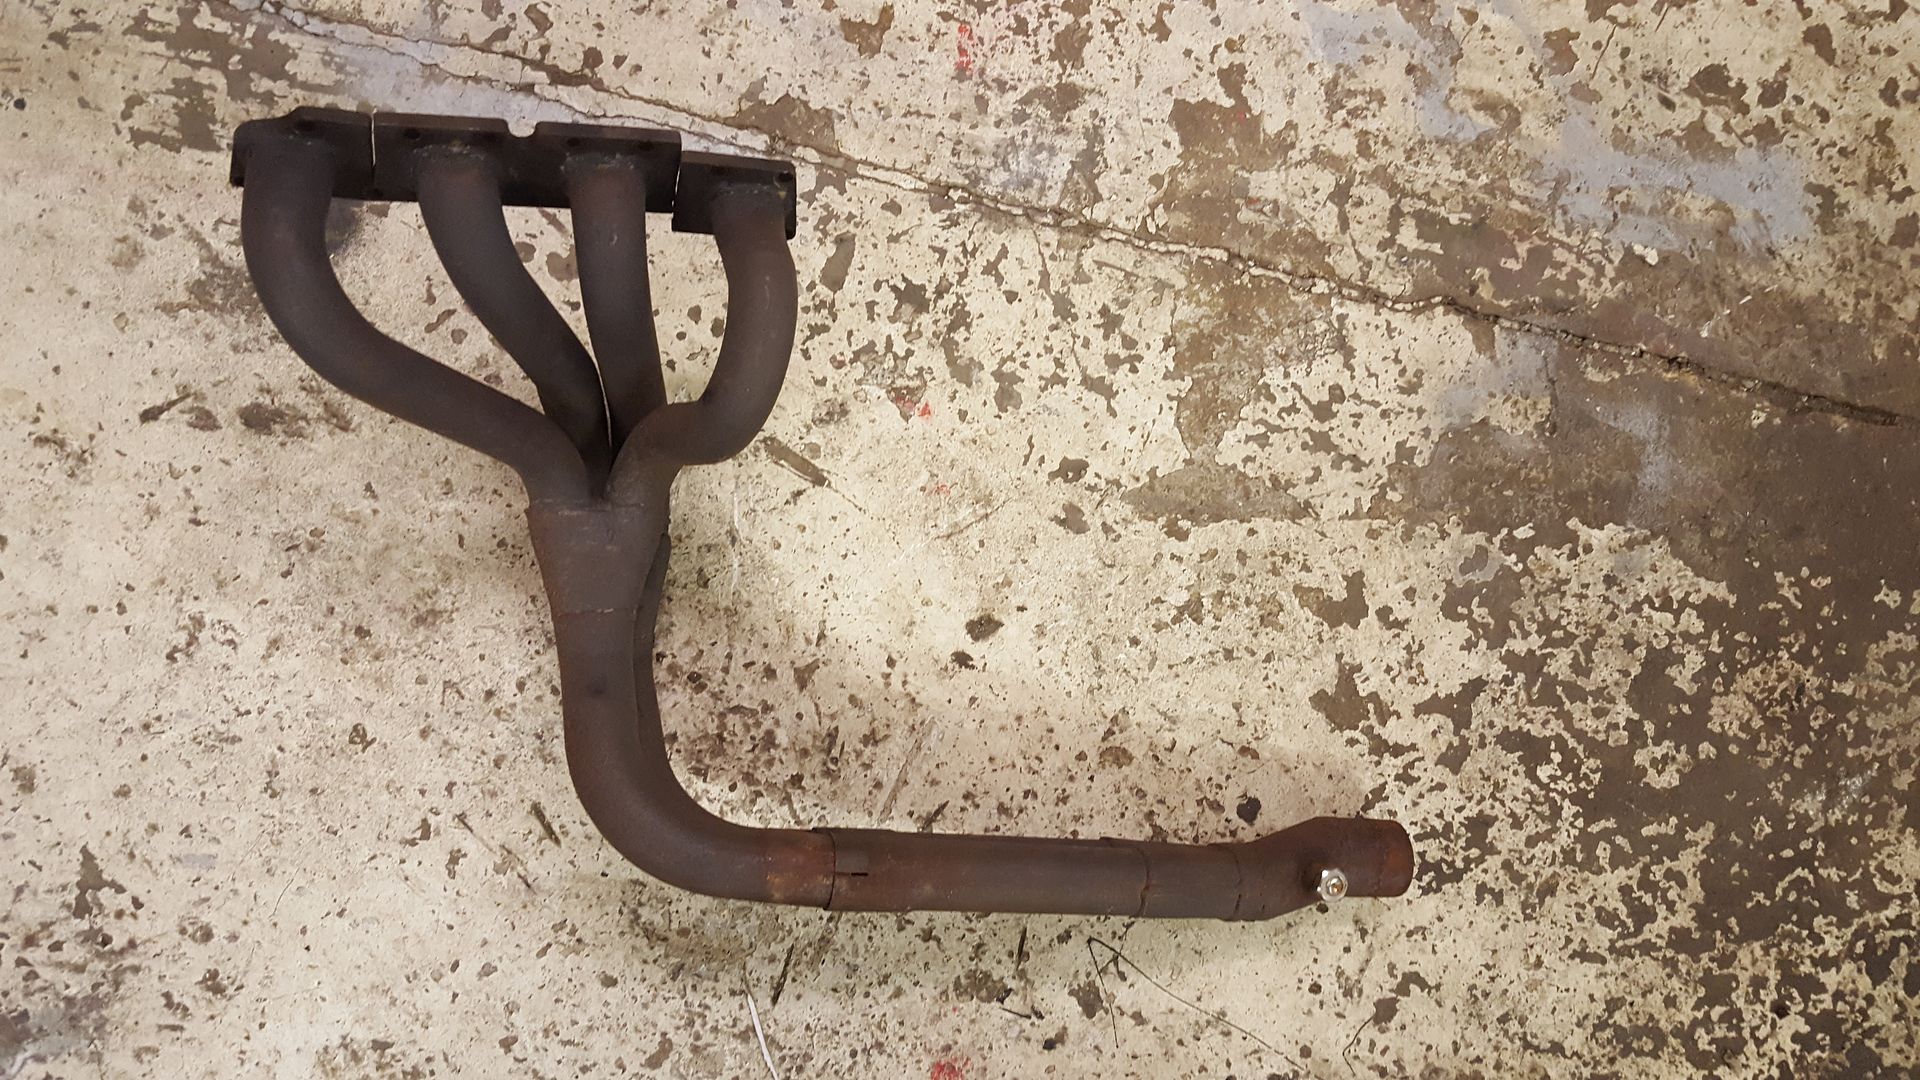
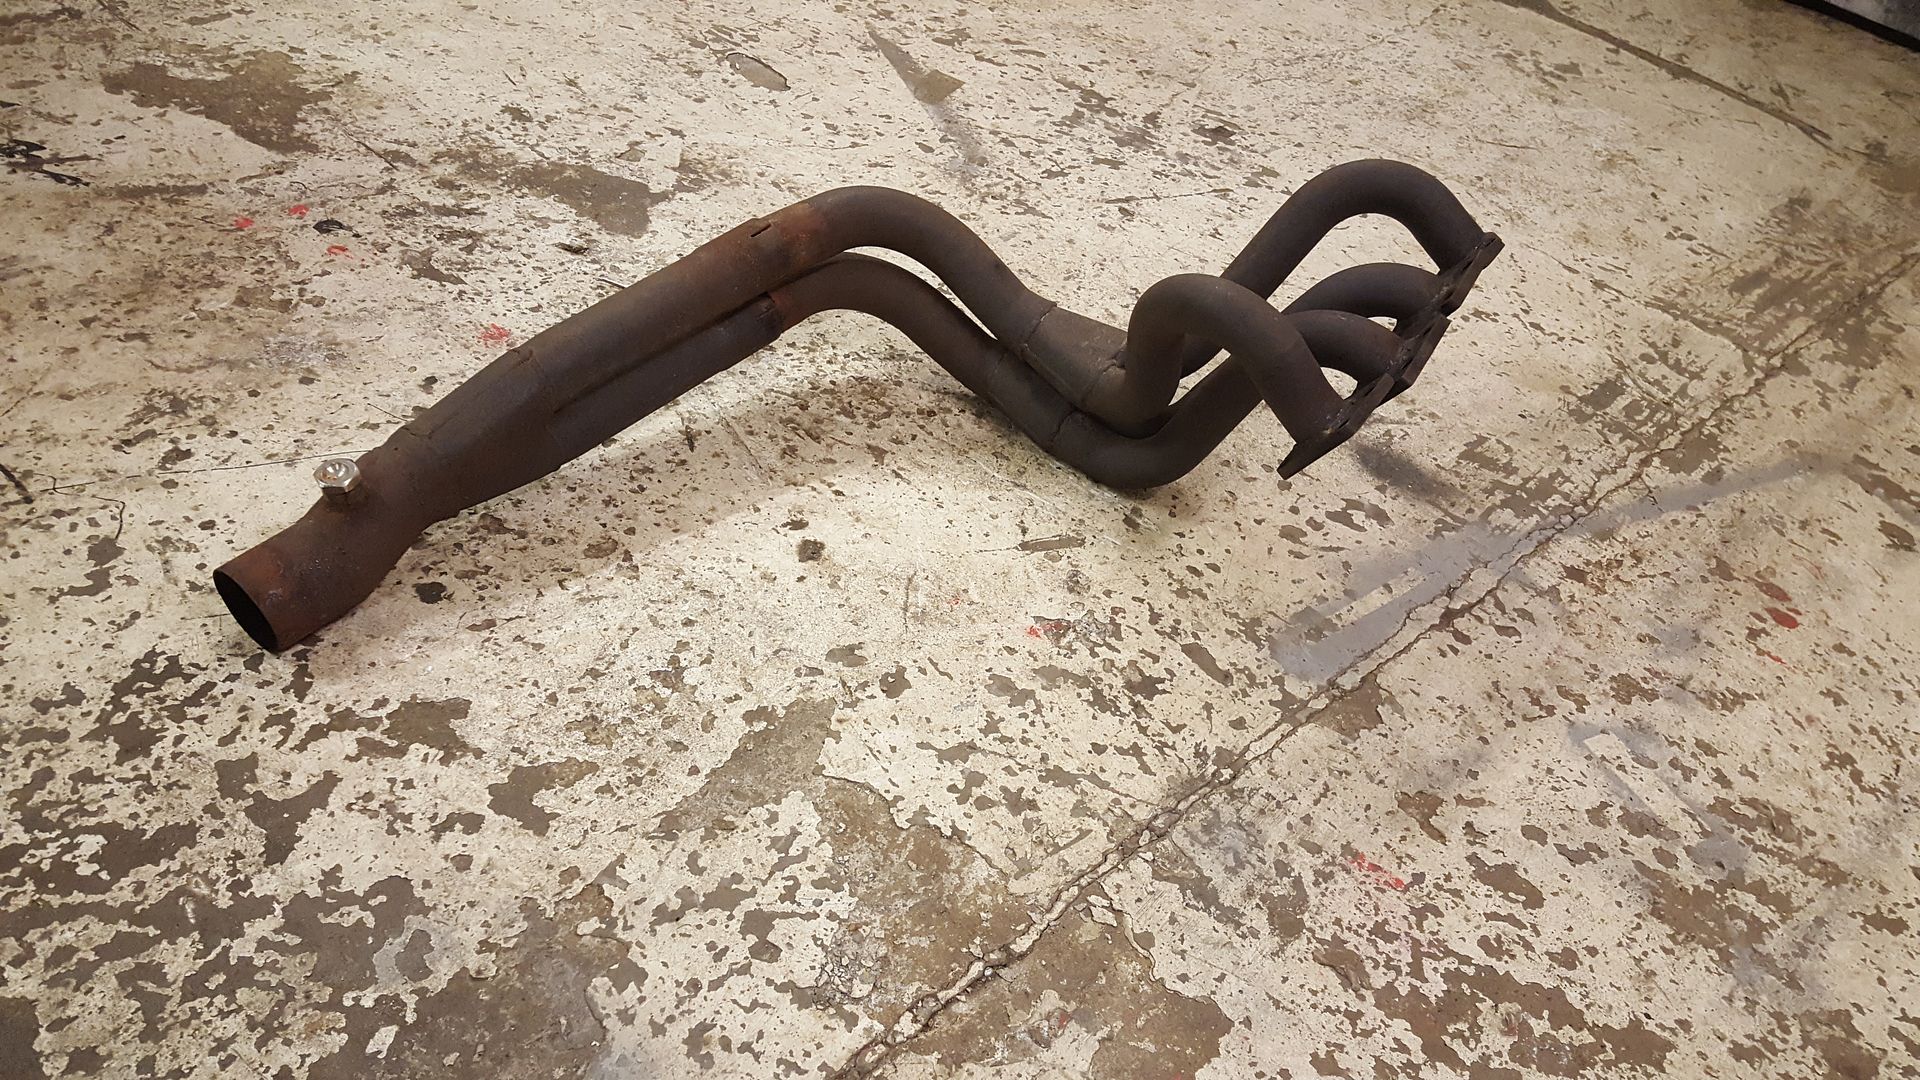
It is going to be pretty dam close to one of the chassis rails but I can't try it on until the body is back off so will have to wait until then
to try
I didn't realise how big it was until I put it next to a standard xe manifold

He did have a beautiful stainless silencer too but that bidded up to Ł200.
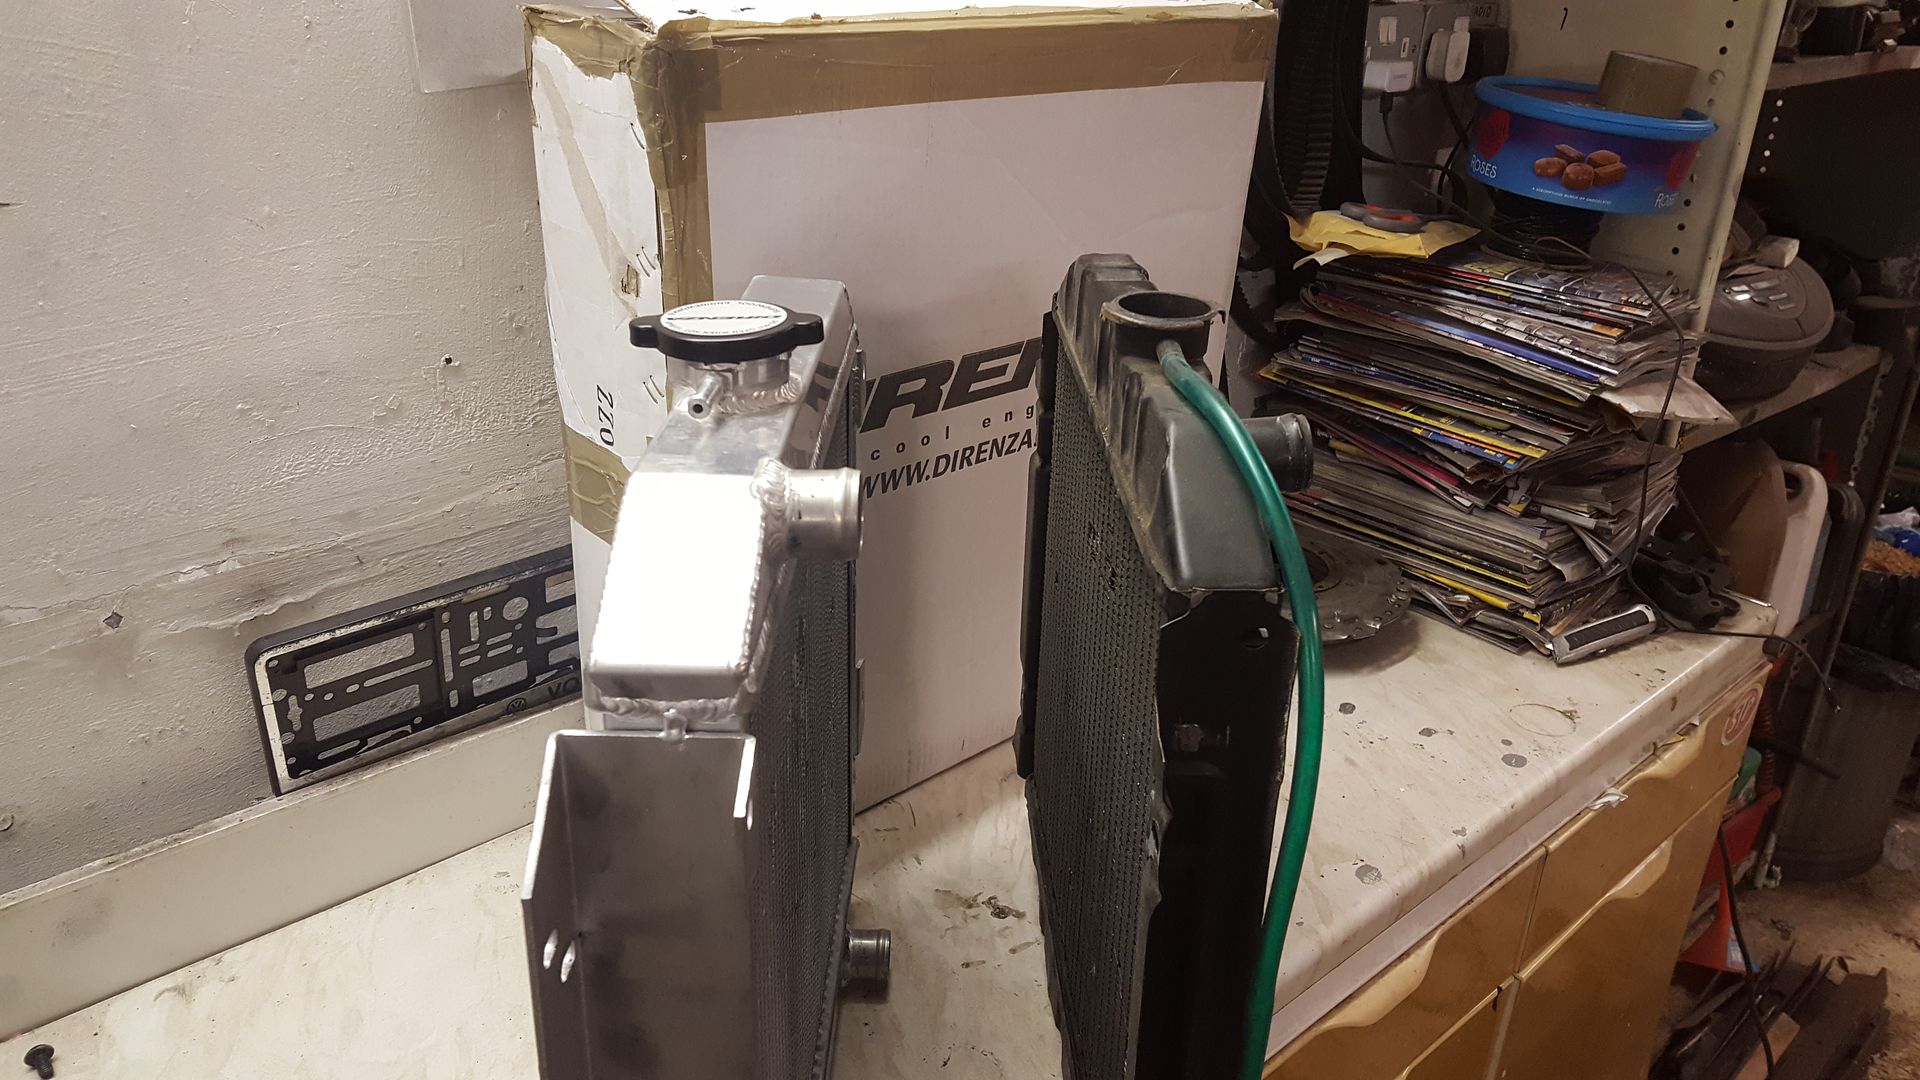
Next bit of ebaying had to raise up the recent Ł50 budget to Ł90 And won this. It' been fitted to a car but never on the road.
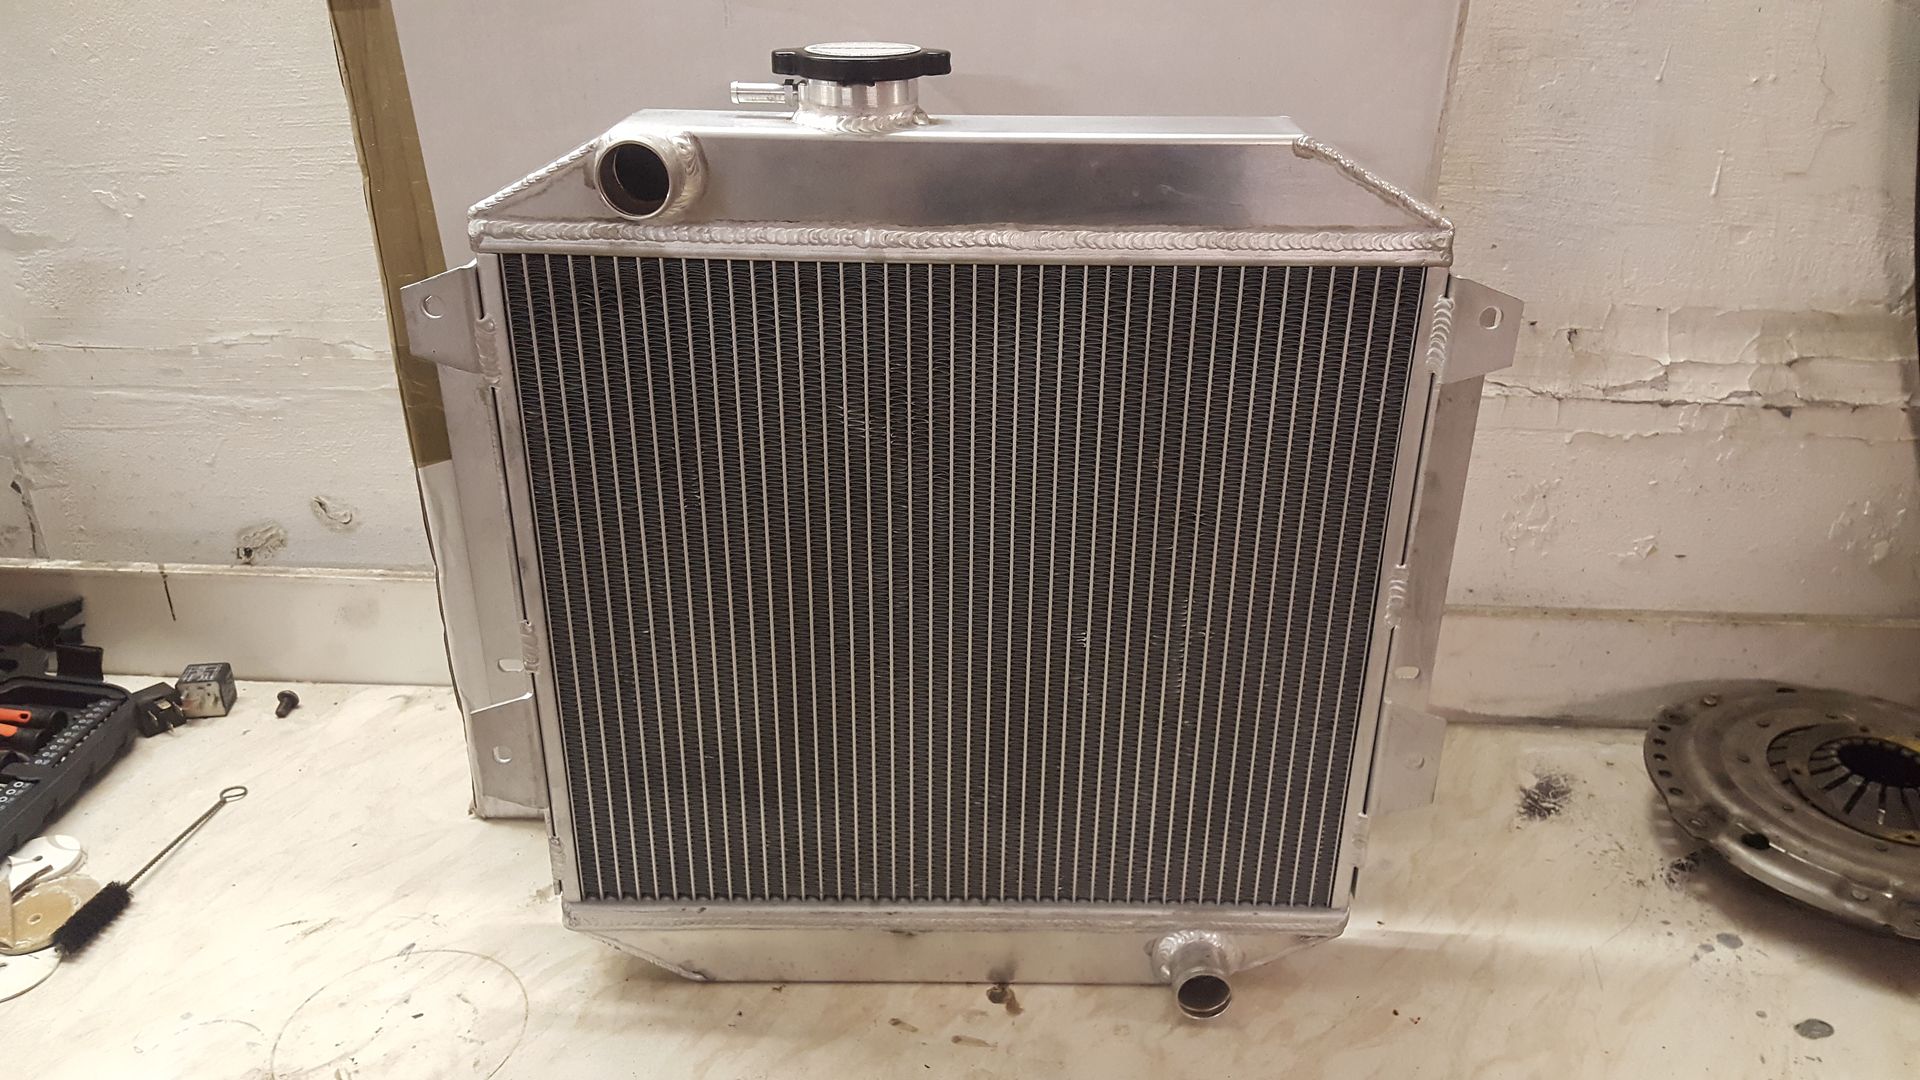
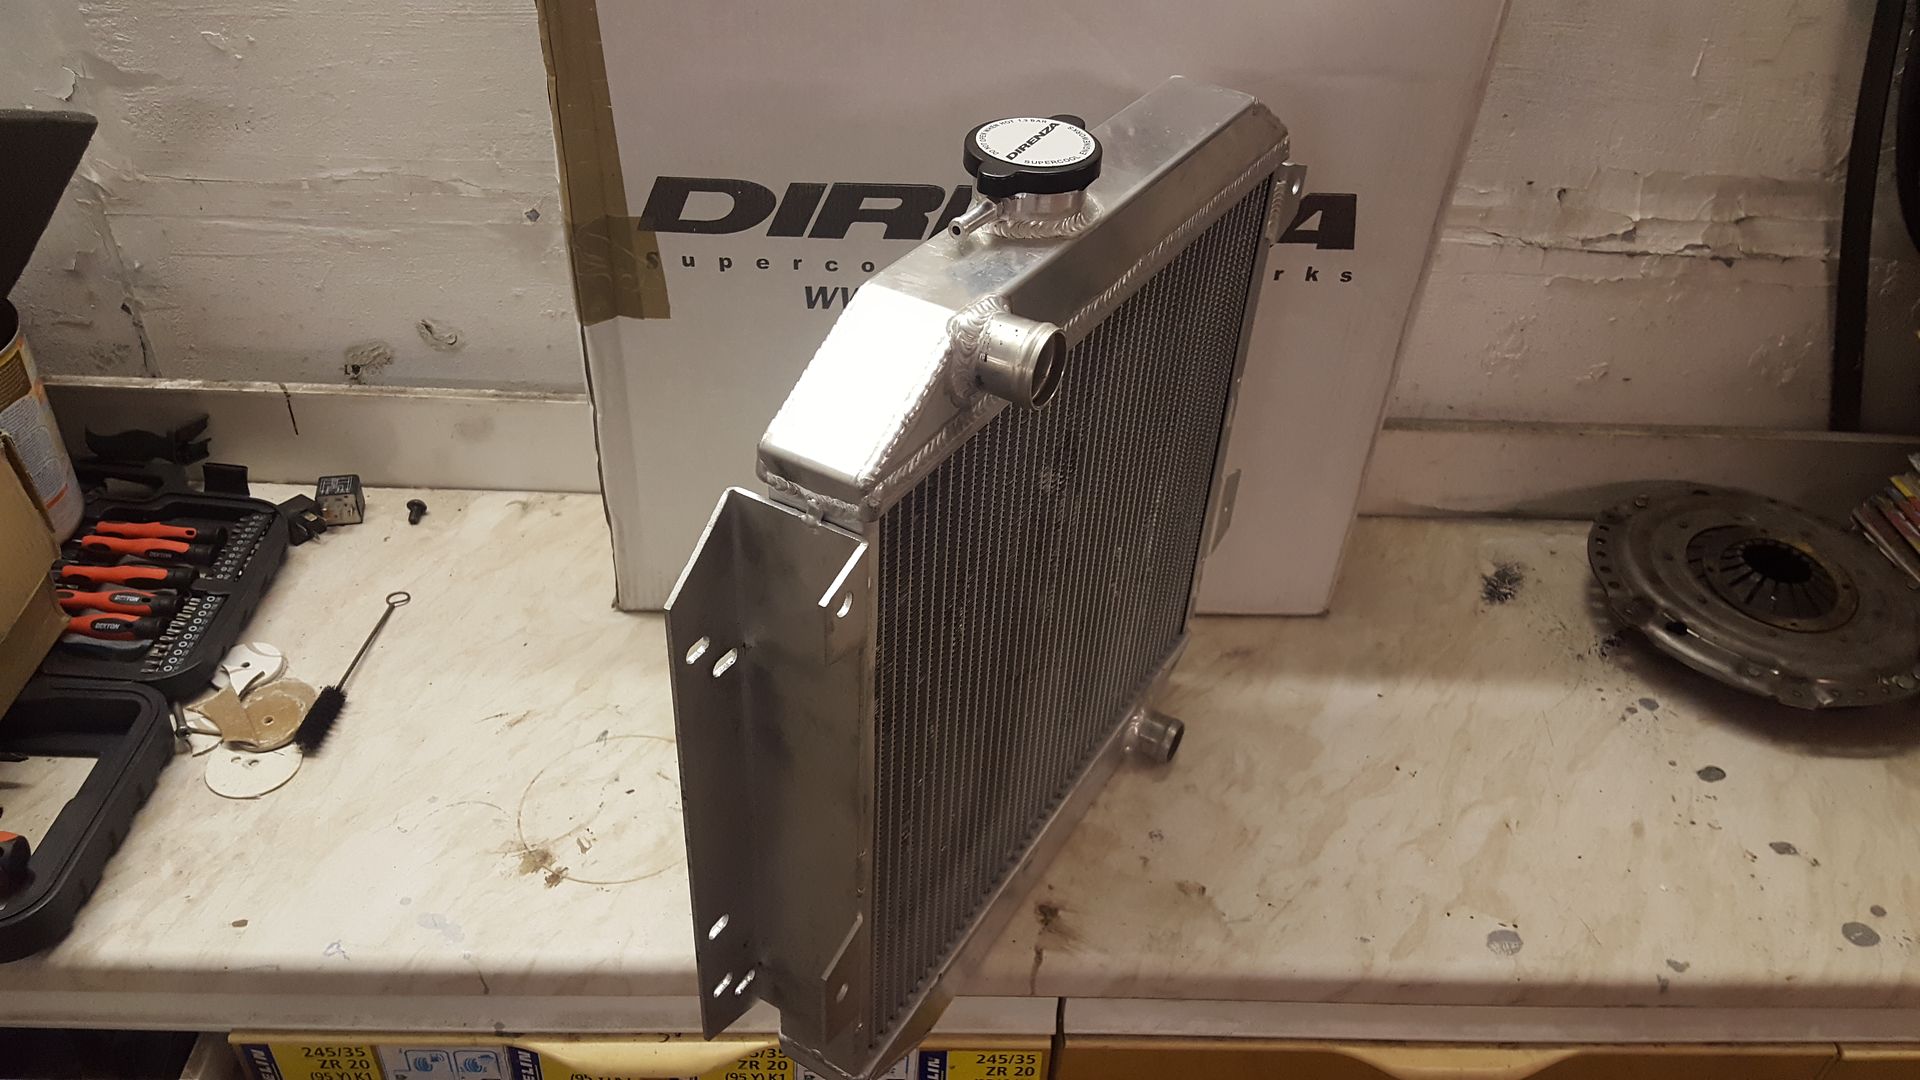
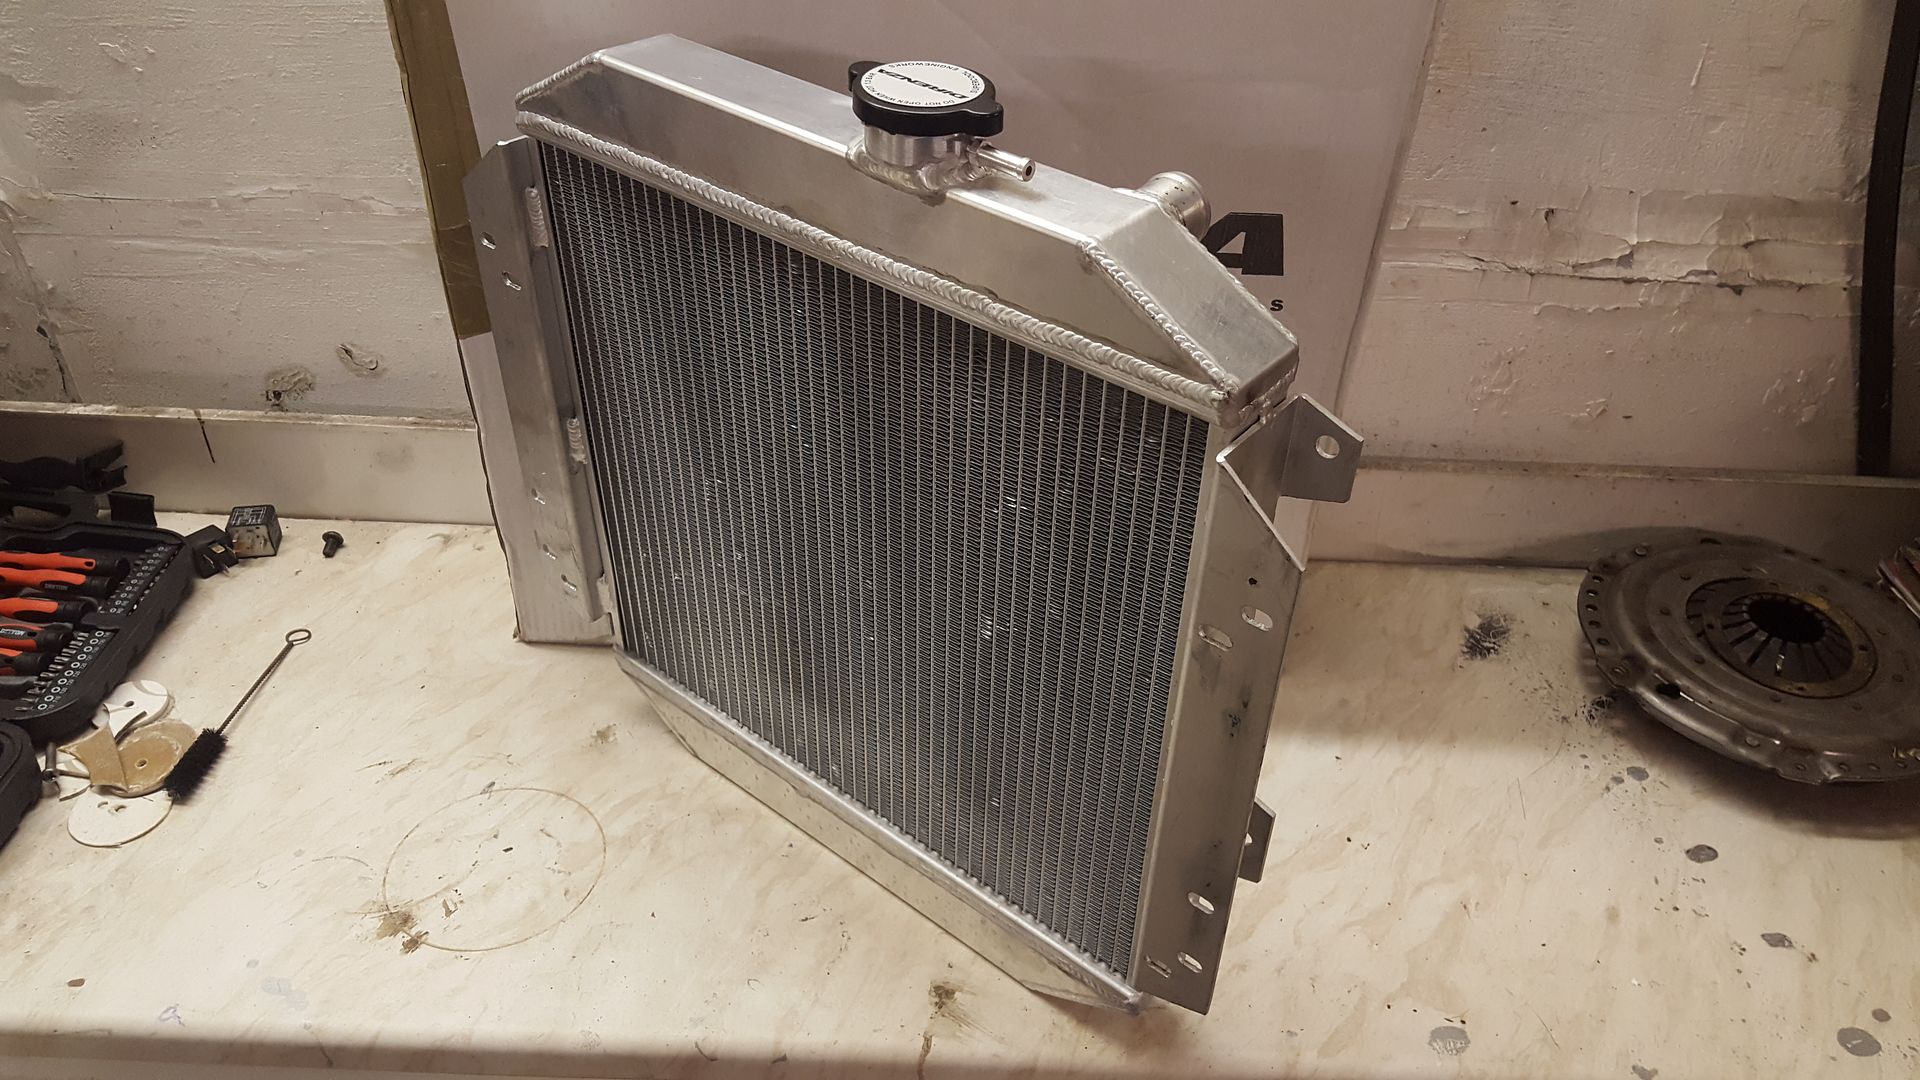
It's a 42mm twin core alloy radiator upgrade for a mk2 escort, which is what the GBS ZERO chassis is designed for,
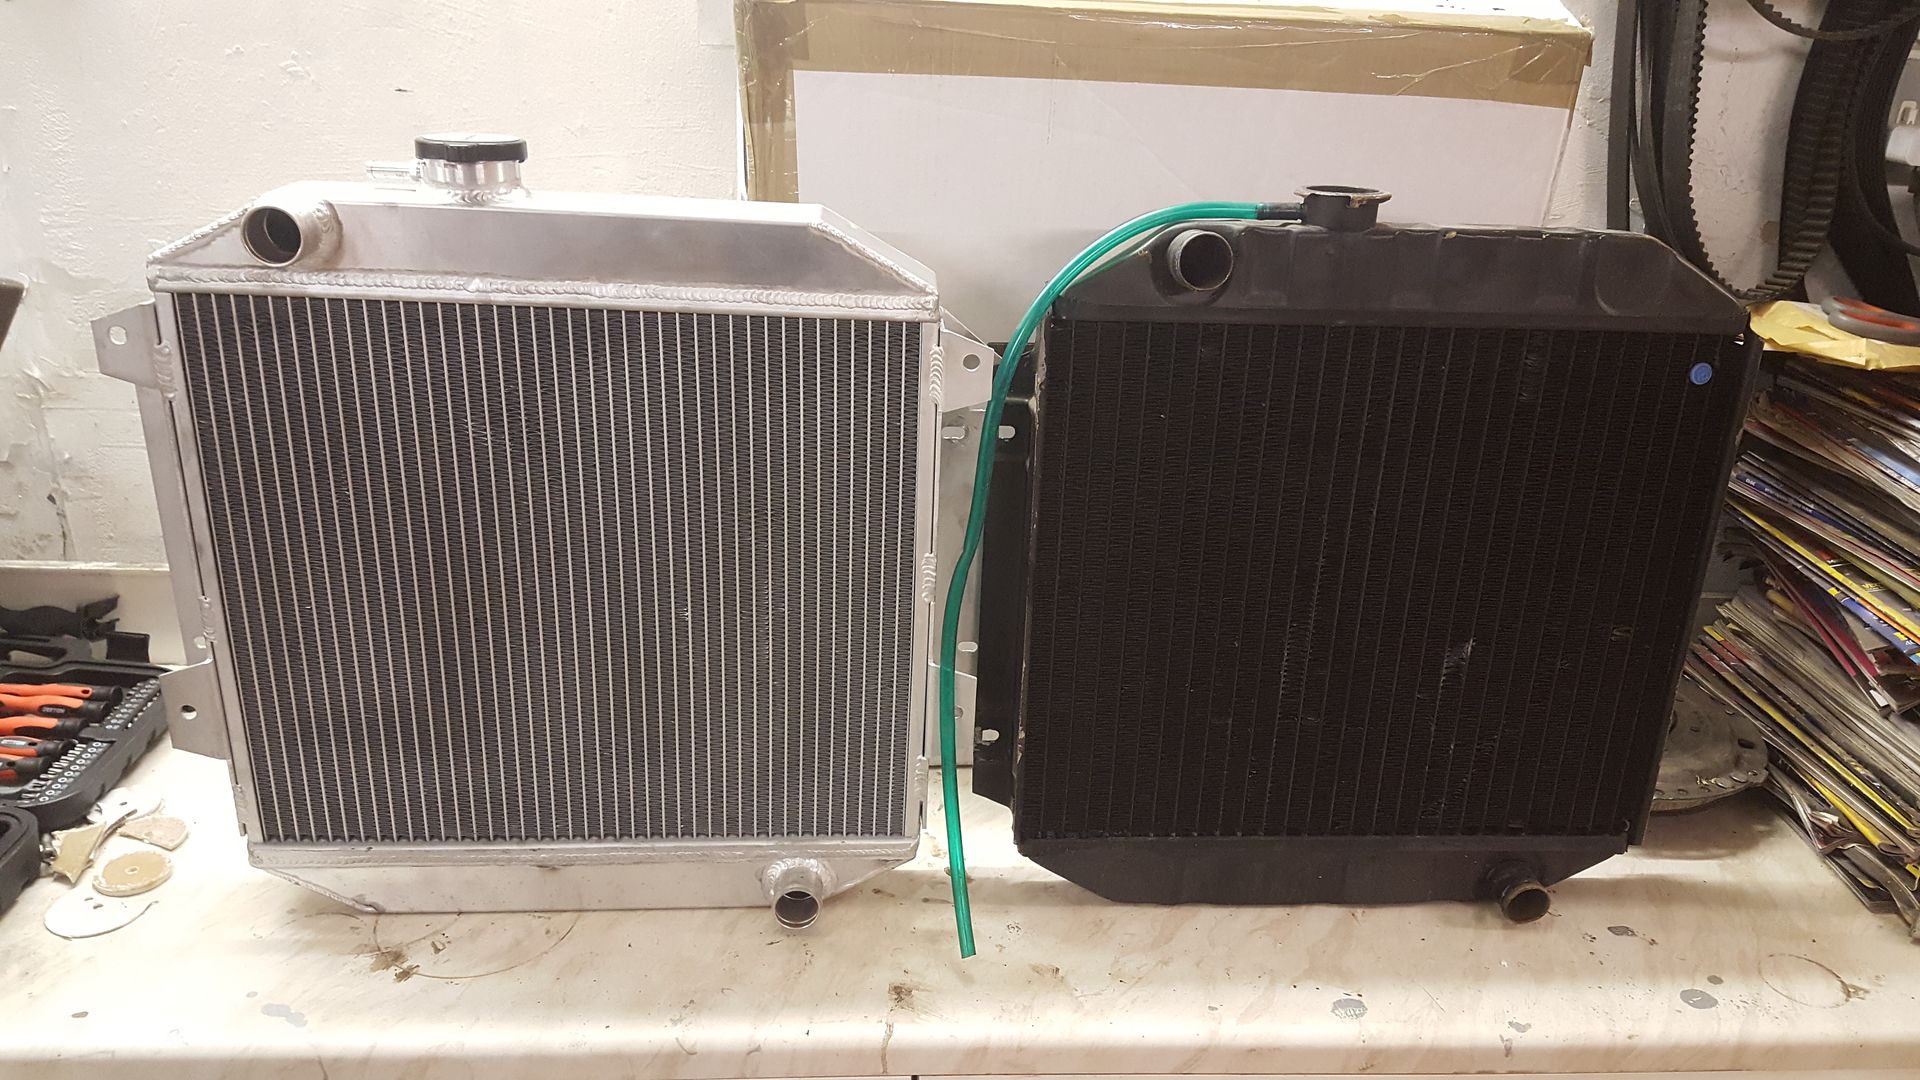
A lot fatter than standard!
And lastly was a freebeey, my uncle had just changed the alternator on his karbota mini tractor and it looked suspiciously like the super expensive
alternator SBD sell for the Xe!
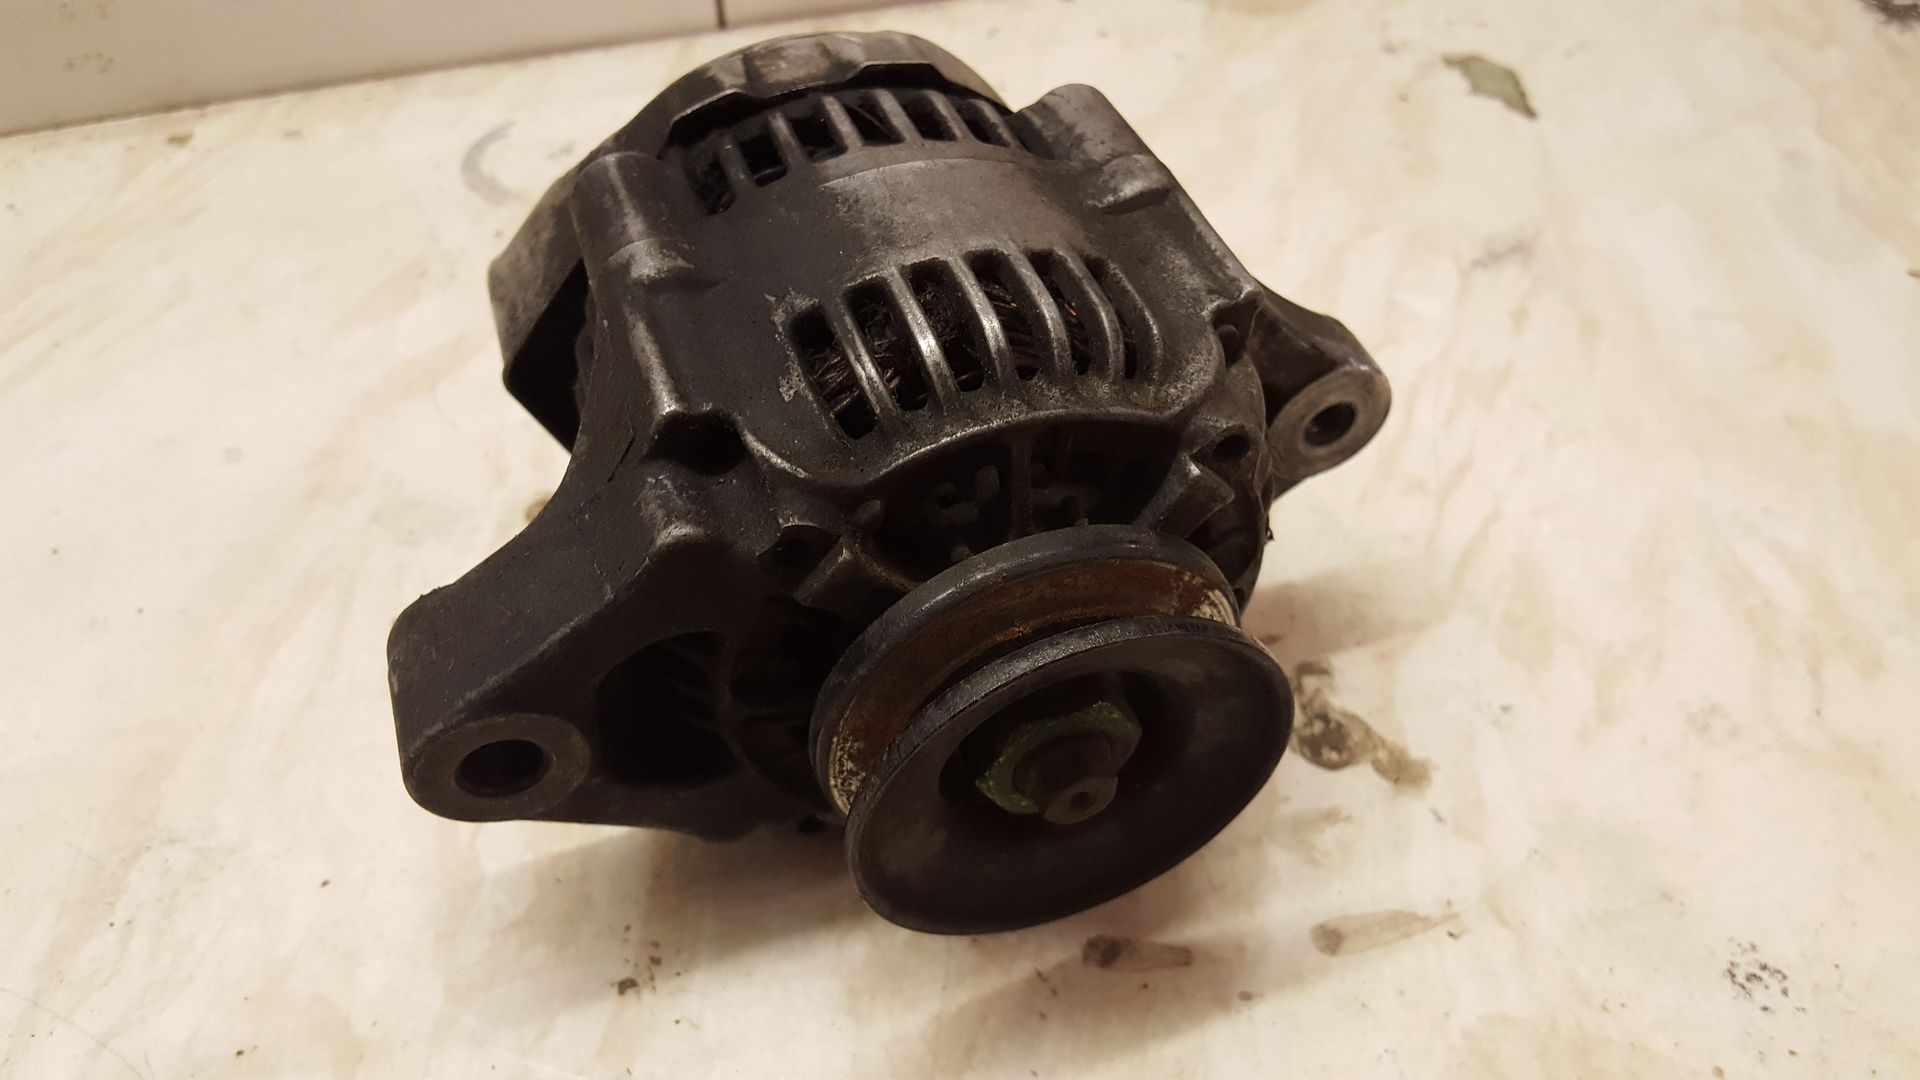
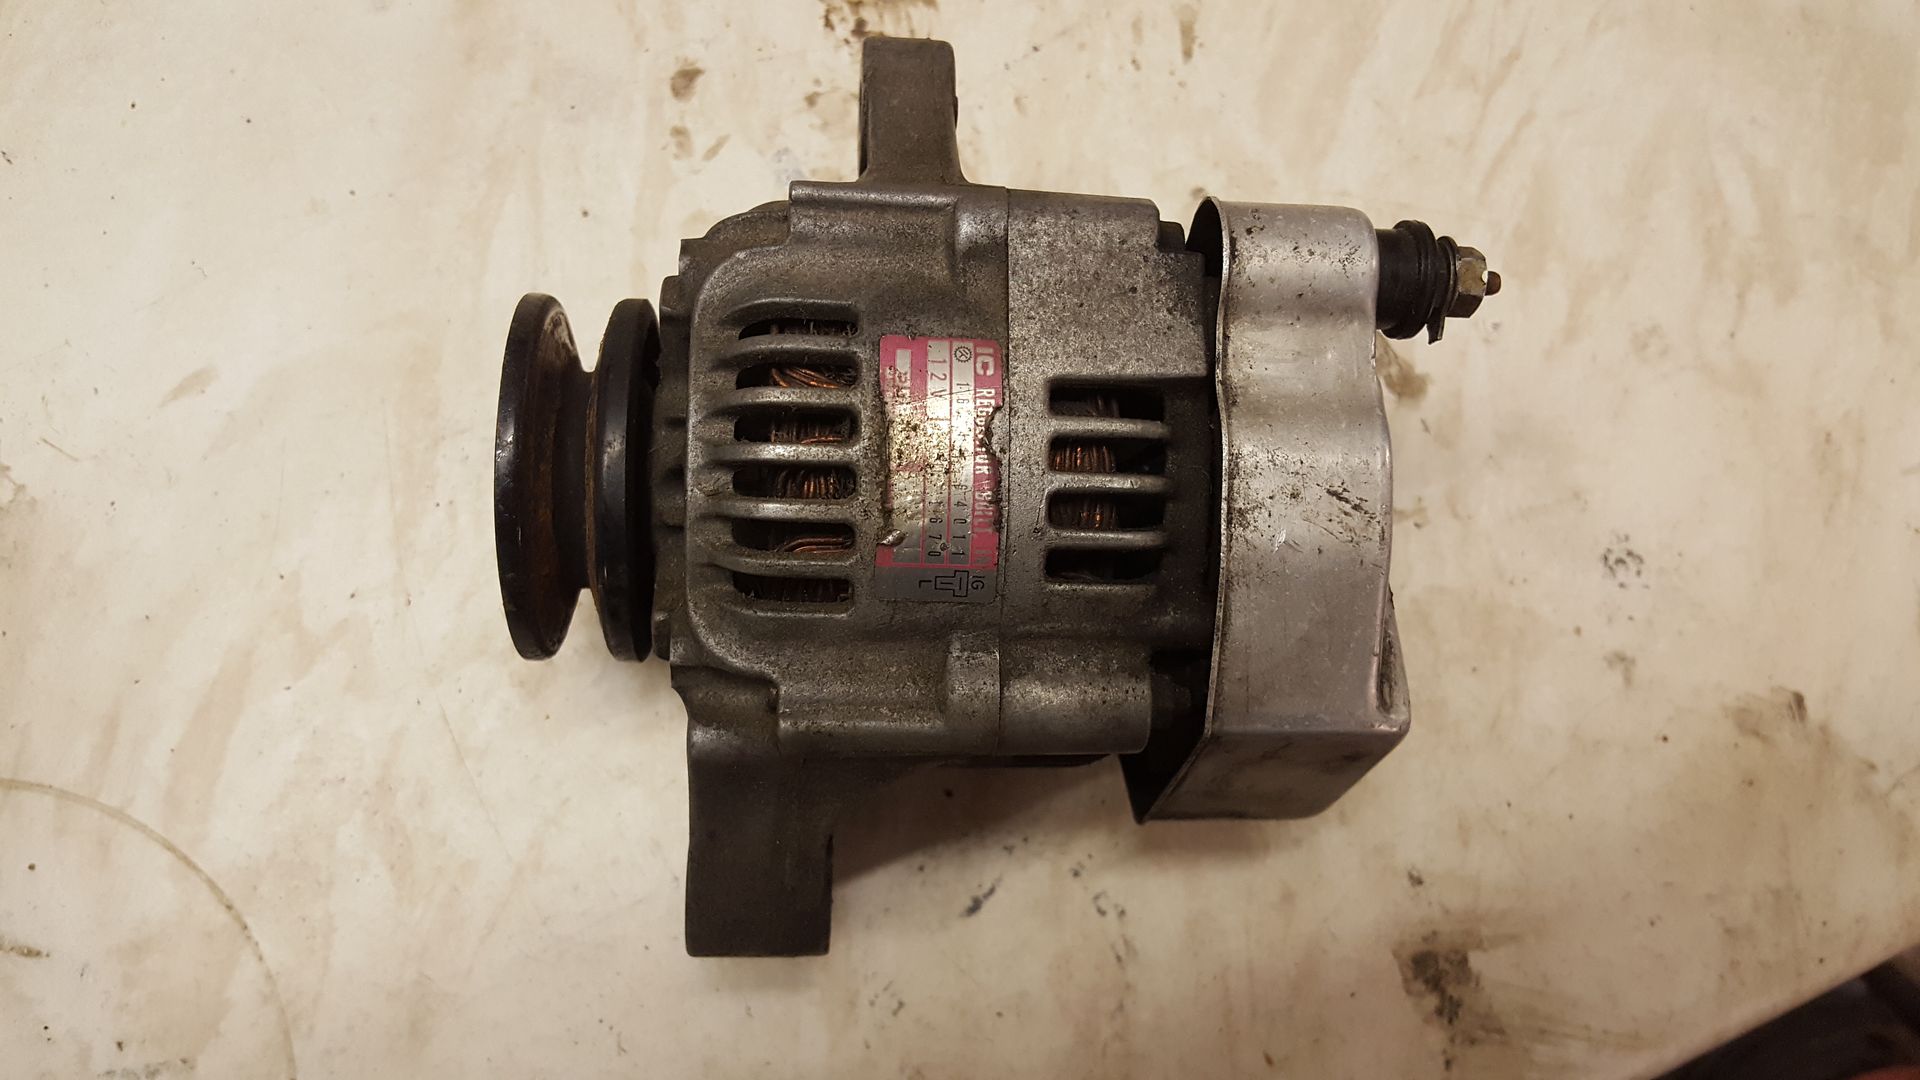
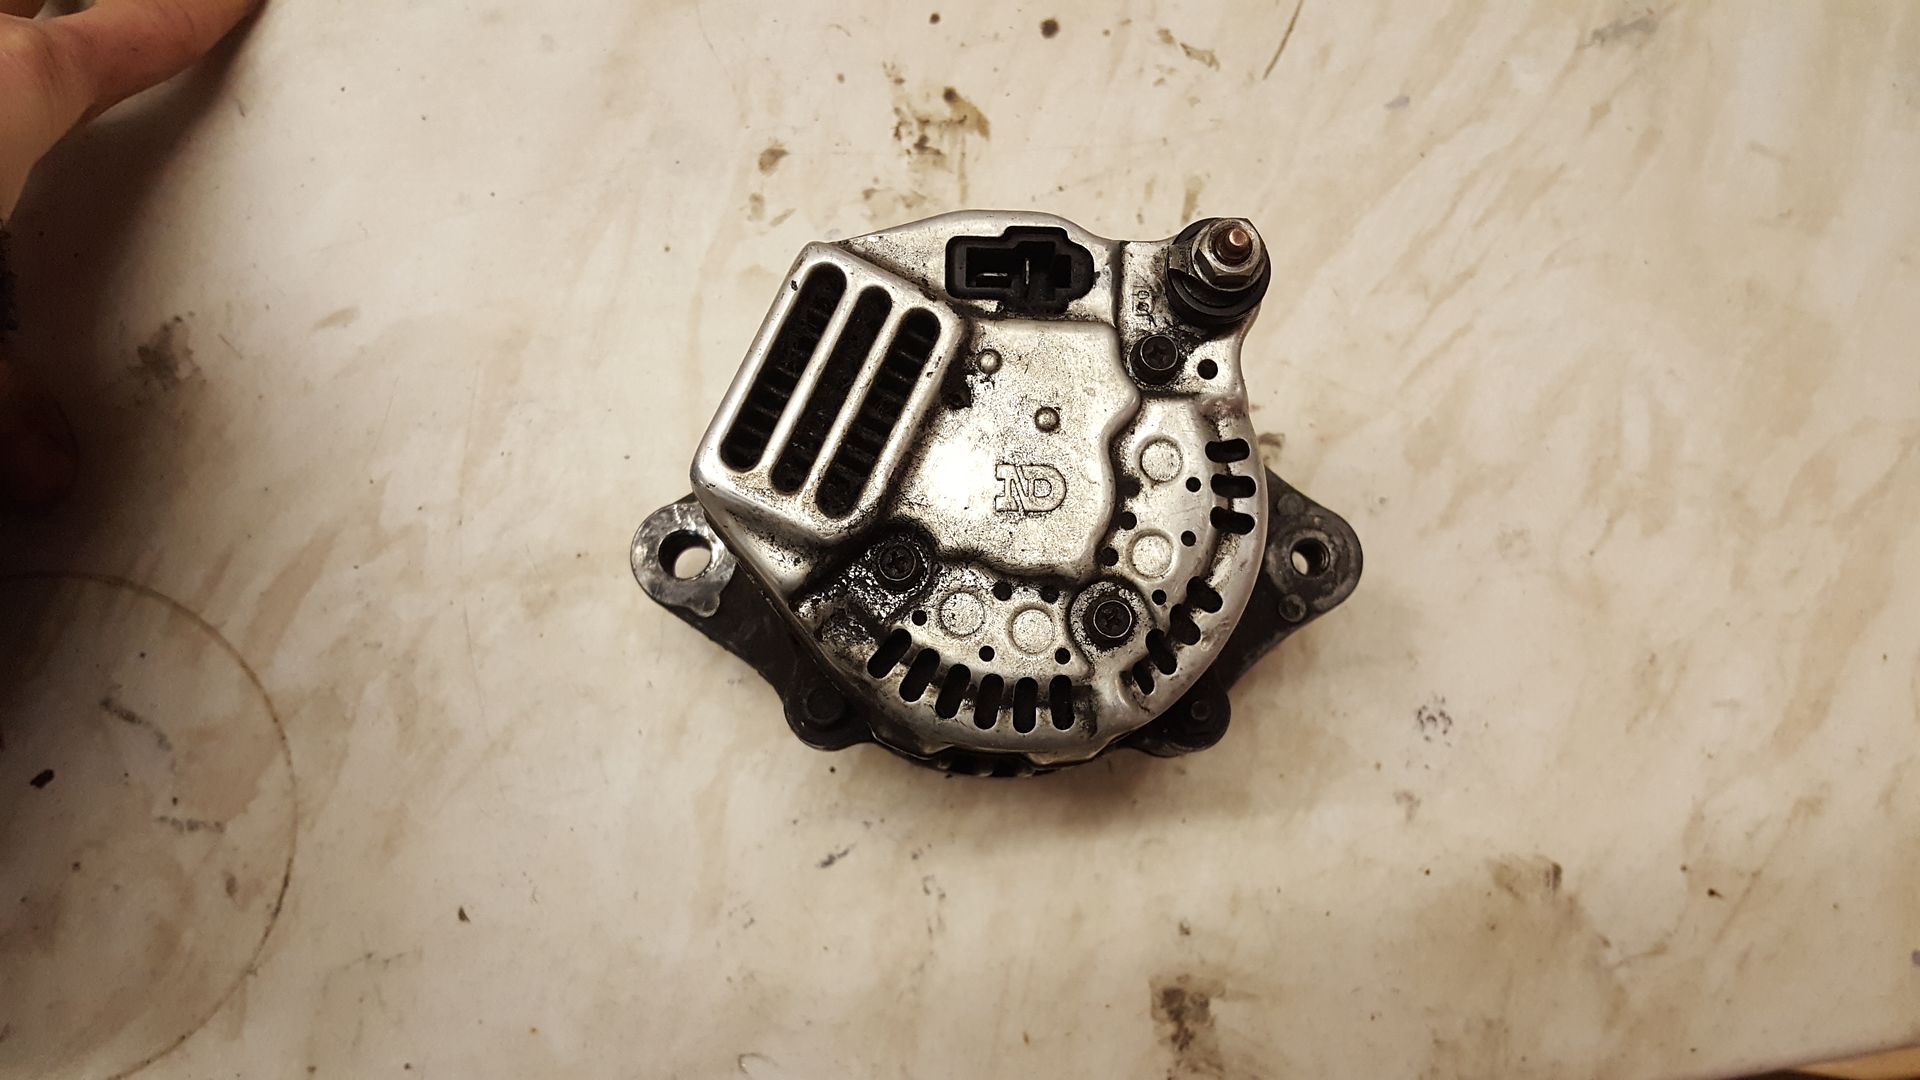
For a bit of perspective.... here's a standard c20xe alterator!
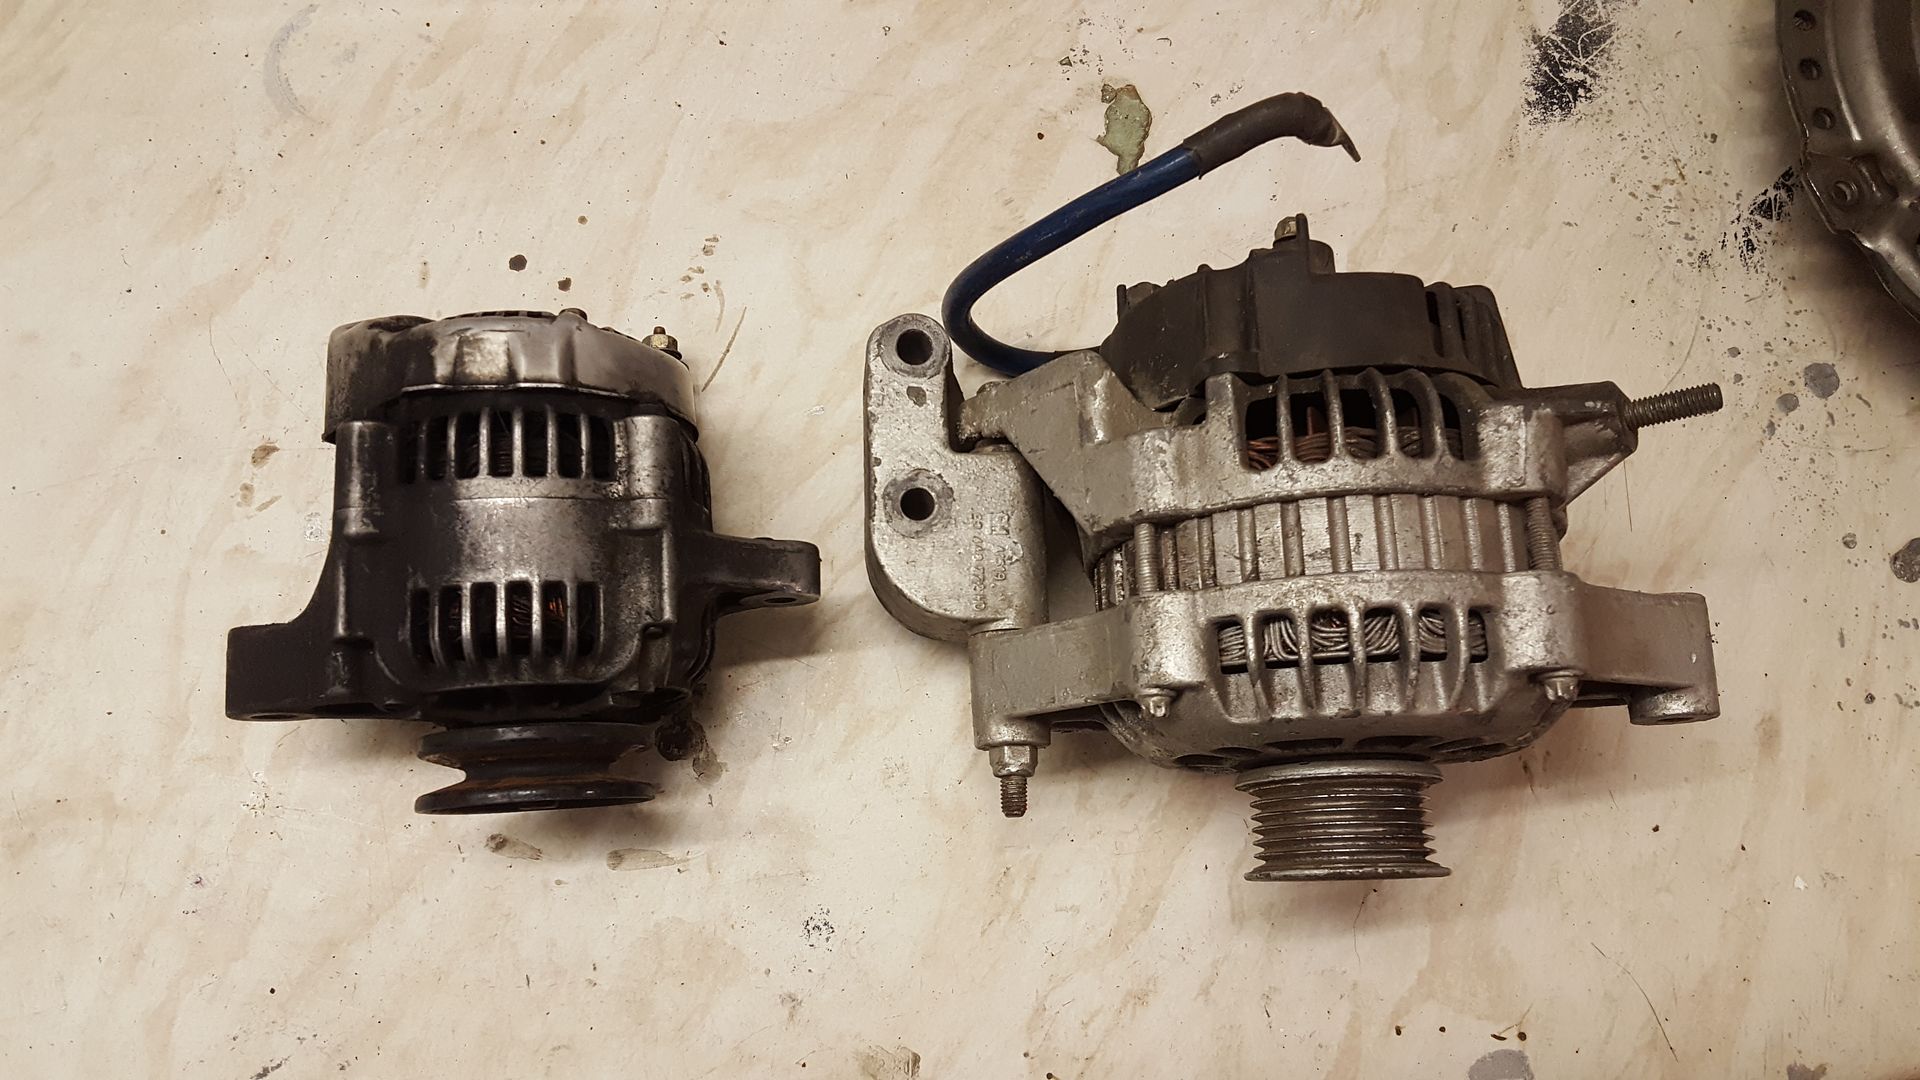
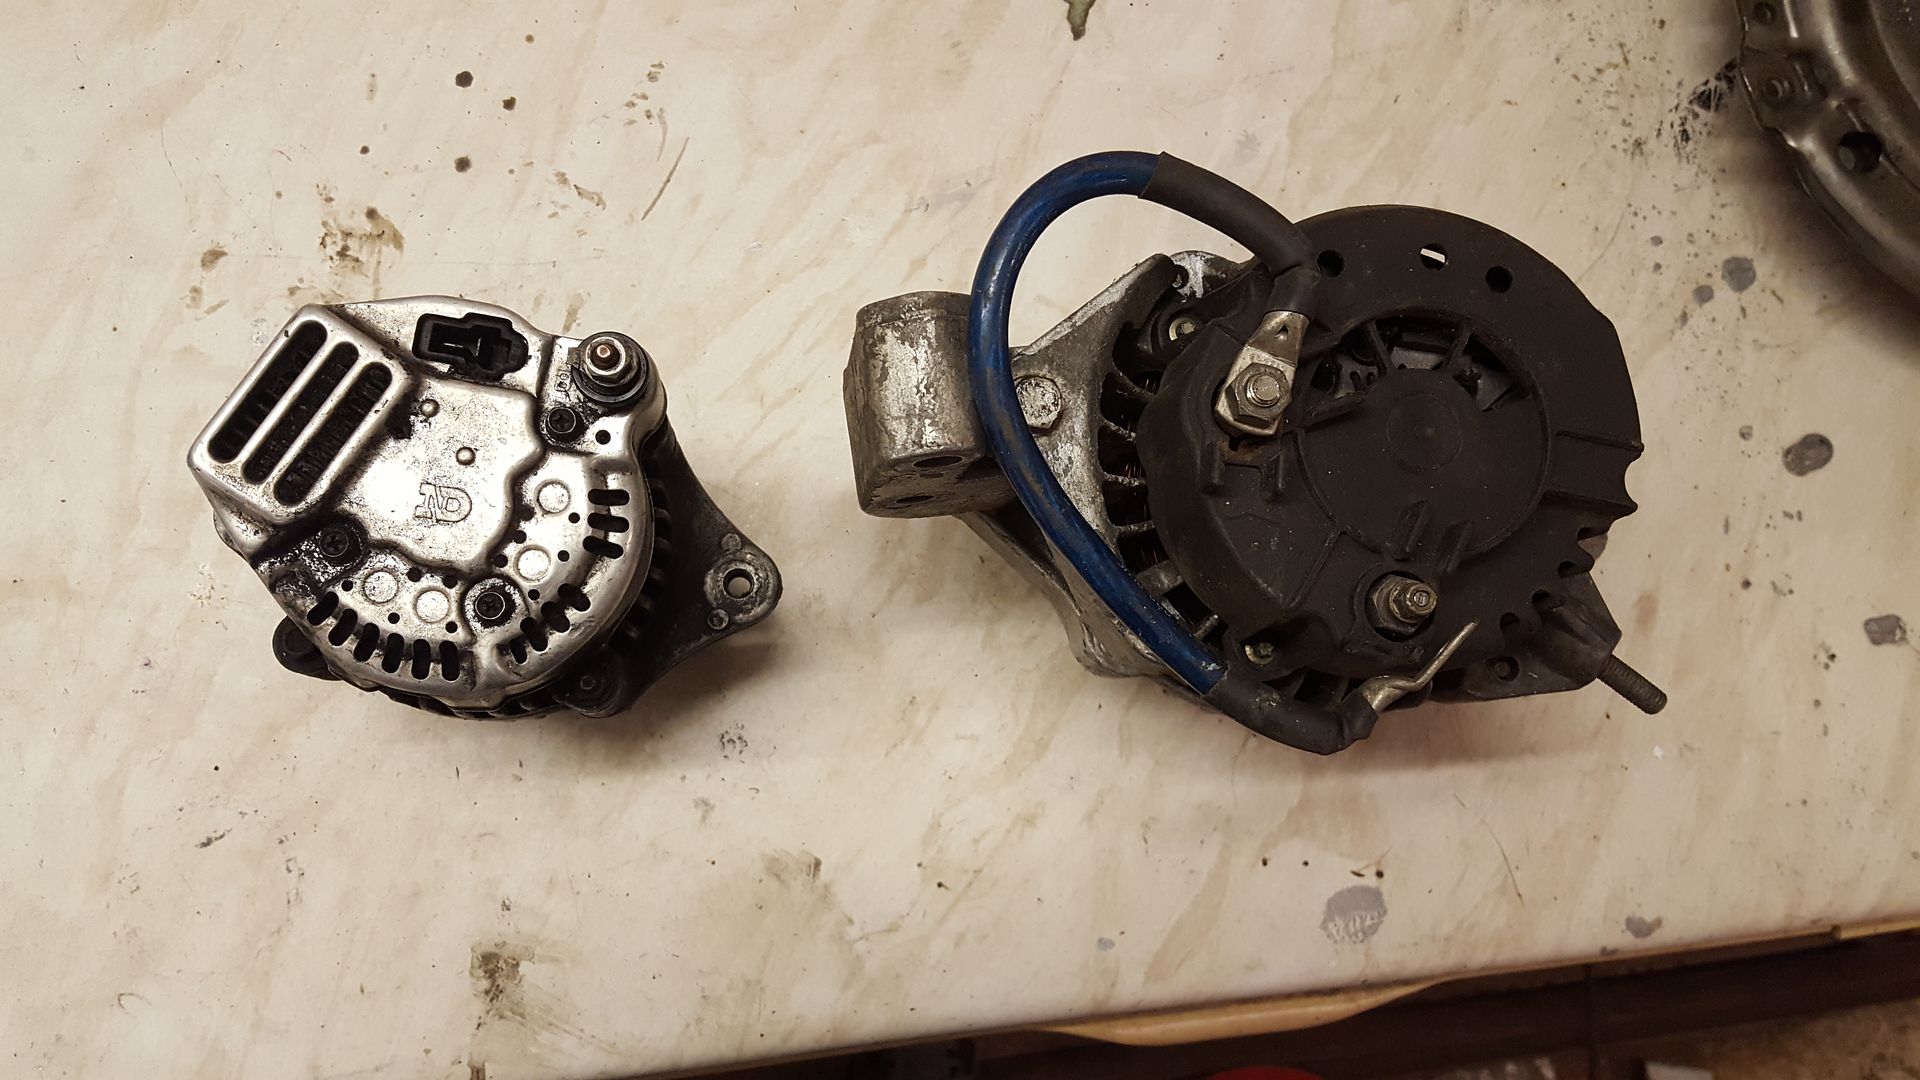
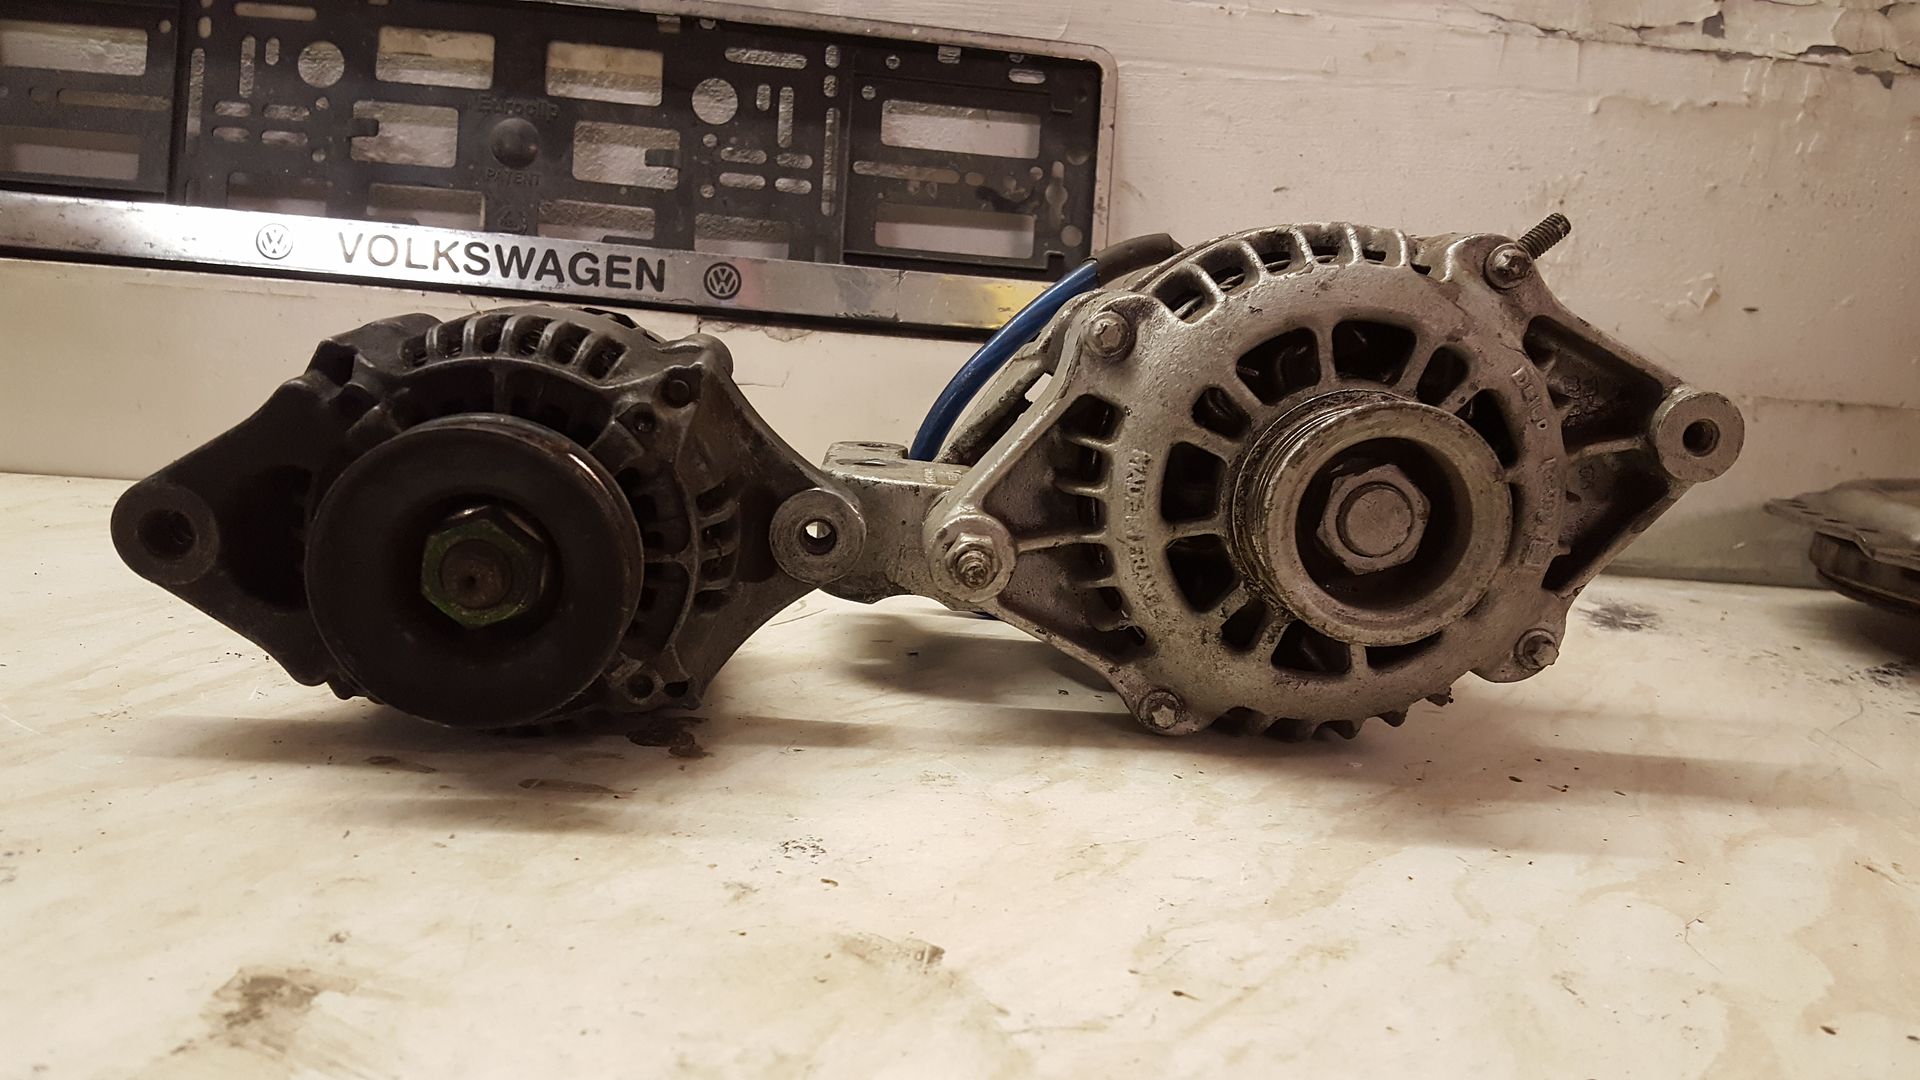
It's 12v 40Amp so plenty for my needs on this. It's kackered but if it does work size wise I have a part number for a new one
Now, moving on, over the years I've made some pretty epic build threads, if I do say so my self ;-) but as the world is evolving vlogging has far
overtaken blogging in the car build game.
I watch over 60gb of youtube a month and all car related, mighty car mods, roadkill, engine masters, Adam lz, project binky, roadking, b is for build,
cars and cameras, the list goes on for ever.
So I thought I'd give it a go my self. It seems a whole load of hassle and make everything take 3 times as long and the internet always trolls
you, you feel like an idiot talking to a camera, but it is the future!
So far I've only put up the slide shows of a few of my old projects, but the plan is when I get some more progrss on the Kit Car to actually
start a Vlog with it.
Here's the channel
https://www.youtube.com/channel/UCYv4ib04lqWaC6SBk9kA0Hg
So check it out, subscribe up and once I have a decent amount of content I'll start uploading I'll carry on build threads here too
ofcourse
[Edited on 12/2/18 by super-ron]
super-ron - 18/2/18 at 06:18 PM
A problem I found when I assembled the front suspension was that the thread on the top arm for the ball joint was full of powder coat and a bit chewed
where they had tried to wind the ball joint in. The new joints I'd bought wouldn't wind in more than a turn
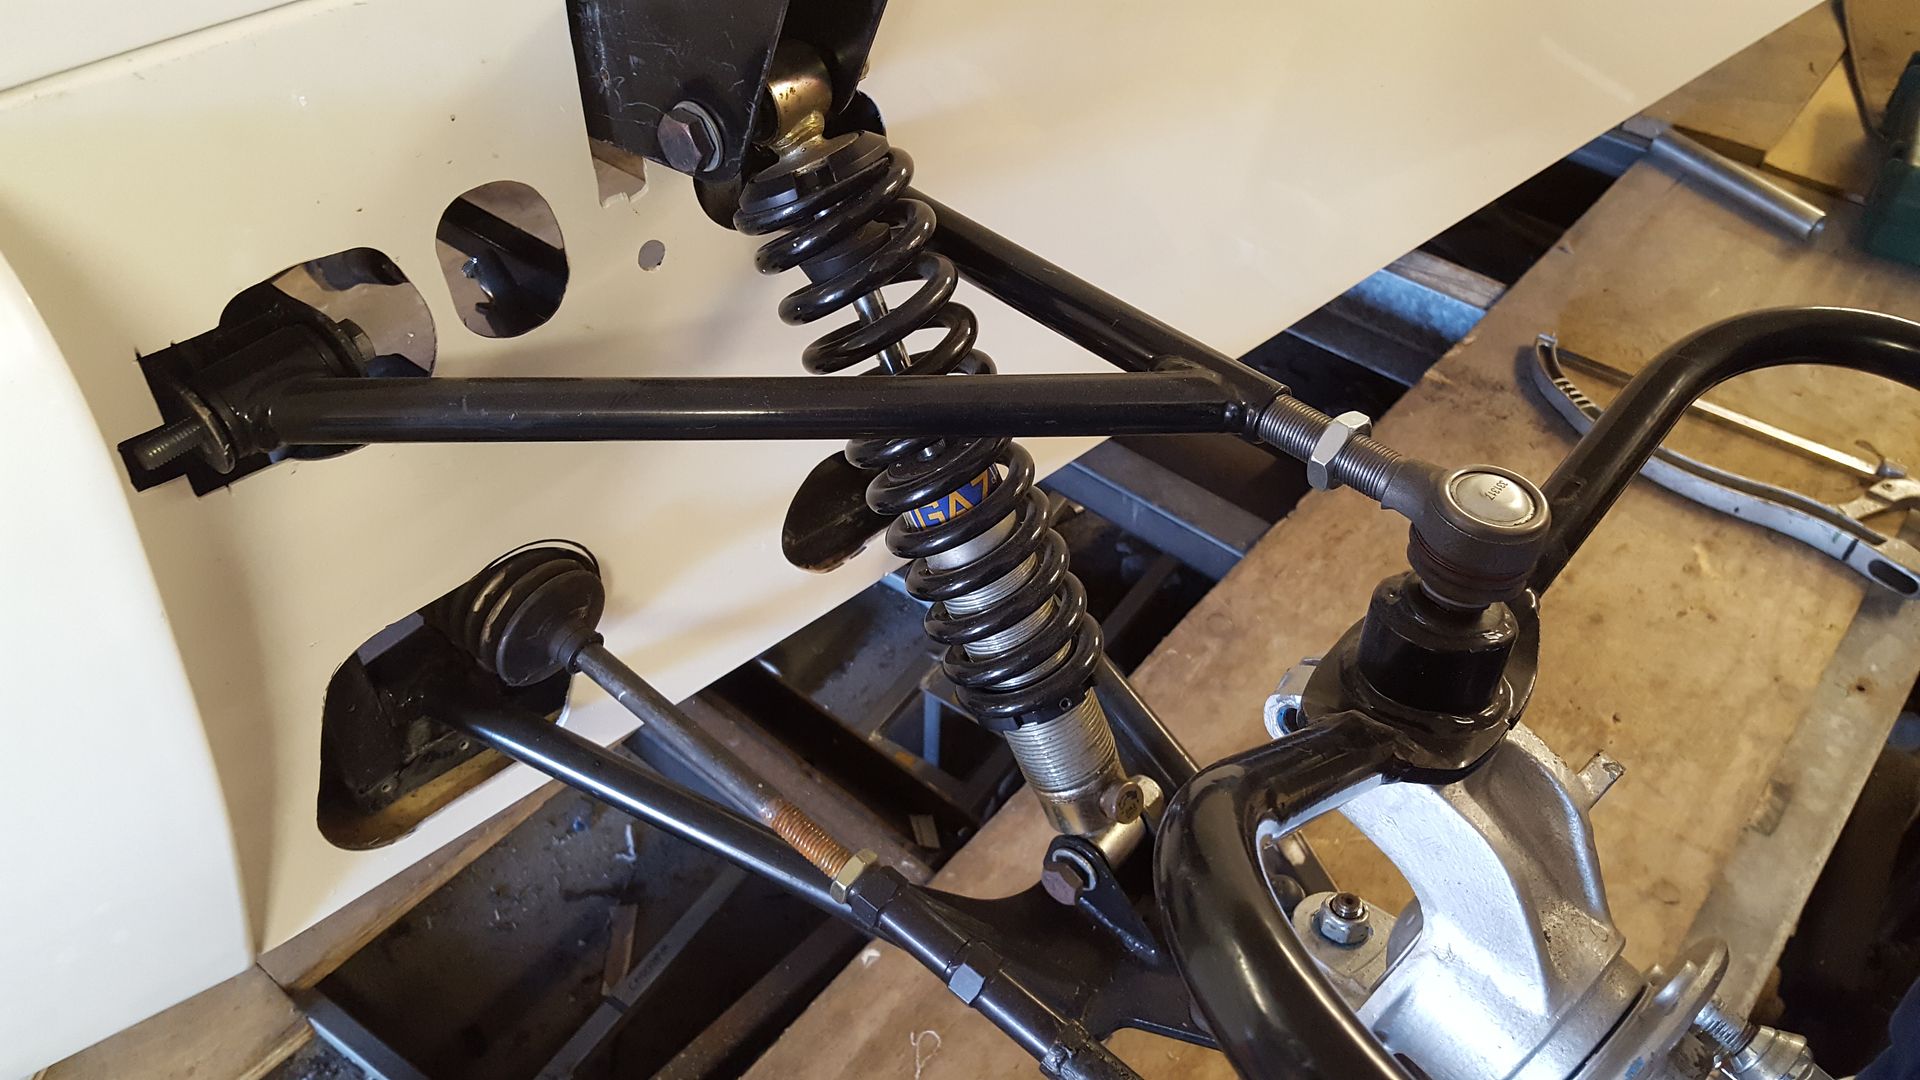
So had been asking around my friends for a M18x1.5 tap and one came up trumps
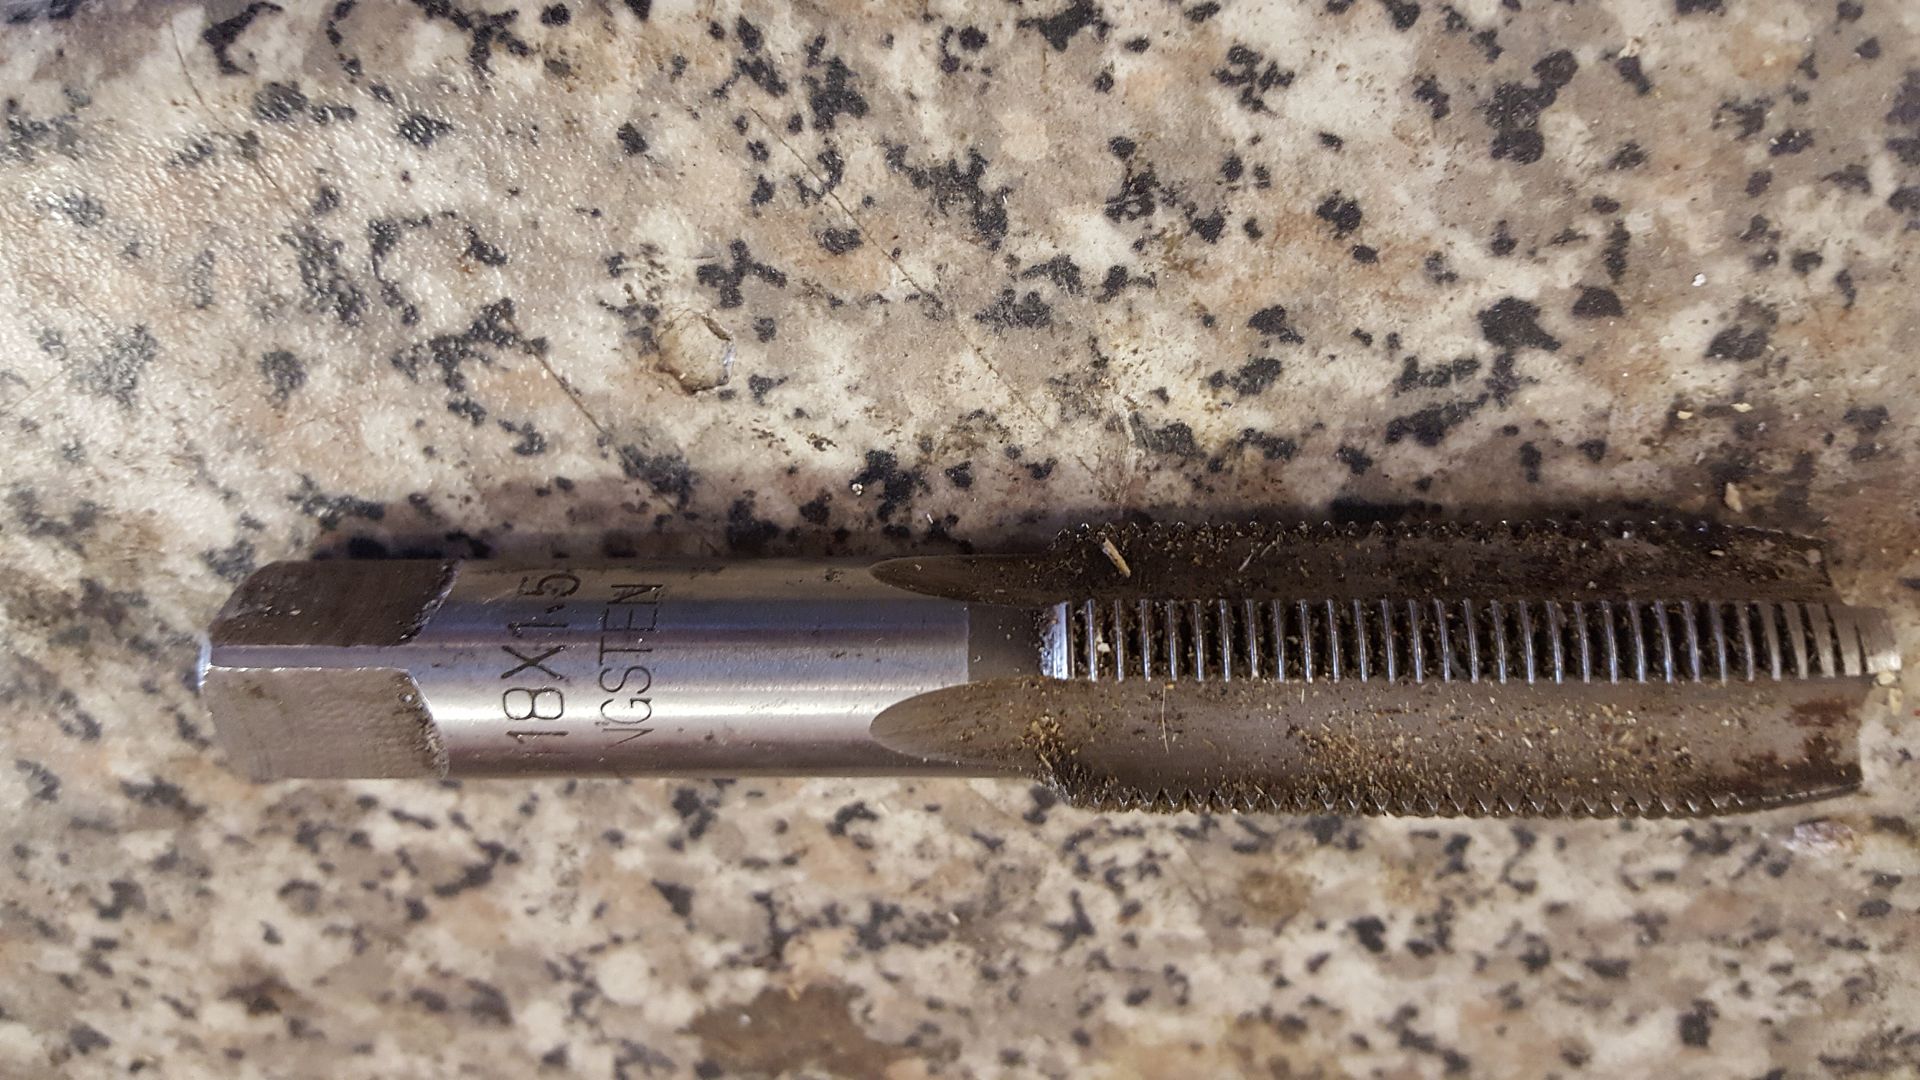
It was pretty full of powder coat and crap
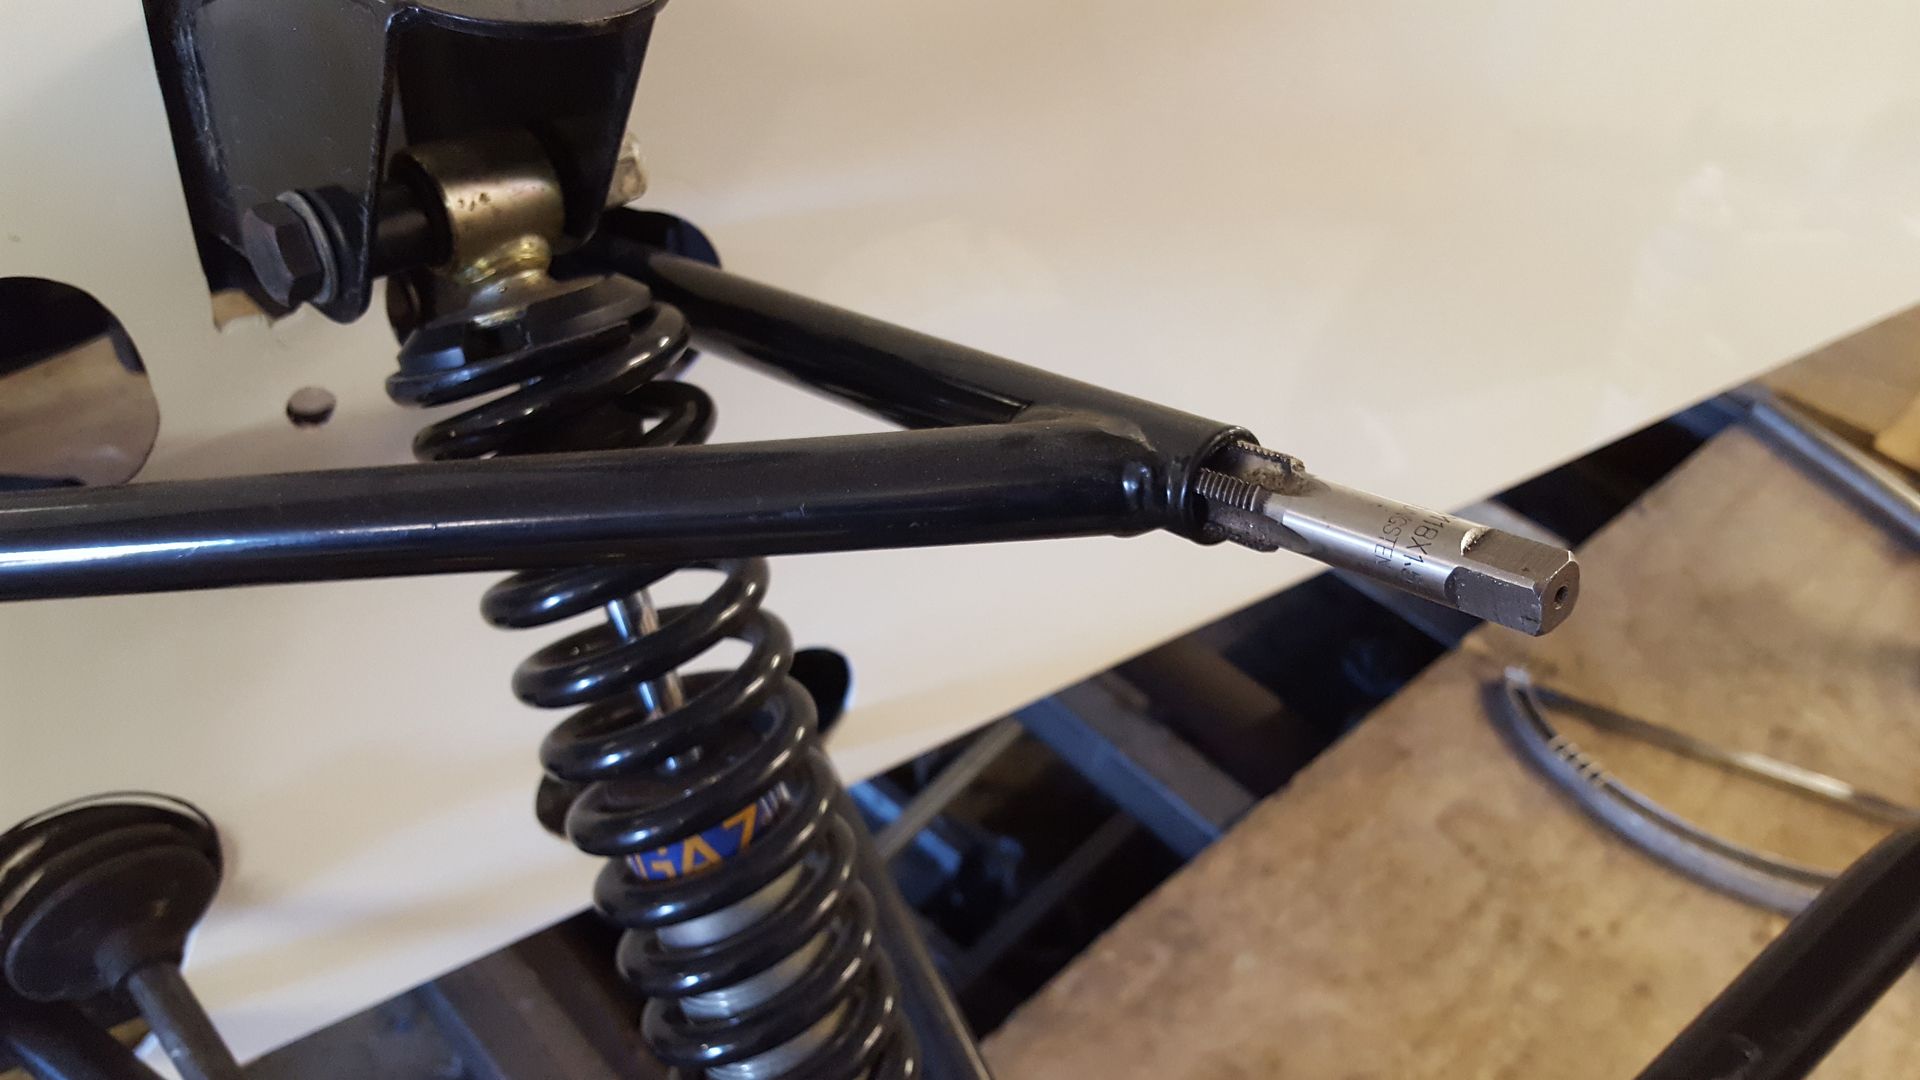
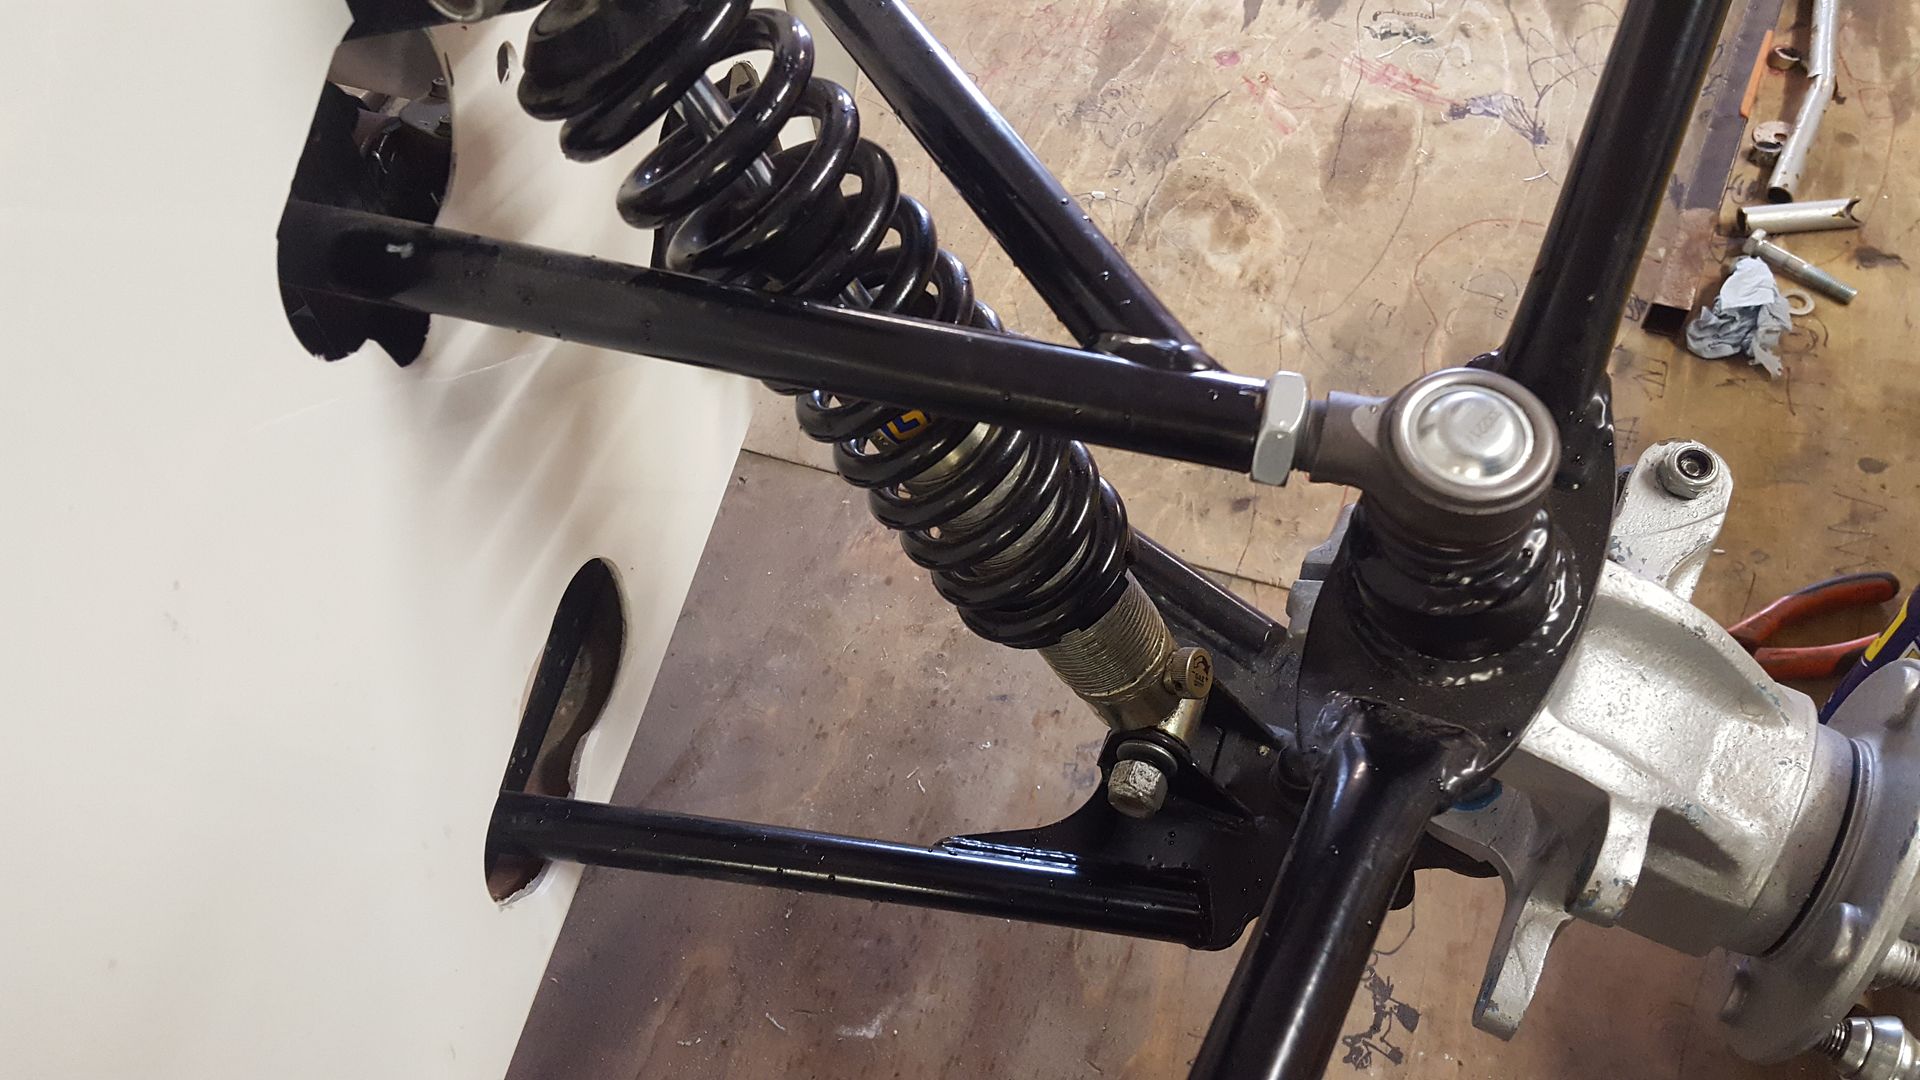
Greased it all up and now they can run freely all the way in if needed

And then I got a rather peculiar message......
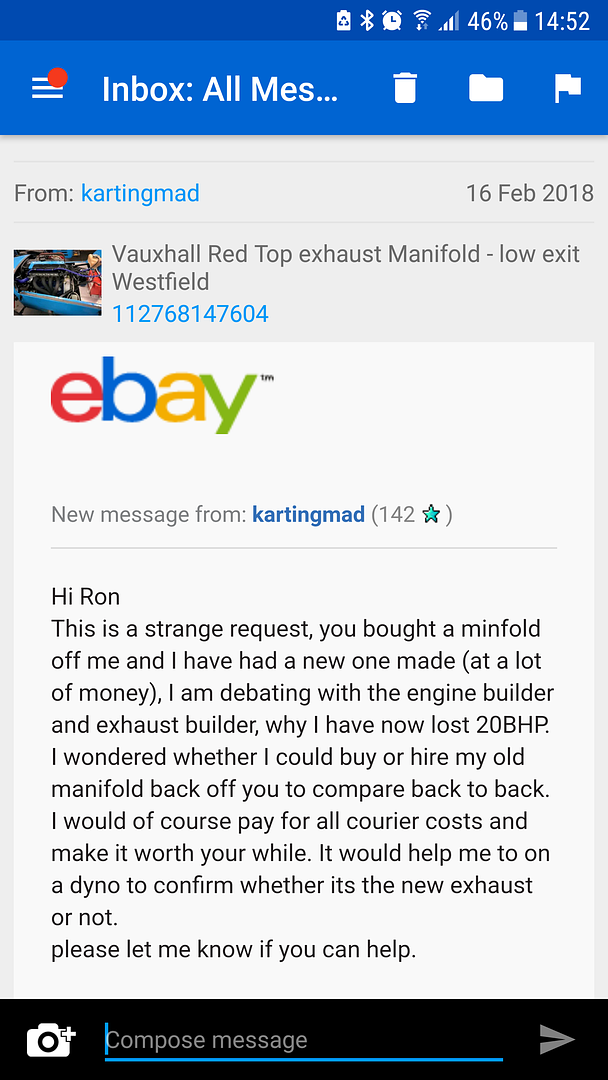
He was running 210bhp on this setup
As I'm not needing the manifold for (quite) some time, he's bought it back temporarily to stick it on the dyno
Back it goes :lmao:
alistairolsen - 19/2/18 at 10:49 AM
Always nice to be able to help out and pay it forward somewhat, just have to hope he's honest enough to honour the deal!
super-ron - 14/3/18 at 08:12 PM
Sorry not had any time for progress but I did hear from the guy with the exhaust. It turns out it was the engine was at fault, not the manifold. They
managed to blow 235bhp through it.
I originally bought the manifold for Ł55, and I was bidding on his silencer too but the bids kept running on that and I gave up at Ł190 I think.
I don't know if the other guy got the same request to buy the silencer back for the dyno or what ever, but he offered me the manifold and the
silencer together for Ł195 delivered. Sounded good to me!
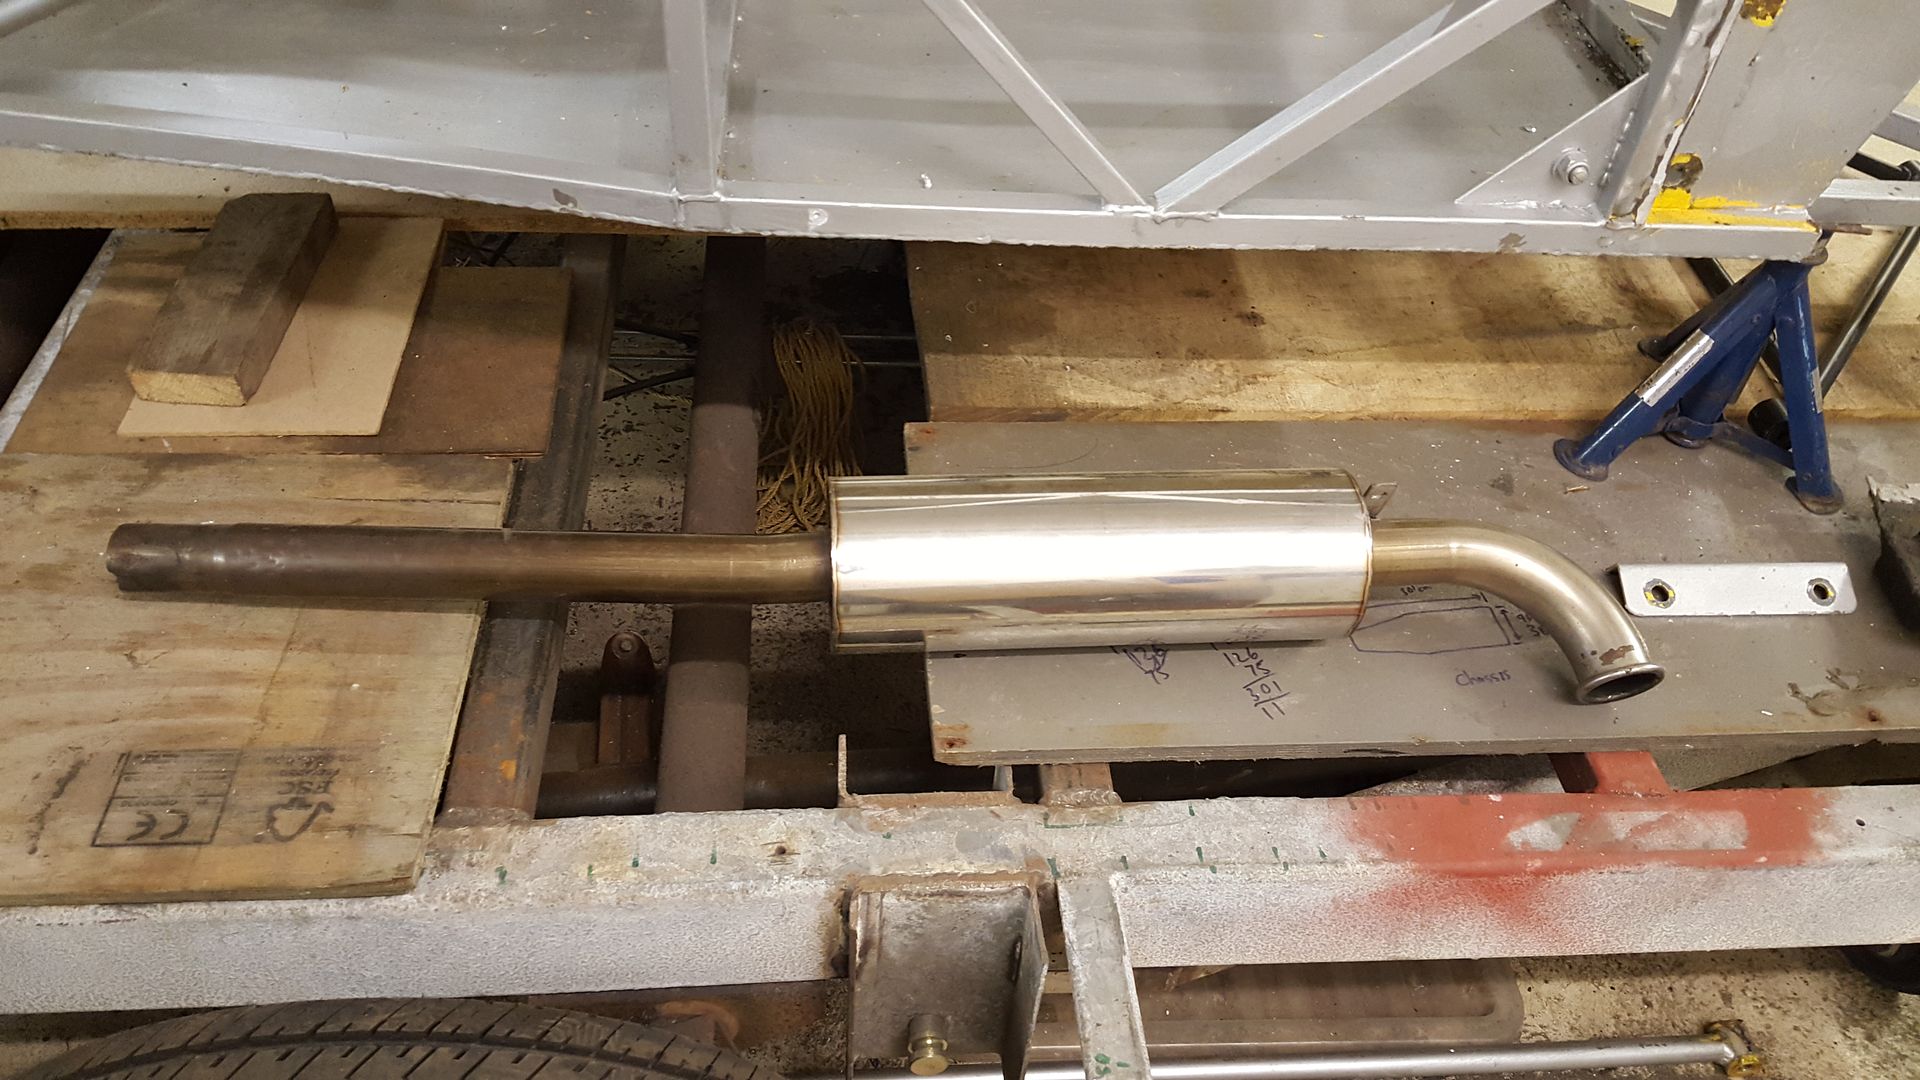
So a bigger box arrived this time
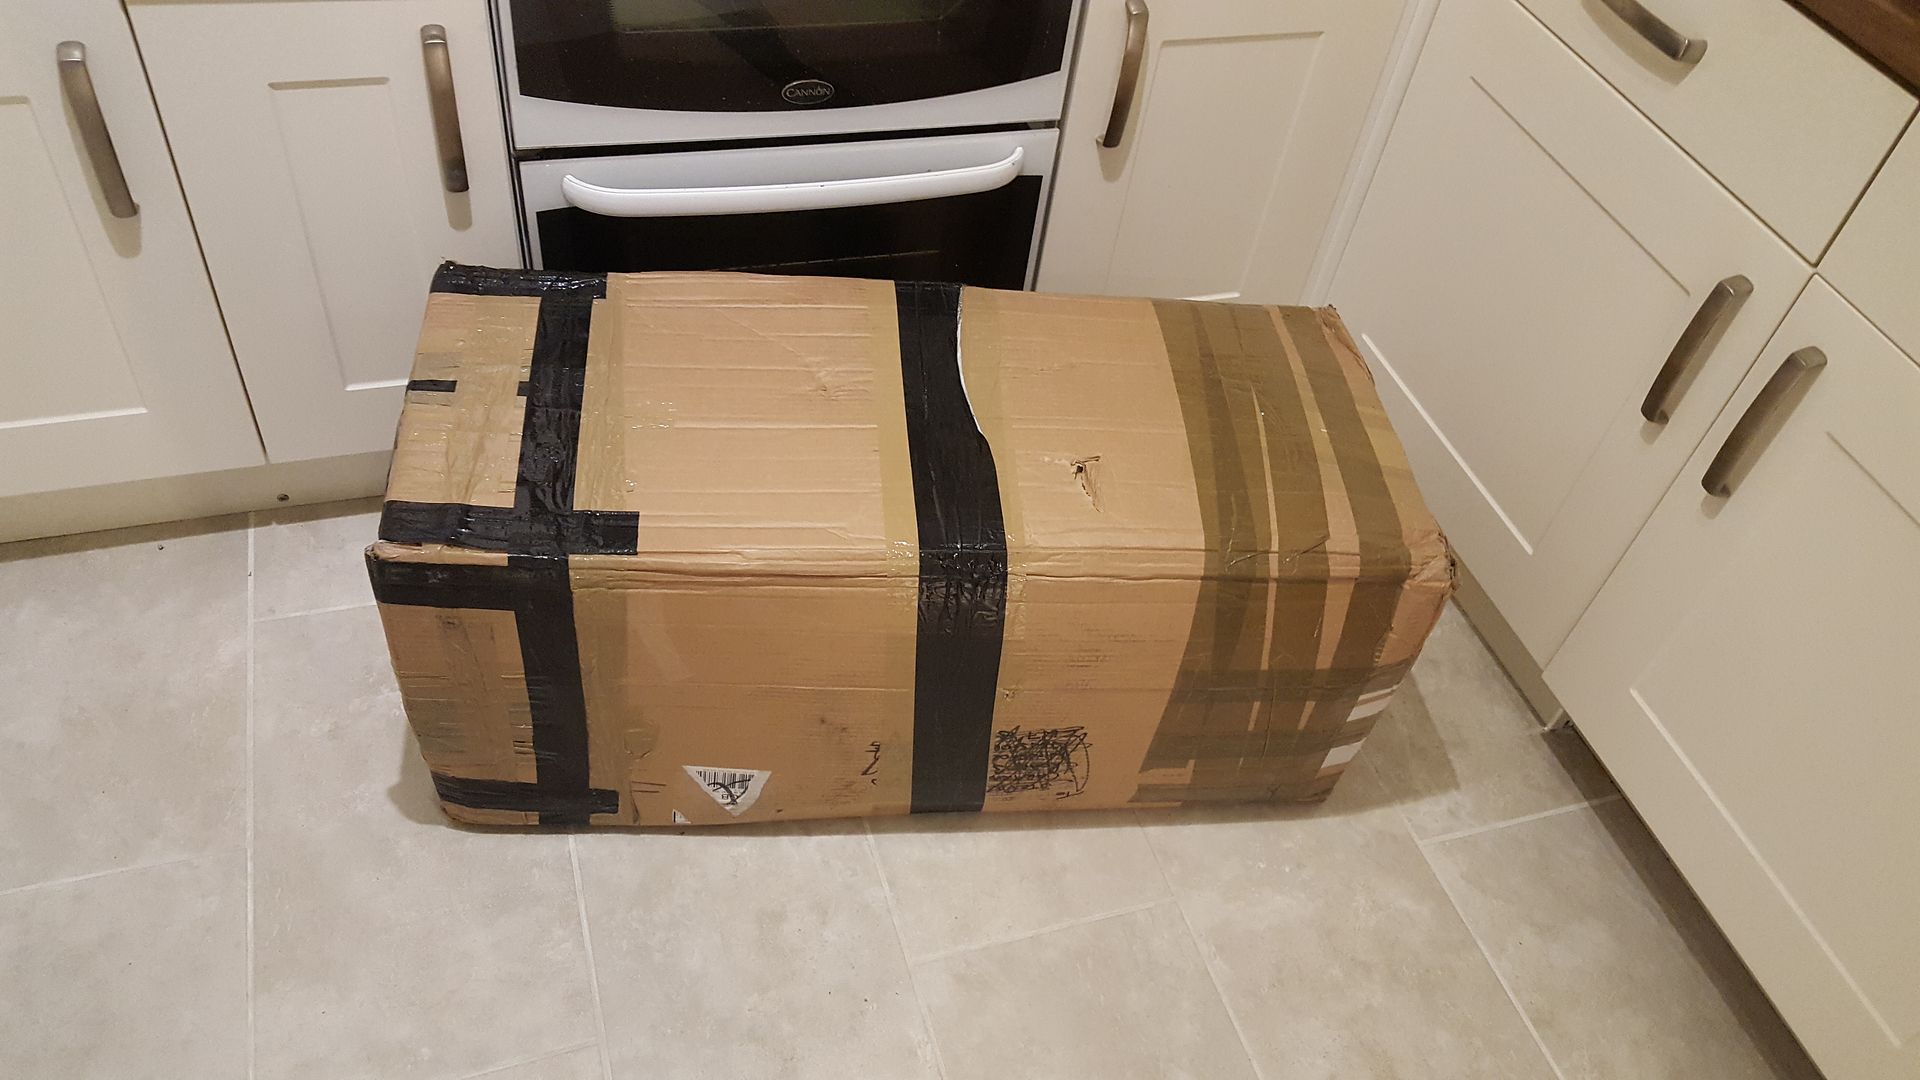
The silencer is made by Techcraft motorsport and is a good size, and repackable
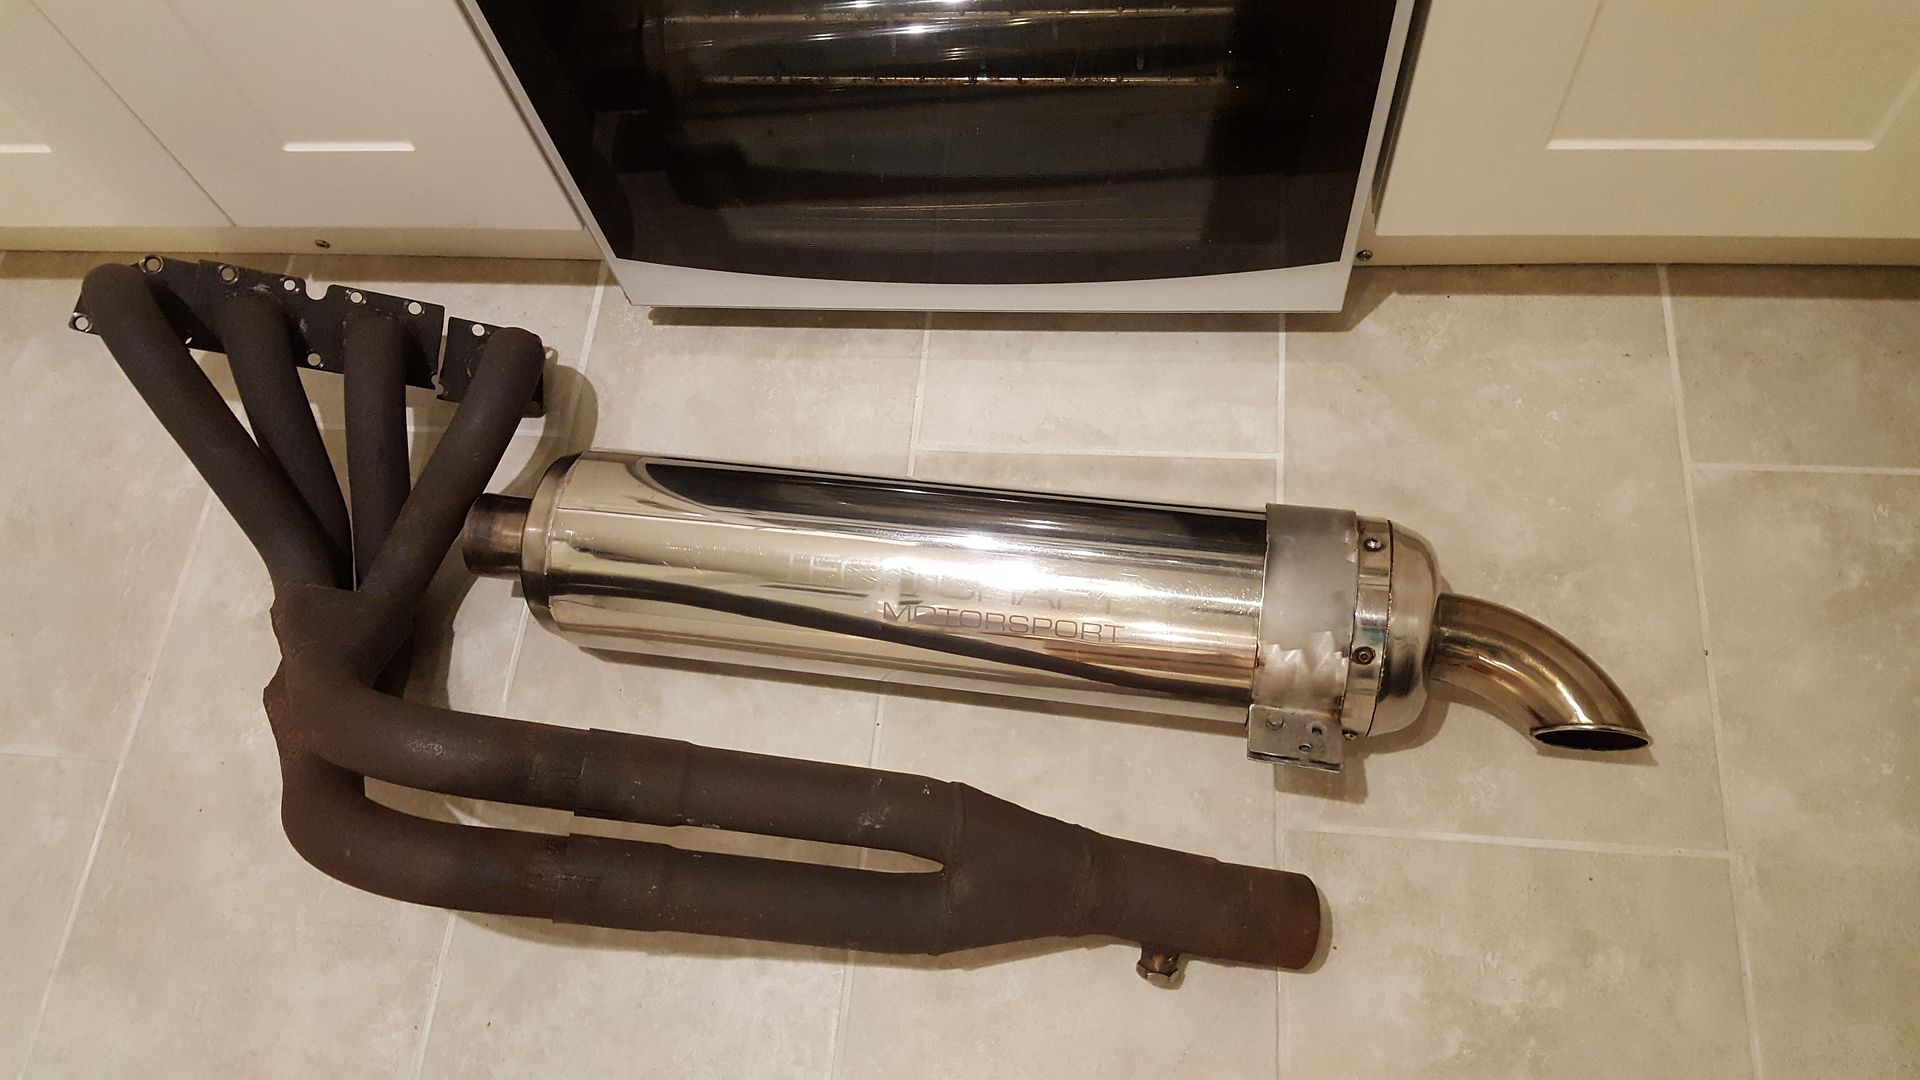
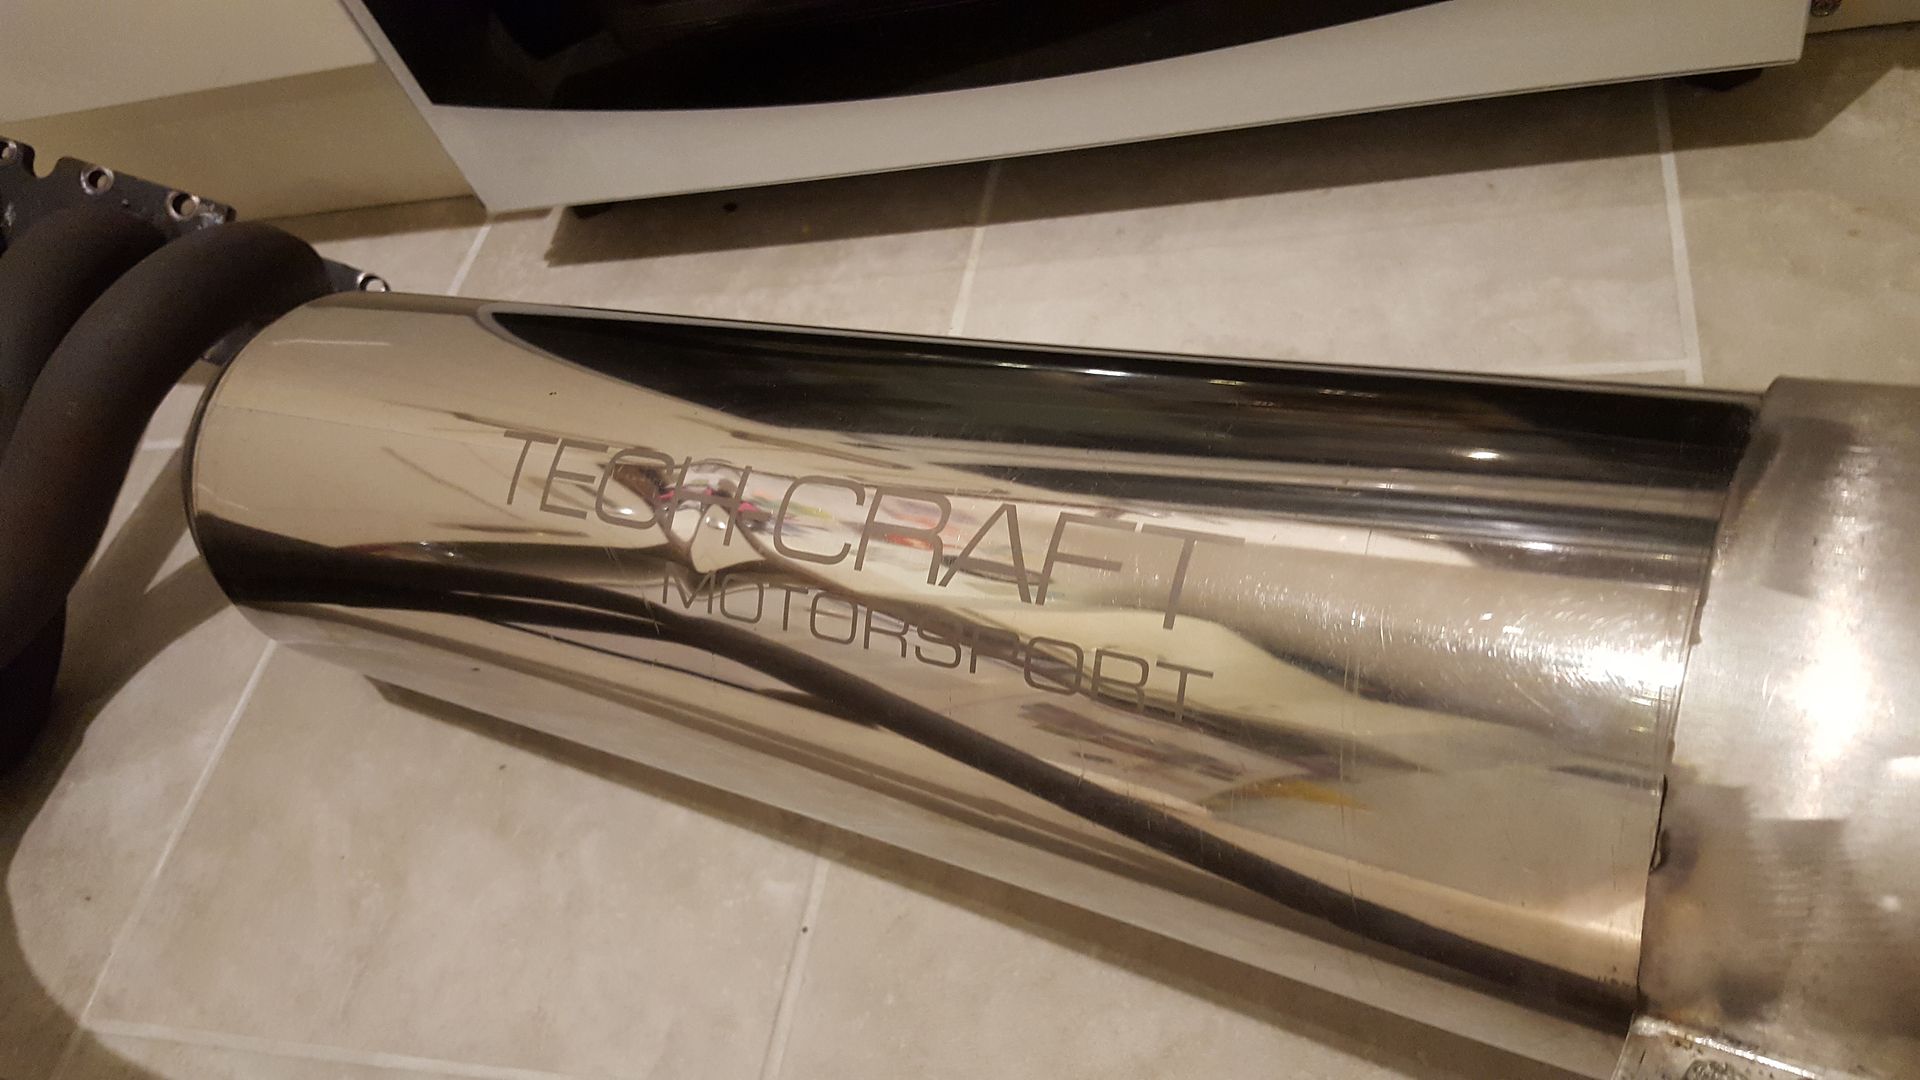
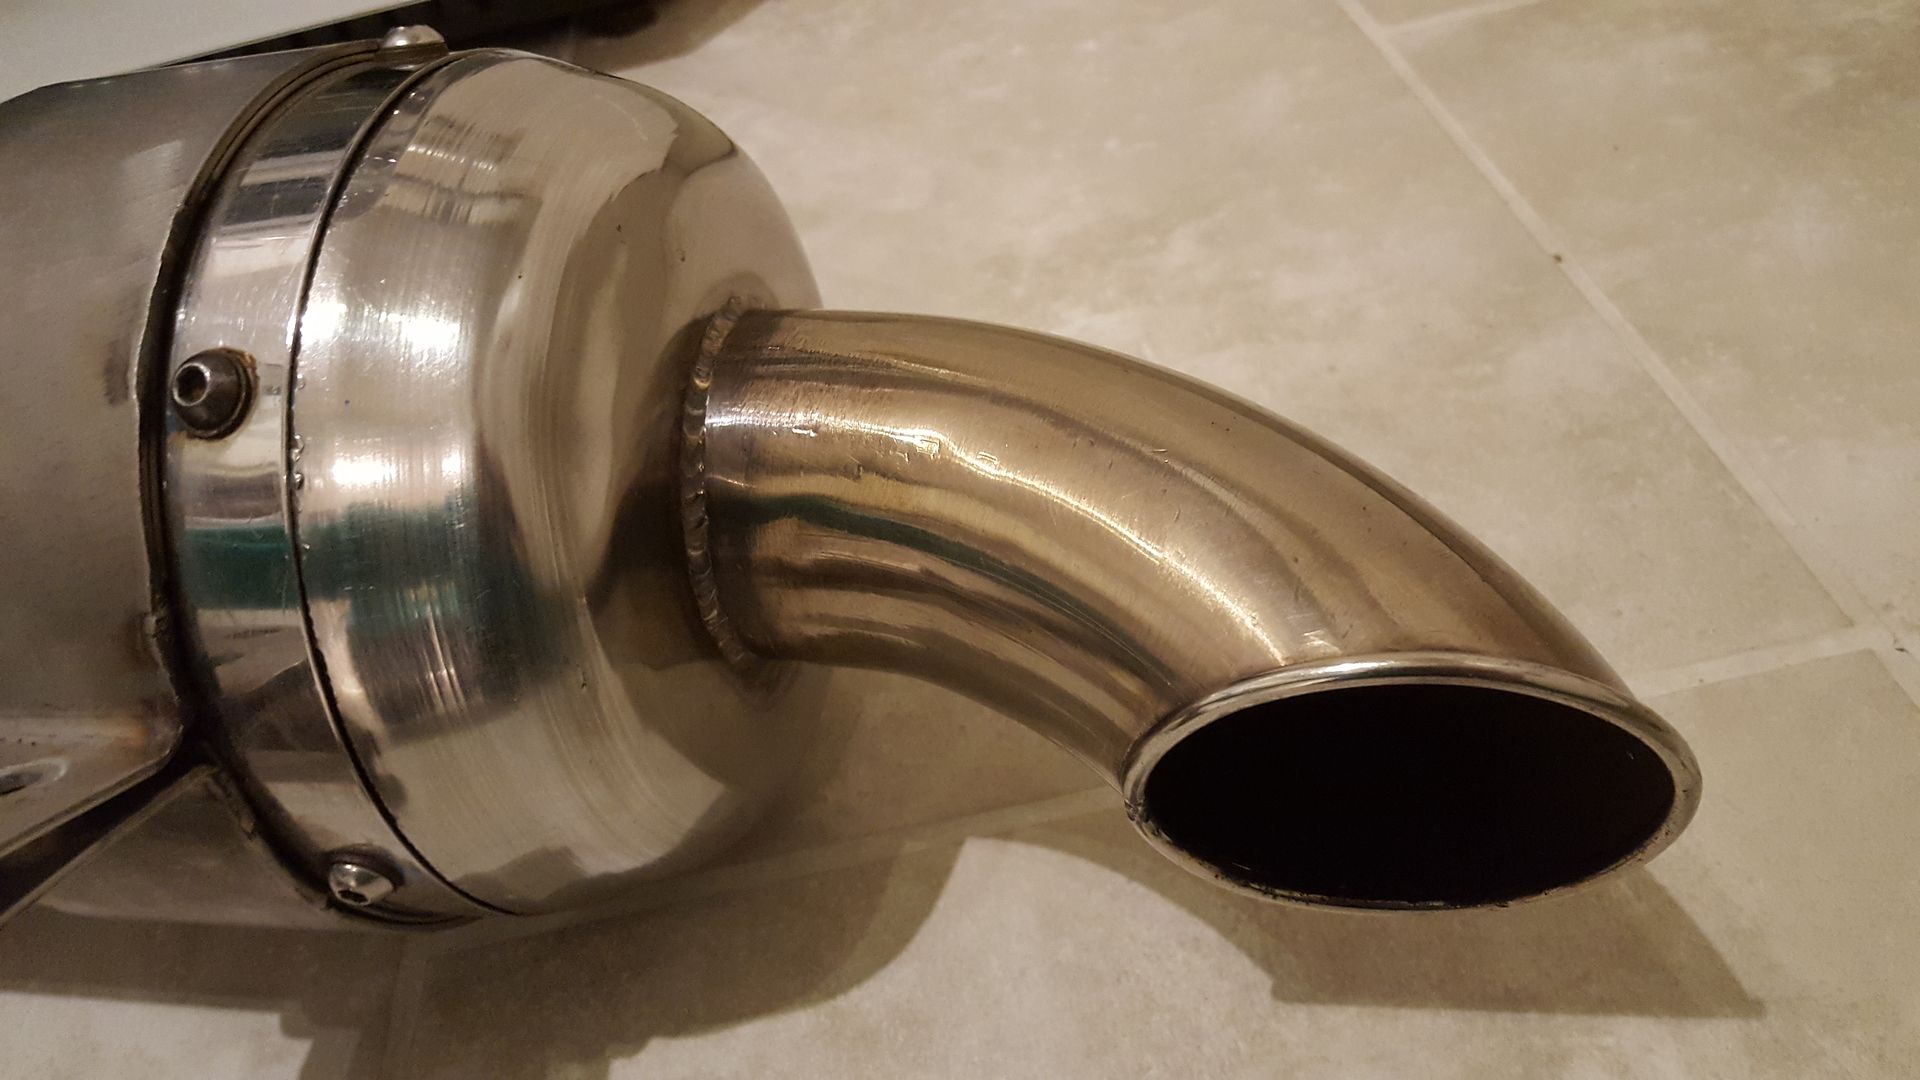
It's a full 2.5inch system
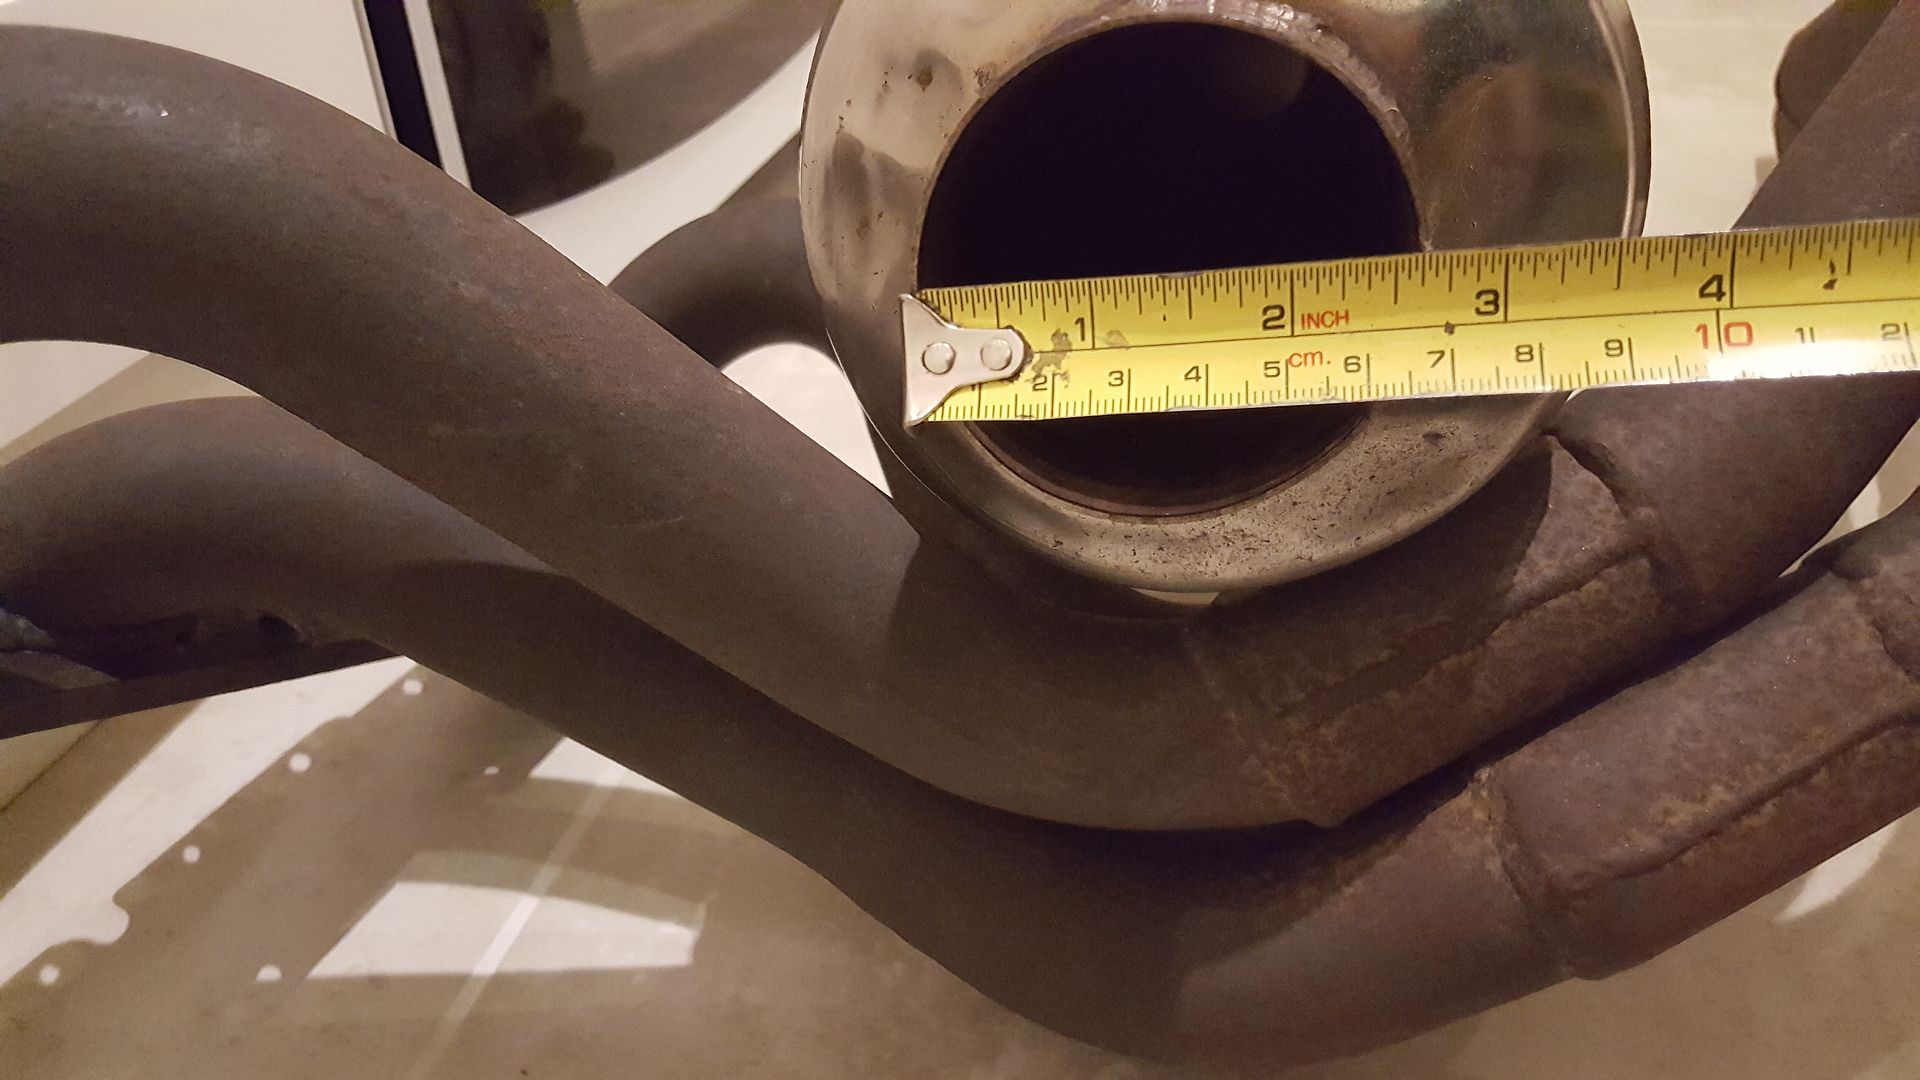
He used it on track days so noise shouldn't
be too bad
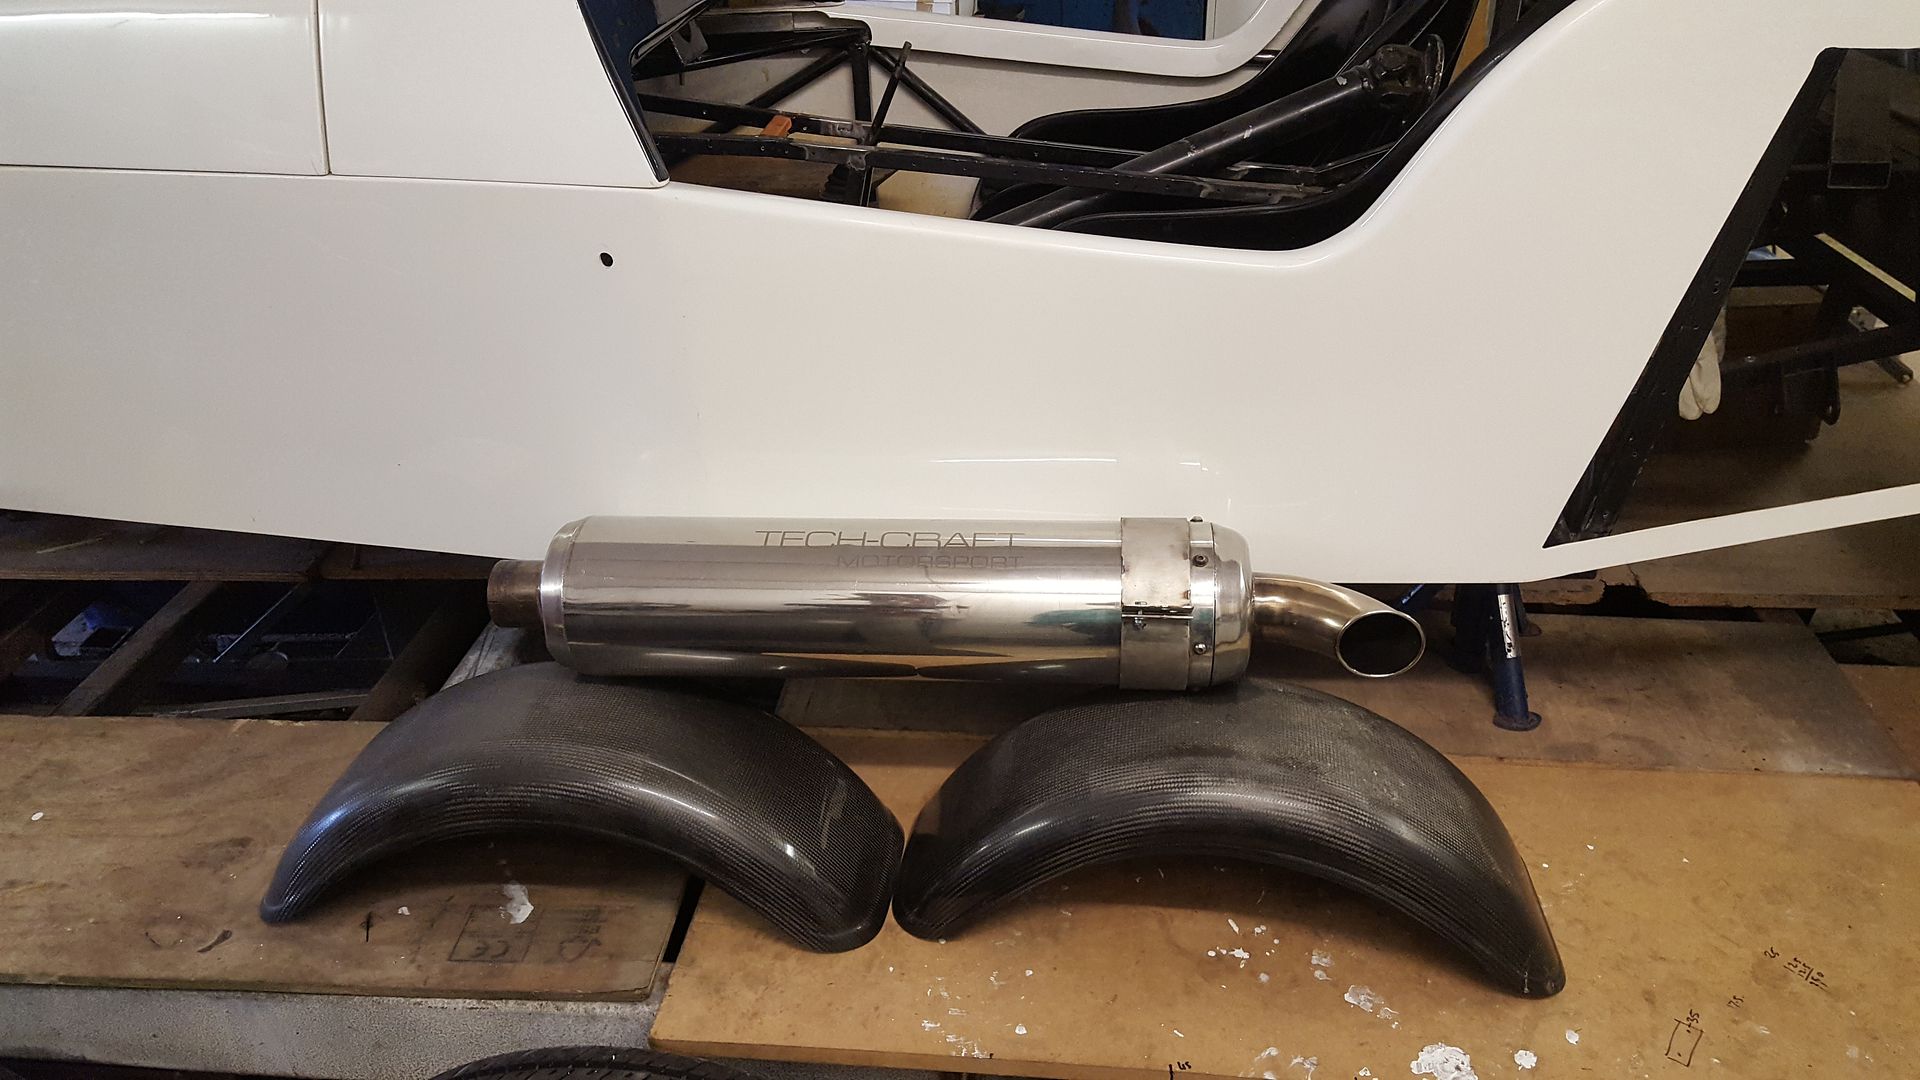
Last week I went on a bit of a road trip to pick up another purchase. A lathe
I was not prepared for how heavy it was going to be! Lmao. Thank God I took my engine crane with me! We separated it into pieces, but even then I
couldn't even move a leg, let alone lift it! The suds tray which is usually just sheet metal is nearly an inch thick cast iron!
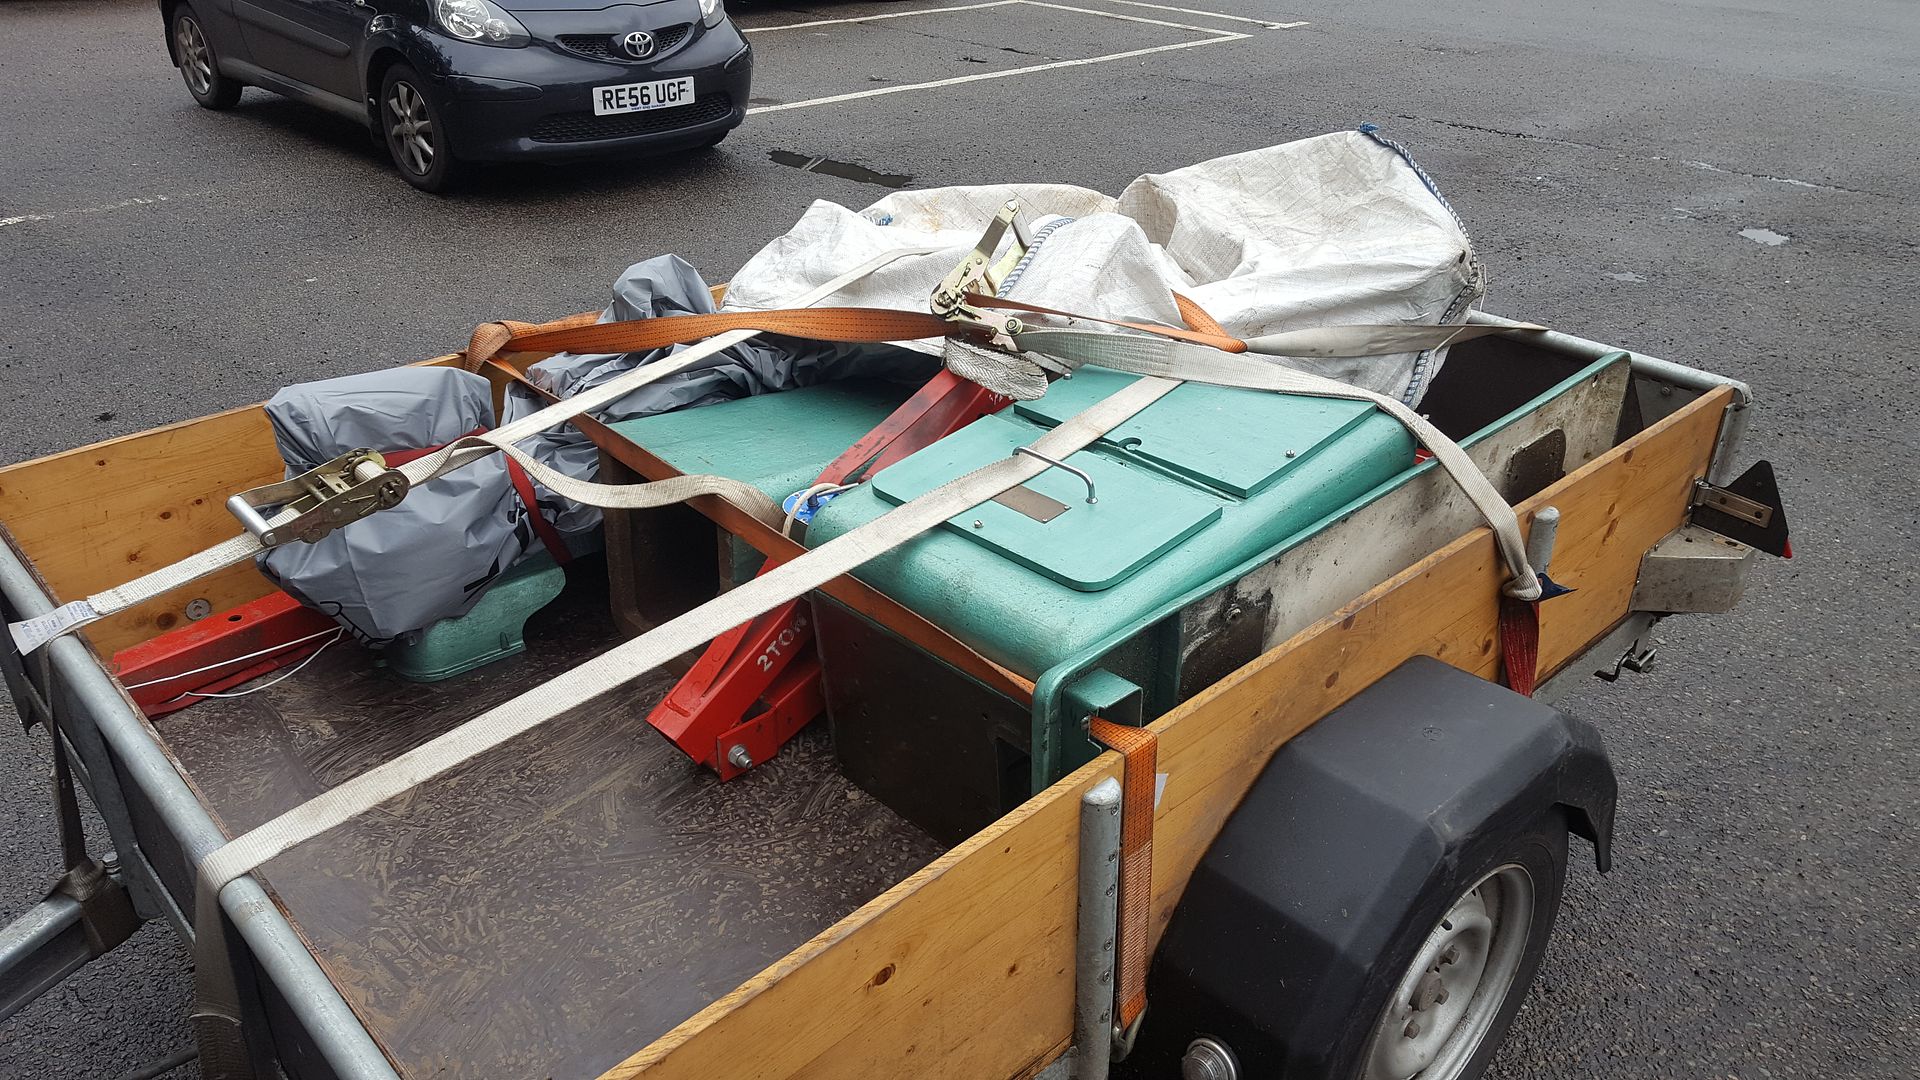
Look how thick cast the legs Are!
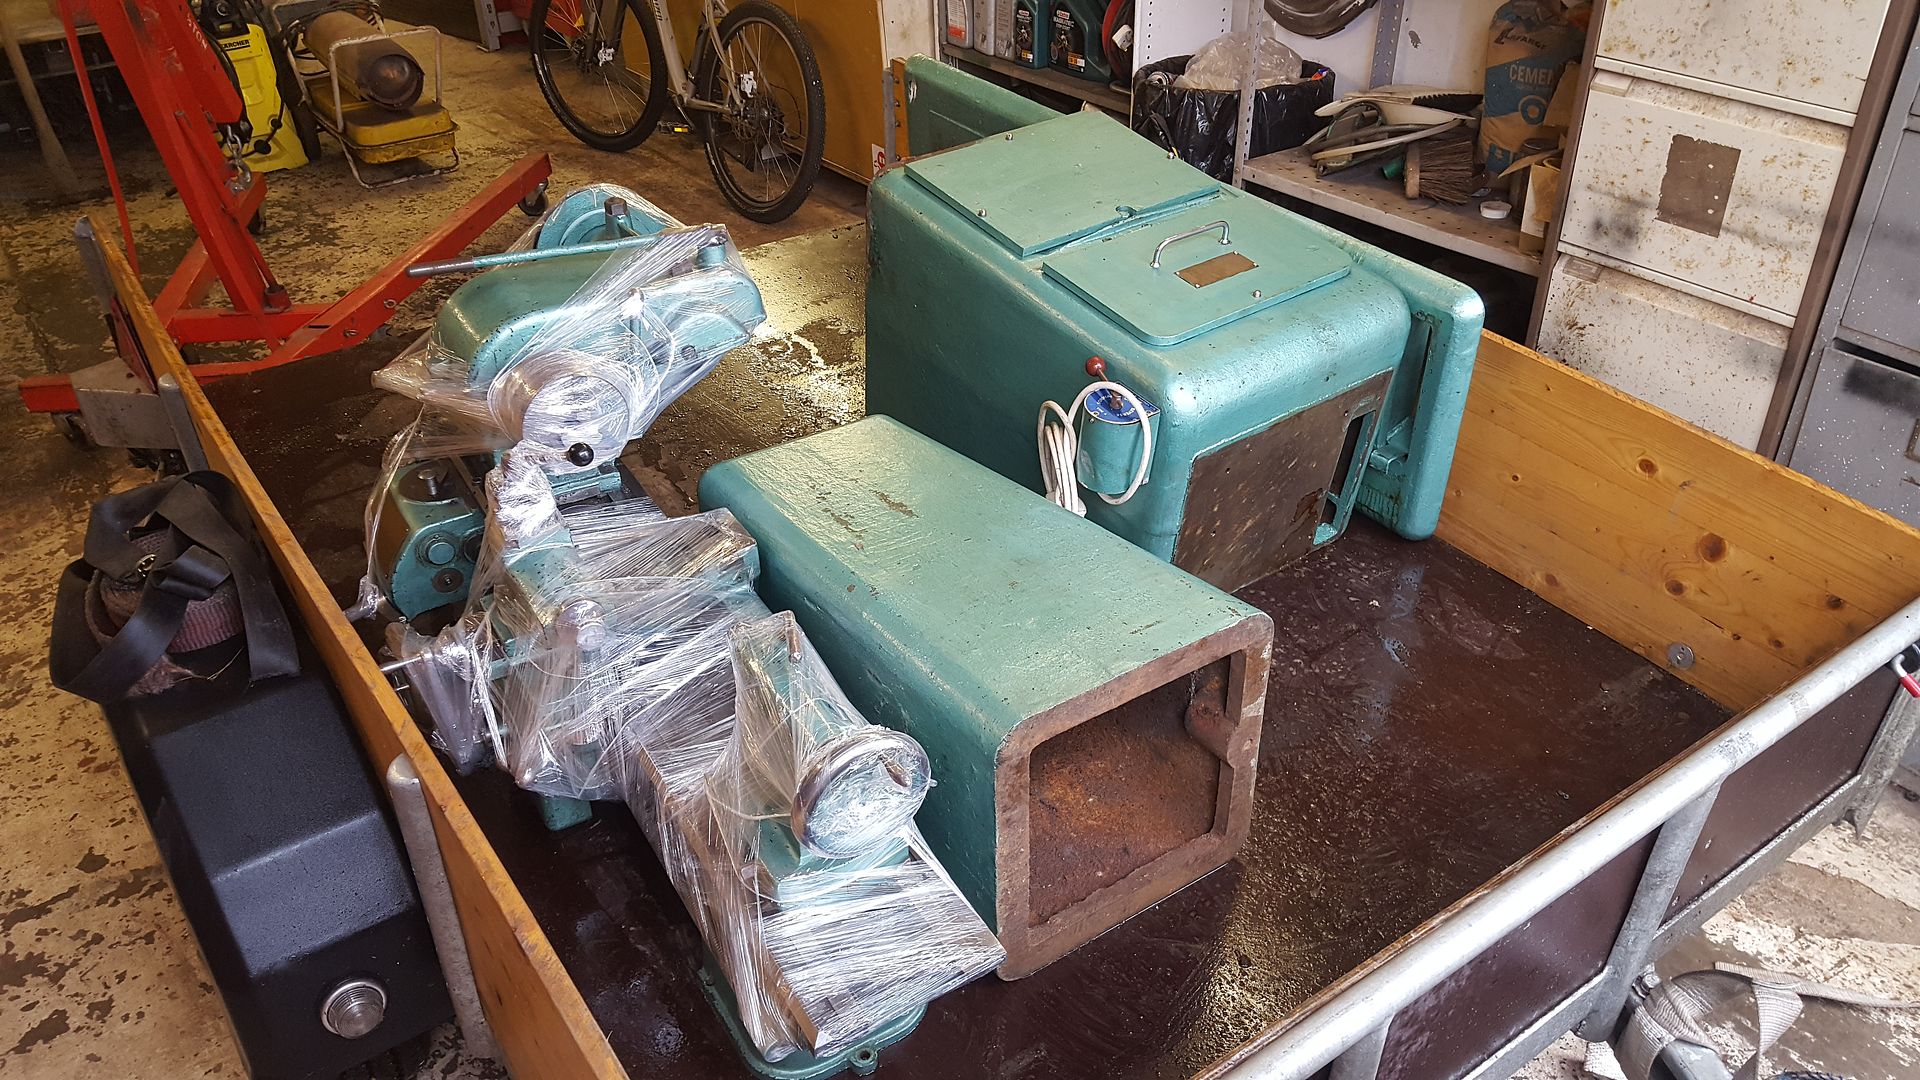
And here it is, it's a 1950ish Fortis Model E/B 12x24inch bed, powered longitudinal and cross feed, full thread cutting gearbox (imperial
though), clutch, backgears, loads of accessorie, 3 and 4 jaw chucks and faceplates, quick change tool post, fixed steady,

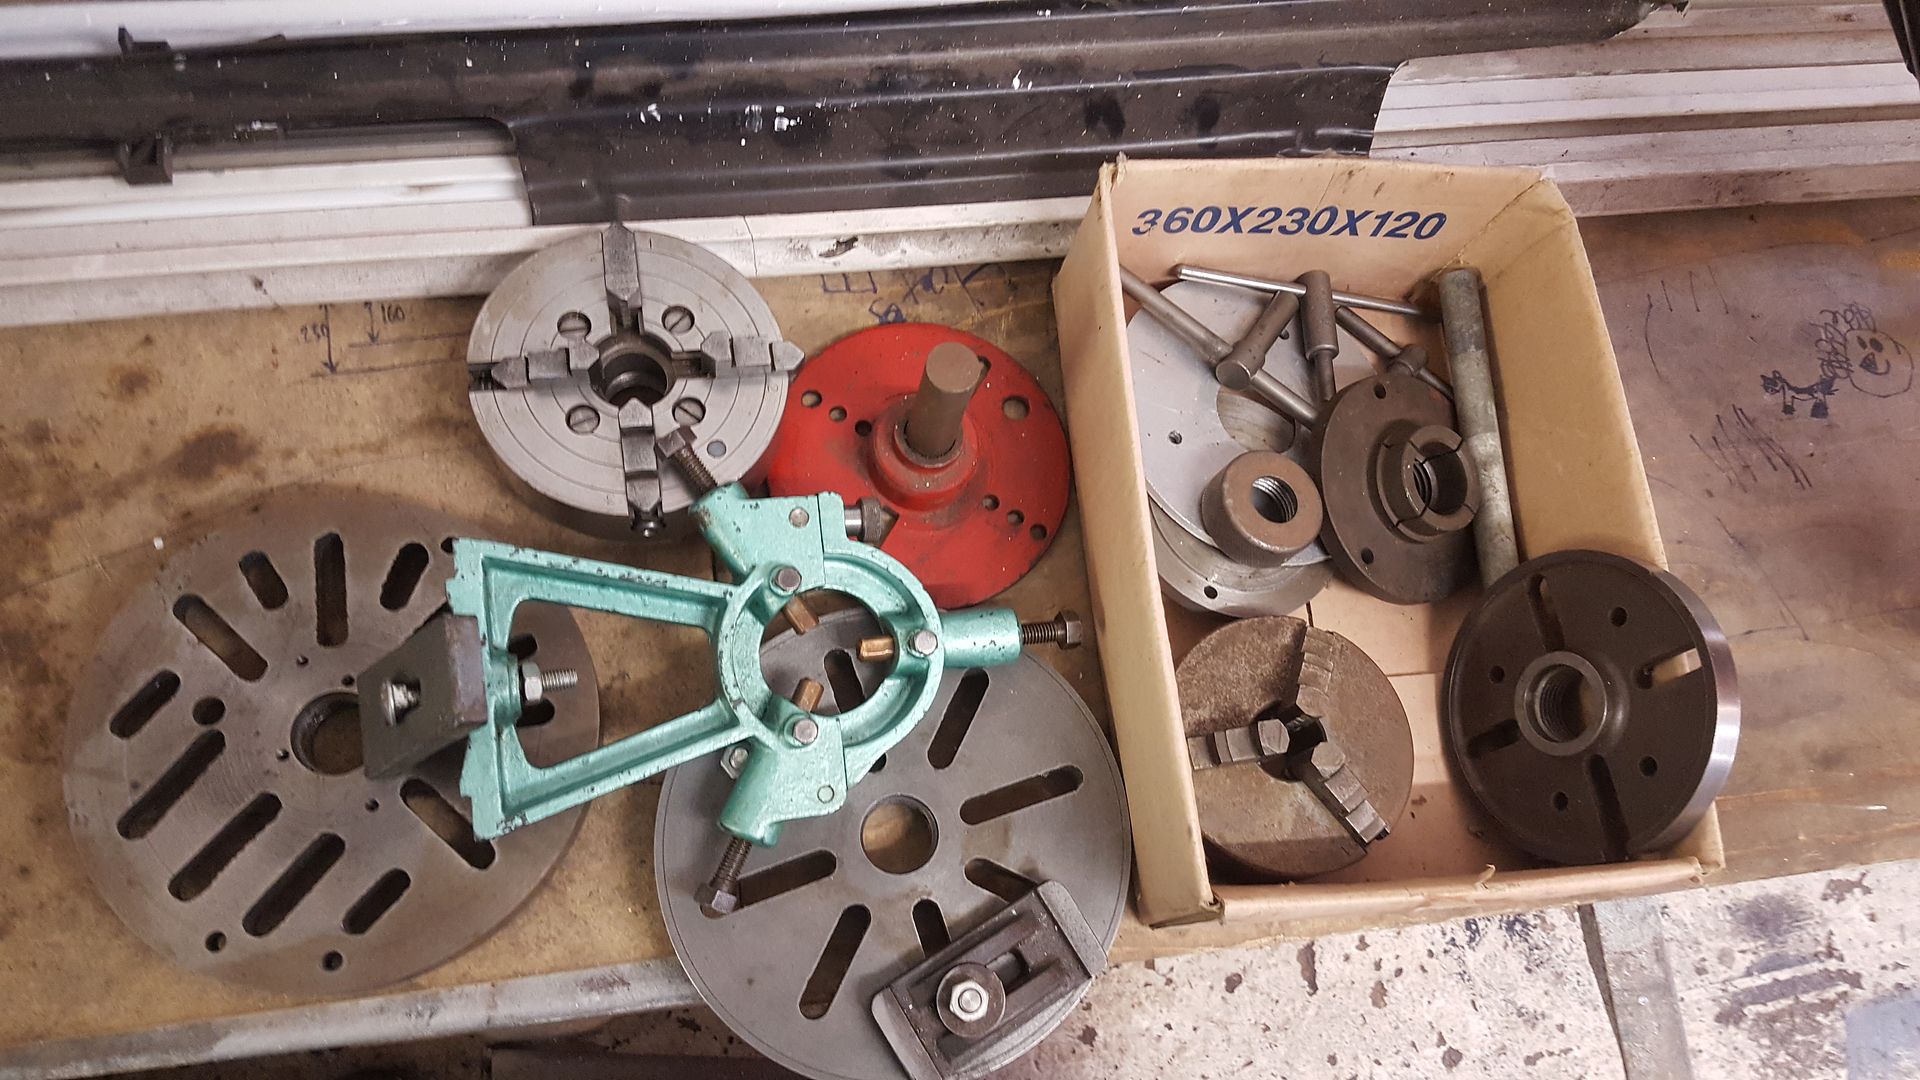
Gonna have lots of fun with this
alistairolsen - 15/3/18 at 10:28 AM
Lathes are properly awesome, so many little jobs suddenly become possible, or much easier.
Looks in nice condition too!
super-ron - 18/3/18 at 12:15 PM
Most definitely, i doubt I will be putting it to it's full potential, but for things like making up spacers instead of loads if washers, or
shortening bolts or rods, it's going to make such a nicer job. And the option of creating pieces from scratch is now there too when I get the
hang of it
super-ron - 12/4/18 at 07:48 PM
Still haven't had any time to work on the kit car, I've been working 70hour weeks the last few weeks.
Been on some cool cars though, just made a complete wiring loom for a 1974 Bmw 2002 this last week.
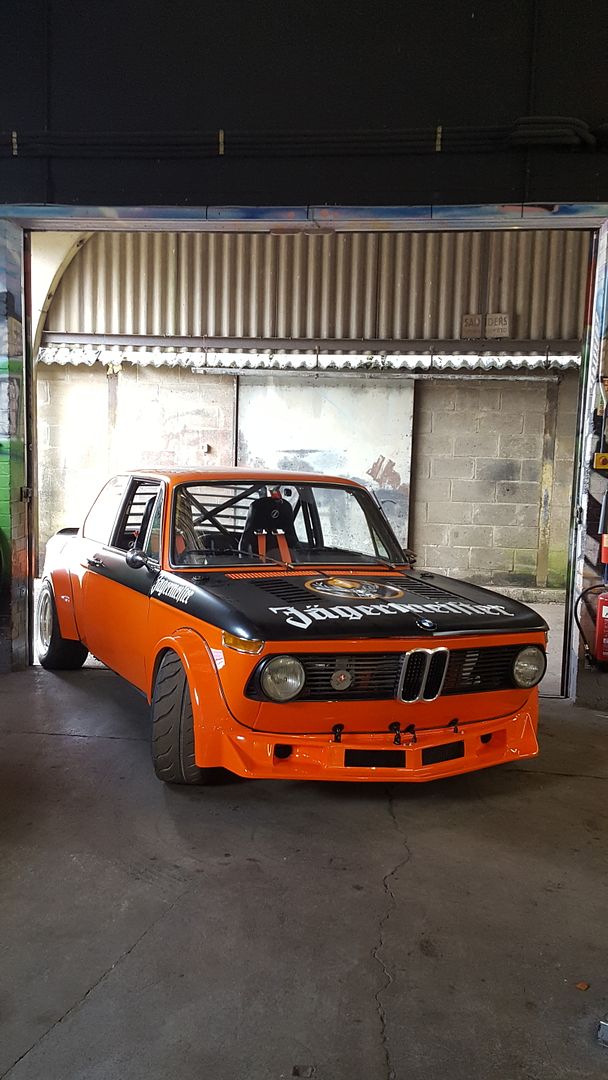
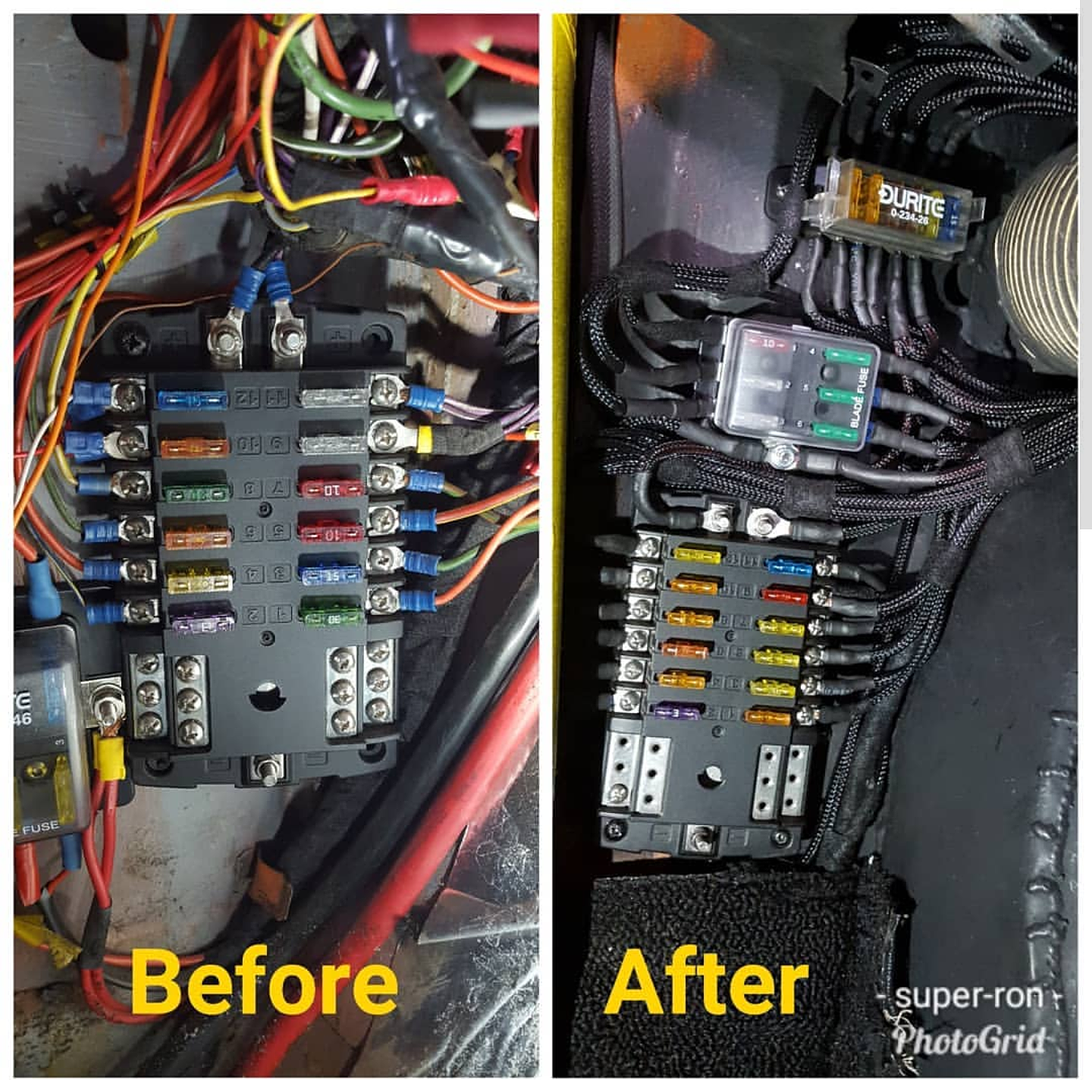
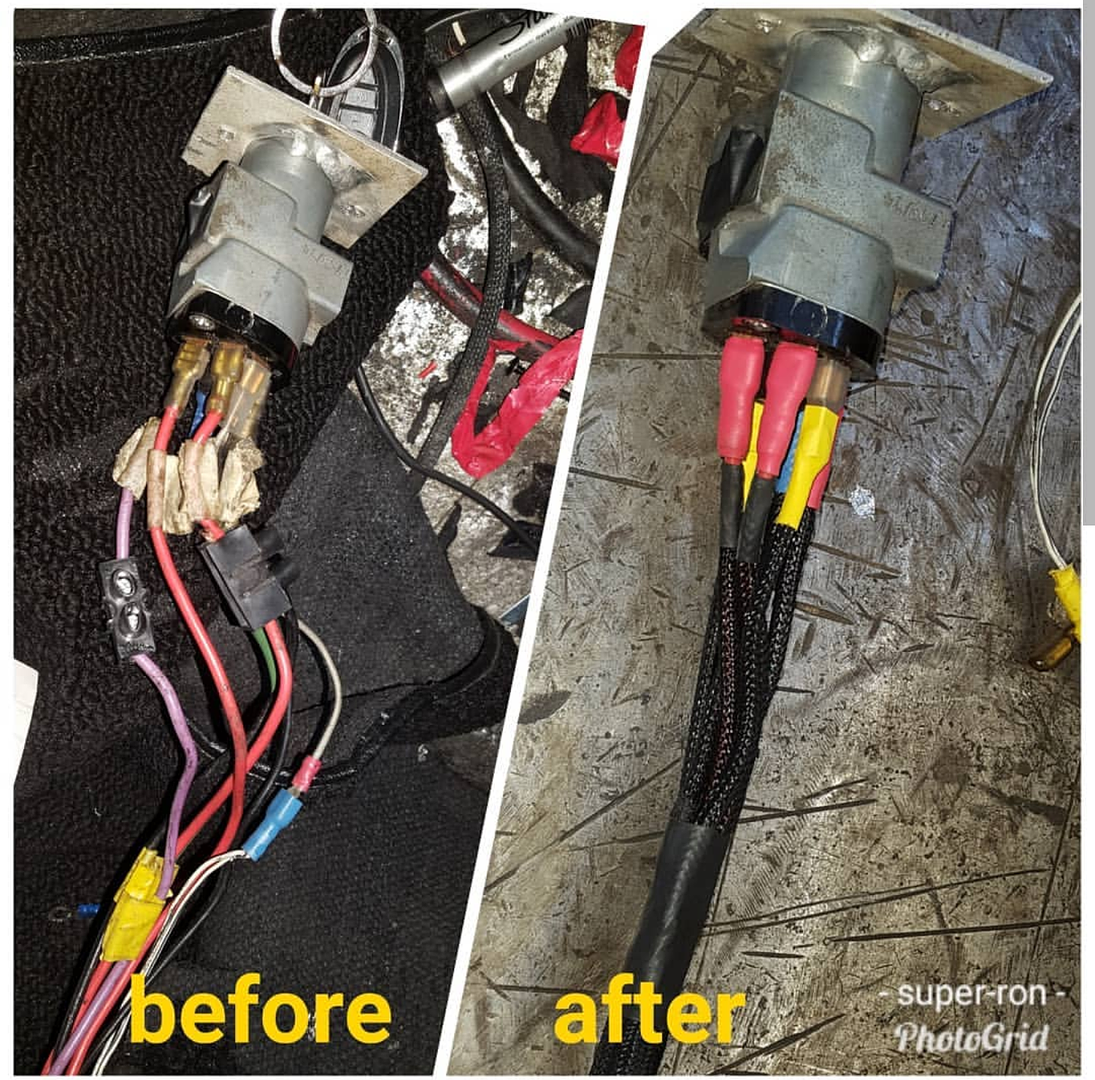
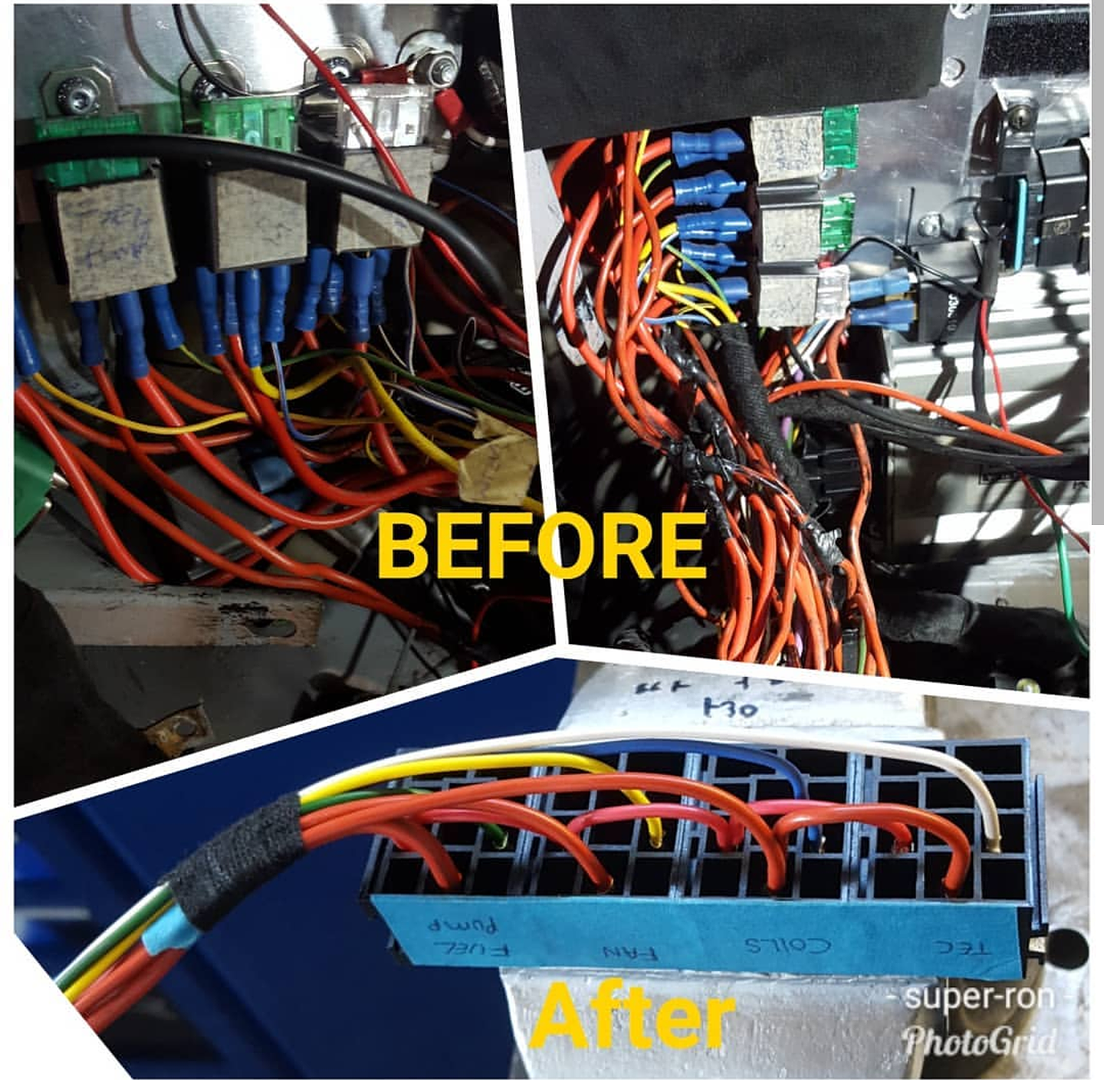

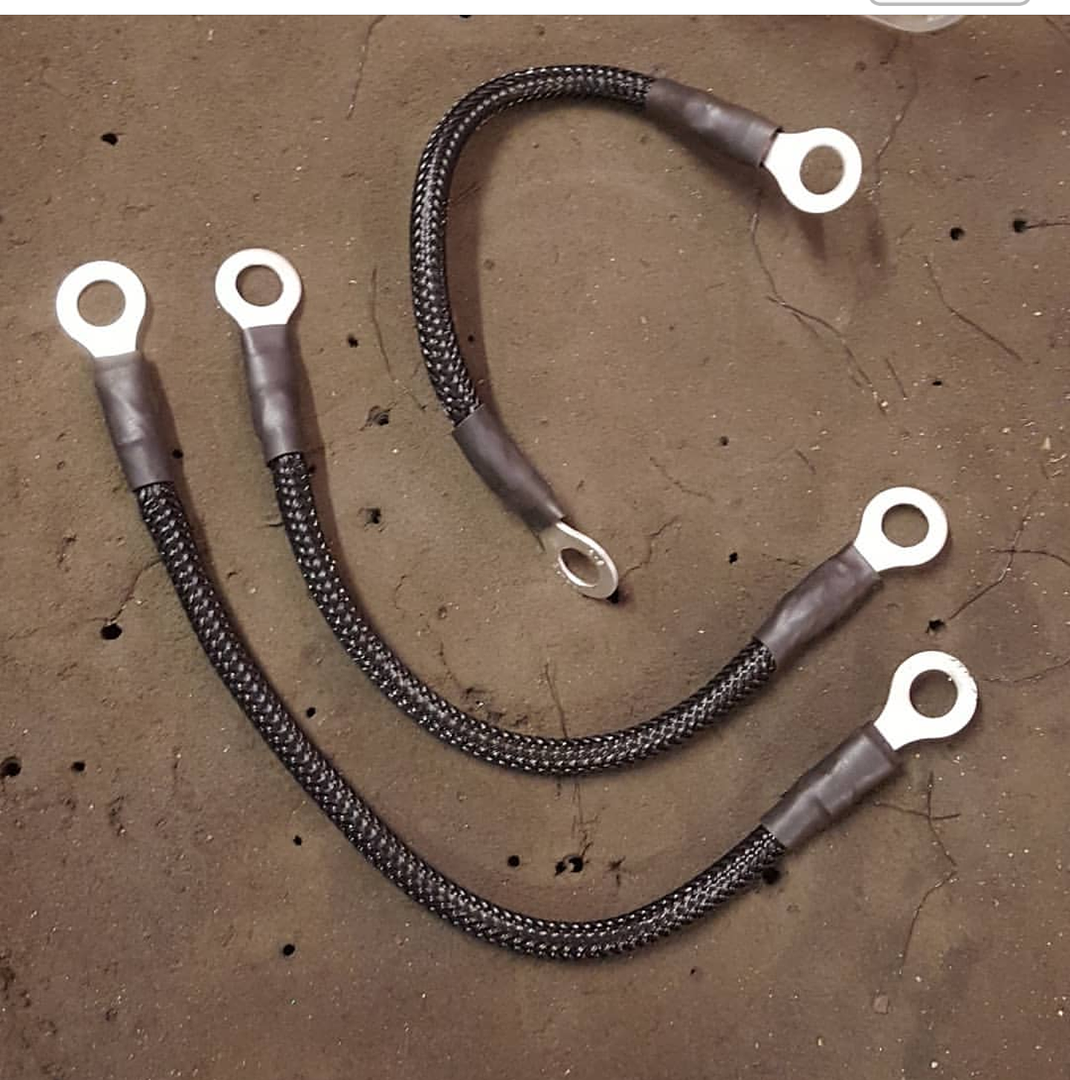
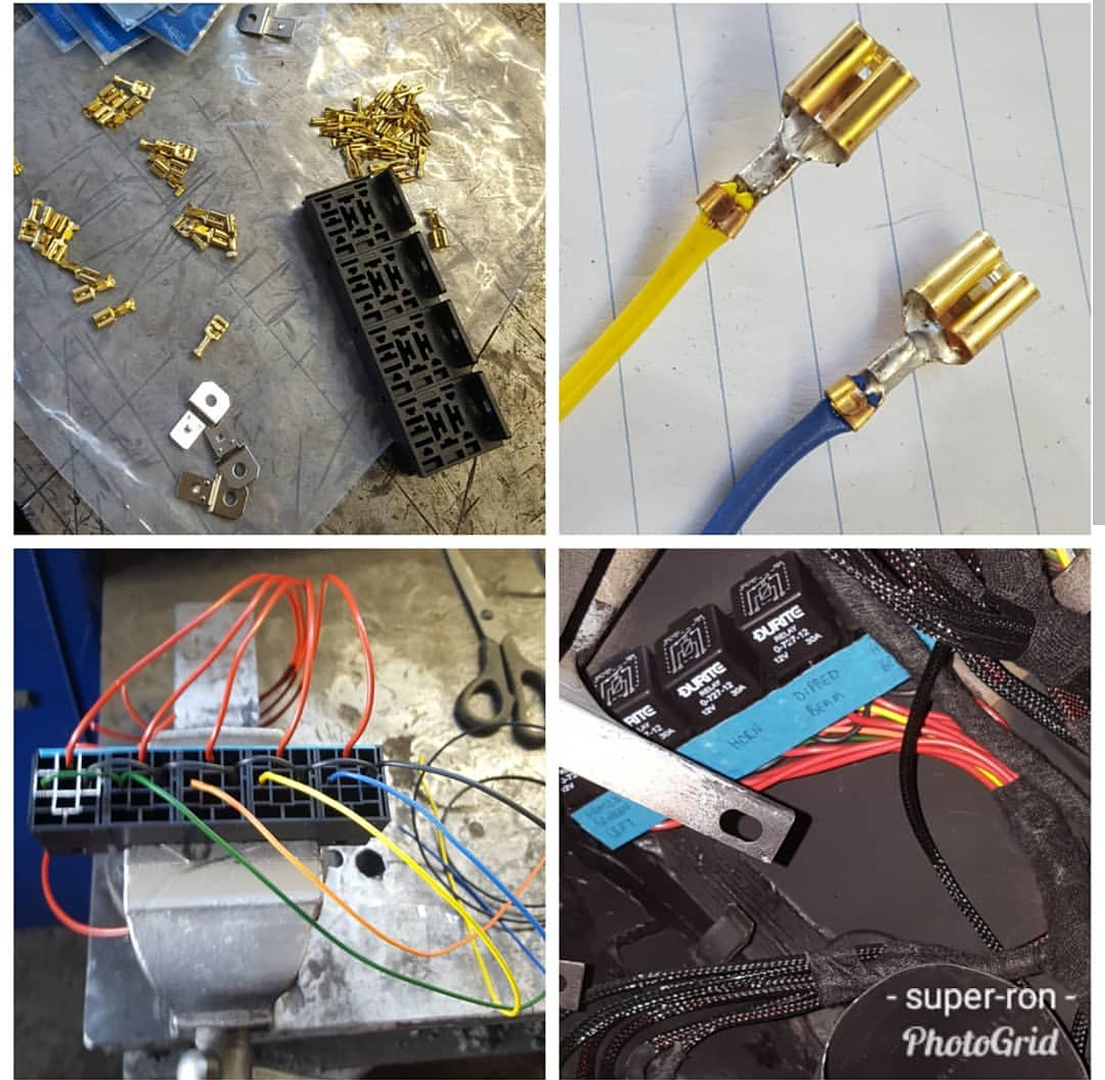
I designed it all from scratch
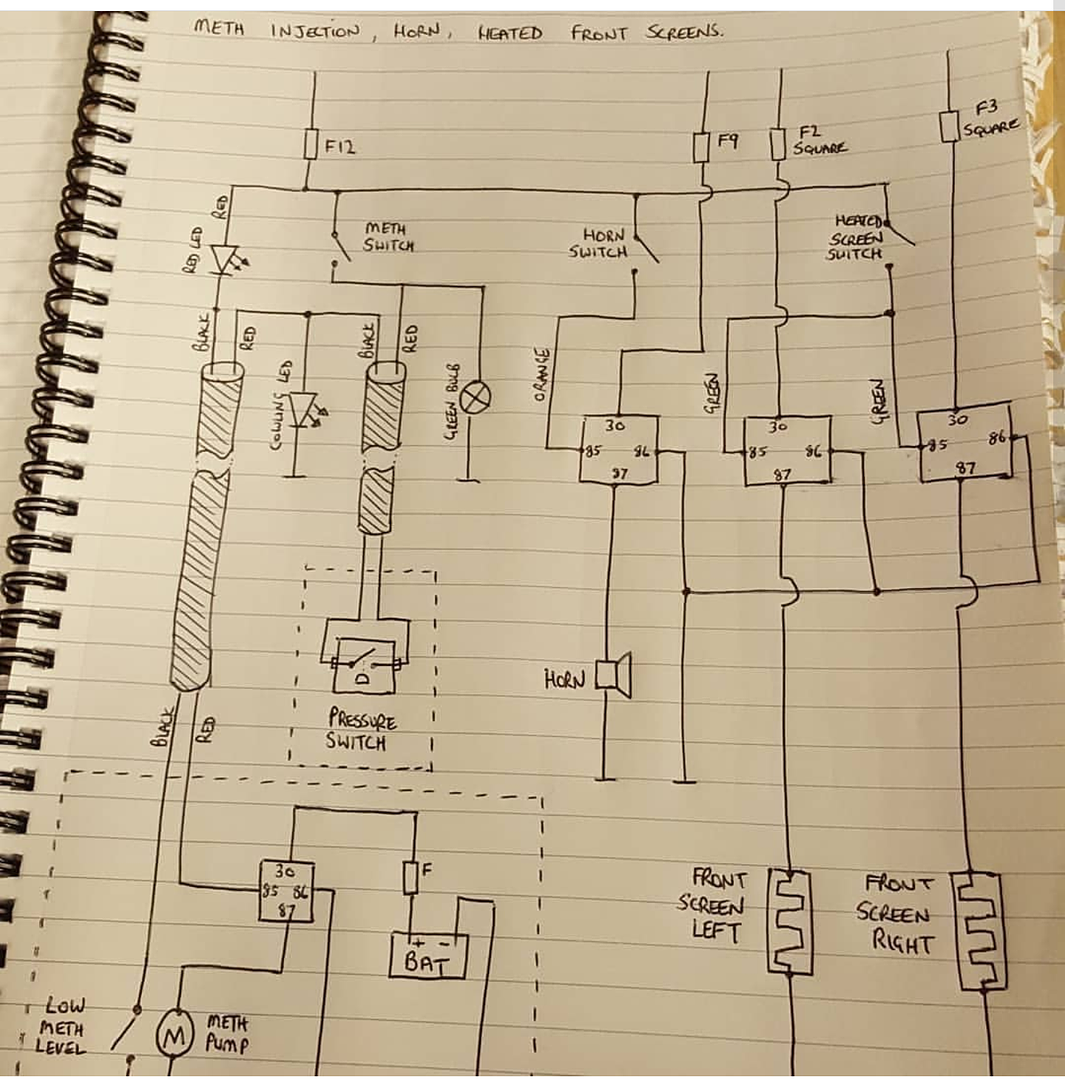
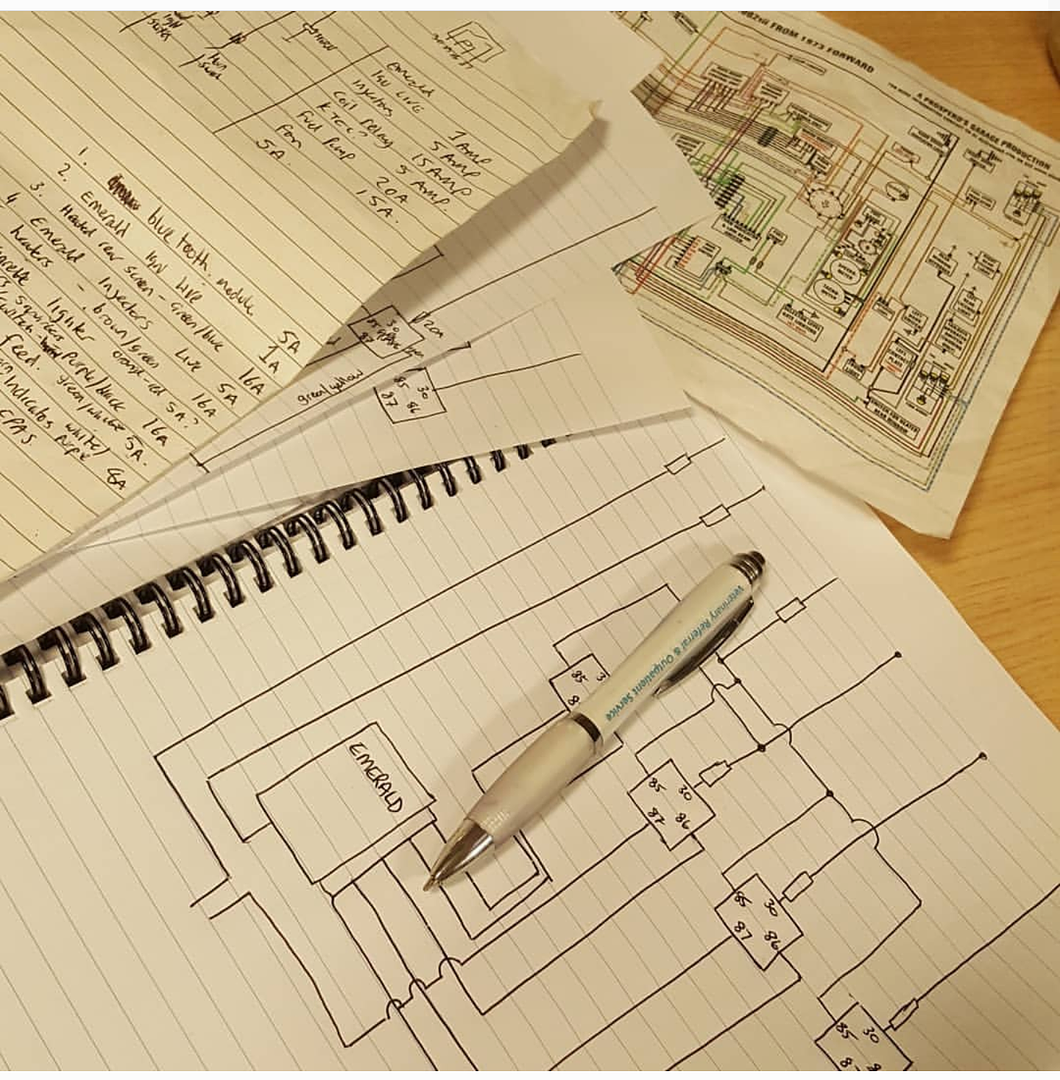
All good fun
I have still been creeping on eBay with the Zortex in mind. With the shallow Westfield sump I have it does leave the oil filter a bit vonerable,
Westfields all seem to have remote filters so I kept a look out and this one popped up for a c20xe for Ł25
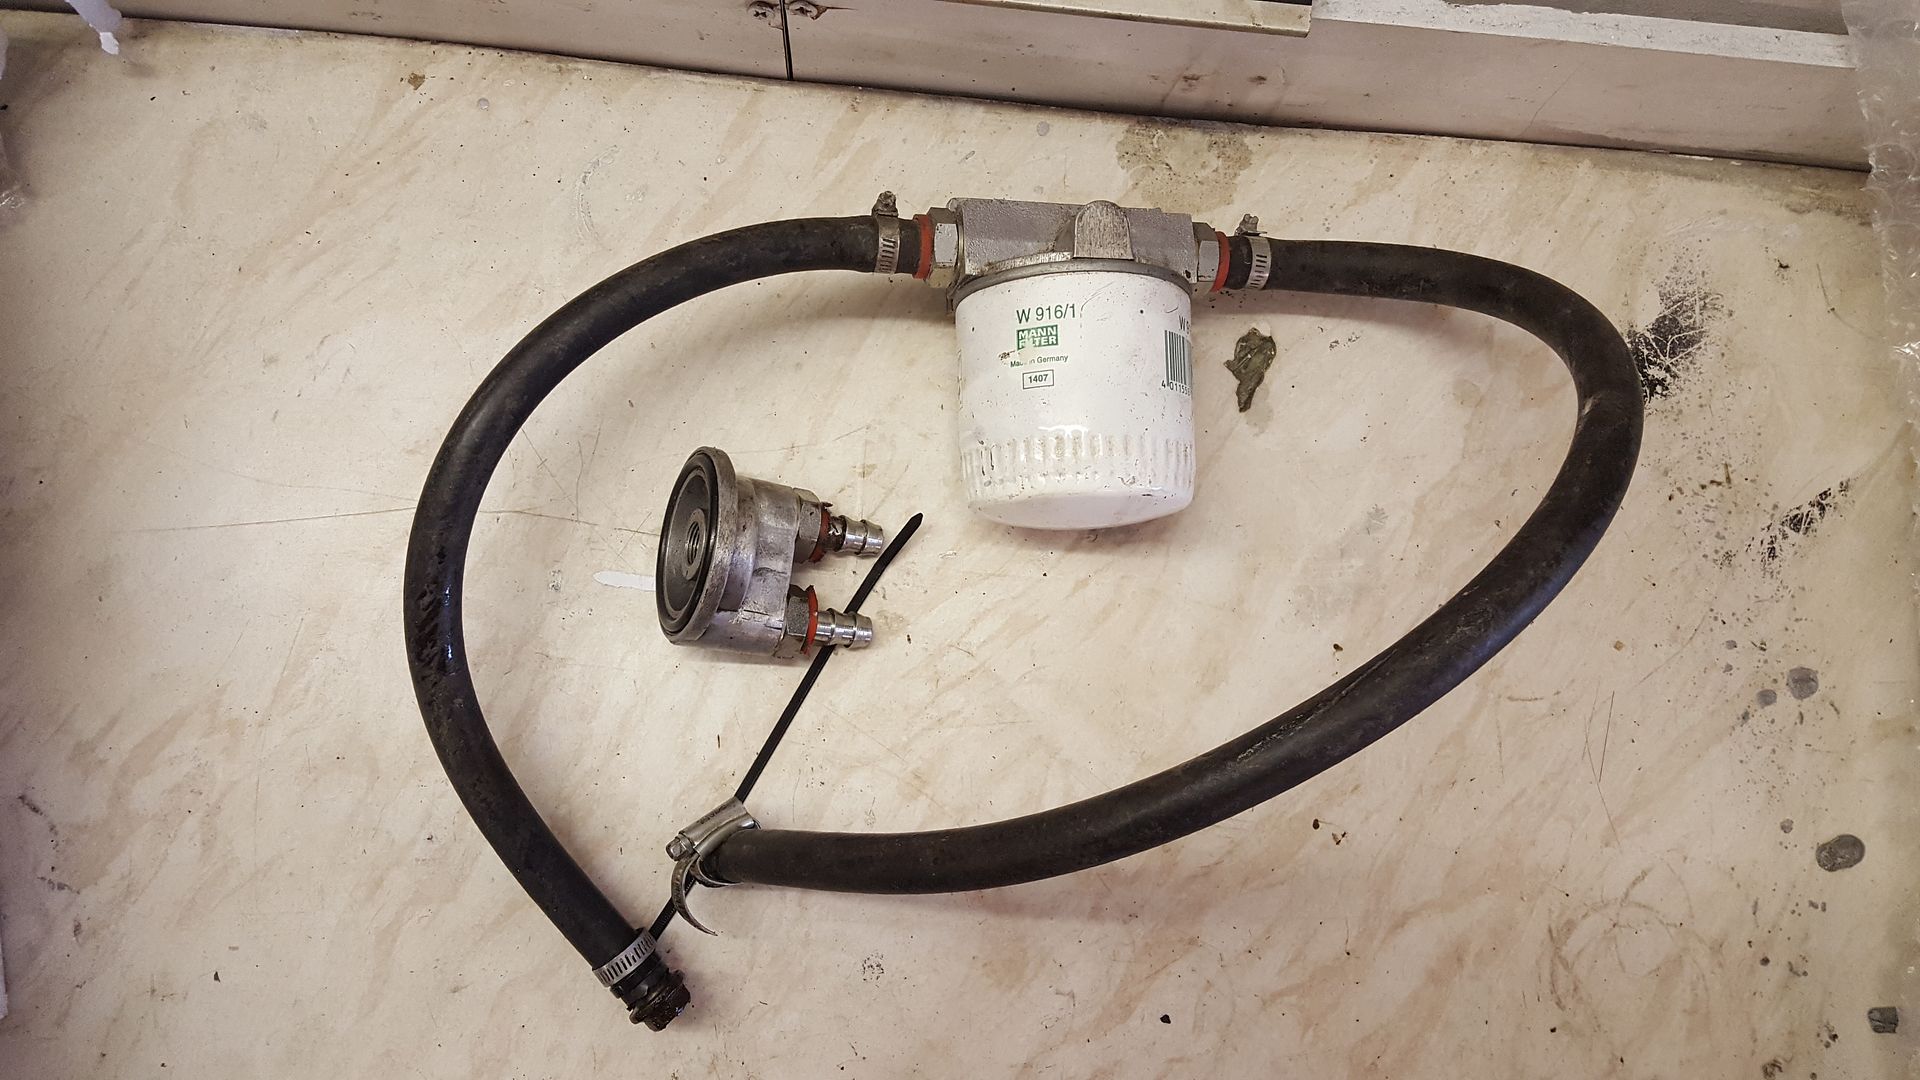
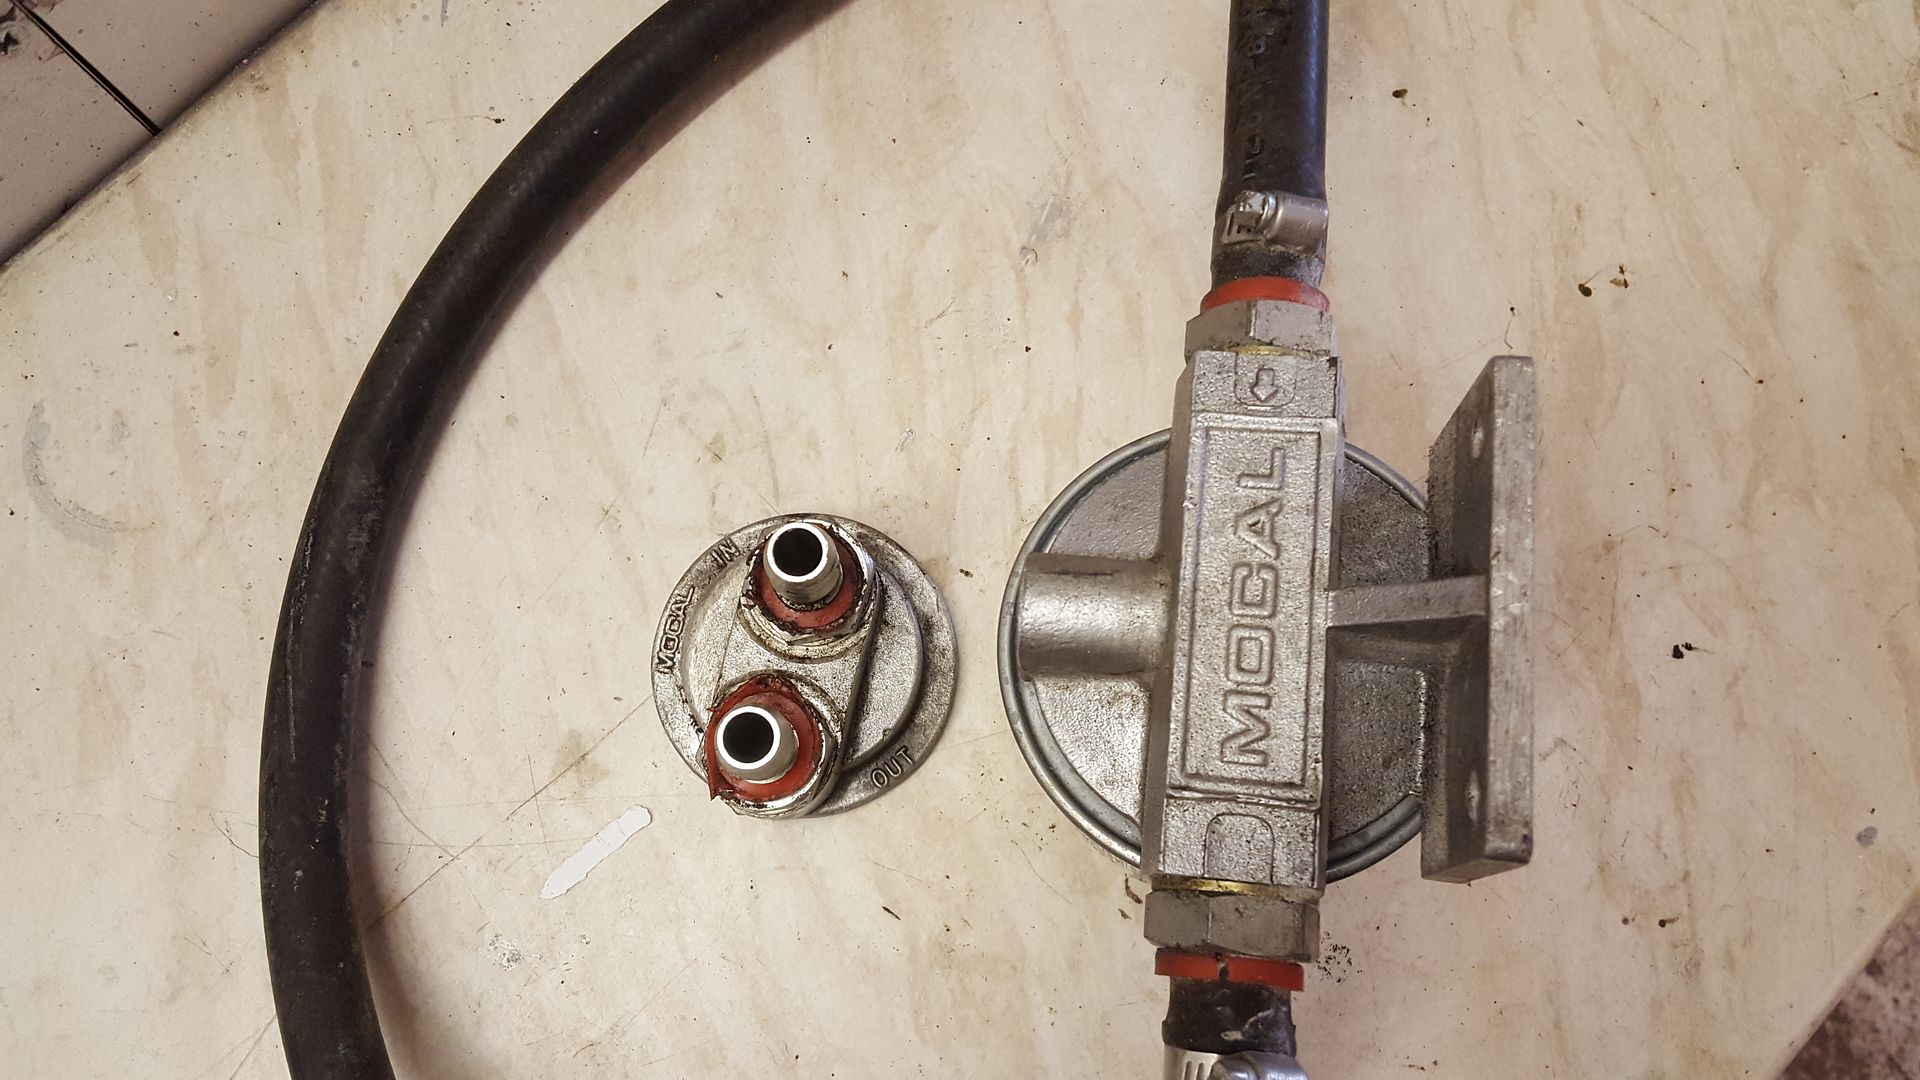
I spotted on a Facebook group someone was selling all his left over bits so did a deal on a injection pump, alloy bracket, sytec filter, and the
module for the fog light to pass the iva, Ł40 posted all in.
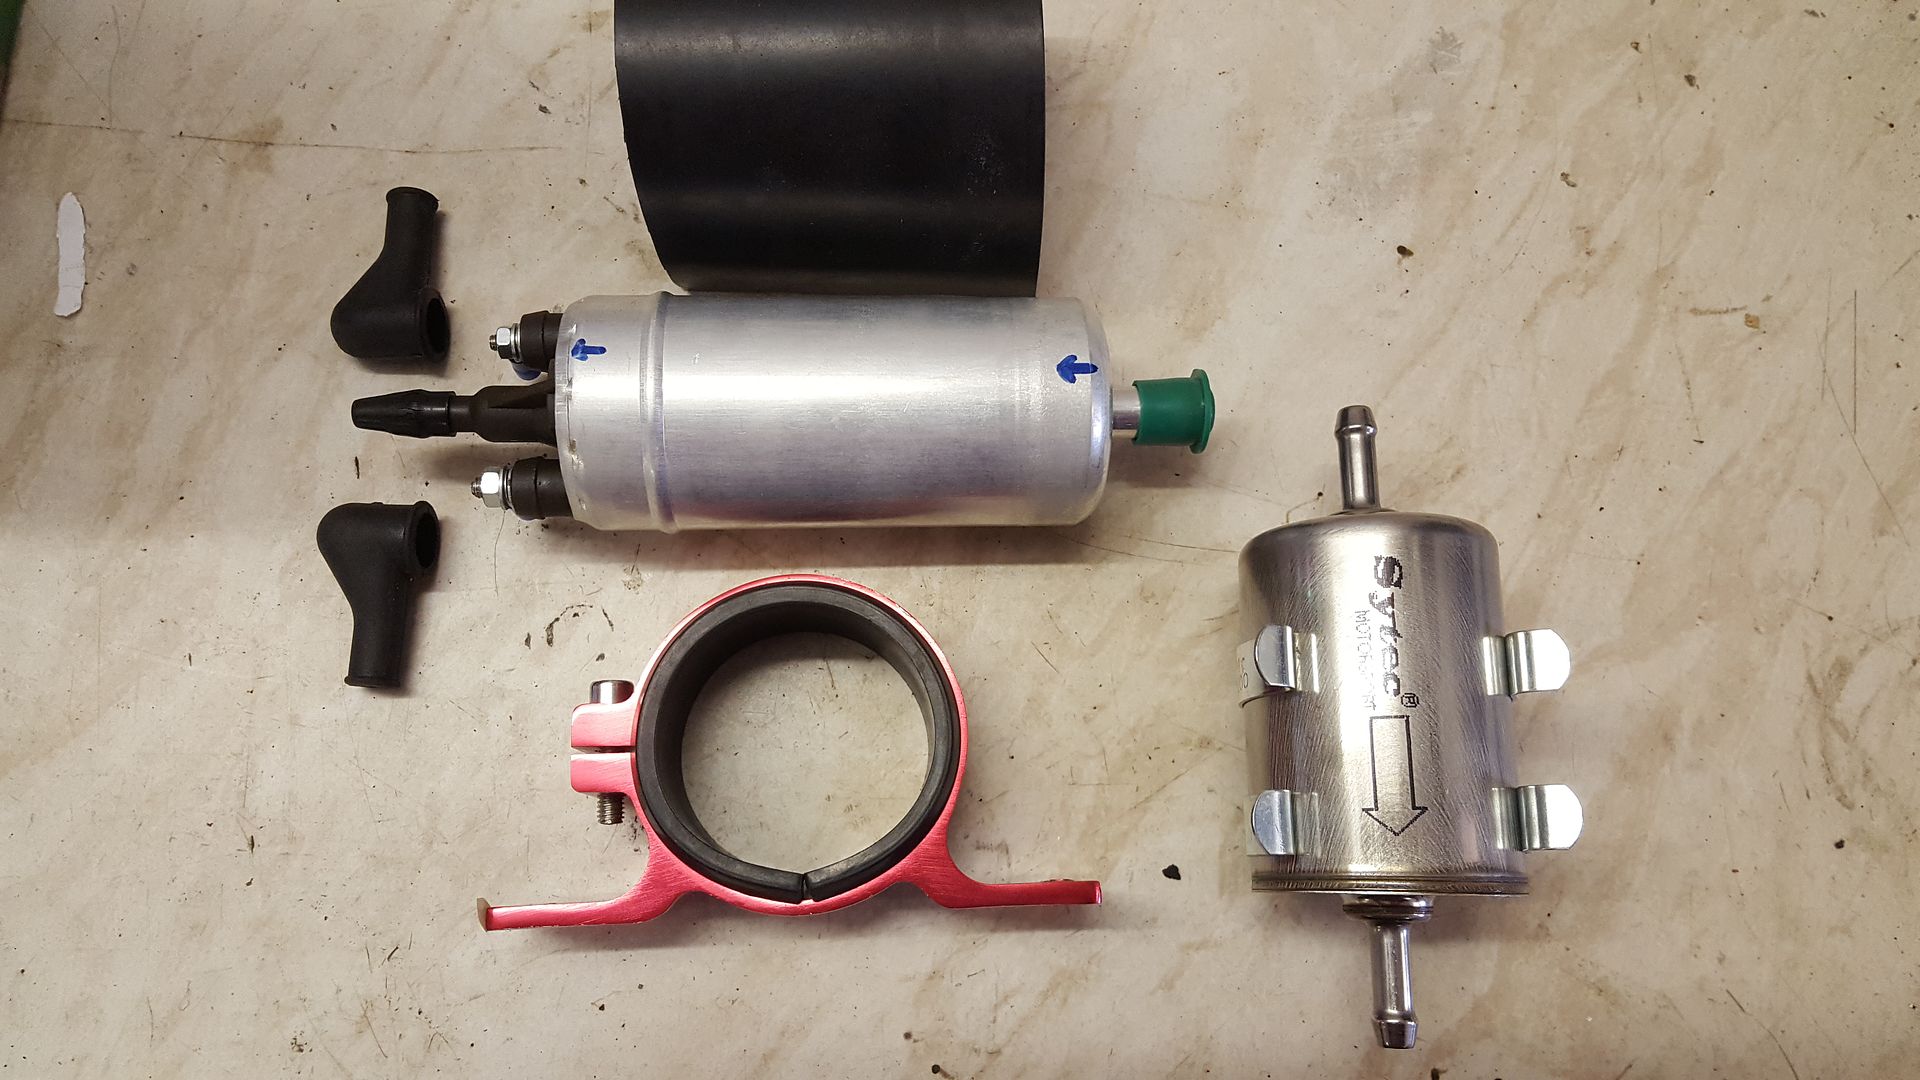
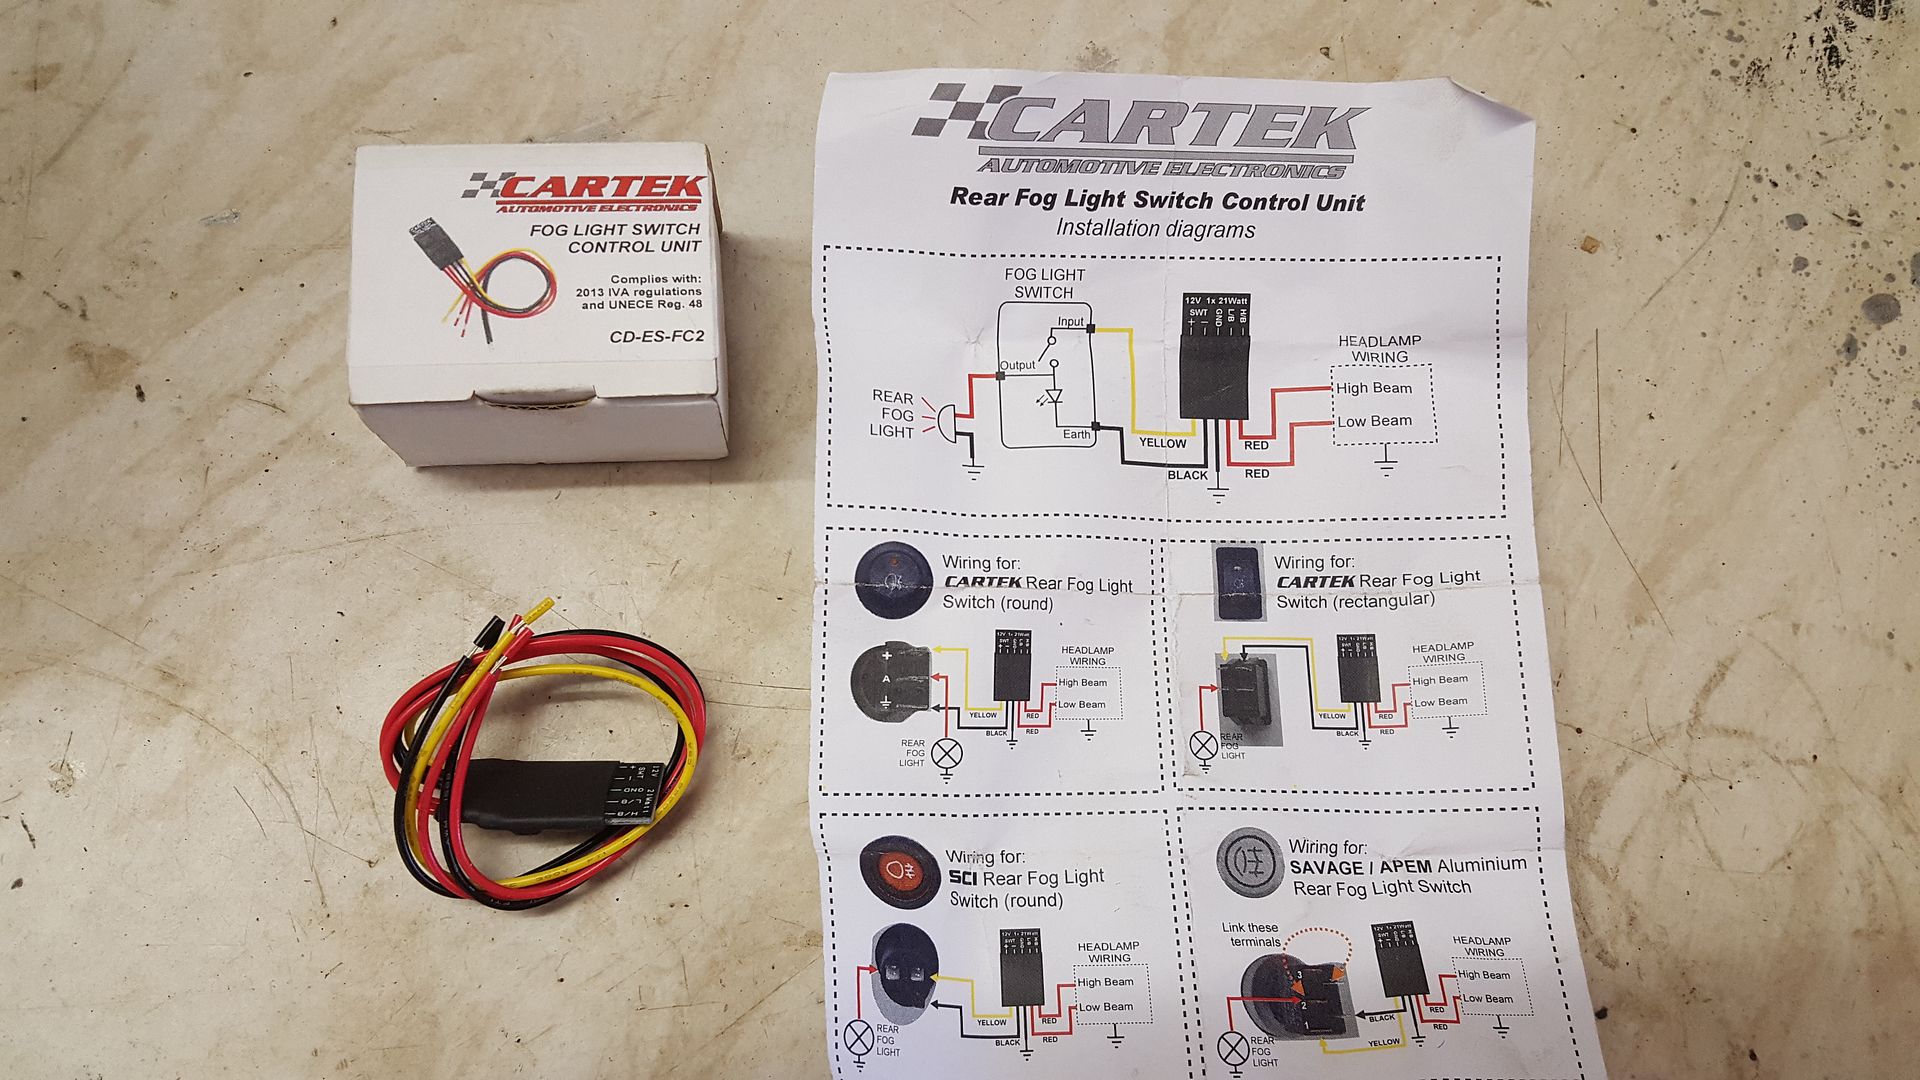
And then pushed the boat out a bit when I spotted some cams, sbd 220 & 230 camshafts. Not been run for long, and in great condition. From what
I've read these are the most wild cams on a hydraulic profile.
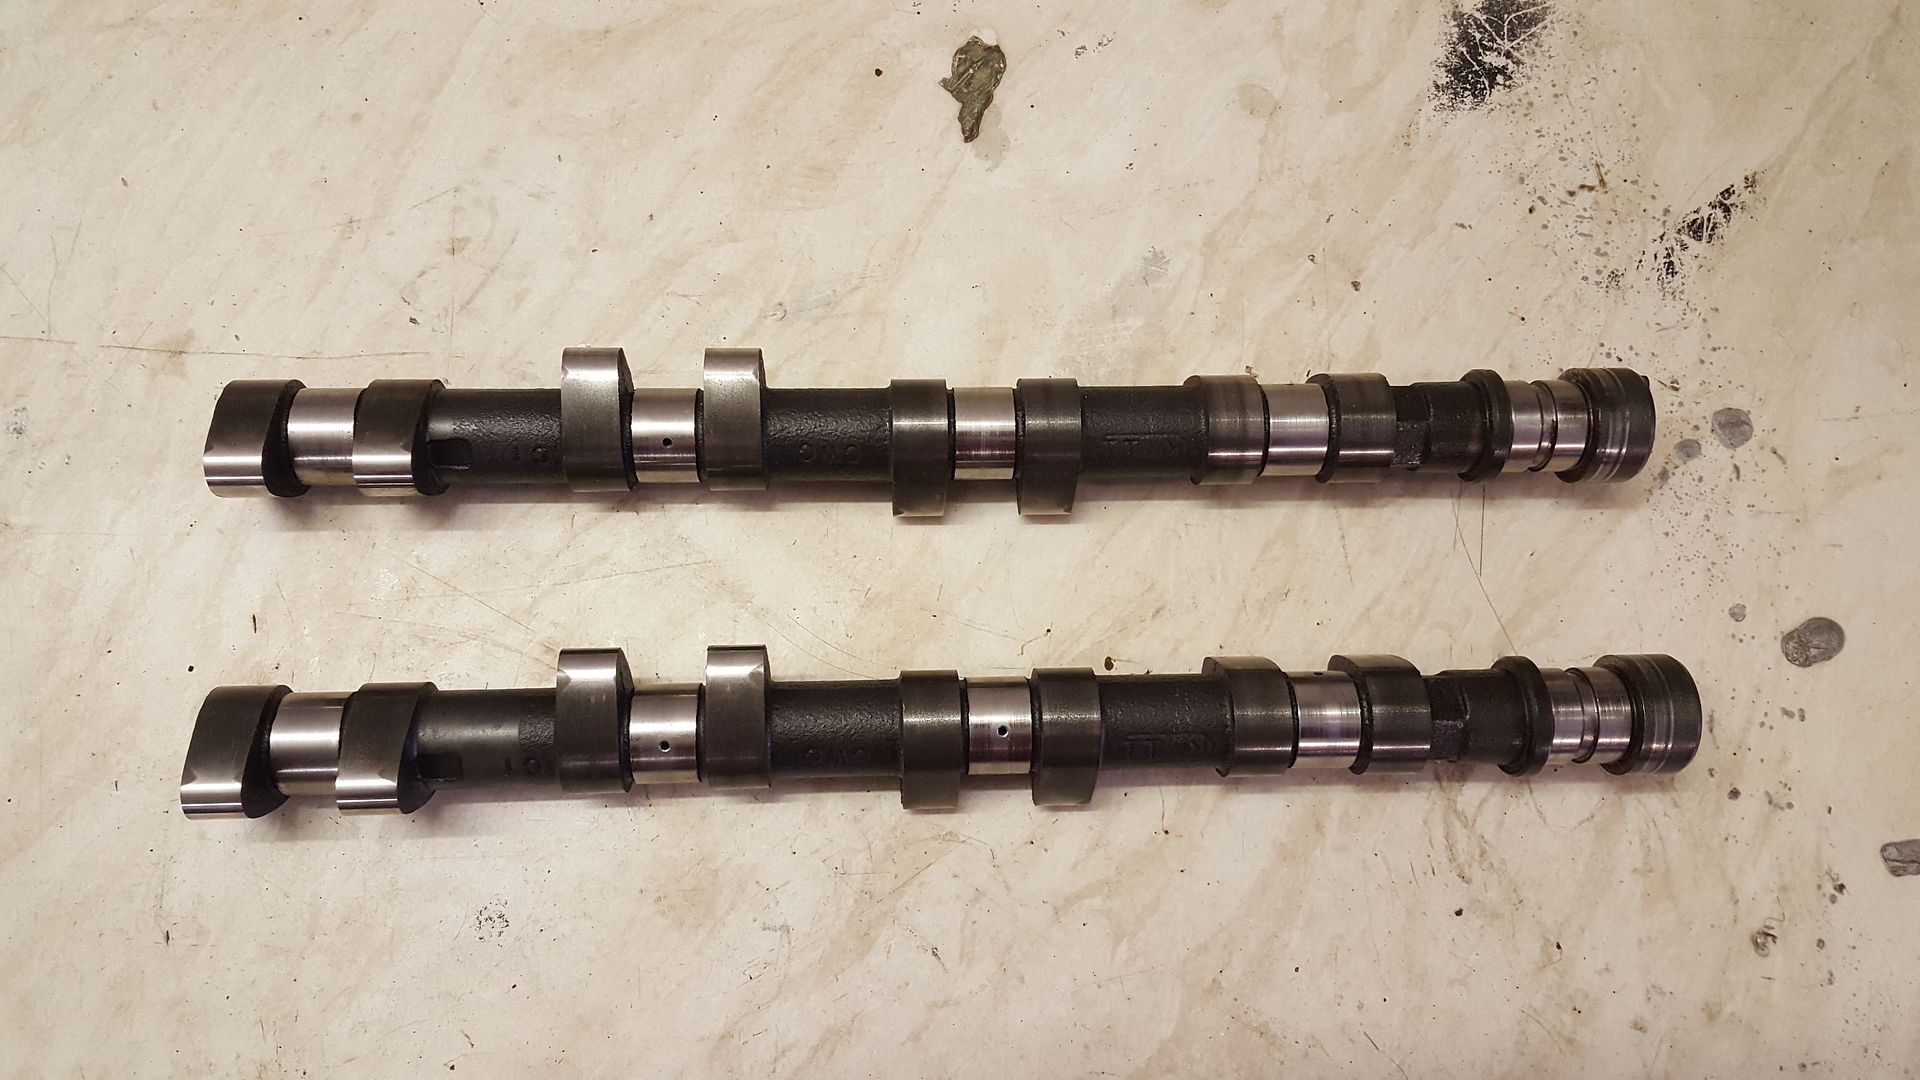
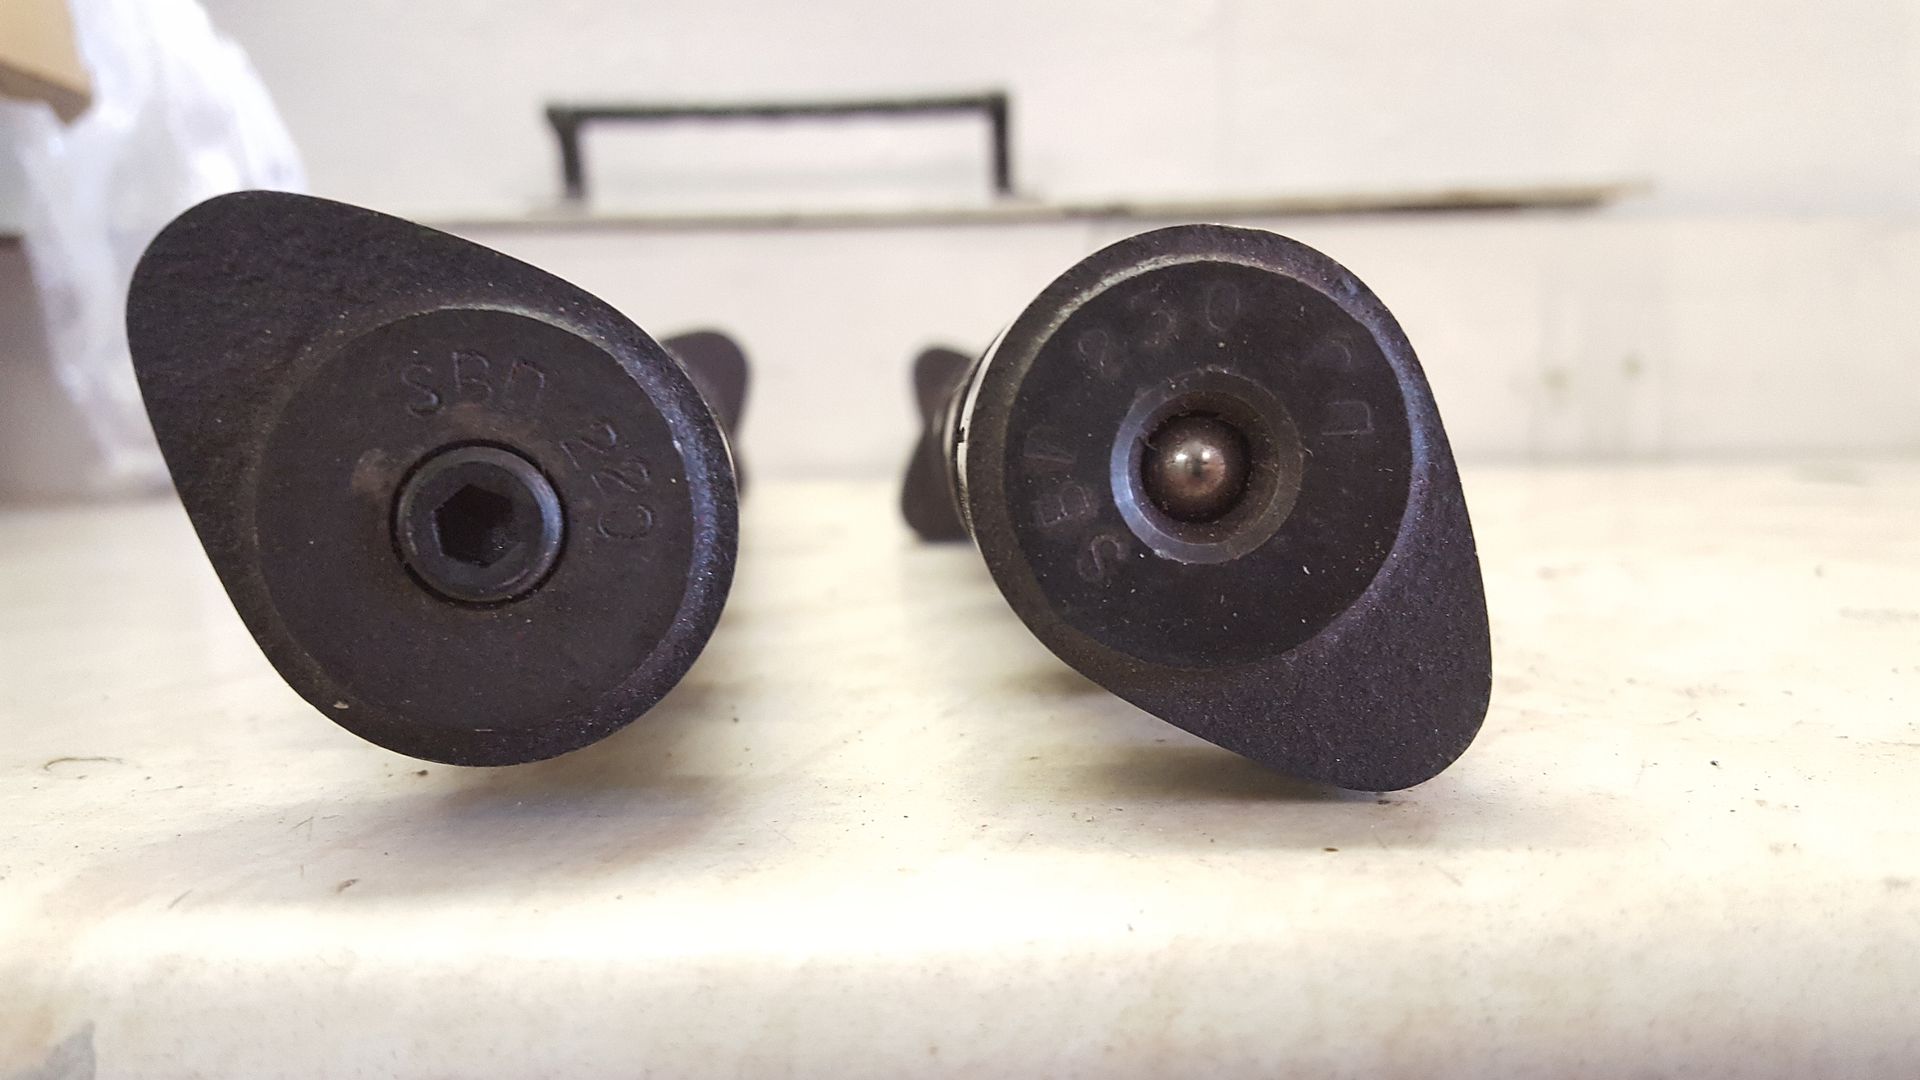
Won them for Ł200. So these will be pushing me well over the 200bhp mark
alistairolsen - 17/4/18 at 08:52 AM
Some nice finds there! Loom looks good too! Are you full time on cars now?
CosKev3 - 17/4/18 at 10:11 AM
You don't need to use those fog light looms,fog light will pass IVA as long as it's powered from the headlight feed (not side lights)and has
a tell tale warning light on the dash
Daf - 17/4/18 at 10:25 AM
quote:
Originally posted by CosKev3
You don't need to use those fog light looms,fog light will pass IVA as long as it's powered from the headlight feed (not side lights)and has
a tell tale warning light on the dash
You sure this is still the case? I thought they needed to go off when lights were turned off and not come back on when the lights are turned back on.
super-ron - 17/4/18 at 11:25 AM
quote:
Originally posted by alistairolsen
Some nice finds there! Loom looks good too! Are you full time on cars now?
My full time job is still driving these little cranes in the day and I work in the custom car garage evenings and weekends and days off (hence the
70hour weeks)
super-ron - 17/4/18 at 11:27 AM
quote:
Originally posted by Daf
quote:
Originally posted by CosKev3
You don't need to use those fog light looms,fog light will pass IVA as long as it's powered from the headlight feed (not side lights)and has
a tell tale warning light on the dash
You sure this is still the case? I thought they needed to go off when lights were turned off and not come back on when the lights are turned back on.
I read this was the case too.....
super-ron - 15/5/20 at 06:18 PM
Hello guys, Sorry I've been a long time absent. I've still had the kit car all these years but it had just sat there untouched..... until
now I've finally got my act together and brushed the dust off. I am changing platform and continuing the build on youtube, so if you want to
keep up with progress here is episode 1 of the build:
https://youtu.be/NfLVqFhoO1k
Be sure to subscribe as I plan to really push on with progress from now on!


