
Z20LET into a Haynes Roadster
Ben_Copeland - 3/1/14 at 11:04 AM
Its time i posted up my build diary for fitting my Astra turbo engine into my Haynes Roadster, seems to be one of the next upgrades people might start
doing.
Firstly it started out with a NA 2.0 16V Vauxhall Engine C20XE so the conversion is a little easier for me. The Z20LET is a 2.0 16V Turbo engine,
very similar to the C20LET which is the Turbo verson of the C20XE. This all means that the existing bellhousing and engine mounts all fit straight
on, although the passenger side mount needs modifying for the boost pipe to go through.
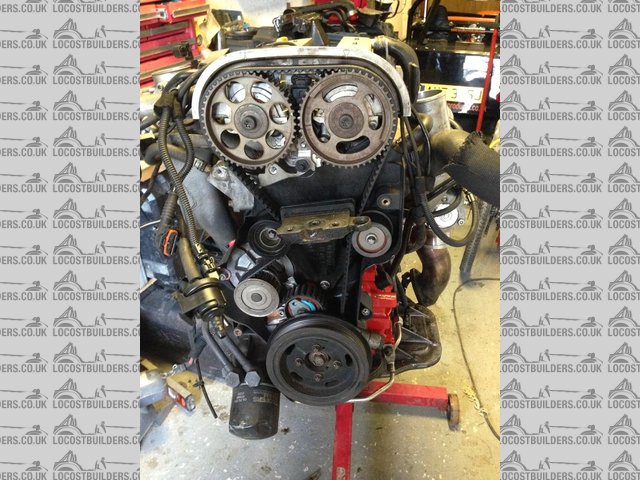
Picked up a running engine and stripped stripping it all of bits i wont need anymore....
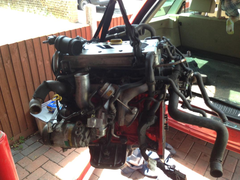

Picked up

Z20LET Engine Before

Cambelt
Its very busy this end and i dont like it !
Description
Thats better.
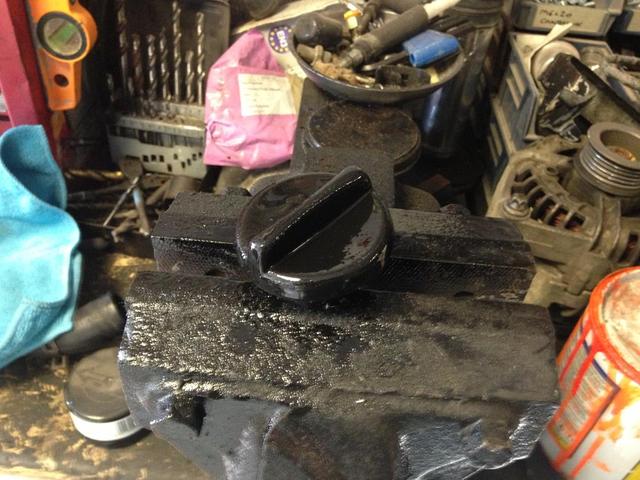
Next i need to replace the throttle body, the TB on the Z20LET is fly-by-wire and i cant run that on MS2 (or cant be bothered to work out how)

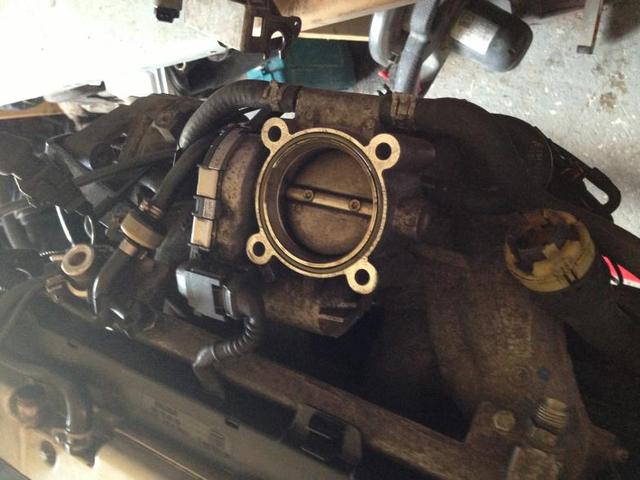
Throttle Body Removed
I've bought a throttle body of a X20XEV which is effectively a NA version of my engine (2.0L 16v from a vectra/astra etc)
Its fits straight on and converts to cable throttle, its slightly larger which cant be a bad thing.

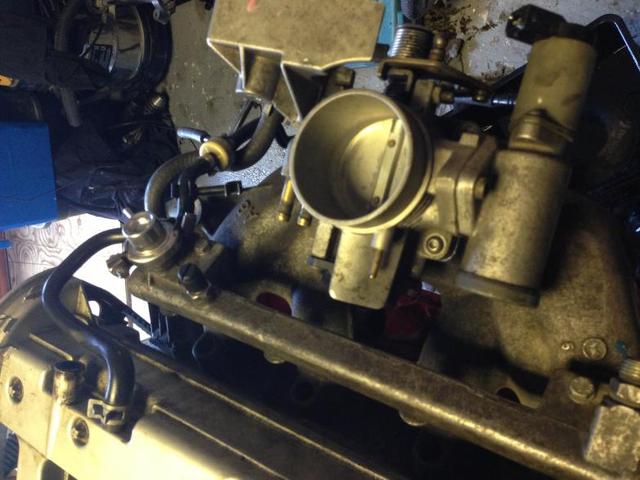
New Throttle Body Fitted
I actually ended up turning this round 180 degrees so it fits better.
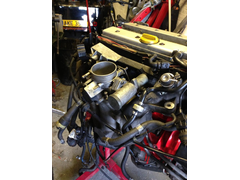
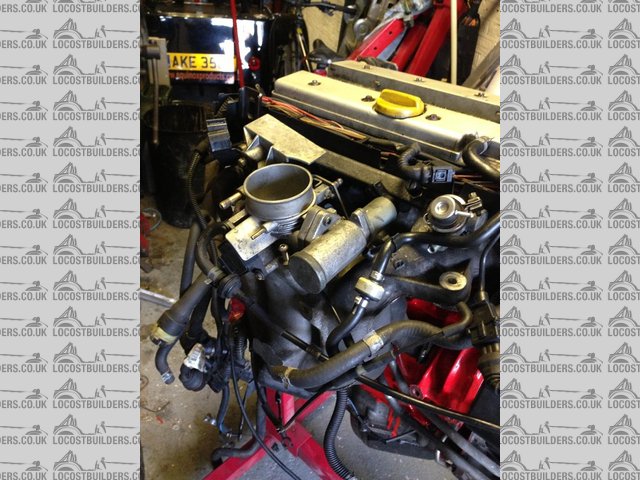
Throttle Body
[Edited on 3/1/14 by Ben_Copeland]
beaver34 - 3/1/14 at 11:05 AM
looks fun,
turbo 7 cars are great fun 
Ben_Copeland - 3/1/14 at 11:25 AM
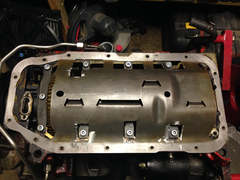
Next is to remove the sump which is massive and isnt going to fit, also i removed the balance shafts that are mounted over the crank. These sap power
and also add a massive weight to the bottom of the engine. Unfortunately they are oil feed from the crank bearing caps, so they need tapping and
filling so the oil doesnt come out !

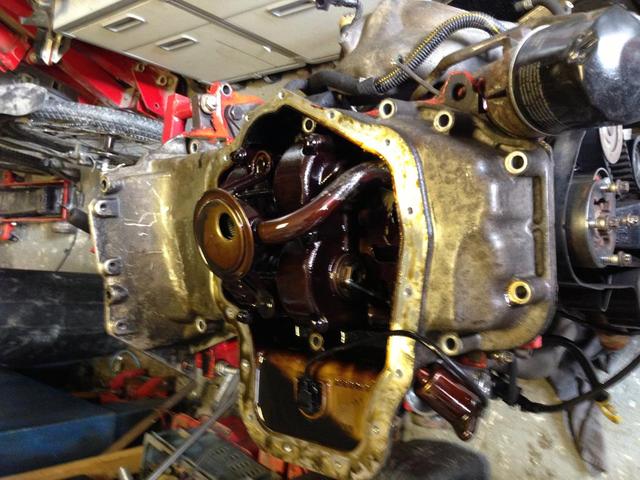
Sump Off

Tapping Oil Feeds
Tapped and grub screwed.

Grub Screws in


Balance Shafts Removed
Caps back in.
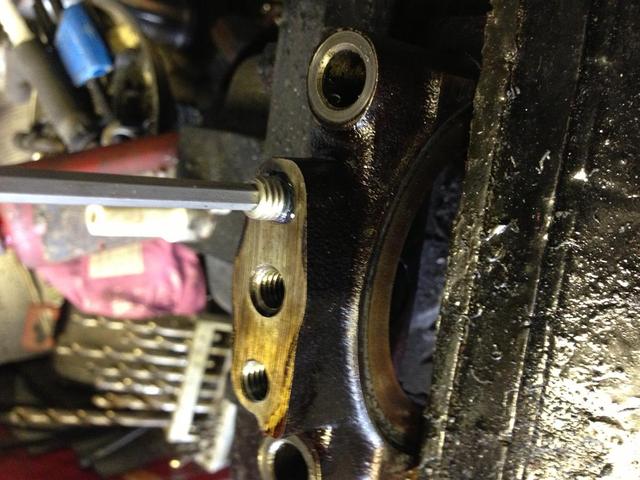
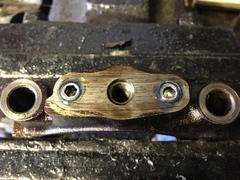
The downside of removing the balance shafts is they also act as crank girdle so you either need to find a X20XEV crank girdle that doesnt have balance
shafts (early one maybe) or make your own.
Friend of mine sent me this to play with as it didnt fit with his sump....

Crank Girdle
Unfortunately i ended up having to cut it up as it didnt fit with my sump either, but strips are better than nothing.

Windage
I used the XE windage tray just cutting holes where the girdle stuck through.
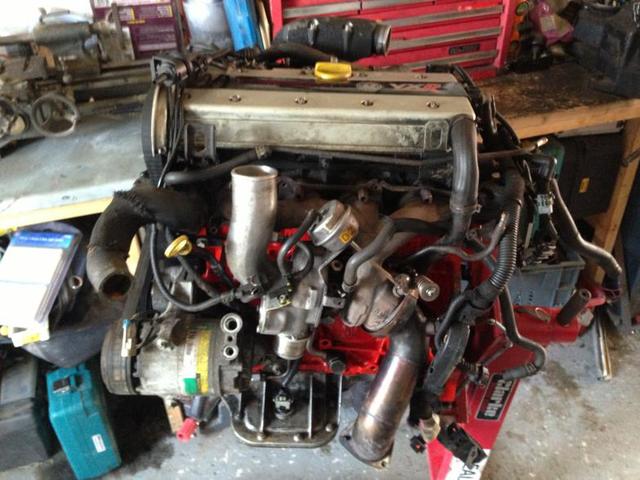
I'm fitting a Caterham Alloy Sump from my XE engine, which just fits but ive had to modify the pickup pipe, using the head of the XE one with the
oil pump end from the ZLET engine. Its a bit of a faff to sort and unfortunately i didnt take a picture, but just make sure its got no leaks! I also
had to drill out the sump bolt holes because they are m8 instead of m6 like the XE, but easy enough to do.
Ben_Copeland - 3/1/14 at 11:39 AM
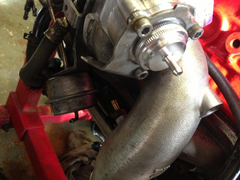
I then started checking over the turbo. It had been fitted with a VXR turbo and wastegate which is a popular power upgrade, pretty much a direct swap
and good for about 300bhp.
I had noticed the oil feed pipe was oily and one of the connections was at an angle..

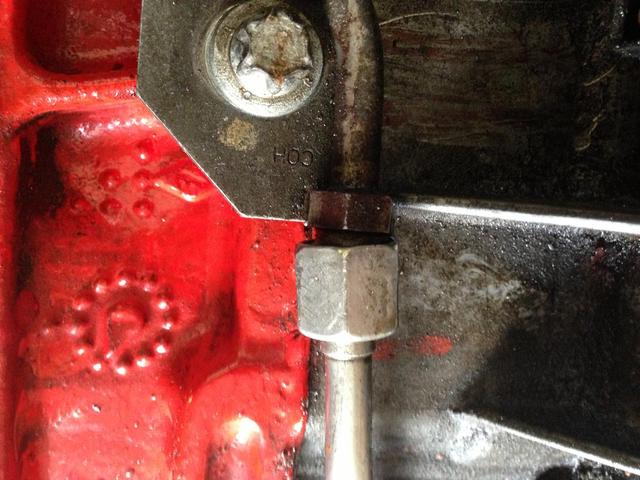
Oil Line
Dumb Arse!!!
Took it apart and luckily i rescued it with a small file and a bit of patience....

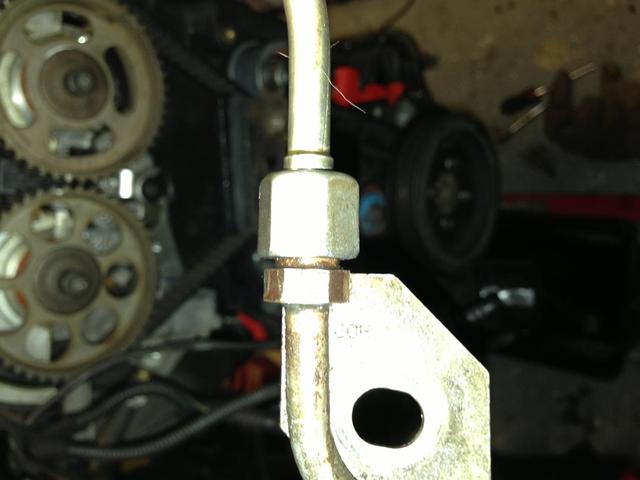
Oil Line
Better.
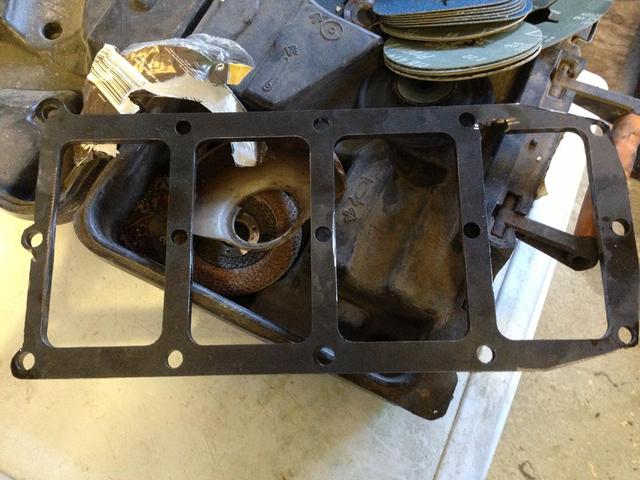
I took the exhaust manifold off to replace the gasket and found 2 stripped threads in the head and rusted studs/nuts
They'll all need replacing before the turbo manifold can go back on... BALLS.

Exhaust studs
I helicoiled the 2 threads in the head and replaced all the studs. While the exhaust manifold was off i painted the block black to get rid of the Red
as it didnt match which my cars colours.
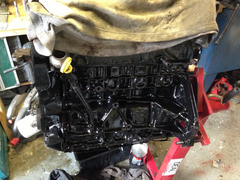
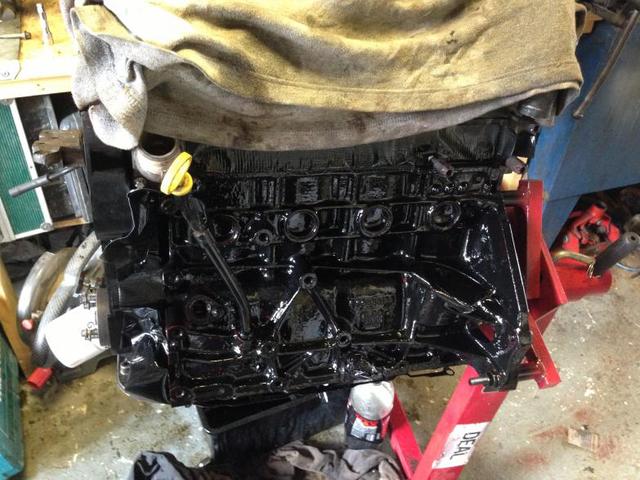
Painted Black
Also the turbo return pipe was held in with a bolt and self tapping screw and glue. WTF, how difficult would it of been to find another bolt for it.
Again, luckily! i managed to remove the glue and cleaned up the bolt hole. Replaced the gaskets and bolted it all back up.

Oil Return
I also binned the dump valve bits and fitted a nice alloy recirculation valve, back to standard...ish.
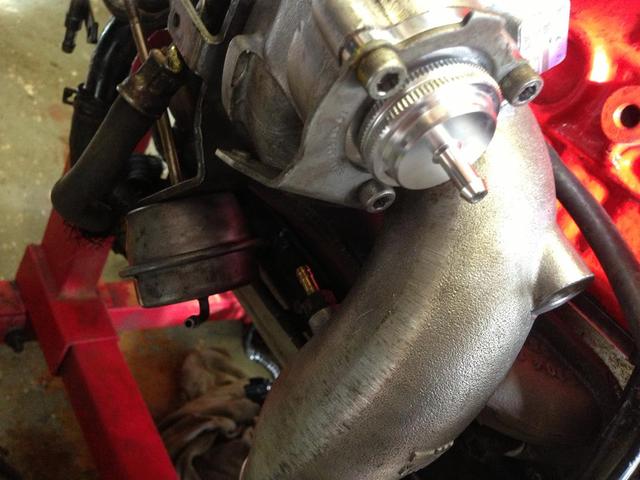
Recirculation Valve
maccmike - 3/1/14 at 11:47 AM
nice work keep the photos coming
Ben_Copeland - 3/1/14 at 12:01 PM
Moved back over to the inlet side and decided to check the injectors. As i thought standard, and not suitable for VXR turbo power.
I had some Rover 800 Turbo injectors lurking in the garage which are a direct swap, a lot more cc's. So i sent them off to Mr Injector to get
them cleaned and check etc.
380cc i believe @ 3 bar

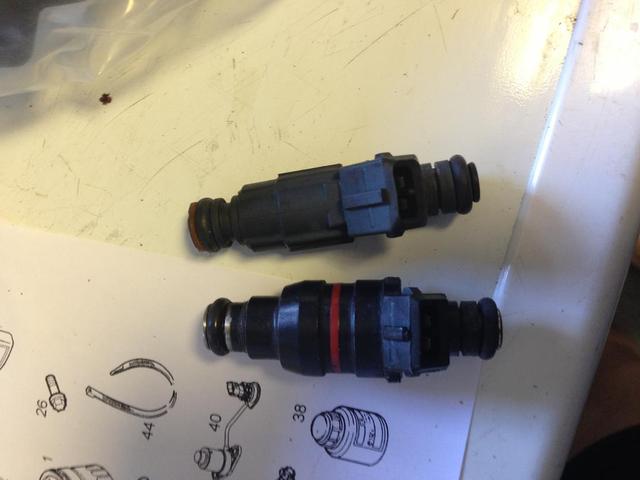
Injectors
Refitted the rail. Done
[Edited on 3/1/14 by Ben_Copeland]
Ben_Copeland - 3/1/14 at 12:12 PM
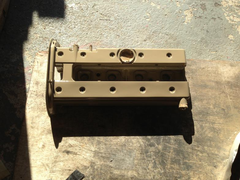
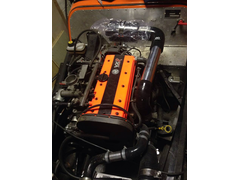
Got a bit of a painting bug from doing the engine block so decided to do the camcover.
Rubbed down
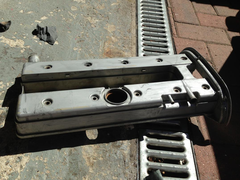

Paint Prep
Primed with a etch primer
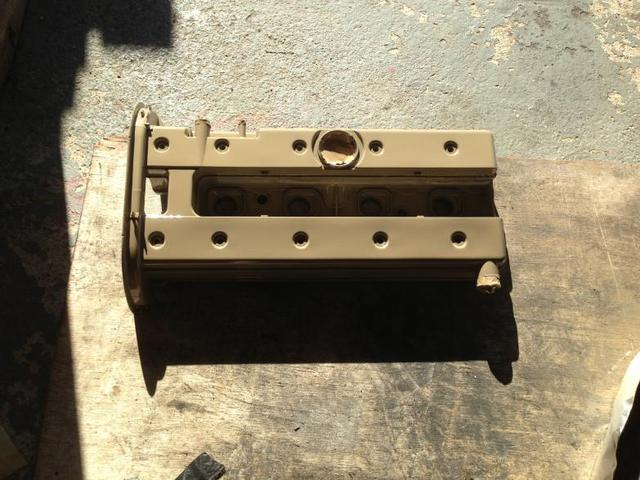
Primed
Undercoated white

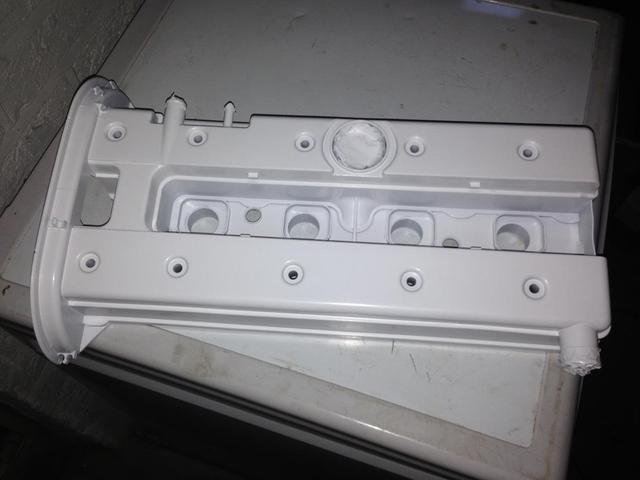
Primed
Top coated with DynaRod orange and then lacquered to make it oil/petrol/heat resistant.

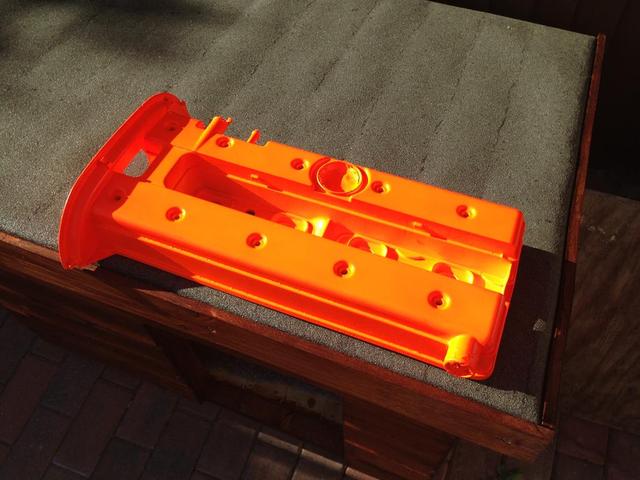
Painted
Didnt like the standard yellow oil cap, so rubbed that down and painted it black.

Painted Black
Also painted the bolts black too ;-)

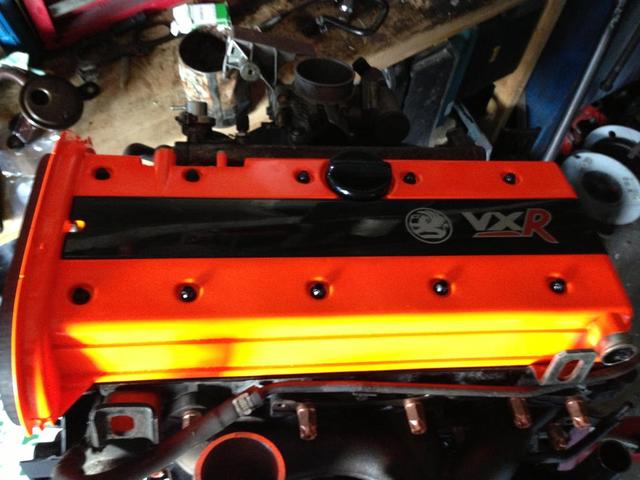
Camcover finished
Fitted and finished with a Black VXR spark plug cover.
Ben_Copeland - 3/1/14 at 12:23 PM
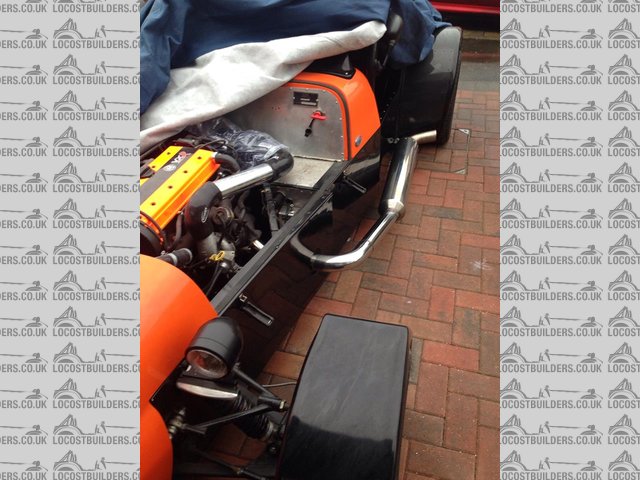
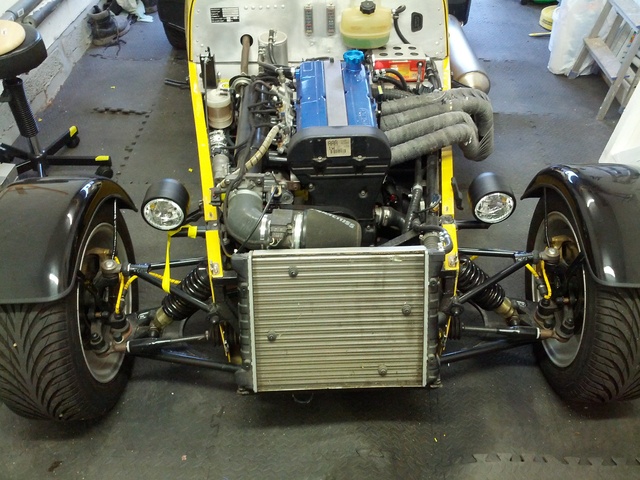
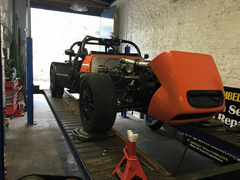
Time to strip the old engine out of my car. Ive done this a couple of times so should be easy enough.
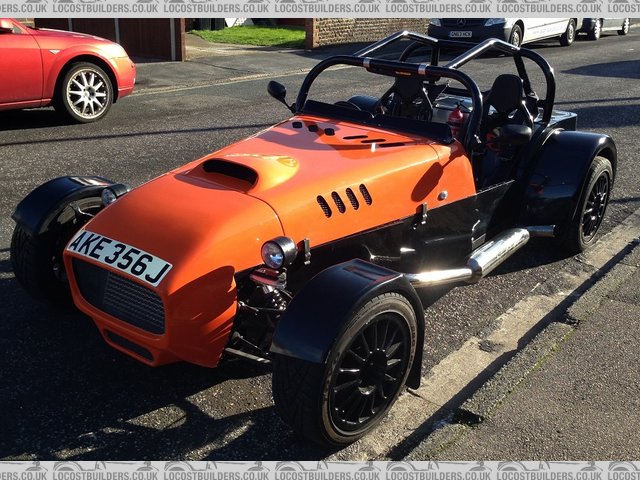
Fully assembled car including nosecone etc.

Engine Coming Out
Ok no nosecone in this picture...
To engine out on the bench in 1hr 15mins... not bad for an evening after work.

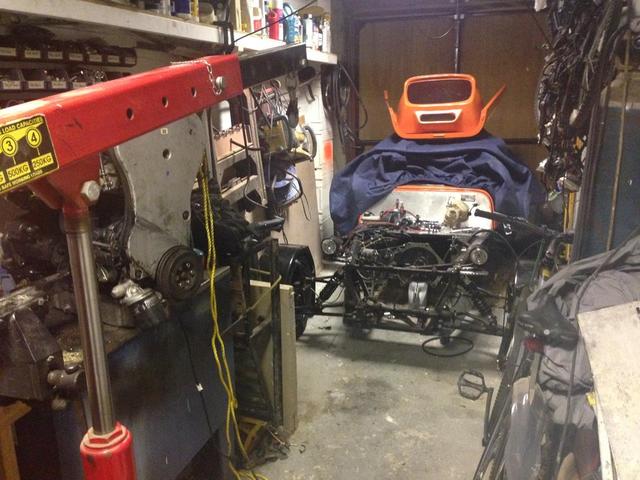
Engine Out in 1Hour 15mins
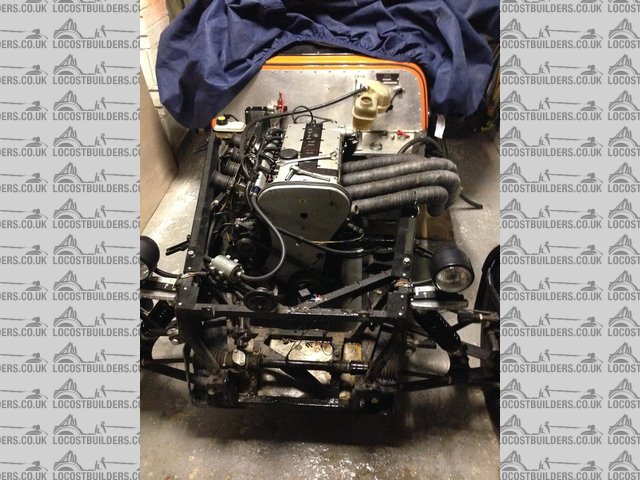
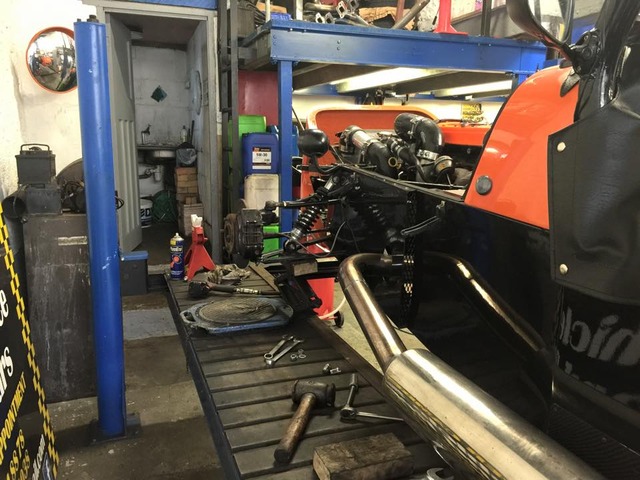
New engine hanging ready to go in.

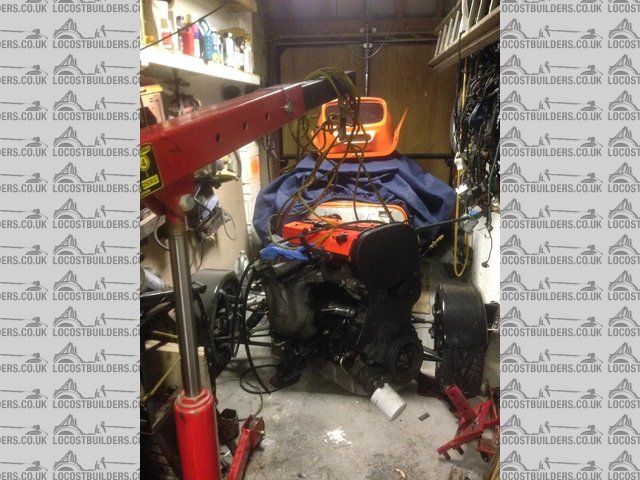
Hanging
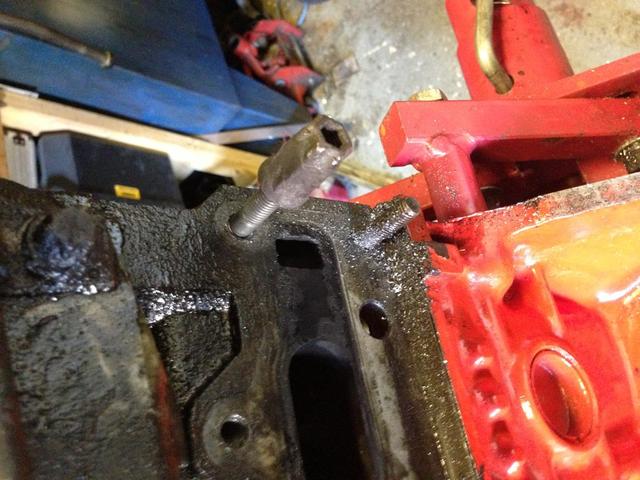
Engine in and bolted up to the gearbox. Driver side engine mount in and bolted up. Just need to modify the passenger mount to allow the bottom boost
pipe to pass through it.
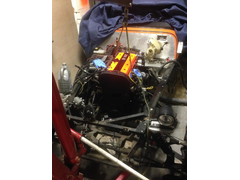
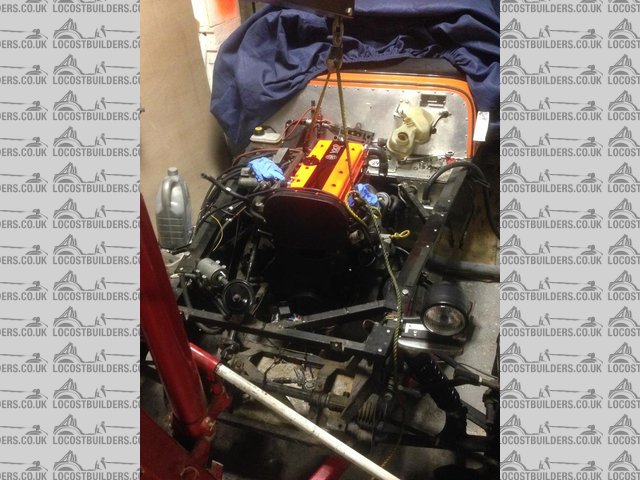
IN
Forgot to say: the clutch is ford galaxy 2.8 friction and Vauxhall pressure plate. Using alloy bellhousing and type 9 box
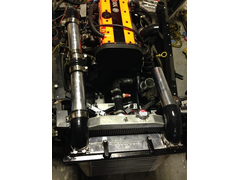
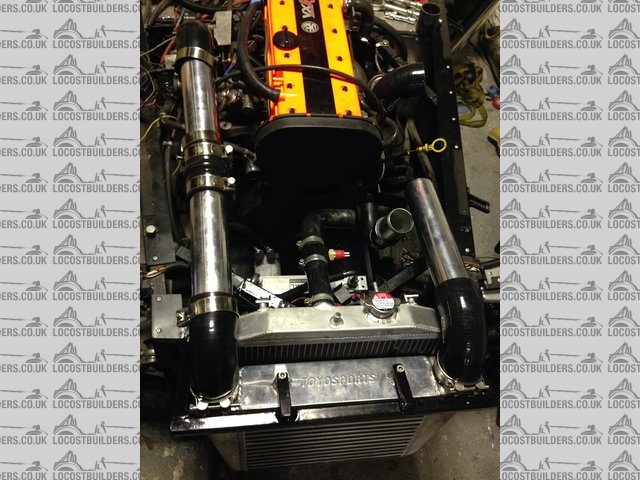
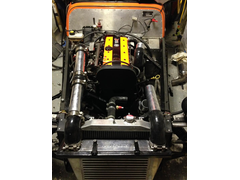
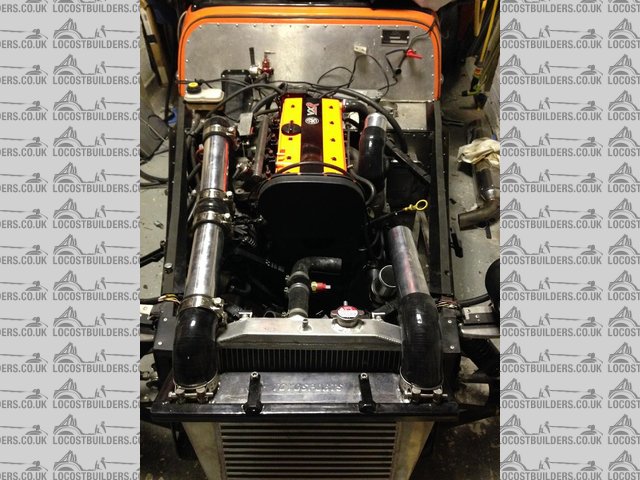
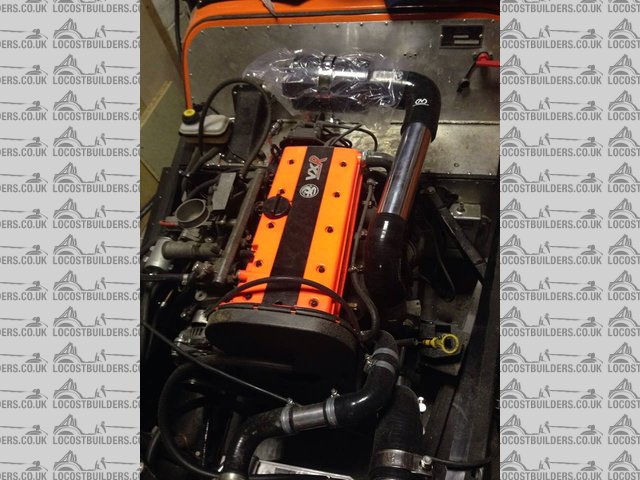
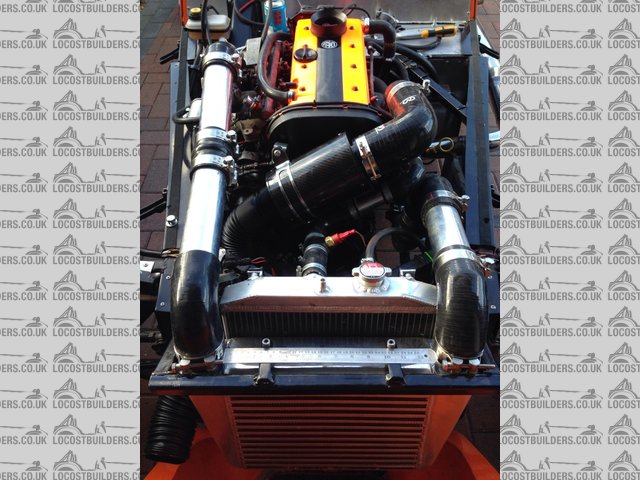
Jumped forwards a bit to fitting the radiator and intercooler.

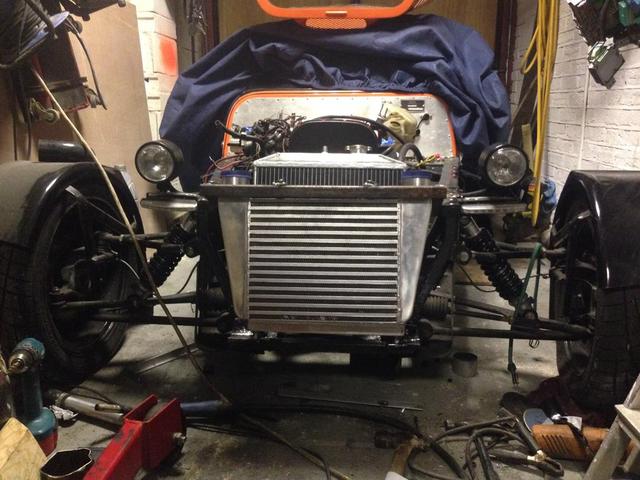
Intercooler
Next i made up some mountings for the fans, i couldnt get one big fan into the space behind the radiator so went for 2 smaller ones instead.

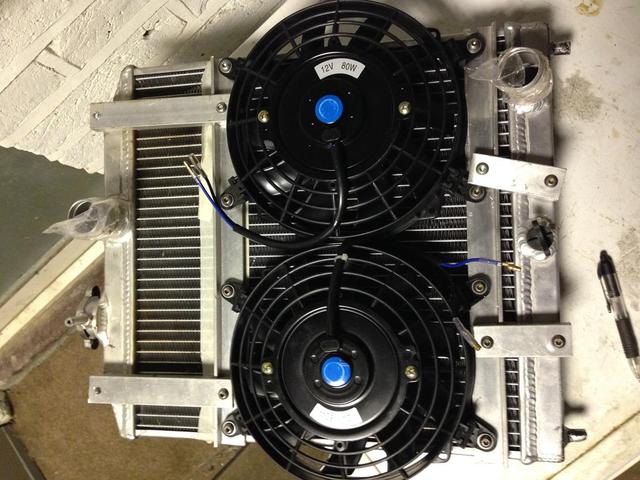
Double Fans
Radiator is a Honda Civic alloy racing one i bought off ebay and intercooler is a universal alloy one from ebay. Both cost about Ł75 each
[Edited on 3/1/14 by Ben_Copeland]
swanntech - 3/1/14 at 07:46 PM
Hi ben just fitting an xe engine to my roadster i am useing a metal yukspeed sump is it necessary to fit a windage tray as i dont have one in my xe
powerd grasstrack car
Ben_Copeland - 3/1/14 at 07:59 PM
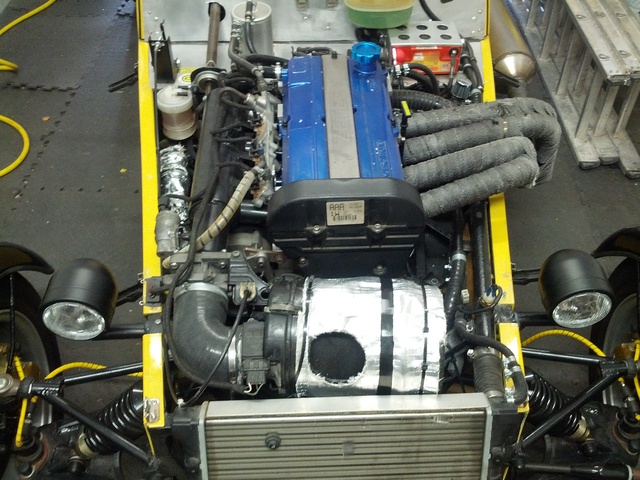
Needed to change the Inlet Temperature Sensor, but couldn't find one that bolted straight into the manifold, so i had to buy an adapter and tap
that so the sensor could fit inside.

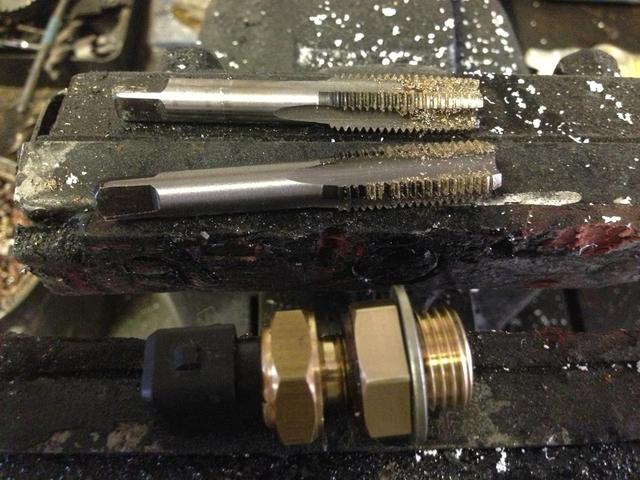
Air Temperature Sender
Went to refit the steering column extension, but it fouls slightly on the inlet manifold so i've had to put an extra joint in and rosejoint to
support it.

Steering Column
Still waiting on some nuts to fit it in place.
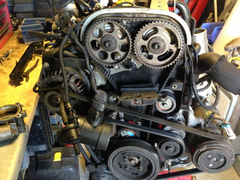
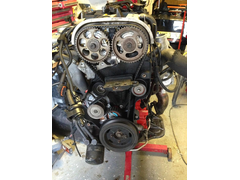
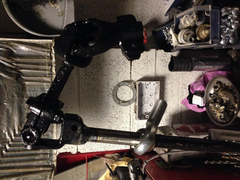
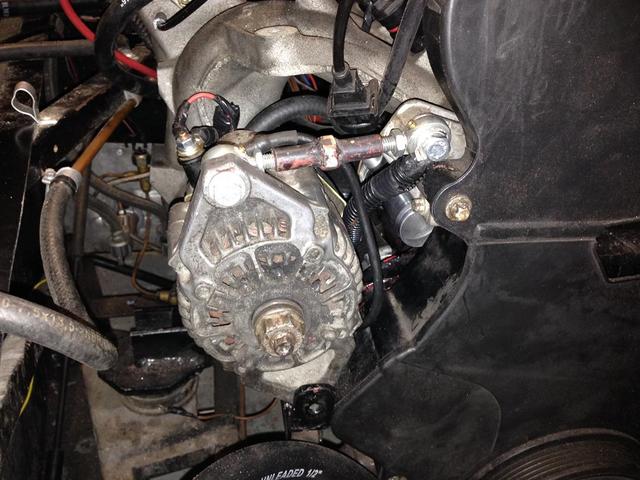
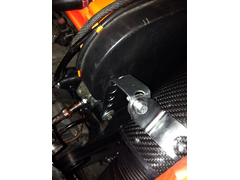
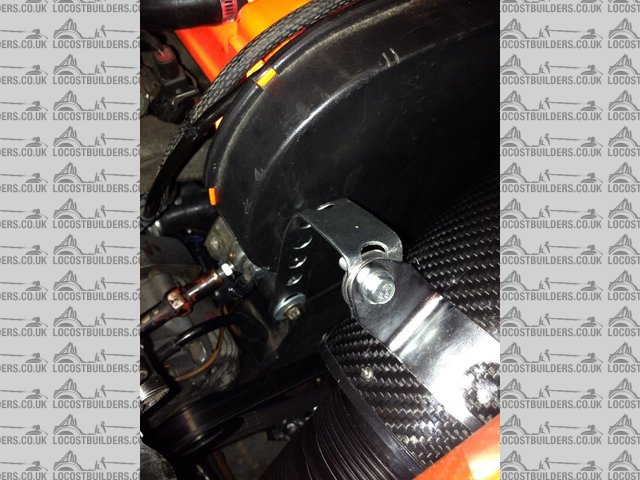
Next up is the alternator bracket, its one i made for the XE engine so ive reused it and it bolts up in the same place just needed spacing off the
engine slightly as it fouled on the cambelt cover.
The adjuster is made from 2 rosejoints, one right hand and one left hand thread with matching threaded bosses welded together with a nut between them.
Picture speaks a thousand words...

Alternator Mount
Next i managed to source a belt and new pulley for the alternator that matched the crank pulley.

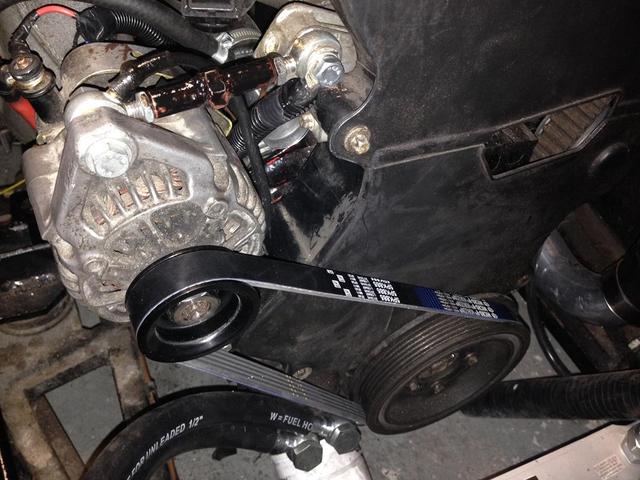
Belt and Pulley On
Bought some silicone hose and joiners just before xmas and so i started fitting it all. Got a big list of pipework and connectors that i still need
to get, but its nearly there.
PipeWork!
I've also started to tidy up the wiring and using all the OEM connectors i can find.


Tidy Up
[Edited on 3/1/14 by Ben_Copeland]
Ben_Copeland - 3/1/14 at 08:00 PM
quote:
Originally posted by swanntech
Hi ben just fitting an xe engine to my roadster i am useing a metal yukspeed sump is it necessary to fit a windage tray as i dont have one in my xe
powerd grasstrack car
You should do, but a friend of mine has that yukspeed sump and recons its ok without the tray.
swanntech - 3/1/14 at 08:09 PM
Thanks for that might try running it without first .nice looking engine your fitting. is the xe crank and main bearing caps the same as an let.
Ben_Copeland - 3/1/14 at 08:13 PM
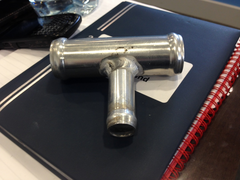
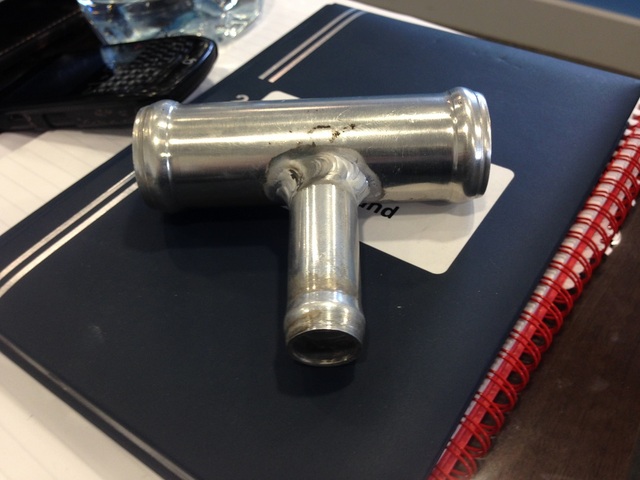
Bought a T piece pipe for the coolant system off ebay, but i was less than impressed considering it was quite expensive.

Crap T Pipe

Crap T Pipe
The pipe was all bent and the smaller pipe wasnt drilled out properly.
Connected the laptop up last night and started updating the basic map info to match my engine and i want to test the fans work etc.
Ben_Copeland - 3/1/14 at 08:13 PM
quote:
Originally posted by swanntech
Thanks for that might try running it without first .nice looking engine your fitting. is the xe crank and main bearing caps the same as an let.
C20LET yes, the Z20LET is different but not a lot.
I've got a XE bottom end all built up still if your interested
[Edited on 3/1/14 by Ben_Copeland]
Ben_Copeland - 3/1/14 at 08:16 PM
I'm also selling the Coscast Head atm on ebay and have a ton of spares if your after anything
http://www.ebay.co.uk/itm/331095959224?ssPageName=STRK:MESELX:IT&_trksid=p3984.m1555.l2649
Wheels244 - 3/1/14 at 08:29 PM
quote:
Originally posted by Ben_Copeland
quote:
Originally posted by swanntech
Thanks for that might try running it without first .nice looking engine your fitting. is the xe crank and main bearing caps the same as an let.
C20LET yes, the Z20LET is different but not a lot.
I've got a XE bottom end all built up still if your interested
[Edited on 3/1/14 by Ben_Copeland]
Hi Ben
I thought you was flogging that to me ?
Good work on the install.
loggyboy - 3/1/14 at 10:47 PM
quote:
Originally posted by Ben_Copeland
Bought a T piece pipe for the coolant system off ebay, but i was less than impressed considering it was quite expensive.
Crap T Pipe
Crap T Pipe
The pipe was all bent and the smaller pipe wasnt drilled out properly.
Connected the laptop up last night and started updating the basic map info to match my engine and i want to test the fans work etc.
Is that an ASH one?
Ben_Copeland - 3/1/14 at 11:02 PM
quote:
Originally posted by loggyboy
quote:
Originally posted by Ben_Copeland
Bought a T piece pipe for the coolant system off ebay, but i was less than impressed considering it was quite expensive.
Crap T Pipe
Crap T Pipe
The pipe was all bent and the smaller pipe wasnt drilled out properly.
Connected the laptop up last night and started updating the basic map info to match my engine and i want to test the fans work etc.
Is that an ASH one?
No wish I'd seen the ash ones before I bought that crap.
Ben_Copeland - 3/1/14 at 11:07 PM
quote:
Originally posted by Wheels244
Hi Ben
I thought you was flogging that to me ?
Good work on the install.
Thought it was too much for you ;-)
yellowcab - 4/1/14 at 11:18 AM
Looking good Ben, good pics and diary showing your difficulties and how you overcome them, a good source of information for those other LCB readers to
learn from.
Keep up the good work pal, should be a hoot to drive!
Looking forward to having a go already 
Ben_Copeland - 4/1/14 at 05:42 PM
Olz if you ever come and visit, we'll do a swap for the day ;-)
andywilson - 4/1/14 at 07:35 PM
good progress Ben, looking really good!
should be getting back on with mine in a month or so expect questions!
Ben_Copeland - 4/1/14 at 10:14 PM
Cheers Andy
Modified the Rally Design pedal box to take a Vauxhall accelerator cable, had to add a small box to space up the cable sleeve and bend the back of the
pedal up so the cable pulls further.
Pedal Box Modify
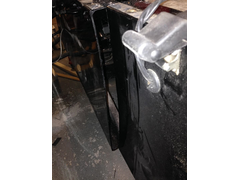
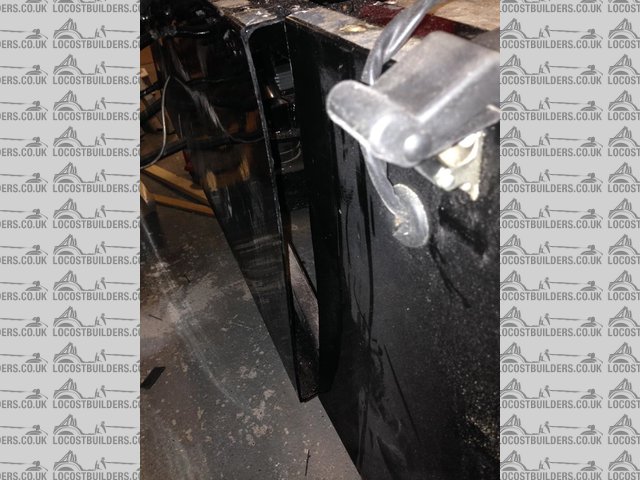
Decided while i was waiting for funds for more parts i'd flared the side panels to get some of the heat out!

Side Panel Flare
Side Panel Flare
Side Panel Flare
Not much left i can do currently
Ben_Copeland - 9/1/14 at 09:54 AM
Ordered Ł300 worth of bits and pieces yesterday so when they come I'll post a picture of the bounty 
Ben_Copeland - 20/1/14 at 12:35 PM
Sorry about no activity recently, my parts came in dibs and drabs so I didn't bother taking a picture. Still missing some bits which is
annoying.
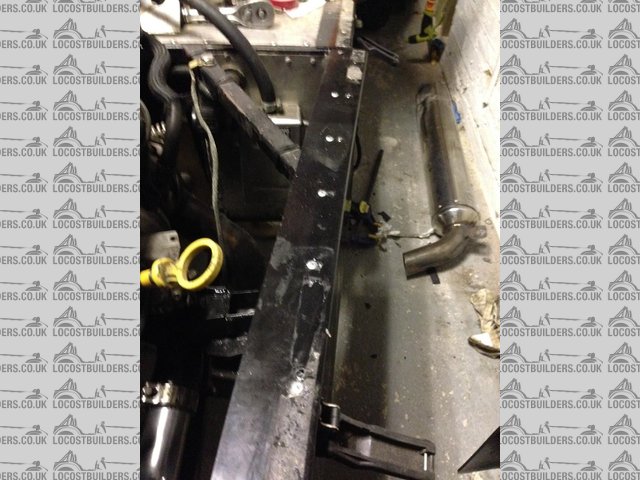
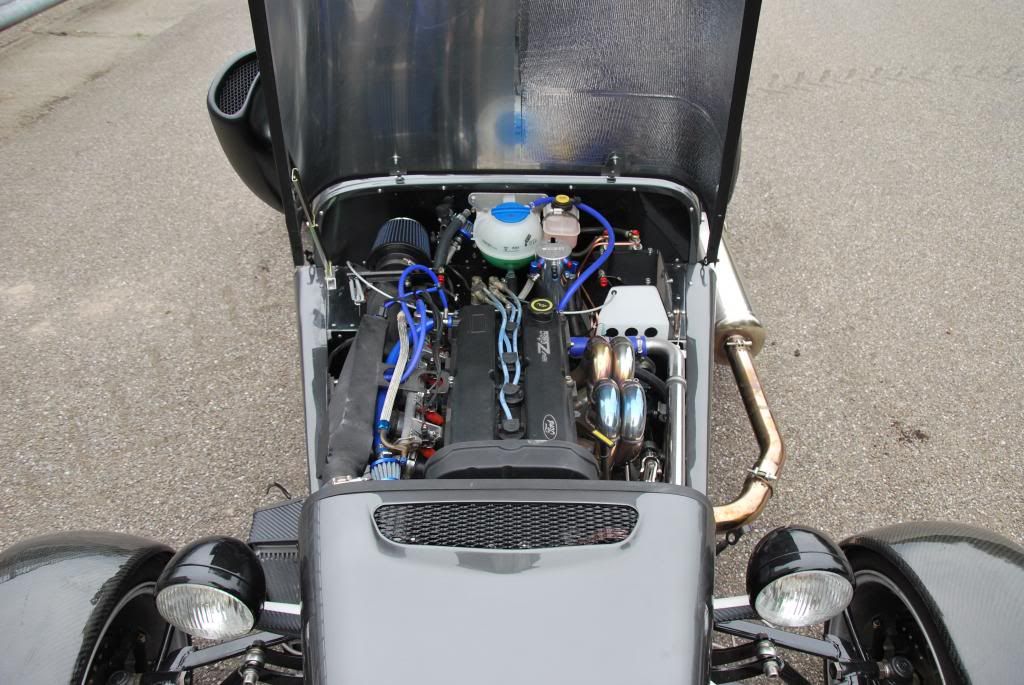
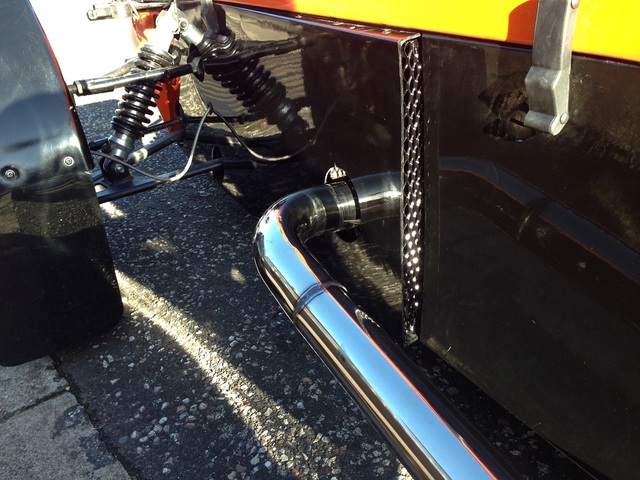
Anyway, I had a go at making an exhaust for the car. Tacked it all together and hopefully I can get it tig up later this week.
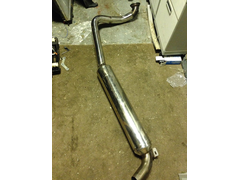
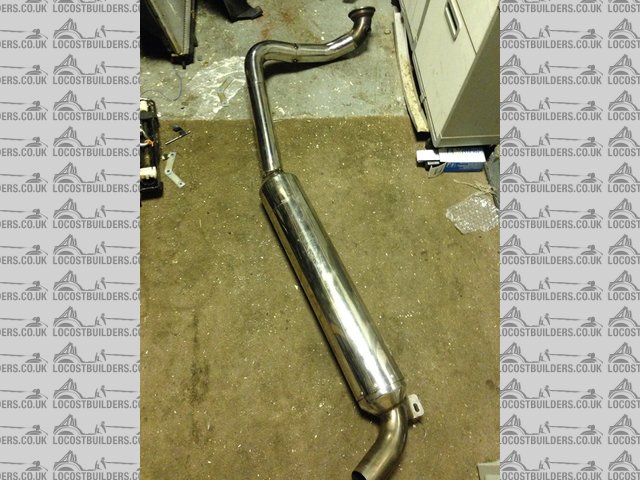
Exhaust
I also had to rejig the coolant lines off the back of the water pump because I found another pipe off the head, which is annoying as it means I cant
fill it up with water till I get another t-piece.

Found Pipe
That's it for now, i'll hopefully have all the bits by the weekend (except the extra t piece) and I can finish most of the pipework
[Edited on 20/1/14 by Ben_Copeland]
Ben_Copeland - 27/1/14 at 01:54 PM
Got my mate to tig up the exhaust last week, so fitted it this weekend. Fitted perfect first time, right slap bang centre of the cut out in the side
panel too. Really pleased how its turned out!
Exhaust

Exhaust
I'm also struggling to find a place for my airfilter, where am I going to get fresh air from ?
Air Filter
[Edited on 27/1/14 by Ben_Copeland]
laptoprob - 27/1/14 at 02:27 PM
quote:
I'm also struggling to find a place for my airfilter, where am I going to get fresh air from ?
Air Filter
[Edited on 27/1/14 by Ben_Copeland]
Scoop in the bonnet mate or maybe in the side panel?
Ben_Copeland - 27/1/14 at 02:30 PM
I have a scoop, which I thought maybe I could attach a funnel and flexy pipe too, but its the agro of disconnecting if I want to remove the bonnet.
daveb666 - 27/1/14 at 02:32 PM
Won't it go where my old one was?

Description
but put it in a box/shield or something?
Ben_Copeland - 27/1/14 at 02:38 PM
Dave, that's a hideous place for an air filter lol sucking lovely hot air off the radiator
In all seriousness I cant fit anything in the front, theres no space
daveb666 - 27/1/14 at 02:44 PM
I agree Ben; that's why I added the scoop and put the filter in a sealed box so that only the air from the scoop got to the filter

Description
Ben_Copeland - 27/1/14 at 03:19 PM
Good Lad
laptoprob - 27/1/14 at 07:01 PM
quote:
Originally posted by Ben_Copeland
I have a scoop, which I thought maybe I could attach a funnel and flexy pipe too, but its the agro of disconnecting if I want to remove the bonnet.
My mate finishhed the MAC1 with the LET engine(think i mentioned it) in and basically he made a 'box/pocket' near the scuttle which is where
the air sccop was and put the cone filter inside it so when are was pushed into the 'pocket' the only place it could go is down the
filter.
If i can get you a photo Ben ill send it over.
Ben_Copeland - 27/1/14 at 07:43 PM
Cheers rob
yellowcab - 27/1/14 at 11:25 PM
Looking good Ben, think it looks awesome when there is only a single pipe exiting the engine by, crys out dirty turbo
BangedupTiger - 27/1/14 at 11:43 PM
excellent work mate, considered an LEH for mine, but decided to go down the Z16LER route instead.
Ben_Copeland - 28/1/14 at 08:04 AM
quote:
Originally posted by BangedupTiger
excellent work mate, considered an LEH for mine, but decided to go down the Z16LER route instead.
I did think about it, but I wanted easy grunt
laptoprob - 28/1/14 at 04:17 PM
quote:
Originally posted by Ben_Copeland
Cheers rob
Email sent to your hotmail account with pictures
Ben_Copeland - 28/1/14 at 05:10 PM
Yep, got them. I see what you mean. I could box a vent in and put the air feed into it.
daveb666 - 28/1/14 at 05:15 PM
seen something similiar on a turbo zetec (although not boxed in):
but has an airfeed from the side:

yellowcab - 28/1/14 at 05:35 PM
Lovely oil cooler position lol
Ben_Copeland - 28/1/14 at 05:37 PM
quote:
Originally posted by yellowcab
Lovely oil cooler position lol
Wow I missed that !
Crazy dutch
Ben_Copeland - 28/1/14 at 06:47 PM
Well, Huge update time !!
I filled the oil up, cranked it over for a bit till the light went out (with the coilpack and fuel pump unplugged).
Next came the startup. The first actual start was witnessed by yellowcab via facetime... soz
But this is the 2nd start up, not bad considering its still running the same map as the xe, I just upped the req_fuel.
SO here it is :
http://youtu.be/1Qoy9cHD1wQ
Think a belt is too tight, but apart from that. No nasty sounds heard
yellowcab - 28/1/14 at 06:52 PM
Awesome mate
stevepj - 28/1/14 at 08:12 PM
Nice work Ben, not long now til it's all done and spreading a smile all over your face.
Reminds me a lot of this, I don't know why!

Ben_Copeland - 28/1/14 at 08:48 PM
quote:
Originally posted by stevepj
Nice work Ben, not long now til it's all done and spreading a smile all over your face.
Reminds me a lot of this, I don't know why!
Thanks for all the help Steve. Life saver!!
Ben_Copeland - 31/1/14 at 08:27 AM
Few more bits done over the past couple of nights.
Boost Gauge, I was going to replace the oil pressure gauge to save drilling another hole but I might swap that for a oil temp gauge instead so I put
the boost gauge where I could see it

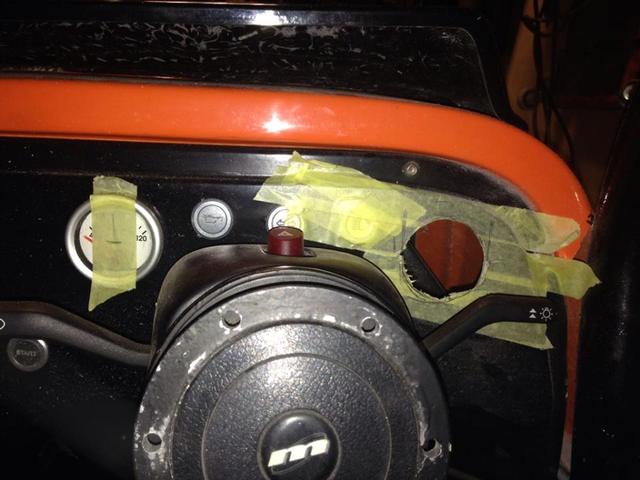
Boost Gauge 1
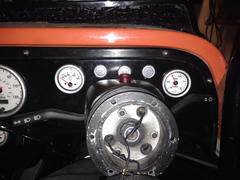

Boost Gauge 2

Boost Gauge 3
Next was some prop catchers, I originally planned to fit 2 sets of catchers inside the tunnel. One set at each end, but my prop is quite short and I
had nowhere to mount them other than in the middle.
I got these from FastDan, they don't seem wide enough for the Haynes Tunnel I'm guessing the locost tunnel is a little narrower so I had to
make some crude brackets up, while trying to work in a tunnel with the prop still attached. 
Prop Catchers
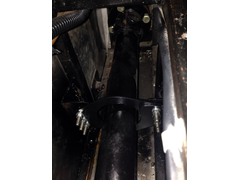
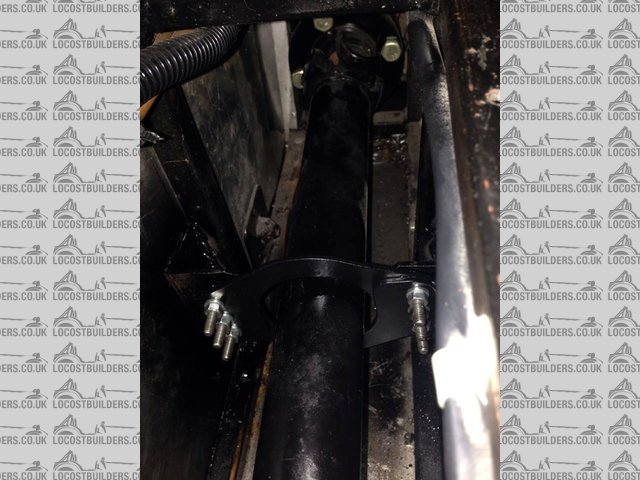
Prop Catchers
I then decided to tackle the air filter location problem... Somehow I just got it to sit infront of the engine, the 73mm flexy cold feed JUST squeezes
down between the radiator/intercooler and nosecone. That should hopefully be ok, just need to work out a way of mounting the air filter.

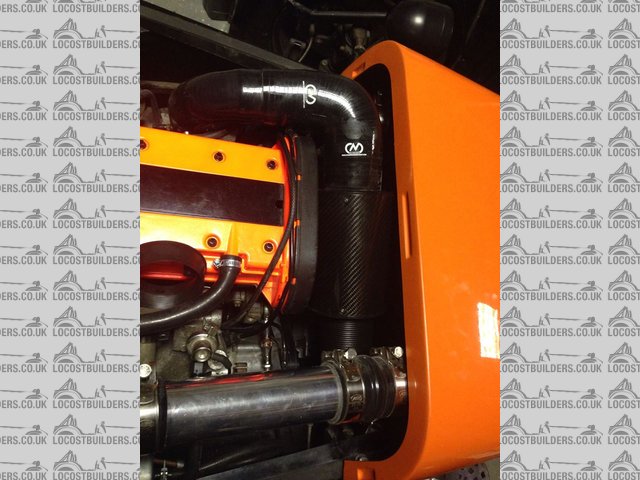
Filter

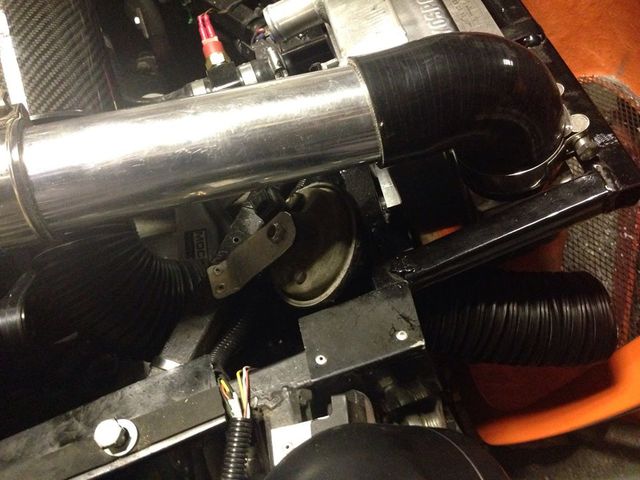
Air Feed

Air Feed
[Edited on 31/1/14 by Ben_Copeland]
stevepj - 31/1/14 at 01:19 PM
if you hadn't chopped that big horrible engine mount off the front you could have got a fixing on there somewhere
Ben_Copeland - 31/1/14 at 01:35 PM
Don't worry steve, i'll find somewhere to mount it. Theres no way that mount is coming back !
Ben_Copeland - 1/2/14 at 05:18 PM

Airfilter mounted
Enclosed Airfilter mounted using the bracket that came with it, slightly modified. I used the cambelt cover bolt to hold it all in place.
Tight
I'll have to turn the hose clamp around to stop it getting in the way.
Description
Mounting bracket
Ben_Copeland - 3/2/14 at 04:50 PM
Description
Small update, couldn't find a t - piece the right size (32mmx18mm) to join that surprise pipe up to the bottom/water pump hose so I had one made
I already had the individual pipes so I cut and shaped the smaller one and drilled the larger pipe, then my friend tig'd them together for me.
Hoping tonight I can get all the water system finished
[Edited on 3/2/14 by Ben_Copeland]
Ben_Copeland - 3/2/14 at 10:53 PM
All plumbed in and filled up with water and antifreeze. No leaks so far ran the engine for a bit but it was too late and too noisy.
stevepj - 4/2/14 at 11:01 PM
All coming together nicely now Ben, you should be ready in plenty of time for the good weather.
Have managed to map in the IACV on mine today so now it starts and fast idles from cold and the fast idle decays to normal idle as the temp increases.
Ben_Copeland - 5/2/14 at 10:12 AM
I've left mine disconnected, I could wire it into the ecu but I'm not sure its worth it tbh.
Perhaps once its at mapping the tuner can make that decision for me
yellowcab - 5/2/14 at 10:41 AM
GoPro action required
Ben_Copeland - 5/2/14 at 11:25 AM
Think i'll have it recording the tuning
Ben_Copeland - 10/2/14 at 05:45 PM
http://youtu.be/n3vVJiQOv-g
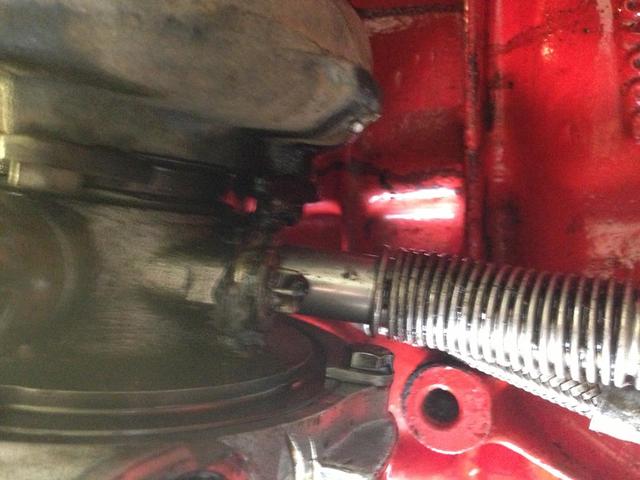
I had to turn the oil filter mounting so the pipe connections didn't rub on the alternator belt, I also found the wastegate was rattling, so
tightened up the actuator arm.
Hey presto much quieter running engine.
Thanks Daveb666 for the suggestion of rotating the oil filter mounting, id forgotten they were bolted on.
yellowcab - 10/2/14 at 06:33 PM
Gook work Ben - roll on Saturday huh!?
Ben_Copeland - 10/2/14 at 07:22 PM
Bloody well looks like it. I've got the ok from Allison and I've got most of the money for it.
Just need to try get the car up to running temperature tomorrow night and hope it's got no problems.
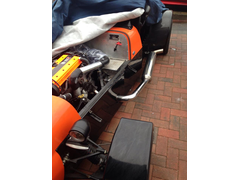
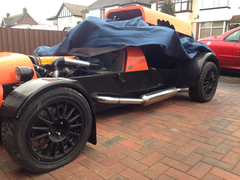
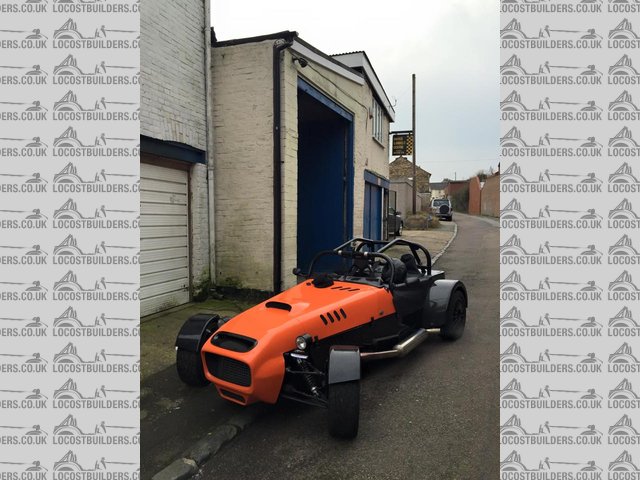
Ben_Copeland - 7/3/14 at 08:15 AM
Bit of an update, I missed my original tuning booking due to a leaking clutch cylinder and a noisy clutch.
The leak been fixed but the noise is still there, I replaced the clutch bearing but its not that. So don't know what's wrong. I've
given up trying to fix it, so it'll either get worse or whatever's touching when the pedal is pushed down will wear away enough to stop
Tuning is now booked for Friday 14th March, so i'll update then.
But it does drive fine and the water and oil system all works. I've also fitted an oil temperature sender but i'll update at the weekend
once its all working ok.

New Road View
beaver34 - 7/3/14 at 08:23 AM
looks great
Ben_Copeland - 7/3/14 at 08:30 AM
Forgot I missed a step, Faired side panels... I also meshed them to hide the chassis behind.

Description
Ben_Copeland - 7/3/14 at 10:38 AM
quote:
Originally posted by beaver34
looks great
Thanks pal
Ben_Copeland - 9/3/14 at 07:58 PM
Saturday morning I finished wiring in an oil temperature sender. Drilled and tapped the oil cooler line banjo bolt and inserted a smiths water
temperature sensor. This was then wired to a switch along with the original water temperature cable.
Basically this all means that I can flip a switch and see what the oil temperature is, then flip it back for water temperature on the same gauge.
Otherwise I've got to buy another smiths gauge which are over Ł50, plus Ł15 for the sender. That's fine but I'm running out of space
on my dash!!
I'll stick a couple of pictures up tomorrow when I get to work as my laptops charger has had it at home.
Ben_Copeland - 15/3/14 at 11:21 PM
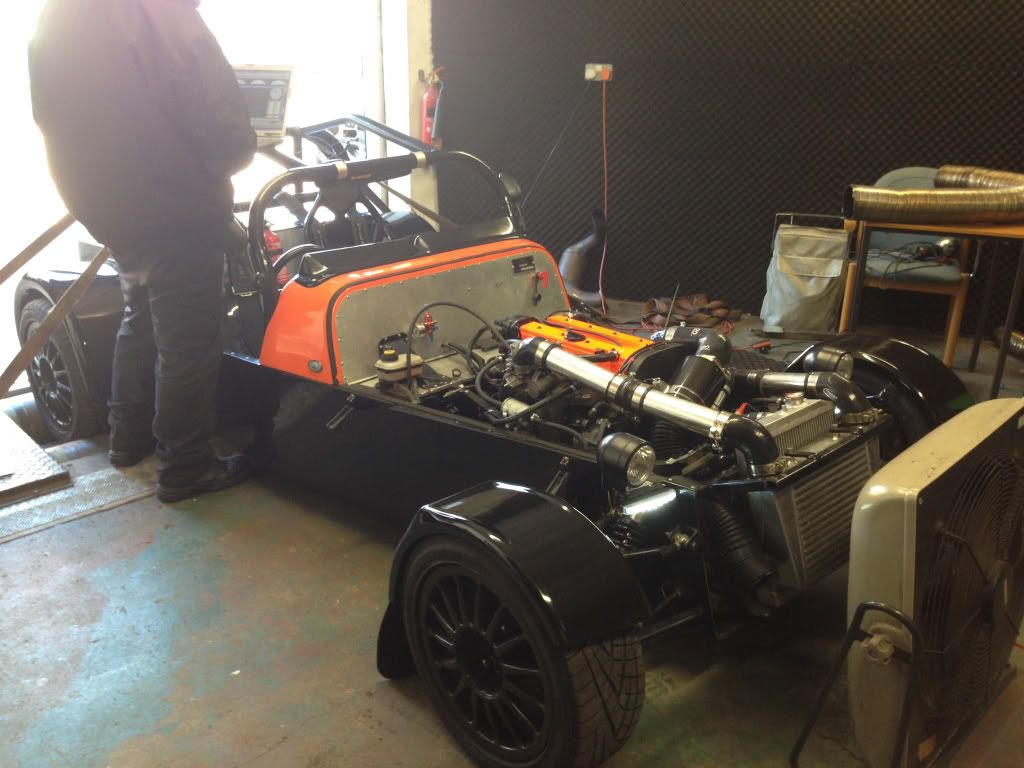
So, the big day was on Friday! Tuning day at Bailey Performance!
Wow what a guy, Dale knows his stuff. I'm going to do a separate thread with a bit of a report with plenty more details.
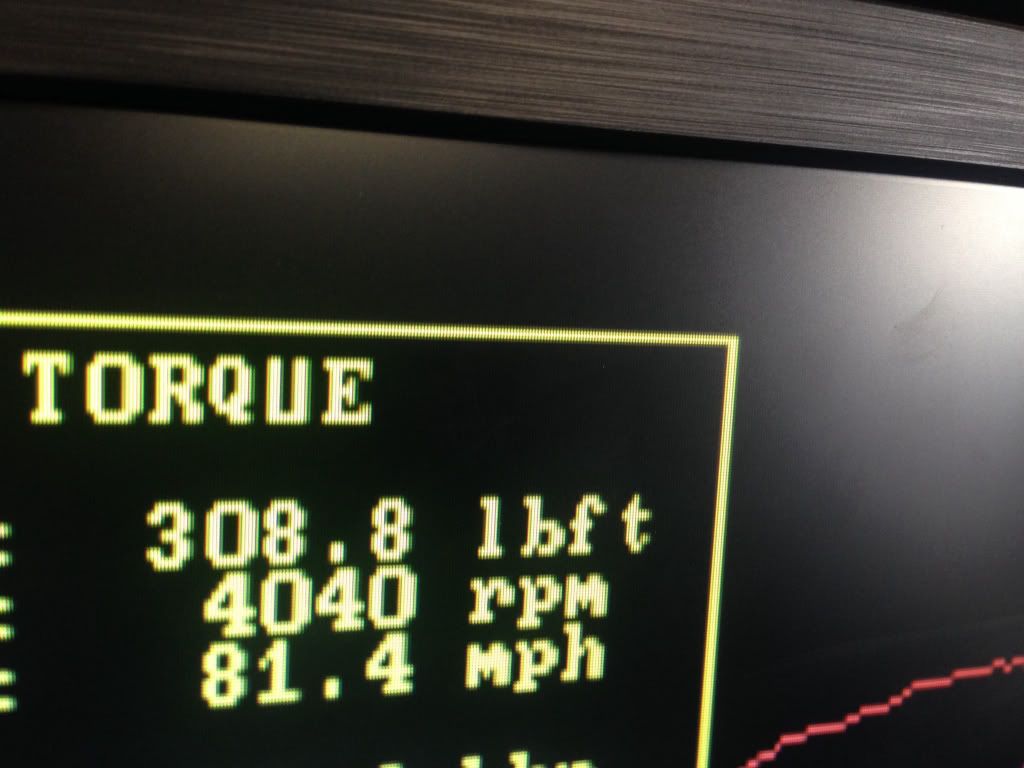
But, the gory figures ars so:
272bhp and 308ftlb torque, it's was savage on the rollers and it kept spinning the rear wheels as peak torque come on. We ended up removing the
splitter so it could be strapped down tighter.
I've not driven it anywhere yet, but Dale promises me it'll do 30mpg on cruise!
Happy bunny and no Major issues thankfully.
http://youtu.be/S0lndNHN5eY


[Edited on 16/3/14 by Ben_Copeland]
andywilson - 16/3/14 at 08:11 AM
Great result Ben!
me! - 16/3/14 at 08:41 AM
That'll shift!
beaver34 - 16/3/14 at 09:27 AM
get ready!
300lbft at 4k you will be going anywhere but straight
CosKev3 - 16/3/14 at 09:45 AM
Great conversion
That power will be very interesting! What diff do you run?
Would have popped down for a nosey when it was being tuned if I had known, as I'm only just up the road from Bailey Performance.
Ben_Copeland - 16/3/14 at 11:13 AM
Hi chap. It's got a LSD sierra diff from a 2.0 xr4x4 I seem to remember.
Ben_Copeland - 17/3/14 at 08:57 AM
I did a write up of the day on a separate thread.
Please see it here:
http://www.locostbuilders.co.uk/forum/9/viewthread.php?tid=189685&page=#pid1595632
Ben_Copeland - 21/3/14 at 09:02 AM
Well, I've sent my ECU back to Dale so he can add the necessary bits to run my rev counter (diodes off the coil was causing interference)
I've found the oil leak on the bottom of the turbo and hopefully sealed it.
I bought a set of cooler plugs, but they turned out to be too big (14mm socket) to fit in the spark plug holes. Dale's going to send me some of
the right ones when he returns my ecu.
I've bought a ford coil pack to replace the GM one. The GM one seems to be causing a minor misfire during hard acceleration.
I'll update with pictures once its arrived and all fitted
Ben_Copeland - 2/4/14 at 11:51 AM
Well taxed the car and off out I went!! Holy poo the car shifts. Turbo kicks in low down the rev range. I had to really watch the speedo as I was
speeding very quickly.
80degrees water temperature all the time and oil got up to 110degrees.
It doesn't scream off like the engine I had before, where your watching the revs go up ready to change gear. It's all about torque now, it
just shoots off up the road like a scalded cat with no effort.
Big grins from me. Had the go pro running but it's was a bit dark,
Couple of Really Boring Videos :
http://youtu.be/KgD1qUD5g7I
http://youtu.be/C_kAP_ZjV24
[Edited on 2/4/14 by Ben_Copeland]
beaver34 - 2/4/14 at 06:08 PM
Awesome!
Watch your oil temps though as that's quite high for pottering around
Ben_Copeland - 3/4/14 at 09:24 AM
I'm not 100% sure that's correct. The temperature sensor I put into the banjo bolt for the oil cooler take of is not really the best
place.
I'm going to relocate it to the sump and see what difference that makes.
I'm also going to drill a 6mm hole in the coolant thermostat to allow for lack of heater bypass. Which might explain why the fans coming on but
gauge is only reading 80c
Ben_Copeland - 22/4/14 at 02:21 PM
Right, bit of an update.
Oil temperature is now fine. The thermostat wasn't opening properly and I had the oil temp sensor in the wrong place. Its now located in the
sump plug and appears normal.
I also installed a massive oil cooler, but its obvious its not necessary so will probably swap it back to a smaller one.
Water cooling, I had a bit of an issue where the fan was coming on during normal driving. Appears that I wasn't getting enough air in the
front.
I'll made some crude cowling to try and force more air through the rads. I've also removed the meshing from the nosecone... The mesh I had
was very restrictive. Just need to find something to replace it with.
I've also replace the thermostat with a 82c one and put the heat bypass pipe back in.
I'm yet to give it a blast on a hot day, so I'm hoping for some nice evenings or spot of sun this weekend where I can give it a bit of a
hoon and see what's what.
I'm also going to Stoneleigh so come and say hi if you see me / the car.
[Edited on 22/4/14 by Ben_Copeland]
daveb666 - 22/4/14 at 03:07 PM
quote:
Originally posted by Ben_Copeland
I'm also going to Stoneleigh so come and say hi if you see me waiting on the hard-shoulder for the AA.
[Edited on 22/4/14 by Ben_Copeland]
Ben_Copeland - 22/4/14 at 03:10 PM
Thanks for your support Dave ;-)
Think it'll manage the 20 miles from Olivers lol
daveb666 - 22/4/14 at 03:17 PM
Aww didn't realise you were cheating and doing the journey in two bits.
Ben_Copeland - 22/4/14 at 03:18 PM
Yeah, bleep that... I need to change my diff if I want to start doing long runs !
beaver34 - 22/4/14 at 04:26 PM
quote:
Originally posted by Ben_Copeland
Yeah, bleep that... I need to change my diff if I want to start doing long runs !
why whats it reving to at normal speeds?
Ben_Copeland - 22/4/14 at 04:52 PM
Runs about 3.5k at 70mph
If I can get that down to 3k at 70 I'd be happy.
Runs out of revs at 120mph
beaver34 - 22/4/14 at 06:57 PM
Really? Must be odd ratios for that to happen 3,500 is normal revs really for 5th at 70
Is it live axle or IRS?
Ben_Copeland - 22/4/14 at 07:13 PM
Type 9 v6 box and a sierra 3.9 (I think) LSD diff.
I'm thinking that if I get hold of a 3.38 diff and swap the crown wheels etc. or find a lobro 3.38 diff and bolt LSD in. Then I'll get
better top end but as I have a lot of power the acceleration won't be so affected.
Ben_Copeland - 6/11/14 at 08:06 AM

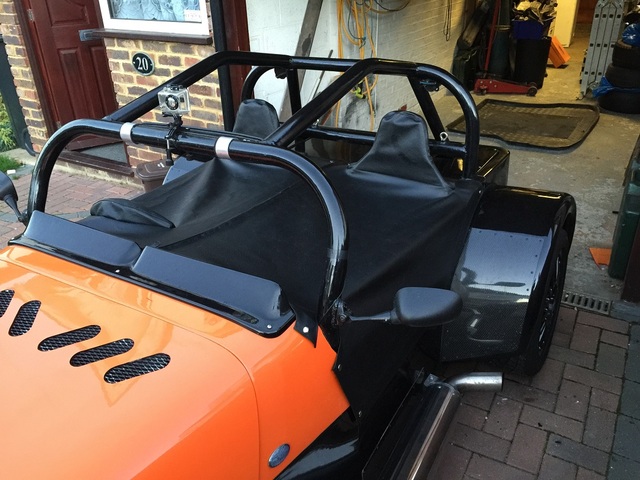
Cover 1

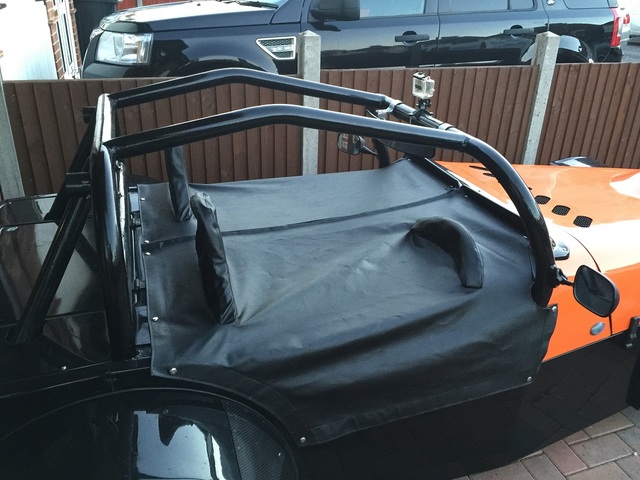
Cover 2

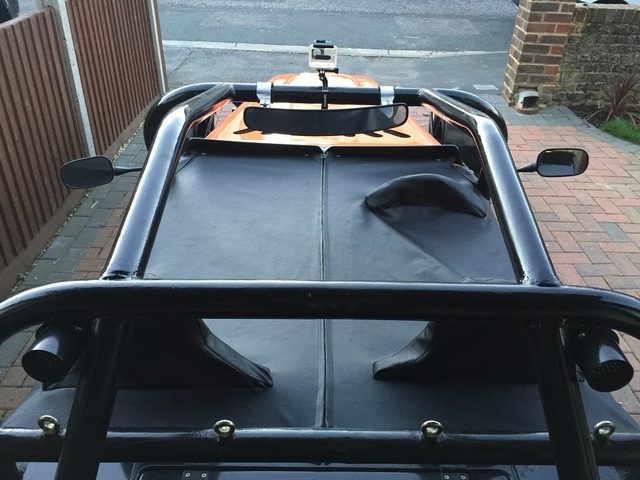
Cover 3
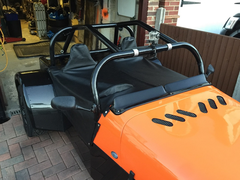

Cover 4
Last weekend I had my tonneau cover made and fitted. Should keep the rain out when parked up
Made by a local place - Browns Custom Trimming
[Edited on 6/11/14 by Ben_Copeland]
daveb83 - 10/11/14 at 12:40 PM
Liking the cover.
I could have done with one just like that on friday for a very wet track day, was unable to get a garage and didnt want to put my car cover over as
would have melted on the exhaust. something like that would have been ideal though.
If you dont mind me asking, how much was it just so i know a ball park figure to try and find a local trimmer near me to make one for myself?
Ben_Copeland - 10/11/14 at 01:00 PM
It should cost between Ł200 - 300 from a trimmers. Depending on how complicated it is.
Soft bits for sevens wanted Ł450+ to do the same thing and they are quite unhelpful via email.
[Edited on 10/11/14 by Ben_Copeland]
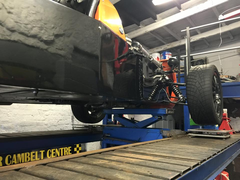
Ben_Copeland - 16/2/15 at 06:22 PM
Made my own Rosejointed wishbones a while ago, ahead of finding someone to set up the suspension.
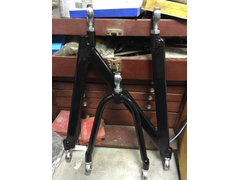
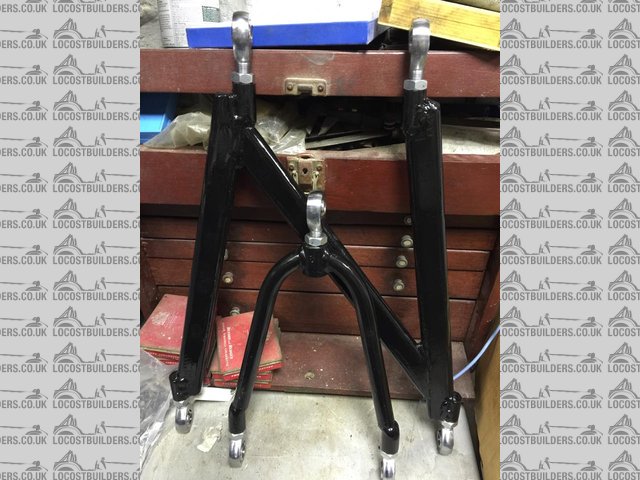
Description
Took the car to get the suspension setup today. Its been too long with ropey handling.

Description


Description

Description

Description

Description
Steve @ Dover Cambelt Centre certainly knows his stuff. Explaining to me what he was doing and why, I helped out with alterations as much as I could
to help speed things along.
Camber, tracking and corner weights were adjusted and this is what we ended up with in the end.
Rear Camber -1 degree.
Rear Tracking 2mm toe in.
Front Camber -1.5 degree
Front Tracking 0.5mm toe in.
Corner Weights:
LF 169kg cross weights RR to LF 49%
RF 177kg cross weights LR to RF 51%
LR 190kg
RR 217kg
The drive home was a lot of fun, pushing it into roundabouts even with a slightly damp greasy road the grip was 100% better.
Steve @ Dover Cambelt Centre
2-3 Ethelbert Road, Tower Hamlets, CT17 0DR, Dover, Kent
01304 448878
07973 304038
[Edited on 16/2/15 by Ben_Copeland]
CosKev3 - 16/2/15 at 11:27 PM
Wishbones look good
Have you made them from scratch or just added the rose jointed ends?
What set up have you got on the top of hubs where wishbone rose joint attaches?
[Edited on 16/2/15 by CosKev3]
Ben_Copeland - 17/2/15 at 07:33 AM
Half made them. I used some old mk wishbones. Cut the tubes off and welded in threaded bar that I made myself.
The rose joint goes where the original bush tube was into the top of the upright. Then used spacers either side so the upright doesn't move
about. Same as the rest of the joints in the wishbone chassis brackets
Benzo - 28/8/18 at 09:38 AM
Been Reading through this thread thinking of doing something similar to my Westie XE.
How have you found the Turbo power now after a few years? Has it been reliable?
What clutch & flywheel setup do you use on the Z20? with Type9 box?
Ben_Copeland - 28/8/18 at 10:36 AM
Hi Benzo
It’s been very reliable, I changed the turbo core as the previous owner of the engine had messed about with it and it failed prematurely, otherwise
it’s been fine.
Clutch wise, I used a Astra turbo clutch cover, galaxy v6 friction plate and bearing that came with slave.
Tbh, I’ve changed the type 9 to a Vauxhall omega box. R25-28 it’s a lot stronger if your looking to increase the power at all.
Benzo - 28/8/18 at 10:41 AM
quote:
Originally posted by Ben_Copeland
Hi Benzo
It’s been very reliable, I changed the turbo core as the previous owner of the engine had messed about with it and it failed prematurely, otherwise
it’s been fine.
Clutch wise, I used a Astra turbo clutch cover, galaxy v6 friction plate and bearing that came with slave.
Tbh, I’ve changed the type 9 to a Vauxhall omega box. R25-28 it’s a lot stronger if your looking to increase the power at all.
Awesome, its bound to be Mega on the road, what diff ratio do you run?
What did you source the Z20 from initially? are you just running the standard FWD Flywheel?
I thought they where only VX220 but now I see they are in Astra coupes, GSI's etc etc
Ben_Copeland - 28/8/18 at 10:51 AM
Diff ratio was originally 3.9 but I swapped it out for 3.6, make sure you have a LSD as it’ll just spin a wheel.
I used an 8v cavalier flywheel as it’s lighter but you could use the original flywheel, bit of a lump tho.
Engine was out of a converted Astra fake GSI, he gave me everything including the dash loom lol
If you want to run the original Ecuador you need the ignition module and key module. Otherwise bin it all and use a 3rd party tuner ecu


