Stuart_B
|
| posted on 6/10/09 at 07:48 PM |

|
|
swap form pinto to duratec start
hi all, this is my thread which i will be updating from a 1.6 pinto to a 2.0 duratec, as i am now 18. and can afford it.lol and can afford it.lol
right then well a few days ago i found out that my duratec i brough had taken a secondary buttery fly and steel rod in to one of it pistons.
see here for more info
so now today, i got home at 6.00 and my dad was home and i said i all alls ways wanted to rebuild an engine, and it is happening now.lol
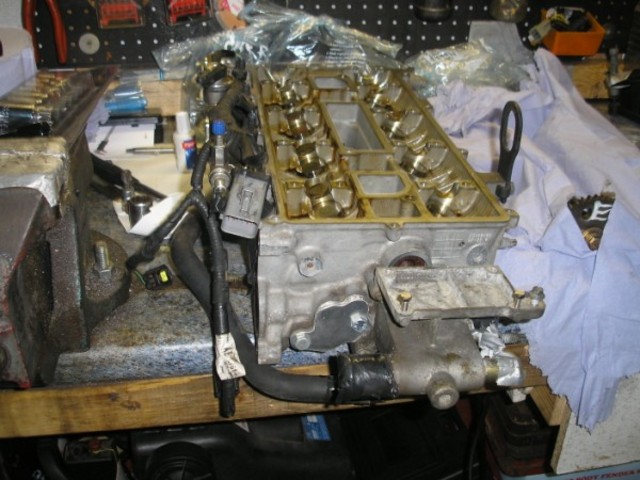
so we got out to the gargre and started with this:
 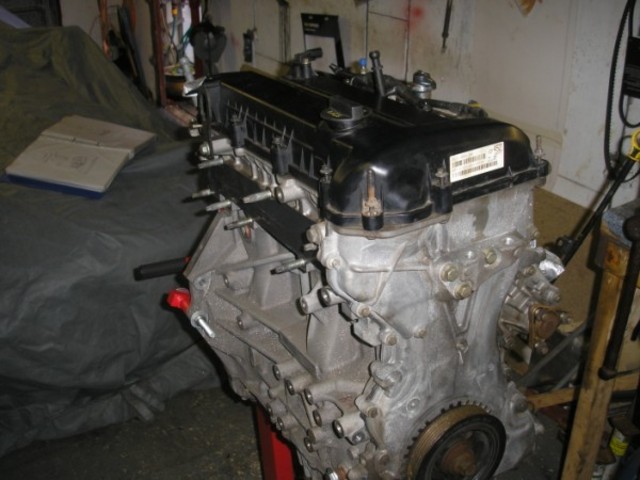
cleaner engine
so the rocker cover comes off:
 
roker cover off
cams
now, tiem to undo the crank pulley, that was a misson, me and dad could not budget, so we throught a lillte bit of heat and teh impact gun, and it
eventruly shifted.lol
 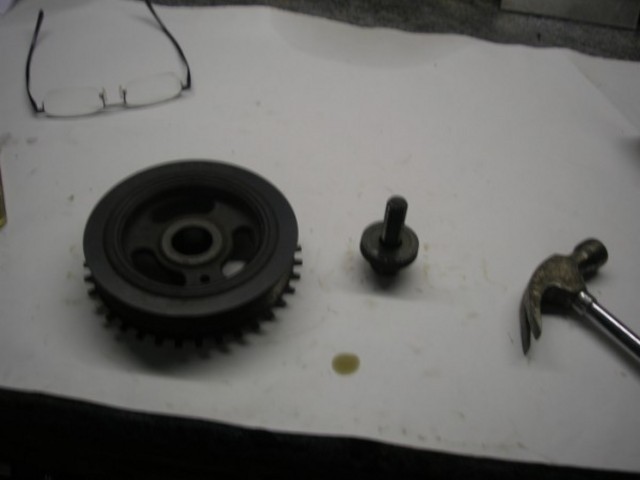
crank pulley
next was the timming chain cover to remove.
 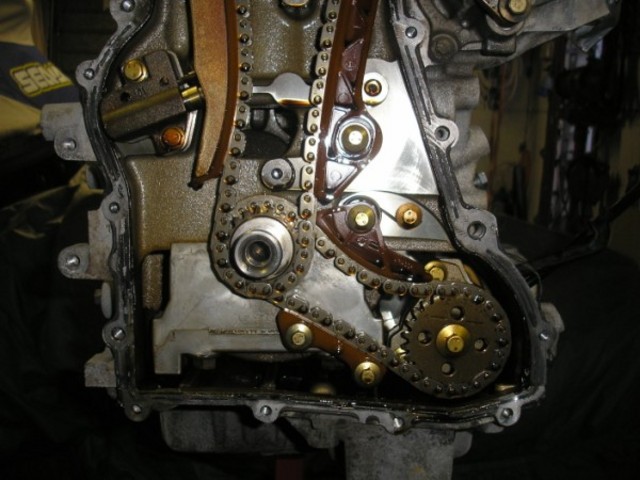
timing cover off
and now to lock the tensor back:
 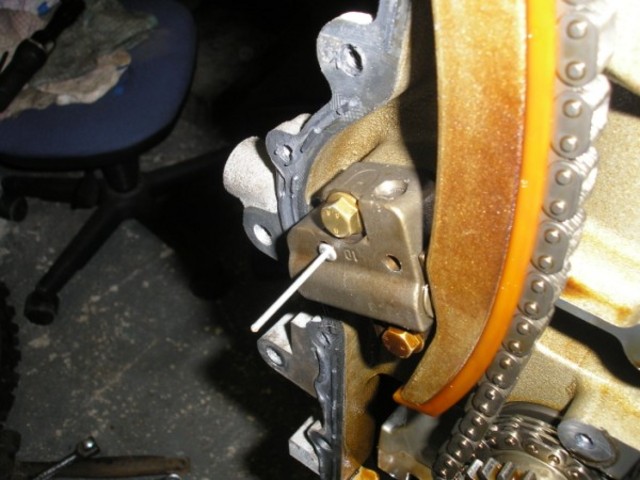
tensinor
a clever use of a pop rivet, taht was dad's idea.lol
and the chain is lose:
chain lose
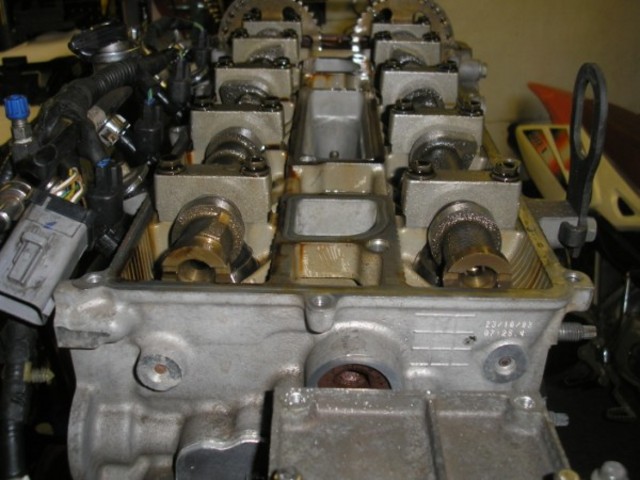
next was to take the cams out:
cams out
and the camshafts on the bench:
cams on bench
and now to undo the torx head bolts which at t55, and i only have a set up to t 50, so a quick dart around one off my mates, and got a t55, adn off
came the head.
head off
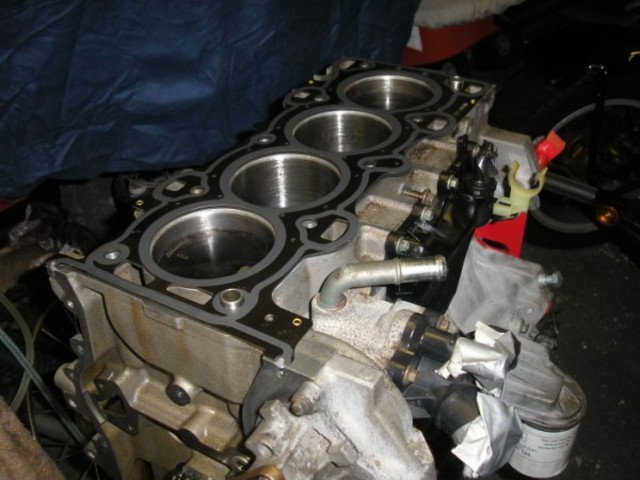
and i sore the damge, to the vaules and the piston.
the bore is fine, will just need a hone, but it needs a new piston, and the vaules could do to be taken out and relaped.
 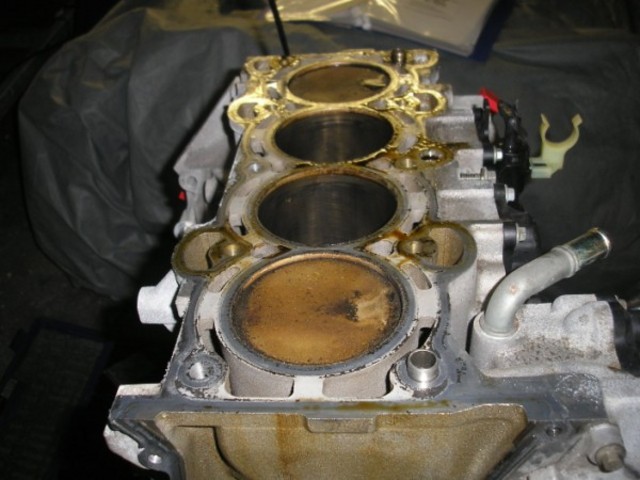
block
so after, that time to take the sump off, and get to the crank.
 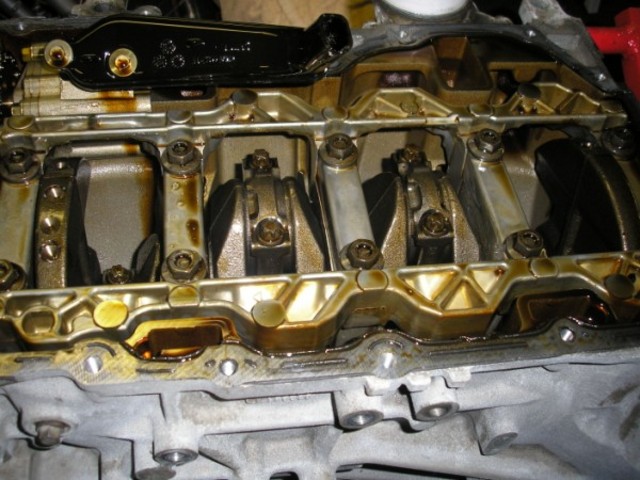
crank
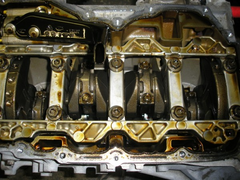 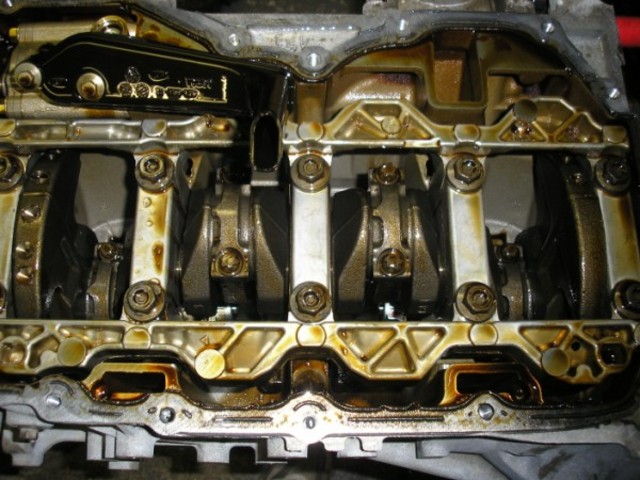
crank
and i the conrod bolts are star drives on teh out side, and i do not have any off those, so i will have to get some, and take the piston out.
will keep this thread updated.
thanks
stuart
[Edited on 6/10/09 by Stuart_B]
black mk indy, 1.6pinto on cbr600 bike carb's.
|
|
|
|
|
omega0684
|
| posted on 6/10/09 at 07:57 PM |
|
|
well at least you know how your duratec is put together now, all the ins and outs, make sure you have a good look at the condition of the crank
bearings and big end bearings for excessive wear etc.
keep us posted!
|
|
|
Doofus
|
| posted on 6/10/09 at 08:30 PM |
|
|
Cool,
Looks like you will be giving us a good reference guide as you go along. Keep up the good work
|
|
|
MakeEverything
|
| posted on 7/10/09 at 07:23 AM |
|
|
Cool stuff innit.
I remember taking apart a 1.8 Zetec that i skipped an could now do with! 
Its the best way to learn.
Good Luck.
Kindest Regards,
Richard.
...You can make it foolProof, but youll never make it Idiot Proof!...
|
|
|
Stuart_B
|
| posted on 7/10/09 at 07:44 PM |
|
|
hi all, well my dad took the undun teh crank bolts, and got the con rod, and piston out today as i was at work, and he has got this week off.
and this is the damaged piston:
 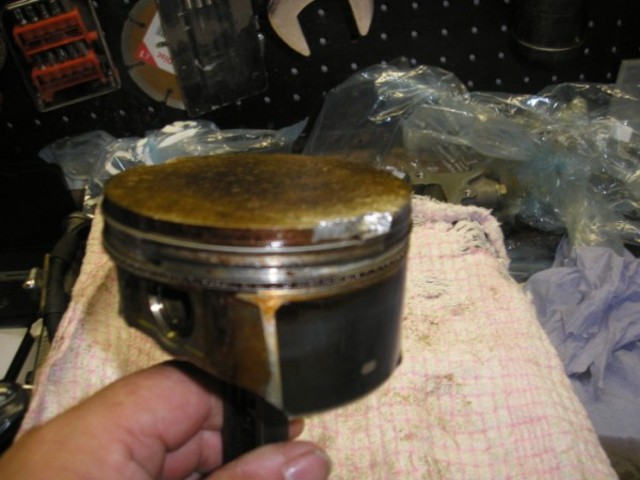
piston
 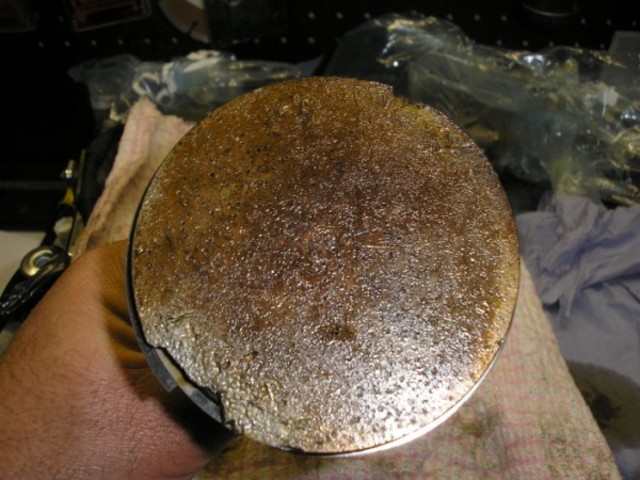
piston
as you can see it is not good.
will update this thread through out the project
thanks
stuart
black mk indy, 1.6pinto on cbr600 bike carb's.
|
|
|
goaty
|
| posted on 7/10/09 at 08:22 PM |
|
|
thats bad......do you need a replacement still?? or all sorted ok??
I going to strip mine down next week ready to take to scholar
|
|
|
flak monkey
|
| posted on 7/10/09 at 08:27 PM |
|
|
Once I finally recieve my rods I will be stripping mine to fit the forged bits, so if you want a full set of nearly new rods and pistons let me
know.
Might be another month or so though.
David
Sera
http://www.motosera.com
|
|
|
MikeRJ
|
| posted on 7/10/09 at 10:58 PM |
|
|
quote:
Originally posted by Stuart_B
and this is the damaged piston:
Ouch. Is there much damage to the head?
|
|
|
Stuart_B
|
| posted on 9/10/09 at 03:49 PM |
|
|
hi, i have got a second hand set coming, with low milage, as i might go down the supercharging route in a few years time.
the vaules, i have not manged to get ot yet as i have not got a double vaule spring compressor.
cheers
stuart
black mk indy, 1.6pinto on cbr600 bike carb's.
|
|
|
neilj37
|
| posted on 10/10/09 at 04:16 AM |
|
|
Its always gets interesting when you start to rebuild engines. Look forward to your posts.
Oh by the way I hope the rebuild goes better than your spelling 
|
|
|
Stuart_B
|
| posted on 10/10/09 at 07:46 PM |
|
|
quote:
Originally posted by neilj37
Its always gets interesting when you start to rebuild engines. Look forward to your posts.
Oh by the way I hope the rebuild goes better than your spelling
lol, so do i.
i have ordered a head gasket set, and the head bolt set, so hopefuly next weekend it might be back toghter.
stuart
black mk indy, 1.6pinto on cbr600 bike carb's.
|
|
|
Stuart_B
|
| posted on 18/10/09 at 05:46 PM |
|
|
right a bit off an updated,
yesterday and today i have been working on the duratec.
i took out the other 3 pistons, then de glazed the bores on all 4.
then i got the new pistons, and allinged the pistons rings, so the joins where in the right poistions, and then installed the 4 pistons and con rods
in to the block, but i have not done the conrod bolts up tight as i have not recived my new ones yet.
 
4 pistons in
next on to taking the vaules out off the head.
so i got them all out, took the old vaule steam seals out as well as i am replacing them.
allthevaulesoutoffthehead
then i fitted the new vaule stem seals, and then finely lapped the vaules in, just to make sure there was no damage to the vaules when the engine
decide to take a steel rod.
so once all the vaules where lapped, i put the vaules and springs back together, and the little collets are tricky but by the end off this head i was
doing fine. putting a little bit of grease on the steam off the vaule was a great help, my dad told me about that.lol
vaules
then i just cleaned out the head, and made sure it was nice and clean, so i can get the head back on the block, and the camshafts in.
thanks
stuart
black mk indy, 1.6pinto on cbr600 bike carb's.
|
|
|
rusty nuts
|
| posted on 18/10/09 at 07:08 PM |
|
|
Better to fit the valve stem oil seals after lapping in the valves and cleaning all traces of grinding paste, your text makes it sound like you fitted
them before lapping in the valves?
|
|
|
Stuart_B
|
| posted on 19/10/09 at 06:18 PM |
|
|
oh, sorry yes i laped the vaules in then cleaned the whole head, and fitted new vaule steam seals.
it was my first cylinder head, so bit jhard to take it all in.
stuart
black mk indy, 1.6pinto on cbr600 bike carb's.
|
|
|
Stuart_B
|
| posted on 25/10/09 at 09:16 AM |
|
|
hi all, last night i went out to the gargre to finish the engine.
first job was to fit the new conrod bolts in the duratec, a nice easy job to start with:
new conrod bolts in
now time to move on and get the head on, so get the rtv and head gasket ready, in the book it says you have 10mins from once you have started to do
the head to finish it, so me and dad throught we will go for it.
headgasket in place:
new headgasket on
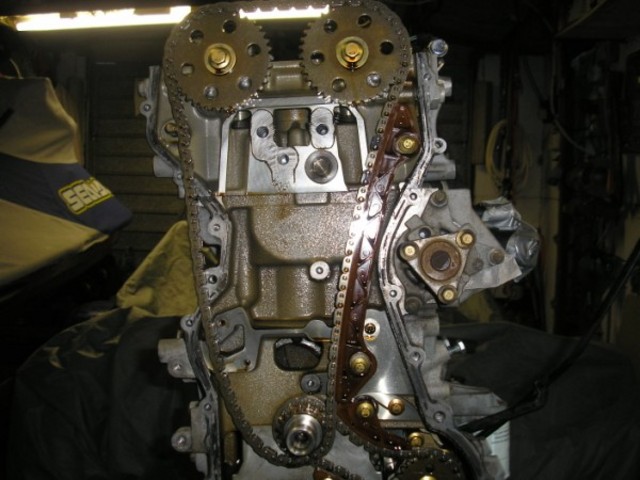
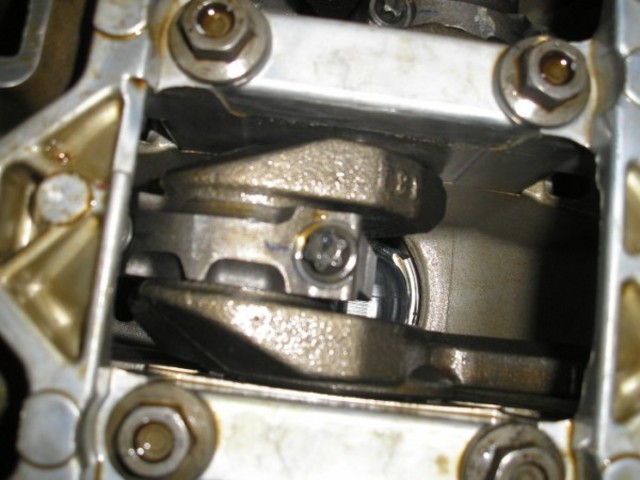
so then placed the head on and started to place all the bolts in by hand, then start tighting them in the correct sqeunce and correct pressure. once
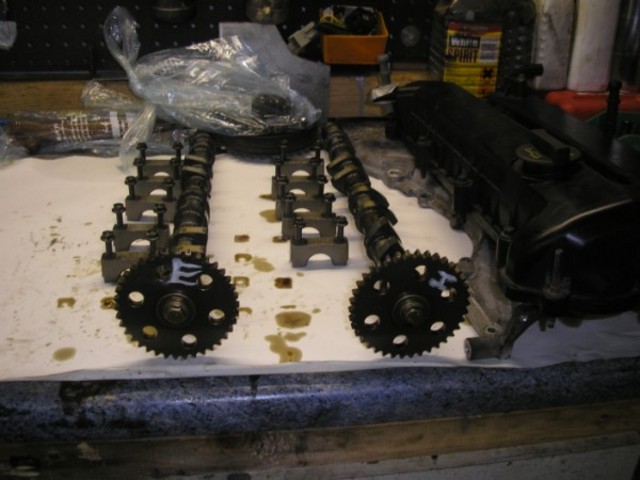
they where all done, it was time to fit the vaule buckets, so i fitted them, in the correct place from wher ethey where taken out off. after that it
was time to place the camshafts in and the cam carries in and do them up in the right order and pressure, once they where done, we lined both
camshafts up and palced the timing chain on, and made sure the no1 piston was at tdc with the tdc pin.
head done, camshafts in
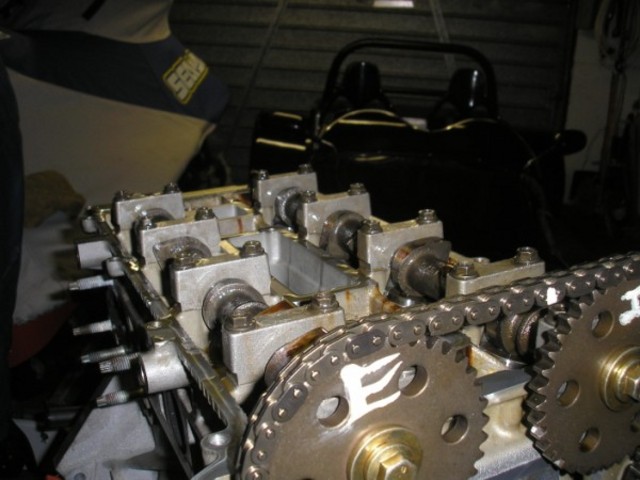
now to fit all the timming chain tension, and realse the pin, and it took up all slack off the chain, now in the book it say's remove all the
locking tools and do 2 complet revoultions off the engine by hand, we done that and nothing hit, and all the marks lined up, so that ment we got it
right.
then we put the locking tools backing in, and then went on to the timing chain cover and replaced the front seal, and then rtv in the correct places
on the block, and then bolted it up.
 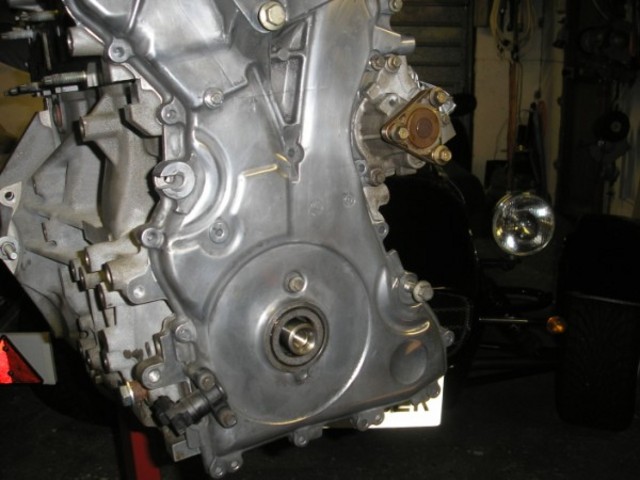
timing chain cover going on
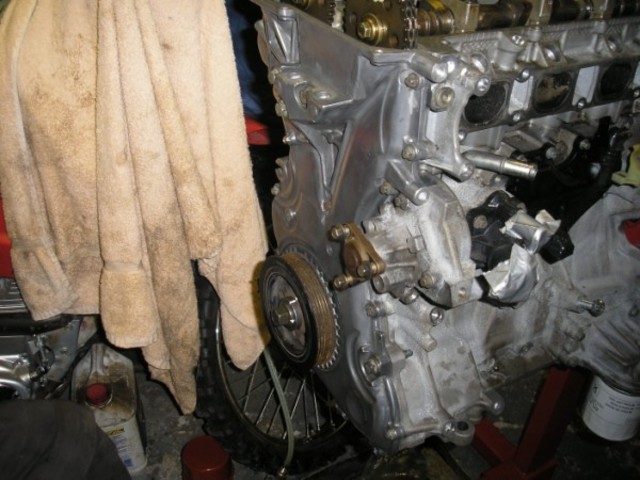
now time to put the pulley on and the new bolt on, it was hard to come off so we new it was hard to go back on.
but lucky i have my dad and he is bigger than me so that helped alot.seeing he done it.lol
now a complet engine, again
engine done
engine done
engine done
thanks
stuart
black mk indy, 1.6pinto on cbr600 bike carb's.
|
|
|
MikeRJ
|
| posted on 25/10/09 at 10:34 AM |
|
|
quote:
Originally posted by Stuart_B
oh, sorry yes i laped the vaules in then cleaned the whole head, and fitted new vaule steam seals.
Good work, it's looking great!
Not wanting to sound like a spelling/grammar nazi, but do you have a duff entry in your spell checker? Every instance of the word 'valve'
comes out as 'vaule' in your posts?
[Edited on 25/10/09 by MikeRJ]
|
|
|
scootz
|
| posted on 25/10/09 at 04:42 PM |
|
|
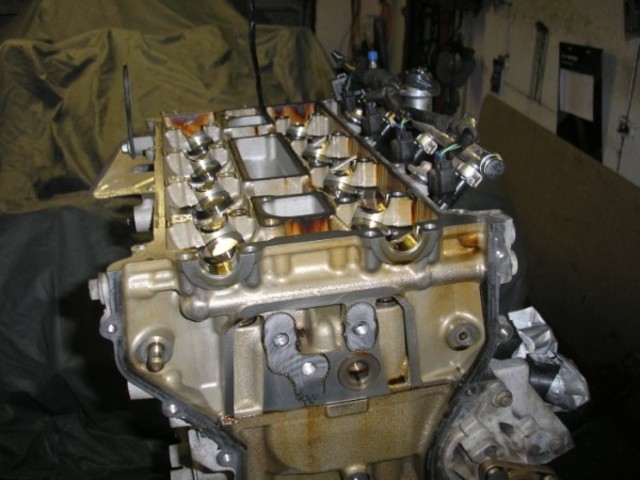
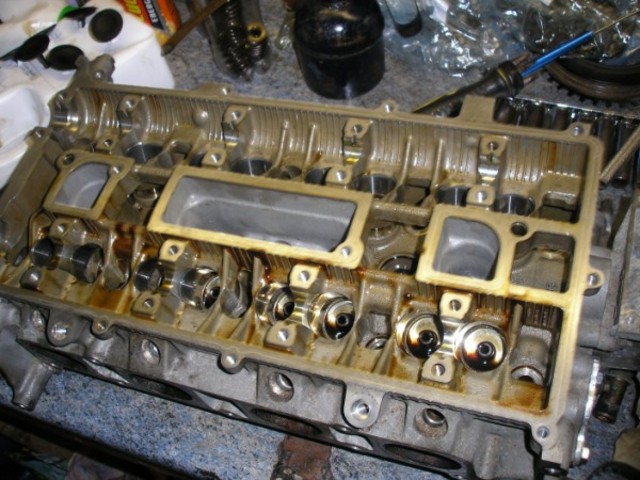
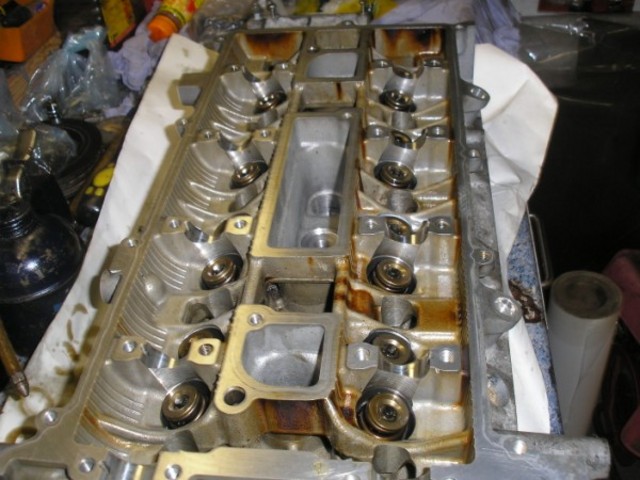
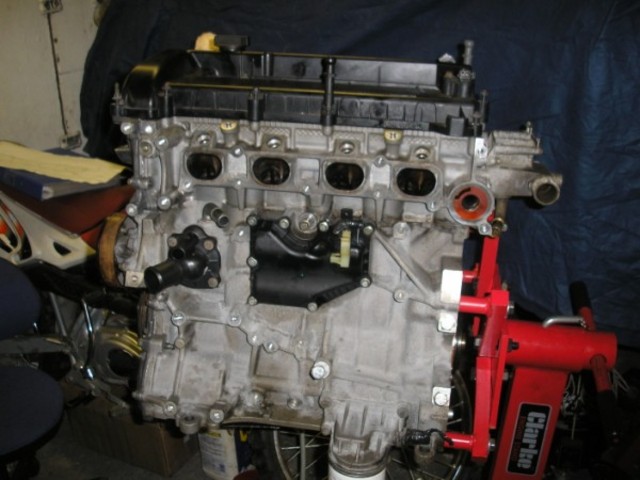
What's the port to the right of the inlet ports?
[img][/img]
|
|
|
scootz
|
| posted on 25/10/09 at 04:46 PM |
|
|
Also, Flak Monkey mentioned that a Zetec clutch is required if mating a Duratec to a Type 9 Box (thanks) - is the general 2.0 Zetec clutch suitable
for around the 200bhp mark?
|
|
|
flak monkey
|
| posted on 25/10/09 at 04:58 PM |
|
|
The other port is the egr port. Which goes to the egr valve on the back of the head. Its an M20x1.5 IIRC and ideally needs to be plugged.
If you are worried about the clutch slipping with 200bhp the one to fit is an uprated one for an RS Turbo (AP CP3560-2) which is good for 350bhp. But
again you'll need a friction plate with the correct splines. Speaking to AP they said use a 215mm plate as they dont actually make any 220mm
plates anyway. So an uprated plate for the pinto, coupled with the CP3560-2 plate on a fiesta st flywheel should do the trick 
David
Sera
http://www.motosera.com
|
|
|
Stuart_B
|
| posted on 25/10/09 at 05:22 PM |
|
|
hi, as david mention it is the erg port there is one on the exhaust side as well but i am not sure what to do about that one, but thanks david for the
thread taht saves me some time.
cheers
stuart
black mk indy, 1.6pinto on cbr600 bike carb's.
|
|
|
scootz
|
| posted on 25/10/09 at 06:34 PM |
|
|
Thanks (again!) chaps.
I was thinking it was the EGR port, but it threw me as the one on my engine doesn't have the natty red bit on it! Think I need to stop looking
at other Duratecs as the slight differences just confuzzle me!
|
|
|
Stuart_B
|
| posted on 10/12/09 at 08:42 PM |
|
|
hi all, bit of an update, i have made my own oil take off plate so i do not have to spend lots off money on a raceline part or simlar, and got a
remote filter head, so just will get the hose once it is in.
and have got a type 9 gearbox and durtec bellhousing of ebay for a good price, and a fiesta st flywheel off ebay as well.
i have no pictures at the moment but will get some soon.
thanks
stuart
black mk indy, 1.6pinto on cbr600 bike carb's.
|
|
|
Stuart_B
|
| posted on 11/12/09 at 06:15 PM |
|
|
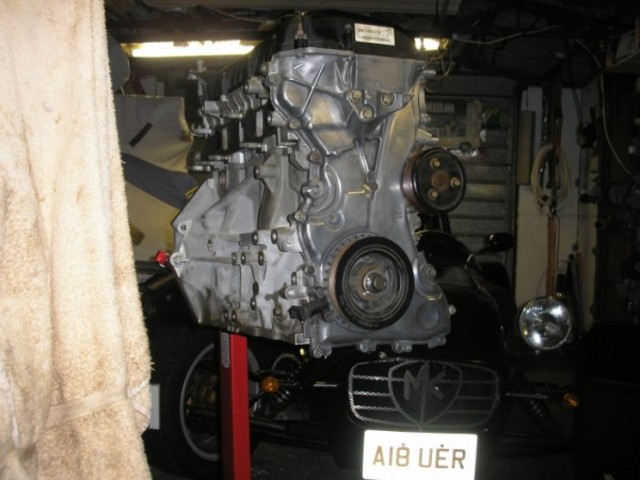
here are some pictures of the engine:
 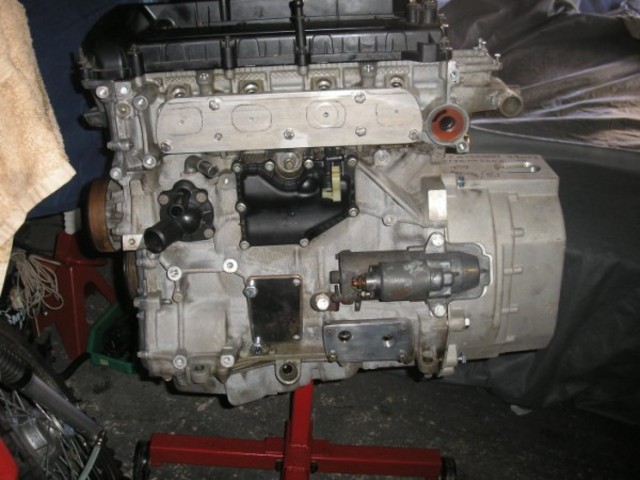
engine
here is the duratec with the bellhousing and oil adaptor, and the inlet flange and engine mount plates.
here is teh gearbox it got with the bellhousing,
 
gearbox
oil take of plate:
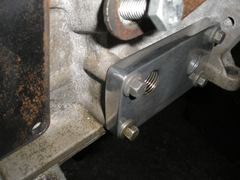 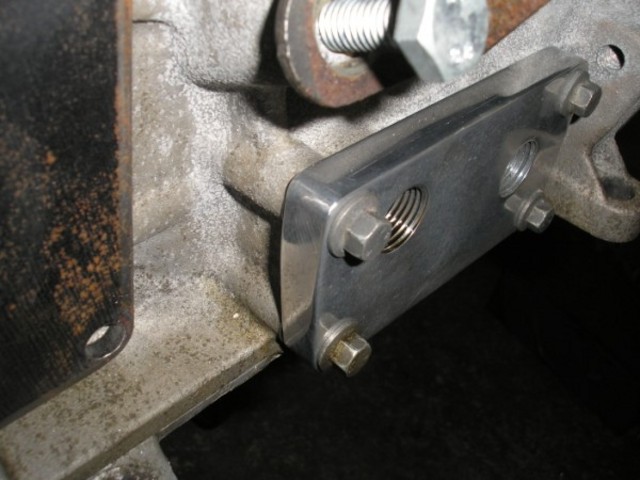
oil take off plate
from that i will go with oil hose to my remote filter head mount some where i can easy change the filter.
cheers
stuart
black mk indy, 1.6pinto on cbr600 bike carb's.
|
|
|
flak monkey
|
| posted on 12/12/09 at 12:44 PM |
|
|
Looking good Stuart, keep up the good work
Sera
http://www.motosera.com
|
|
|
Stuart_B
|
| posted on 26/12/09 at 12:22 PM |
|
|
hi all, bit of work on it,
i respaced my gsxr 750 throttle boddies, these are the standard spacing:
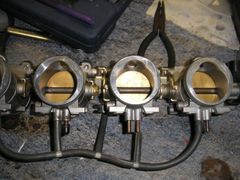 
gsxr 750
and this is after i respaced the throttle boddies:
 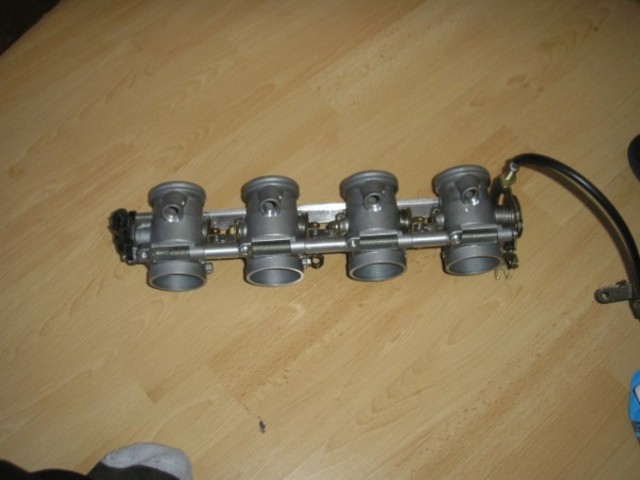
gsxr 750 throttle boddies
 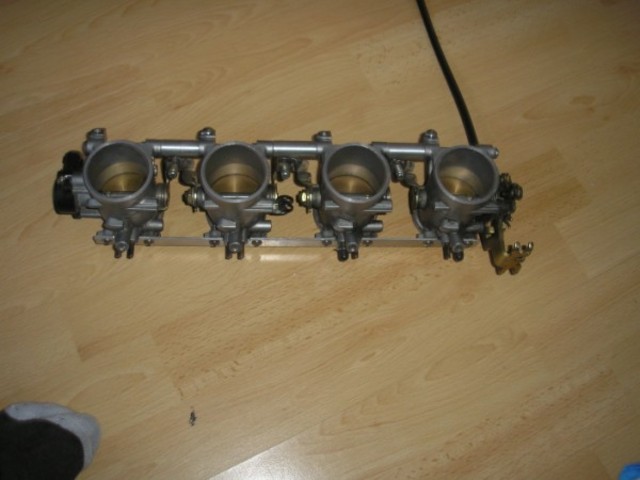
gsxr 750 throttle boddies 2
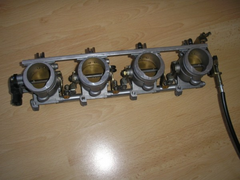 
gsxr 750 throttle boddies 3
i think it turend out all right as it was teh first try at resacing the throttle boddies, as on the pinto i just made a manifold to suit.
thanks
stuart
black mk indy, 1.6pinto on cbr600 bike carb's.
|
|
|


.jpg)


.jpg)