flak monkey
|
| posted on 1/9/11 at 06:54 PM |

|
|
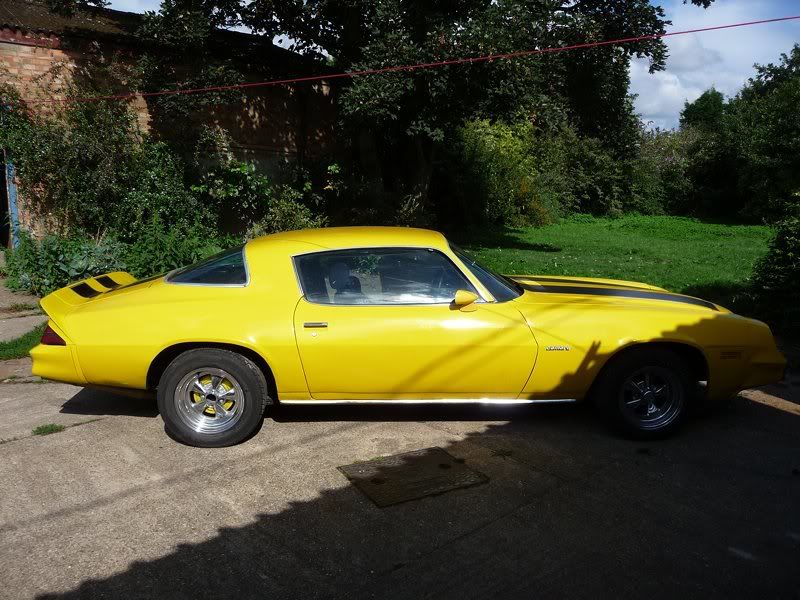
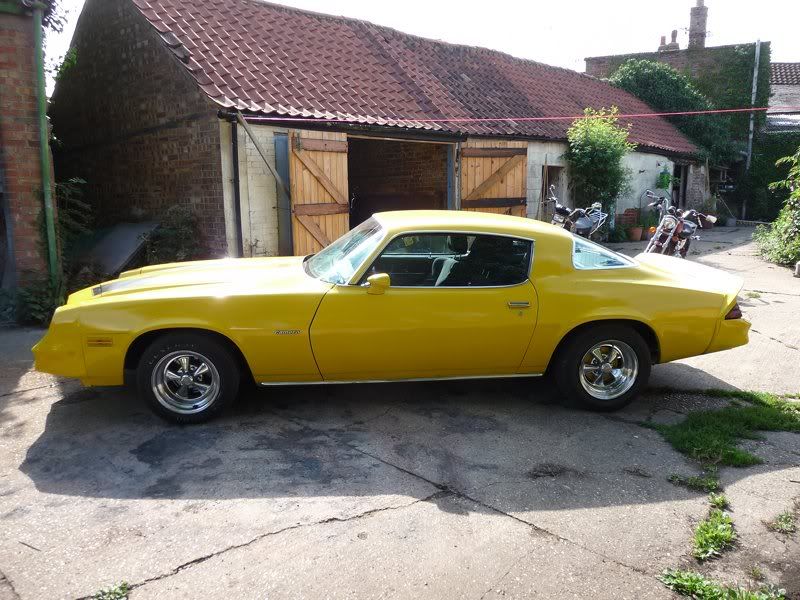
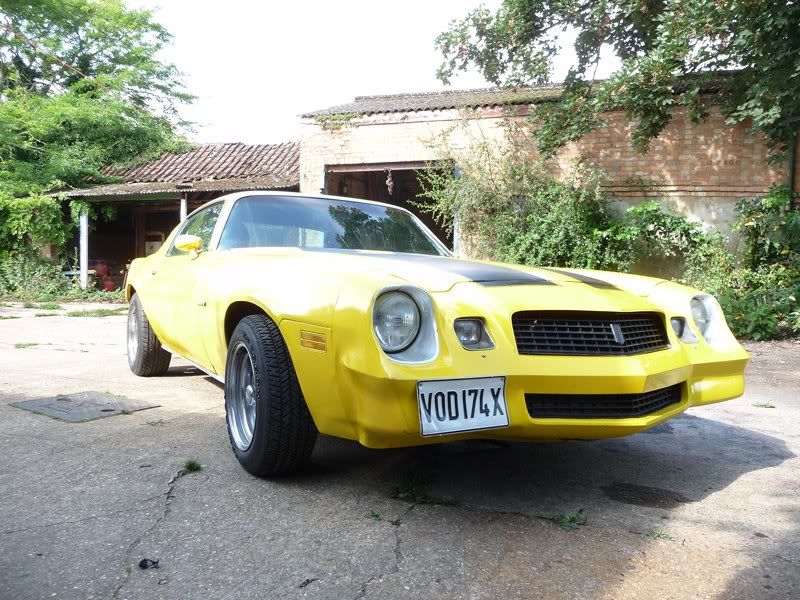
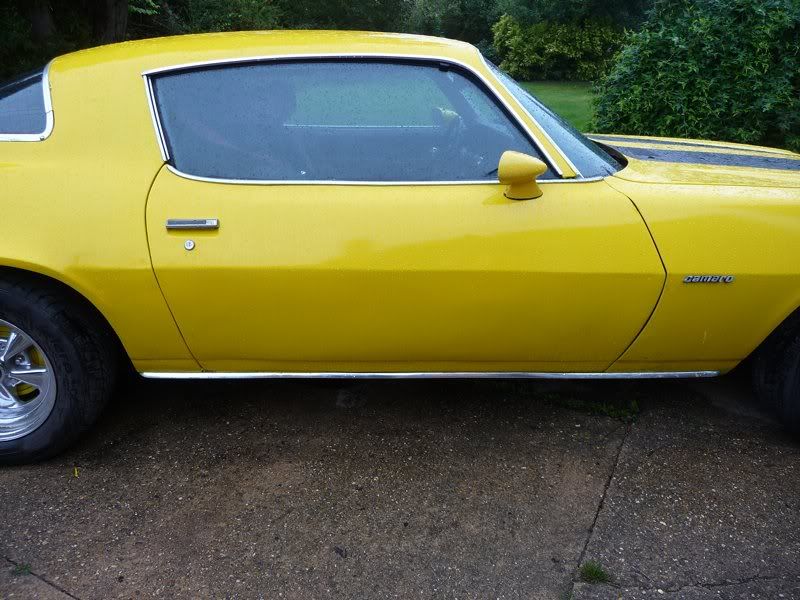
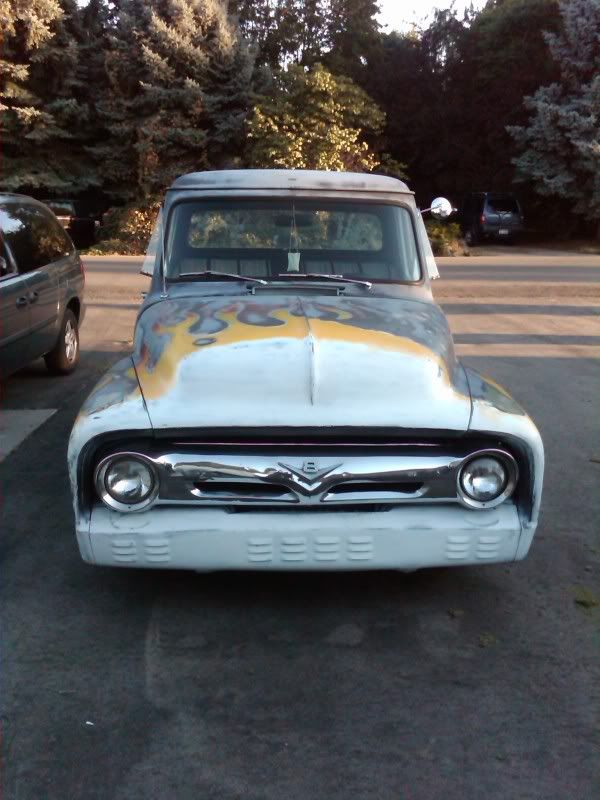
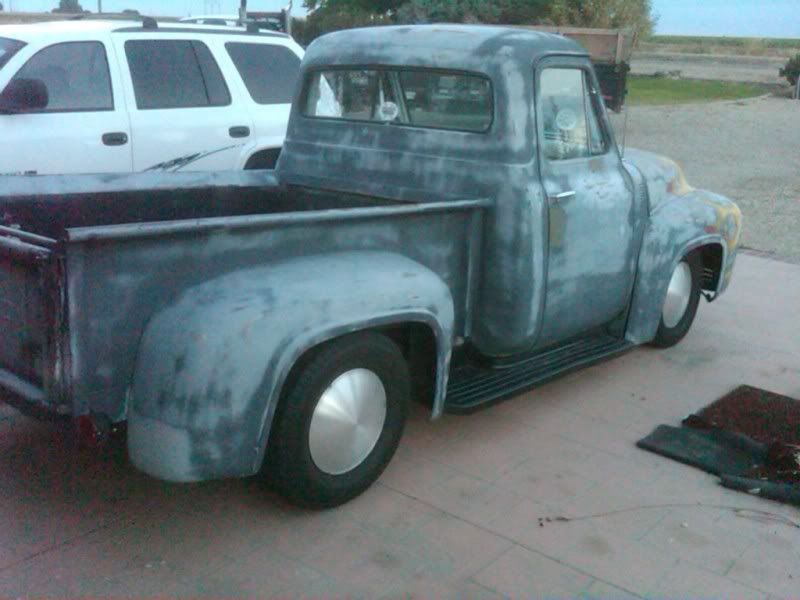
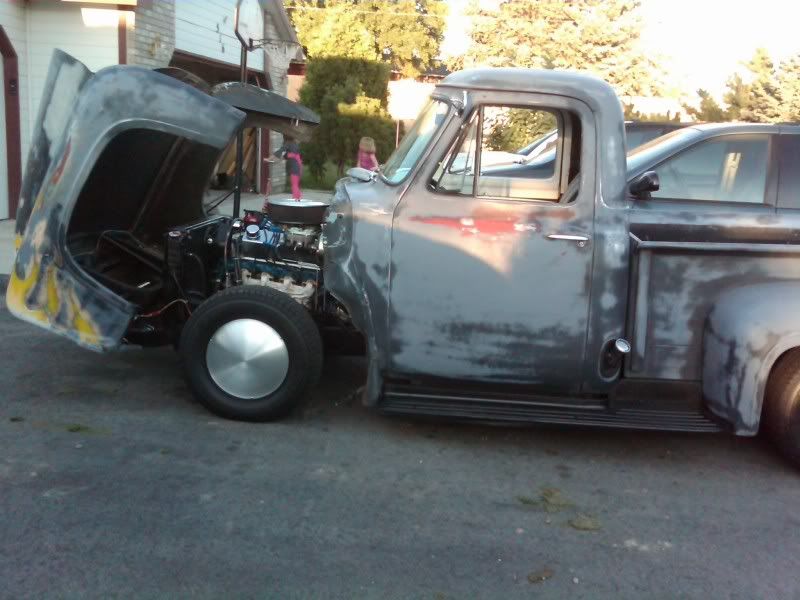
My Camaro Project
I know there are a few people here who like old yank cars, so thought I would post up some progress on my project car.
This is the underbonnet wiring that was awaiting me
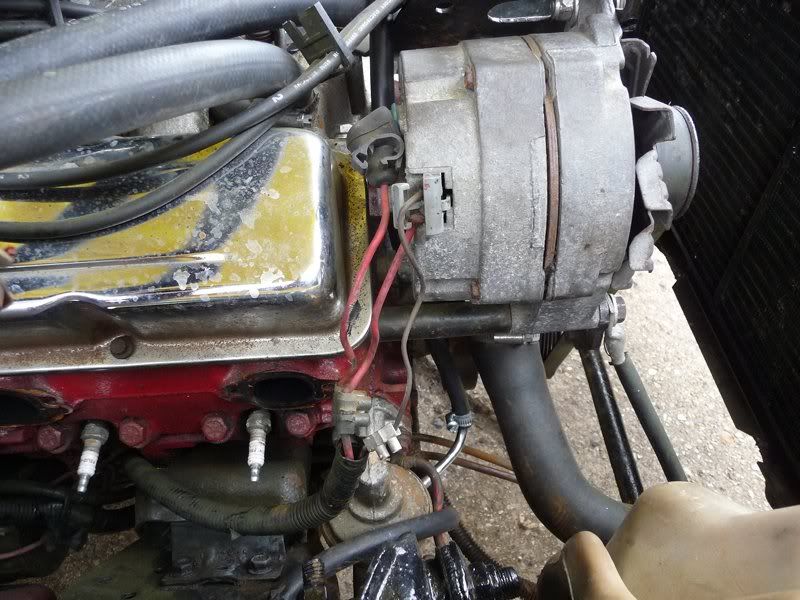
Nicely roasted and mostly connected with chocolate blocks
So it was all pulled out and completely redone
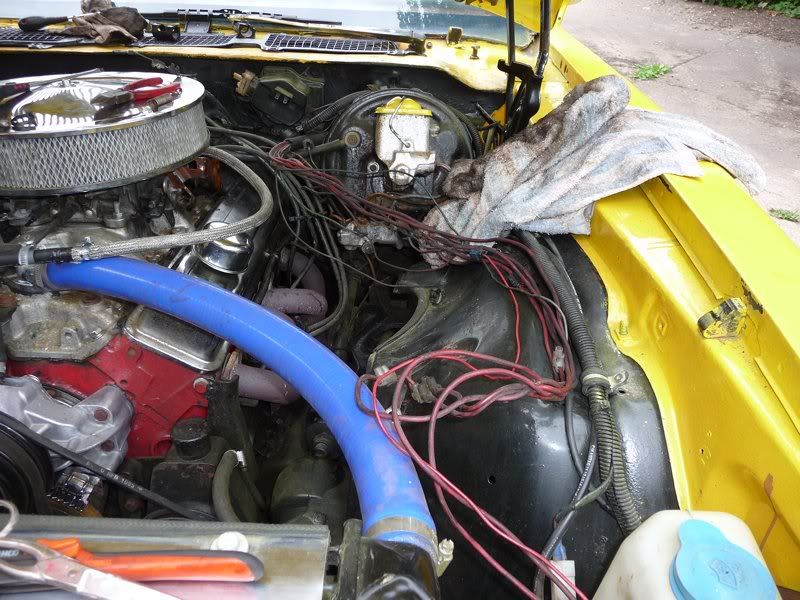
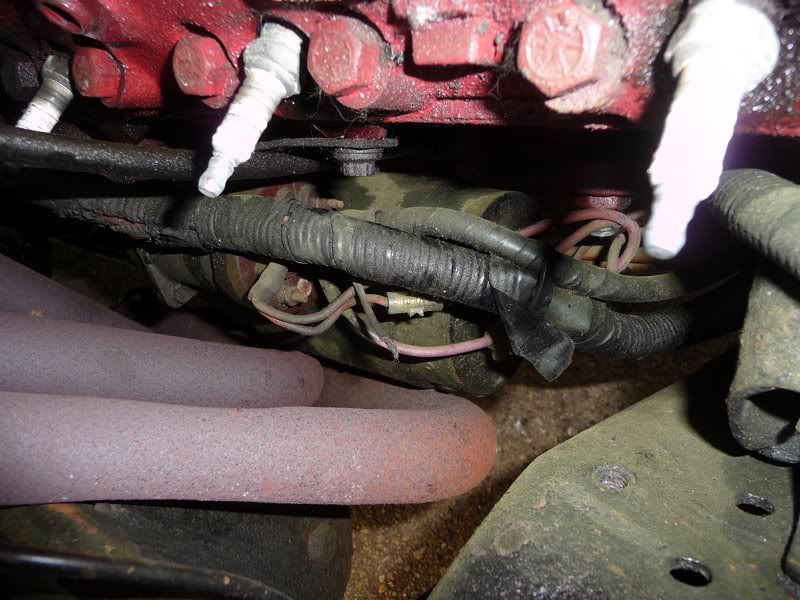
And rerun well out of the way
Ok its not hidden away now, but I would rather know it isn't going to be melted and short out
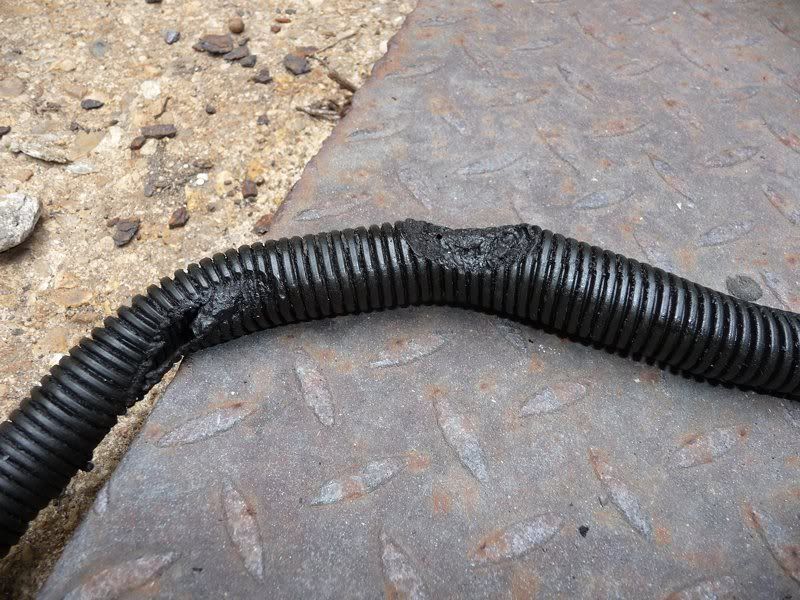
Also fixed the headlights, found a wire 'repaired' with a scotchlock which seemed to have a bad connection. Spliced in a new piece of
cable and it seems ok for the moment. Its all part of the drivers side engine bay wiring that will be getting tidied up and redone fairly soon
anyway.
--------------------
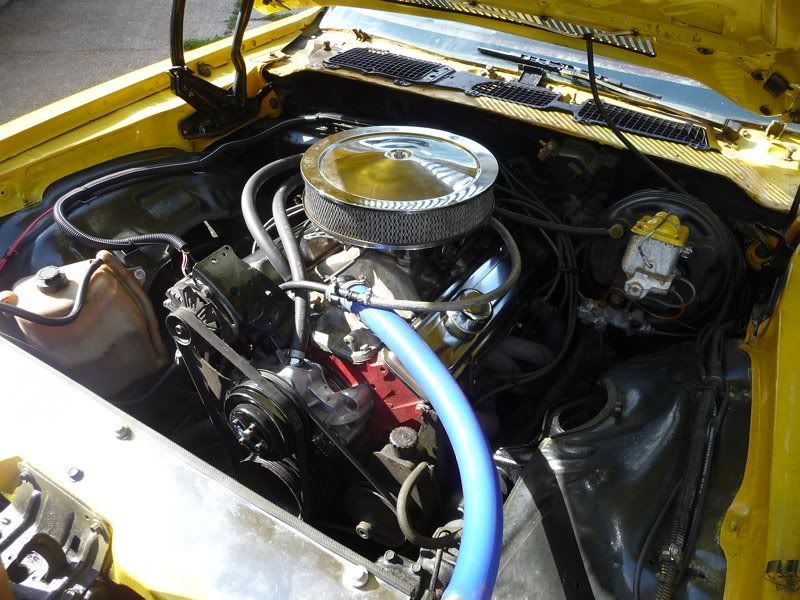
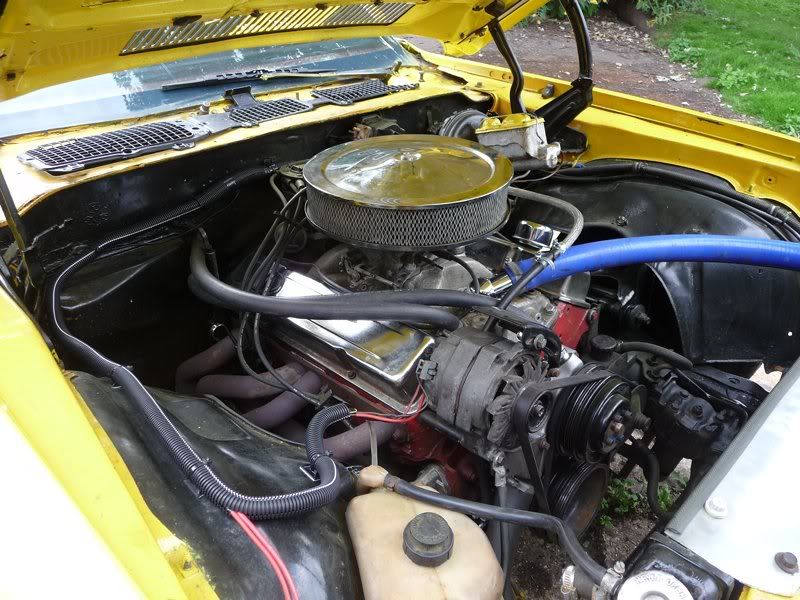
Fitted a new Holley 600 CFM carb and Edelbrock filter which fits under the bonnet a bit better then the old one. The car that was on it was a Cater
mechanical secondary 750CFM which was way too big for the engine and causing bogging and lots of fuel guzzling.
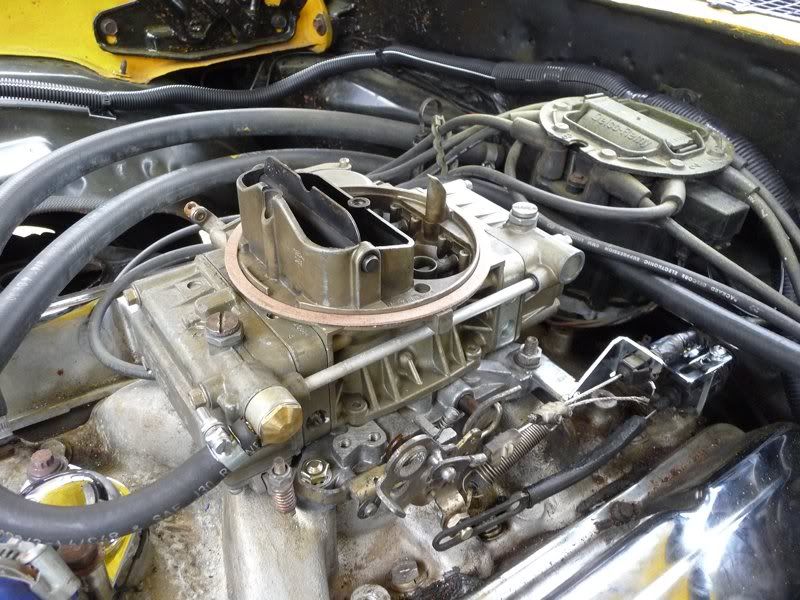
Seems to start and idle much better now. First run up the road it was misfiring like a goodun under part throttle acceleration and low speed. Pulled
the vac secondary diaphragm out and reseated it and it seems better now. Time will tell. The carb allegedly came from a 350. Runs a lot better anyway
even if its still a little out. Will see how it goes longer term.
This is the old one
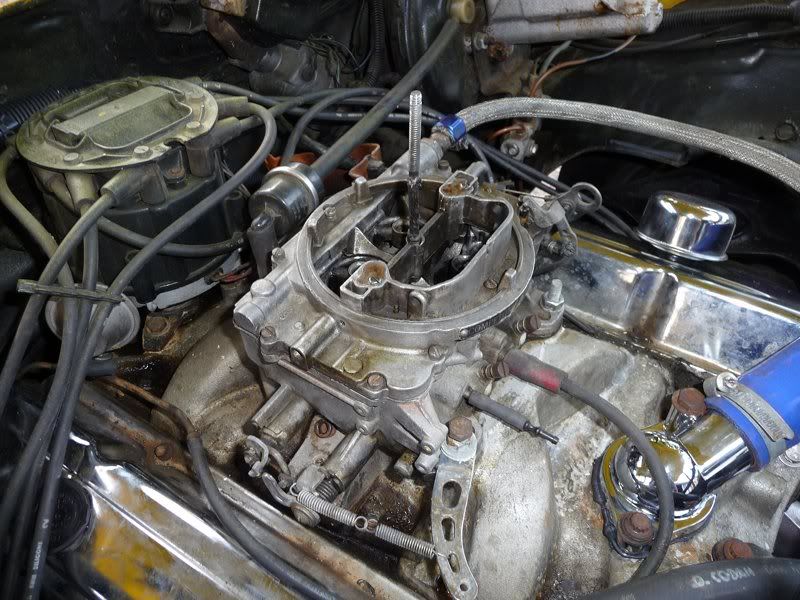
Really bodged as everything else is. M8 studs rammed into 5/16UNC threads, leaking vacuum connections and dripping fuel everywhere. No kickdown cable
attached either.
And this is what I have ended up with, no manual choke cable fitted, but starts well anyway.
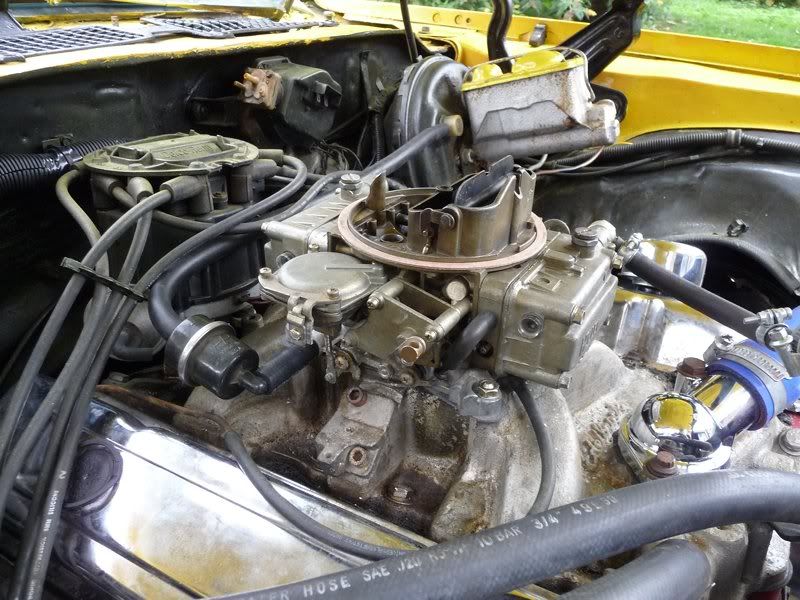
Just need to reconnect the vac advance on the dizzy when I am happy its running OK as it is at the moment.
And an idling video...
http://www.youtube.com/watch?v=2C28riMVePE
---------------
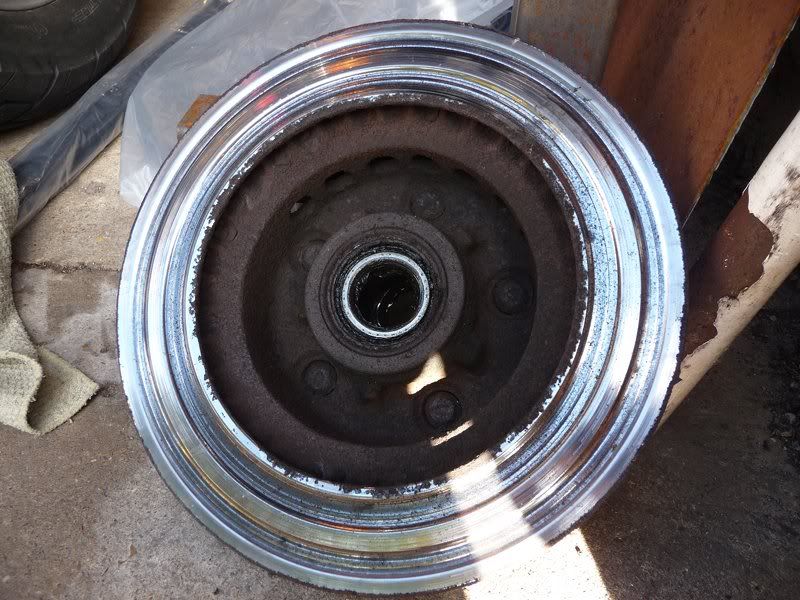
New drivers side front brake disc fitted and new pads to both sides.
Actually a reasonably easy job, looks like it will need new calipers at some point as the dust shields have fallen apart and the bleed nipples are
broken on both sides.
The disc I removed is one of the worst grooved I have seen...quite how anyone lets them get this bad is beyond me. The outside is no better either.
The grooves are about 4mm deep...!

----------------------
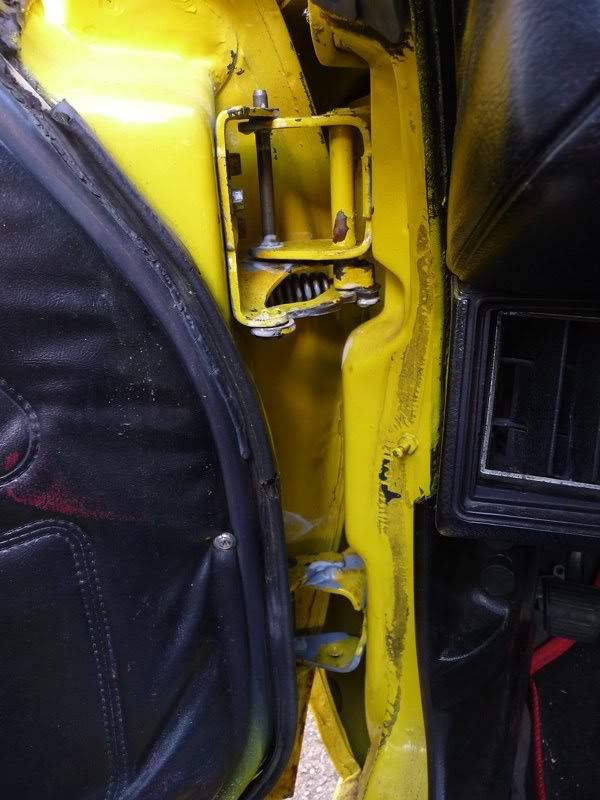
I also re-bushed the door hinges as they had worn out which let the doors drop a lot when opened. Not too bad, worst part was lining the door back up
as it was a mile out before I started and had been shimmed etc.
My method for getting the 150lb door off...
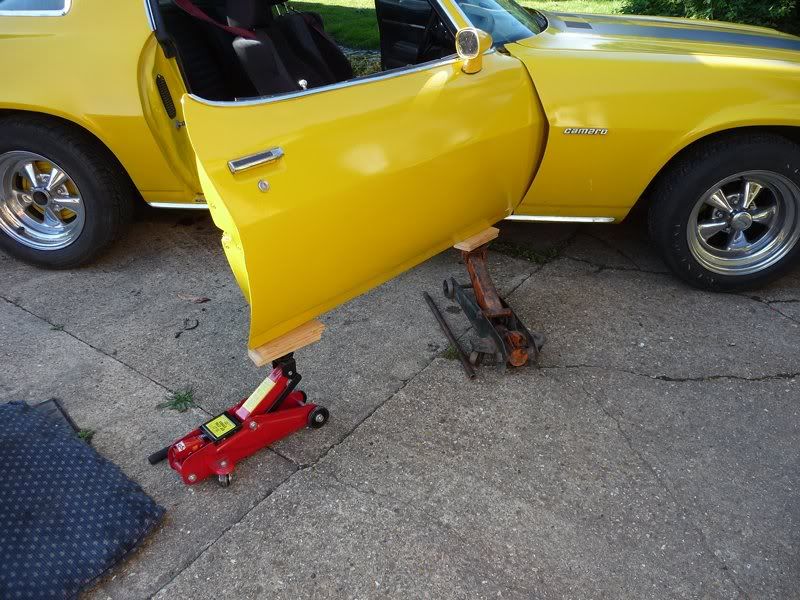
Then undo the bolts holding the hinge to the door and just balance the door on the jacks. Then shout for help to lift it down and place on a cushion
or 2.
Body isn't in bad shape under the hinges, just some light surface rust which is now sorted. The car was originally dark metallic grey by the
looks of the paint on the hinges and under the hinges. The cracks in the paint are just from a reaction when the car was sprayed, its all solid
underneath.
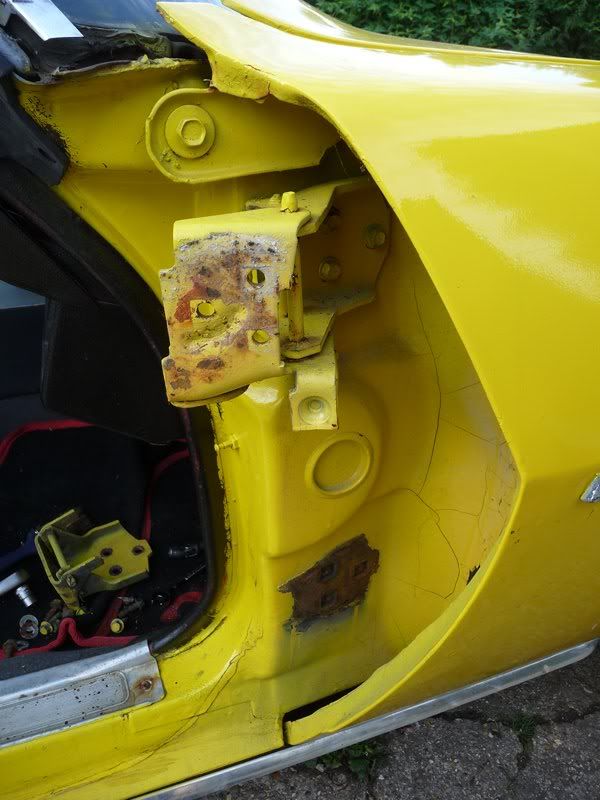
Hardest parts of the job was reinstalling the detent spring, but a small gear puller had it sorted fairly quickly and realigning the door after
refitting.
Door doesn't drop at all now and lines up much better after a lot of swearing. Needs new rubber buffers fitting and the wether strip after I do
the panel work which will be next spring...
Drivers door hinges were in a much worse state than the passenger side as I expected. Someone had welded the pins into the hole where the bush should
be so the pins had been turning in the other part of the hinge for some time. So the holes in the non-bushed halves were elongated quite badly
So I welded each one up and re-drilled them properly.
The bush fits were a little loose this side as well so I stuck the bushes into the hinges with Loctite 642 Retainer so they aren't going
anywhere soon.
And that was that
I'll get around to painting them when I do the bodywork/cosmetics on the car next year. For now, they function properly and the doors open and
close as they should now.
I did have to adjust the window on the drivers side as well, and the door alignment isn't perfect but I will revisit it another day as I need to
drop the doors off the hinges again anyway to do some repairs to the bottom edges.
Also got the proper wiper arms fitted up, so I now have wipers that function properly. Aside from the relay playing up a bit so I will have to have a
look at the motor at some point.
---------------------
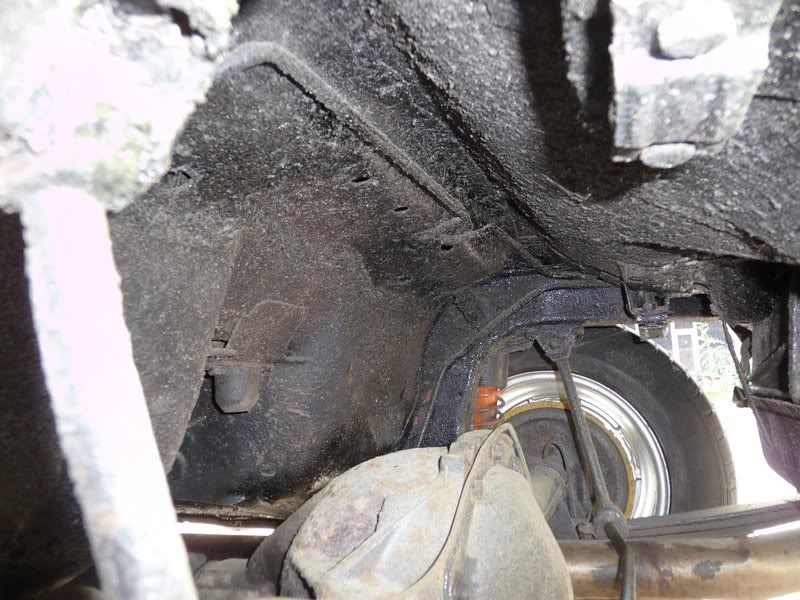
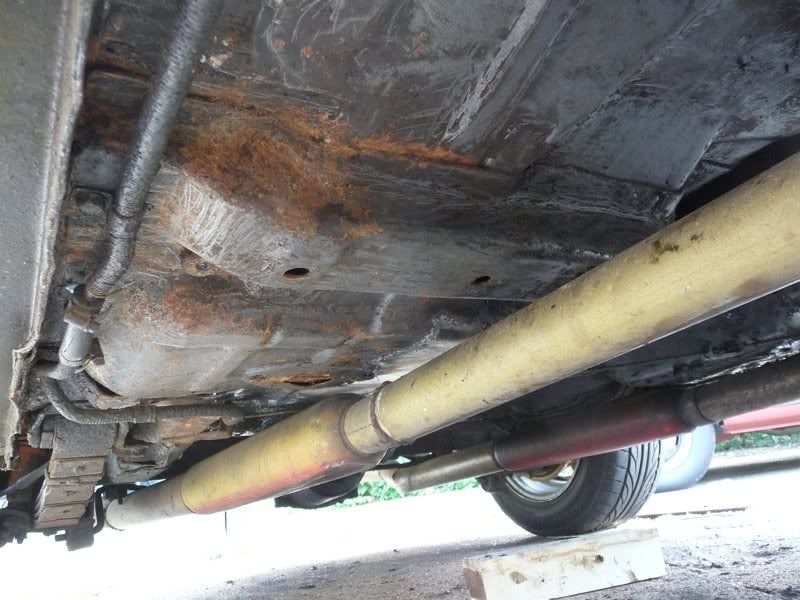
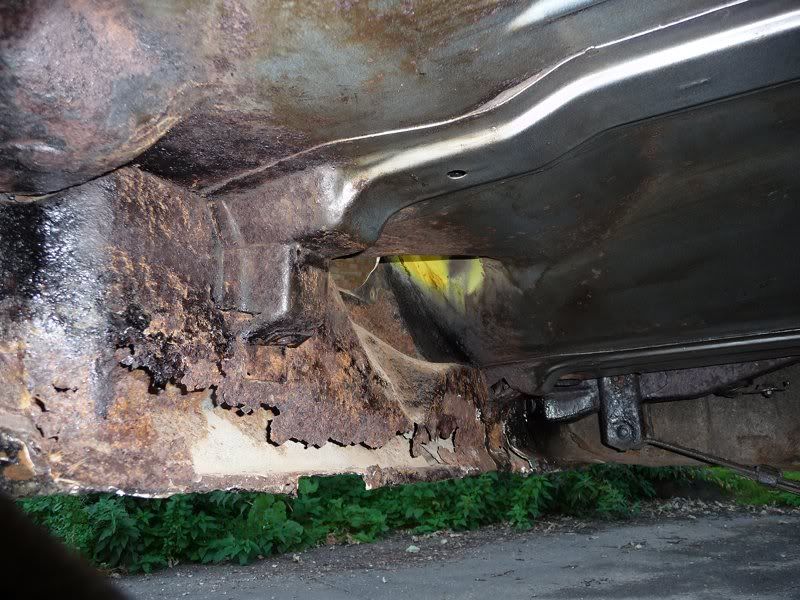
Jacked the rear of the car up to have a good look underneath. First time I had and I was expecting worse to be honest.
All in all looks reasonably sound. Some welding has been done in the past and the underseal was put on over loose road muck so I scraped some of it
off to get a better idea of the condition of the rear frame rails. All in order to know the extent of the welding required underneath before I make a
start.
Also the shocks seem to have weak springs fitted, no idea what they are other than orange...
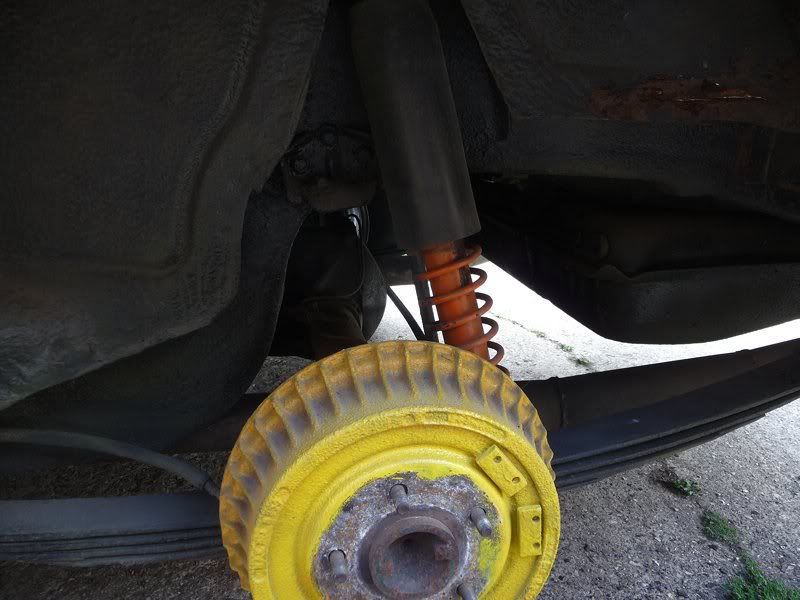
Anyway drivers side first...
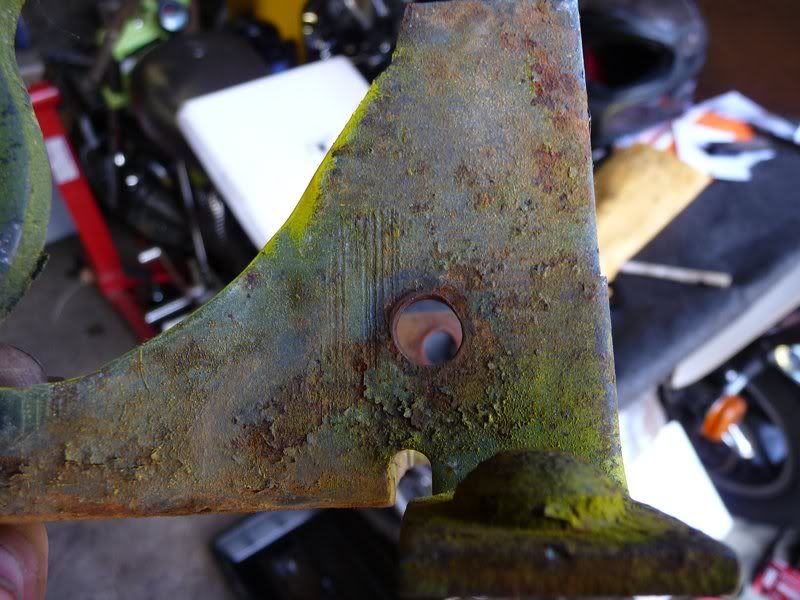
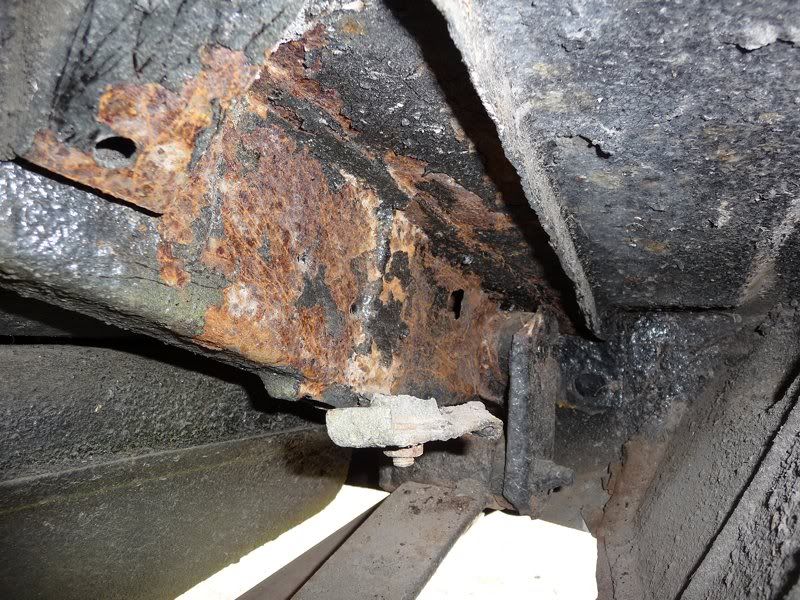
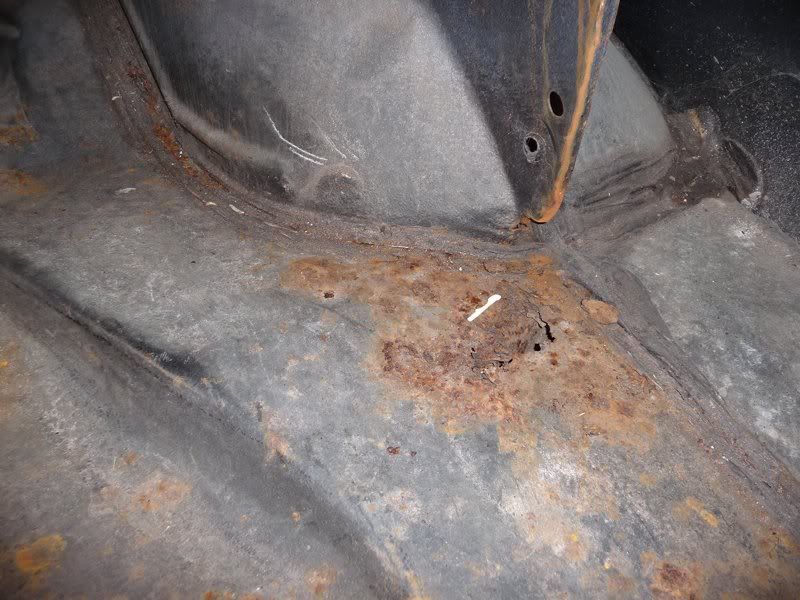
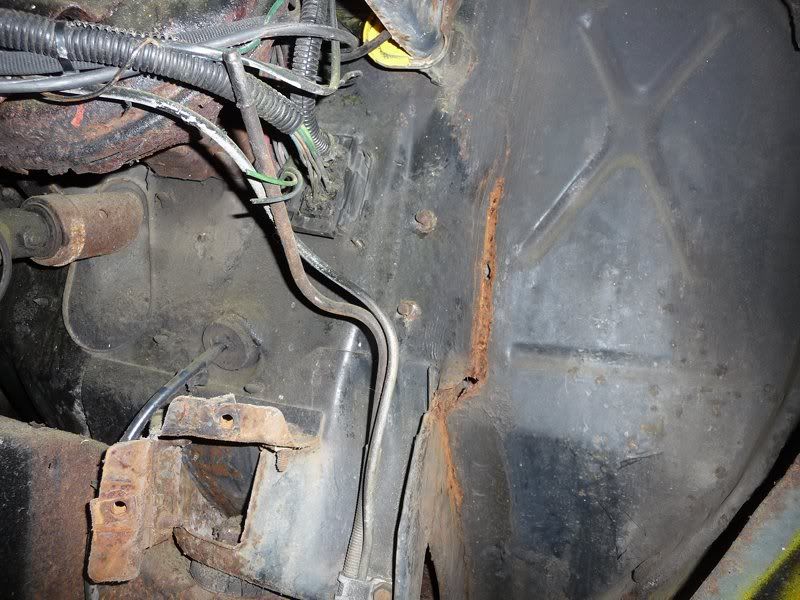
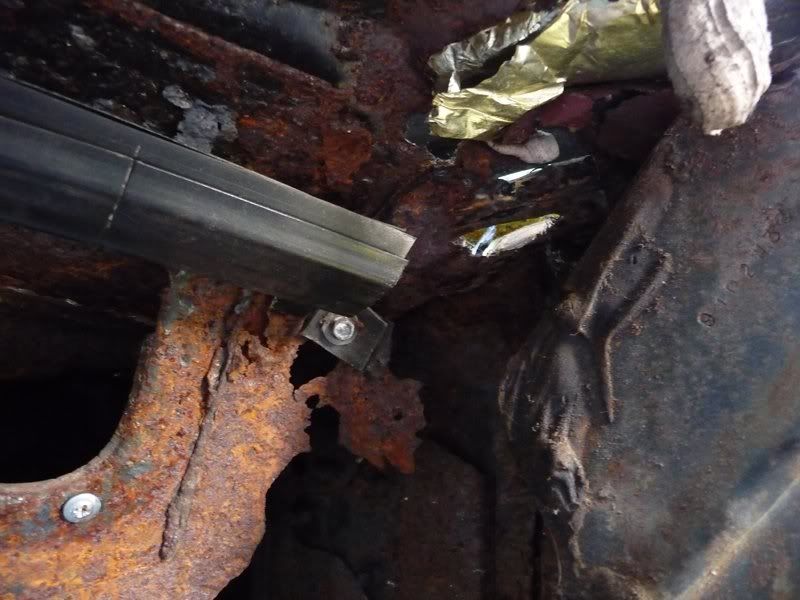
Rusty seam between inner arch and trunk floor. Accessible from both sides, so should be a straight forward repair
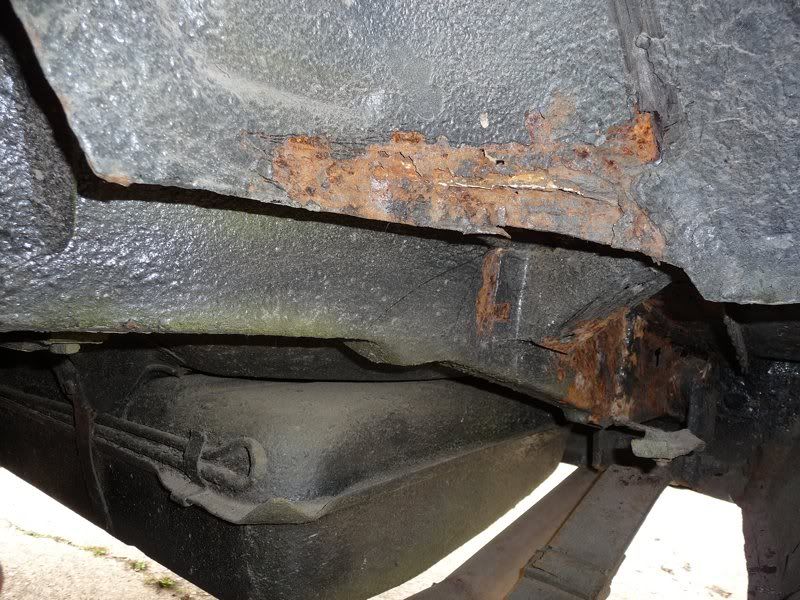
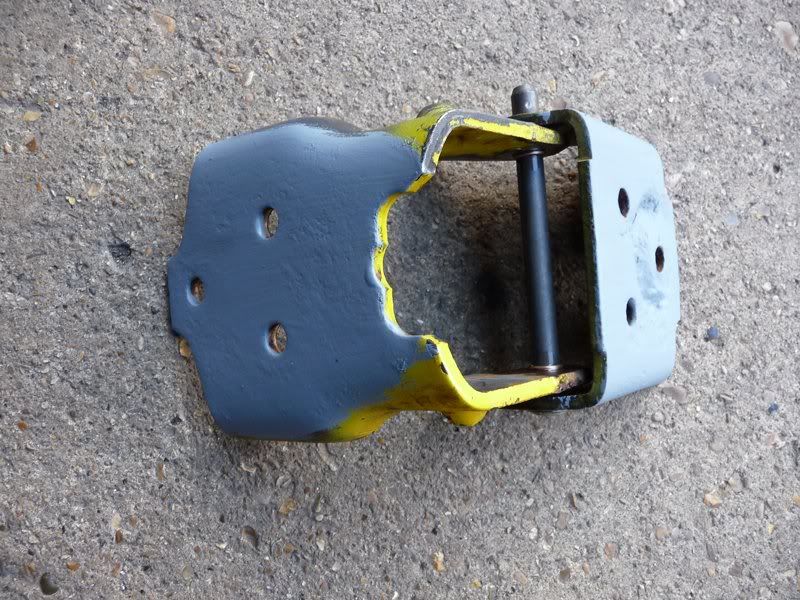
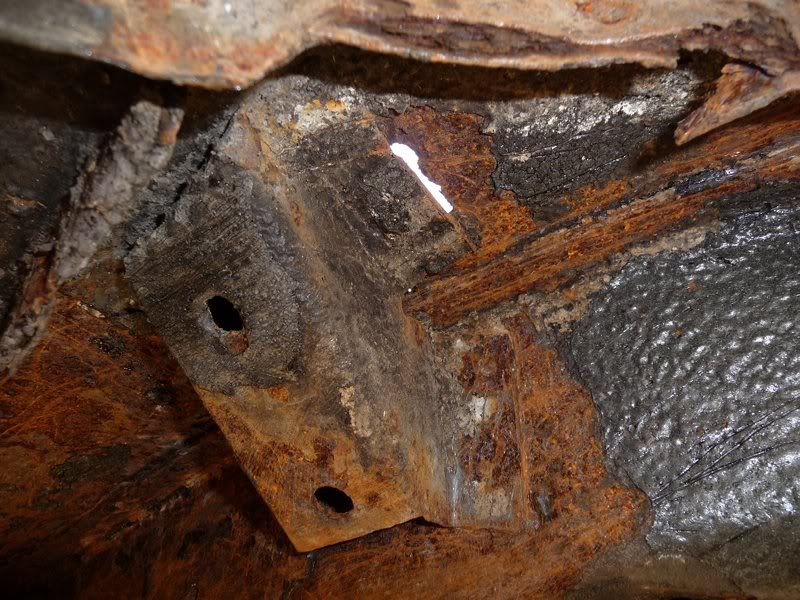
Small hole in rear frame rail near spring mount. Will be fun to weld a patch on... (anyone know what the bracket is for??)
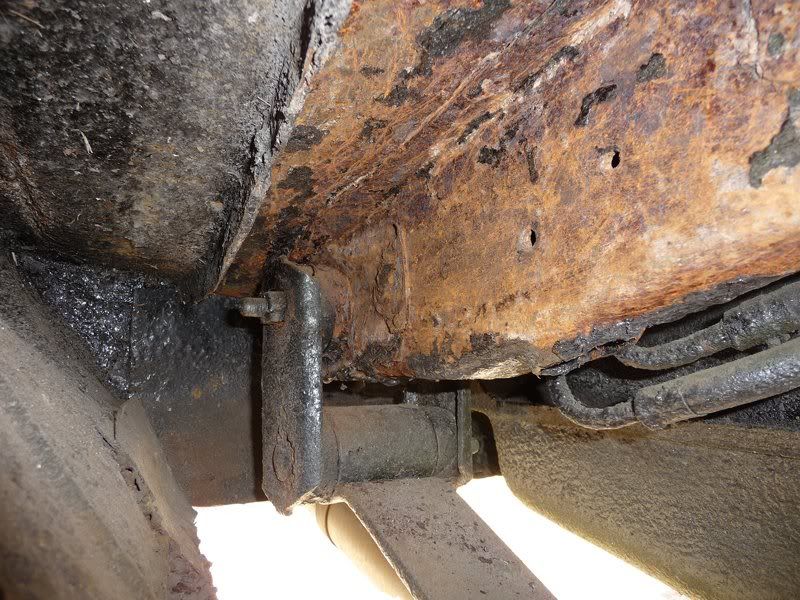
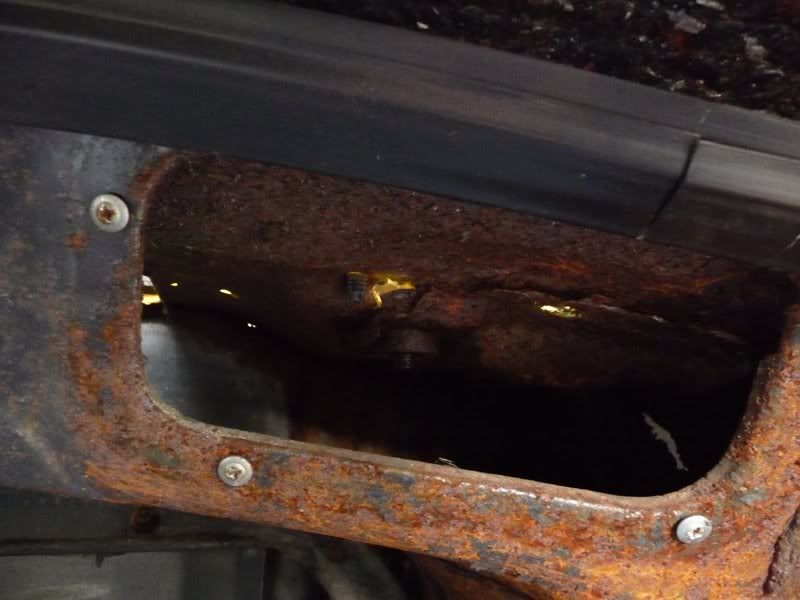
Hole at rail mount to boot floor. Again easy access from both sides
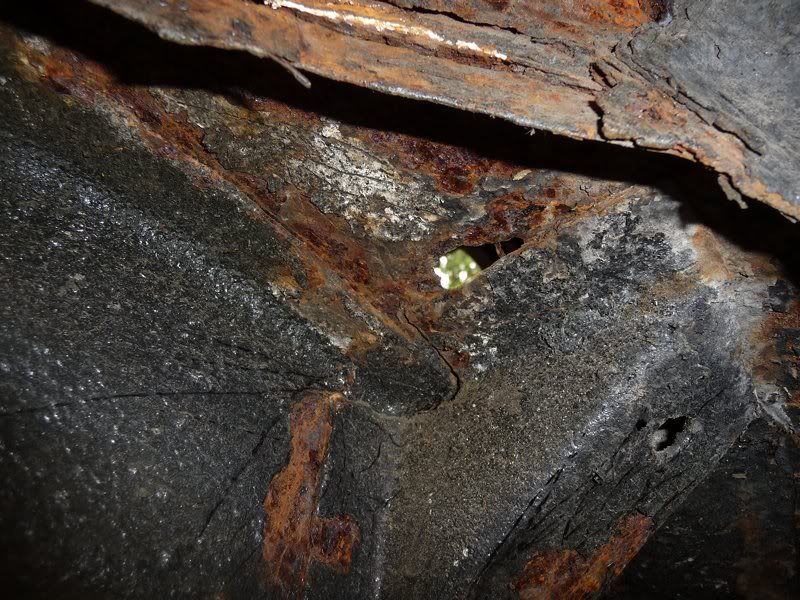
The same holes from above
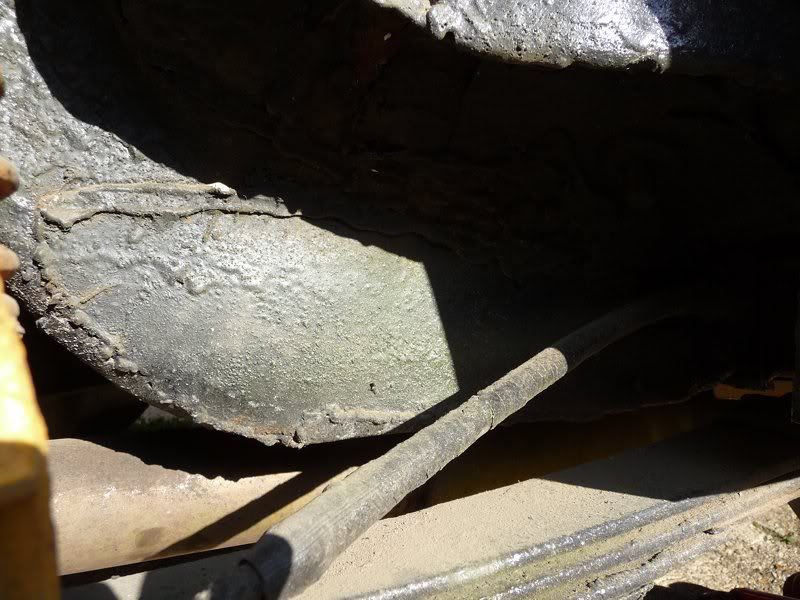
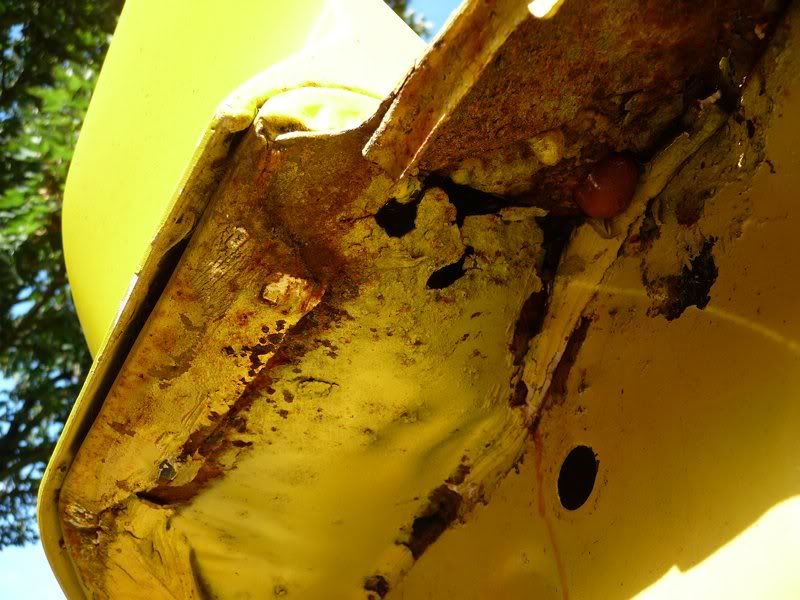
And rust under the trunk hinge mounts
Passenger side is much the same story, hole at rail mount
Other than that some light surface rust
And a patchwork rail at the front, although it seems to have been done reasonably well, but not how I would have done it
Other than that it seems fairly solid with a few old patches here and there. (Again anyone know what the 2 brackets are for?? One is on the top right
hand side of the pic below in the extreme foreground and another in the same place the other side)
In trying to find out where the tank breather/vapour return was I found a few things dropped down between the inner wing and firewall...aren't
magnetic pick up tools wonderful?
Well saves some weight and a couple of rattles I guess
------------
Picked up my new radiator and trans cooler along with a few other bits. Only changing it because it's leaking and its a bit of a bodge, end
tanks have been hammered to fit.
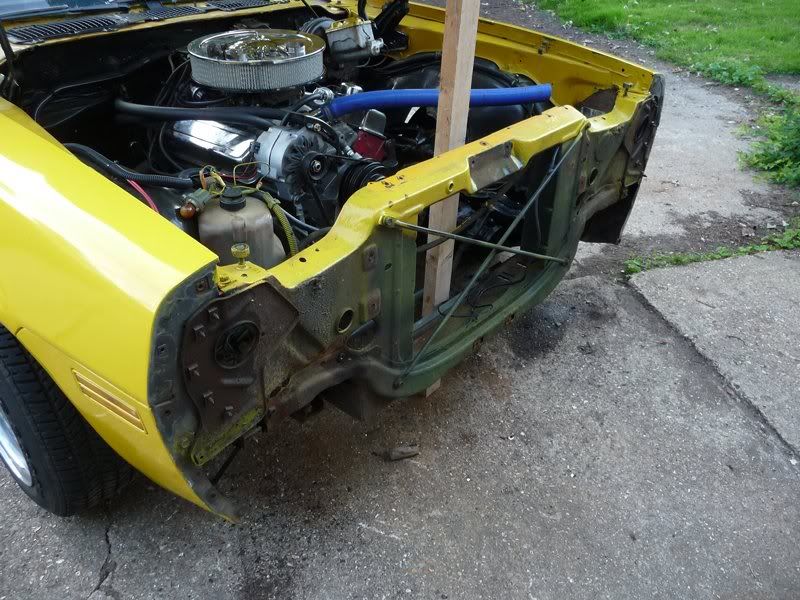
Thought I would make a start on changing the radiator, only to uncover a nicely rotten core support. No major problem as I was planning on stripping
the front end of the car to do any repair work necessary. I just wasn't planning on doing it so soon. Here's what was fitted to start
with.

Some sort of GM radiator, with about a 31" wide core and integrated trans cooler.
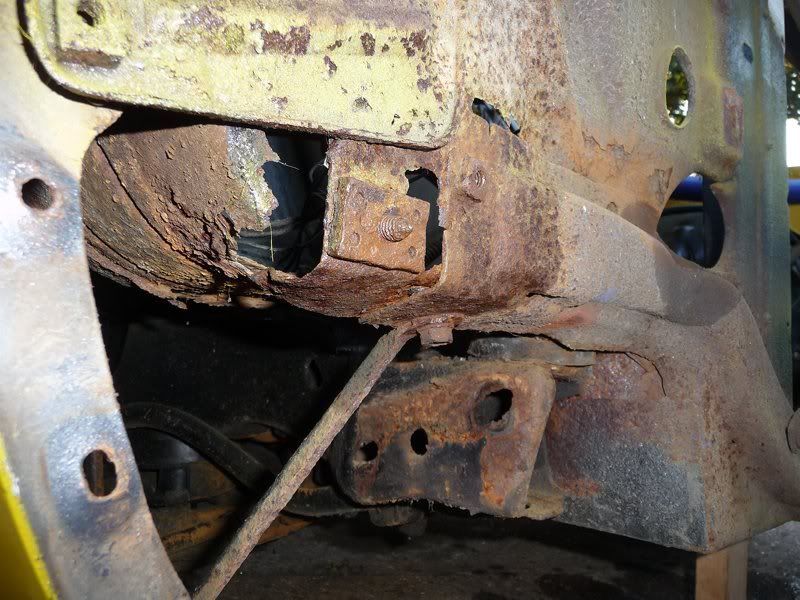
Drained the coolant and pulled the rad and uncovered this


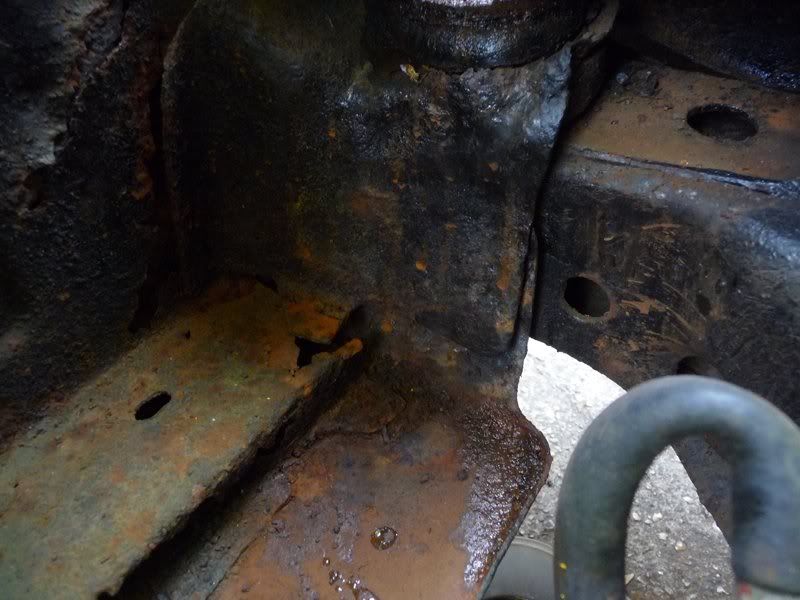
There isnt much left to hold the radiator up to be honest, its also got plenty of rust under the battery tray, but I havent removed it yet to survey
the damage.
More bits stripped off tonight, just the core support itself to come off, but tried all the bolts and they all come undone OK except 1, which shouldnt
be a problem anyway.
Some more photos of the damage
Cue some happy hours with the welder and grinder 
I will be changing the core support bushes for poly bushes while it is off as they are much easier to get to now than when it is all back together!
Not bad for 3 weeks work I don't suppose. Lots more to do and I'll update as I go along...
Sera
http://www.motosera.com
|
|
|
|
|
r1_pete
|
| posted on 1/9/11 at 07:04 PM |
|
|
Nice one, some familiar sights there, reminds me why I went for replacing the back wings and boot floor on my Jag, then kept going that bit
further.
Good luck with the rest of it.
|
|
|
liam.mccaffrey
|
| posted on 1/9/11 at 07:08 PM |
|
|
so jealous, i fell in love with muscle cars and pickups when i lived over there. I want a chevelle or a Nova though
Good work mate its going to be a cracking car if your previous work is anything to go by.
Build Blog
Build Photo Album
|
|
|
steve m
|
| posted on 1/9/11 at 07:09 PM |
|
|
Looks like youve bought a lemon ?
I bet the body has got more filler than jordan, so dont scape the yellow paint off !
steve
|
|
|
flak monkey
|
| posted on 1/9/11 at 07:51 PM |
|
|
The rust i have found is all pretty minor and nothing unusual for F body cars. It's actually about as solid as you could wish for. No filler in
the arches. All the rear structure is solid, just cosmetic stuff more than anything.
There are certain places if you find rust its time to worry, but there's none of that on this car.
Normal places are boot floor, rear window, core support, main floor and around the screen.
The cosmetic/body will wait until next year, now its getting mechanically sorted while the weather is ok.
Sera
http://www.motosera.com
|
|
|
flak monkey
|
| posted on 3/9/11 at 09:04 PM |
|
|
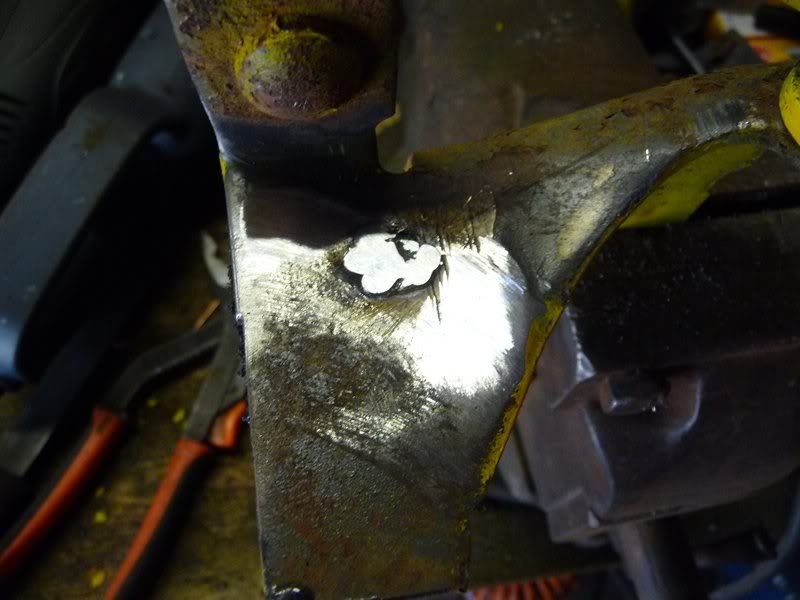
Got the core support off yesterday afternoon, rust about what I expected. Gave it a quick wire brush with the angle grinder.
Passenger side mount was completely shot, as was quite a lot of the lower sheet metal
And these were the bushes
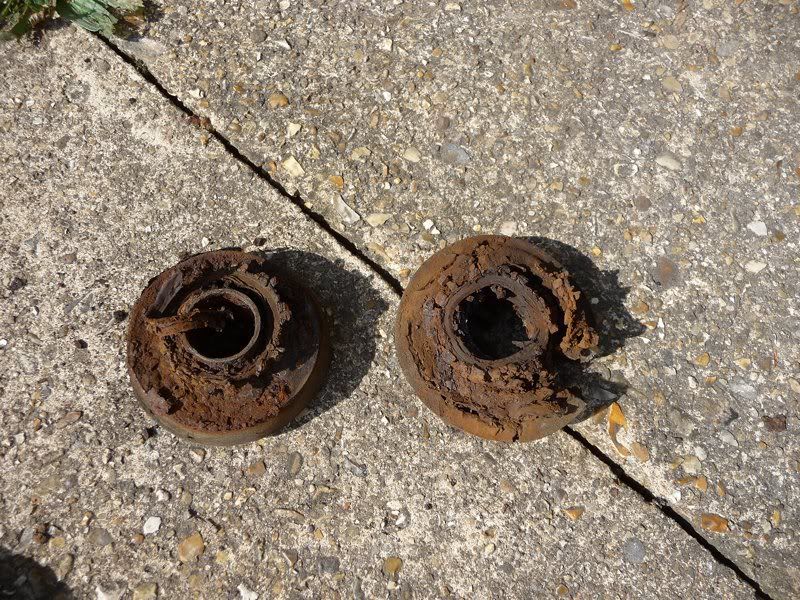
Nice...
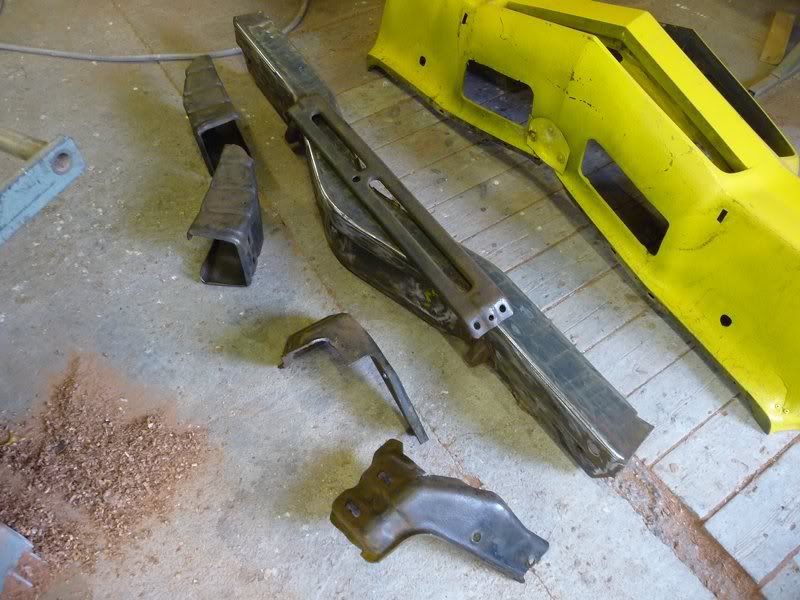
Cut all of the rot out completely. No point messing about. The painted all the insides with POR15
It took all day today to repair it all, and it now looks a bit like a Franken core support
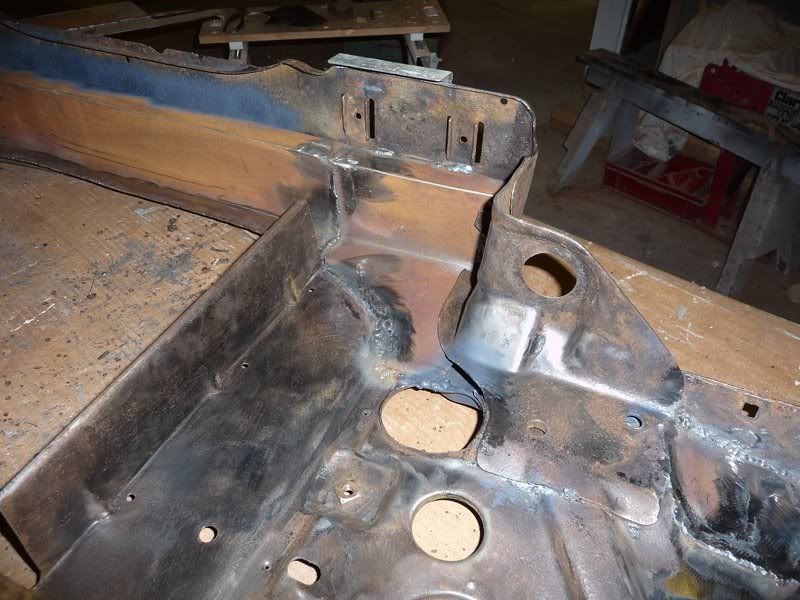
Fixed passenger side mount
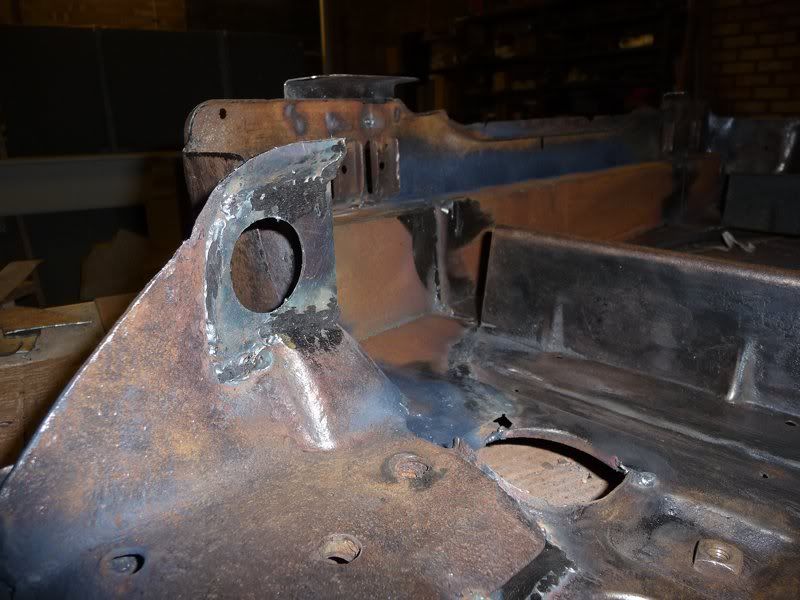
Paint tomorrow and fixing the inner wings
[Edited on 3/9/11 by flak monkey]
Sera
http://www.motosera.com
|
|
|
big_wasa
|
| posted on 3/9/11 at 09:24 PM |
|
|
allways wanted a 50's 60's early 70's yank tank. hmmmm keep up the good work
|
|
|
flak monkey
|
| posted on 4/9/11 at 04:21 PM |
|
|
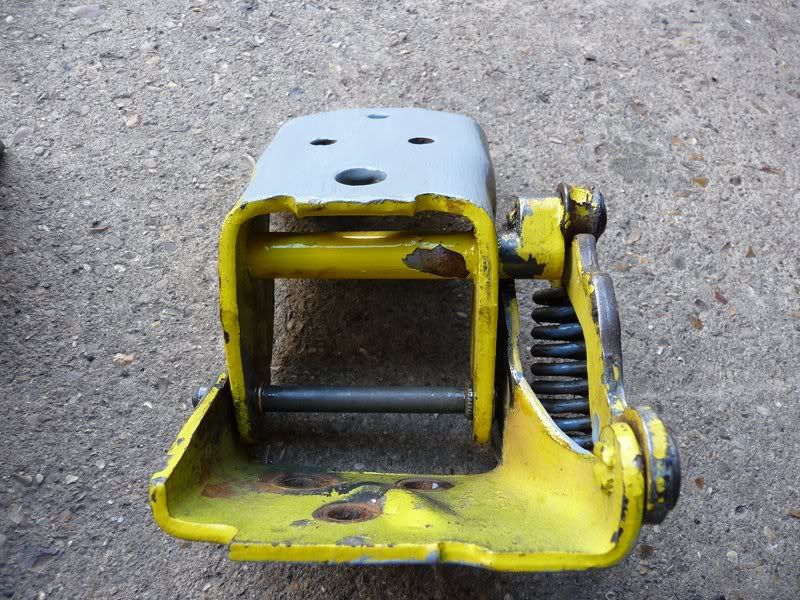
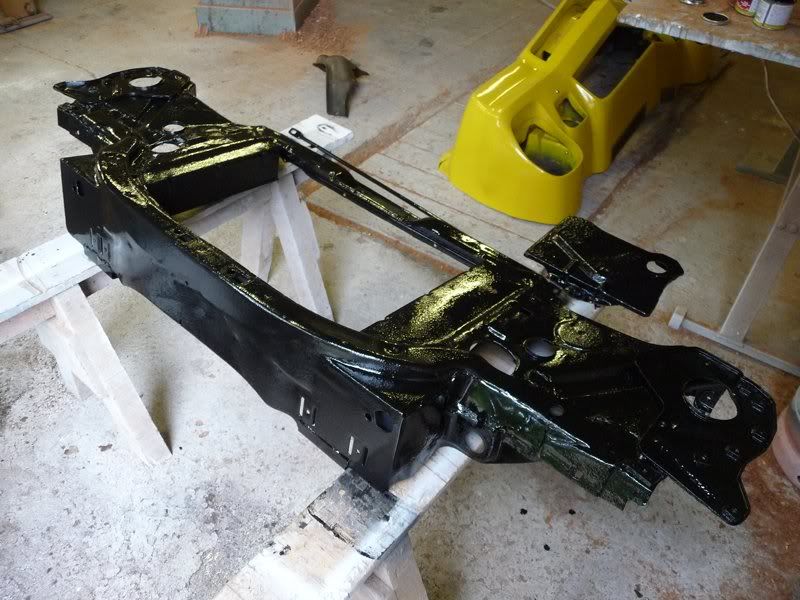
Today has mostly been a painting day. Painted up the core support, impact beam and a few other bits with POR15
Decided to dismantle the impact beam which wasn't too bad, wire brushed it and scuffed it up with a soft pad.
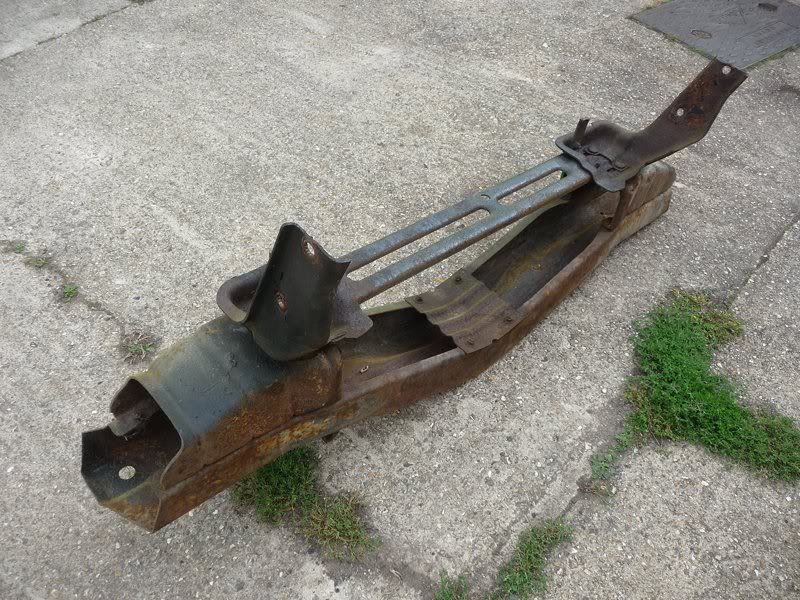
And 2 coats of paint
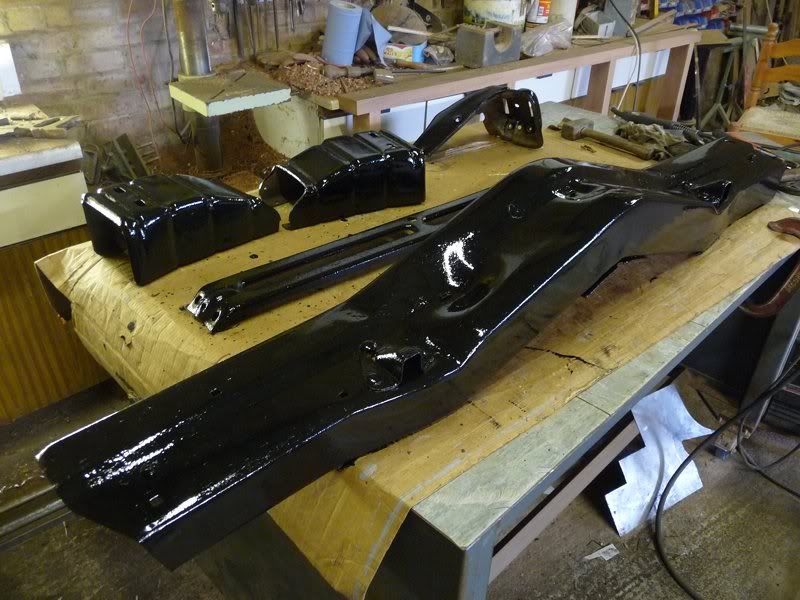
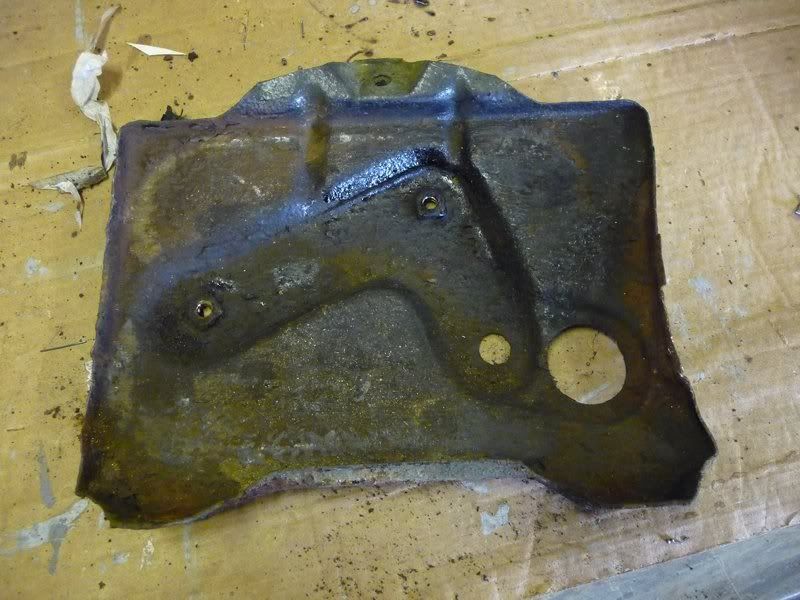
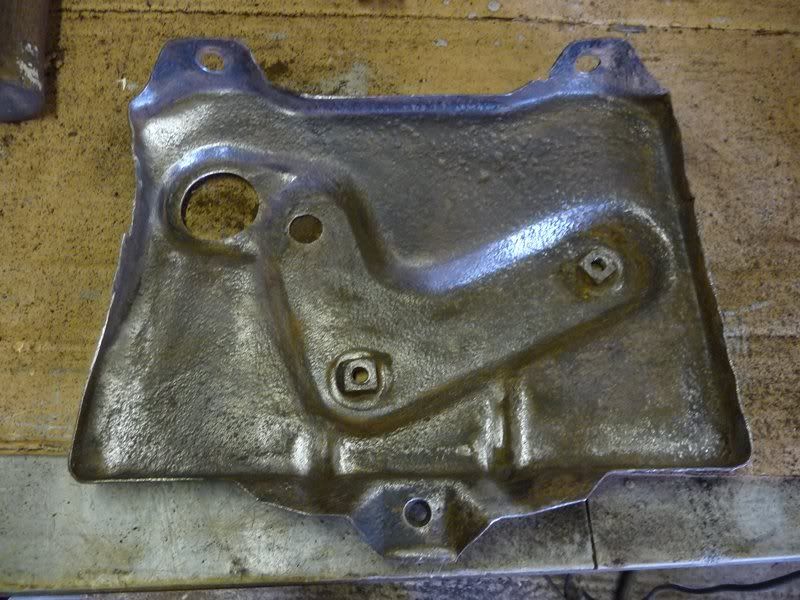
Same with the battery tray
Also swapped a rear wheel over to see what 225 tyres would be like on the front. The sidewall sits about 2mm outside the arch.
Would prefer them to be better tucked in, but lack of money precludes buying new rims for the forseeable future. If these 225 from the rear will be OK
then I will just get some widers tyres fitted to the current front rims as the tyres are perished that are on there anyway. Probably go for
255's in the back, need to have a measure up when it stops raining....
Sera
http://www.motosera.com
|
|
|
flak monkey
|
| posted on 9/9/11 at 07:36 PM |
|
|
Lots of grinding and dismantling today.
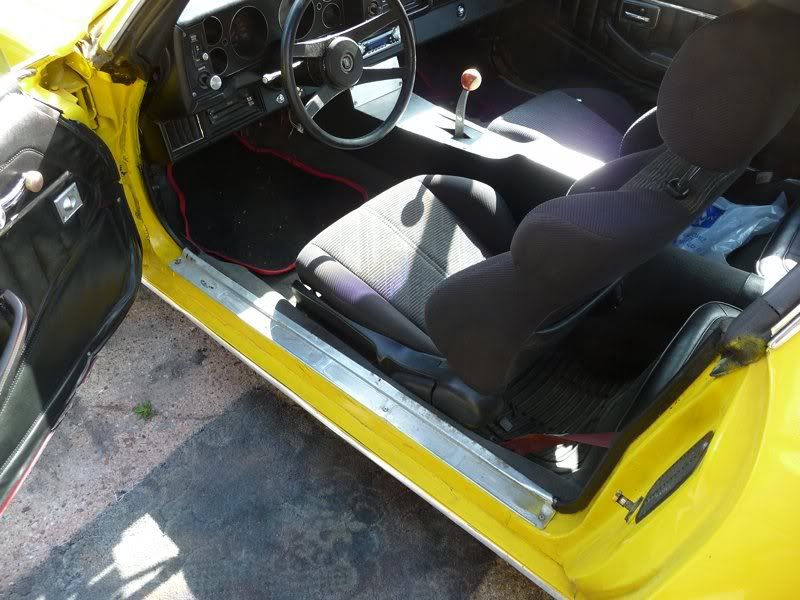
Pulled out the whole interior, so I could lift the carpet out. Hadn't had a look under the drivers side until now and I was plesantly suprised
by it being quite solid.
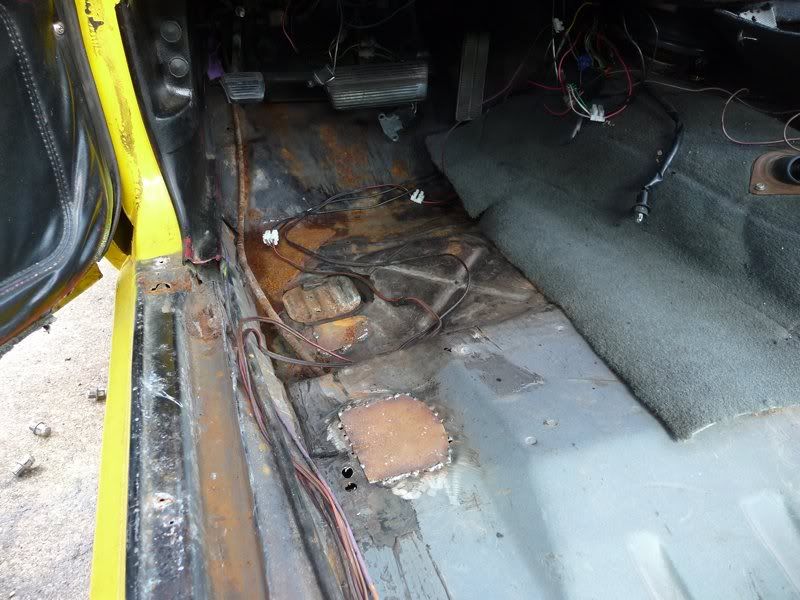
Some previous bad repairs, some fibreglass under the rear seat. All of which will be coming out and being done properly.
Also cut out the previous patches on the passenger side as they had just been put on the inside of the floor and the rot hadn't been cut out
properly.
Seems to a lot worse than the drivers side. But I put that down to what I assume to be a water leak up at the base of the screen as there is some rust
visible if you look up under the dash. So I will be taking the fender off after I have sorted the floor out and have a good look at the
cowl/firewall.
I won't be fitting new floor pans, just patching the ones that are there properly as its all pretty straight forward stuff.
Whats less simple is sorting this mess out

Sera
http://www.motosera.com
|
|
|
matt_gsxr
|
| posted on 9/9/11 at 08:33 PM |
|
|
MegaSquirt was pretty much designed for that.
I bet it would even run on the default settings
Looks like a nice project.
|
|
|
flak monkey
|
| posted on 10/9/11 at 07:09 PM |
|
|
I thought about switching it to injection, but shan't bother for the forseeable. Too much other stuff to do at the moment  I am going to be
fitting a wideband lambda gauge when I do the instruments though. So it'll make setting it up a bit easier anyway I am going to be
fitting a wideband lambda gauge when I do the instruments though. So it'll make setting it up a bit easier anyway 
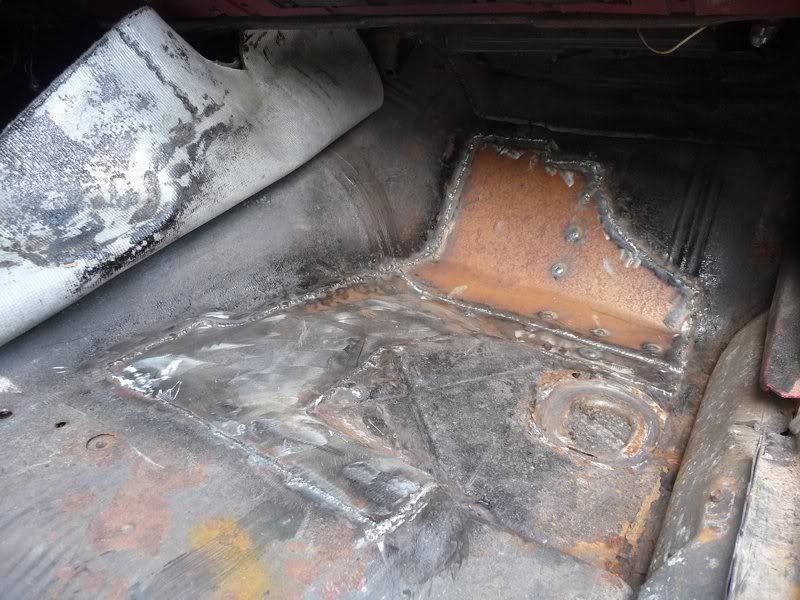
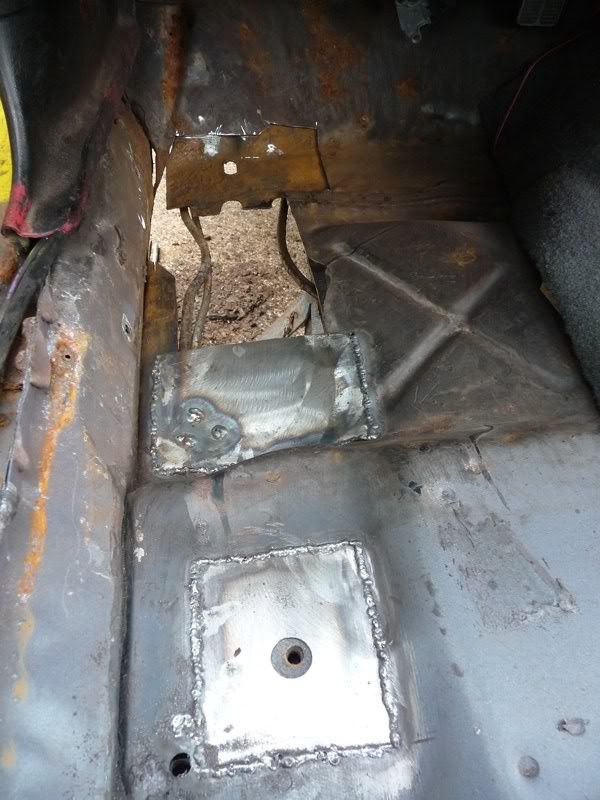
More cutting today. Cut out the rot from the floor and set about patching. Just the toe board to finish off tomorrow if the weather isn't too
bad.
Ended up cutting a big chunk of the floor out, and in hindsight it would have probably been better to replace the whole passenger side floor. But if
it needs any more work in the future that would be the plan. I managed to replace the front section of floor with one piece of plate, which although
time consuming should be better in the long run.
The plus side is the rear subframe looked pretty solid from the top, as does the box where the rear front subframe bolt is.
Once the passenger side is done I will move on to the drivers side, which seems to be in a lot better condition. So hopefully won't take any
where near as long.
I'll seam sealer all the welds top and bottom as well, then pull the shifter out and give the whole floor a coat of POR15 inside. That will be
the main floor area sorted for another few years hopefully.
Then I just need to decide what to do with the poorly repaired floor under the rear seats. I don't think anyone makes those floor sections. Am I
right? If not then It will be another big job for another day.
While poking around underneath I found a couple of small holes near the forward passenger side spring perch. If it all comes undone fairly easily it
won't be a bad job.
As an aside, I would like to meet whoever invented underseal and punch them, right in the face.... 
Sera
http://www.motosera.com
|
|
|
flak monkey
|
| posted on 11/9/11 at 04:43 PM |
|
|
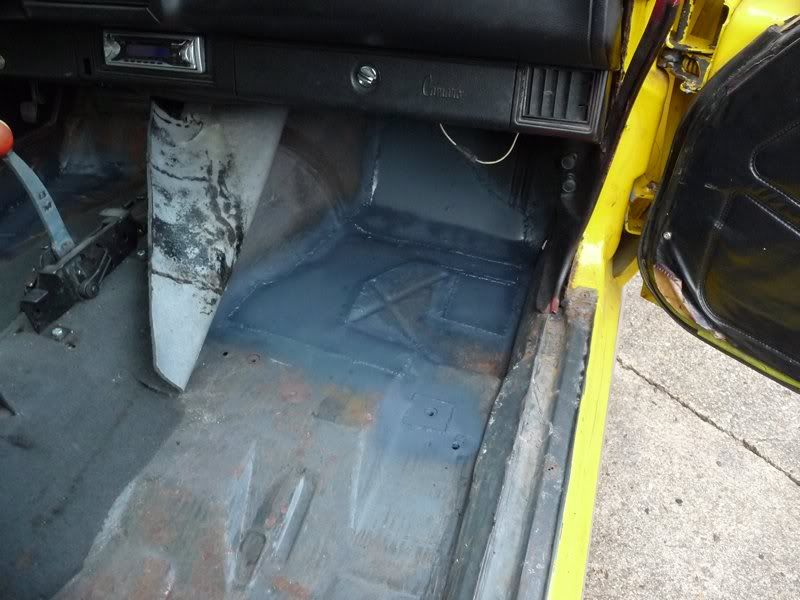
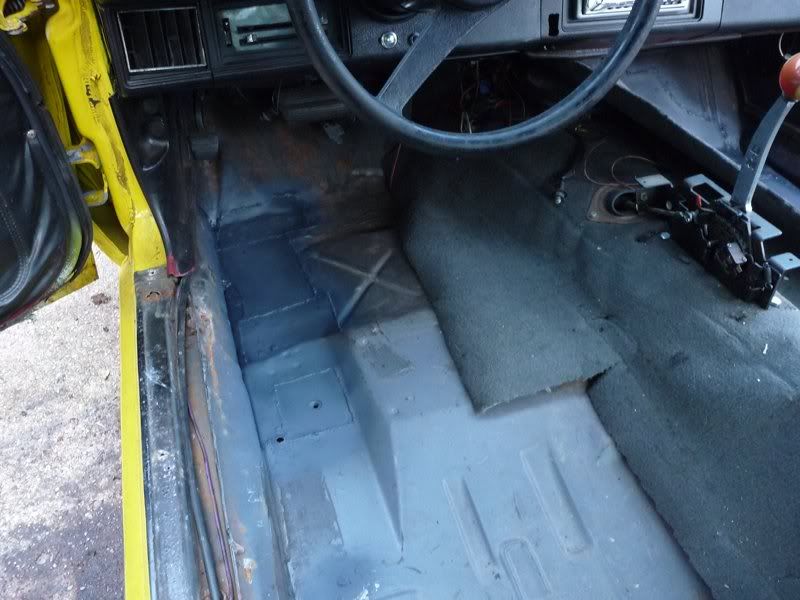
Finished off the major work on the passenger floor today. Then set about scraping the underseal off the car. Thankfully most of it seems to come off
very easily as its been put on without cleaning the floor. Hopefully I will get it all scraped off by the end of next weekend then I can get the
underside steam cleaned and give it a proper coat of paint. I'll be leaving the front subframe for the time being as I will pull that off when
the engine is out and will deal with that then.
There was a little more work lurking under the passenger toe board but nothing major
Gave it a coat of anti-rust paint inside for good measure as well while I was there...
The other side of the repair metal is already nice and clean, just need to wire brush the whole passenger floor then its ready for a coat of paint.
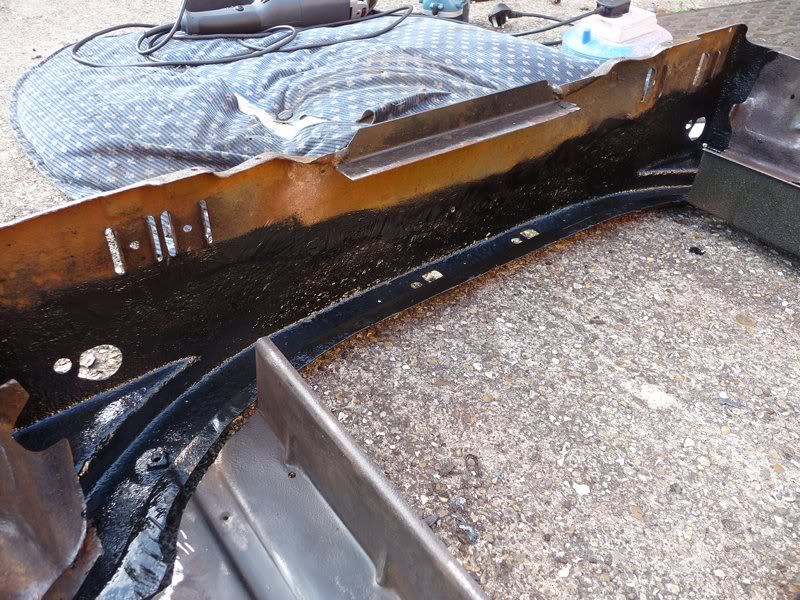
And the underside is pretty sound under the loose underseal. Most of it still has the original paint on it and is actually in really nice
condition.
Once its steam cleaned I will give it a good coat of paint, though I am not sure whether to use POR15 or not yet.
[Edited on 11/9/11 by flak monkey]
Sera
http://www.motosera.com
|
|
|
bj928
|
| posted on 11/9/11 at 05:38 PM |
|
|
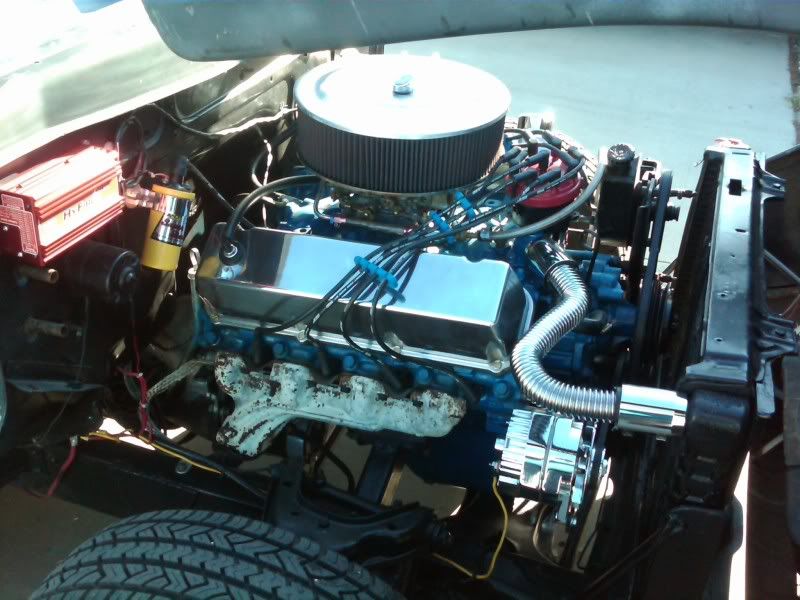
nice project, here is mine i'll be shipping to the uk later this year.
460 v8
|
|
|
flak monkey
|
| posted on 15/9/11 at 07:10 PM |
|
|
Thats a lot of engine in there! 
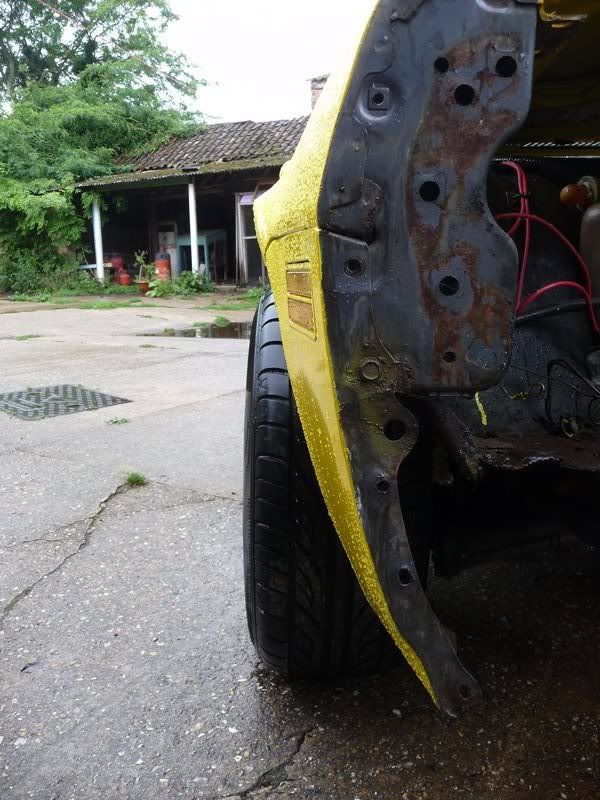
Removed the inner fenders tonight. Wasn't actually too bad only had to cut a couple of bolts through.
Slowly pulling the whole front end off so I can get a good look at the cowl as there is some rust visible from inside the car. The plan being to make
some temporary repairs for now, then get the screen pulled out and have the cowl/dash panel off to get inside properly. Plus there is some rust around
the screen that needs seeing to anyway.
From what I can see so far it doesn't look to be too bad. Couple of little holes on the drivers side and just some surface rust on the passenger
side to deal with once the fenders are off.
Tomorrow I'll get the fenders off and have a better look around. I know the passenger fender has been badly repaired along the bottom, so I may
get a repair patch for that rather than messing around.
Lot more welding this weekend if the weather is good...! I just want to get a really solid shell as a basis before going too far with anything
else.
I also have my poly bush kit for the body mounts too, so that will be going in before it all goes back together.
Sera
http://www.motosera.com
|
|
|
flak monkey
|
| posted on 16/9/11 at 07:30 PM |
|
|
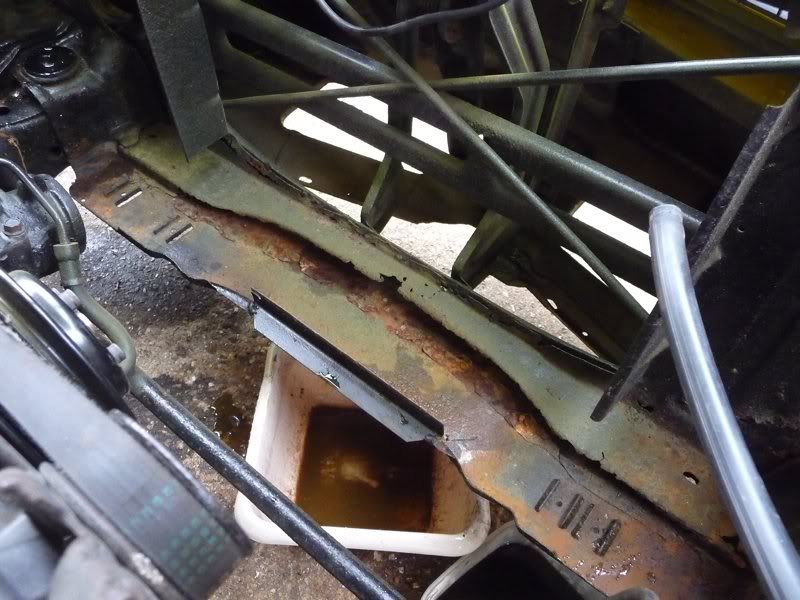
Well curiosity got the better of me and I thought I would do some more welding on the floor while the weather is OK. Though I am suffering with a
damaged back at the moment, so progress is slow
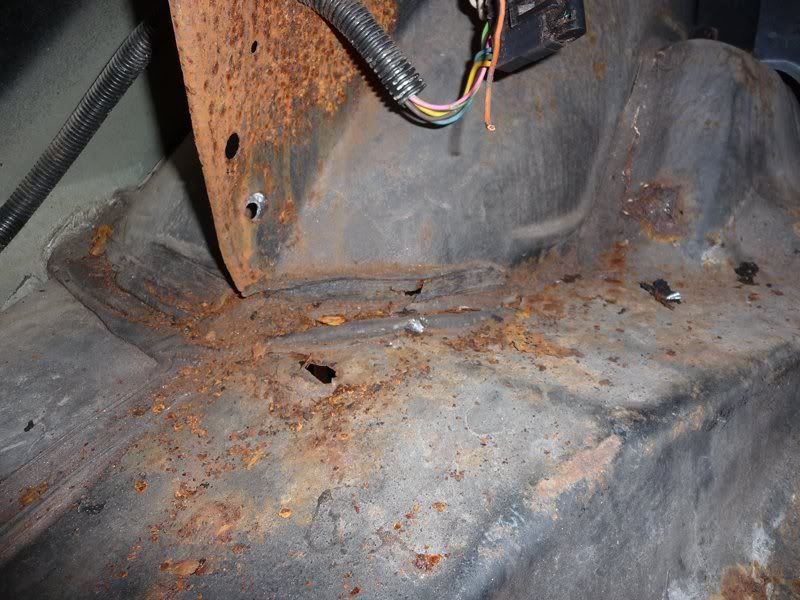
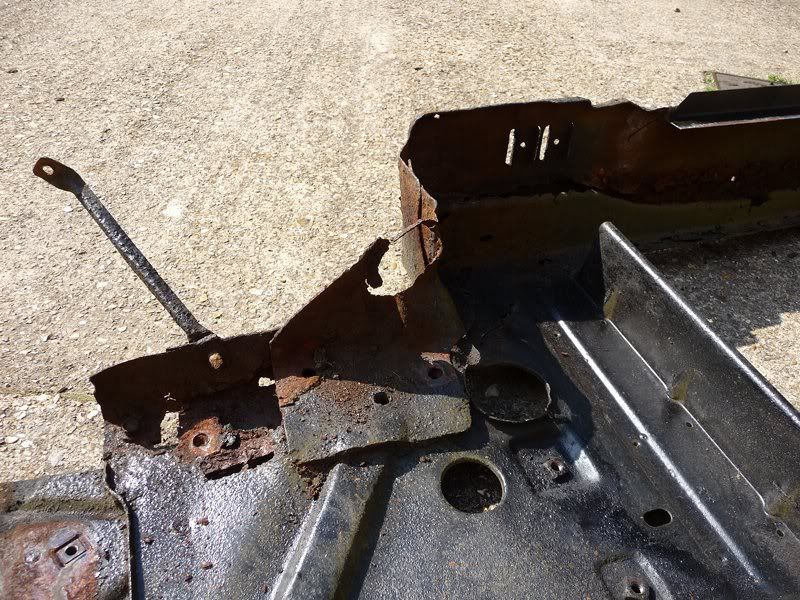
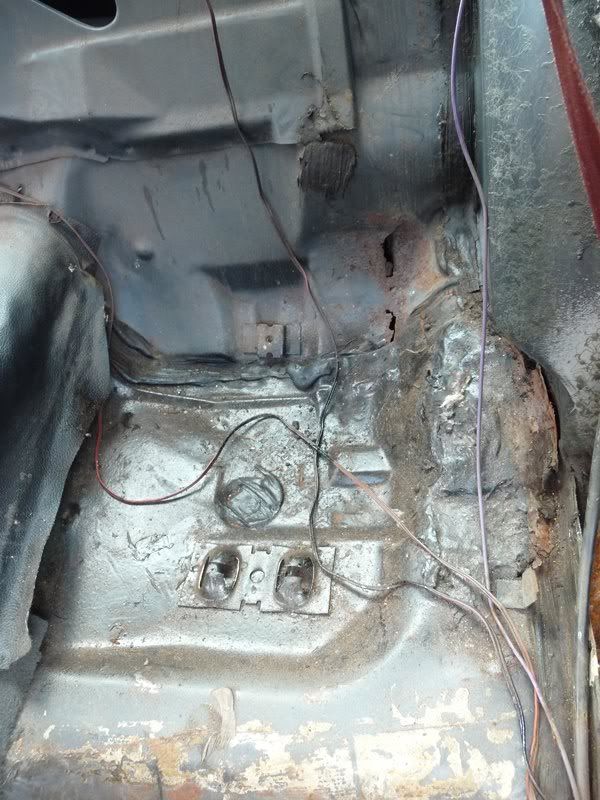
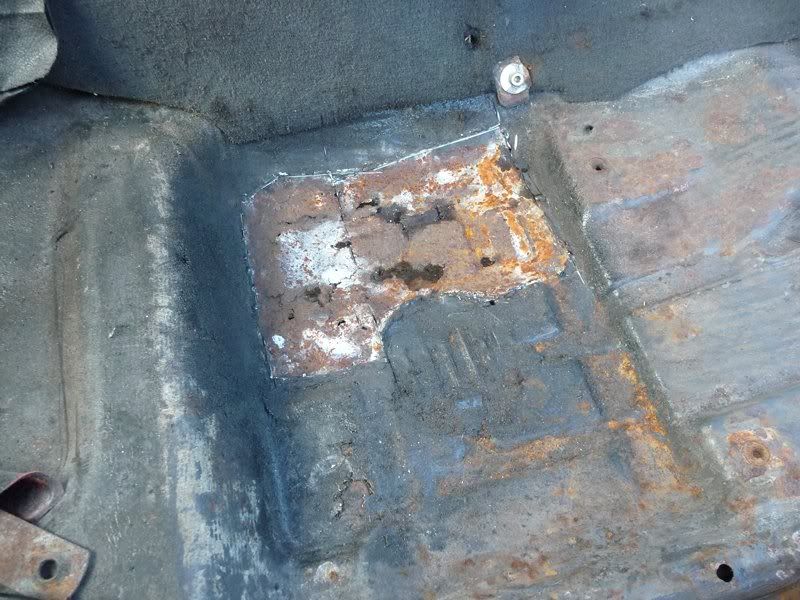
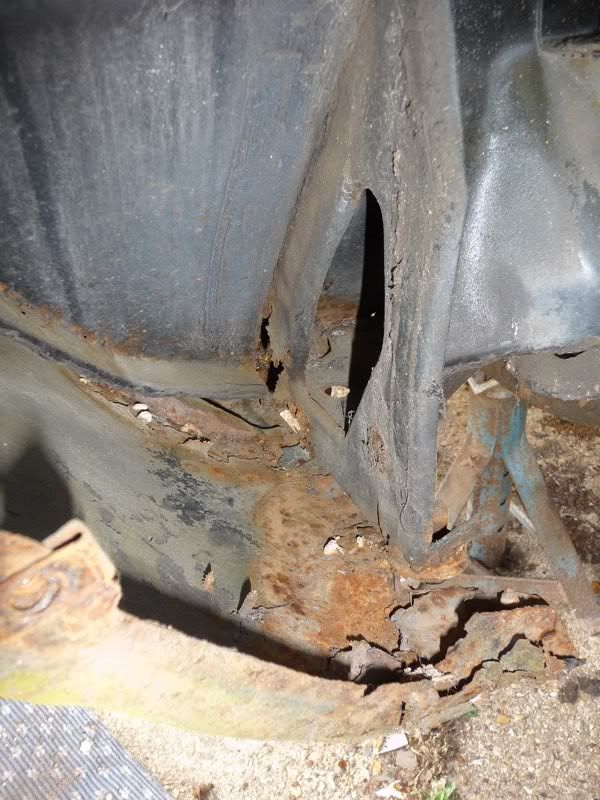
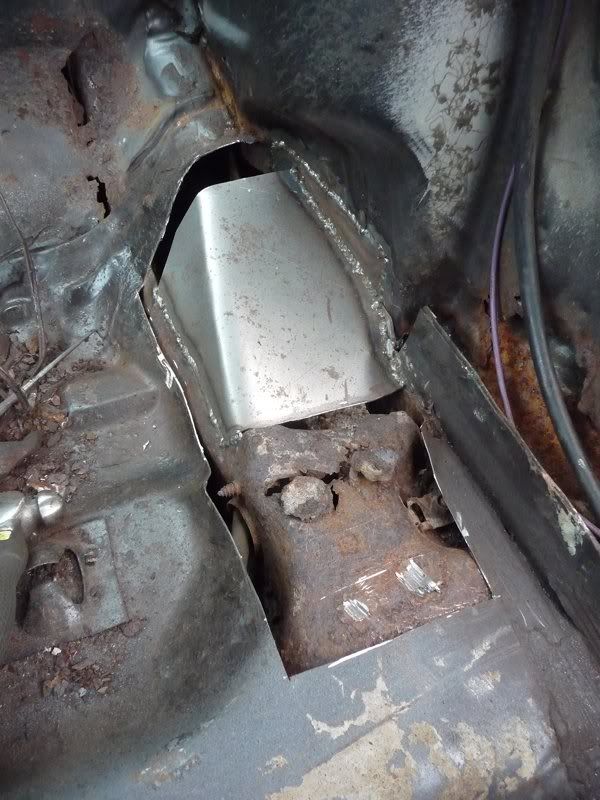
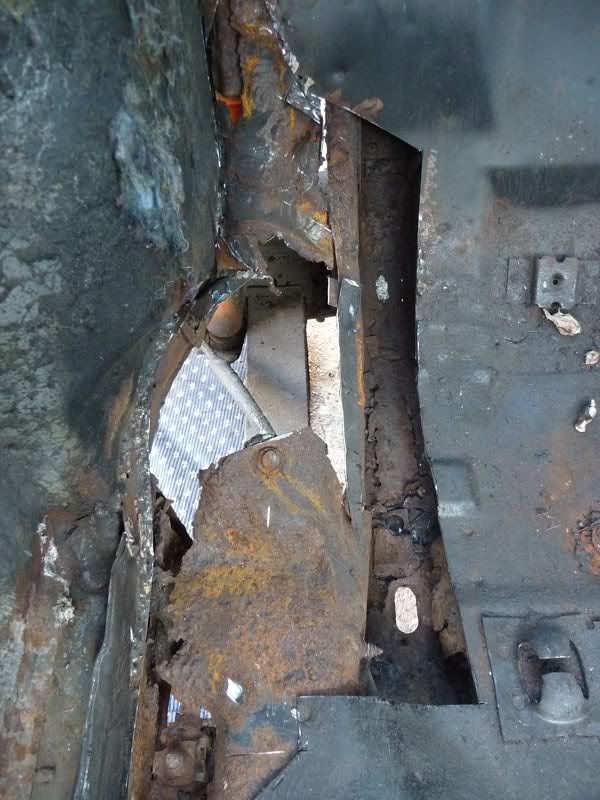
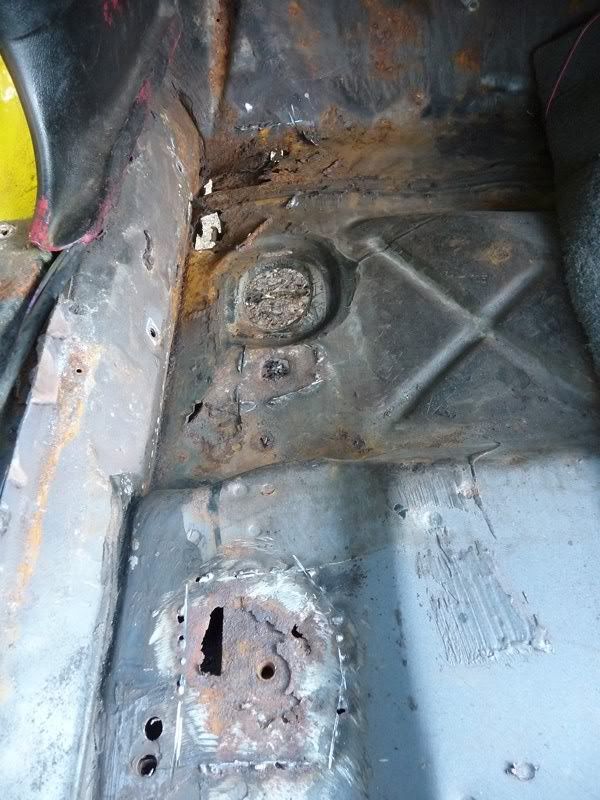
Thought I would have a look under the filler under the rear passenger seat....and look what I found...
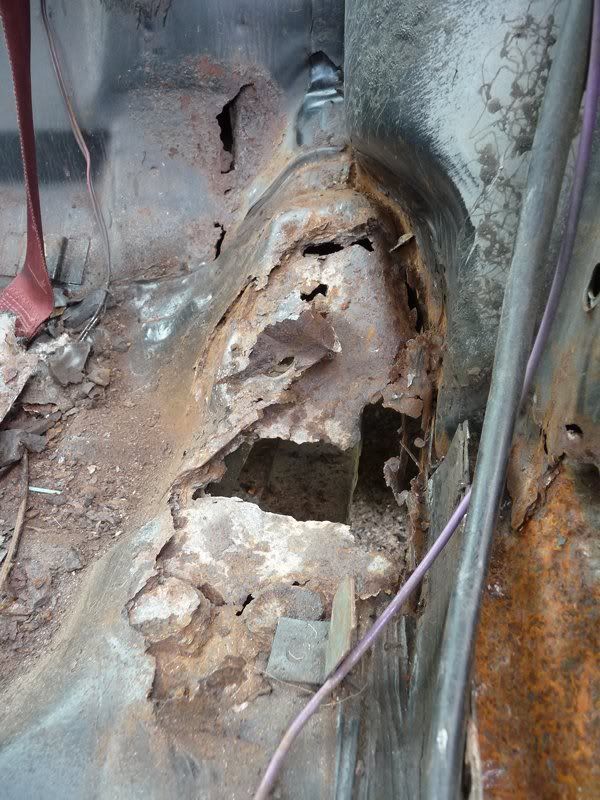
Who the hell covers that with filler?! Just filler, no fibre glass....
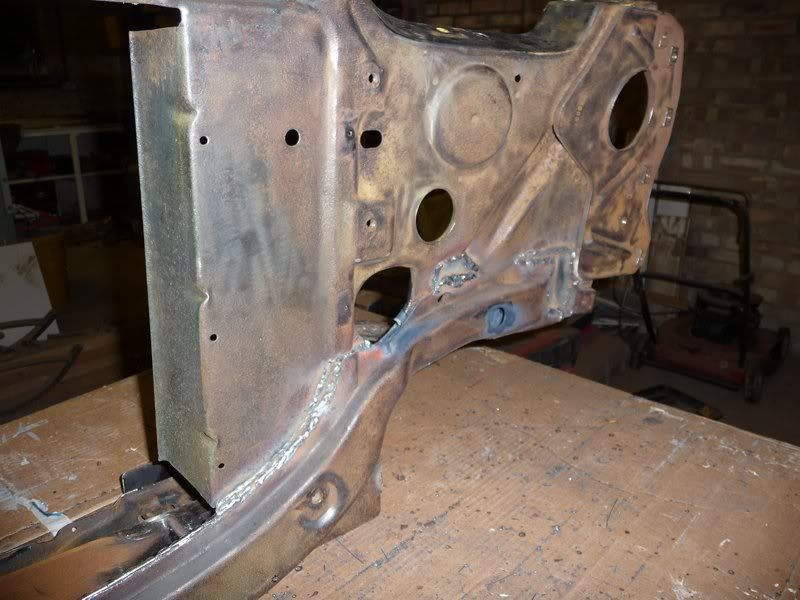
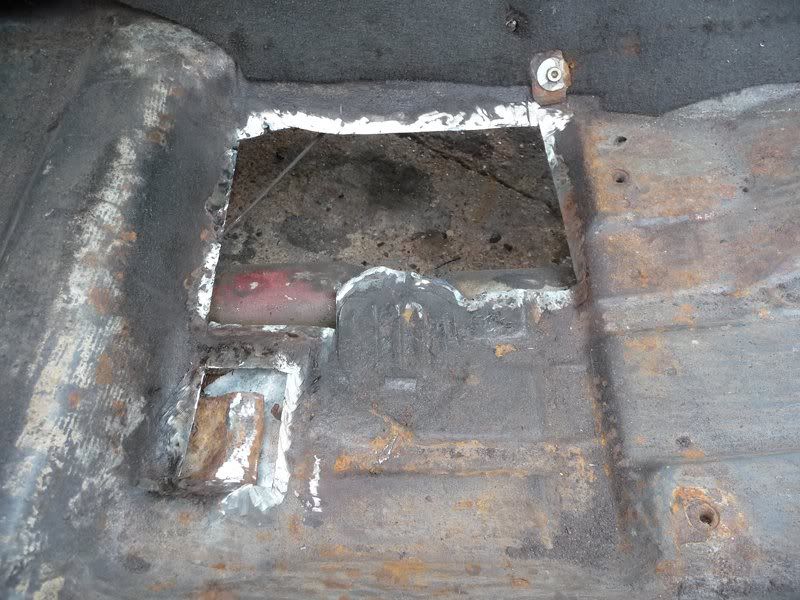
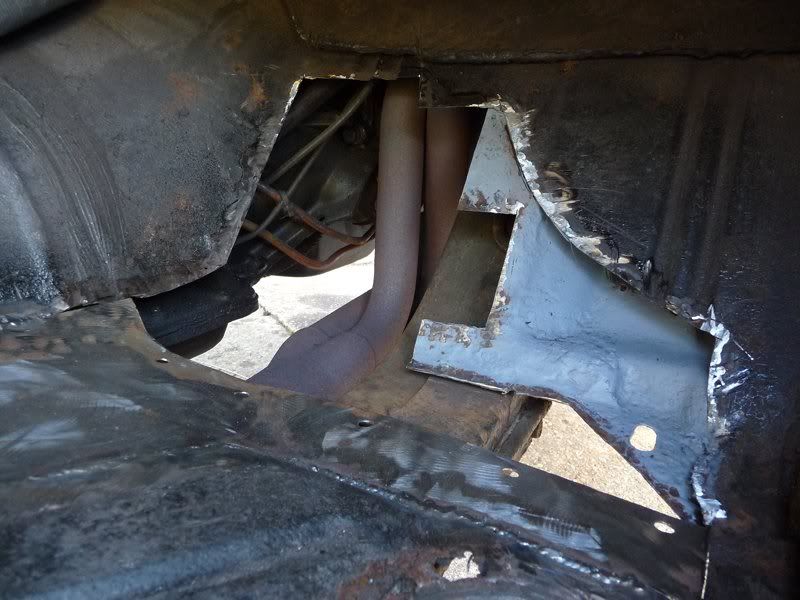
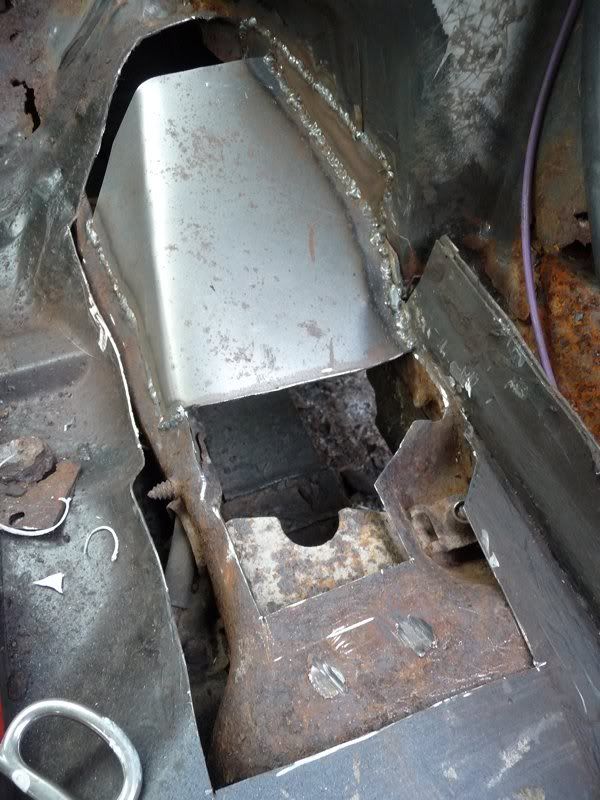
Cut the floor pan away to uncover the frame rail near the spring pocket
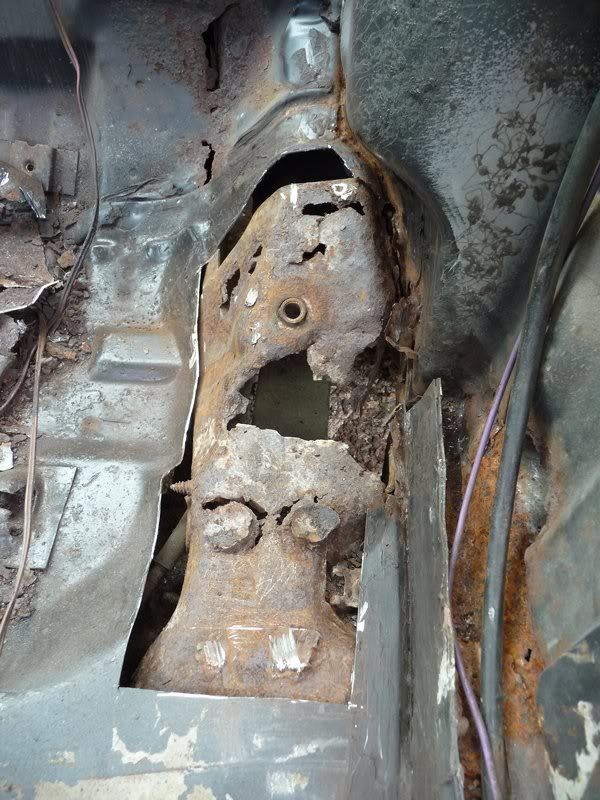
Getting better...
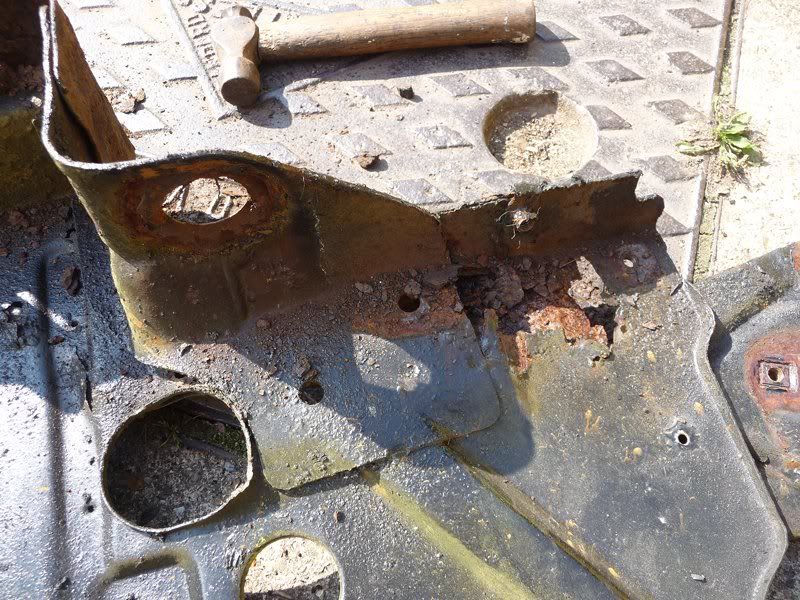
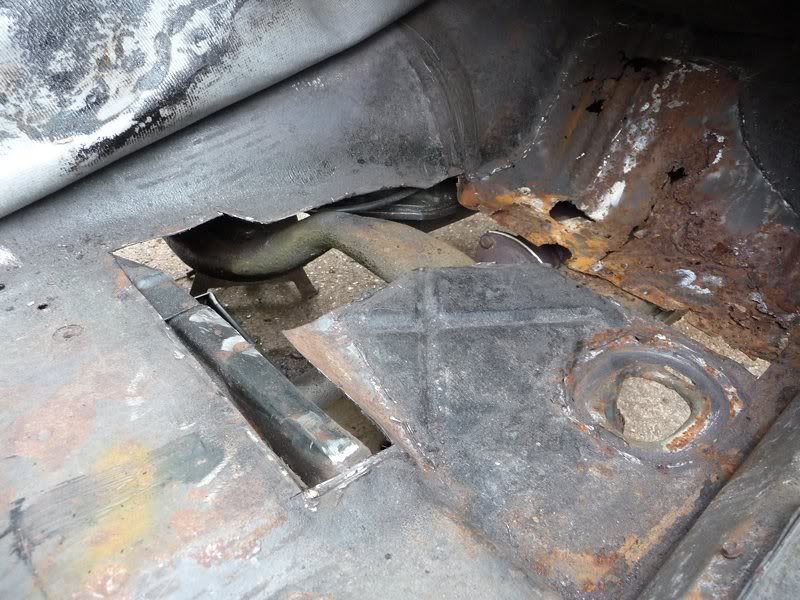
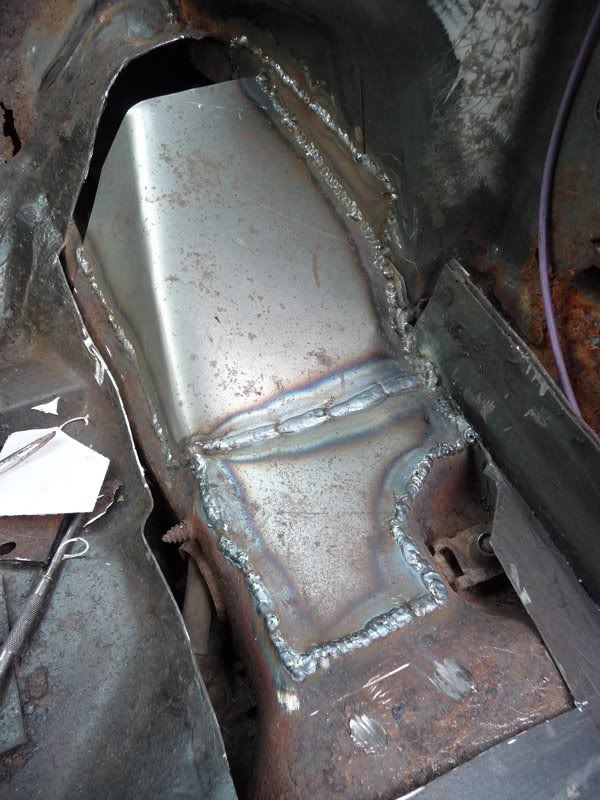
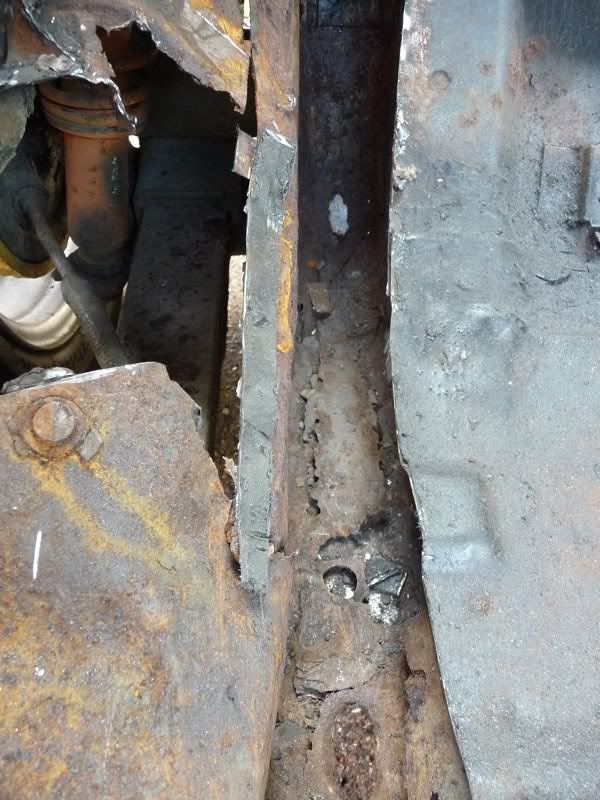
Then cut out the rusty parts of the rail and part of the inner wing that was rotten and started welding in new metal. Used 16swg for everything to
match up with this part of the frame rail.
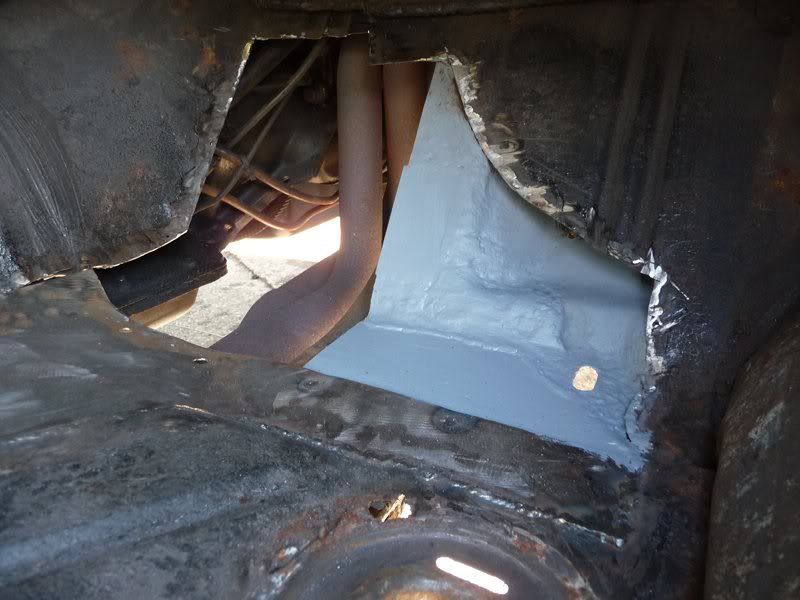
Cut out some card templates and started repairing the rail. Did it in 2 parts just to make it easier
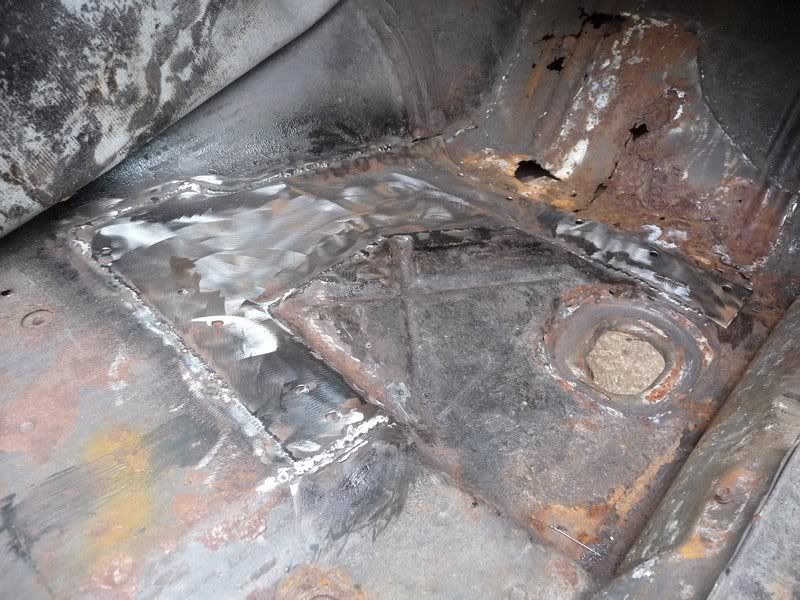
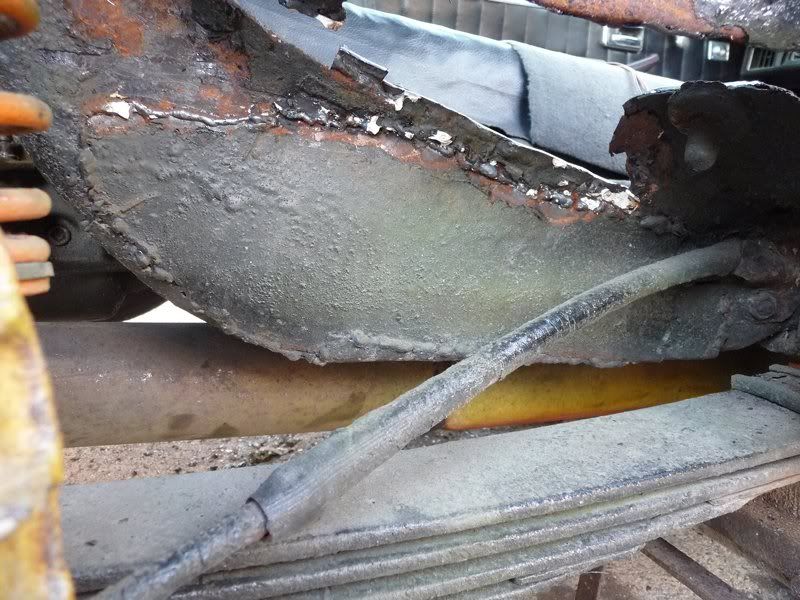
Thats it for this afternoon, gave it a quick coat of paint ready for welding in a new piece of floor over the weekend.
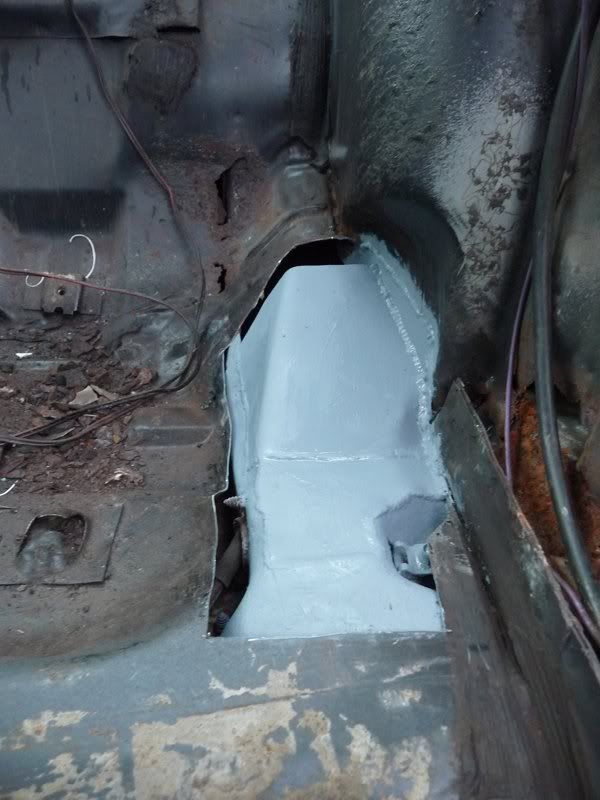
The good news is the rest of the rail looks to be in good condition, and I will be dropping the spring at some point when I change the bushes to have
a more thorough inspection.
Going to get the passenger side to the same state tomorrow before welding in the patches on the floor.
Sera
http://www.motosera.com
|
|
|
flak monkey
|
| posted on 17/9/11 at 05:28 PM |
|
|
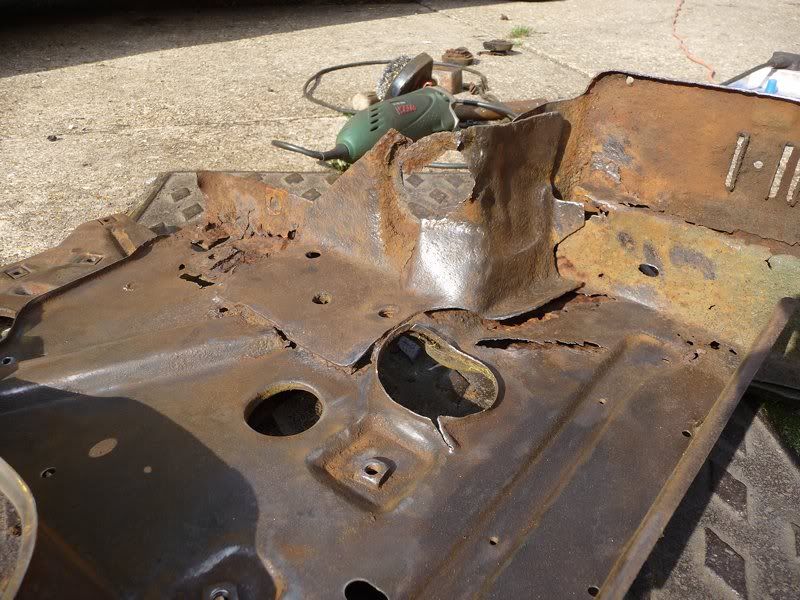
Thought as the repairs to the driver side weren't too bad I would tackle the passenger side. And didnt actually get all that far before having
to stop and think about the best method to continue.
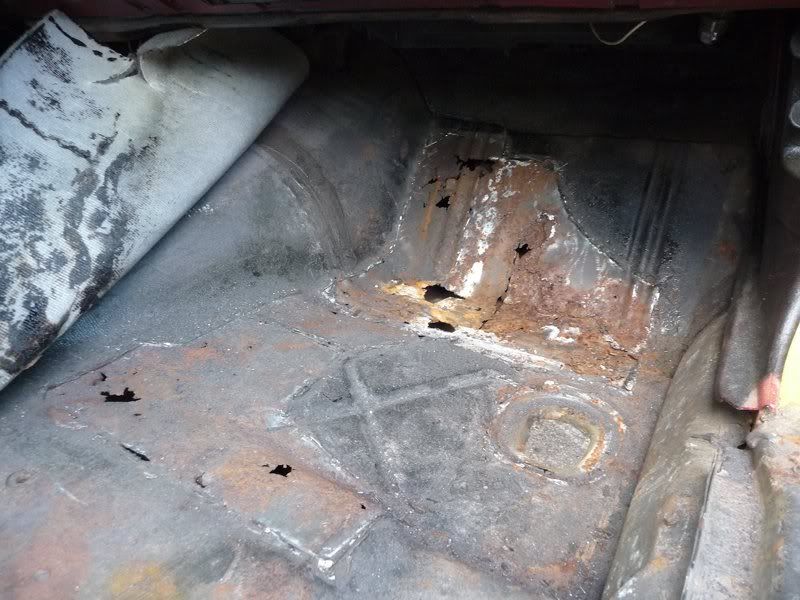
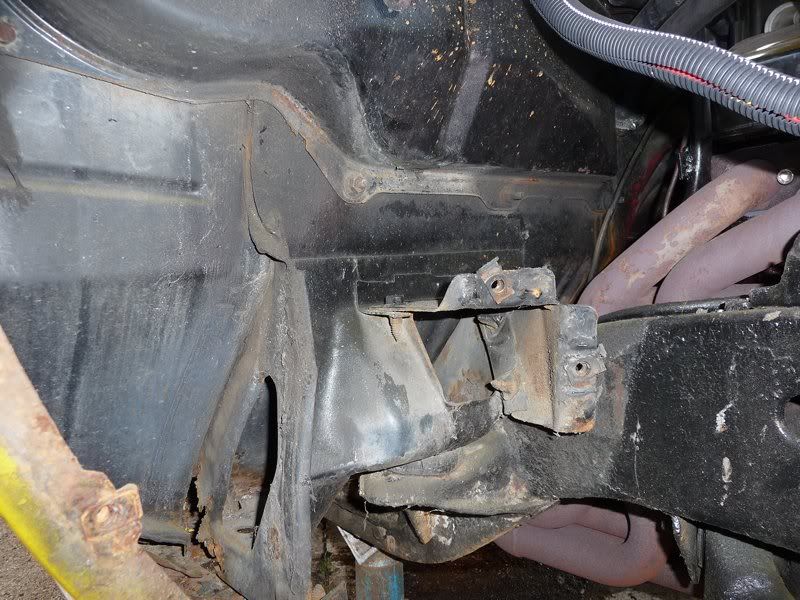
Started off looking like this, patches over the top of rusty metal
To be fair it was well welded together, but it wasn't really achieving much other than providing a place for water to collect and the rot to
spread.
Took an age with the grinder to carefully peel off the plates to find out what was salvageable underneath. Turns out I should have just hacked it out
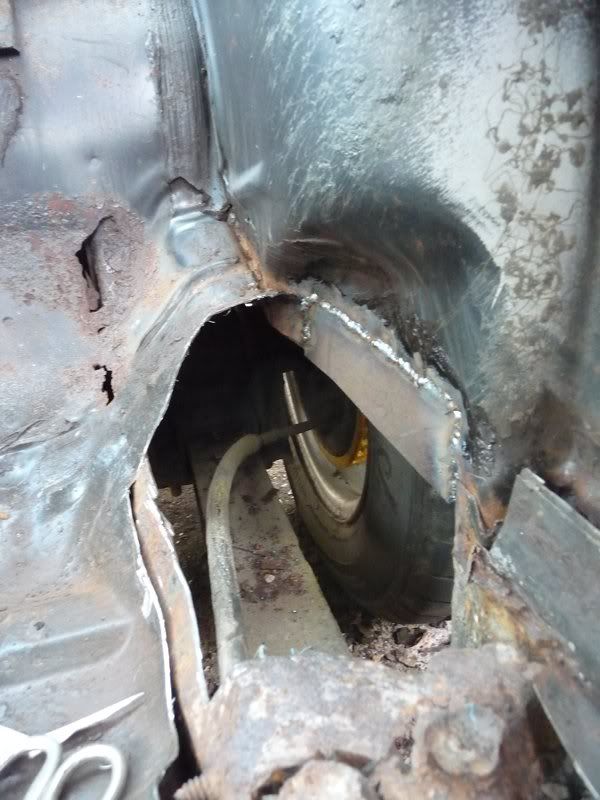
as there wasnt really much left after removing the rusty metal anyway.
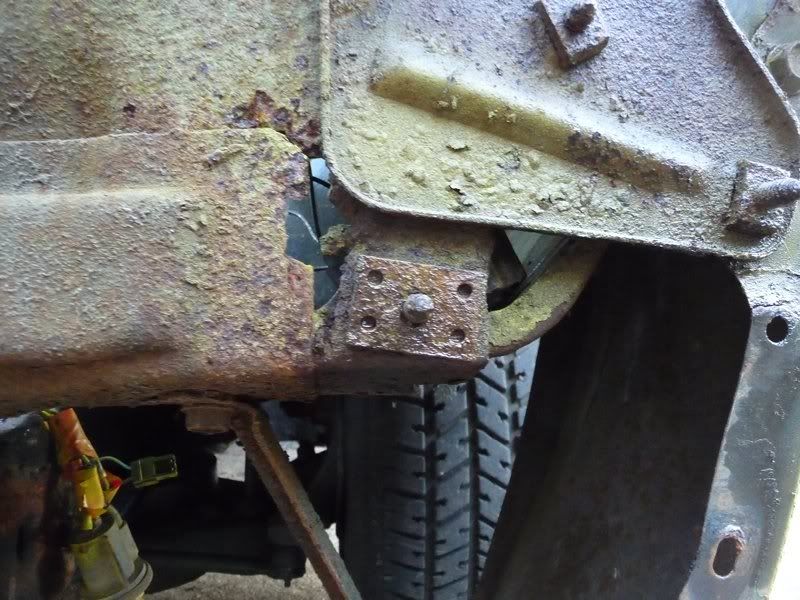
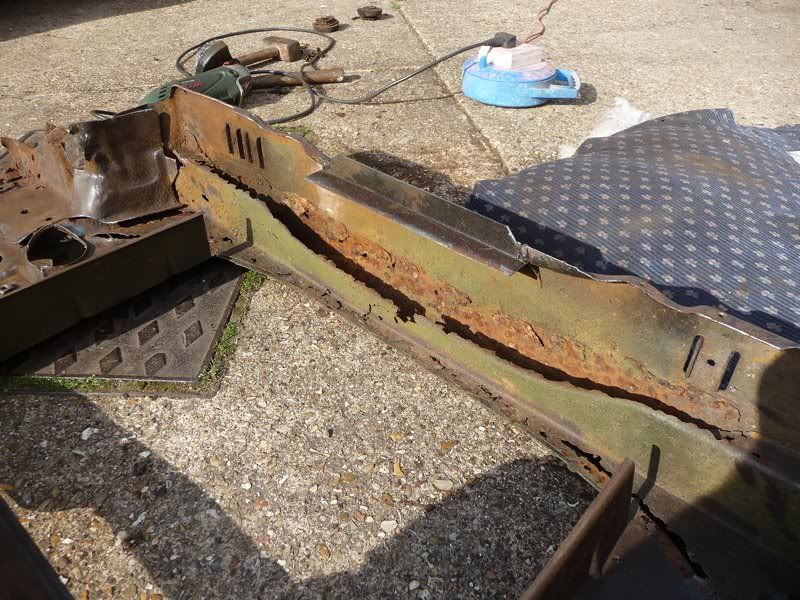
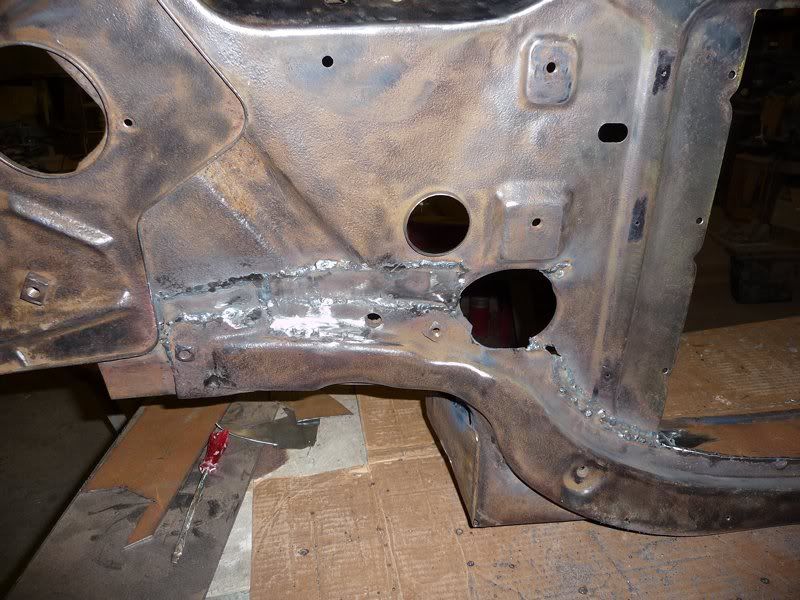
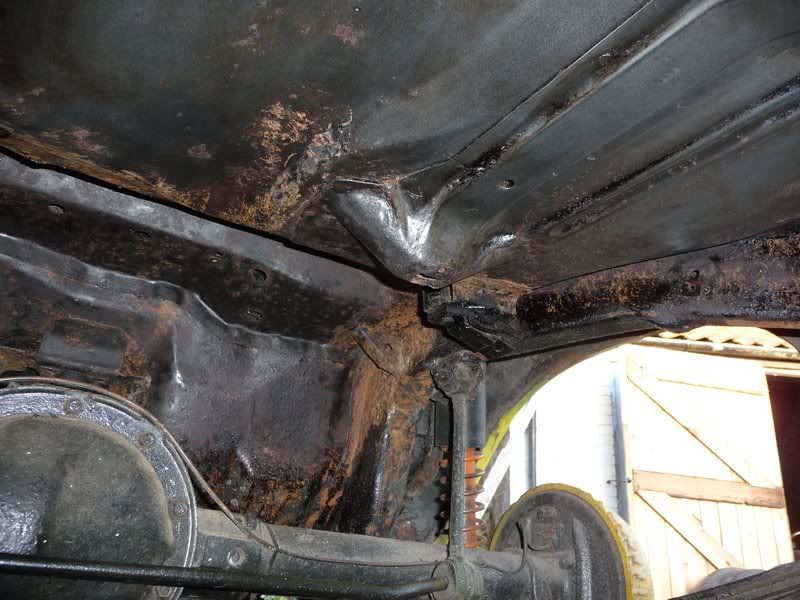
Much worse than the driver side. Notice the nice rotten torque box and frame rail...?
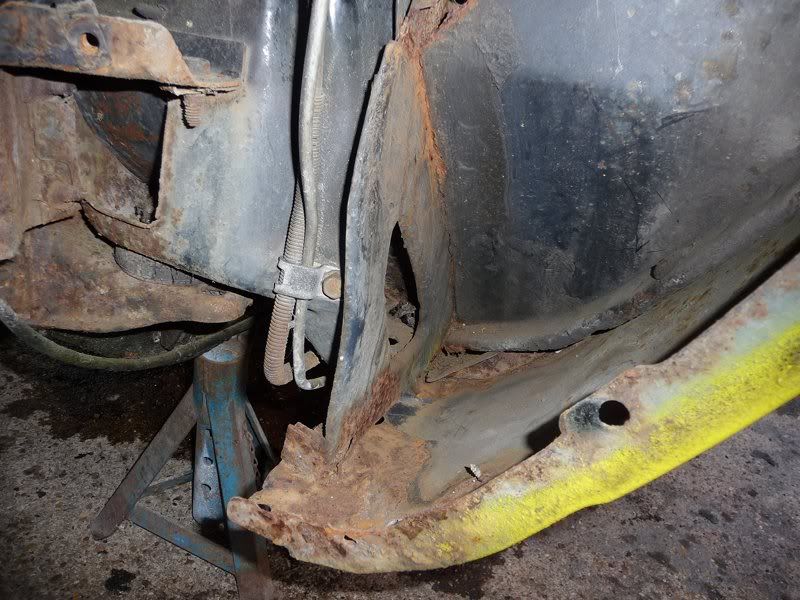
The rail has been patched up from outside before with 18g metal. It looks like I am going to have to drop the leaf spring this side so I can get to
the rail properly to cut off the previous patches and repair it properly. Not sure what thickness the rails themselves are, somewhere between 16g and
14g from measurements, but it seems to vary quite a lot.
I think its getting serious enough to break out the plasma cutter tomorrow.... But first I'll be making up some sort of brace to
hold the frame somewhere near right while I repair it.
Its a real shame no one makes repair sections for the front of the frame rails would save a lot of grief.
Oh well, more cutting and welding tomorrow by the looks of it.
Sera
http://www.motosera.com
|
|
|
big_wasa
|
| posted on 17/9/11 at 06:03 PM |
|
|
You really have got some work there 
|
|
|
Davegtst
|
| posted on 17/9/11 at 07:30 PM |
|
|
Jesus, is that a car or the titanic?
|
|
|
T66
|
| posted on 17/9/11 at 07:42 PM |
|
|
My Lada project had less tinworm than your tackling, something warming about cutting rot out and throwing it in a pile, then replacing it with new
metal.
Very rewarding garage play...
keep on posting the pics
|
|
|
DixieTheKid
|
| posted on 17/9/11 at 07:58 PM |
|
|
Lots of work there, but cars like that deserve to be put back on the road in there former glory! Keep up the good work.

COS IT'S Worth IT
|
|
|
r1_pete
|
| posted on 17/9/11 at 07:58 PM |
|
|
I've tackled similar on many occasions, it always amazes me how they got through their last MOT, there's more than 12 months deterioration
there.
Stick at it, it'll make a nice usable motor.
|
|
|
T66
|
| posted on 17/9/11 at 08:36 PM |
|
|
These any good to you ?
http://tinyurl.com/6dhlcac
|
|
|
flak monkey
|
| posted on 18/9/11 at 06:23 PM |
|
|
Thanks for the comments guys.
It's worse than I was hoping. Nothing is impossible to fix though Just going to take a lot longer than planned. Might end up taking it off
the road properly for a few months while I fix all the rust.
I am looking to see if I can find a section of rear subframe to cut out of a less rotten shell before I start putting any new metal in there. Will be
a better way to go if I can
Its got MOT until the end of next Jan...its only done about 800miles since its last MOT as well A lot of this stuff was covered up, but not very
well.
Sera
http://www.motosera.com
|
|
|
flak monkey
|
| posted on 26/9/11 at 02:46 PM |
|
|
I spent another 5 hours scraping underseal off the bottom of the car. Its now pretty much there, other than the inner arches at the rear. Most of the
rust you see is only light surface rust, looks worse due to the camera flash.

Just needs steam cleaning once I have stripped everything else off the car.
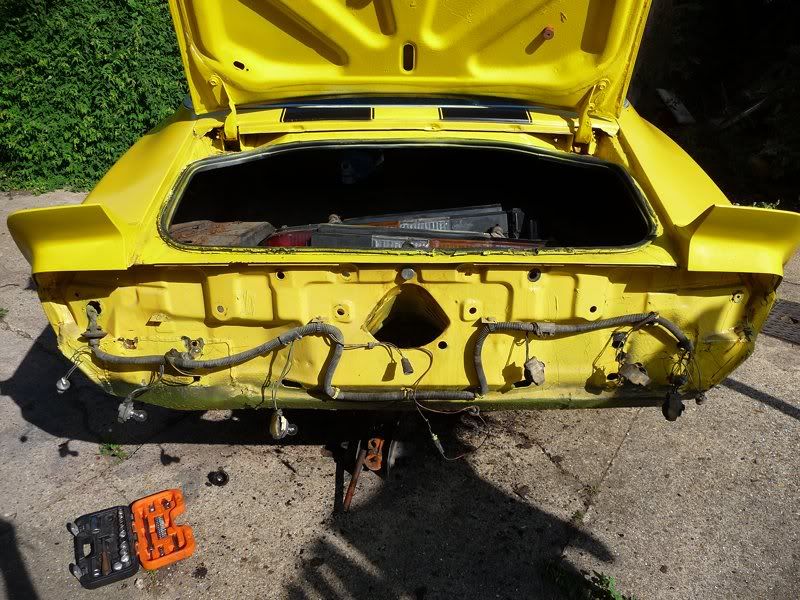
Pulled off the fibreglass patch on the valance as well, no suprise at what was underneath
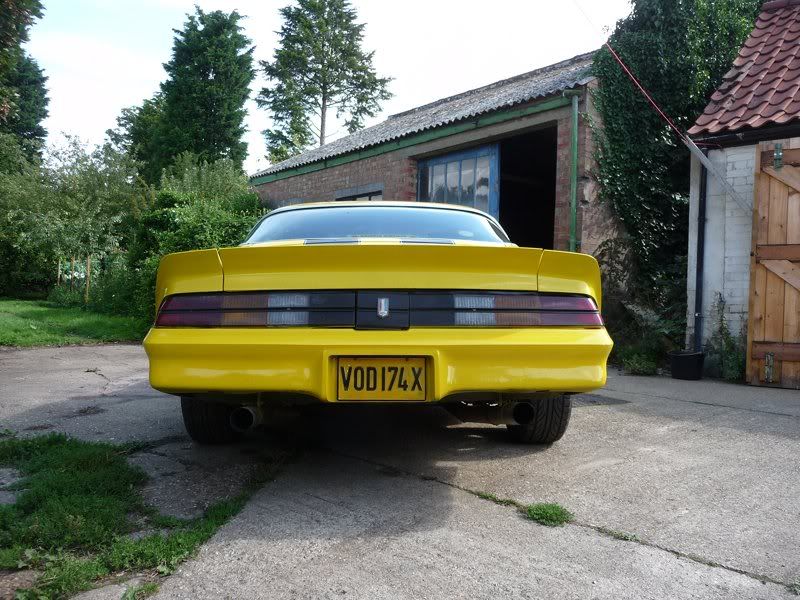
Also pulled the rear bumper and lights to get a look at the rear panel. Been bodged up in the past, so I'll be tackling that at some point
While I wait for some patch panels to arrive I might as well crack on with everything else.
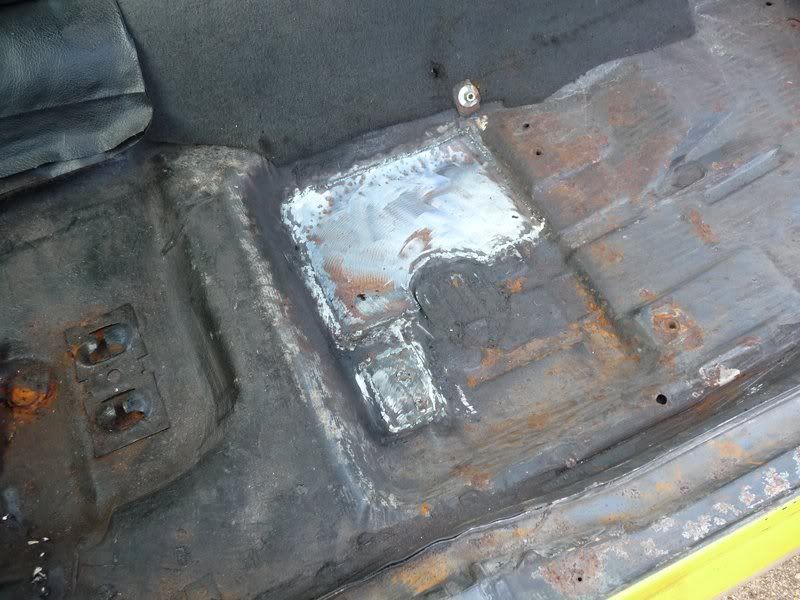
Finished off patching the floors. They are now all done and ready for paint when the time comes. The driver side wasn't really too bad compared
to the passenger side. Still removed plenty of metal though.
This is what it looked like after the existing patches had been cut off. Not too bad.
Lots of little bits, and it took quite a while to cut all the old rot out properly.
I decided to do away with the drain holes as well as one cover was missing anyway and the floor was rotten around where they fitted.
Now its all etch primered ready for a top coat of epoxy eventually.
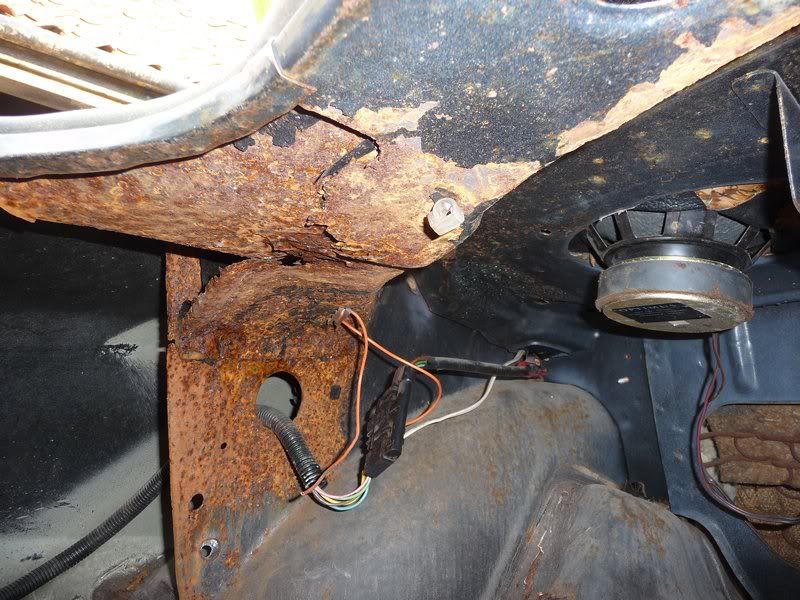
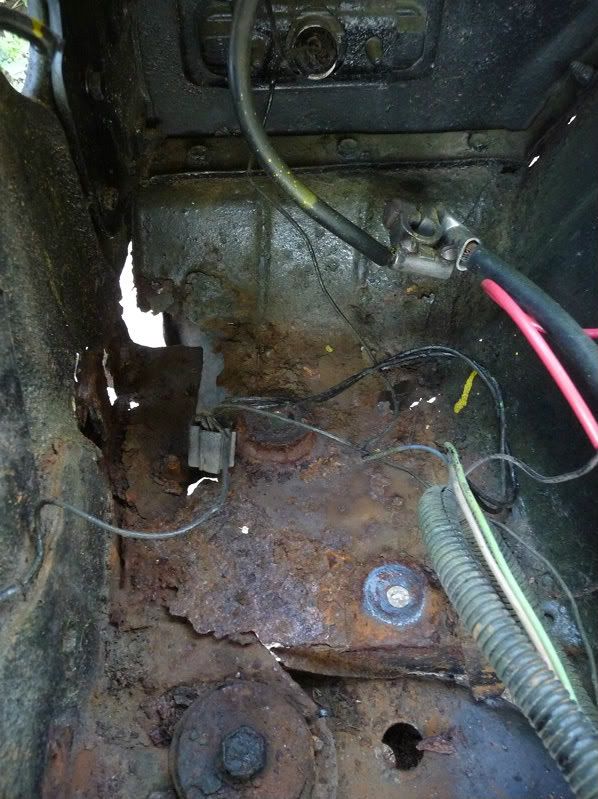
Pulled the dash out then removed the heater matrix and kick panels to get a look at the damage. The firewall is solid. The driver side cowl panels
arent too bad, just a small hole at the top which will be easy enough to get to. The passenger side is completely gone though... ever wondered what a
few years of a leaking cowl does? Here you go...
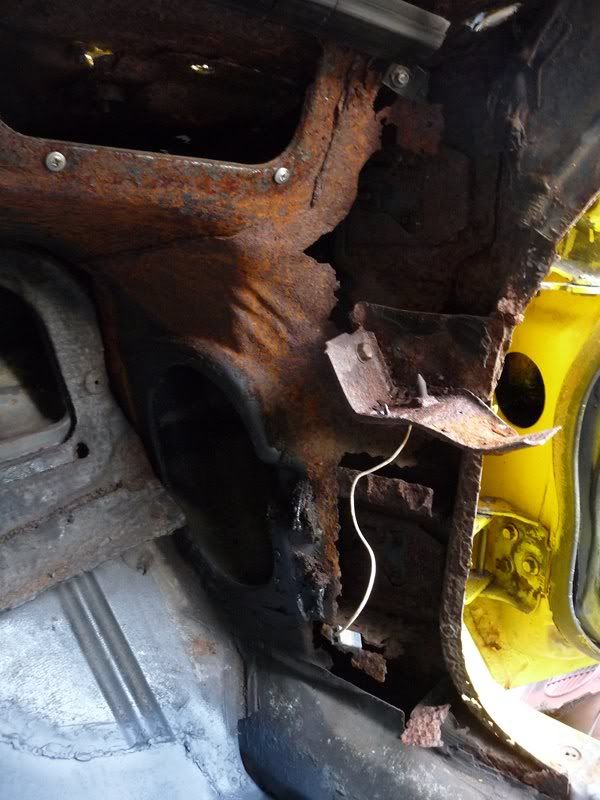
And a few holes in the cowl panel
Nothing that can't be fixed with a happy day with the welder.... Before I get too far I will have to pull the screen out and take the cowl vent
panel off so I can get inside the cowl area and fix it properly and give it a damn good coat of epoxy.
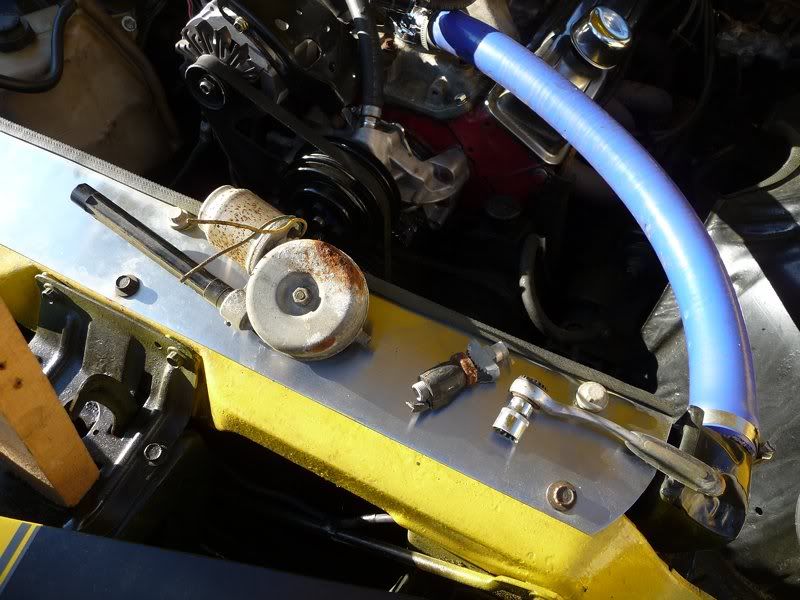
I also started pulling out a load of superfluous wiring. Lots of things the car has been fitted with in the past that are no longer there, retractable
aerial, clutch converter lock up, and a rubbish stereo. So the wiring has more or less got back to whats needed. Still a bit to come out when I
actually do the electrical system though.
Just as an example, this was the masterpiece that made up the stereo wiring...
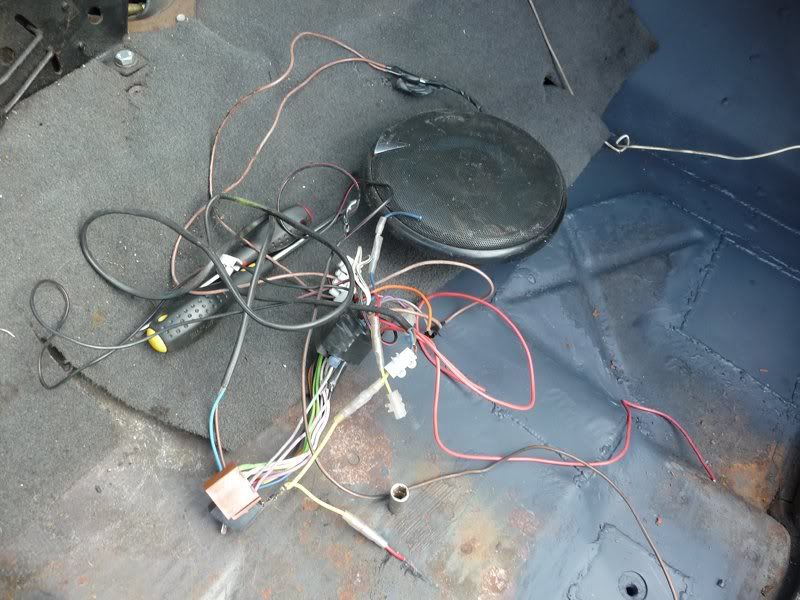
Definately not fitting a stereo when I put it back together. In two minds whether to bother even putting the heater back. I guess I ought to really...
[Edited on 26/9/11 by flak monkey]
Sera
http://www.motosera.com
|
|
|
David Jenkins
|
| posted on 26/9/11 at 03:59 PM |
|
|
I just wouldn't have the patience to do that sort of work... I would have been shipping it to the scrap merchants long ago!
Astonishing persistence...
|
|
|