CosKev3
|
| posted on 4/2/14 at 07:19 PM |

|
|
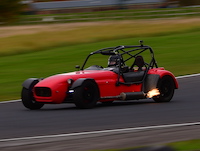
Mac1 ZR R1 Project
Finally bought myself a kit after a few years of fancying building one!
Have watched my m8 Steve build three BEC MK Indys and a MEV over the years and enjoyed going out as a passenger in his.
Bought this Mac1 off E-Bay,its been owned by two members off this forum but has only had a few alloy panels riveted on in its life so far.
Chassis is the ZR built for a Zetec,but after my experience in Steves BEC Indys the plan always was to convert the chassis to take a bike engine.
The kit was a bargain for everything that was included B)
So for what seems like ages I've been cleaning/de-rusting/painting old Ford parts!
Brakes stripped ready for blasting:

Shot blasted then soaked in Bilt Hamber Deox-C,then rebuilt with kits from BigRedd:


Hubs/drive flanges have all received the same treatment:


Two coats of Rust Bullet:


Rebuilt with new bearings and two coats of Rust Oleum Satin black:


[Edited on 4/2/14 by CosKev3]
|
|
|
|
|
CosKev3
|
| posted on 4/2/14 at 07:38 PM |
|
|
So onto the chassis mods for the engine swap.
Getting some sort of idea for engine position:

Picked up a prop shaft off here that was done by MK for a Busa eng,took a chance on it and I'm glad I can make it fit. 
I was planning on making a cradle from scratch,but Danny from MK offered me one at a price that made making one myself seem daft!
Welded in the mounts for cradle and made up a bottom mount once the cradle was in a position I was happy with.
Also took the opportunity to move the factory fitted chassis number plate up onto the top bar I was welding in,and weld it on right around as from the
factory it was only welded on with two spots.
Cut off the Zetec engine mounts too.
 
Description


Prop shaft centre bearing mount and gear cable mount fitted:

I bought a reverse kit off here that was designed for a MK Chassis,hoping it would fit on the Mac1 chassis pretty easily,wrong! 
The diff is lower in the Mac1 so the motor would not fit below the diff/propshaft.
So I had to mount it on the top 

Downside to moving to the top was the fact it interferes with the handbrake lever,so I had to modify the handbrake front mount point and the bar at
the rear that pulls the cable so that it sits in the centre of the tunnel,as the lever will now have to sit slightly towards the drivers side to clear
the reverse motor:

[Edited on 4/2/14 by CosKev3]
[Edited on 4/2/14 by CosKev3]
[Edited on 4/2/14 by CosKev3]
|
|
|
kingster996
|
| posted on 4/2/14 at 10:26 PM |
|
|
Nice one. Just the sort of project I am looking at doing.
Keep posting pics please, I need inspiration ;-)
|
|
|
CosKev3
|
| posted on 4/2/14 at 10:40 PM |
|
|
quote:
Originally posted by kingster996
Nice one. Just the sort of project I am looking at doing.
Keep posting pics please, I need inspiration ;-)
Cheers will do 
Really enjoying it so far!
|
|
|
CosKev3
|
| posted on 4/2/14 at 11:01 PM |
|
|
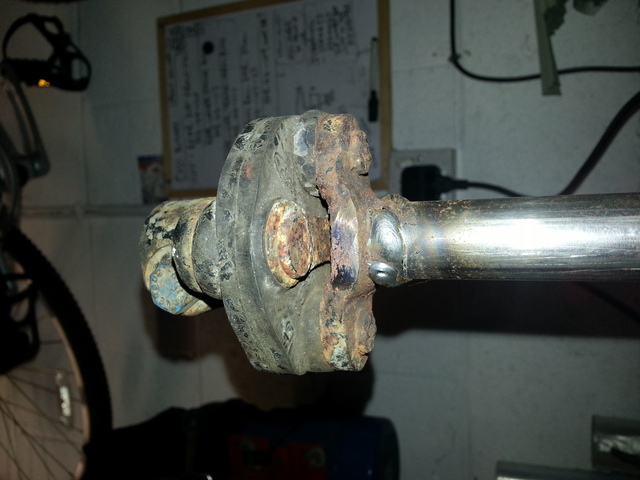
Refurbed this rusty old perished thing too!!
Description
 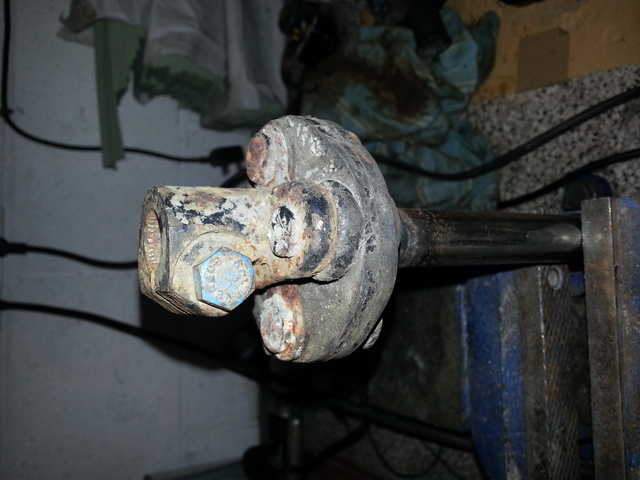
Description
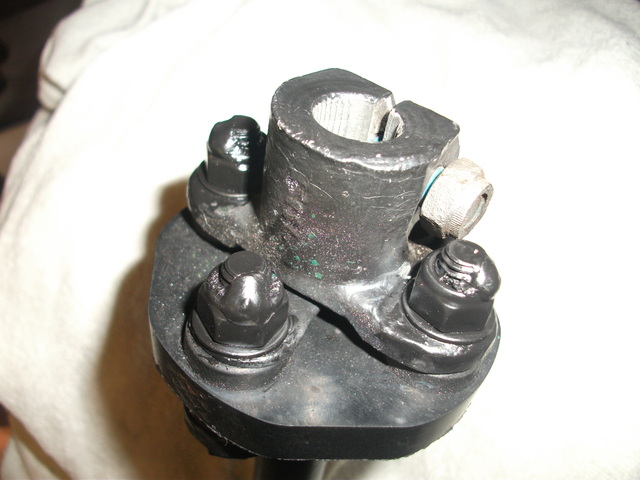
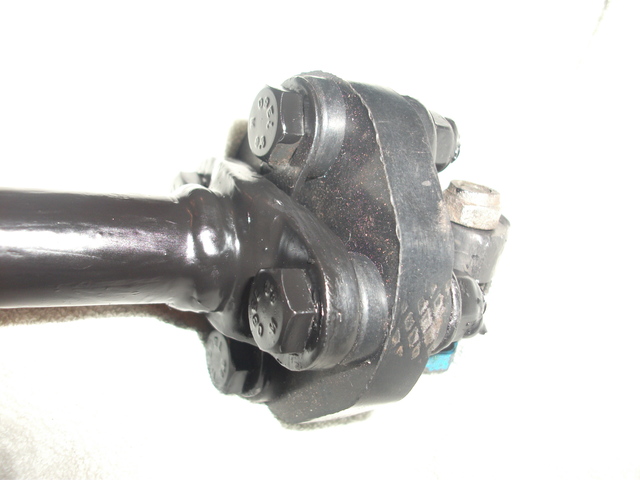
Given the same treatment as the hubs/calipers,and new bush kit off E-Bay:
Description
Description
|
|
|
CosKev3
|
| posted on 15/2/14 at 10:26 PM |
|
|
Cleaned up/painted diff and fitted new driveshaft and pinion seals,landed lucky with the diff,has been in storage for years and was removed from a
Sierra that only covered 600 miles 


Brakes painted and new handbrake springs fitted:


|
|
|
CosKev3
|
| posted on 28/2/14 at 07:59 PM |
|
|
Still plodding on
Driveshafts done:

Steering column:

All welded parts painted with Rust Oleum satin black aerosol,pretty good match to orig Mac1 powdercoat:

Gear cable/lever mounted for trial fit:

I added a bracket to the eng cradle for the gear cable eng end,just need the cradle powdercoating to finish:

Reverse motor fitted and tested:


Modified Handbrake lever as it sits to avoid motor:

|
|
|
CosKev3
|
| posted on 5/3/14 at 06:43 PM |
|
|
Rear hubs/uprights/coilovers/drive shafts fitted.
Nice now bolting on de-rusted/painted parts


|
|
|
Mattwillmett
|
| posted on 6/3/14 at 11:40 AM |
|
|
Hey I like how this is coming together! Nice work! I am interested in the rear calipers you are useing! Could you link me to a set or tell me what
year of car they are off? And also what width size disc they will accept, as I have some discs already but they are 23mm wide I might possibly have to
change them to the same discs you have also? If so where did you get them from and are they the orgonal ford discs aswell?
Thanks Matt!
|
|
|
CosKev3
|
| posted on 6/3/14 at 04:21 PM |
|
|
Cheers
they are sierra xr4x4 rear calipers and discs,4x4 saph cosworths and escort cosworths run a wider vented disc, but I'm not sure if 23mm wide
discs would fit in them.
the ones I've got are 253mm iirc solid discs, where as the cosworths have 273mm vented discs.
|
|
|
Mattwillmett
|
| posted on 7/3/14 at 07:49 PM |
|
|
okay thanks for that might look into seeing if the brake discs would fit over my hubs and change it all
thanks
|
|
|
kingster996
|
| posted on 18/3/14 at 10:26 AM |
|
|
Will be getting my callipers etc blasted soon (but don't hold your breath!) - what did you do with the pistons (and any other areas that would
not want to be abraded) to protect them?
|
|
|
CosKev3
|
| posted on 18/3/14 at 03:39 PM |
|
|
I stripped them down and got new seal kits/dust covers.
cheap enough off Biggred, rear handbrake mech is abit fiddly though.
I wouldn't get them blasted complete, shot would get in somewhere and could cause you big probs on the road if it got between seal and caliper
etc.
|
|
|
kingster996
|
| posted on 18/3/14 at 04:18 PM |
|
|
quote:
Originally posted by CosKev3
I wouldn't get them blasted complete, shot would get in somewhere and could cause you big probs on the road if it got between seal and caliper
etc.
Exactly what I thought - been many years since I last had something blasted and recall that I to be very careful about what was exposed! At the time,
a mate ran a blast cleaner business, so he was careful and knew to check everything for us - not got that luxury these days...
|
|
|
CosKev3
|
| posted on 19/3/14 at 05:57 PM |
|
|
Made up a new arm for the gearbox end of cable,the orig bike arm was too short and it was hard to find neutral

Steering column fitted:

PVC covered copper fuel pipe fitted


|
|
|
CosKev3
|
| posted on 8/4/14 at 08:20 PM |
|
|
Few more bits done
Handbrake cables and fittings bought from trailertec,welded the threaded bar to the clevis and welded the nut onto the end of the threaded bar:


The braided flexi pipes I got with the kit were specced for Wilwoods,so no good for my Sierra calipers.
So ordered some made to measure from HEL Performance,spot on quality.
Got them made up with banjo bolt ends on the caliper ends,helps with clearance to the wheels on rear and allows better alignment of the hoses .
Made some brackets up and rivetted them to chassis,as I don't want the front pipes passing through the side panels.
Welded a bolt to the chassis for the rear T piece in brake line and used a nylock to hold it on:


Had to do a fair amount of fiddling with the pedals,made up stops for the clutch and throttle so they sit nicely level with the brake pedal,welded
some extra bits to the pedals too so I could fit cables to both of them that would line up nicely with the tubes welded into the chassis for the cable
routing:

Master cylinder and front brake pipes fitted:

|
|
|
zx12r dug
|
 posted on 8/4/14 at 08:31 PM posted on 8/4/14 at 08:31 PM |
|
|
Looking good mate
|
|
|
CosKev3
|
| posted on 8/4/14 at 08:40 PM |
|
|
quote:
Originally posted by zx12r dug
Looking good mate
Cheers pal
About time we saw some pics of your orange beast on here
|
|
|
daveb666
|
| posted on 9/4/14 at 07:23 AM |
|
|
Progressing fairly fast Kev.
When are you expecting it to be done?
2007bc Photography - Commercial and Wedding Photographer based in West Yorkshire
http://www.2007bc.co.uk / http://www.huddersfieldcommercialphotographer.co.uk
|
|
|
CosKev3
|
| posted on 9/4/14 at 07:41 AM |
|
|
quote:
Originally posted by daveb666
Progressing fairly fast Kev.
When are you expecting it to be done?
yeah faster than planned! Really enjoying it though
Plan at the minute is hopefully IVA late this year/jan or feb next year so it's ready to be taxed for a full spring/summers use next year.
|
|
|
CosKev3
|
| posted on 29/4/14 at 10:19 PM |
|
|
Final fit of the pedals today
They came supplied with plastic bushes for the centre of the tube on pedal,no chance of these fitting in with the powdercoat in the tube,once the
powdercoat was removed the bushes were a very slack(crap)fit in the tubes,so once fitted there was lots of play in the pedals.
This felt shonky and with the pedals being pretty close together I wanted to make a better job of them.
So went down to Bearing Man and got bearings to fit in the tube
Cut down the orig plastic bushes and used them to fill the space between the two bearings in the tube.
Very very pleased with the result,no play at all and very smooth moving pedals
Also added stops to the clutch and accelerator pedals due to the limited movement on the bike clutch and throttle.


Also brake lines are now complete


|
|
|
bi22le
|
| posted on 29/4/14 at 10:44 PM |
|
|
Nice work on the pedals, I remember mine had movement due to the plastic bush.
Another thing that I did because I was concered was make up a sleeve to go over the threaded bar that adjusts the position of the brake pedal. I was
worried that during a track day I would bend it with my leg. Un servo brakes, sticky tyres you will put a serious amount of pressure through the
pedal. only takes 100kg at a slight angle and you could snap the weld or bend the bar.
Not sure if this worry was justified. It was just a quick and easy fix, as I am a short a$$ the thread was all of the way out.
Track days ARE the best thing since sliced bread, until I get a supercharger that is!
Please read my ring story:
http://www.locostbuilders.co.uk/forum/13/viewthread.php?tid=139152&page=1
Me doing a sub 56sec lap around Brands Indy. I need a geo set up! http://www.youtube.com/watch?v=EHksfvIGB3I
|
|
|
James
|
| posted on 29/4/14 at 11:32 PM |
|
|
Very nice!
You might want to consider removing the paint from the face of the hubs. I found the varying thickness was enough to throw the disc out enough it was
hitting the calliper!
Cheers, James
------------------------------------------------------------------------------------------------------------
"The fight is won or lost far away from witnesses, behind the lines, in the gym and out there on the road, long before I dance under those lights."
- Muhammad Ali
|
|
|
Magic Beans
|
| posted on 30/4/14 at 02:41 PM |
|
|
Nice work so far
The clutch stop will make a big difference. I've just fabricated one for my Indy Busa, as I'd been struggling with the bike clutch.
It's a bit like having stabilisers fitted, but hell, if it helps
|
|
|
CosKev3
|
| posted on 2/5/14 at 11:03 AM |
|
|
quote:
Originally posted by bi22le
Nice work on the pedals, I remember mine had movement due to the plastic bush.
Another thing that I did because I was concered was make up a sleeve to go over the threaded bar that adjusts the position of the brake pedal. I was
worried that during a track day I would bend it with my leg. Un servo brakes, sticky tyres you will put a serious amount of pressure through the
pedal. only takes 100kg at a slight angle and you could snap the weld or bend the bar.
Not sure if this worry was justified. It was just a quick and easy fix, as I am a short a$$ the thread was all of the way out.
Cheers.Not seen anybody else do anything as far as I can remember with the rod to MC,but you can't be too careful where braking is concerned!
quote:
Originally posted by James
Very nice!
You might want to consider removing the paint from the face of the hubs. I found the varying thickness was enough to throw the disc out enough it was
hitting the calliper!
Cheers, James
Thanks.Have seen people get issues with powdercoat on hub/wheel faces,but not a thin coat of paint.Were yours painted by yourself or powdercoated?
quote:
Originally posted by Magic Beans
Nice work so far
The clutch stop will make a big difference. I've just fabricated one for my Indy Busa, as I'd been struggling with the bike clutch.
It's a bit like having stabilisers fitted, but hell, if it helps
Cheers.
So you were running yours just relying on the cable not snapping once you reached the limit of clutch?
|
|
|