fuzzy!!
|
| posted on 15/7/07 at 06:26 PM |

|
|
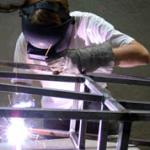
started welding - finally, but...
...it kind of fell apart!!
I tacked up the bottom section but when done we found that one side (F1/F2) was about 1/2 inch shorter than the other  so... I thought I'd
see what would happen if I took the entire section and gave it a little tap on the garage floor - well one moment I was holding the whole bottom
section the next I just had D2 in my hand and all of my original tubes nicely sprinkled around me so... I thought I'd
see what would happen if I took the entire section and gave it a little tap on the garage floor - well one moment I was holding the whole bottom
section the next I just had D2 in my hand and all of my original tubes nicely sprinkled around me 
so - (1) when we say tack/spot do you tack all connecting faces? or just the top or is spot welding not enough at this stage (2) when do most people
take the chassis off the board? (3) how extensive is the 'provisional' welding before final welding? is a single spot weld per connection
enough as long as we leave all tubes on the board?
In fairness to me  I don't think the quality of the welding was bad I just don't think I went through the correct process. Lessons
learnt though. I don't think the quality of the welding was bad I just don't think I went through the correct process. Lessons
learnt though.
|
|
|
|
|
DIY Si
|
| posted on 15/7/07 at 06:42 PM |
|
|
I find when just doing little bits like your are, I turn the welder up a notch or two, as MIG welding takes a moment or two to penetrate when starting
from cold.
Let your plans be dark and as impenetratable as night, and when you move, fall like a thunderbolt.
Sun Tzu, The Art of War
My new blog: http://spritecave.blogspot.co.uk/
|
|
|
Simon S
|
| posted on 15/7/07 at 06:56 PM |
|
|
Tacky...
Hi,
I was lucky enough to visit a company called Caged Ltd in Westbury recently, and saw first hand how those who produce Caterham chassis every working
day tack the frames together. It certainly re-enforced a few basics. The tacks were literally just that, but they were of a quality to hold the
pieces together adequately to allow removal from jig and then weld with better access.
When you tack weld a chassis member or what ever you are building the weld will naturally contract on cooling, so if you only tack on one side you may
well get distortion. Best thing therefore is to tack on both sides as small a bead as you can to guarantee its welded, giving the weld a light tap
with a ball pein hammer after to relieve the stresses a little.
My big temptation was to attempt to complete a weld too far whilst still in the jig. With the relatively poor access to the weld jig-bound versus
free you inevitably end up with a poorer quality weld. Once I realised how much better the weld quality could be with the component firmly tacked and
then removed from the jig so you could get it and you placed exactly right before welding I never looked back.
I think you would be best served taking a step back, however, and getting a bit more welding practice at the bench first to not only get your eye in
but also get the welder settings correct. If you haven't read anything on it yet I can reccommend the Haynes book on the topic. If welds
haven't held then make sure the surfaces are cleaned back and the voltage & wire feed (assuming MIG) settings will truely heat up both work
pieces being welded.
It sounds obvious I know, but you will be staggered how your welding improves with practice, and as it improves you get double pay back of also being
able to weld adequately even in less than ideal circumstances (access to components being welded etc.).
Hope all goes well,
Cheers.
|
|
|
mark chandler
|
| posted on 15/7/07 at 07:04 PM |
|
|
If you just tack one side it will all fold up and fall apart, you need to tack at least opposite sides to add some mechanical strength (thats opposite
sides of the same tube, even if you fully welded one side it would act like a hinge and twist apart).
By tacking you will not lose 1/2", I suggest you recheck your board. When you build the top or bottom frames you should be able to invert and
get a perfect fit.
Regards Mark
Carry on with the good work, kits are for girls 
[Edited on 15/7/07 by mark chandler]
|
|
|
Peteff
|
| posted on 15/7/07 at 07:13 PM |
|
|
I cut all the pieces for the chassis base and fastened them to the baseboard then put a tack in the corner of each join to just hold them in place. I
then welded the top side and the outside of each tube fully before I turned it over and fastened it back down to do the now top and inside face. I
then faced all the welds on the top so I had a flat surface to fasten the uprights to. I did get a slight bend in my base but I took it out by putting
one end on a 3x2 and strategically jumping on it ( jigging the chassis ) )
yours, Pete
I went into the RSPCA office the other day. It was so small you could hardly swing a cat in there.
|
|
|
Middy Tim
|
| posted on 15/7/07 at 07:35 PM |
|
|
Hold the weld for a bit longer to get a stronger tack, if it's just a quick shot, there won't be enough heat the weld won't
penetrate and will be VERY weak. Tacking on more than one side is also a good idea, especially if you plan on moving the piece before seam welding.
|
|
|
fuzzy!!
|
| posted on 15/7/07 at 07:47 PM |
|
|
1/2" out definitely due to marking out the board I should have checked before welding each section
Good spot on powering up the welder - we kept turning it off; tea breaks etc and just cracked on when turned back on.
I didn't realise they needed warming up.
Welder's also a bit dodgy - will be posting something on mig-welding.co.uk soon.
thx all
|
|
|
big_wasa
|
| posted on 15/7/07 at 07:47 PM |
|
|
As said turn the power well up and tack two faces.
Measure twice and weld once 
|
|
|
nitram38
|
| posted on 15/7/07 at 08:13 PM |
|
|
A little tip when tacking square frames. Use a tape measure to measure diagonally, corner to corner.
If one diagonal is longer than the other, then the frame is not square.
Tap the longest diagonal on a hard surface to re-square the frame up.
Tack on opposite side of join to hold and remeasure.

|
|
|
pewe
|
| posted on 16/7/07 at 07:39 AM |
|
|
Agree with all the above plus make sure the welder is plugged directly into the power source. If you do need to use an extension cable make sure
it's a meaty one otherwise you'll suffer voltage drop before it reaches the welder - from personal experience that can lead to crap welds!
Cheers, Pewe 
|
|
|
robertst
|
| posted on 16/7/07 at 08:35 AM |
|
|
i ignored the tack-welding stage and fully-welded everything from the start. saved me quite some time, plus its ok if you go by stages, i.e: bottom
frame, top frame, H tubes, connect bottom and top frames, rear part, bulkhead, engine bay.... i took it step by step and just fully welded the thing.
also avoided the possibility of forgetting to weld a part.
Tom
|
|
|
Angel Acevedo
|
| posted on 16/7/07 at 10:03 PM |
|
|
As usual,
You gain the experience just after it was needed.
I`m doing light fabrication of Burglar Bars, and noticed that on tacking 1/4" (6mm) lat bar to 1/2" Solid square section,
my regular setting was not enough to get the penetration to hold things together.
Also the same comes true, on 14 ga. steel once the material is tacked (and warm) if you keep the settings used for tacking, you blow holes fairly
easy.
cheers
Beware of what you wish.. for it may come true....
|
|
|