
Making an Aluminium Bonnet Scoop: step by step pictures
2cv - 18/10/10 at 02:54 PM
As with many things in life there are often a number of ways to achieve the same object and metal shaping is no exception. There are no right or wrong
ways, you just find a method that works for you.
Hammerforming works for me and that's the way I'm tackling the bonnet air scoop.
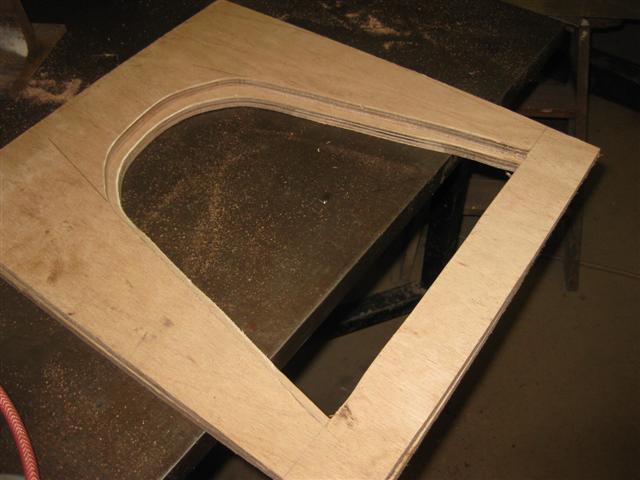
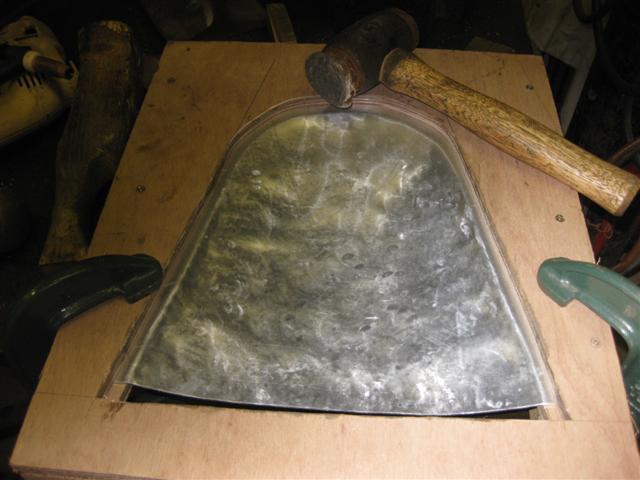
As with the power bulge covered in a previous thread, the desired shape was cut out of two pieces of 12mm ply, the upper piece being about 10mm larger
all round than the lower piece. This time I'm using 1.5mm thick pure aluminium 1050A and have not annealed it. The aluminium was sandwiched
between the two pieces of ply and screwed together to stop any movement.
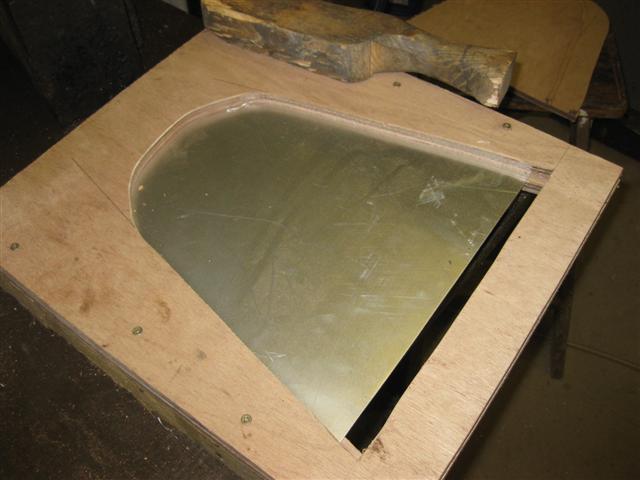
In the un-annealed state the aluminium was a lot harder to work and so I used the soft head of a Thor hammer to get some shape into it.
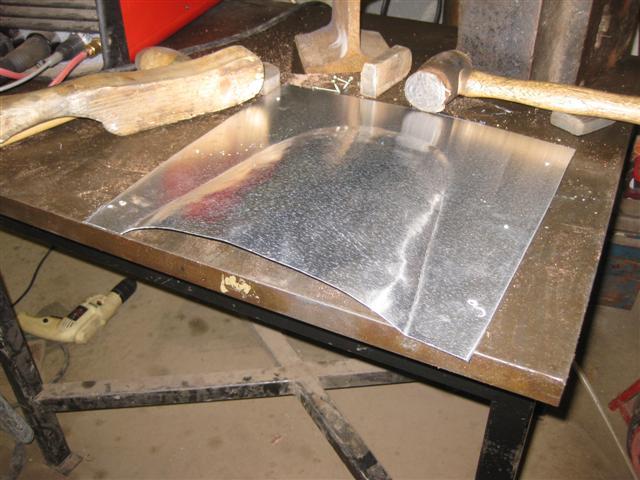
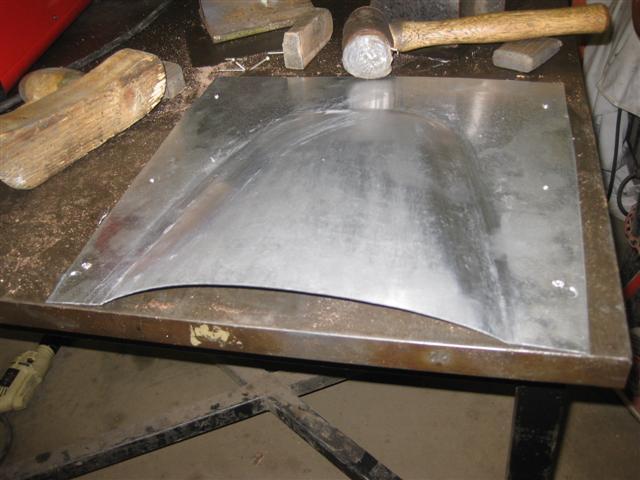
I covered the planishing stage in the previous thread and this was done in exactly the same way.
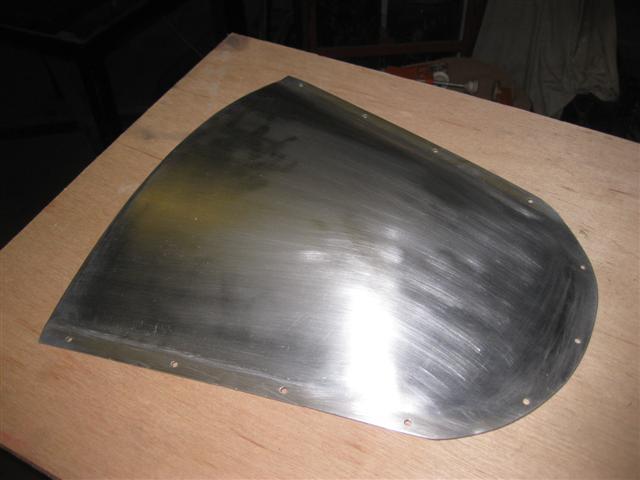
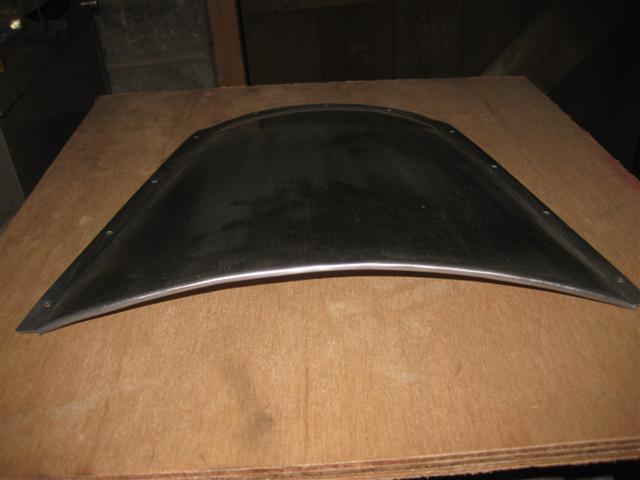
Here are some early stage pictures.
[img]

Description
[/img]
[img]

Description
[/img]
[img]

Description
[/img]
[img]

Description
[/img]
[img]

Description
[/img]
[img]

Description
[/img]
[img]

Description
[/img]
[Edited on 18/10/10 by 2cv]
[Edited on 18/10/10 by 2cv]
Ivan - 18/10/10 at 03:04 PM
 I just have to try this some time
2cv - 18/10/10 at 03:15 PM
I warn you, it is addictive!!
flak monkey - 18/10/10 at 03:20 PM
Excellent stuff, missed your previous installments and just went back and had a look 
You have more patience that me, thats for sure. I have always wanted to give it a go though!
2cv - 18/10/10 at 03:25 PM
I'm not patient at all but I don't think you need patience to do something you enjoy.
Daddylonglegs - 18/10/10 at 03:58 PM
Nice one!
Always someone giving great advice on here 
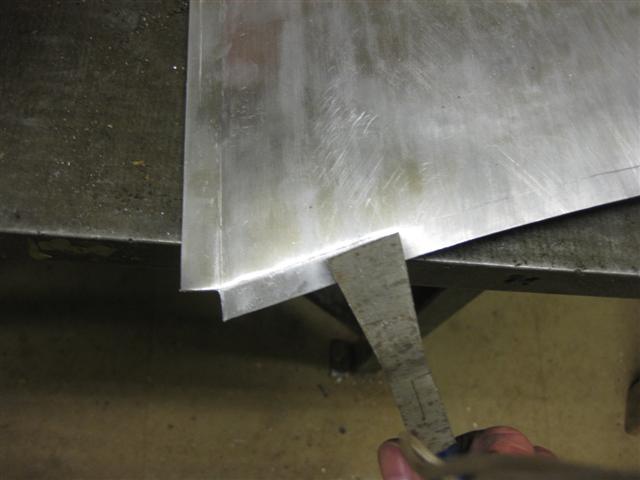
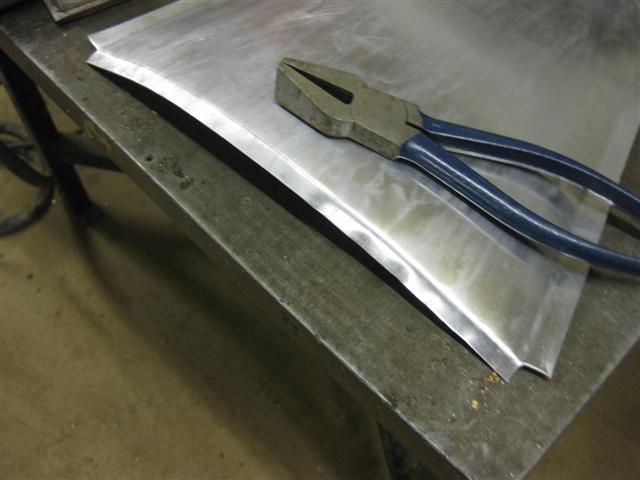
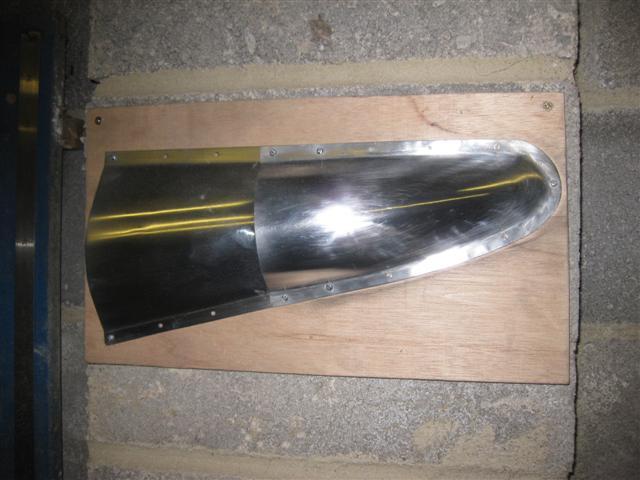
2cv - 19/10/10 at 12:05 PM
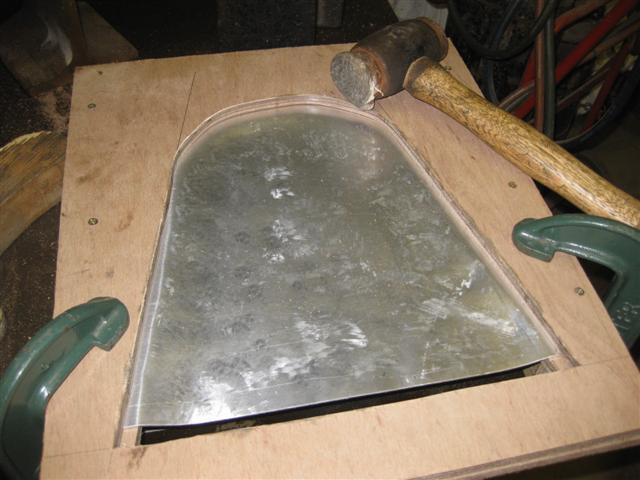
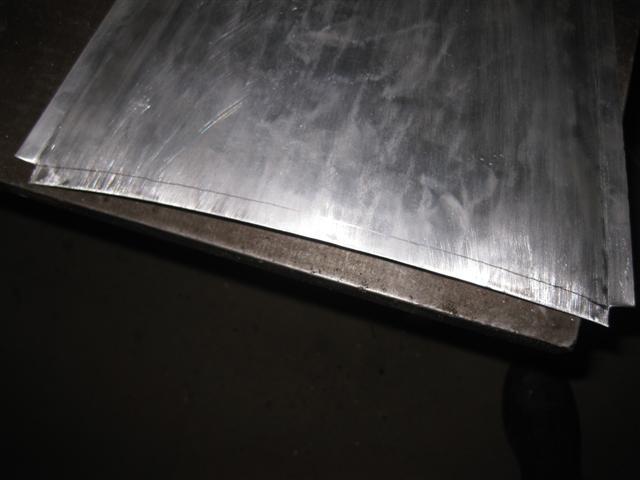
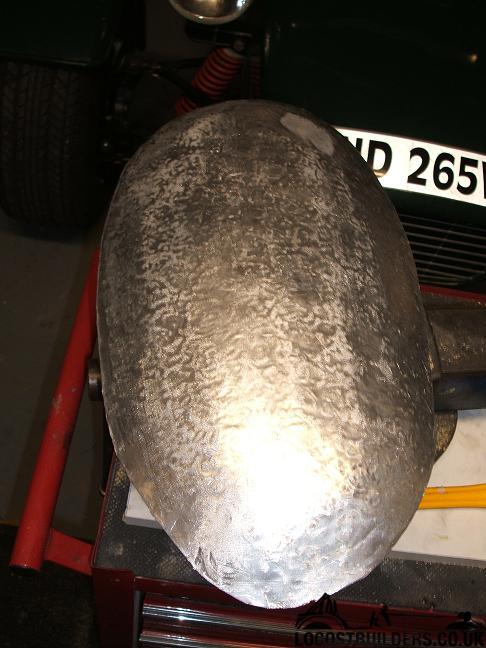
After planishing out the dents and blemishes caused by the hammering the next step is to form a safe edge on the front lip. After trimming off and
squaring up the flange a pencil line is made 10mm in from the edge. Using glaziers pliers the edge is progerssively turned over to as far as you can
go. The rest of the way is taken care of with a cross pein hammer.
[img]

Description
[/img]
[img]

Description
[/img]
[img]

Description
[/img]
[img]


Description
[/img]
[img]

Description
[/img]
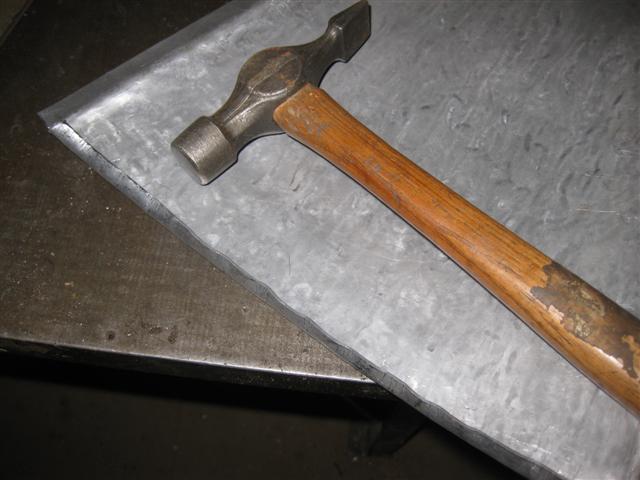
2cv - 19/10/10 at 12:27 PM
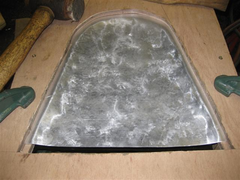
Once you have broken the line, the aluminium will always bend along that line.
[img]

Description
[/img]
[img]

Description
[/img]
[img]

Description
[/img]
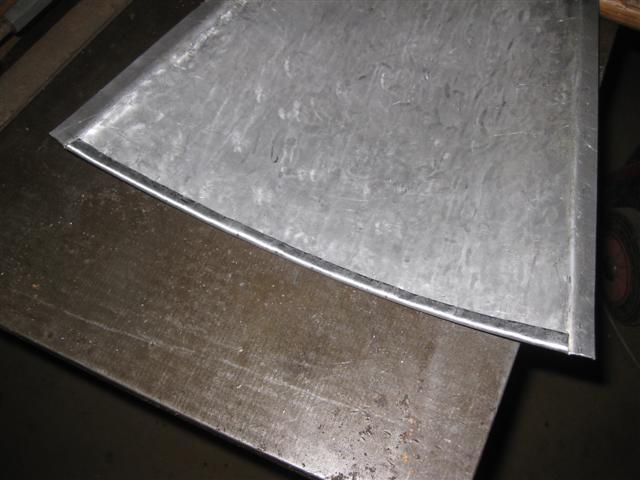
2cv - 19/10/10 at 12:45 PM
The last job was to punch 4mm mounting holes for either rivets or screws.
The great thing about a Hammerform is that it can be cut to the exact shape and size to suit the job and the finshed component will be exactly the
right size.
MikeR - 19/10/10 at 02:17 PM
thank you - you're giving me inspiration for when i finally replace my crossflow with a zetec.
2cv - 19/10/10 at 02:50 PM
That's really good news Mike, I'm very pleased that this has been a help to you.
2cv - 22/10/10 at 07:05 AM
Just to bring the three threads to a conclusion, the following parts can be easily made using just the normal hand tools that most of us will have in
the workshop. The parts being, bonnet air scoop, power bulge and Dellow type heat extaction flutes.
They are all easy to make and in my opinion look good.
I hope these three "How To" topics will be an encouragement for others to have a go themselves and discover the delights of metal
shaping.
[img]
Description
[/img]
[img]

Description
[/img]
[img]
Description
[/img]
[Edited on 22/10/10 by 2cv]
steve m - 22/7/11 at 10:03 AM
yesterday, i had a second attempt at making a bonnet hump to replace my sad looking fiberglas one that has been in the wars, and lost!
my main queston , is that now i have the shape i want, how do i get all the little bumps out?, i have tried and tried to no avail!
The current setup
The new bump just laid over the old one,, it needs cutting down, but the shape is there
As it is right now, waiting for the final bump removal and then polishing
2cv - 22/7/11 at 11:44 AM
Hi Steve, That looks really good. You managed to put a lot of shape in and I know how much effort it takes to do that. I can also imagine your
satisfaction at having done it. Will you be putting a flange on for fixing the bulge to the bonnet?
There are two ways to remove the bumps. One is using a dolly and a slapper and the other is with an English wheel. If you take the first method, the
dolly will need to have a slightly greater radius than the bulge and the slapper can be made from an old heavy flat file first heated and bent and
then the serrations removed. The idea is to bring the low spots up by stretching. You then need to use a body file at the finishing stage to take out
the highs. Wherever there is any feathering (small cracks) around the edge these need to be trimmed off to avoid the cracks spreading further.
U2U sent.


