goaty
|
| posted on 21/1/10 at 08:10 PM |

|
|
caterham parts show one for non roller barrell so assume the other is for roller bearings. or could go for raceline 
|
|
|
|
|
flak monkey
|
| posted on 22/1/10 at 12:49 PM |

|
|
The tensioner fits ok, its the fact I need a spacer to make the plenum clear it now 
Will get all the bits for the plenum laser cut in the next week or so.
Also expecting my radiator/intercooler in the next couple of weeks 
Sera
http://www.motosera.com
|
|
|
flak monkey
|
| posted on 22/1/10 at 07:49 PM |

|
|
Big day today. Decided to get the engine trial fitted in the chassis, thankfully everything seems to fit and I am very pleased that I put the
supercharger on the exhaust side, I dont think it would have fitted in the chassis on the inlet side.
Fitted the bellhousing to the engine as this will determine the fore/aft position of the engine in the chassis ultimately.
 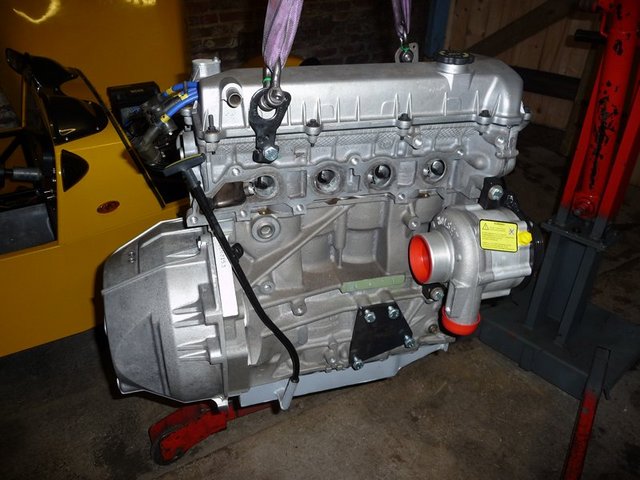
Engine test fitting 1
 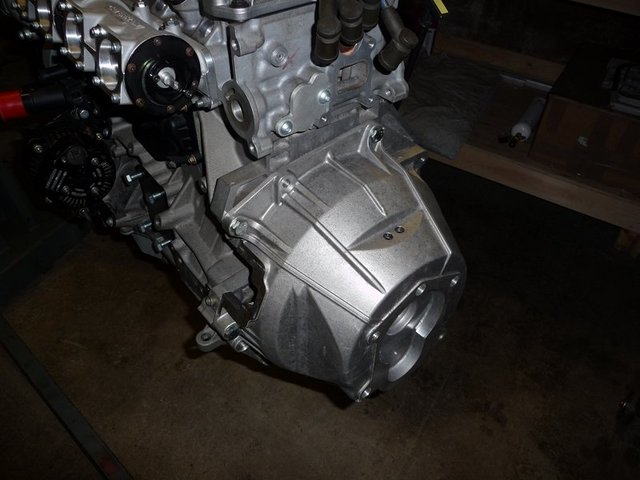
Engine test fitting 2
Then dropped the engine into the bay (obviously with the nose off to start with!)
 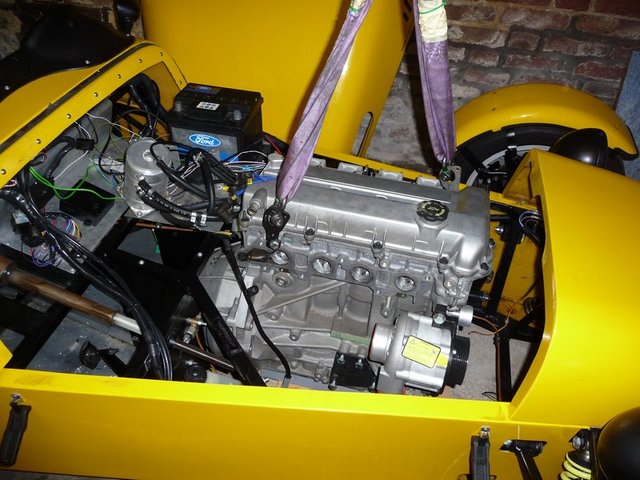
Engine test fitting 3
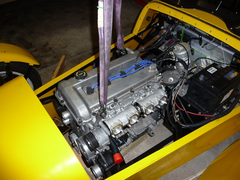 
Engine test fitting 4
Then spent a little time getting the height right. There is about 5mm clearance to the bonnet, which should hopefully be enough. I could alway make a
new lower profile cap at a later date.
 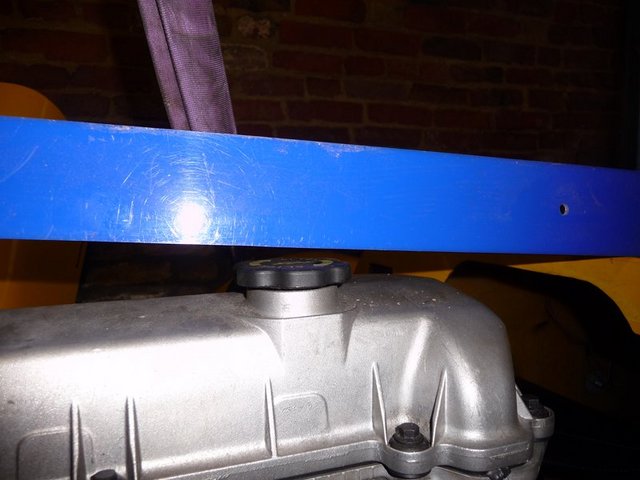
Engine test fitting 5
The sump will be around 25mm below the chassis, which is less than the pinto was, so I will end up with a little more ground clearance 
 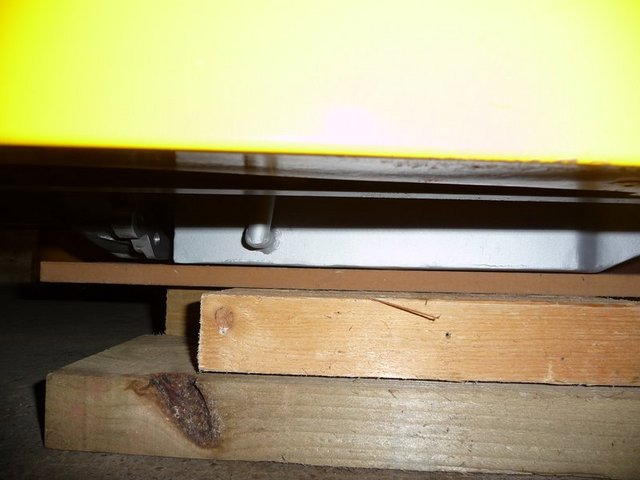
Engine test fitting 10
Thankfully only one more joint is needed in the steering column and the rally design plined column is exactly the right length for the second link. So
now I need to make some supports for some rose joints to hold this part.
 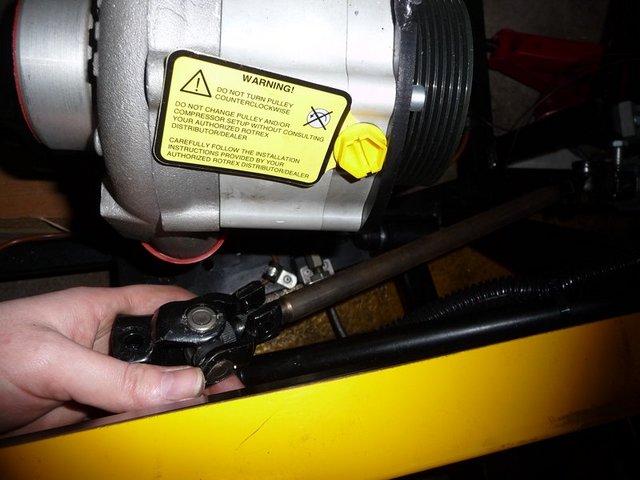
Engine test fitting 6
Theres around 25mm clearance all around the bellhousing cut aways. Which is nice. The engine can't really go any further back anway. In this
position the gearstick should also be in about the right place I think.
Engine test fitting 7
Theres about 10mm between the alternator bracket and the brake pipe. I need to make a new pipe anyway, so will try and make some more room around
here
 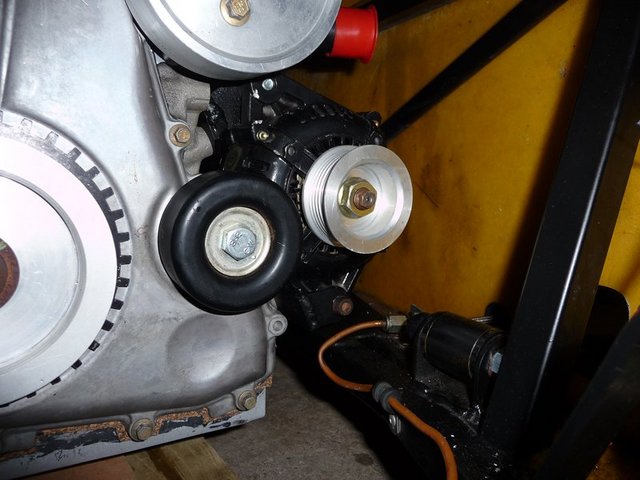
Engine test fitting 8
But plenty of room around the rotrex for the column
 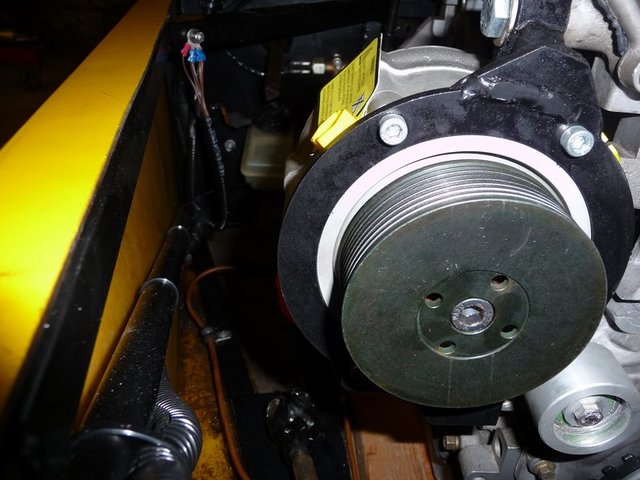
Engine test fitting 9
Tomorrows job is to make the engine mounts and steering column support mounts too 
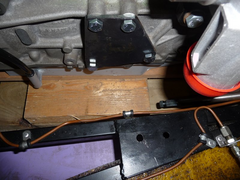 
Engine test fitting 11
[Edited on 22/1/10 by flak monkey]
Sera
http://www.motosera.com
|
|
|
goaty
|
| posted on 22/1/10 at 08:05 PM |

|
|
looks very good. does fit in nicely. Think i will have to move two chassis rails, the two diagonals coming forward each side of the engine on mine
come alot further forward at less of an angle. Can move them to be like yours with no problems.
Great to see it in the car though, bet your well pleased 
|
|
|
daniel mason
|
| posted on 22/1/10 at 08:39 PM |

|
|
what sort of height differene or how much lower would a honda s2000 motor sit in the chassis as you seem to have plenty of room!
|
|
|
flak monkey
|
| posted on 22/1/10 at 09:45 PM |

|
|
As far as I know the S2000 is a bit of a large engine. I have seen a dax with one fitted, the engine had to be mounted at an angle to get it in (
perhaps matching the std install?)
The gearbox is quite large as well
Sera
http://www.motosera.com
|
|
|
sebastiaan
|
| posted on 23/1/10 at 09:41 AM |

|
|
Looking good there David! It seems to be far enough backwards in the 'ole!
Have fun making the engine mounts, but it might be a good idea to do one more trail fit but with the gearbox attached? If it does not fit now and
you've already made the engine mounts you would need to redo them or do a chop-chop job on the tunnel...
|
|
|
flak monkey
|
| posted on 23/1/10 at 07:15 PM |

|
|
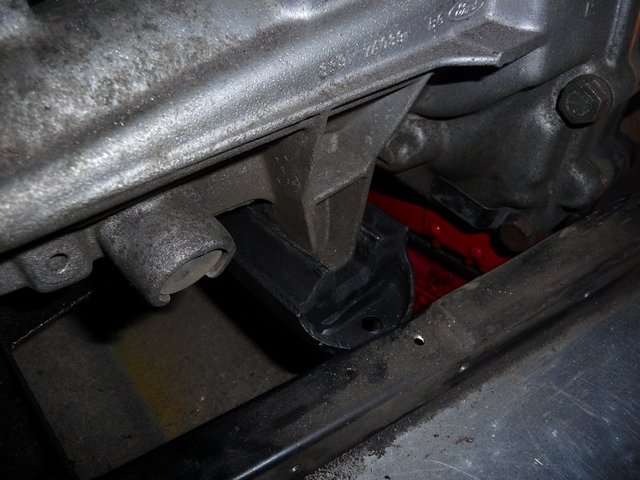
Thanks Sebastiaan, I did fit the gearbox this morning as I was thinking the same thing 
The gearbox is snug, but theres at least 10mm clearance all around. It physically cannot go any further back though.
I need to tidy up where I roughly ground off the old gearbox mounts this morning. I will be making new ones tomorrow from box section.
 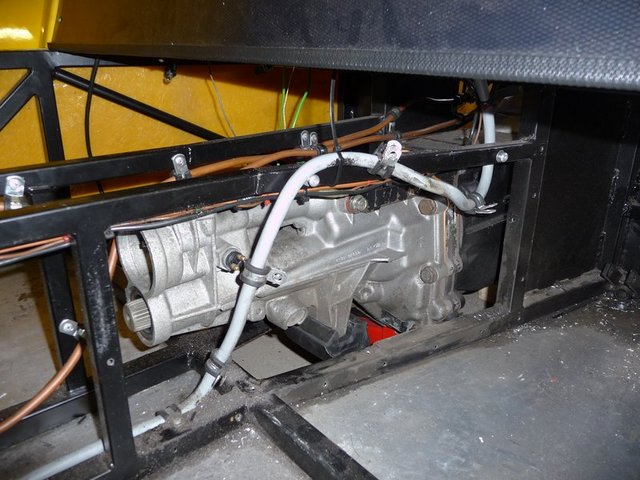
Gearbox fitted 1
I will be modifying the westy/caterham gearbox mount slighty to allow me to fit a piece of 20x20 box each side to bolt it to.
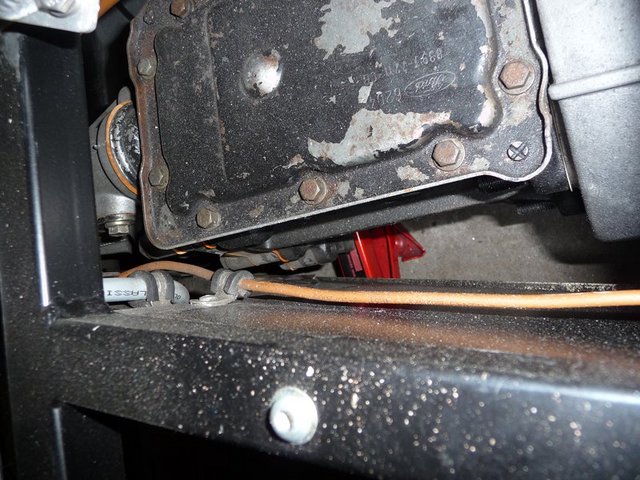
Gearbox fitted 2
There's not an awful lot of room down there. The brake pipe is actually well away from the box, not how it looks in the pic, must be the angle
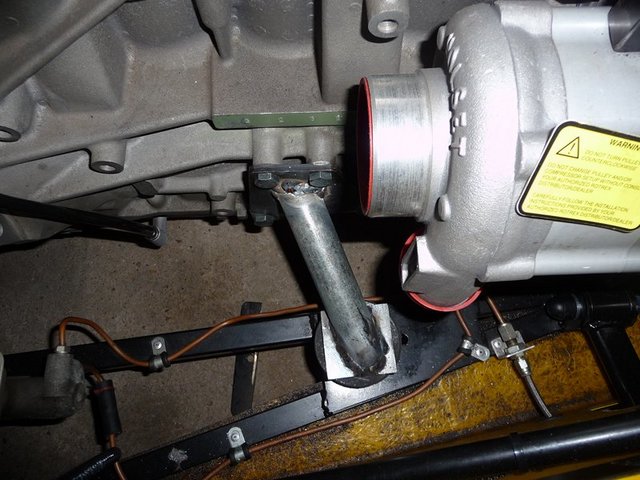
Gearbox fitted 3
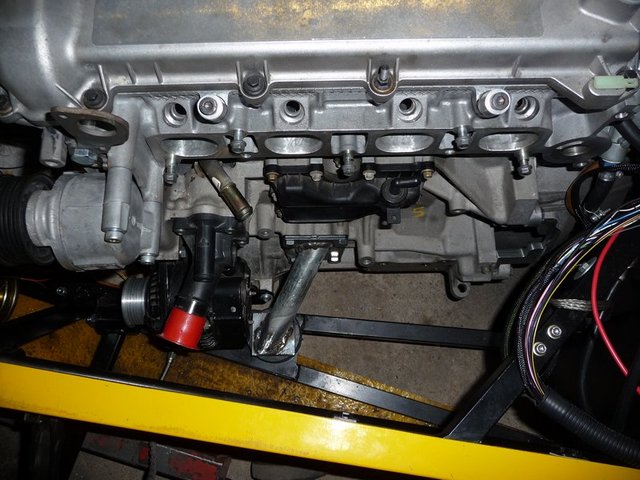
Made the engine mounts today. A job which seems to have taken all day for some reason, but never mind! They will of course be painted at a later date!
For now they are supporting the engines weight.
Engine mounts 1
Engine mounts 2
And it all leaves me with a decent amount of ground clearance. Could even wind it down a bit if I wanted to. Theres about 4" to the sump now.
 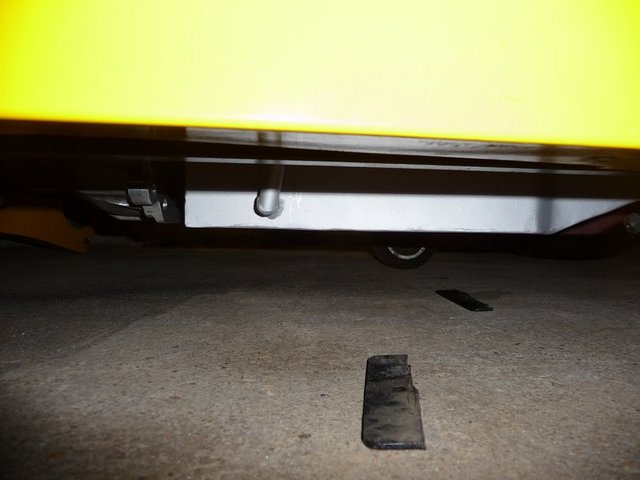
Ground clearane
[Edited on 23/1/10 by flak monkey]
Sera
http://www.motosera.com
|
|
|
flak monkey
|
| posted on 24/1/10 at 06:50 PM |

|
|
Got the gearbox mounts welded in today. After a bit of hassle with the welder, think I could do with a new liner. No problem with the weld pentration,
just not very tidy! 
Anyway, made 2 closed end tubes with crush tubes in to bolt the westy gearbox mount to.
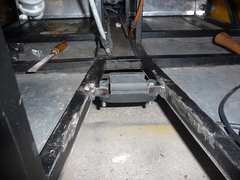 
Gearbox mount
Will get a coat of paint on it one evening this week.
Had to split the engine and box again to fit the flywheel and clutch. St150 flywheel fitted with ARP bolts. Cover is an AP racing CP3560-2 rated to
230lbft of torque (expecting around 220lbft) and a competition AP racing pinto friction plate (CP5351-1).
 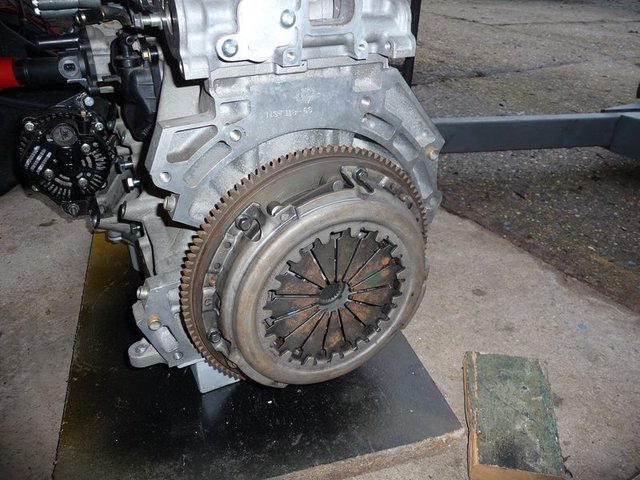
Flywheel and clutch fitted
Also spent a bit of time cleaning the car inside, as everything was covered in oil from when the pinto was extracted, and then covered in angry
grinder dust, so now a much nicer place to work 
Removed the old battery and now there's space for the shiney new one!
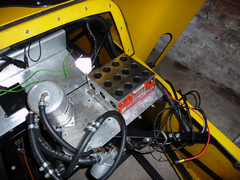 
New battery
Seems like a few steps backward today as well as the engine and box are out again and wont be back in until I have a new prop shaft. 
Next job is to determine how much clutch pedal travel I need to get the release bearing travel I need. Which means getting some adaptors made for the
hydraulics. Then I can get the master cylinder fitted and new clutch pedal made next weekend. Also need to start thinking about finally fitting the
battery, swirlpot, rotrex oil tank and header tank on the footwell tops. Should be enough space anyway. I would also like to get the steering column
refitted with the extra link.
[Edited on 24/1/10 by flak monkey]
Sera
http://www.motosera.com
|
|
|
Breaker
|
 posted on 26/1/10 at 10:00 AM posted on 26/1/10 at 10:00 AM |

|
|
You did a veeeeeery nice job !
Although I think you can get much nicer (better) welds with a TIG.
|
|
|
eddie99
|
| posted on 26/1/10 at 11:27 AM |

|
|
Looking real nice. Really can't wait to see it running and driving 
|
NOTE:This user is registered as a LocostBuilders trader and may offer commercial services to other users
|
Stuart_B
|
| posted on 27/1/10 at 07:13 PM |

|
|
nice porgress david.
i will soon chasing a new engine conversion, as the duratec did not do so well.lol
stuart
black mk indy, 1.6pinto on cbr600 bike carb's.
|
|
|
goaty
|
| posted on 28/1/10 at 11:52 AM |

|
|
just a quick one, what are you planning for a fuel pump??
i am sitting just looking for bits right now...lol 
|
|
|
flak monkey
|
| posted on 28/1/10 at 12:01 PM |

|
|
I am using a GSL392 external pump to feed the fuel injection:
http://store.looseboltsmotorsports.com/waexfupu.html
Really small pump (about 2/3 the size of a bosch) and the same flow capacity. 70US gallons/hr
And a red top facet to keep the swirl pot topped up. Although the facet cannot supply enough fuel to run the pump flat out all the time (45us gal/hr),
the 2 litres in the swirl pot should be enough buffer.
The only low pressure pumps I could find to supply enough fuel to match the GSL392 were american V8 pumps.
As a general rule, multiply your BHP by 0.47 to get your fuel requirements in litres per hour for forced incduction. So you want at least 155lph pump
(assuming 330bhp) which is 40US GPH so maybe a redtop will be enough for flat out....
Sera
http://www.motosera.com
|
|
|
goaty
|
| posted on 28/1/10 at 10:51 PM |

|
|
wonderful, cheers dave. i will have a little look at some
|
|
|
flak monkey
|
| posted on 31/1/10 at 06:16 PM |

|
|
Slowish weekend this one, for 2 reasons. 1 its been bloody freezing and 2 I managed to damage myself on saturday morning, meaning I only have the use
of one opposable thumb at the moment 
Anyway...
Friday evening I made a special M12x1 to -3 hose fitting for the bleed connection to my clutch slave cylinder. They are prety simple to make really,
and I dont know why I didnt do it sooner.
This meant I could get the cylinder finally fitted to the bellhousing so its ready to be finally bolted up to the engine next weekend. The main feed
hose is -4 as this seemed more common for clutches.
All bolts were loctited in just to be on the safe side as they arent biting on much thread
 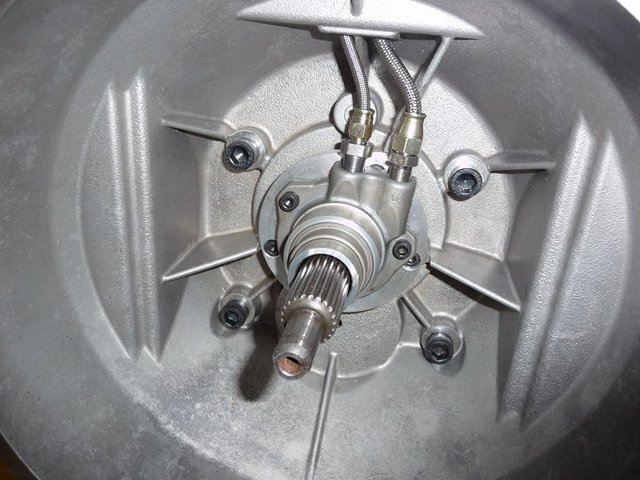
Fitted slave cylinder
I also, thankfully, checked the operation of the gearbox before finally fitting it to the car and found I couldnt select gears properly. I had
forgotten to correctly locate the centring bit on the selector shaft and it was catching on another part. All fixed now though 
Next job was to make the mounts for the steering column downlink bearing. I have decided I will be adding in another tube yet. I intend to add another
down from the diagonal to the nut holding the rose joint, as due to the length of the current one Its not going to be strong enough long term. Will
get that done next weekend, and then get all the bits painted.. All being well the column will now clear the supercharger!
I had to make a sleeve for the column to pass through the rose joint, just drille dout a piece of steel tube and spot welded it to the shaft, then
turned the lot down in the lathe so it was a nice sliding fit for the joint.
 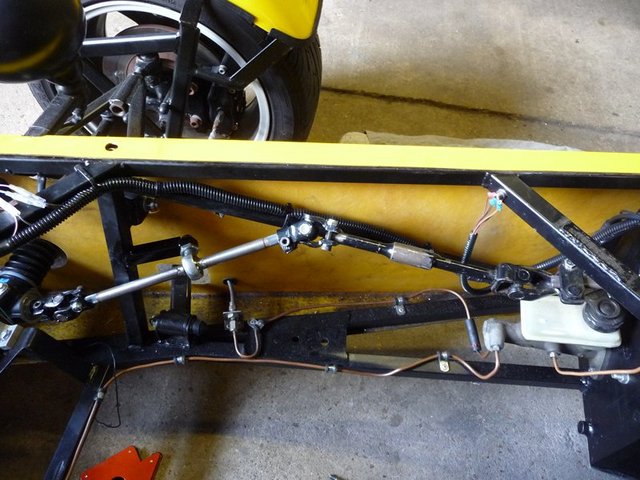
Steering column modded 1
 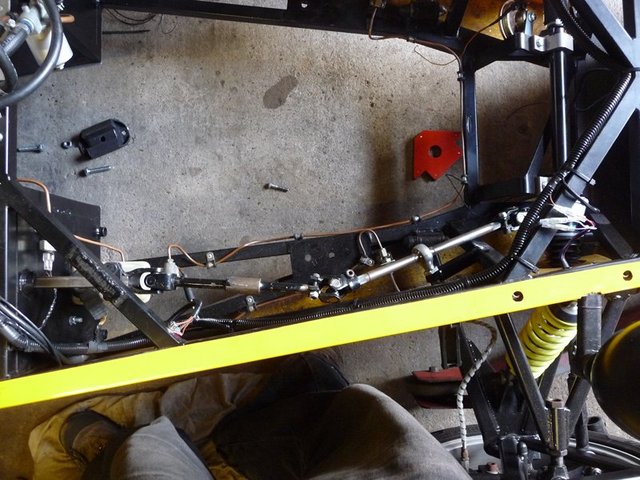
Steering column modded 2
The job for today was drilling and tapping all of the plenum parts. I had the plates water jet cut by andyw7de who did an excellent job, and very
quick too (5 days turn around).
There are 3 plates, 1 spacer plate to give a little more room inside the plenum, this is 1/2" thick. 1 back plate for the plenum which is 8mm
thick and then a spacer plate to space the plenum out enough to clear the tensioner, this is 3/4" thick.
Backplate and spacer after drilling and tappping
 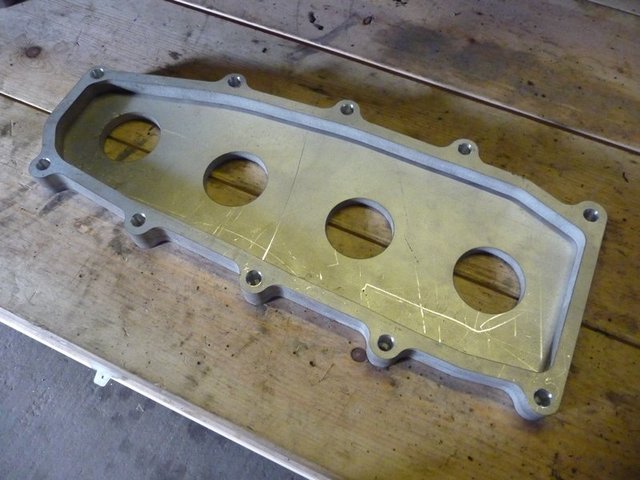
Plenum bits 1
3/4" spacer before drilling to suit throttle bodies
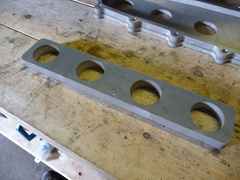 
Plenum bits 2
And the final thing after lots of marking out and drilling! Hopedully it will all fit nicely.
 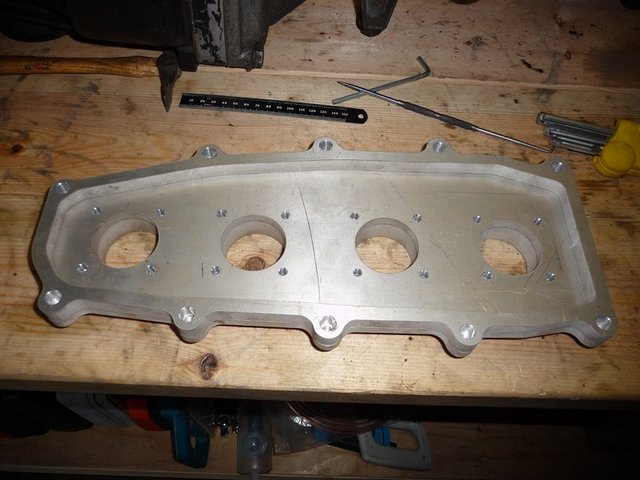
Plenum bits 3
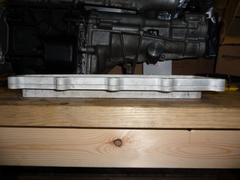 
Plenum bits 4
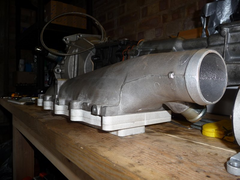 
Plenum bits 5
Next weekend its time to sort the clutch pedal and slave cylinder mountings. Remake a couple of brake lines, then move the fuel feed and return. After
thats all done the engine can go in and stay in finally  
Sera
http://www.motosera.com
|
|
|
goaty
|
| posted on 31/1/10 at 06:53 PM |

|
|
wow, very impressive dave, i wish i was able to spend as much time working on mine at the mo.
I think that your plenum will look awesome too, really is great fun to read through these pages 
|
|
|
westy turbo
|
| posted on 31/1/10 at 11:27 PM |

|
|
Neet work!!!
Doing the same inlet at the moment,in a vx.but my air trumpets ned to b shortened,so they can face the back plate,got any pic from inside the plenum?
|
|
|
flak monkey
|
| posted on 1/2/10 at 03:09 PM |

|
|
Not sure what you mean about pics inside the plenum? The inside looks exactly as shown above....
I will be fitting the shortest trumpets I can inside the plenum, IIRC they are 15mm long. I also need to drill and tap the backplate for the air temp
sensor to fit into. Need to work out the temp curve for the cosworth air temp sensor......
Sera
http://www.motosera.com
|
|
|
Breaker
|
| posted on 3/2/10 at 01:49 PM |

|
|
All this effort to squeeze out some more BHP out of a Duratec 
FYI: Soon Ford and Volvo will start selling cars with a 2.0 GTDI (Gasoline Turbo direct injection). The engine has about the same size as a Duratec
and will have 203 BHP / 300 Nm as standard.
I think in about 2 years, the GTDI will become the successor of the Zetec/Duratec in kitcars. 
|
|
|
flak monkey
|
| posted on 3/2/10 at 02:03 PM |

|
|
quote:
Originally posted by Breaker
All this effort to squeeze out some more BHP out of a Duratec 
FYI: Soon Ford and Volvo will start selling cars with a 2.0 GTDI (Gasoline Turbo direct injection). The engine has about the same size as a Duratec
and will have 203 BHP / 300 Nm as standard.
I think in about 2 years, the GTDI will become the successor of the Zetec/Duratec in kitcars. 
You can get 200bhp from a std duratec with just throttle bodies anyway.
This should end up around 300bhp and 300Nm
Sera
http://www.motosera.com
|
|
|
Breaker
|
| posted on 3/2/10 at 03:50 PM |

|
|
quote:
Originally posted by flak monkey
You can get 200bhp from a std duratec with just throttle bodies anyway.
This should end up around 300bhp and 300Nm
Ok, but direct injection petrol cars should be more fuel efficient.
A 2.0 GTDI with 240bhp/340 Nm will also be available later this year.
|
|
|
flak monkey
|
| posted on 3/2/10 at 04:27 PM |

|
|
Fair enough, but I am not really interested in fuel economy.... 
Just been doing a bit more reading and 11psi will give 310bhp. Jamsport have run this level on a totally stock bottom end for 17,000miles with no
reliability issues.
My ultimate aim is 15psi, will be interesting to see what that gives.....
Sera
http://www.motosera.com
|
|
|
eddie99
|
| posted on 3/2/10 at 04:37 PM |

|
|
Recipe for speeding points surely    
|
NOTE:This user is registered as a LocostBuilders trader and may offer commercial services to other users
|
iscmatt
|
| posted on 3/2/10 at 06:06 PM |

|
|
quote:
Originally posted by eddie99
Recipe for speeding points surely    
also a Recipe for bragging rights! I can't wait to see and hear this car!
|
|
|


