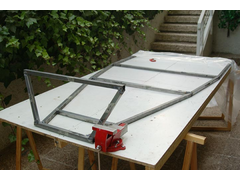
chassis progress so far....
robertst - 11/7/06 at 12:20 AM
well, today i managed to finish the bottom section of the chassis and i must say, for an arc welder, it didnt go that bad: just blew one hole so far
and it wasnt that big.
my question arises from the fact of my accuracy in cutting lengths and, more important, angles.
i managed to keep within the dimensions of McSorley, but i ended up with some tubes at slightly different locations.
to be more specific: tube E is two centimetres off (forward)from the original location, and some angles... well... not exactly at, say, 117.6º.
is it catastrophic to have a high tolerance in the cutting, such as +-1 cm in length and a few degrees in the angles?
i have triple checked the symmetry of the chassis but am concerned about the accuracy.
any ideas please?
thanks
btw: i found it more accurate to cut with the angle grinder than with the hacksaw...
[Edited on 11/7/06 by robertst]
zetec7 - 11/7/06 at 03:22 AM
Well, we kept our cuts to within +/- 1 mm (we used a horizontal bandsaw) & our angles to within 1 degree on our custom McSorely 2+2+2 frame, and
it went together pretty much airtight. That having been said, though, the symmetry is more crucial than perfect lengths/angles, assuming the
suspension pieces will end up in the right place. Check to ensure all of the diagonals are as accurate as possible (we couldn't get closer than
2 mm at the worst, due to warpage in welding, manufacturing inaccuracies in the steel, etc.), as each error compounds as you go
 Correct anything
that you can do easily - it pays off when attaching the suspension pickup points! Double check your diagonals when you are ready to do these!!! We
fund we had to alter the lower bone mounts slightly to get wheelbase/track, etc. exact on both sides of the car.


leto - 11/7/06 at 04:18 AM
LA, LB, FU and M are sensitive, the rest don't matter that much. You might get some minor difficulty when you place FU if E is out of place, but
nothing serious.
You might also run in to trouble to make the top of the frame match the bottom as you can't make the top from measures but have to build it to
fit the bottom.
joneh - 11/7/06 at 09:24 AM
How did you get it 2cm off? Are you using an axe to cut it? 
big_wasa - 11/7/06 at 09:39 AM
Try and get it the best you can as it will distort when you weld it.
andyharding - 11/7/06 at 11:01 AM
quote:
Originally posted by big_wasa
Try and get it the best you can as it will distort when you weld it.
Mine didn't
robertst - 11/7/06 at 11:08 AM
i didnt see much distortion either. but i guess i will start to see it when welding uprights such as H.
now i am going to start the front end: (i.e: LA, LB, LC, LD)
i dont know how to get accuracy from using a small protractor.
wish there was some kind of laser angle finder...
btw i got E 2cm off because of the position of F1+F2, got the front opening (where LD goes) a space of 350mm instead of 320 so the angle is wider,
hence the already cut tube E was too small...
leto - 11/7/06 at 04:20 PM
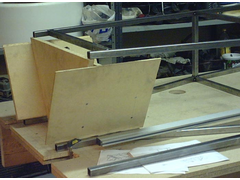
I recommend you to use some kind of jig for LA and LB, like this one or the one in the book.


Front_Jig
robertst - 11/7/06 at 05:41 PM
thanks leto, already did the front part using the book method.
pretty easy i must say (although it is not prefectly symmetrical, LA is half a centimetre shorter than LB...oops).
got it smack on 80mm
btw... i noticed i did the LA,LB,LC,LD combo before the top part of chassis. according to the book and mcsorley order the top part comes after...
oh! and i also found out a way to mark and cut accurate angles without even using that hateful protractor! wooooo!
[Edited on 11/7/06 by robertst]
[Edited on 11/7/06 by robertst]
[Edited on 11/7/06 by robertst]


Rescued attachment DSC_0035.jpg

 Correct anything
that you can do easily - it pays off when attaching the suspension pickup points! Double check your diagonals when you are ready to do these!!! We
fund we had to alter the lower bone mounts slightly to get wheelbase/track, etc. exact on both sides of the car.


