Big Ali D
|
| posted on 14/5/06 at 08:29 AM |

|
|
McSorley +442 front wishbones
Am i right in asuming that i need to extend the length of the wishbones by about 2 inches, if im using sierra running gear?.
|
|
|
|
|
nige
|
| posted on 14/5/06 at 08:33 AM |
|
|
bones
if you use book width bones you will have
a narrow front end
i bought bits from M.N.R. and made my own wider ones
i struggled to find dimension written down
for wide track
i still have the wooden jigs i used
when you start this journey
you think it will be done in " no " time but then " no " turns into a " bloody " long time
|
|
|
nige
|
| posted on 14/5/06 at 08:36 AM |
|
|
off topic
just noticed the clock on here is 1hr out
when you start this journey
you think it will be done in " no " time but then " no " turns into a " bloody " long time
|
|
|
datz510
|
| posted on 15/5/06 at 09:32 PM |
|
|
Ive made my own wishbones for the 442 chassis.. here are some photos. Should be fairly similar with any upright you use. I havent finsihed the
uppers just yet, but I have all the parts to do so out in the garage:

Parts for the uppers:

http://www.locostusa.com/forums/viewtopic.php?t=503&postdays=0&postorder=asc&start=90
|
|
|
Nisseven
|
| posted on 17/5/06 at 11:11 AM |
|
|
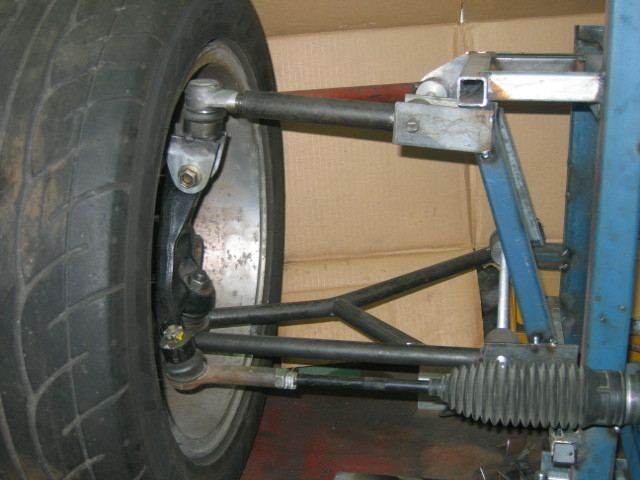
Hi datz510
I am interested in your design as I am using a similar donor.
Just out of interest, as you seem to know what you are doing, this is how I solved the issue with those front uprights. All the original dimensions of
the bottom arms and steering have been retained, which means that the original rack can be used with no problems with bump steer. The upright has had
the top bolt hole cut of and a bracket made that uses the second hole and the top hole on the brake calliper. This has the affect of getting the top
pivot point in a good position to give good scrub radius and near to where it is in theory with the original strut.
Please only look at the geometry of these pictures as they are only mock ups of the real thing.
I hav'nt tackled the rear so will be interested to see how you do that.
Bruce Kelly
 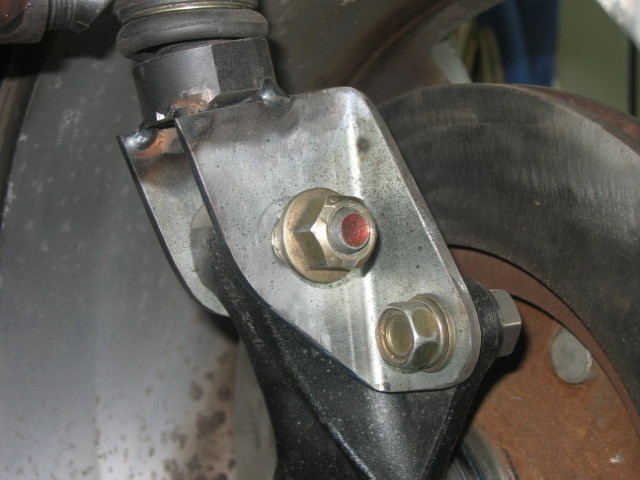
Rescued attachment IMG_0838.JPG
|
|
|
Nisseven
|
| posted on 17/5/06 at 11:21 AM |
|
|
Another photo of the bones. It will be rear steer just as the original.
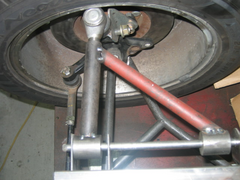 
Rescued attachment IMG_0840.JPG
|
|
|
Nisseven
|
| posted on 17/5/06 at 11:24 AM |
|
|
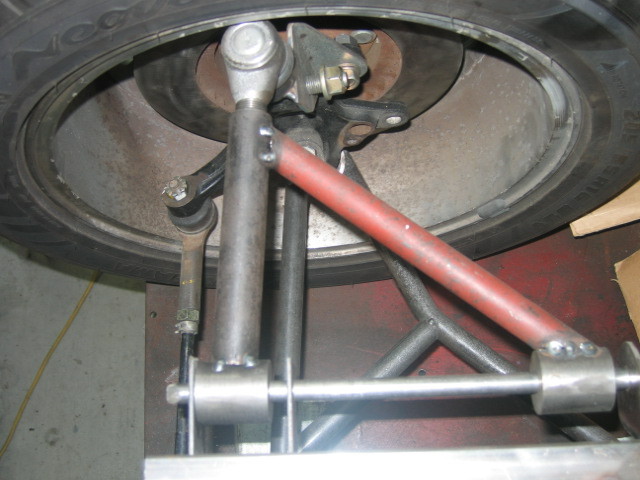
and anther. Can't seem to get more than one photo to attach at a time
Rescued attachment IMG_0839.JPG
|
|
|
datz510
|
| posted on 18/5/06 at 04:54 AM |
|
|
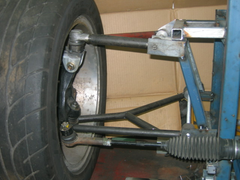
Here are a few photos of the rear suspension:


And with the coilovers mocked up in place.. I am in the process of redoing the pivots, as these gave too low of a spring rate at the wheel:

Hang on, we're goin for a ride!
1972 Datsun 510 (1600) w/ 200hp 3.0L V6
1995 Nissan Pathfinder rock crawler
|
|
|