bilbo
|
| posted on 4/7/06 at 09:40 PM |

|
|
Finally some progress
Well, after weeks of pulling apart old cars and removing rust, today was the first day when I actually built something. At last the car actually
exists. I know it's not much to look at yet, but it is (as far as I can tell) all straight and true and I'm rather chuffed
 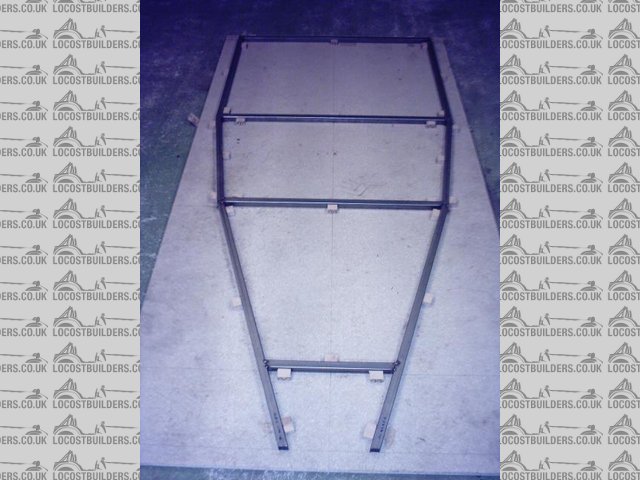
Chassis First Stage
---------------------------------------
Build Diary: http://bills-locost.blogspot.com/
Web Site: http://locost.atspace.com
|
|
|
|
|
stevec
|
| posted on 4/7/06 at 09:54 PM |
|
|
Well done, I have not done my own chassis but I really admire you guys that do.
Steve.
|
|
|
zetec7
|
| posted on 4/7/06 at 10:53 PM |
|
|
Excellent start! When you fully weld the frame tubes, make sure to clamp it down well, because it will warp a great deal if you don't
If you look inside one of your pieces of square tube, you'll find a seam. Try to cut/weld al of your pieces with the seam oritented the same
way. I didn't, and eventually discovered that 1) the tubes warp in different directions when heated, depending on the orientation of the
seams, and 2) the square tube is not exactly square - relative to the seam, one pair of sides is marginally longer than the other. Makes a
difference if you're doing accurate measurements on a pair of pieces, and the pieces aren't the same size due to these differences!!
|
|
|
locostv8
|
| posted on 4/7/06 at 11:18 PM |
|
|
I was wondering about this. It would seem that from a strength standpoint you would want the seams to point down on all tubes that are horizontal
and possibly to the front those that are vertical or on an angle.
http://wrangler.rutgers.edu/gallery2/v/7slotgrille/hssss/
|
|
|
bilbo
|
| posted on 5/7/06 at 08:46 AM |
|
|
quote:
Originally posted by zetec7
Excellent start! When you fully weld the frame tubes, make sure to clamp it down well, because it will warp a great deal if you don't
If you look inside one of your pieces of square tube, you'll find a seam. Try to cut/weld al of your pieces with the seam oritented the same
way. I didn't, and eventually discovered that 1) the tubes warp in different directions when heated, depending on the orientation of the
seams, and 2) the square tube is not exactly square - relative to the seam, one pair of sides is marginally longer than the other. Makes a
difference if you're doing accurate measurements on a pair of pieces, and the pieces aren't the same size due to these differences!!
Thanks for the tip on that. I'll bear that one in mind as i build the rest of the chassis up. By pure luck most of the seams are the same way
at the moment.
[Edited on 5/7/06 by bilbo]
---------------------------------------
Build Diary: http://bills-locost.blogspot.com/
Web Site: http://locost.atspace.com
|
|
|
Peteff
|
| posted on 5/7/06 at 09:13 AM |
|
|
When I did my first base it was like a rocking horse bottom after I welded it up . I put the front up on a block and jumped on it and it laid
perfectly flat afterwards.
yours, Pete
I went into the RSPCA office the other day. It was so small you could hardly swing a cat in there.
|
|
|
nitram38
|
| posted on 5/7/06 at 10:13 AM |
|
|
I recommend that the entire chassis is tacked together first before you weld it up. Check it for squareness as you go.
Use a logical approach to welding in that welds will pull inwards on internal corners so knocking things out of square.
I recommend welding external corners and sides before welding internal ones.
Remember that it is easier to undo a tack than a full weld.
|
|
|
Bob C
|
| posted on 5/7/06 at 10:53 PM |
|
|
Nitram's right - fully tacked up (esp. with the diagonals in) the chassis can't move far when welded. The final "weldathon"
should be done methodically, symmetrically down the car (left then right) to stop it tying a knot with itself.
A tacked- up chassis is surprisingly strong and will resist the local stresses introduced by a weld. You can feel/hear a structure warping during the
weld-up in these circumstances (clicking & creaking) & I remember that my (book) chassis was reassuringly quiet!
When it's all together, if it's a few mm out, it's easy enough to get the suspension pickups back in line & that's what
really matters
Bob
|
|
|
clbarclay
|
| posted on 6/7/06 at 10:51 AM |
|
|
Ref. weld seam in tube.....
Position seam so that you don't have to drill through it for pop rivets etc. as it is harder than the rest of the tube and makes drilling a
b****r. Broken/blunted bits or drill wanders to one side.
|
|
|