rumplitter
|
| posted on 29/4/08 at 09:23 AM |

|
|
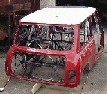
seat belt anchor points
As many of you have already pointed out I've done a poor job of my top seat belt mount welds. Please have a look at the word attachment where
I've shown what i propose to do. I'd like peoples honest opinions.
by the way, i don't want to grind off what I've already done.
http://www.locostbuilders.co.uk/upload/MiniMojoProject.JPG
|
|
|
|
|
rumplitter
|
| posted on 29/4/08 at 09:24 AM |
|
|
top anchor point pic
as you can see not strong enough
Rescued attachment top mount.jpg
http://www.locostbuilders.co.uk/upload/MiniMojoProject.JPG
|
|
|
02GF74
|
| posted on 29/4/08 at 09:33 AM |
|
|
what is wrong with a triangular gusset each side of the nut?
(in red)
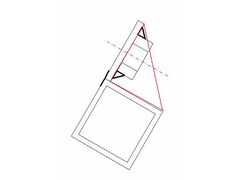 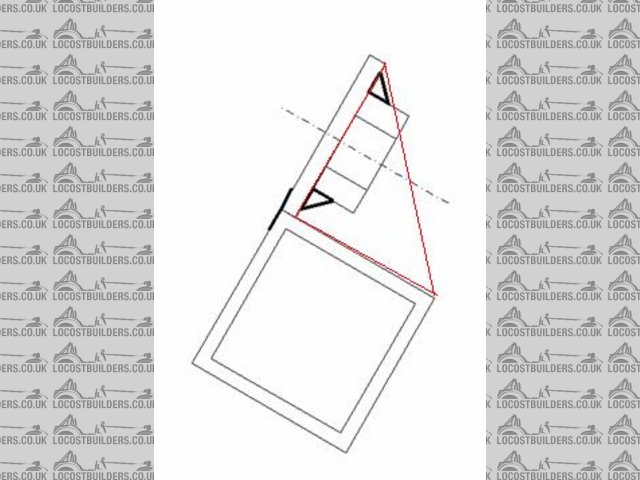
Rescued attachment gusset.jpg
|
|
|
Mr Whippy
|
| posted on 29/4/08 at 09:37 AM |
|
|
as above, two each side of each anchor point
|
|
|
rumplitter
|
 posted on 29/4/08 at 09:40 AM posted on 29/4/08 at 09:40 AM |
|
|
excellent! that'll do me!
http://www.locostbuilders.co.uk/upload/MiniMojoProject.JPG
|
|
|
02GF74
|
| posted on 29/4/08 at 10:06 AM |
|
|
I would recommend you read section 5 seat belt anchorage strength assessment of SVA manual.
|
|
|
Mr Whippy
|
| posted on 29/4/08 at 10:20 AM |
|
|
just looked at your photo archive, well jellous, that will look so smart when finished lol at the width
|
|
|
MikeR
|
| posted on 29/4/08 at 11:46 AM |
|
|
I'd do what the others have suggested
PLUS
Add a bar (removable if needed) from the middle of each set of seat belt mounts to the rear engine side tubes - that way the force of you're
body on the seat belts has to break / bend / twist the existing tube and also pull in the chassis side rails at the side. If you can do both
you're either the fattest man alive or probably cheese wired by your seat belt harness.
I have known someone fail SVA for just welding to the top chassis rail as he raised up the mounting by a couple of inches and therefore induced a
twisting motion in the rail.
|
|
|
rumplitter
|
| posted on 29/4/08 at 01:04 PM |
|
|
just like this?
just like this?
http://www.locostbuilders.co.uk/upload/MiniMojoProject.JPG
|
|
|
rumplitter
|
| posted on 29/4/08 at 01:05 PM |
|
|
oops
try again
 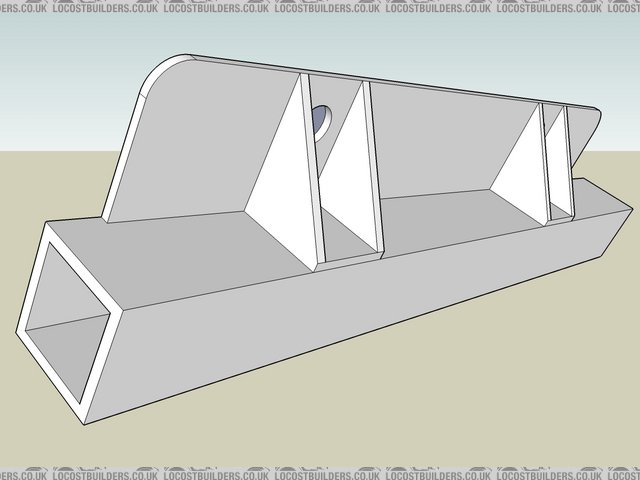
Rescued attachment seat belt mount.jpg
http://www.locostbuilders.co.uk/upload/MiniMojoProject.JPG
|
|
|
BenB
|
| posted on 29/4/08 at 01:31 PM |
|
|
Yup. But I don't see what the horizontal plate welded under the triangulations is supposed to do??
|
|
|
rumplitter
|
| posted on 29/4/08 at 01:53 PM |
|
|
i just thought cut it from rectangular hollow section, thats all
http://www.locostbuilders.co.uk/upload/MiniMojoProject.JPG
|
|
|
BenB
|
| posted on 29/4/08 at 01:57 PM |
|
|
Fair enough- though it will reduce mean that each triangulation fillet is welded on one side only....
|
|
|
Mr Whippy
|
| posted on 29/4/08 at 02:09 PM |
|
|
I see no issues with that, fully seem weld it.
Remember to radius the edges everywhere in the cabin including around the harness connections behind the seats. Where this is not practical like on
sheet metal sections use plastic U section. Hows the dash? is it rounded at the bottom?
Would like to see more pictures of the car.
|
|
|
Mr Whippy
|
| posted on 29/4/08 at 02:17 PM |
|
|
Does your steering column have a collapsible section? As it looks very straight
 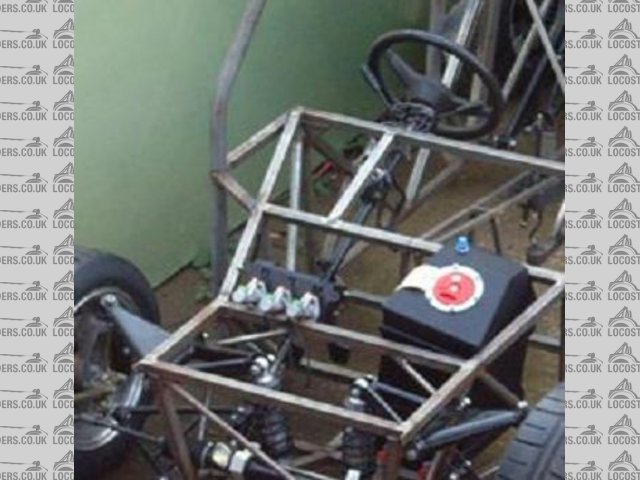
Rescued attachment mini steering.JPG
|
|
|
rumplitter
|
| posted on 29/4/08 at 05:57 PM |
|
|
i've altered the steering column since i saw the bit in the SVA about not having a straight connection, can't remember off the top of my
head the angle i have to achieve but it'll mean lenthening the main shaft and shortening the lower shaft.
both have splined ends, i was going to cut, sleeve and weld them.
or i'll be looking at alternatives at Stoneleigh on Sunday!
Not sure about the dash, i need to get my head around the mini windscreen/spaceframe junction.
i'm tempted to mold the whole thing in foam and make a one off fibreglass dash but not sure yet!?
i've changed the pedal box since too!
 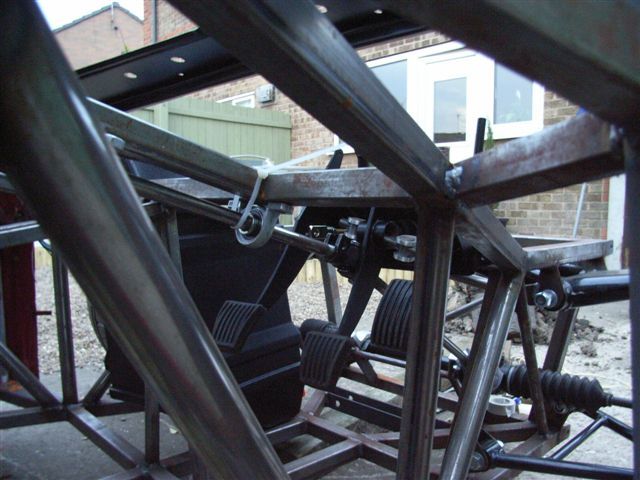
Rescued attachment 23_04_07 006.jpg
http://www.locostbuilders.co.uk/upload/MiniMojoProject.JPG
|
|
|
rumplitter
|
| posted on 29/4/08 at 05:59 PM |
|
|
pic of pillow bearing for steering culumn support!
 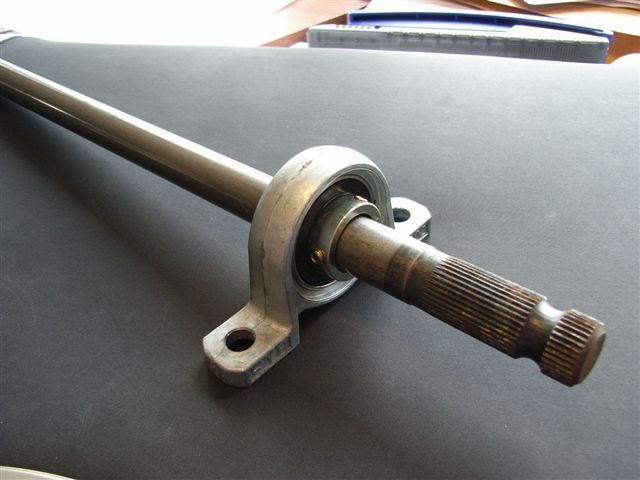
Rescued attachment 20_04_07 010.jpg
http://www.locostbuilders.co.uk/upload/MiniMojoProject.JPG
|
|
|
rumplitter
|
| posted on 29/4/08 at 06:12 PM |
|
|
as for the dash
like i say, not sure how to create the dash/chassis together.
I've sketched how i see it on the attached word document.
suggestions on a post card please
http://www.locostbuilders.co.uk/upload/MiniMojoProject.JPG
|
|
|