andrew.carwithen
|
| posted on 26/5/07 at 08:07 PM |

|
|
Some photos of recent progress....
Just thought I'd post a few photos of recent progress since being inspired by Soggy's at Stoneleigh...
Some nice bits and some nasty bits...
First, the nasty...
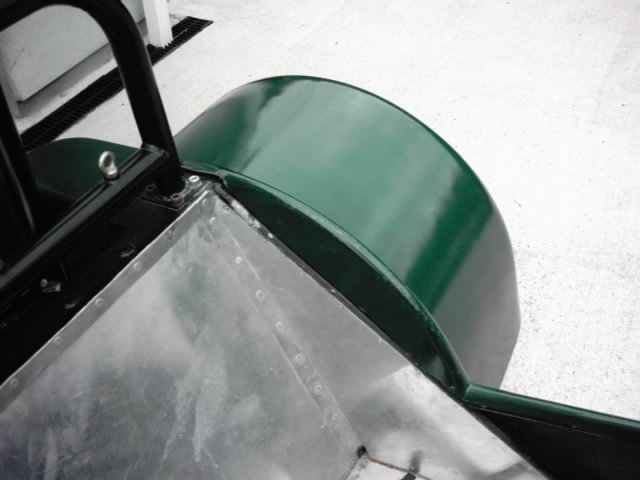
Refitted the bodywork and as can be seen, I've got my work cut out repairing the butcher job previous owner did of 'fitting' bodywork -
especially around rollbar mounts....still, I have got the original offcuts so may be able to use them to fill in.
Dodgy bodywork 1.
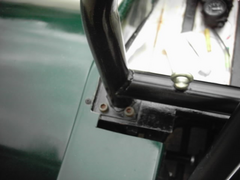 
Rescued attachment dodgy bodywork.JPG
|
|
|
|
|
andrew.carwithen
|
| posted on 26/5/07 at 08:08 PM |
|
|
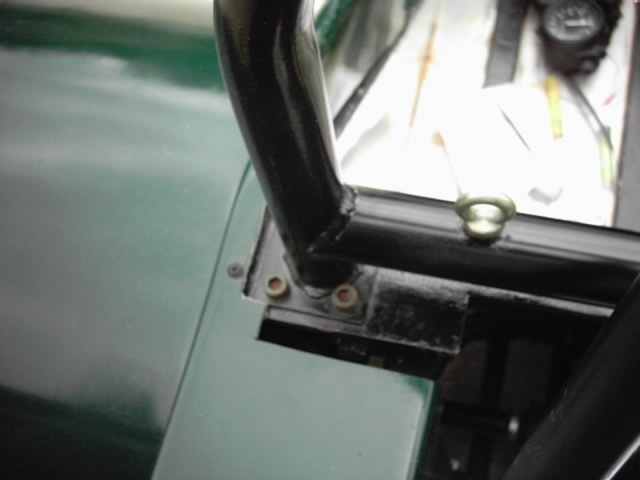
Dody bodywork 2...
Rescued attachment dodgy bodywork 2.JPG
|
|
|
andrew.carwithen
|
| posted on 26/5/07 at 08:09 PM |
|
|
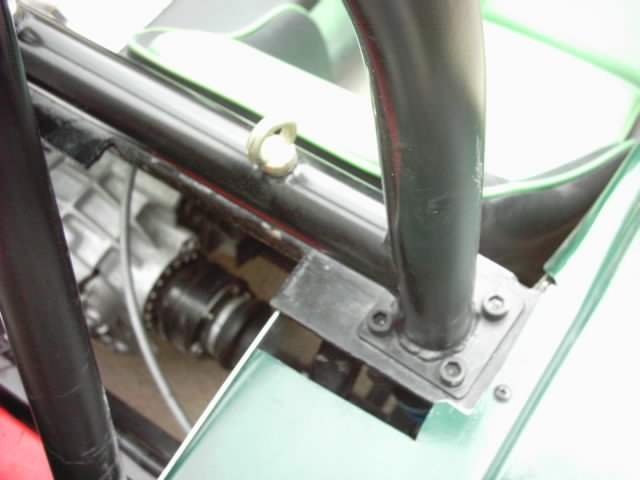
Dodgy bodywork 3..
Rescued attachment dodgy bodywork 3.JPG
|
|
|
andrew.carwithen
|
| posted on 26/5/07 at 08:12 PM |
|
|
And now for some nicer bits....
Engine bay just about finished bar a pedal box cover and scuttle trim...
 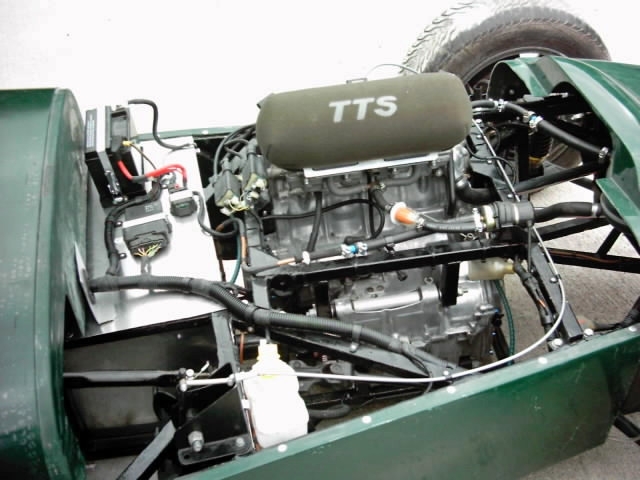
Rescued attachment engine bay.JPG
|
|
|
andrew.carwithen
|
| posted on 26/5/07 at 08:17 PM |
|
|
Transmission tunnel top - admittedly not as 'blingy' as Soggy's but I'm pleased with it.
Rescued attachment tunnel top.JPG
|
|
|
andrew.carwithen
|
| posted on 26/5/07 at 08:20 PM |
|
|
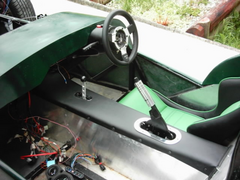
And I couldn't resist putting one of my Intatrim Voyager seats in position just to see what they'll look like.
I reckon they'll look pretty good with the Kawasaki Racing Green colour scheme I've got planned.
 
Rescued attachment voyaber seat and tunnel.JPG
|
|
|
andrew.carwithen
|
| posted on 26/5/07 at 08:24 PM |
|
|
Oh' and finally I couldn't resist temporarily fitting one of my new wheels - just to see how it sits in the rear arch. (think I may have
to wind down the spring platform a little!) wheel alignment.JPG)
|
|
|
Hellfire
|
| posted on 26/5/07 at 10:36 PM |
|
|
I think you'll find you won't have to wind down the spring platforms at all!
Steve

|
|
|
Rudy
|
| posted on 27/5/07 at 06:53 AM |
|
|
quote:
Originally posted by Hellfire
I think you'll find you won't have to wind down the spring platforms at all!
Steve
I also think that, but I understand what you mean, maybe you can fill the arch by putting a taller tires.
...and compliment for you built
Sorry about my English
|
|
|
mat.price
|
 posted on 27/5/07 at 08:53 AM posted on 27/5/07 at 08:53 AM |
|
|
Nice work on the bodywork
I did mine over charismas and it was a mile out shape and everything
|
|
|
t.j.
|
| posted on 27/5/07 at 09:56 AM |
|
|
Nice!
I like your seats BTW.
Are they tigers?
|
|
|
andrew.carwithen
|
| posted on 29/5/07 at 08:56 PM |
|
|
quote:
Originally posted by t.j.
Nice!
I like your seats BTW.
Are they tigers?
Cheers!
Naw, the seats are Intatrim Voyagers (basically a low-back version of their Odyssey seat.)
|
|
|
Avoneer
|
| posted on 2/6/07 at 02:15 AM |
|
|
Well done andy!
Been a long time - thought I'd see you at a show this year in it!
Looking really good, especially those seats!
Pat...
No trees were killed in the sending of this message.
However a large number of electrons were terribly inconvenienced.
|
|
|
soggy 3
|
| posted on 7/6/07 at 10:56 PM |
|
|
Hi andy i can see why you want to paint it ,mine was that colour its horrid, BRG belongs on a bentley not a tiger.
|
|
|
andrew.carwithen
|
| posted on 12/6/07 at 06:31 PM |
|
|
quote:
Originally posted by soggy 3
Hi andy i can see why you want to paint it ,mine was that colour its horrid, BRG belongs on a bentley not a tiger.
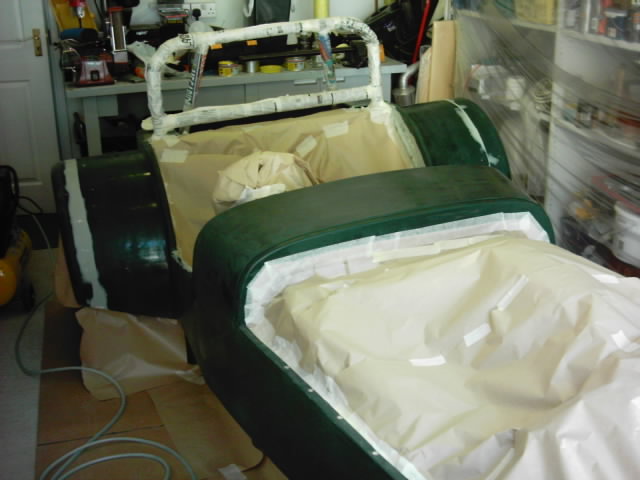
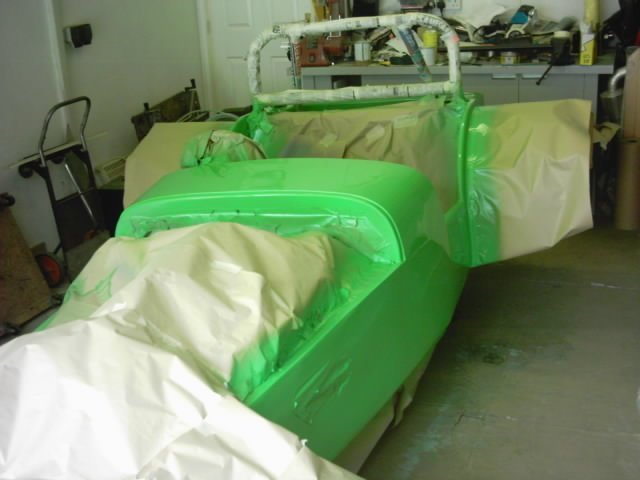
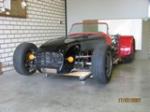
Absolutely! Things have now moved on apace. Having repaired the dodgy bits and widened both rear arches, so they match! I'm now in the process of
painting the bodywork....
Whatcha think - is it bright enough?!!  
Sorry for seperate pics but dunno how to post more than one at once (It's taken me three years to suss how to get an avatar!!  ) )
Rescued attachment IMAG0093.JPG
|
|
|
andrew.carwithen
|
| posted on 12/6/07 at 06:32 PM |
|
|
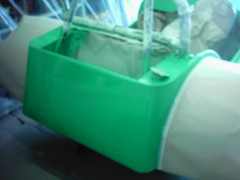
painted bodywork....
Rescued attachment paintedbodytub.jpg
|
|
|
andrew.carwithen
|
| posted on 12/6/07 at 06:34 PM |
|
|
from rear.... (whoops! slightly out of focus...)
[Edited on 12/6/07 by andrew.carwithen]
Rescued attachment IMAG0098.JPG
|
|
|
Black Cat
|
| posted on 12/6/07 at 08:12 PM |
|
|
Lime green, I had a Ford Anglia that colour back in the 60's.
How did you go about wideing the rear arches?
I've a problem with mine, I have Momo rims that have a 38mm offset and they just stick out about 5mm at the rear and I was thinking about
cutting the rear arches off and bring them out and at the same time squaring them up with the wheel.
I can remember someone else did this before and there were some photo's posted on here.
Can anybody remember who it was?
Regards Steve
|
|
|
andrew.carwithen
|
| posted on 12/6/07 at 09:55 PM |
|
|
quote:
Originally posted by Black Cat
Lime green, I had a Ford Anglia that colour back in the 60's.
How did you go about wideing the rear arches?
I've a problem with mine, I have Momo rims that have a 38mm offset and they just stick out about 5mm at the rear and I was thinking about
cutting the rear arches off and bring them out and at the same time squaring them up with the wheel.
I can remember someone else did this before and there were some photo's posted on here.
Can anybody remember who it was?
Regards Steve
I basically followed previous examples as done by Soggy etc.
Nearside arch I cut from back to front about 3" or so in from outer edge but not completely the entire length. I then splayed out the rear of
the arch until it was wide enough to completely cover the outer edge of wheel. (I too have offset of ET38)
The gap is bridged with several wooden batons and self-tappers to hold the arch secure. Used a fibreglass repair kit from Halfords to mat over the gap
from inside the arch. Once set, batons removed from outer face of arch and filler used to fill in gap and smooth level.
Repeated on offside arch - though had to completely remove outer edge in order to match new dimensions of nearside.
HTH,
Andy.
|
|
|
Black Cat
|
| posted on 14/6/07 at 08:32 PM |
|
|
I have drums on my rear wheels and when I fitted my wheel the large nut in the center forced off the disc in the middle of the wheel.
Did you have this problem?
I was thinking about fitting spaces on the rear wheels to overcome this issue and then to set my arches up to suit.
I will need to get my head around what spacers to fit as I've seen several comments and possible pit falls on this site about wheel spaces.
Regards Steve
|
|
|
soggy 3
|
| posted on 25/6/07 at 08:16 PM |
|
|
Hi andy, just back from holls so only just seen your new pics,it,s looking great mate.
|
|
|
Lightning
|
| posted on 28/6/07 at 08:37 PM |
|
|
Well i suppose I will see you coming......
Looking very sweet mate.
i'll pop in to see you one day soon.
Steve
|
|
|
andrew.carwithen
|
| posted on 8/8/07 at 08:58 PM |
|
|
Just thought I'd update with a few more recent photos...
(hopefully they're not too big!!)
As can be seen, aeroscreen and c/f dash now fitted.
Still need to paint rest of bodywork etc....
Andy.
 
Rescued attachment avon nearside.jpg
|
|
|
andrew.carwithen
|
| posted on 8/8/07 at 08:59 PM |
|
|
rear view...(I've started to fit rear lights since this photo was taken)
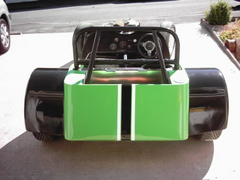 
Rescued attachment avon rear.jpg
|
|
|
andrew.carwithen
|
| posted on 8/8/07 at 09:00 PM |
|
|
dash now complete....
 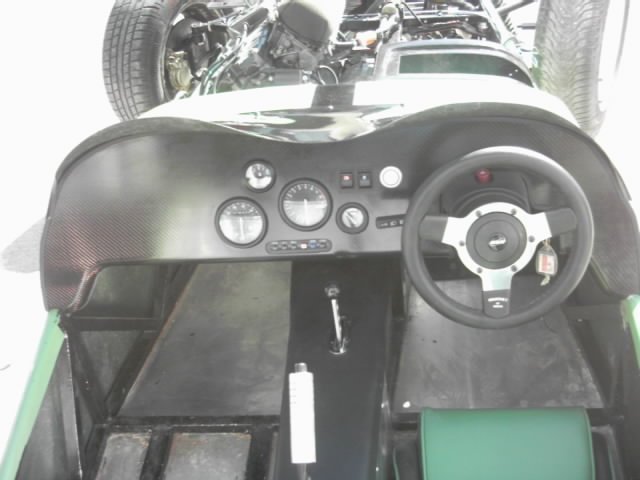
Rescued attachment avon carbon dash.jpg
|
|
|


%20(WinCE).JPG)


