
PRO-BLADE-TURBO-COMP. RE-BUILD
welderman - 10/7/12 at 08:56 AM
This will be a start of my re-build diary, im not good with words but will take lots and lots of pictures  .
.
First up is how this car started life as i once knew and how it once looked, some of you might know the car already as it was once for a short period
owned by a fellow member on here, ive pinched this description of the car from a post and theres a picture of it too.
Procomp LA Gold
Life started out for this car as a 2002 car that's been road-registered, but used predominantly for sprinting.
2.0 16v Vauxhall XE engine
QED 420 Cams
Up-rated Con-Rod Bolts
Twin Webber 45's
MBE Programmable Ignition
Tony Law Exhaust
Modified sump
Custom Ali Flywheel
5Ĺ" Twin Plate Alcon Clutch
Circa 210bhp
TranX Close-Ratio Straight-Cut Clubman Box
4.4:1 Diff
4-pot Alloy Alcon F3 Front Calipers
2-pot Alloy Alcon Rear Calipers
Floating Discs All-Round
Fully Caged
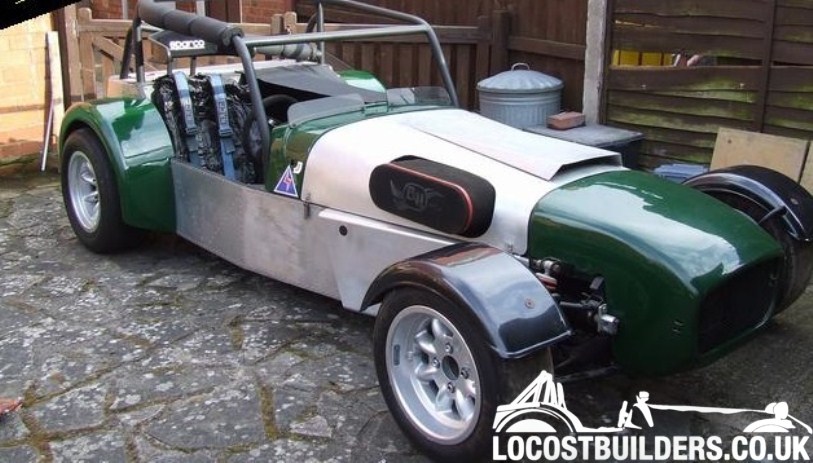
This is a picture of the erm car after it was delivered. The rest of the car was in boxes  , it did not however come with an engine as i had already
had one from a previous build.
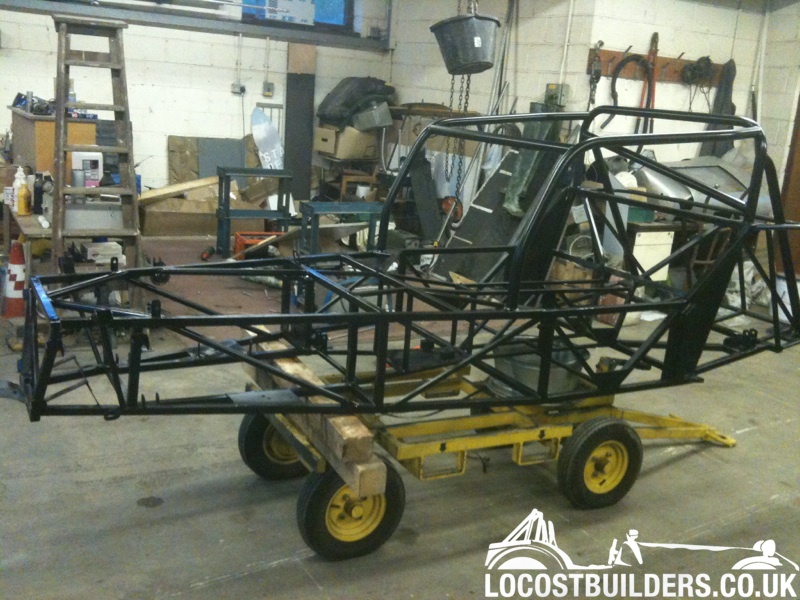
All comments most welcome good or bad as i go along.
[Edited on 10/7/12 by welderman]
scootz - 10/7/12 at 09:09 AM
Not sure it suits those new yellow wheels Joe... you may have to lengthen the wheelbase a little too! 
welderman - 10/7/12 at 09:24 AM
quote:
Originally posted by scootz
Not sure it suits those new yellow wheels Joe... you may have to lengthen the wheelbase a little too! 
 rear wheel steering too
welderman - 10/7/12 at 09:36 AM
Now sat in its home for the build.

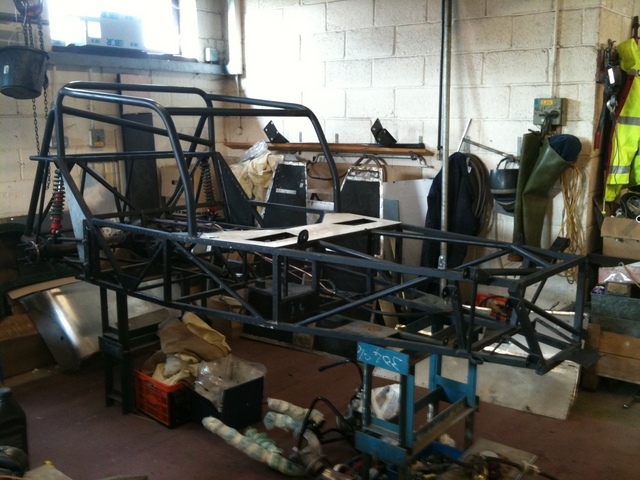
Bear frame
Now time to find where was best to fit the engine, Honda Fireblade 919, with turbo.

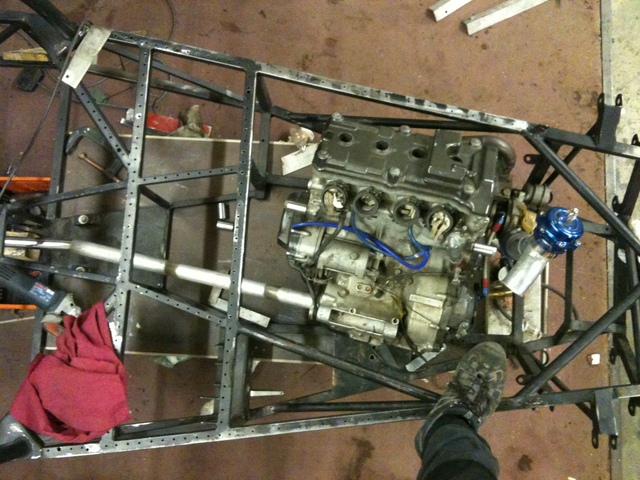
Engine position ???
Make shift prop

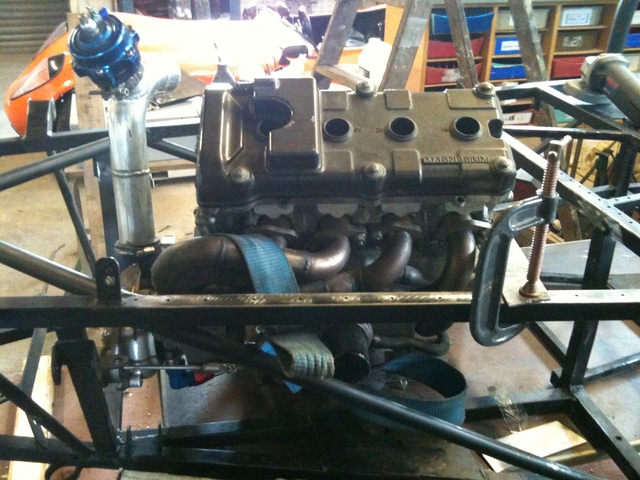
Engine position ??
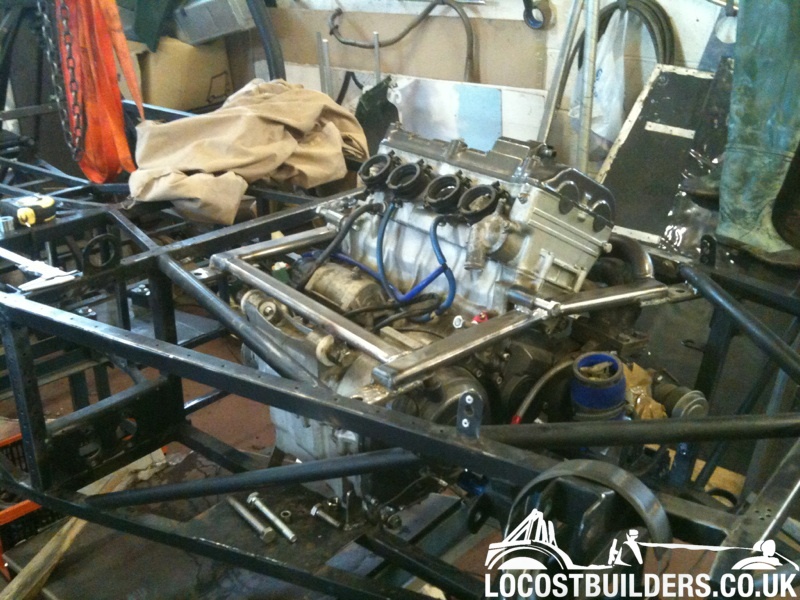
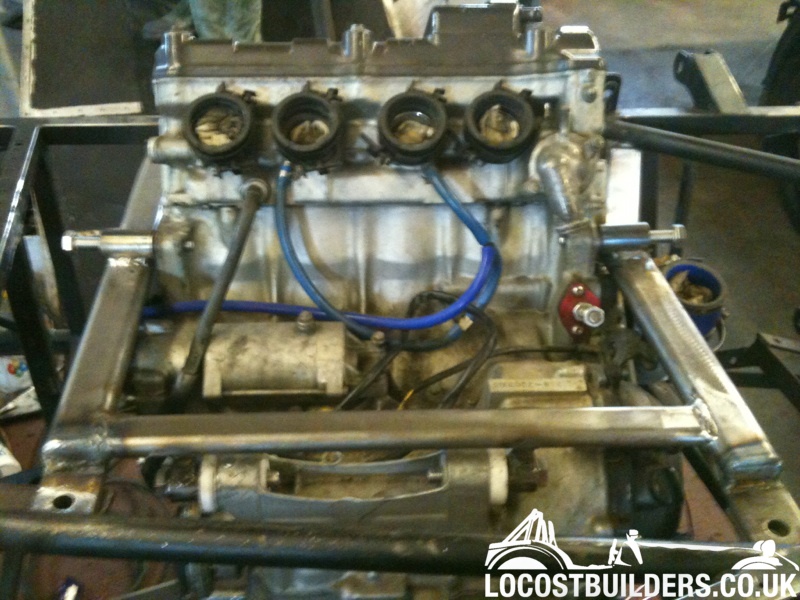
After a bit of moving around and a few blocks to get it right i proceded to make up a frame for it and re welded some bottom mounts to the frame.
locoR1 - 10/7/12 at 10:35 AM
Subscribed  keep the pictures coming Joe
Will this be a trackday toy or is it going back on the road?
imp paul - 10/7/12 at 10:55 AM
awesome joe it looks cool mate 

BigLee - 10/7/12 at 11:11 AM
That cage isn't high enough for me 
welderman - 10/7/12 at 11:33 AM
Will this be a trackday toy or is it going back on the road?
Trackday toy, but will get it an MOT too 
Lee you could fit in it, but your head might pop up OVER the cage 
welderman - 10/7/12 at 11:52 AM
Dinner time so bit more update
engine sent to Andy Bates as back in the day i killed the gearbox  , only had 1st, 5th and 6th left lol.
Scrounged a few old gearboxes to try and keep cost down but ended up having another fitted by Andy as it made more sense.
While the engine was on holiday, spun the frame round and started on the bottom, hammered the original ally floor back into shape, filled in some
holes in the ally floor and a few in the frame and made a start with the rivits and sikaflex.

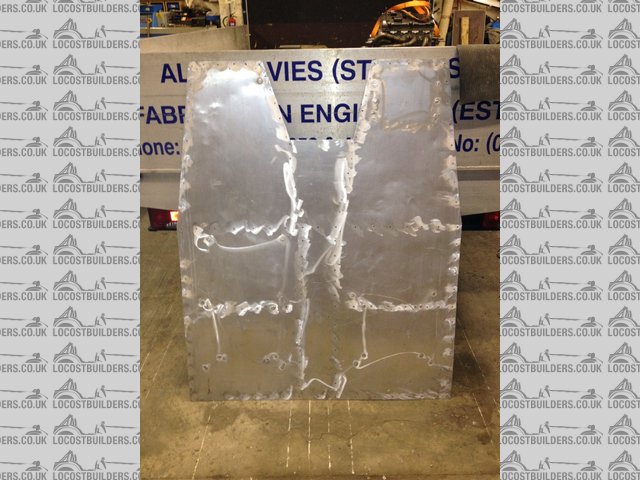
Welded ally floor
D Beddows - 10/7/12 at 11:55 AM
Been looking forward to this 
Dangle_kt - 10/7/12 at 12:21 PM
looking good joe!Keep up the good work!
Proby - 10/7/12 at 12:49 PM
This will be interesting, make sure you post pleny of pictures! I'm subscribed!
welderman - 10/7/12 at 01:35 PM
Floor fitted and made a start on the front and rear wishbones, fitted all new bushes purchased from Matt at Procomp  .
.

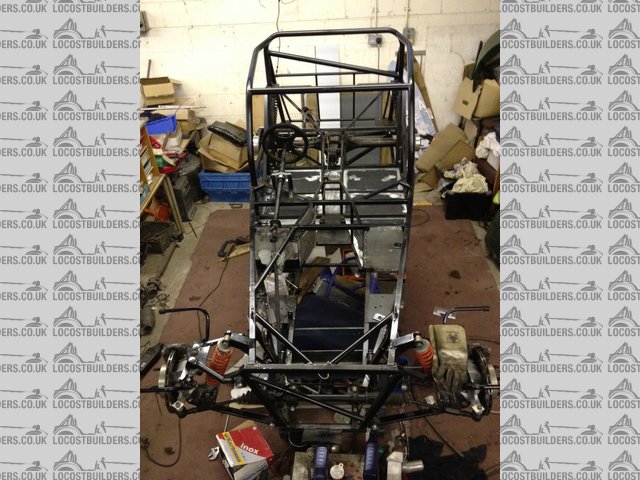
ally floor on frame
Also fitted the massive huge Alcon callipers and discís.

offside front.dsic and caliper
Slotted the diff in but this was going to come out at some point as i wanted a 3.54 ratio.
PAUL FISHER - 10/7/12 at 02:56 PM
Looking good Joe, love the Alcon brakes , I will be watching the rest of the build with interest now
welderman - 10/7/12 at 02:59 PM
Thanks Paul, they are mahooosive those things
quick brew so a few more pictures 
Well a bit more bashing later !, managed to flatten all the inside and outside ally panels read to re fix into place.
Made a start on the brake lines too 
Couple of pictures of the footwellís

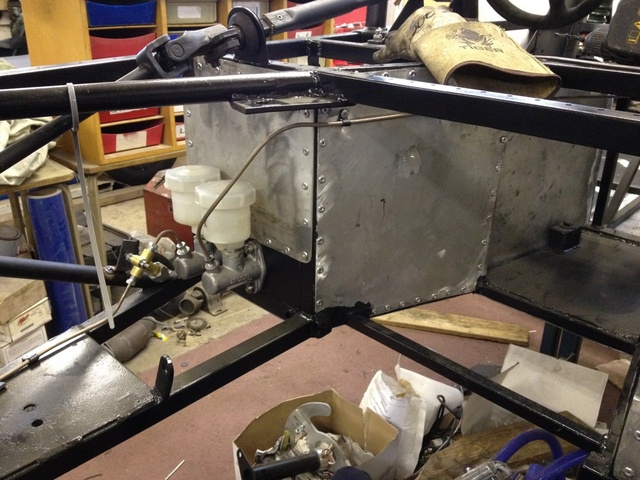
driver footwell cylinders

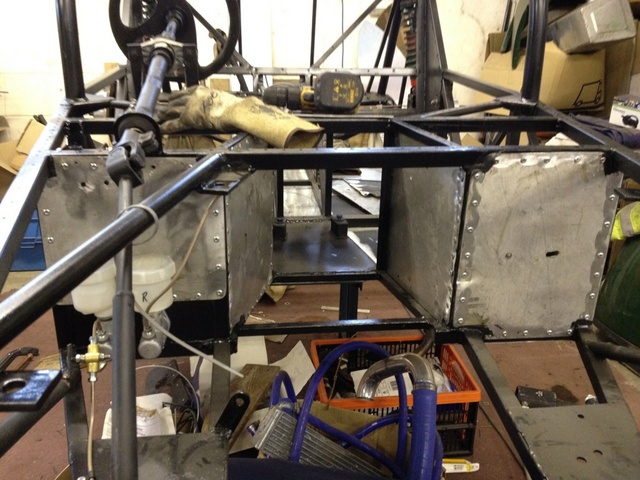
drivers and passenger footwell

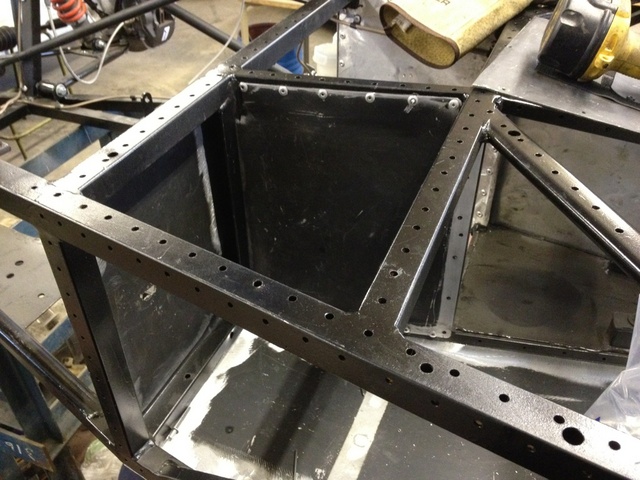
passenger footwell
Tack welded a small bracket to the frame so i could put a ďTĒ in for the brake switch. I must not forget to weld it up !!!!!!!!

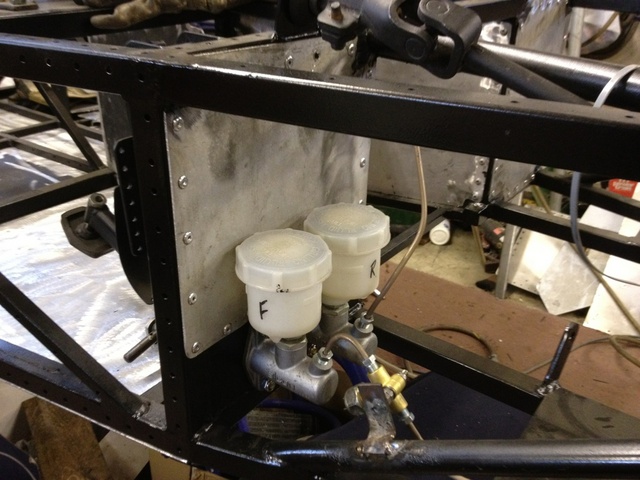
cylinder and T
Steve Hignett - 10/7/12 at 06:41 PM
Lookin great so far BJ, but what's with all the gay Ali? 
welderman - 11/7/12 at 07:12 AM
quote:
Originally posted by Steve Hignett
Lookin great so far BJ, but what's with all the gay Ali? 
Gay Ali hmm, im having to use it to keep costs down and use up as many old parts of the car i possibly can 
welderman - 11/7/12 at 07:18 AM
As the original nose cone is quite a bit battered looking ive opted to fit another one instead.
Just trial fitted for now, dont want to cut it just yet 

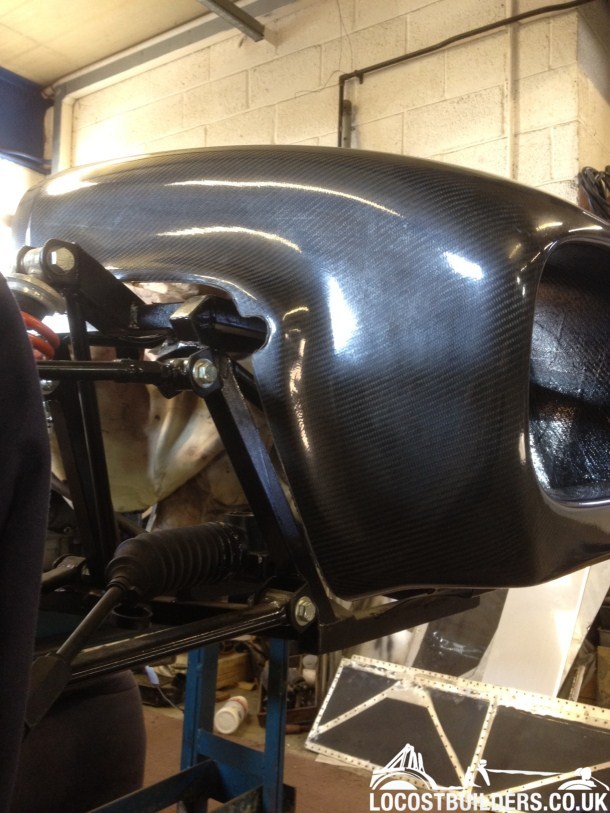
oh go on, and another
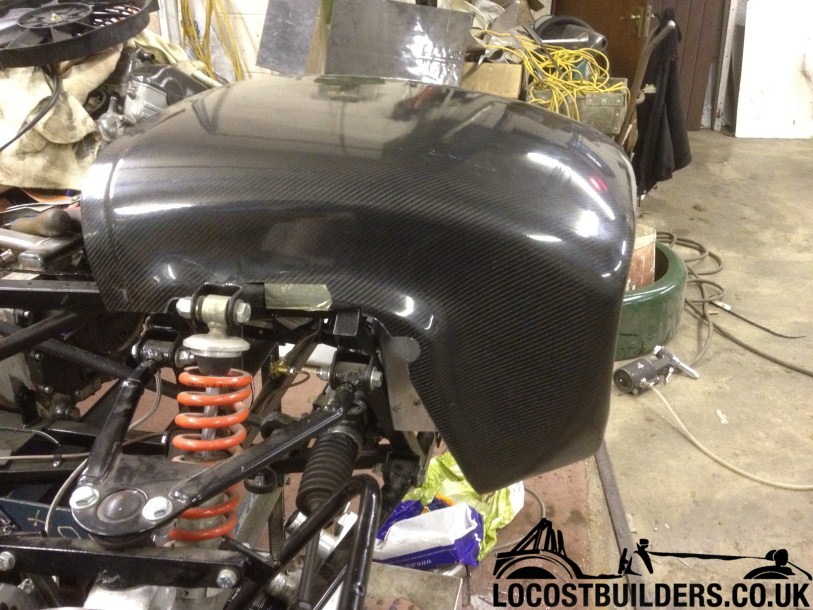
hows that Mr H 
Steve Hignett - 11/7/12 at 08:08 AM
looks alllrrriiiiiiighttttt............ 
welderman - 11/7/12 at 12:00 PM
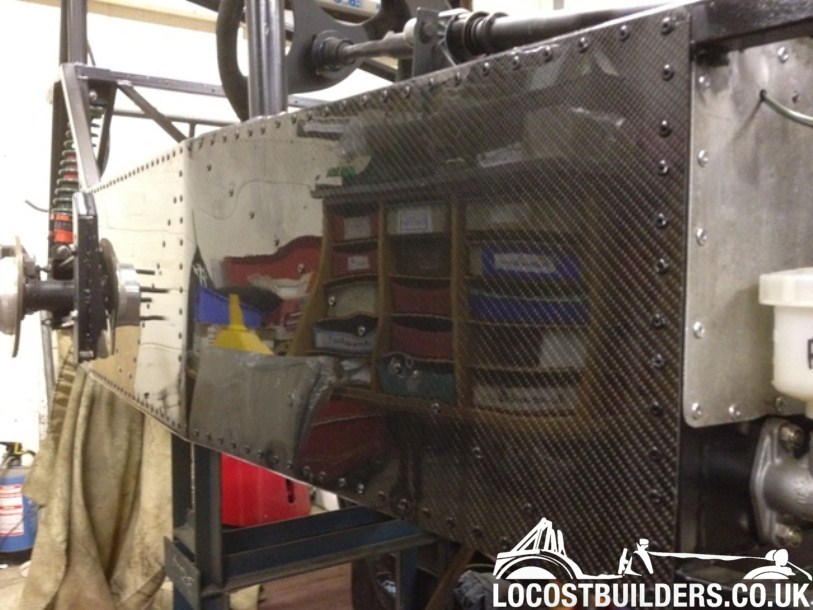
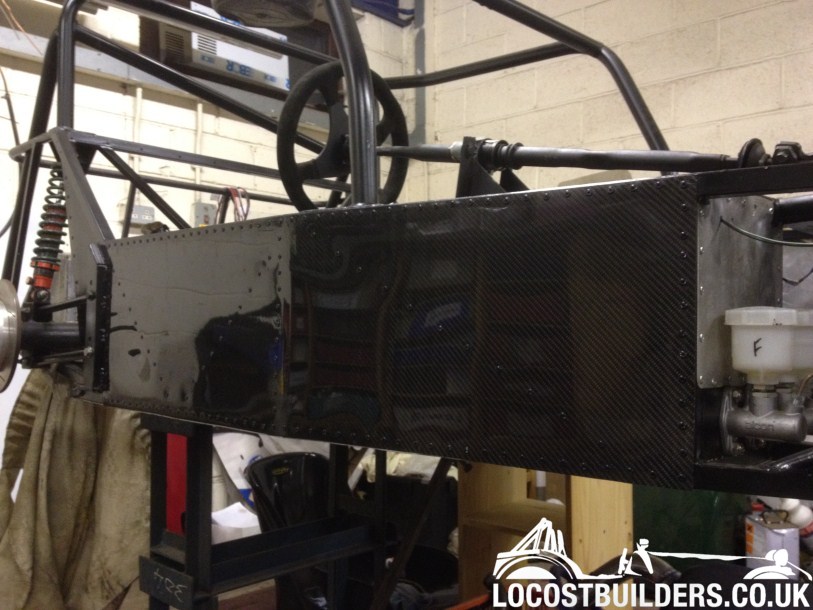
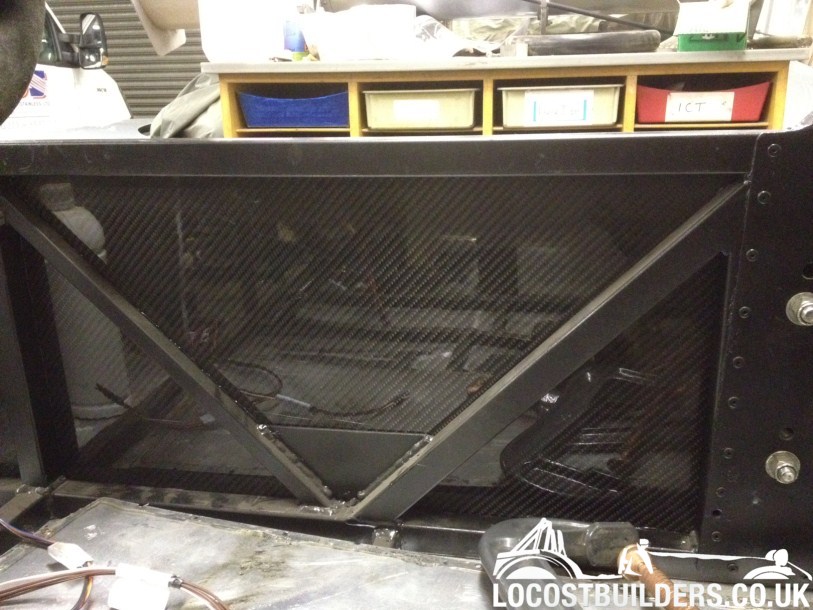
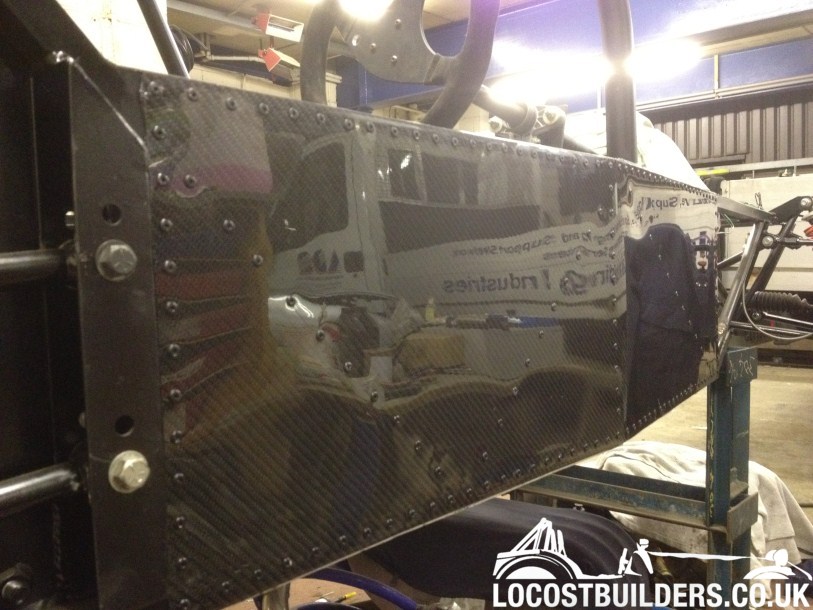
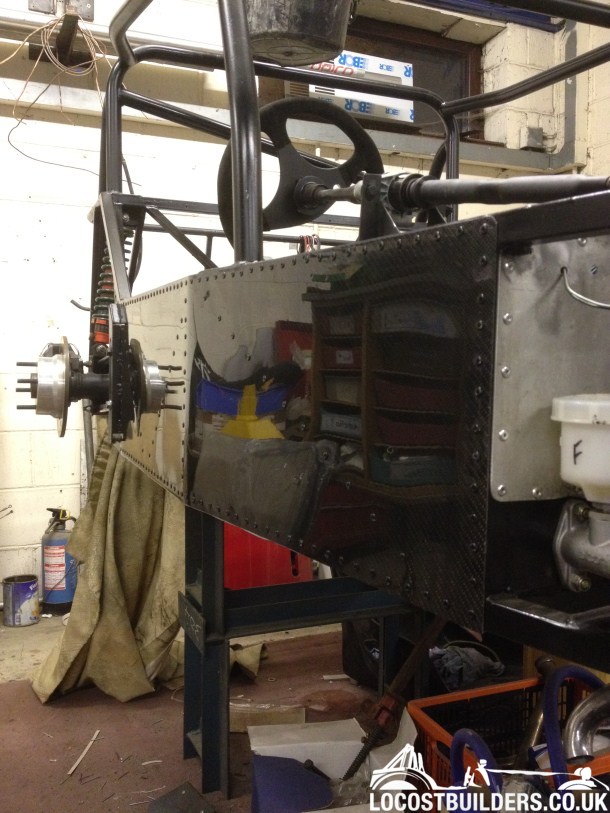
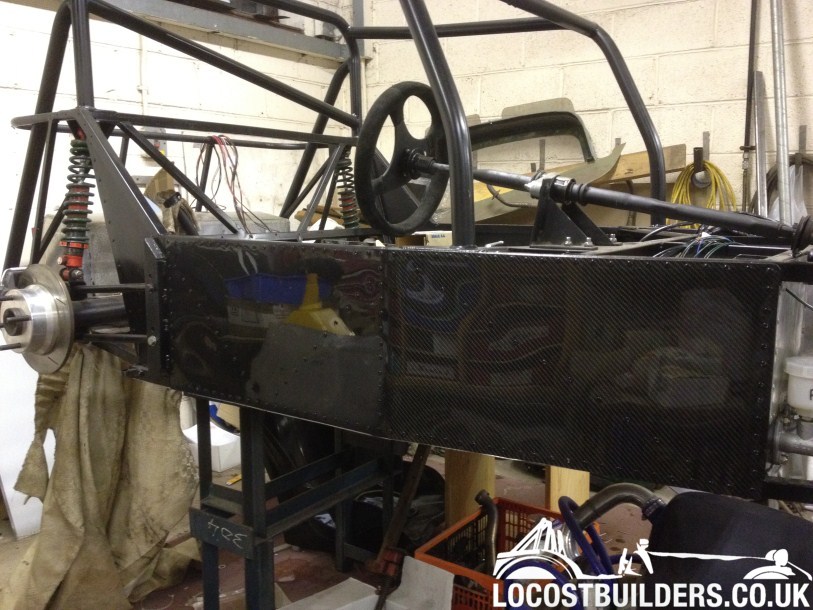
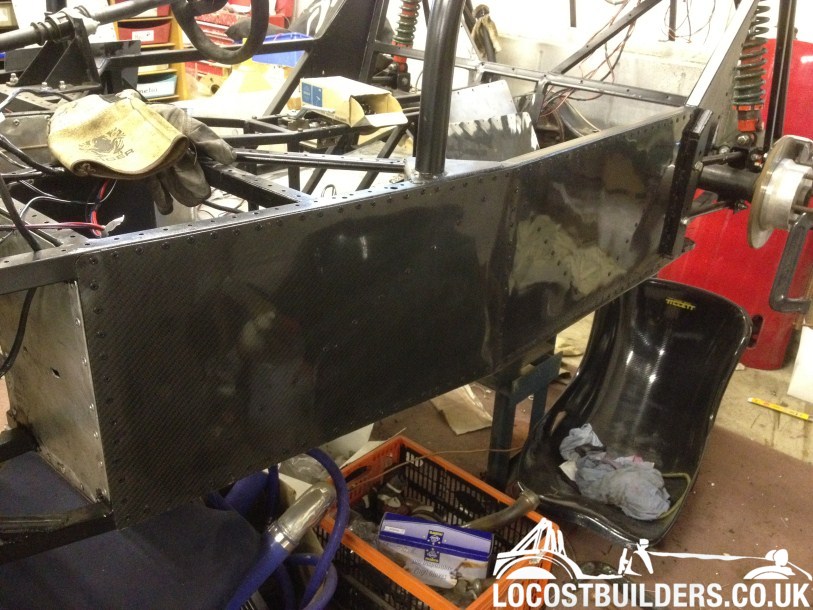
Staying on with the carbon theme just for a while, i managed to get hold of some carbon fiber sheets and set about panelling the sides of the car,
using the old ally ones as templates as there are 100ís of holes in each one.
Steve Hignett - 11/7/12 at 12:39 PM
Lookin good matey 

PAUL FISHER - 11/7/12 at 12:42 PM
Ooh all that carbon fibre , your just showing off now
welderman - 12/7/12 at 07:41 AM
Thanks for all your comments so far, there will be a 2 week break now, im off on holiday 
needforspeed - 24/7/12 at 05:54 PM
looks fantastic! 
welderman - 3/8/12 at 09:56 AM
Righty, ive been back from my holidays for a week 
Its so hard trying to get back into working, i need to win the lottery  .
.
As you can see i have a bit of a carbon fettish, could be something to do with hanging around with a mate of mine, you know who you are.
Any how, back onto the build, after trawling the tinternet for what seemed ages i found a live axle 3.54 crown and pinion.
I stuck a bid on it and hay ho won it on ebay  .
.
So then set about collecting it from Sheffield. Gave TommyP a ring and we set off with the my kids and on our merry way we traveled, nice drive over
the Woodhead and back  .
.

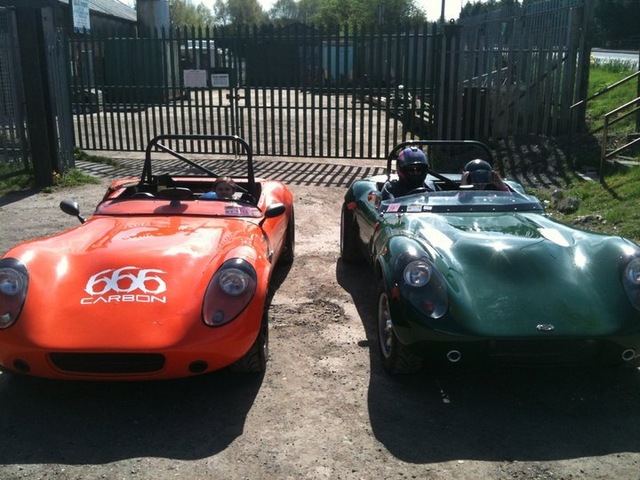
sheffield trip for diff
After a few days i decided to take the live axle appart !, first time for everything.
Then noticed i needed some new parts, bugger.
Ordered a spacer tube and some new bearings and waited.
After a bit of looking around i down loaded some destructions and managed to strip the diff and rebuild it after a few hours.

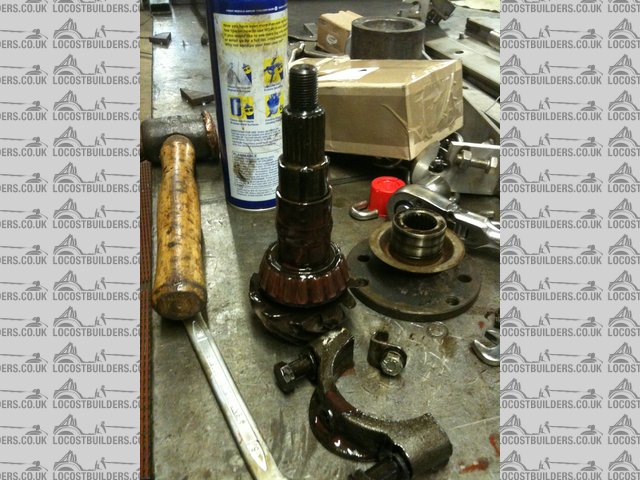
Diff rebuild.........

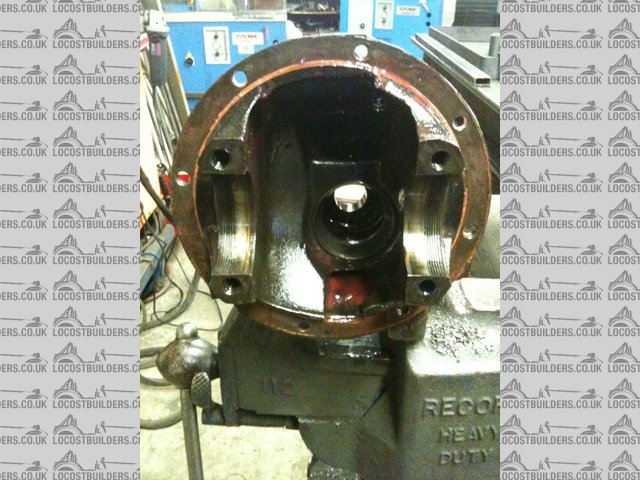
Diff rebuild......

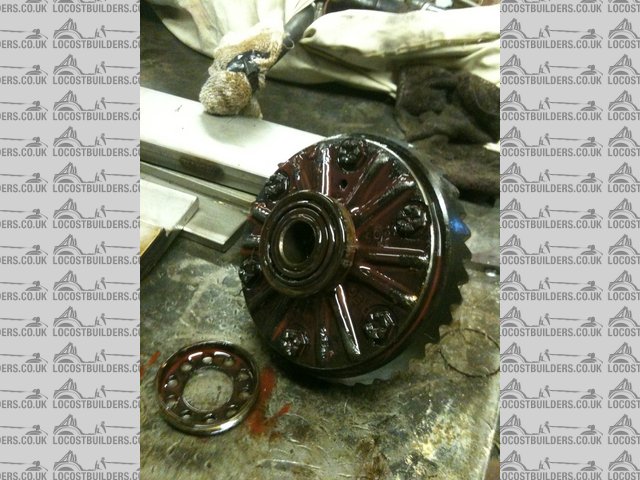
Diff rebuild....

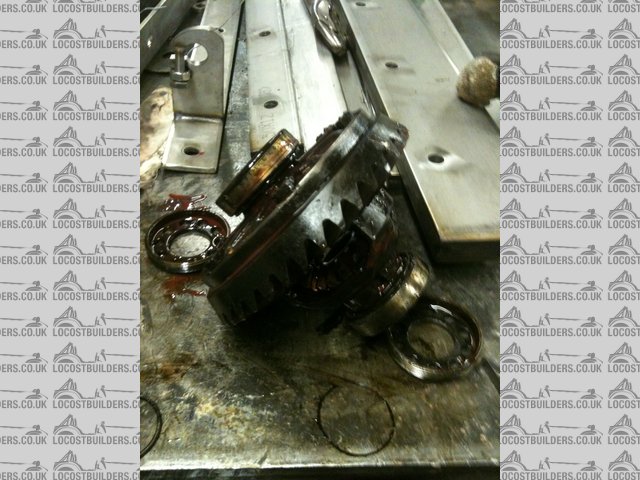
Diff rebuild...

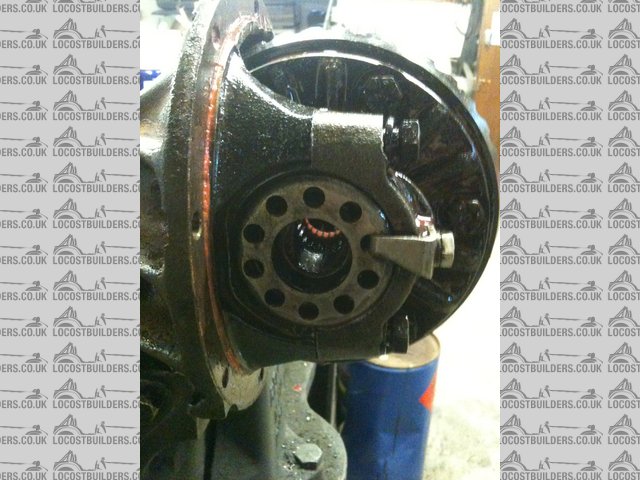
Diff rebuild...
I only have myself to blame if it breaks 
Dopdog - 3/8/12 at 12:41 PM
looking good, I also like lots of pictures
mark chandler - 3/8/12 at 12:55 PM
quote:
Originally posted by welderman
Floor fitted and made a start on the front and rear wishbones, fitted all new bushes purchased from Matt at Procomp  .
.


ally floor on frame
Also fitted the massive huge Alcon callipers and discís.


offside front.dsic and caliper
Slotted the diff in but this was going to come out at some point as i wanted a 3.54 ratio.
If you run nice 13" wheels then this diff will not cut it, I run 3.14 in my turbo blade and run out of revs +12,000 by Brands Hatch pit lane !!!
that's with 185/60/13 tyres all around.
welderman - 3/8/12 at 01:30 PM
quote:
Originally posted by mark chandler
quote:
Originally posted by welderman
Floor fitted and made a start on the front and rear wishbones, fitted all new bushes purchased from Matt at Procomp  .
.


ally floor on frame
Also fitted the massive huge Alcon callipers and discís.


offside front.dsic and caliper
Slotted the diff in but this was going to come out at some point as i wanted a 3.54 ratio.
If you run nice 13" wheels then this diff will not cut it, I run 3.14 in my turbo blade and run out of revs +12,000 by Brands Hatch pit lane !!!
that's with 185/60/13 tyres all around.

bugger
MsD - 3/8/12 at 04:49 PM
Looking really good Joe, but....
If mines not on the road before yours somethings not right!
I know your weight saving with all the Carbon but isnt drilling thousands of holes in your chassis a step too far? 
Mark.
Dangle_kt - 3/8/12 at 05:16 PM
looks great - so you still have fury too? How did you swing that??? 
bigfoot4616 - 3/8/12 at 06:23 PM
quote:
Originally posted by welderman
quote:
Originally posted by mark chandler
quote:
Originally posted by welderman
Floor fitted and made a start on the front and rear wishbones, fitted all new bushes purchased from Matt at Procomp  .
.


ally floor on frame
Also fitted the massive huge Alcon callipers and discís.


offside front.dsic and caliper
Slotted the diff in but this was going to come out at some point as i wanted a 3.54 ratio.
If you run nice 13" wheels then this diff will not cut it, I run 3.14 in my turbo blade and run out of revs +12,000 by Brands Hatch pit lane !!!
that's with 185/60/13 tyres all around.

bugger
3.54 is as good as you can get for the live axle though. from what i remember when i had the blade fitted with 205/60/13's it would be geared for
about 125 max. more than enough with no turbo, wouldn't of thought it would be enough for you though. increase the tyre size?
welderman - 3/8/12 at 07:41 PM
Dangle. Fury has gone now since I did the diff 
Mark. The rate I'm going. You could build 2 cars lol
Richard. Fury topped out at 128 so I could probably live with a bit less speed. Hopefully it's how quick it gets there 
mark chandler - 5/8/12 at 11:58 AM
You will have no problem getting there 
I was at Woodbridge yesterday, faster accelerating than a Nissan Skyline and Griffith, kept with a Porsche GT3RS on acceleration, better on the twisty
stuff slower when flat out as hitting the rev limiter then he started to pull away then my clutch went (I suspect the lifting pin has snapped again)
so never got a chance for him to let me go past and see if he could keep pace with me.
2010 911 stats (it arrived on a trailer)
The new car therefore continues the series of uncompromisingly sporting derivatives of the 911 homologated for road use and, with its purist
character, addresses above all the driver with motorsport ambitions, as the car's specifications clearly prove: 3.8-litre six-cylinder
horizontally-opposed power unit delivering 450 bhp (331 kW); six-speed manual gearbox; acceleration from 0-100 km/h in 4.0 seconds; top speed 310 km/h
(192 mph); DIN unladen weight 1,370 kg (3,021 lb); fuel consumption in the NEDC driving cycle 13.2 ltr/100 km (equal to 21.4 mpg imp).
My £3000 investment is looking pretty good 
welderman - 10/8/12 at 12:18 PM
quote:
Originally posted by mark chandler
You will have no problem getting there 
I was at Woodbridge yesterday, faster accelerating than a Nissan Skyline and Griffith, kept with a Porsche GT3RS on acceleration, better on the twisty
stuff slower when flat out as hitting the rev limiter then he started to pull away then my clutch went (I suspect the lifting pin has snapped again)
so never got a chance for him to let me go past and see if he could keep pace with me.
2010 911 stats (it arrived on a trailer)
The new car therefore continues the series of uncompromisingly sporting derivatives of the 911 homologated for road use and, with its purist
character, addresses above all the driver with motorsport ambitions, as the car's specifications clearly prove: 3.8-litre six-cylinder
horizontally-opposed power unit delivering 450 bhp (331 kW); six-speed manual gearbox; acceleration from 0-100 km/h in 4.0 seconds; top speed 310 km/h
(192 mph); DIN unladen weight 1,370 kg (3,021 lb); fuel consumption in the NEDC driving cycle 13.2 ltr/100 km (equal to 21.4 mpg imp).
My £3000 investment is looking pretty good 
Shame about the clutch pin, was it welded longer or did you get one machined to suit ?
Joe
welderman - 27/9/12 at 01:52 PM
Right, where were we ?
Not been able to get on the car as late, found out that Mrs Welderman is expecting our third (3rd) child  , this will be over ten years since i last
changed a nappy lol.
Anyway, we (the Mrs) decided that we needed more room at home so for the last few weeks ive been busy in the garage and with the help of Tommy P, i
now have an extra room. Just need to get some furniture in there and its sorted. Once all the dust has settled i will be back on with the build.
Apparently i can keep the car (for now) 


i have been able to sort the wiring out though, having the car at work and being able to work on it at dinner has been quite useful as of late.
BIG thanks to Steve Keenan at MK sports cars for being at the other end of the phone  , he is an electrical genius
[Edited on 27/9/12 by welderman]
roadrunner - 27/9/12 at 02:22 PM
If you are trying to keep the cost down, why all the carbon.
By the way, theirs not enough pictures of the carbon side panels.
Brad.
AllWeatherDan - 27/9/12 at 02:27 PM
Your right, more pics of the beautiful Carbon would not go amiss.........
adithorp - 27/9/12 at 02:37 PM
Congratulations! Better get cracking on the car before you're up to your elbows in nappys.
welderman - 27/9/12 at 02:40 PM
lol, carbon is the future and i have been collecting it for a few years now, got quite a few scrappy bits which i cut bits to make nice bits if that
makes sense 
Right, the engine is now in and ive started to make a start on the plumbing !, made up some ally brackets and fitted the radiator, then made some side
panels for the charge cooler rad to fit to and also they will keep the air going through the rad and help cool things down alot better.

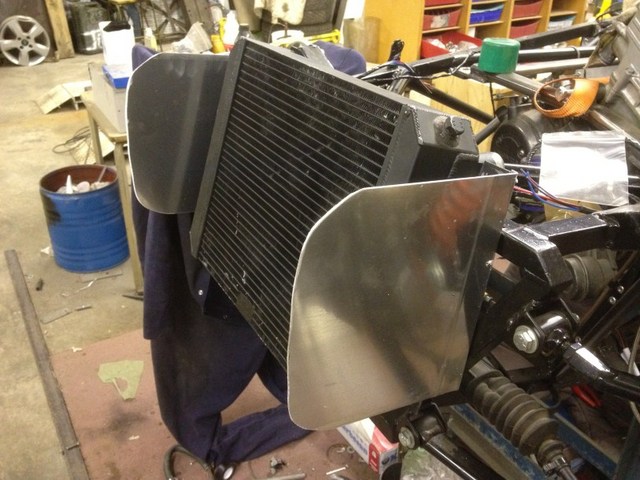
rad mounting and side cooling

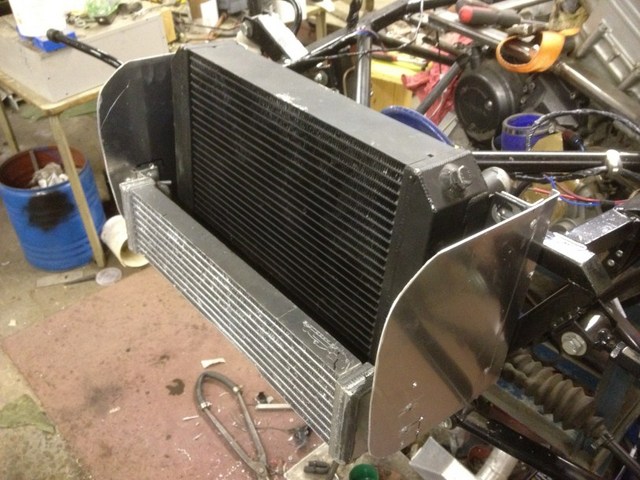
charge cooler rad and rad

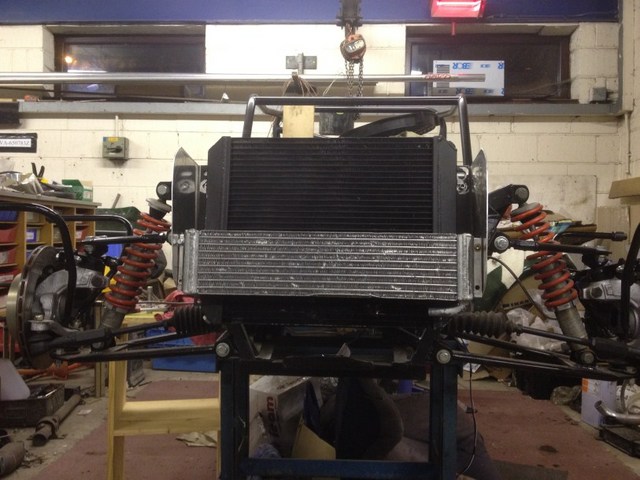
front rad and rad
Now that the cooling is hopefully sorted i went about trying to fit the nose cone, wish caused me quite a few problems and had to keep cutting the
ally radiator side panels down until i eventually got the nose cone to fit.
Then i thought i would cut a slot into the front of the nose cone, this will get more air into the charge cooler rad (that was one job i was not
looking forward to, but now it looks quite good me thinks). 

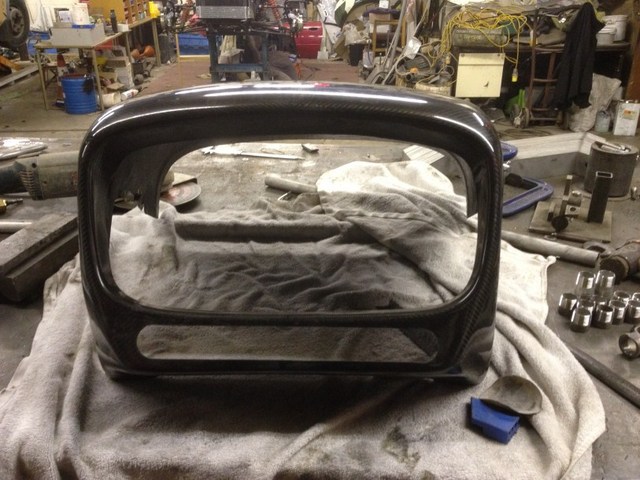
nose cone cut out

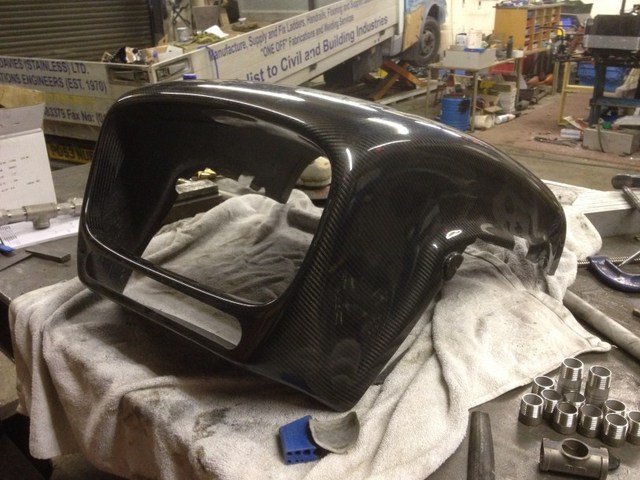
nose cone cut out

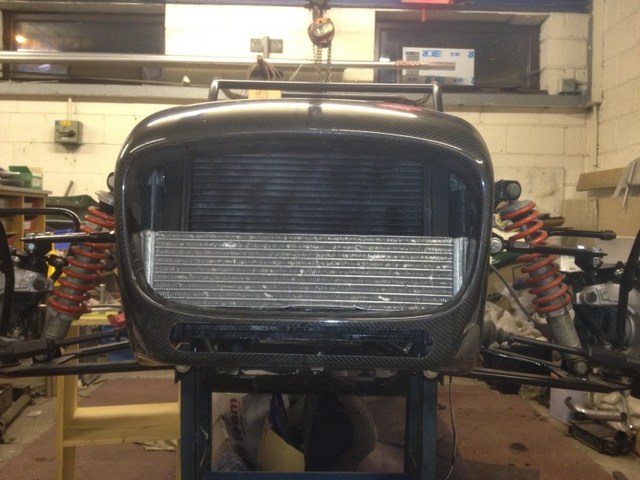
trial cut out nose cone

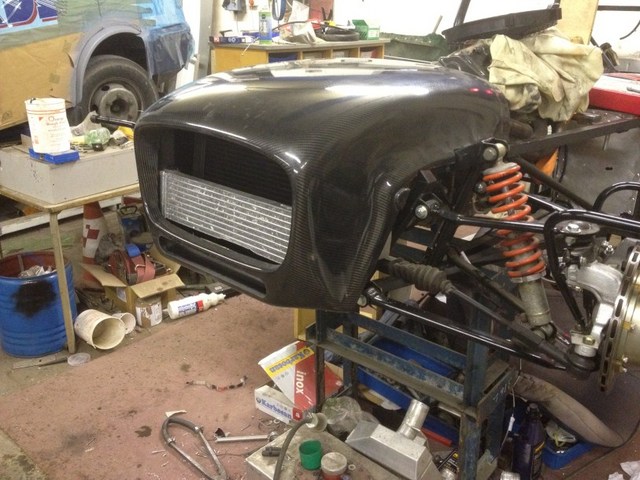
trial nose cut fit

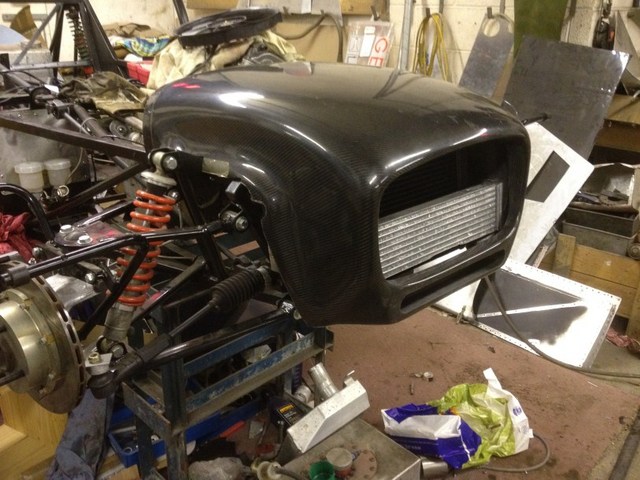
nose cone trial fit
welderman - 27/9/12 at 02:42 PM
quote:
Originally posted by adithorp
Congratulations! Better get cracking on the car before you're up to your elbows in nappys.
thanks Ady, i realy want to get cracking with the car now, but got to keep the Mrs happy too (maybe thats where the baby came from lol), so my dinner
breaks mean i spend approx 2 hours a week on the car, progress is coming along slowly.
adithorp - 27/9/12 at 02:59 PM
quote:
Originally posted by welderman
...maybe thats where the baby came from lol...
Might be worth getting to the bottom of that before you're up to your elbows in babies.
How's Tommy's bonnet doing?
welderman - 27/9/12 at 07:09 PM
quote:
Originally posted by adithorp
quote:
Originally posted by welderman
...maybe thats where the baby came from lol...
Might be worth getting to the bottom of that before you're up to your elbows in babies.
How's Tommy's bonnet doing?
Toms bonnet has still not arrived. It's been on order for ages now 
MsD - 27/9/12 at 07:28 PM
Congrats Joe!
The cars coming along nicely!
Is it being IVA'd? If so im sure it'll be blasting up the trough!
Mark.
welderman - 27/9/12 at 09:44 PM
Cheers Mark
The car was SVA before it got stripped back to its chassi so will be on the road trips up the trough 
welderman - 2/10/12 at 02:05 PM
On with the charge cooler.
Iíve gone for a homemade build, so thereís only me to blame if it does not do what itís supposed to.
Well started off by getting hold of a second hand intercooler from this very site, thanks to 40inches for the Valeo intercooler, one plastic end was
damaged but seeing as i was going to cut them both off then that were not a problem.

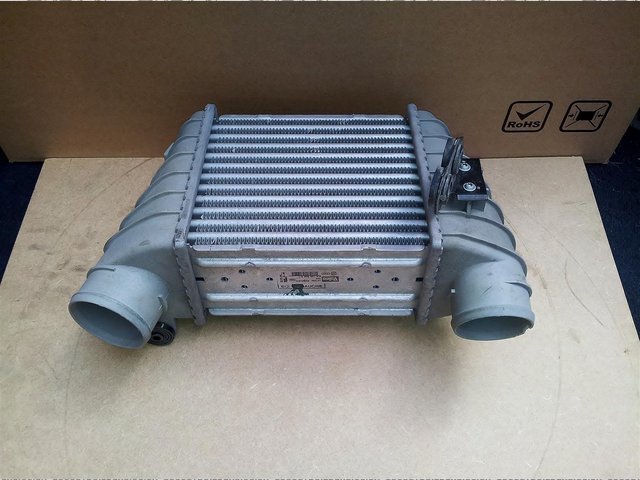
intercooler
So then started to get the end off with a big flat blade screw driver until i was left with the ally core.
Proceeded then to cut and fold some ends for the air to run through.

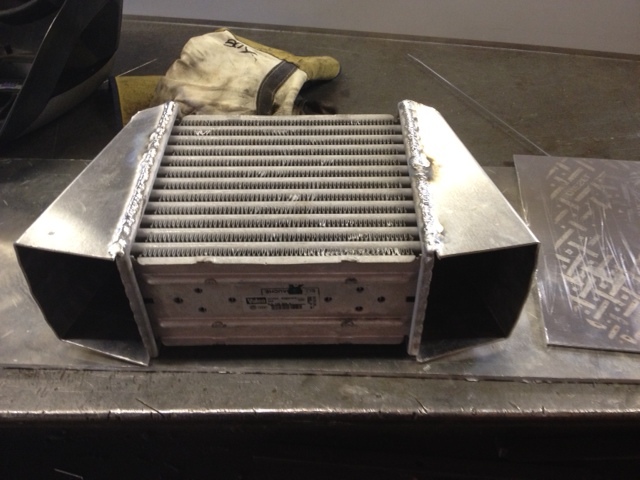
side
Welded them on when i was happy i had what i think is ok.

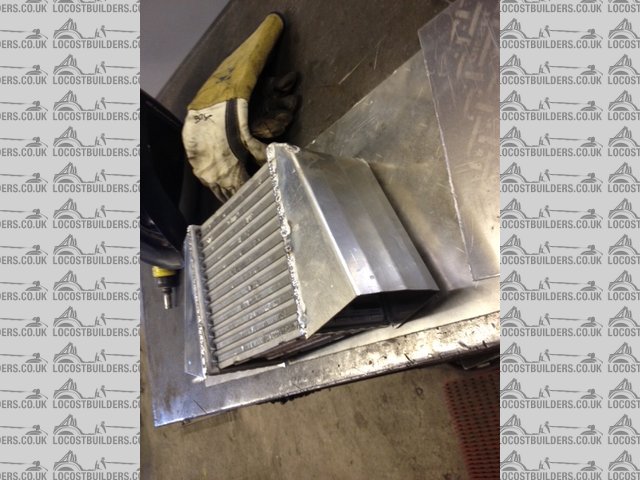
sides

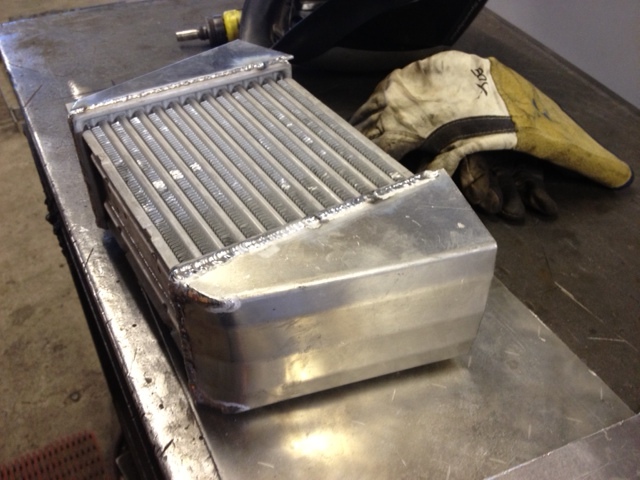
sides.
Cut and put a small bead on some tube and welded them onto the ends of the in/out let holes and hey presto i have an ally intercooler!!!!!!

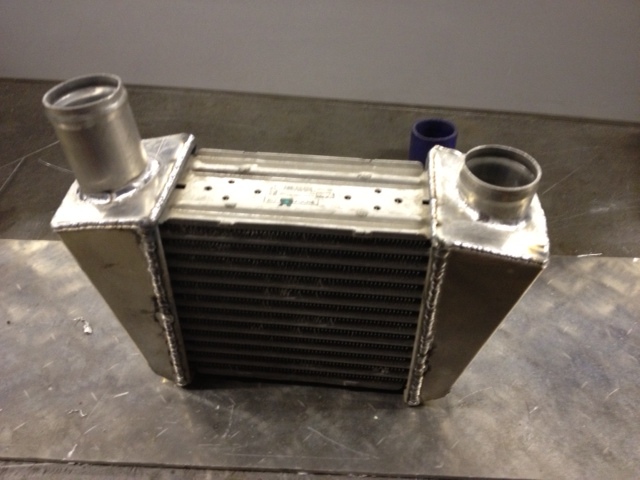
ends
Pressure tested it and no leaks

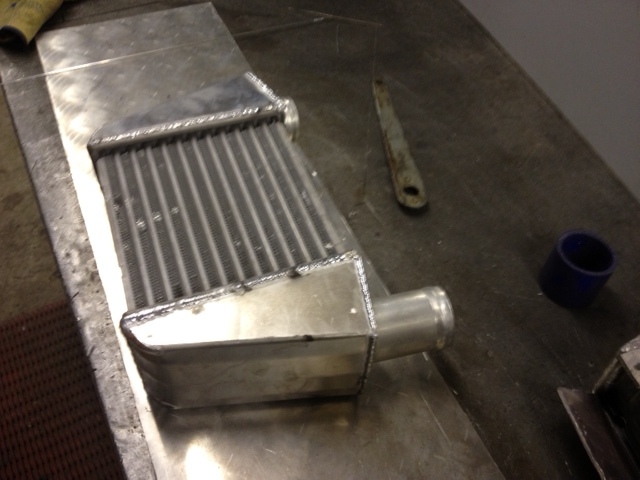
tube ends
Cut and folded some more ally plate and made a jacket to cover the intercooler fins/body, this is where the water will flow around and hopefully cool
the air from the turbo, fingers crossed. Any way welded that lot up, added a couple of 12mm pipes for the water to run trough and job done.

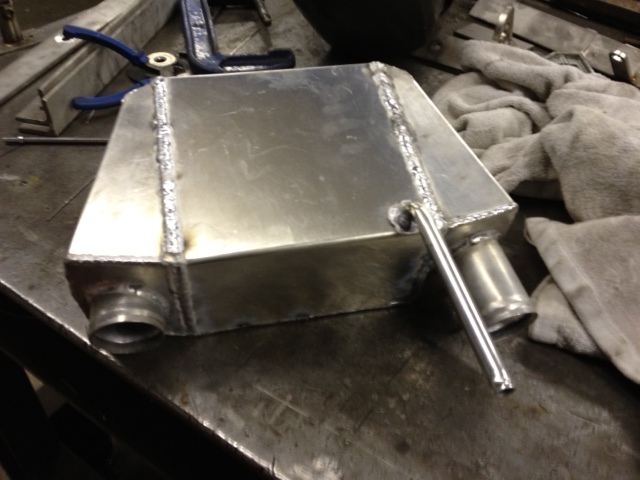
charge cooler
Iím happy with the result, tested for leaks and all is ok 
Fitted it to the car and next job is finish off the plumbing, put some water in and try starting her up: 0
welderman - 8/10/12 at 09:36 AM
Bit more done on the car this week
Decided to PU the front arches on, i love PU, itís called Good S#it here at work lol.
Any way, cut the profiles for the arch stays that come off the front uprights, i hate cutting the carbon fiber, you cant weld a bit back on if it all
goes pete tounge.
Once on i just tapeded them up with good ole packaging tape.
Job done

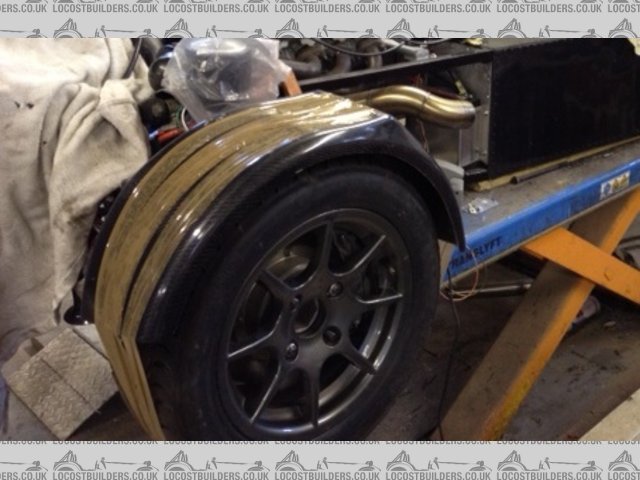
arch

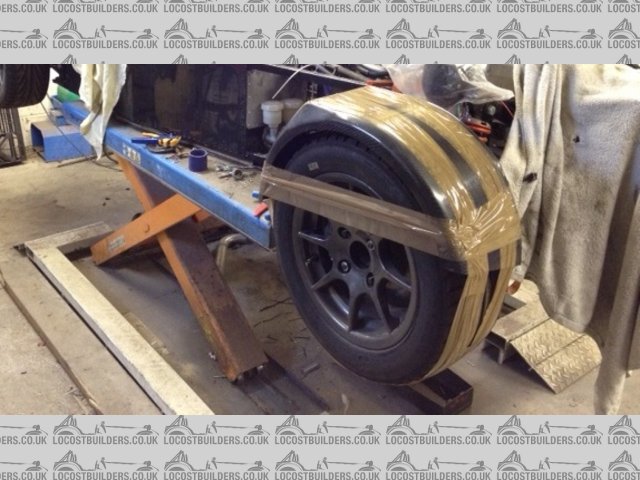
front arch

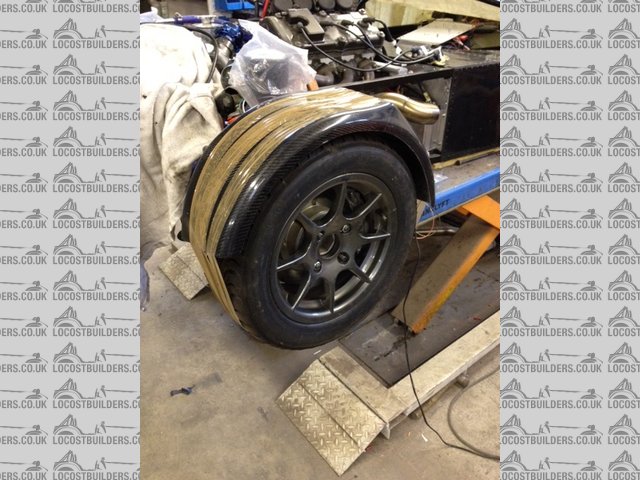
PU front arch
jeffw - 8/10/12 at 10:28 AM
Have a look at Avon ZZR tyres. They do a 215/60 13" which is closer to 231mm in section. The other choice is Kunho V70 (235/50 from memory)
both of which would give you more top end.
mark chandler - 8/10/12 at 10:55 AM
quote:
Originally posted by welderman
quote:
Originally posted by mark chandler
You will have no problem getting there 
I was at Woodbridge yesterday, faster accelerating than a Nissan Skyline and Griffith, kept with a Porsche GT3RS on acceleration, better on the twisty
stuff slower when flat out as hitting the rev limiter then he started to pull away then my clutch went (I suspect the lifting pin has snapped again)
so never got a chance for him to let me go past and see if he could keep pace with me.
2010 911 stats (it arrived on a trailer)
The new car therefore continues the series of uncompromisingly sporting derivatives of the 911 homologated for road use and, with its purist
character, addresses above all the driver with motorsport ambitions, as the car's specifications clearly prove: 3.8-litre six-cylinder
horizontally-opposed power unit delivering 450 bhp (331 kW); six-speed manual gearbox; acceleration from 0-100 km/h in 4.0 seconds; top speed 310 km/h
(192 mph); DIN unladen weight 1,370 kg (3,021 lb); fuel consumption in the NEDC driving cycle 13.2 ltr/100 km (equal to 21.4 mpg imp).
My £3000 investment is looking pretty good 
Shame about the clutch pin, was it welded longer or did you get one machined to suit ?
Joe
Welded pin, it snapped at the base so I have stuck back together with a fillet.
Pretty tough metal, if it fails again I guess Machining will be required in HSS.
Regards Mark
welderman - 8/10/12 at 03:48 PM
Managed to get a few hours off this weekend from doing the house work !, sorry decorating.
Getting quite excited now being a Dad again, we only have the babies room to decorate now, but mrs welderman can decide how/what/which way things are
being done in the spare room ARGH !.
Any how, back on the important stuff, decided rather than make a new rear tub i would try and make good alloy the one that originally came off the
car, it was slightly out of shape and having access to lots of hammers etc at work i managed to get it looking pretty dam fine.
Offered it up to the frame and got most of the old rivet holes to match up, whipped the rivet gun out, used the rubber hammer to get the top and
curved edges flat and it went on like a dream.

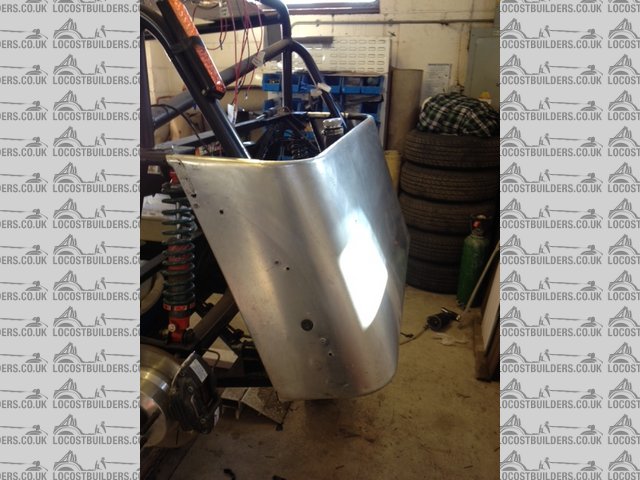
panel rear

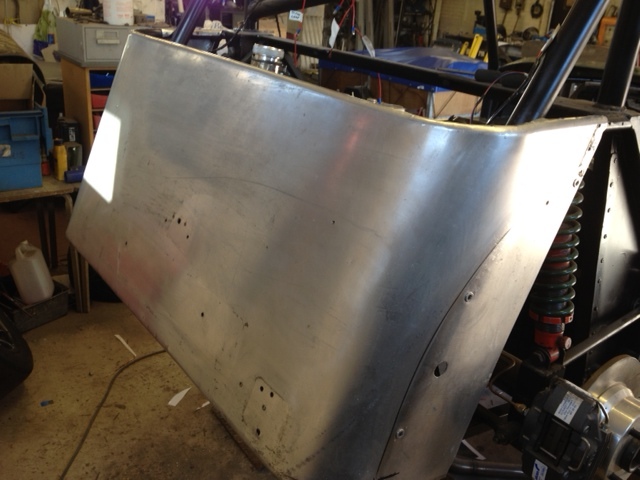
rear panel

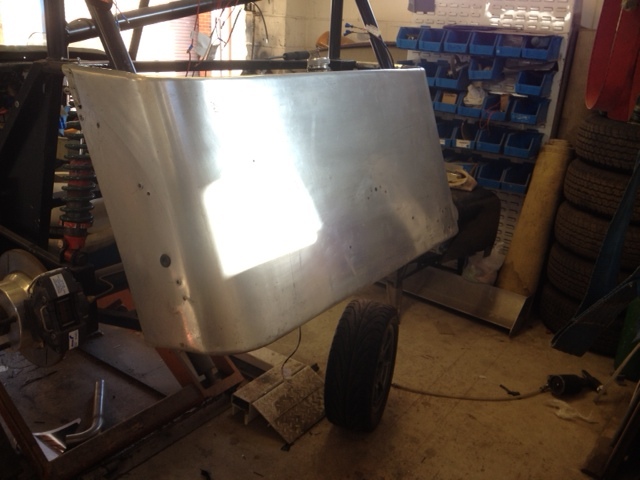
rear
Happy happy happy
marked up for the rear arch

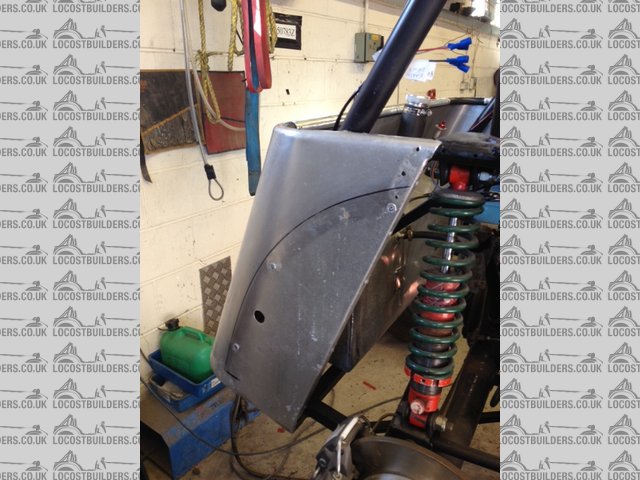
panelrear

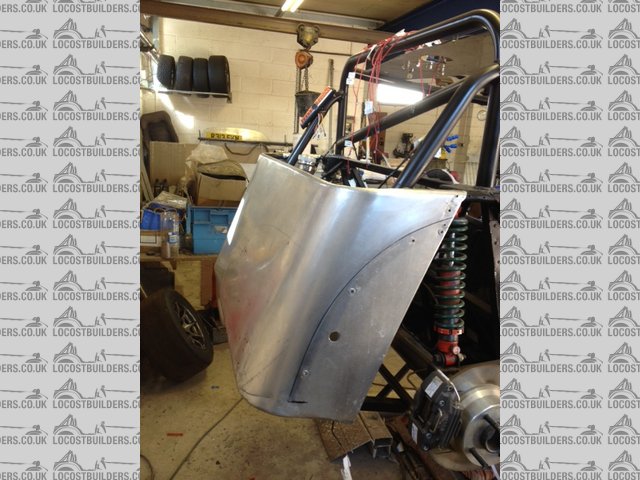
rearpanel
scootz - 8/10/12 at 06:07 PM
Good work fella! 
imp paul - 8/10/12 at 06:17 PM
looking awesome Joe nice job mate 
welderman - 8/10/12 at 08:42 PM
quote:
Originally posted by scootz
Good work fella! 
Ta. It's all down to you fella 
bi22le - 8/10/12 at 09:44 PM
Nice rebuild, i have just read the lot!
When you removed the old panels how did you get the old rivet ends out of the chassis tubes?
daniel mason - 8/10/12 at 10:17 PM
looking good!
welderman - 8/10/12 at 10:18 PM
quote:
Originally posted by bi22le
Nice rebuild, i have just read the lot!
When you removed the old panels how did you get the old rivet ends out of the chassis tubes?
To remove most not all of the rivet ends I cut the ends of the box section off with a 1mm slitting disk in the tubes that I though would house the
most ends, then blew compressed air through until they flew out. Ended up quite a mess with bits all over the floor, but well worth it. Once I was
happy with a good amount of ends being removed, just tig welded the ends of the box section back on. I also drilled out some holes with the hole
cutter in some of the tubes that were not blanked off, ie met another tube end on so cut the hole rivets out and then weld back up.
Just for good measure I pumped end a little grease in a few places just to catch any rivet ends that may roll around. But I don't think I will
hear them rattling around when I'm driving the car.
welderman - 9/10/12 at 07:45 AM
Following on from the charge cooler, i forgot i had made the header tank for the engine cooling system.
Bought a header tank top from ebay and had some tube lying around, cut some holes out of some alloy plate for the top and bottom and welded the thing
up.
Sorry no build pictures just the end result.

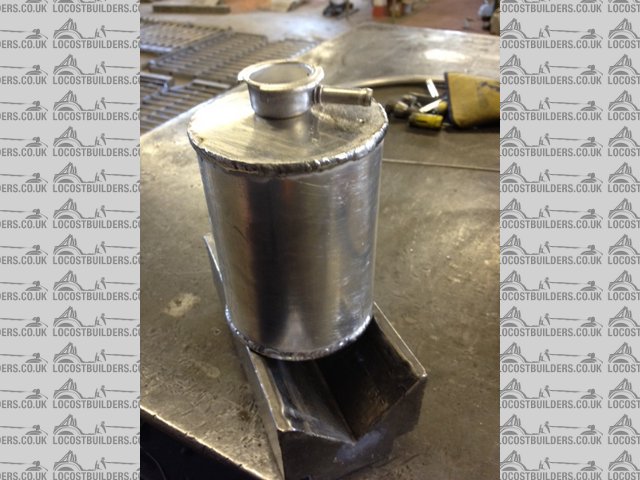
header

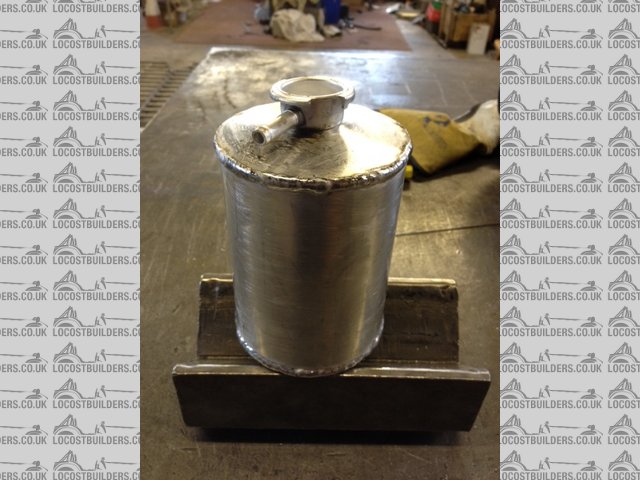
head

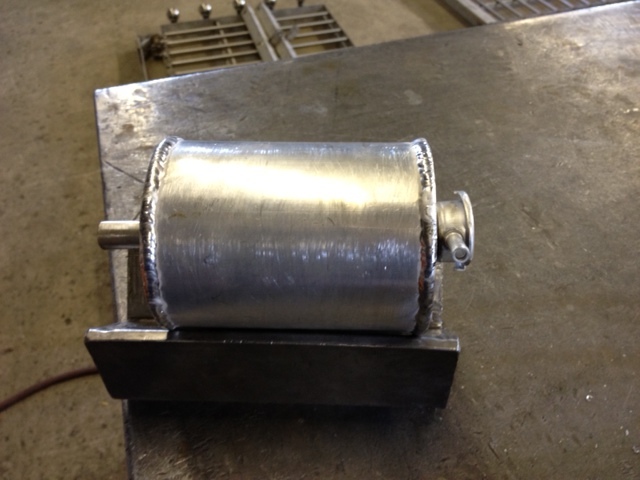
boing
welderman - 9/10/12 at 01:57 PM
On with the build rebuild blog re-build with lots pictures blog diary.
Decided to make a new plenum chamber for the blade engine. Did loads of searching, a few u2uís here there and blatant copying of other designs, bit of
a mongrel really lol.
But all said and done it looks very good, for now Iím going to leave as it is, it might need a few bits adding here and there like strapping down tabs
etc.
All thoughts and critics welcome, I wonít stalk you forever.

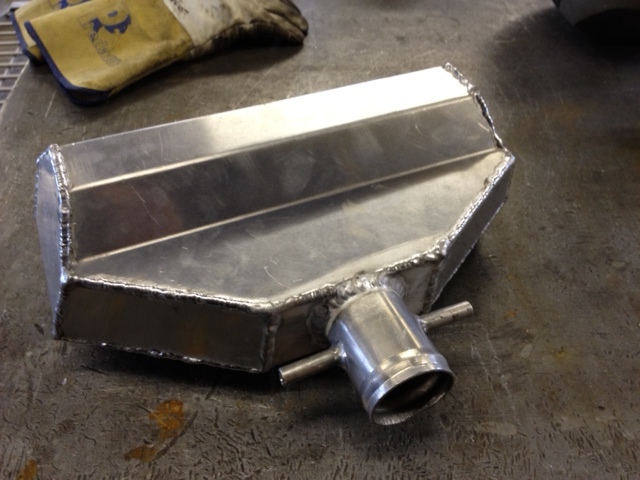
plenum

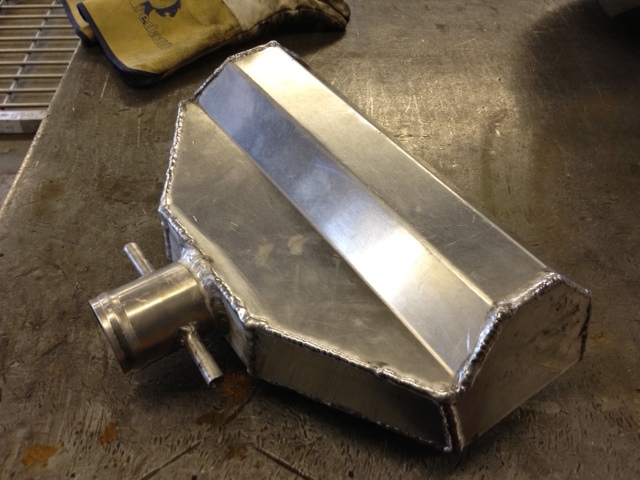
plenum

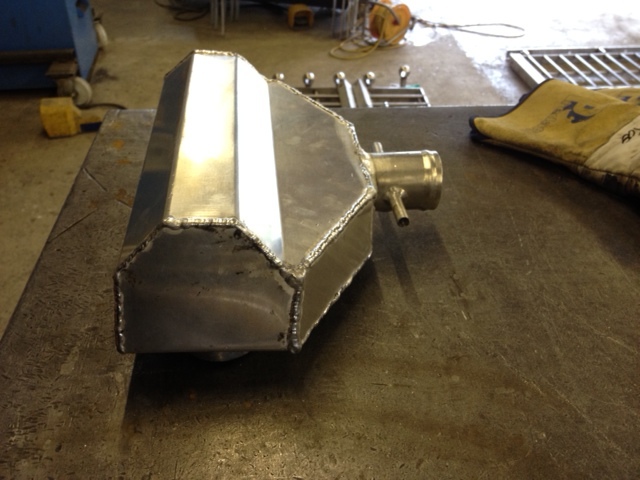
plenum

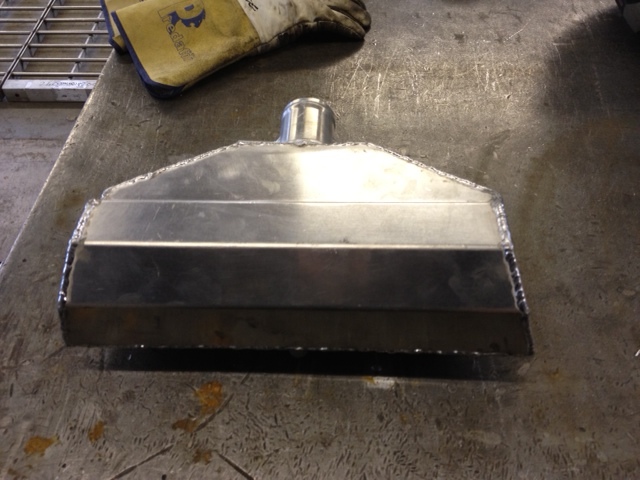
plenum
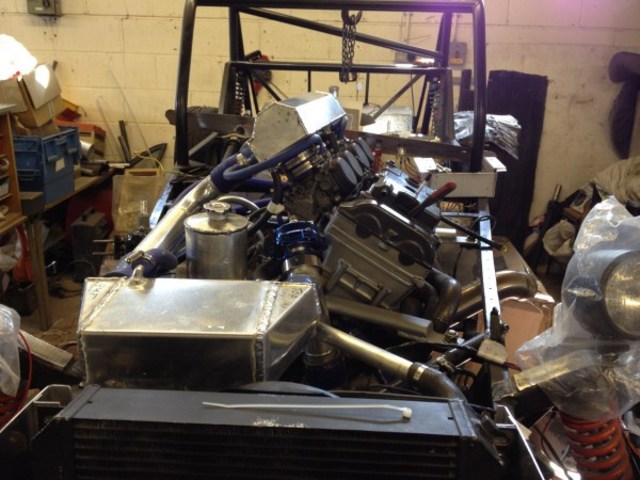
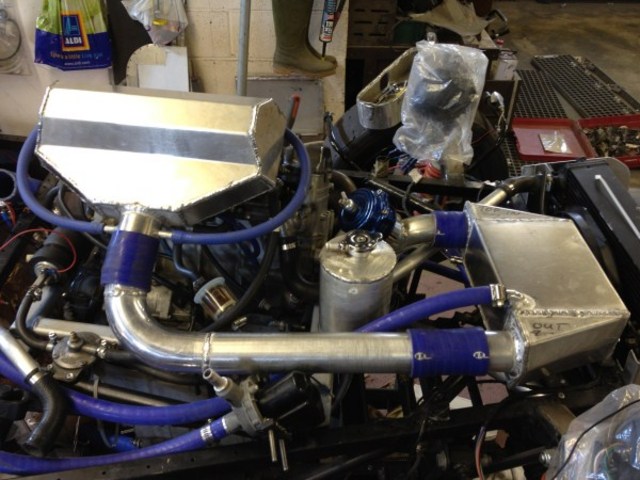
welderman - 10/10/12 at 02:38 PM
Engine install almost finnished

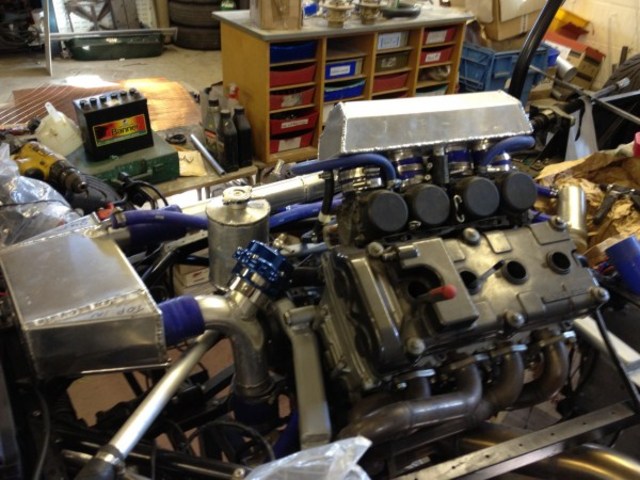
in

in

in
Had some carbon sheet left over, this was going to be the bit behind the seats, but some kind person (aka the invisible man) here at work cut a
100x100mm square hole out of it, so it was then too short, to this day no one has admited to this crime, bastardo's.
So cut it down to size for the foot well cover.

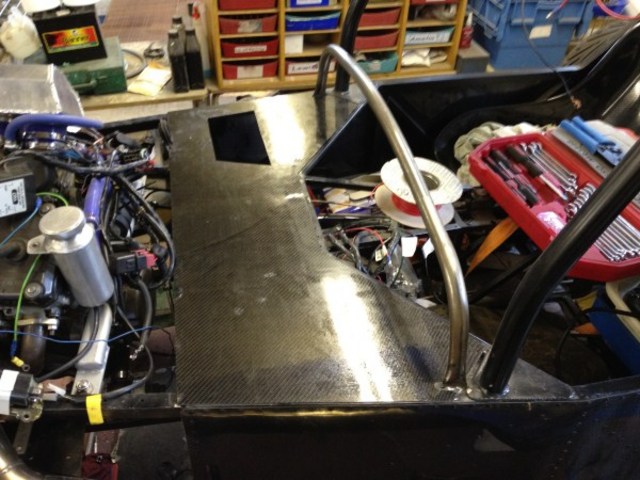
foot
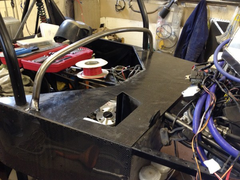

foot
Moved the car over to the ramp now so its getting closer to the door lol

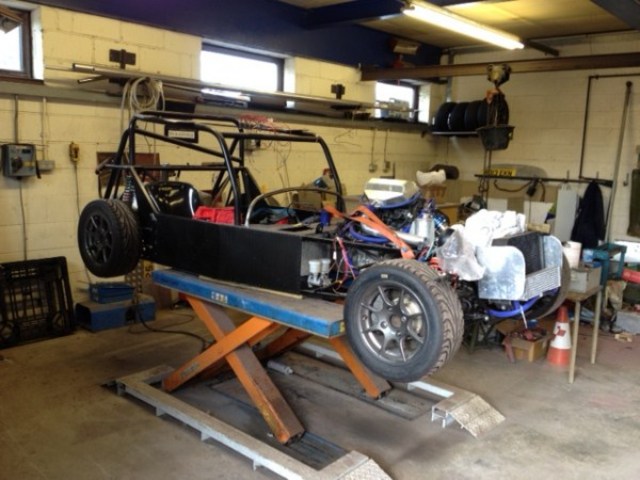
moved to next stage
snakebelly - 10/10/12 at 04:59 PM
Joe, did you get my u2u?
welderman - 10/10/12 at 05:22 PM
quote:
Originally posted by snakebelly
Joe, did you get my u2u?
Yep. Just forgot to reply lol
U2U back 
Dangle_kt - 10/10/12 at 07:56 PM
Looking really good joe - love the fact most is self made! Very 
Also, massive congratulations on becoming a Dad again! its a shame you will be drawing your pension when s/he turns 8. 
welderman - 10/10/12 at 08:36 PM
quote:
Originally posted by Dangle_kt
Looking really good joe - love the fact most is self made! Very 
Also, massive congratulations on becoming a Dad again! its a shame you will be drawing your pension when s/he turns 8. 
Thanks and THANKS lol. Might I remind you I will be the oldest dad at school in a few years time.
Plus side is lots of yummy mummies 
welderman - 12/10/12 at 08:40 AM
Decided to have a go at fitting the rear arches, but i came across a problem. I had a gap there the curve of the arch meets the frame.

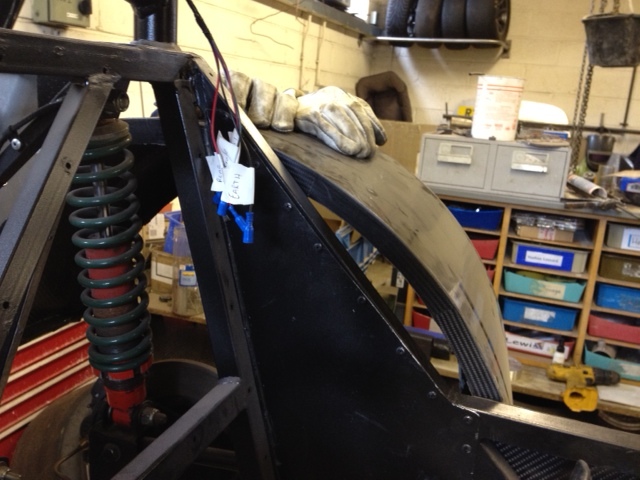
arch gap

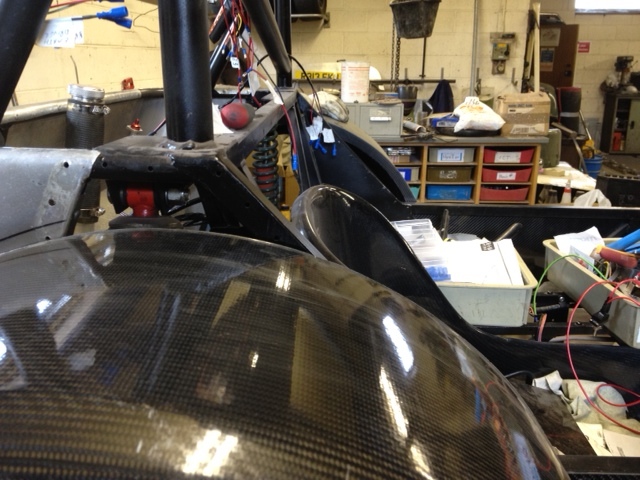
arch gap
So after a call to an old friend for a bit of advice we came up with a solution (he had the same problem on his very first car he built), so cut and
welded up some plate and fabricated some infill panels.
Bluemoon - 12/10/12 at 09:26 AM
Just had a quick look at your charge cooler, the jacket is quite a large flat sheet, I would be tempted to pressure test this it may "swell"
a bit at 15psi water pressure (or what ever these BEC use)??... You might need some enforcing ribs or something..
Dan
welderman - 12/10/12 at 01:05 PM
quote:
Originally posted by Bluemoon
Just had a quick look at your charge cooler, the jacket is quite a large flat sheet, I would be tempted to pressure test this it may "swell"
a bit at 15psi water pressure (or what ever these BEC use)??... You might need some enforcing ribs or something..
Dan
there's not much pressure going through the tank water wise, just a constant flow of water using a small water pump.
Well i hope lol, thanks
Bluemoon - 12/10/12 at 03:19 PM
quote:
Originally posted by welderman
quote:
Originally posted by Bluemoon
Just had a quick look at your charge cooler, the jacket is quite a large flat sheet, I would be tempted to pressure test this it may "swell"
a bit at 15psi water pressure (or what ever these BEC use)??... You might need some enforcing ribs or something..
Dan
there's not much pressure going through the tank water wise, just a constant flow of water using a small water pump.
Well i hope lol, thanks
o.k was assuming it's working on the existing radiator coolant loop (cold side).
sebastiaan - 12/10/12 at 03:43 PM
Cold side of the rad will still be hot, so it needs to run on a seperate circuit.
Joe, have you tried to make sure the entire core is in the water flow (i.e. inlet and outlet pipes on opposite sides of the core and as far away from
eachother as possible)? This is hard to see from the pictures and could make a significant difference to the efficiency of the cooler.
Nice looking work and rapid progress by the way, keep it up!
welderman - 12/10/12 at 04:07 PM
The inlet is right at the bottom far away as possible to the outlet on the top. So hopefully there's enought water and no air going through 
All runs on a separate cooling and electrical circuit too, there's loads of pipes lol
Thanks all for the comments, next job get the rear arches fitted, got a busy weekend though. But will see if I can have a bit of chill time 
[Edited on 12/10/12 by welderman]
procomp - 12/10/12 at 06:19 PM
Hi Joe.
Just been looking at some of the pics. One thing i notice is that you have a set of the very ugly MK1 wishbones on the front. Ill upgrade you to some
of the much later ones. I am sure3 i have a few sets spare lying around. Ill sort a set out FOC. 
Cheers Matt
welderman - 13/10/12 at 12:41 AM
quote:
Originally posted by procomp
Hi Joe.
Just been looking at some of the pics. One thing i notice is that you have a set of the very ugly MK1 wishbones on the front. Ill upgrade you to some
of the much later ones. I am sure3 i have a few sets spare lying around. Ill sort a set out FOC. 
Cheers Matt
Matt your a star, once I've completed the build it's going to get booked in for a procomp set up 
welderman - 15/10/12 at 11:26 AM
Well managed to get out the house and down to work for an hour or so at the weekend.
Started the weekend off with a Masked Ball for my mates rugby club, Chorley Panthers, there was 250 all together, great night out and lots of money
made on the night for the club.


Description
im the good looking one with one eye lol
Then spent Saturday morning and afternoon feeling rough, then out again at night to a 21st.

Description
Sunday started off with a Mcdonalds breakfast, then off we all went PRAM shopping !.

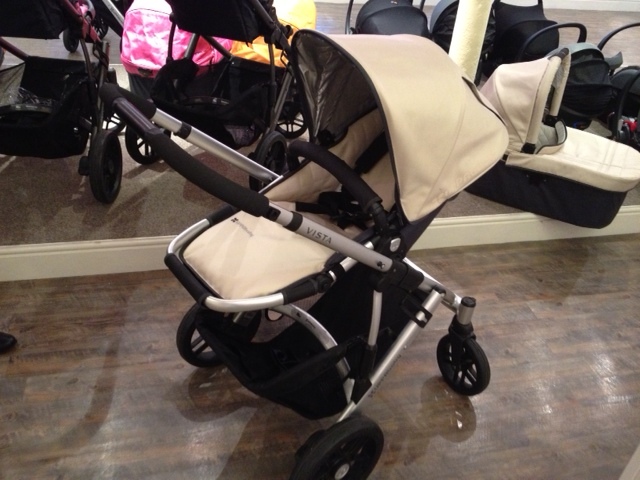
pram

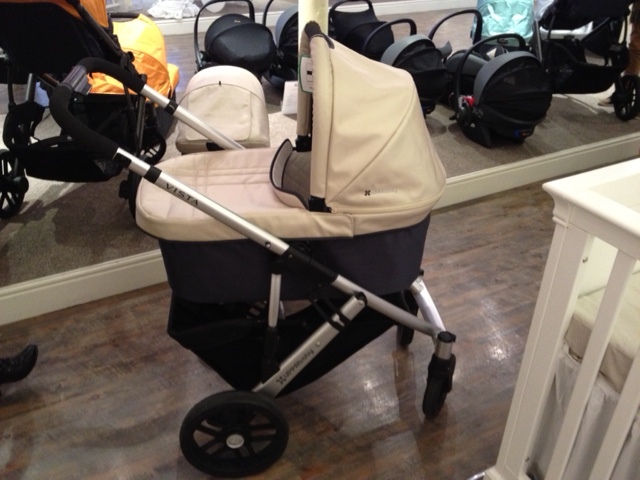
Description

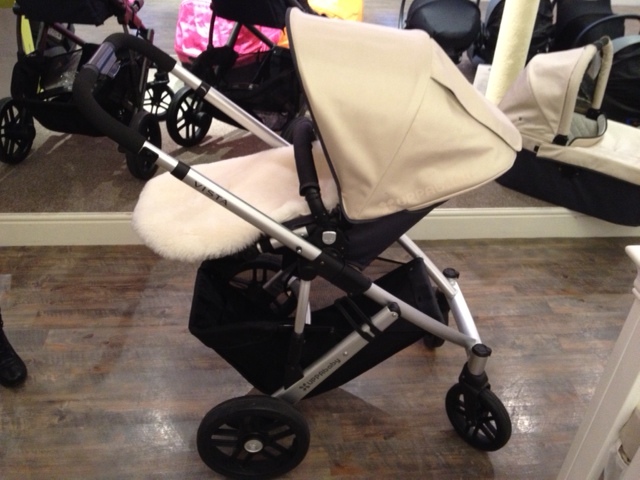
Description
Once all prammed out, managed to get away and have a little time on the car.
Clamped the carbon plates on.
Took the clamps off this morning and all looks good.

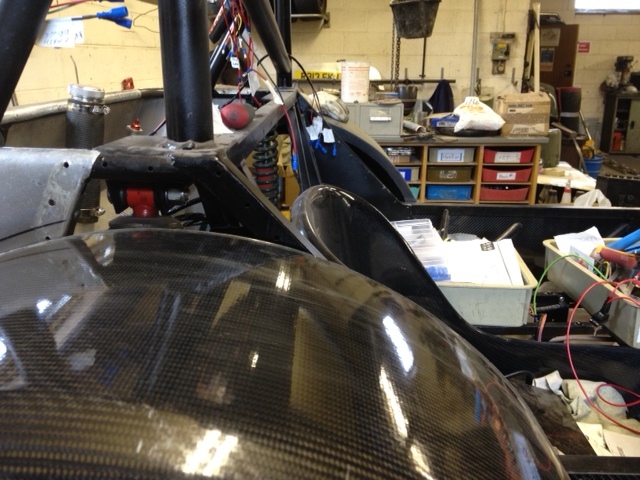
Description

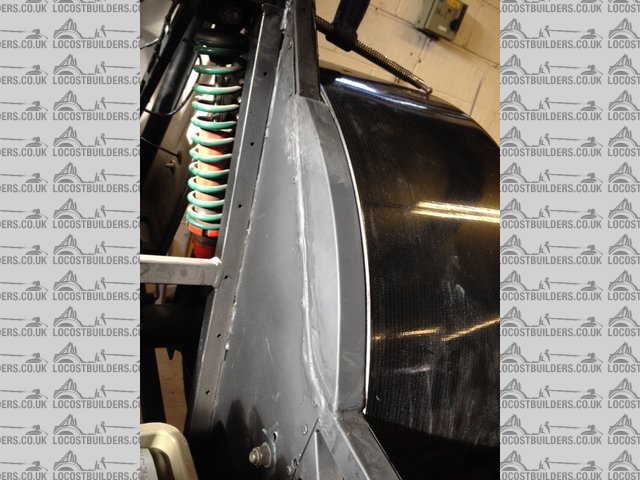
Description

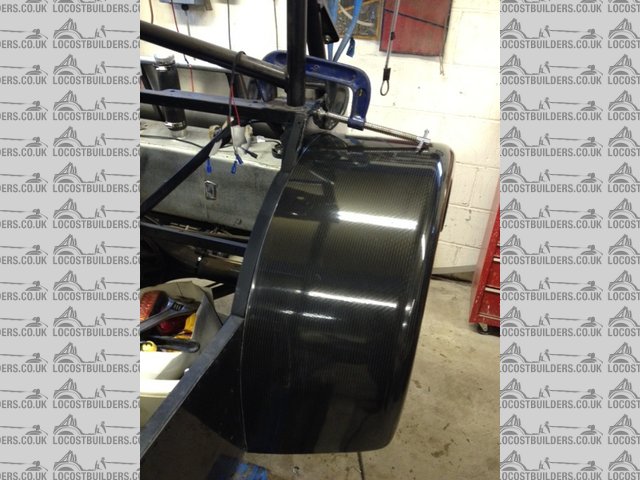
Description

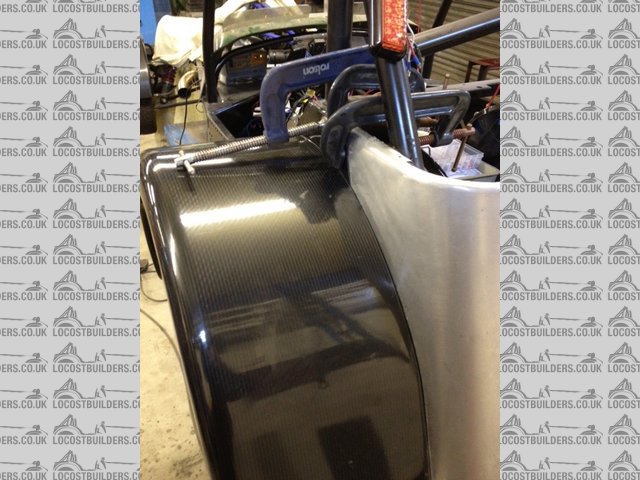
Description

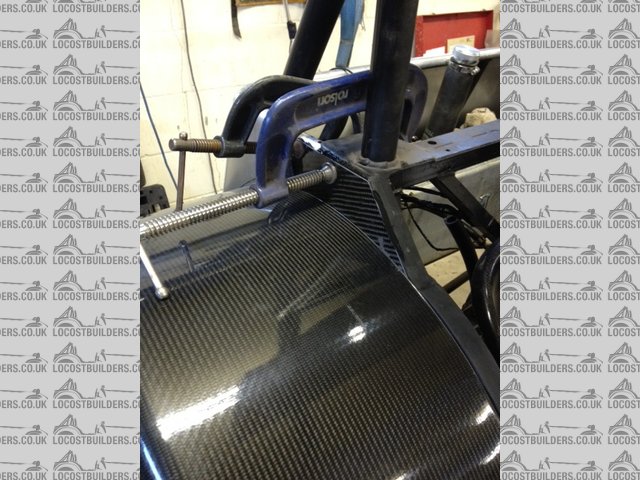
Description

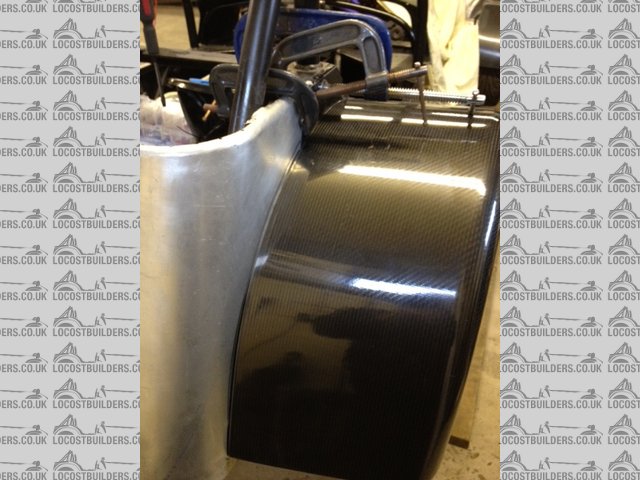
Description

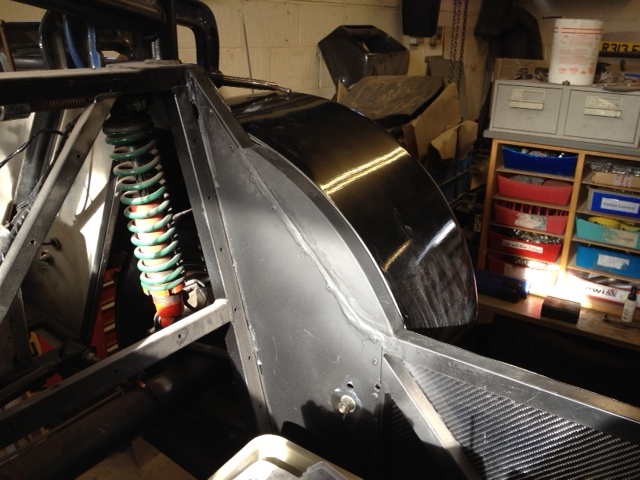
Description

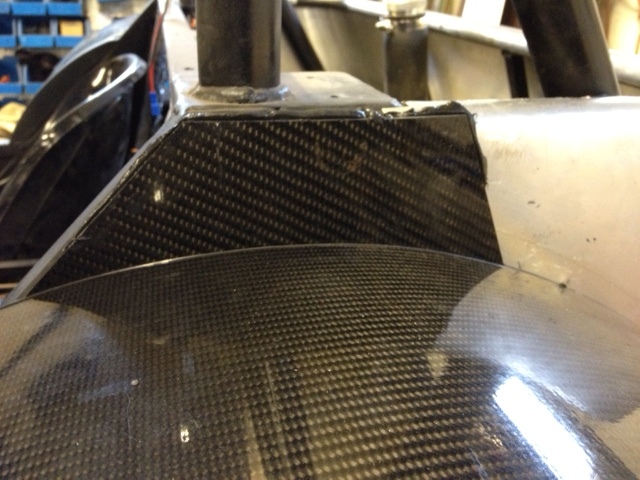
Description

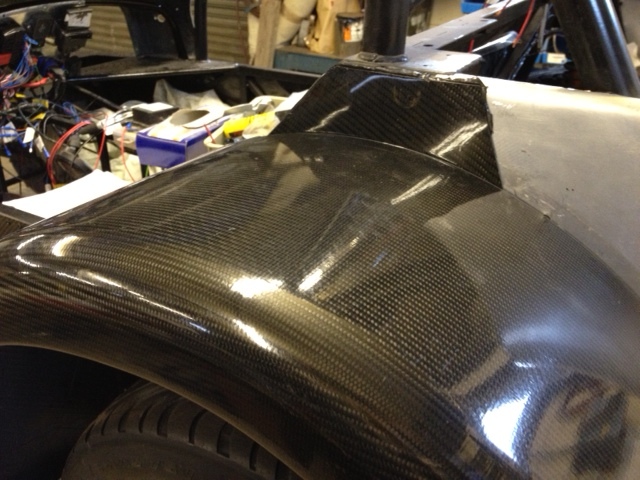
Description

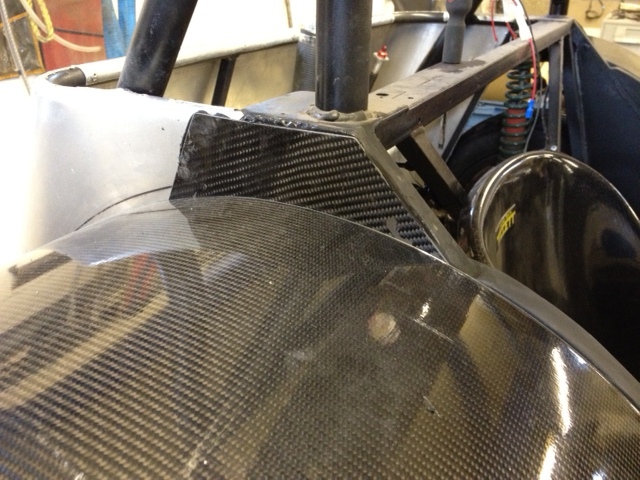
Description
scootz - 15/10/12 at 05:18 PM

welderman - 15/10/12 at 08:16 PM
quote:
Originally posted by scootz

It's all starting to come together now fella 
scootz - 15/10/12 at 08:19 PM
I'll come down for a nosey (and a cup of tea) once it's done! 
ReMan - 15/10/12 at 08:35 PM
Thread reported to mods due to excessive pram-ness.
Seriously this is going really well and I'm watching avidly, particularly the turbo bit, was hoping to do mine last year, but other things in the
way and taking my time. Your doing a great job, could you knock me up a plenum when you're bored?
What Turbo have you got/planned?
ATB
Col
Steve Hignett - 15/10/12 at 11:31 PM
quote:
Originally posted by scootz
I'll come down for a nosey (and a cup of tea) once it's done! 
Let us know when that is Red, and I'll meet you there...
Joe, the build is looking very good, stunning in fact.
I'm chuffed for you matey, it's gonna be one hell of a "locost".............
Just gotta get rid of that Ali back panel as its literally turning my stomach. I could make you a CF one when I come up on Friday, if you want?
welderman - 16/10/12 at 07:21 AM
quote:
Originally posted by Steve Hignett
quote:
Originally posted by scootz
I'll come down for a nosey (and a cup of tea) once it's done! 
Let us know when that is Red, and I'll meet you there...
Joe, the build is looking very good, stunning in fact.
I'm chuffed for you matey, it's gonna be one hell of a "locost".............
Just gotta get rid of that Ali back panel as its literally turning my stomach. I could make you a CF one when I come up on Friday, if you want?
hmmm more carbon, will speak later then, Scootz will even get some buiscuits 
welderman - 16/10/12 at 07:22 AM
quote:
Originally posted by ReMan
Thread reported to mods due to excessive pram-ness.
Seriously this is going really well and I'm watching avidly, particularly the turbo bit, was hoping to do mine last year, but other things in the
way and taking my time. Your doing a great job, could you knock me up a plenum when you're bored?
What Turbo have you got/planned?
ATB
Col
Turbo is a TD04 16T, most probably sort you a plenum out when your ready too
beaver34 - 16/10/12 at 08:01 AM
looks great, what rear archs are they?
Tommy P - 16/10/12 at 11:15 AM
Their carbon fiber rear arches - of course, and I agree with Steve, that back panel would be great in CF.
Great work Joe H, I feel privileged to be able to see the build in the flesh on a regular basis (as I'm never away from yours).
Can I come round and join the tea party too 
scootz - 16/10/12 at 12:26 PM
Biscuits!!! GET IN!!!!
Tommy P - 16/10/12 at 01:58 PM
And them little whist pies from bowens.
I should have my bonnet by the end of this month - nearly six months since ordering it in May!!!
welderman - 16/10/12 at 03:31 PM
pie's, tea, biscuits, owt else 
beaver34 - 16/10/12 at 07:53 PM
quote:
Originally posted by Tommy P
Their carbon fiber rear arches - of course, and I agree with Steve, that back panel would be great in CF.
Great work Joe H, I feel privileged to be able to see the build in the flesh on a regular basis (as I'm never away from yours).
Can I come round and join the tea party too 
yeah saw that but where from?
Tommy P - 16/10/12 at 09:12 PM
quote:
Originally posted by welderman
pie's, tea, biscuits, owt else 
Errm - cheese and crackers just in case any one prefers coffee 
welderman - 17/10/12 at 07:57 AM
quote:
Originally posted by beaver34
quote:
Originally posted by Tommy P
Their carbon fiber rear arches - of course, and I agree with Steve, that back panel would be great in CF.
Great work Joe H, I feel privileged to be able to see the build in the flesh on a regular basis (as I'm never away from yours).
Can I come round and join the tea party too 
yeah saw that but where from?
The arches were sourced over a period of time, i bought one off a chap at Stoneleigh show last year and the other one i already had for a riny day

The one from Stoneleigh was sold to me as a Carbon Mods one, and the other looks just as good, there are a few marks and scratches, one does have a
few small cracks but im happy, its all about the weight factor.
They weigh bugger all 
welderman - 18/10/12 at 07:49 AM
I hate drilling holes in Carbon. Measure 3 times drill once !
Carbon arches will have holes in for rear LED lights at dinner time. That's another job out of the way.
Pictures later 
adithorp - 18/10/12 at 09:03 AM
Looking good, Joe. Is there a date set for this tea party?
How many of the tubes in those prams could you replace with carbon?
mcerd1 - 18/10/12 at 11:06 AM
quote:
Originally posted by welderman
pie's, tea, biscuits, owt else 
just make it a BBQ and well all come round for a look 

Tommy P - 18/10/12 at 11:12 AM
This tea party is getting out of hand - Bring your own booze and camp beds or there is alternative accommodation locally as well as a spare room at
weldermans house. 
welderman - 18/10/12 at 11:31 AM
BBQ sounds good to me, can be sorted very easily.
Could be a good turn out, plenty of parking (under cover if its raining  )
)
D Beddows - 18/10/12 at 11:35 AM
Lol Joefest 
scootz - 18/10/12 at 12:35 PM
I'll have to buy a new hat for the occasion!
PS - remind me to leave my walking stick at home... I hear the cops in Chorley struggle to identify them from samurai swords and can get a bit
taser-happy!!!
adithorp - 18/10/12 at 12:40 PM
quote:
Originally posted by Tommy P
This tea party is getting out of hand - Bring your own booze and camp beds or there is alternative accommodation locally as well as a spare room at
weldermans house. 
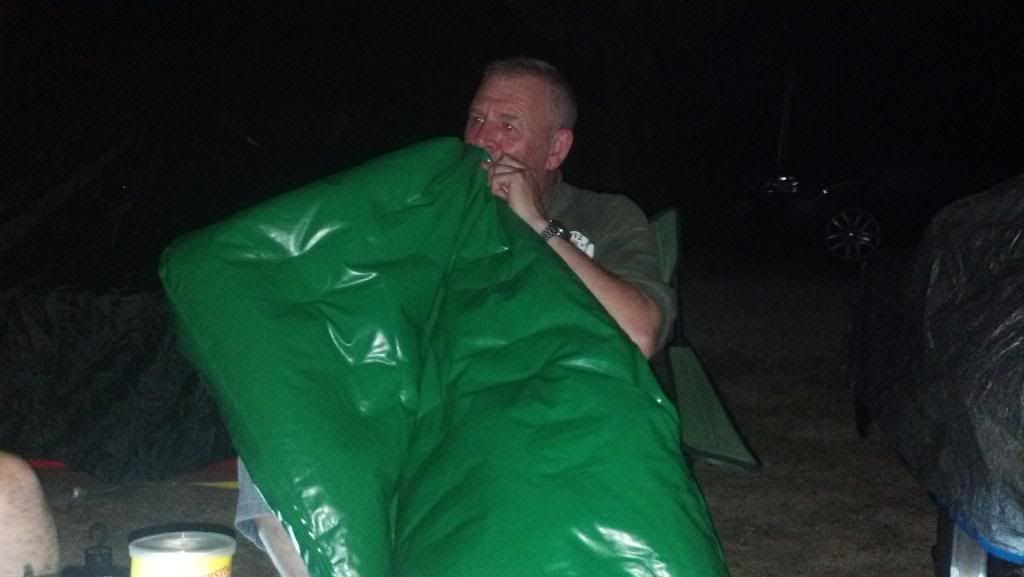
Yeah, don't rely on Tommy to blow up the camp bed; You'll be waiting all night...
welderman - 18/10/12 at 01:14 PM
quote:
Originally posted by scootz
I'll have to buy a new hat for the occasion!
PS - remind me to leave my walking stick at home... I hear the cops in Chorley struggle to identify them from samurai swords and can get a bit
taser-happy!!!
ye be very careful matey, mind you he didnt see it coming 
welderman - 18/10/12 at 01:18 PM
Joefest, lol.
Back to the car, dinner time and as usual did a bit on the car.
Arches drilled and lights fitted.
Looking good.

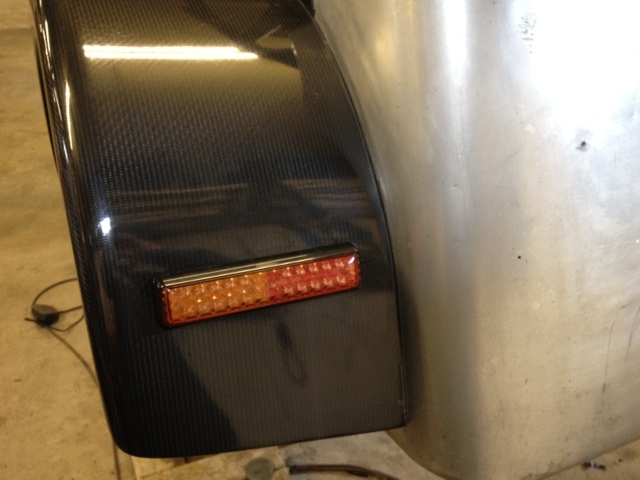
LED rear light

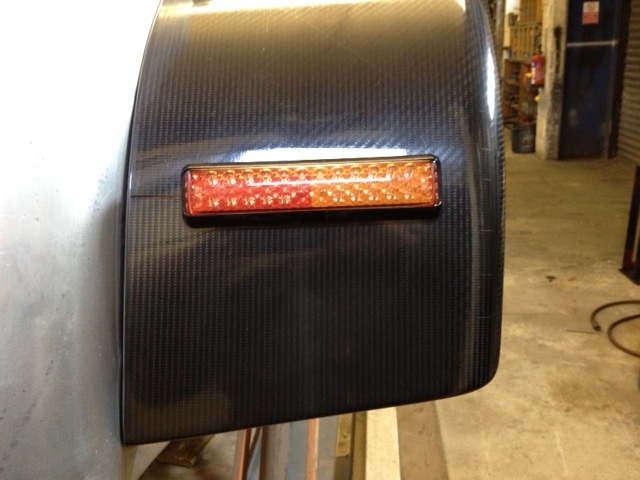
LED rear lights
gtr_garner - 18/10/12 at 01:23 PM
looking really good, im planning on turboing my hayabusa lump v soon, are you forging the internals or staying stock for the moment and keeping on a
lowish boost?
The fab work looks decent, i like the idea of a charge cooler and may find it is what ill have to go for when the time comes!
Tommy P - 18/10/12 at 02:12 PM
quote:
Originally posted by adithorp
quote:
Originally posted by Tommy P
This tea party is getting out of hand - Bring your own booze and camp beds or there is alternative accommodation locally as well as a spare room at
weldermans house. 
Yeah, don't rely on Tommy to blow up the camp bed; You'll be waiting all night...

Yeah I still hate fookin camping but like the idea of a hog roast with the BBQ.
Nice lights!
welderman - 19/10/12 at 08:10 AM
Todays job is to double check my propshaft measurements and try and get one ordered !!!!
its going to be a struggle getting it in now 
Bailey Morris and Dunning and Fairbank are my choices. Let see how there prices compare. 
MsD - 19/10/12 at 08:34 AM
quote:
Originally posted by welderman
Todays job is to double check my propshaft measurements and try and get one ordered !!!!
its going to be a struggle getting it in now 
Bailey Morris and Dunning and Fairbank are my choices. Let see how there prices compare. 
You tried NW props Joe?
I got mine made whilst I waited. Can't fault the service/ price/ quality! Only down the road from you aswell.
Looking good.
Mark.
TimC - 19/10/12 at 09:33 AM
quote:
Originally posted by welderman
Todays job is to double check my propshaft measurements and try and get one ordered !!!!
its going to be a struggle getting it in now 
Bailey Morris and Dunning and Fairbank are my choices. Let see how there prices compare. 
Joe,
I had quite an alarming conversation about props yesterday. I went to see a local specialist who does all sorts of work, including for Bond cars and
the 'Rainbow Sheikh's' collection as well as commercial and race car stuff. Before he'd quote, he wanted to know what BHP
I'm running and calculated how fast the prop would be spinning as well as angles etc. The upshot is, and he showed me the component
manufacturer's guidelines so wasn't just "up-selling", standard UJs and a 2.5" tube is not enough for my car where the prop
is exceeding 7000rpm at VMax. Make sure BM and D&F sort you out properly. My conversation with BM now feels a bit alarming.
Also, if you have a get together, give me a shout and I'll see if I can send you some of the UK's finest pies.
mcerd1 - 19/10/12 at 09:39 AM
once you've got the prop sorted (even if its the best possible quality) fit prop some catchers ! - they are cheaper than new knees
if it all goes horribly wrong....
welderman - 19/10/12 at 05:50 PM
I have a price off B&M  . More than I expected and not very informative
Spoke to D&F and he was very helpful. Price seemed ok as a budget. I've given him sizes etc, he asked about bhp weight if car etc and we
decided on a heavy duty type with stronger uj etc. will have a price by Monday.
While I have the welder out for the Center bearing mounts I think I will stick in some more steel for prop catchers 
Tim. Pies up this way are pretty damn good so you have got a pie challenge 
Mark. Gave up on northwest props as they did my first kit car pop and I wasn't overly impressed. But it was a bec and I'm not sure if they
had done one before
scootz - 19/10/12 at 06:26 PM
When's the Chorley Pie-Fest?
welderman - 20/10/12 at 01:04 PM
quote:
Originally posted by scootz
When's the Chorley Pie-Fest?
Does the car need to be finished. I guess not for a get together 
Could be a interesting day
welderman - 24/10/12 at 11:13 AM
Well ended up ordering a prop from D&F, quite a bit cheaper than BM, will hopefully have it by next week. Will take pictures once it arrives 
Going to make a start on the dash this weekend, going to opt for 2mm ally and stick some real carbon sheet on top, im NOT going to buy a carbon dash
 .
.
I also had a Locostbuilder visitor last week and we did a little job on his car. 
welderman - 29/10/12 at 09:23 AM
Well managed to get out of the shopping trip yesterday and started on the dash.
Made up of ally sheet for now, hardest part is/was trying to think where to put all the switches and guages.
Nearly done, couple of more holes and its done.
Might get time on it at dinner, but will see with month end coming up.

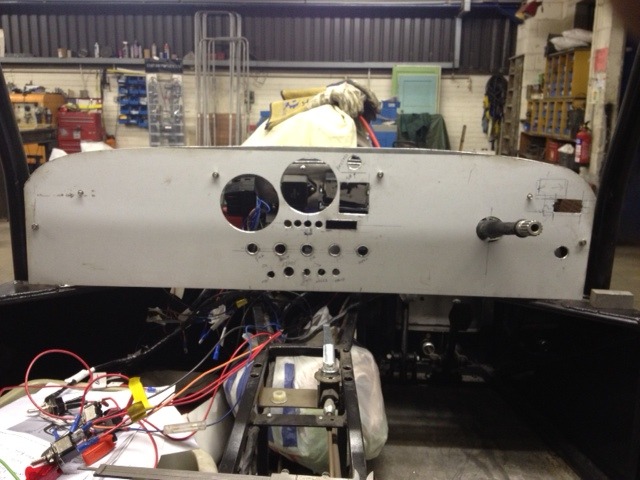
Dash
welderman - 30/10/12 at 03:32 PM
Milestone reached
Got to start her up today. Temp sender problem with fan running but it runs
Uploaded video to YouTube.
Link below
http://www.youtube.com/watch?v=jsZv4Fn2Tpo
bigfoot4616 - 30/10/12 at 04:55 PM
good to here it running joe, your in a better position than me now.
adithorp - 30/10/12 at 05:01 PM
I bet you're still grinning. How long is it since it ran before?
welderman - 30/10/12 at 05:11 PM
quote:
Originally posted by bigfoot4616
good to here it running joe, your in a better position than me now.
Have you broke it mate ?
welderman - 30/10/12 at 05:17 PM
quote:
Originally posted by adithorp
I bet you're still grinning. How long is it since it ran before?
It's been a good 5 years before it last ran. Just need to sort fan switch thingy out
bigfoot4616 - 30/10/12 at 06:24 PM
quote:
Originally posted by welderman
quote:
Originally posted by bigfoot4616
good to here it running joe, your in a better position than me now.
Have you broke it mate ?
yes, managed to get 7 trackdays out of it before it spun a bearing at anglesey
welderman - 30/10/12 at 06:51 PM
quote:
Originally posted by bigfoot4616
quote:
Originally posted by welderman
quote:
Originally posted by bigfoot4616
good to here it running joe, your in a better position than me now.
Have you broke it mate ?
yes, managed to get 7 trackdays out of it before it spun a bearing at anglesey
I had noticed you were on a track day mission. Shame about the engine though. Is it back on the to being fixed ?
bigfoot4616 - 30/10/12 at 07:51 PM
will probably just get a replacement engine, crank and one rod are badly damaged. they're certainly not cheap to rebuild.
welderman - 31/10/12 at 12:46 AM
Not as cheap as a old blade engine then.
I might be road worthy by the time you get it fixed I hope 
welderman - 5/11/12 at 11:39 AM
Well after a bit of a cooling fan problem i splashed out and bought one of these little beauties.
http://www.cbsonline.co.uk/product/Adjustable_Fan_Controller_Thermostat_STAT
I must say it works better than i thought, i set it to 60 deg then ran the engine and watched the temp gauge, bang on 60 deg the fan kicked in. HAPPY
DAYS.
Thanks for your help in a previous thread (shaunB).
Set to come on at 100 deg, maybe its a little high but these bike engines tend to run at high temps.
I will now be happy when im sat in long standing traffic.

welderman - 9/11/12 at 02:25 PM
Well been a bit of a funny week this, had a visit from a mate last Friday who like me has a CARBON fiber fettish lol 
Any way to put it bluntly he made me buy a load of materials to make some carbon fiber flared side panels, so this week ive been preparing myself to
do somethings ive never done  . LAying up carbon and glass.
Firstly i had to make a mould, this was the easy part, pulled some zintec sheet off the shelf and folded it into a channel shape.

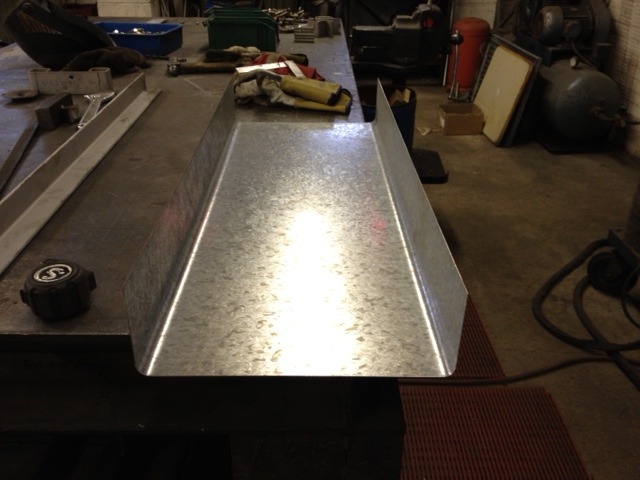
side panel mould
Then on Wednesday i had a delivery of resin, gloves,mixing pots,hardener,brushes, rollers, tons of stuff 
So at dinner time i set about going through the process of making a carbon side panel, well after i had mixed the first lot of stuff, dinner was over
!!, so carried on regardless and manage to slap it in my mould, long story is, by the time it had dried and i put the carbon in and glass i had
finnished work, gone home, came back after tea and finnished off.

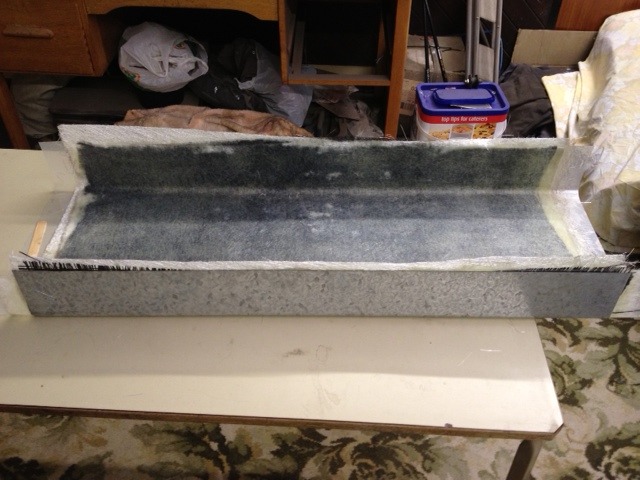
laid up carbon in my mould

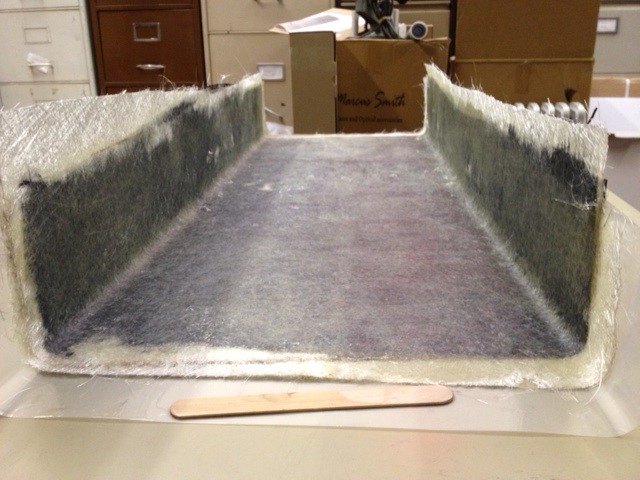
carbon side panel in mould
went home after it had been all laid up and waited until morning, that was a long wait i tell you.
Boom, its morning and back to work, ran upstairs and pulled the carbon out of the mould, to my suprise it looks absolutly fricking brilliant


 . Well i think so, there are a few little spots there dust must have dropped on while i was making the part, but im happy
as a happy person.

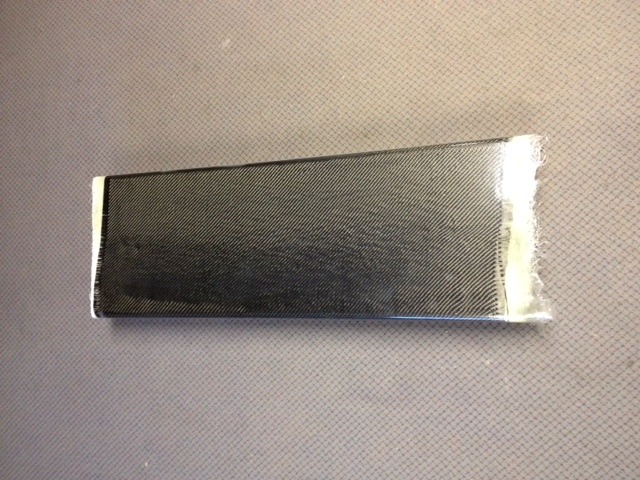
carbon side out of mould
Anyway, far from happy with the very fisrt carbon manufacturing i made another for the other side of the car 
Then thought sod it and made a dash blank from the same mould 


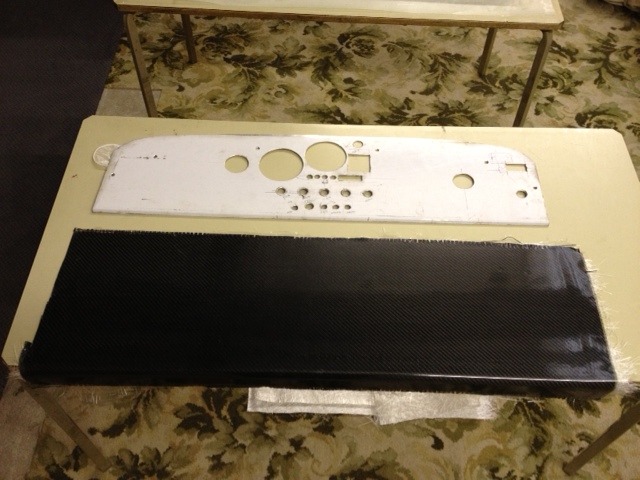
carbon and ally dash
So im now very happy with the results and i can finally say ive made some carbon bits for my own car. 
bigfoot4616 - 9/11/12 at 08:50 PM
would like to say looking good joe, but i can't see them properly. its not just these pics though i've been having issues viewing any on
this site today
welderman - 9/11/12 at 09:15 PM
I know some pictures I look at are ok. These ones I've put up are upside down !
It's looking good though lol 
hobbsy - 22/11/12 at 08:15 PM
quote:
Originally posted by adithorp
quote:
Originally posted by Tommy P
This tea party is getting out of hand - Bring your own booze and camp beds or there is alternative accommodation locally as well as a spare room at
weldermans house. 
Yeah, don't rely on Tommy to blow up the camp bed; You'll be waiting all night...

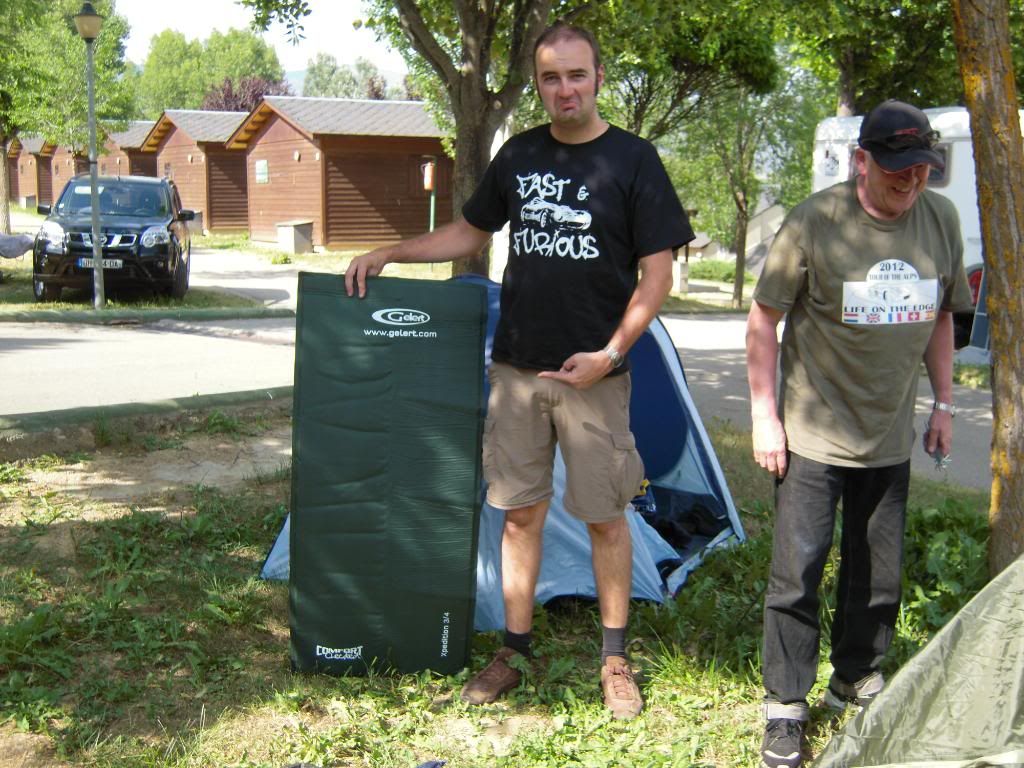
PMSL - I remember that mattress blowing up - took about an hour, interspersed with wheezing and even more "I f00kin hate camping!"
Next time around it's all going to be hotels  Just as well with my the 3/4 size mattress I took along by mistake!
adithorp - 22/11/12 at 09:32 PM
...and don't rely on Hobbsy to supply the mattreses' either...
hobbsy - 22/11/12 at 09:36 PM
One day you too will have a mattress related incident and then you'll be sorry.
MUWHAHAHAHAHAHA!!!!
Or perhaps you won't.
welderman - 23/11/12 at 02:09 AM
Lol call that a mattress 
welderman - 5/12/12 at 08:31 AM
Not a great deal done since last build post, had a big health and safety issue at work and ive been paper chasing for the last 2 weeks of my life !!!

No one injured thankfully
welderman - 15/1/13 at 02:24 PM
Well countdown to baby is here, baby is due this week some time, unless its late !.
Ive been on and off doing the car with work and family commitments, decorating and getting the house ready for our new arrival.
But ive have managed to spend the odd hour here and there over the last 5 weeks on the car and i think the over all out come has been good.
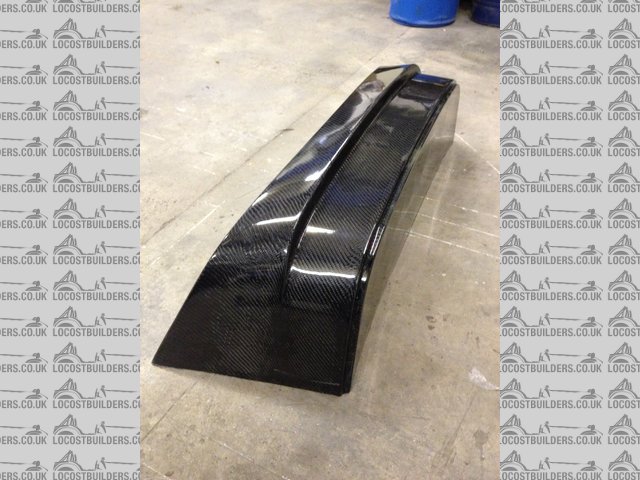
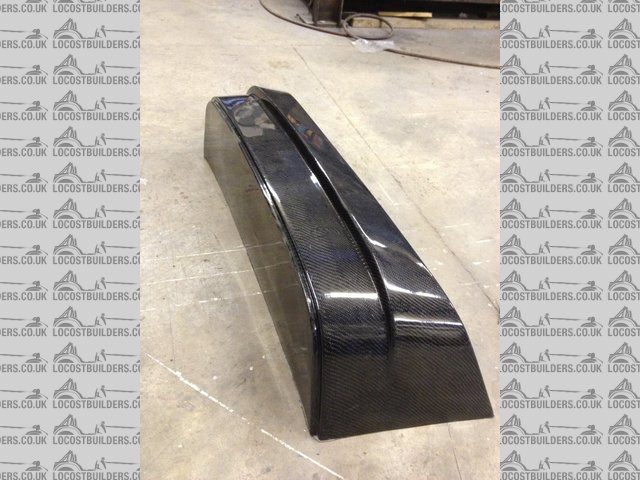
Searching on the world wide web ive yet to see a scuttle for the car i wanted, so ive ended up making my own !. boy what a task i set myself here.
Long and short of it is, made a mould from the old one after filling in holes etc etc (proper pain in the bum), bought a load of mould making stuff
and heypresto had my first attempt at making a mould from another kit car part.
After quite a few splinters later the mould was made, not the best because the epoxy mix i made while i was laying up the chop strand mat was so
carelessly knocked over my some idiot (ME) and spilt all over the floor and soaked up into the blooming carpet !!!!!!!!!!!!!!! grggrrggrgrgr. So by
the time i had mixed another batch the matting was virtually hard and was beyond using, the pictures say it all lol.

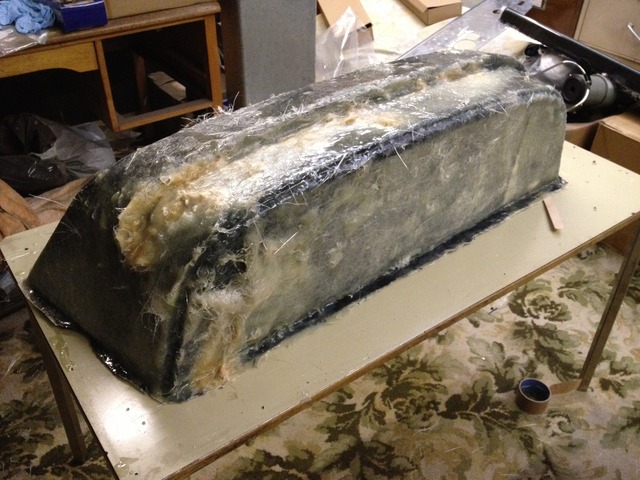
scuttle mould.

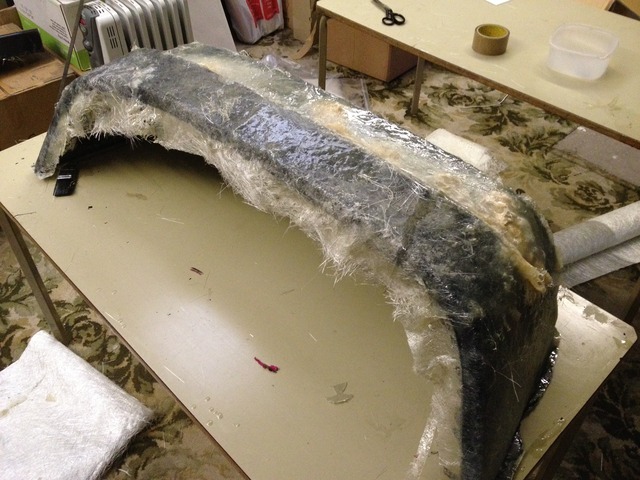
scuttle mould..

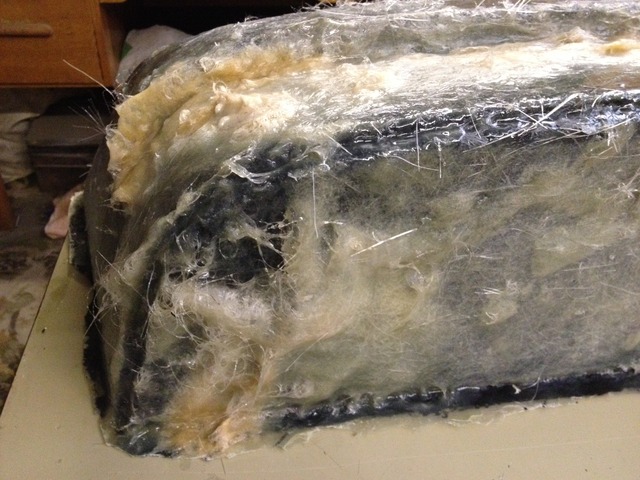
bad scuttle mould
So, after leaving the mould for a week because i was unable to bring myself to look at it i pulled and prised the mould off the scuttle and to my
amazement it aint half bad inside, yay a shouted. Looking closely there were a few scratches and i filled them in and gave it a good olde polish.

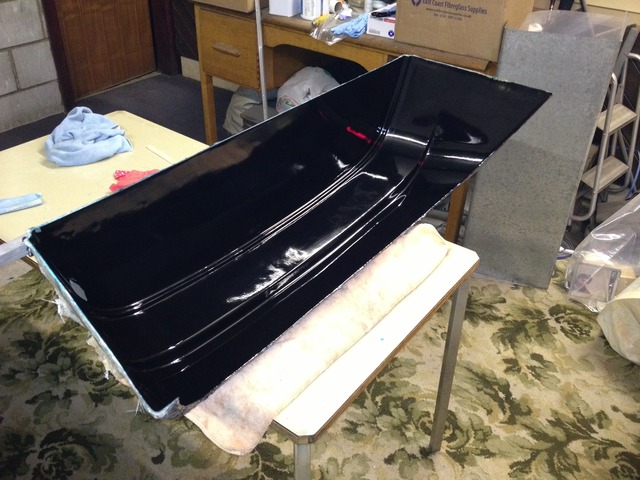
splendid inside mould :):):)
Next up is buy some more gel coat, wax release agent matting and materials etc to make the scuttle, had to wait over Christmas for this lot.
Happy New Year and the bits arrive yay, i can start making my scuttle wahooo. Made some templates for it using an old towel and cut the bits of
matting up. Few coats of this that and the other lol and bish bash bosh sctuule has been made. Leave it for a day for it to harded up nice and
proper.
Next day cut my new scuttle out of the mould, give it a reet good polish and it looks blooming fan blooming tastic. Hope you all agree.

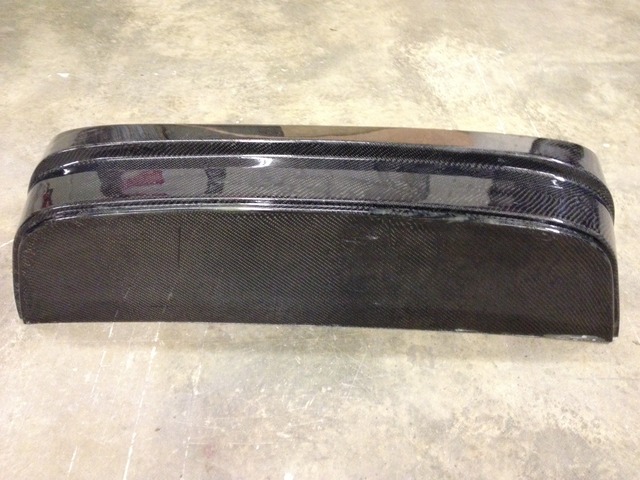
carbon scuttle.

carbon scuttle..

carbon scuttle...

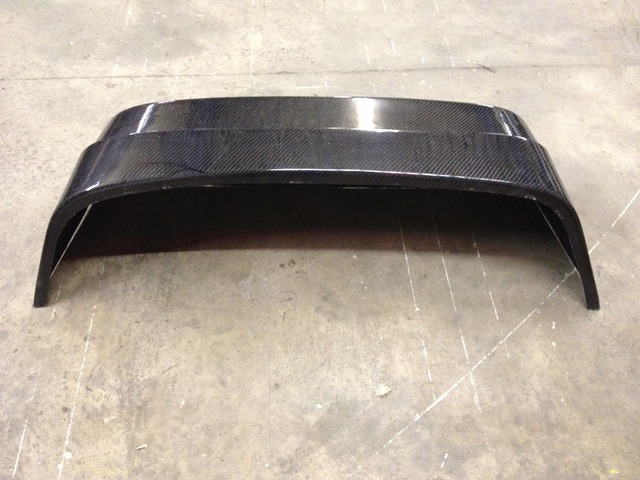
carbon scuttle....
Thats enough for now, still needs a bit of a trim up and a few little bits to tart up, but as its my first go im very very happy with it.
Catch you later, never know next time i post i could be a DAD again 
cerbera - 15/1/13 at 02:32 PM
Looking good Joe. 
welderman - 15/1/13 at 06:26 PM
Cheers fella. How's your winter mods coming on
TimC - 15/1/13 at 06:33 PM
You flash bu**er!
cerbera - 15/1/13 at 06:49 PM
quote:
Originally posted by welderman
Cheers fella. How's your winter mods coming on
Slowly. Hopefully will be giving you a call for some ali welding in the next few weeks 
MsD - 15/1/13 at 09:05 PM
Nice one Joe. When you starting to make carbon parts for us to buy then?!
Its looking pretty good, im guessing you have no deadline for it to be on the road then?
Just out of interest- how are you attaching the scuttle?
Mark.
adithorp - 15/1/13 at 09:23 PM
Nice! I wonder if I can guess who put the idea of making it in carbon in your head?
welderman - 16/1/13 at 10:23 AM
I dont think i will be selling any parts, there good enough for me but im sure if i were to re-sell them they would have to be perfect. Im going to
fold some small angle fron ally and stick them too the scuttle then fix the sculltle with rivinuts.
Flash  ahahhh, no not really, just a plain one would not match the rest of the car
Hmm Ady i wonder who that might be !
[Edited on 16/1/13 by welderman]
RK - 18/1/13 at 01:29 PM
Very inspiring! You, and some of your mates need to come to Canada and show us how it's done.
welderman - 1/7/13 at 10:34 AM
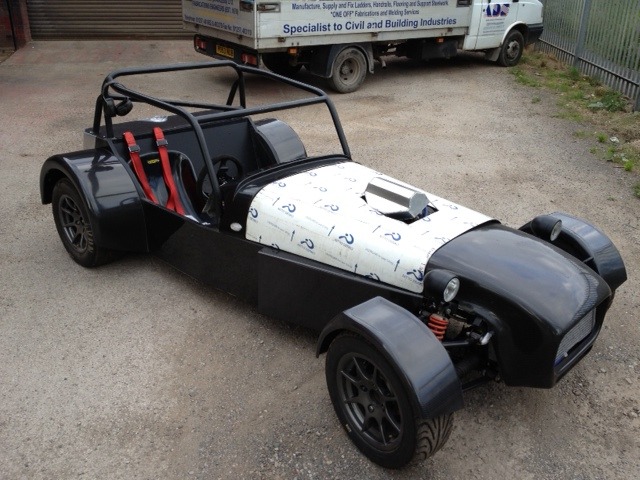
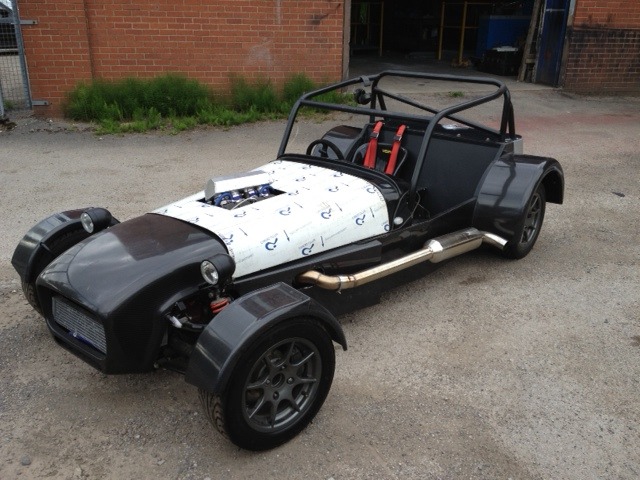
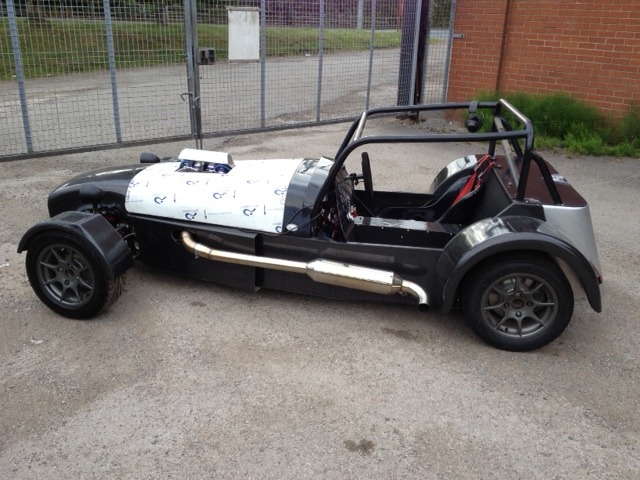
Not many updates in a while, but did manage a few hours on it a couple of weeks ago, more panes done and fitted, looks like a car now.
Happy so far, just hope it works lol.

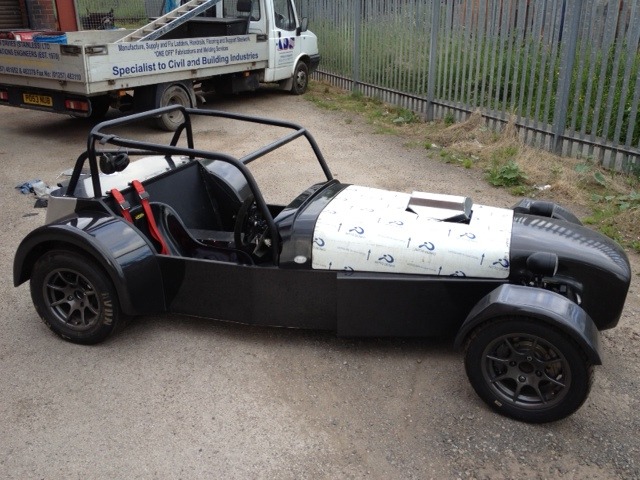
nearly there 1

nearly there 2

nearly there 3

nearly there 4
bigfoot4616 - 2/7/13 at 06:41 PM
doesn't look so far away from being done now joe, when do you plan on getting it finished?
welderman - 2/7/13 at 11:24 PM
It's not far off. Dash is nearly done, need some softer front springs and I'm waiting for V5 to come back. Then get an mot hopefully
Couple of little bits then 
[Edited on 3/7/13 by welderman]
welderman - 25/7/13 at 08:33 AM
Well baby Matilda is 6 months old and how time flies 

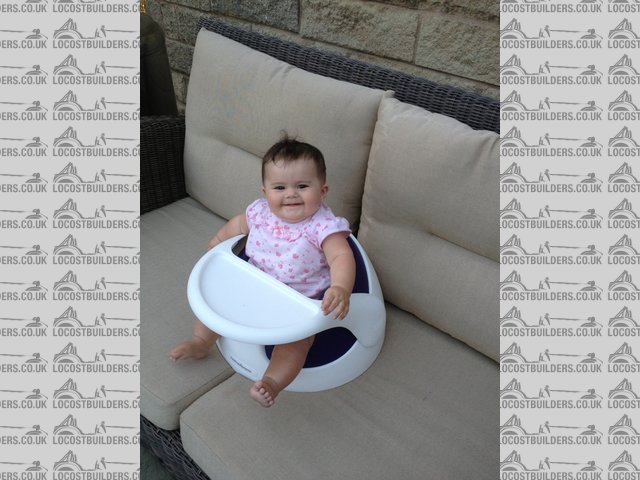
hah
She loves motorsport, F1 Matilda

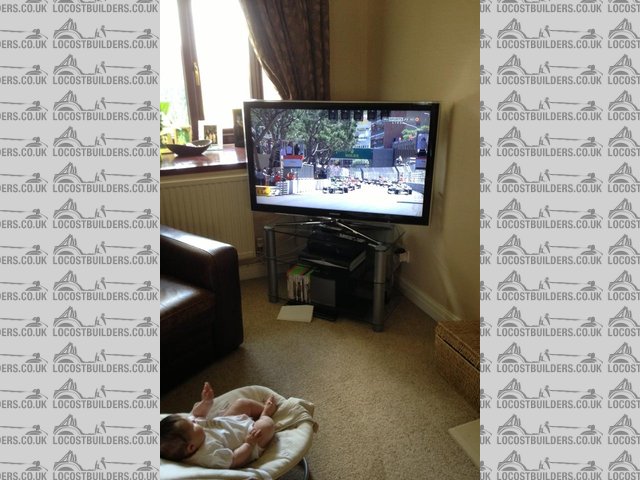
F1 matilda
Moto GP Matilda, even taking the corners full tilt holding her feel, hehe. Just to add, I got told off by the Mrs as Matilda nearly fell out of the
bouncer, even though she was strapped in going from side to side. We were nearly wetting ourselves laughing lol.

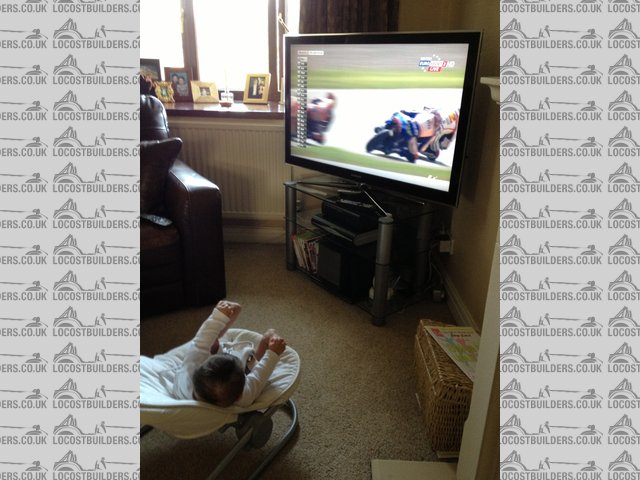
moto gp matilda
oh and just like her Dad, FIRE hohohehehaha

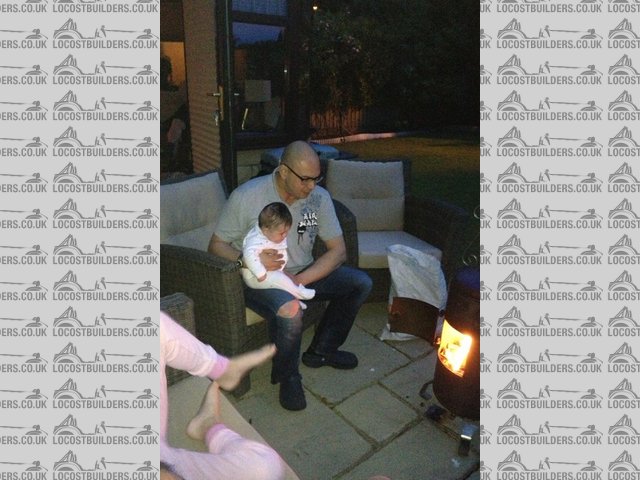
Fire hehehehehehe
[Edited on 25/7/13 by welderman]
mcerd1 - 25/7/13 at 08:42 AM
looks like you've got her on the right track - how long till she can hold a spanner ? 
welderman - 25/7/13 at 08:51 AM
quote:
Originally posted by mcerd1
looks like you've got her on the right track - how long till she can hold a spanner ? 
funny you should say that lol.
We have to put a recording of the F1 gp on if she gets a bit cranky lol, it soon calms her down. She has now started watching Rory the racing car, so
the Mrs tells me in a morning. 
welderman - 25/7/13 at 09:23 AM
Now the best bit.
Finnished the bonnet, put some louvers in. ( I could probably do these in small sheets of ally if I can get the machine set up to do a few)

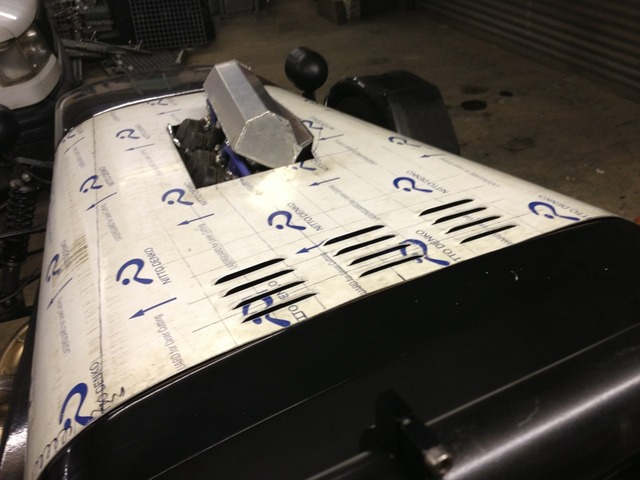
home made louvers
welderman - 25/7/13 at 09:27 AM
Ended up using 3M carbon wrap for the back panel, looks good I think.

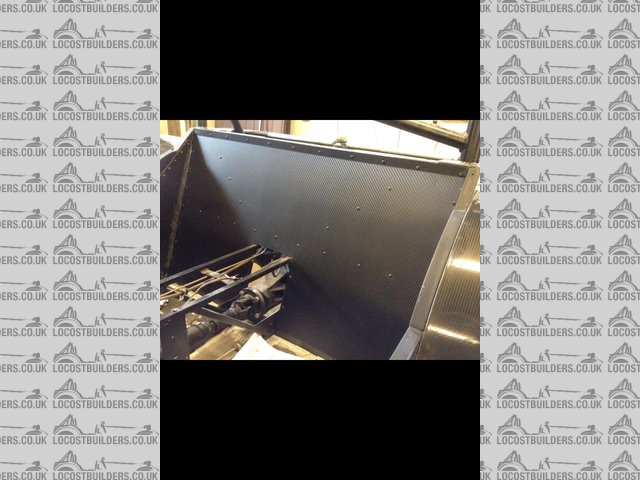
inside rear panel
Quite easy to do.

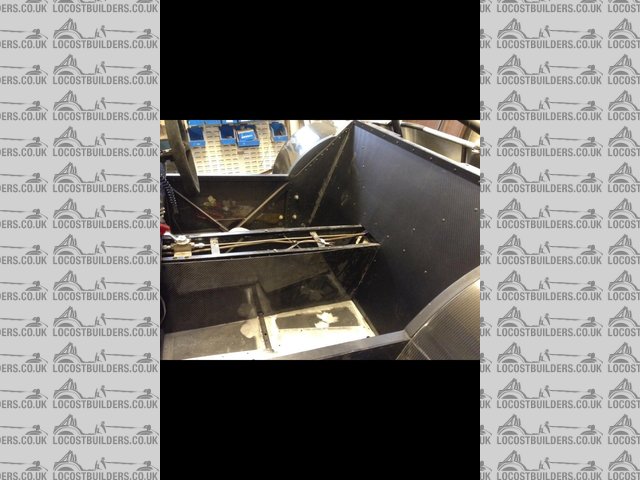
inside rear panel..
welderman - 25/7/13 at 10:43 AM
And finally took the Procomp to infant school for the middle daughters last day show and tell, Kirsty was well made up, her teacher was froughing at
the mouth he was so excited lol.

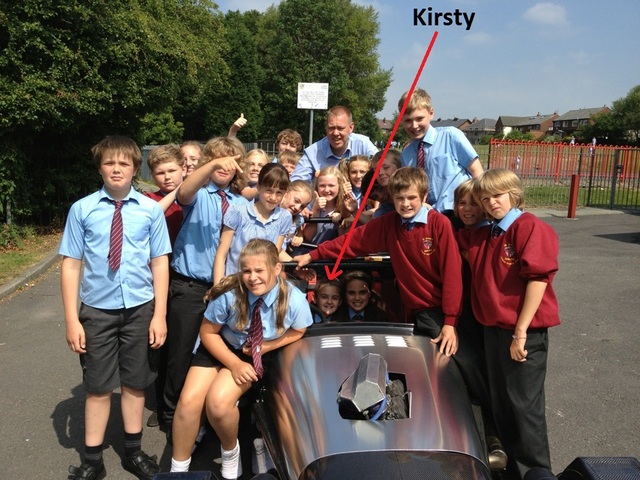
Kirsty school

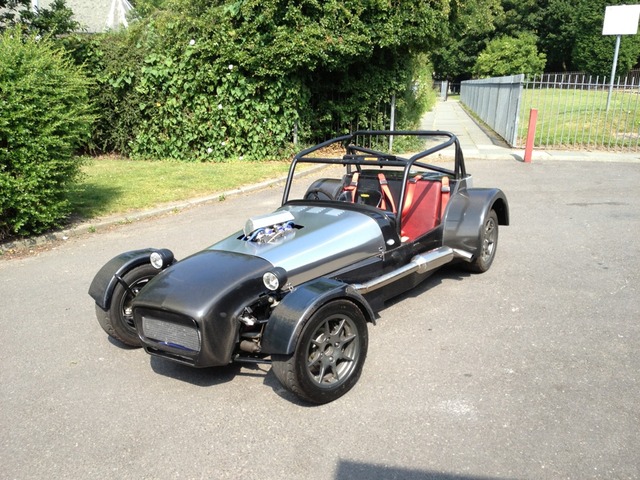
done

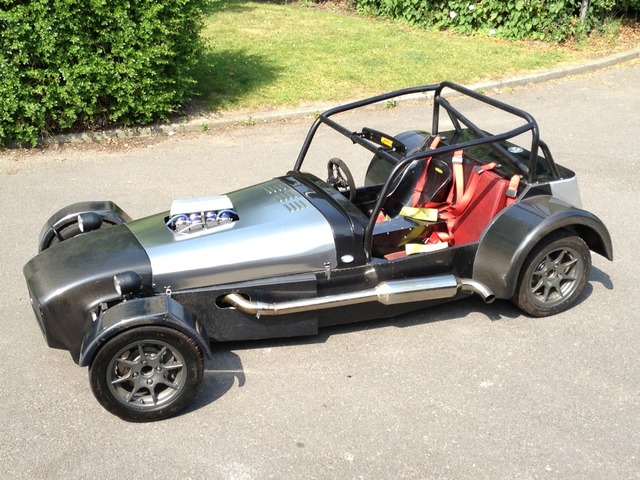
Done.

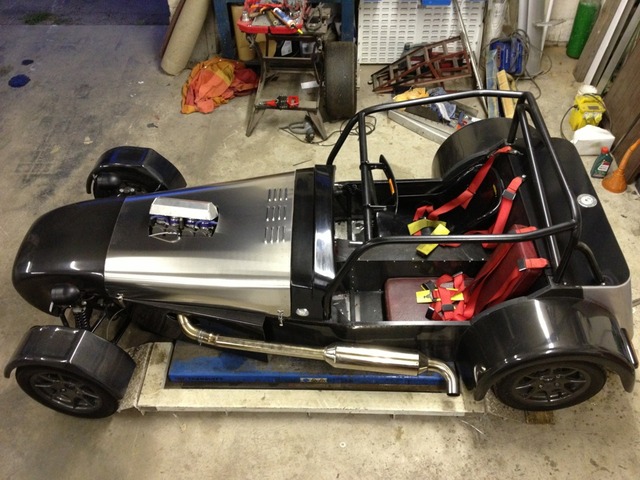
Done..

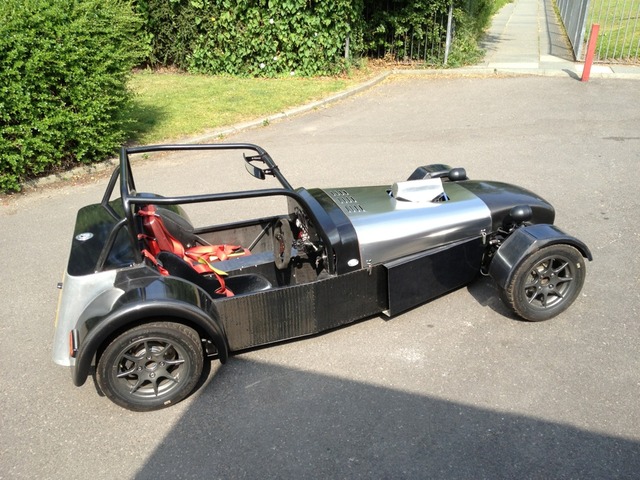
Done...

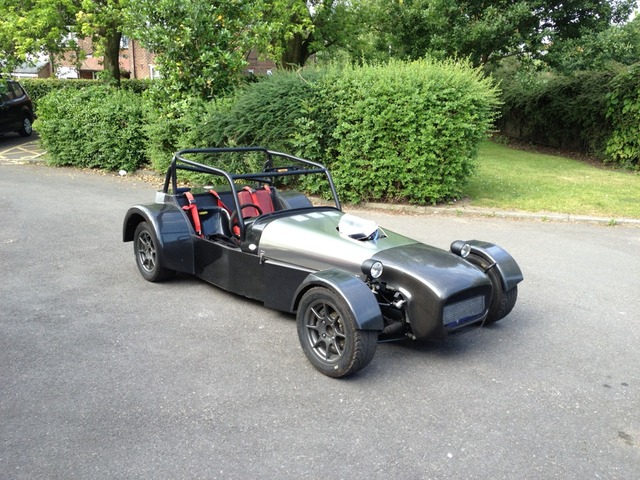
Done.....
Now a big thanks to you all, Wife and kids for letting me come down to work late at night, My business partner as it takes up room in the work shop .
TommyP, Scootz, Steve H, JhonnyP, LocoR1, Bigfoot, Matt, Andy Bates and all those who gave given me a kick up the arse to get it finished lol, sorry
if ive missed some one out.
Its now got an MOT and insurance, just need to tax it. Appart from a fueling problem its ready to go.
Cheers eveyone
cerbera - 25/7/13 at 11:00 AM
Congrats. Good to hear you're back on the road 
bigfoot4616 - 25/7/13 at 04:24 PM
looking good now mate. get the fueling sorted and get it on track
i'd love a passenger ride and see how a turbo BEC goes.
trackaction have a day at oulton in november i'm planning on doing
welderman - 25/7/13 at 09:02 PM
Bigger jets will be in tomorrow I hope.
welderman - 9/9/13 at 03:35 PM
Not much of an update, got the bigger jets fitted, its rained and time hard to come by with the little un.
Contemplating selling it as car time is very very hard to come by.
Any one make me a reasonable offer its theres. 
Pat_T - 5/10/13 at 05:55 PM
very nice build! I imagine a turbo BEC would fit nicely inbetween the rubbish BEC's that have no torque, and the equally rubbish (depending on
who you talk to!  ) CEC's that are too heavy!!
One quick question though, how did you get those brakes underneath 13"s? and who makes the discs with bells in that diameter? if you could PM me
some info would be much appreciated.
cheers,
Patrick
welderman - 28/10/13 at 09:28 AM
http://locostbuilders.co.uk/forum/34/viewthread.php?tid=185462
imp paul - 28/10/13 at 10:22 AM
joe thats a nice build you have done there mate, it looks cool as normal top job pal 
welderman - 13/2/14 at 01:37 PM
Sorry to say this car has now sold, but theres always another project lol.
gaz_gaz - 13/2/14 at 03:42 PM
Well done. Onto the next 1
Does this mean you now have a free space for me Joe? 
welderman - 13/2/14 at 04:28 PM
Not at the moment fella, got the mini on the ramp at the moment. bit of a problem with it. A wheel fell off lol
Doctor Derek Doctors - 15/2/14 at 10:37 AM
Meant to ask this ages ago mate, but did you ever document all of the parts and work needed to turbo the 919? If so would you be interest in selling
the details as I would like to do mine at some point.
I'll send over a more detailed U2U later.
 .
. 
 , it did not however come with an engine as i had already
had one from a previous build.

 rear wheel steering too


 , only had 1st, 5th and 6th left lol.


