Padstar
|
| posted on 27/4/14 at 04:57 PM |

|
|
Engine & Box Install Questions
Hi,
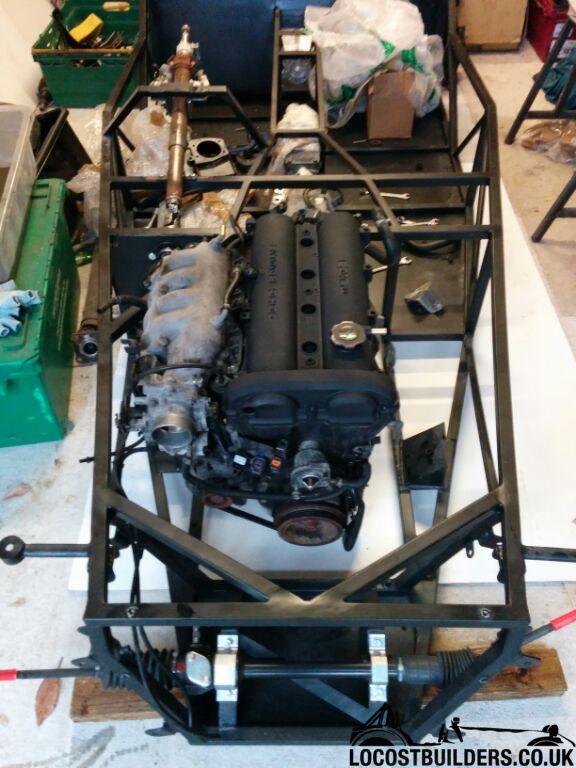
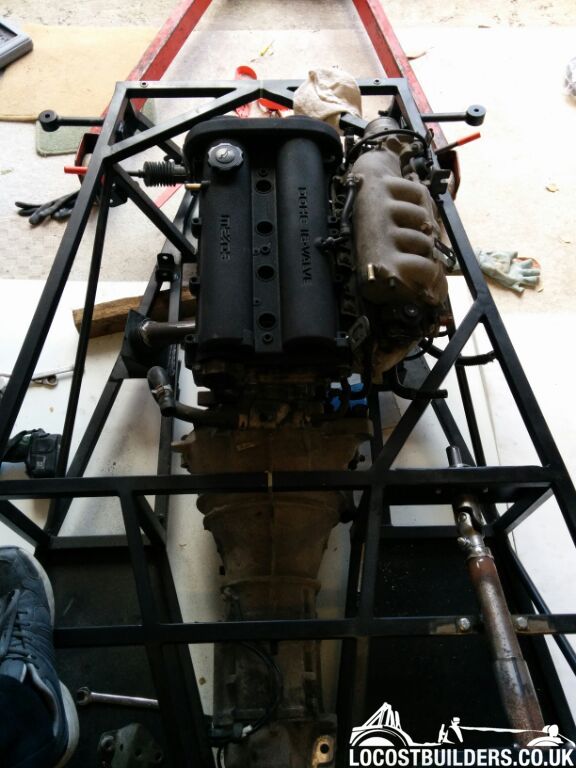
I have been trying to get the engine and box test fitted into the chassis for some time now. I got myself an engine crane from a friend last weekend
and want to try and get it in next weekend.
I have been eyeing it up today having tacked the engine mount plates in today and it looks worryingly tight?!
I am going with the fact that i have built to the instructions and that it is going to fit. A few questions i have if anyoe could assist in
answers;
1) What is the best way about going about fitting it for the first time (me and old man just man handling it with the help of the crane?)
2) Where exactly should the engine sit in relation to the front of the chassis/entrance to the tunnel/floor of chassis?
3) Should it be leveled and if so from the top?
4) Should it sit perfectly central to the chassis?
It is an MX5 set up.
Any help much appreciated as i am particularly nervous about this for some reason.
|
|
|
|
|
Slimy38
|
| posted on 27/4/14 at 06:27 PM |

|
|
I can't help, but I'd love to see pictures as it's something I'll be attempting sometime soon!
|
|
|
adithorp
|
| posted on 27/4/14 at 07:47 PM |

|
|
quote:
Originally posted by Padstar
1) What is the best way about going about fitting it for the first time (me and old man just man handling it with the help of the crane?)
2) Where exactly should the engine sit in relation to the front of the chassis/entrance to the tunnel/floor of chassis?
3) Should it be leveled and if so from the top?
4) Should it sit perfectly central to the chassis?
1. Yes, combo of using the crane to take the weight and muscle power to get it in the right spot.
2. Commonly, as far back as it'll go to help with the weight distribution. How far you can go back will depend on clearance between bellhousing
and tunnel entrance. Remember it'll move slightly on the mountings so prob' best to have 1/2" clearance.
3. As level as possible. Top edge of the head is as good a place as any to measure and prob' the most accessible. Height will depend on your
bonnet and how low you're happy to have the sump.
4. Not too vital but close if you can (slightly to the nearside will help counteract your weight on the off side if you want to be pedantic). It is
important that if possible the gearbox output shaft and diff input center lines are parallel but off-set (either height or sideways); This puts slight
angle on your prop' shaft UJ's and helps prevent wear in the bearings. So assuming the diff is square to the chassis the engine/gearbox
needs to be aligned with the chassis.
"A witty saying proves nothing" Voltaire
http://jpsc.org.uk/forum/
|
|
|
ste
|
| posted on 27/4/14 at 07:48 PM |

|
|
I have just done mine this weekend.
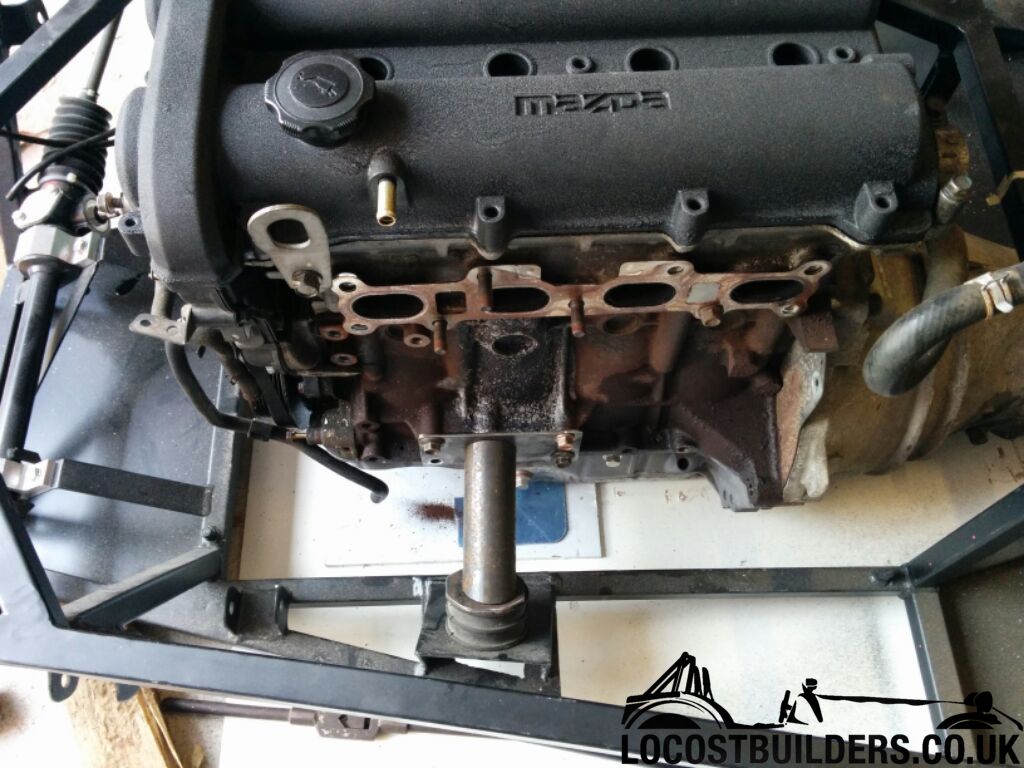
First off, you will need a shortened sump as otherwise you will be ripping it off on the first speed bump you go over.
I cut mine down and made the plates to rebuild it from 6mm ally. I had it welded by K4KEV on the haynes forum.
Next you will need to cut out the lump of ally at the back of the gearbox that used to bolt to the PPF (the long ally channel that ran down the
MX5.
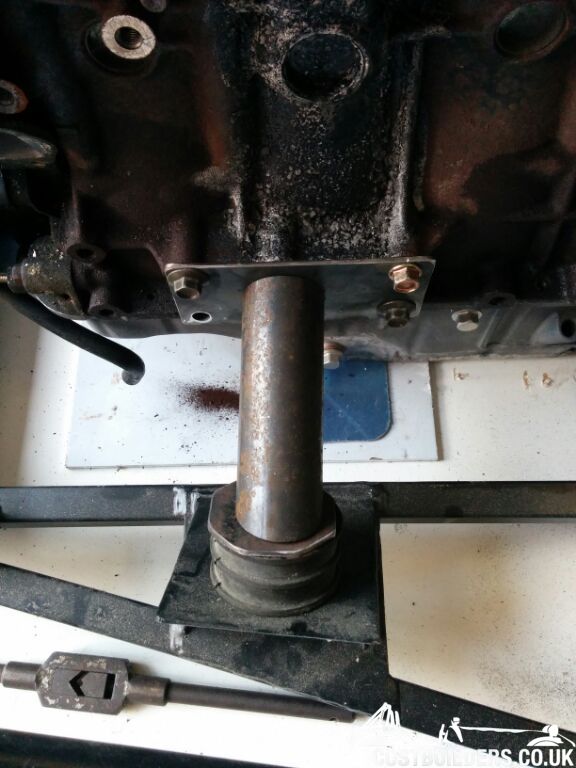
Next, tap out the rusty holes on the block with an M10 x 1.25 tap and make the plates to bolt to the engine block
I Then lowered the chassis to the floor and stood it on 45mm blocks of timber. This gave my my ground clearance.
I then used a length of box over the top of the chassis to check the engine was level and chocked up under the rear of the the gearbox to level up the
engine so the exhaust ports were all level.
I then measured and measured and measured again to make sure the engine was dead centre in the bay.
Then made the mounts using 2" tube with 3mm wall.
The engine and box are a 1.8 from a mk2 but on mine, the second ring around the bell housing was level with the front of the foot wells.


|
|
|
Padstar
|
| posted on 27/4/14 at 10:24 PM |

|
|
Do you have any pictures of the sump alterations. Is it necessary to reduce it and can they be purchased/sent away for the work to be done?
|
|
|
Padstar
|
| posted on 28/4/14 at 12:44 PM |

|
|
Also how much did you reduce it by? there is no mention of it in the book but sounds ligical.
|
|
|
ste
|
| posted on 28/4/14 at 10:19 PM |

|
|
I'll get some pictures tomorrow for you.
The sump was cut inline with the bottow of the rear flange for the gearbox.
Some links here to how others have done it
http://mazdafield.wordpress.com/2012/07/27/modified-sump/
http://forum.wscc.co.uk/forum/index.php/topic/96138-mx5-modified-sump/
http://andyswestfieldbuild.wordpress.com/
|
|
|
brum_gustavo
|
| posted on 29/4/14 at 01:05 AM |

|
|
I didn´t have an engine crane, so I made a dolly with scrap wood and 4 office chair wheels. I lifted the chassis (much lighter than the engine),
rolled the egine in, and lowered the chassis around the engine. Then I slipped the transmission in place (it´s light enough to be done without
mechanical help) and bolted it to the engine. Then I could move them foward and back till I found the best position (as far back as you can without
getting too close to chassis tubes). My transmission has an angle of 2 degrees in relation to the diff (pinion angle). I am using shims under the
transmission mount to tune pinion angle.
Build diary: http://gustavobrum.wordpress.com/
|
|
|
Padstar
|
| posted on 29/4/14 at 06:33 AM |

|
|
Thanks for the links. The pictures really help visualise some ideas.
Does anyone know how far the underside of the bonnet sits from the top rails either side of the engine. I don't currently have the bodywork so
wouldn't mind a quick sanity check when installing the engine to confirm that it is likely to sit under the bonnet when it arrives.
|
|
|


