
Duratec Engine Swap Thread
davidimurray - 27/7/14 at 04:41 PM
So started collecting bits a couple of months ago for this, but have only just got around to starting a thread - actual swap won't be until
winter so this is going to be a long one!
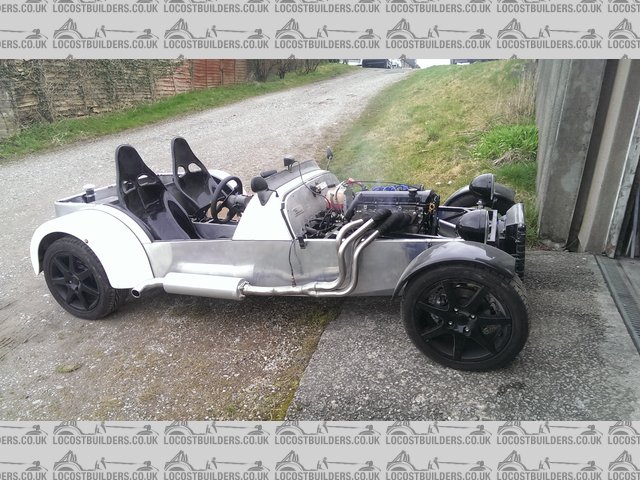
My Haynes Roadster currently has an 1800 Pinto - this was a conscious decision and allowed me to use a single donor and get an age related plate so no
need for a cat in future. Car has been on the road for 7 months now and is great fun, but feels a little underpowered. At a guess, the car must be
somewhere around 85-100bhp at present.
The Plan
I looked at various options for the swap, I wanted something that would be tuneable in future and would reach 200bhp with some work. Considered Zetecs
etc, but the exhaust/intake would be opposite to what I have now so while I might save money on bellhousings, I would need a whole new exhaust. So the
challenge is to build a 'cheap' Duratec - I would be more than happy with 150bhp to start as that would be a good hike over the Pinto. The
Pinto is running a Megajolt and ZX6R carbs, with a zx6r fuel pump so the plan is to use these on the Duratec. Budget - well always a tough one - I
would like to think sub Ł1k for the swap - everyone says it is not possible - am I a fool - we will see what evolves!
Current Status
Collecting bits started a couple of months ago -
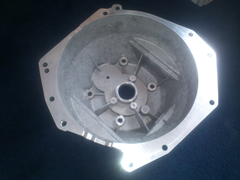
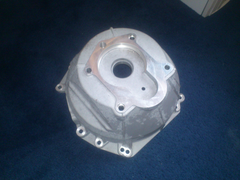
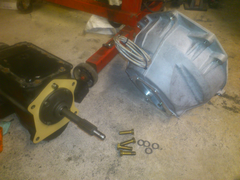
All started with a Bellhousing and slave cylinder on ebay - Ł200 for both. Had planned on going with a cable clutch, but when I looked at it I would
need a different clutch arm etc and with my discount bell/hyd slave the cost would be about the same.

Description

Description


Description
Also picked up an ST150 Starter


Description
To be continued .....
ali f27 - 27/7/14 at 06:05 PM
Hi good luck with the build i had 1.8 pinto and have gone duratec went fuel injection and bodies and when i think about it thats were most of the
money is so good luck with it and lets see how cheap you can do it.
Cheers ALI
davidimurray - 27/7/14 at 06:47 PM
quote:
Originally posted by ali f27
Hi good luck with the build i had 1.8 pinto and have gone duratec went fuel injection and bodies and when i think about it thats were most of the
money is so good luck with it and lets see how cheap you can do it.
Cheers ALI
Cheers Ali - how was the difference between the pinto and Duratec?
When I get on my other PC will update with some costs.
davidimurray - 27/7/14 at 07:00 PM
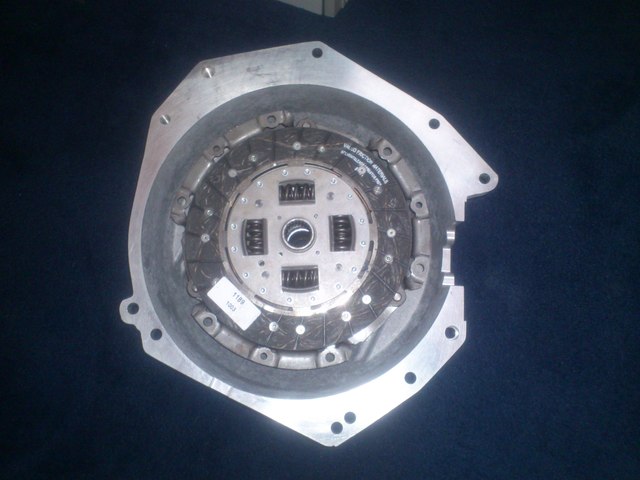
Picked up a new VCK726 clutch - from one of the older mondeos

Description
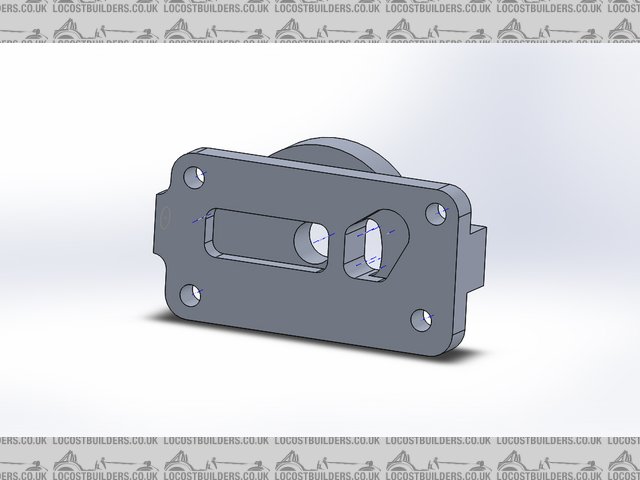
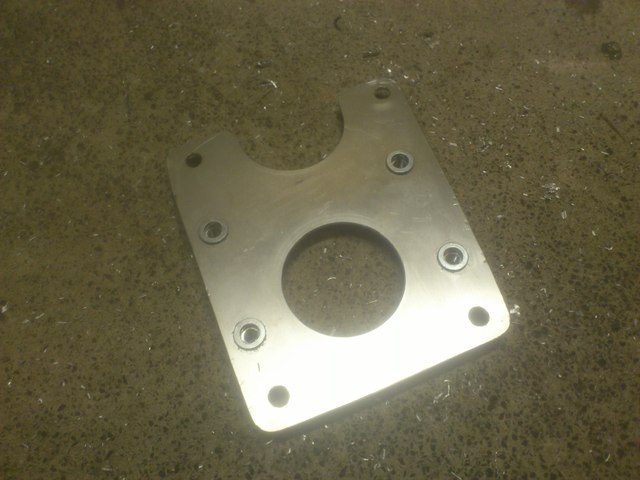
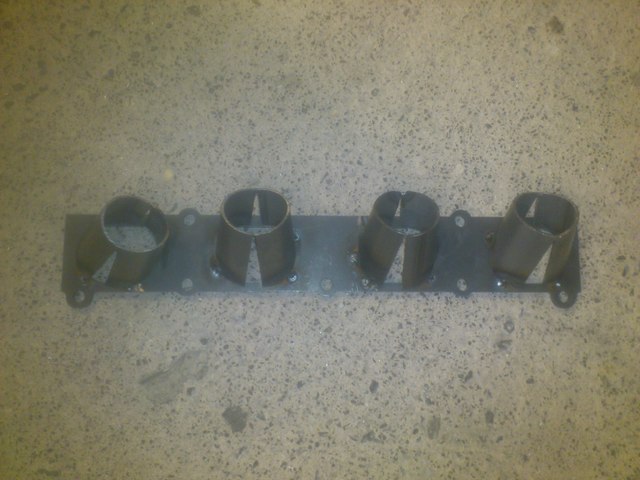
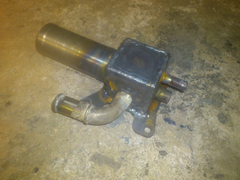
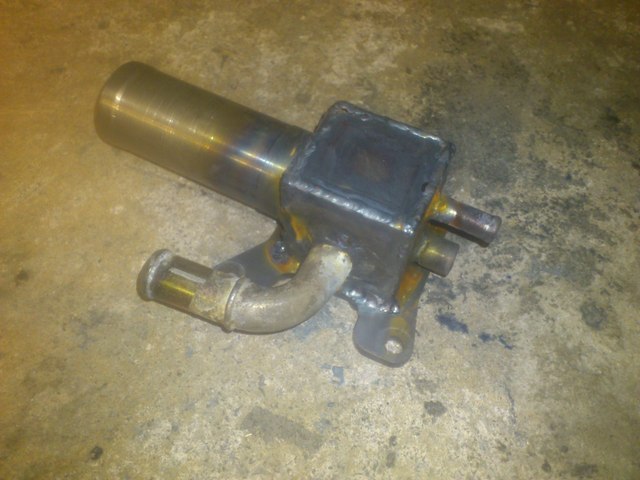
Also picked up an exhaust manifold plate from a forum member -

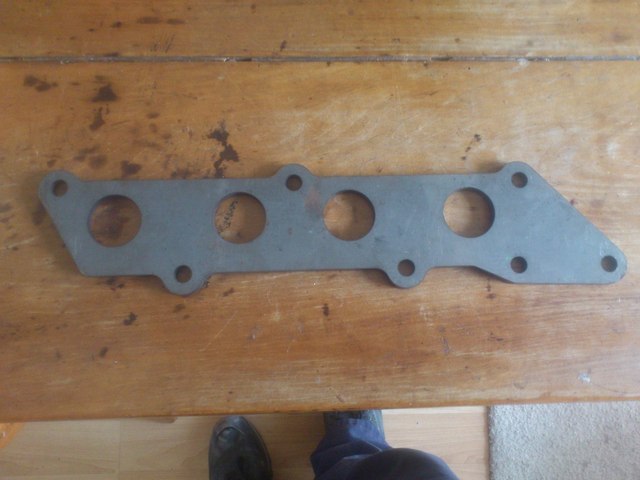
Description
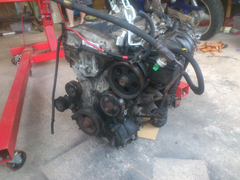
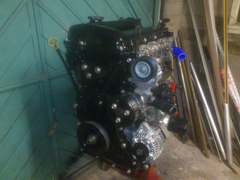
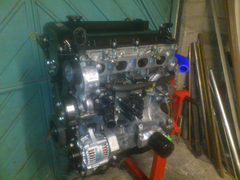
Then onto the engine. I had followed various engines on ebay for a while. Spotted one that was up for Ł250 - from a 2001 Mondeo that had failed MOT on
brake lines - car had done about 80k miles. A few hours before the auction ended I decided to make the guy a cheeky offer - he was never going to
accept it - Ł140 - imagine my surprise when he accepted the offer! I decided worse case I have a mock-up engine and spares - but no reason why she
shouldn't be fine. So the next day I found myself in an industrial estate in Wolverhampton. Turns out the guy ran a body shop and did banger
racing in his spare time - he decided the mondeo was too good to wreck so was parting it out.
Picked it up in the back of the ZR


Description
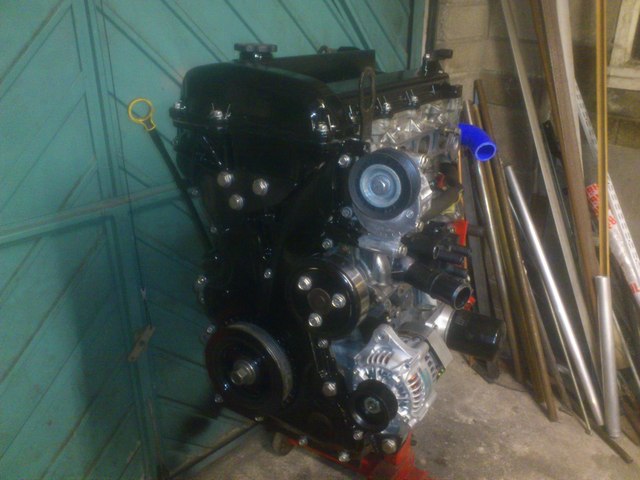
He had left loads of bits on it so I started stripping the bits off
Before -


Description

Description

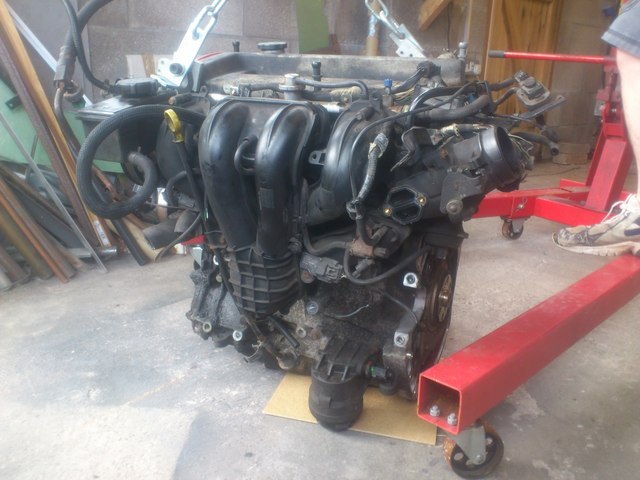
Description
After


Description
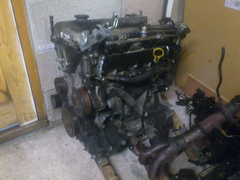

Description
big-vee-twin - 27/7/14 at 08:11 PM
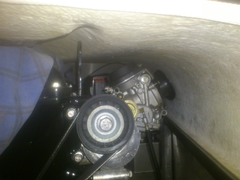
Make sure you put a bolt in your bell like pick below, stops the layshaft falling out
[img]
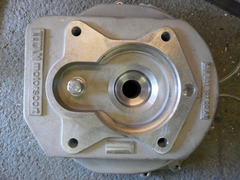

Layshaft retaining bolt
[/img]
[Edited on 27/7/14 by big-vee-twin]
ali f27 - 27/7/14 at 08:42 PM
i would advise a strip and check because i was getting hard up budget wise i put mine in un checked and it burn oil ran like a bag of spanners etc
when i took it back out and stripped it bores were good but rings were blocked with gunge and coke so i hone the bores cleaned it and fitted new rings
etc runs perfect now should have done it first be careful buying parts make sure bellhousing will work with clutch etc and in answer to the other
question i doubled my bhp so imagine the differance i was all over the pinto but have to have my wits about me now on the road anyways.
Was going to put high com pistons and steel rod cams etc this winter but think the extra pwer would spoil it as a road car.
We also have a 2.3 durtec in our hillclimb car wins when ever mark drives i am getting a bit old i think love the engine but it would be to much for a
road car.
Big v twin helped me alot when i was building
Cheers Ali
davidimurray - 27/7/14 at 09:43 PM
Thanks big-vee-twin - that's on my list of reminders, along with the crank shaft end bearing.
Ali- I'm torn as to whether to crack it open or not. Out of interest how much did sorting the rings cost you? I'm guessing head gasket and
ring set - do you have to change the head bolts?
Out of interest have either of you done a compression test or know what sort of reading you should get? Was thinking of doing a cold compression
test.
Cheers
Dave
davidimurray - 28/7/14 at 07:25 PM
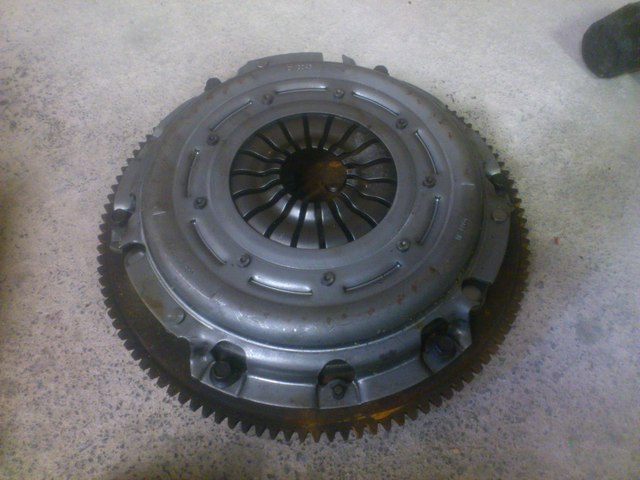
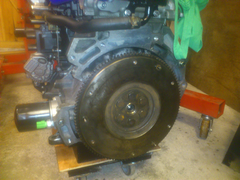
I picked up an ST150 flywheel - it was described as having a light covering of surface rust, looked terrible from the pics, but seller assured me it
would clean up - worth a punt for Ł20 and it came with all the bolts.
Here it is before cleaning up and the VCK 726 clutch


Description
Now when fitting the clutch - it wouldn't fit over the dowels - I had expected this so simply opened up the holes a fraction of a mm and it all
fitted nicely.
Before


Description
After

Description
Decided it was time for a quick test fit -


Description
Then on with the bellhousing and starter


Description


Description
The slave needed to be compressed about 20mm to get the bellhousing on so fingers crossed this combo will work. I believe the bellhousing is from
Retroford and has no spacer behind the slave like most others.
Whipped the cam cover off to have a look - everything looks fine under there. The engine oil was relatively clean, water was spotless and it even had
Iridium plugs fitted!


Description
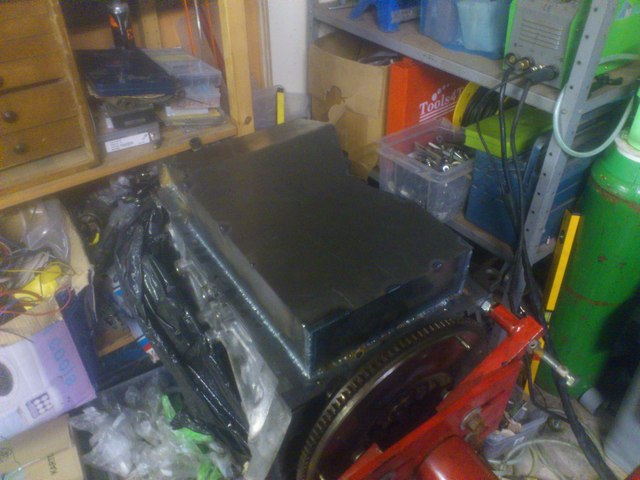
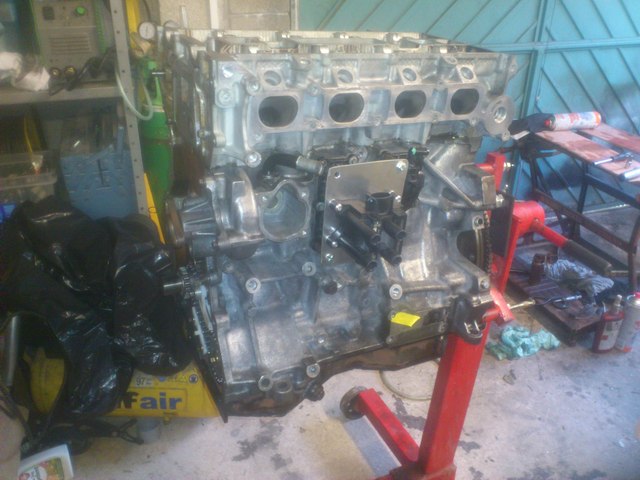
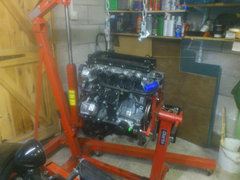
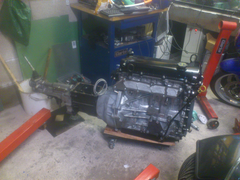
Then it was onto the engine stand and to meet it's future-
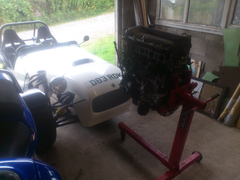

Description

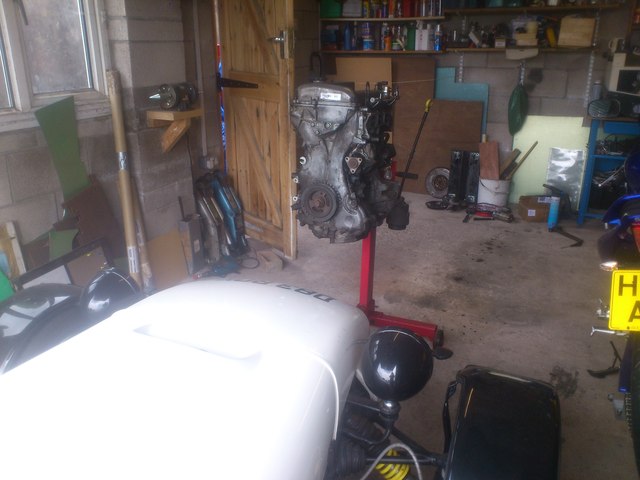
Description
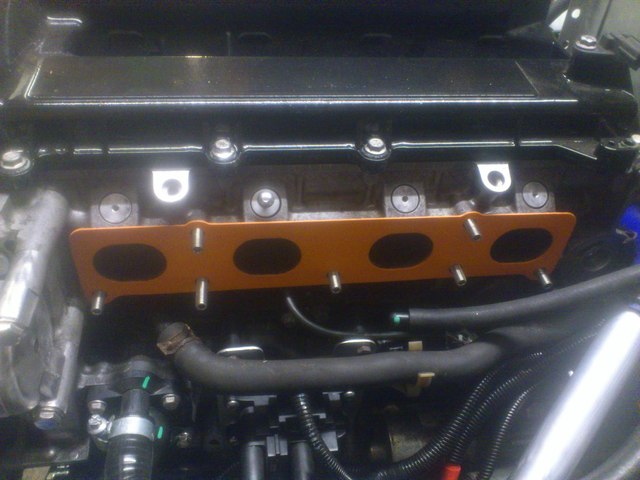
And fitted the EGR blanking plate - no fancy motorsport plates - just a Ł3 laser cut plate from ebay.

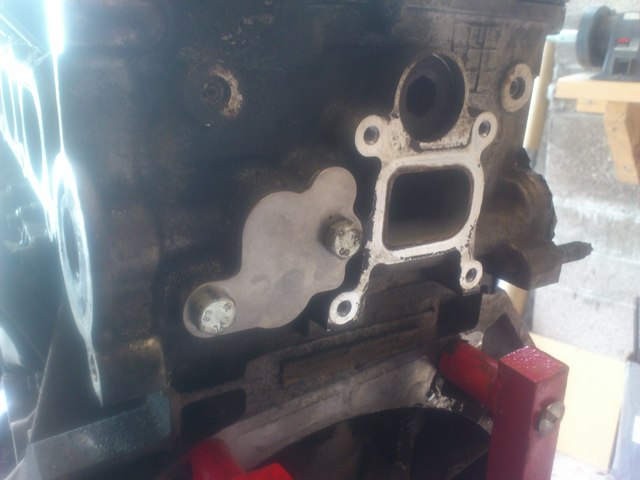
Description
davidimurray - 28/7/14 at 07:35 PM
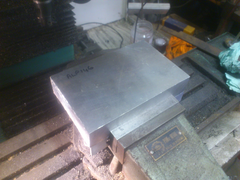
Decided to get the bits for a sump laser cut and the inlet manifold plate. Had a few prices -Ł190, Ł160 etc all ex vat then contacted a place called
Doncaster Laser Services -Ł65 ex vat in delivery.
Seemed a great price so decided to take the opportunity to also get some engine mount plates and some bits for a DIY water rail cut. Cue lots of paper
prototypes and Mrs M cutting them out for me and after 4 or 5 iterations we were there. Added the extra items and price went down by Ł1.30 
So in the end - Total cost inc vat and delivery was Ł76 - that's for sump, inlet flange, engine mounts and water rail bits.
After TNT tried to lose them - got my hands on them on sat - 4 days after paying!

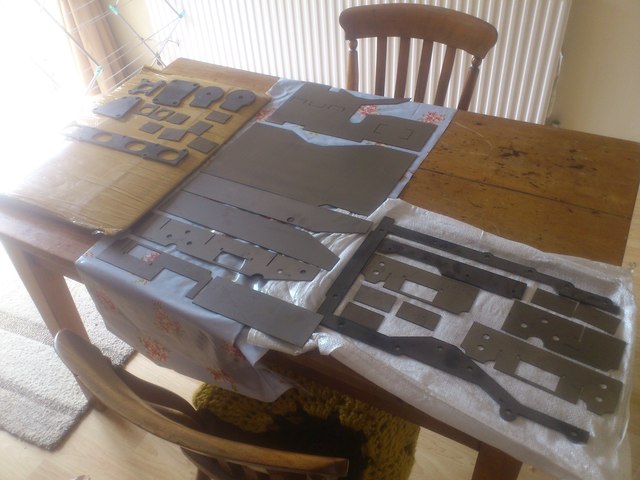
Description
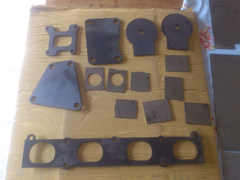
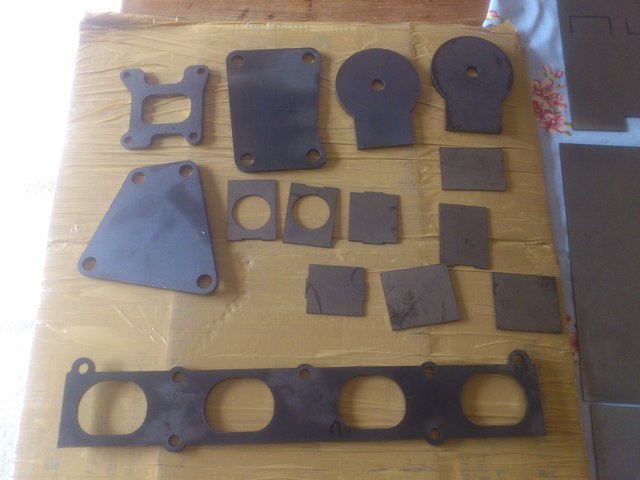
Description
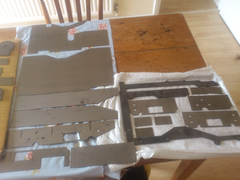

Description
Also picked up some Landrover engine mounts -

Description
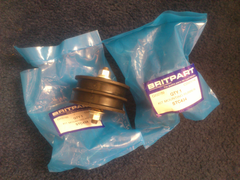
And would you believe the cheapest place to buy a mechanical thermostat is from Caterham!
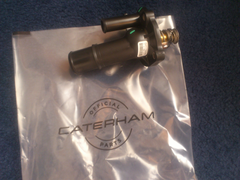
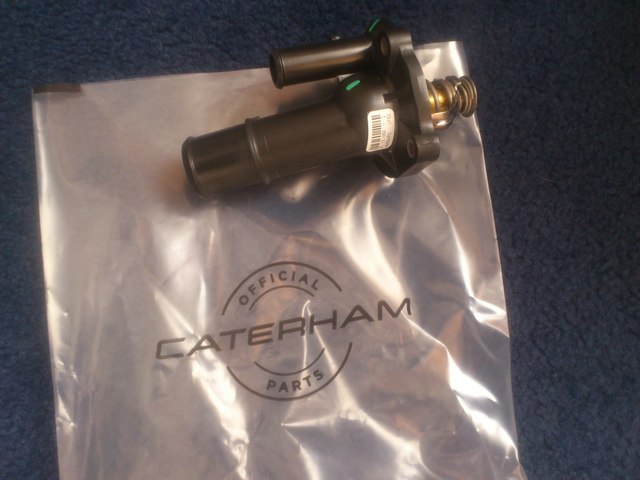
Description
Kghaas - 6/8/14 at 09:23 PM
"sub 1k..."
Since you are reusing your megaJ and bike bits it might be possible, but my own experience tells me different...
I had an xflow and converted to Duratec last year. My total came to about 2.5k, All stuff is more expensive here in Norway, but still.
I found all the small parts really added up. My biggest issue was with fitting the cluch slave, but then again I also did a tranny swap at the same
time..
You can see my thread over at Pistoanheads:
Lotus Seven S4
As for the carbs and megajolt. Don't you think you are loosing a bit of bhp here? Any thoughts on this?
I used GSXR throttles and Microsquirt. Easy, reliable and easy to tune. Even fun to learn
davidimurray - 6/8/14 at 09:40 PM
quote:
Originally posted by Kghaas
"sub 1k..."
Since you are reusing your megaJ and bike bits it might be possible, but my own experience tells me different...
I had an xflow and converted to Duratec last year. My total came to about 2.5k, All stuff is more expensive here in Norway, but still.
I found all the small parts really added up. My biggest issue was with fitting the cluch slave, but then again I also did a tranny swap at the same
time..
You can see my thread over at Pistoanheads:
Lotus Seven S4
As for the carbs and megajolt. Don't you think you are loosing a bit of bhp here? Any thoughts on this?
I used GSXR throttles and Microsquirt. Easy, reliable and easy to tune. Even fun to learn
Thanks Kghass - I will have a good read of your thread.
In terms of carbs and power, yes this setup won't give me the full potential of the engine so I will be down on BHP - I have heard of a Zetec
running 176bhp on zx6r carbs and fuel pump. If I can get 150bhp from this setup, then that will be 1.5x the current power I have. Obviously not to the
full engine capacity but a good increase.
Changing over to throttle bodies and fuel injection would probably give me another 30-60bhp, but I would need an ECU, throttle bodies, new fuel pump
and either a new tank or swirl pot- add this up and it will cost another Ł700ish to do this - almost doubling my budget!
Instead I will save a fuel injection upgrade for next winter.
Kghaas - 7/8/14 at 08:14 PM
Sounds like a good plan.
150bhp should still be fun.
I guess I am at 160 at the moment. With proper exhaust, velocity stacs and raising the redline i guess I will be getting about 180 but that is the
future
Good luck on your project.
austin man - 7/8/14 at 09:31 PM
should easily get above 150 a silvertop zetec can do 165 on carbs set up correctly
davidimurray - 3/10/14 at 10:00 PM
Time for an update - Had a crazy couple of months at work that stopped progress but just had a couple of weeks off so got back on the engine work.
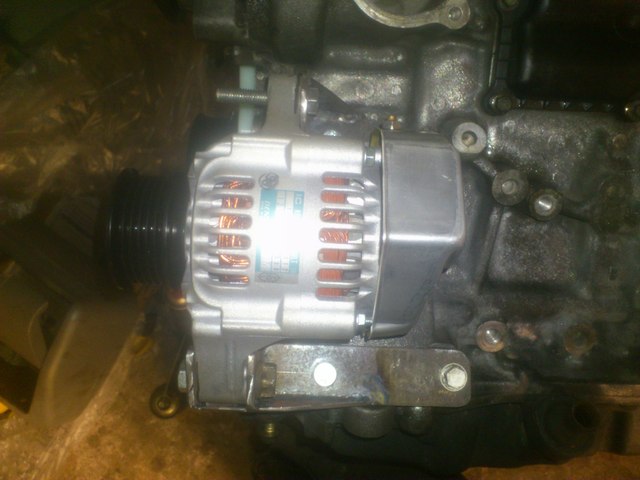
Treated myself to a nice little 45A alternator

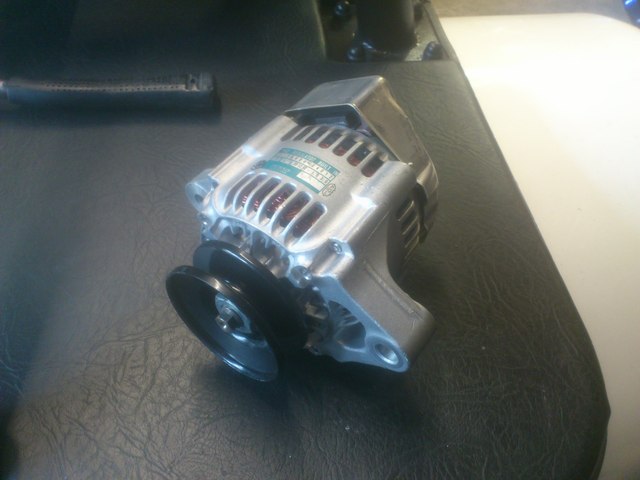
Description
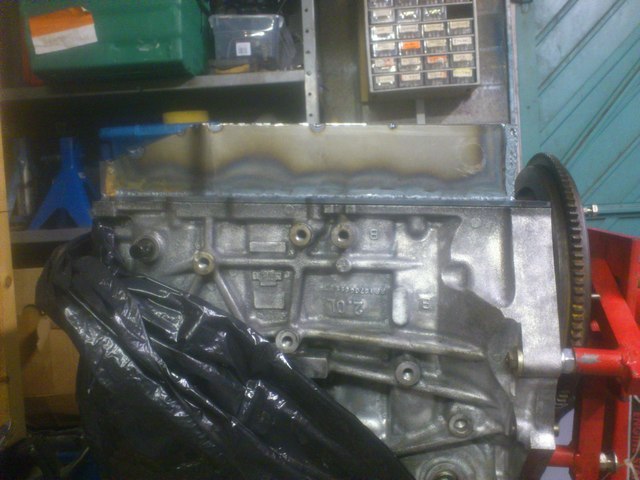
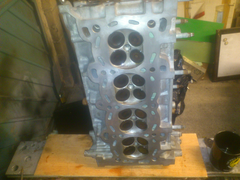
Then turned my attention to cleaning up the engine - first removing some of the gunk around the outside with some degreaser. Then attacked the block
with some wire wheels.
Half way through one side


Description
And finished


Description
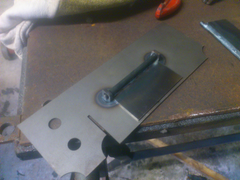
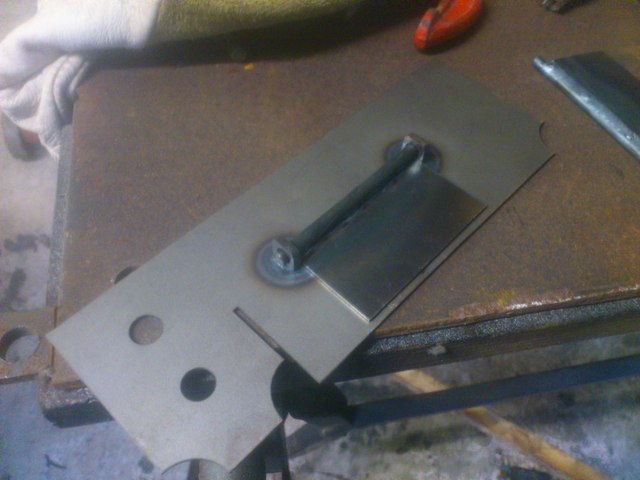
Having decided to strip the engine - next job was to fit the flywheel and make a locking tool so I could remove the crank pulley


Description


Description
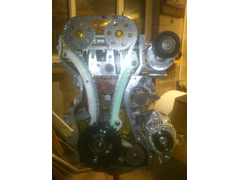
Then the timing tools in, lock the flywheel and off with the front pulley and cover

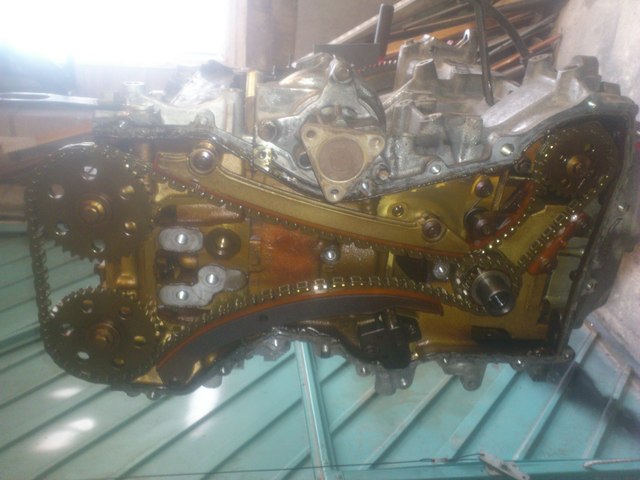
Description
Off with the cam caps
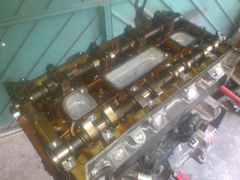

Description
And out with the cams


Description
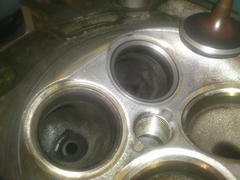
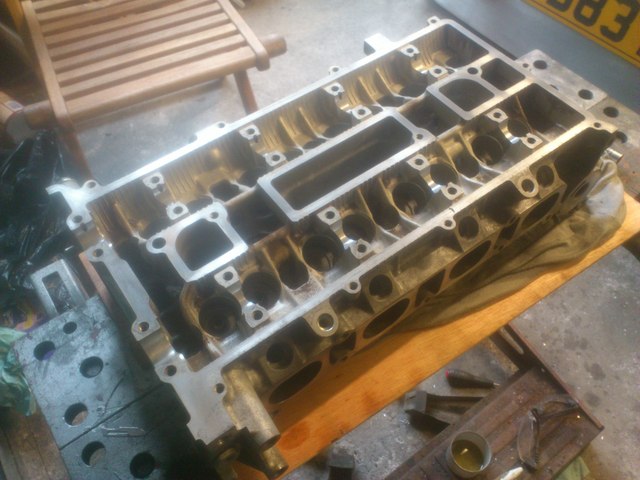
All the buckets/followers removed and positions/thickness recorded and then off with the head

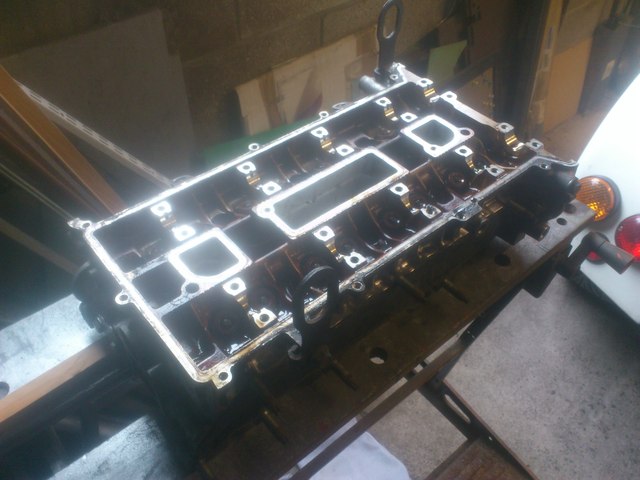
Description

Description

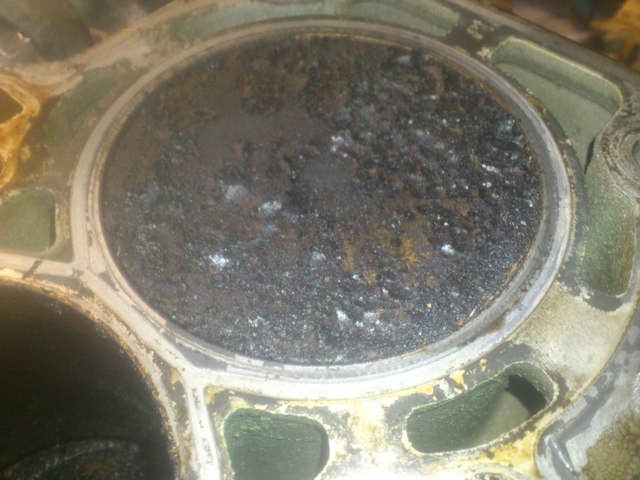
Description

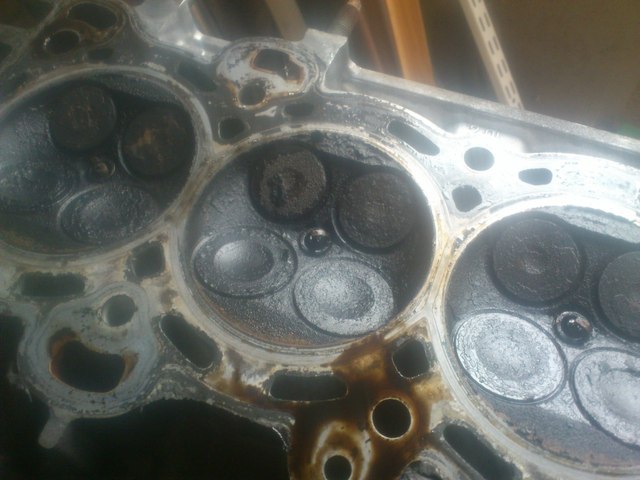
Description
Lots of oily gunk / coke around, but all looked the same across all the cylinders. You could still see the original honing marks on the cylinder
bores.
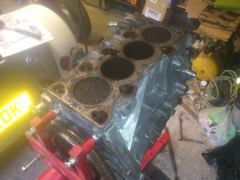
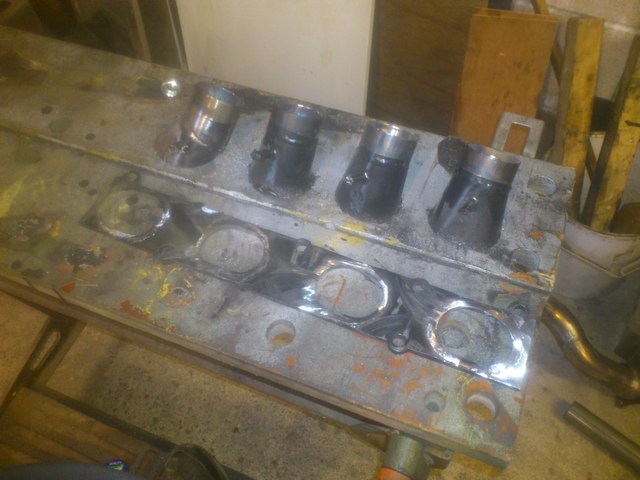
Then I moved onto removing the piston and con rods.
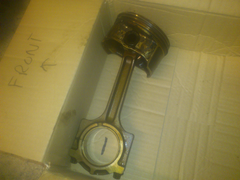

Description
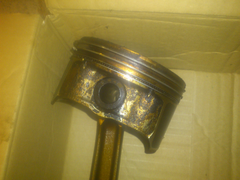

Description
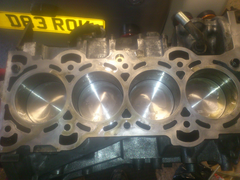
The crank looked good and the pistons were generally good but the rings were gummed up and the oil control rings were stuck on a couple of pistons.
Now as it happens I had these in my back pocket


Description
Picked up from an engine builder - stripped from a brand new crate Duratec - only Ł39 for the set.
Luckily all the piston sizes matched up with the grades I had fitted, so the only question was on the crank/big end fit, so onto fitting and out with
the Plastigauge

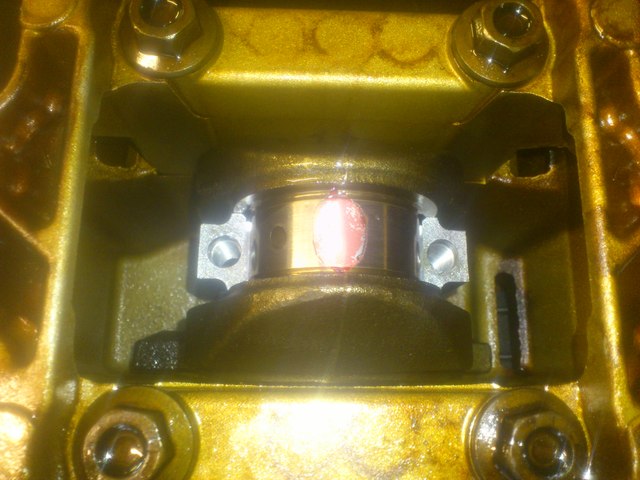
Description
And the good news all were within spec when fitted

Description
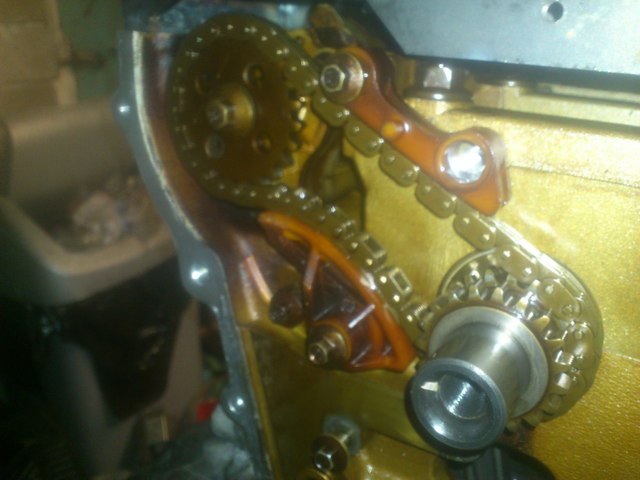
Looking at the tensioner, it was using 7 of the available 9 teeth for adjustment. The guides had some wear at the ends and some pitting in a couple of
places. So with the engine so far stripped I decided to bite the bullet and change all the timing gear as well.


Description
Machined some injector blanking plugs for the head.

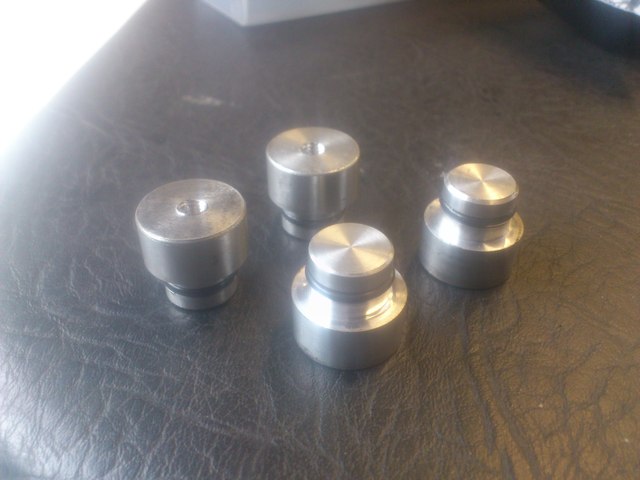
Description
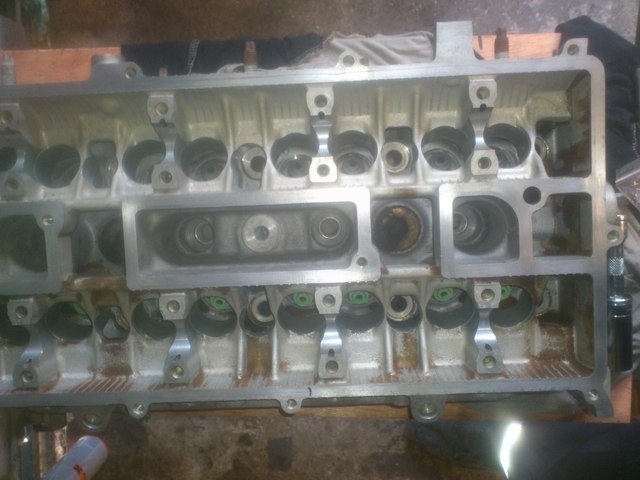
Back to the head, I stripped all valves and gave the exhaust passages a decoke and a general cleanup.
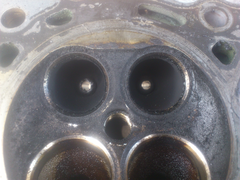

Description
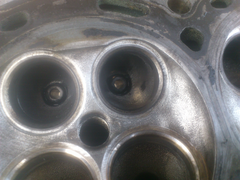
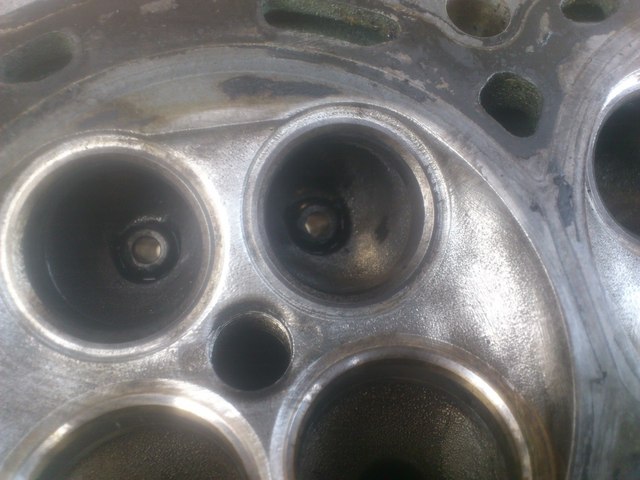
Description
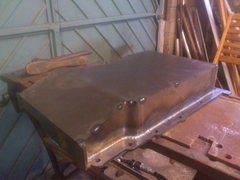
Before I started valve lapping, I fancied a bit of fabrication so moved onto the sump.
Description


Description

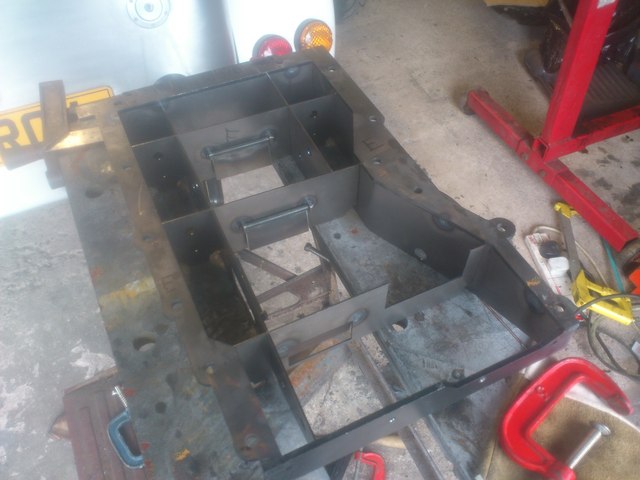
Description
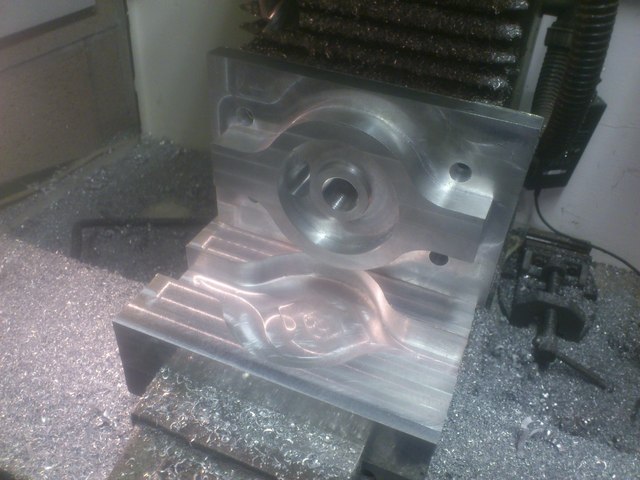
Having a CNC mill also gives me the chance to do a bit of multitasking while I get on with other jobs. So I spent a few evenings designing an oil
filter adaptor and set about machining it.


Description

Description

Description

Description

Description
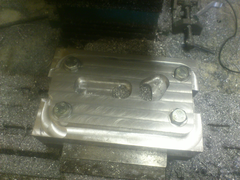
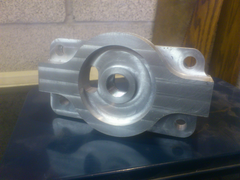
davidimurray - 4/10/14 at 10:09 PM
Just about finished the oil filter adaptor - just needs a clean up and drilling for the oil pressure sensor

Description

Description


Description

Description

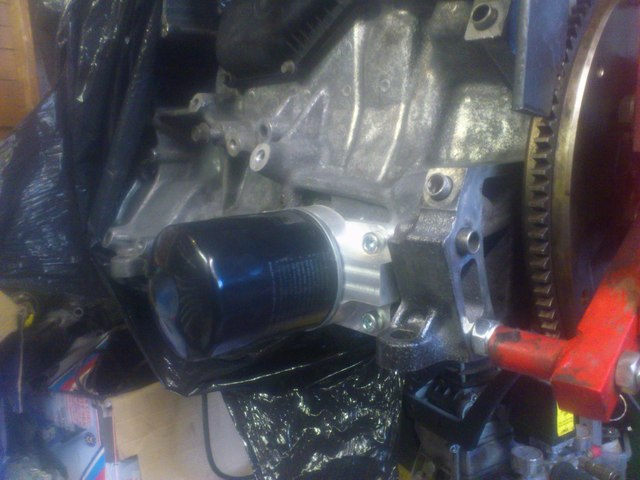
Description
ceebmoj - 5/10/14 at 07:45 AM
quote:
Originally posted by davidimurray
Machined some injector blanking plugs for the head.
Description
Great thread. Could I convince you to make me a set of injector plugs?
davidimurray - 5/10/14 at 09:10 PM
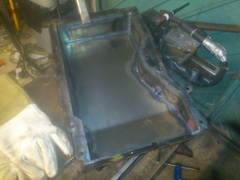
Got a couple of hours in the garage this afternoon so did some more work on the sump. Started by bending the bottom plate to fit and tacking it up.
Description
Then a test fit onto the engine

Description

Description
Comparison between the original and new sump

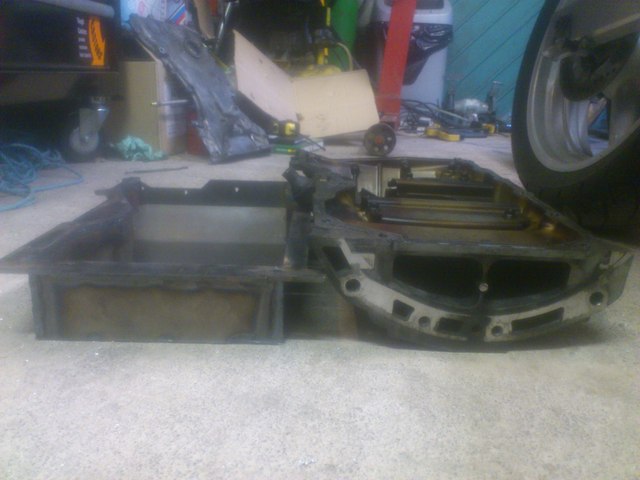
Description
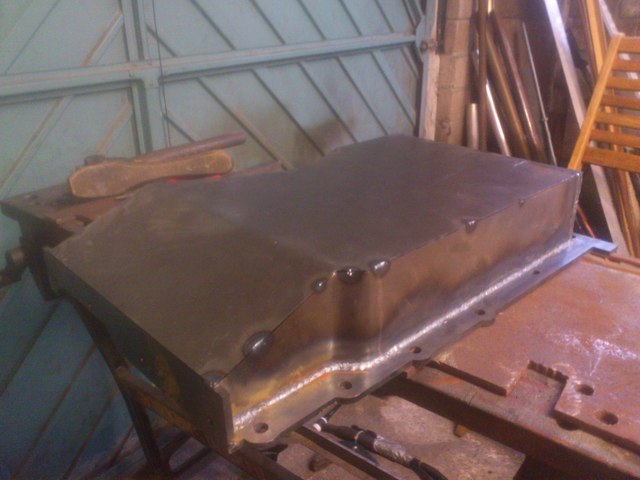
Got the outer platework all welded up.


Description

Description
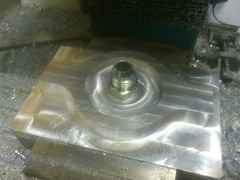
Machined up a boss for the sump plug to reuse the original Mondeo item and tacked it in - just need to fully weld then fit the internal baffles next.
ali f27 - 29/10/14 at 06:17 PM
Hi just wondered how you were coming on
davidimurray - 29/10/14 at 09:41 PM
Sump is all done except for the dipstick tube, waiting to get the engine together before I finalise the position. Head has been fully stripped,
cleaned and decoked. Valves have all been lapped in and reassembled with new valve seals - just working out which new followers I need to buy at the
moment. Front cover has had the mount machined off, cleaned and painted, as have the rocker cover and front pulley. Fitted the new oil pump chain,
gears and tensioner tonight complete with diamond washer.
Must do a proper update sometime with photos.
davidimurray - 3/11/14 at 09:32 PM
Update time
So I finished welding up the sump, then added the gated baffles

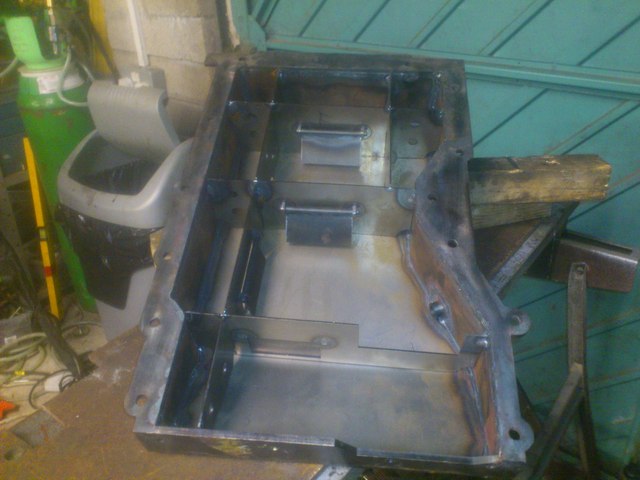
Description
Then finished it off with the windage plate. Still need to add the dipstick but will need to fit it to the engine first to work out the best
position.

Description
Then it was onto the head, stripped all the valves and valve seals, then decided to lap all the valves in - a slow and tedious process

Description
In between lapping valves, I made a start on cleaning the front cover and then onto the mill to remove the front engine mount.


Description


Description

Description

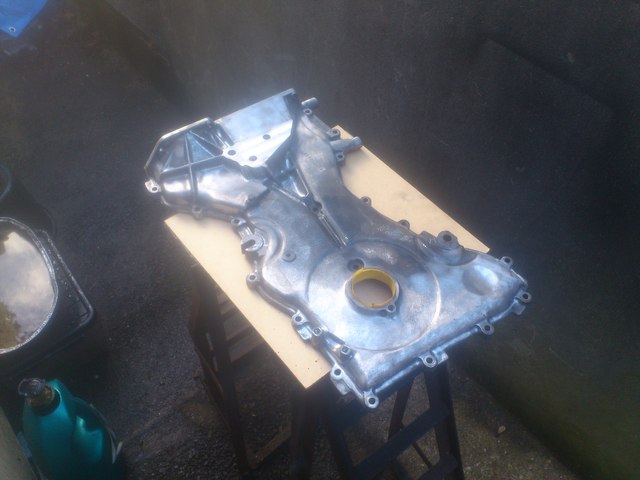
Description
And drilled the oil filter adaptor to take the standard ford oil pressure switch

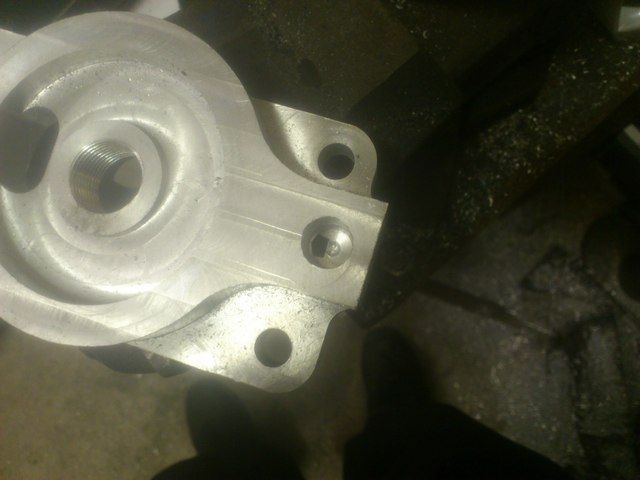
Description


Description
davidimurray - 3/11/14 at 10:06 PM
After the valve lapping, I cleaned up the gasket faces and then put the head in the dishwasher to get it nice clean.

Description


Description
Then I fitted all new valve seals

Description
Then all the valves were refitted


Description

Description
I carefully put all the buckets back in their original positions, refitted the cams and then checked the valve clearances. Inlets were pretty good but
almost all the exhaust were out, which is not surprising considering the amount of lapping required. I popped the figures into the commonly use
spreadsheet, and with some juggling of buckets I only needed to buy 4 new buckets - these are on order with Burtons.
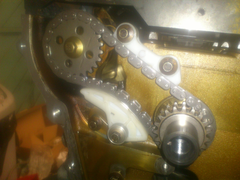
I had decided to change all the timing gear as a precaution. So bought a kit with everything in. Started on the oil pump drive. Also bought a new
crank bolt and diamond washers, surprisingly Caterham were the cheapest supplier.


Description

Description

Description


Description

Description
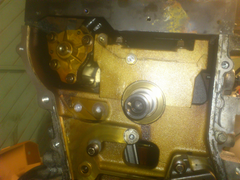
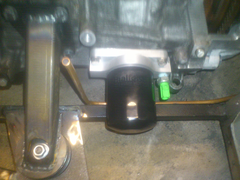
Removed the crankcase oil breather, drilled out the bottom of the elbow and released the little valve inside.


Description


Description
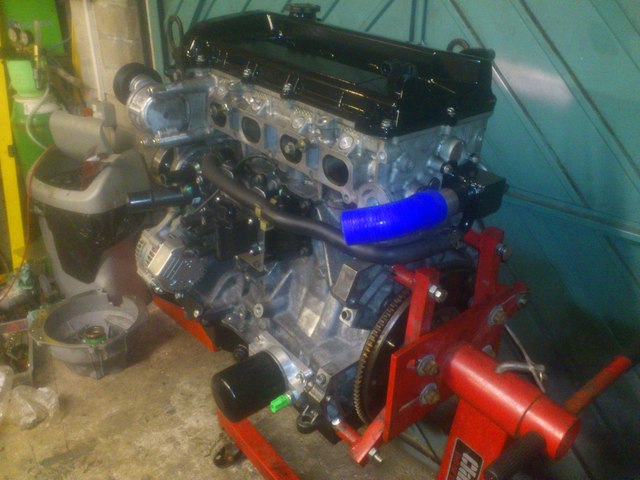
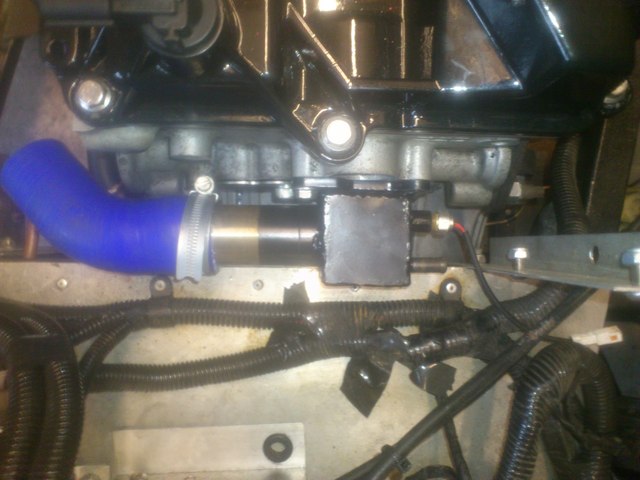
Decided to move the coilpack under the inlet.

Description

Description
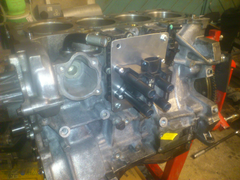
Refitted the cylinder head.

Description
And had a quick mock up with all the bits fitted on the inlet side


Description
Been busy painting as well.


Description


Description
davidimurray - 4/11/14 at 11:02 PM
Well - I can actually say I have a bit of Cosworth in my engine - valve followers/buckets arrived today.

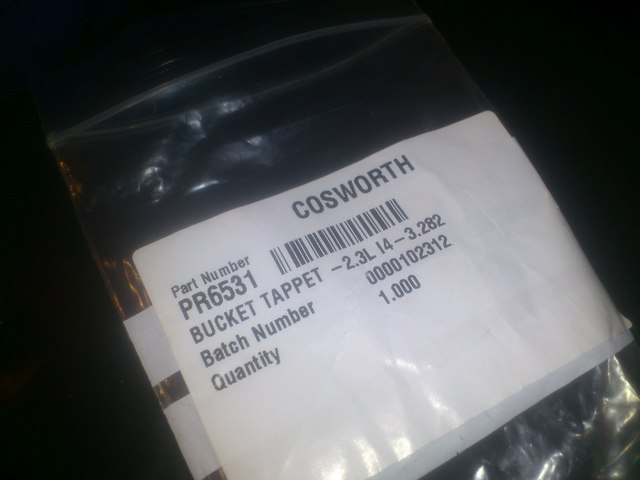
Description
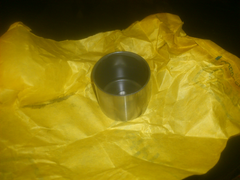

Description
That meant that I could the exhaust cam back in and fit the new timing chain.


Description
davidimurray - 10/11/14 at 08:52 PM
Been busy doing some more work - made up an inlet manifold to suit the zx6r carbs - was quite a fabrication challenge!

Description


Description

Description


Description


Description

Description
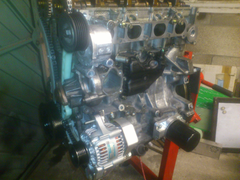
Then made some brackets to hold my little 45A alternator. Surprised to discover that I couldn't copy the cosworth kit as the block casting is
different and there is a lug missing compared to later engines.

Description

Description

Description

Description
ceebmoj - 10/11/14 at 09:29 PM
Alternator install looks very good. Do you have any more details i.e. Which alternator and do you have a sketch of the brackets?
davidimurray - 11/11/14 at 10:25 PM
quote:
Originally posted by ceebmoj
Alternator install looks very good. Do you have any more details i.e. Which alternator and do you have a sketch of the brackets?
This is the alternator

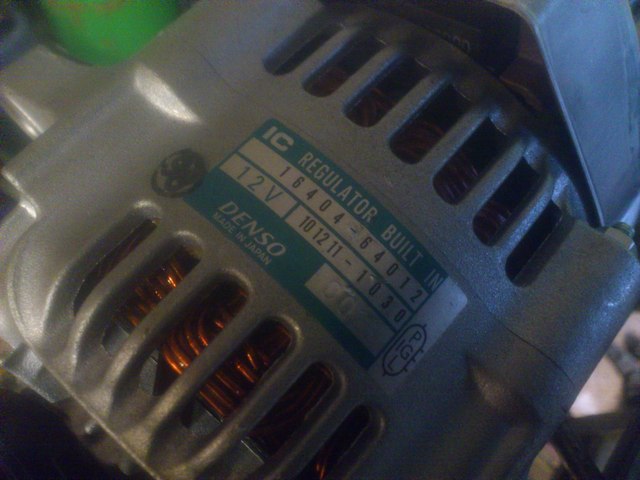
Description
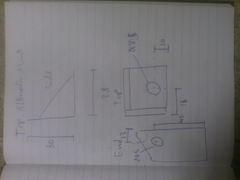
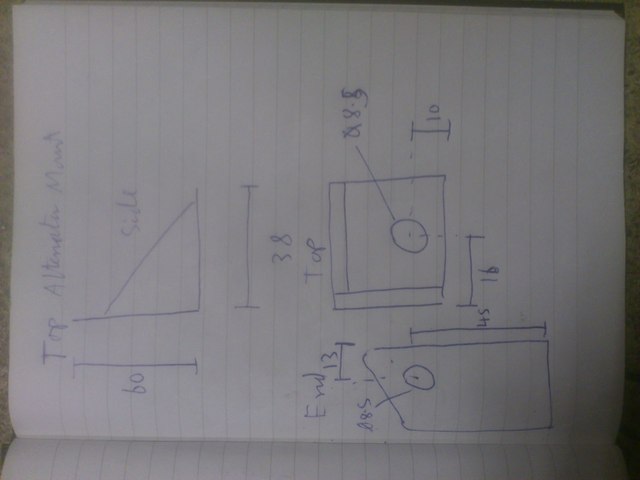
Sketch of top bracket
Description
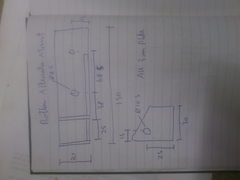
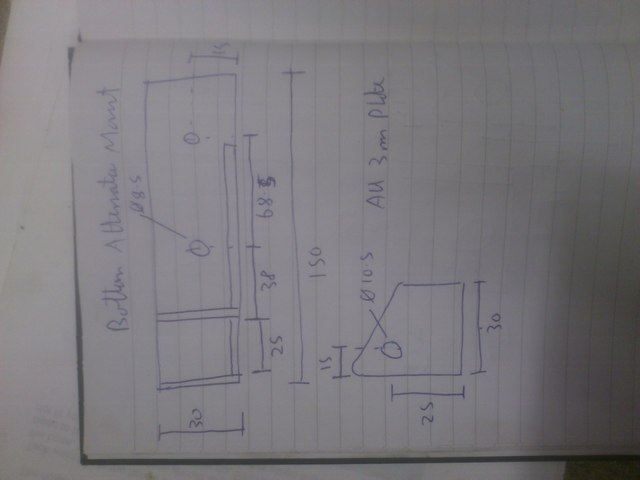
Sketch Of Bottom Bracket
Description
davidimurray - 5/12/14 at 09:42 PM
Catch up time again.....
Decided to make up a new water rail for the back of the head.
Description
Then on with refitting the repainted covers and crank pulley
Description

Description

Description
Took the car out for a last blat with the Pinto on the penultimate weekend in November, then onto SORN and time to start stripping.

Description


Description
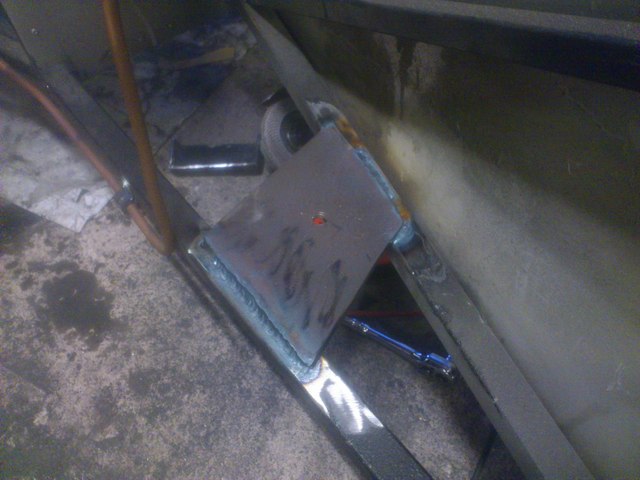
On getting the tunnel top off, I discovered that the top of the reverse switch had been knocked off on the side of the tunnel. Need to change the
original sierra mount for something stiffer - have a Cortina one to go in there.
Then it was onto taking the engine out, Brother in law came over to help and within a few hours it was out.

Description

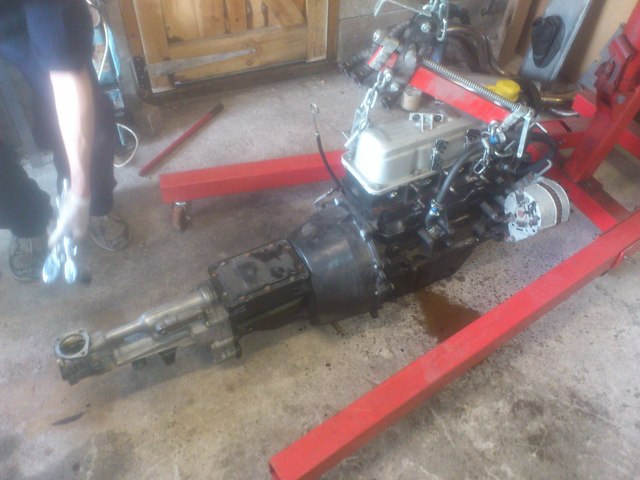
Description
davidimurray - 15/12/14 at 09:36 PM
Some more progress to report
Split the engine and gearbox before removing the bellhousing.

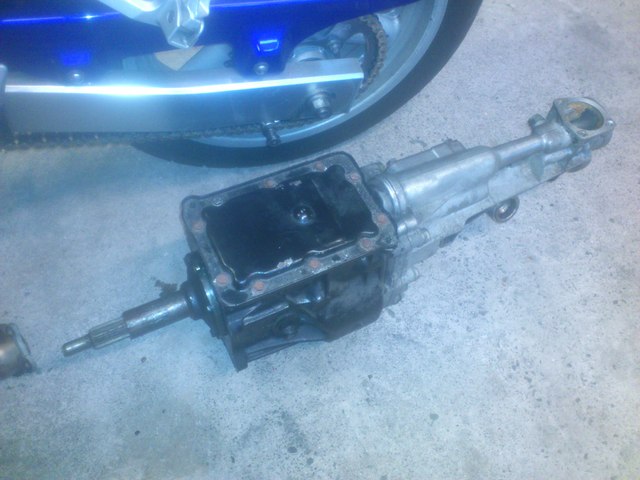
Description
Then had a look at the front of the gearbox. The old release bearing sleeve does not fit through the hydraulic cylinder, and is no longer required so
I cut it off.
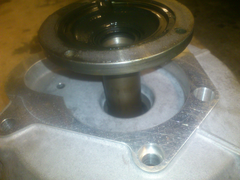

Description

Description
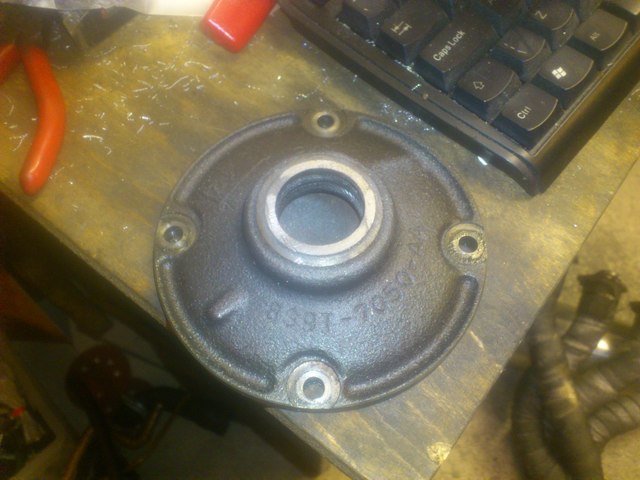
Then onto fitting the bellhousing to the gearbox, complete with hydraulic cylinder, hoses and layhaft securing bolt.

Description


Description
Then it was time to get the engine off its stand, fit the flywheel, crank bearing and flywheel

Description

Description
Then time to mate the engine and gearbox.

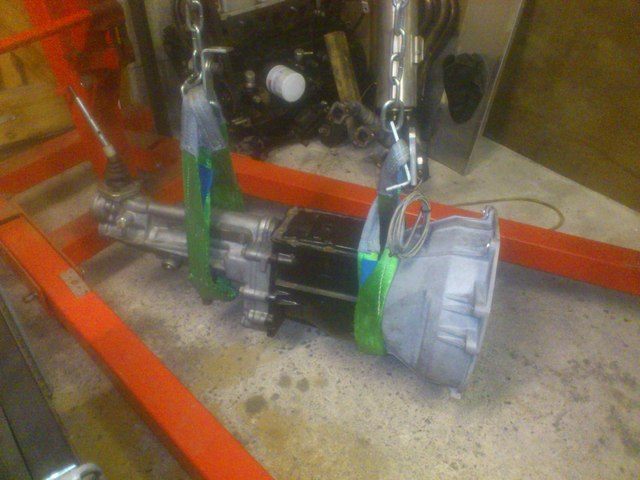
Description

Description
Made a guard to cover the opening under the bellhousing


Description
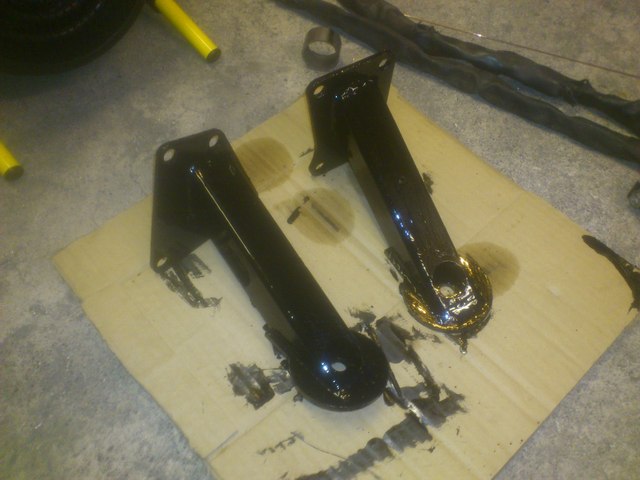
davidimurray - 15/12/14 at 09:57 PM
The original Type 9 gearbox mount was too flexible and had allowed the gearbox to move and damage the top of the reverse switch. Fund tat the Cortina
HD mount is a popular alternative, but has different hole centres and is higher than the sierra item. I didn't want to modify the chassis so I
made some adaptor plates.


Description

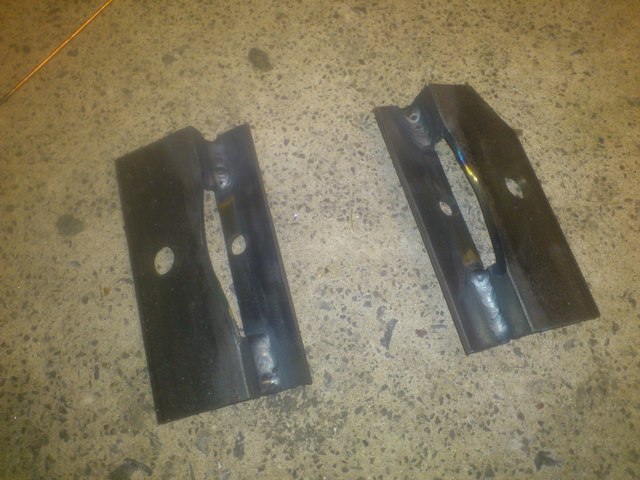
Description
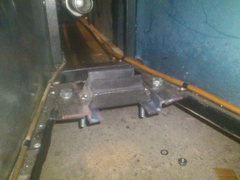

Description
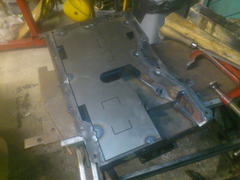
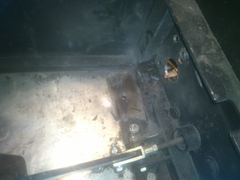
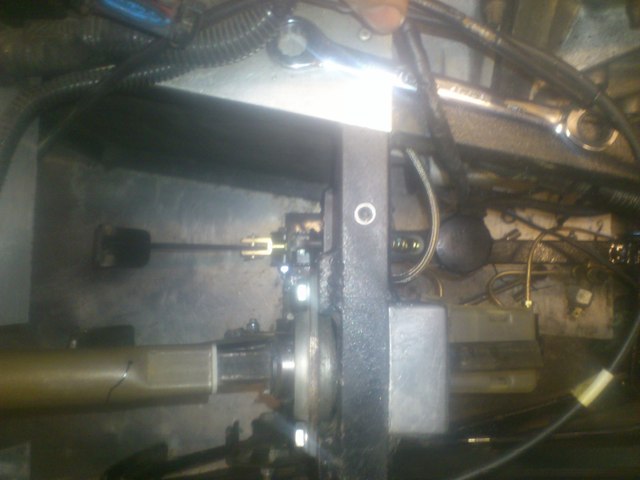
Before I fitted the engine I wanted to modify the pedalbox while I could get into the engine bay. The old clutch was cable operated, so I needed to
fit a master cylinder and then a bottom mounted pedal to operate it. Without removing the scuttle/ steering column, access is limited, so I decided to
make a bolt in frame for the new pedal.
First job was to remove the old bits, and drill the holes for the master cylinder.


Description

Description
Then it was onto cutting out the bits in the pedalbox - an absolute pig to get access involving angle grinders, saws dremels etc

Description
Then I made up a frame to bolt through the bottom of the pedalbox and master cylinder to act as the pivot. Used a Haynes brake pedal with a couple of
minor mods

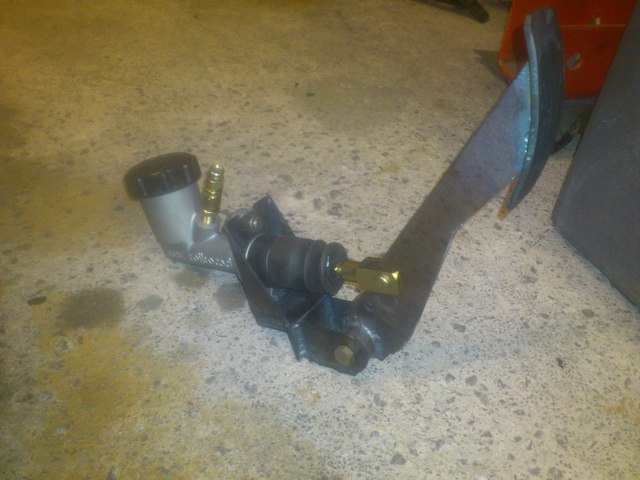
Description
davidimurray - 15/12/14 at 10:13 PM
Then it was time to go for an engine fitting. Roped the brother-in-law in again to help. Got the engine on the crane, halfway in and then realised the
jib wasn't out far enough to get it all the way in - out it came for a re-rig and back in again.
A few bits were tight and the water rail, oil filter and starter had to come off. After 2 hours of work the engine was in. Now to look at the engine
mounts. Hmm - the first problem. The sierra mounts sat on a turret above the chassis rails, for the duratec these were too high. So out came the
engine, the turrets were chopped off and plates welded across the chasss rails - that took a couple of hours messing around!
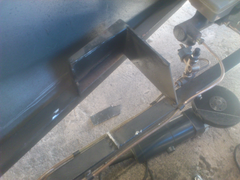
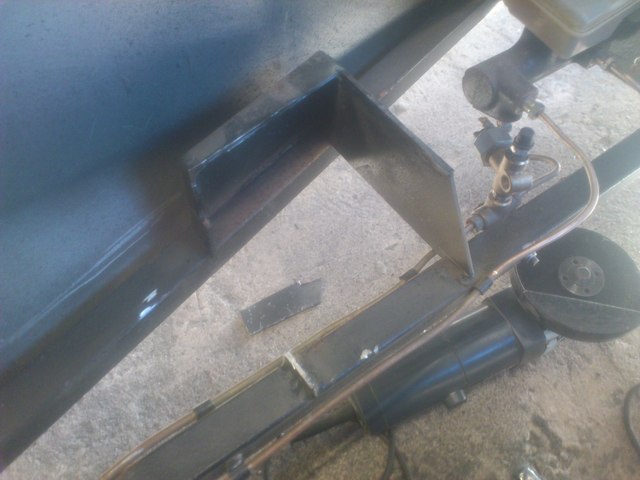
Description

Description
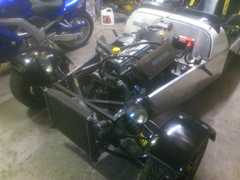
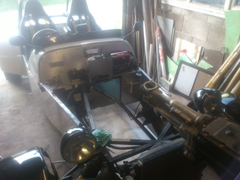
Then it was back in with the engine. Followed by lots of careful measuring, setting and lining up. To my surprise the engine was further back than I
expected by about 15mm. This meant that it would be touch and go if my homemade water rail would fit. Only the plus side it can only be good for
weight distribution!
With the engine all setup I then made the engine mounts

Description
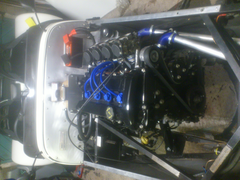
And to finish off the engine sat in its new home 
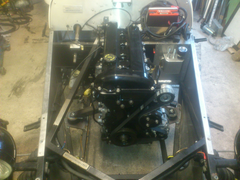

Description
peter030371 - 16/12/14 at 10:57 AM
Looking good, your engine bay looks huge compared to a Striker 
davidimurray - 29/12/14 at 08:28 PM
Time for another update.
With the engine in I popped the bonnet on and it fitted nicely under the bonnet

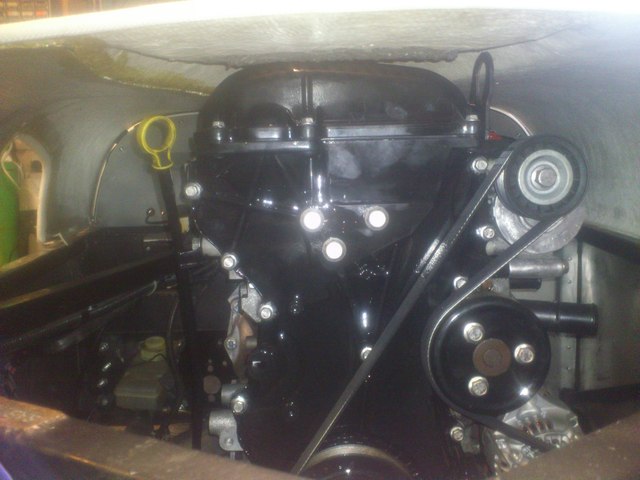
Description
Then I stripped the old carbs and separated them ready for test fitting.
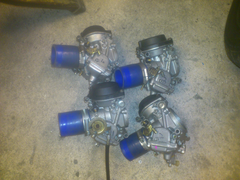

Description
Popped them onto the manifold I made a while back and all was looking good.....

Description
Then on with the bonnet and oh c*ck! The bonnet was resting on top of the carbs and still had another 10mm to shut.

Description
Time to start again. Cut the runners off the plate and then made some new horizontal runners with a kick up to get some angle on the carbs

Description
Made up the first runner as a test and all was good.

Description
A day of cutting, welding, grinding and new manifold was done ...

Description


Description
Meanwhile I fitted my 'homemade' water rail which fitted over the top of the bulkhead with the pipe underneath just clear of it. I will have
to re-engineer my header tank mounting.

Description
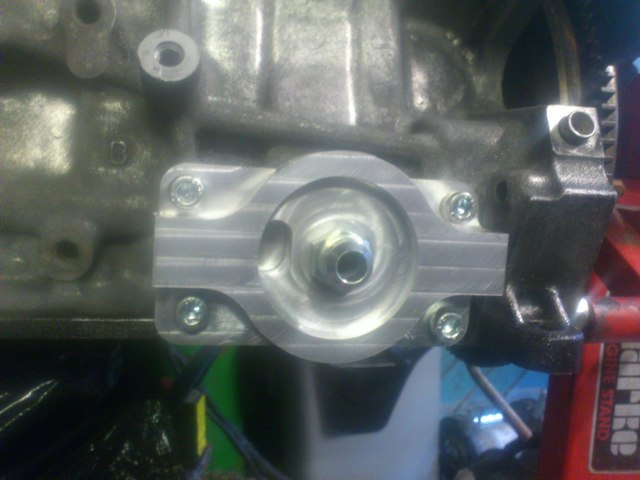
Another area I had been worried about was my homemade oil filter adaptor - no cause for concern as there was plenty of clearance.

Description
ceebmoj - 30/12/14 at 01:05 PM
great progress
theduck - 30/12/14 at 02:17 PM
Looking good, how do you think you are doing budget wise?
davidimurray - 31/12/14 at 07:40 PM
quote:
Originally posted by theduck
Looking good, how do you think you are doing budget wise?
Budget wise, I'm upto about Ł1250 but I did go a bit over the top rebuilding the engine and also bought a small denso alternator as I decided it
was easier to fit out of the car. In total all the gaskets, timing chains, cam buckets etc cost me about Ł170 for the engine and the alternator was
Ł90.
davidimurray - 3/1/15 at 08:35 PM
No rest for the wicked so I've been ploughing along over the Christmas break. Not many exciting developments but lots of important jobs done.
Got on with painting the engine mounts and mods to the chassis.

Description
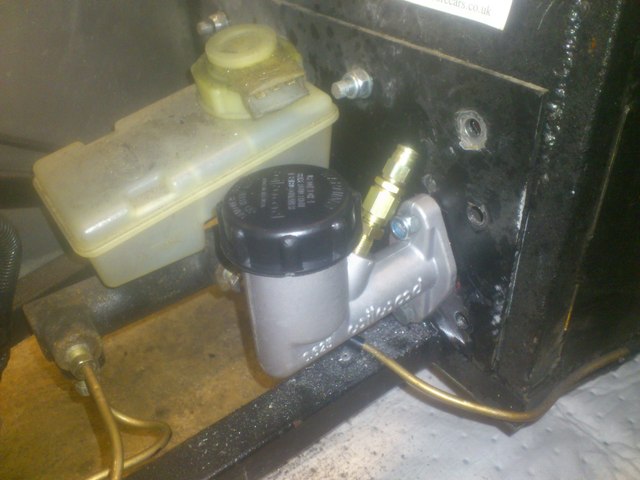
Then fitted the clutch pedal, master cylinder, and finished making up the hose so I could fill the system. I back filled the system with a syringe
from the bleed nipple. It must have worked as not much air came out during bleeding .... or there is still loads in there! I had a slight panic while
bleeding as fluid started coming out form the bottom of the bellhousing apparently this is common. I've pumped the pedal until my leg goes dead
and there is no sign of any leaks.

Description
I had also taken the opportunity to fill the engine with oil and remark the dipstick for the new sump. Unfortunately the next day I noticed a small
oil patch on the floor. I actually found a couple of problems. The first was the dipstick tube, it was the only weld I hadn't tested for leaks
and there was a tiny pinhole in it. Secondly I found a small weep from the sump to front cover joint. Finally I had used flanged bolts and discovered
that a couple of them were catching the edge of the weld, I chucked these in the lathe and reduced the diameter. Sorted all those problems out and
everything is now oil tight. With all that done I also filled the gearbox up.
Then it was onto the wiring, I sourced new plugs (quite a few free  ) for all of the connectors. The alternator and crank sensor are on opposite side
to the Pinto, so first job was to pull all the wiring back and get it on the correct side. I cut off the old crank sensor plug and replaced with the
new one. Also pulled out the oil pressure switch wire and fitted it to the switch with a new plug.
) for all of the connectors. The alternator and crank sensor are on opposite side
to the Pinto, so first job was to pull all the wiring back and get it on the correct side. I cut off the old crank sensor plug and replaced with the
new one. Also pulled out the oil pressure switch wire and fitted it to the switch with a new plug.
The alternator was a bit more troublesome. Connected the battery and light terminals up. Then had to find a switched live, which I took form the
opposite side of the ign light and ran a new cable down. Connected this up and then the diagrams I found showed a sense terminal for monitoring
battery voltage. I powered the car up and the ign light was off without the engine running. Lots of research later I discovered that my alternator has
a P terminal which is an output to indicate engine running. Disconnected this wire and the light came on.
Last bit of electrics was to extend the coil wires down to the new coil location and hook the starter up.
With all this done it was time to turn the engine over and check for oil pressure. Plugs out, key in and after 30s of worried cranking the oil light
went off - phew. I also checked for spark at the same which was present.
Meanhwile I have been working on the carbs. Built each individual carb onto their respective runners, then made some aluminium spacers and long bolts
to hold the carbs apart.


Description
For the fuel rail, having a CNC lathe comes in handy. Made two new outer fuel rails in aluminium and the centre tee in brass. The tee was made in two
pieces and silver soldered together.
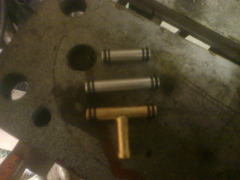
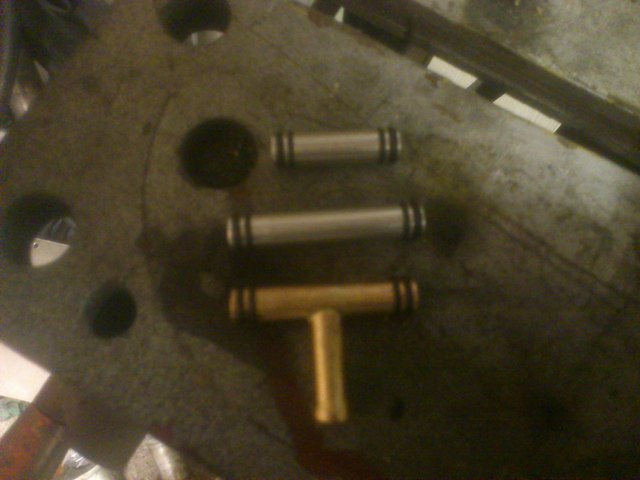
Description
The choke bar has also been respaced and the throttle levers modified to their new lengths - just need reassembling now. With the carbs on the bench I
also took the opportunity to clean all the jets.
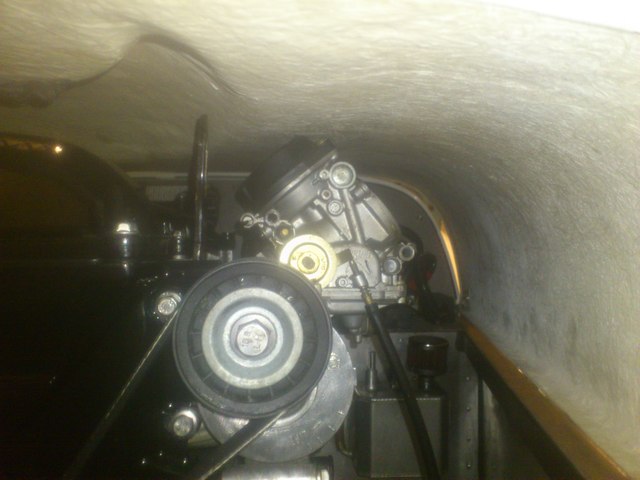
Today I've been working on the cooling system, being from a front wheel drive car, all the cooling pipework is on the inlet side so things are
very crowded - will make jetting and carb tuning tricky. Got the basic layout setup
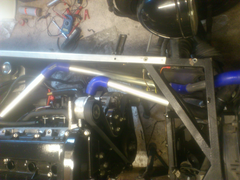
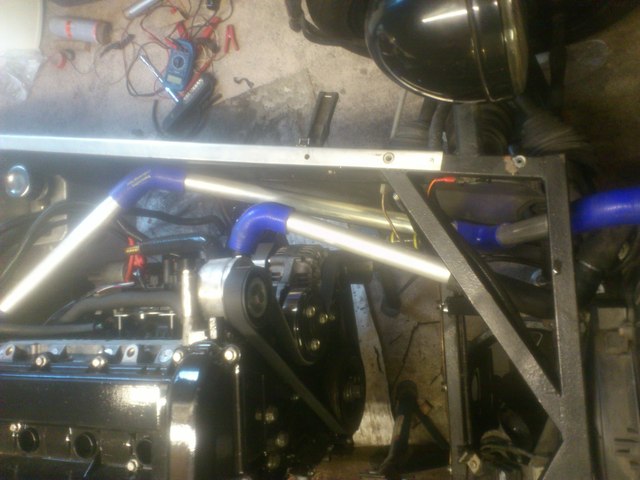
Description
Also got the header tank re-mounted, whih should have been simple but involved new brackets, modifying bits etc etc


Description
We're slowly working towards that first start ...... gulp!
davidimurray - 7/1/15 at 07:24 PM
Just a quick update.
After mocking up the cooling system I finished the aluminium tubes by swaging them then connected everything up. Filled the system with water
................. drip .....drip .........drip ........... Bugger
I could see a small drip under the back of the head. The most likely culprit was my homemade water rail so I stripped the header tank off then,
disconnected the various hoses, then removed the water rail. No obvious witness marks but I decided to pop it on the mill anyway to make sure the
flange face was perfectly flat and then refitted with some RTV before rebuilding the cooling system.
Popped down the garage to refill the cooling system, all lovely and then drip drip drip. Looks like it is actually the EGR blanking plate leaking!!
Oh well back to work...
Kghaas - 11/1/15 at 06:21 PM
Really good progress! Some small setbacks is part of the progress! Good luck on the startup, shouldt be to far away
davidimurray - 13/1/15 at 08:28 PM
Bit slow updating...
So after a bit of research I discovered that the EGR is water cooled. So off with the water rail, off with the EGR then lots of RTV and all back
together. Refill cooling system and bingo - no leaks
This is how the cooling system ended up - as you can see very crowded!


Description
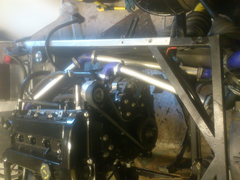

Description
Then made the final tests of the inlet manifold. I made some brackets to hold the carbs to the head. Simple aluminium strip bent around. I had the
carbs try and come off on the Pinto so added these as belt and braces.


Description
I got a thick inlet manifold from DanST.

Description
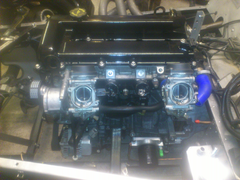
Then everything was fitted up, carbs on ignition leads fitted. Looks pretty nice even if I do say so myself 
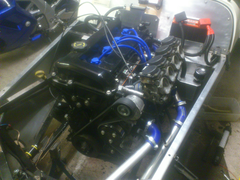
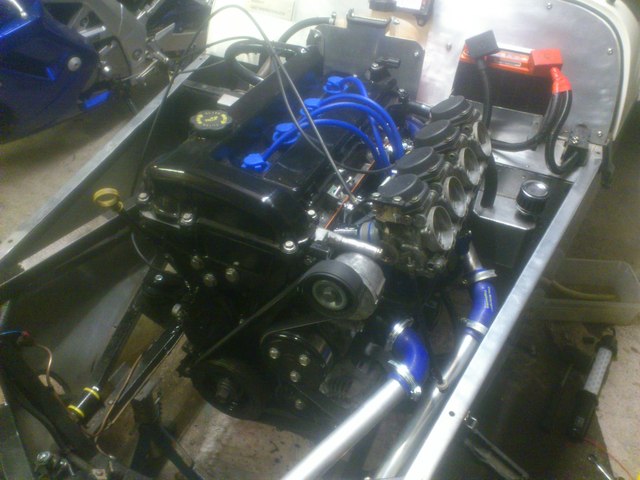
Description

Description


Description
I've been waiting for some exhaust tube to arrive to start the mods, but in the meantime I couldn't wait to try and start it. Previously, I
had turned the engine over to check oil pressure and spark. Before fitting the carbs I balanced them on the bench with a bit of flattened welding rod
and then would them until there was just a crack of light showing through.
Then the moment of truth ......
http://youtu.be/BecyQL0T1-Y
Yeeehaaaa. Was really surprised at how quickly and easily it started - i'm more used to 5 minutes of chugging, splurting and coughing!
ryanill - 14/1/15 at 10:25 AM
looking good, keep up the good thread
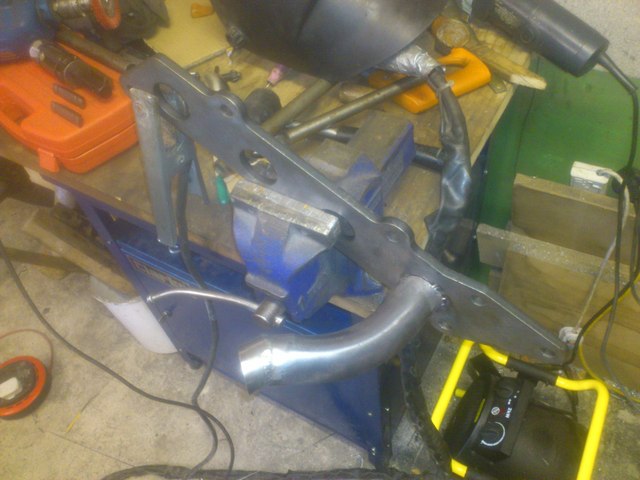
davidimurray - 18/1/15 at 07:39 PM
Time to get on with the exhaust. I had planned to do this over Christmas, but I was let down by two separate suppliers trying to get some tube, so
when I finally got some I took a couple of days off as I knew I would run out of welding gas part way through!
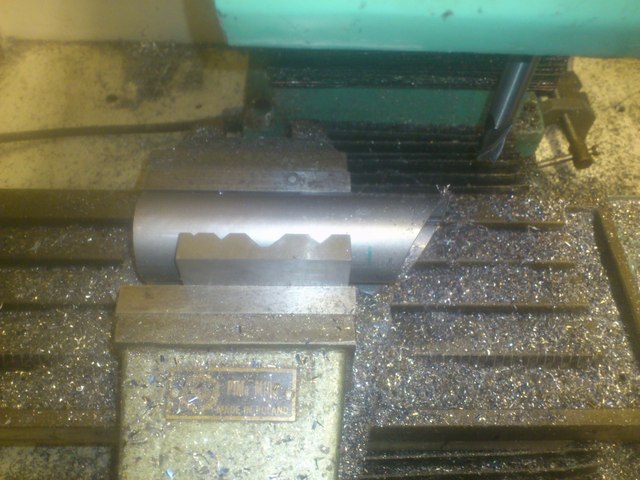
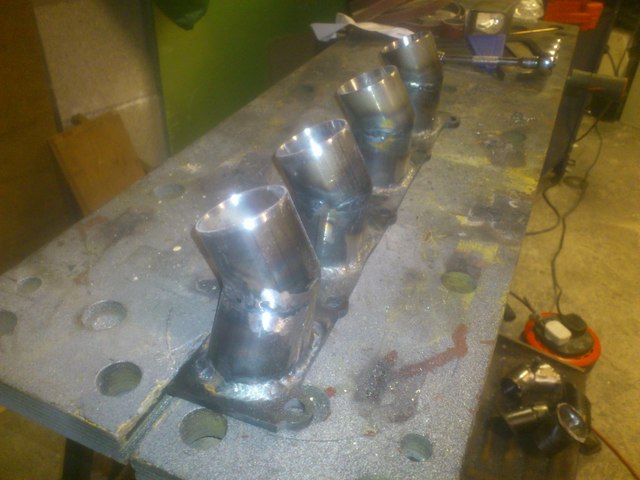
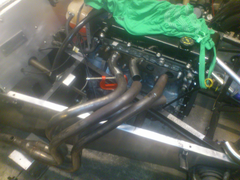
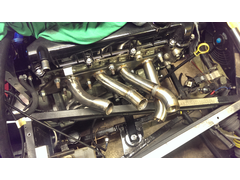
First job was to cut off the old flanges and offer the tubes up to the new engine.
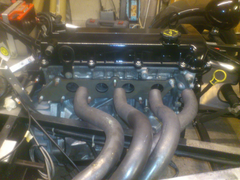

Description
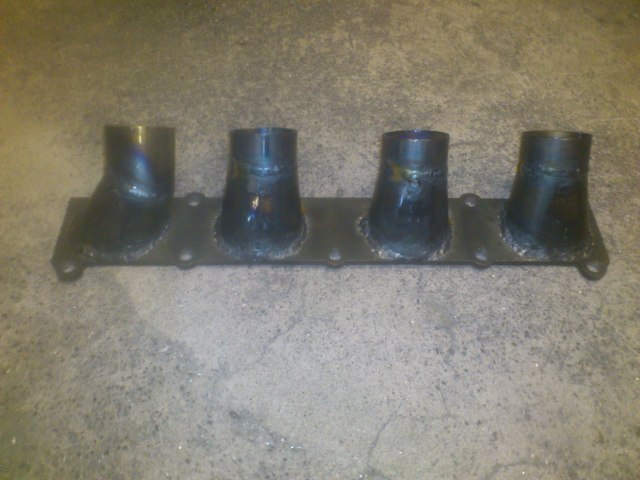
Hmmm - that doesn't look good. The port spacing wasn't that different, but as my engine was sitting slightly further back, I needed to
decide what to do. I could move my complete exhaust back, but then my silencer would be very close to the rear arch and I would have to open up the
bonnet hole. Instead I decided to leave the exhaust position as is and modify the runners to reach the head.

Description

Description
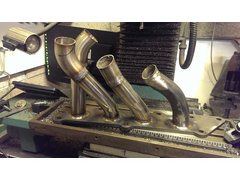
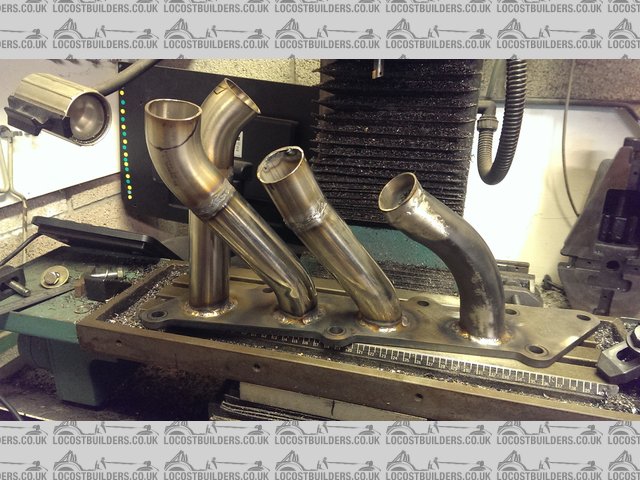
Description

Description

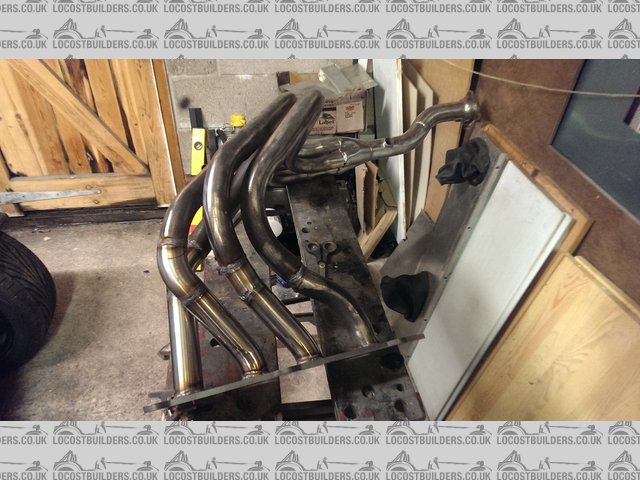
Description
Description
A couple of days work doesn't look like much in a few photos!
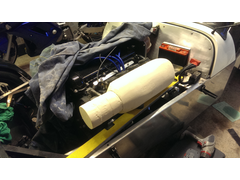
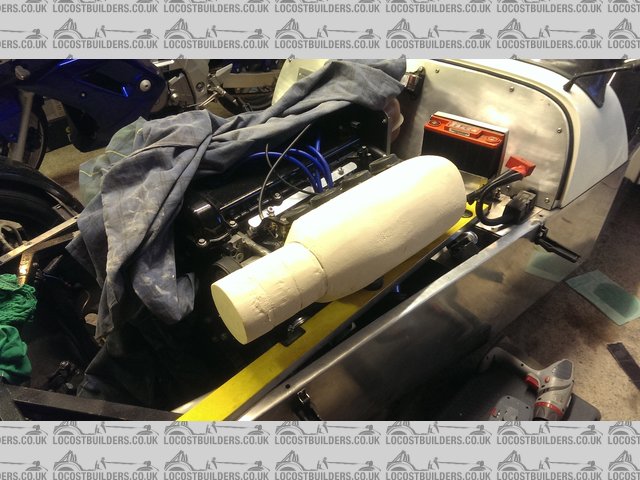
Now onto my next challenge - an airbox. With the carbs mounted, there is very little space under the bonnet for a filter. If I did manage to fit one
it would be tight up against the of the bonnet and probably quite restrictive. I didn't want to cut a hole in the bonnet and stick the filter out
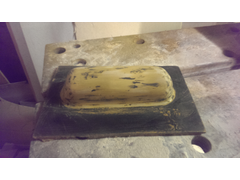
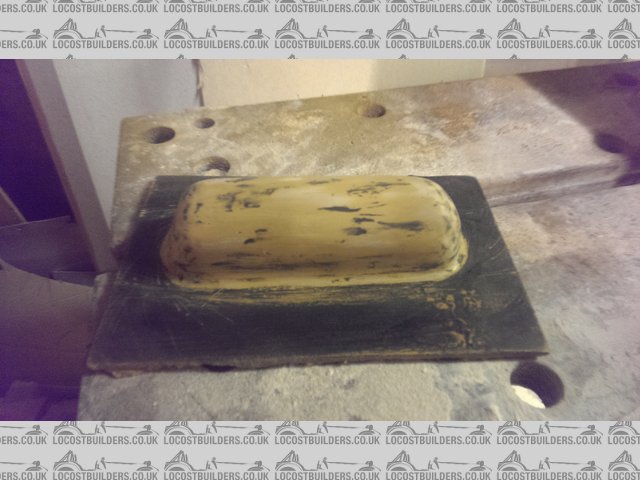
so my only option was to make my own airbox - I'm a fibreglass virgin so this should be interesting.
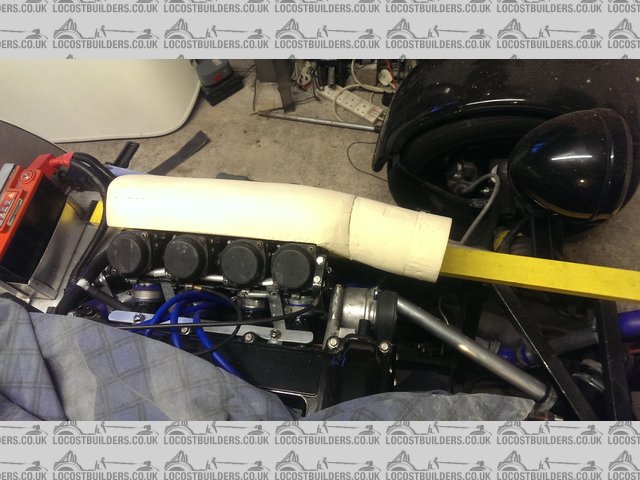
Started by buying a filter element from a pipecross airbox. After a bit of head scratching and googling I worked out how it fits.

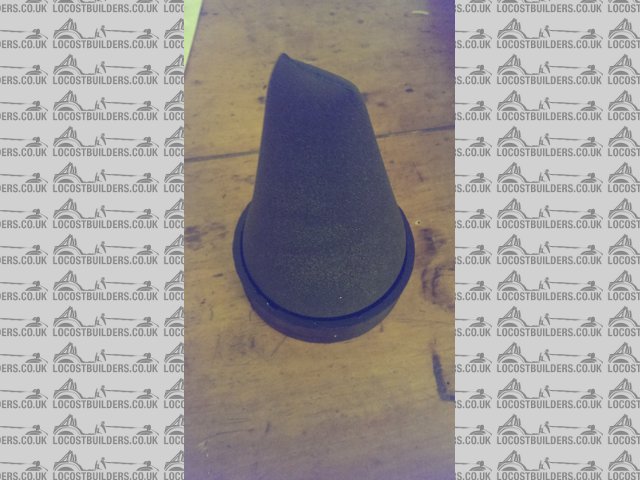
Description
Got a sheet of Celotex insulation from wickes and started carving
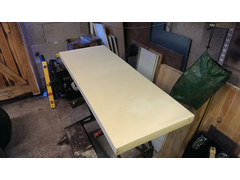
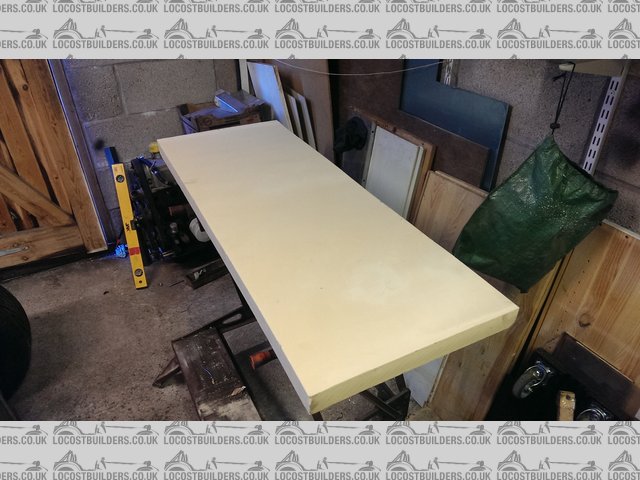
Description

Description

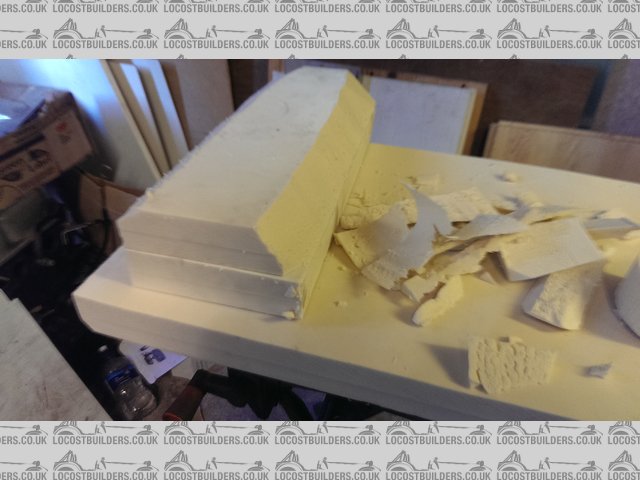
Description
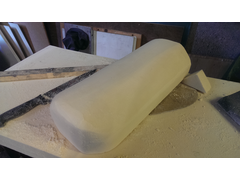
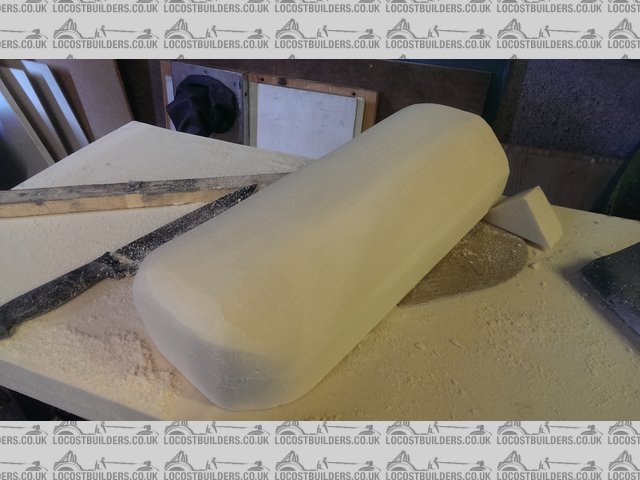
Description


Description

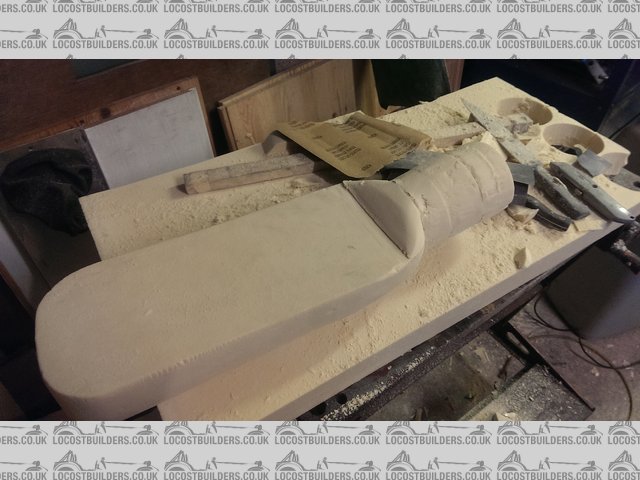
Description
Description

Description
On with the filler next.
Kghaas - 17/3/15 at 08:30 PM
How are you getting along? Are you upp and running?
A lot of nice fabrication in your thread...
davidimurray - 17/3/15 at 09:02 PM
quote:
Originally posted by Kghaas
How are you getting along? Are you upp and running?
A lot of nice fabrication in your thread...
Thanks. I need to get back on here and update!
The engine starts and runs up to temp and the car has moved under its own power. I now need to get the engine setup, carbs balanced etc. After lots
and lots of effort the airbox came out of the mould on the weekend. Now needs tidying up and fitting. New fuel tank fitted, along with a boot box,
modifying the boot lid and relocating the fuel filler.
davidimurray - 21/3/15 at 10:04 PM
Forgive me for I have sinned ......... It has been a long time since my last update. A promotion at work means some of my car time has disappeared so
I've been spending time working on the car rather than updating here.
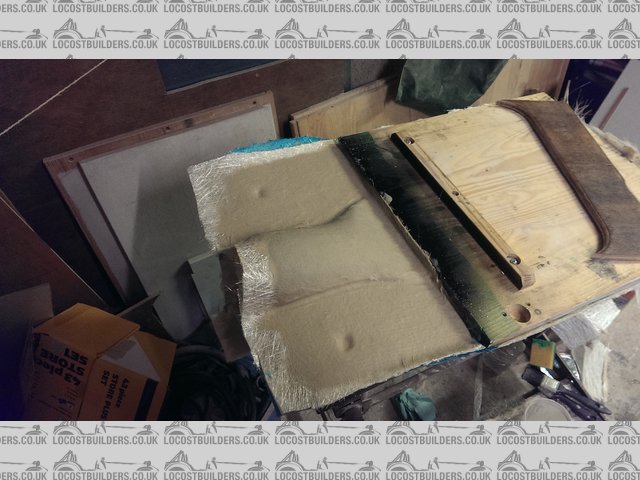
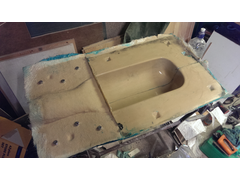
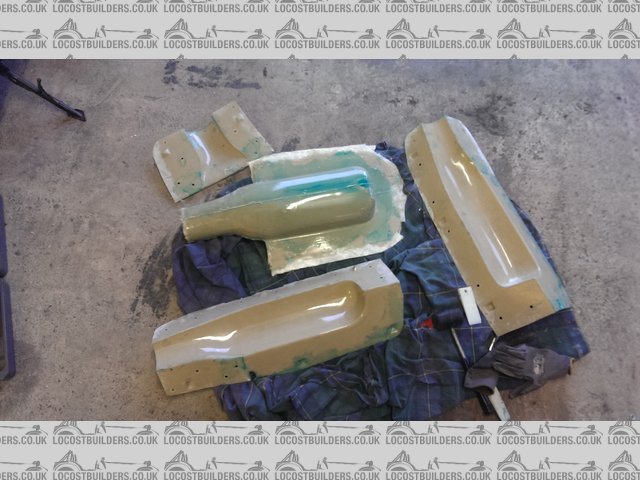
So to start with the airbox. It has been quite a big learning experience!
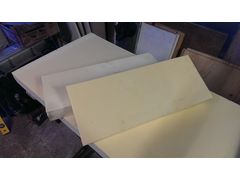
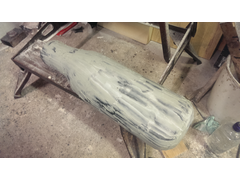
I took the foam body and following the advice in a book I have I watered down some polyfilla and brushed it on. After numerous days of filling,
sanding etc. Was all looking great, then the problems started. The filler formed a shell over the foam, but then started to break up and come off in
chunks. At this point I decided to switch to proper p38 bodyfiller.

Description


Description
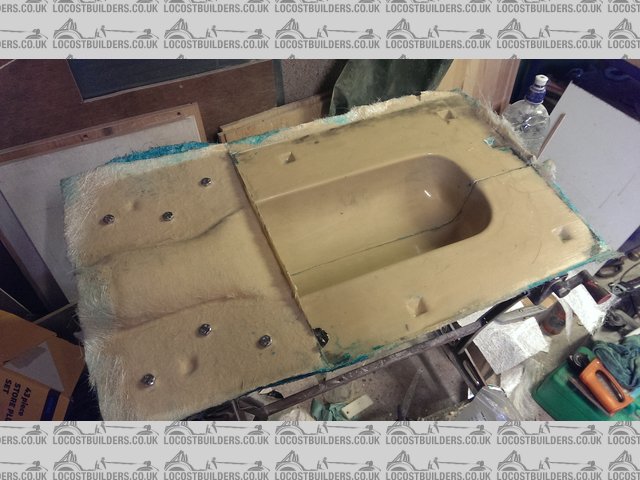
I fitted the mould to a board to form the flange. After a few weeks of sanding, filling etc we were just about there. There were a few little pin
holes so while in Halfords I grabbed some holts stopper. Applied and all great until back in the garage to find large blisters over the mould -
aaaaarrrrgggghhh. Seems some form of reaction had taken place so I had to scrape loads out and start again. Eventually getting closer and closer


Description
In the meantime I also made a small test piece to experiment with fibreglassing. Came out quite well.
Description

Description
Description
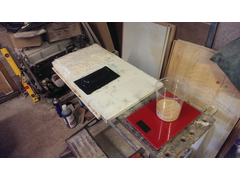
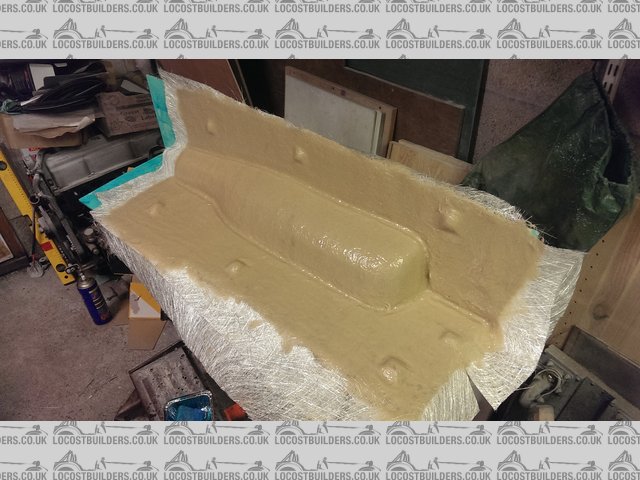
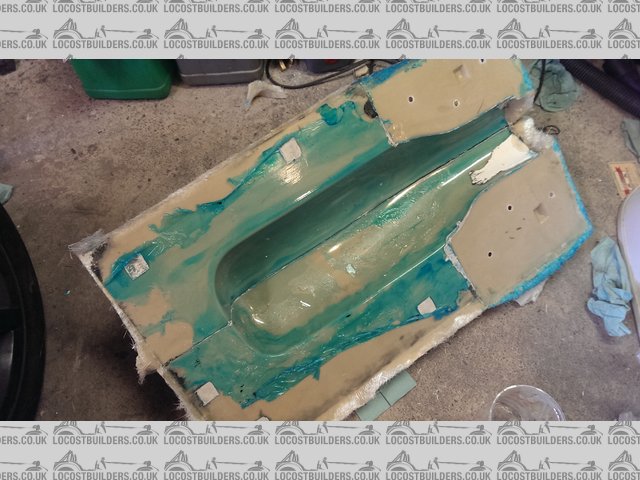
Then it was back to the main job, firstly making fences then covering everything with mould release agent, before removing the fences and laying up
each section in turn


Description


Description

Description
Description


Description

Description
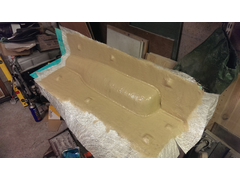
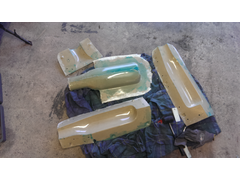
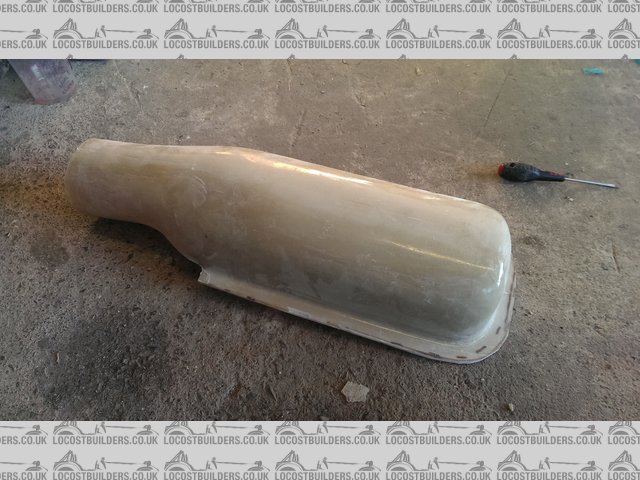
With that all done it was left to harden before all being separated. The parts of the mould came apart surprisingly easy, but the original foam mould
broke up in the process. I trimmed up all the edges to get rid of the excess material.
Description

Description
Description

Description
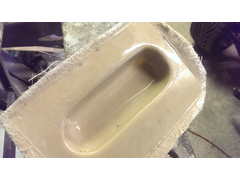
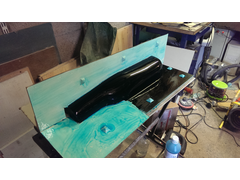
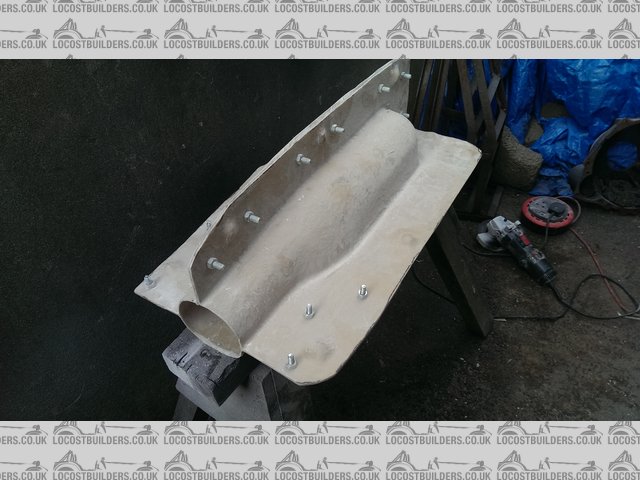
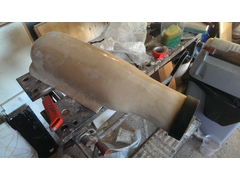
Time to take the plunge. Made the female mould up, coated in release agent then laid it up. Trying to do the tube section was very difficult as it was
hard to make sure I got resin everywhere and got the air out.


Description
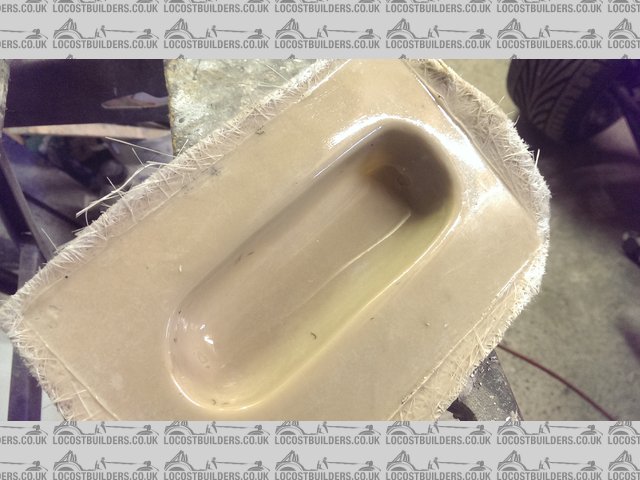
RESULT
Description
Trimmed up. Finish is not perfect but will be fine with a bit of filler and paint.

Description
And with pipercross air filter fitted.

Description
And finally test fitting to the car
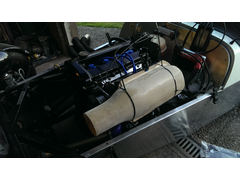
Description
davidimurray - 21/3/15 at 10:50 PM
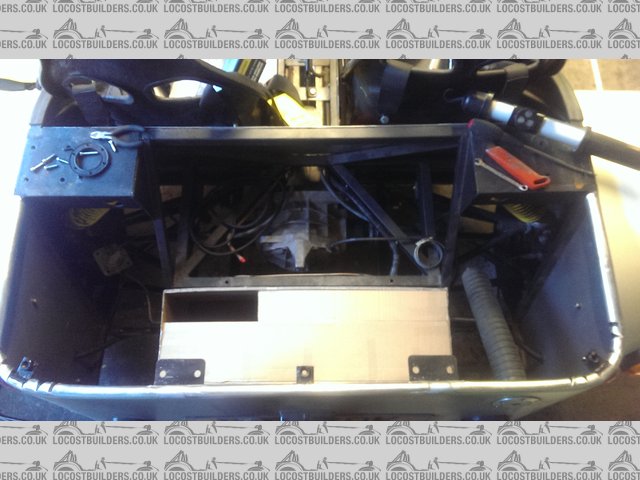
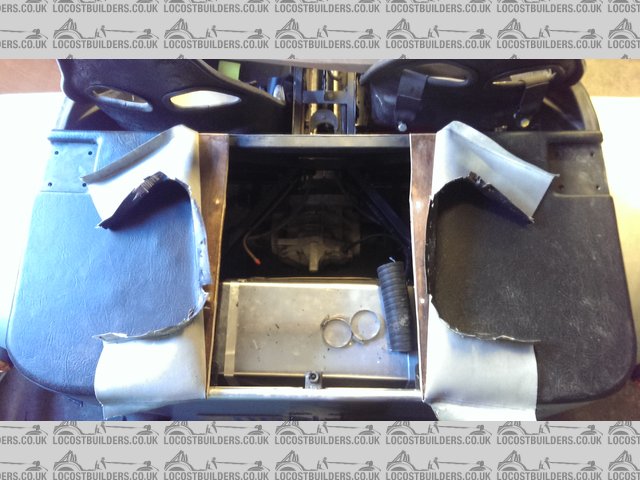
It's not jus all about the airbox.
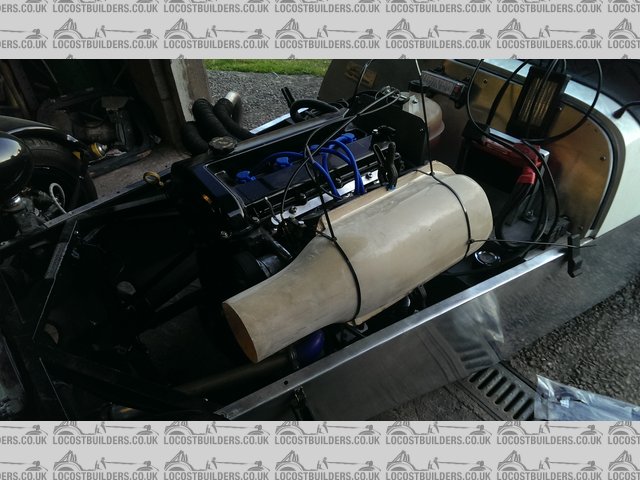
The back of the car was stripped down and fuel tank removed.
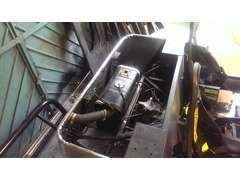
Description

Description
This allowed me to do some CAD (cardboard aided design) for a new fuel tank. Old tank was small and tall, so aim was to go lower, wider and get more
capacity.

Description

Description

Description


Description
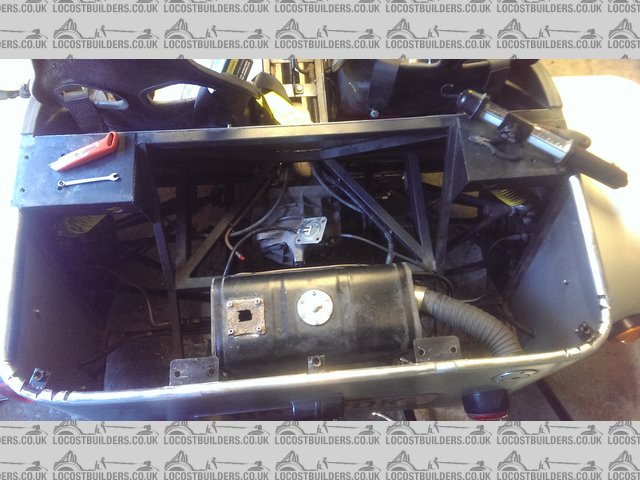
K4Kev over on the Haynes forum then made an aluminium tank to my design, complete with sump.

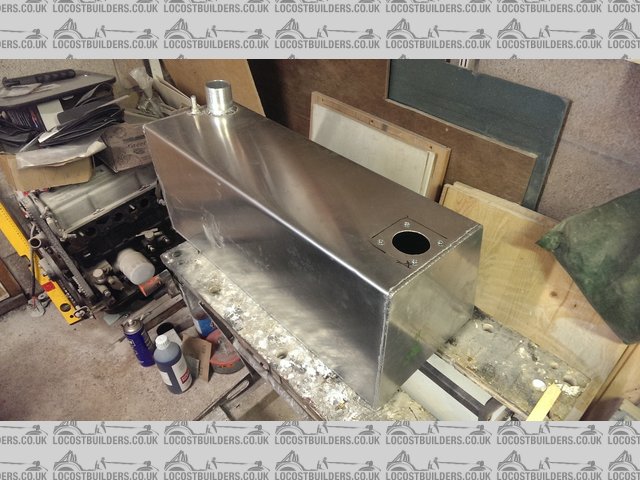
Description

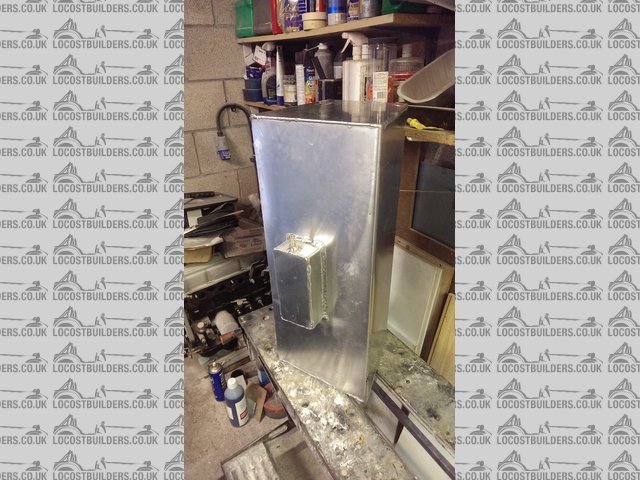
Description
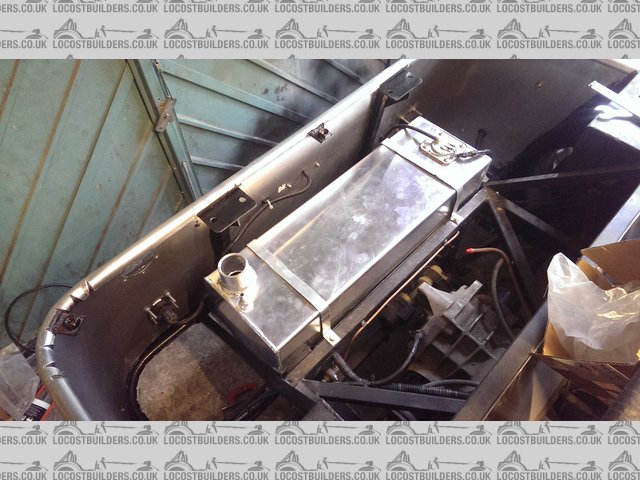
Description
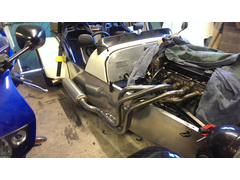
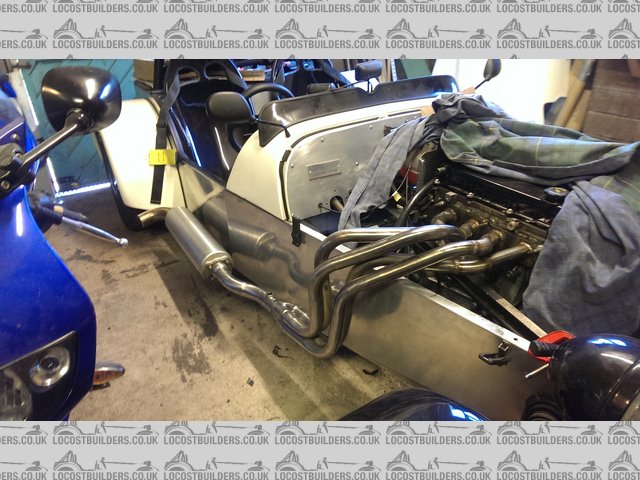
I've also wrapped the exhaust headers under the bonnet. After wrapping I tried spraying them with the special wrap coating you can buy to try and
keep it tidy.

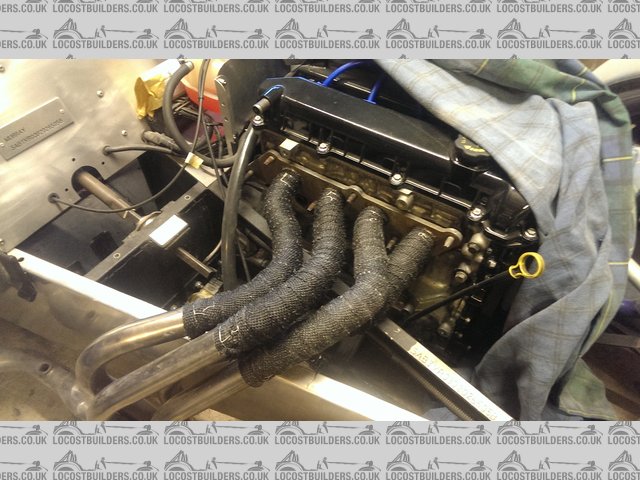
Description


Description
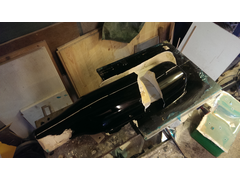
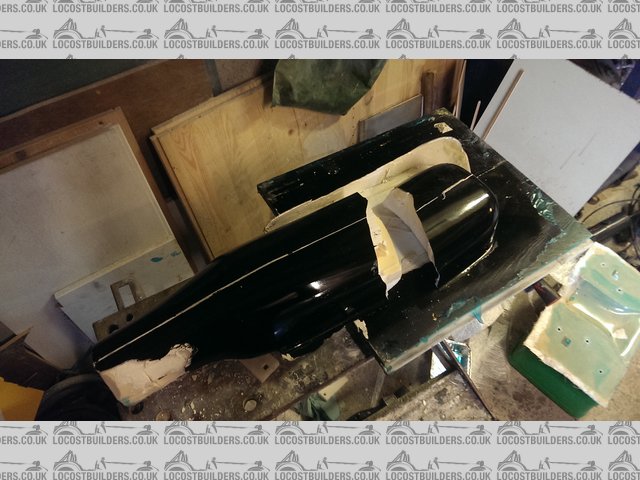
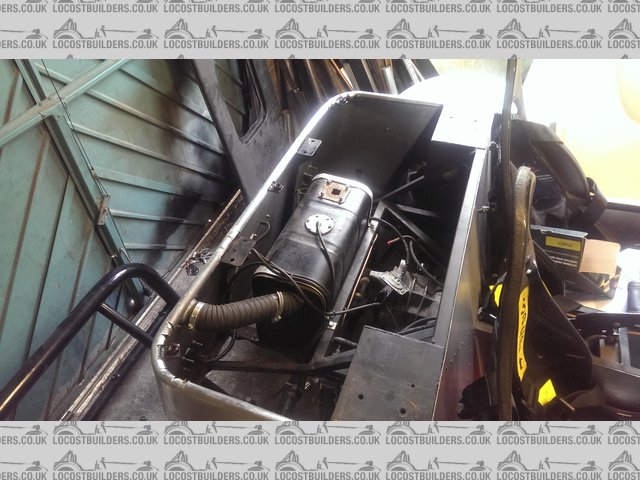
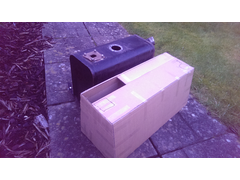
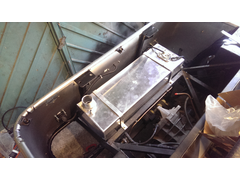
With the new fuel tank fitted I hacked the top cover into pieces and have made a start on a boot box. Part of this work also includes moving the fuel
filler to the top of the tub - I'm fed up of dribbling fuel in at every fill up.
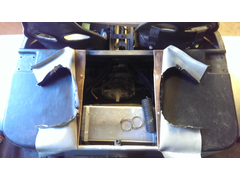
Description
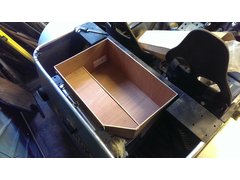
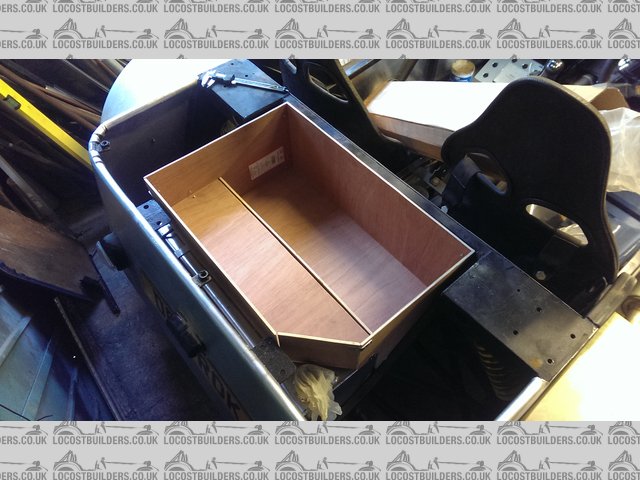
Description
And last but not least the car has moved under it's own power. After a few setup issues - will get onto them later I even went as far today as
taking it for a spin around the block.

Description
peter030371 - 23/3/15 at 08:33 AM
I bet it was great to drive around the block


