
DIY pinto porting
ryanill - 31/10/12 at 11:48 AM
hi all
over the last few weeks ive been doing a bit of DIY porting on my spare pinto head. i found some guids on DIY porting and have been having a go
could anyone who knows more than me about porting give me some friendly feed back ?
im not after maximum power from this head, just a bit more. everything measured up withing the tolerances in the haynes manualso im hoping to use it
next year on the car
cheers ryan


tegwin - 31/10/12 at 12:12 PM
If you have removed material have you balanced the volumes of the combustion chambers?
http://www.merkurxr4ti.com/chambervolume.html
chillis - 31/10/12 at 12:13 PM
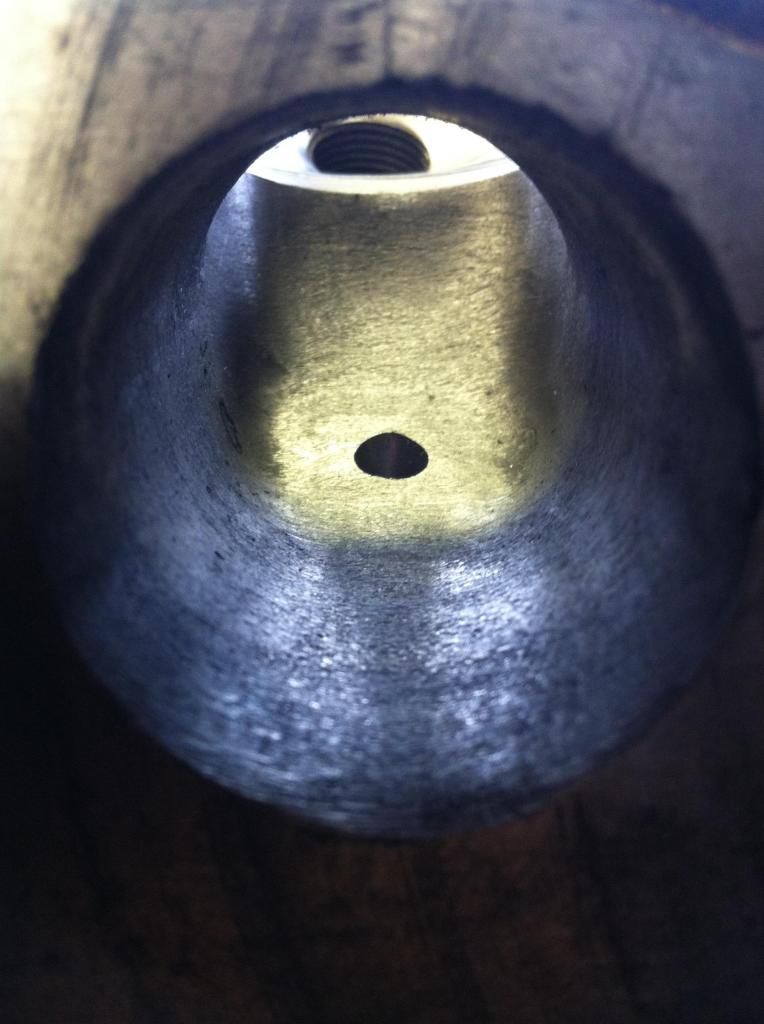
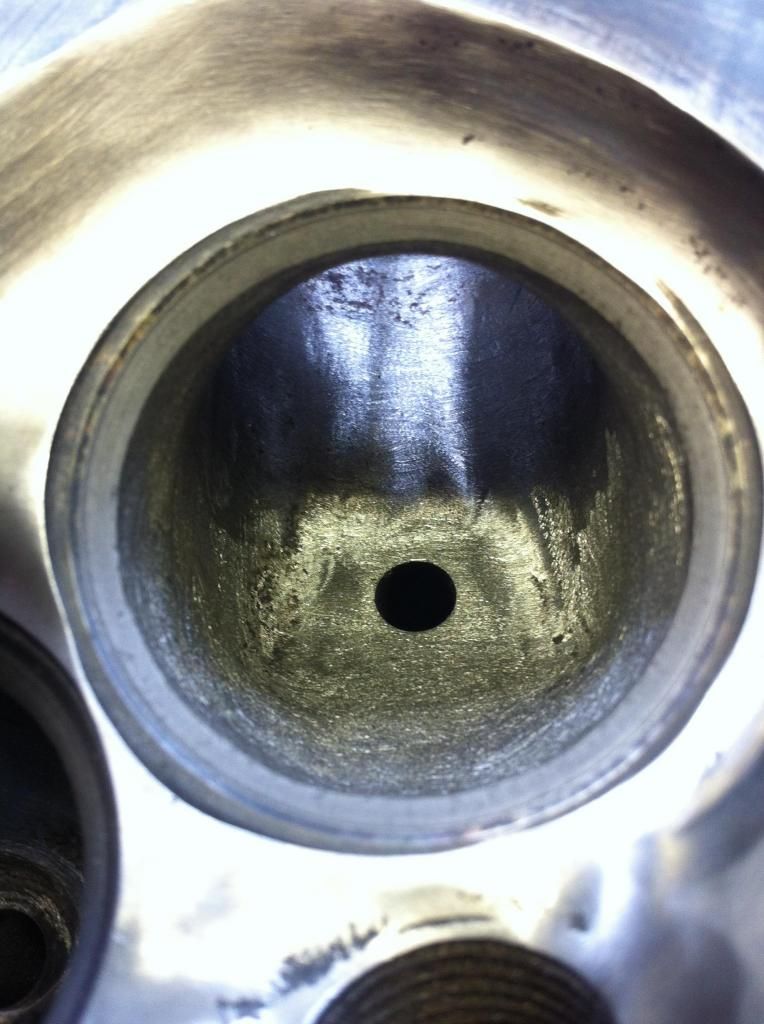
Did you polish the combustion chambers or was it like that already? (don't polish the ports)
Hope you havent opened the ports out except in the area of the valve guide (the ports are already too big on a pinto but badly shaped) you have ground
the inlet valve guide boss completely away from what I can see in the picture - you will now need replacement valve guides or the valve will wear
whats left out in no time even with a stock cam, but then if you were running a stock cam why port the head?
All in all though looks alright generally.
Mr Whippy - 31/10/12 at 12:16 PM
oh that's brings back memories of me as a teen, did this to my poor suffering cortina (20 years ago! god time fly's)
you need to make sure each head space has the same volume and it sure reduces the compression ratio, performance was awful till I forked up the cash
to get the head skimmed but worked well after that. Do make sure the manifold matches well, as almost the same effect as porting if done right.
yeah a bit suspious of the valve guides though I can't remember how they looked normally or if they had inserts in both the inlet and exhaust
There was a great link for pinto tuning here a long time ago, can't remember the link maybe someone else can
ah here it is, can't open it here at work due to IT plebs, so not even sure the link is live now, give it a go
tuning pinto guide linky
[Edited on 31/10/12 by Mr Whippy]
ryanill - 31/10/12 at 12:56 PM
Hi all
Here's the details
Inlets :
Non polished (as ground/ sharp edges removed)
Valve throats opened to 1.5 inch
Inlet left standard (just gasket matched)
Valve guide removed
Short side radius given more generous radius
Exhaust :
Guide left in
Sharp edgest removed
Gasket matched
Polished with 80 gritt to stop build up of carbon
Chambers :
Minimal polish
Plans to skim soon and will be balences after that
BangedupTiger - 31/10/12 at 01:02 PM
I once caught a mate doing this to an esprit turbo with a black and decker. 
All I can say is well done for having a crack, way outside my skill element.
Be good to see the outcome, as currently i'm looking at alternatives to my pinto.
Rod Ends - 31/10/12 at 01:03 PM
This book has diagrams showing how to port pinto heads.

ryanill - 31/10/12 at 01:14 PM
Yes I'm looking forward to seeing the results. The guide I guid had plenty of diagrams may have been extracted from the vizard book???
It said the valves would wear quicker but with low mileage use (5000 a year) guides should be ok cast ? Or would it be best to have them replaced with
the skim ?
Changing to a fr 32 fast road cam.
I'm trying to keep it all lo cost as possible but if new guides are a must then ill get them done
Ryan
mcerd1 - 31/10/12 at 01:23 PM
did you get a copy of the other pinto book ?

ryanill - 31/10/12 at 01:52 PM
no books yet but both on the xmas list 
Mr Whippy - 31/10/12 at 03:00 PM
I think getting valve guides that extend into the port as much as possable would be a good investment in the long run and help make the engine more
robust, this is a perfect time really to get it done and should not be too costly. They an also seat the valves at the same time for you...
mcerd1 - 31/10/12 at 03:52 PM
I haven't done any porting to mine yet, but the total bill for skimming, 3 angle valve seats and bronze guides (fitted) wasn't that bad at
all - unfortunately it was now so long ago I can't remember what it was and the invoice is a lump sum including extensive bottom end work.....
snapper - 31/10/12 at 04:57 PM
Remove edge round the valve seat where it meets the chamber, a smooth transition is what you want
Chamber walls need widening where they are closest to the valve at lift but not past the gasket fire ring.
3 angle valve seats
Port matched to manifolds, you can cut the head and the manifold to suit
Measure chamber volume
Measure volume above the piston at TDC
Calculate gasket volume
Add this together
Divide engine size x 4 (498 something)
Divide this by combustion volume
You get compression ratio
You will want atleast 10 to 1 probably more depending on cam
mookaloid - 31/10/12 at 05:05 PM
you can also take material off the valves to improve flow. I think this is in the vizard book.
ryanill - 31/10/12 at 05:57 PM
yes the engin is still in the car at the moment so all the combustion ration will be figured out once its on the bench then ill have it skimed.
ill get in contact with my local engine builder and start getiing some idea of what its going to cost.
just everythings starting to add up. more questions i ask the more money people tell me to spend.
original plan was to port the head to improve flow a bit and fit a new cam kit and genraly strip and rebuild engin replacing piston rings, shells,
gaskets ect.
so far iv had added:
bottem end dynamicly ballenced
head skimed
3 angle seats
new valve guids
im not interest in getting the absolute maximum power out of the engine just rebuild it as fairly standar with a bit more poke than last year. so its
a case of what do i really need ? im trying to keep it mainly "locost"
ryanill - 31/10/12 at 05:59 PM
could the option of the valve guids be done after next season? althoughill need new valves to go with it all but with the head as it is would they
last a season ?
jacko - 31/10/12 at 06:09 PM
Well done it looks very much like mine i also had 1mm planned of mine to give better compression
What cam are you going to use ?
Jacko