
Busa engined middy build
Gakes - 12/10/09 at 04:59 PM
Hi Guys,
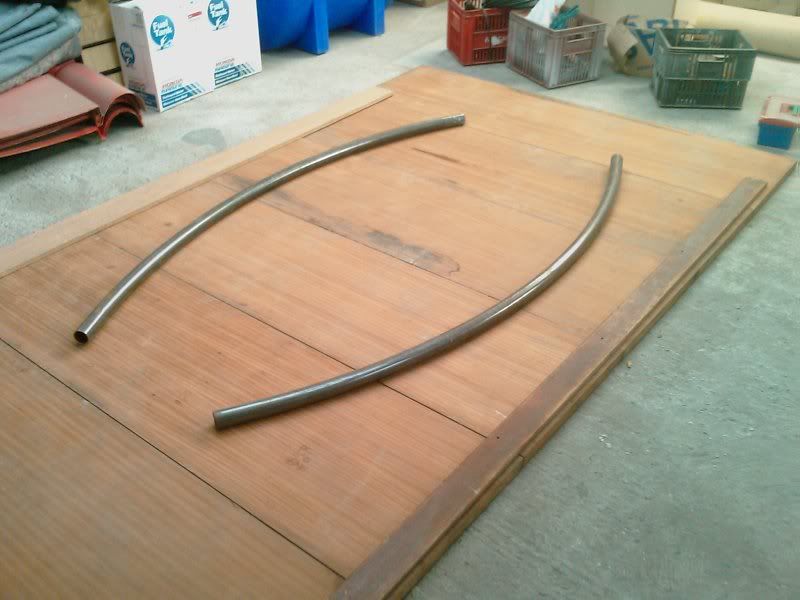
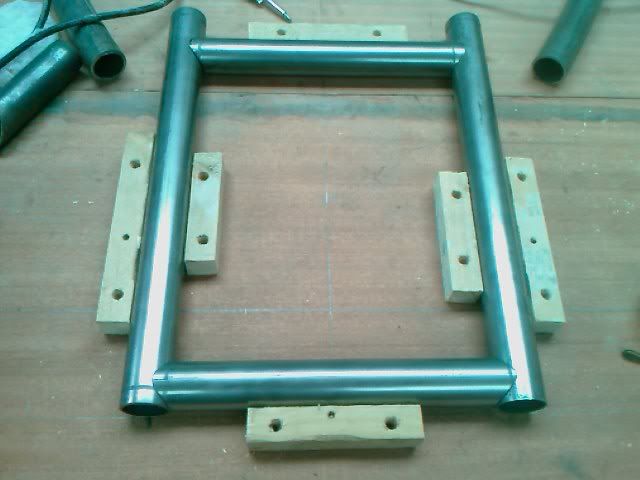
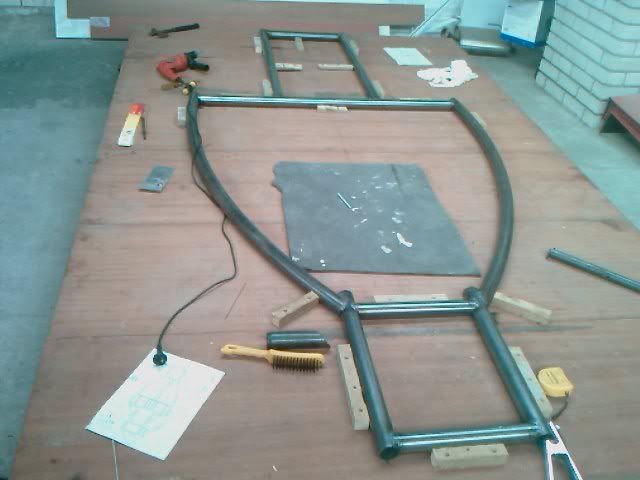
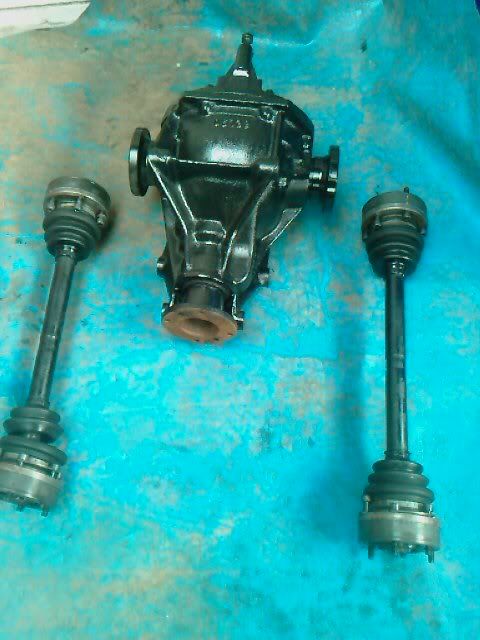
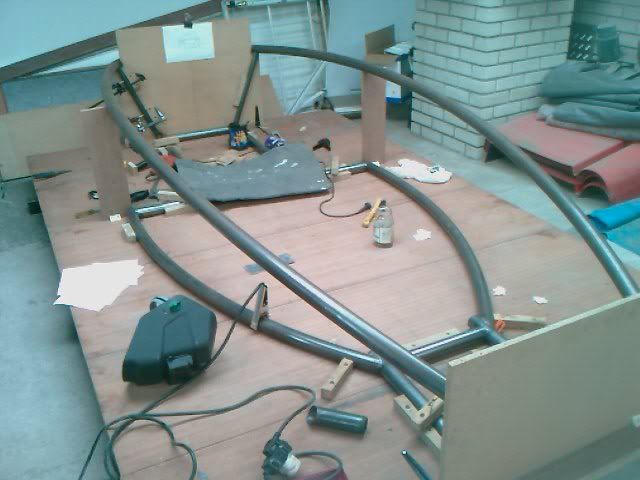
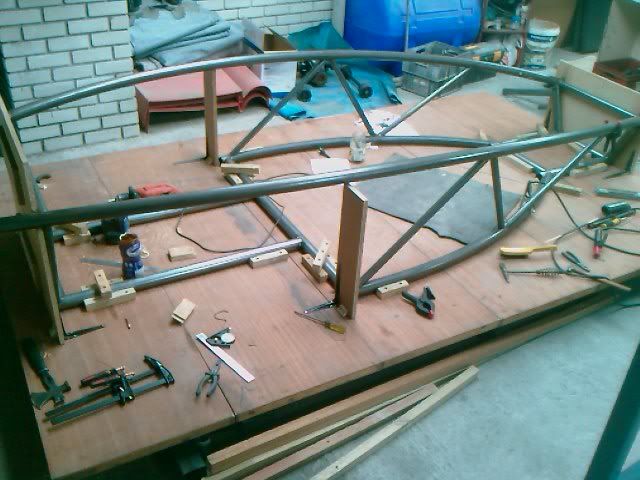
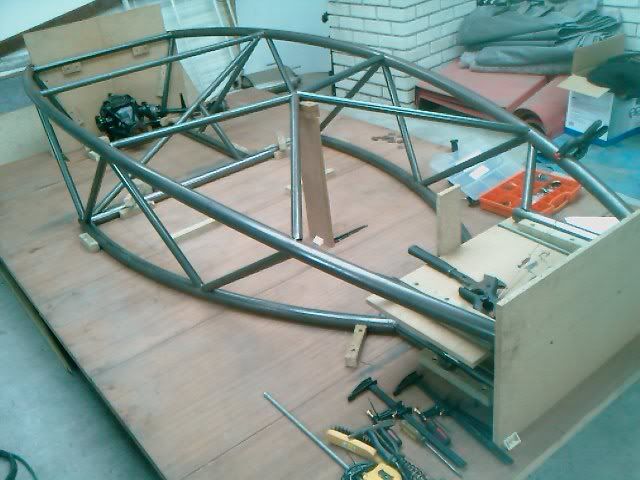
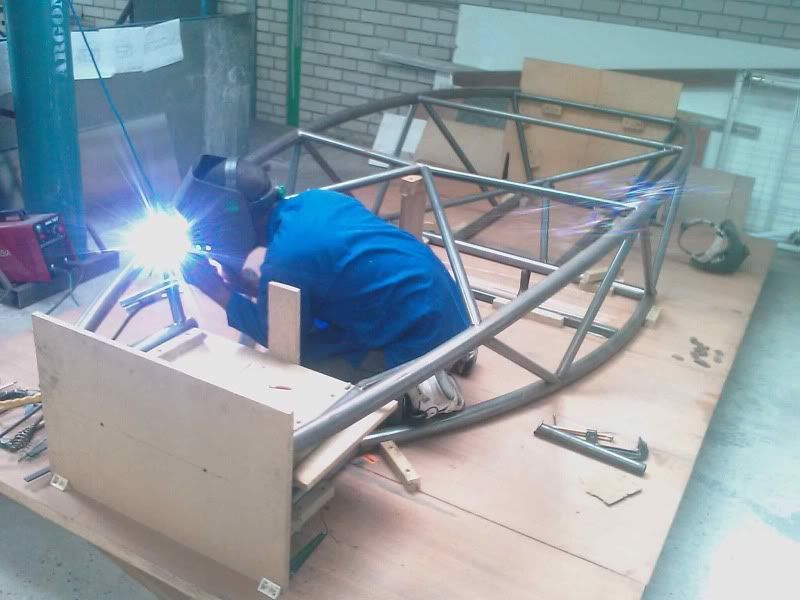
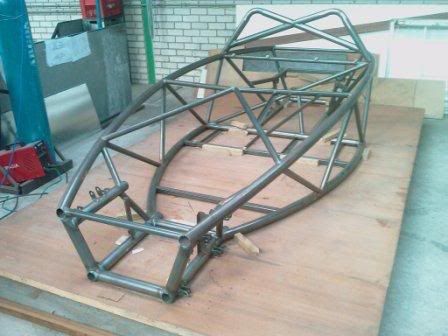
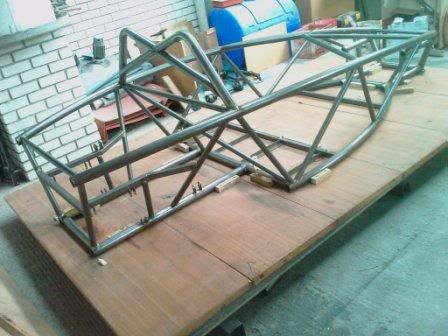
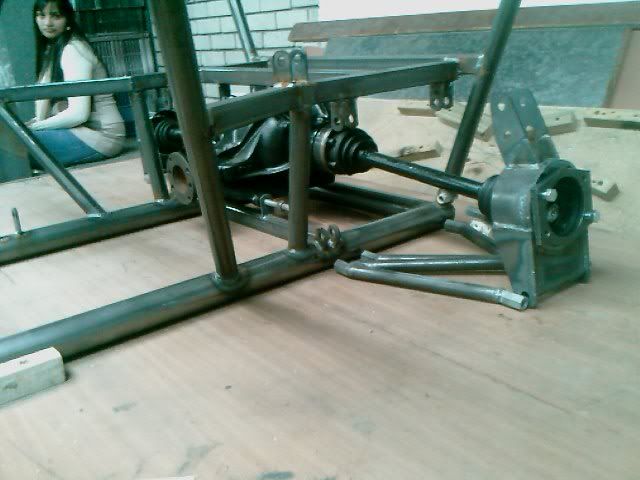
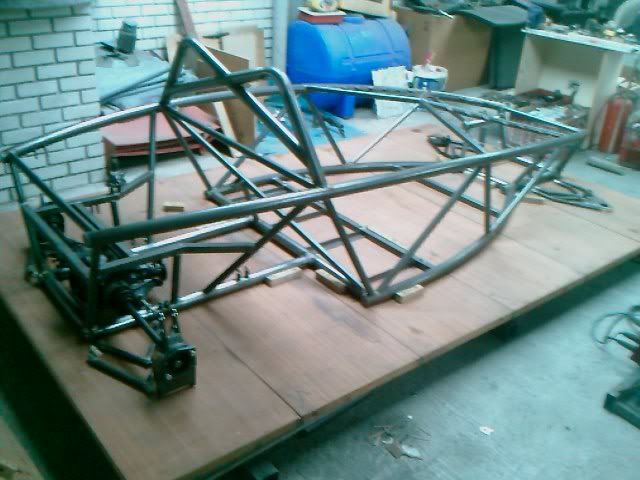
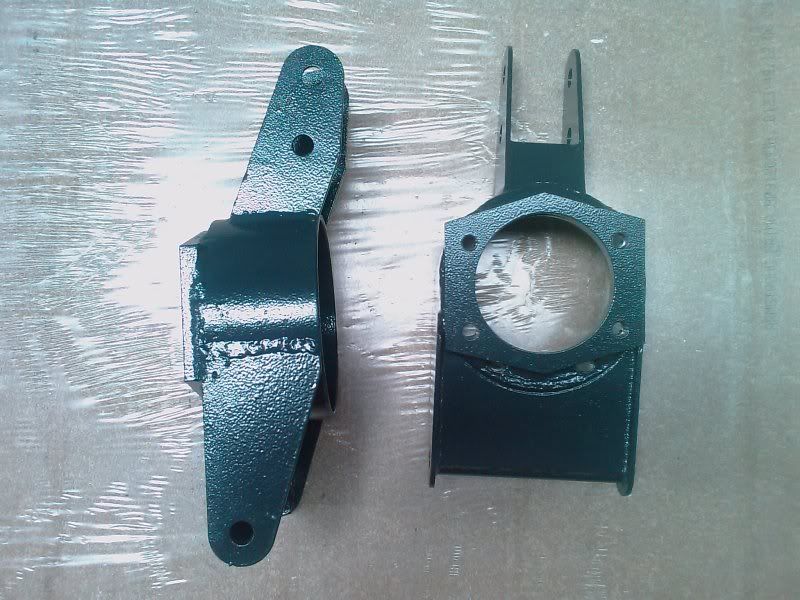
Heres a few pics of my bike engined build based on my first car (learnt a lot from all the constructive criticism . Im using a Sierra diff(3.36),
made up some Haynes style uprights, VW starter for reverse, custom revers gear, cortina front uprights and Golf 3 steering.
In the process:
machining reverse gear and fitment of Discovery 1 rubber coupling as cush drive
Next on the list:
1.Fabricate starter mounting and fit electric starter

CRAIGR - 12/10/09 at 05:03 PM
Looking good there chap 
Jon Ison - 12/10/09 at 05:08 PM

Paradoxia0 - 12/10/09 at 05:24 PM
I am in awe of all you people with the talent to build things like that! I lake the imagination too!
Very nice so far, keep us posted!
Mark
flibble - 12/10/09 at 05:28 PM
Superb!
Some classy fishmouths there, do them by hand or some special tool?
Can't wait to see more 
Gakes - 12/10/09 at 05:33 PM
Thanks for the nice comments.
I've learnt quite a bit messing around with my first car and not taking any shortcuts this time
quote:
flibble posted on 12/10/09 at 08:28 PM Superb! Some classy fishmouths there, do them by hand or some special tool? Can't wait to see more
Just a grinder and lots of time
speedyxjs - 12/10/09 at 06:10 PM
Nice 
Looks very atom/moterleira-esque 
Miks15 - 12/10/09 at 06:45 PM
looks very tidy! look forward to seeing finished product!
One question, how come you decided to mount the busa longditudinal and not transverse?
prawnabie - 12/10/09 at 06:51 PM
Im shocked no-one has mentioned the lass yet lol
OX - 12/10/09 at 07:17 PM
very nice but like prawnabie has said why are you putting it in the wrong way ,,with all that room it should fit in a doddle 
Gakes - 12/10/09 at 07:25 PM
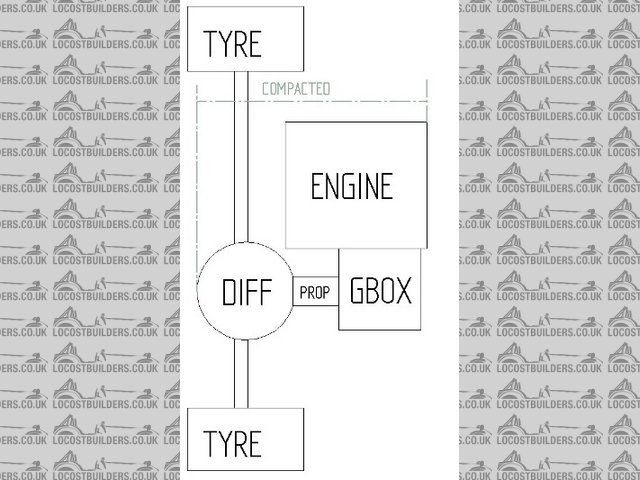
Im mounting the the engine longitudinally so as to use a prop instead of a chain drive. Not too keen on a chain snapping
The diff is mounted offset to the right with the engine just left of the centre. This will also keep most of the weight as low as possible and compact
as possible which in turn will hopefully balance her a bit more.....in theory that is
nitram38 - 12/10/09 at 07:57 PM
I hate copies! 


Nice job, welcome to the dark side
Luke, I am your father..............Nooooooooo 
Doug68 - 14/10/09 at 03:12 AM
quote:
Originally posted by Gakes
(learnt a lot from all the constructive criticism
This guy will go far! Particuarly if you can turn turd flinging into "constructive criticism" he he.
quote:
Originally posted by prawnabie
Im shocked no-one has mentioned the lass yet lol
Boy howdy she looks bored but at least she's in the shed, I used to have one that would sit in the shed and give me that look too. It did not
end well.
For the tube notching I'm guessing he's using somerthing like this:

Which fits in a pillar drill and uses hole saws to cut the tube. I have a similar device and love it as it makes you look like a tube fitting genius.
Gakes - 14/10/09 at 06:21 AM
quote:
Doug68
Which fits in a pillar drill and uses hole saws to cut the tube. I have a similar device and love it as it makes you look like a tube fitting genius.
lol. Honestly I just use a tape measure, marker pen and grinder.
I did however build a mini milling station this week and still looking for long hole saws here in South Africa. But that little machine Doug38 posted
was looking pretty tempting
cheapracer - 3/12/09 at 05:58 PM
quote:
Originally posted by Gakes
lol. Honestly I just use a tape measure, marker pen and grinder.
Then you need to stop wasting time and get the "Tube Mitre" software thats floating around the net in many places, brilliant little program
I even emailed the creator and told him so with a big thanks!
Your girl looks like she needs some build time too.
Gakes - 4/12/09 at 05:42 AM
I've checked out the software. Didnt use it cos I didnt know how good it was. but if you say its that good, I will give it a try. I've just
invested in a set of good Bi-metal hole saws. We'll see how they work in a drill press.
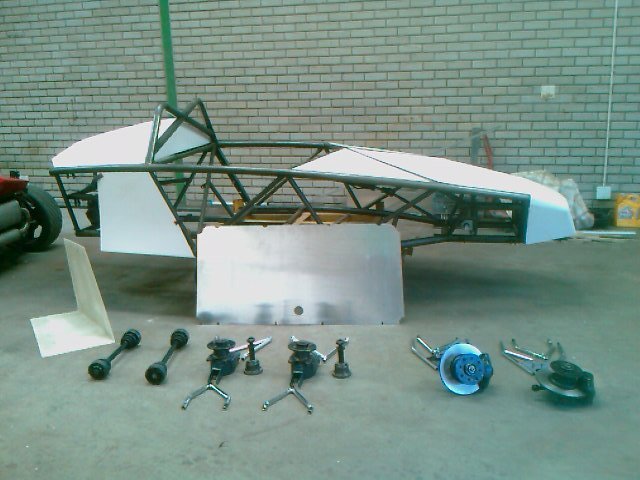
Heres more pics of the build. I sold it to a guy in California, Cord. He is busy with a Sonic 7 as well, and I can see he has a good eye for these
things.
[Edited on 4/12/09 by Gakes]

Rescued attachment IMAG0511.jpg
tadltd - 4/12/09 at 10:36 PM
quote:
Originally posted by Gakes
Im mounting the the engine longitudinally so as to use a prop instead of a chain drive. Not too keen on a chain snapping
The diff is mounted offset to the right with the engine just left of the centre. This will also keep most of the weight as low as possible and compact
as possible which in turn will hopefully balance her a bit more.....in theory that is
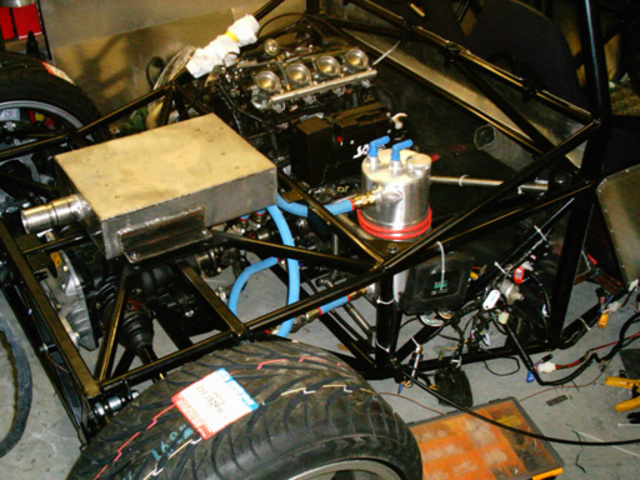
Like we did:

undies-03
...about 7 years ago. 
(Ignore the 'cake tin' exhaust - it was an extreme effort to meet Bedford Autodrome's noise restrictions - and it worked!!)
Bobbus - 5/12/09 at 01:11 AM
quote:
Originally posted by Gakes
Im mounting the the engine longitudinally so as to use a prop instead of a chain drive. Not too keen on a chain snapping
The diff is mounted offset to the right with the engine just left of the centre. This will also keep most of the weight as low as possible and compact
as possible which in turn will hopefully balance her a bit more.....in theory that is
I wouldn't be worried about chains snapping, I competed in the RGB championship for a few years in a BDN and never experienced a problem with
chains. Out of the cars competing in the RGB there were far more problems with props than with chains. Using chains gives you a lighter solution and
it's certainly much easier to change ratios.
Below are a couple of shots of the rear of the BDN S3, which has chain drive:


nitram38 - 5/12/09 at 06:02 AM
also using a prop makes the car longer
Gakes - 5/12/09 at 06:29 PM
Thats the idea "tadltd", nice job  What engine you using?
Bobbus, thats a good setup as well. The guy that ordered the car(Cord) wanted a rugged setup to take lots of power. I have also seen some chains snap
on the track, maybe they weren't serviced as well as yours. Dont get me wrong, the chain drive was tempting as well.
Heres a diagram that illustrates my idea:

Rescued attachment XO400 ENGINE BAY.jpg
cheapracer - 6/12/09 at 10:52 AM
When I look at tadltd's picture and your chassis it looks like it may be a tight squeeze? (bum to axle distance).
Yeah that software is great, I always told the software that the male tube I was using was 1 mm bigger than the female to allow for the thickness of
the paper and 2mm wall thickness.
cordycord - 9/12/09 at 02:36 AM
quote:
Originally posted by nitram38
also using a prop makes the car longer
Not necessarily. I measured an actual Quaife & 'Busa chain setup with reverse, and then measured out a longitudinal 'Busa with
differential. There's less than 1" difference in length. Either way, it's a tidy little package in the xO400 with lots of extra
room.
I actually requested this design from Gakes, less for chain snap and more because I thought it could be reproduced at a lower price than the Quaife
solution. Not that it's better, just as a proof of concept. Gakes filled in the details quite nicely, I think.
aitch - 10/12/09 at 04:59 PM
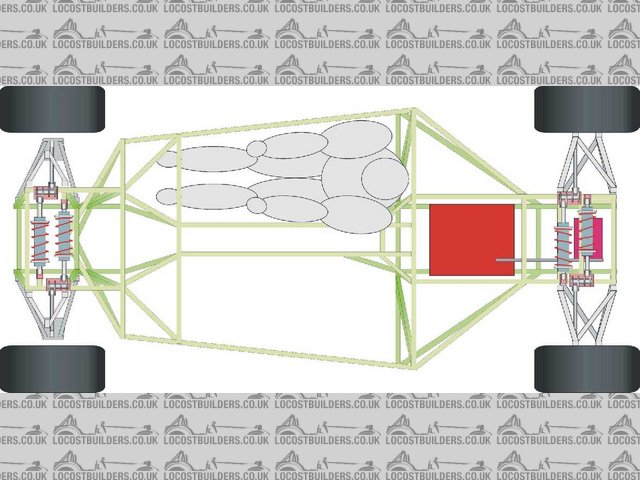
my idea for busa engined midi
only in a draw programme not in cad so its a bit basic.
locost front suspension and uprights from Rally designs and haynes rear suspension and upright from 3gecomponents so a major cost but worth it i think
for tried and tested parts
sierra drive shafts and diff converted for chain drive, escort steering rack
nothing at all way out there or new really, this will be fully enclosed GRP composite bodywork
aitch
p.s. hopefully pic is small enough to see now and ill start a new thread soon with thought process

Rescued attachment chassis 2 steel 2.jpg
Gakes - 11/12/09 at 07:24 AM
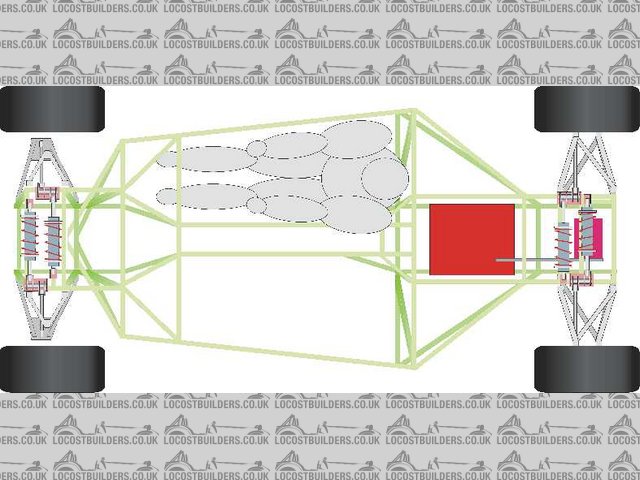
Great layout Aitch, just flip your front wishbones around I think it will help the Kpi.
I hope you get starting soon
aitch - 11/12/09 at 09:08 AM
quote:
Originally posted by Gakes
Great layout Aitch, just flip your front wishbones around I think it will help the Kpi.
I hope you get starting soon
lol id been looing into castor on another thread and had worked out i got this wrong after the assumption cortina uprights with steering arm
horizintal and forwards, heres the corrected sketch
thanks gakes i could have been going off road and this pic been posted in three places although i realised you are the only person that pointed it
out
aitch

Rescued attachment chassis 2 steel castor.jpg
 . Im using a Sierra diff(3.36),
made up some Haynes style uprights, VW starter for reverse, custom revers gear, cortina front uprights and Golf 3 steering.


