
new build rear engine midi
bart - 29/4/18 at 10:59 PM
Hi All
well I'm back in the saddle , health is better and my business is doing ok , so time to build a car
when I built the single seater it started as a two seater and sum how ended up a single seater.
so clean sheet start - back to a two seater
I some know I have spent the last months recovering from a hart attack and running a business ,got a bit bored so planed and
designed my new project
the design is now at a stage where I can make the chassis
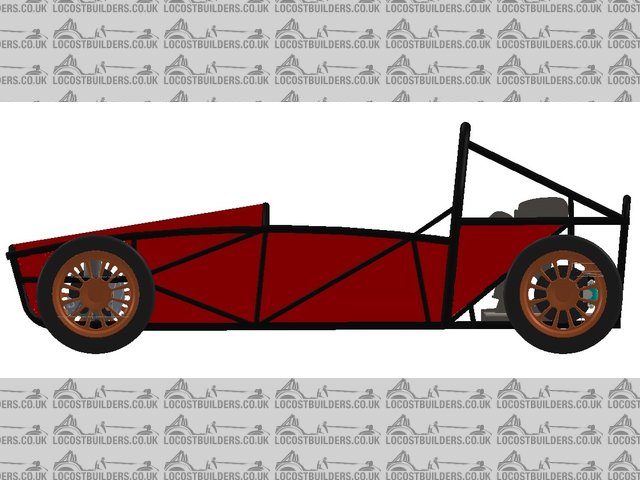
this is a side view

Description
spec is exo skeleton taking big hints from several designs
it has a square face bottom to allow easy of build and panel attachment
the top half ( floor up ) is all round tube
front suspension is hi spec uprights
engine and gearbox is Toyota Celica gts 190 hp ( turbo charged expecting around 350 hp at the crank )
rear suspension is all unique ,
all arms and geometry is unique
i have deigned it to take either front or rear rads , i will make the final desision when engine is in the frame
all the panels are simple flat cut out coloured aluminium
colour scheme will be gloss red and black chassis
today i turned up the rollers to make all the rolled sections , up till now i ahve also machined the suspension
bushes and a few tooling aids.
the plan is to make all the chassis tubes over the next few weeks
i will make a chassis table soon ect
hope to post regular up dates and pics.
bart - 29/4/18 at 11:12 PM
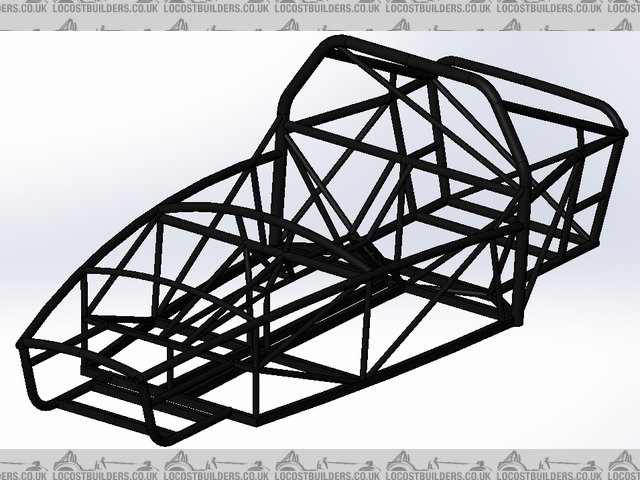
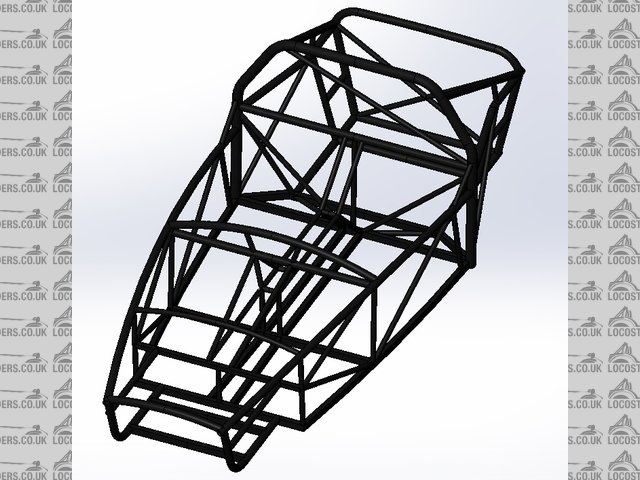
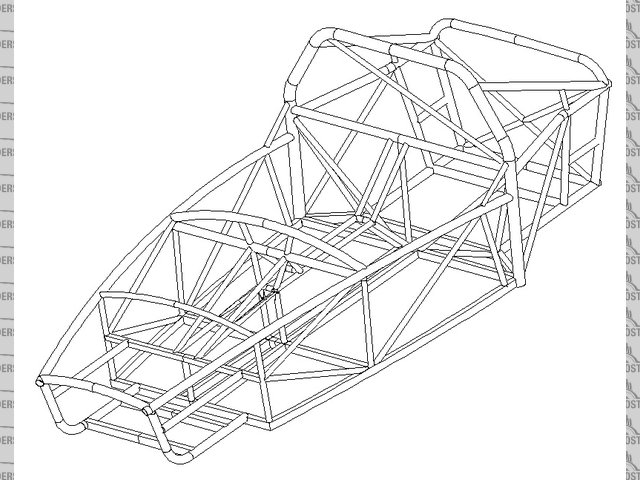
just a few jpegs of chassis design

Description

Description

Description
as you can see it has a centre tunnel to give extra strength and somewhere for possible rad tubes and gear change cables
[Edited on 29/4/18 by bart]
bart - 29/4/18 at 11:36 PM
I choose this engine for the following reasons
1) the rev like a bike engine
2) they turbo charge really well
3) forged rods and crank as standard
4) variable cam and lift
5) light weight
6) exhaust will be at the rear of the car
7) gear box is good for 350 bhp ( crank ) after that its a grenade !
engine pic front on view

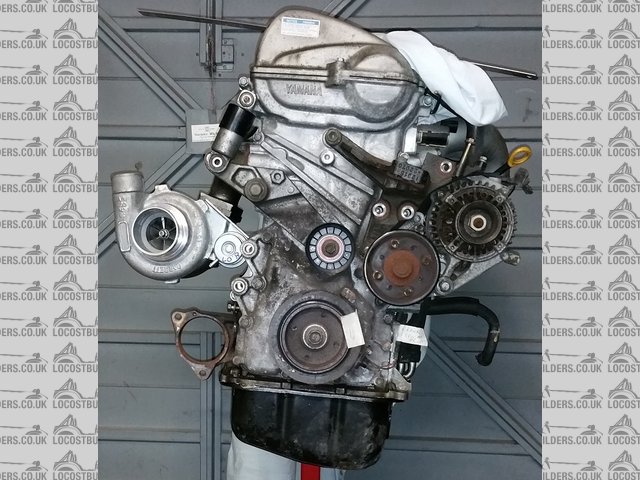
Description
rear view

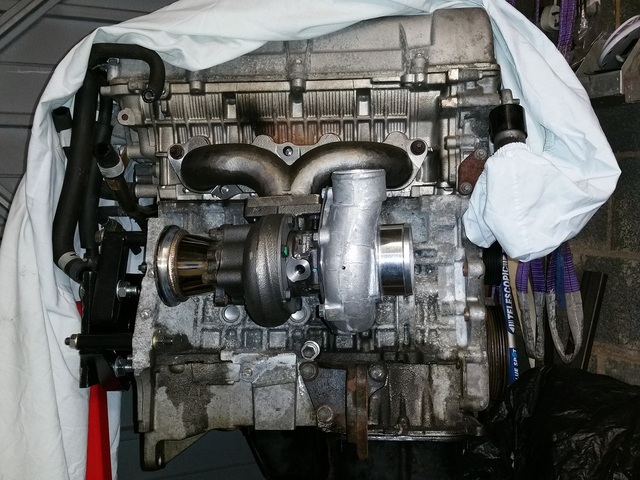
Description
as you can see I have the turbo mocked up in position and all the bitts I don't need taken off
I have already designed a new belt root
it will have a moroso baffled sump.
I was going to build my own turbo manifold , but some things have to give as my work capacity is not what it used to be.
and decided it was not worth the extra effort , although I did design it .

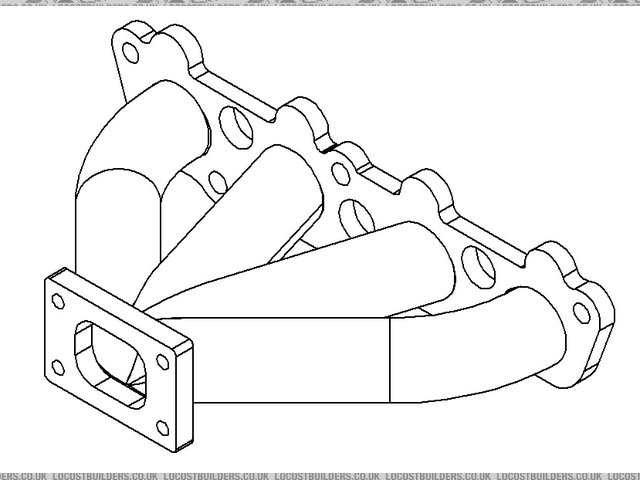
Description

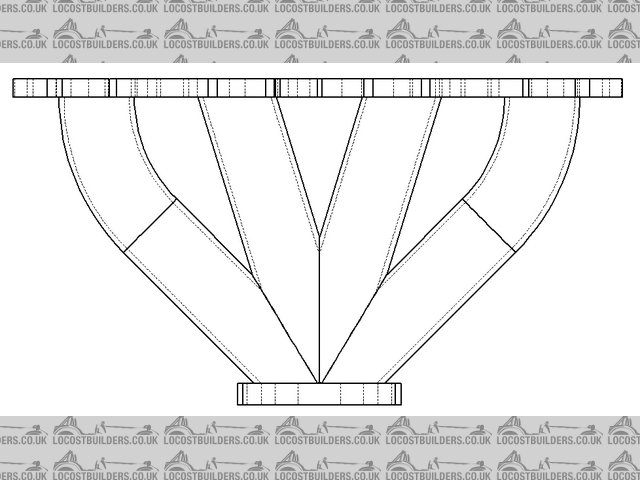
Description
bart - 29/4/18 at 11:51 PM
a few more general layout pics
If you thinking it only has 3 wheels and one side suspension , I only draw what I need if it is to be mirrored
yes I am lazy and I don't care ! 
front view
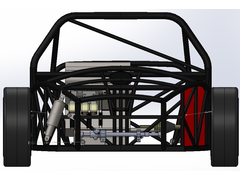

Description
rear view

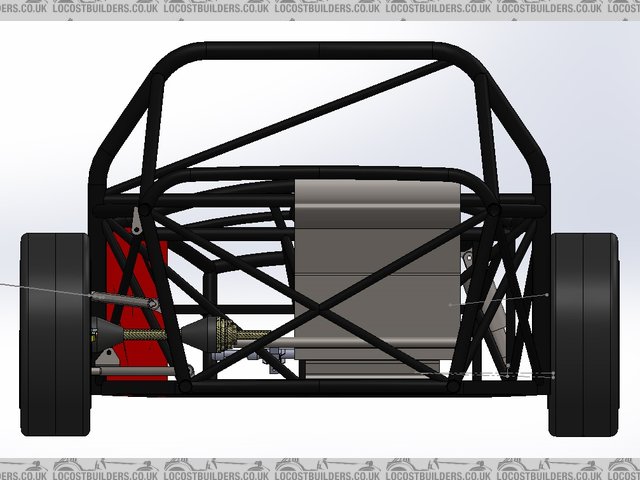
Description
top view

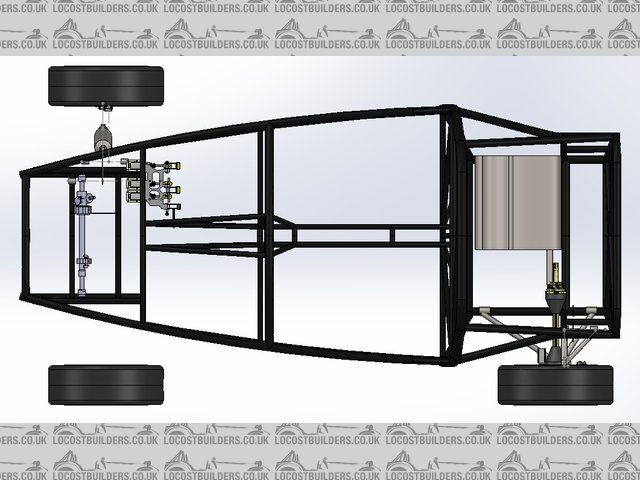
Description
rear suspension view

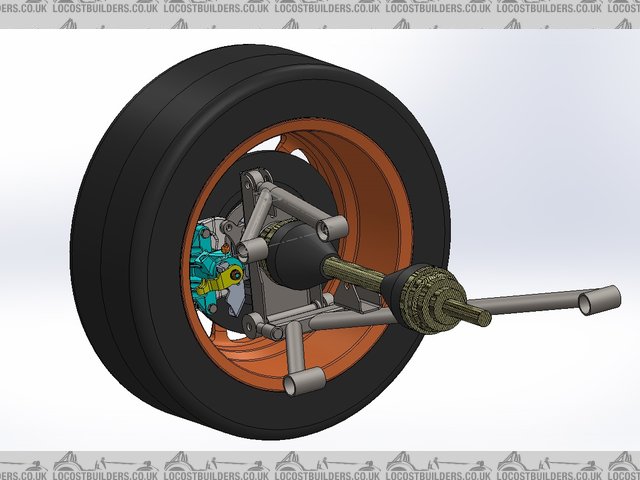
Description
[Edited on 29/4/18 by bart]
Bigboystoys - 30/4/18 at 08:02 AM
Pleased all has improved after the heart attack, the drawings look amazing really looking forward to seeing this progress.
nick205 - 30/4/18 at 08:11 AM
Glad health and business are back on track and glad to see you back designing and building as well.
Personally I've always liked the idea of your proposed layout. IMHO it opens up big possibilities for using a wider range of FWD car
engines/transmissions in a build.
Please keep us posted on your progress with pictures and words!
bart - 30/4/18 at 09:20 AM
good morning all.
having posted this last night late I realise the errors . failing eyes as well
and you never write what you thought you did 
few more specs in no particular order - as they fall out of my brain .
wheel base is 2250 very go cart like
track is 1497 front and rear , uses standard drive shafts ect.
it is designed to take the larger framed gentalman !
1200 wide in the cockpit and long enough for 6 ft 8" or so
wet car aiming for 520 kg on track so far 
driver is trying to loose weight !
looking to be 350bhp ish.
tyres are 195 /50 I don't feel the need for bigger
no windscreen although there will be wind deflectors
road legal going for IVA
most panels will be inset in the frame , so chassis can still be seen and makes IVA exoected rads easy to achieve.
at the moment a few cross tubes are missing to brace suspension pionts
i will add them when engine is in ect i have a few idears but easier to work round and with other components.
lots more to report but my breakfast tea is running out so its off to the kettal ( ie shout the wife )
as more comes to mind i will post updates.
ohh one more thought , the chassis front and rear where level for a long time and to be honest it looked slightly better but it made the step in to
high after I did a temp build : ie a bit of plastic tube 2 chairs and a few books. I'm old and stiff and would have found it
"difficult" to get in and out , and I'm not getting younger, so hence the last minute drop in chassis height more seven height now ,
well half way between what I had and a seven .
[Edited on 30/4/18 by bart]
MikeR - 30/4/18 at 11:05 PM
Hope you don't mind, when i saw the diagram I thought the back looked a little (don't have the right word but something didn't resonate
with me). I'm absolutely no artist but i've had a very quick play on paint and tried to add curves. I'm not sure its better but figured
if i share it, it may reinforce your view of your design or inspire you to do something different.

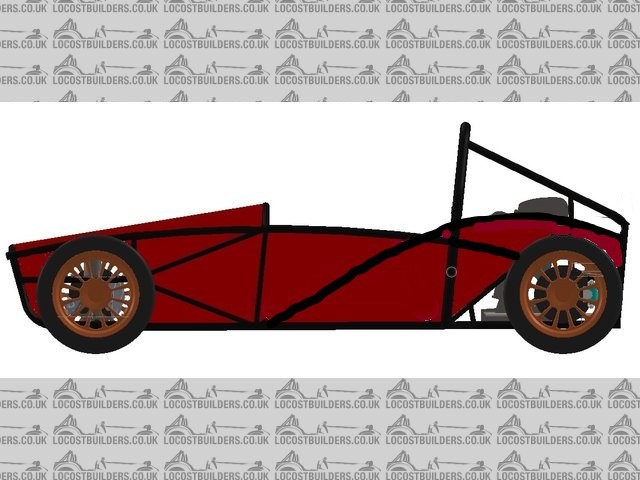
alternate view
Ugg10 - 1/5/18 at 01:18 PM
Welcome back and glad you are recovering well.
Looks like a good project. if you can make the rear prettier than the Exotec then that would be a good thing. Stuart Mills did a version of the Rocket
with the Celica 190 engine but don't think it saw the light of day, this was when he was updating it to have a more pointed front end, he also
did a v6 version for a customer IIRC. Any reason you went turbo as Lotus used a supercharged version of this engine in the exige/evora IIRC to get
350hp.
http://www.totalkitcar.com/2016/06/09/onwards-and-upwards/
Good luck and will be following closely.
bart - 1/5/18 at 03:10 PM
Thanks all for the reply's
first rear frame
I always find the rear frame on an rear engine car the most difficult
as basically you have a tall engine to accommodate and it is just a "big hole" to get around
I have a much higher back than most to stop big tall engine covers ,
I am thinking style the rear when I can see what I truly have to get around.
I have some ideas double hump fast back , flattish with a flip up etc etc
I am trying to avoid fibre glass moulds this time , although I think the rear engine cover may have to be fibre glass.
don't mind doing a mould if you know my previous work but the mess is incredible !.
might have to do side scoops for rear radiator if I go that route as well .
may go down the aluminium route, I fancy a go a shaping my own panels.
we shall see 
re engine > well why did I go down the 2zz-ge route.
simple answer > it seemed like a good idea at the time.
why the turbo rather than supercharger. couple of reasons
1) to much noise just behind drivers head
2) parasitic losses
3) capped at about 320hp > I was originally going for 450-500hp - had a rethink on that though now 350 ish 
ps these engines can do 450,500 quite easily 
I think originally I was going for the 1600 Eco boost engine , but the exhaust is on the wrong side , loads of heat behind driver.
I think you can go on for years deciding which way to go , and sooner or later you have to put your cards on the table . and work with that
decision.
again we shall see .
thanks for your comments all welcolm.
ps: i had a look at the side view redesign that MIKER propposed , when looked at in 3D , think it would be difficult to make it work . especialy with
the rear engine cover and possible side scoops . " but any out the box thinking is always welcom.
well im off to teach myself tig welding that should be hours of "oh S--T" "B---r" ect ect.
could well end up going back to mig welding it all !
good by for now folks.
bart - 10/5/18 at 03:11 PM
hi all
well got some time off today and made start
first the build table made as small as possible to get around and work
can you spot the mistake 
spotted it after I took the picture and corrected it.
measure twice as they say , good job I was not cutting it in half !

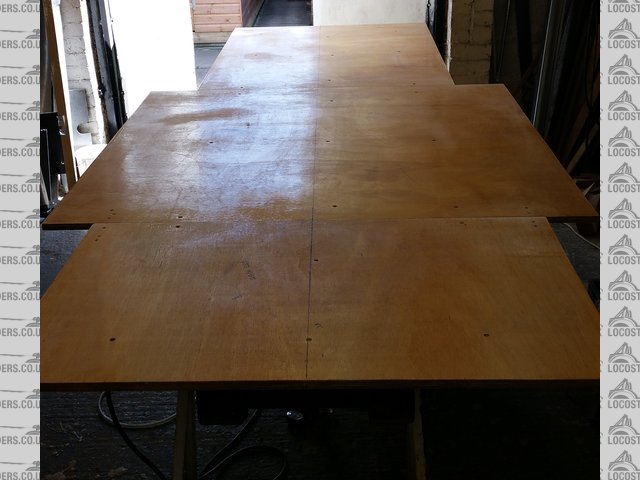
Description
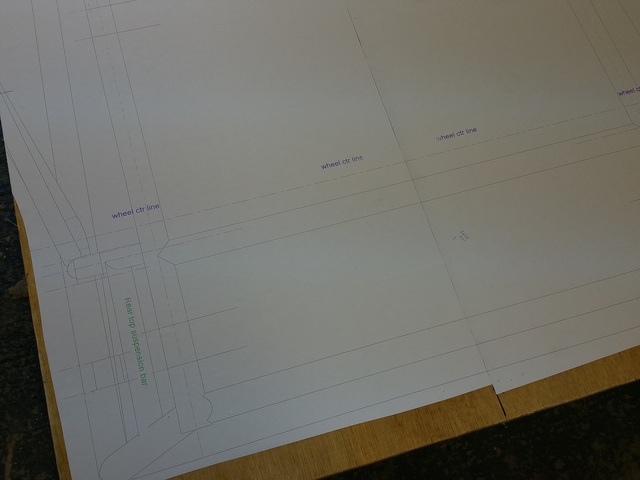
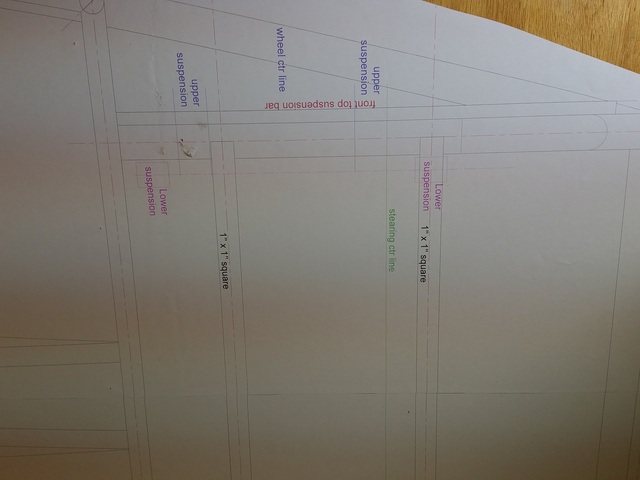
next picture you can see the flat pattern clued to the table
i had to split the drawing and stretch the length as for some reson my plotter does not print scale in the long axis.
got fed up trying to correct it so just cut the drawing in half . and added 9 mm gap to correct the error .
yes yes i know every thing is slightly out but it wont hurt .( i shall retract that statement if it all goes belly up  )
)

Description

Description

Description
tea time now, if i can raise the effort i will make the roll templates tonight for all the rolled pieces.
i have already made the rolling formers so should progress when work allows ( and wife )
bart - 10/5/18 at 03:15 PM
final word for today
I had terrible trouble getting laser quotes done.
I sent the dxf/dwg files out to 6 companies , only got one company to quote.
any one else had similar problems , and yes I tried all the recommended companies from this forum
bart - 10/5/18 at 07:58 PM
late post for the day
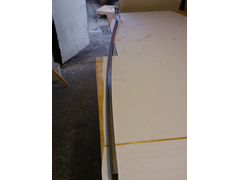
I rolled the outer lower chassis rails tonight
came out perfect - a good start

Description
there 1.5" x 1" fyi
bart - 13/5/18 at 09:03 PM
Hi all , just a quick update
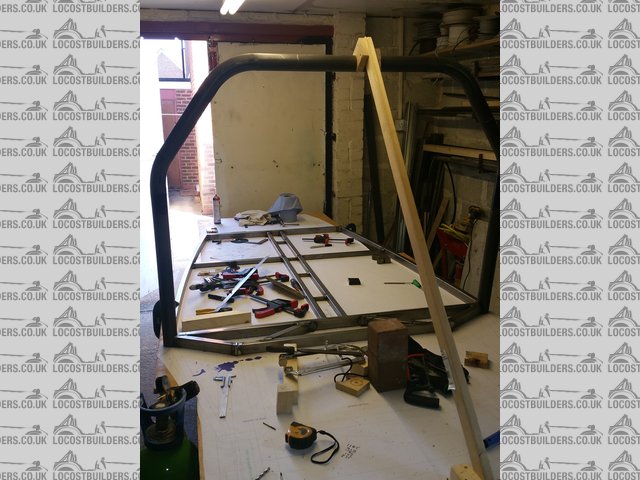
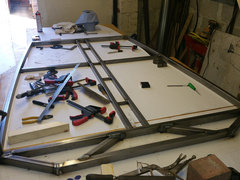
finished the main tub floor fabrication
got the roll bar in position and cut round the main tub frame.
a few pics below

Description
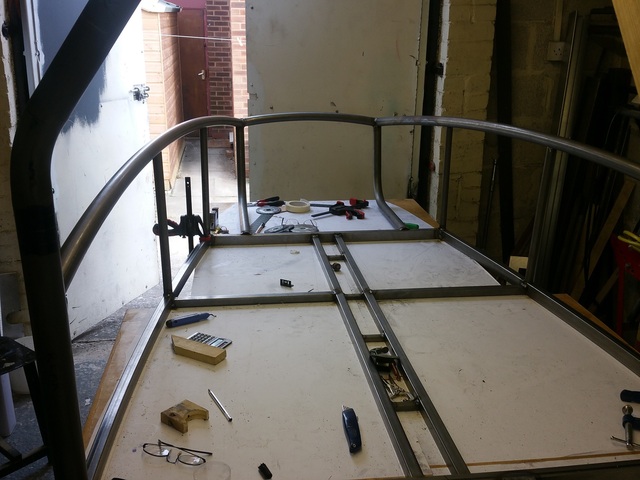
looking down the table with roll bar in position

Description
better pic through roll bar
bart - 27/5/18 at 08:48 PM
Hi all hope your having a good bank holiday.
just an update
I now have the main chassis finished
I need to add the cross braces ( triangulation where possible )
also need to add all the little bit's suspension points ect ect ect
and weld up but the shape is all there now.
so here we go

Description
chassis nain tub top rails

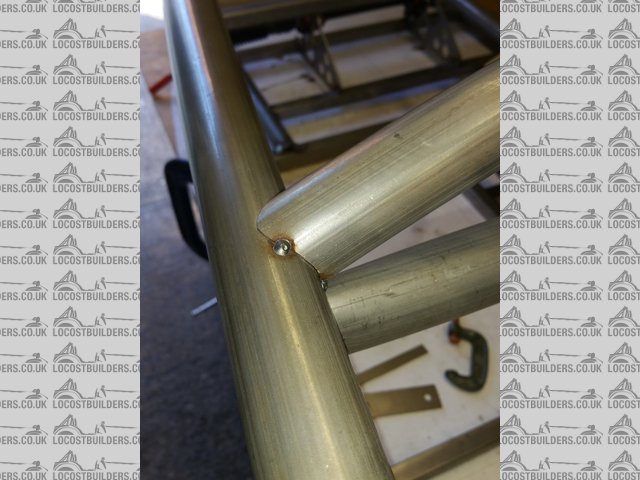
Description
fish mouth with multy compound angles and rolled section , quite pround and pleased with these.

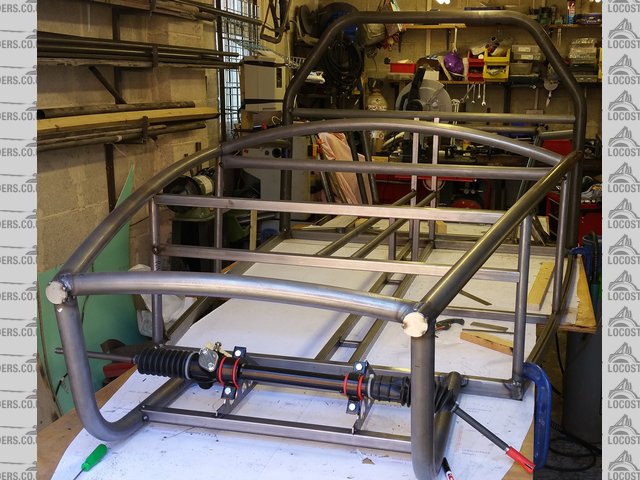
Description
chassis front not finished but showing rack in place

Description
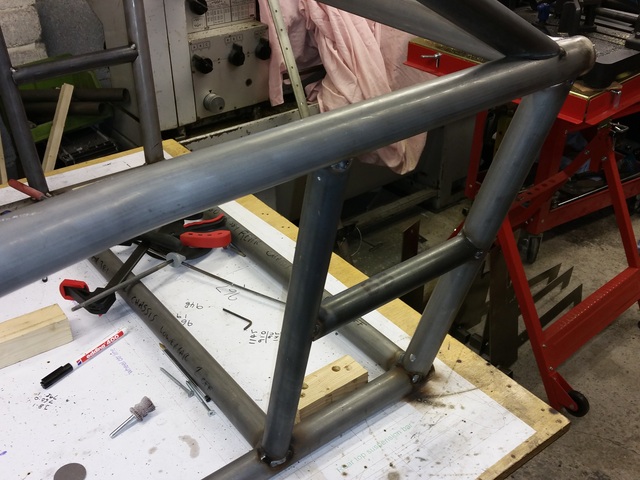
chassis from rear getting near now

Description
close up of rear

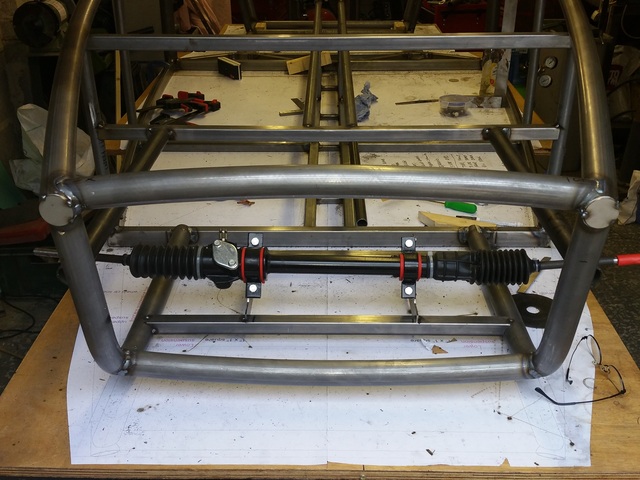
Description
front with lower bar in place

Description
another rear view

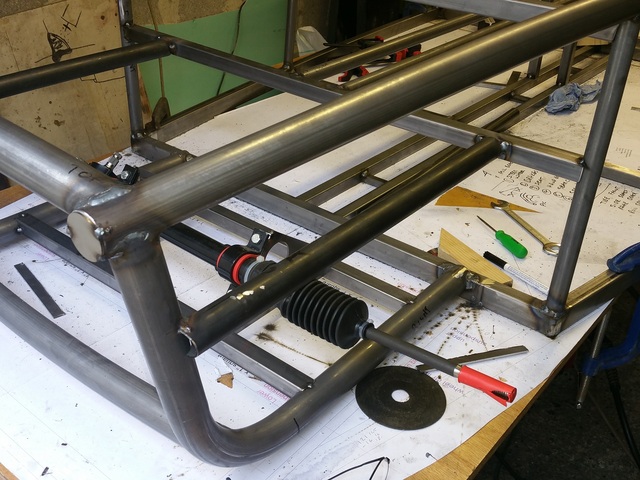
Description
another view of the front
to finish i sat in the car today for the first time , every thing seems to be ok all in the correct place.
have a friend comming round tomorrow to mark up wheel posistion , gear change , brakes etc etc
funny , when i sat in the car for the first time did all the usual sound affects ( what a pratt im 60 for god sake 
[Edited on 27/5/18 by bart]
bart - 11/6/18 at 09:22 PM
Hi All
sorry no recent post.
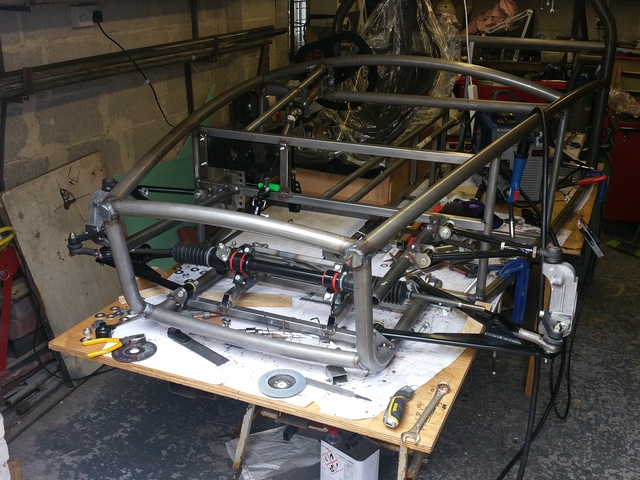
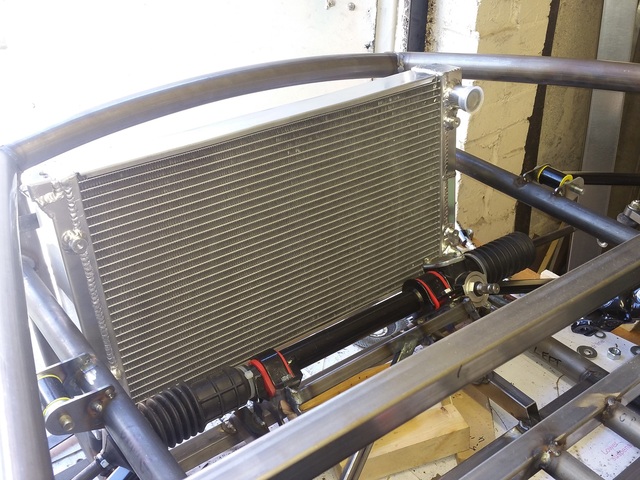
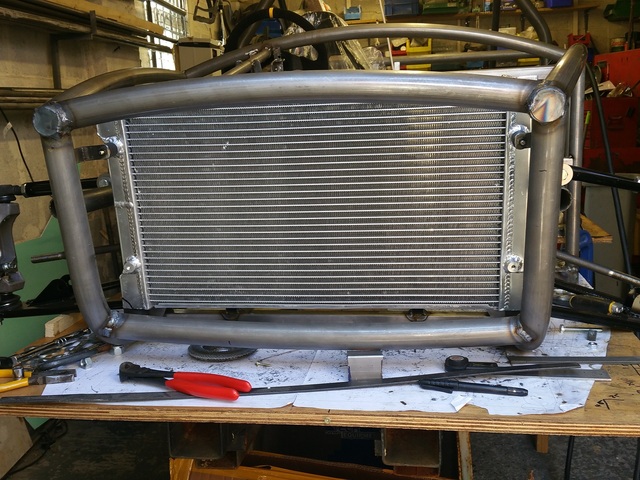
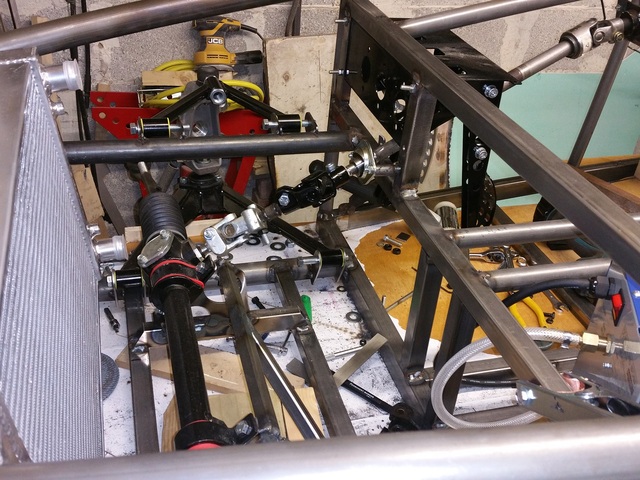
however , I have installed the front suspension
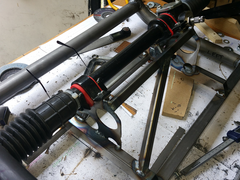
reinstalled the steering ( moved rack )
radiator installed
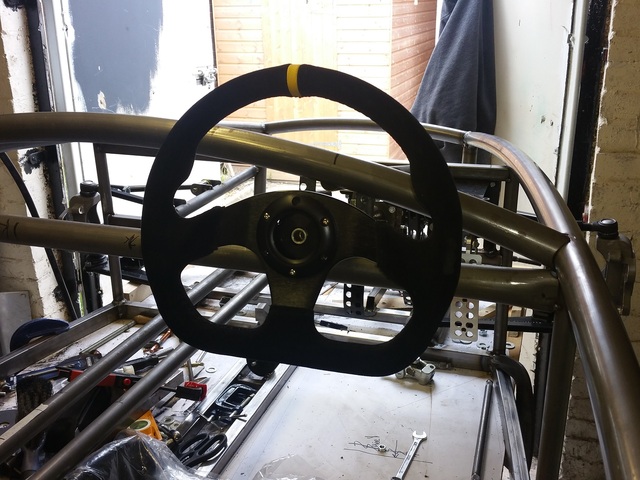
steering complete
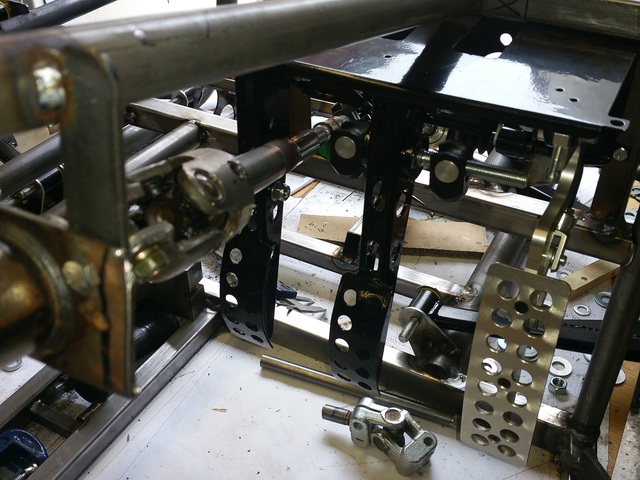
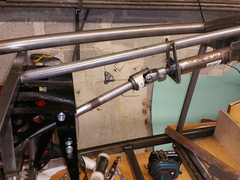
started on finishing mid tunnel
had a proper sit in the car
next step is to install seat belts
seat structure next
working my way to the back of the car.
pictures explain themselves no particular order.

Description

Description

Description

Description

Description

Description

Description

Description

Description
AdamR20 - 13/6/18 at 11:41 AM
Looking great! I love the way you work, just get stuck in and deal with whatever comes your way 
I've had decent success with a couple of laser cutting companies - AK Stainless in Bamber Bridge (Preston) and Microkerf (Leicester). The second
are a bit cheaper but obviously further from you.
Adam
bart - 29/6/18 at 05:39 PM
Hi All
ive got the air con unit on in my office so I thought id do an update whilst i'm cool 
first a design change, after much investigation I have changed to an ecoboost 2.0 focus st engine
and gear box
lots of reasons
1) celica engine had a lot of issues around the ecu control and was not easily solvable
2) apparently the gearboxes are made of cheese
3) usefull power would have been limited to around 250 bhp with that gearbox
so a change to the ecoboost which i aslo already had.
advantages :
power anywhere from 250 to 500 easily available
more parts easily available
gearbox is solid. 6 speed getag good for 450+ NM ( in a light car probably more )
can be strocked to 2.3ltr easily and so on
also the turbo i brought for the celica engine will work well as an up grade after IVA has been passed.
so the plan , i also had a crashed unusable ecoboost engine that has a cracked block that i paid £100 for just for odd bits.
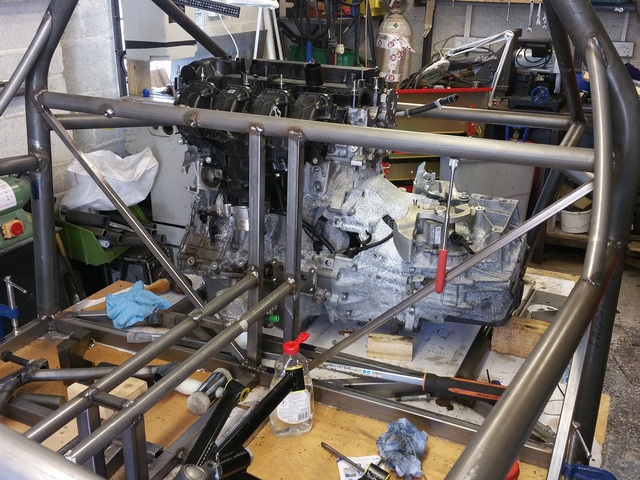
so i stripped all the weight out ie crank , balance shafts , pistons rods , cams , flywheel , so its a dumy engine ( like me ! )for fittment purposes
.
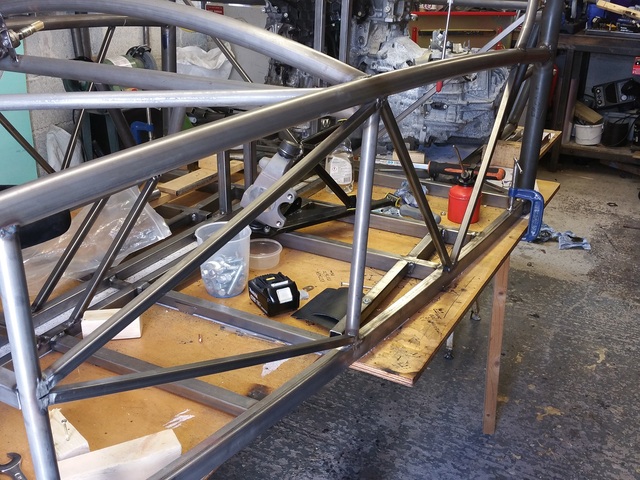
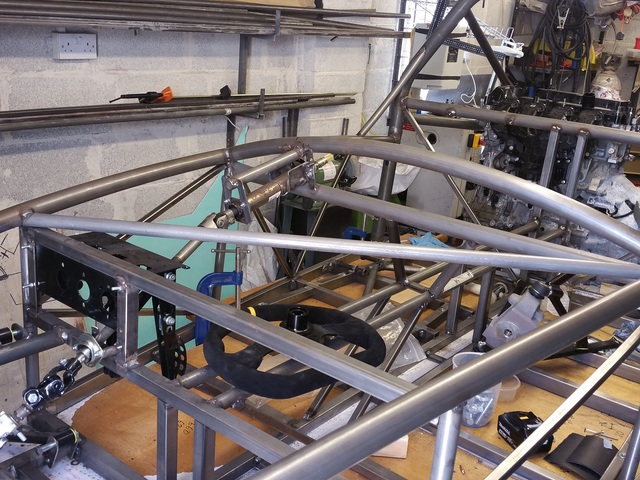
so the chassis is apart from little brackets finished roll cage forward.pictures below

Description

Description
picture above show cross brace i put in to give it some anti twist

Description
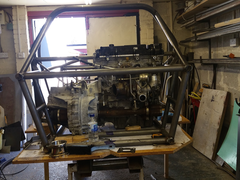

Description
engine in place from the back
another view

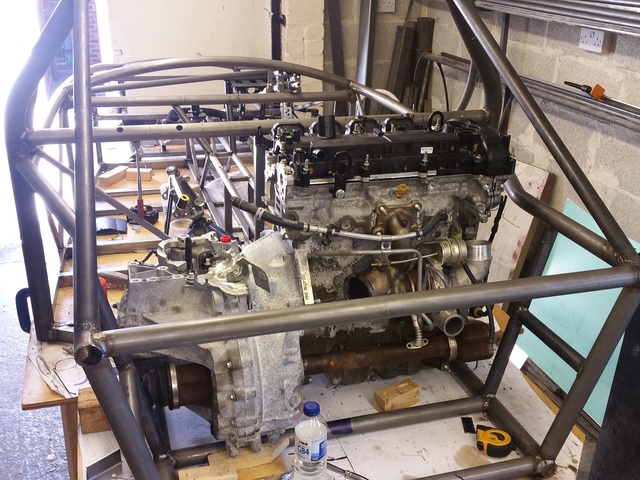
Description
plan to go forward next.
[Edited on 29/6/18 by bart]
bart - 29/6/18 at 06:01 PM
so to the plan
after a week of contemplation , much tea sipping , and drawing of breath through the teeth.
( and the wife thought I was being nice taking her away for a few days , just gave me time to think. just kept saying yes dear and every 10 mins and
nodding , no idea what I agreed to !)
problems! to solve
1) if I use the original drive shafts from the focus st3 then the rear track will be 80mm wider.
2) ecu control of the ecoboost
3) engine and gearbox are 50 to 60 kg more than the Celica
4) exhaust has no room
5) engine mounts are difficult to place
6) the drive shafts fowl the existing frame
7) i want to move the engine back another 20 to 30 mm to give a little more room behind the bulk head.
so to the solutions or a plan is formulated 
i want to use the original drive shafts ( one plan was to use st150 drive shafts but they dont fit ) so i will redesign the back suspension to take
them and increase the track.
so its chop the back of the chassis off just behind the roll bar ( just 6 tubes at the moment no braces fitted )
im going to increase the wheel base some 40 to 50 mm , make the space behind the engine bigger for the exhaust , rediesin the suspension pickup points
so i can get round the bigger gearbox and driveshafts
looking at possibly redesign on the front suspension pick up points so as to increase the front track as well .
changing frame to acomadate the engine mounts a little more easily.
a host of other changes , so - im off to the garrage to see how much tube i have left over .
will post the changes when done .
[Edited on 29/6/18 by bart]
miskit - 29/6/18 at 09:25 PM
Great looking build. Those fish-mouths are impressive!
What are you using to roll the pipes with ?
Riskyshift - 30/6/18 at 07:00 AM
Enjoy following this - keep up the updates!
Ian
bart - 30/6/18 at 07:09 AM
? how do I do fish mouths
well I sort of blow a kiss and move my mouth up and down
! sorry could not resist that !
hole saw ,and 4.5" grinder with a multiflap wheel . mostly sort of cut fit mark cut fit mark cut ect
some are easy jut one cut cleanup done , others are multi try , mostly the ones with multiple angle both ends.
ive not scrapped many one or two i think , and i reused the pipe. theres one or two bigish gaps but i can fill them with an infill
and weld over , there not in structual places.
rolling I brought a cheap tube roller and made my own dies
[Edited on 30/6/18 by bart]
big_wasa - 30/6/18 at 08:03 AM
You do make rapid progress.
bart - 26/7/18 at 09:50 AM
hi all
well I not done a lot this month , been busy at work making car vouchers
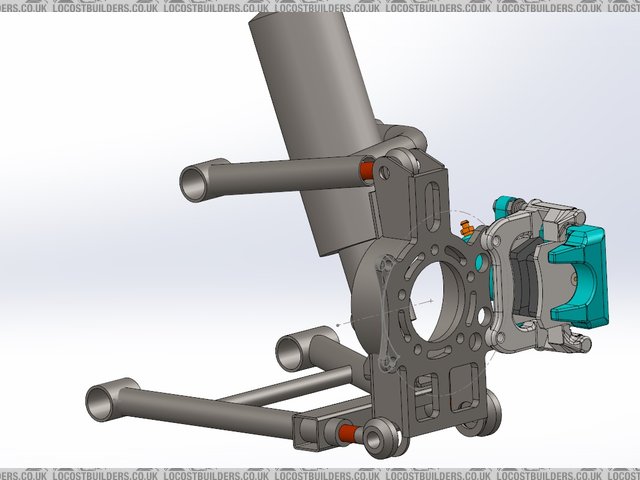
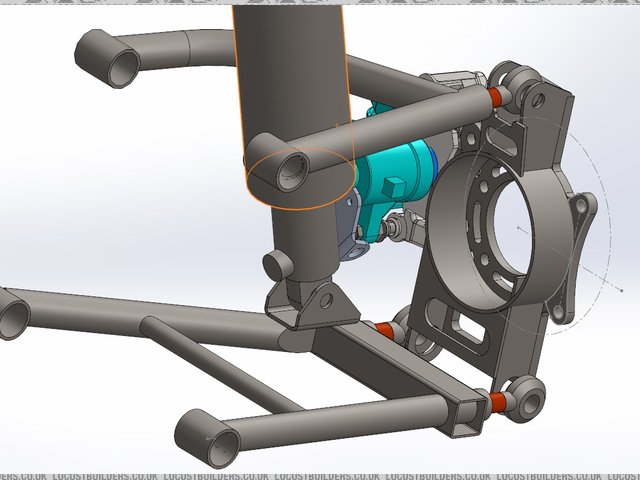
as stated ive changed to the ecoboost engine so had to redesign the rear suspension
done the redesign pictures below with the following specs
wheel bearings transit mk6 front
disc vw 282 mm solid
designed to take 2 different calipers vw manual and VW epb
going to design a electronics unit so that I can use epb calipers - bet that gets some interest
but if I fail then I can use manual cable type , ps they use different mounting spacing.
widder track for rear to accomadate standard drive shafts ect ect
ive also fitted the engine mountings pictures to follow
ordered the laser profiles at 3 oclock this morning as you do 

Description

Description

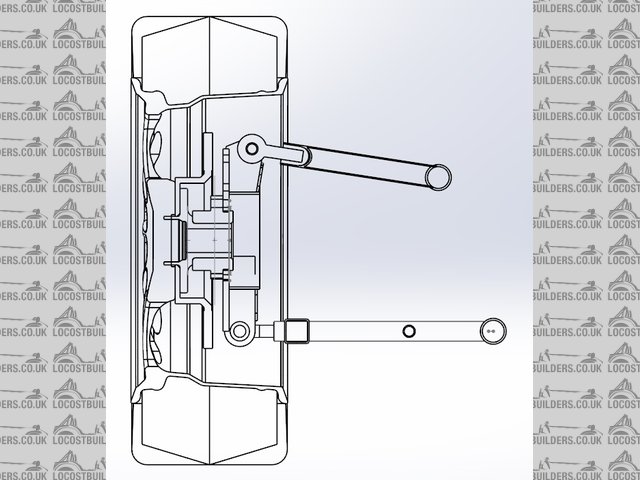
Description

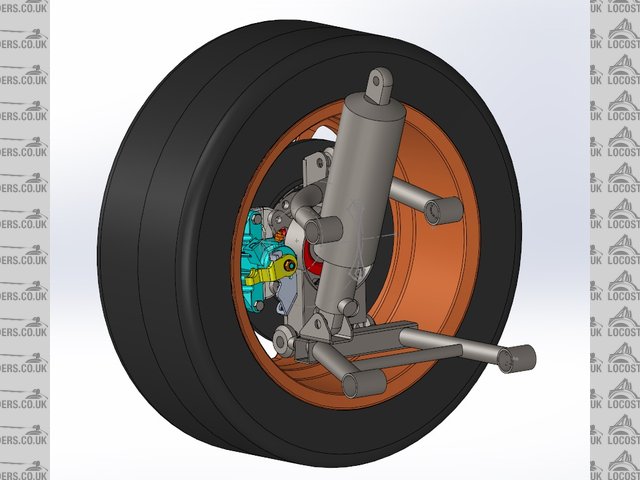
Description
ps all you need to look at the transit front bearing strong light weight and super suitable for locost builds
[Edited on 26/7/18 by bart]
coyoteboy - 26/7/18 at 12:31 PM
quote:
Originally posted by big_wasa
You do make rapid progress.
I was just thinking through in my head that these were all the sorts of things I checked out before I even started designing and felt a bit smug, then
realised that a) I've not got mine off the drawing board in 4 years and b) I'll probably still find the same number of mistakes. The is
impressive progress and nice to see it coming together!
bart - 26/7/18 at 03:02 PM
I find car design subject to change due to many reasons
as we are trying to use as many standard parts as possible
1) things are never quite what you think they are
2) things on a cad/3d cad are much bigger than on a screen
3) general c--k ups
4) until you get the item in your grubby hands its often difficult to get accurate dims
5) what you think will work, DONT
6) money gets tight
7) or you have more money than you thought for a better solution
8) you change your mind
9) other people change your mind
so I adopt the following
work out a general plan and direction
design the important things : ie pick up points , make sure the engine fits , make sure you fit , general design style
fill in the little bitts later - a lot easier than 100% design
drink plenty of tea
when its wrong don't kick yourself just make the required changes
measure 3 times 
tack every thing try not to fully weld until you have to
and so on and so on
finally give it a go - what the hell you can only be wrong and it don't matter unless its structural !
the best way is to report it is finished. and only report the correct decisions.
I prefer to report all , that way it encourages younger builders with less experience
and shows warts and all - I don't mind looking stupid - I don't give a DAM as long as I go forward in life
and encourage other to take a calculated risk and move forward.
Theshed - 6/8/18 at 09:20 PM
Please either put the bottom outer joints into double shear or leave the brownies right now!
Mr Whippy - 7/8/18 at 12:14 PM
you see both being used on here often
this may help
Linky about bending rose joints
personally I'd not touch rose joints for road cars, poly bushes are hard enough as it is
[Edited on 7/8/18 by Mr Whippy]


