
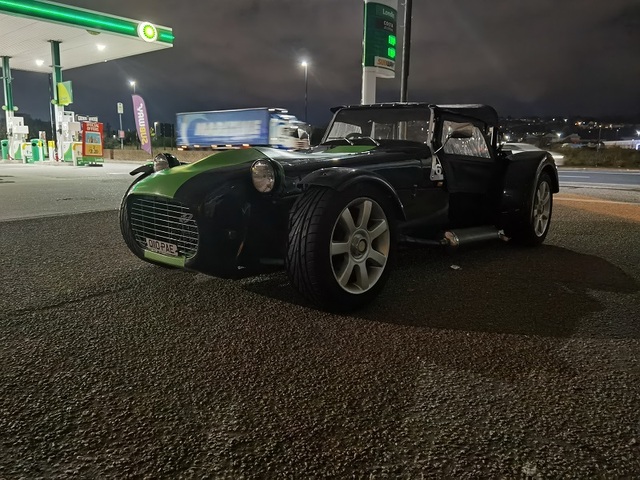
Description
and how she is looking now

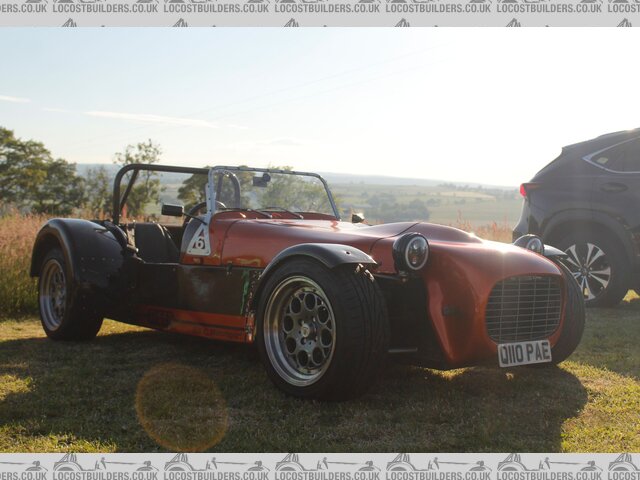
Description

Hi am new to locost builders forum. but have been the guardian of my Tiger Super 6 for 2.5yrs, in that time I have made a few changes and most
importantly been using and enjoying it.
I will try my best to create a diary of the up and downs from when I bought her to present day, as improvements will continue.
I was a member of the Tiger owners club but unfortunately that forum has gone by the wayside.
[Edited on 3/1/23 by supersix170]
First 4 hours in to ownership


Description
and how she is looking now


Description
The adventure into kitcar ownership started in 2020, Whilst looking through Ebay I spotted this Tiger for sale spares or repairs.
Spares or repairs due to running issues and "its needs a full engine rebuild" so I did the right thing and bought her, and got a train down
to the sellers and attemped to drive her back. the reason she "needs a engine rebuild" was because it was only running on 2 cylinders at
idle, this was simply down to the carbs been that far out balance cylinders 1 and 2 were not firing, I did a quick and dirty carb balance got her
running half decent and proceded on my 200mile journey home.
Unfortunately it was not all plain sailing discovered quickly she had some cooling issues on a light throttle she was sitting at 70C the second you
looked at the throttle she shoot to 95c. mmmmmm headgasket me thinks, so slow and steady wins the race.
100miles into the journey and things went south, rev counter stopped working (no big deal) then a mile later everything stopped working.
we had ran out electricty battey sitting at 6v. so whilst waiting for recovery i was reading through the extensive history folder and to discovery
only 2 months it had a alternator rebuild mmmmm
long story short the journey started at 11am on friday I didnt get back till 6am Saturday and the car didnt get home till Tuesday.
Not the best introduction to the world of kitcars. let the adventure begin
So now she is back home we need to address the lack of electricty and the overheat issue
The lack of charging was simple the alternator bracket was snapped and more to the point had been snapped for a long time looking at the rust on the
break and that alternator had not been refurbed or even removed, the previous owner had been charged £130 for them not not doing the job. anyways nice
easy free fix for me.
Next problem she was running hot and lots of bubbles in the header tank. This was because the cooling system was plumbed up wrong and was effectively
bypassing the rad, and cavitation causing bubbles so rerouted correctly temps are spot on no bubbles etc...
Cooling fan was wired up wrong polarity so was pushing air out of the nose cone.
The next big issue was handling she drove like a pig, would turn right great, not so keen on left, everytime you hit a bump it would try to leave the
road.
The handling was down to a poor setup. the rear axle was 2inches of center due to badly adjusted panard, one rear shock was set to full damping and
the other min damping, tyre pressures all round where 32psi. Front end drivers side had full posi camber and the pass side was full neg camber and
about 5 miles of toe out, so now this are all reset she drives so so much better.
The previous owner had the front suspension removed and powder coated which will be why the geo was all over. BUT Not sure who is responsible either
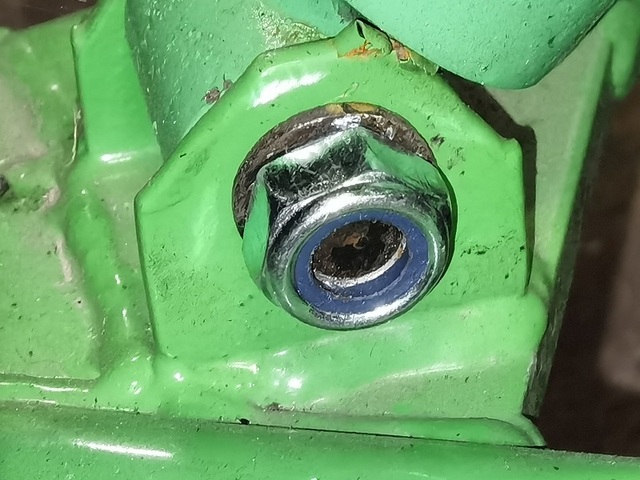
the previous owner or the garage but they should of been shot. it has had a load of new fasteners in the front suspension which is nice but every
bolt/nut was far from tight, nipped at best which is bad enough but every bolt was that short in length they did not protrude into the nylon on the
nyloc nuts. so barely tight nuts with no locking method, That would be fun at speed.
The 2 bolts that hold the VW upright to the upper ball joint are just normal bolts not the eccentric washer type not huge deal just makes camber
adjustment a bit more fiddly. but then spotted they have used the eccentric washer bolts to hold the shocker top mounts.
Its really basic engineering principles make sure the bolts are the correct length, i have always worked on the priciple of you need atleast half the
diameter of the bolt protruding beyond the nut.
Bought the car knowing it was a rolling project and always knew by the nature of it been a kit car there will be things i would need to rework, either
because its badly done or personal preference. but the likes of the front suspension I find annoying and scary that sort of stuff gets people killed
and there is no excuse.
[img]

Description
[/img]
Not a great deal done. Been busy welding up rotten transit vans (thankfully not mine)
Got a few road miles on it, used it for a couple of days to travel to work. and discovered to things that need addressing.
First one been I need to make some wind deflectors for the side of the windscreen to stop that icey blast.
And the second one is to address the cooling system, when I first got the car it was running hot all the time and air bubbles in the header this was
down to the cooling circuit not been properly plumbed up and was scavaging air from the top of the header tank in to head now it is properly plumbed
the bubbles have stopped nice even temps across the engine etc.....
The engine was fitted by RAW back in 2001 and for whatever reason they did not fit the thermostat housing (remote one) I have read about other seven
type cars with a RAW conversion and they did not have the thermostat either.
So now the cooling system is flowing correctly I now no longer have overheat issues But i now have cannot get hot issues, was out today for a good 50
miles 13c ambient and good not get the engine over 55c, saying that much rather have need to get it hot than get it cool issues, Just to fit a remote
bypass stat and all will be good.
I did address the brakes today and much much happier with them, the car has the standard beetle M/C and Golf brakes with EBC Green stuff and drilled
and grooved disks the brakes as per was somewhat wooden, took me back to when I used to own a breadvan polo which is non servo as well, I moved the
pushrod on the pedal 1/4 inch closer to the pedal pivot point and M/C to keep everything in line and now the brakes are what i would expect a little
more pedal travel but now powerfull and progressive. nice free upgrade.
I have addressed my cooling system, after rerouting the plumbing system i went from hot uneven temps and a bubbly header tank to stuggling to get her
to heat up, for some reason RAW did not fit the toyota remote thermostat housing.
you can buy aftermarket remote stats etc... but as you have probs noticed by now I am not keen on spending money on shiney stuff. the outlet on the
toyota engine is 31mm so needed a remote housing with that size as it turns out a yamaha R1 remote stat fits the bill at 30mm and very cheap, £5
delivered. so now my engine warms up as it should sits between 80-85 ticking over, driving etc.... and because it now has a stat this acts as a slight
restriction so now the water flowing a bit more slowly through the radiator and the radiator is now cooling alot better. (stock tiger rad but did fit
a small bore pipe to rad top tank back to header to purge the air)
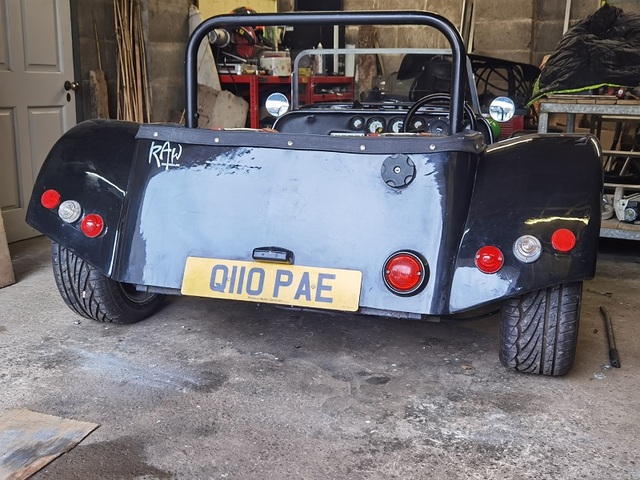
Well got a bit fed up with doing mechanical fixes on the car and thought i would treat myself (and the car) to some cosmetic work so she got a abit of
facelift (well more of a bumlift).
The rear end always bugged me the handbrake cables where hanging out protruding beyond the rear panel and hated the trailer type rear lights and the
green is not my cup of tea etc.....
So rerouted the handbrake cable so now they are tucked up, lifted the number up and leveled/centered it, unfortunately cannot get it any higher as it
is hiding the cutouts in the rear panel from when it had a spare wheel carrier.
Then at this point saw that the number plate was not level or centered, which lead me to see the green stripe was off centre and not level, to which I
happily removed, (plan is to de-green the whole car)
Next was the rear lights not a fan of square lights and even less of a fan of them been 1.5 inches out to each other, so some nice landrover type
lights, and the fun of fitting them to hide the old holes and keep them equal to each other etc....
Lights before

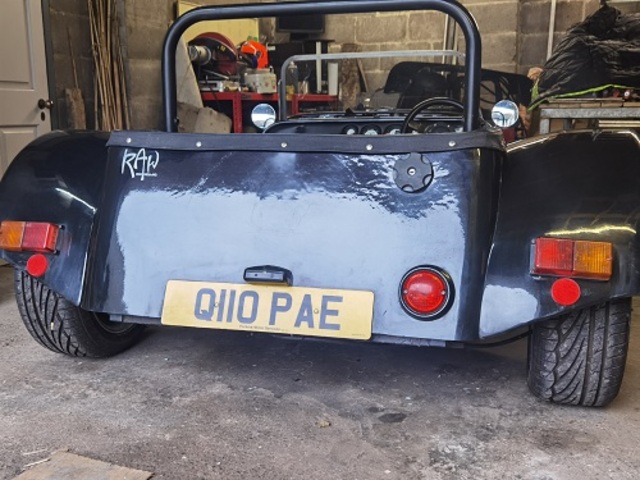
Description
and now

Description
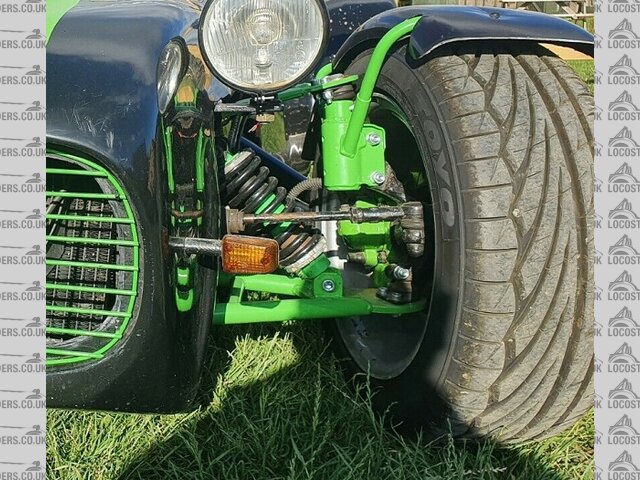
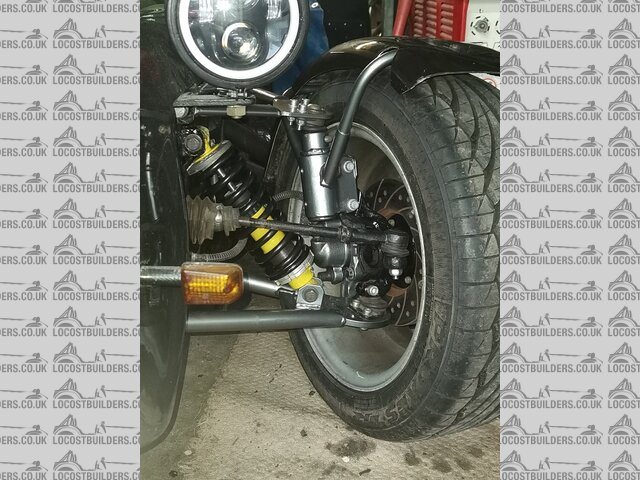
Well operation De-green or De - Kermit as the wife calls continues, all the wish bones have been repainted Spax Coilovers taken to bits and repainted.
etc..... took a while to put everything back together as I spent a lot of time going through my many biscuit tins of nuts n bolts as I wanted both
sides to mirror each other hardware wise,
Oh and sporting China special LED headlights.

Description

Description
Well spent the day playing with the carbs and ignition management. whilst the car was running ok and on all 4 cylinders, not running as well as she
should be
The igintion is taken care be a OMEX ecu. ignition map itself was quite messy timing advance quite muddled jumping from 40degrees advance to 10 then
back to 38 etc....... so thats been cleaned up quite abit using a bit of common sense and looking at maps for the 4age, car feels a little cleaner and
more linear.
For some reason the idle feature had not been utilised, its only a few presses of the keyboard and it dynamically changes the timing advance at idle
to help maintain the idle speed, now this is setup, now it doesnt matter if the engine is hot or cold she idles at a nice even 750rpm.
The biggest change I have done is the jetting whilst the car was starting and running etc.... she was running rich across the board, you could smell
the fuel, black smoke and driving in the dark the exhaust provide quite a light show (good 2 foot flames on over run)
Popped all the jets out and wow i think it was jetted for a 3 litre engine
for example a 2.1 pinto with a lumpy cam would probs have 140-145 mains 45idle and 205 air. my carbs had 155 mains 60 idle and 215 air.
using the jet calculators and looking to see what other 4age engine are running with the same carbs and I have installed 135 mains 40idle and 185 air.
and the difference is night and day car pulls cleaner through out the rev range, no black smoke and more of a bark to the exhaust. only downside is I
have lost my flame show.
Welcome to the mad house. There is no better place for any kind of knowledge.
If you love tinkering and driving, then there is no better car to own.
Welcome to the forum, you've come to the right place. Keep the updates coming too.
Welcome!! Nice looking car.
When you did the right thing and took the train down after buying it I hope you took a pair of vice grips and some spare sparkles 
I had a rucksack full of gear lol, and a good recovery policy with my back account. There's been lots of up and down but everytime you drive the car all is forgiven
Welcome !!
This is a great website for building a kit car. it helped me for over 20 years to get mine through the IVA so keep up the great work putting it right,
just in time for our warm weather and run outs with other 7's 


Jason
This will be her third summer I have owned and driven her the build diary I am posting is retrospective from when I first bought her, we still have the fuel injection conversion, engine swaps to come to bring it up to present day, I have a few ideas planned before this summer, the thing I found with a kit car is you acquire friends we now have a local group here in the North east there are about 25 of us with 7esq kits so plenty of ride outs and car shows.
Headlight buckets and grill are all painted now just waiting on the clear to cure then get them fitted tomorrow and the car is nearly de-greened
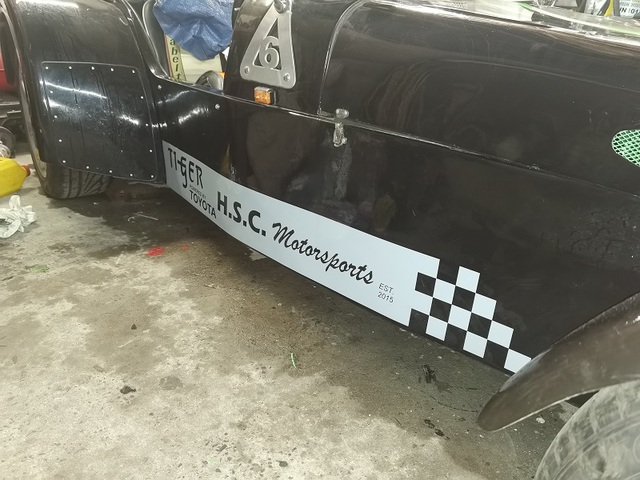
and for a bit of fun had a play with the vinyl plotter again and made some side stripes for the car. I am not a 100% sold on them I was just cut from
some left over vinyl.
The H.S.C. came about 5 years ago when I was building a track car, the garage I use is at my mam and dads property which is called " Hall Station
Cottage" hence H.S.C. motorsport was born and every trackcar and toy since then has had the HSC motorsport.

Description
Well spent the day playing with the carbs and ignition management. whilst the car was running ok and on all 4 cylinders, not running as well as she
should be
The igintion is taken care be a OMEX ecu. ignition map itself was quite messy timing advance quite muddled jumping from 40degrees advance to 10 then
back to 38 etc....... so thats been cleaned up quite abit using a bit of common sense and looking at maps for the 4age, car feels a little cleaner and
more linear.
For some reason the idle feature had not been utilised, its only a few presses of the keyboard and it dynamically changes the timing advance at idle
to help maintain the idle speed, now this is setup, now it doesnt matter if the engine is hot or cold she idles at a nice even 750rpm.
The biggest change I have done is the jetting whilst the car was starting and running etc.... she was running rich across the board, you could smell
the fuel, black smoke and driving in the dark the exhaust provide quite a light show (good 2 foot flames on over run)
Popped all the jets out and wow i think it was jetted for a 3 litre engine
for example a 2.1 pinto with a lumpy cam would probs have 140-145 mains 45idle and 205 air. my carbs had 155 mains 60 idle and 215 air.
using the jet calculators and looking to see what other 4age engine are running with the same carbs and I have installed 135 mains 40idle and 185 air.
and the difference is night and day car pulls cleaner through out the rev range, no black smoke and more of a bark to the exhaust. only downside is I
have lost my flame show.
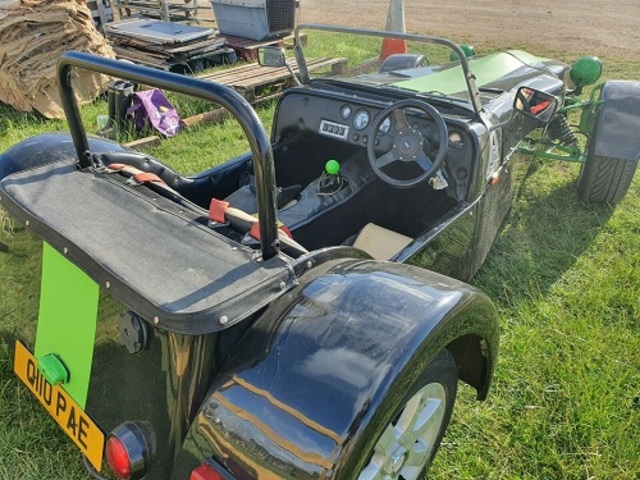
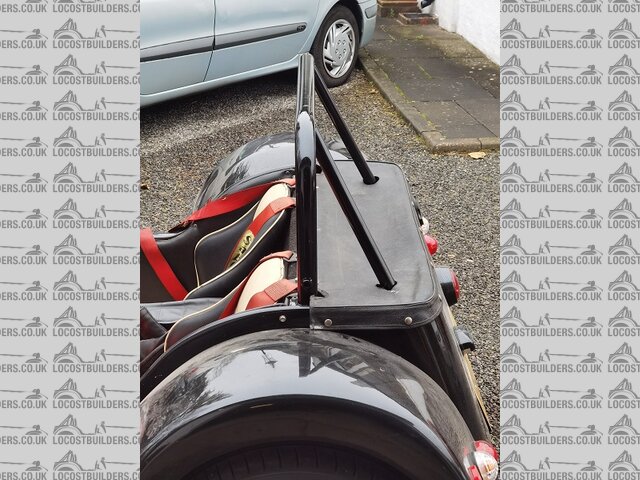
Not done a great deal, but did do a job that had been bugging me for a while, never liked the look of the single roll hoop, personally thought it
looked a bit fragile, so raided the pile of scrap steel at the back of the garage and found some 32mm x 2.4mm steel tube. welded some 6mm mounting
plates to chassis, the end of the tubes have a bung welded in the end and tapped to m12, all refinished in ford panther black (had some spare from
another job)
Its one of those jobs that only cost time using bits I had lying about and i think the car looks alot better.
old roll hoop

Description
modified roll hoop

Description
The car is/was running Omex ignition and Dellorto 45s and runs well but i am a big believer that if it aint broke you can still fix it, one of the
probs is the engine is over carb'd they have 38mm chokes fitted really the sweet spot for that engine is 34-36mm but they aint cheap at £23 a
piece,
So we are going full engine management. which price wise works out the same as buying the chokes for the Dellorto's.
So now she is running Yamaha fzr600 throttle bodies which was a Ebay steal at £15 posted. wasted spark taken care with a VW coil pack (spare I had
lying about)
Got the trigger wheel made up at work,
And the engine management is Speeduino I had built up. I have played with Megasquirt in the past and its very very simular and a lot cheaper.
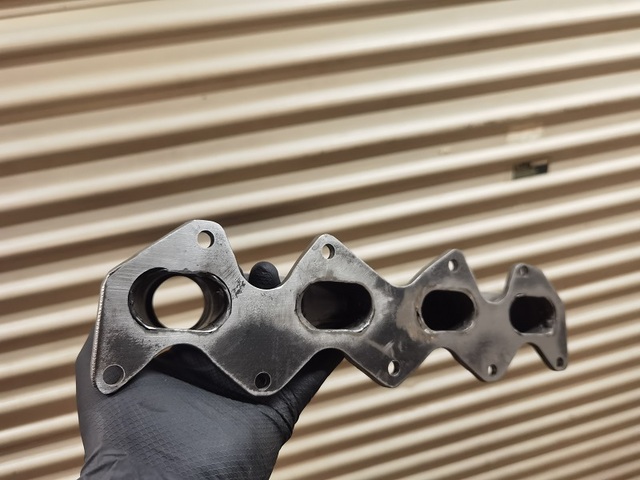
I needed some way of mounting the ITBs to the engine I could of put my hand in my pocket and bought a premade one but they are not cheap so made one
from 2 lengths of steel from a old towbar and some exhaust from a nova.
Its now at the stage that it starts and revs etc.... still a but more tuning to do but so far happy runs cleaner than the carbs and seems a lot more
responsive.
still a ton of jobs to do the Speeduino is hooked up on a temp harness but I am in the middle of making the proper one, still have the swirl pot to
fit (homemade again). Going to pull the engine out so i can freshen up the engine bay paint it etc... re-route the brake lines harness etc.... as it
looks very cluttered.

Description
even knocked up some 3D printed velocity stacks
[Edited on 4/1/23 by supersix170]
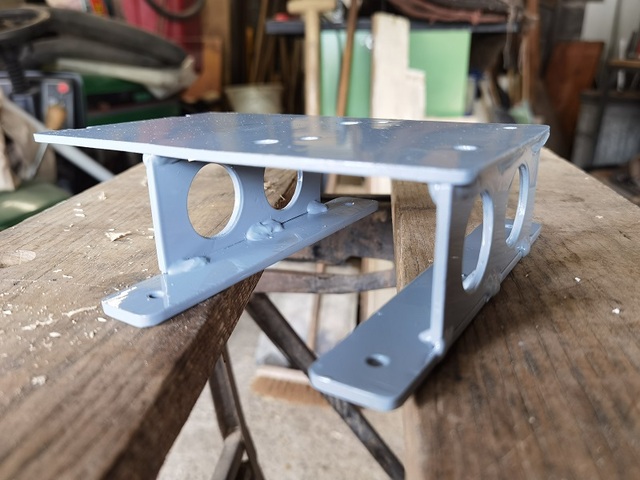
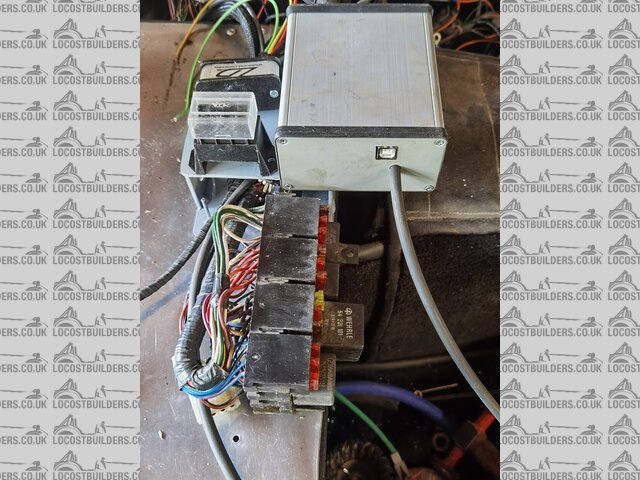
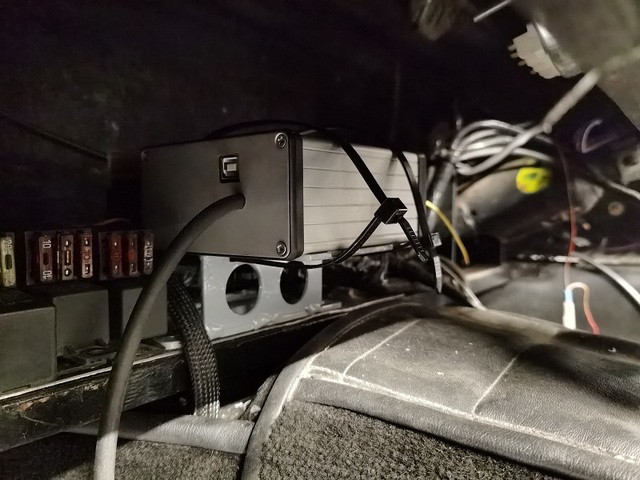
Made a little bracket up to hold the Speeduino ECU, due to space limitations I wanted to mount it above the the Tiger loom and towards the rear of the
car to give me clearance from the scuttle, all the wiring is now complete I kept the Speeduino/injection system as seperate system,
Little mount bracket made from scrap steel.

Description

Description

Description
After some tuning she made it to the road powered by arduino
[Edited on 4/1/23 by supersix170]
Well today was the first time in my ownership I got to enjoy the Super6 and not work on it, did a 100mile round trip of mixed driving and she behaved
beautifully, tiny flat spot on a slight throttle opening but she really spent much time on a light throttle LOL.
starts from cold without touching the throttle and idles spot on, mapped some nice pops and burbles on overun. Even saw another kitcar owner out on my
run.
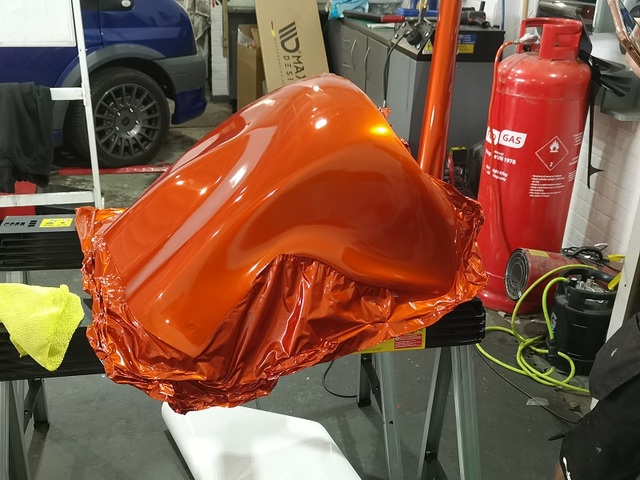
Cosmetic re-vamp is under way, nose cone, bonnet and rear wrapped in burnt orange, sides and wheel arches are staying in black.
The orig gel coat was looking tired and dull, my friend owed me a favour or two so I cashed them and he has started to work his magic.

Description
I cut some new sidestripes out in the same vinyl to tie it all together


Description
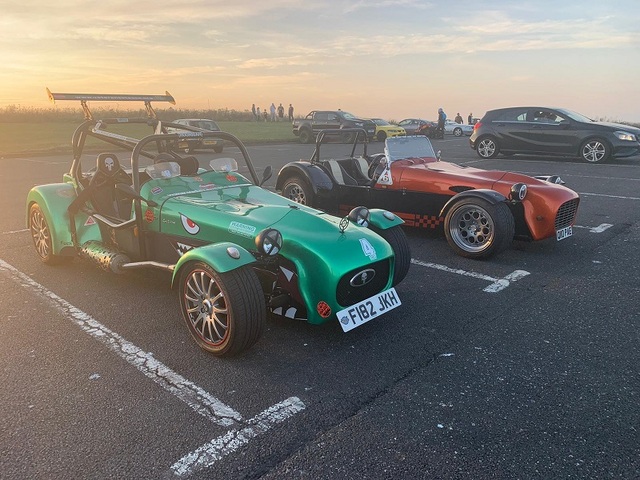
And whilst owning and driving the Tiger was fun it more fun with a group and she gained a fellow Tiger as a play mate.

Description
A few months prior to wrap job I bought a set of new to me wheels they where cheap and very rough condition, but mainly cheap,
So after some elbow grease they came up well,
I used my car as lathe, removed the tyres, bolted the wheel to the axle and engine running in second gear we got to polishing.
Preclean

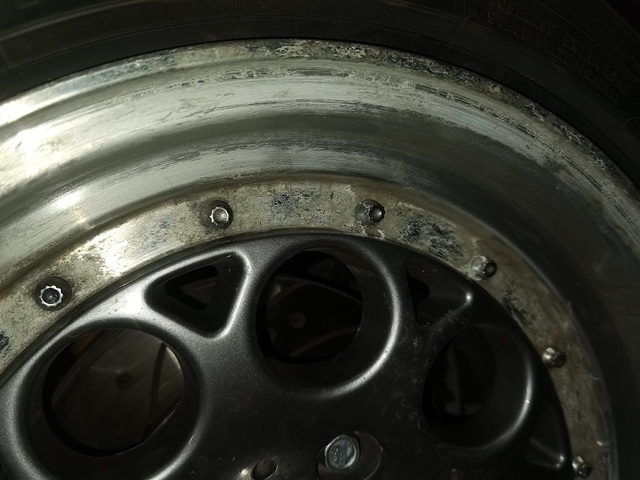
Description
Post clean

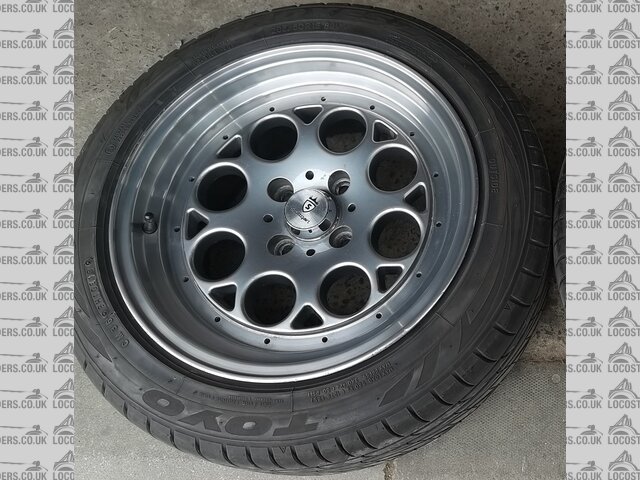
Description
Well all is not well in the Tiger camp at home, all of a sudden the engine is not happy.
She is burning oil on number 2 like its going out of fashion, fouls the plug in comes out dripping in oil, still got very good compression across all
4 pots did a leak down test all good, valve stem seals all good, all I can think is the oil control rings on number 2 have left the party.
And to top it of, all this happened 18days before a car show I am booked into, So I have a few options.
Rebuild the engine (dont know if I can muster the energy for that)
Dont bother going to the show (really been looking forward to it)
Do a engine swap (lot more work but if I ZETEC it better for future engine swaps etc...)
So with 18days to the car show I went for engine swap (Gulp)
I aquired a free 1.8 zetec and started doing a engine swap. progress is going quite well engine is squared in the chassis and mounts made, in order to
gain decent bonnet clearance and level the engine I ended up moving the engine and gearbox back 1inch and the tail of the gearbox down 1.25inches
(fortunately the prop had enough slip yoke to allow this).
I was hoping I would get away with not chopping the sump until after the car show and just be careful drivng, sadly I only had 1.25 inch clearance
between the sump and tarmac, so 2 inches have been cut from the sump. I have lost 1L of oil capacity but have added a extra wing which have given back
500ml, after the show the plan is to fit a oil cooler which will gain more capacity, (still have the bottom to weld on sump but waiting for a metal
oil pick up pipe to be delivered)
Made a new alternator bracket and opted for a small denso type alternator(bought one listed for case tractor as its cheap than a "lightweight
race alternator) I know you can buy them but 1 they are £52 and 2 are for the lucas alt and I am running a small Denso unit. really pleased with how
it came out spent far to much time making it look pretty and its way to enginnered made from 4mm sheet steel. ( will out last the car)
The exhaust was going to be real time consumer project and had settled on running the stock manifold with a single pipe to silencer until after the
show.then make a 4 branch... But the big plus point is a toyota 4age 4 branch is not to far away port spacing etc...so with a little malnipulation
cutting and welding we now have a 4 branch.
I won a used inlet mainfold so that speeds things up a bit (i actually dipped my hand in my pocket bought something instead of making it).
The bulk of the work is done but still have a lot to do.
Cooling pipes/hoses to make and run (wont be pretty function over form until after show)
A small amount of wiring (on the plus side I lot of it is good starter on the same side as before injector harness still the same etc....)
finish the sump
fit starter motor
Timing belt
measure up and order AUX belt
Coil pack bracket to make
Drill and tap hole for ECU temp sender
Start and tune
THE UNKNOWNS
dont know if the engine runs and is any good was told it was a good runner etc... she has good compression but still a unknown.(the was over a litre
of water in the sump)
See if clutch set up works, stock 1.8 flywheel and cover with a mk1 mondeo plate, homemade release arm pivot to space release bearing correctly.
oh and as I writing this I have 9 DAYS left to the show and working 12hr days at work,
On the positive I will end up with a engine that has more power and is cheaper to source and upgrade


Description


Description
Well things are looking hopeful for the show. 10days after starting the work on the blacktop its finally in the car. not the prettiest install but
time is not my friend, so after the show I will have to tidy things up a bit.


Description
Well she is back in one piece now and even drove out and back in to the garage under her own steam. so tomorrow weather permitting will take her out for a shake down run.
Well shake down didnt go plan had a wicked missfire at 2000 rpm spent 2 days chasing it, and missed the car show.
finally fixed the missfire turned out to be a scholl boy error, not sure if I did it or when I did a firmware update , but flatshift was enabled (I
dont have a clutch switch) so when it hit 2k it was in massive retard causing the popping and banging, 30 seconds after switching it off and all was
good.
not really done much other than drive the car and loving it it goes so much better with the 1.8 zetec.
She has been running fantastic, did have one semi break down the plastic thermostat housing developed a crack, only £12.90 for a new part.
The only other issue is fueling because the car is running better than ever and I have dialed the suspension in she is handling and cornering better
than ever, I am suffering from fuel stavation when the fuel level is below 1/4 tank on fast left handers so will have to fit a external swirl pot
before its first trackday.
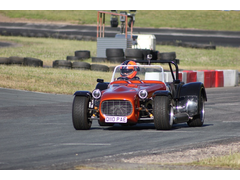
Well she lived through her first trackday. scrapyard engine did fantastic no over heating, got a bit warm 98c after 7 laps but nothing to scary and
its still running the tiger orig rad. did a 60mile round trip to and from the track and clocked 40mile on the track, she burnt a total of 150ml of
oil.
I was suprised and pleased at how balanced the car felt front end just dug in no understeer and the rear end was so predicatable.

Description
So with the car running well and producing enough power to hold its own, the natural thing to do is add more power, the simple upgrade is a 2.0L
blacktop which is the natural progression and I was all set on that. however in the meantime with Speeduino's continued firmware development VVT
support had been added, so the right thing to do is skip the 2.0L blacktop and go straight to a ST170.
So after a bit of searching I managed to find possibly the cheapest ST170 engine in the uk, however there was 2 problems
1 been it was 340mile round trip to collect it.
2 been it was partially dismantled (are all the bits there?)
So I bit the bullet and went for it.
The old Ford Focus did me proud, as always did the trip without complaint and 78+mpg.
On the face of it the ST170 lump was in fairly complete condition the block was still assembled and not been taken apart, the head had been vapour
blasted, new stem seals etc... so the head was ready to be dropped on the block.
roughly placed together to see what bits I had


Description
So the grand plan is to build the engine up ready for a winter upgrade/install. so the most important job for building the engine up is to ignore the
checking the internals and go straight to painting the rocker cover.


Description


Description


Description
I decided it was time to dig in to the ST170 engine and check the health internally etc...
So spent many a happy hour assembling the head and shiming the valves etc..... all went quite smoothly as the head had been vapour blasted and already
had the valves lapped in etc...
Attentions then turned to the bottom end, on first glance the bores looked fantastic, still had nice honing marks etc.... no wear ridge etc...
Once I dropped the sump all was not good, there was glitter in the sump!!! Number 3 main had spun a bearing and marked up the journal quite badly.
So now faced with a few options:
1 get the crank reground/polished
2 Find a good crank
I favoured the second option as I would rather not have a undersized crank, well it turns out Ford are pretty good all Zetec's silver tops, Black
tops and with the ST170 been a Zetec with a fancy head all used the same crank, same part numbers etc.... no matter on age or capacity. So plenty of
secondhand cranks out there.
As it turns out I have a good Zetec crank it is living in my 1.8 Blacktop thats currently in the Tiger.
But I am currently using that crank so that puts the engine build on the back burner.


Description
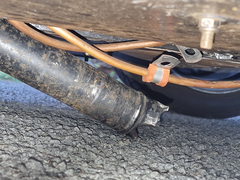
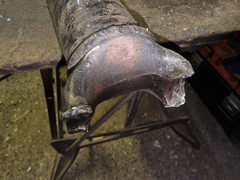
We had a bit of catastrophic failure on the way back from The Dairy Barn, driving style and generally been a knob where the reason behind it. I
snapped my prop right half in two. Made a good bang damaged fuel lines took a chunk out of the chassis rail as well.

Description

Description


Description
So with the car of the road awaiting a prop and the Ushaw Moor Car show only 2 weeks away, the sensible thing to do is pull the 1.8 Blacktop out and
pillage it for parts to build the ST170, Seems to be a common theme for me leaving it to the last minute.
Prop was built by Drive Line I have used them a few times in the past superb service and they know what they are talking about, I got a prop made with
bigger UJs so the next failure should be the axle.
So with 14 days to the car show and whilst I was waiting for the new prop I pulled the 1.8 blacktop and stripped her for the crank so I could rebuild
the ST170
So the 1.8 donated the crank,waterpump and its flywheel (lighter than the ST170) fortunately it not much different swapping a zetec for zetec engine
mounts exhaust etc... had to add a bit extra wiring for the VVT and cam sensor and rework the inlet manifold as the ports are larger and slightly
different position. but after 5days the engine was rebuilt and in and running.
So she has full closed loop VVT. and sporting a aluminium polo rad and the 20 year old tiger rad decided it no longer wanted to hold fluids
anymore.
I did a couple of shake down runs then she had a 80 mile round trip for the car show.
The ST170 has transformed the car from 2k she just pulls and pulls and the intake sounds pretty rude.
First run after a 5day engine swap/build
So thats a quick History of the last couple of years upto present day ish (midway through some little projects on her at the moment)
Ive enjoyed the work enjoyed making it better
Made a lot of new friends and attended many a car show and enjoyed many a drive out