mangogrooveworkshop
|
| posted on 4/9/10 at 09:16 PM |

|
|

|
|
|
|
|
flak monkey
|
| posted on 8/9/10 at 07:39 PM |
|
|
Look what arrived for me today - 25kg of belt primary
 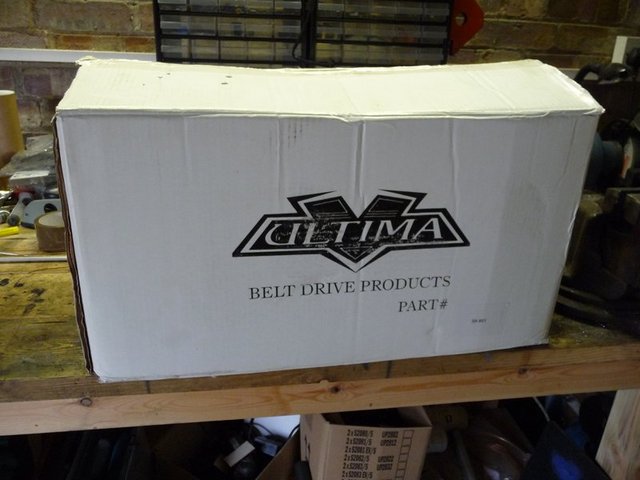
Ultima belt primary 1
Ultima belt primary 2
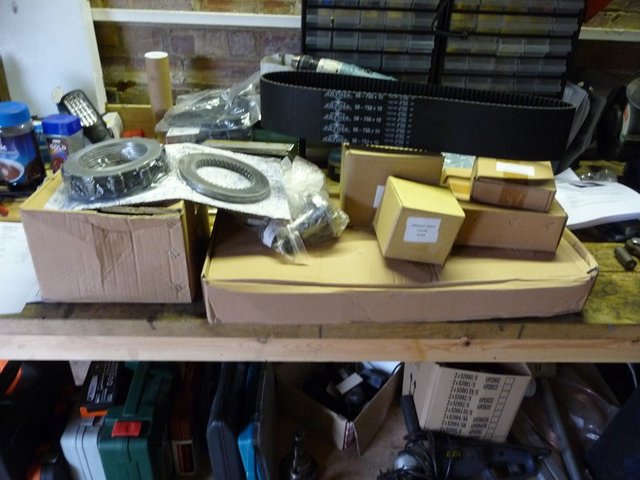
Virtually everything is plain billet aluminium at the moment, but I am planning on painting quite a lot of it satin black.
Done a little bit of pre-assembly - but can't do much more at the moment.
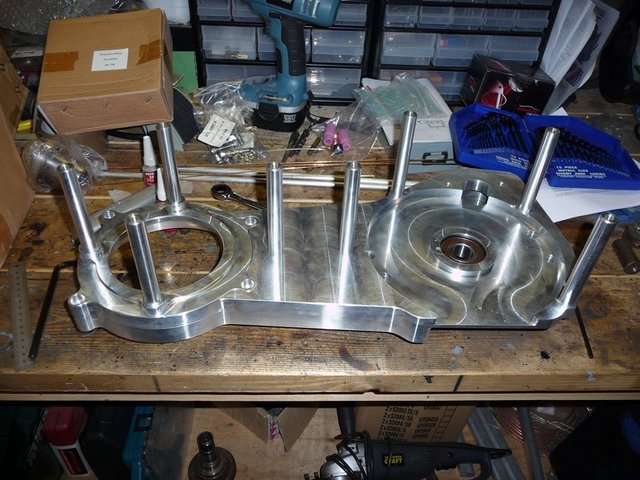
This is the motor plate which connects the engine and box together. Probably the heaviest bit of the kit - a good solid chunk of billet. Just fitted
up the support posts for the outer bearing plate. This will all be painted satin black.
Ultima belt primary 3
This is the outer bearing plate - with the covers fitted up. Again this will end up black with plain aluminium caps.
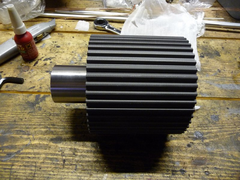
Front pulley with 45mm offset insert fitted
Ultima belt primary 5
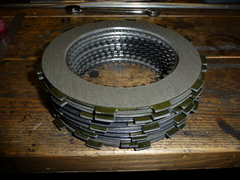
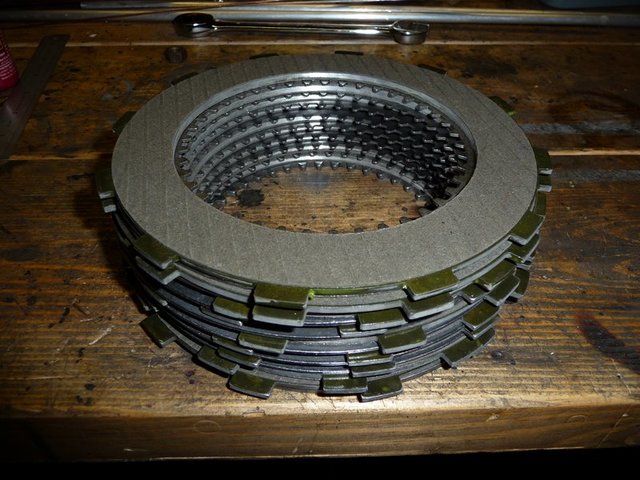
The clutch is a bit of a monster (well thats in keeping with the rest I guess!). 9 friction plates and 9 steel plates.
Ultima belt primary 6
And the rear pulley with clutch and cover mocked up.
 
Ultima belt primary 7
More coming soon hopefully 
Sera
http://www.motosera.com
|
|
|
flak monkey
|
| posted on 1/10/10 at 07:06 PM |
|
|
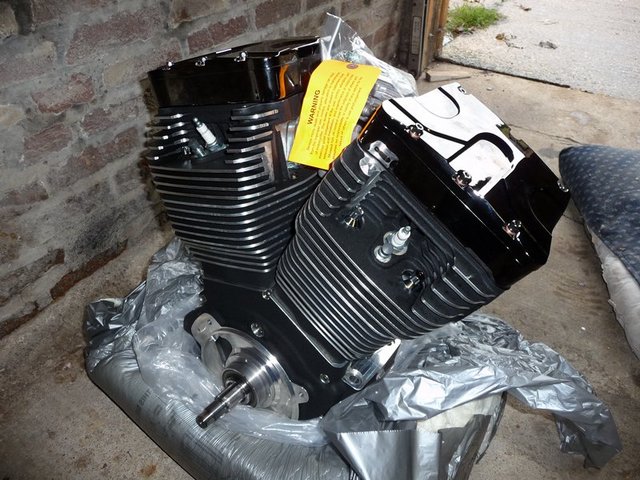
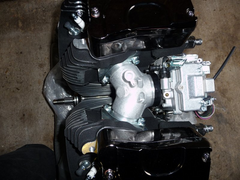
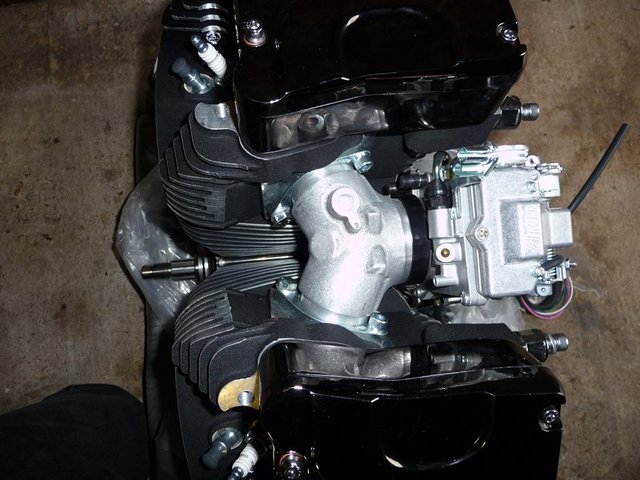
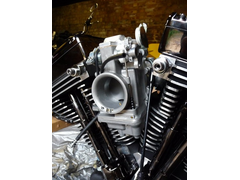
In other news today...
Whilst having fun on the dyno my bike engine and gearbox arrived. My garage is now unworkable as its so crammed with stuff (3 bikes, the car, loads of
bike parts, welders, racks, bench etc etc)
But anyway, UPS delivered the engine and box. I was expecting them to be on a pallet, but they arrived in a normal van and the bloke had no
lifting/moving equipment to lift the 70kg box....bizarre. A pallet truck solved the problem, but its just lucky we have one!
One big @rse box....
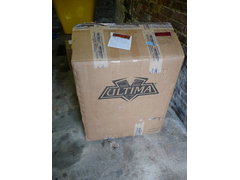 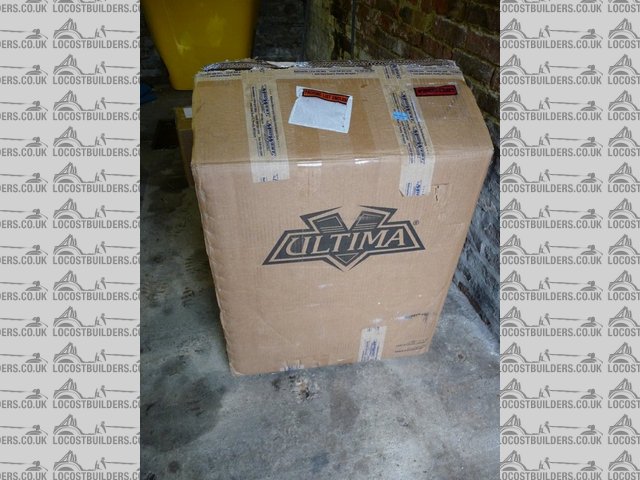
Engine delivery
For a bi @rse engine!
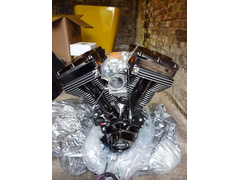 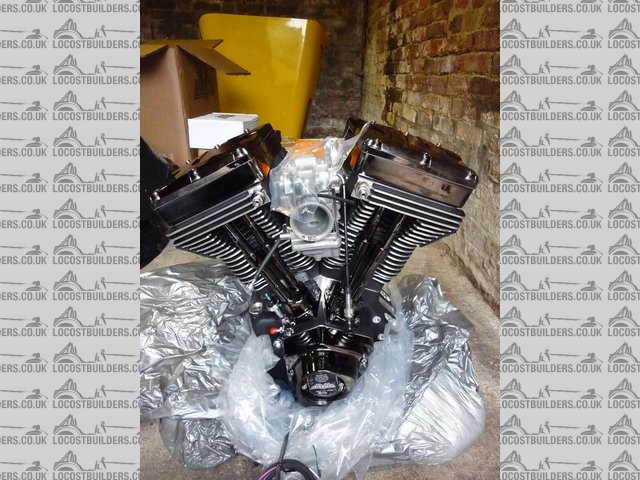
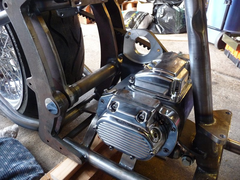
Engine 1
When I say big, I mean huge....all 2096cc of it
Engine 2
Engine 3
48mm slide carb
 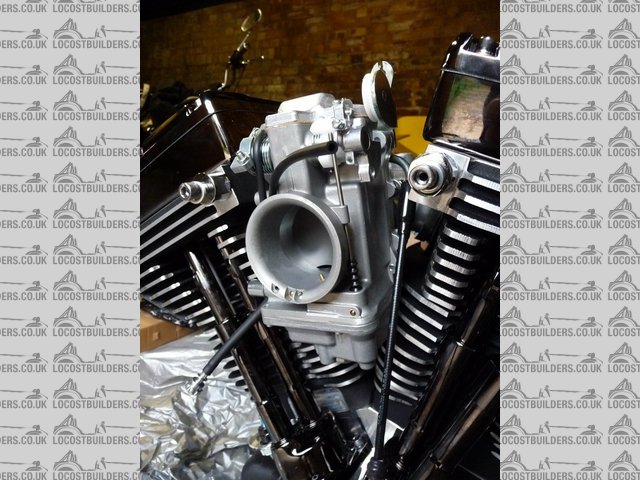
Engine 5
Looks to be nicely made and finished. The black nickel plating is nice and thick so should be durable.
The smaller box contained the 6 speed gearbox.
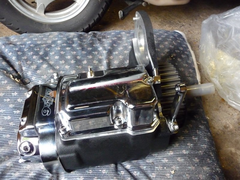 
Gearbox 1
Gearbox 2
Which again appears to be well made and finished.
Will be good to make a proper start on the project when I have the space to get all set up properly.
Sera
http://www.motosera.com
|
|
|
greggors84
|
| posted on 3/10/10 at 04:31 PM |
|
|
How about anodising the ali parts black? Not very expensive if you get them done as a batch and you wouldnt have to worry about the coating scratching
off.
Have you sold the GTS yet?
Chris
The Magnificent 7!
|
|
|
flak monkey
|
| posted on 4/10/10 at 08:15 PM |
|
|
Yes I sold it a while ago, but have been doing some work on it for the new owner. Its nearly complete now though.
I hadn't considered anodising, mainly because its not really shiney or matt. I would rather have parts gloss powder coated or plated to be
honest
Sera
http://www.motosera.com
|
|
|
boggle
|
| posted on 5/10/10 at 10:11 AM |
|
|
this is something i have considered doing next, but do you have to buy a frame or can you make your own?
just because you are a character, doesnt mean you have character....
for all your bespoke parts, ali welding, waterjet, laser, folding, turning, milling, composite work, spraying, anodising and cad drawing....
u2u me for details
|
PLEASE NOTE: This user is a trader who has not signed up for the LocostBuilders registration scheme. If this post is advertising a commercial product or service, please report it by clicking here.
|
flak monkey
|
| posted on 5/10/10 at 06:30 PM |
|
|
Frame wise you can do whatever you want. A bike frame is more critical on alignments than a car frame though and really needs jiing for best results.
Hence why I am having mine built by a pro. They arent cheap though, a custom basic rigid mount softail frame is around £1300. If you want a rubber
mount they are around £1600. Hardtails usually come in around £1100. Compare that to a locost chassis and you get the idea. That said - I think a lot
of the locost parts are generally underpriced for the time and skill involved.
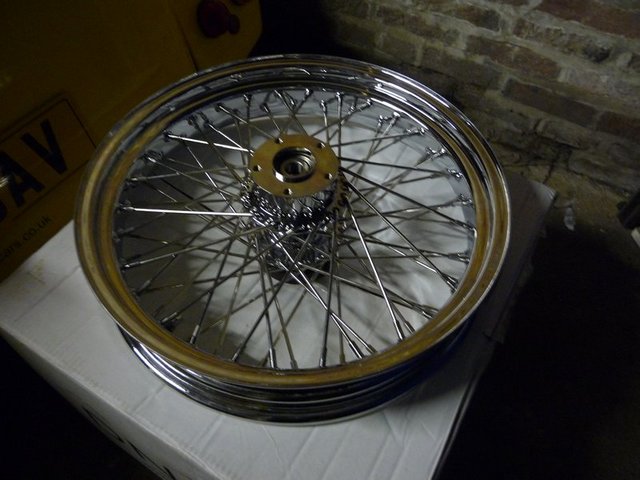
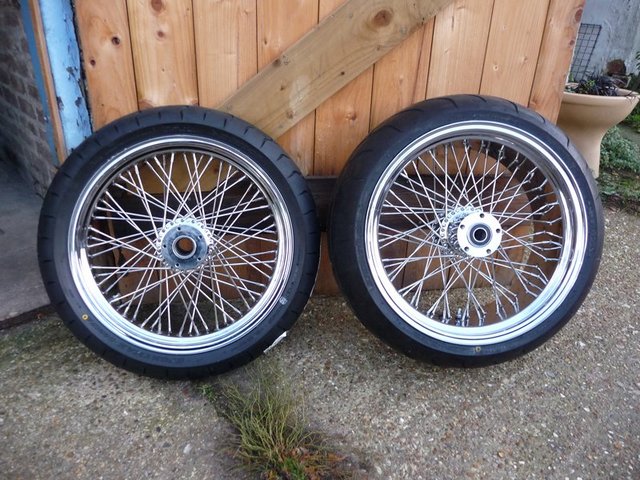
Anyway - wheels!
Bit of a compromise at the moment as I really wanted black alloy rims, but they are an easy change later if I wanted to.
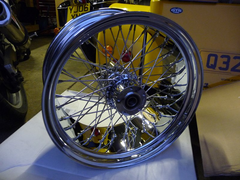 
Rear rim 1
Wide bastard! 18x8.5" for 1" axle.
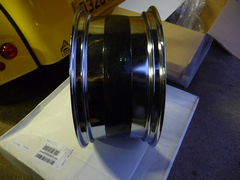 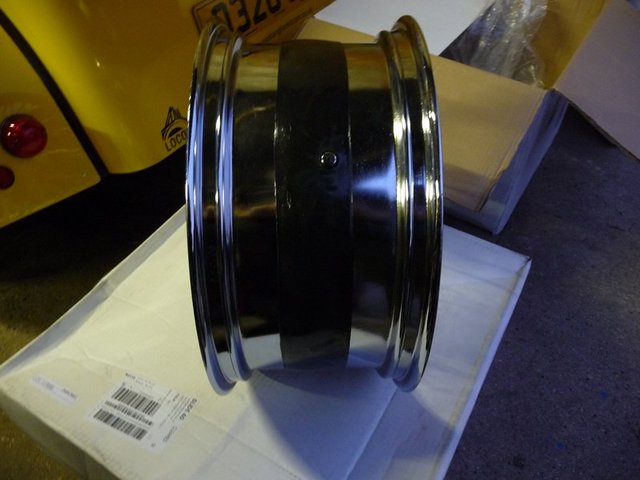
Rear rim 2
And the pulley/brake fits without needing any modification....I thought I was going to have to bore out the recess on the back of the pulley as the
rim is listed as post 2000, and the pulley pre-99. But its a relief and time saver that they fit properly!
 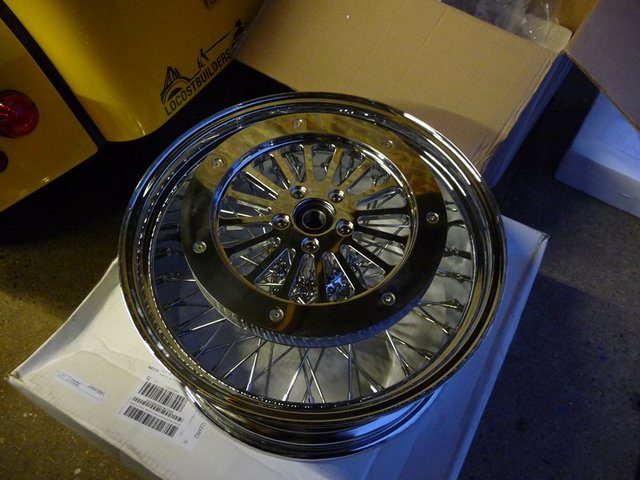
Rear rim and pulley
Front rim is an 18x3.5" for twin discs and 3/4" axle. So it should fit straight into the Midwest forks and supplied axle....
Front rim 1
The wheels themselves are from DNA and I had them sent over from the USA. The quality appears to be ok, but only time will tell I guess!
I guess I should find some tyres!
Sera
http://www.motosera.com
|
|
|
matt.c
|
| posted on 19/10/10 at 09:57 PM |
|
|
 Love the new stuff!! Its going to be a monster. Love the new stuff!! Its going to be a monster.
Keep updating while you build. Cant wait to see this one finished. 
|
|
|
flak monkey
|
| posted on 20/10/10 at 07:01 AM |
|
|
Loads of parts are on order, the frame is due in a few weeks. Until the car is out of the garage I dont have space to make a proper start anyway.
Sera
http://www.motosera.com
|
|
|
franky
|
| posted on 20/10/10 at 07:46 AM |
|
|
Great wheels, spokes are they way forward could you not get them dark chrome plated or painted black if thats what you want?
Looks like there's some nice bits there.
How long till the car goes?
|
|
|
flak monkey
|
| posted on 20/10/10 at 09:40 AM |
|
|
I could have had them powdercoated from the factory, or black chrome them if I dismantled them. I dont think the sealing strip on the inside of the
rim would take too kindly to being dunked for chroming!
Sera
http://www.motosera.com
|
|
|
flak monkey
|
| posted on 9/11/10 at 07:13 PM |
|
|
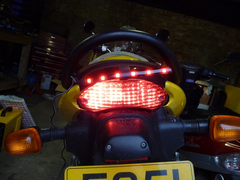
Well things are still plodding on as well as can be expected while waiting for the frame to arrive.
I got some LED strips through the post today which I am planning on incorporating into the rear fender for some really discrete rear lights. I need to
knock up a little circuit to allow me to do dual brightness on the red strips so I can use them for both tail and brake lights, though I dont think
its going to be a problem to do even if I have to knock up a little PWM circuit to get it right!
These are the strips, stupidly cheap off ebay, completely sealed and run off 12v (built in resistors). The plan is to mount them to the very edge of
the rear fender behind a smoked lens to make it all blend in with the rest of the bike.
Amber:
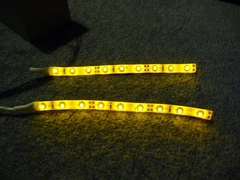 
Rear lights 1
Red:
 
Rear lights 2
And both together:
 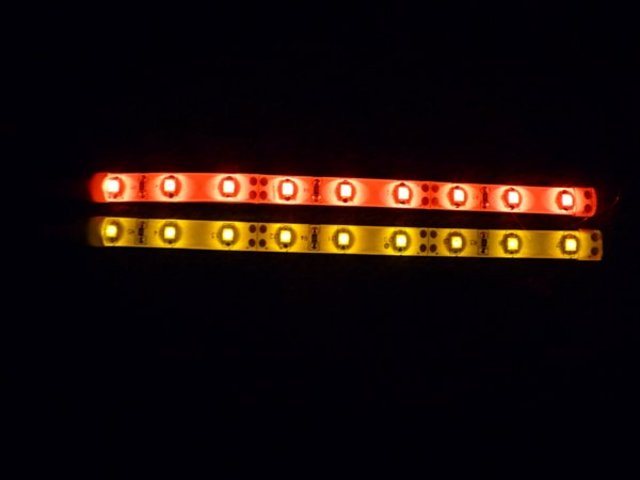
Rear lights 3
They are about 4" long and 3/8" high and 1/8" thick, so pretty tiny but super bright (dont show well in pics)
In other news I found a good use for a broken workmate! 
 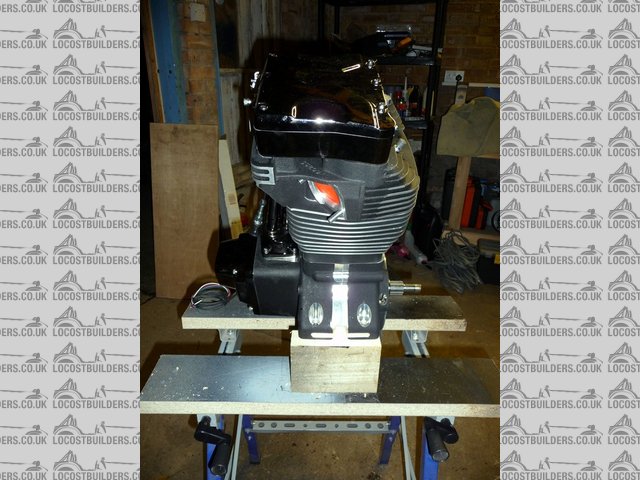
Engine stand 2
[Edited on 9/11/10 by flak monkey]
Sera
http://www.motosera.com
|
|
|
flak monkey
|
| posted on 13/11/10 at 06:36 PM |
|
|
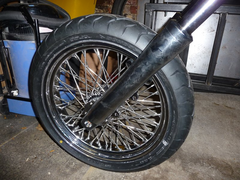
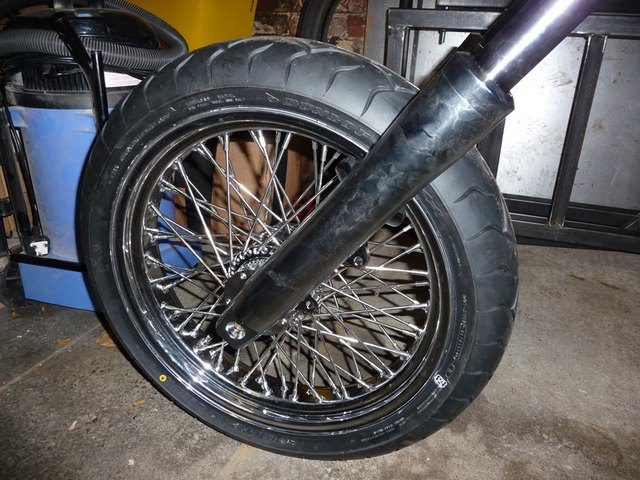
Some more minor progress this weekend.
Been fiddling with the dual brightness mod for the rear lights and that seems to work pretty well. Also got hold of some dazzlingly bright LED strip.
Taped it to the back of my SV for a brightness comparison and I am pretty pleased with the result - though taking pics of lights is always
difficult.
Tail light:
Rear lights take 2 - tail
Brake light:
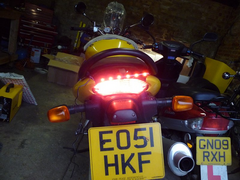 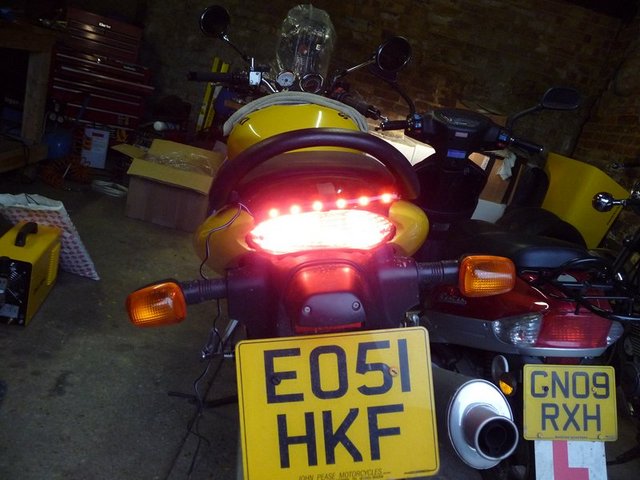
Rear lights take 2 - brake
I think that by the time its mounted up in a small housing with a prismatic lens fitted it should be ok... The brightness mod consists of 2 diodes and
a 150ohm resistor, pretty simple stuff.
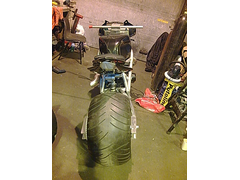
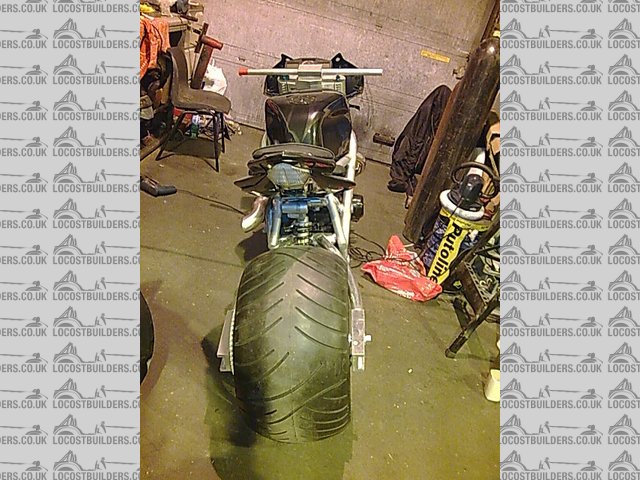
Fitted the tyres to the rims this afternoon as well...the rear one was a bit of a handful and took rather a lot of pursuasion! But it went on in the
end. I think they look pretty smart now they are fitted with some rubber
Wheels and tyres
 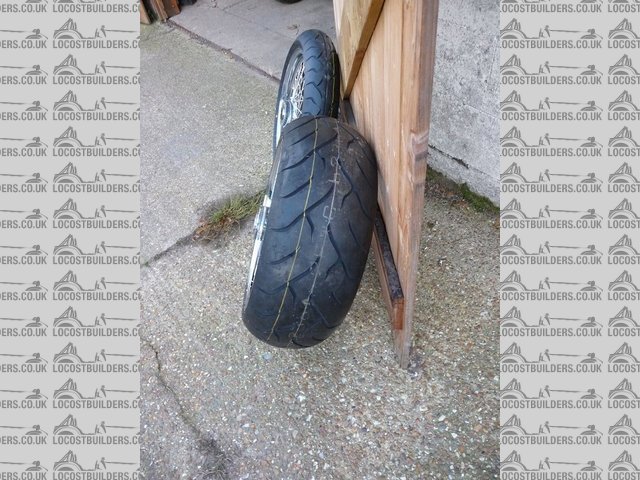
Wheels and tyres 2
Tyres are Dunlops D221's - standard fitments for VL1800's apparently.
And I spent some time polishing up the yokes I had sent over from the US. They were powdercoated from the factory and the finish was pretty good if a
little dull. Only trouble is now they show every little blemish in the powder coat! Oh well!
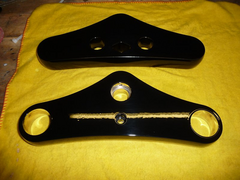 
Yokes
Sera
http://www.motosera.com
|
|
|
scootz
|
| posted on 18/11/10 at 09:44 AM |
|
|
Very
I was having a look at the engine specs (and that of some of its big brothers) and was amazed at the torque figures! What do they rev to?
It's Evolution Baby!
|
|
|
flak monkey
|
| posted on 18/11/10 at 10:10 AM |
|
|
The rev limit is 6500rpm. The torque curve is rather interesting as its more a flat line from 1500-6000rpm...!
Theres only 2 bigger ones, a 130ci and 140ci
 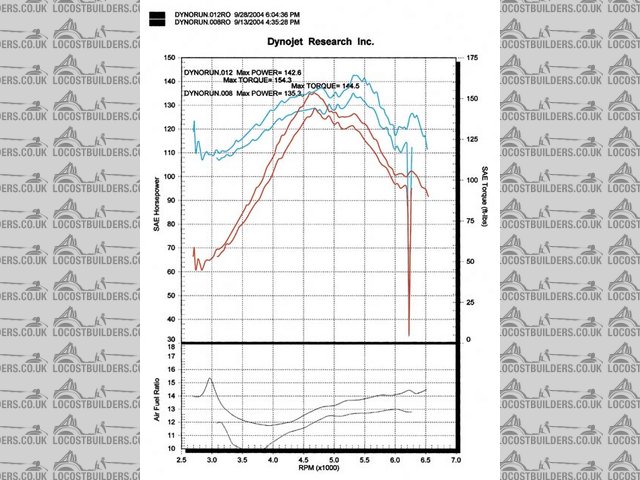
Dyno Print Out
Sera
http://www.motosera.com
|
|
|
scootz
|
| posted on 18/11/10 at 10:33 AM |
|
|
It was the 140ci I was looking at... 'El Bruto'!
It's Evolution Baby!
|
|
|
scootz
|
| posted on 18/11/10 at 10:36 AM |
|
|
Flippin eck... just twigged that 140ci equates to 2300! No wonder it has the devils torque!
What sort of weight is in these engines David?
It's Evolution Baby!
|
|
|
flak monkey
|
| posted on 18/11/10 at 11:13 AM |
|
|
The engine weighs in at 77kg and the gearbox another 15kg for a 6 speed So they arent a silly weight.
I am hoping the bike weighs in under 250kg when its done.
Sera
http://www.motosera.com
|
|
|
welderman
|
| posted on 18/11/10 at 04:46 PM |
|
|
Lookg good, i like fat rears, this was a Spondon Turbo, massive rear tyre would stand up on its own lol.
Joe
fat rear's !
|
|
|
scootz
|
| posted on 18/11/10 at 04:50 PM |
|
|
Yep... chunky rears are
What sort of power figures are belts up to these days? I never could understand how they stood up to the abuse!
It's Evolution Baby!
|
|
|
flak monkey
|
| posted on 18/11/10 at 09:06 PM |
|
|
Allegedly they will take the same power as chain width for width, so a 1 1/8" belt like I am using should be stronger than a chain.
The issue is they are more prone to snap if badly aligned or if they pick up a stone so there are lots of stories of belts breaking all over the
internet.
Primo (make belt drives) to prove how tough the belts are, took a stock harley belt (Gates Polychain GT2) and cut off a 1/4" wide strip then
fitted that strip to a bike and rode it hard around a track and never broke it.
My rear tyre is only a 240, as I still wanted to be able to go round corners
Sera
http://www.motosera.com
|
|
|
flak monkey
|
| posted on 28/11/10 at 03:09 PM |
|
|
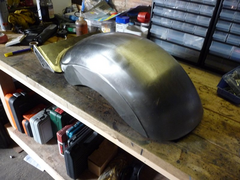
Picked up my rear fender this morning. Or at least one option anyway. I am still not sure whether to go with this one (slightly modded) which is a
rigid mounted one, or one mounted to the swing arm which follows the tyre.
Its going to need quite a bit of cutting and shutting to fit the way I want it I think. Going to take quite a bit of work as its 3mm thick at the
thinnest point. Just as well I have that plasma cutter....
 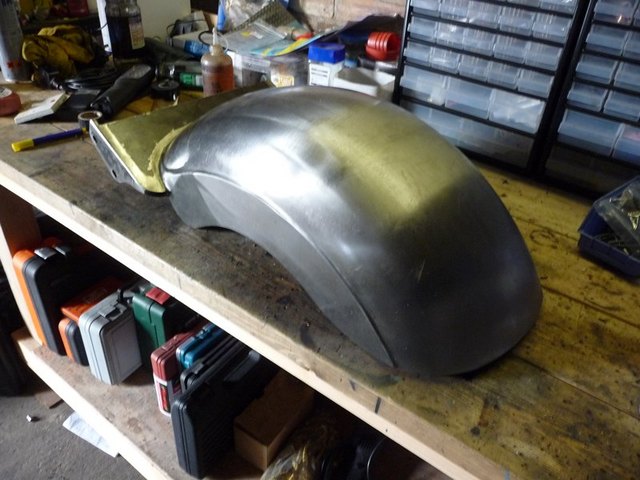
Rear fender (rigid)
Good thing is, this one would be strong enough to carry a passenger!
Sera
http://www.motosera.com
|
|
|
flak monkey
|
| posted on 10/12/10 at 08:00 PM |
|
|
Big day today (or busy day, whatever you prefer!)
Picked up my frame from Briz, very impressed with it indeed. Beautifully made
Got it back and made a start on putting a few bits together. Some swearing and head scratching, but getting there slowly. Hoping to get it all mocked
up over the next couple of months before stripping it all down again for paint.
The bare frame:
 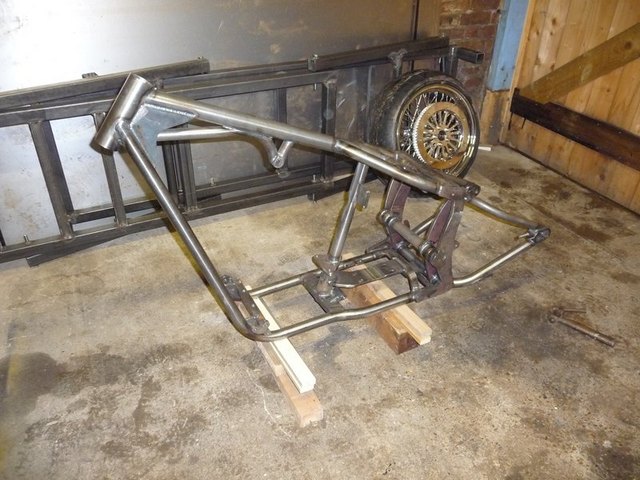
Bare frame 1
Bare frame 2
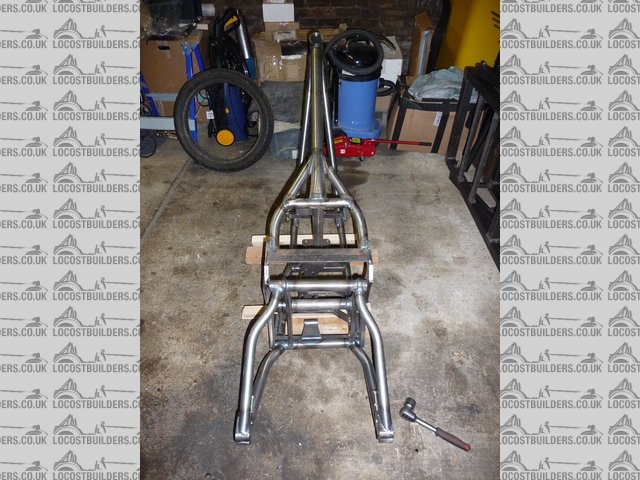
Removed the swing arm so I could fit the belt. The refitted it with a rear shocks losely fitted and adjusted to around halfway for ride height, turns
out they need to be set a little higher to bring the frame level. I also need to make some spacers for the bolts as they don't do up tight.
 
Rear shocks
Rear shocks
I know I am going to have to take them back out to fit the gearbox, but I wanted to get it together to see what it would look like.
I then set about fitting the front end. I need to order some dust shields and some internal fork stops before too long, so will be on the hunt for
some of those tonight.
The biggest problem was getting the top nuts/stops off the shocks so I could fit the flush ones as my yokes have hidden top nuts. Took quite a lot of
swearing and a few bashes with a large hammer to get them undone, quite why anyone decided they needed to be that tight I will never know. Got there
in the end though, and it went together quite nicely. Everything seems to line up.
Forks are 4" over stock.
 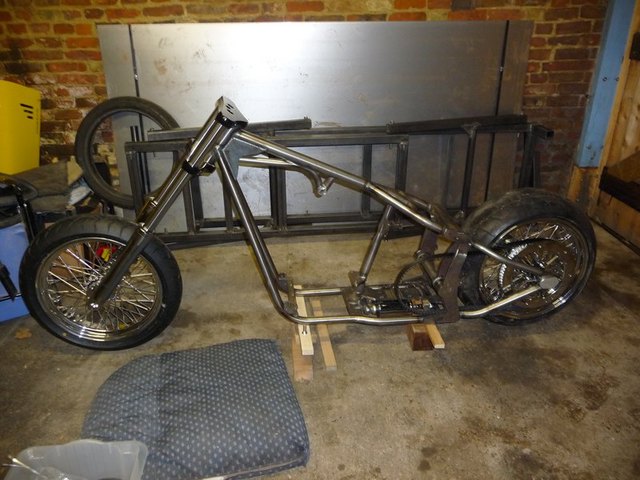
Rear wheel fitted 1
Front wheel
 
Front end
I need to make some spacers for the front axle tomorrow as the first job. Shouldn't take long though.
Then I refitted the rear wheel and its all coming together.
 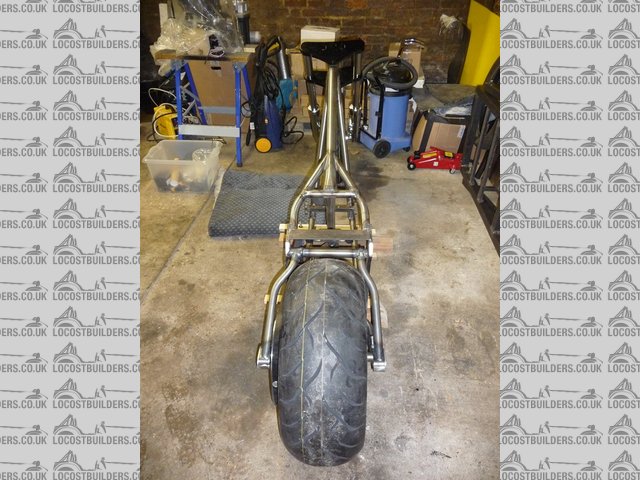
Rear wheel fitted 2
Brakester#
Getting a good idea now of what its going to end up looking like. Need to decide on a tank type/style. The top tube is about 20" long, so I am on
the look out for something close to that to get me started.
Tomorrow I am going to start looking at getting the engine and box ready to go in and getting it on the lift to make it a bit easier to work on.
Sera
http://www.motosera.com
|
|
|
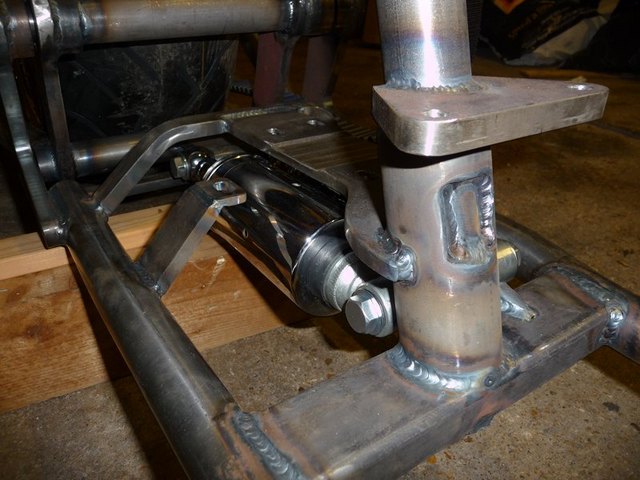
flak monkey
|
| posted on 11/12/10 at 07:59 PM |
|
|
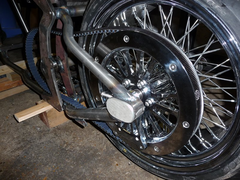
Made the mock up front wheel spacers this morning, just need to get some stainless bar in to make some proper ones now.
Trial fitted the rear brake caliper, not sure how I am going to hide the hydraulic line to it, but I'll figure something out...
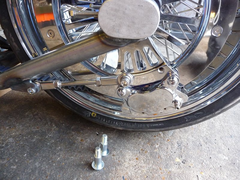 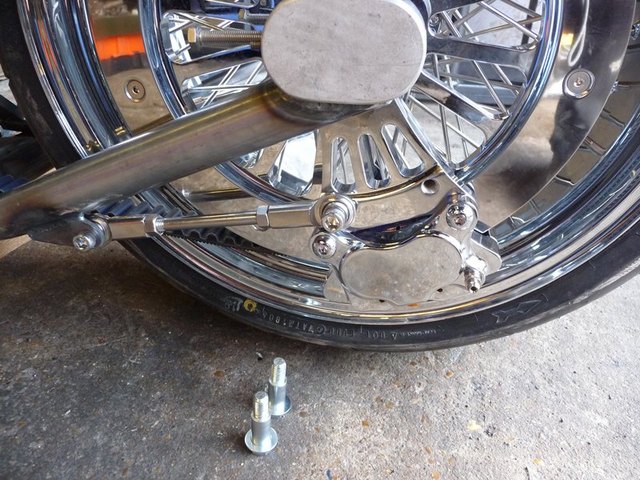
Caliper fitted
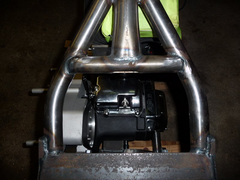
Dropped gearbox into the frame. Need to trim the left side studs down a little so they dont hit the shock, the other 3 all clear OK. Need a .5mm shim
under the 5th stud
Gearbox fitted
Heaved the engine in too and everything seems to line up pretty well - theres a small misalignment of around 1mm at one end somewhere, the primary
plate doesnt quite sit tight to the engine - I'll have to investigate a little tomorrow. Need to get some suitable bolts for fixing it in, will
order some next week. Also need longer bolts to attach the primary to the engine as theres a 45mm offset.
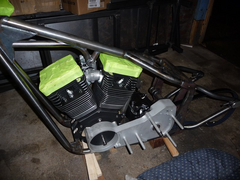 
Engine in 1
 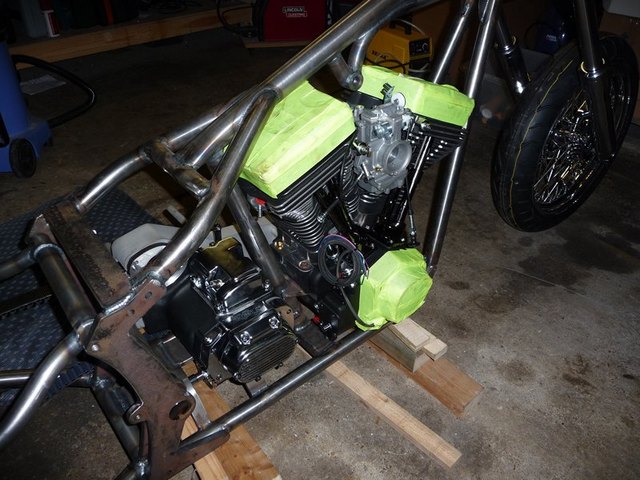
Engine in 2
Gearbox from top
I struggled for a while to fit the primary backplate, then realised the belt seems a little tight. Took the rear wheel out and it helped. Now I cant
get the axle back in, looks like I may need a longer belt  I check the tooth count tomorrow to make sure it is actually a 133T belt I check the tooth count tomorrow to make sure it is actually a 133T belt
Oh the joys of getting stuff to fit together :lol:
Sera
http://www.motosera.com
|
|
|
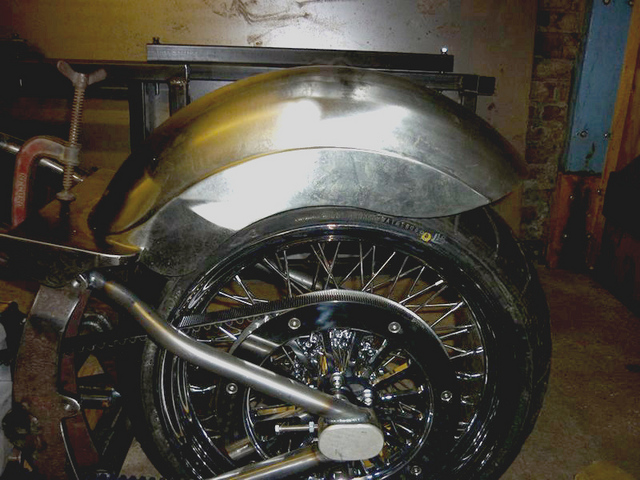
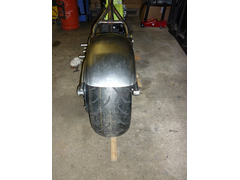
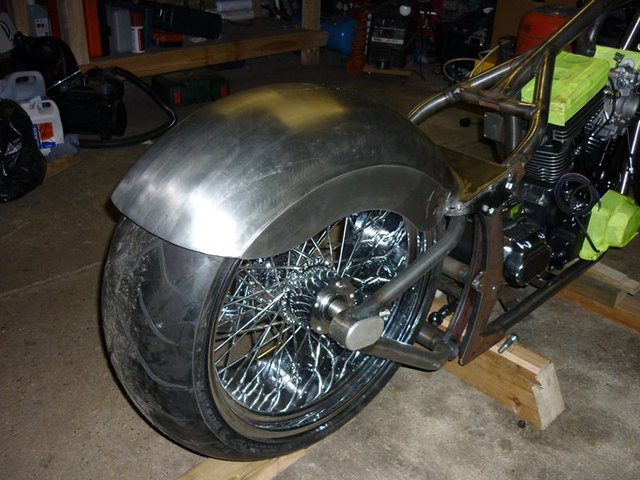
flak monkey
|
| posted on 17/12/10 at 08:36 PM |
|
|
Started on modifying the rear fender tonight. I picked it up on ebay pretty cheap. Very heavily built, could probably support 2 people as
pillion...
I was originally going to fit a hard tail type fender to the swing arm so it followed the tyre as I am not a fan of having a huge gap between the tyre
and fender. But I decided to give it a go with a normal softail style fender and see how tidy I can make it.
It was way too wide where it attaches to the frame (around 1" too wide) and sat way too high on initial fitment. Wheel is chocked to the target
ride height in these pics.
 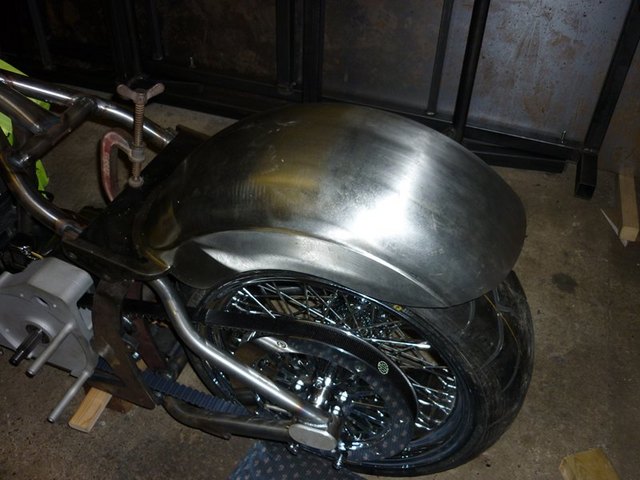
Initial fender fitment 1
Initial fender fitment 2
Doeesnt follow the wheel at all and it just looked wrong.
So I cut off the mounting brackets with the plasma cutter, and trimmed the edges up with the angry grinder and soft pad.
Layed a couple of pieces of pipe on the rear wheel and chocked it up to the suspension bump stops. Layed the fender on and then tacked the mounting
brackets back on so the holes lined up.
First modified fender fit 1
First modified fender fit 3
Sits a lot better now with the wheel back at normal ride height, but forgot to take a pic! (DOH!)
Tomorrow I will be fully welding the brackets back on and trimming up the welds to an acceptable state.
I will also be modifying and chopping it to length, but I am not quite sure where I am going to cut it off yet. Having now got it fitting better I
quite like the look of it at the length it is and will be much easier mounting a plate for the SVA. But it will make it more difficult to do the rear
lights the way I want. So I am a little unsure at the moment. I also want to ut the sides down to reduce the depth of it a considerable amount. Not
too concerned over the strength implications as I won't be carrying a pillion anyway.
More tomorrow hopefully!
Sera
http://www.motosera.com
|
|
|