coyoteboy
|
| posted on 9/11/21 at 06:21 PM |

|
|
Fusion360 offers a free limited license for hobby users. It used to be a lot less restrictive.
[Edited on 9/11/21 by coyoteboy]
|
|
|
|
|
Mr Whippy
|
| posted on 28/2/22 at 01:14 PM |

|
|
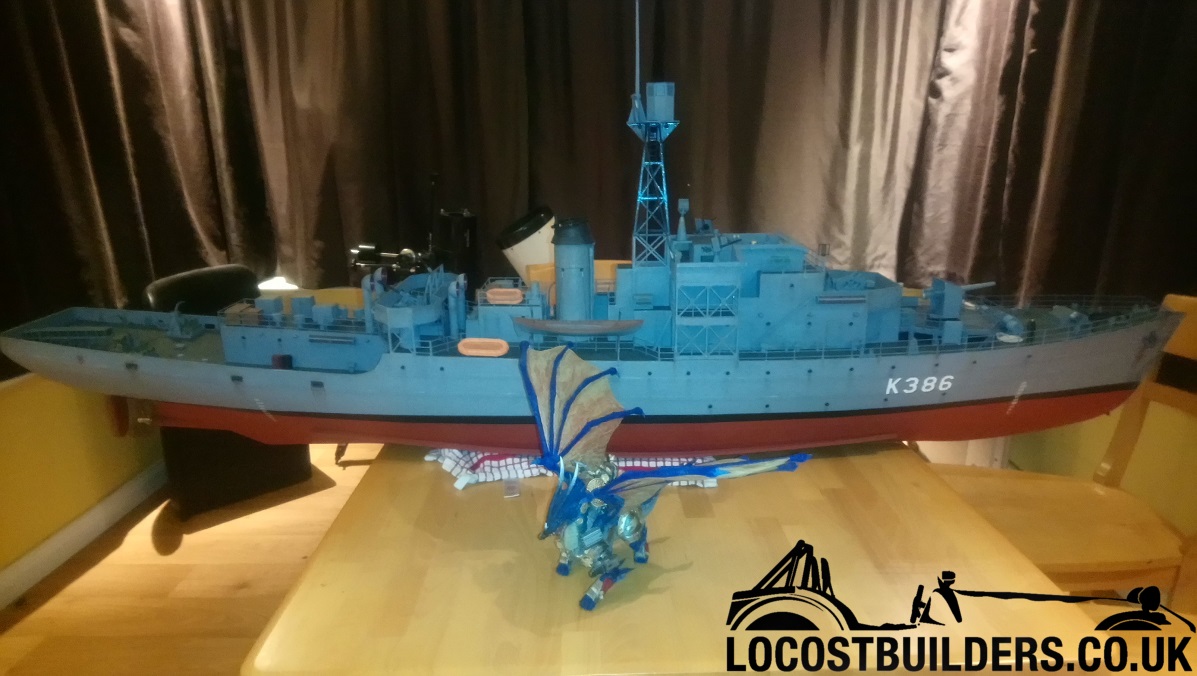
Phew that took a while... but it's almost finished. I did this model so I could learn to use my 3D printer better and is my first ever model
ship  . Turned out to be more a baptism of fire tbh . Turned out to be more a baptism of fire tbh  and quite a bit of replacement parts for the printer were needed after many failed prints and quite a bit of replacement parts for the printer were needed after many failed prints
 . Never mind it did it's job and I'm much better now and am already a 1/3rd through the hull of the next ship, that one being a 2m
long Fletcher Class Destroyer. . Never mind it did it's job and I'm much better now and am already a 1/3rd through the hull of the next ship, that one being a 2m
long Fletcher Class Destroyer.
So here it is, fully RC, 5kgs (with no ballast) and 1.6m long haven taken almost 4 months to get to this point. Files are available from CG Trader and
if I was to do it again I'd have scaled it up by 125% as that would still have fitted on the printer.


|
|
|
harmchar
|
| posted on 28/2/22 at 03:51 PM |

|
|
Thatís an absolute beauty. Will she float? Might see it down the Duthie Park if it does lol. Canít believe some of the detail on it as well. Great
job.
|
|
|
Slimy38
|
| posted on 28/2/22 at 04:19 PM |

|
|
quote:
Originally posted by Mr Whippy
Phew that took a while... but it's almost finished. I did this model so I could learn to use my 3D printer better and is my first ever model
ship  . Turned out to be more a baptism of fire tbh . Turned out to be more a baptism of fire tbh  and quite a bit of replacement parts for the printer were needed after many failed prints and quite a bit of replacement parts for the printer were needed after many failed prints
 . Never mind it did it's job and I'm much better now and am already a 1/3rd through the hull of the next ship, that one being a 2m
long Fletcher Class Destroyer. . Never mind it did it's job and I'm much better now and am already a 1/3rd through the hull of the next ship, that one being a 2m
long Fletcher Class Destroyer.
So here it is, fully RC, 5kgs (with no ballast) and 1.6m long haven taken almost 4 months to get to this point. Files are available from CG Trader and
if I was to do it again I'd have scaled it up by 125% as that would still have fitted on the printer.
I hate to be 'that guy' especially as it does look pretty awesome, but I thought 3d prints aren't watertight? Or did you do
something different to seal them?
|
|
|
Mr Whippy
|
| posted on 28/2/22 at 07:43 PM |

|
|
thanks for the comments
You are kinda right, the bare 3D prints are slightly porous. However this has had many layers of primer, paint and matt lacquer and is totally
waterproof.
|
|
|
Russell
|
| posted on 1/3/22 at 09:34 AM |

|
|
Awesome! Much respect for the time and patience you've put into that!
What filament is it and did you have to rub down all the parts to get a smooth surface for painting?
|
|
|
Mr Whippy
|
| posted on 1/3/22 at 11:58 AM |

|
|
Cheers.
I used just basic black PLA filament from ReprapWorld on big 5kg rolls, as that's one of the cheapest ways of buying it and the prints come out
very clean. I mount the spool on up on the wall on a home made bracket rather than the machine.
Only the hull needs sanding & filling between the joints and then gets a good thick coat of paint, most of the other parts come out super crisp. I
used big tins of Halfords primers for the base colours, those little tins of enamel for the detailed stuff and then coat the lot in matt primer. The
only glue use was 100ml bottles of CA from B&Q, stuff bonds really well. I used Tinkercad for designing a lot of extra details like the railings,
battery tray, portholes, mast, antenna etc and still have a lot of small detail parts to add.
Once painted I went over it with Tamiya weathering master kit doing all the streaks of rust and muck, even dirty areas of the deck were people walk.
Have to say that was one of the most fun parts of the build, then a light coat of lacquer to seal that on. One of my favorite parts is the anchor
chains which I printed too, and they are real chains! I thought that was funny being able to make them 
I now need to get some ballast and put it in my pond to get it floating right, so will probably weigh about 15-20kg once that's done  oh my
poor back! oh my
poor back!
Shorty I'm probably going to do a Youtube video (will be my first ever  ) to review the model in detail and go through what it took to make and
all the pit falls I found and how not to do the same lol ) to review the model in detail and go through what it took to make and
all the pit falls I found and how not to do the same lol 
|
|
|
Mr Whippy
|
| posted on 31/3/22 at 07:02 AM |

|
|
A bit more lead ballast at the bow but was moored up in the pond the whole day and not a drop of water inside  almost looks real. almost looks real.
Have now finished the hull of the next boat at 2m long 

|
|
|
Benzine
|
| posted on 31/3/22 at 07:15 AM |

|
|
That's superb!
|
|
|
David Jenkins
|
| posted on 31/3/22 at 10:27 AM |

|
|
Amazing...
Photograph that in front of a suitable background and you'd swear it was a real ship.
|
|
|
Russell
|
| posted on 1/4/22 at 09:39 AM |

|
|
That's a spectacular result!
Have you got any recommendations for a good quality/value 3D printer? I was looking at the Ender 5 Pro.
I can't really say what my purchase criteria are because I don't know about 3D printers - I guess a moderate price and something with good
user support and can achieve a decent quality output without excessive amounts of offputting trial and error. I don't have a specific build
project in mind, I would just like to experiment at first and then go from there.
|
|
|
David Jenkins
|
| posted on 1/4/22 at 10:47 AM |

|
|
If you are a total newbie then it's best to go for the simplest kind of 3d printer, e.g. the Creality Ender 3. There are other makes with the
same basic layout, which goes back to the original Prusa (also an excellent make, but much more expensive).
The best thing about these is that they're usually the cheapest, easiest to understand, and easiest to fix if something doesn't work as
planned. The 3 planes of motion are separate and easy to comprehend, which makes fault-finding much less of a battle.. I have 2 more unconventional
printers: one is the CoreXY type where 2 motors have to move in opposite directions just to get the printing head to go in a straight line, and the
other is a delta that requires 3 motors working together to go in any direction! Each can be a total PITA when they decide to not work properly (it
will always happen, eventually).
Many of the cheaper ones come as kits, and these days most of the big names are very well packed and easy to assemble - if you can build and run a
Locost then these are a doddle as long as you take your time and keep your brain in gear. If you can afford the extra cost, get one with a heated
print bed - it makes life easier.
You will also need software to create your designs, software to reduce your design into something printable (slicer), plus software that talks to your
printer and controls its temperatures and movement. Each varies in cost from free through to bleedin' expensive - almost all of mine is free.
The downside of free is that you usually have to sort out your own problems and issues, although there are various forums where advice can be
found.
Don't be tempted by the newer resin printers - they're messy, smelly and expensive to run. The final quality is brilliant, but print size
is very limited and the models need special treatment after printing, such as washing in IPA and then exposure to UV light to fully harden them. Too
much hassle for me!
|
|
|
Mr Whippy
|
| posted on 1/4/22 at 11:58 AM |

|
|
quote:
Originally posted by Russell
That's a spectacular result!
Have you got any recommendations for a good quality/value 3D printer? I was looking at the Ender 5 Pro.
I can't really say what my purchase criteria are because I don't know about 3D printers - I guess a moderate price and something with good
user support and can achieve a decent quality output without excessive amounts of offputting trial and error. I don't have a specific build
project in mind, I would just like to experiment at first and then go from there.
The printer I used for the boat is a Creality cr10s pro v2, that is a rather expensive machine at about £450, it is big and works ok but is not
perfect by a long way and is good at breaking down. I bought my kids a Creatity Ender 3 Pro at £170 and although smaller I'd say it was much
better value. I use Cura for the slicer as that's free and works very well and the setups for my machines was spot on.
They are kinda specialist machines and are really only suitable if you are -
1) Ideally a model builder
2) Very patent
3) Good at fixing broken machines
4) Happy to start small and work your way up
5) Not in a rush
6) Have somewhere to put the machine where the noise and smell is not an issue
People do say they are slow but I have never built so many models in such a short amount of time, I do wonder how many I will have this time next year
and just where I am going to store them all.
[Edited on 1/4/22 by Mr Whippy]
|
|
|
b14wrc
|
| posted on 4/4/22 at 06:12 PM |

|
|
I bought Creality CR10S pro a couple of years ago now and done loads of prototype work on it for the locost, you will have seen a bit recently on my
mid engined (now) 2.4 20vt.
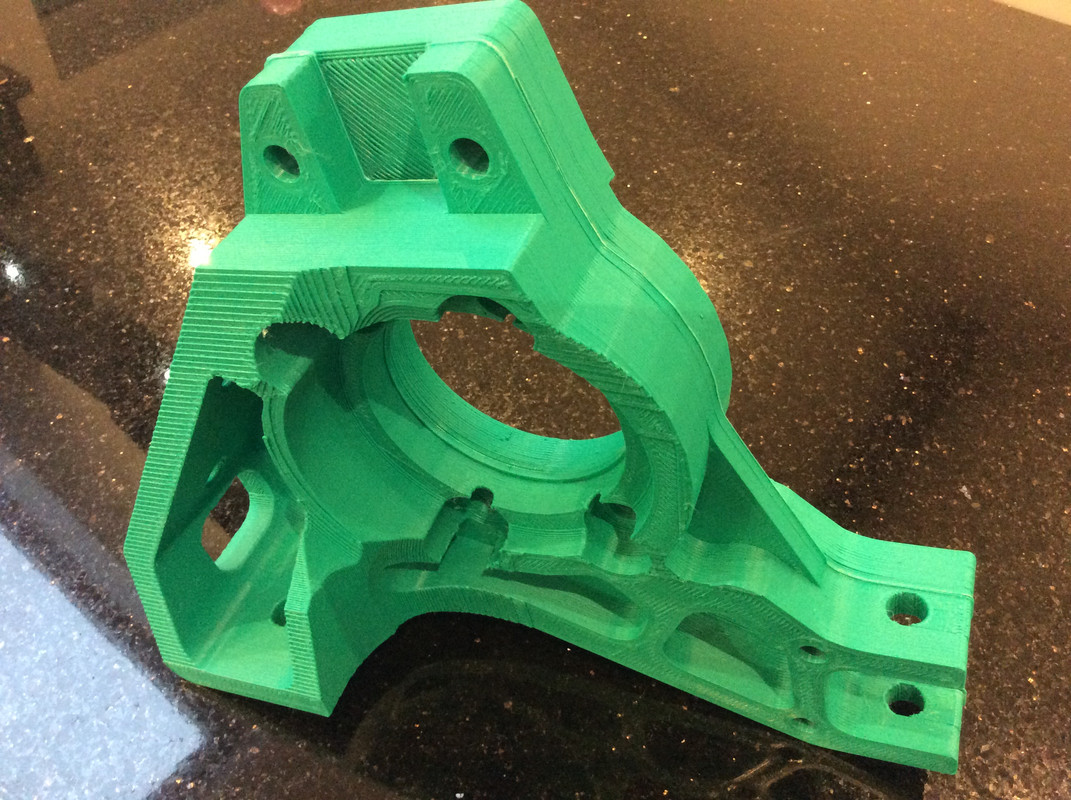
Latest work below:

The print didnít come out as well as usual - I suspect the batch of filament and a nozzle change needed. I printed this with a 0.8mm nozzle and a
layer height of 0.5mm, total time for the two halves around 16hours. The neat trick I have just mastered is you can locally change the properties of a
single model, really helpful for a structural part like this. The aim is to get the wheels on and lower the locost to the ground next weekend. THIS IS
MOCK UP BEFORE YOU ASK, but I know a less reinforced earlier version supported the engine and gearbox, 220kg, so with out the motor in, I think Iíll
achieve my goal of getting it on its wheels and ďrollingĒ it for the first time.
I would highly recommend to anyone getting a printer, itís a must have piece of kit, and I recommend Creality. Iíve had a really good luck with mine,
I have modified it a bit to get it to run better and believe the V2 spec of the CR10S has a lot of the upgrades you want. I think you need to prepare
yourself for a certain level of experimentation, itís just the number of variable both the machine and software can change, materials vary a lot
too.... so just be prepared to spend an amount of time setting it up. Over the last few years Iíve really hammered mine and replaced bits as I went,
most extreme print was in ABS and 90 hours, it printed fine at 250deg C for most of the week!
I love your boat, Well done on that.
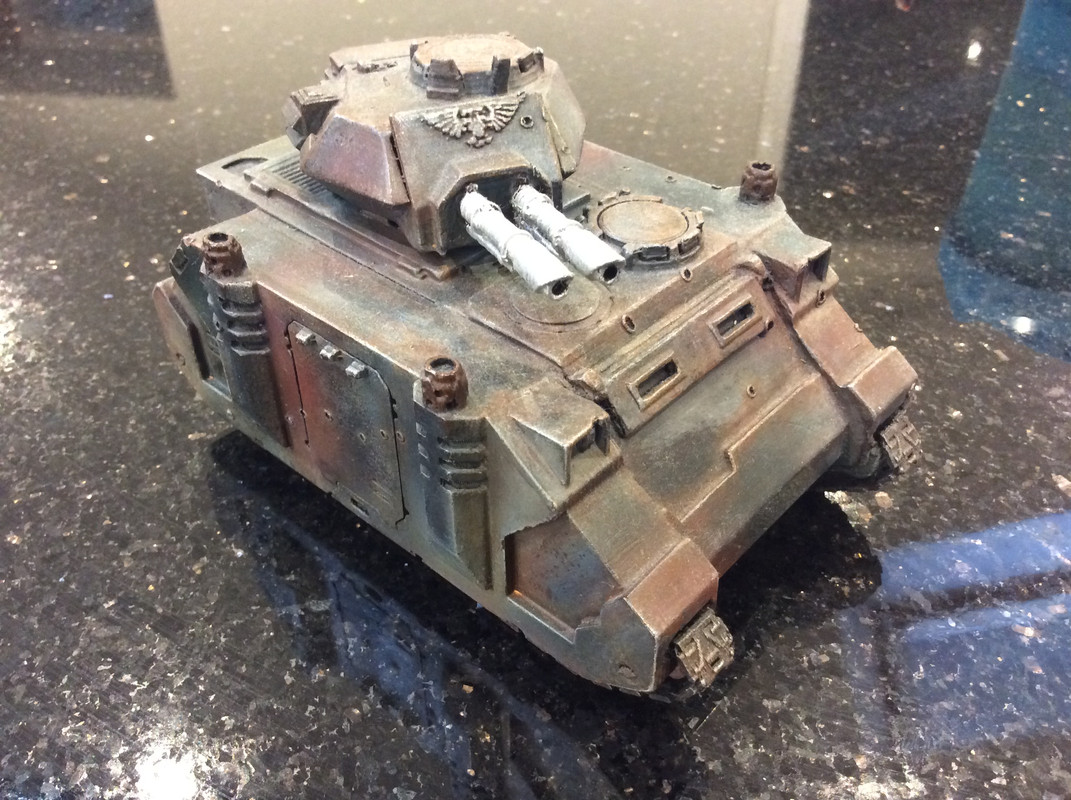
I did a warhammer Tank last winter, think I could have printed it with a finer nozzle but on a standard 0.4mm the actual printed lines are pretty hard
to see once painted:

It isnít finished, I wanted to put decals on it and paint it for snow use like a German tiger tank....
Rob
20vt powered rear engined locost
|
|
|
Russell
|
| posted on 4/4/22 at 07:02 PM |

|
|
That's really interesting info, thanks very much for the insights guys.
How do you deal with the print lines to make a finished piece, is it a case of light sanding and painting?
Also, I read PLA can soften and lose shape on a hot day. What filament is best for durability say for example to make dashboard parts?
Sorry for the multiple queries but you've got me very interested in this. I've seen CR10S Pro V2 for £429.00, which is do-able.
|
|
|
David Jenkins
|
| posted on 4/4/22 at 07:19 PM |

|
|
PLA will sag on a hot day, and it also gets weaker as it ages (it is supposed to be biodegradable - open to debate).
ABS is one of the most durable of the common filaments, but it's a PITA to print as it can warp and split during the printing process unless
you've got a heated print chamber - added cost and complexity.
PETG is a reasonably good compromise - relatively easy to print, although it's best to print slowly with it, otherwise it leaves strings
everywhere. It's also reasonably durable, with a higher 'glass transition temperature' (where it starts to get weak) than PLA, but
still lower than ABS. The only down-side for me is that I've found it hard to get a good surface finish.
One alternative to make the part in PLA then use that to make a mould for casting - you can then chose a very durable material such as resin.
I've even seen PLA prints used to make metal moulds in a similar way to lost wax casting, as it can be burned out of the mould material before
pouring the metal.
|
|
|
Russell
|
| posted on 5/4/22 at 11:01 AM |

|
|
Interesting feedback and ideas there David, many thanks. I like the idea of cleaning up the 3D print and resin casting from a mould :-)
I'll take the plunge with a decent quality printer and start experimenting.
|
|
|
b14wrc
|
| posted on 5/4/22 at 11:27 AM |

|
|
On the tank I just sanded it down a washed it with Acetone. For my locost parts Iíve just left them as are as itís prototype work.
20vt powered rear engined locost
|
|
|


