scootz
|
| posted on 17/12/10 at 11:20 PM |

|
|
Looks great! 
|
|
|
|
|
flak monkey
|
| posted on 18/12/10 at 05:38 PM |
|
|
Thanks Scott 
Done some more today, really need to dort a flue out for the woodburner so I can heat the workshop. -6 deg out today!
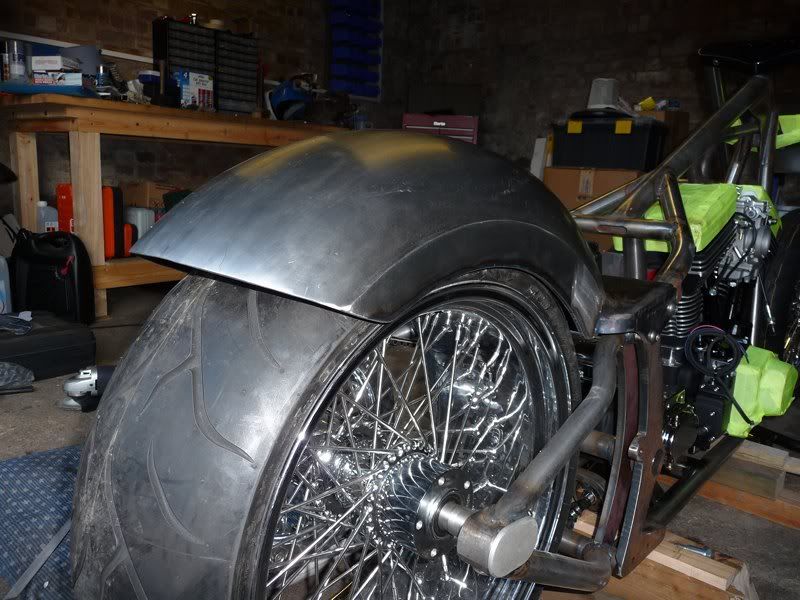
This is how I ended up with the fender fitting last night
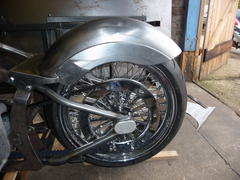 
First modified fender fit 5
I hope you would agree its a damn sight better than how it started (second pic in previous post).
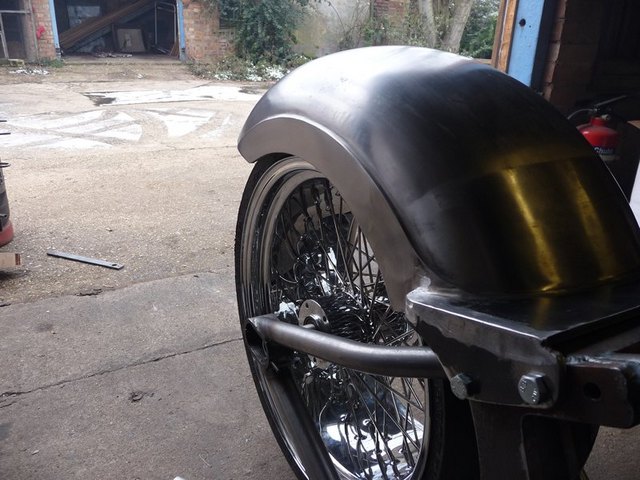
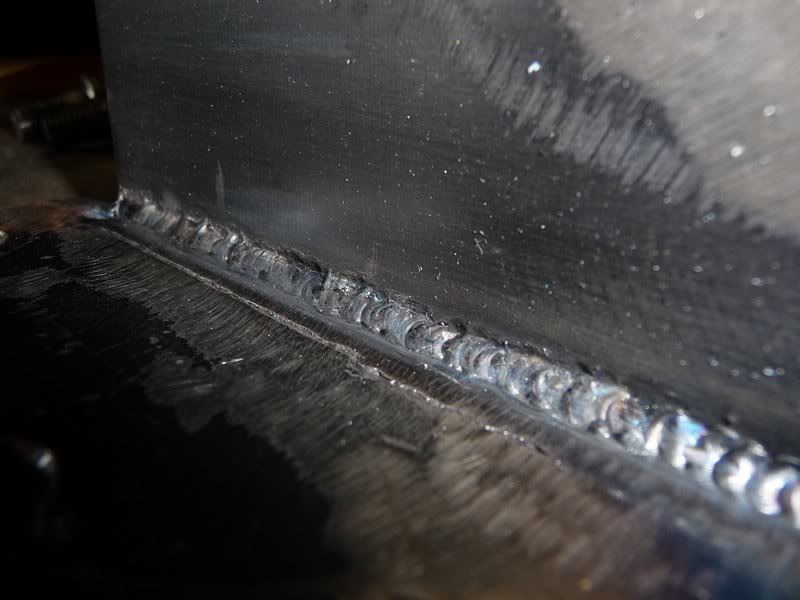
This morning I welded it all back together and trimmed it up so it was presentable again. Then decided to have a go at trimming the sides down a
little so the radius matched the rim at ride height. Still needs a little smoothing off and the bottom edge radiusing and blending into the rear edge
but by this point it was getting late in the afternoon and I couldnt face doing any more grinding!
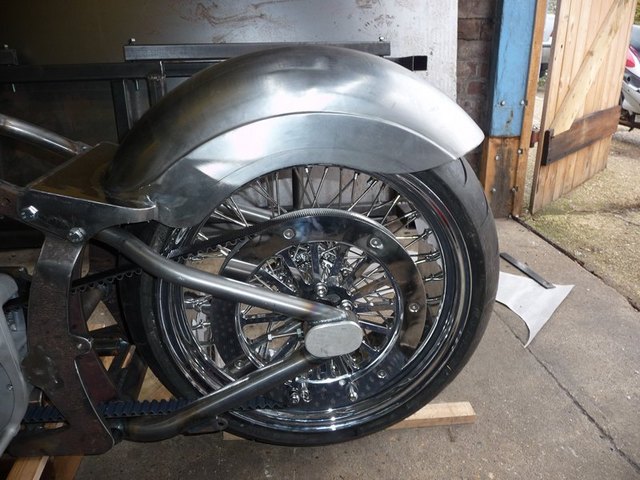
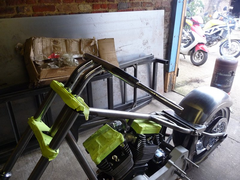
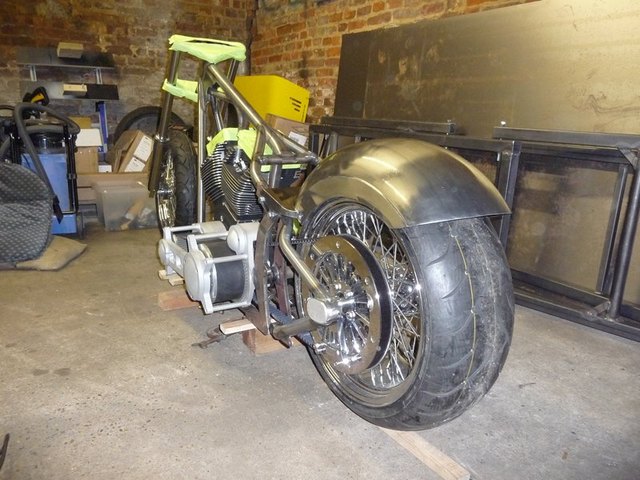
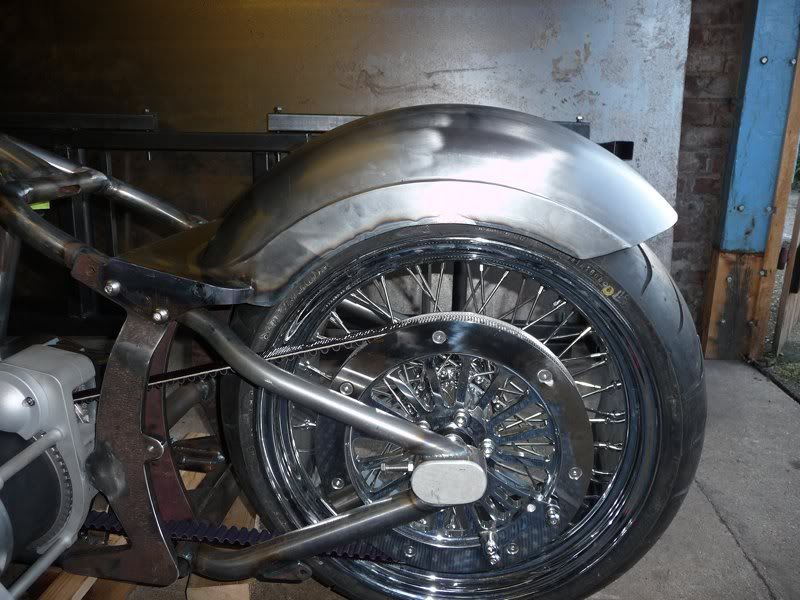
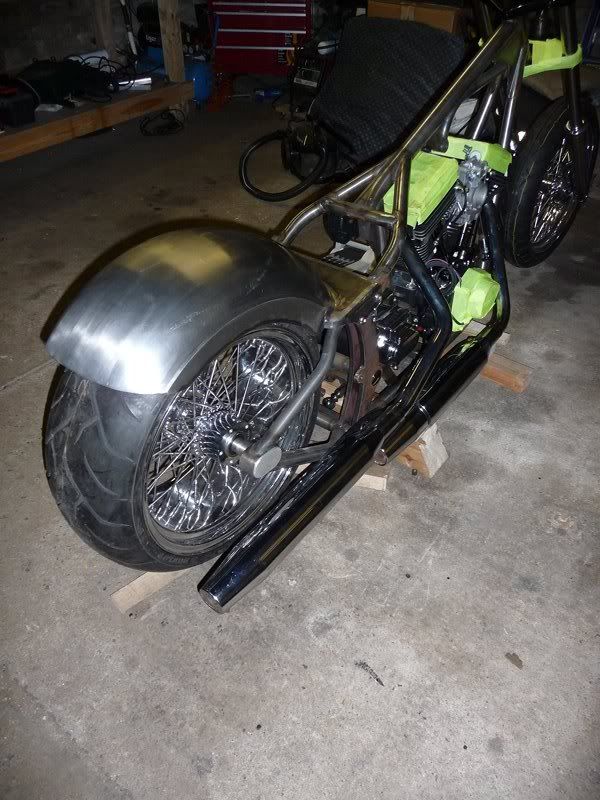
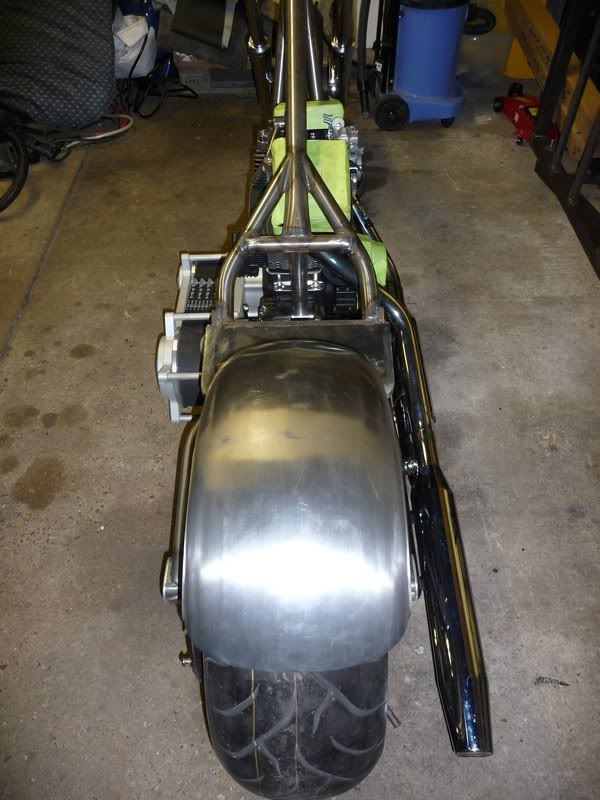
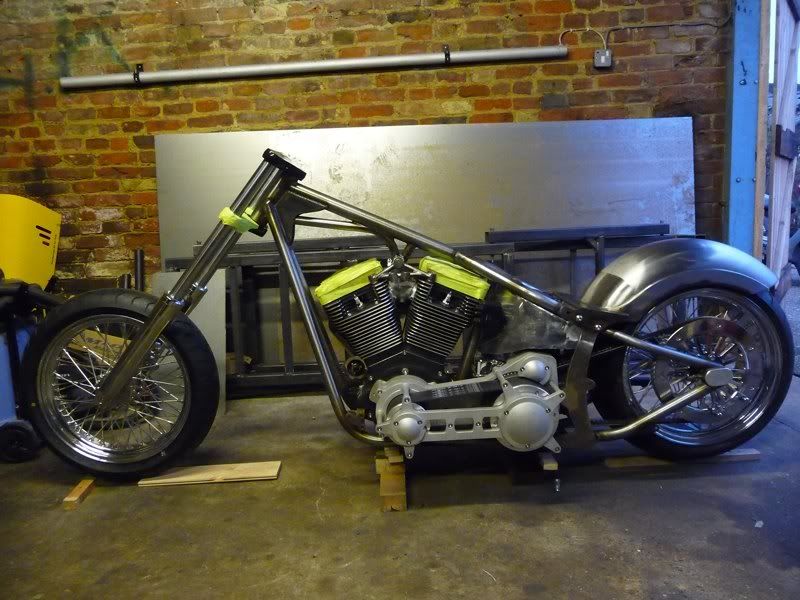
This is the final fit, bar a few bits of trimming up. The wheels going to come back around 1/2" yet when the belts tensioned up. I have decided
to keep it at this length as its going to make a few things a little easier to do further down the road...
 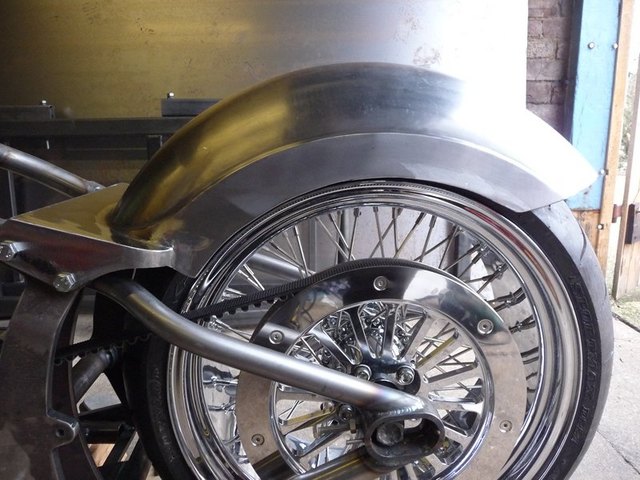
Final fit fender 1
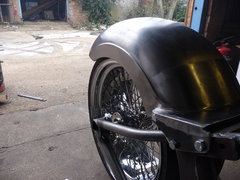 
Final fit fender 2
 
Final fit fender 5
A shot of the fender bracket
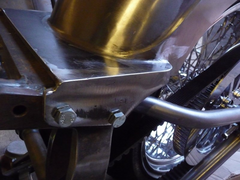 
Rear fender bracket
I also got my set of handle bar mounts today, so I could trial fit the 'test' handlebars just to get an idea of whether its worth modifying
these or starting afresh.
 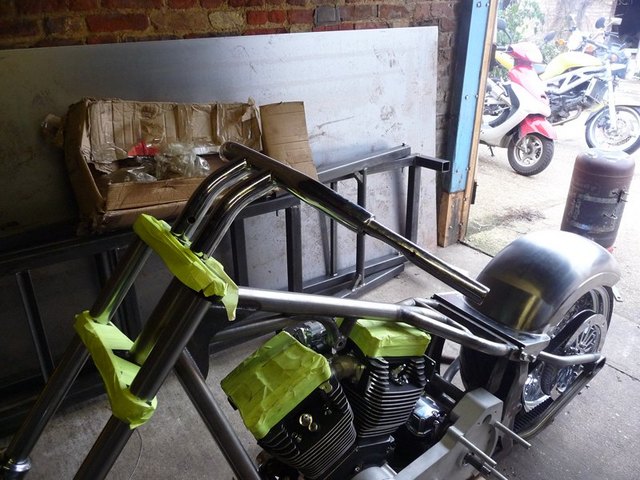
Handle bar test 1
Pretty quickly decided the pull back is about right but they are way too high. So I will be making a complete new set, just need to get some 1"
and 1.5" tube to make them from.
Then moved on to a test fitting the primary drive. All went together relatively smoothly, other than having to pull the backplate off again to insert
another spacer behind the alternator rotor to bring the pulleys into alignment.
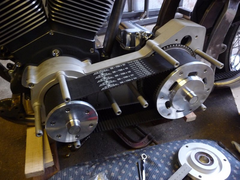 
Primary assembly 1
 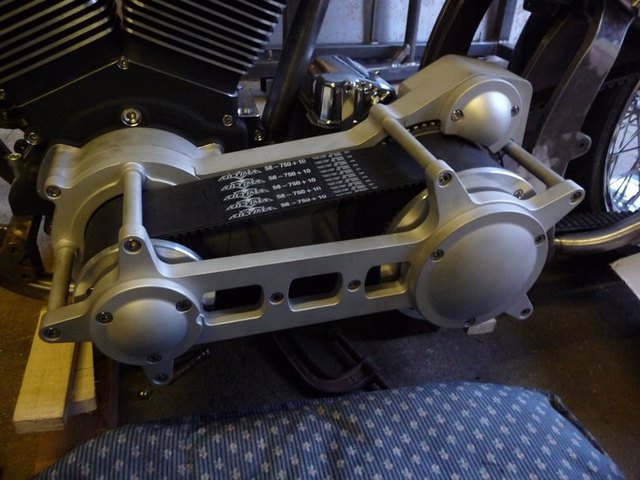
Primary assembly 2
And this is how it sits currently. Still an awful lot to do, but its nice to see progress. Pretty pleased with the overall look at the moment.
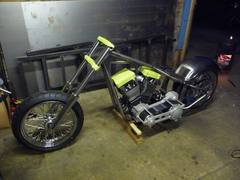 
Current progress 1
Final fit fender 4
First job tomorrow is the top motor mount
Sera
http://www.motosera.com
|
|
|
alistairolsen
|
| posted on 21/12/10 at 11:44 AM |
|
|
Looking good, like the rear guard! Is it my imagination or is a lot of this quite heavy? Also, christ that primary drive sticks out a long way!
My Build Thread
|
|
|
flak monkey
|
| posted on 21/12/10 at 01:20 PM |
|
|
Yeah none of its lightweight stuff. There's so much vibration on the bikes at tickover that you cant make stuff out of thin material or it just
breaks. The mudguard is 3mm thick mainly, with reinforcement on the sides and the bracket is 8mm thick. But then its also designed to carry the weight
of a pillion without any further reinforcement.
The frame is all 1.5x0.125" seamless tube and doesnt weigh that much in itself. The engine is 77kg, transmission 15kg.
Primary does stick out a fair bit, the belt is 85mm wide for a scale. Still plenty of room underneath to lean into the corners though, the sidestand
is more likely to ground.
Sera
http://www.motosera.com
|
|
|
flak monkey
|
| posted on 23/12/10 at 07:36 PM |
|
|
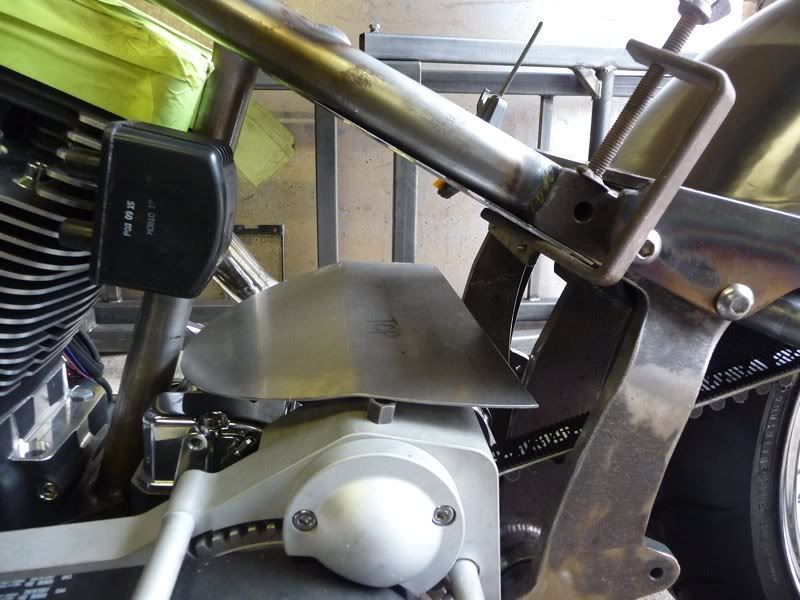
Well todays little job was make the top motor mount. In the end it took the better part of the day. Relatively pleased with how it turned out, though
my TIG welding looks crap compared to Briz's. Will clean it up and finish it off tomorrow.
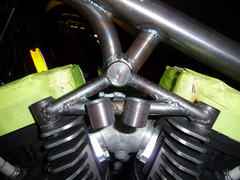 
Top motor mount
The 2 bits of tube on the front are for the plug leads to loop through. The ignition switch is going to be secreted away somewhere else.
Going to have to have that inlet manifold off and crackle black it to match the rest of the engine too!
Sera
http://www.motosera.com
|
|
|
Simon
|
| posted on 28/12/10 at 10:37 PM |
|
|
quote:
Originally posted by flak monkey
Yeah none of its lightweight stuff. There's so much vibration on the bikes at tickover ...
Of course, you could always use a modern engine to cure that - like a Rover V8, a mere 50 year old design
Don't panic, once my extension is done, I'm planning on a diesel bike
ATB
Simon
|
|
|
flak monkey
|
| posted on 29/12/10 at 04:00 PM |
|
|
Diesel rat bike! There have been a few done, have a search on google.
Finished the top mount off today - ready for paint when the time comes now.
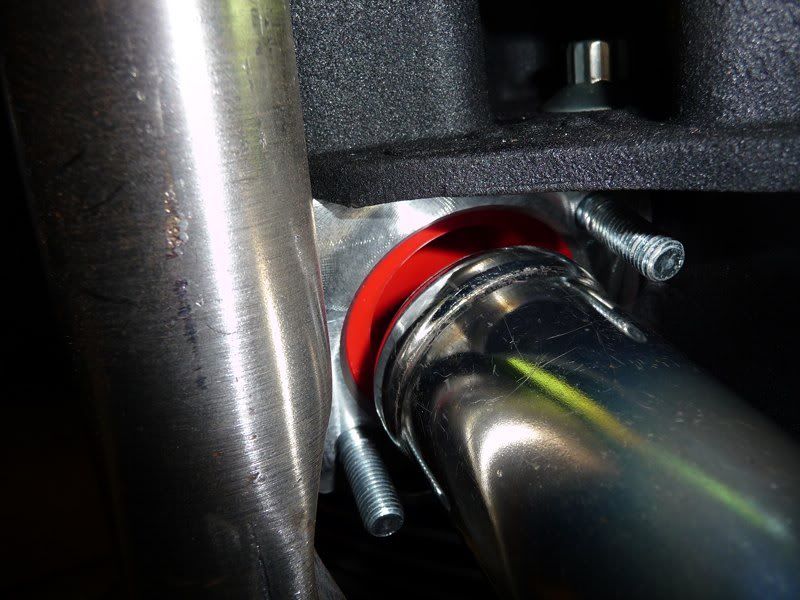
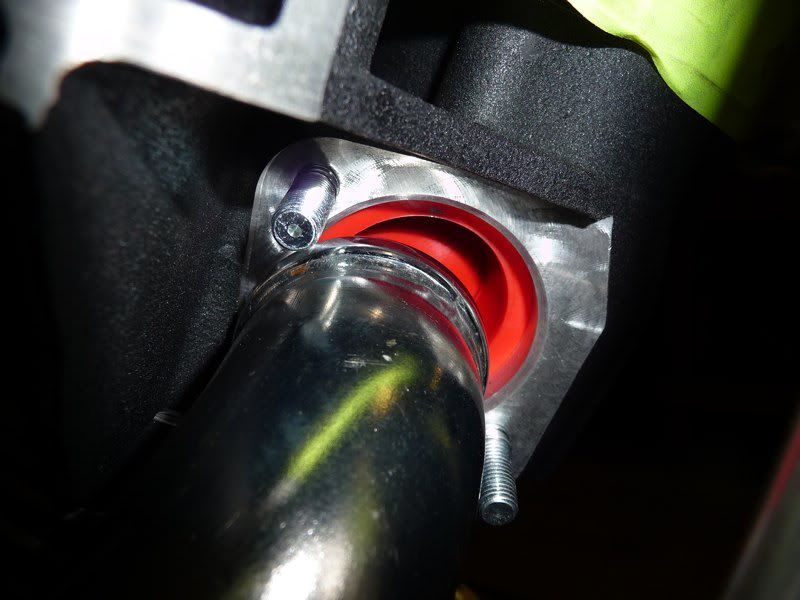
Swapped the transmission end cover from the standard cable one to the hydraulic one I got from the US.
Standard cover:
 
Original clutch cover
Nice and clean and tidy in there:
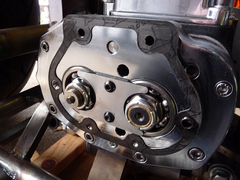 
Clutch cover removed
New cover fitted
 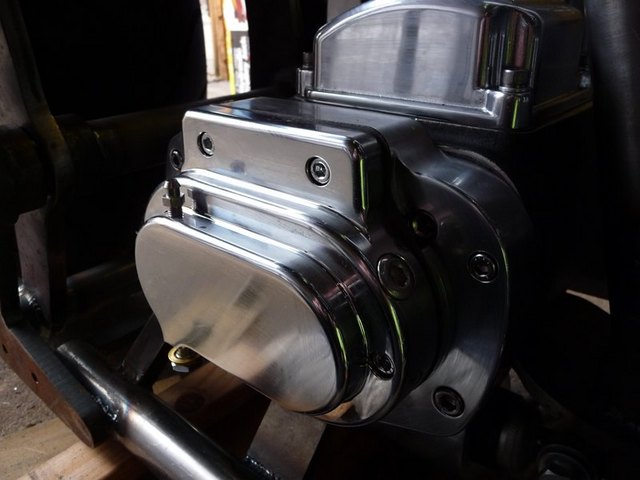
New cover fitted
Not sure how I am going to get the hydraulic line to it yet, but I am sure I'll figure something out, sure it will be easier to hide than a
normal cable.
The front brake calipers arrived just before Xmas as well, just need some bolts to fit them, along with some front brake discs now. Once they are
bolted up I will make up the front brake lines. I am going to fit dual front discs, so have a left and right hand caliper. Both are wilwood
GP310's powdercoated in black.
 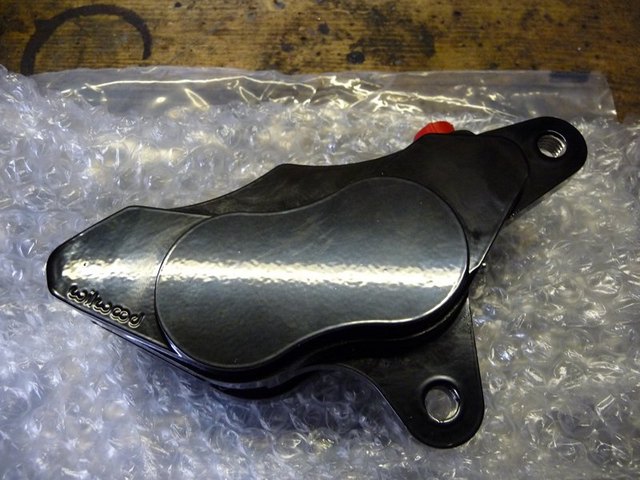
Brake caliper 1
Sera
http://www.motosera.com
|
|
|
Simon
|
| posted on 29/12/10 at 11:50 PM |
|
|
Rat.... Be nothing ratty about my diesel bike - they're just for people who didn't think about what they were doing or ran out of
money
Prob gonna use a BMW K100, bin the motor and go for a Pug/Ford/Mada 1400 tdi, and a regearing to make the most of the expected economy.
As I'd had 72mpg (at 40mph) from my 'busa, it'll be a challenge
ATB
Simon
|
|
|
flak monkey
|
| posted on 3/1/11 at 12:19 PM |
|
|
Been finishing off the designs for the forwards this morning, printed them out 1:1 and stuck them on the frame, the angles can be tweaked once I have
some physical bits. Will end up with all the plates laser cut. Everything that pivots sits on 2 sealed ball bearings, so they should be maintenance
free. Everything is steel.

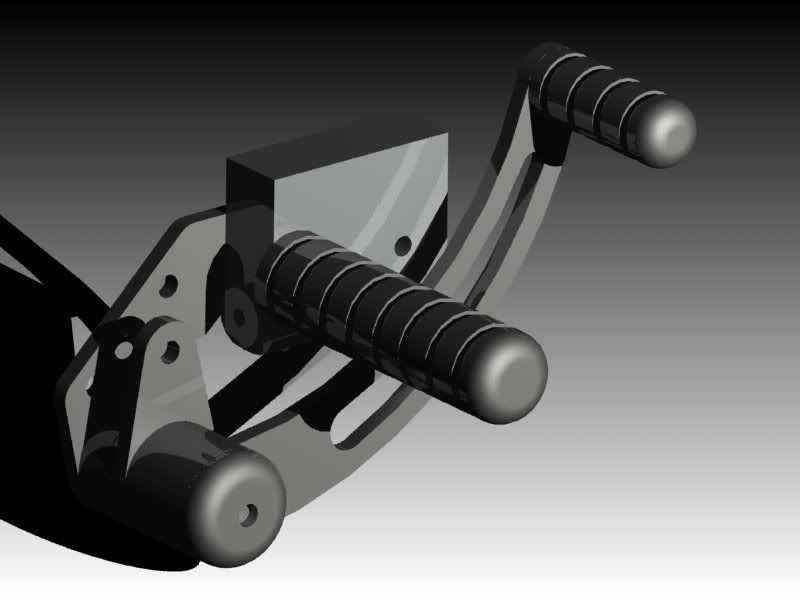
Will finish the DXF's tonight ready for laser cutting this week.
Sera
http://www.motosera.com
|
|
|
dlatch
|
| posted on 3/1/11 at 12:38 PM |
|
|
thats looking fantastic
making fast progress may be ready for the sunshine
how much nicer are bikes to work on than cars?
|
|
|
matt.c
|
| posted on 3/1/11 at 02:15 PM |
|
|
Thats propper bike porn!
Is there anything you cant do??? 
|
|
|
flak monkey
|
| posted on 4/1/11 at 02:41 PM |
|
|
Thanks 
Plenty I can't do, bike building's been a bit of a steep learning curve to be honest. Knowing what fits with what is just as much of a
nightmare as with cars - hence why I decided to leave the frame building to a professional!
Its easier to work on than a car, in that there are less parts - but that just means that there is much more attention to detail needed as absolutely
everything is on show. So I wish my TIG welding was prettier rather than just functional. But hey ho...
Bikes are also much more expensive...and I end up importing a lot of stuff from the US as there is bigger choice over there. Shame about the
extortionate shipping costs thats all.
Itching to get the oil tank made and a petrol tank fitted so I can see it all coming together.
Sera
http://www.motosera.com
|
|
|
scootz
|
| posted on 4/1/11 at 05:10 PM |
|
|
Good work fella!

It's Evolution Baby!
|
|
|
flak monkey
|
| posted on 8/1/11 at 06:33 PM |
|
|
Been fiddling around a little more this afternoon.
Swapped the final drive belt out for a 135T, which has brought the rear axle to the centre of its adjustment. This allowed me to finish off the rear
fender by trimming the sides to where I wanted them and smoothing it all off. Once I was happy with it I edge welded it and welded the brackets on the
inside.
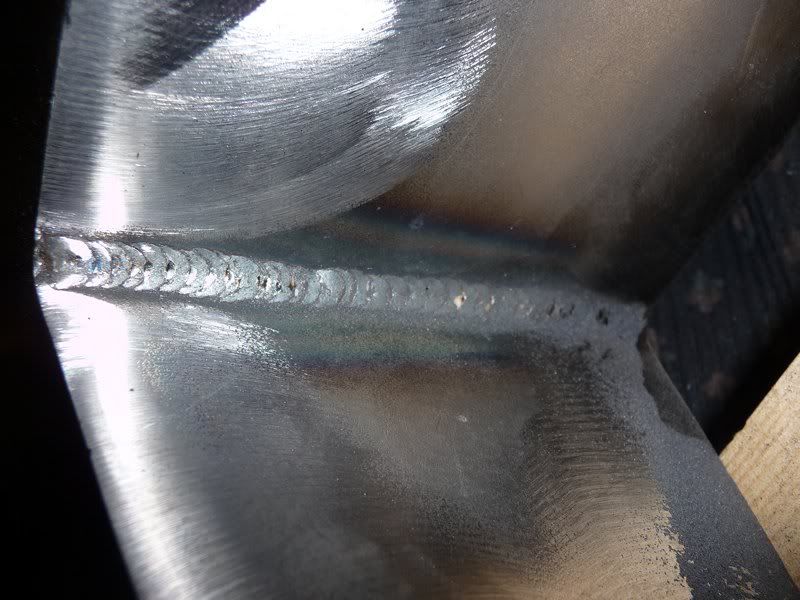
Was an excuse to practice the TIG on steel again, at least making it neater anyway. Tidier this time (line infront of the weld is where the brackets
were originally welded on to the fender and I cut them off)
So I took the opportunity to redo the top motor mount too, so that looks better now.
Also got hold of a stock Dyna exhaust to use for SVA, which fits remarkably well. Only needs cutting and about 1/2" extension welding in on the
2 headers to make everything fit. Probably only needs extending because I had to space the bracket off the frame by 3/4" so the silencers
cleared the swing arm.
Nothing too drastic anyway, and I just need to find a couple of bits of pipe to do it with, may have something buried in the workshop scrap pile...
[Edited on 8/1/11 by flak monkey]
Sera
http://www.motosera.com
|
|
|
flak monkey
|
| posted on 13/1/11 at 08:27 PM |
|
|
Got the starter fitted tonight. Its a 2kW Thunderfire unit, hopefully that will be man enough for the job. Bargain from the USA, $99 plus $40
shipping. Cheap enough for me to be live with having a chrome one, which I'll strip and get powder coated later.
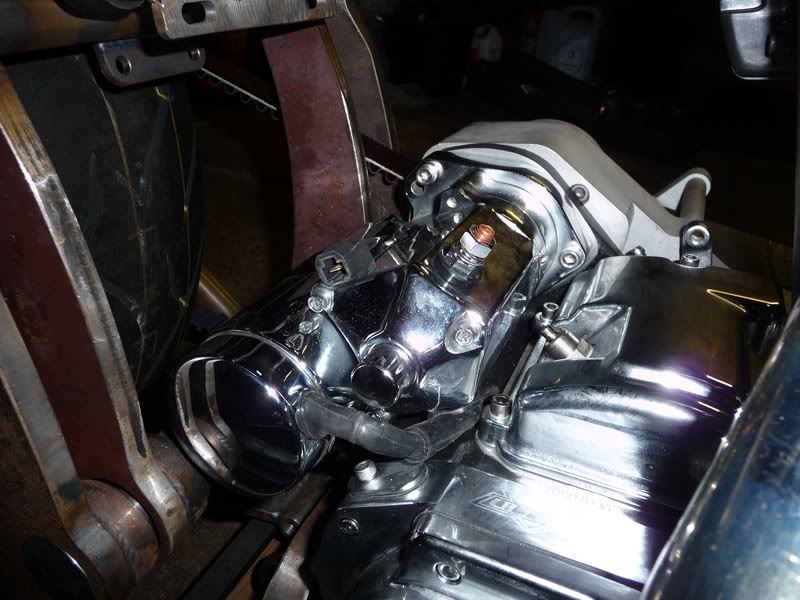
Can crack on with the oil tank tomorrow afternoon now.
Oh, and I had another look at the exhaust headers, and it looks like they will fit without any mods after all with a bit of pulling and shoving.
Sera
http://www.motosera.com
|
|
|
scootz
|
| posted on 13/1/11 at 08:31 PM |
|
|
"Thunderfire" starter... you've got to love those Americans!
What colour scheme are you thinking of for the bike David?
It's Evolution Baby!
|
|
|
flak monkey
|
| posted on 13/1/11 at 08:42 PM |
|
|
quote:
Originally posted by scootz
"Thunderfire" starter... you've got to love those Americans!
What colour scheme are you thinking of for the bike David?
Errrr black...and chrome in various finishes. I have a couple of ideas for designs for the tank, but unsure yet.
Sera
http://www.motosera.com
|
|
|
flak monkey
|
| posted on 15/1/11 at 07:27 PM |
|
|
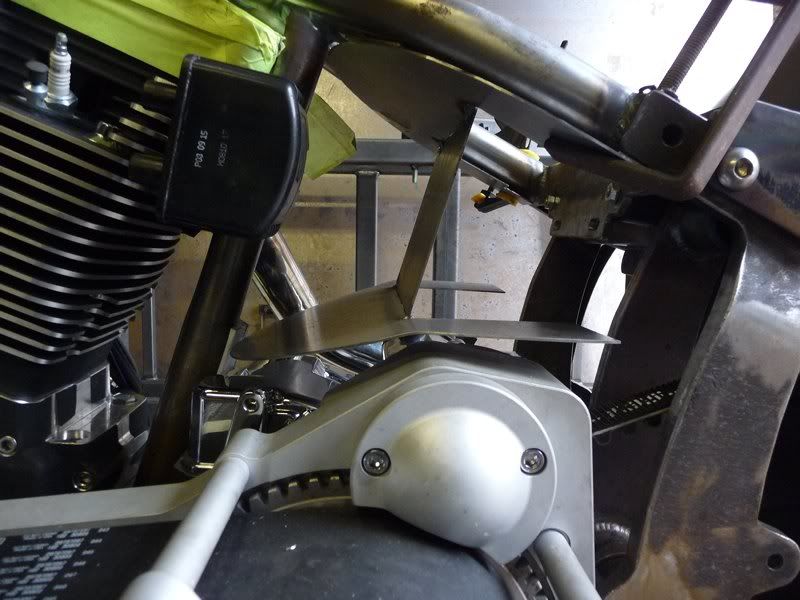
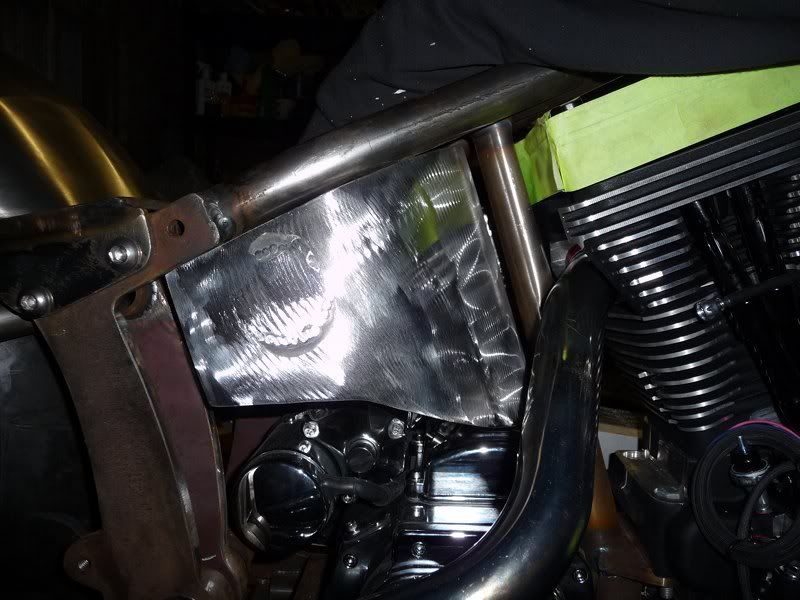
Been working on the oil tank for the past day and a half. Spent most of yesterday trying to decide how to mount the battery, and finally went with the
usual....
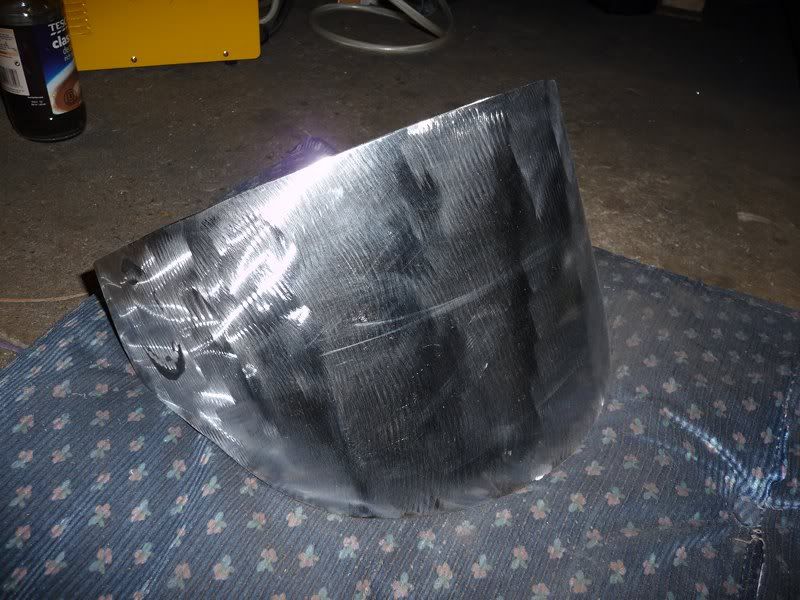
Made up some card templates to get the top and bottom plates the right shape. This took a couple of hours fiddling around yesterday. Trying to keep
everything as close fitting as possible as that was the whole point of making the tank rather than buying one.
Just two plates to close off the tank after the holes have been drilled for filler and take off/returns and the infill panels either side to match the
tank up with the frame.
I dont have much sheet metal work experience, so its taken me all day to do the tank and I am pretty pleased with the results. The bulk of the
structure is 1.6mm sheet and the curved front is 1.2mm as it was easier to bend. Everything cut with plasma cutter or angry grinder and bent with
brute force and a lot of ignorance....
Top and bottom plates
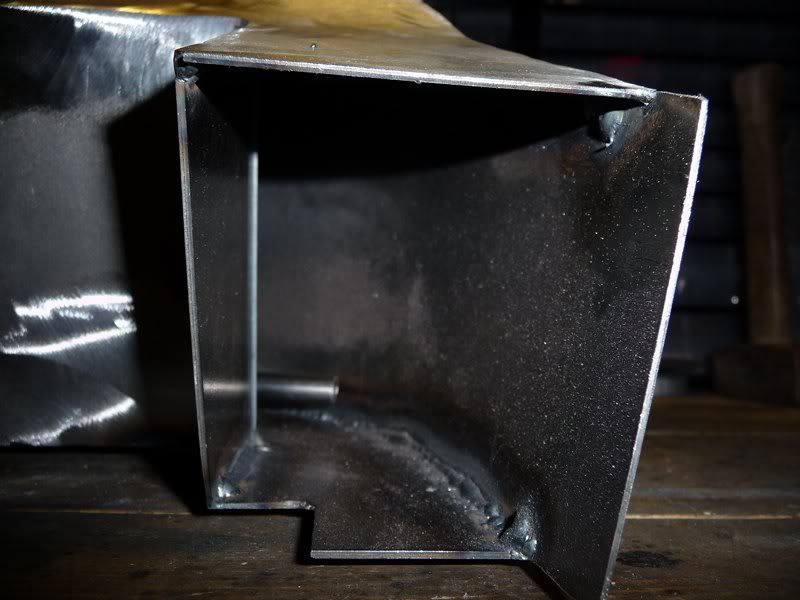
First joining plate tacked in and finally it's supporting itself so I could set the angle of the bottom plate.
Add some sides:
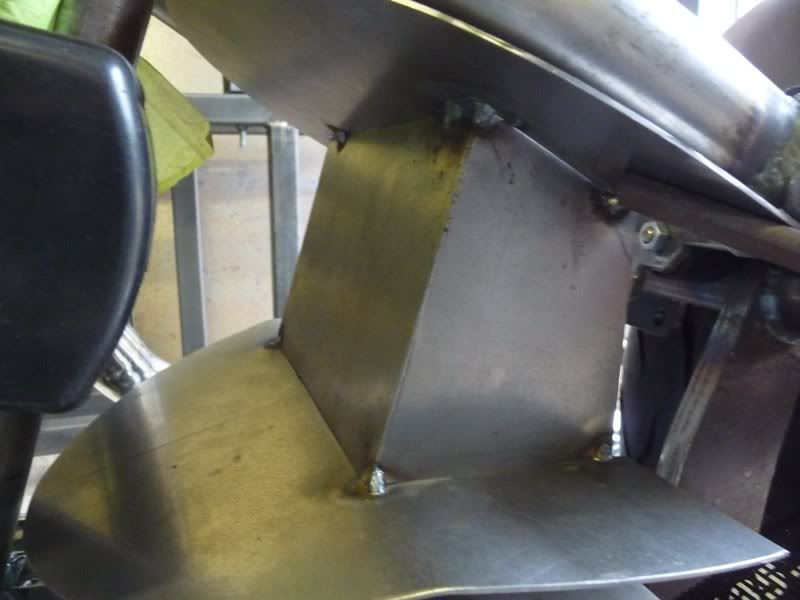
I am going to put the ignition switch in the right side of the tank so I had to weld in a tube to allow the switch and wires to be threaded through.
Used a bit of 2" stainless I had laying around. Welded it to the front of the tank first and leak tested it prior to starting to weld the front
on.
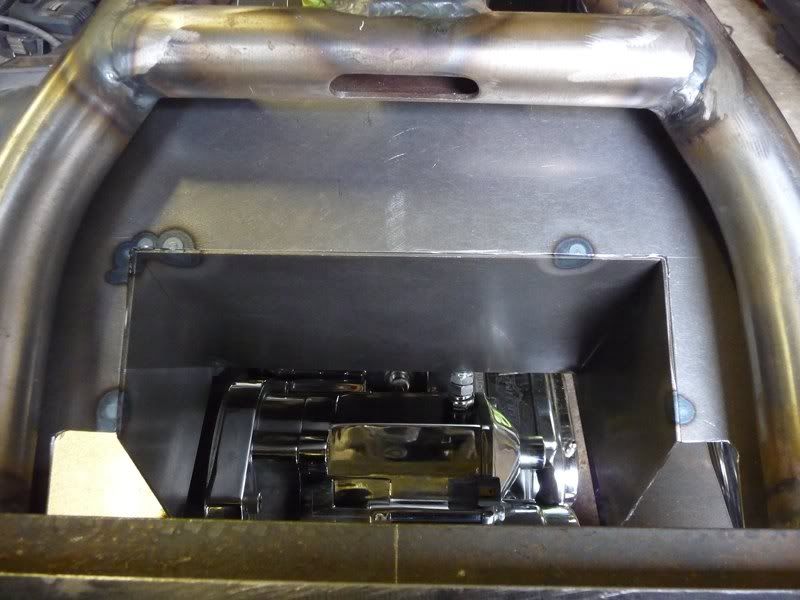
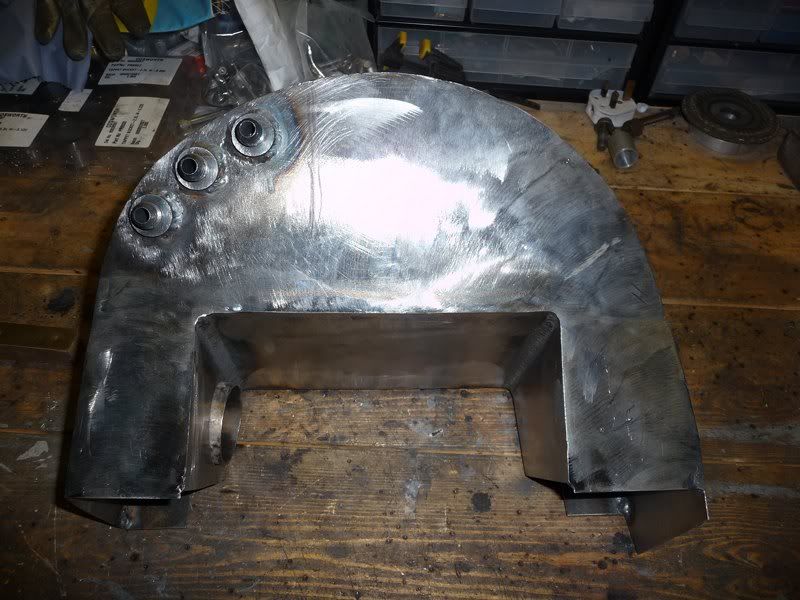
Cut the front well oversize, tacked on the rest of the assembly and just rolled it round tacking as I went. Seemed to work quite well
Cut the excess off and fully welded it all. Trimmed up with a softpad and this is how it turned out
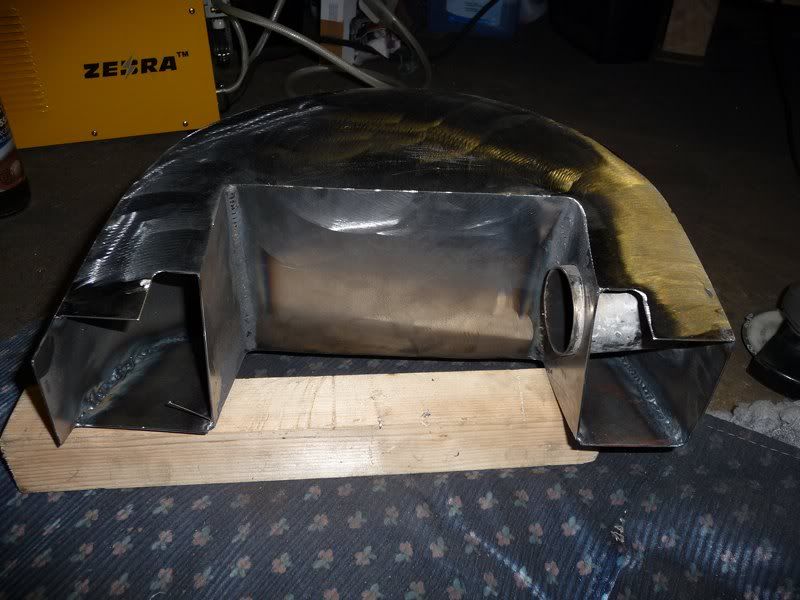
And it still fits in the frame, which is a bonus...
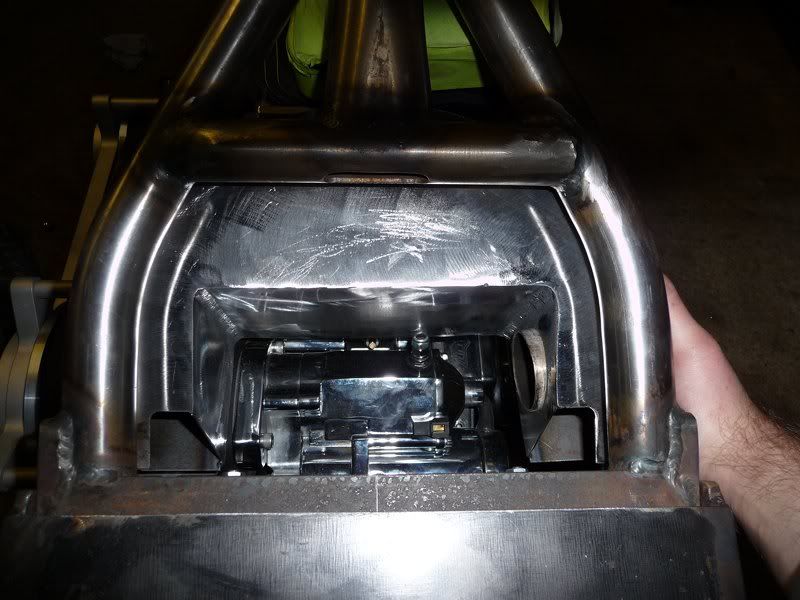
Just needs a little P38 before paint where I welded the tube on the inside.
Tomorrow I'll be making the brackets for it so I can fix it into the frame before making the infill panels to match up with the frame plates.
The filler cap will be going under the seat, in the top of the tank.
Nice to do some sheet metal work for a change and found it quite good fun and only one minor burn all day has to be some kind of record for me...
[Edited on 15/1/11 by flak monkey]
Sera
http://www.motosera.com
|
|
|
flak monkey
|
| posted on 16/1/11 at 05:38 PM |
|
|
Didnt get an awful lot done today, spent much of the morning making bits for other people on the lathe but there we go, still squeezed in a couple of
hours on the bike.
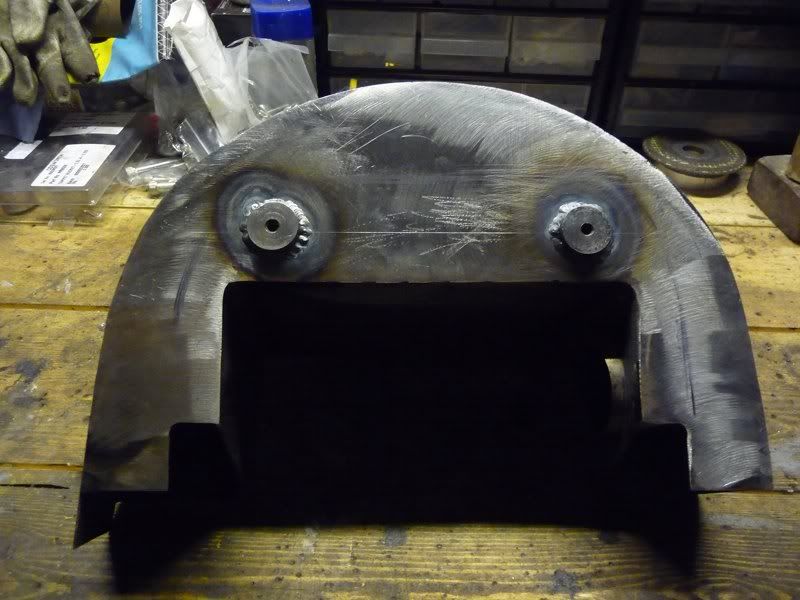
Made up two bosses for the front mounting rubbers, had a rethink on the sort of mounts to use, so am waiting for those to arrive at the moment. Welded
them on the top of the tank, though I hate tigging around small bosses :x :x
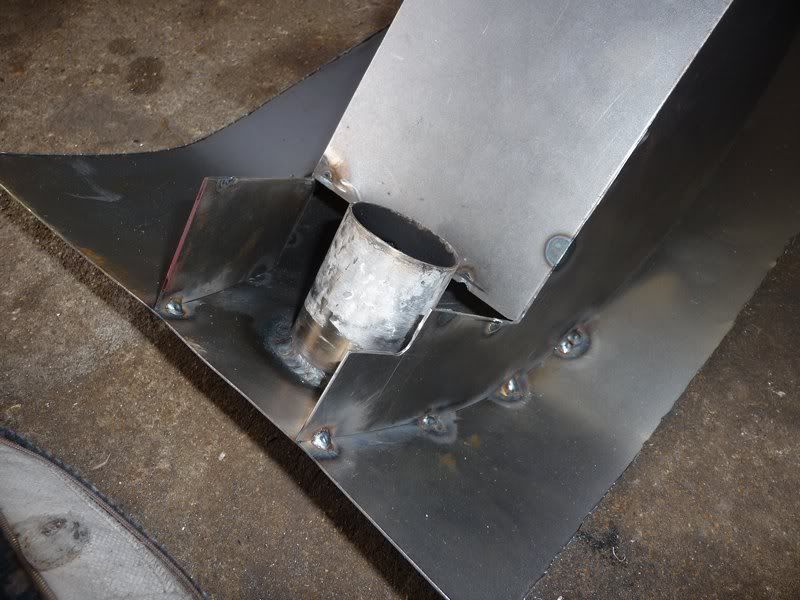
Then started on the feed, return and breather connections. All the connectors are -6AN / JIC fittings, bought some steel weld on bungs for a couple of
quid each.
Return first - used some 10mm OD steel tube to make a pipe to go inside the tank. Idea being to promote oil circulation by dumping the returned oil on
the opposite side of the tank to the feed. Found that a small copper pipe bender was man enough for the job (just).
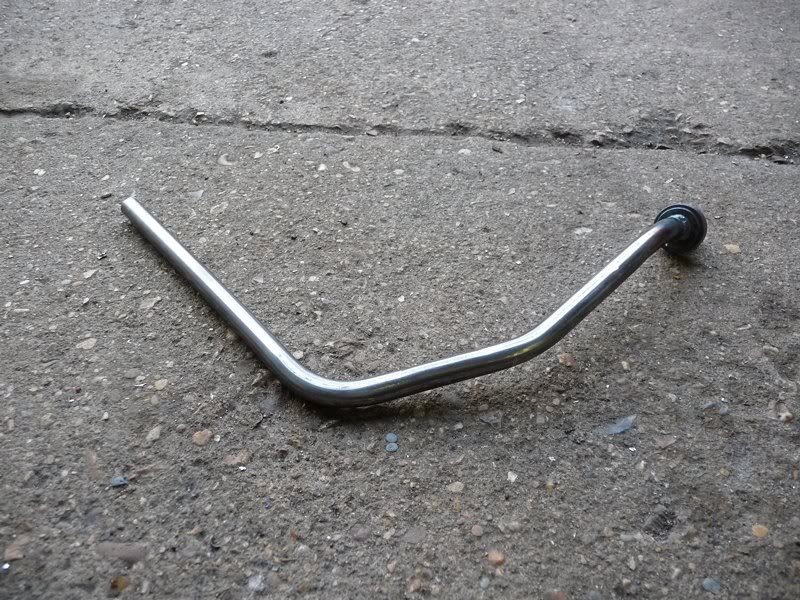
Then threaded into the tank and welded in, and this is where the pipe ended up inside the tank. Should allow a reasonable oil level hopefully.
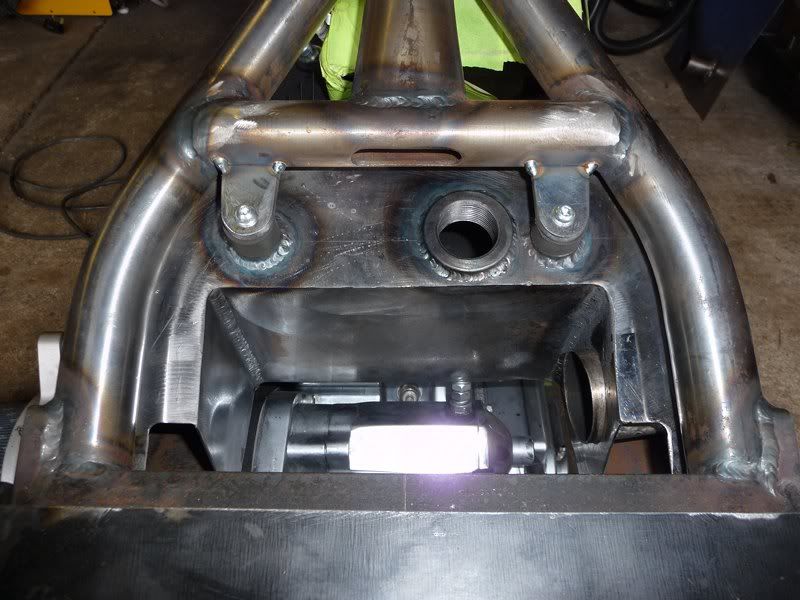
Breather is similar, but more or less just a straight piece of pipe to the top of the tank. All 3 welded in on the bottom of the tank at the front
edge. From left to right, breather, feed and return. Knowing my luck the one the welds will leak on will be the breather inside the tank :roll:
Next job is to make a tank cap, which can be a job for next weekend. Its been a while since I did any thread cutting on the lathe, so no doubt there
will be some swearing eminating from the workshop!
Sera
http://www.motosera.com
|
|
|
flak monkey
|
| posted on 23/1/11 at 05:42 PM |
|
|
Time for another update....
I finally have the oil tank finished and mounted, with battery tray as well. I leak tested it with water this morning and found and fixed a few
pinholes. Once I have some oil line fittings I will pressure test it properly, which will be a job for next weekend.
Friday I turned myself a steel bung for the oil cap and a corresponding cap up out of aluminium.
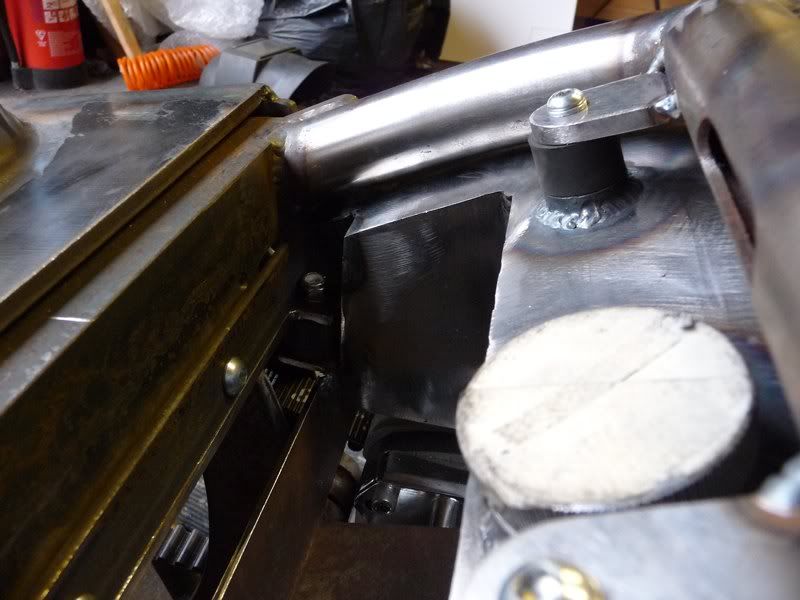
Yesterday I set about finishing the main tank up and starting to make the brackets. This took a lot longer than expected, but I am happy with the
results. The front is mounted on 2 rubber bushes with male and female threads, hanging on 2 1/4" plate tabs welded to the frame. I'll
fully weld them once I have stripped the bike again
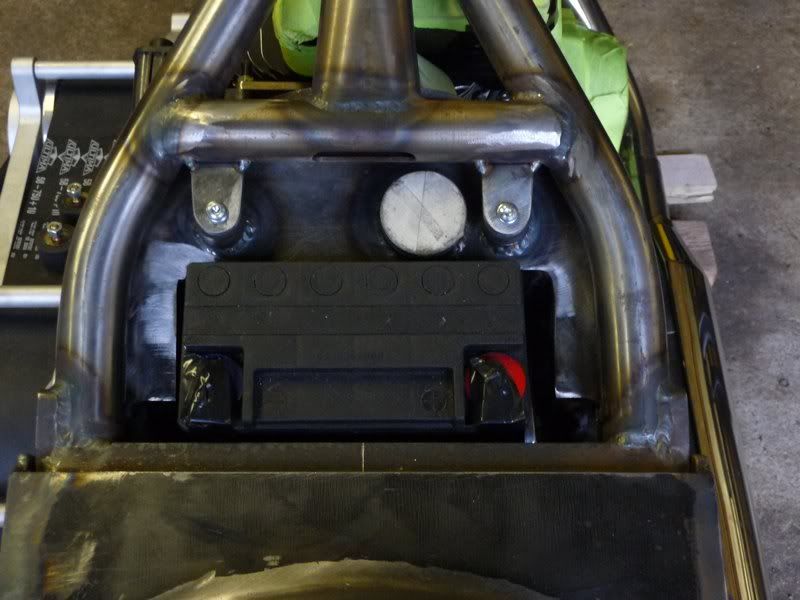
The back hangs from a piece of 5mm thick 30mm angle bolted to the frame mount. The corresponding mounts on the tank are part of the battery support
which was all made out of 1/8" plate. Again it hangs on rubber mounts. The tank mounting took as long, if not longer than fabricating the tank
itself :lol:
Dropped the battery in and it looks like it will sit comfortably under the seat pan, and there is room for some foam padding too to stop it rattling
around.
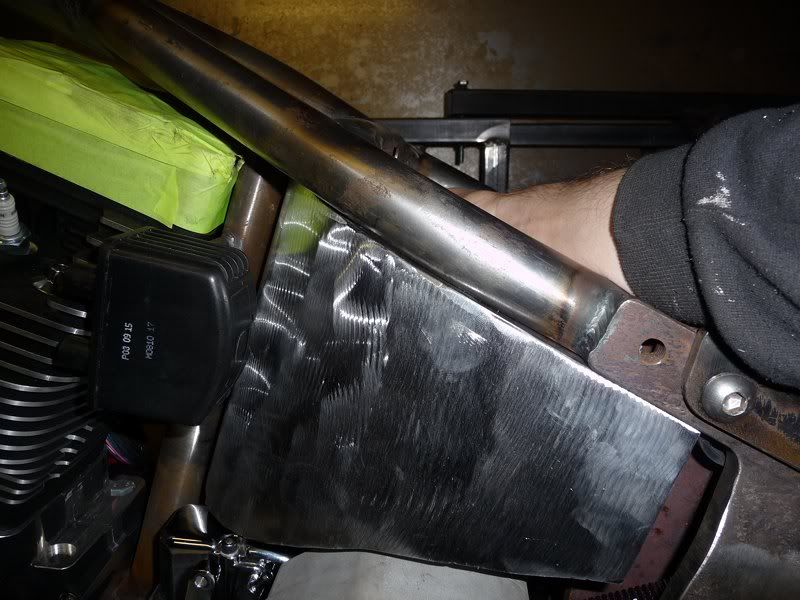
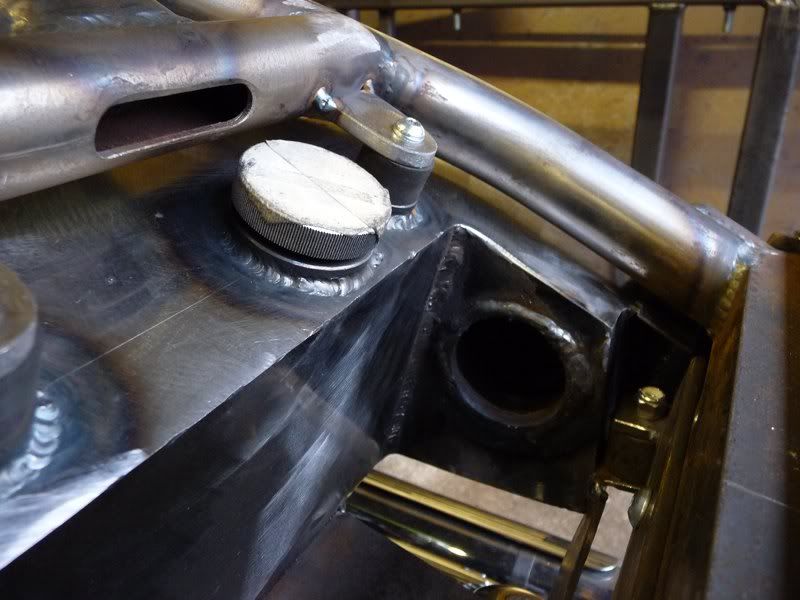
Last job today was make the finishing pieces for the sides of the tank so it matches up with the frame both sides. The right side was easy as its a
flat piece just welded on
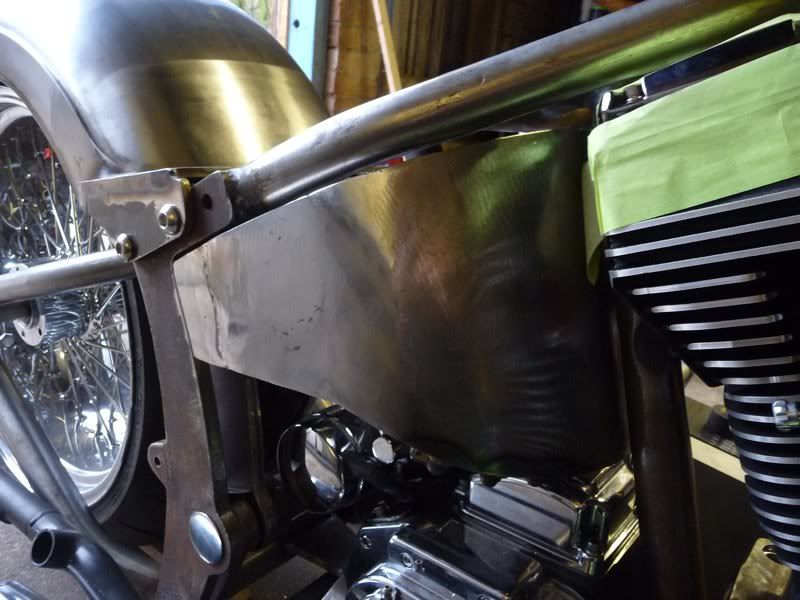
The left side was a little more tricky as it needed a compound curve for a smooth transistion between the side of the tank and the frame. Nothing a
hammer, some bits of pipe and some swearing didnt sort out though

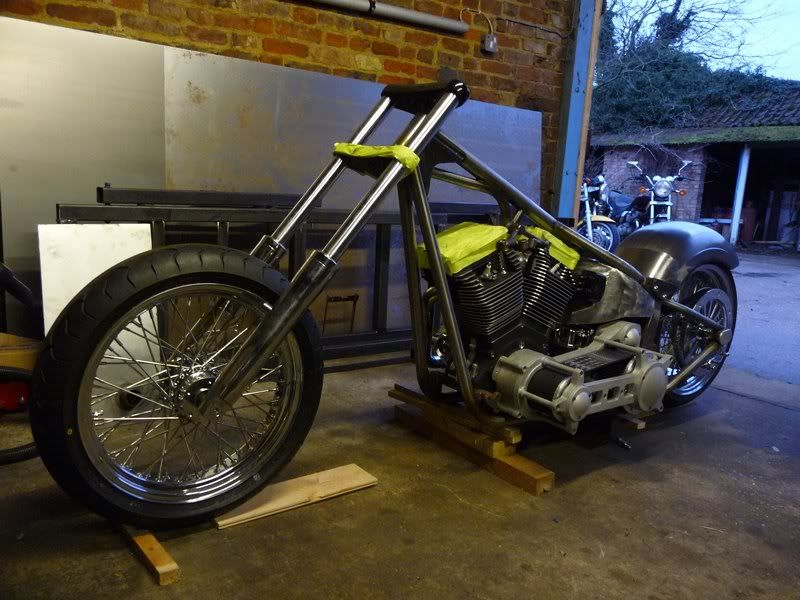
And thats pretty much where I have left it for now. Once its pressure tested it will be finally finished.
Next job is make a number plate bracket for the back to also hold my rear lights. The lights will stay in the same position after SVA, but the plate
will be moved to side mount. I'll also be getting the fuel tank on order next week after getting paid...
Finally this is how it currently looks
Sera
http://www.motosera.com
|
|
|
jacko
|
| posted on 23/1/11 at 05:57 PM |
|
|
Fantastic work David
It's just like Orange County Choppers but BETTER
|
|
|
stevebubs
|
| posted on 23/1/11 at 06:11 PM |
|
|
Looking good..parafin is better to use than water if looking for leaks...it squeezes through smaller holes....
|
|
|
flak monkey
|
| posted on 23/1/11 at 06:18 PM |
|
|
quote:
Originally posted by stevebubs
Looking good..parafin is better to use than water if looking for leaks...it squeezes through smaller holes....
Yep, thanks Its also more flammable
I will be pumping the tank up to around 1 bar pressure and looking for leaks that way first then fill with some sort of liquid and pressurise again to
double check.
All good fun....
Sera
http://www.motosera.com
|
|
|
dlatch
|
| posted on 24/1/11 at 12:51 AM |
|
|
superb work really enjoying following the build
|
|
|
flak monkey
|
| posted on 24/1/11 at 09:16 PM |
|
|
quote:
Originally posted by dlatch
superb work really enjoying following the build
Thanks
Sera
http://www.motosera.com
|
|
|