emsfactory
|
| posted on 4/10/07 at 04:47 PM |

|
|
making some decent progress now
Having a push at the minute to try and get things done.
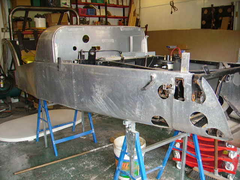
Today I finnished my wishbones and remade the front of the chassis to remove the 'ears'
Having an hf tig makes all the diference. So gald I made the bulk buy now.
Heres how it looked to start with
Rescued attachment PICT0291.JPG
|
|
|
|
|
emsfactory
|
| posted on 4/10/07 at 04:48 PM |
|
|
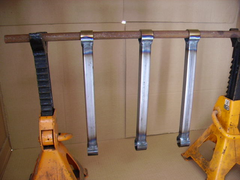
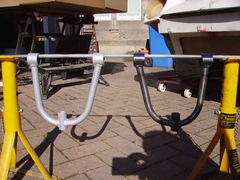
heres the new bones. I'll get a piccie of the new front soon.
[Edited on 4/10/07 by emsfactory]
 
Rescued attachment PICT0298.JPG
|
|
|
SeaBass
|
| posted on 4/10/07 at 06:21 PM |
|
|
Looking very good. Everytime I show someone steel welding with the TIG they are amazed - the most common comment is where is the spatter?? Maybe time
to get some new boots though eh??
Cheers
|
|
|
emsfactory
|
| posted on 5/10/07 at 08:11 AM |
|
|
Yeh tig is the dogs.
This is the comfiest footware I have. Few years left in them yet
[Edited on 5/10/07 by emsfactory]
|
|
|
emsfactory
|
| posted on 5/10/07 at 04:27 PM |
|
|
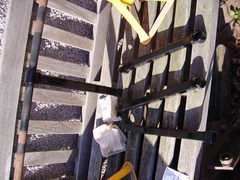
I started playing with my powder coater today.
Great fun. The powder looks like it could make one hell of a mess!
I did have an electric oven for curing but my wee bro has stripped it for bits for one of his projects, so it was the old heat gun im afraid.
It worked OK. the surface being directly heated tended to get little fish eyes in it. Not sure if it was from the gun actually blowing crap onto the
surface.
The other side of the parts cured nicely.
That was my first go at powder coating and I'd reccomend it. I bought one of the £100 odd quid sets and it seems good enough.
I undid the air feed and scraped all the crud out from inside first.
I did my trailig arms and my top bones.
I still have to put coilover brakets on the lower bones and then i'll do them too.
before
Rescued attachment PICT0299.JPG
|
|
|
emsfactory
|
| posted on 5/10/07 at 04:28 PM |
|
|
After
Rescued attachment PICT0300.JPG
|
|
|
emsfactory
|
| posted on 5/10/07 at 04:28 PM |
|
|
top bones before and after
Rescued attachment PICT0302.JPG
|
|
|
emsfactory
|
| posted on 5/10/07 at 04:29 PM |
|
|
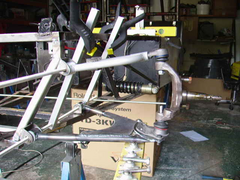
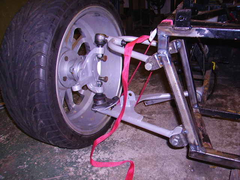
starting to mock up the front end
Rescued attachment PICT0303.JPG
|
|
|
emsfactory
|
| posted on 9/10/07 at 06:43 PM |
|
|
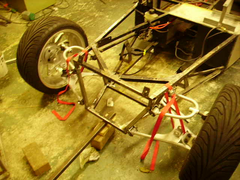
the fronts coming on
Rescued attachment PICT0304.JPG
|
|
|
emsfactory
|
| posted on 9/10/07 at 06:44 PM |
|
|
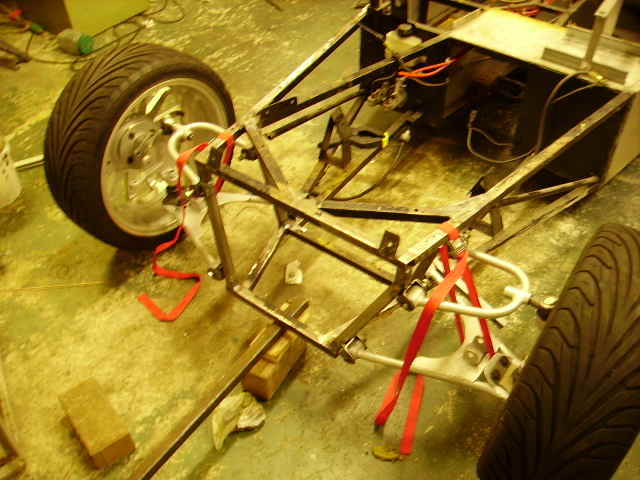
I'll get the coilover mounts done tommorrow.
Need to make a panhard rod too.
Rescued attachment PICT0308.JPG
|
|
|
emsfactory
|
| posted on 11/10/07 at 04:44 PM |
|
|
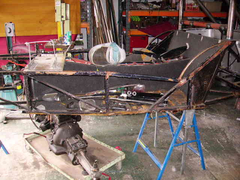
Made a start on fixing the odd chasis dialgonals today. Not sure why it was done that way but I didn't want to leave it like that.
Heres what it looked like when I took the sides off
Rescued attachment PICT0315.JPG
|
|
|
emsfactory
|
| posted on 11/10/07 at 04:45 PM |
|
|
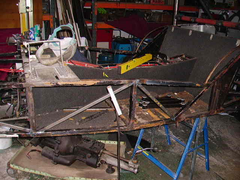
new rails in place
Rescued attachment PICT0317.JPG
|
|
|
emsfactory
|
| posted on 22/11/07 at 06:51 PM |
|
|
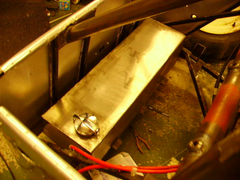
Made the fuel tank up, still to fit the sender unit.
Rescued attachment PICT0004.JPG
|
|
|
emsfactory
|
| posted on 22/11/07 at 06:53 PM |
|
|
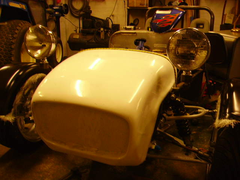
Also made up my headlight brackets. Like the caterham style with the lights high up so thought i'd try that. It should also mean i wont have to
have a repeater on the wing. I'll hopefully be able to run the cables through the curved bar so ther wont be any cables visible
outside.
 
Rescued attachment PICT0002.JPG
|
|
|
emsfactory
|
| posted on 22/11/07 at 06:54 PM |
|
|
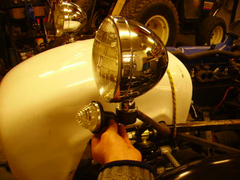
different angle
Rescued attachment PICT0001.JPG
|
|
|
emsfactory
|
| posted on 22/11/07 at 06:55 PM |
|
|
Indicator position. Still have to make up some light housings
Rescued attachment PICT0003.JPG
|
|
|
emsfactory
|
| posted on 27/11/07 at 07:26 PM |
|
|
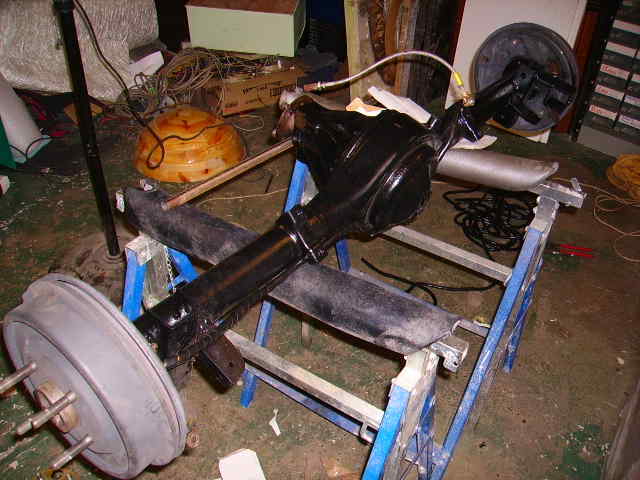
Did a bit of work today and got the back axle back together. I've got a bit more to do on the rear end and then I can start getting the rear end
back together.
Its amazing how something heavy and awkward like an axle, or elbow clipper, manages to always be exactly where you wanna be.
Rescued attachment PICT0023.JPG
|
|
|
emsfactory
|
| posted on 4/1/08 at 06:47 PM |
|
|
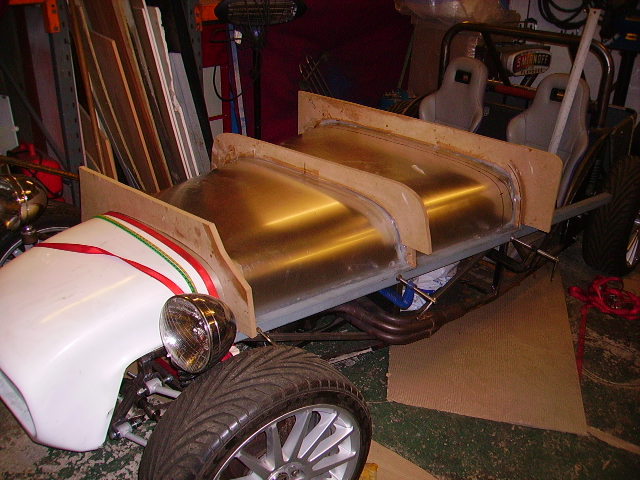
Finally got started on the bonnet mould today.
I am going to make the bonnet and scuttle in one piece, hopefully with a cowel thing over the steering wheel.
I'll leave the silicone to set over night. I'll build it up with foam and more wood tomorrow.
[Edited on 4/1/08 by emsfactory]
Rescued attachment PICT0090.JPG
|
|
|
emsfactory
|
| posted on 4/1/08 at 06:50 PM |
|
|
stiffeners
Rescued attachment PICT0093.JPG
|
|
|
emsfactory
|
| posted on 5/1/08 at 06:23 PM |
|
|
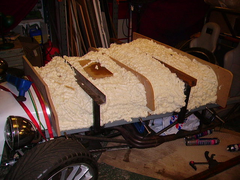
steel stiffeners added and I sprayed expanding foam over the full thing to make the surface, hopefully go rigid.
Also threw all the long thin bit of junk I had lying about in it to try and add stifness. I dont want it to ping back out when I undo the clamps!
|
|
|
emsfactory
|
| posted on 5/1/08 at 06:24 PM |
|
|
steel stiffeners added and I sprayed expanding foam over the full thing to make the surface, hopefully go rigid.
Also threw all the long thin bit of junk I had lying about in it to try and add stifness. I dont want it to ping back out when I undo the
clamps!
Rescued attachment PICT0094.JPG
|
|
|
richard thomas
|
| posted on 5/1/08 at 08:45 PM |
|
|
I do like what you're doing here! Who rolled the ally bonnet?
[Edited on 5/1/08 by richard thomas]
|
|
|
emsfactory
|
| posted on 6/1/08 at 01:55 PM |
|
|
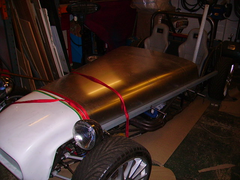
I made the bonnet. Its not rolled though.
It was pulled over the curve with ratchet straps and clamped in place with some 40x40 box.
I have tried before to make an ally bonnet but the curves were never perfect tbh.
I'll hopefully get a good shape using grp.
|
|
|
emsfactory
|
| posted on 8/1/08 at 06:24 PM |
|
|
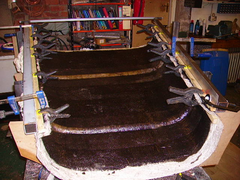
Had a bit of a crappy morning. I had gel coated the nose up yesterday with the intention of glassing it today.
I had to move the mould before i could put the glass on and half the bloody gel coat released.
I wasn't too pleased but poo happens.
Had to start over again but used a hotter dose so it could set quicker. managed to get the glass and a couple of stiffeners on too.
Rescued attachment PICT0099.JPG
|
|
|
emsfactory
|
| posted on 9/1/08 at 10:26 AM |
|
|
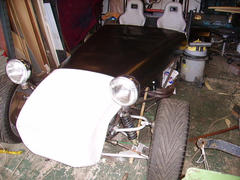
Taaa Daaaaa.
Now I get to start the block work and building the rolled edge for the cockpit.
Rescued attachment PICT0100.JPG
|
|
|