
Stealth HD Chop build
flak monkey - 1/9/10 at 08:12 PM
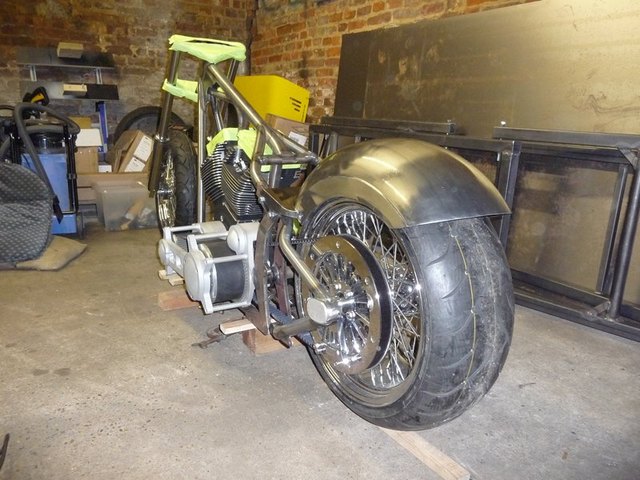
Not really sure where to put this - but as a few people asked for a build thread, here it is....
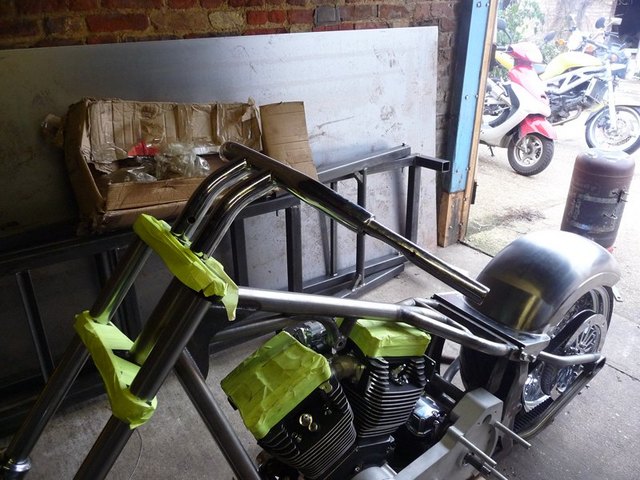
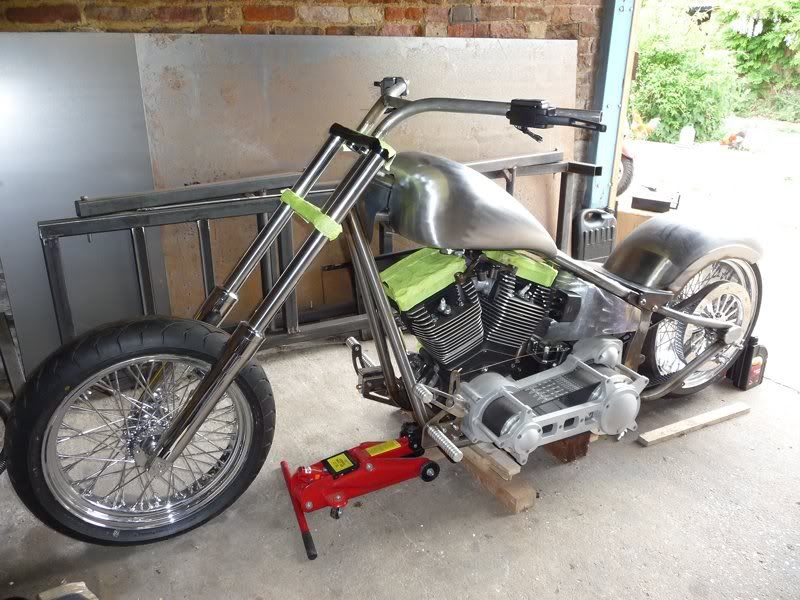
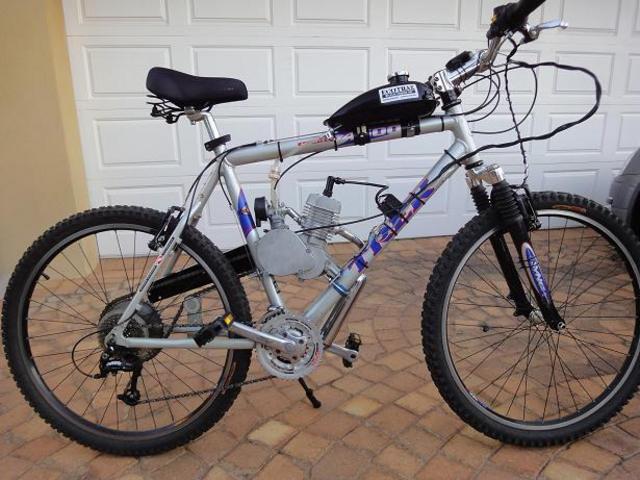
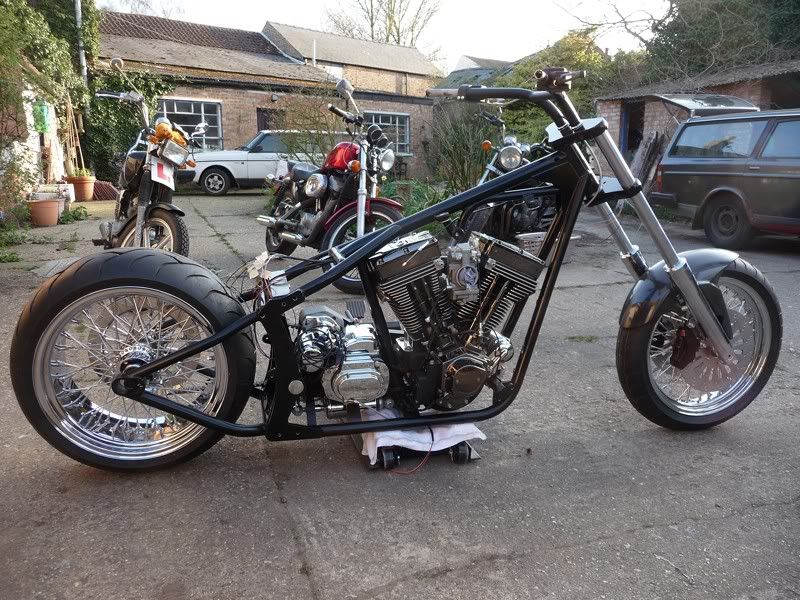
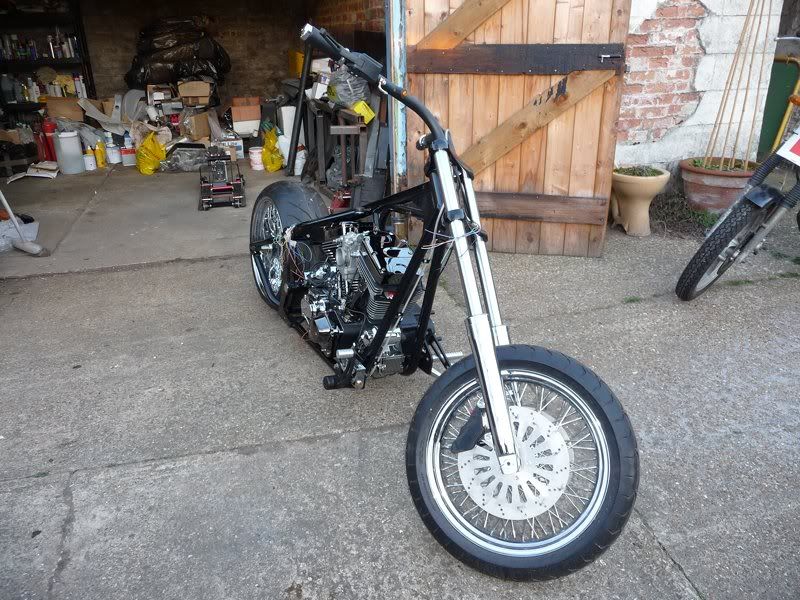
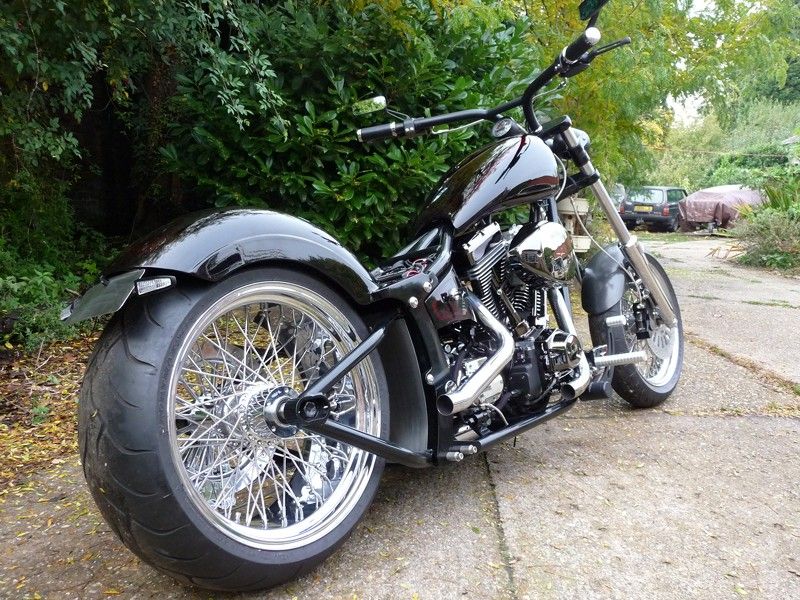
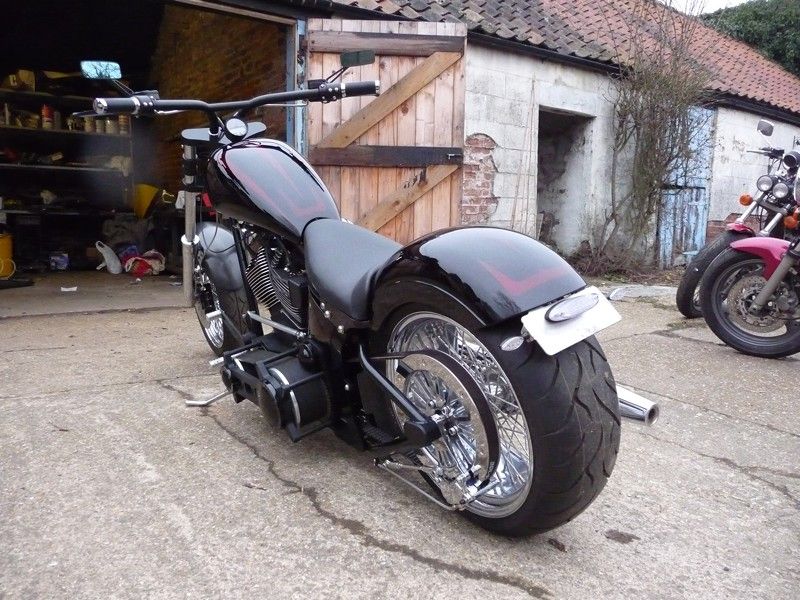
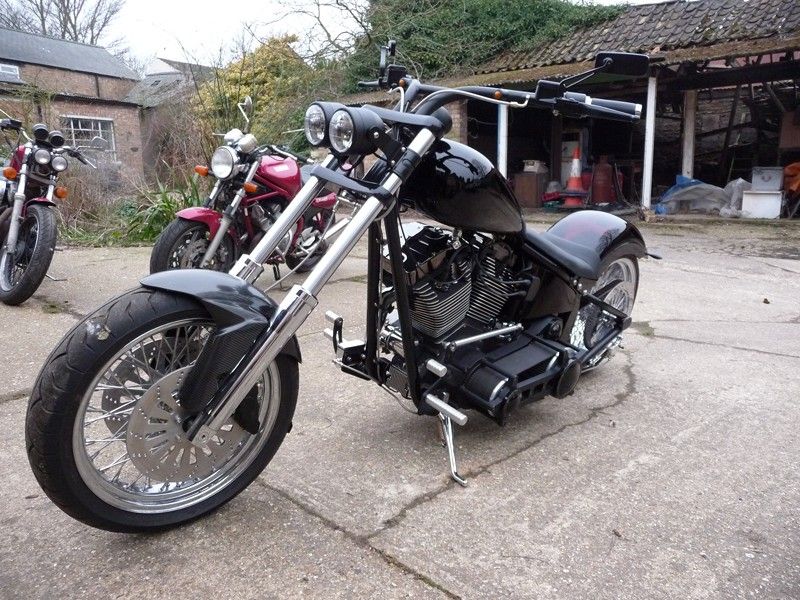
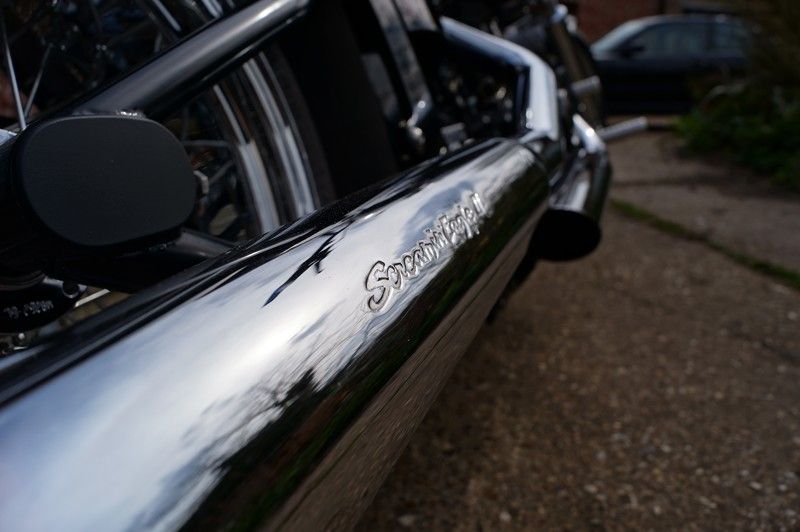
Basic idea is a pretty understated bike, mostly matt/satin black with the odd chrome highlight.
35 deg rake with 4" overs
DNA 41mm Wide glide, twin disc front end
240 rear, 130 front tyres on 18" rims
Solid mount softail frame
Ultima 6 speed LSD with 1.75" offset
Ultima 3.25" open primary
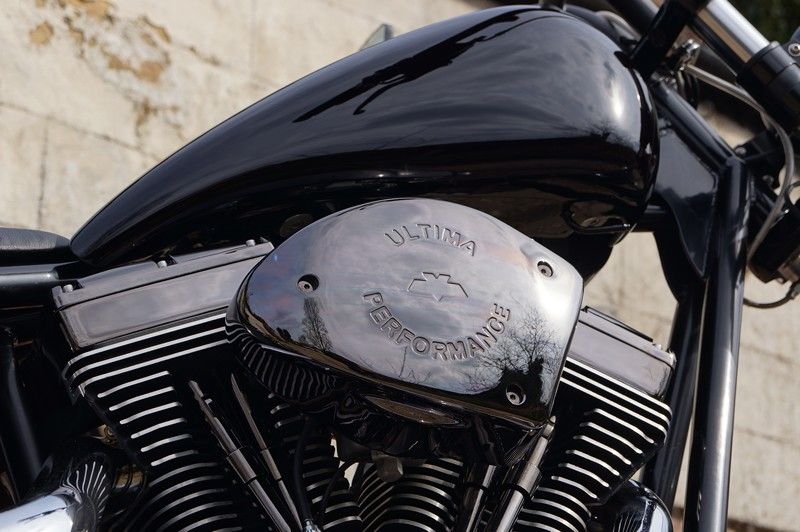
127ci Ultima black gem engine
Drag style bars
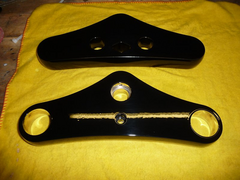
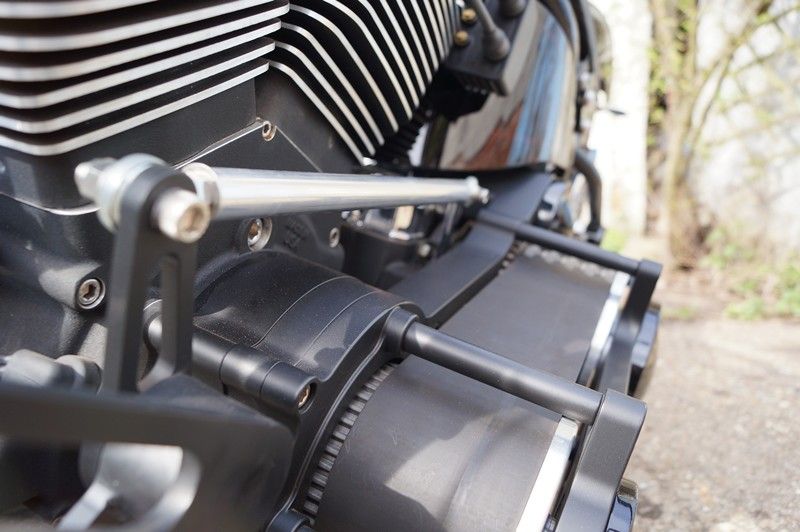
Combined pulley/brake on rear running 1 1/8" narrow belt
Going to be doing a lot of the fabrication and machining myself (as I have the facilities to do so), other than the frame which I will be leaving to
the experts. Went to see a couple of local frame builders last week and I think I have decided on who I am going to have make my frame.
This is a rough sketch of the overall look I am aiming at:
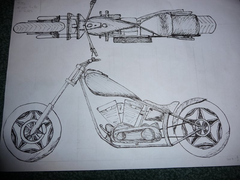
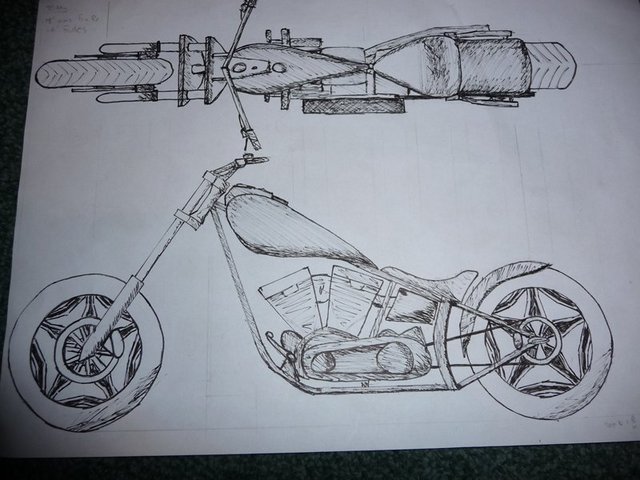
Desin rough
No doubt things will change and evolve as the project progresses.
Sourcing custom HD parts in the UK seems expensive but I have managed to pull together most of the major parts through US sources. Last major
component is wheels.
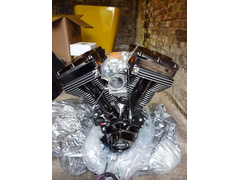
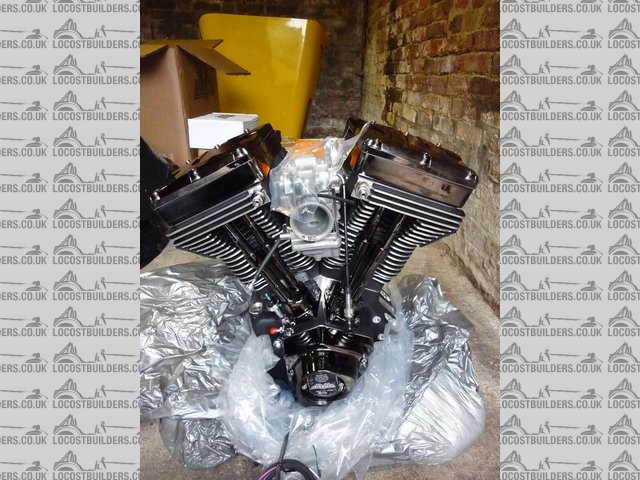
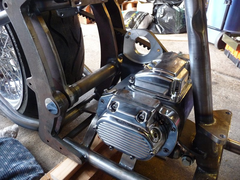
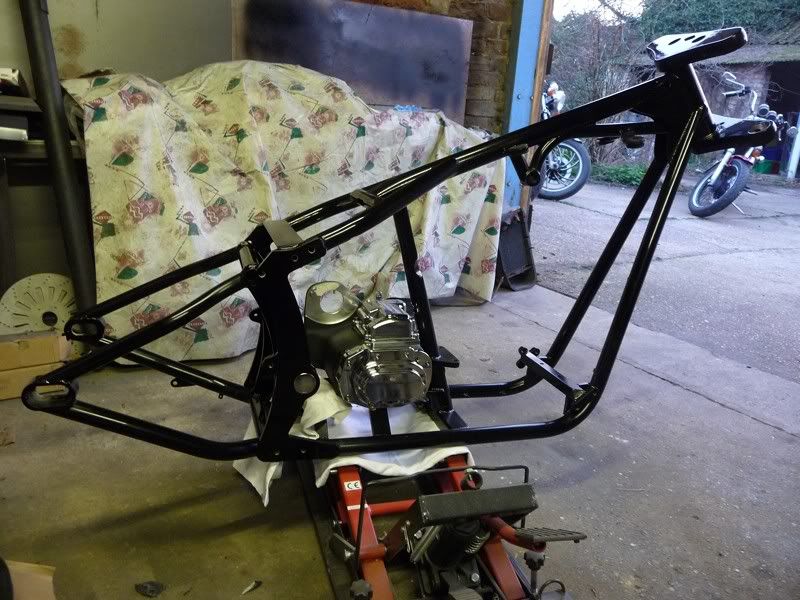
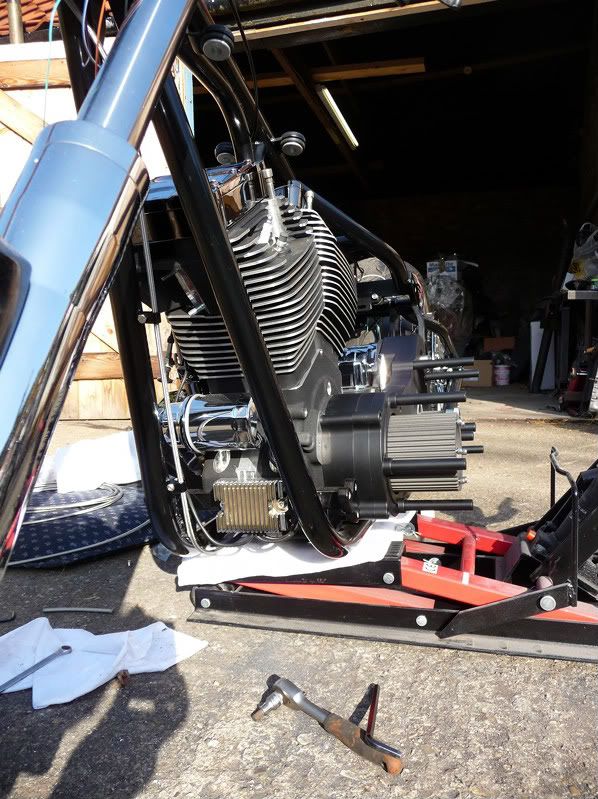
This is the engine:
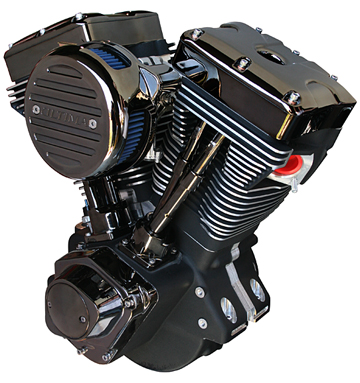
140rwbhp and 145lbft torque
Most major parts are on order; engine, gearbox, primary, forks along with primary spacers. Frame will be ordered on Friday with a 6-8 week lead
time.
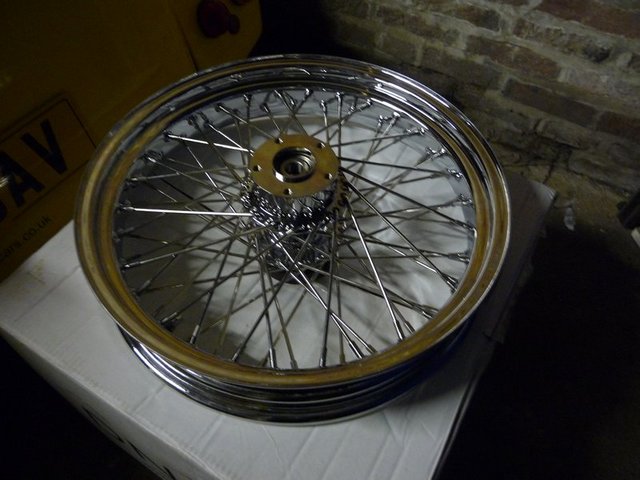
I havent decided on spoked or billet wheels yet - but that decision may be down to cost at the moment.
David
matt.c - 1/9/10 at 08:20 PM
Cool!!! 
franky - 1/9/10 at 08:27 PM
it'll look cool, spoked wheels would get my vote
I know of a good wheel builder if you supply the hubs. Which wheel option is the more expensive?
skodaman - 1/9/10 at 08:28 PM
Awesome engine. I know it's not the done thing and I'm not really into choppers but have you considered having rear suspension, something
like Harley softail if you don't want it too conspicuous.
jambojeef - 1/9/10 at 08:32 PM
Good luck with it David - Id still like to have another go at a custom sometime.
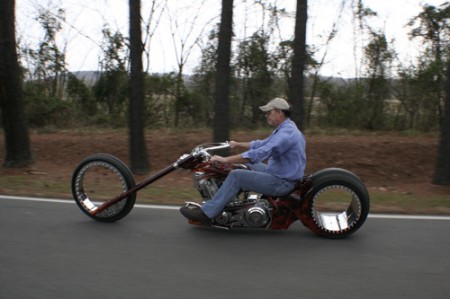
I liked some of these designs when I was researching:
http://www.exilecycles.com/index.php?section=20
Geoff
blakep82 - 1/9/10 at 08:39 PM
thats something i always wondered, are you allowed to have bikes with no suspension?
cars have to don't they? is msva different?
SALAD - 1/9/10 at 08:46 PM
Excellent, good luck Monkey Man 
I considering a Bobber build when the 7 is eventually finished.
Keep us updated!
Edit: If you need any assistance (not saying you will) I can always ask the Battistinis guys for you.
[Edited on 1/9/10 by SALAD]
westf27 - 1/9/10 at 08:46 PM
Man after my own heart.Just watch over your shoulder for Paul Senior
flak monkey - 1/9/10 at 08:58 PM
The frame is softail yes - hardtails are too skittish around the bends by all accounts. The hard tail look is cleaner - but I consider that to all be
part of the challenge!
Hardtail is perfectly legal.
mSVA is also a lot simpler than a full car SVA and is still SVA rather than IVA so costs around �110.
The Exile bikes are lovely and the bloke is a true nutter. I like the clean lines and I must say theres going to be a little inspiration drawn from
them.
With regards wheels, I am looking at billet hubs coming in at around $750 each plus shipping, VAT etc. Or spoked coming in at around $550 each + VAT
etc
Nothing is cheap when it comes to bikes. I also want to keep everything new where I can as I want a new reg # at the end of the build 
jambojeef - 1/9/10 at 09:35 PM
quote:
Originally posted by flak monkey
Nothing is cheap when it comes to bikes.
I think thats what finished my custom off in the end - there seems to be a huge price difference between getting a chop to work and look
"ok" and getting the really clean look that the exile bikes have (and i really like).
My fabrication skills arent good enough and I couldnt afford all the billet (mostly)US of A custom stuff - hidden controls etc which make a huge
difference to the look of a chop - and lets be honest - its all about the look.
You're gonna have to spend some money David!
Keep us posted....
D Beddows - 1/9/10 at 09:38 PM
I'm interested to see how this works out I used to be a biker in the late 80's/early 90's, went to the Bulldog Bash and all the
other rallys every year, was in a club etc etc BUT although I loved the look of some custom bikes (especially the more radical minimalist ones) but I
always used to ride the sports bikes of the day because ALL the custom bikes I tried were absolute pigs to ride!!! I know you're one of the
people on here who knows what they're talking about so I'm interested to see how you take the move from function over form (7's
aren't pretty lets face it!) to form over function  Hardtails are NO fun from my experience but you'll get no style points for a softail!!
fha772 - 1/9/10 at 10:37 PM
With power figures like that, why has nobody built a Harley powered BEC?
The sound would be epic and REALLY confuse people!!!
Simon - 1/9/10 at 11:57 PM
Only one sort of wheel needs to be considered
ATB
Simon
flak monkey - 2/9/10 at 06:19 AM
Thanks for the encouragement chaps. Will keep you posted on progress over the coming months.
I expect its going to take around 12-18 months to finish the bike.
quote:
Originally posted by fha772
With power figures like that, why has nobody built a Harley powered BEC?
The sound would be epic and REALLY confuse people!!!
Probably because one of those engines will set you back around �4k.....
scootz - 2/9/10 at 06:21 AM
Looks David!
I'm definitely warming to chops in my old age!
Richard Quinn - 2/9/10 at 06:48 AM
quote:
Originally posted by flak monkey
quote:
Originally posted by fha772
With power figures like that, why has nobody built a Harley powered BEC?
The sound would be epic and REALLY confuse people!!!
Probably because one of those engines will set you back around �4k.....
I don't think the �4k is the main issue as it's not that much up on a late 'busa etc.
I think the answer lies HERE
Think you may need a periscope!
tony-devon - 2/9/10 at 11:56 AM
nice parts list, a hard tail is absoulutely fine, to be honest I would have to say that a well built hardtail will ride as well as, if not better then
a bad or average setup softail
just make sure whoever does the frame is reliable and reputable
if you need the MSVA manual then its now totally free download online from VOSA
was updated last month so get the latest version for free, seems like a bargain to me
DaveFJ - 2/9/10 at 12:20 PM
Surely you would be better slipping that engine into your Car!
but, like others, i look forward to the build pics... I've watched American Chopper enough times to think 'I could do that'
DaveFJ - 2/9/10 at 12:20 PM
Surely you would be better slipping that engine into your Car!
but, like others, i look forward to the build pics... I've watched American Chopper enough times to think 'I could do that'
Hellfire - 2/9/10 at 05:22 PM
quote:
Originally posted by fha772
With power figures like that, why has nobody built a Harley powered BEC?
Because Harleys are truly agricultural in comparison to modern superbike engines, which use 21st Century technology and actually have the gearbox
built into the engine.......
Phil
flak monkey - 2/9/10 at 05:35 PM
The TC harley engine does have the box built into the engine - but they are a pain for a custom bike builder as virtually no after market parts are
available yet.
Agricultural? No, not really. They are very simple engines though with a very well proven design
Hellfire - 2/9/10 at 06:16 PM
Sorry, Agricultural was perhaps the wrong word to use. 'Tractor like' would probably have been more apt.......
Phil
02GF74 - 3/9/10 at 10:25 AM
^^^^ doesn't matter if the engine is using dated technolgoy since chops are for show and not go.
good luck with the porject - I looked into building one but got put off by the cost - you are gonnna need deep pockets ... will make the GTS you sold
look cheap .... and unlikely to recoup the money but then money is not the point.
flak monkey - 3/9/10 at 11:21 AM
Well the engine, primary, frame, gearbox and a few odds has totted up to around �6.5k already.
The last really expensive bits are wheels and tyres at around �1500 for a set and a set of forks which are �600 with yokes.
After that I can make or modify most parts myself - or at least thats the plan!
DRC INDY 7 - 3/9/10 at 05:09 PM
There is nothing 21st century about a gearbox built into the engine the mini had them in 1959
mangogrooveworkshop - 4/9/10 at 09:16 PM

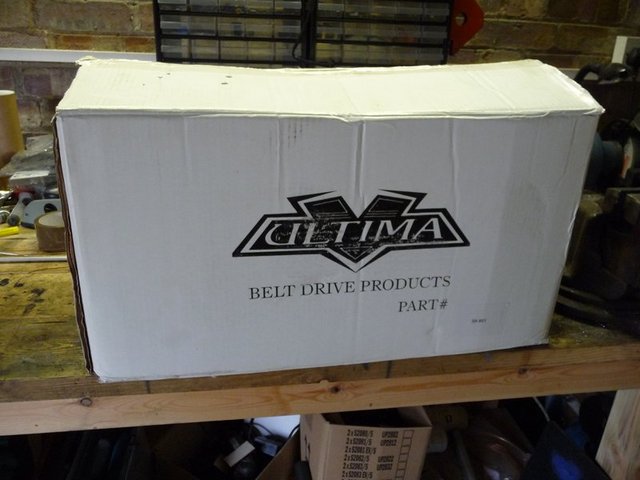
flak monkey - 8/9/10 at 07:39 PM
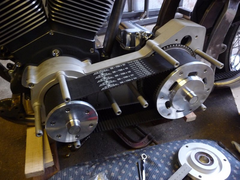
Look what arrived for me today - 25kg of belt primary

Ultima belt primary 1

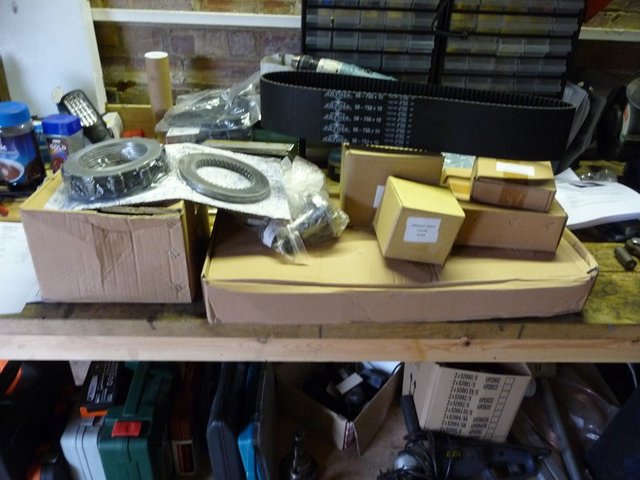
Ultima belt primary 2
Virtually everything is plain billet aluminium at the moment, but I am planning on painting quite a lot of it satin black.
Done a little bit of pre-assembly - but can't do much more at the moment.
This is the motor plate which connects the engine and box together. Probably the heaviest bit of the kit - a good solid chunk of billet. Just fitted
up the support posts for the outer bearing plate. This will all be painted satin black.

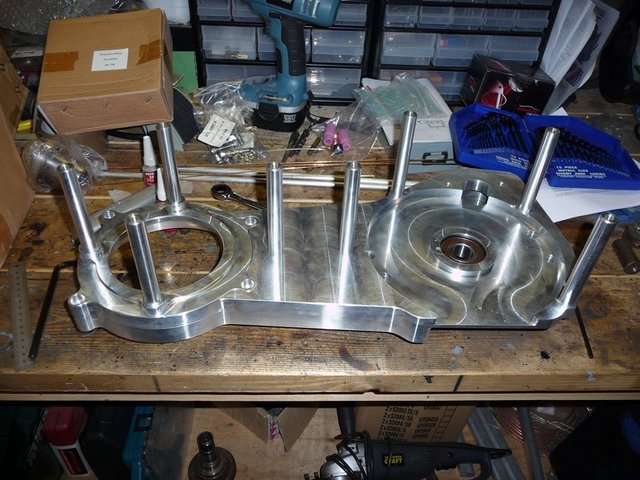
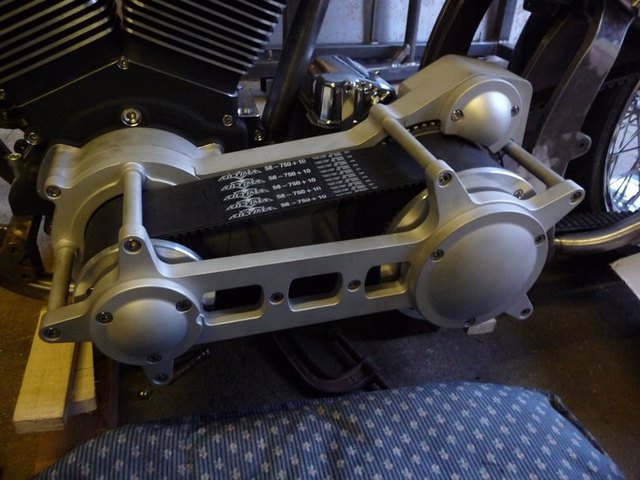
Ultima belt primary 3
This is the outer bearing plate - with the covers fitted up. Again this will end up black with plain aluminium caps.
Front pulley with 45mm offset insert fitted
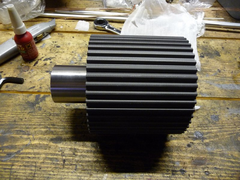

Ultima belt primary 5
The clutch is a bit of a monster (well thats in keeping with the rest I guess!). 9 friction plates and 9 steel plates.
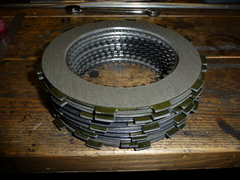
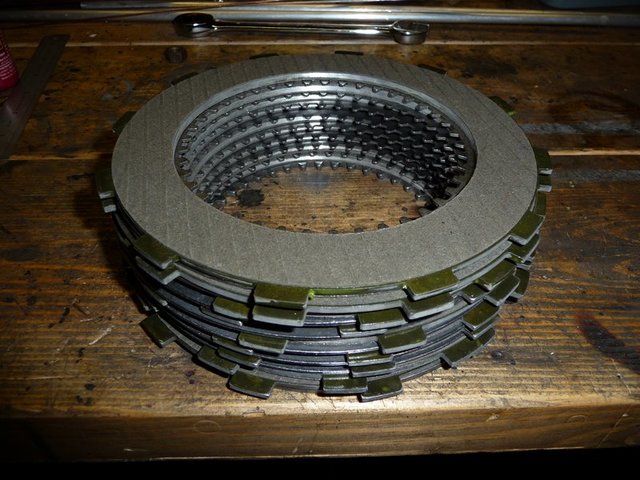
Ultima belt primary 6
And the rear pulley with clutch and cover mocked up.


Ultima belt primary 7
More coming soon hopefully
flak monkey - 1/10/10 at 07:06 PM
In other news today...
Whilst having fun on the dyno my bike engine and gearbox arrived. My garage is now unworkable as its so crammed with stuff (3 bikes, the car, loads of
bike parts, welders, racks, bench etc etc)
But anyway, UPS delivered the engine and box. I was expecting them to be on a pallet, but they arrived in a normal van and the bloke had no
lifting/moving equipment to lift the 70kg box....bizarre. A pallet truck solved the problem, but its just lucky we have one!
One big @rse box....
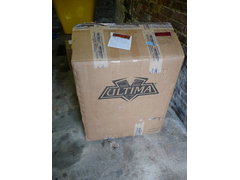
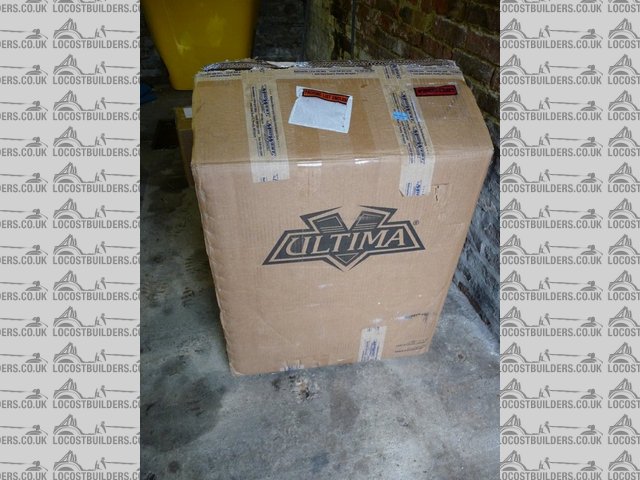
Engine delivery
For a bi @rse engine!
Engine 1
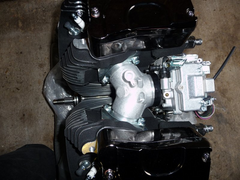
When I say big, I mean huge....all 2096cc of it

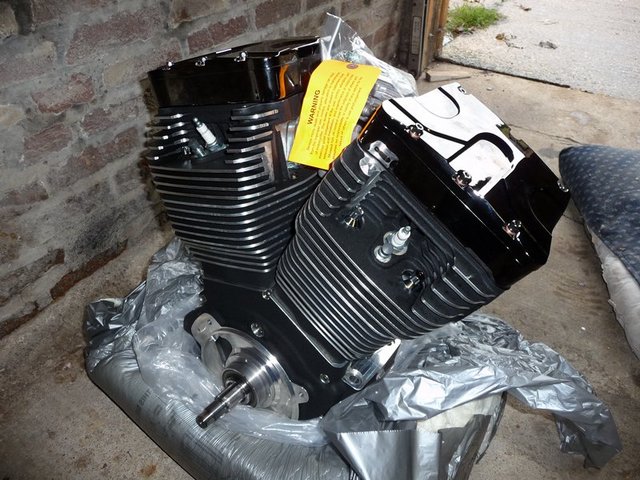
Engine 2
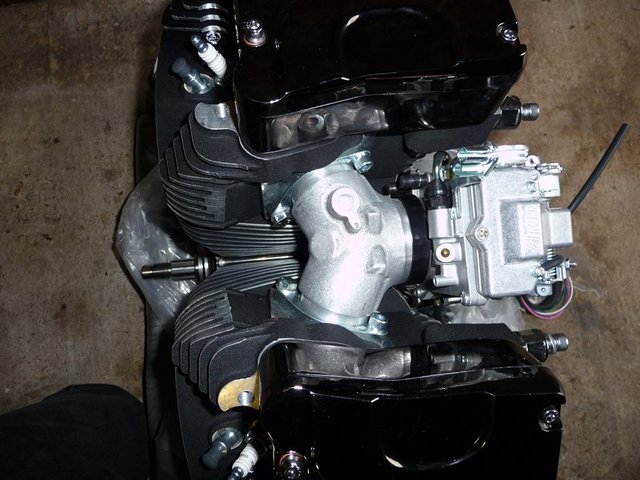
Engine 3
48mm slide carb
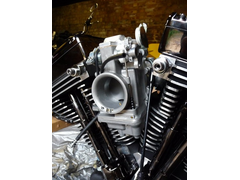
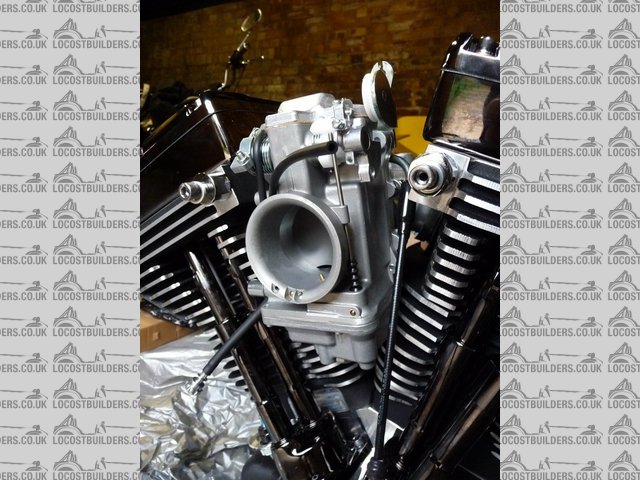
Engine 5
Looks to be nicely made and finished. The black nickel plating is nice and thick so should be durable.
The smaller box contained the 6 speed gearbox.
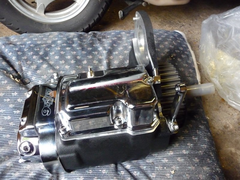

Gearbox 1
Gearbox 2
Which again appears to be well made and finished.
Will be good to make a proper start on the project when I have the space to get all set up properly.
greggors84 - 3/10/10 at 04:31 PM
How about anodising the ali parts black? Not very expensive if you get them done as a batch and you wouldnt have to worry about the coating scratching
off.
Have you sold the GTS yet?
flak monkey - 4/10/10 at 08:15 PM
Yes I sold it a while ago, but have been doing some work on it for the new owner. Its nearly complete now though.
I hadn't considered anodising, mainly because its not really shiney or matt. I would rather have parts gloss powder coated or plated to be honest
boggle - 5/10/10 at 10:11 AM
this is something i have considered doing next, but do you have to buy a frame or can you make your own?
flak monkey - 5/10/10 at 06:30 PM
Frame wise you can do whatever you want. A bike frame is more critical on alignments than a car frame though and really needs jiing for best results.
Hence why I am having mine built by a pro. They arent cheap though, a custom basic rigid mount softail frame is around �1300. If you want a rubber
mount they are around �1600. Hardtails usually come in around �1100. Compare that to a locost chassis and you get the idea. That said - I think a lot
of the locost parts are generally underpriced for the time and skill involved.
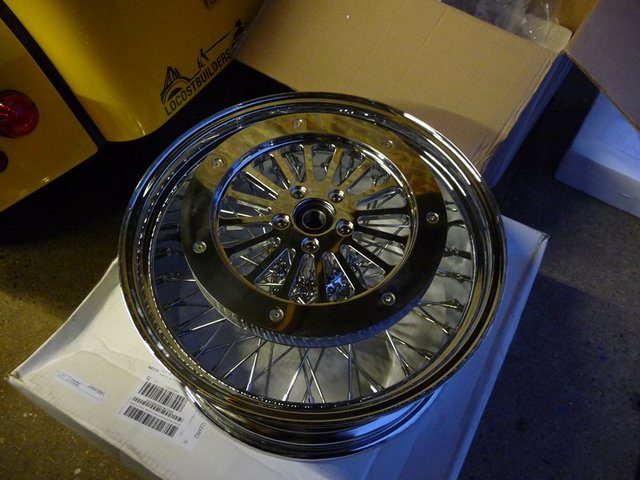
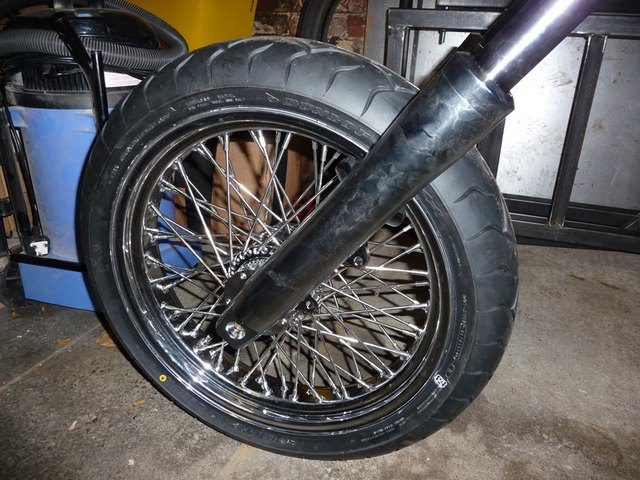
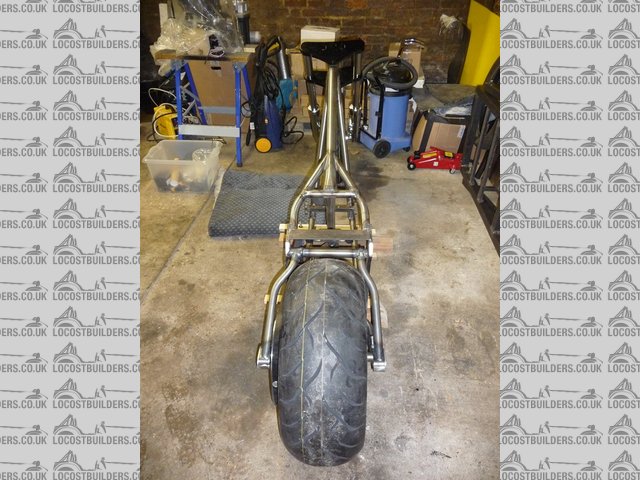
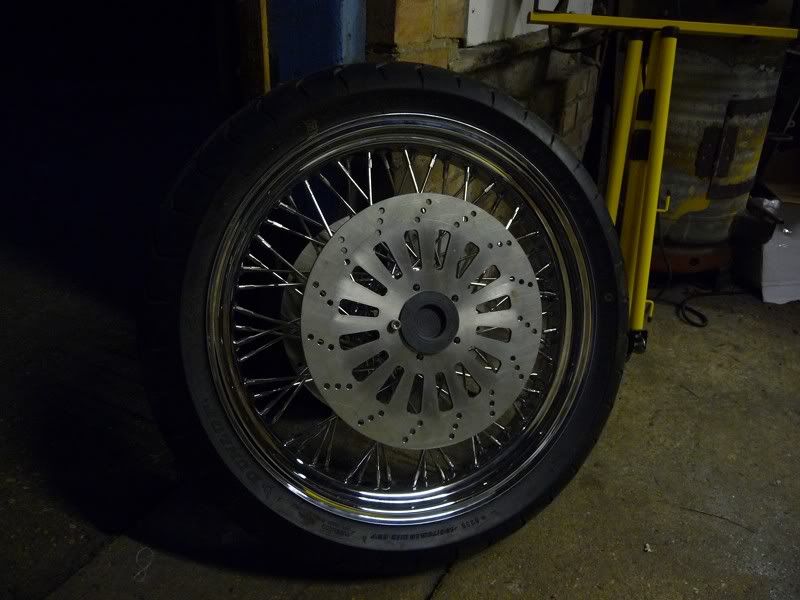
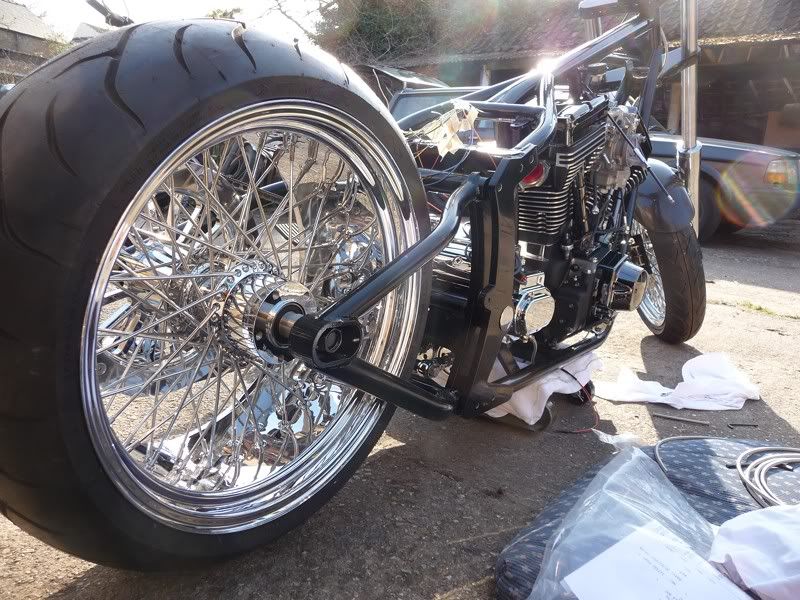
Anyway - wheels!
Bit of a compromise at the moment as I really wanted black alloy rims, but they are an easy change later if I wanted to.
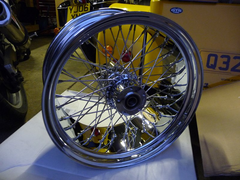

Rear rim 1
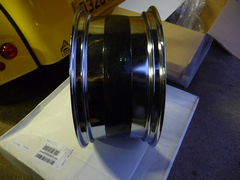
Wide bastard! 18x8.5" for 1" axle.
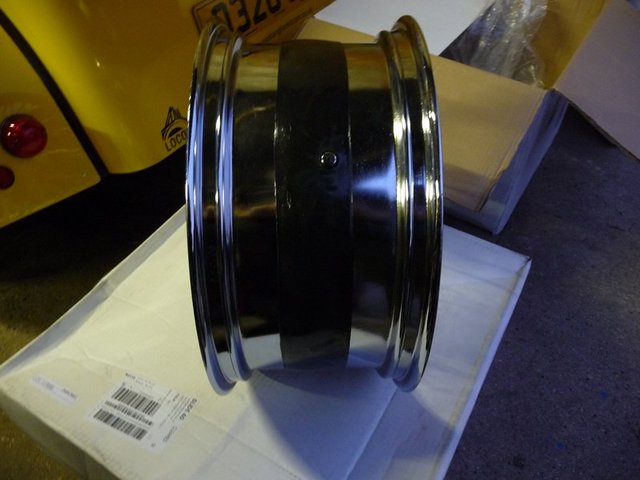
Rear rim 2
And the pulley/brake fits without needing any modification....I thought I was going to have to bore out the recess on the back of the pulley as the
rim is listed as post 2000, and the pulley pre-99. But its a relief and time saver that they fit properly!

Rear rim and pulley
Front rim is an 18x3.5" for twin discs and 3/4" axle. So it should fit straight into the Midwest forks and supplied axle....

Front rim 1
The wheels themselves are from DNA and I had them sent over from the USA. The quality appears to be ok, but only time will tell I guess!
I guess I should find some tyres!
matt.c - 19/10/10 at 09:57 PM
Love the new stuff!! Its going to be a monster.
Keep updating while you build. Cant wait to see this one finished.
flak monkey - 20/10/10 at 07:01 AM
Loads of parts are on order, the frame is due in a few weeks. Until the car is out of the garage I dont have space to make a proper start anyway.
franky - 20/10/10 at 07:46 AM
Great wheels, spokes are they way forward could you not get them dark chrome plated or painted black if thats what you want?
Looks like there's some nice bits there.
How long till the car goes?
flak monkey - 20/10/10 at 09:40 AM
I could have had them powdercoated from the factory, or black chrome them if I dismantled them. I dont think the sealing strip on the inside of the
rim would take too kindly to being dunked for chroming!
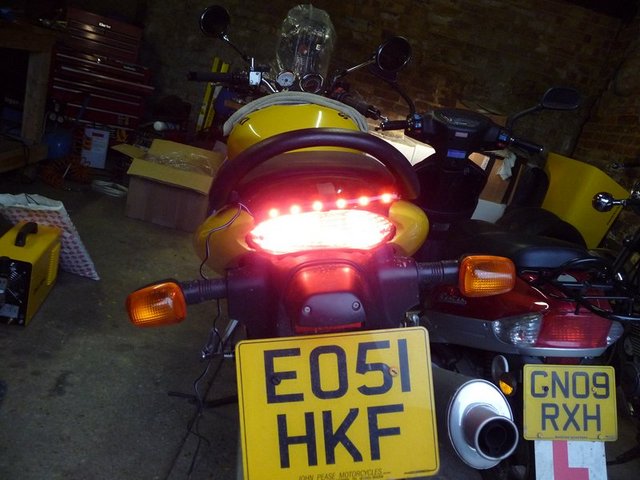
flak monkey - 9/11/10 at 07:13 PM
Well things are still plodding on as well as can be expected while waiting for the frame to arrive.
I got some LED strips through the post today which I am planning on incorporating into the rear fender for some really discrete rear lights. I need to
knock up a little circuit to allow me to do dual brightness on the red strips so I can use them for both tail and brake lights, though I dont think
its going to be a problem to do even if I have to knock up a little PWM circuit to get it right!
These are the strips, stupidly cheap off ebay, completely sealed and run off 12v (built in resistors). The plan is to mount them to the very edge of
the rear fender behind a smoked lens to make it all blend in with the rest of the bike.
Amber:
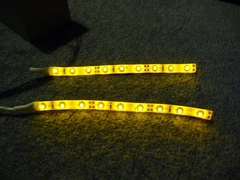

Rear lights 1
Red:


Rear lights 2
And both together:

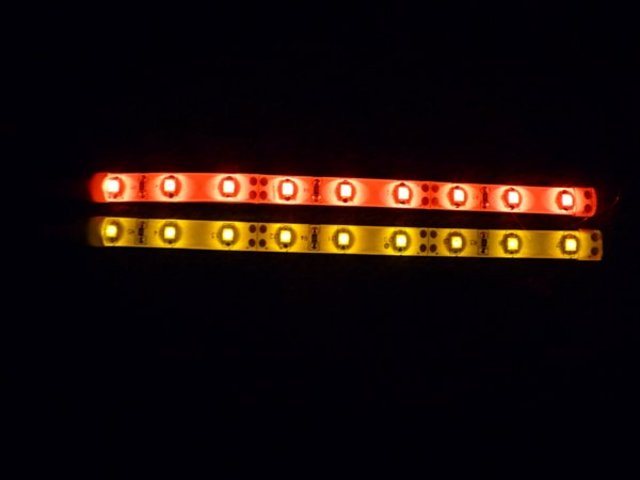
Rear lights 3
They are about 4" long and 3/8" high and 1/8" thick, so pretty tiny but super bright (dont show well in pics)
In other news I found a good use for a broken workmate!

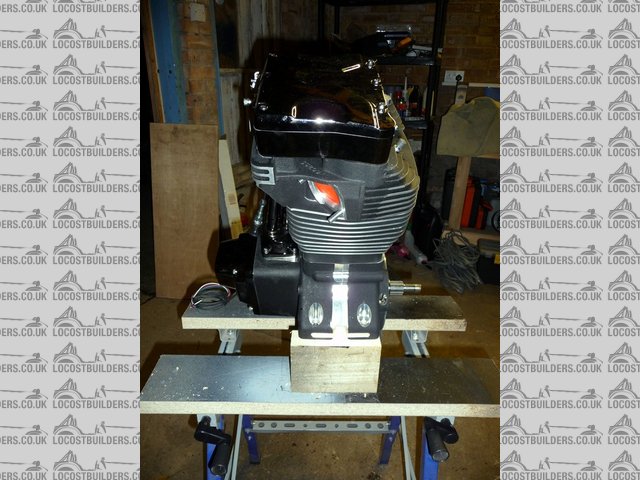
Engine stand 2
[Edited on 9/11/10 by flak monkey]
flak monkey - 13/11/10 at 06:36 PM
Some more minor progress this weekend.
Been fiddling with the dual brightness mod for the rear lights and that seems to work pretty well. Also got hold of some dazzlingly bright LED strip.
Taped it to the back of my SV for a brightness comparison and I am pretty pleased with the result - though taking pics of lights is always
difficult.
Tail light:
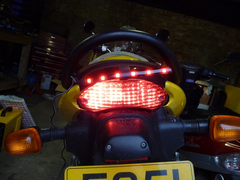

Rear lights take 2 - tail
Brake light:
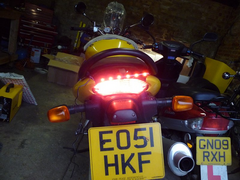
Rear lights take 2 - brake
I think that by the time its mounted up in a small housing with a prismatic lens fitted it should be ok... The brightness mod consists of 2 diodes and
a 150ohm resistor, pretty simple stuff.
Fitted the tyres to the rims this afternoon as well...the rear one was a bit of a handful and took rather a lot of pursuasion! But it went on in the
end. I think they look pretty smart now they are fitted with some rubber

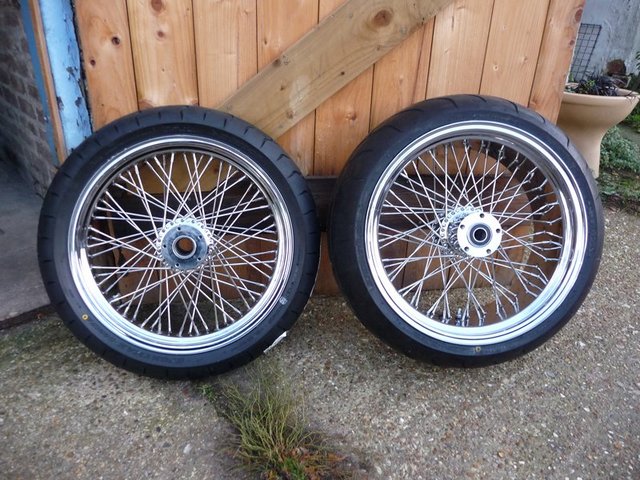
Wheels and tyres
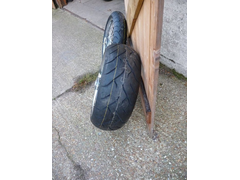
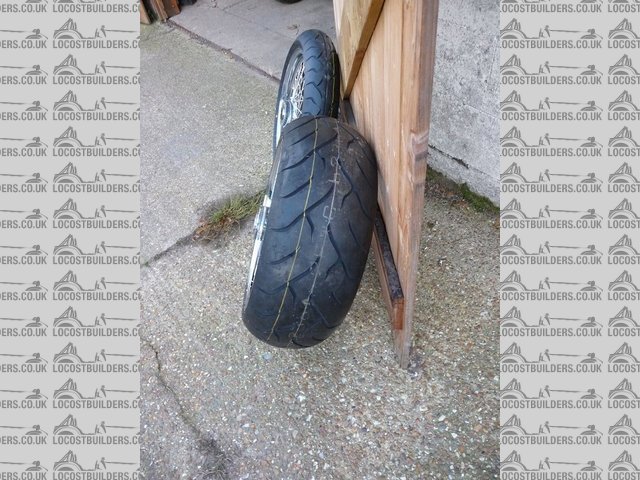
Wheels and tyres 2
Tyres are Dunlops D221's - standard fitments for VL1800's apparently.
And I spent some time polishing up the yokes I had sent over from the US. They were powdercoated from the factory and the finish was pretty good if a
little dull. Only trouble is now they show every little blemish in the powder coat! Oh well!

Yokes
scootz - 18/11/10 at 09:44 AM
Very
I was having a look at the engine specs (and that of some of its big brothers) and was amazed at the torque figures! What do they rev to?
flak monkey - 18/11/10 at 10:10 AM
The rev limit is 6500rpm. The torque curve is rather interesting as its more a flat line from 1500-6000rpm...!
Theres only 2 bigger ones, a 130ci and 140ci

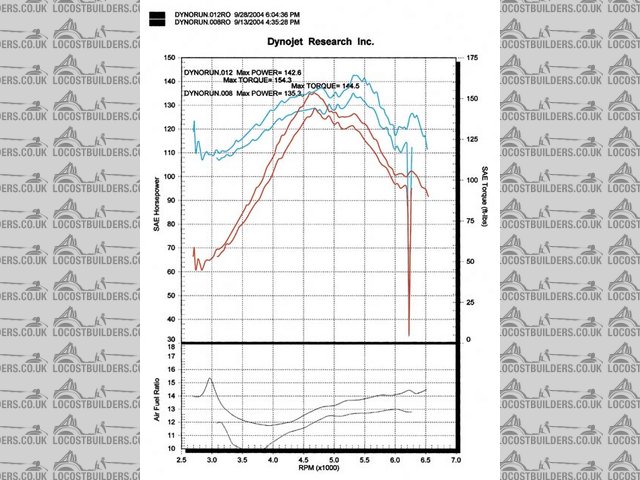
Dyno Print Out
scootz - 18/11/10 at 10:33 AM
It was the 140ci I was looking at... 'El Bruto'!
scootz - 18/11/10 at 10:36 AM
Flippin eck... just twigged that 140ci equates to 2300! No wonder it has the devils torque!
What sort of weight is in these engines David?
flak monkey - 18/11/10 at 11:13 AM
The engine weighs in at 77kg and the gearbox another 15kg for a 6 speed So they arent a silly weight.
I am hoping the bike weighs in under 250kg when its done.
welderman - 18/11/10 at 04:46 PM
Lookg good, i like fat rears, this was a Spondon Turbo, massive rear tyre would stand up on its own lol.
Joe
fat rear's !
scootz - 18/11/10 at 04:50 PM
Yep... chunky rears are
What sort of power figures are belts up to these days? I never could understand how they stood up to the abuse!
flak monkey - 18/11/10 at 09:06 PM
Allegedly they will take the same power as chain width for width, so a 1 1/8" belt like I am using should be stronger than a chain.
The issue is they are more prone to snap if badly aligned or if they pick up a stone so there are lots of stories of belts breaking all over the
internet.
Primo (make belt drives) to prove how tough the belts are, took a stock harley belt (Gates Polychain GT2) and cut off a 1/4" wide strip then
fitted that strip to a bike and rode it hard around a track and never broke it.
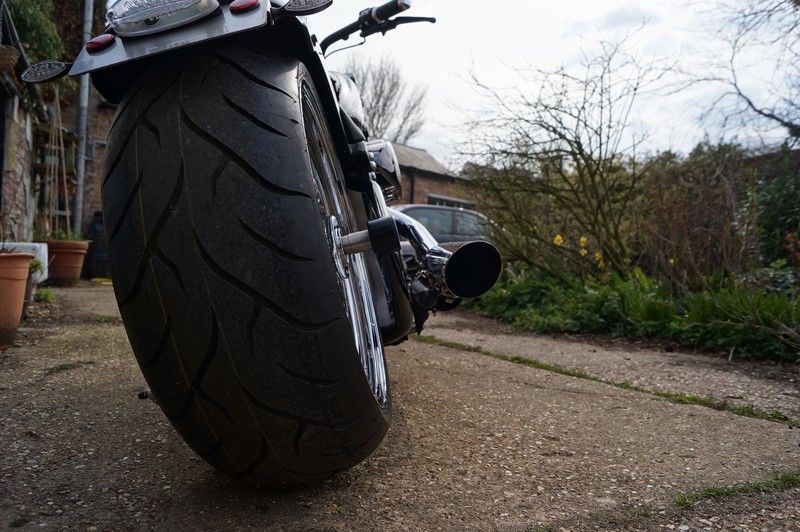
My rear tyre is only a 240, as I still wanted to be able to go round corners
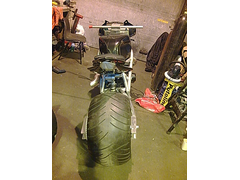
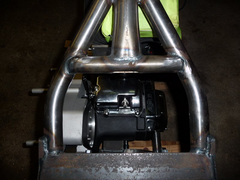
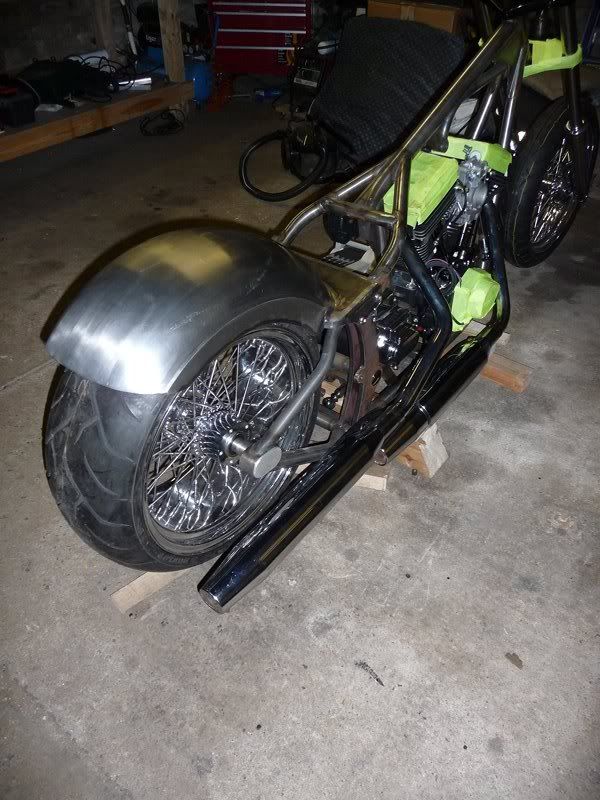
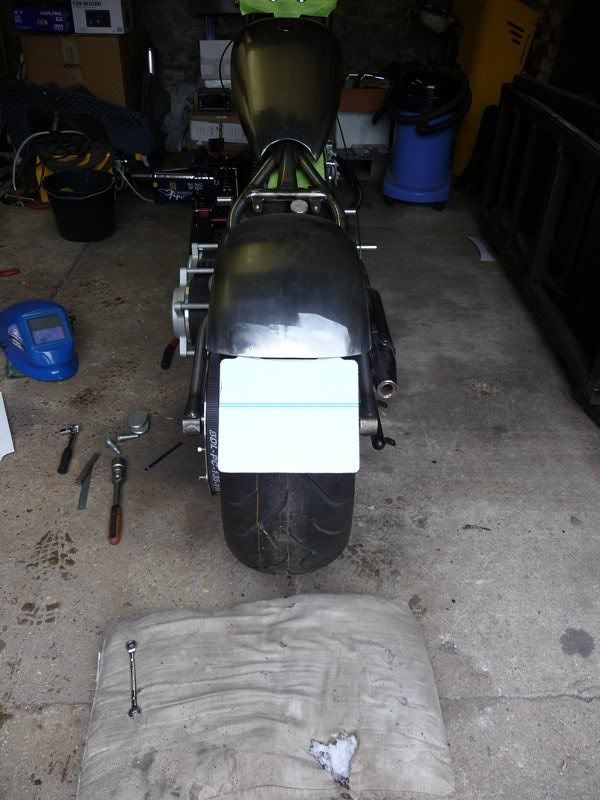
flak monkey - 28/11/10 at 03:09 PM
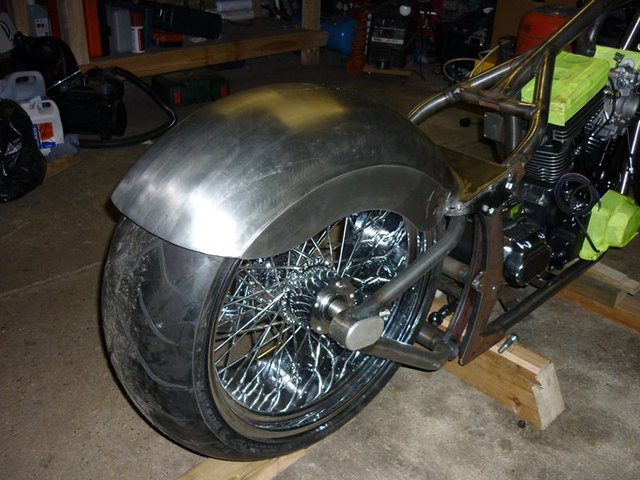
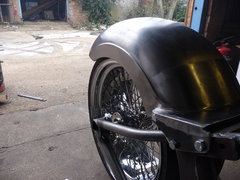
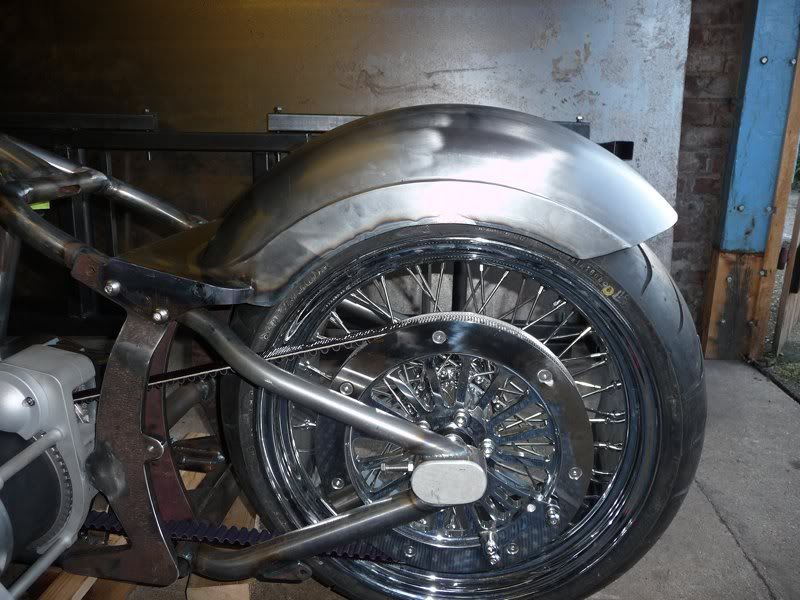
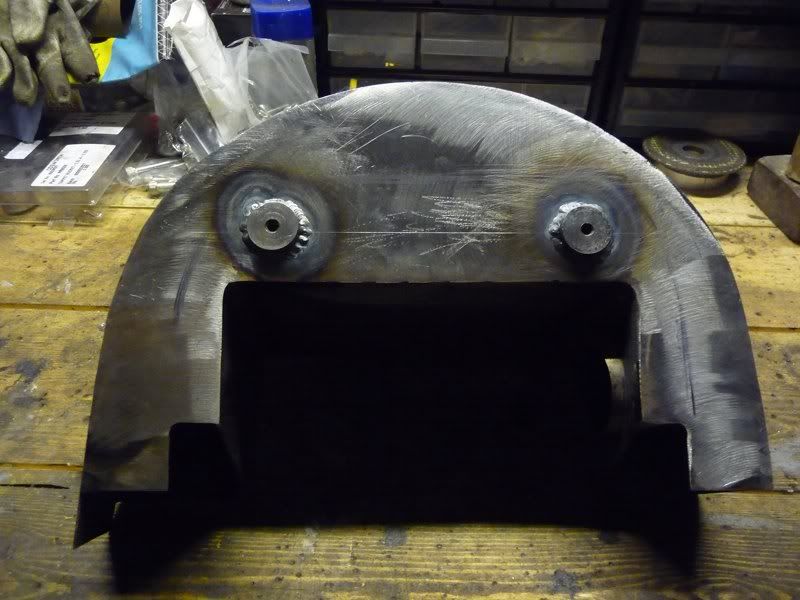
Picked up my rear fender this morning. Or at least one option anyway. I am still not sure whether to go with this one (slightly modded) which is a
rigid mounted one, or one mounted to the swing arm which follows the tyre.
Its going to need quite a bit of cutting and shutting to fit the way I want it I think. Going to take quite a bit of work as its 3mm thick at the
thinnest point. Just as well I have that plasma cutter....
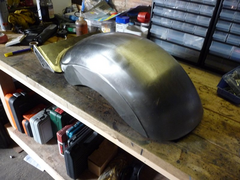
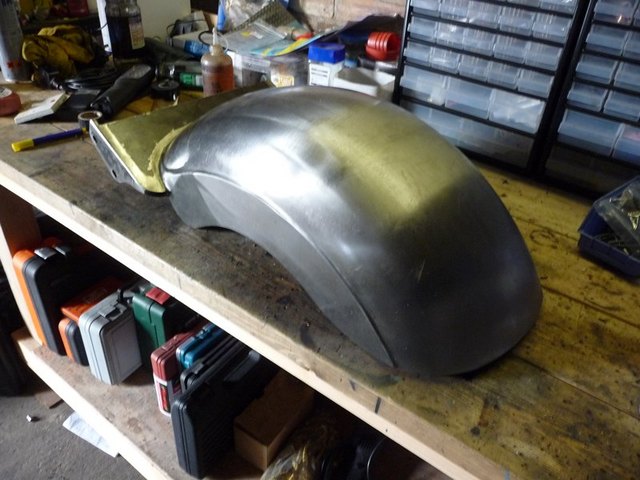
Rear fender (rigid)
Good thing is, this one would be strong enough to carry a passenger!
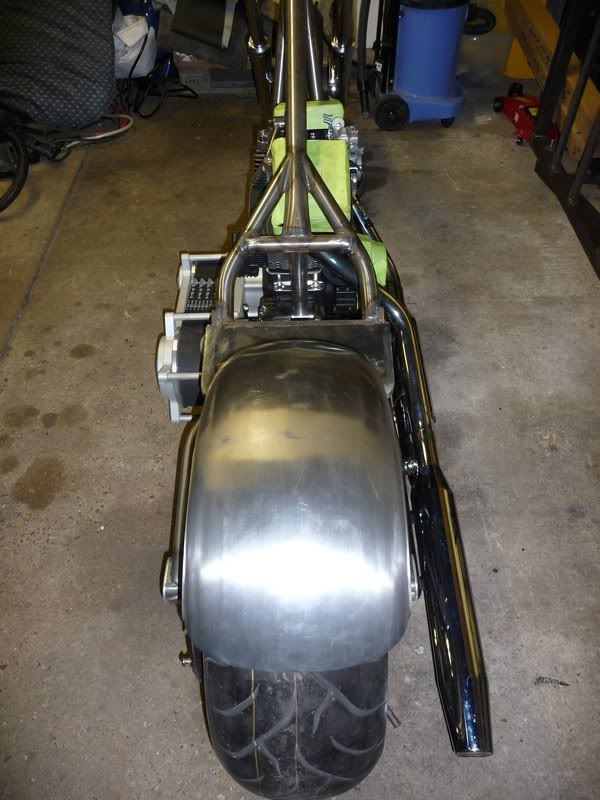
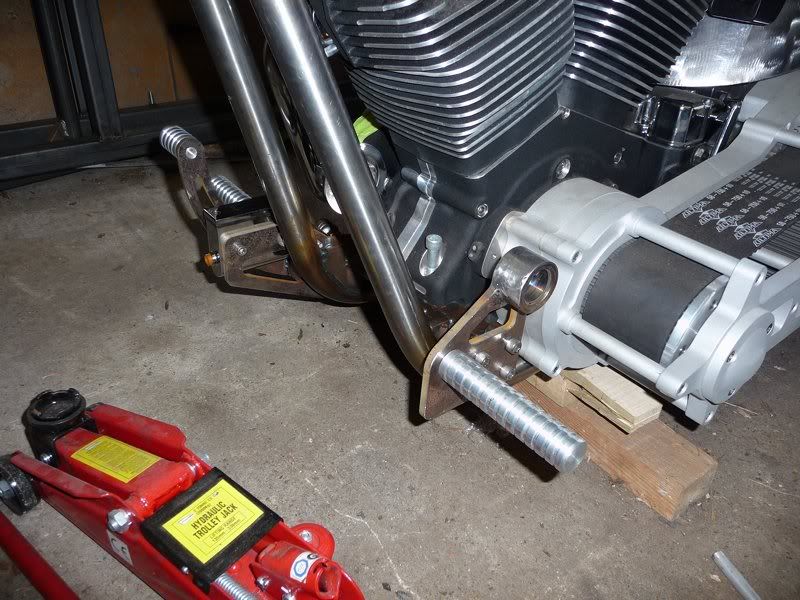
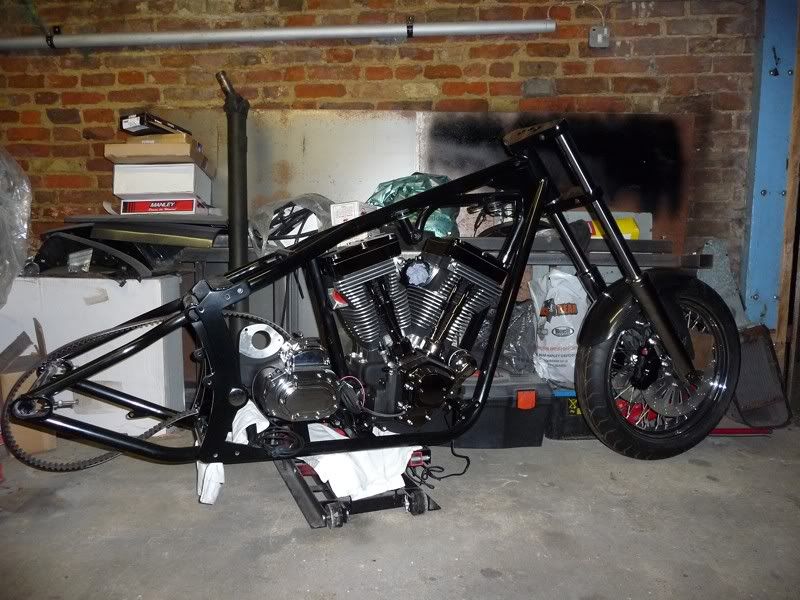
flak monkey - 10/12/10 at 08:00 PM
Big day today (or busy day, whatever you prefer!)
Picked up my frame from Briz, very impressed with it indeed. Beautifully made
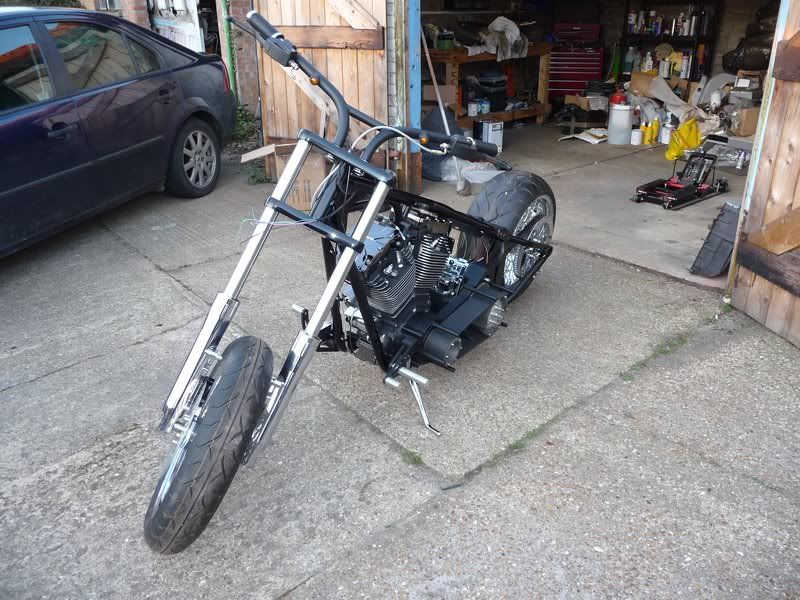
Got it back and made a start on putting a few bits together. Some swearing and head scratching, but getting there slowly. Hoping to get it all mocked
up over the next couple of months before stripping it all down again for paint.
The bare frame:

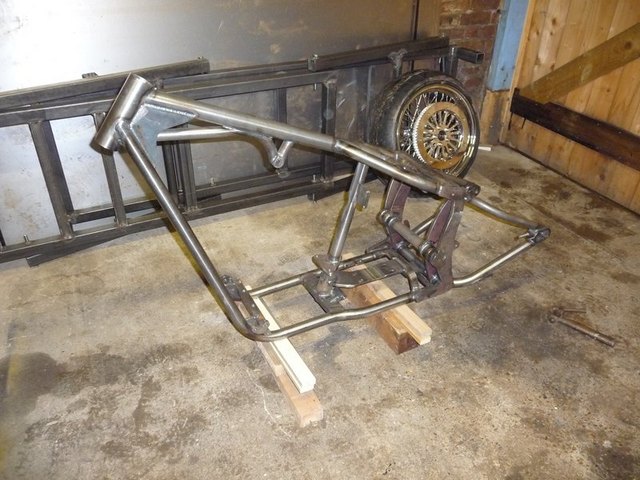
Bare frame 1
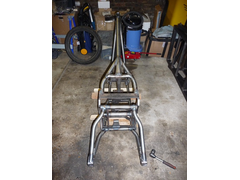
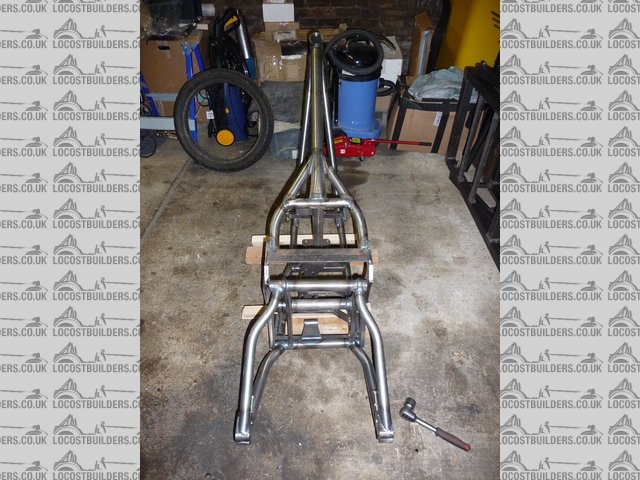
Bare frame 2
Removed the swing arm so I could fit the belt. The refitted it with a rear shocks losely fitted and adjusted to around halfway for ride height, turns
out they need to be set a little higher to bring the frame level. I also need to make some spacers for the bolts as they don't do up tight.


Rear shocks

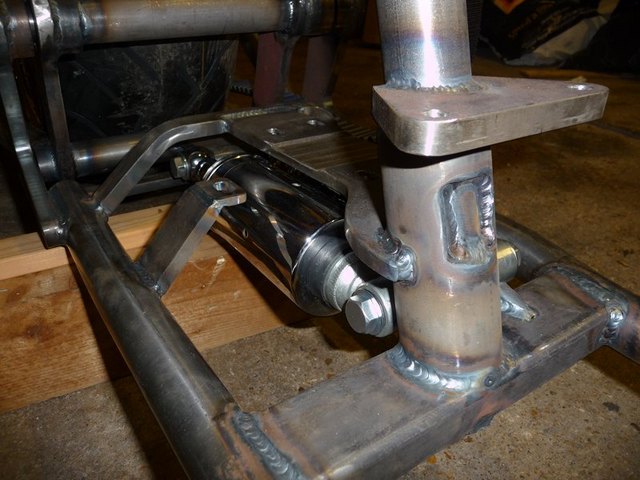
Rear shocks
I know I am going to have to take them back out to fit the gearbox, but I wanted to get it together to see what it would look like.
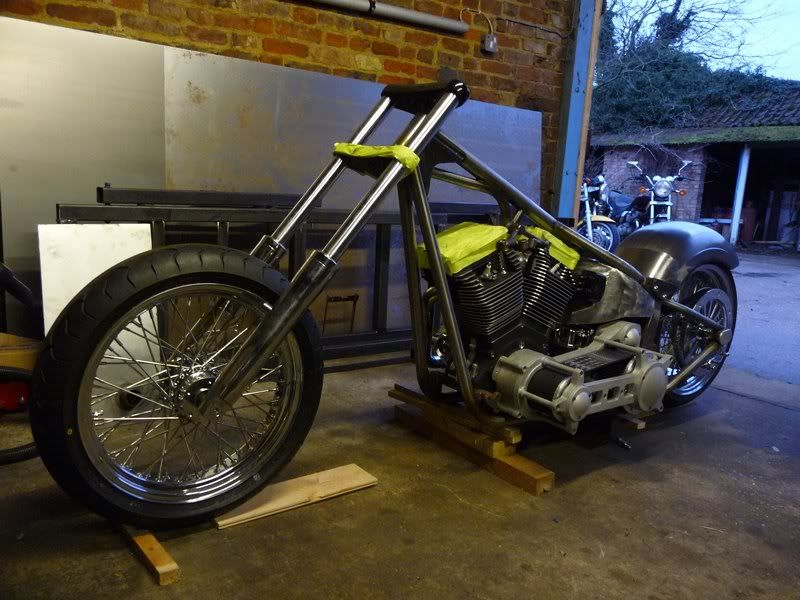
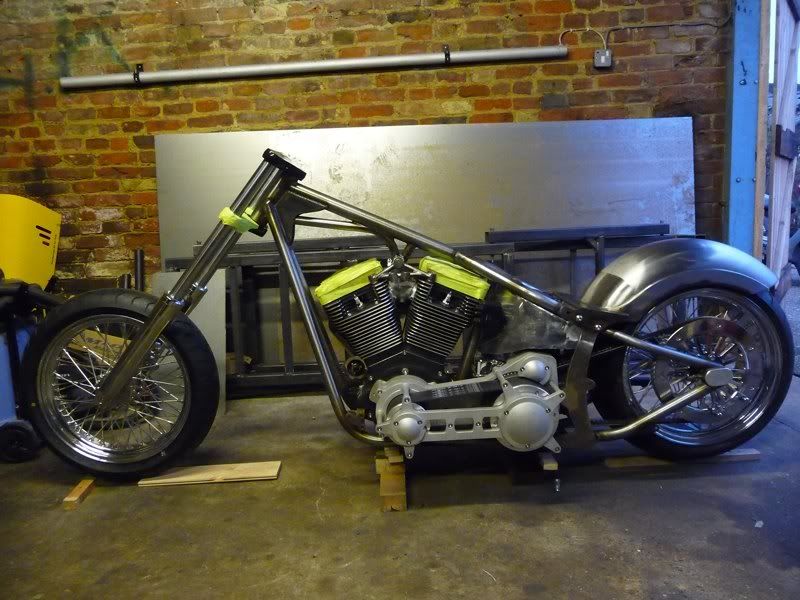
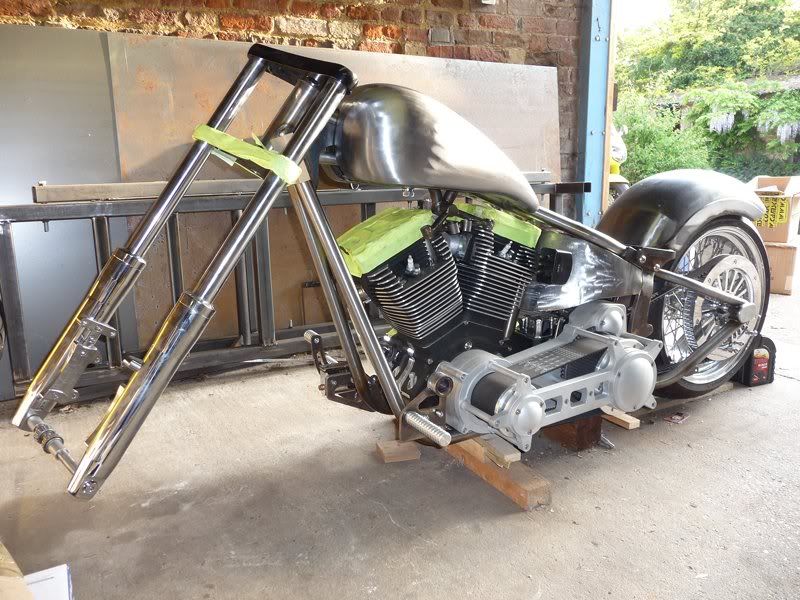
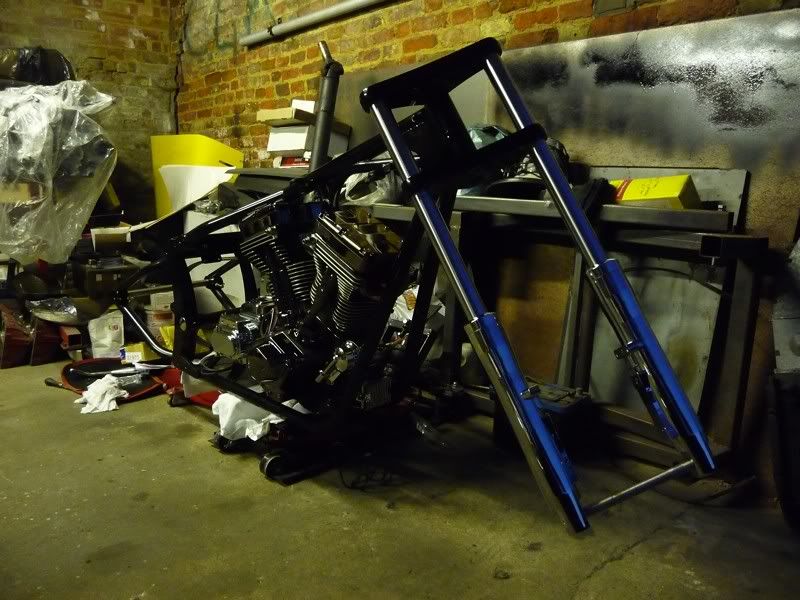
I then set about fitting the front end. I need to order some dust shields and some internal fork stops before too long, so will be on the hunt for
some of those tonight.
The biggest problem was getting the top nuts/stops off the shocks so I could fit the flush ones as my yokes have hidden top nuts. Took quite a lot of
swearing and a few bashes with a large hammer to get them undone, quite why anyone decided they needed to be that tight I will never know. Got there
in the end though, and it went together quite nicely. Everything seems to line up.
Forks are 4" over stock.

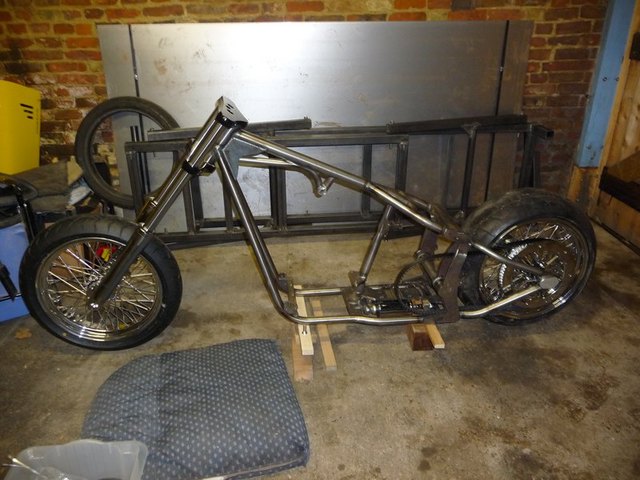
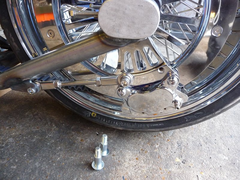
Rear wheel fitted 1
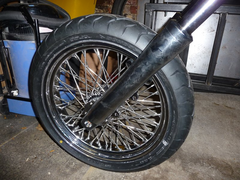
Front wheel


Front end
I need to make some spacers for the front axle tomorrow as the first job. Shouldn't take long though.
Then I refitted the rear wheel and its all coming together.

Rear wheel fitted 2
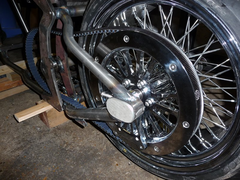

Brakester#
Getting a good idea now of what its going to end up looking like. Need to decide on a tank type/style. The top tube is about 20" long, so I am on
the look out for something close to that to get me started.
Tomorrow I am going to start looking at getting the engine and box ready to go in and getting it on the lift to make it a bit easier to work on.
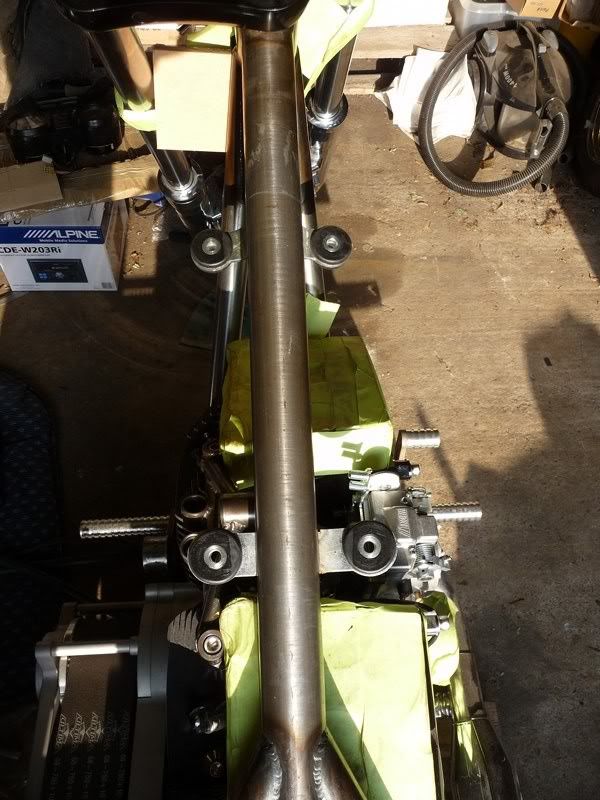
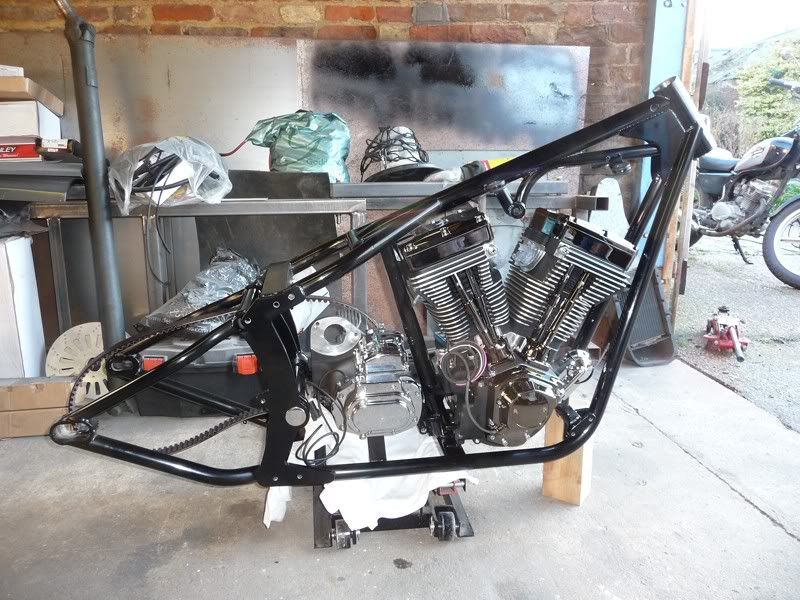
flak monkey - 11/12/10 at 07:59 PM
Made the mock up front wheel spacers this morning, just need to get some stainless bar in to make some proper ones now.
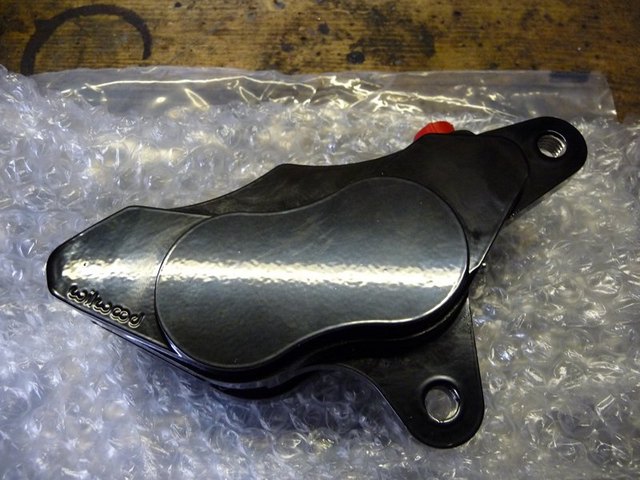
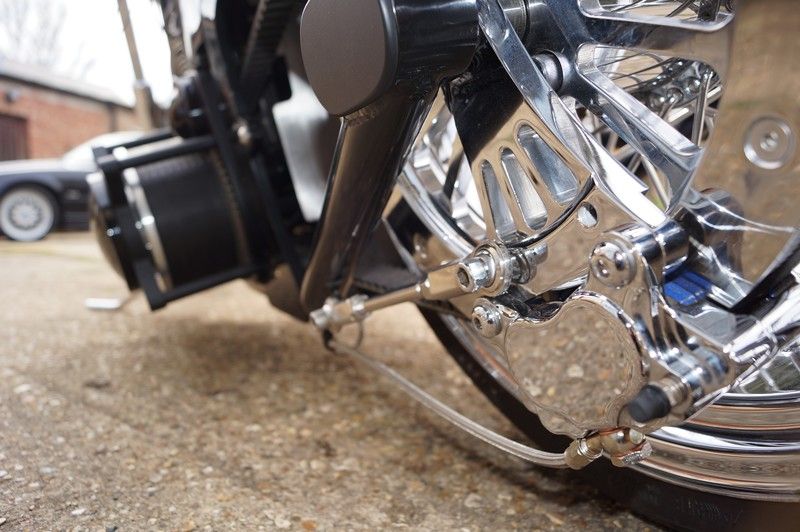
Trial fitted the rear brake caliper, not sure how I am going to hide the hydraulic line to it, but I'll figure something out...
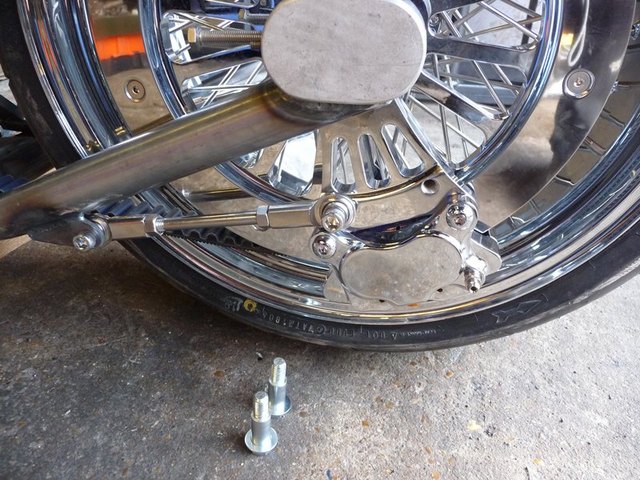
Caliper fitted
Dropped gearbox into the frame. Need to trim the left side studs down a little so they dont hit the shock, the other 3 all clear OK. Need a .5mm shim
under the 5th stud

Gearbox fitted
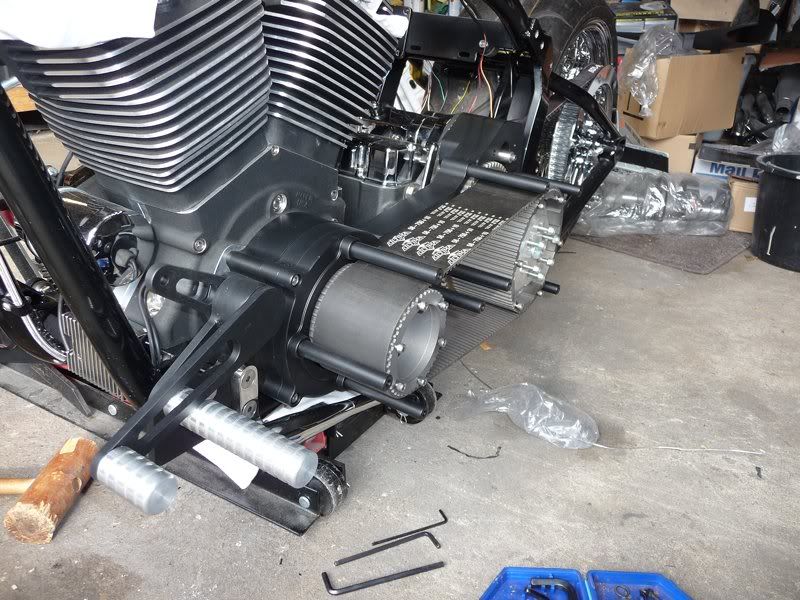
Heaved the engine in too and everything seems to line up pretty well - theres a small misalignment of around 1mm at one end somewhere, the primary
plate doesnt quite sit tight to the engine - I'll have to investigate a little tomorrow. Need to get some suitable bolts for fixing it in, will
order some next week. Also need longer bolts to attach the primary to the engine as theres a 45mm offset.
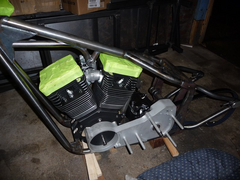

Engine in 1

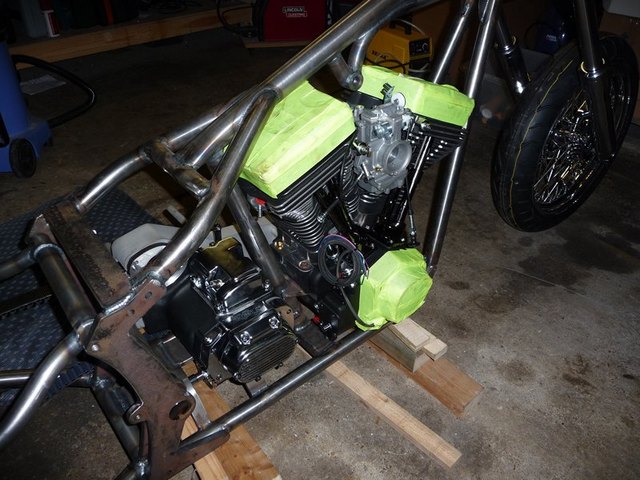
Engine in 2

Gearbox from top
I struggled for a while to fit the primary backplate, then realised the belt seems a little tight. Took the rear wheel out and it helped. Now I cant
get the axle back in, looks like I may need a longer belt  I check the tooth count tomorrow to make sure it is actually a 133T belt
Oh the joys of getting stuff to fit together :lol:
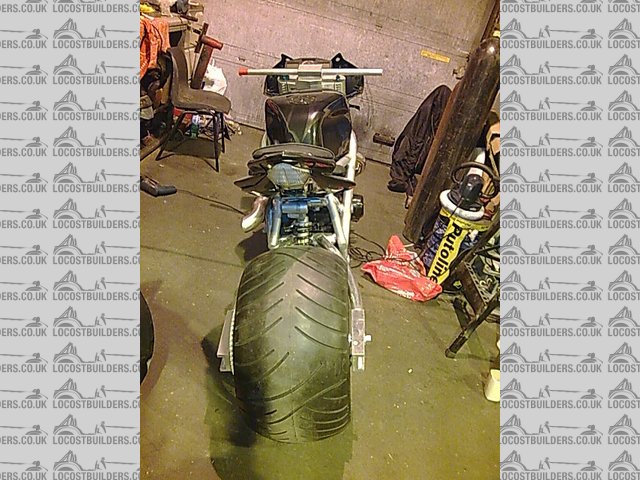
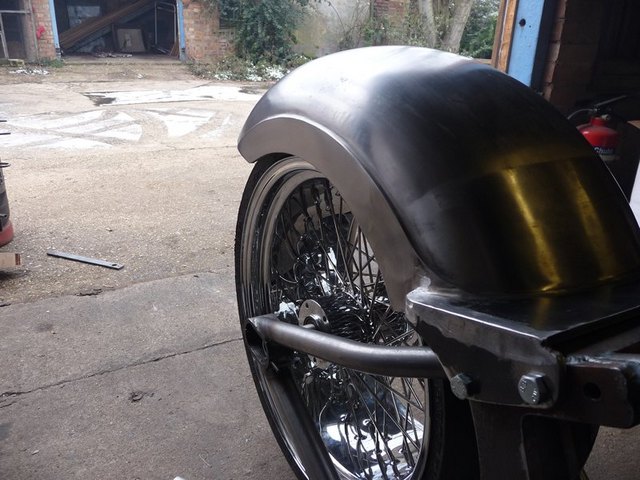
flak monkey - 17/12/10 at 08:36 PM
Started on modifying the rear fender tonight. I picked it up on ebay pretty cheap. Very heavily built, could probably support 2 people as
pillion...
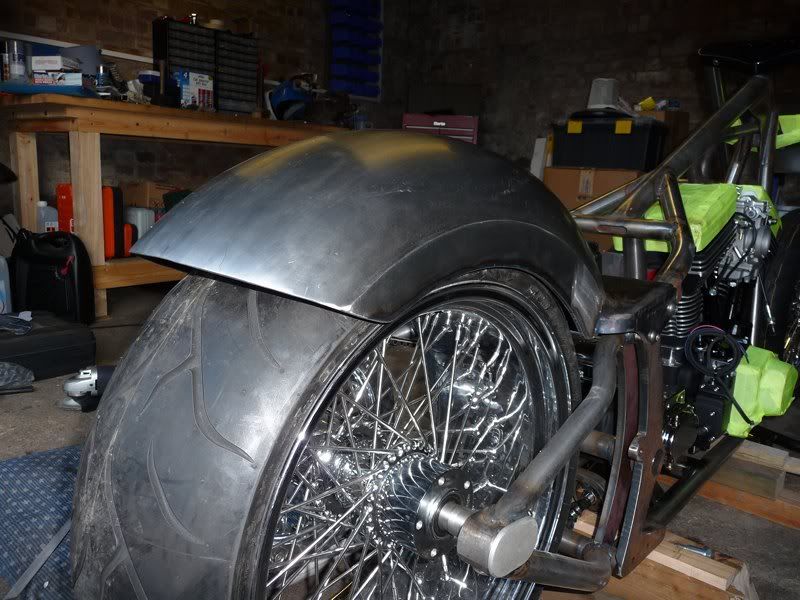
I was originally going to fit a hard tail type fender to the swing arm so it followed the tyre as I am not a fan of having a huge gap between the tyre
and fender. But I decided to give it a go with a normal softail style fender and see how tidy I can make it.
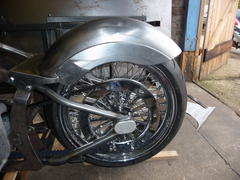
It was way too wide where it attaches to the frame (around 1" too wide) and sat way too high on initial fitment. Wheel is chocked to the target
ride height in these pics.

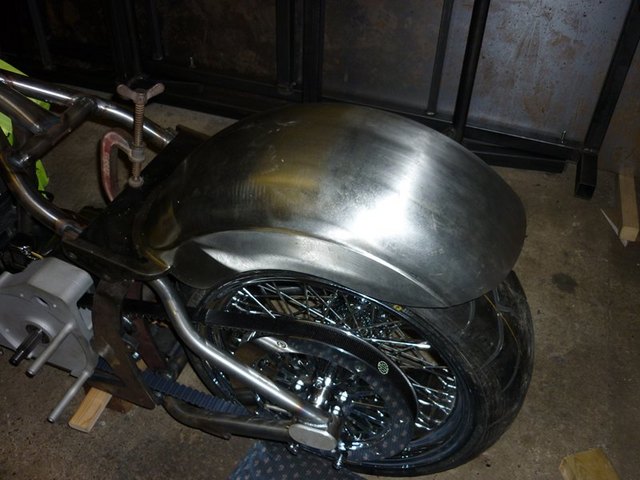
Initial fender fitment 1

Initial fender fitment 2
Doeesnt follow the wheel at all and it just looked wrong.
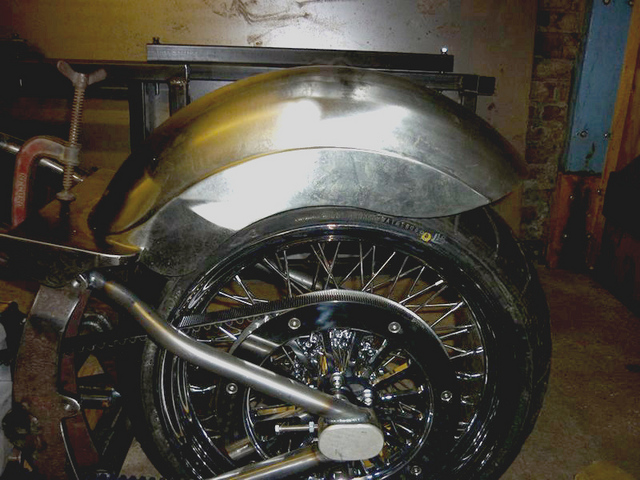
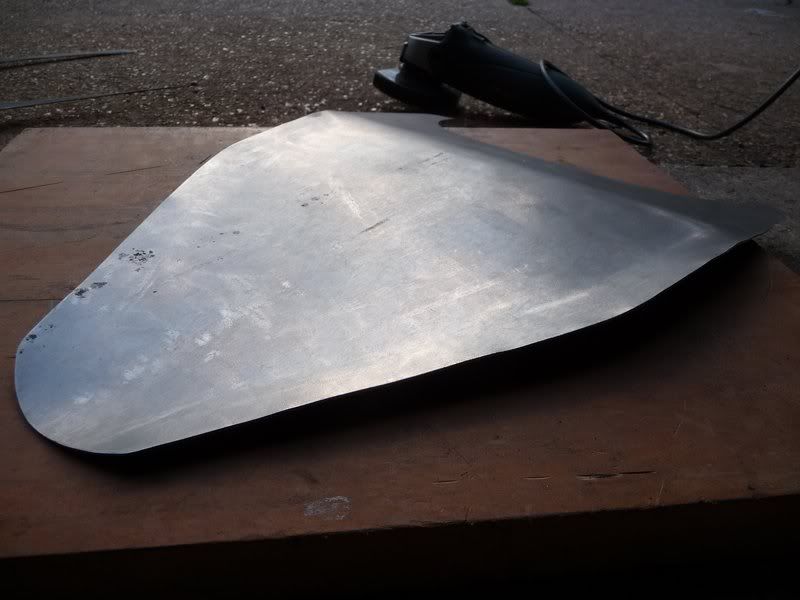
So I cut off the mounting brackets with the plasma cutter, and trimmed the edges up with the angry grinder and soft pad.
Layed a couple of pieces of pipe on the rear wheel and chocked it up to the suspension bump stops. Layed the fender on and then tacked the mounting
brackets back on so the holes lined up.

First modified fender fit 1

First modified fender fit 3
Sits a lot better now with the wheel back at normal ride height, but forgot to take a pic! (DOH!)
Tomorrow I will be fully welding the brackets back on and trimming up the welds to an acceptable state.
I will also be modifying and chopping it to length, but I am not quite sure where I am going to cut it off yet. Having now got it fitting better I
quite like the look of it at the length it is and will be much easier mounting a plate for the SVA. But it will make it more difficult to do the rear
lights the way I want. So I am a little unsure at the moment. I also want to ut the sides down to reduce the depth of it a considerable amount. Not
too concerned over the strength implications as I won't be carrying a pillion anyway.
More tomorrow hopefully!
scootz - 17/12/10 at 11:20 PM
Looks great!
flak monkey - 18/12/10 at 05:38 PM
Thanks Scott
Done some more today, really need to dort a flue out for the woodburner so I can heat the workshop. -6 deg out today!
This is how I ended up with the fender fitting last night
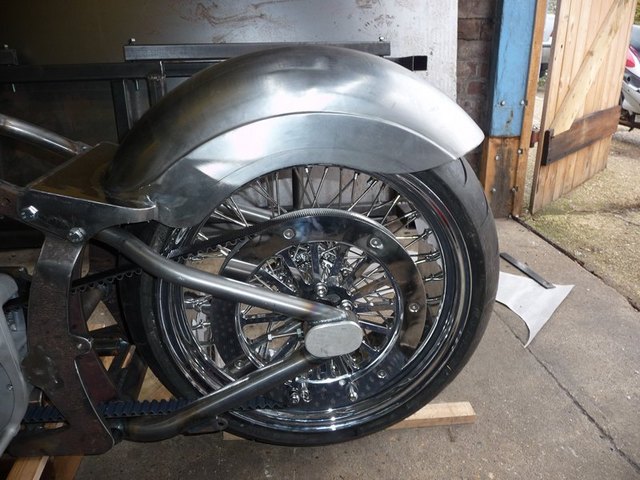
First modified fender fit 5
I hope you would agree its a damn sight better than how it started (second pic in previous post).
This morning I welded it all back together and trimmed it up so it was presentable again. Then decided to have a go at trimming the sides down a
little so the radius matched the rim at ride height. Still needs a little smoothing off and the bottom edge radiusing and blending into the rear edge
but by this point it was getting late in the afternoon and I couldnt face doing any more grinding!
This is the final fit, bar a few bits of trimming up. The wheels going to come back around 1/2" yet when the belts tensioned up. I have decided
to keep it at this length as its going to make a few things a little easier to do further down the road...

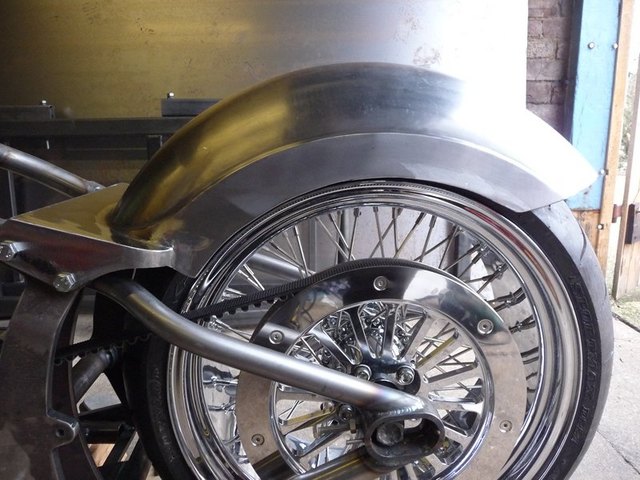
Final fit fender 1
Final fit fender 2


Final fit fender 5
A shot of the fender bracket
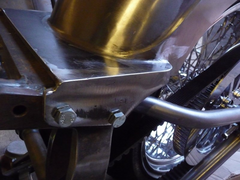

Rear fender bracket
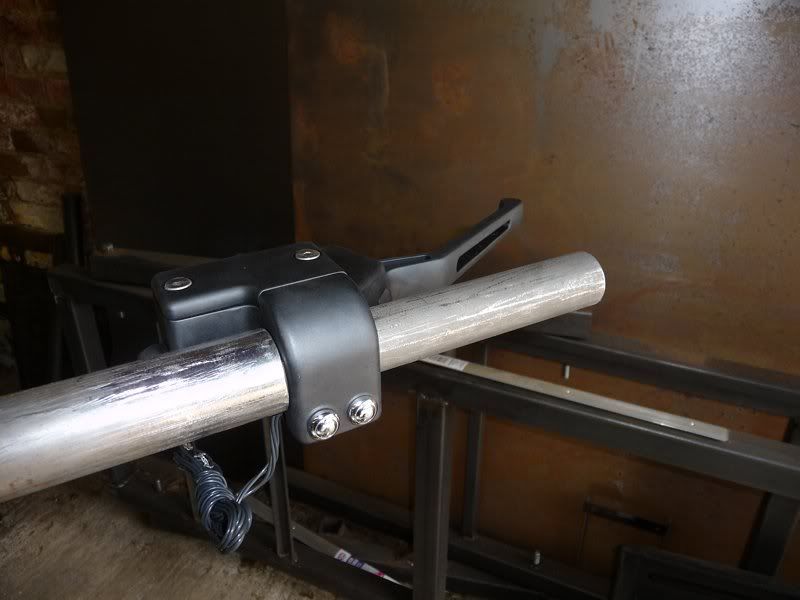
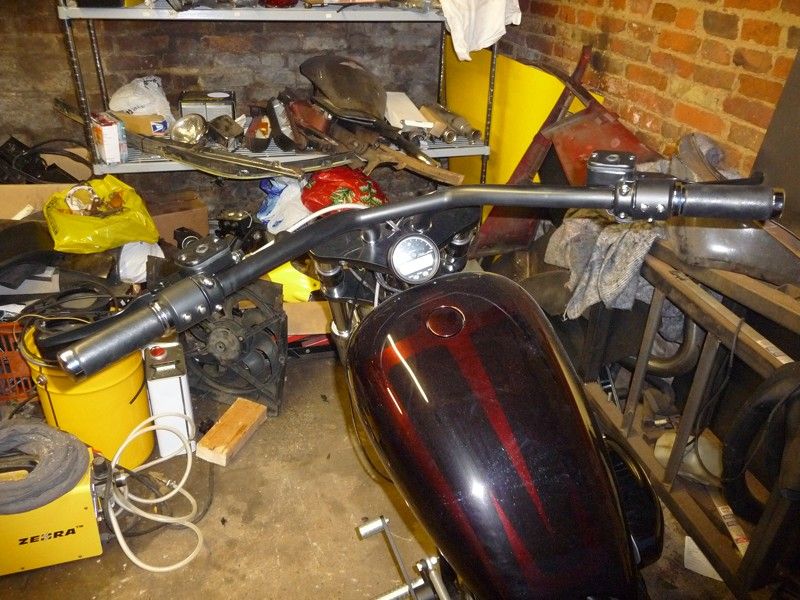
I also got my set of handle bar mounts today, so I could trial fit the 'test' handlebars just to get an idea of whether its worth modifying
these or starting afresh.
Handle bar test 1
Pretty quickly decided the pull back is about right but they are way too high. So I will be making a complete new set, just need to get some 1"
and 1.5" tube to make them from.
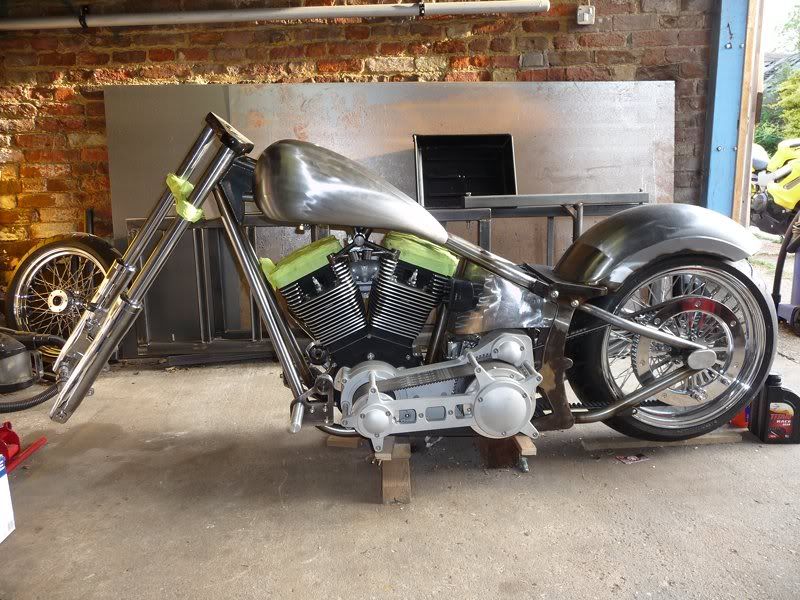
Then moved on to a test fitting the primary drive. All went together relatively smoothly, other than having to pull the backplate off again to insert
another spacer behind the alternator rotor to bring the pulleys into alignment.

Primary assembly 1

Primary assembly 2
And this is how it sits currently. Still an awful lot to do, but its nice to see progress. Pretty pleased with the overall look at the moment.
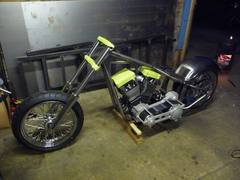

Current progress 1

Final fit fender 4
First job tomorrow is the top motor mount
alistairolsen - 21/12/10 at 11:44 AM
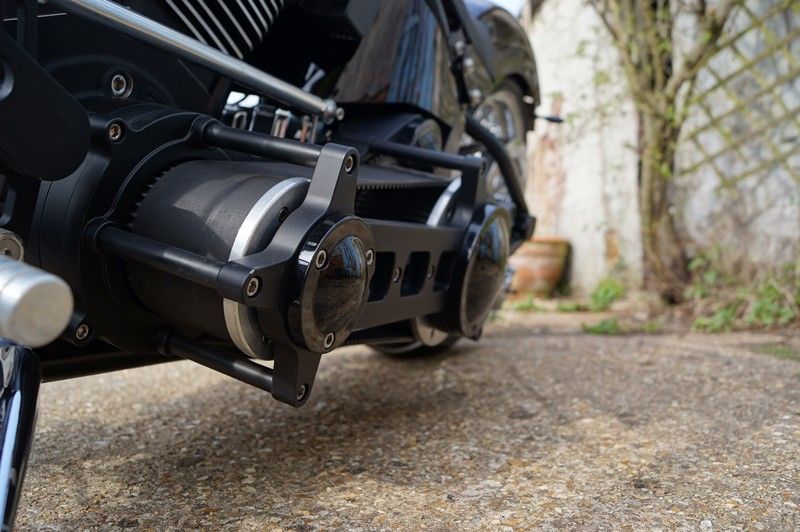
Looking good, like the rear guard! Is it my imagination or is a lot of this quite heavy? Also, christ that primary drive sticks out a long way!
flak monkey - 21/12/10 at 01:20 PM
Yeah none of its lightweight stuff. There's so much vibration on the bikes at tickover that you cant make stuff out of thin material or it just
breaks. The mudguard is 3mm thick mainly, with reinforcement on the sides and the bracket is 8mm thick. But then its also designed to carry the weight
of a pillion without any further reinforcement.
The frame is all 1.5x0.125" seamless tube and doesnt weigh that much in itself. The engine is 77kg, transmission 15kg.
Primary does stick out a fair bit, the belt is 85mm wide for a scale. Still plenty of room underneath to lean into the corners though, the sidestand
is more likely to ground.
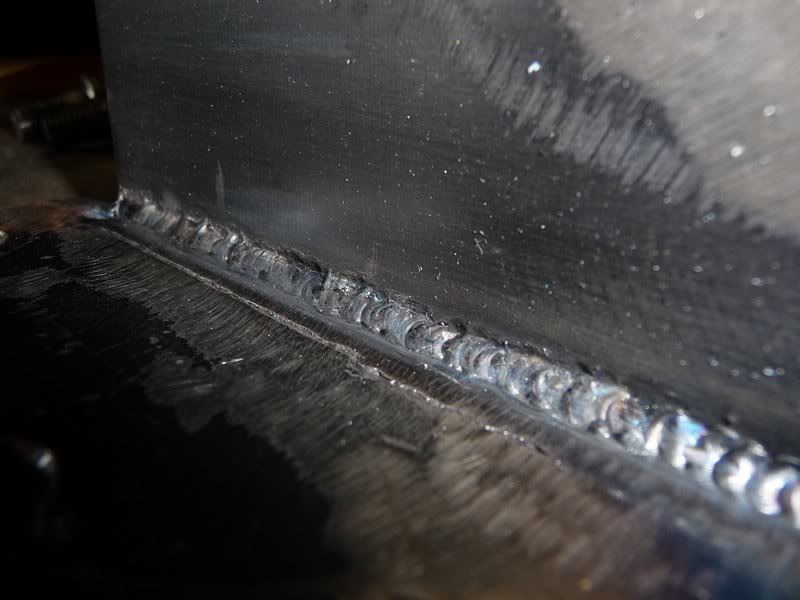
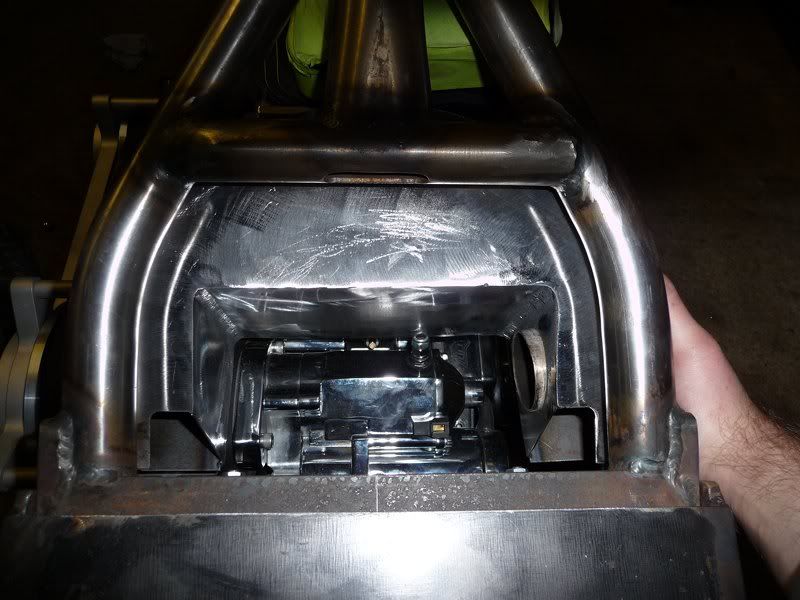
flak monkey - 23/12/10 at 07:36 PM
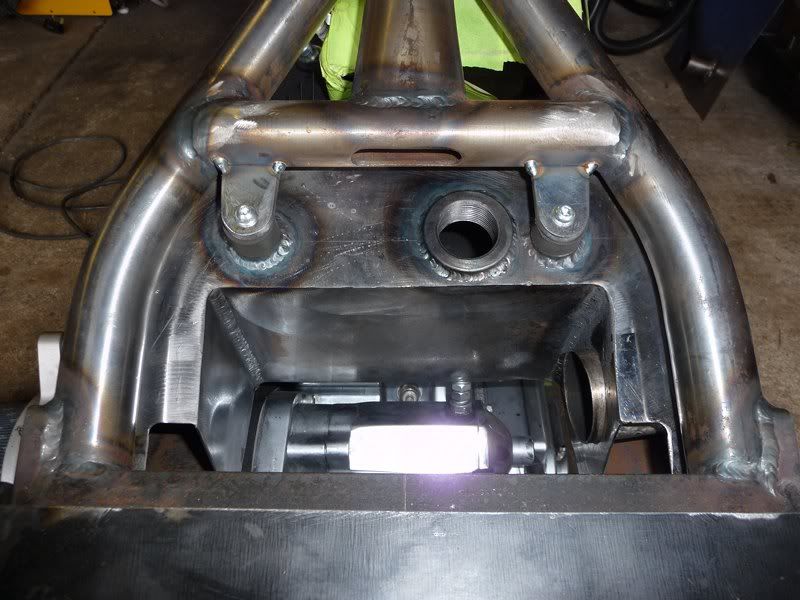
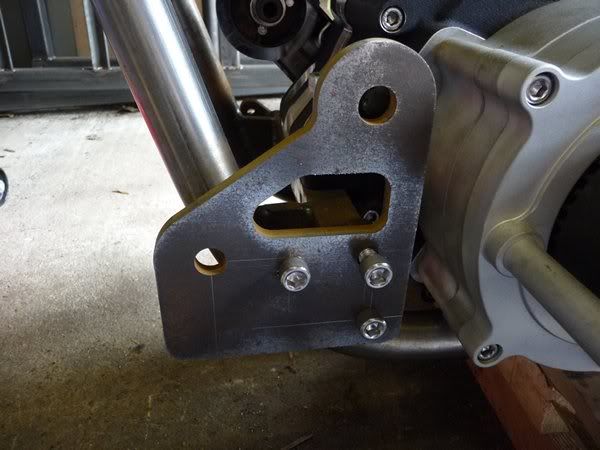
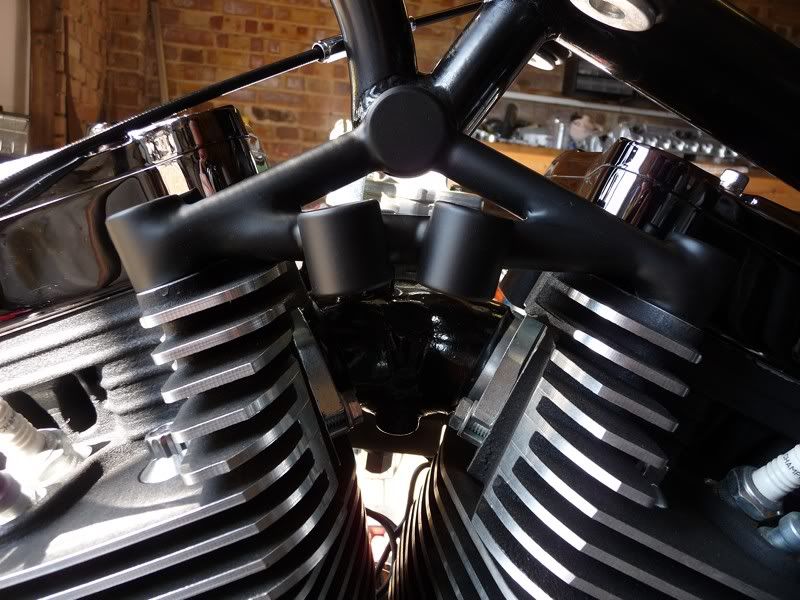
Well todays little job was make the top motor mount. In the end it took the better part of the day. Relatively pleased with how it turned out, though
my TIG welding looks crap compared to Briz's. Will clean it up and finish it off tomorrow.
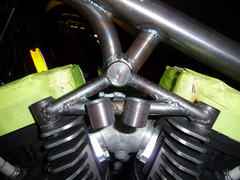

Top motor mount
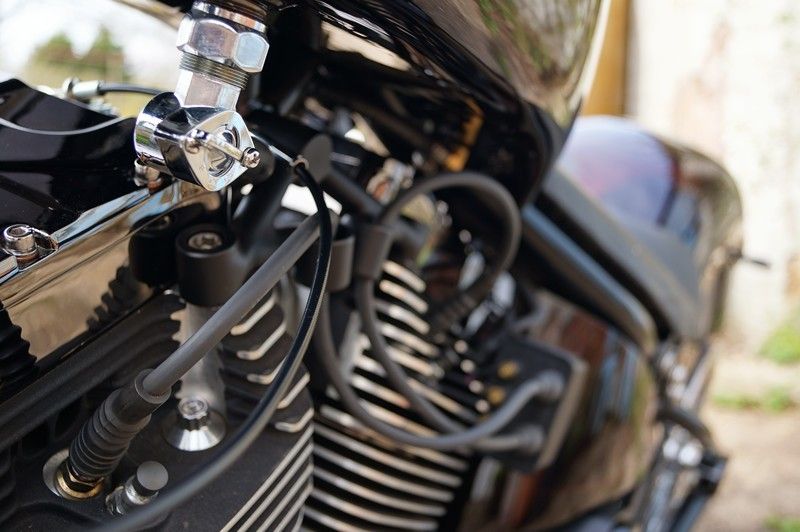
The 2 bits of tube on the front are for the plug leads to loop through. The ignition switch is going to be secreted away somewhere else.
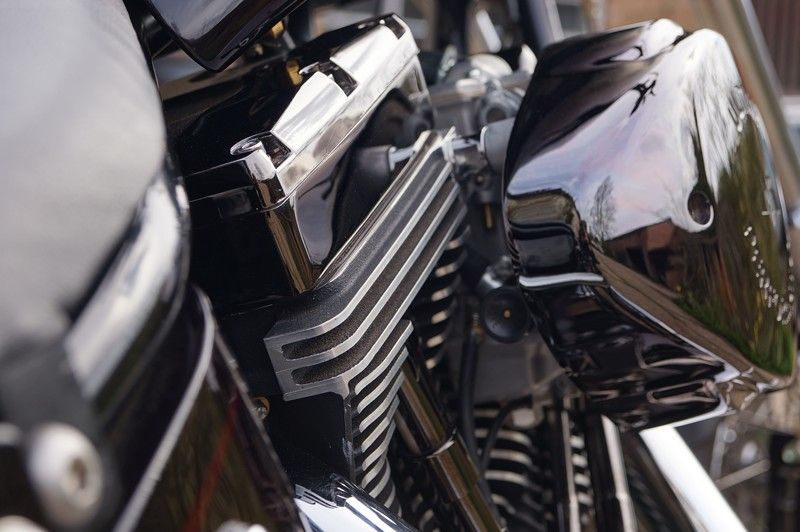
Going to have to have that inlet manifold off and crackle black it to match the rest of the engine too!
Simon - 28/12/10 at 10:37 PM
quote:
Originally posted by flak monkey
Yeah none of its lightweight stuff. There's so much vibration on the bikes at tickover ...
Of course, you could always use a modern engine to cure that - like a Rover V8, a mere 50 year old design
Don't panic, once my extension is done, I'm planning on a diesel bike
ATB
Simon
flak monkey - 29/12/10 at 04:00 PM
Diesel rat bike! There have been a few done, have a search on google.
Finished the top mount off today - ready for paint when the time comes now.
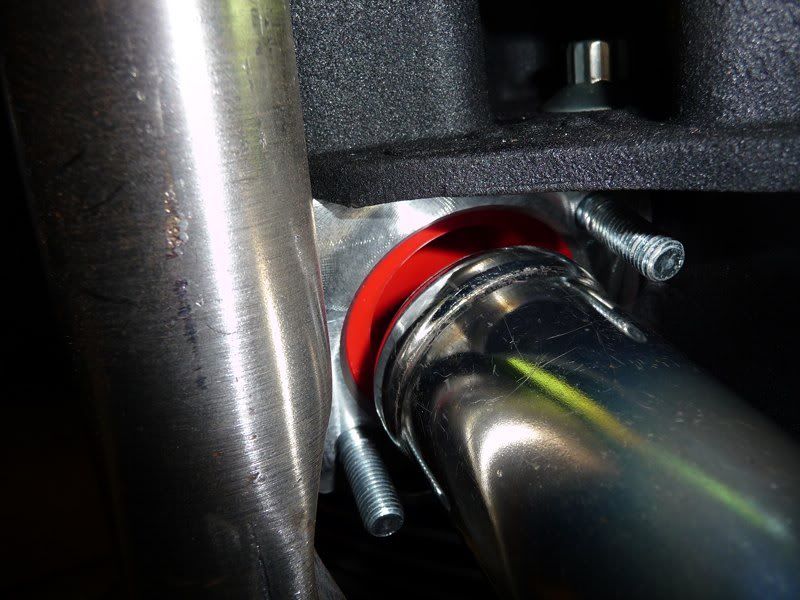
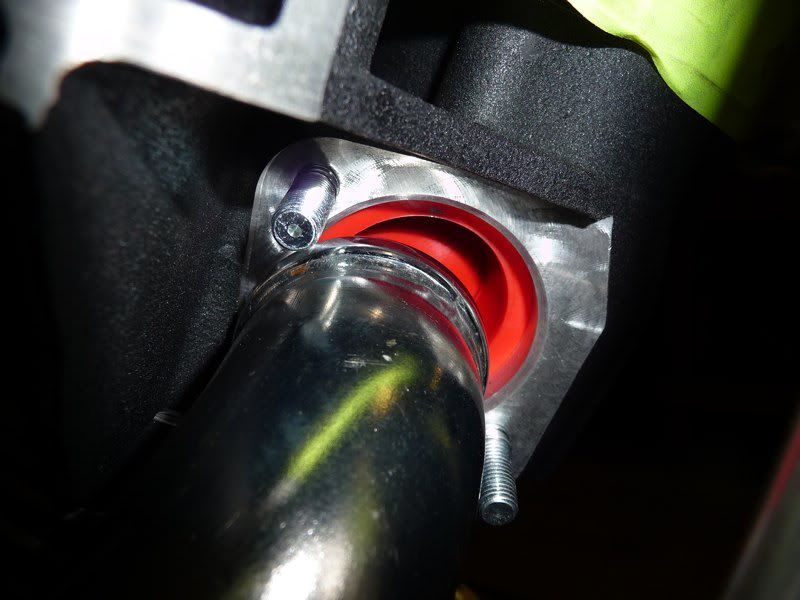
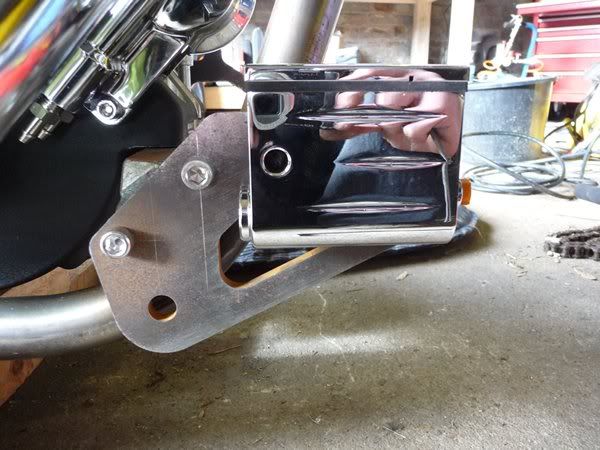
Swapped the transmission end cover from the standard cable one to the hydraulic one I got from the US.
Standard cover:


Original clutch cover
Nice and clean and tidy in there:
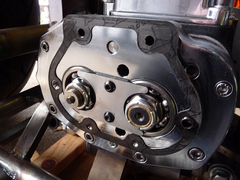

Clutch cover removed
New cover fitted

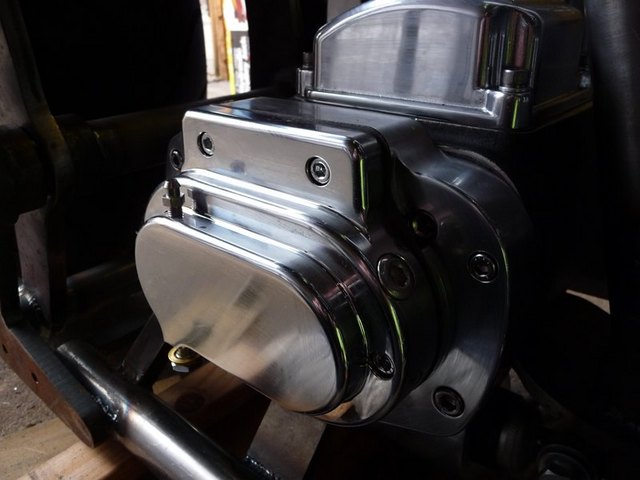
New cover fitted
Not sure how I am going to get the hydraulic line to it yet, but I am sure I'll figure something out, sure it will be easier to hide than a
normal cable.
The front brake calipers arrived just before Xmas as well, just need some bolts to fit them, along with some front brake discs now. Once they are
bolted up I will make up the front brake lines. I am going to fit dual front discs, so have a left and right hand caliper. Both are wilwood
GP310's powdercoated in black.

Brake caliper 1
Simon - 29/12/10 at 11:50 PM
Rat.... Be nothing ratty about my diesel bike - they're just for people who didn't think about what they were doing or ran out of money
Prob gonna use a BMW K100, bin the motor and go for a Pug/Ford/Mada 1400 tdi, and a regearing to make the most of the expected economy.
As I'd had 72mpg (at 40mph) from my 'busa, it'll be a challenge
ATB
Simon
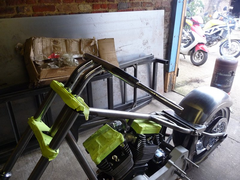
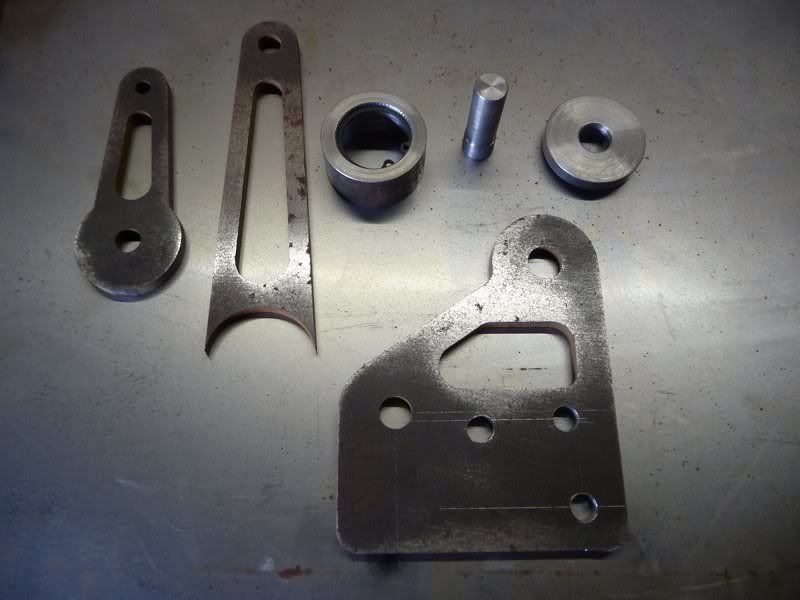
flak monkey - 3/1/11 at 12:19 PM
Been finishing off the designs for the forwards this morning, printed them out 1:1 and stuck them on the frame, the angles can be tweaked once I have
some physical bits. Will end up with all the plates laser cut. Everything that pivots sits on 2 sealed ball bearings, so they should be maintenance
free. Everything is steel.

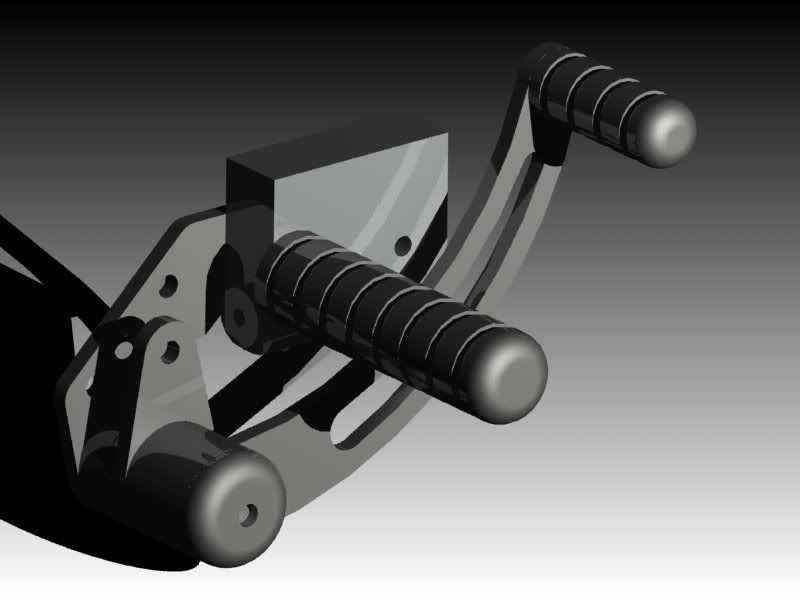
Will finish the DXF's tonight ready for laser cutting this week.
dlatch - 3/1/11 at 12:38 PM
thats looking fantastic
making fast progress may be ready for the sunshine
how much nicer are bikes to work on than cars?
matt.c - 3/1/11 at 02:15 PM
Thats propper bike porn!
Is there anything you cant do???
flak monkey - 4/1/11 at 02:41 PM
Thanks
Plenty I can't do, bike building's been a bit of a steep learning curve to be honest. Knowing what fits with what is just as much of a
nightmare as with cars - hence why I decided to leave the frame building to a professional!
Its easier to work on than a car, in that there are less parts - but that just means that there is much more attention to detail needed as absolutely
everything is on show. So I wish my TIG welding was prettier rather than just functional. But hey ho...
Bikes are also much more expensive...and I end up importing a lot of stuff from the US as there is bigger choice over there. Shame about the
extortionate shipping costs thats all.
Itching to get the oil tank made and a petrol tank fitted so I can see it all coming together.
scootz - 4/1/11 at 05:10 PM
Good work fella!

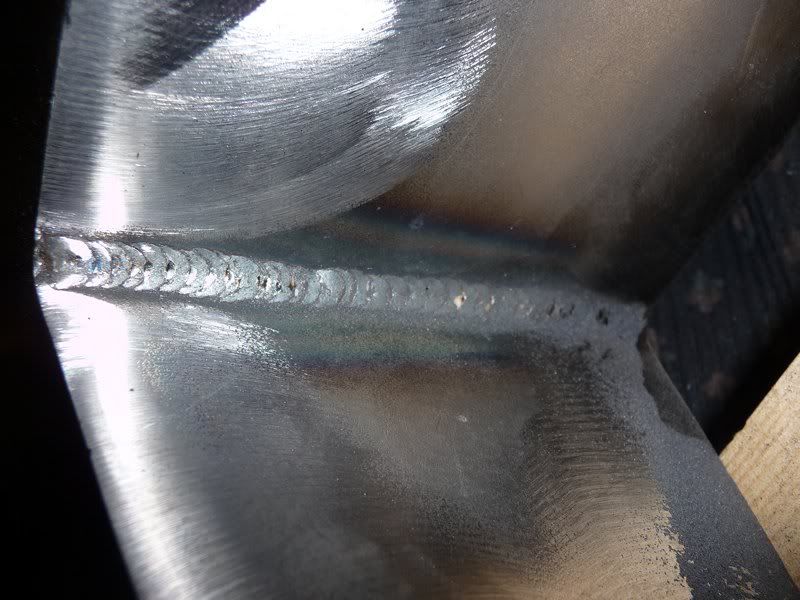
flak monkey - 8/1/11 at 06:33 PM
Been fiddling around a little more this afternoon.
Swapped the final drive belt out for a 135T, which has brought the rear axle to the centre of its adjustment. This allowed me to finish off the rear
fender by trimming the sides to where I wanted them and smoothing it all off. Once I was happy with it I edge welded it and welded the brackets on the
inside.
Was an excuse to practice the TIG on steel again, at least making it neater anyway. Tidier this time (line infront of the weld is where the brackets
were originally welded on to the fender and I cut them off)
So I took the opportunity to redo the top motor mount too, so that looks better now.
Also got hold of a stock Dyna exhaust to use for SVA, which fits remarkably well. Only needs cutting and about 1/2" extension welding in on the 2
headers to make everything fit. Probably only needs extending because I had to space the bracket off the frame by 3/4" so the silencers cleared
the swing arm.
Nothing too drastic anyway, and I just need to find a couple of bits of pipe to do it with, may have something buried in the workshop scrap pile...
[Edited on 8/1/11 by flak monkey]
flak monkey - 13/1/11 at 08:27 PM
Got the starter fitted tonight. Its a 2kW Thunderfire unit, hopefully that will be man enough for the job. Bargain from the USA, $99 plus $40
shipping. Cheap enough for me to be live with having a chrome one, which I'll strip and get powder coated later.
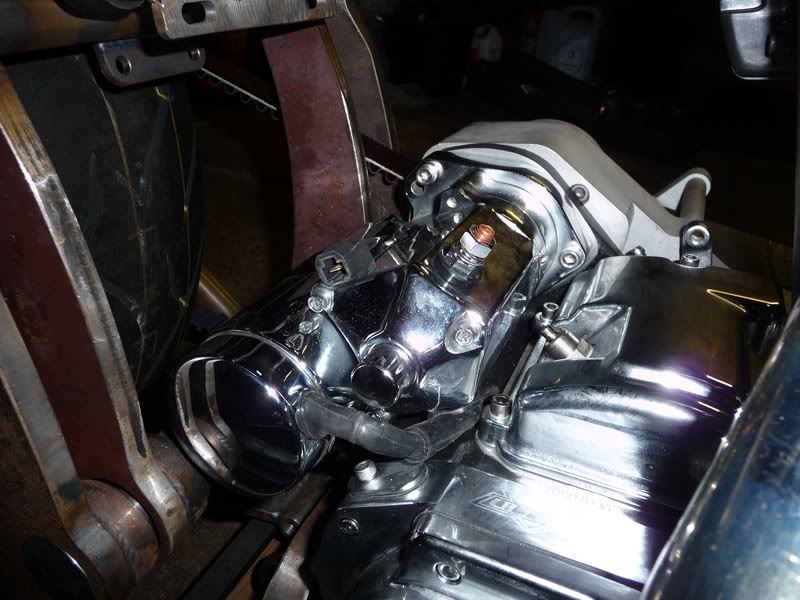
Can crack on with the oil tank tomorrow afternoon now.
Oh, and I had another look at the exhaust headers, and it looks like they will fit without any mods after all with a bit of pulling and shoving.
scootz - 13/1/11 at 08:31 PM
"Thunderfire" starter... you've got to love those Americans!
What colour scheme are you thinking of for the bike David?
flak monkey - 13/1/11 at 08:42 PM
quote:
Originally posted by scootz
"Thunderfire" starter... you've got to love those Americans!
What colour scheme are you thinking of for the bike David?
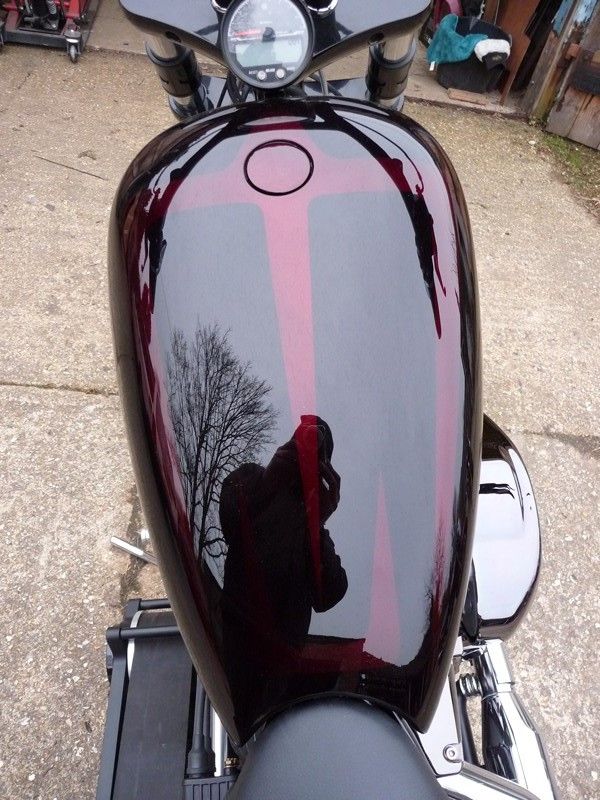
Errrr black...and chrome in various finishes. I have a couple of ideas for designs for the tank, but unsure yet.
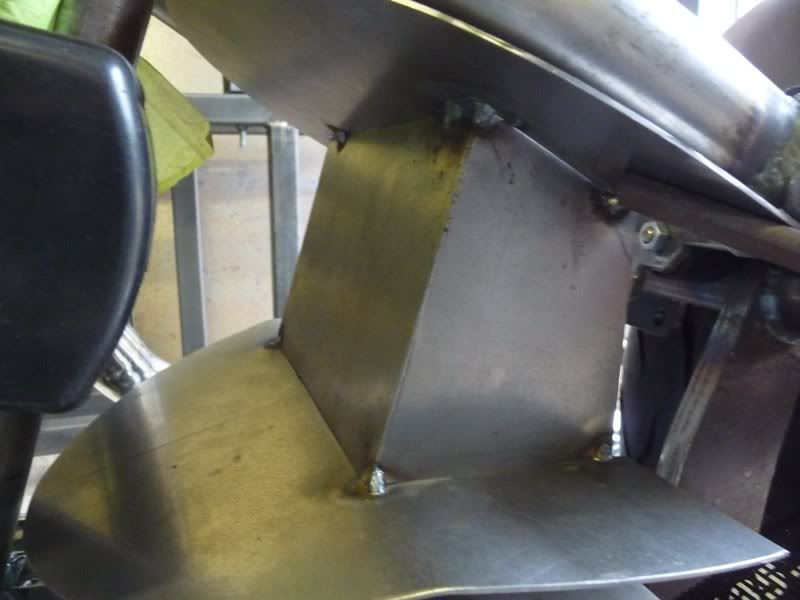
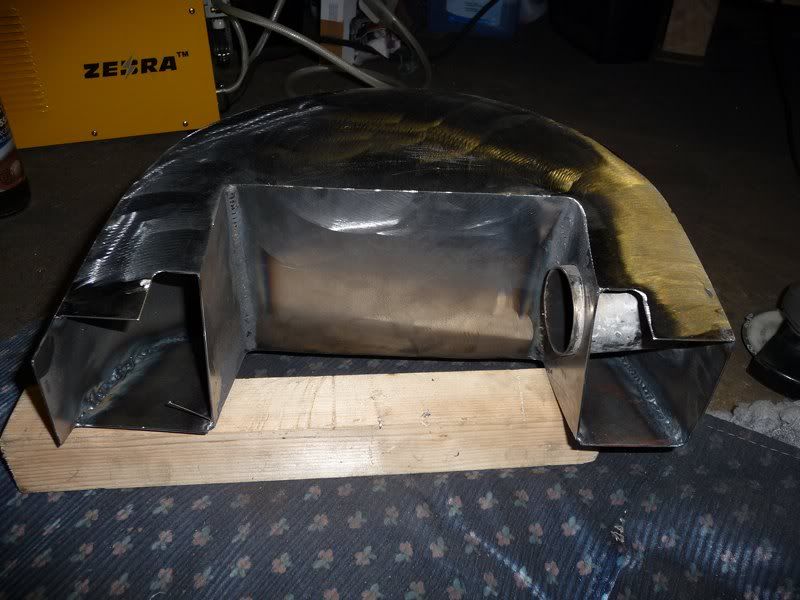
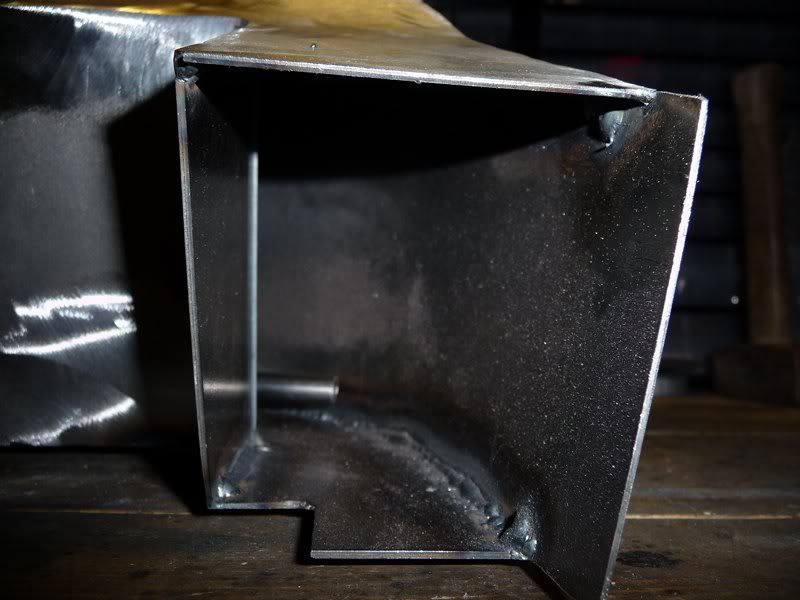
flak monkey - 15/1/11 at 07:27 PM
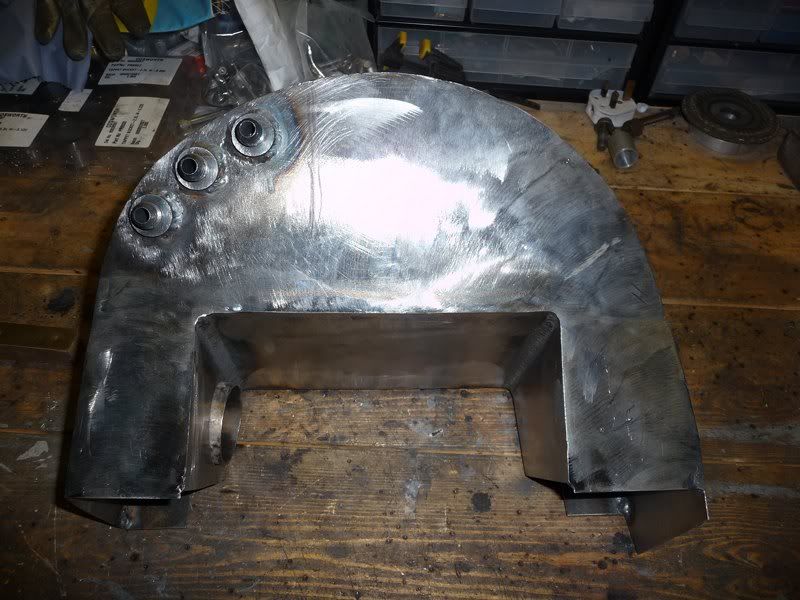
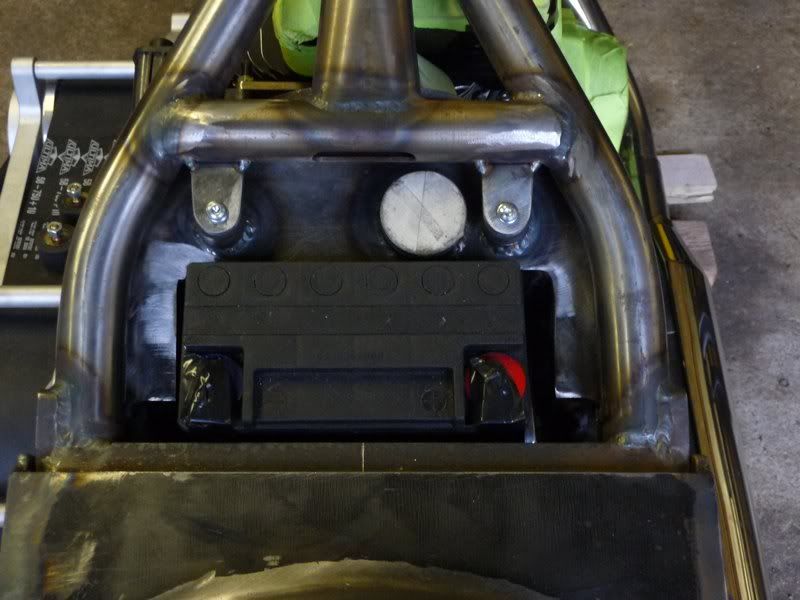
Been working on the oil tank for the past day and a half. Spent most of yesterday trying to decide how to mount the battery, and finally went with the
usual....
Made up some card templates to get the top and bottom plates the right shape. This took a couple of hours fiddling around yesterday. Trying to keep
everything as close fitting as possible as that was the whole point of making the tank rather than buying one.
Just two plates to close off the tank after the holes have been drilled for filler and take off/returns and the infill panels either side to match the
tank up with the frame.
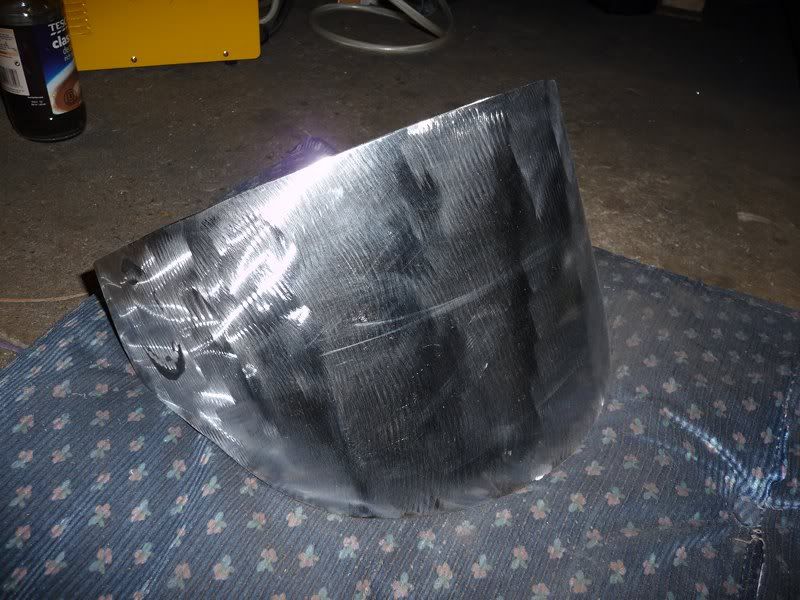
I dont have much sheet metal work experience, so its taken me all day to do the tank and I am pretty pleased with the results. The bulk of the
structure is 1.6mm sheet and the curved front is 1.2mm as it was easier to bend. Everything cut with plasma cutter or angry grinder and bent with
brute force and a lot of ignorance....
Top and bottom plates
First joining plate tacked in and finally it's supporting itself so I could set the angle of the bottom plate.
Add some sides:
I am going to put the ignition switch in the right side of the tank so I had to weld in a tube to allow the switch and wires to be threaded through.
Used a bit of 2" stainless I had laying around. Welded it to the front of the tank first and leak tested it prior to starting to weld the front
on.
Cut the front well oversize, tacked on the rest of the assembly and just rolled it round tacking as I went. Seemed to work quite well
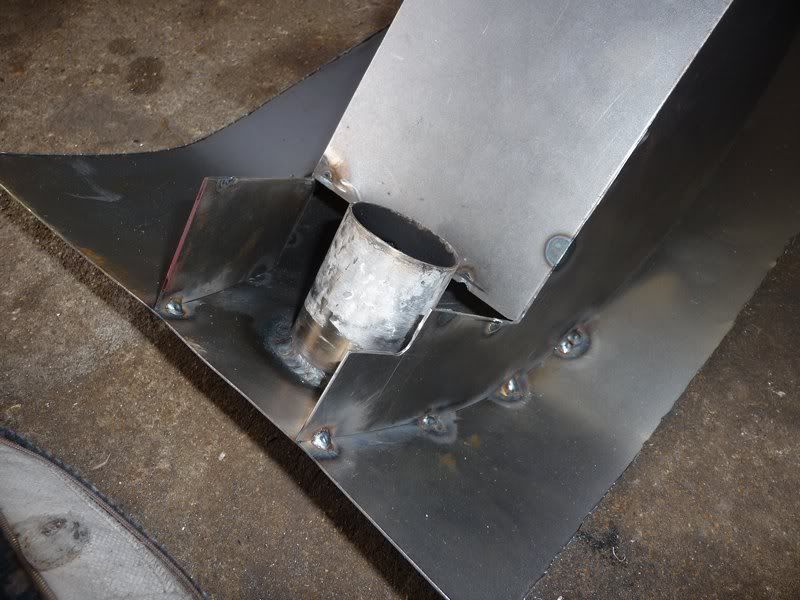
Cut the excess off and fully welded it all. Trimmed up with a softpad and this is how it turned out
And it still fits in the frame, which is a bonus...
Just needs a little P38 before paint where I welded the tube on the inside.
Tomorrow I'll be making the brackets for it so I can fix it into the frame before making the infill panels to match up with the frame plates. The
filler cap will be going under the seat, in the top of the tank.
Nice to do some sheet metal work for a change and found it quite good fun and only one minor burn all day has to be some kind of record for me...
[Edited on 15/1/11 by flak monkey]
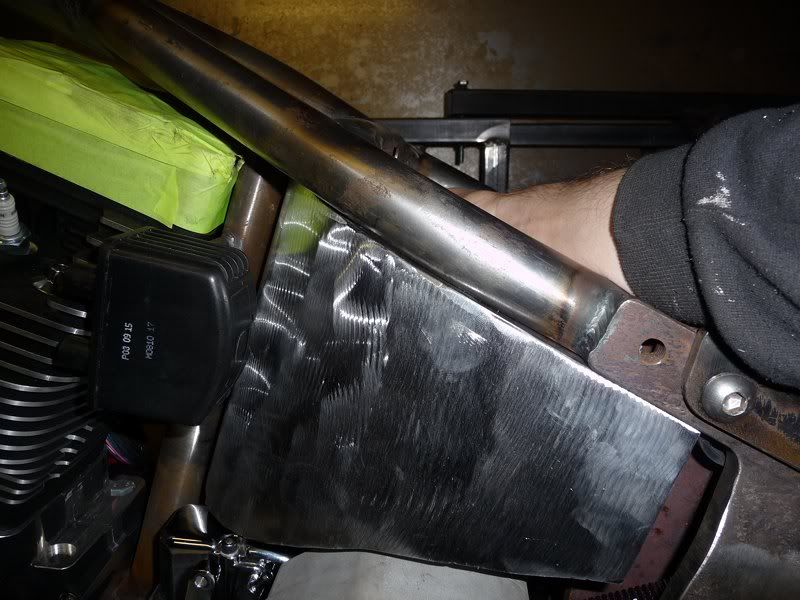
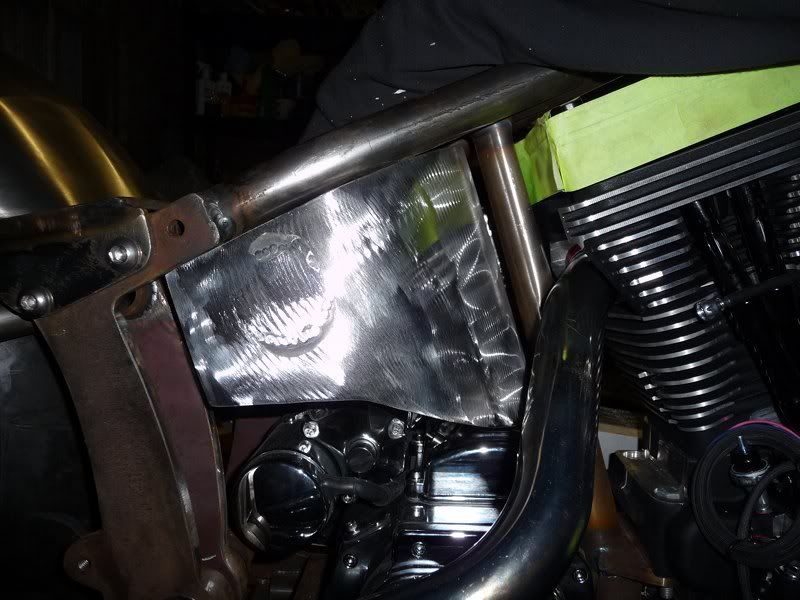
flak monkey - 16/1/11 at 05:38 PM
Didnt get an awful lot done today, spent much of the morning making bits for other people on the lathe but there we go, still squeezed in a couple of
hours on the bike.
Made up two bosses for the front mounting rubbers, had a rethink on the sort of mounts to use, so am waiting for those to arrive at the moment. Welded
them on the top of the tank, though I hate tigging around small bosses :x :x
Then started on the feed, return and breather connections. All the connectors are -6AN / JIC fittings, bought some steel weld on bungs for a couple of
quid each.
Return first - used some 10mm OD steel tube to make a pipe to go inside the tank. Idea being to promote oil circulation by dumping the returned oil on
the opposite side of the tank to the feed. Found that a small copper pipe bender was man enough for the job (just).
Then threaded into the tank and welded in, and this is where the pipe ended up inside the tank. Should allow a reasonable oil level hopefully.
Breather is similar, but more or less just a straight piece of pipe to the top of the tank. All 3 welded in on the bottom of the tank at the front
edge. From left to right, breather, feed and return. Knowing my luck the one the welds will leak on will be the breather inside the tank :roll:
Next job is to make a tank cap, which can be a job for next weekend. Its been a while since I did any thread cutting on the lathe, so no doubt there
will be some swearing eminating from the workshop!
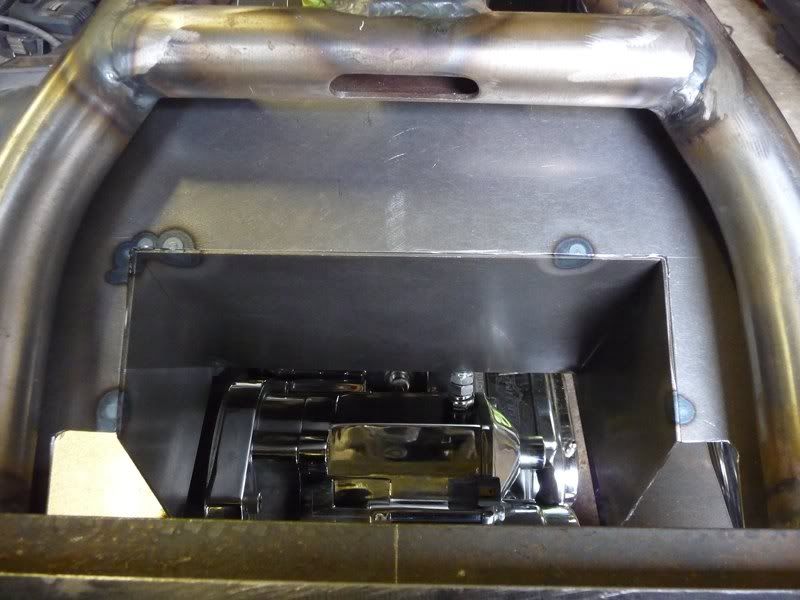
flak monkey - 23/1/11 at 05:42 PM
Time for another update....
I finally have the oil tank finished and mounted, with battery tray as well. I leak tested it with water this morning and found and fixed a few
pinholes. Once I have some oil line fittings I will pressure test it properly, which will be a job for next weekend.
Friday I turned myself a steel bung for the oil cap and a corresponding cap up out of aluminium.
Yesterday I set about finishing the main tank up and starting to make the brackets. This took a lot longer than expected, but I am happy with the
results. The front is mounted on 2 rubber bushes with male and female threads, hanging on 2 1/4" plate tabs welded to the frame. I'll fully
weld them once I have stripped the bike again
The back hangs from a piece of 5mm thick 30mm angle bolted to the frame mount. The corresponding mounts on the tank are part of the battery support
which was all made out of 1/8" plate. Again it hangs on rubber mounts. The tank mounting took as long, if not longer than fabricating the tank
itself :lol:
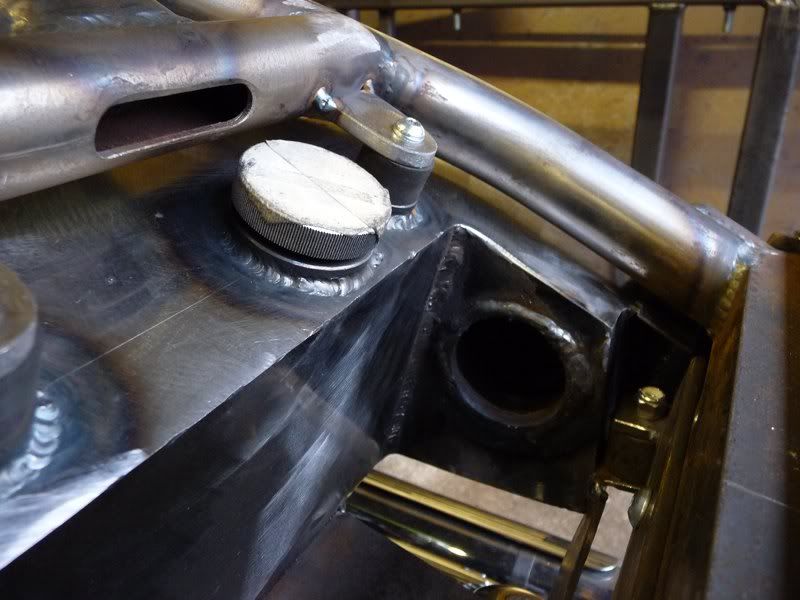
Dropped the battery in and it looks like it will sit comfortably under the seat pan, and there is room for some foam padding too to stop it rattling
around.
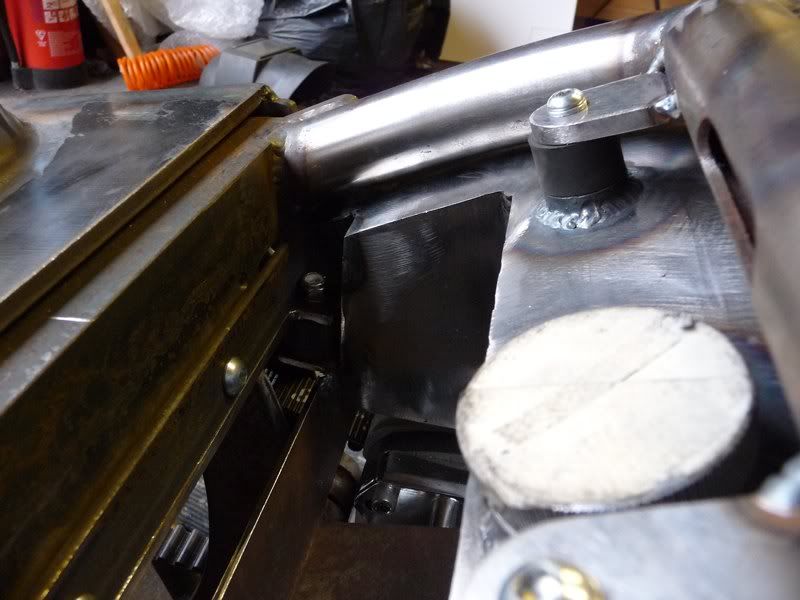
Last job today was make the finishing pieces for the sides of the tank so it matches up with the frame both sides. The right side was easy as its a
flat piece just welded on
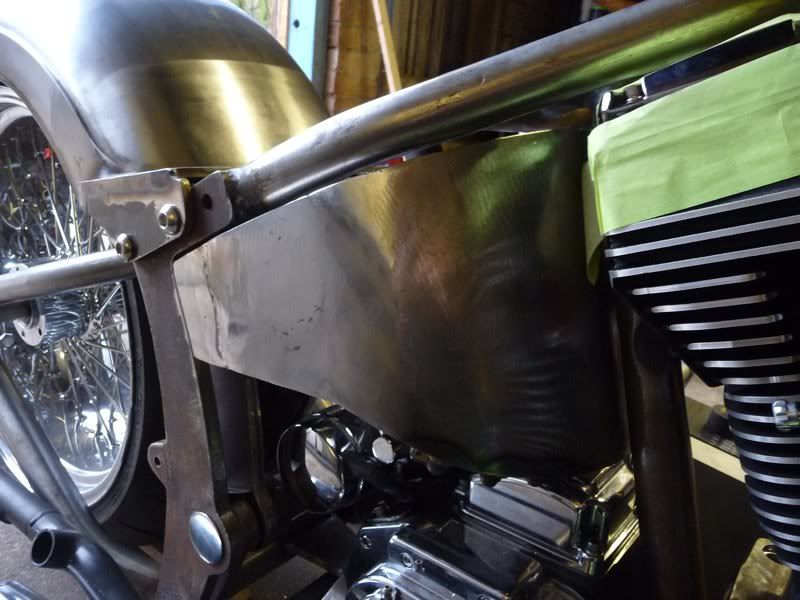
The left side was a little more tricky as it needed a compound curve for a smooth transistion between the side of the tank and the frame. Nothing a
hammer, some bits of pipe and some swearing didnt sort out though

And thats pretty much where I have left it for now. Once its pressure tested it will be finally finished.
Next job is make a number plate bracket for the back to also hold my rear lights. The lights will stay in the same position after SVA, but the plate
will be moved to side mount. I'll also be getting the fuel tank on order next week after getting paid...
Finally this is how it currently looks
jacko - 23/1/11 at 05:57 PM
Fantastic work David
It's just like Orange County Choppers but BETTER
stevebubs - 23/1/11 at 06:11 PM
Looking good..parafin is better to use than water if looking for leaks...it squeezes through smaller holes....
flak monkey - 23/1/11 at 06:18 PM
quote:
Originally posted by stevebubs
Looking good..parafin is better to use than water if looking for leaks...it squeezes through smaller holes....
Yep, thanks Its also more flammable
I will be pumping the tank up to around 1 bar pressure and looking for leaks that way first then fill with some sort of liquid and pressurise again to
double check.
All good fun....
dlatch - 24/1/11 at 12:51 AM
superb work really enjoying following the build
flak monkey - 24/1/11 at 09:16 PM
quote:
Originally posted by dlatch
superb work really enjoying following the build
Thanks
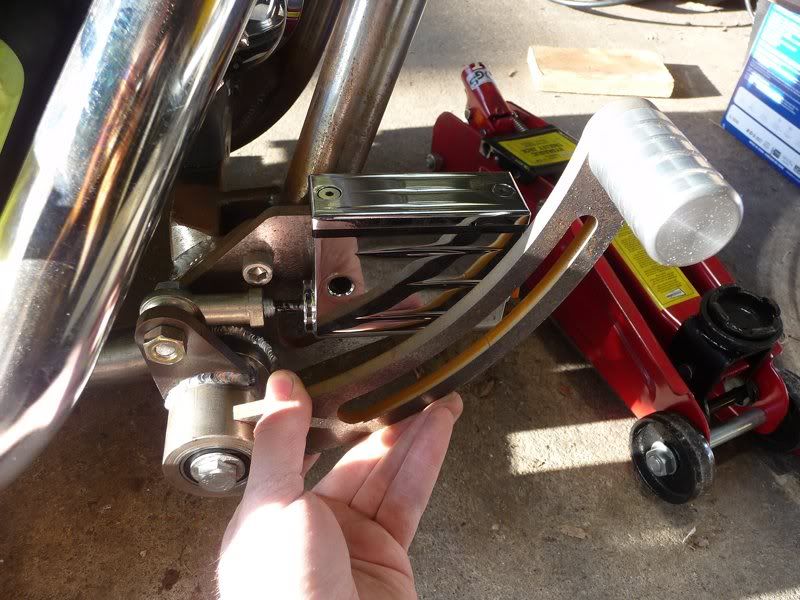
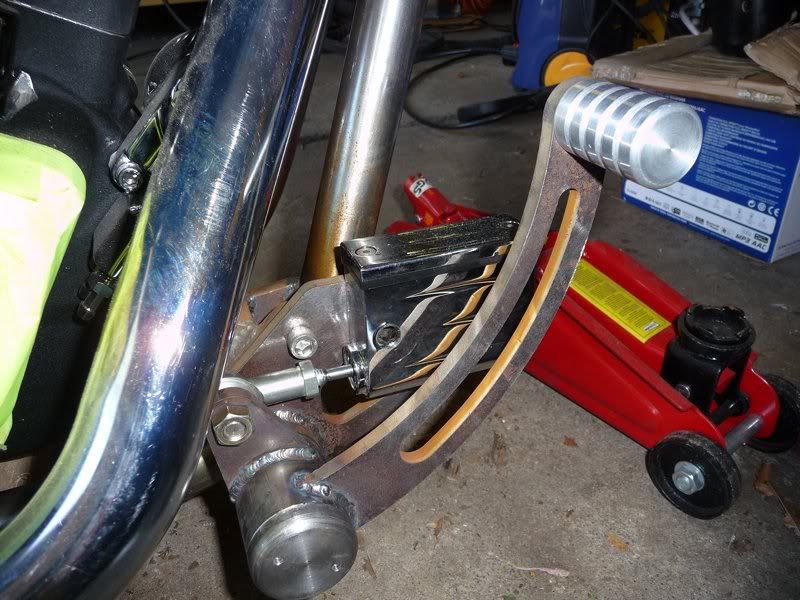
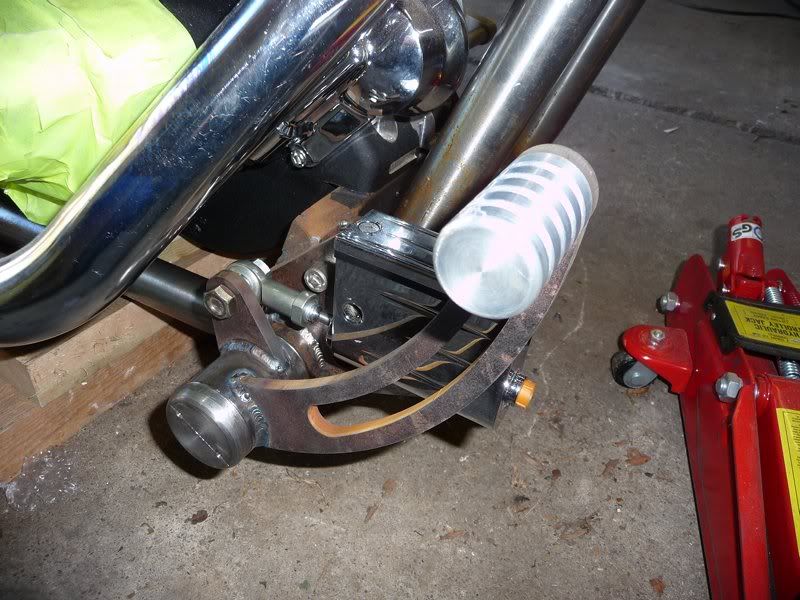
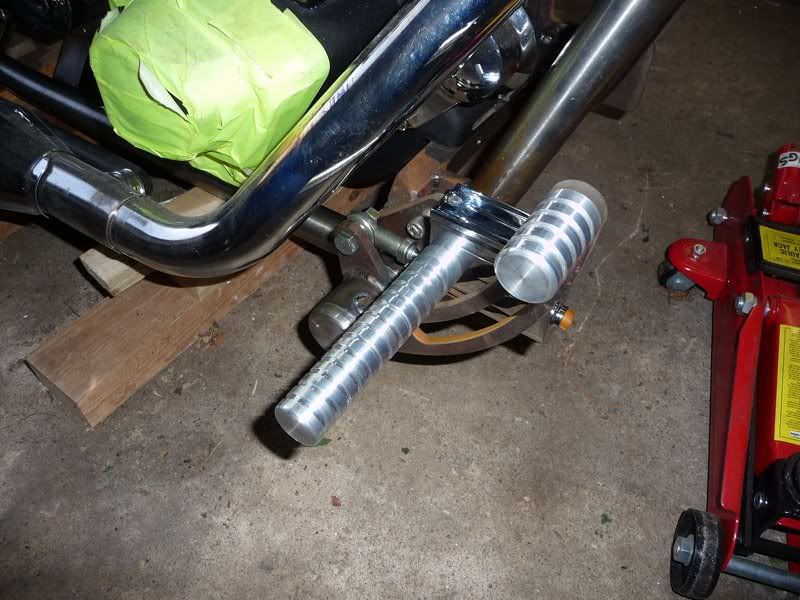
flak monkey - 3/4/11 at 08:01 PM
Bloody hell its been nearly 2 months since I had any time to do some work on this thing!
The DIY on the house is pretty much done now, so I snuck out to do some more this afternoon.
Set about making a start on the forward controls this afternoon. I had most of the parts water jet cut a while back, and the first job was to drill
the back plates
Which ended up giving m an injury! I really must get a bigger machine vice!
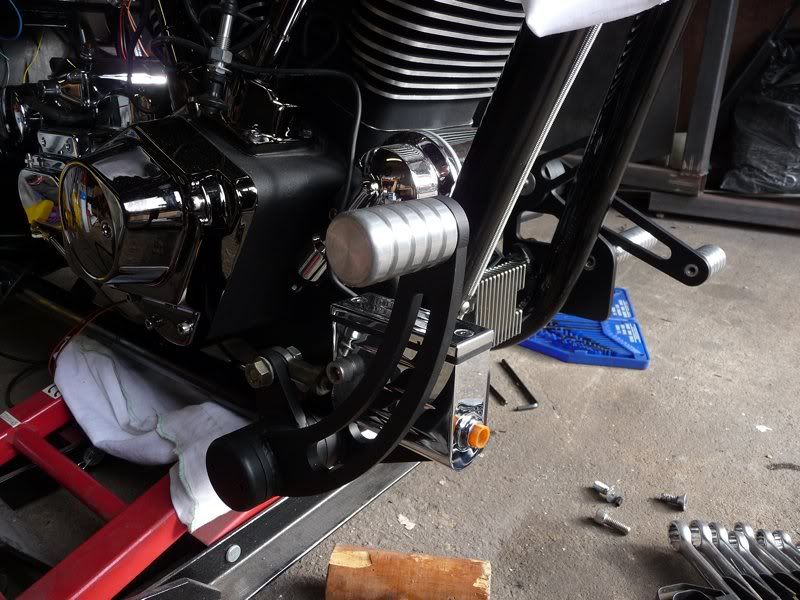
Also gave me a proper chance to try out the positions of the foot pegs and it looks like its all worked out ok.
Tried the side stand as well, its going to need some modification or its going to hit the primary drive belt when its folded up.
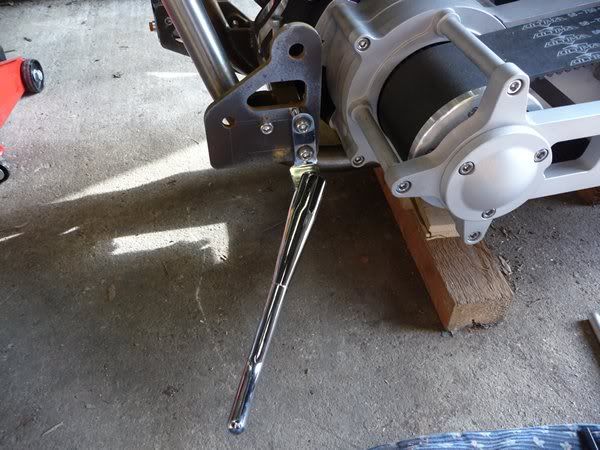
Next I'll be turning all the pivot parts for the forwards and pressure testing the oil tank.
Hopefully my fuel tank will arrive before the end of the month as I have some holiday coming up where I am hoping to finish off most of the assembly
and fabrication.
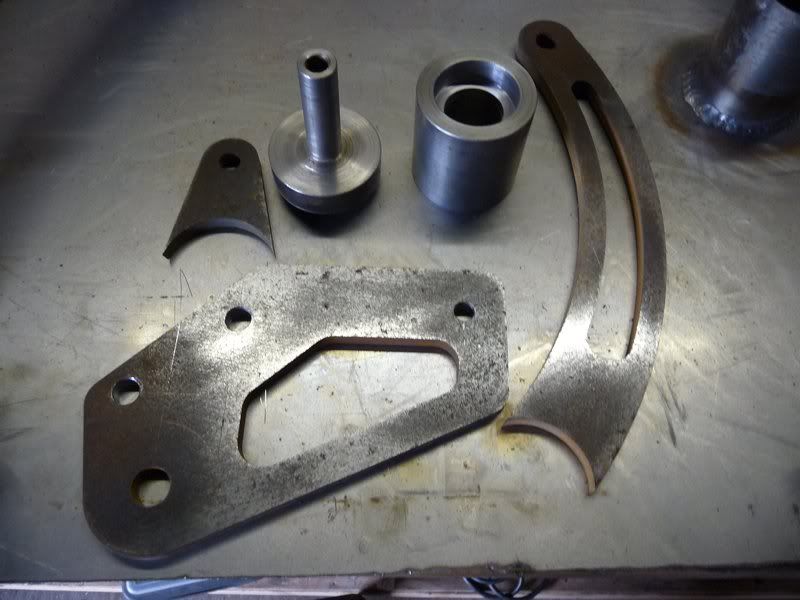
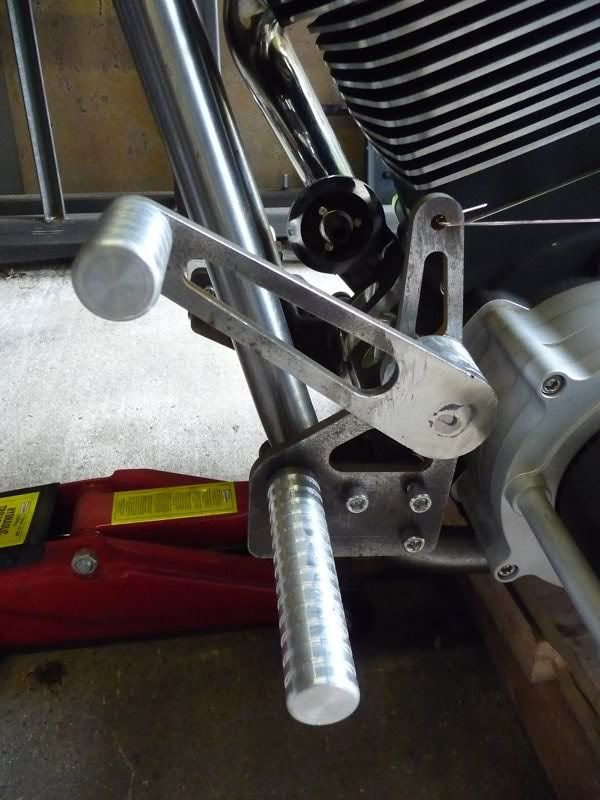
flak monkey - 27/4/11 at 06:46 PM
Got the rest of the bits made for the forward controls, and welded some of it together. I think if I were doing it again I would have made the
forwards themselves from aluminium as well. But there we go.
All the pivots are on 2 sealed ball bearings, so its all nice and smooth
Bits for the left side:
Bits for the right side:
Turned the 2 pegs for the levers, run out of material to make the foot pegs...typical!
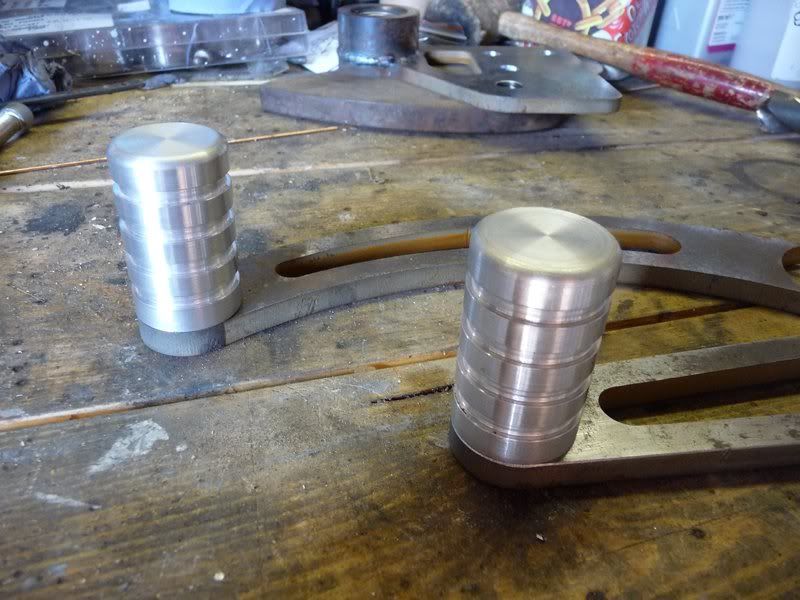
Made up a pushrod for the rear master cylinder and had a bit of a play around getting the alignment right. All seems to work now, will require some
creativity to make the pegs level again. Nothing that cant be solved though
And now its coming together. Once I get the footpegs made I can finally weld the lever on.
Obviously the bolts are going to be changed, and theres a proper end cap to go on rather than a bolt and washer :lol:
SeaBass - 27/4/11 at 07:12 PM
Wow - how did I miss this one.... I know nothing about bikes but love this type of machine and get a rare thrill flicking through Back Street Heroes
in WH Smith every now and again.
Great project and your making such a good job of it!
James
matt.c - 27/4/11 at 08:37 PM
I cant wait till rolls up my road!!!
My neighbours are going to have heart attacks lol
Everything you do is always perfect, puts my work to shame.
flak monkey - 2/5/11 at 05:57 PM
Finished the brake/right side forward off this morning. Actually happy with the results of my TIG welding for a change, the practice is paying off
slowly. :lol:
ch1ll1 - 2/5/11 at 06:32 PM
wow, that looks great,
not been on here for along time
been doing what you have, building bikes,
hope it goes well !
just a quick one, that stand is going to be a real pain in the arse ( mines the same but with no openbelt )
i end up leaning over and pull it out ( not cool )
paul
[Edited on 2/5/11 by ch1ll1]
ch1ll1 - 2/5/11 at 06:41 PM

rev-tec engine


Uploaded with ImageShack.us
Uploaded with ImageShack.us
s&s engine
[Edited on 2/5/11 by ch1ll1]
big_wasa - 2/5/11 at 06:45 PM
Months since I had a read of this Your Tig has come on well. Just wish I had the time to sit and practice mine,
flak monkey - 2/5/11 at 06:52 PM
Nice bikes Paul. Like the second one.
Thanks Warren. Getting there
flak monkey - 3/5/11 at 07:57 PM
Finished the pegs off.
Man is this thing going to be a comfy ride
Just to finish off some milling for the gear shifter now
perksy - 3/5/11 at 08:22 PM
Enjoying this
Keep up the Good work
David Jenkins - 3/5/11 at 09:35 PM
It looks impressive!
Just one question - not trying to be all negative or whatever - but maybe those alloy foot-pegs are going to look scuffed very quickly?
Perhaps stainless would be more durable...
flak monkey - 4/5/11 at 06:58 AM
quote:
Originally posted by David Jenkins
It looks impressive!
Just one question - not trying to be all negative or whatever - but maybe those alloy foot-pegs are going to look scuffed very quickly?
Perhaps stainless would be more durable...
Thanks David. Going to be getting them hard anodised (clear) then the grooves black paint or powdercoat to match the engine casing
Well thats the plan anyway
I thought about making them from stainless, but thought the chances of me scraping them on a corner are pretty high anyway. Easy to replace or change
at a later date should I want to
MikeCapon - 4/5/11 at 07:35 AM
quote:
Originally posted by flak monkey
Thanks David. Going to be getting them hard anodised (clear) then the grooves black paint or powdercoat to match the engine casing
Well thats the plan anyway
Hi David,
Hard anodising will not come out clear. Generally a bronze/brown or grey colour. Talk to your anodiser first. As far as I know then only
'clear' or natural finish you'll find is ordinary decorative anodising.
About filling in the grooves black. In the past I've made similar footrests and fitted some fat section O rings into the grooves. Result is a
nice colour contrast plus a non slip footpeg.
Knowing your fascination for black finishes I have recently had some black chrome done which may interest you. The base is a reasonably thick coat of
electrolytic nickel, followed by a few microns of black chrome.
In terms of hardness, colour depth and consistency and corrosion resistance this is an excellent finish. The only thing it may lack for you is gloss.
The finish is a very nice (IMO) satin. Oh and it's not dear either. Which is nice. I can post some pics if you want...
Cheers,
Mike
flak monkey - 4/5/11 at 10:30 AM
Thanks Mike. I contacted several companies, none of whom were even remotely interested in black chroming parts for me. If you have a contact for a
company that can do it, I would really appreciate it.
I really want black nickel plating to match the engine covers, but again I can't find anyone to do it!
MikeCapon - 4/5/11 at 11:08 AM
Hi David,
These guys did my last batch of stuff. Their workshop etc is not pretty to look at and they are typical old school platers.
Northampton + Midland
They do do one off stuff though. I saw a roll hoop there last time I visited. They also do stuff for EBC.
HTH
Mike
ET correct messed up linky
[Edited on 4/5/11 by MikeCapon]
flak monkey - 4/5/11 at 01:08 PM
Thanks Mike, I have been in touch with them before and they said they couldnt plate aluminium parts...
So back to square one!
flak monkey - 6/5/11 at 08:02 PM
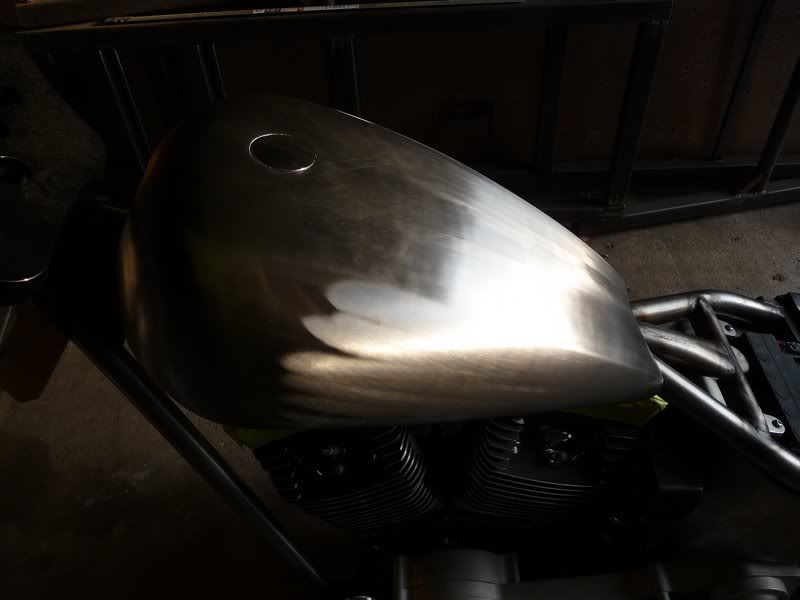
The fuel tank has finally arrived after 5 months....
Popped it on the frame and thanks fully it fitted pretty well...then came the puzzle of how to level and set it central with nothing to measure from
other than curved surfaces. All good fun.
Once I had it positioned, with a few pieces of rubber hose as spacers, I cut up the mounts and tacked them on. The removed the tank and spacer bits,
then put it back to make sure it all cleared the frame as expected.
Didn't take very long really. Next job is the bars....
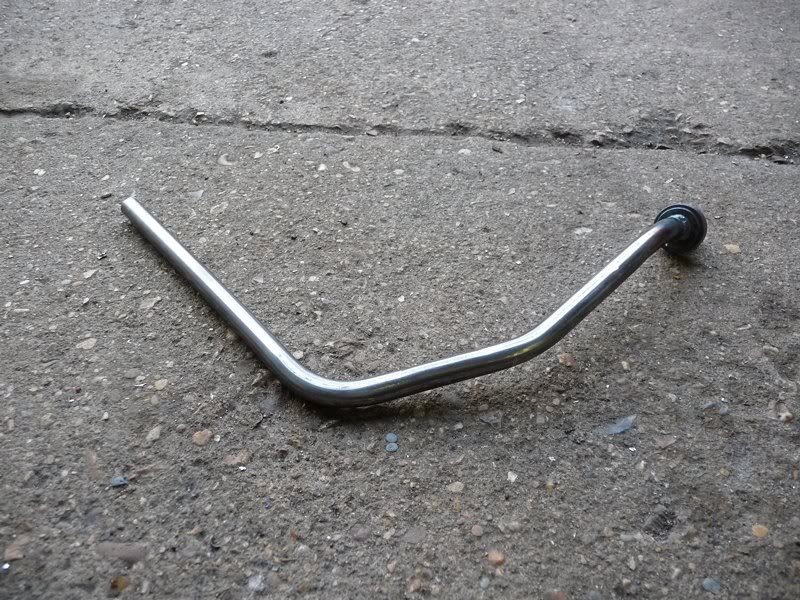
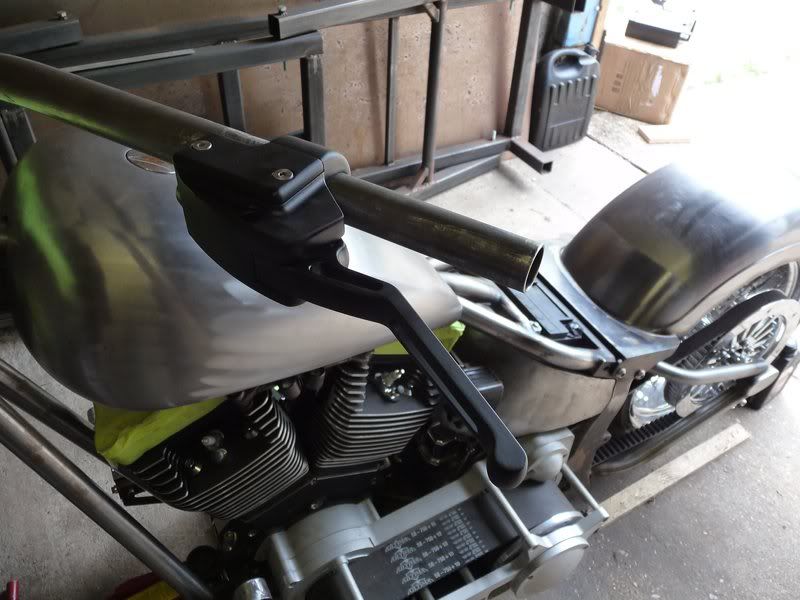
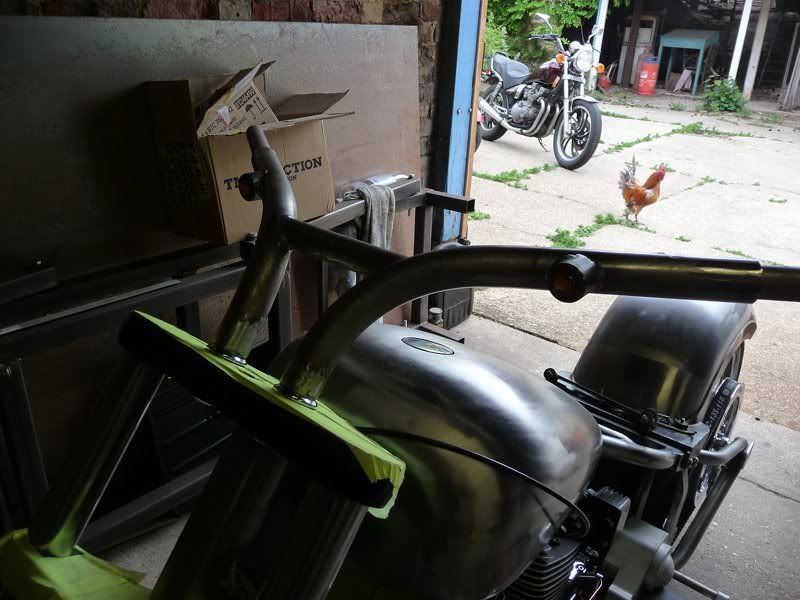
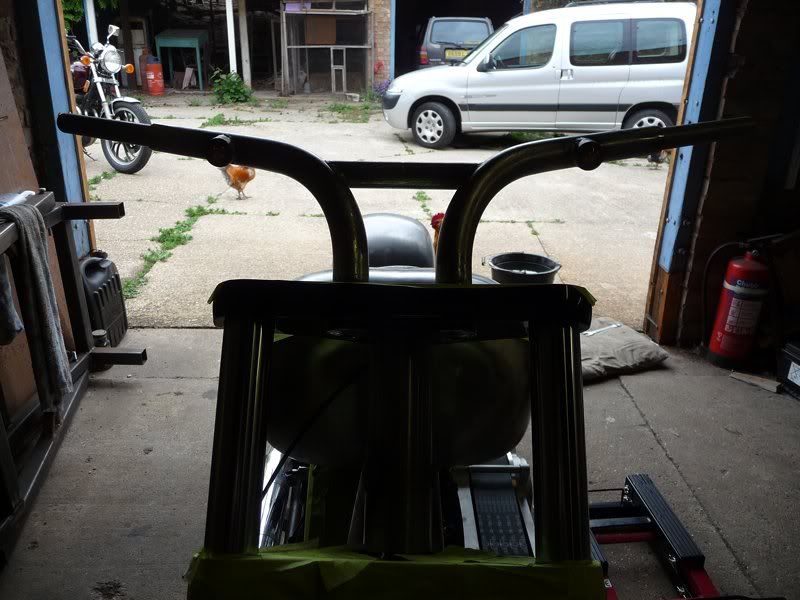
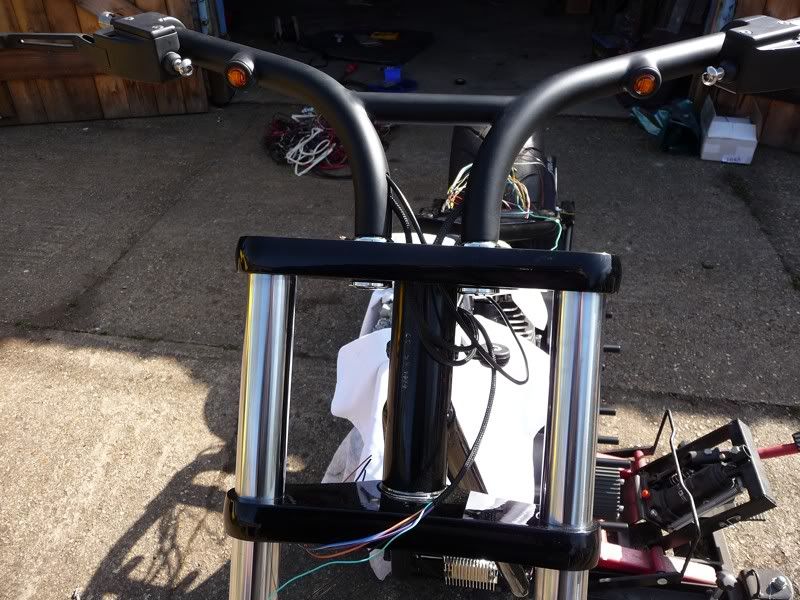
flak monkey - 7/5/11 at 05:42 PM
Mocked up some bars today, just to test out the idea. Need to get some proper tube bent up, but we have about 1 tonne (literally) of this white
1.25" tube laying about, so thought it was worth a test. The final bars will be 1.25" seamless...
Going to lose about another 3" off the end of each bar and increase the bend angle to 85-90deg. They aren't as wonky as they look in the pic
as the forks arent set straight, but then its only to get a rough idea :roll:
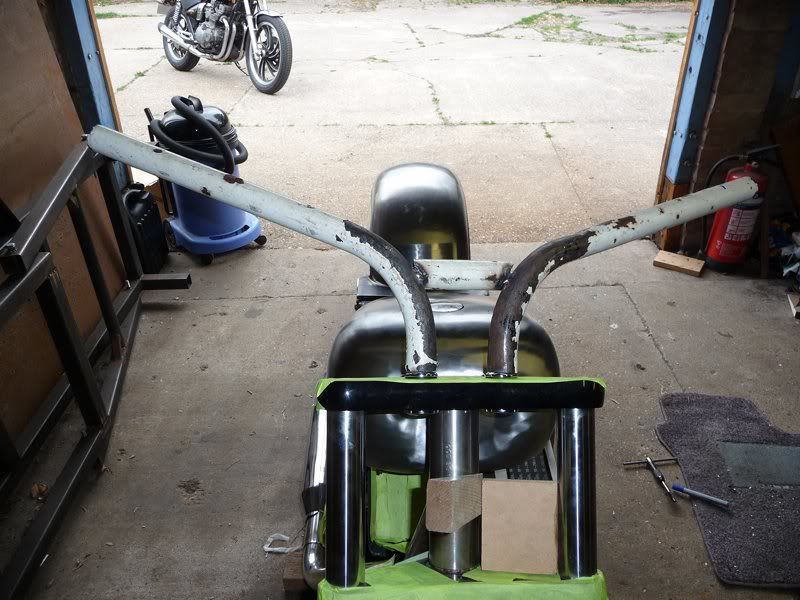
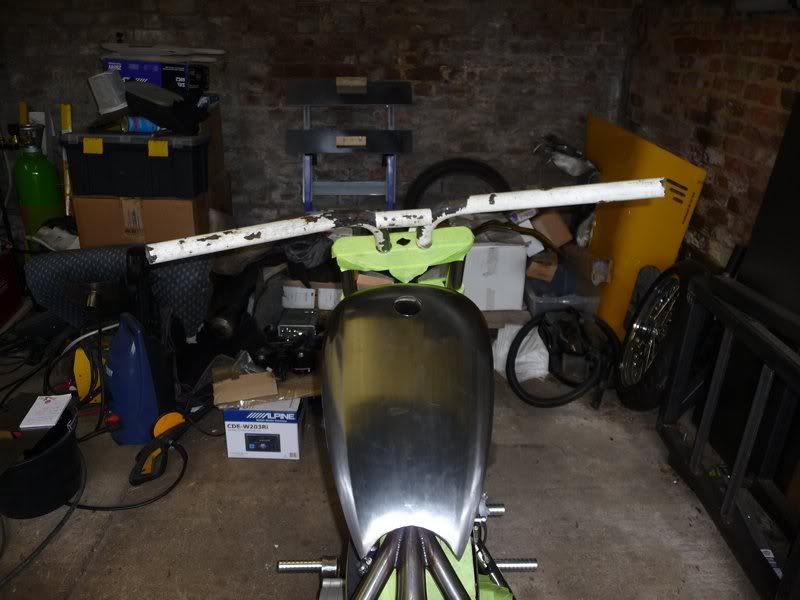
They should make it nice and easy to run the internal cables and hydraulics too :lol:
They were bent with one of those cheapo Clarke benders (die fits perfectly), but I wont be using that for the proper ones.
[Edited on 7/5/11 by flak monkey]
flak monkey - 15/5/11 at 03:01 PM
Got the bars done, well I might narrow them by 80mm OA, but thats easy... Went to see Briz on Friday to get the tube bent, then back home to chop them
up and weld together.
Lots of fiddling to make sure the bars were exactly the same, measuring, checking and rechecking. In the end it took all day to get them cut and
welded up but they are symmetrical within 1mm...so I am pleased with the result. They are 1.25" seamless tube with 1" tubes plug welded in
each end for the controls.
Still need to drill all the holes in them for the wiring and internal throttle.
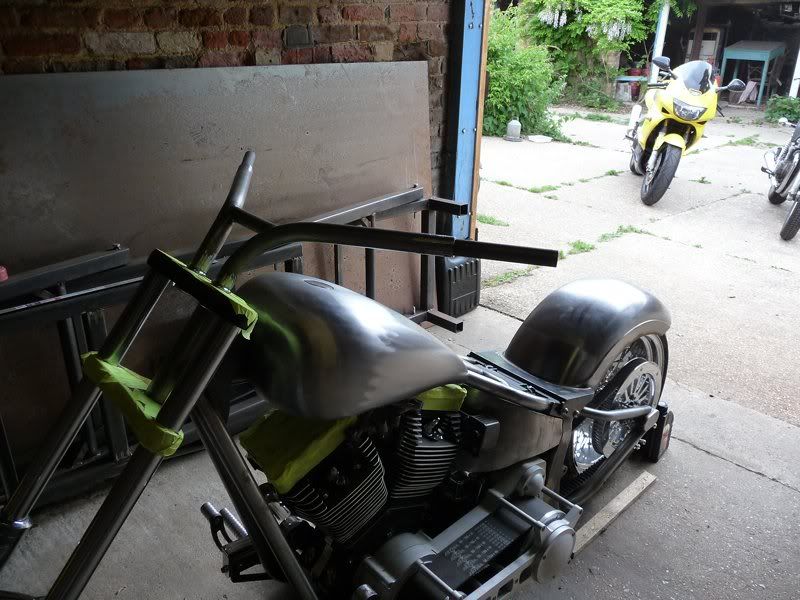
The reason I might have to shorten them is I made the mistake of not checking how the controls would fit, the grip wont actually sit up against the
outside edge of them or the lever is in completely the wrong place, so looks like I will be making up a couple of spacers as well. Not a major problem
by all accounts though.
Also finished off the gear selector (I know the linkage might not be up to the job! ) Hopefully the angle is about right.
And so its starting to look like a bike, major fabrication finished off more or less, now lots of fiddly little things like drilling holes in the
frame... for the wiring and hydraulics etc.
Confused but excited. - 15/5/11 at 04:23 PM
Ooo, it's looking good David.
Try these people for your black nickel plating; http://www.macrodevelopments.co.uk/blacknickel.htm
They reckon they can plate onto any metal.
HTH. John.
flak monkey - 15/5/11 at 04:29 PM
Thanks John, funny enough I have been talking to macro developments last week, need to send some photos of the parts over that I want plating to get a
price.
Stuart_B - 15/5/11 at 06:37 PM
that is very nice
stu
flak monkey - 28/5/11 at 06:22 PM
Cheers
Getting there slowly. Now its got eyes....
Made the front indicator mounts this morning, turned up a couple of bosses chopped them up, spent ages making sure they were level and welded them to
the bars. Sorry about the dodgy pics :lol:
Also made the template for the splash guard and and fitted the studs for the numberplate bracket.
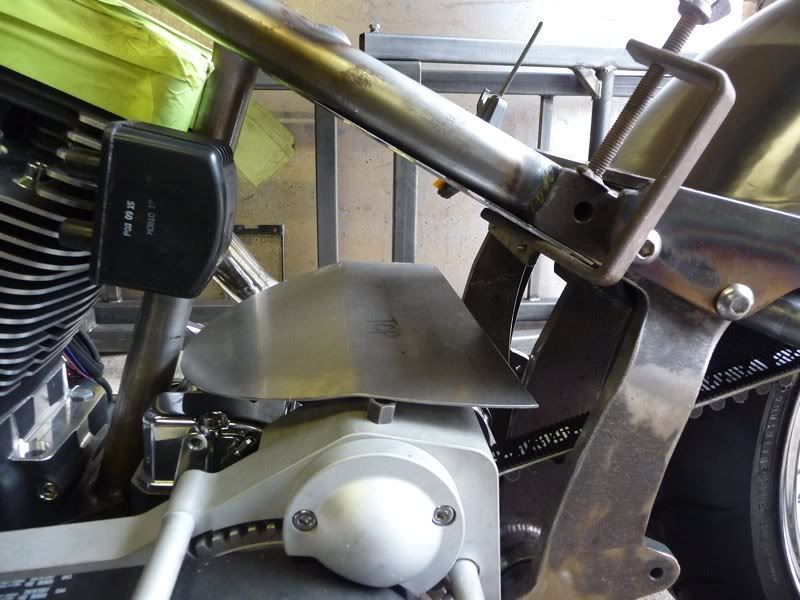
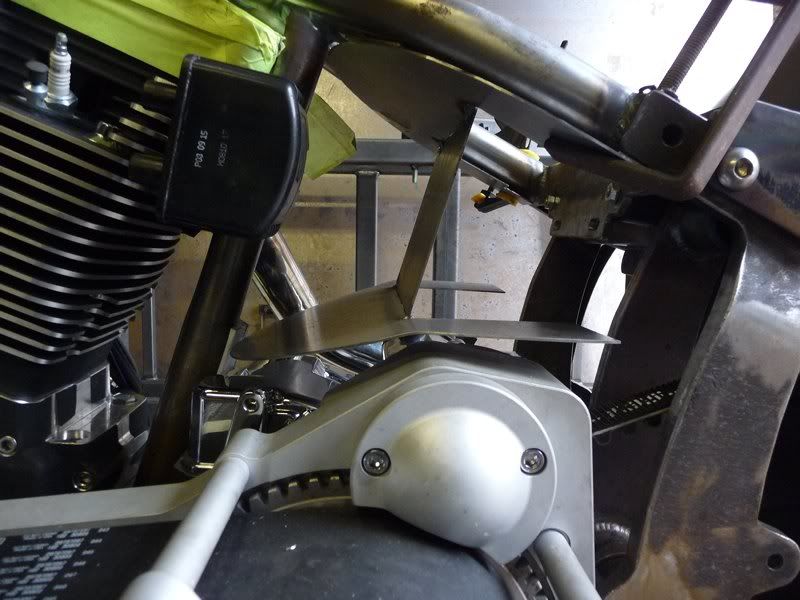
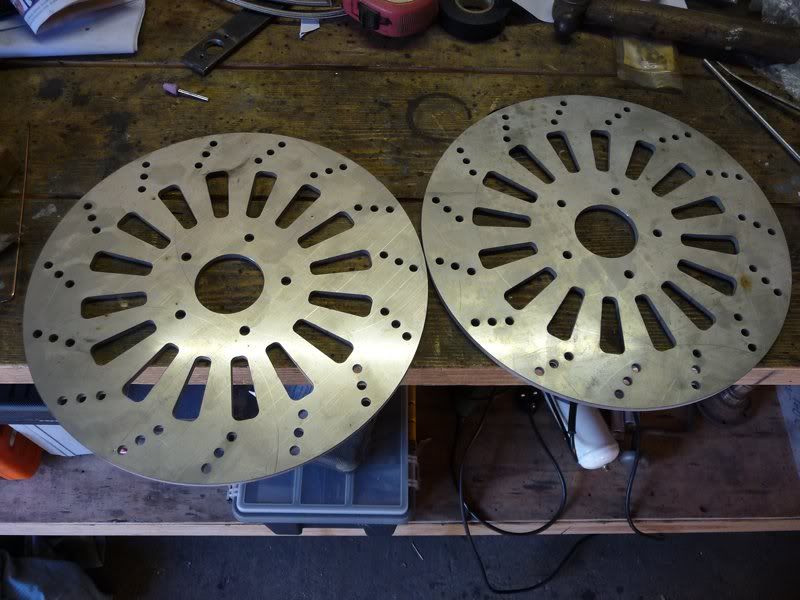
flak monkey - 4/6/11 at 06:02 PM
I have a distinct lack of motivation at the moment, unsure why. But things still continue to progress.
I recieved some more parts from the water jet cutter yesterday, including the brake discs I drew up. Looks like they will fit OK, just need to check
the run out and have them surface ground if necessary. They were cut from 5mm stainless plate.
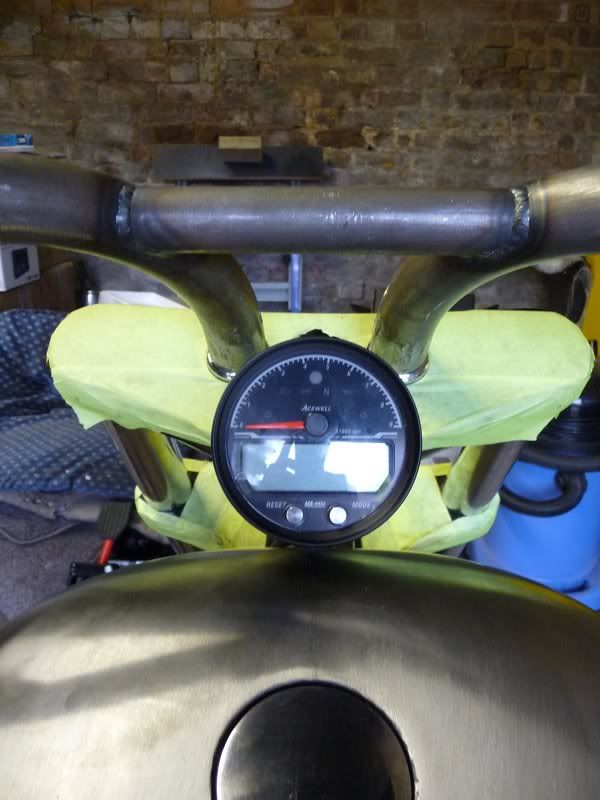
The instrument/dash thing arrived as well.
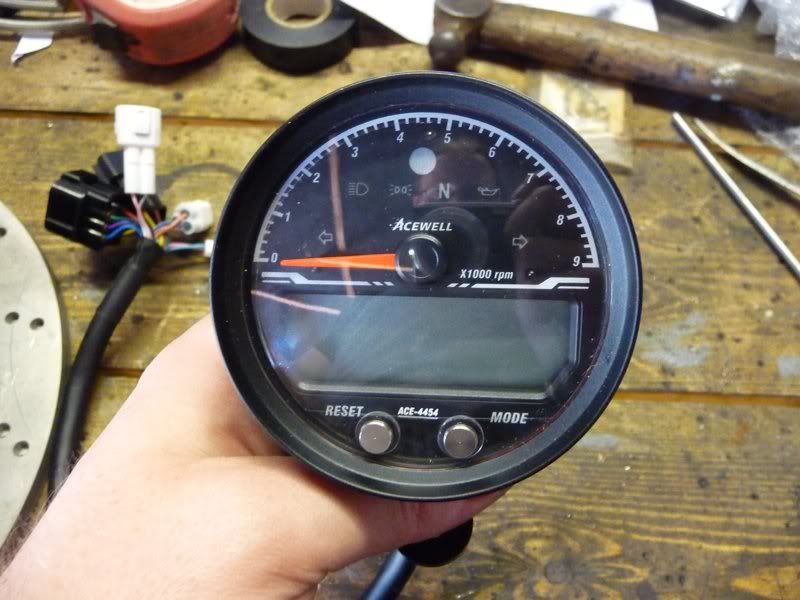
Theres a cunning plan brewing to mount it to the tank, which I have been swearing about today. Its a nice neat unit, but the built in mounting
facilities/choice is limiting. Anyway, hoping to get the mount finished tomorrow and then I'll put some more pics up.
And that stupid legal requirement about having a space for a number plate...so there we go. Another bit of 1.5mm stainless, the rear lights will also
be attached when I remember to get some stainless TIG welding rods.
So jobs for tomorrow, finish the instrument pod mount and then start on the seat pan. Oh and the paint design is almost finalised, though that will
remain a relative suprise 8)
Once thats done I think I am pretty much there with pre-assembly, and its ready to come apart, have various brackets attached properly and the holes
drilled for the internal cables etc. Then its going to be a couple of months waiting for some money to get it finished off.
flak monkey - 5/6/11 at 07:09 PM
Spent most of the day laying under a Volvo welding patches on the floor...spatter in the ear hurts!
In the remaining time I manged to get the instruments mounted to the tank. Its going to have a bit of fettling yet. I am hoping that with the tank
being rubber mounted its going to keep the vibration down on the instrument pod a bit.

flak monkey - 8/6/11 at 09:00 PM
Been meaning to make a seat pan for a while. Never done one before, so was a bit of trial and error.
Cut out a card template and made sure it was symmetrical
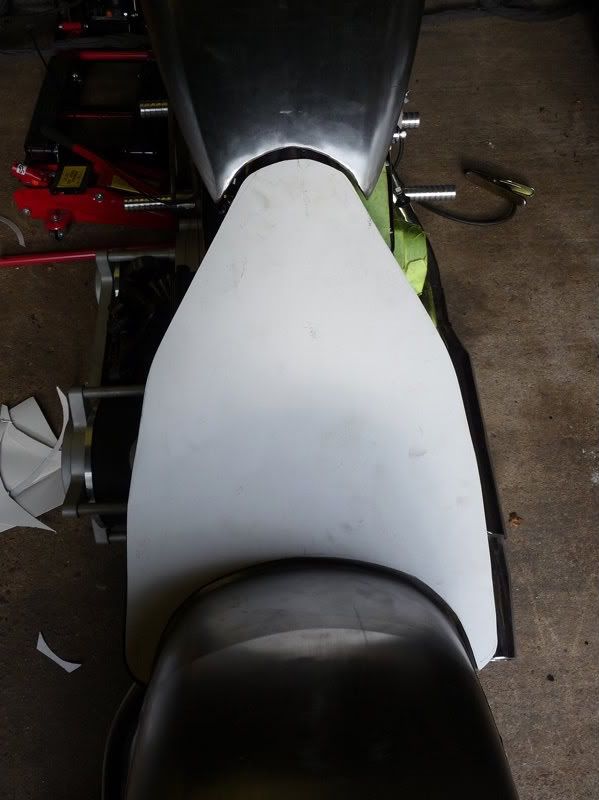
Then cut it out from 1.6mm steel sheet and started to whack some shape into it. Making it up as I go along as I don't normally do any sheet
metal...
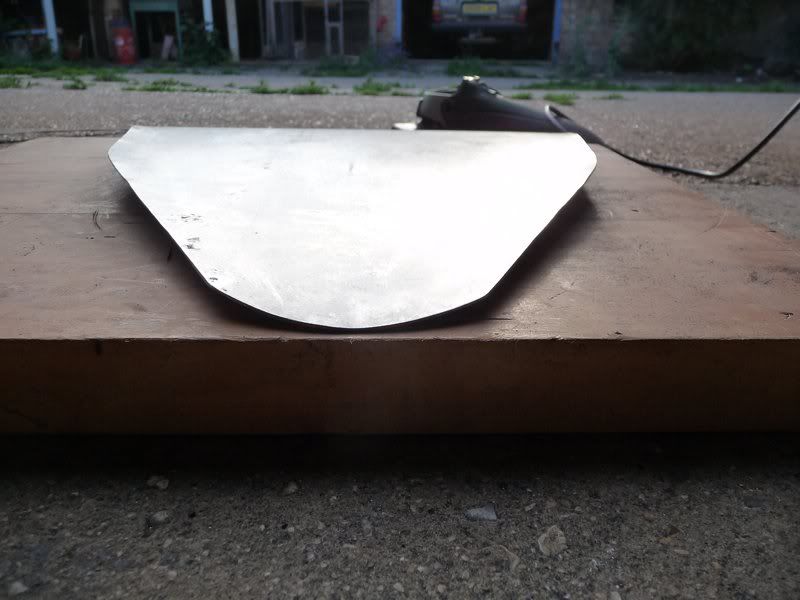
So its fits the frame properly
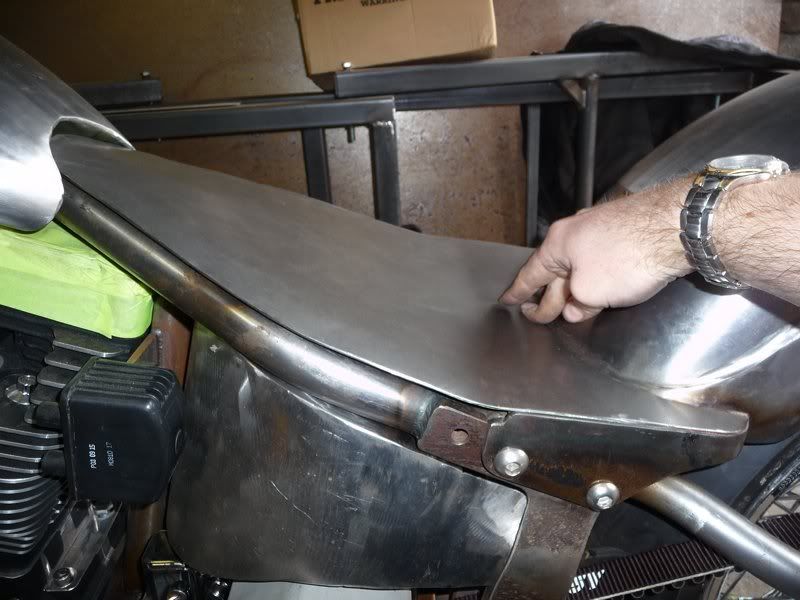
The cut a back out and beat it with a big stick until it fitted the pan and mudguard.
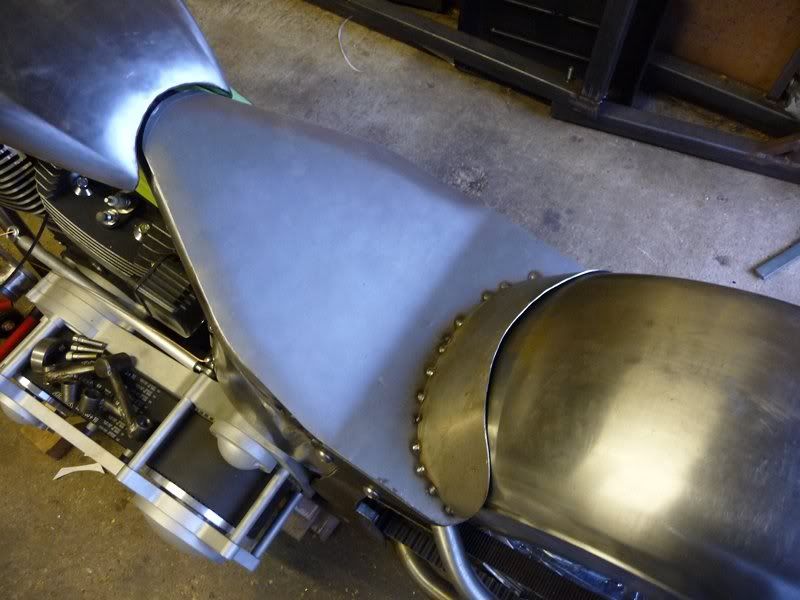
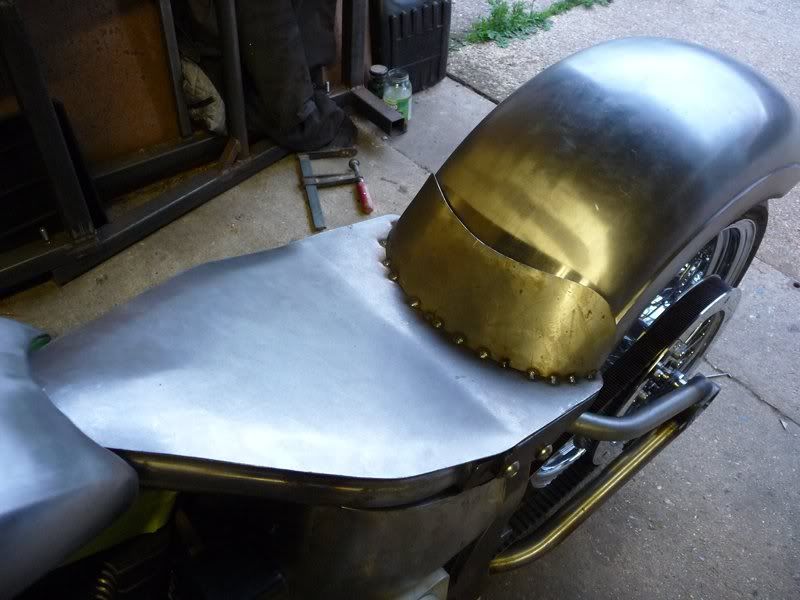
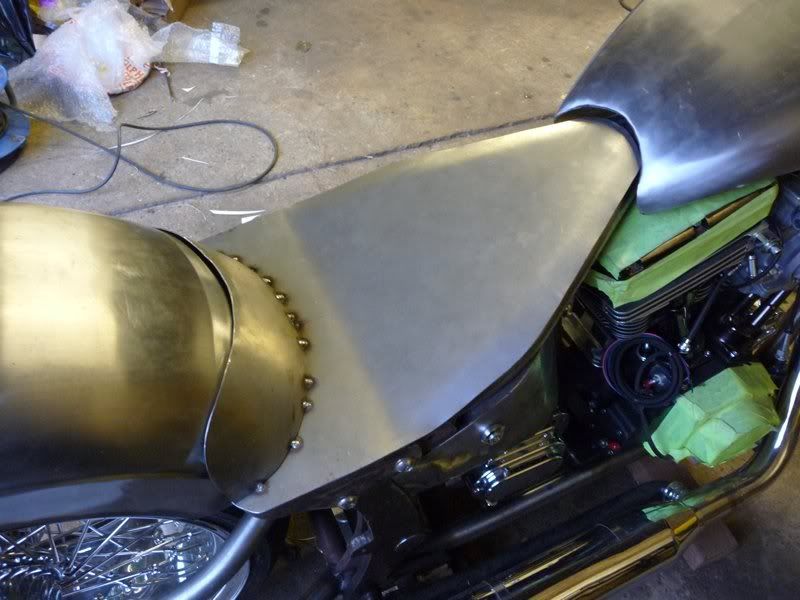
Just need to make the brackets, weld in a stiffening plate and fully weld it all. A job for tomorrow
Already have upholstery planned, just need to finish a few more bits.
Miks15 - 19/7/11 at 02:07 PM
Any new updates David? interested to see how shes looking now!
flak monkey - 25/2/12 at 05:50 PM
Been a while since I updated this, so suppose I should.
Everything is back apart again and is being prepped for paint. Having a go at most of it myself, because you don't know if you dont try. Spent
�320 on 2k paint and primer, so its an expensive experiment
Finished the filler off on the tins today, so primer and more prep tomorrow if the weather is good enough. Otherwise I'll be doing some final
welding of brackets on the frame so I can get it blasted ready for paint.
flak monkey - 26/2/12 at 07:04 PM
First paint thrown, epoxy primer followed by 2k filler.

Just need to flat it all off and sort any remaining issues then its ready for some top coat. Its been baking in my shed all afternoon infront of the
woodburner
[Edited on 26/2/12 by flak monkey]
Peteff - 26/2/12 at 07:29 PM
Don't hide the back tyre with the numberplate for crying out loud and does the front pipe run down the side of the foot rest, it's going to
get hot in your right boot if it does.
flak monkey - 26/2/12 at 09:32 PM
Plates not staying there, needs to be there for the MSVA test though Either that or I'll change it for a smaller one.
I need to get around to making my proper exhaust up as well. No rush for that though will just run it on open headers after the test until I get my
own pipes made up.
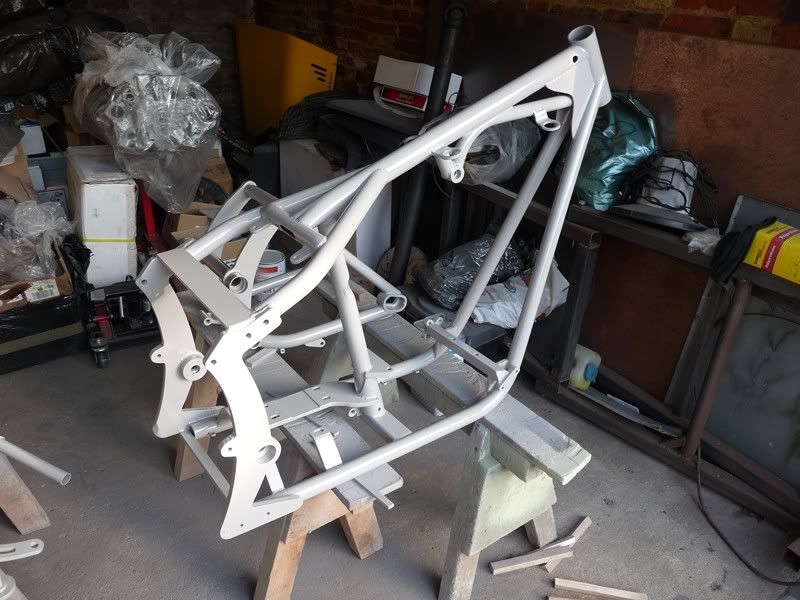
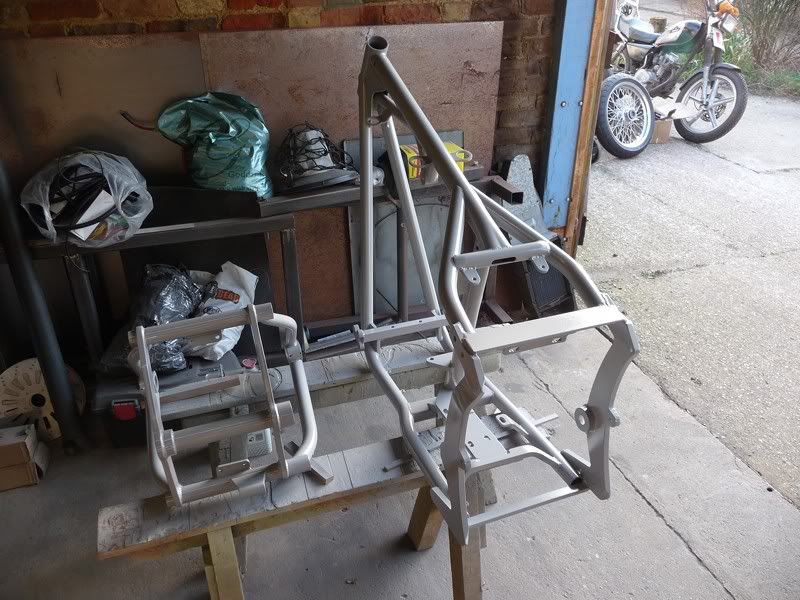
flak monkey - 9/3/12 at 08:27 PM
Picked the frame, bars and forwards up from being grit blasted this afternoon. Then chucked a quick coat of epoxy paint on them. Bit windy outside so
did it in the garage instead.
I'll hang it up to get a full colour coat on it in the morning.
matt.c - 9/3/12 at 09:04 PM
Cant wait to see this baby finished!
flak monkey - 13/3/12 at 07:57 PM
Started the long and tedious job of wet sanding and polishing the frame.... joyous Hopefully have it done by the end of the weekend so I can start
putting things back together
[Edited on 13/3/12 by flak monkey]
alistairolsen - 15/3/12 at 07:03 PM
Glad to see an update, nice to see you trying yet another skill yourself! How are you dealing with the health issues surrounding 2k?
flak monkey - 16/3/12 at 08:24 PM
Thanks, I hate spraying, but only because I havent mastered it yet. Determined to crack it though . Just bought myself a nice Sata Jet gun and some
more/better kit.
WRT 2k, I use a 3m organic/vapour mask
Masks
But they don't suit some peoples face shapes so don't seal properly. They seal perfectly on me, so I am happy to continue with that, but I
would still suggest using air fed for ultimate safety, but it adds another �300+ to the kit bill.
Finished polishing the main frame up today, will be doing the swing arm tomorrow morning then assembly can start...
flak monkey - 17/3/12 at 06:54 PM
After too many hours I got the frame sorted. Pretty pleased with the result, still needs a final polish, but I'll do that later... So started
putting it together today. Still making bits as I go so it's going to take some time.
Engine's going in tomorrow.... and I need to try and figure out the correct assembly for the mismatch of steering neck bearings and bits....
[Edited on 17/3/12 by flak monkey]
flak monkey - 18/3/12 at 10:31 PM
That engines bloody tight in there. Right bastard to get in and out Hopefully it's staying in there this time!

flak monkey - 22/3/12 at 07:27 PM
Been putting as many bits on as possible this week. Still working on some bits so its slow progress, but at least its going in the right direction.
After remaking a few bits for the yokes, and a spacer I managed to get them working. Not a great design, but will see how they go. Not a major job to
change to different ones later. So I dumped the front end on there tonight, need to sort the bearing preload out when its had some weight on it to
settle it all.
Spent a couple of hours last night trimming up the discs I had water jet cut. I have yet to find out if they are flat enough, quickly checked on a
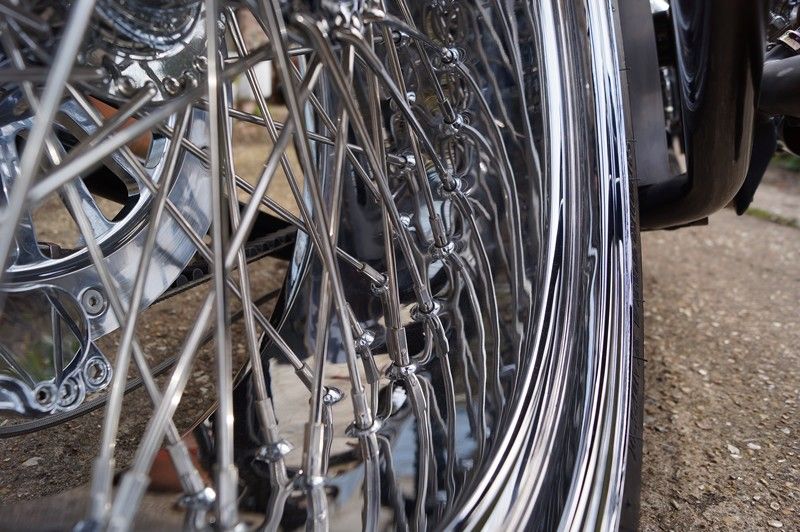
surface plate they seem pretty good. Will clock 'em up once the front wheel is in. Must be the heaviest front wheel around , what with fat
spokes, big heavy discs, and lots of chrome Once I am happy the discs are OK, then I might polish the centres up properly.
Painting the primary, bars and forwards up at the weekend. That will allow some rapid progress then
flak monkey - 26/3/12 at 06:42 AM
Well yesterday I painted up the primary drive bits, only to find the satin came out gloss (yes I mixed it  ), and I wasn't happy with it anyway.
Will order some more paint this week and have another go next weekend weather permitting :lol: Good thing is they are al prepped up ready for another
coat. So an hour or 2 should see them done.
), and I wasn't happy with it anyway.
Will order some more paint this week and have another go next weekend weather permitting :lol: Good thing is they are al prepped up ready for another
coat. So an hour or 2 should see them done.
The rest of this weekend has been making odd little spacers and brackets, all of which seem to take bleedin' ages, especially in stainless. Oh
and making a metal gate for some friends (12' x 4', and tidying the garage, changing the bars on the sporty, doing some pre assembly on the
chevy engine to see how much to have the block skimmed. And the list goes on...
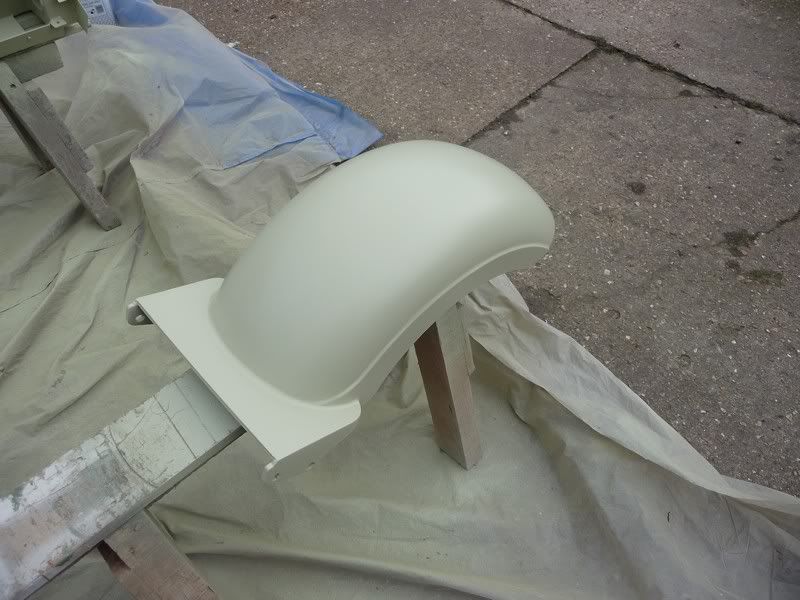
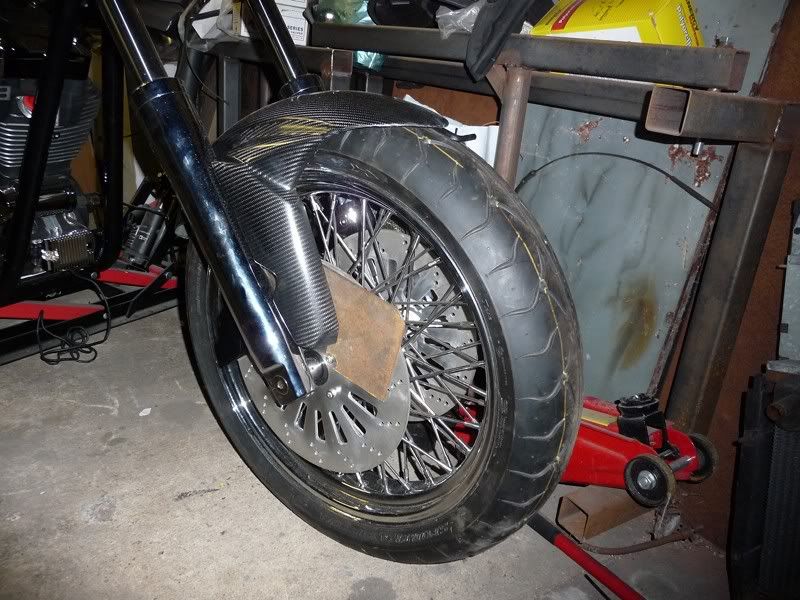
Amongst all of that I got the front wheel fitted, with the proper stainless spacers. Brake calipers mounted up and the mudguard modified and mounted.
The PU glue on the brackets is currently drying off. Hopefully then I can lay some glass mat on up over them inside and they should stay put for
good.
Yes the mudguard isn't what you'd normally expect to see on a custom... but I quite like it. Carbon kevlar thing, no real benefit to the
weight saving on this thing though. Once the brackets are finally stuck on I'll give it a trim and polish up. The bits of plate are wedged in
there while the glue dries
matt.c - 27/3/12 at 10:58 PM
I wish i had your tallent.
alistairolsen - 28/3/12 at 07:18 PM
Christ thats gonna be long!
Slater - 29/3/12 at 07:15 AM
Wow. This is an excellent thread, I can't wait to see the final product. I only found it yesterday! Keep posting the pics and updates.
It certainly beats my home made bike.
MikeRJ - 29/3/12 at 08:54 AM
quote:
Originally posted by Slater
Wow. This is an excellent thread, I can't wait to see the final product. I only found it yesterday! Keep posting the pics and updates.
It certainly beats my home made bike.
I like it! What engine are you using?
Hellfire - 29/3/12 at 11:46 AM
Looking good but I can't help thinking that the mudguard would look so much better if it was fitted the other way round, even though the
brake caliper is in the way. Just my personal opinion though..........
Phil
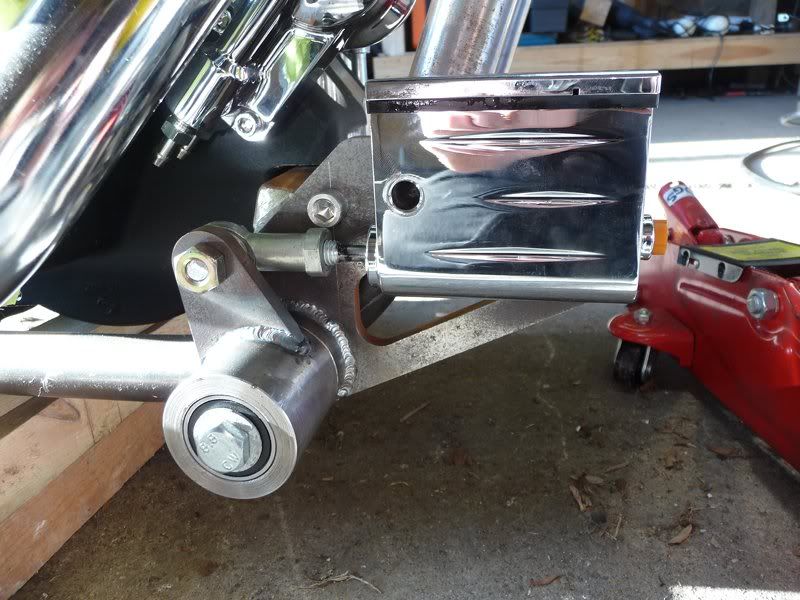
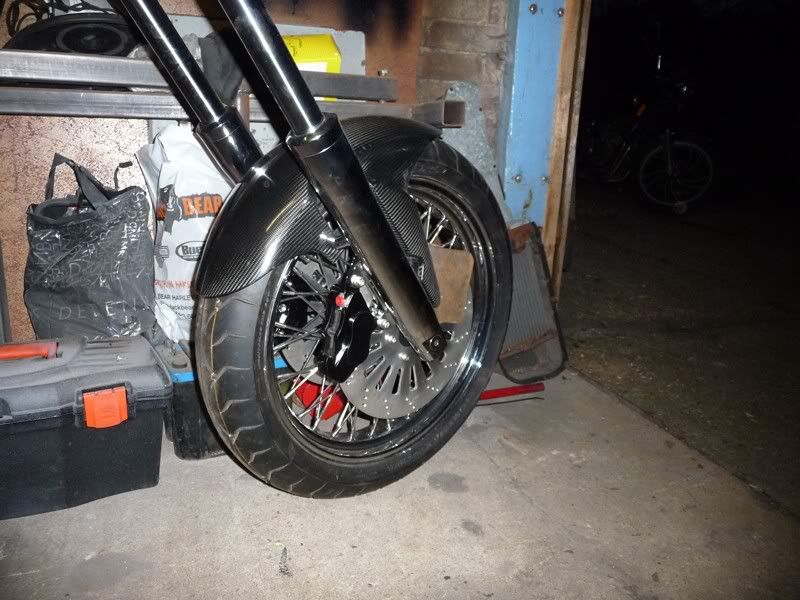
flak monkey - 1/4/12 at 06:45 PM
I did toy with the idea of fitting the front mudguard backwards, but it meant chopping so much of it off that it wasn't really worth it.
More progress. Slow, but steady. But it did get wheeled outside for the first time today.
Got the bars fitted, wires and throttle cable threaded through, rear wheel in, starter fitted, cables in for head light and front brake switch. Mocked
up the clutch line to check routing, going to cover it with clear heatshrink to stop it chaffing everything though. Need to get some different banjos
for the rest of the lines.
Next job is more painting

Benzine - 1/4/12 at 06:50 PM
Drooling over that last pic... TWO volvo 245s!
srsly though, flip hot bike
flak monkey - 1/4/12 at 06:53 PM
the grey ones nearly done 400k now.
MsD - 1/4/12 at 07:23 PM
Excellent... What other forums would you find this level of detail and a diversity of projects!
Top work, very bling!
Mark.
SausageArm - 1/4/12 at 08:31 PM
I've only just noticed this thread, very impressive stuff!
flak monkey - 5/4/12 at 07:41 PM
Thanks gents
Finished the top motor mount off. Quite happy with how it came out in the end
Long weekend coming...so either working on this (mostly painting) or the Camaro, one or the other
flak monkey - 7/4/12 at 07:36 PM
Done a few more little bits and bobs on the bike over the last couple of days. All the time consuming little things that dont really seem to have much
to show for the time and energy expended
Put the forward controls together, one of the few bits that went as planned other than I forgot I needed a couple of bolts to finish it off
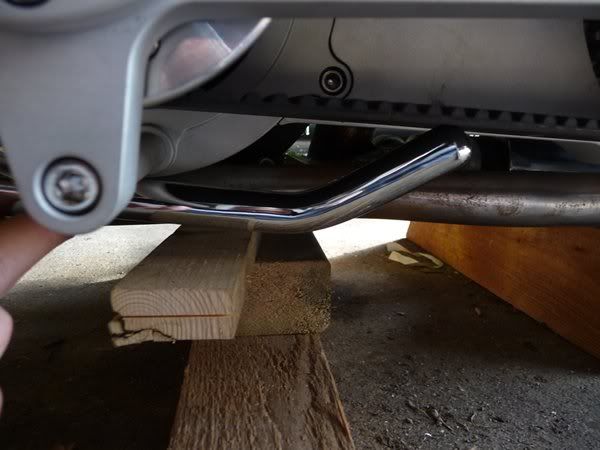
Spent a good couple of hours frigging around with the sidestand to make it work. What a piece of crap, seriously. Made in the USA, my arse.
Werent a cheapo one either. Redrilled the detent dimple to hold it in the up position, still not entirely convinced but will see how it goes.
It's pretty tight anyway.
Connected up the internal throttle, seems to work ok, slightly tight, but hoping it will ease off a bit after a few miles. Finished the clutch line
off, covered it will clear heatshrink where it lays across the bars, to stop it chaffing the paint off. Might fill it up with fluid tomorrow as I need
to adjust the clutch before I can finish putting the primary together anyway.
Sorted out the periphery of the brake discs catching on the calipers, minor adjustment. Layed up some GRP on the brakets for the front mudguard,
hopefully that'll hold it OK. Will look at finishing it off properly tomorrow and final fitting it.
Anyway, it now stands up of its own accord.
Dangle_kt - 7/4/12 at 07:58 PM
Excellent work!
Keep it up! Is the plan for MSVA this summer?
flak monkey - 7/4/12 at 08:04 PM
Hoping to have it finished for the end of may, then off to MSVA and on the road this year. If time and money allows
flak monkey - 16/4/12 at 08:03 PM
Made the brake line splitter for the front brake and modified the brake light switch take off for the rear brake tonight.
Took longer to polish the front one up than anything else

Might be able to sort the front brake hydraulics out tomorrow now.
flak monkey - 9/11/12 at 12:58 PM
Time to update I think
Really quick video, just heat cycling the engine at the moment, so didn't get change to take much of one. Ignore the pipes, thay are just on
there for the sake of some pipes for now. Had the fair share of issues getting to this stage....
http://www.youtube.com/watch?v=v0bCefX3PDk
http://www.youtube.com/watch?v=WgRIVuzqunQ
Anyway its looking more or less finished now. Just outer bearing support for the primary, seat and exhaust to sort,

[Edited on 9/11/12 by flak monkey]
Nick DV - 9/11/12 at 01:06 PM
That's the 'bogs dollocks'!! Fantasic job
Cheers, Nick
scootz - 9/11/12 at 01:19 PM
flak monkey - 9/3/13 at 08:34 PM
More or less finished the bike now, just need to mount the SVA mirrors and refit the headlights.
Made new switch housings, and changed the levers so the clutch was useable
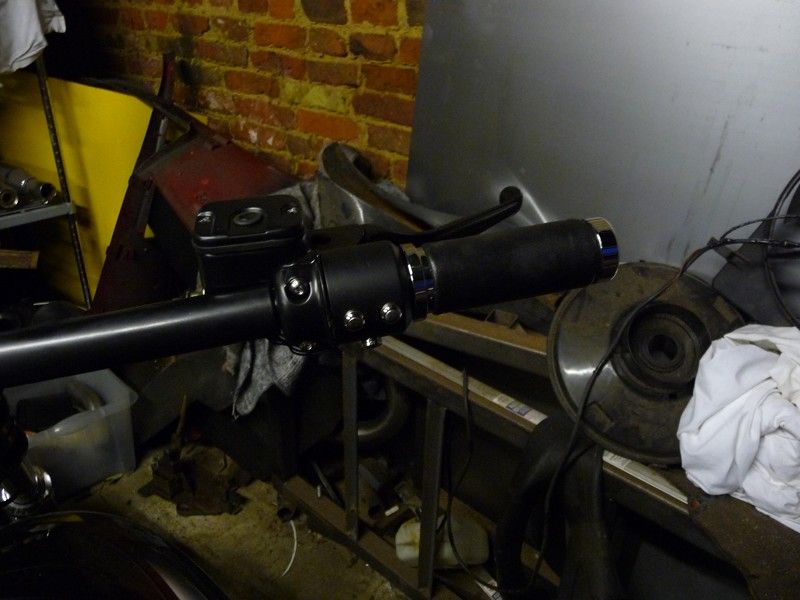
Also managed to get the side stand retracting properly by moving the spring attachment point on the stand bracket. Just needs a new spring on to be
tidy. Good thing is you can't see the spring at all, when the stand's up or down.
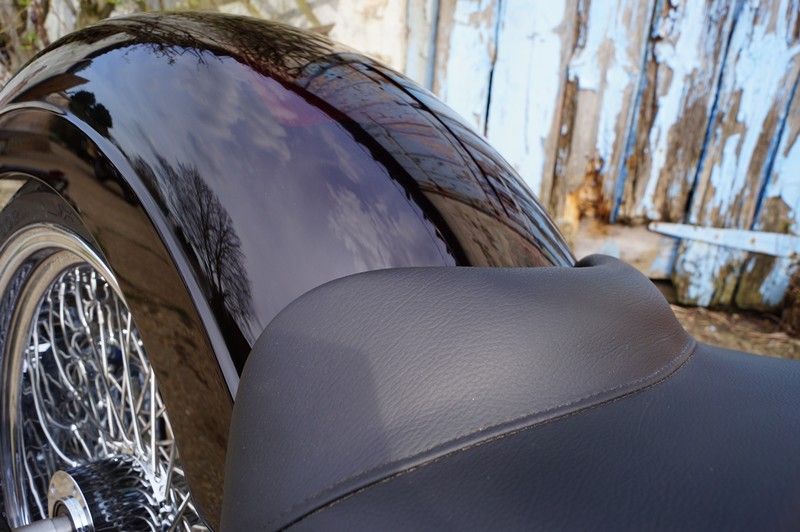
Picked up the seat, nice job and at �40 was cheap enough too (yes its real cow too ) Was short of bolts for it so had to order some
more.
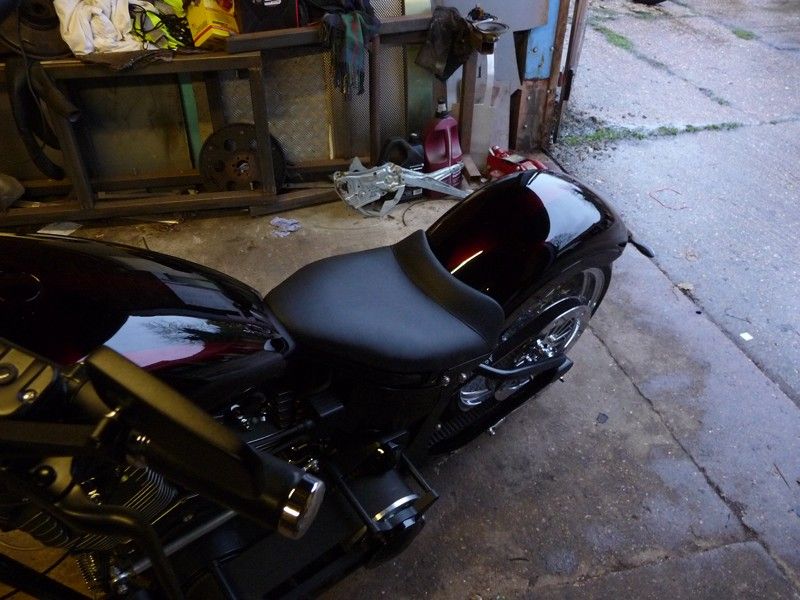
Spent most of the day sorting the exhausts. The stock softail ones seem to fit OK, and it runs suprisingly well with them fitted to be honest. Really
quiet now, hopefully OK for SVA. And as the exhausts have a cat fitted too, hopefully it'll be OK for the emissions test too.

Found a few other minor issues to sort before SVA, like needing to move the connectors for the rear lights, and fit some bigger bump stops. Also a
little concerned by the proximity of the final drive belt to the swing arm this is probably due to me running a 70t rear pulley.
[Edited on 9/3/13 by flak monkey]
tegwin - 9/3/13 at 11:28 PM
Flak, how did you get the joins between the tubes so "fluid", is it a casting?
quote:
Originally posted by flak monkey
Thanks gents
Finished the top motor mount off. Quite happy with how it came out in the end
Long weekend coming...so either working on this (mostly painting) or the Camaro, one or the other
flak monkey - 11/3/13 at 08:03 PM
quote:
Originally posted by tegwin
Flak, how did you get the joins between the tubes so "fluid", is it a casting?
TIG'd, fillered then several hours of sanding....
tegwin - 11/3/13 at 08:16 PM
Aha, cunning! looks tidy!!
RK - 12/3/13 at 01:27 AM
Very nice job there, David!
flak monkey - 13/3/13 at 06:54 PM
Thanks
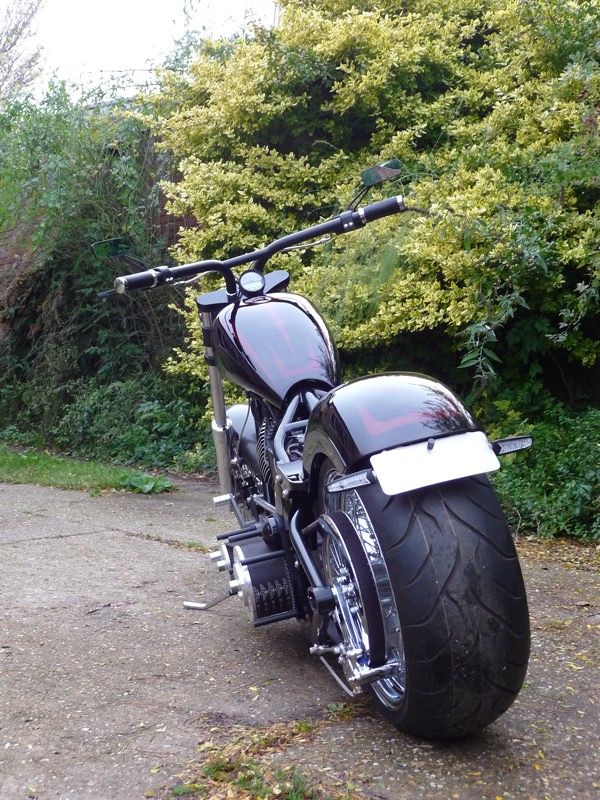
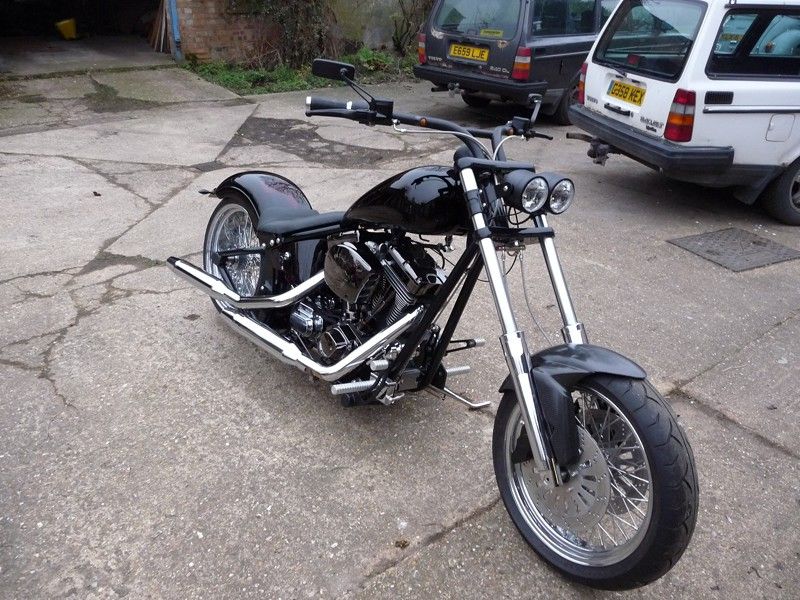
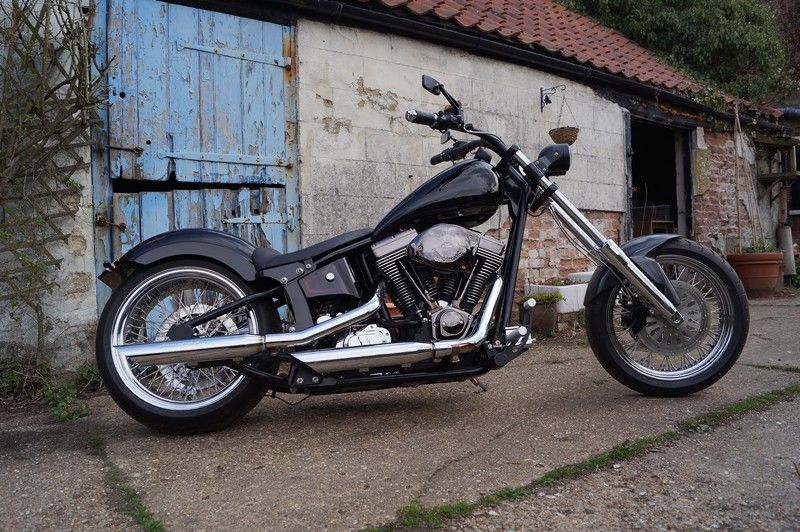
flak monkey - 22/3/13 at 07:39 PM
Finally finished it There's a few things to change before (mirrors) and after the SVA (exhaust). Will be sending the forms off next week I
reckon...
New speed sensor, this time fitted with additional voltage regulation to see if it lasts a bit longer.
www.youtube.com/watch?v=WRK2mbuunis
[Edited on 22/3/13 by flak monkey]
Confused but excited. - 22/3/13 at 08:16 PM
Been waiting to see this finished and
Nice one David!
Your usual exemplary standard of workmanship is obvious throughout.
Volvorsport - 22/3/13 at 08:16 PM
nice volvos ............
flak monkey - 22/3/13 at 09:17 PM
Thanks guys
Dave Ashurst - 22/3/13 at 09:38 PM
Well done! It's really looking great, David. Fantastic work, an excellent job!!
Interesting to see your chosen combination of hard tail with unsprung seat. Is that an S&M thing?
flak monkey - 22/3/13 at 09:49 PM
Thanks Dave!
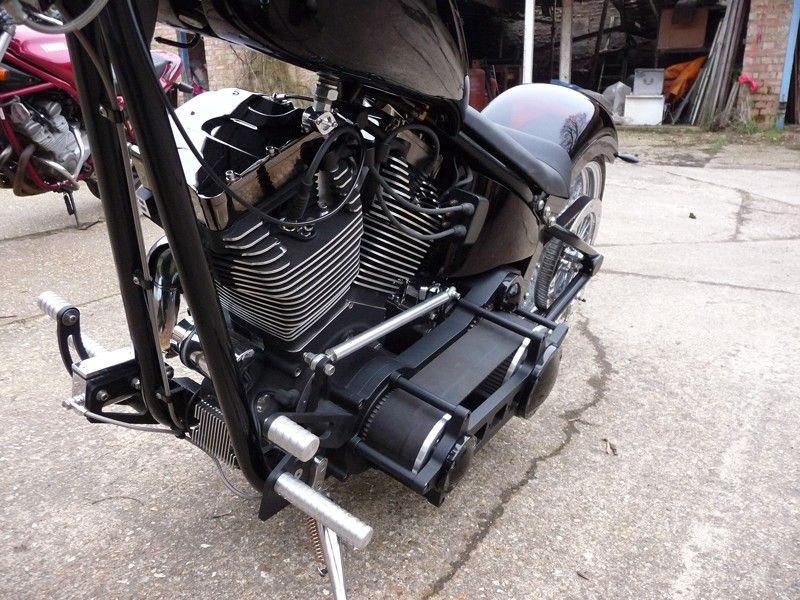
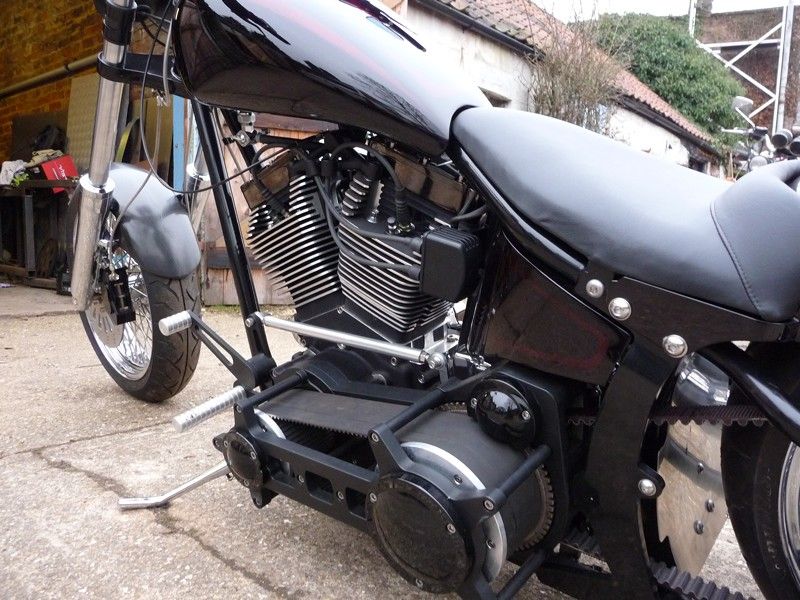
It has got rear suspension. The shocks are underneath the gearbox, hidden away so that it looks like a hard tailed frame
MikeRJ - 25/3/13 at 07:11 PM
Very nice, I'd love to hear a video of it in action.
Also can you do my floorboards with the built in belt sander?
flak monkey - 26/3/13 at 07:09 PM
One vid...minus any sort of exhaust silencers
http://www.youtube.com/watch?v=v0bCefX3PDk
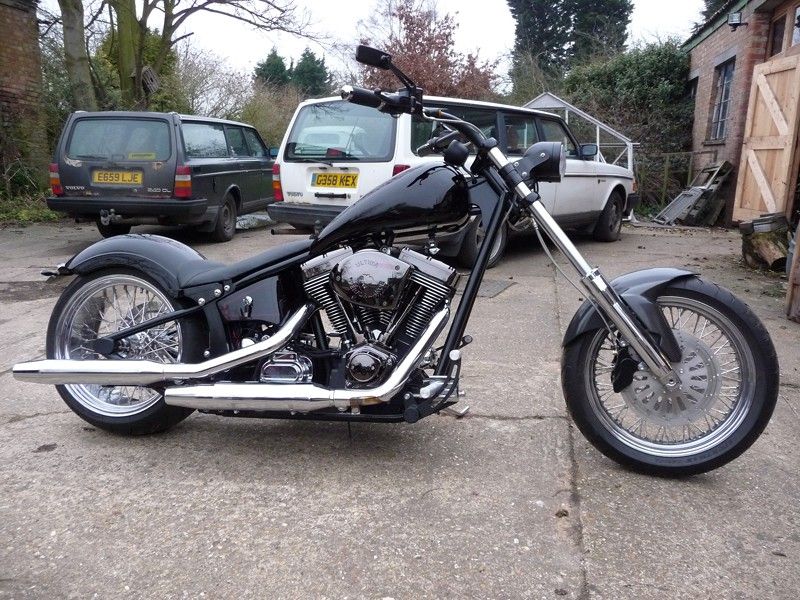
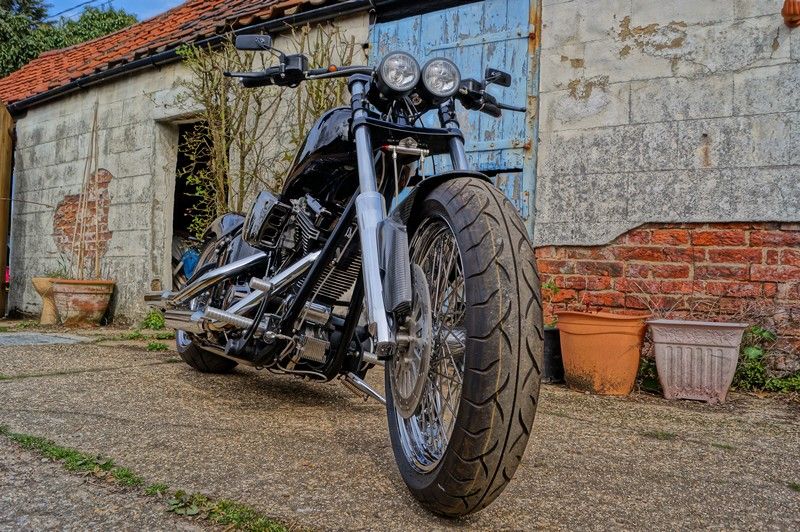
flak monkey - 21/4/13 at 04:31 PM
Well, it's taken 2.5 yrs all together, 12 months longer than it should have taken! And it's cost way more than it should've, but
it's done. One last thing is a little bit of plastic with some numbers on it from the DVLA. Oh, and those rear lights and the exhaust have to go,
when I find and can afford something I like....
This is the reason I've been a bit quiet on here of late. The bike passed it's SVA last week, so that was a relief!
And the best bit of it is I've made some really good friends along the way

Dave Ashurst - 21/4/13 at 05:11 PM
Congratulations!!
It's the biz... really good work.
scootz - 21/4/13 at 05:29 PM

perksy - 21/4/13 at 06:50 PM
Credit where its due that is lovely
Thanks for sharing, I've really enjoyed seeing it come together
flak monkey - 21/4/13 at 08:29 PM
Thanks chaps
mookaloid - 21/4/13 at 08:45 PM
That is very
Lovely build David
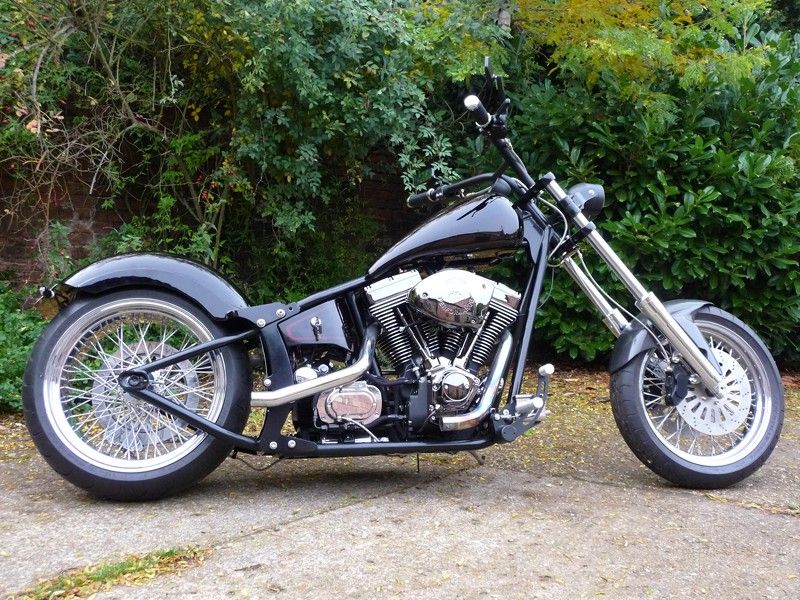
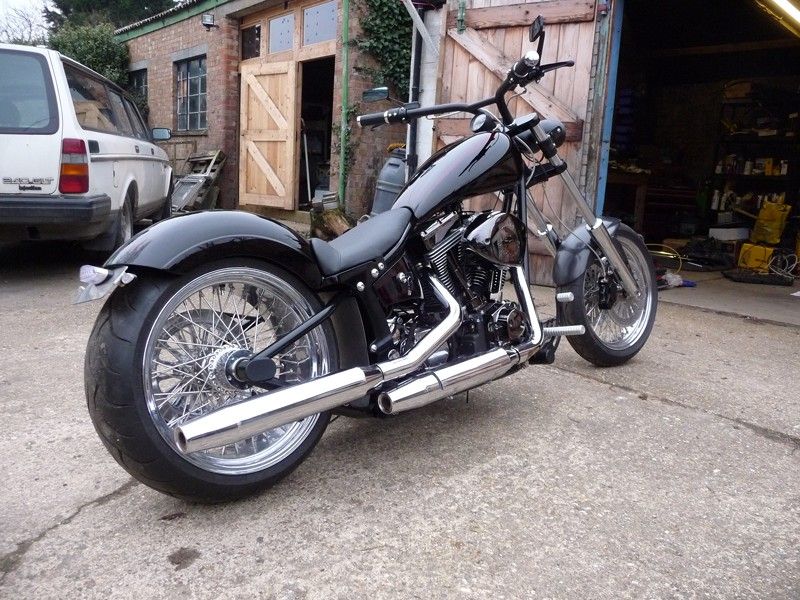
flak monkey - 11/5/13 at 07:41 PM
Thanks again guys.
Done about 100 miles or so on it now. Taking it fairly easy as it's got to be run in for 1000 miles. Even so, it's a real handful pulls like
a train from 2000rpm, wants to lift the front end up all the time and pushes you back off the pegs. And I've not really wound it right open yet
Reckon I'll need to get up the gym so I can hang onto the damn thing
One thing that came as a pleasant suprise was that the vibration isn't half as bad as I thought it would be. Certainly good up to 4k rpm, not had
it any higher. Cruising at 80 ish it's fine, no worse than the Sportster. But it does get more noticeable if you open it up a bit. The rubber
mounts on the fuel tank get a good workout It's good enough that you can see clearly in the mirrors at any speed. No idea how it compares to
a HD big twin, never ridden one...
Seems to be doing about 35mpg, gives me an 75ish mile range until I hit reserve Not going to be a long distance tourer, either that or I'll
be stopping at every gas station! Pulled the plugs and it looks about right. If anything it could do with a bit more fuel I think, sometimes feels
like its a bit lean, around 2200rpm. I have got the next size up main jet, so could change it fairly easily.
Overall really pleased with how it rides, need to get used to the riding position more than anything. Wasn't really sure to start with,
completely different to anything else I've had. But it's easy enough to ride in traffic at a crawling pace, the gearbox is brilliant, shifts
really nicely and the engine is well mannered on the street. The brakes actually work, more like the jap bikes I've had in the past. Need to
figure out how much clearance I've got on left handers before I scrape the belt drive, but have slung it around fairly sharpish and it
doesn't handle half bad either considering
Now all I need is some good weather again....
big_wasa - 11/5/13 at 08:07 PM
I had a look last weekend to see if I could see you at Hunstanton. A lot of bikes there
flak monkey - 11/5/13 at 08:17 PM
Yeah, we went down saturday, but I didnt have the chop on the road. Will be down there tomorrow weather permitting!


