Benzine
|
| posted on 26/9/11 at 04:38 PM |

|
|
Nice project dude ^_^ Good progress on the welding, I'm facing a similar level of rot on my amazon at the mo, feels good when new metal starts
getting welded in!
|
|
|
|
|
flak monkey
|
| posted on 26/9/11 at 08:16 PM |
|
|
I considered giving up...but nothing is impossible! Personal challenge now and determined to rescue the car rather than scrapping it. Its only bad in
a few places, and then its bad due to small problems not being resolved then turning into bigger ones!
Once all the rust is gone it'll be a good car 
Sera
http://www.motosera.com
|
|
|
l0rd
|
| posted on 27/9/11 at 06:43 AM |
|
|
I would say
Scrap the chassis. Keep the body panels and start building a new chassis NASCAR like
|
|
|
flak monkey
|
| posted on 27/9/11 at 07:01 AM |
|
|
quote:
Originally posted by l0rd
I would say
Scrap the chassis. Keep the body panels and start building a new chassis NASCAR like
Er....yeah, righto... 
Sera
http://www.motosera.com
|
|
|
flak monkey
|
| posted on 2/10/11 at 07:29 PM |
|
|
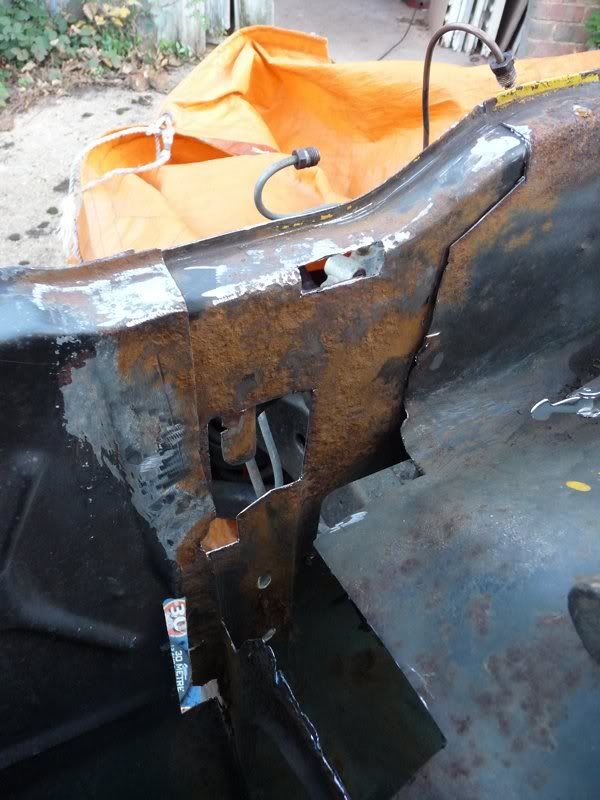
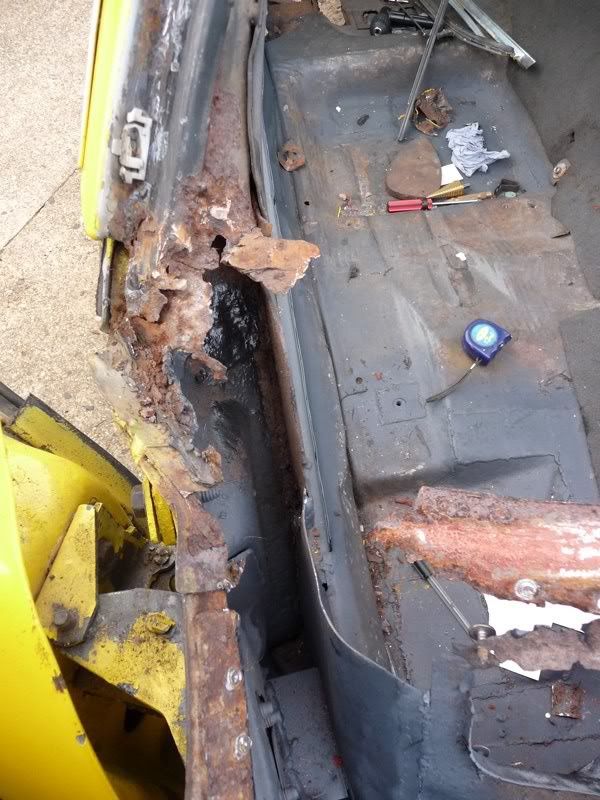
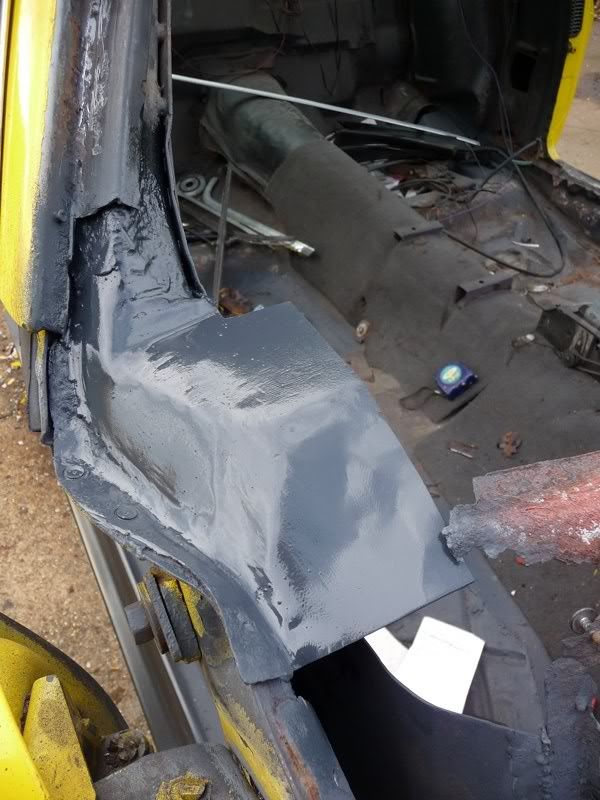
Haven't managed to get much done this weekend, dont really know whats happened.... Nonetheless managed to start patching up the kick panel area
in between helping change the cambelt on the other car. Oh and a mate popped over, which was a nice break from laying in the footwell of the Camaro

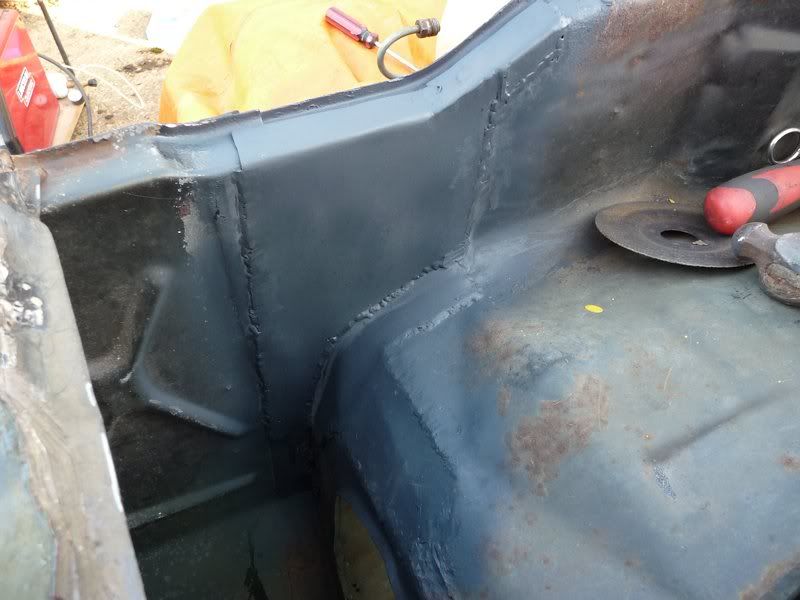
Wirebrushed and painted inside with Jotamastic epoxy as recommended. Seems like good stuff. Other than it don't half burn well when you weld
near it Smells good too After that started repairing the hinge support plates, inner sill, the pinch weld area at the door opening and a few
other time consuming bits

Then welded in a new piece at the bottom, plug welded to all the inner structures and seam welded to the sill.
The rust in the background is the back of the cowl shoulder panel thats coming out soon. Everything thats staying has a good coat of paint.
Just the top pieces to do now, might start on it this week one evening.
[Edited on 2/10/11 by flak monkey]
Sera
http://www.motosera.com
|
|
|
matt.c
|
| posted on 24/11/11 at 10:00 PM |
|
|
Any updates mate? 
|
|
|
l0rd
|
| posted on 24/11/11 at 10:27 PM |
|
|
can't believe i nearly went through all the posts and looking on the pictures to remind me the progress and look at this

quote:
Originally posted by matt.c
Any updates mate?
|
|
|
flak monkey
|
| posted on 4/12/11 at 06:32 PM |
|
|
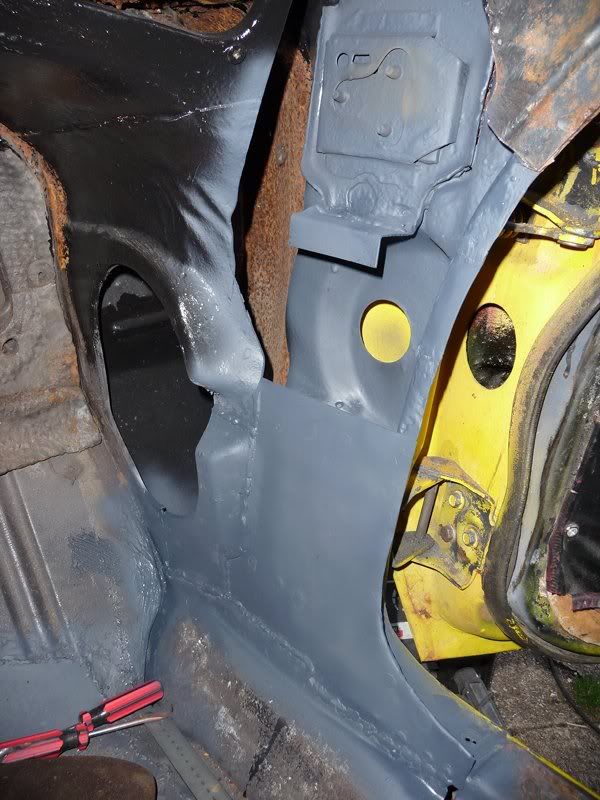
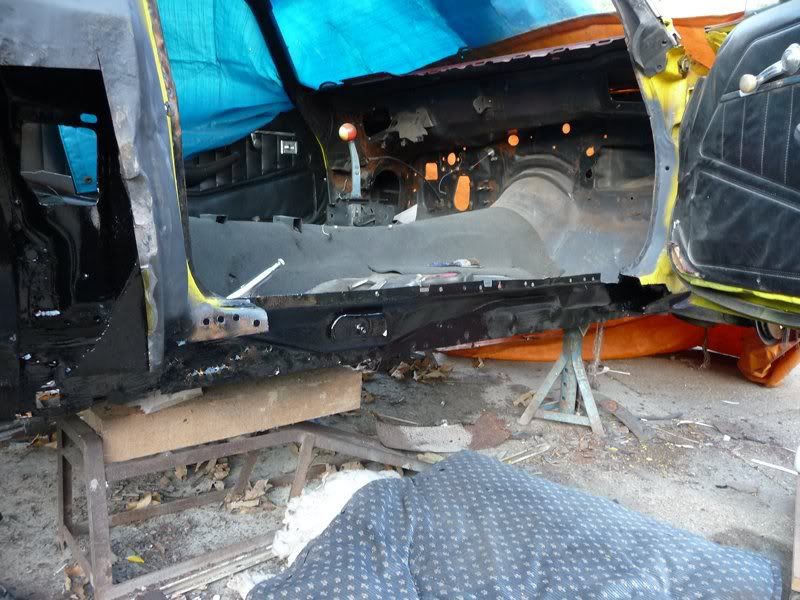
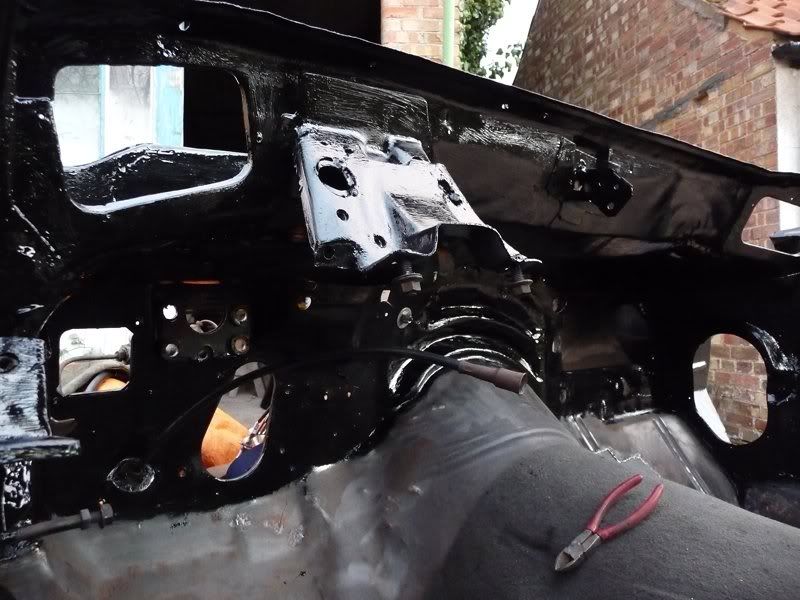
Some tardy updates me thinks. Been spending every dry day at the weekends working on this thing. Now at the point where most of the welding at the
front end is complete. Warning...this post has lot of photos!
Still loads to do, probably about halfway ther with the shell repairs. Once all the topside stuff is finished I'll be flipping it over on a
rotisserie to do the underside properly. Looks bad, but nothing time and patience can't fix. Hopefully its going to be worth it!
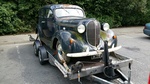
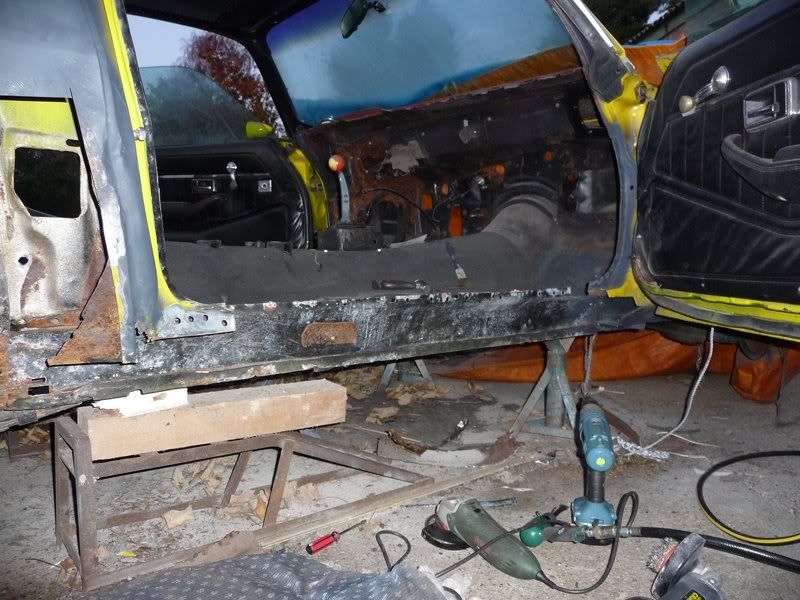
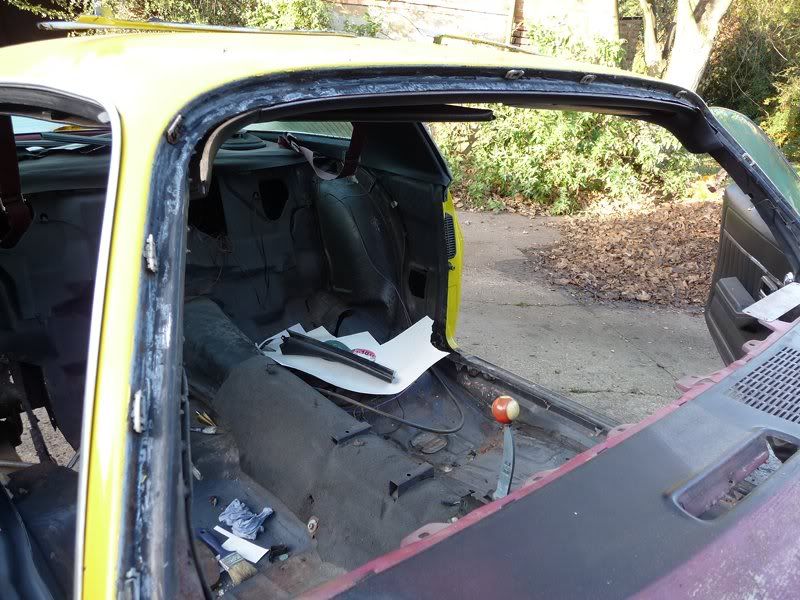
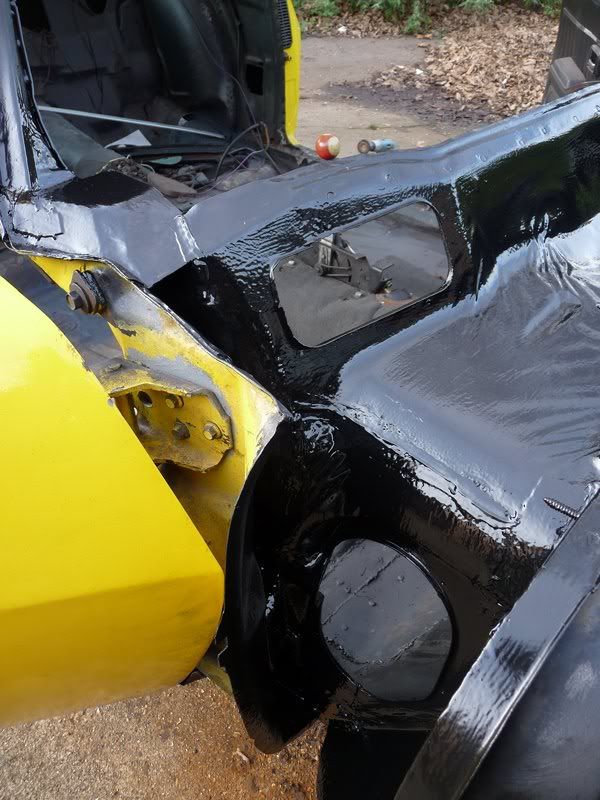
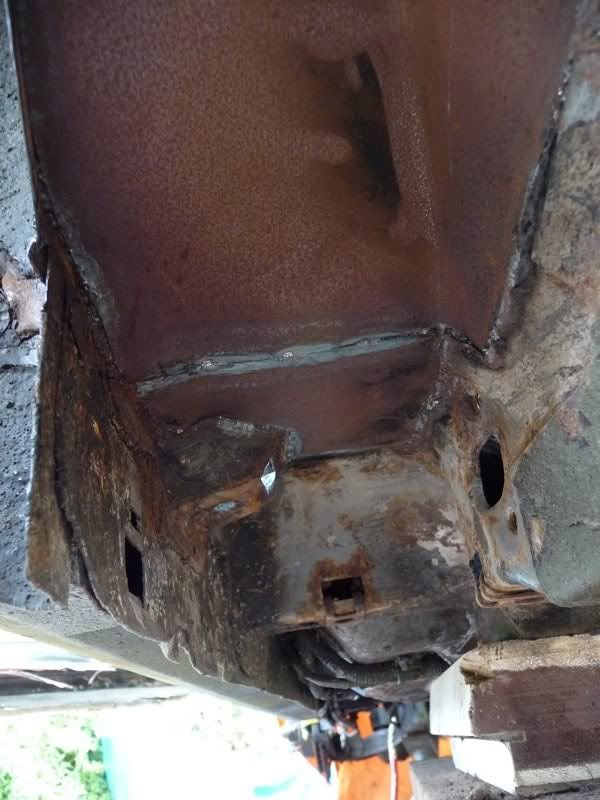
Stripped out the interior completely
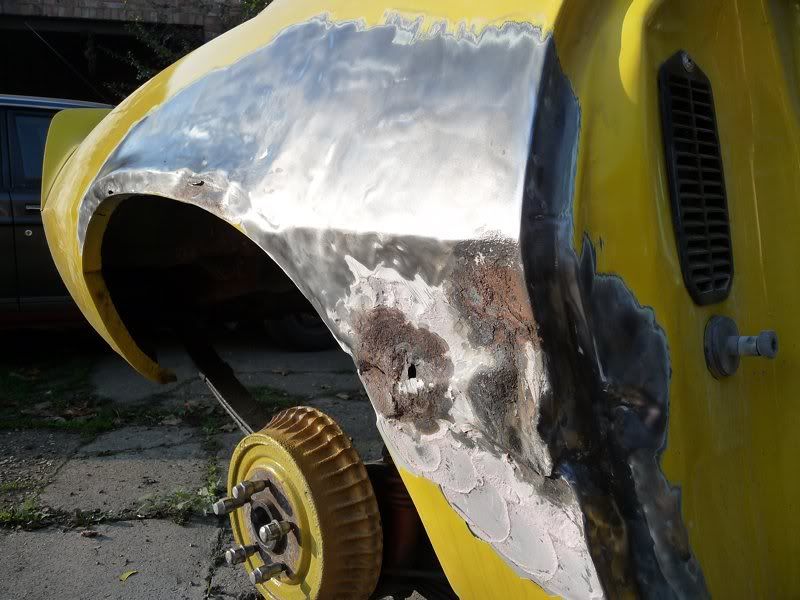
Took the front end off
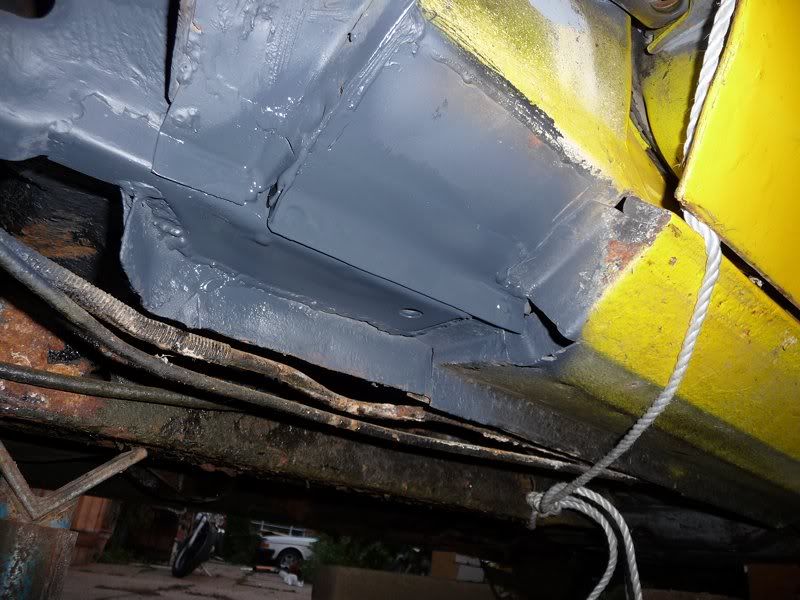
Rust repairs to the front of the drivers side sill/cowl area

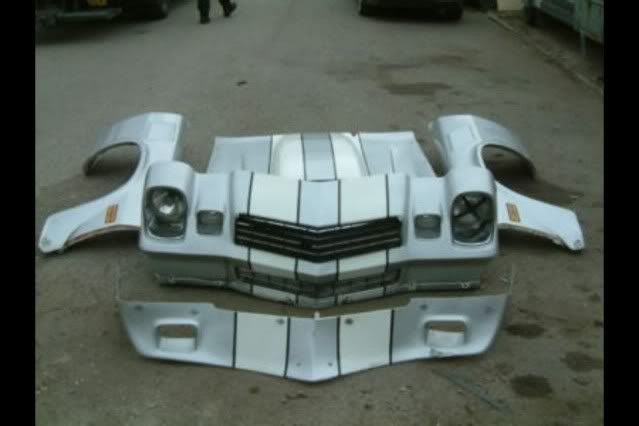
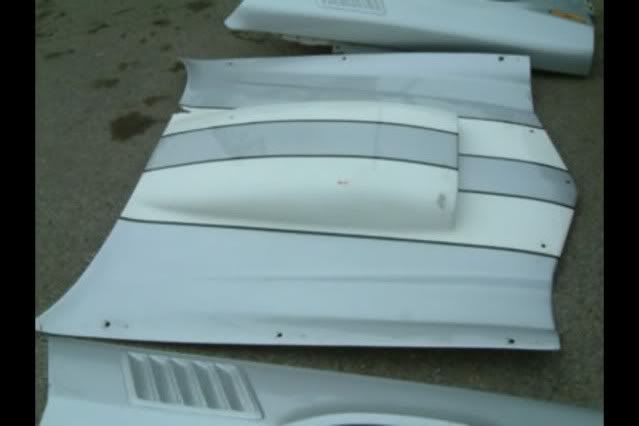
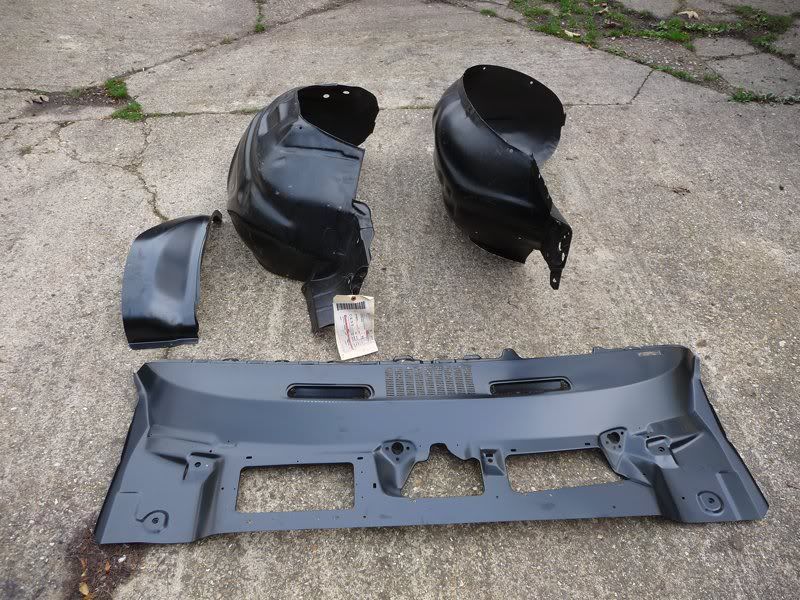
Picked up a complete GRP and Carbon/Kevlar front end. And yes it has a stupid bonnet scoop and front spoiler
The wings and bumper are GRP and the bonnet and splitter are carbon/kevlar. Cheap as chips
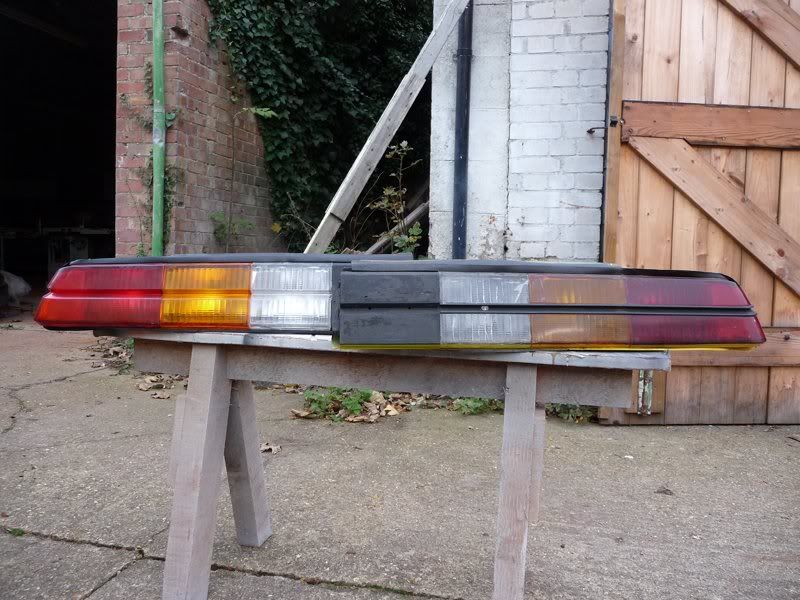
Had some decent rear lights shipped in from Canada. Set about restoring them to their shiney glory. Need to polish the lenses up to finish them
off.
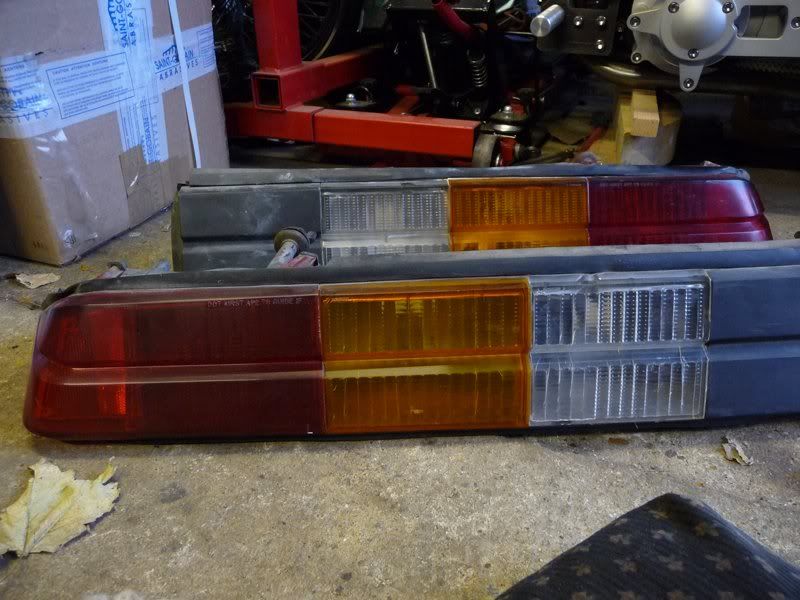

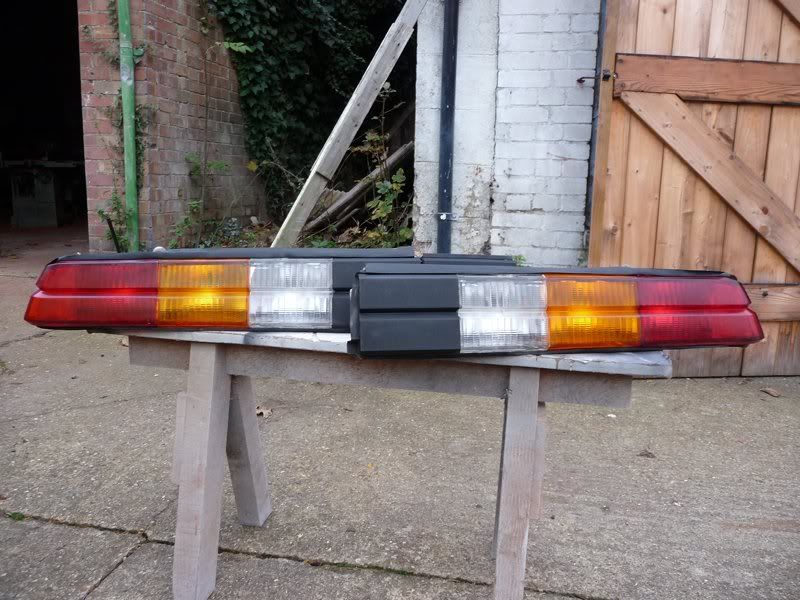
New and old
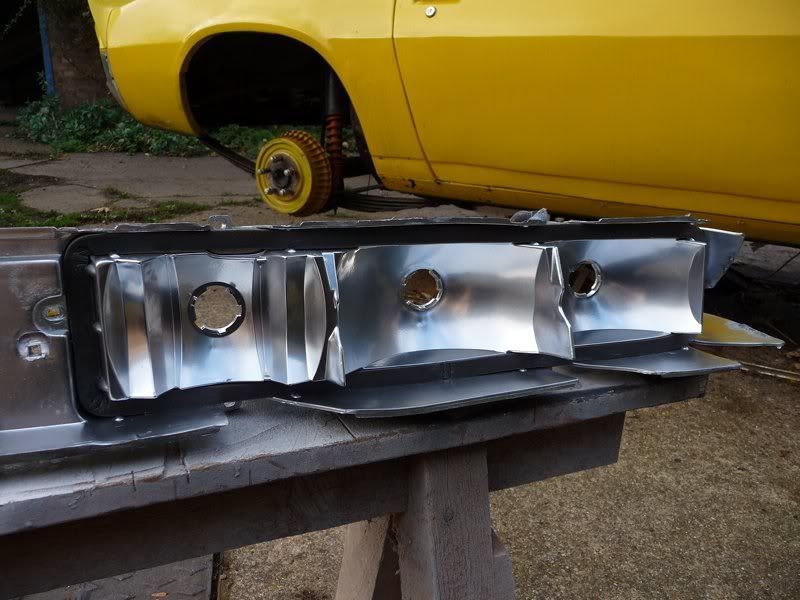
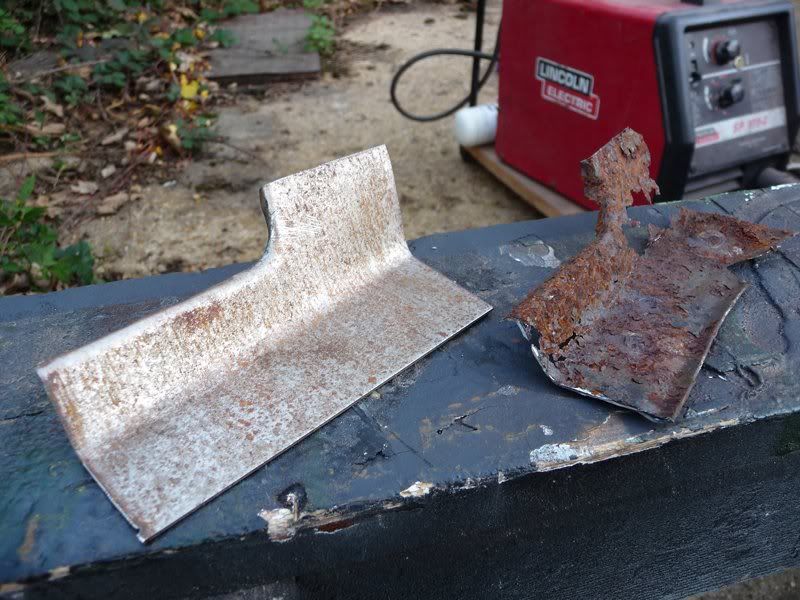
Got some new sheet metal
Found a load of filler and damaged quarter panel

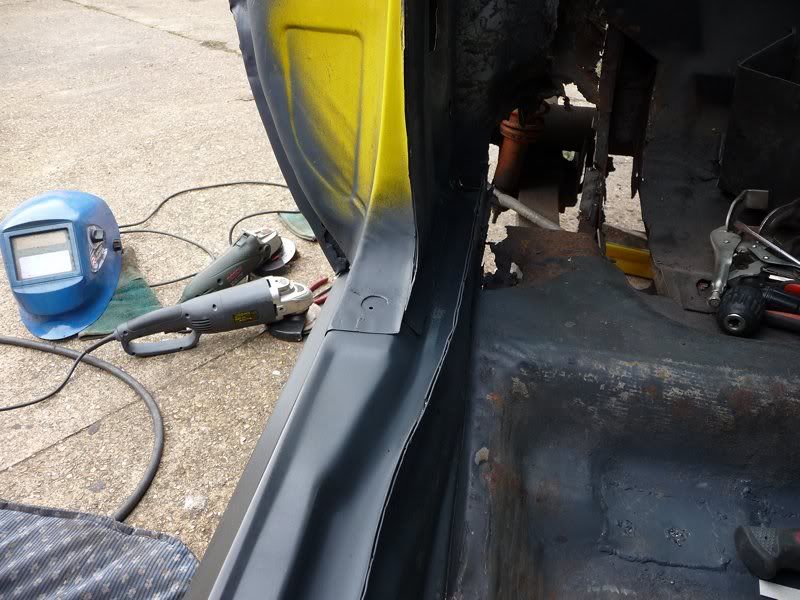
Cut the passenger side sill off to replace complete thing. Thankfully they do factory thickness full replacements
Nice and solid inside, coated it liberally with 2k epoxy paint
New sill ready to go on, also epoxied inside

Just like new


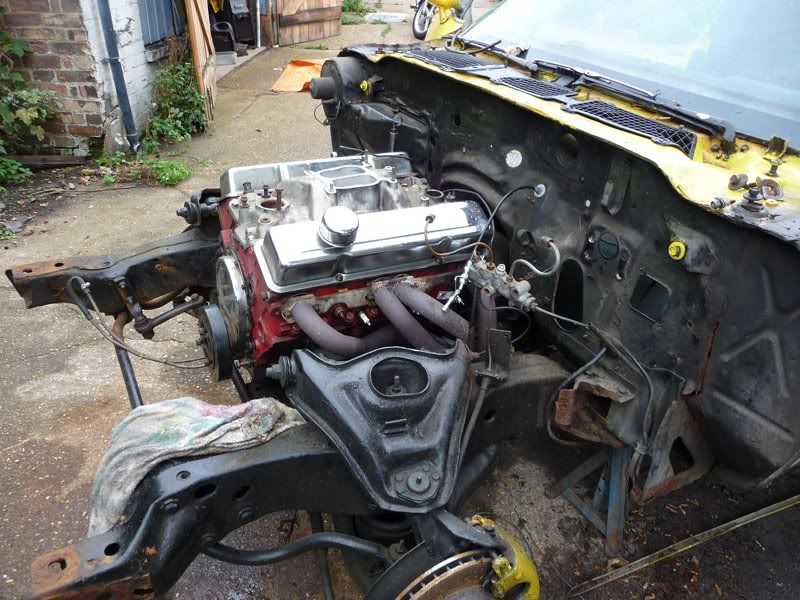
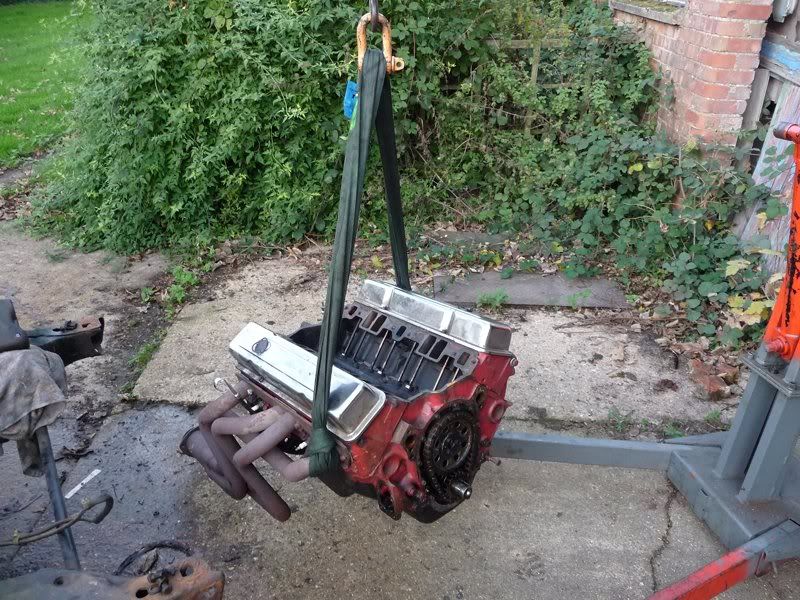
Hoiked out the engine, and stripped the useful bits off before flogging it on...

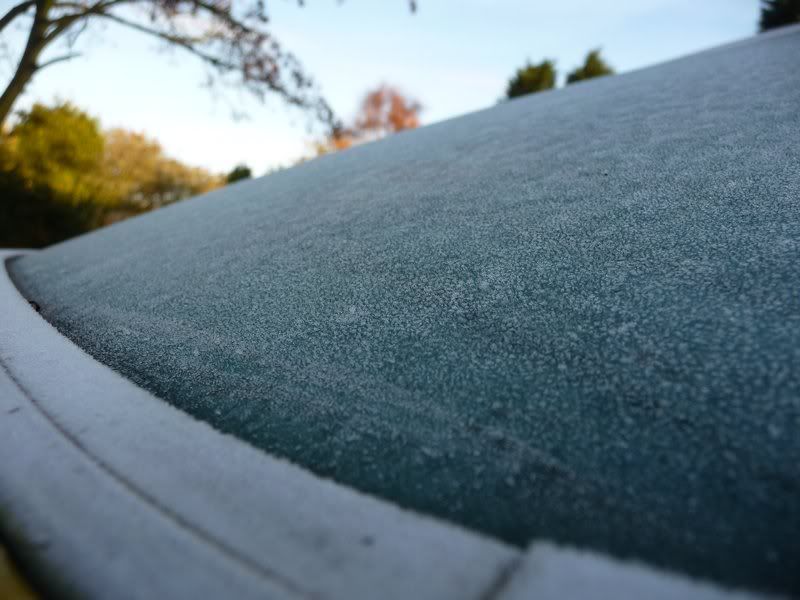
The joys of working outside in the winter
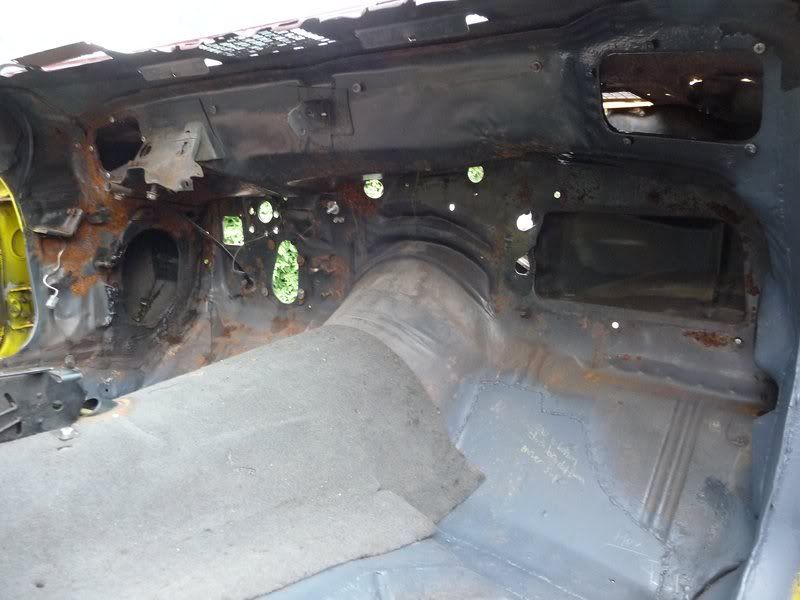
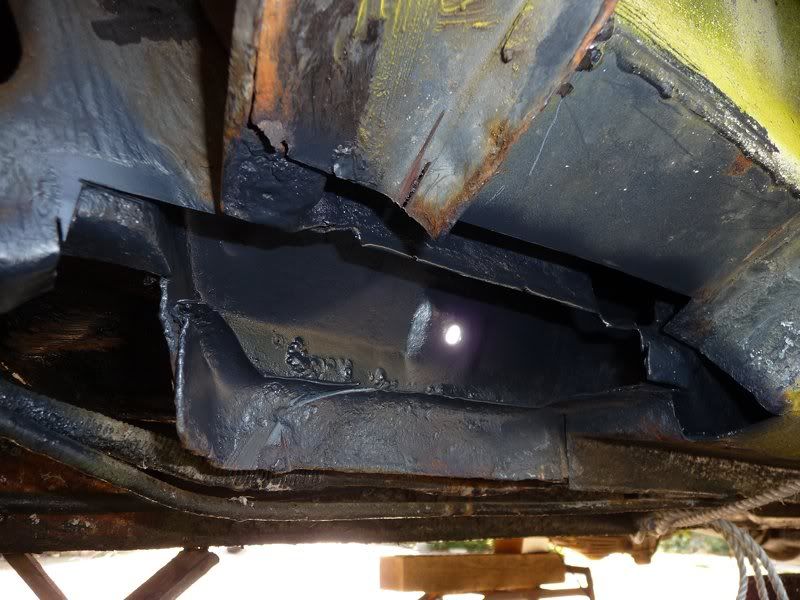
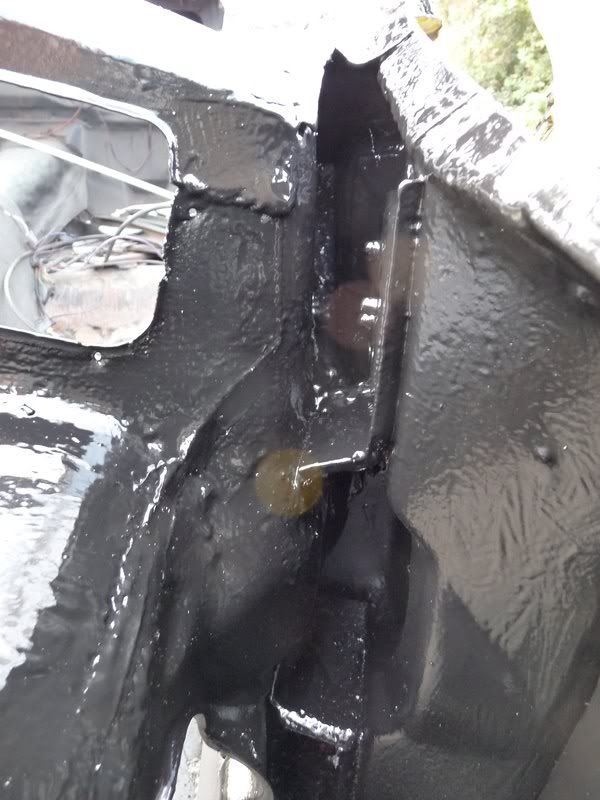
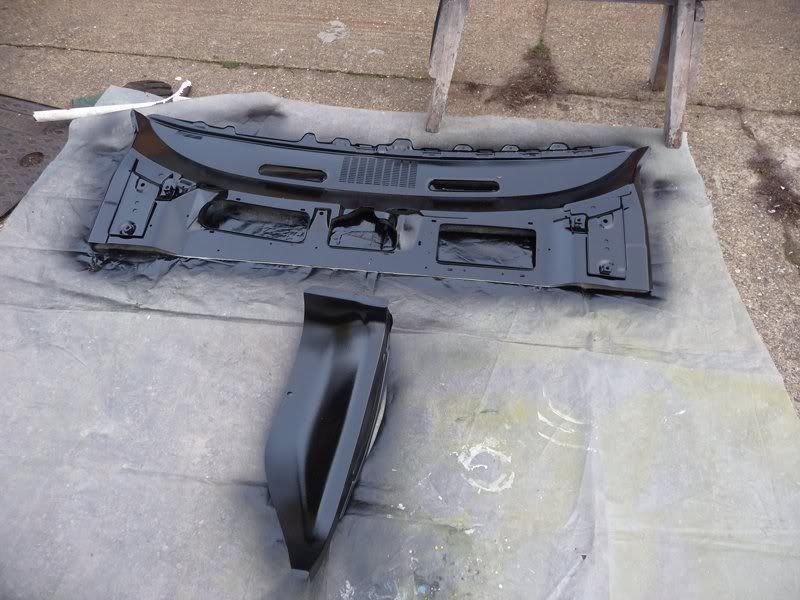
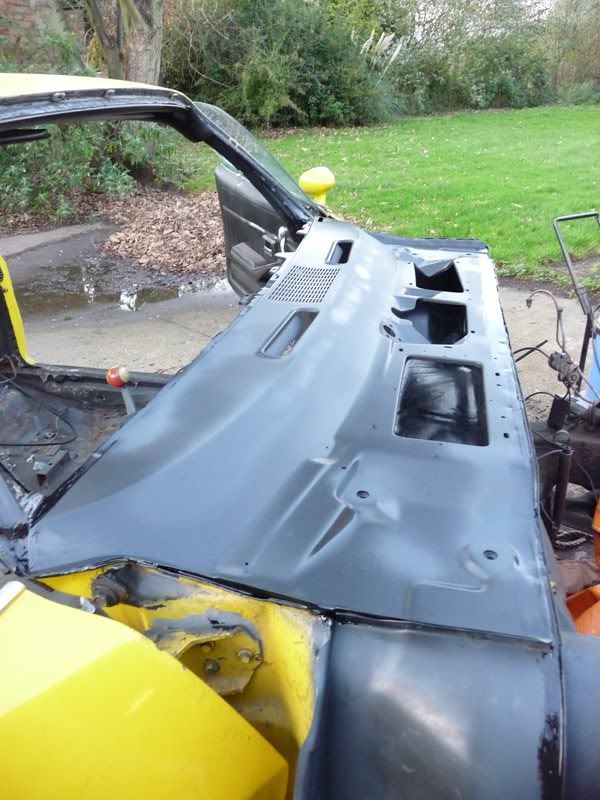
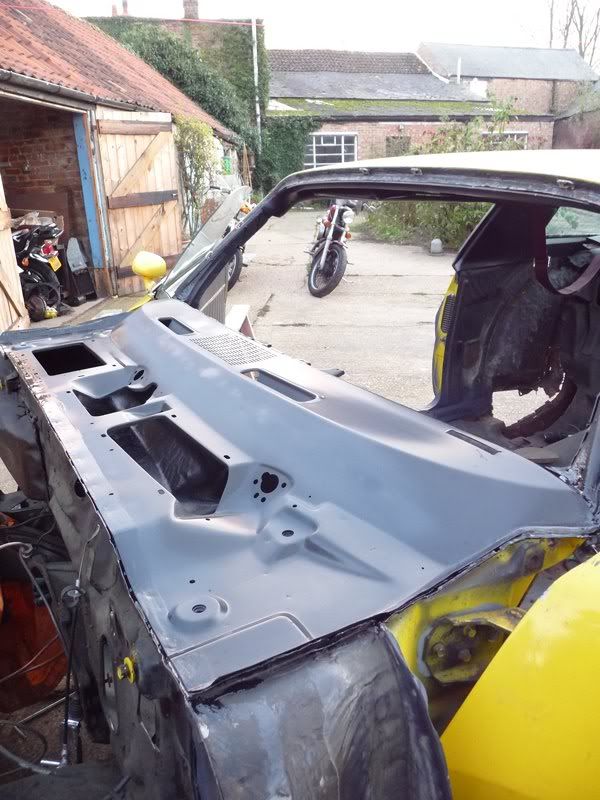
Pulled out the screen so I could work on the cowl area. Knowing it needed lots of work

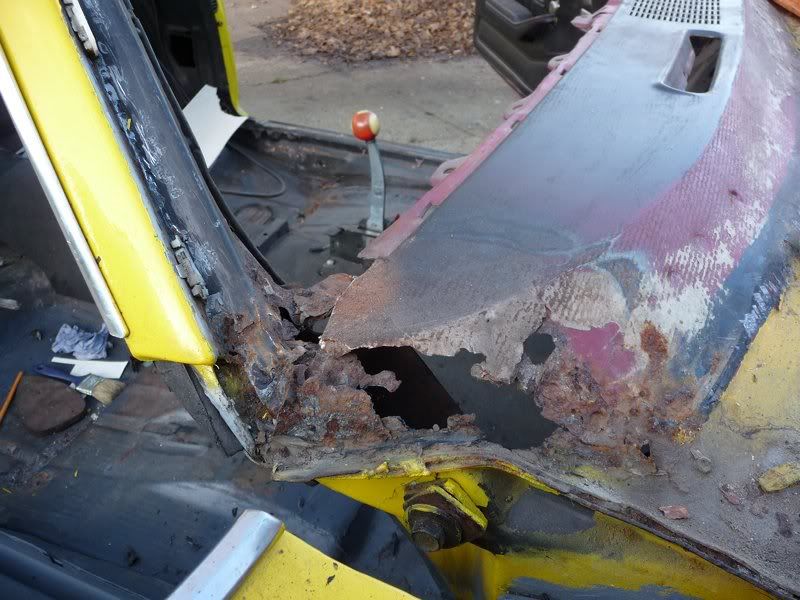
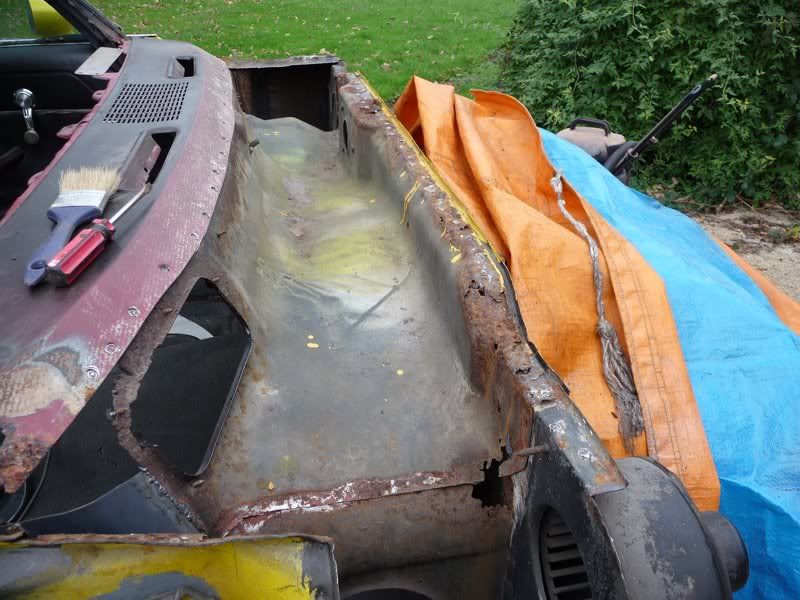

Easy to see why it was leaking into the interior. The sad thing is if it had been stopped quickly the damage wouldn't be so major. Nevermind!


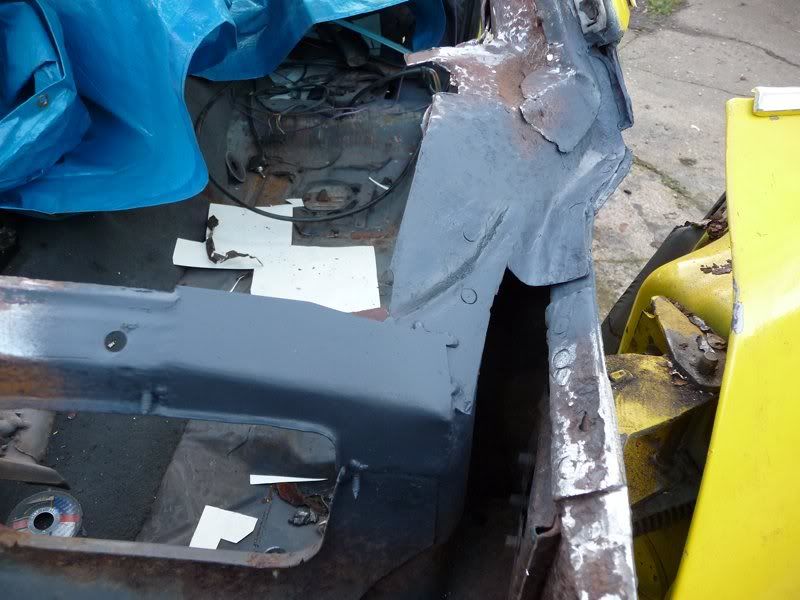
The worst bit was the passenger side pillar... yes this has another 6 months MOT left yet!

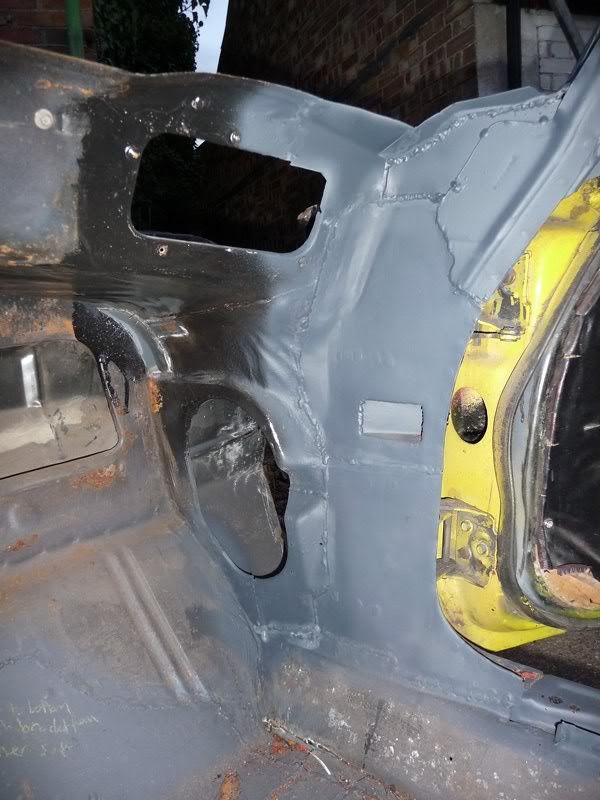
And thats where I am with the bodywork. Most of the front end is finished now, just need to prep the inside of the cowl for 2k epoxy and seam sealer
before fitting the new vent/dash panel.
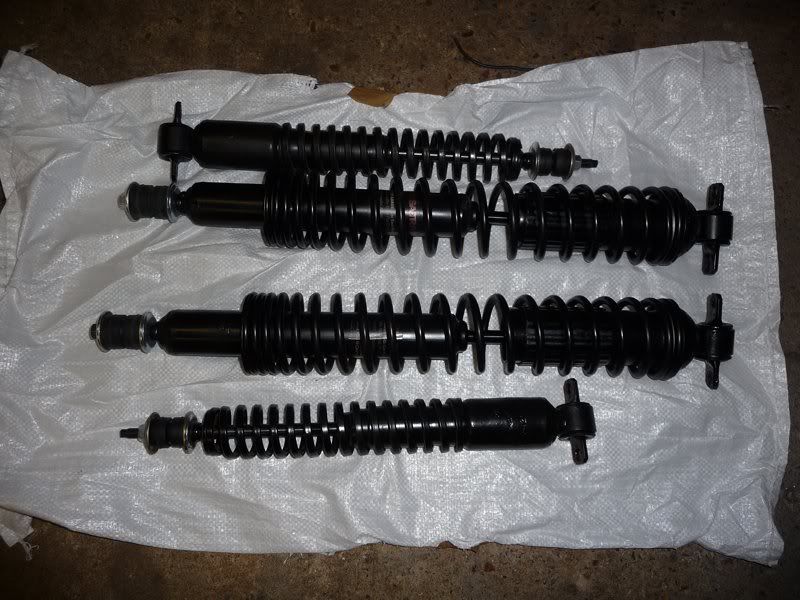
Oh I got some goodies as well...
Monroe Sensa-trac shocks, Competition Engineering sub frame connectors and some new front calipers

Sera
http://www.motosera.com
|
|
|
scootz
|
| posted on 4/12/11 at 07:03 PM |
|
|
You're nuts... but I like it!
It's Evolution Baby!
|
|
|
flak monkey
|
| posted on 4/12/11 at 07:06 PM |
|
|
quote:
Originally posted by scootz
You're nuts... but I like it!
Thanks on both counts
Sera
http://www.motosera.com
|
|
|
l0rd
|
| posted on 4/12/11 at 07:13 PM |
|
|
Sometimes you must love the friendly MOT testers
|
|
|
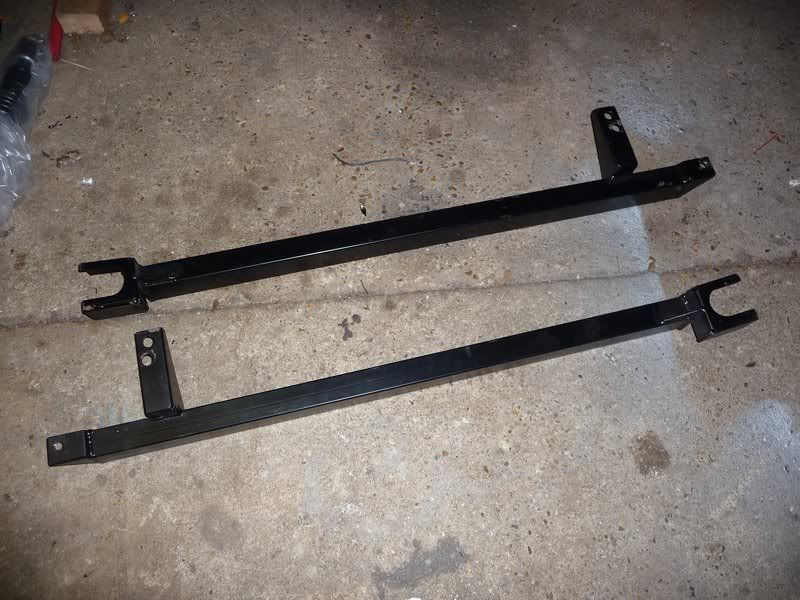
flak monkey
|
| posted on 4/12/11 at 07:21 PM |
|
|
Yeah sometime they are handy. Most of the serious stuff wasn't visible to be fair, but its scary what can lurk beneath.
I have a new section of rear frame rail somewhere on a plane over the atlantic at the moment as well....
Sera
http://www.motosera.com
|
|
|
Xtreme Kermit
|
| posted on 4/12/11 at 08:10 PM |
|
|
Awesome work there flak. Not seen this thread before.
|
|
|
JoelP
|
| posted on 4/12/11 at 08:23 PM |
|
|
Hats off, i can only imagine where you get the determination to bother with a project that big. I'd have burnt it in a rage long ago
|
|
|
ReMan
|
| posted on 4/12/11 at 08:26 PM |
|
|
Hats off to your perseverence!
I'm sure you keep telling yourself it will be worth it, most would have either scrapped or bodged it by now, which is exctly what you've
found so far
Good luck, look forward to seeing it finished.
My bro had one 20 years ago ands that was wors than this one then
www.plusnine.co.uk
|
|
|
locoR1
|
| posted on 4/12/11 at 08:57 PM |
|
|
Im going to echo scootz comment You're nuts
Being serious that's a lot of work but looks your getting on top of it, keep up the good work sure it will be a stunner when its finished!
 
Description
Check out my CB500T Cafe Racer build diary
|
|
|
PSpirine
|
| posted on 4/12/11 at 10:05 PM |
|
|
I'm in complete awe of your dedication. Looks like you're doing a top job of all the fixes! Will be so worth it in the end.
However, I can't help but chuckle thinking back to your post when you just got it when I'm sure you said something along the lines of
"pretty solid, no major rust, just a few small bits to sort out!"
|
|
|
flak monkey
|
| posted on 5/12/11 at 08:23 PM |
|
|
I did say that. Lol. Nevermind, it did look solid on initial inspection. 2 people looked all over it before I bought it. But there we go.
Been painting today


2k Jotun Jotamastic, marine grade epoxy mastic paint. Should hold up as its designed for submersion in salt water
Sera
http://www.motosera.com
|
|
|
jacko
|
| posted on 5/12/11 at 08:30 PM |
|
|
Hi David fantastic work you are a hero taking that on
Have you thought about putting this on Retro Riders they would love this on there
Graham
http://retrorides.proboards.com/index.cgi
[Edited on 5/12/11 by jacko]
|
|
|
big_wasa
|
| posted on 5/12/11 at 08:36 PM |
|
|
Love it.
|
|
|
flak monkey
|
| posted on 6/12/11 at 04:46 PM |
|
|
Today I went around the cowl area with seam sealer. Hopefully I havent missed anywhere, I dont want this thing leaking when I have finished! Then gave
it another couple of spray coats of epoxy inside and out. Spraying let me get right into the hinge areas of the cowl as well. So hopefully thats got
as much as possible coated.
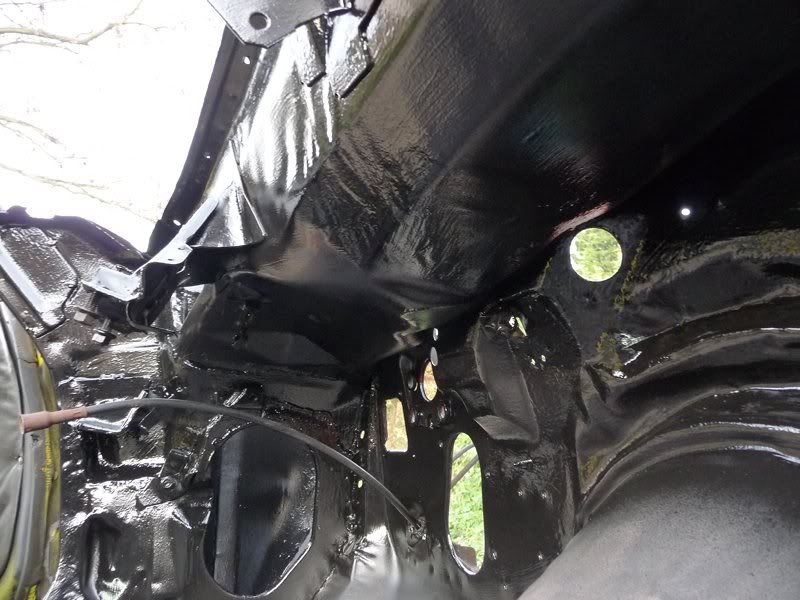
Also scuffed and sprayed the new cowl panels.
Then started to remove the rear axle. To my suprise everthing came loose without many problems. One clip nut broke, but I had the floor cut away above
that anyway.
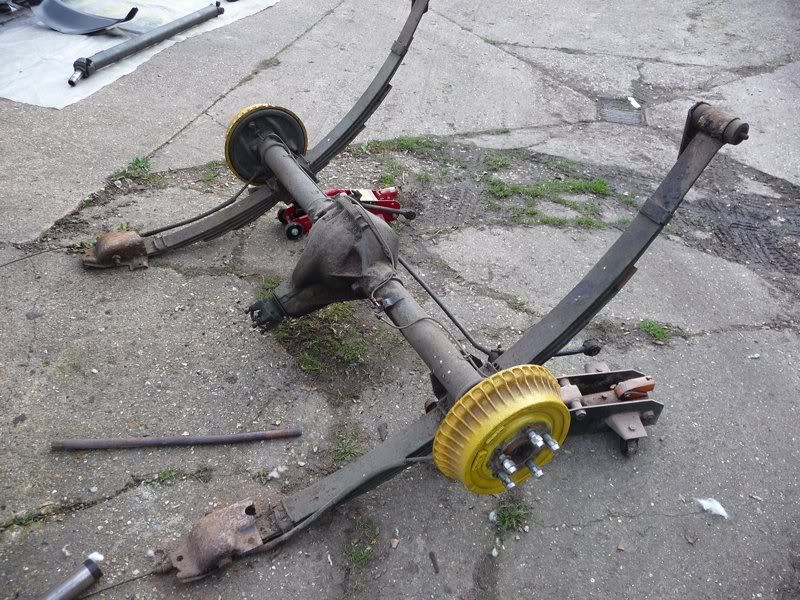
And the drivers side torque box looks good. Bar needing a coat of paint where I did the repairs a couple of months ago.
Passenger side is good towards the front, which means it will be a little easier to replace the frame rail as I will have a good datum to work to.

Thats all for today. Can't get a lot done in 7 hours of daylight 
Sera
http://www.motosera.com
|
|
|
flak monkey
|
| posted on 7/12/11 at 05:10 PM |
|
|
Very cold and windy here today. Started off chancing welding the cowl shoulder panel on, but gave up after 10 minutes.
Instead decided to do some work in the garage with the doors firmly shut!
Herb Adams mod on the leaf spring mounts.
The old mounts were a bit manky, covered in the usual 30 years worth of filth and underseal. That said one of the 5/8" bolts holding the mount
to the front bush was so loose it came undone with a ratchet and no force at all. The mounts also have about 1/4" sideways play on the crush
tubes of the bushes. Will have to make some spacers up to go in there when I reassemble everything.
Just marked out the new holes, and where to cut the top of the mount away to clear the spring eye then sliced it with the trusty angle grinder.

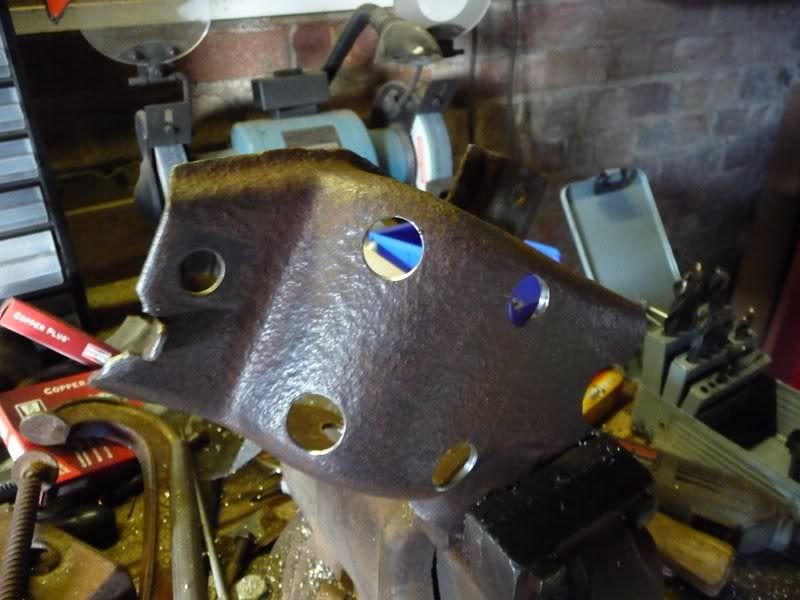
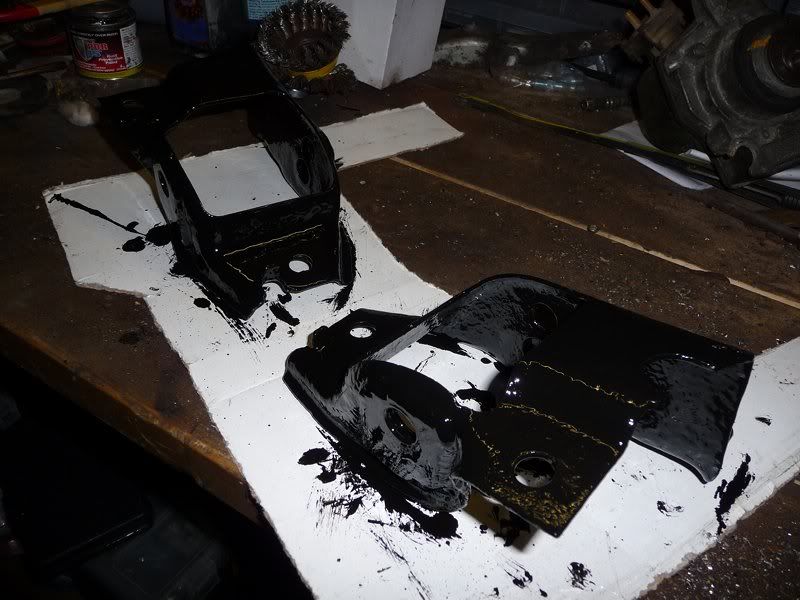
Welded some 1/8" plate over the new holes to add a bit more strength to the bracket. Then gave them a coat of POR15.
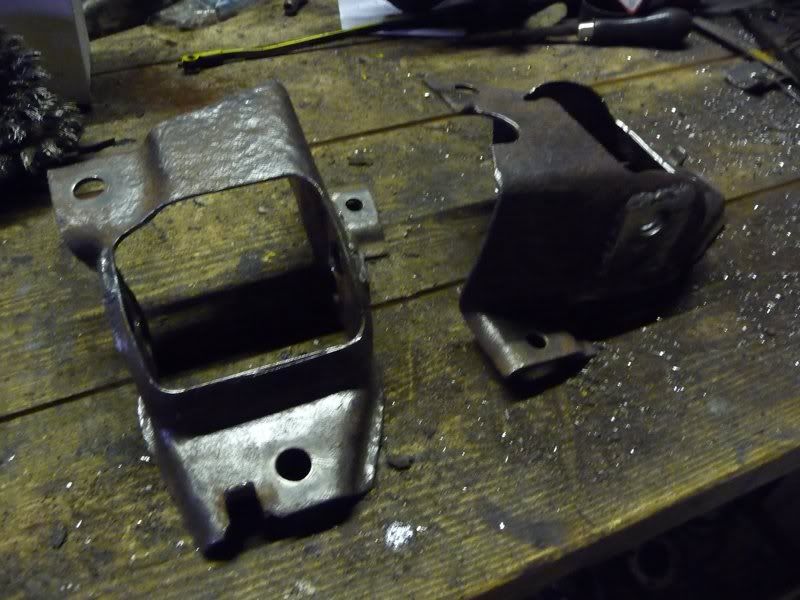
Another job done.
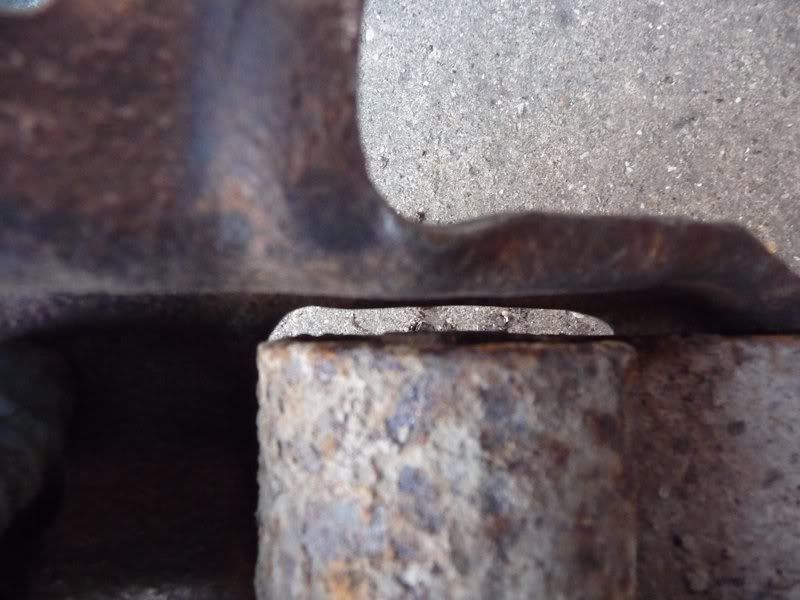
This is the gap between the bushing and mount. They were like this fitted to the car...no wonder it handled a bit funny, and it wasnt just down to it
having cart springs on the back
Sera
http://www.motosera.com
|
|
|
flak monkey
|
| posted on 9/12/11 at 04:42 PM |
|
|
It was 4deg C here today But the weather held out so...
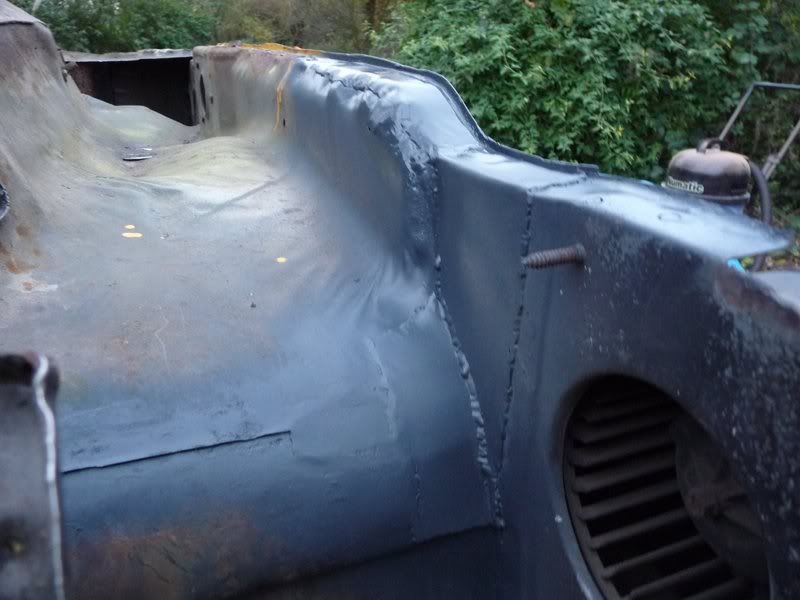
Fitted the new cowl shoulder panel

Painted all the seams inside the cowl again with epoxy (plus I had some mixed up from something else, so figured it can't hurt!)
Then test fitted the cowl panel and marked out the positions for the spot welds. Also checked the fit of the screen and it fits nicely. Then drilled
lots of holes in a nice new panel
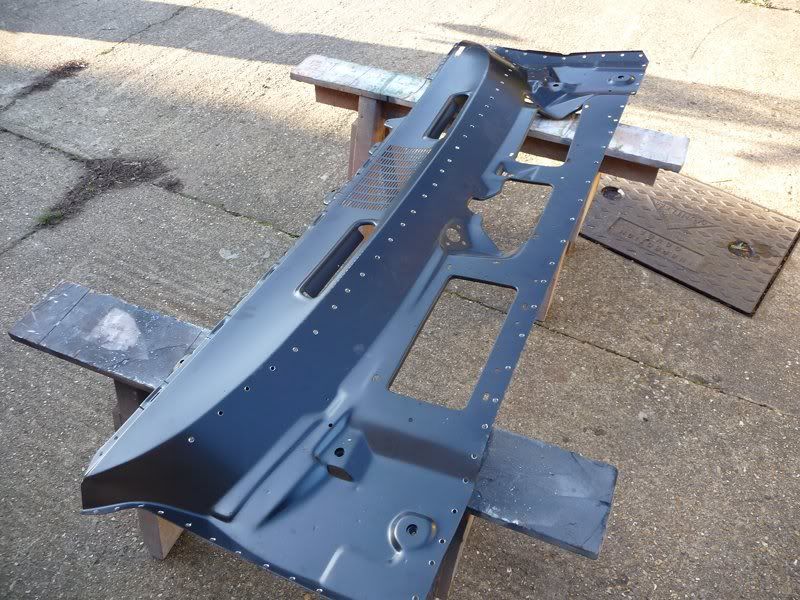
Then after lots of welding, grinding and swearing (mostly at the welder as it kept unravelling the wire today, I swear it's possessed !) the
cowl panel was fitted, seams/joints coated with epoxy and the bare metal etch primed. Tomorrow I'll be going around all the seams with seam
sealer so its ready for a top coat. Not sure what I am going to paint it with yet though.
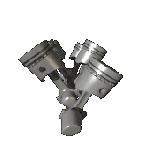
And these are the new heads I picked up yesterday
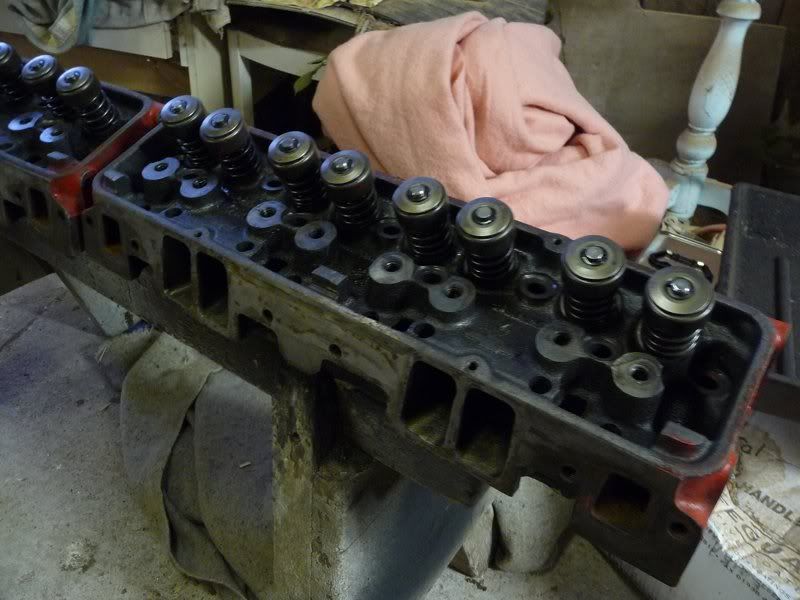

A quick clean up, and check over then they should be ready to use.
Sera
http://www.motosera.com
|
|
|
Confused but excited.
|
| posted on 9/12/11 at 05:01 PM |
|
|
That's going to be one mean machine.
Tell them about the bent treacle edges!
|
|
|
jeffw
|
| posted on 9/12/11 at 05:48 PM |
|
|
Looks good....but shouldn't you be busy with my Plenum 
|
|
|