flak monkey
|
| posted on 19/10/13 at 08:16 PM |

|
|
Thanks Mark
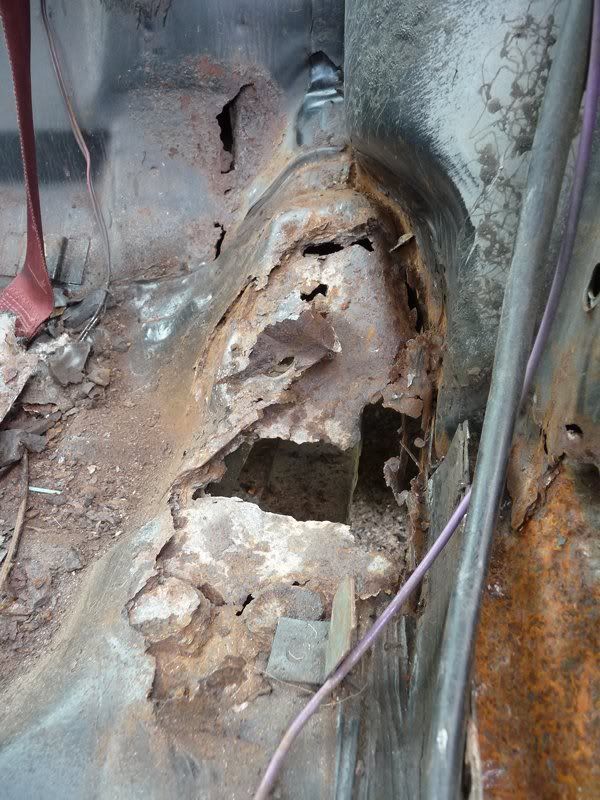
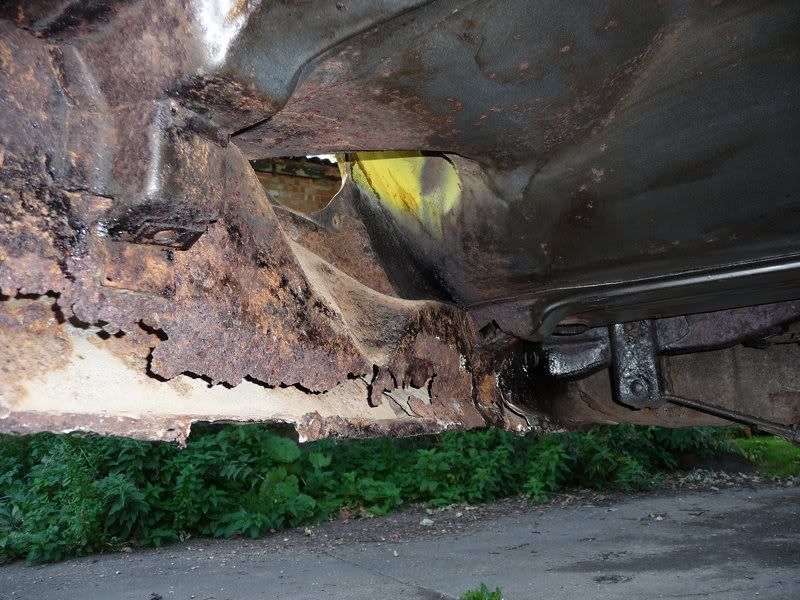
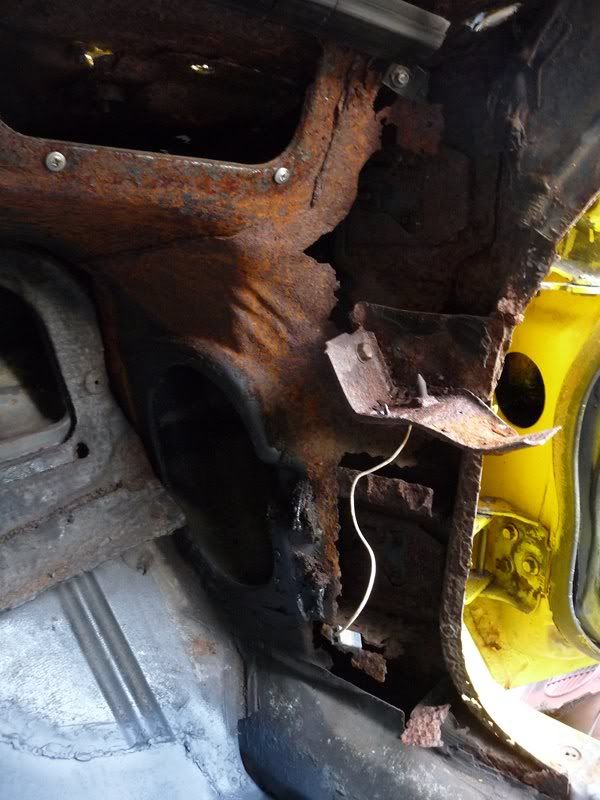
Minor progress today. Finished rewiring the front lights. Tested most of it and it all seems to work ok. There was so much bodged wiring and dodgy
cables I decided to chop it all off at the inner fender and replace the whole lot.
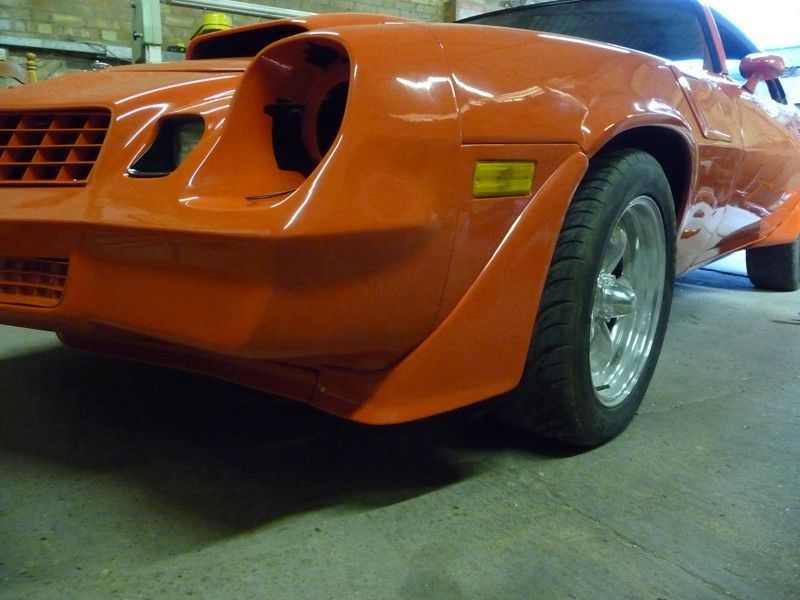
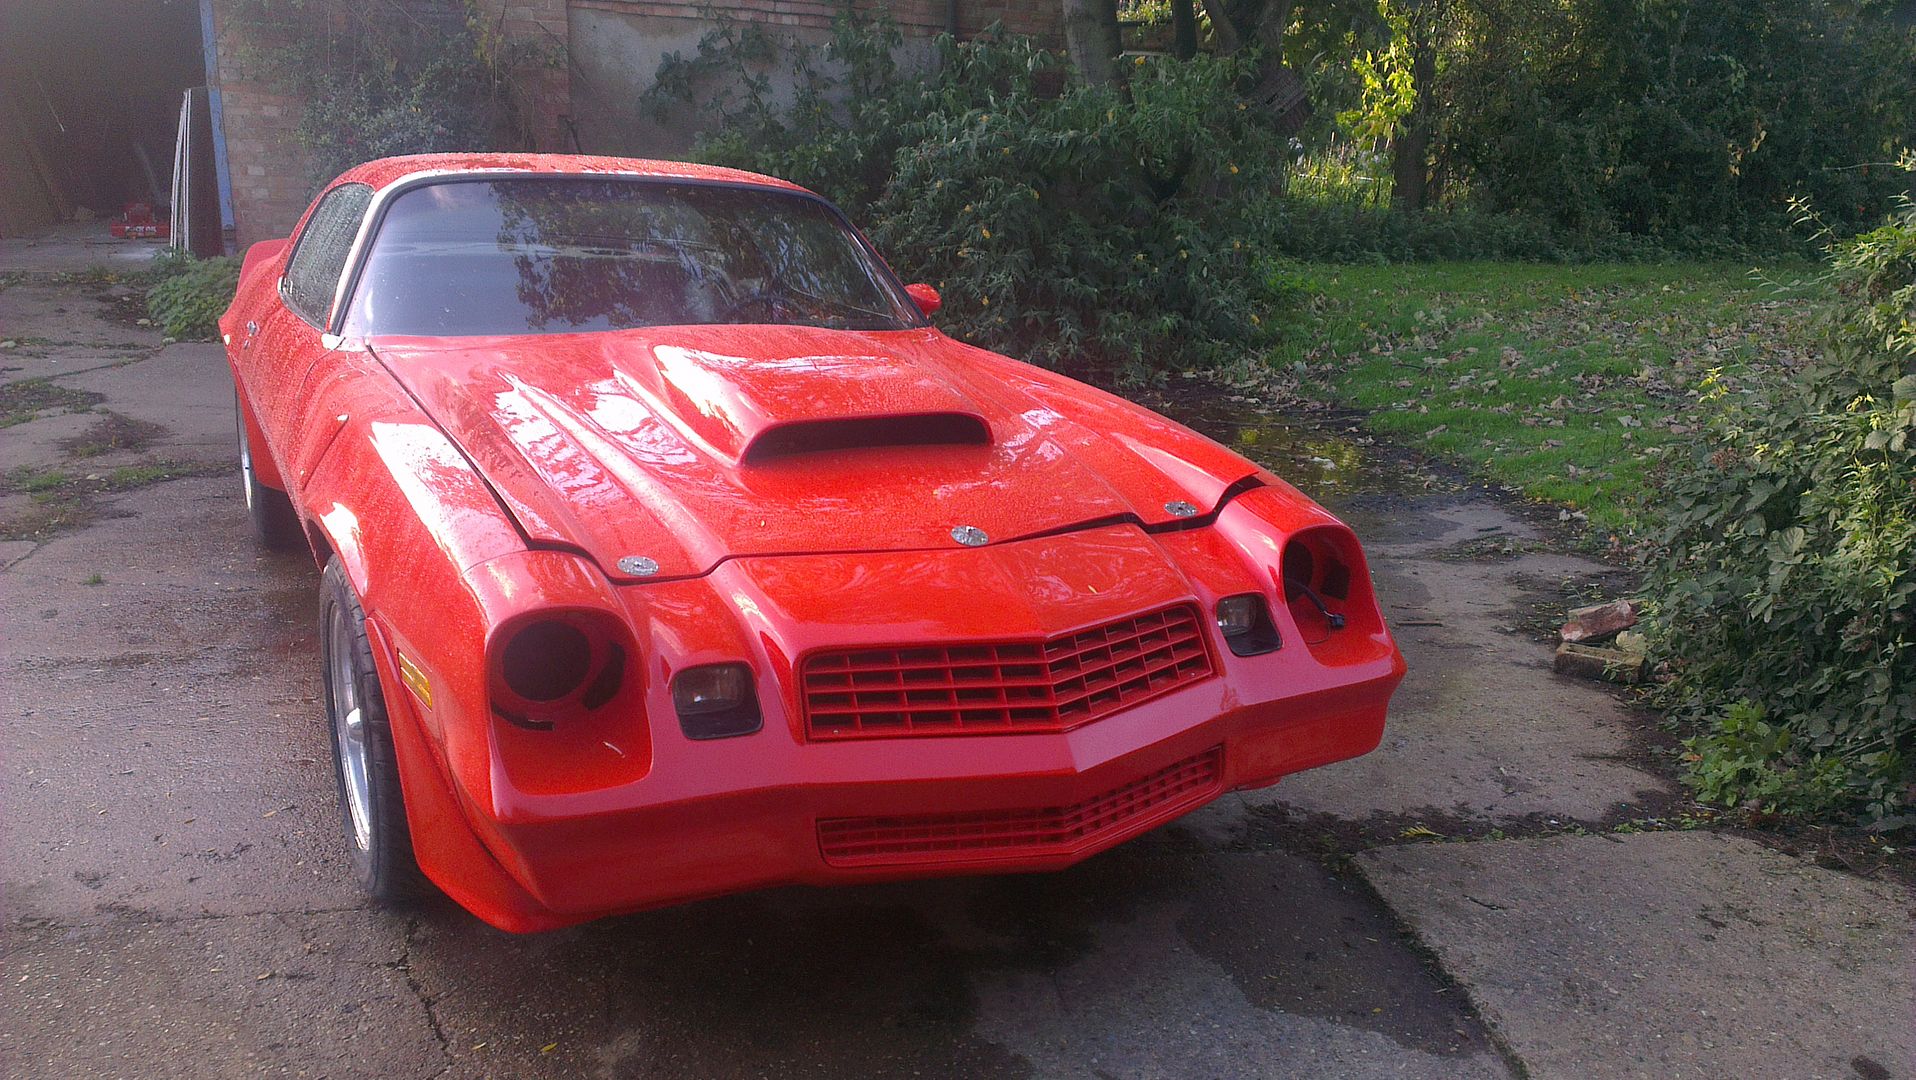
Fitted the front markers and grilles. Waiting for some new headlights before I can get those fitted. It fits reasonably well considering its an
aftermarket nose. I do need to find a better lower grille at some point, and one that matches the upper. These will do for now though.
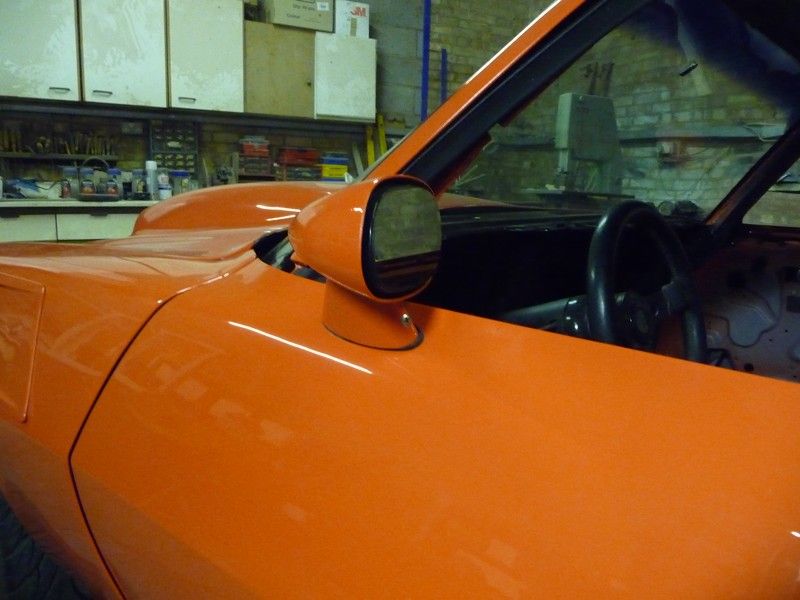
Fitted the reinforcement plates for the hood pins, needs a little adjustment to get it right but it's not far off now I've fitted new hood
bumpers. Also mounted the drivers side mirror, need the right bracket for the p/s, I ordered the wrong one!

|
|
|
|
|
flak monkey
|
| posted on 20/10/13 at 05:40 PM |
|
|
More or less got the exterior of the car put together today. Still a few little things to do here and there, but need a dry day to get it outside to
do those. Also need to get hold of some dynamat or similar for the inside of the doors before I put the glass in. Hopefully get that sorted during the
week.
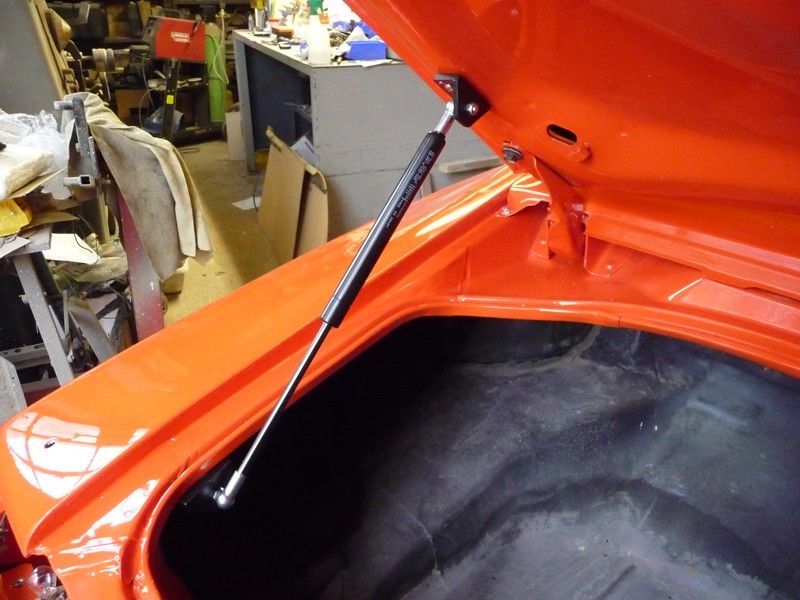
I decided to fit a gas strut to the trunk lid. I battled for half an hour with the torsion rods before the car went to paint, and chickened out of
fitting them after the lighter one did some minor damage. The strut lifts the boot lid with ease once it's unlatched.
I also fitted the new trunk seal. Not all that happy with that to be honest, trunk lid now sits about 1/8" too high and you really have to slam
the trunk to get it to shut, even after adjusting the latch. Will see how it goes over time, hopefully it will squash up a bit eventually. Also have
no idea if it's going to seal or not. Seal doesn't sit in the recess properly in several places which I dont think helps much.
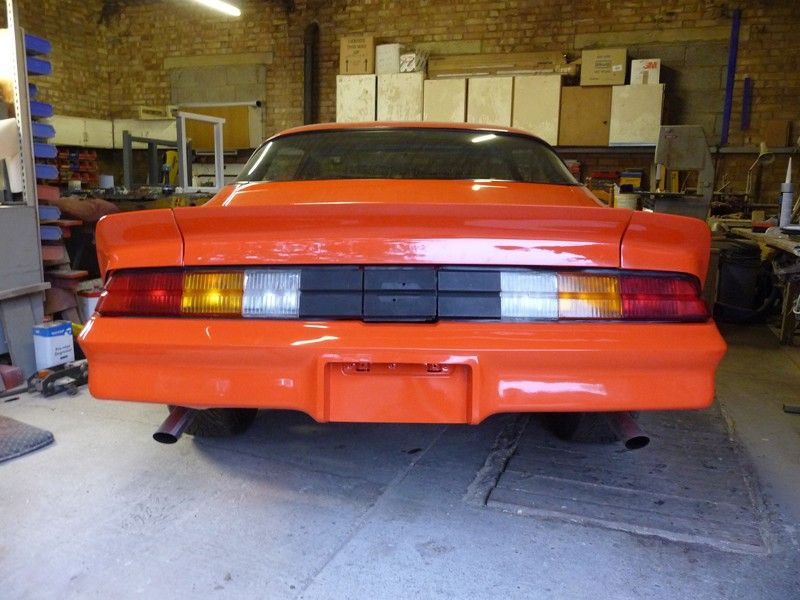
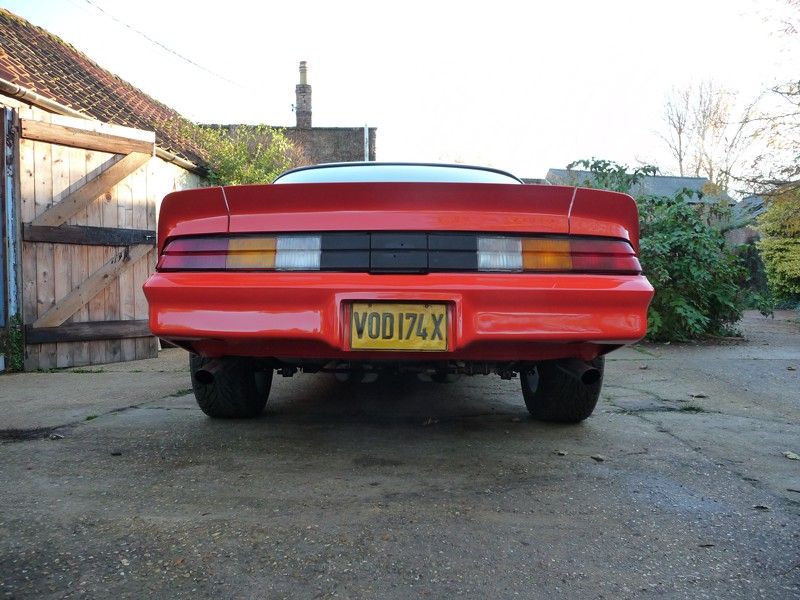
Fitted all of the spats, I'd pre-drilled all the fixing holes before paint, so was a simple job really. Also fitted the rear spoiler and the
lights that I refurbed about a 18 months ago. Managed to get the spoiler lined up even with the trunk lid sitting a bit high, so pleased with that.
Last job was door locks and handles, simple enough. Repro handles are crap quality though, wonder how long they will last!
Need to get an emblem for the fuel door at some point. Least of my worries :lol:


|
|
|
matt.c
|
| posted on 20/10/13 at 08:34 PM |
|
|
Thought i would have a little catchup with some of your projects and am totally shocked!! 
Wow you really done well with this and the chopper project.
Ha ha whats next on the project hit list then? Boat? 
|
|
|
Benzine
|
| posted on 20/10/13 at 08:42 PM |
|
|
I've enjoyed following this thread, top stuff! 
|
|
|
scootz
|
| posted on 20/10/13 at 09:24 PM |
|
|
Great work!
It's Evolution Baby!
|
|
|
flak monkey
|
| posted on 27/10/13 at 09:31 PM |
|
|
Thanks chaps
Another short day after taking someone to pick up a car this morning...
Got the ecu etc reconnected after fitting the carpet. Fitted both door windows and adjusted as best I can for the time being. Think they still need a
little adjustment to be spot on. Fitted sound deadening to the rear parcel shelf and trunk divider panel. Could do with a little more, but I've
run out. Reckon what's there will make a big difference though.
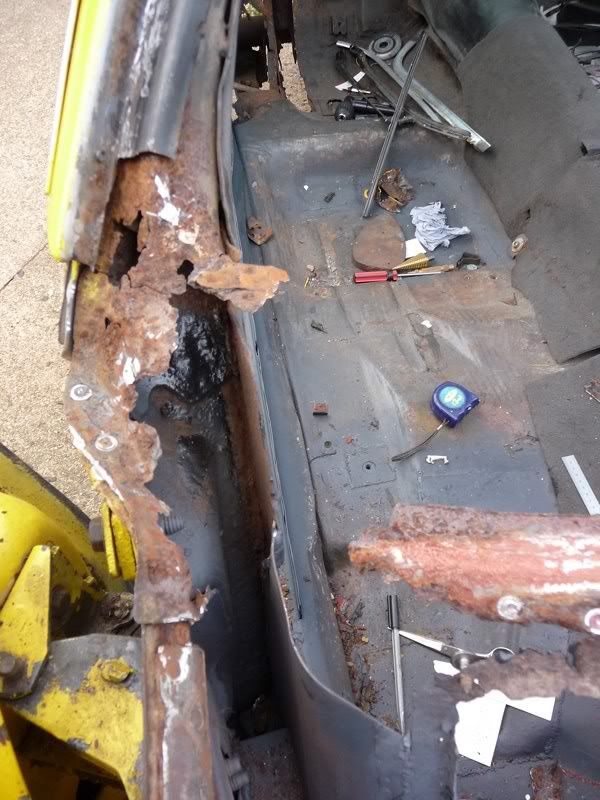
Next job was to do some leak testing with the hose. Gave it a good blasting down and found a couple. I have one at the rear window, which I can fix
with a little extra sealer once its dried out again. We had a couple of problems when fitting the glass so that would explain it, no big deal. The one
that worries me is a slight trickle from the bottom RH corner of the heater box. I seam sealed the blower housing to the firewall when I assembled it,
but still have a slight leak. Not sure if its down to the sheer volume of water, or something else. Either way that one is a problem...
And both doors leak where the upper and lower seals meet. Not sure what to do about that one either as there's no adjustment there. The windows
don't leak though.
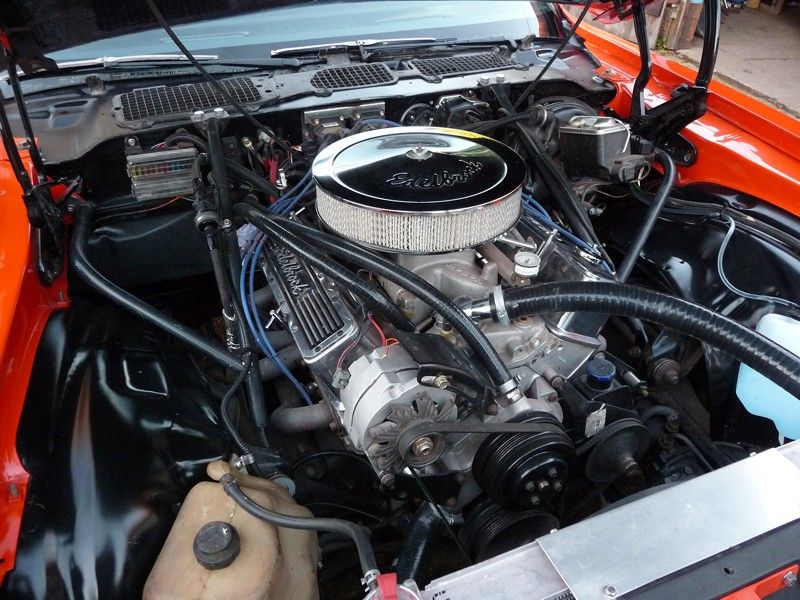
Had a little tweak around with the ECU as well, seems to start up better now and drives ok for the time being.
Tidied up some under dash wiring too. Found the cause of an intermittent turn signal, turned out to be a bad connection at the column plug. And the
horn wasn't working, but fitting a fuse helped!


|
|
|
flak monkey
|
| posted on 4/11/13 at 08:33 PM |
|
|
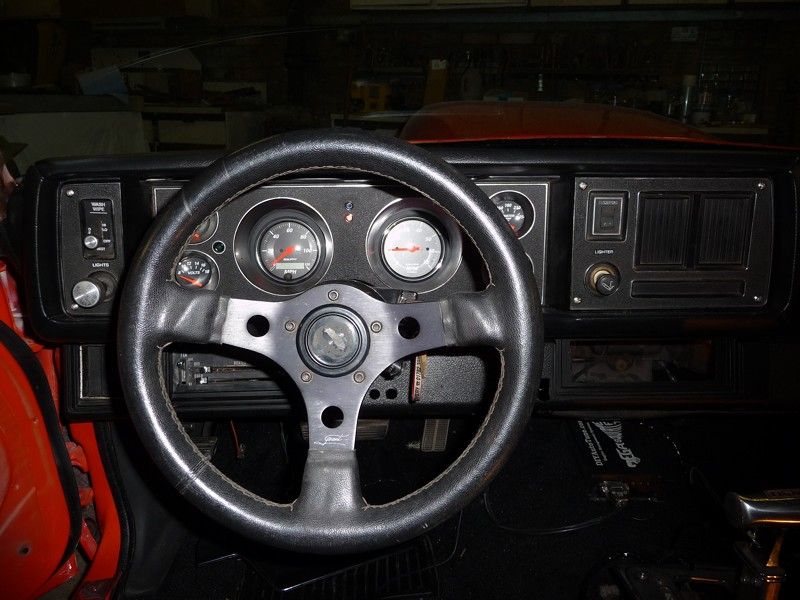
Been off gothing it up in Whitby all weekend, so got nothing done on the car But we got back this morning, so thought I better get on with it.
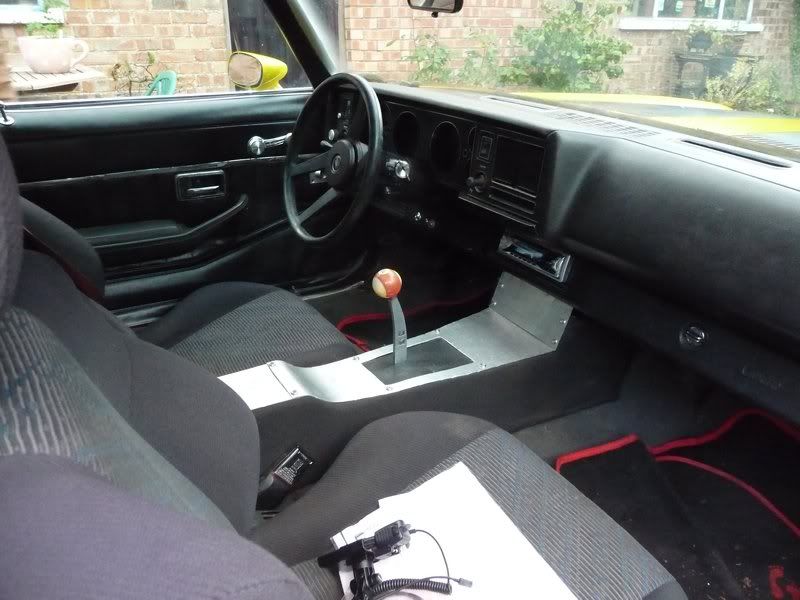
Cleaned up all of the dash parts and sprayed them with black vinyl dye. Great stuff and dries really quick, reassembled the dash and fitted new clips.
Spent a while refitting all the brackets and the heater cables before refitting the dash and tidying up the wiring. Pleased with how it's all
gone back together especially with the new cowl/dash panel I fitted last year.
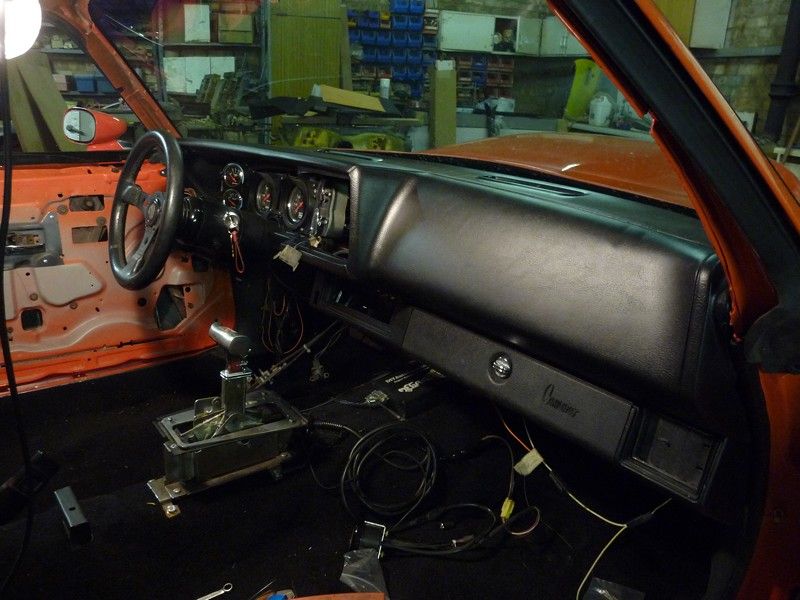

After that I fitted the new headlights, and checked everything worked (which it does!) Tomorrow I'll be finishing off under the dash and
reassembling. Then I am going to have a battle with getting the headliner in. Should be fun
|
|
|
flak monkey
|
| posted on 6/11/13 at 09:09 PM |
|
|
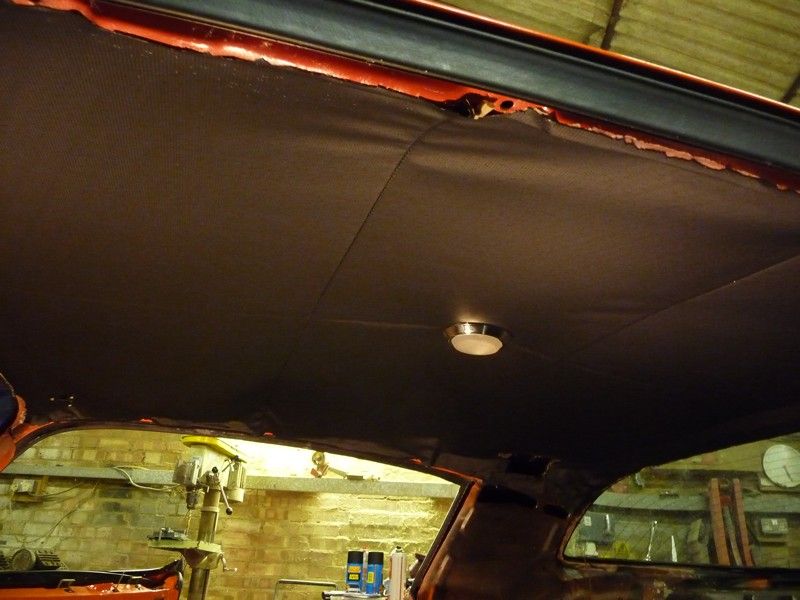
I went for a bow style headliner conversion as it was a lot cheaper option, although it was a lot more work. Fitted the 2 rails for the clips
15" apart on the roof about the centre line.

Then the sides were all pulled tight, cut and glued to the roof with high strenth spray adhesive. Not forgetting to pull the dome light wires through!
Pleased with the result for a first attempt. It's far from perfect, but it'll do for me.
I also refitted the dash bezel and tested the rest of the electrical systems. All seems to function OK. Had to fit new warning lights to the bezel as
I'd chopped the instrument pod up and done away with all of the original warning lights.
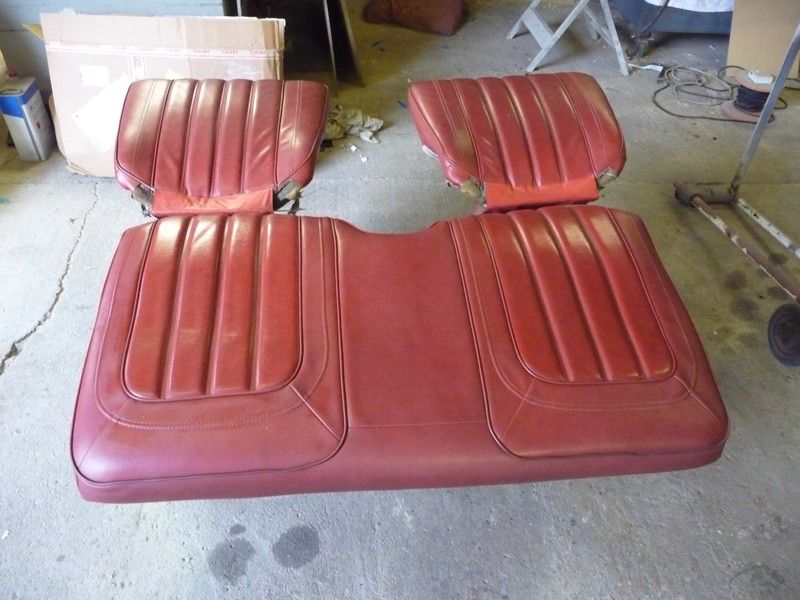
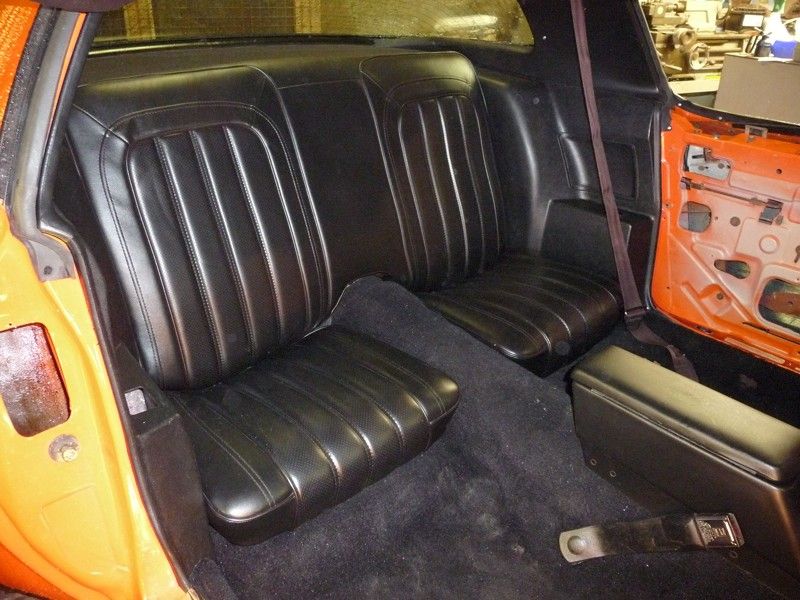
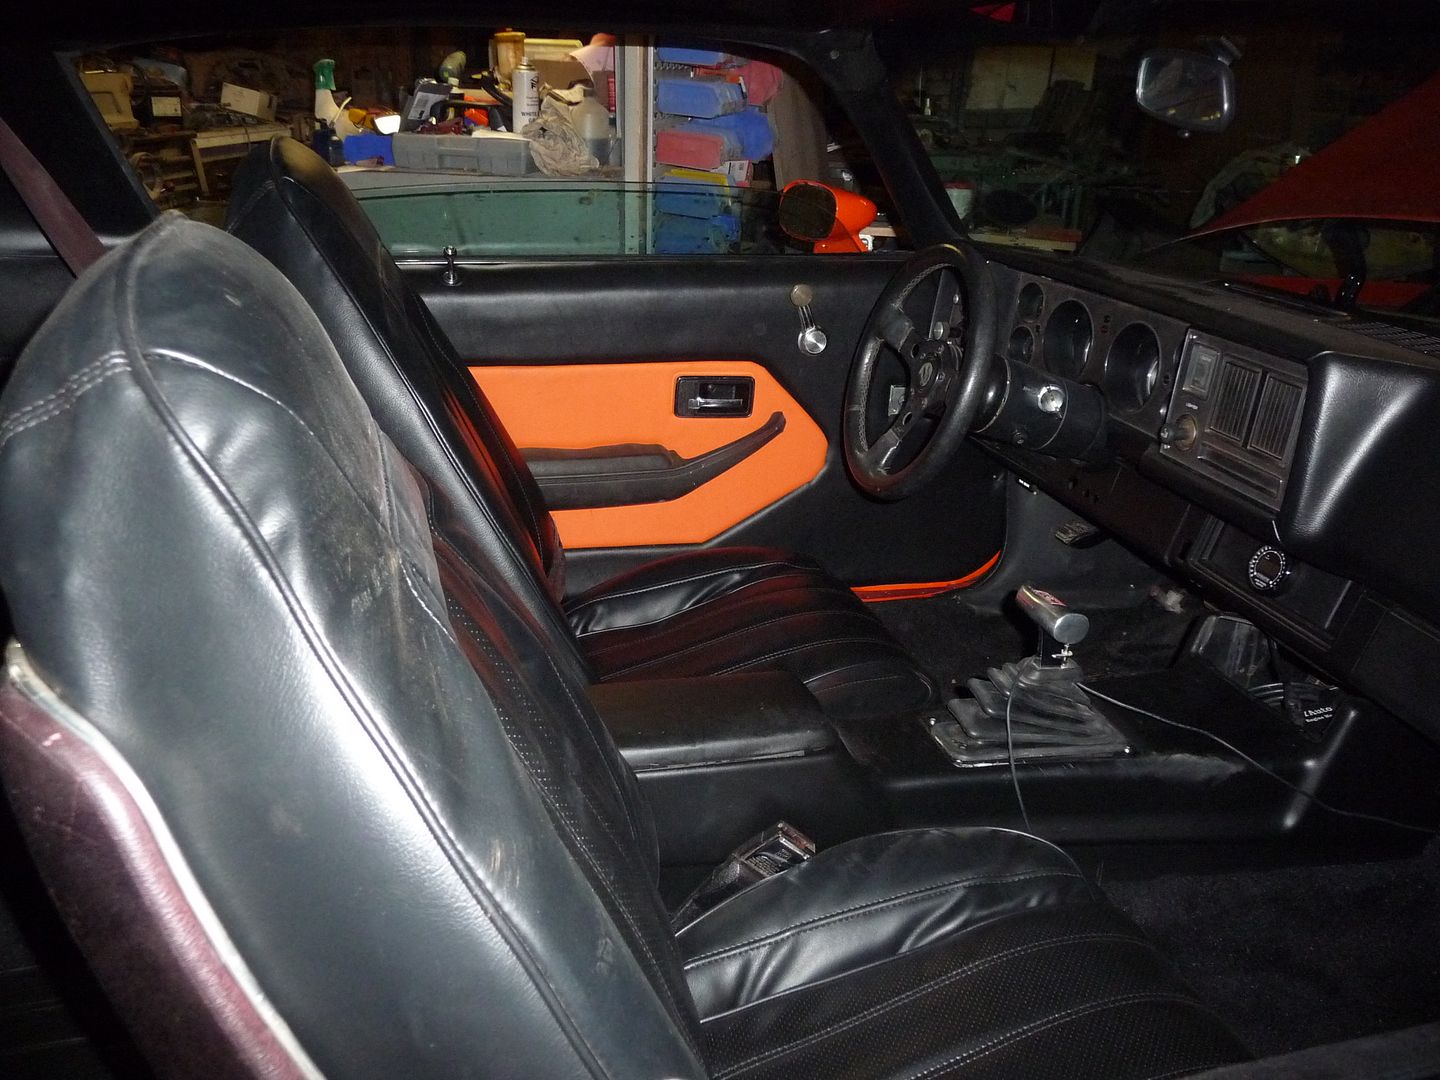
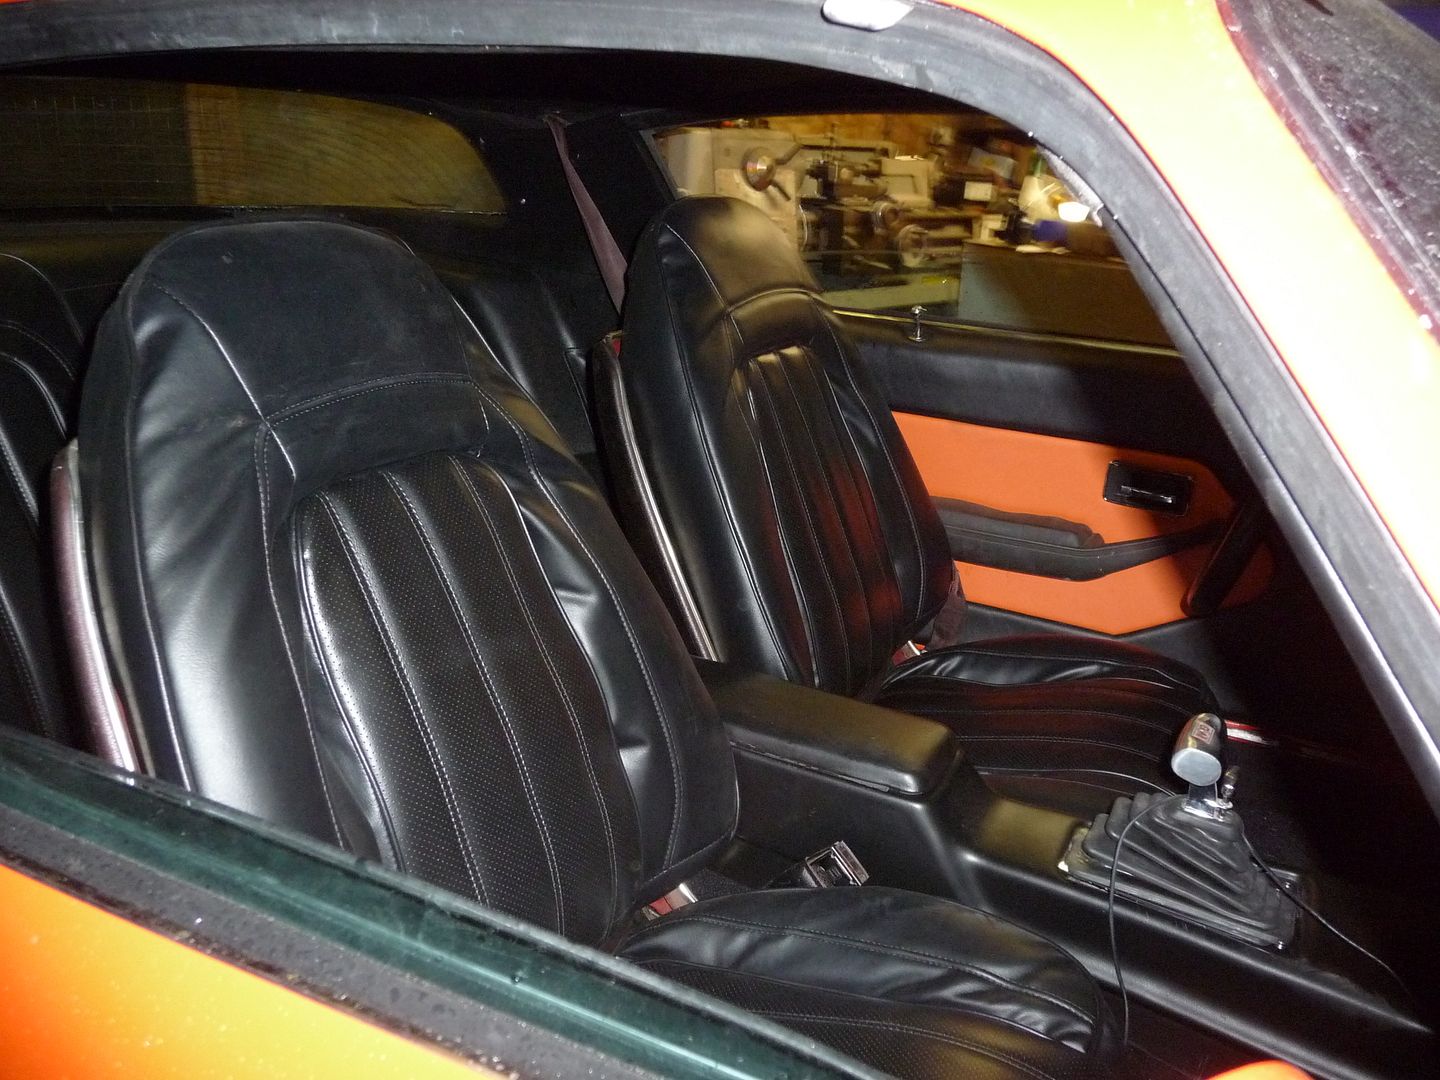
Today I spent most of the day spraying vinyl dye on all of the interior panels, seats etc and then refitting them all. Pleased with the results.

|
|
|
flak monkey
|
| posted on 8/11/13 at 06:56 PM |
|
|
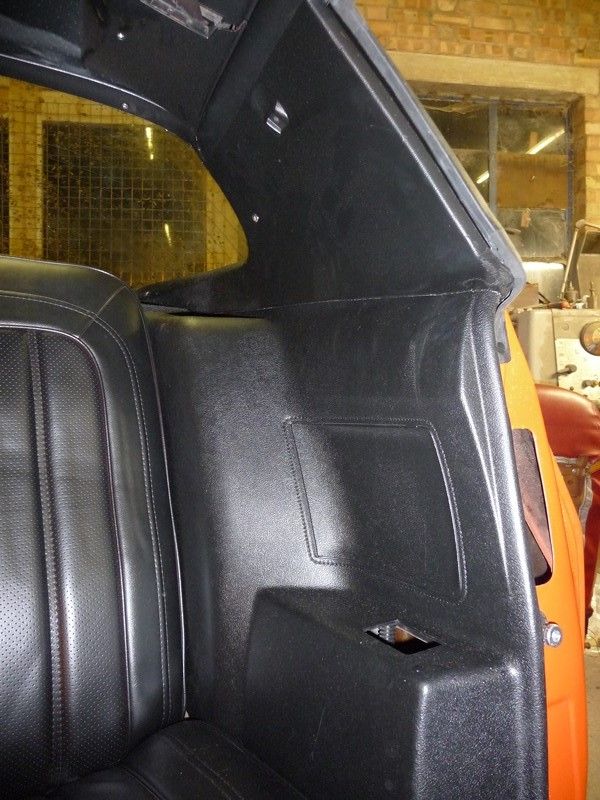
Yesterday morning I set about covering the door cards I'd made. First I laid up some fiber glass on the platic top sections as they had become
very brittle. Just a single layer of 250gsm mat was enough to make them nice and solid again. After that I had a late night having a battle with the
seats. But I did get them done eventually. They came out ok, not perfect, but good enough for me.
This morning I checked over all of the suspension and fitted a few split pins I had forgotten about. Fitted and tested the windshield washers, they
worked ok for a while (just long enough) but I am ultimately going to replace the mechanical pump with an electric one.
After that I thought I'd take it for an MOT.... and the result meant I could part with some money and get one of these!

Yes after 2 and a bit years its back on the road!
Done about 20 miles as an initial shake down and have a small list of things that I need to sort over winter:
Washer pump
Wipers need adjusting - drivers one runs just onto the screen trim.
Exhaust rattle - think it's the left hand rear tail pipe hitting the chassis rail
Brakes are terrible - though good enough to pass the MOT they have no initial bite at all. Will try some better pads first.
New door pulls are needed - I just put the broken old ones back on for the time being.
Intermittent communications issue with the laptop and ECU - a little annoying when trying to tune on the road
Apply some stone chip in the rear wheel wells
Transmission oil leak at the speedo drive/output.
Quite a few rattles to sort
But overall it's great to have it back up and running. The ride is firm but not harsh and it corners nice and flat with the suspension upgrades
I did. The 3rd gen steering box has transformed it, steering is super quick now. It's quiet when crusing at steady throttle but howls when you
open it up a bit. Lots of induction noise as well as exhaust.
|
|
|
scootz
|
| posted on 8/11/13 at 07:42 PM |
|
|
Great work!
It's Evolution Baby!
|
|
|
scimjim
|
| posted on 8/11/13 at 08:38 PM |
|
|
Awesome rebuild
quote:
Originally posted by l0rd
I would say
Scrap the chassis. Keep the body panels and start building a new chassis NASCAR like

|
|
|
flak monkey
|
| posted on 10/11/13 at 04:59 PM |
|
|
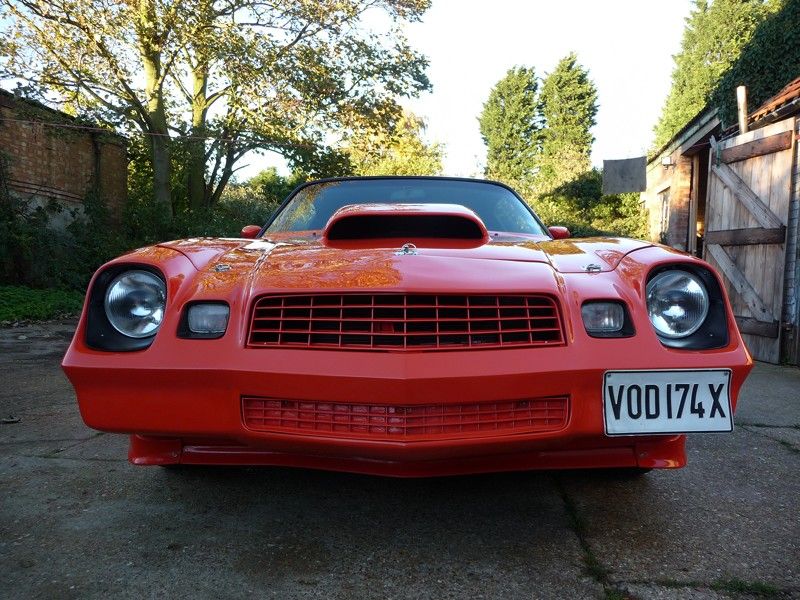
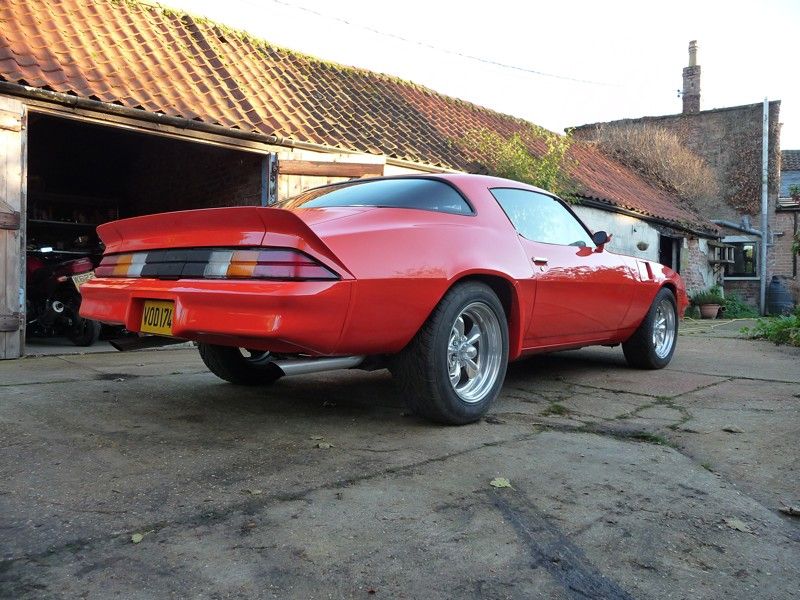
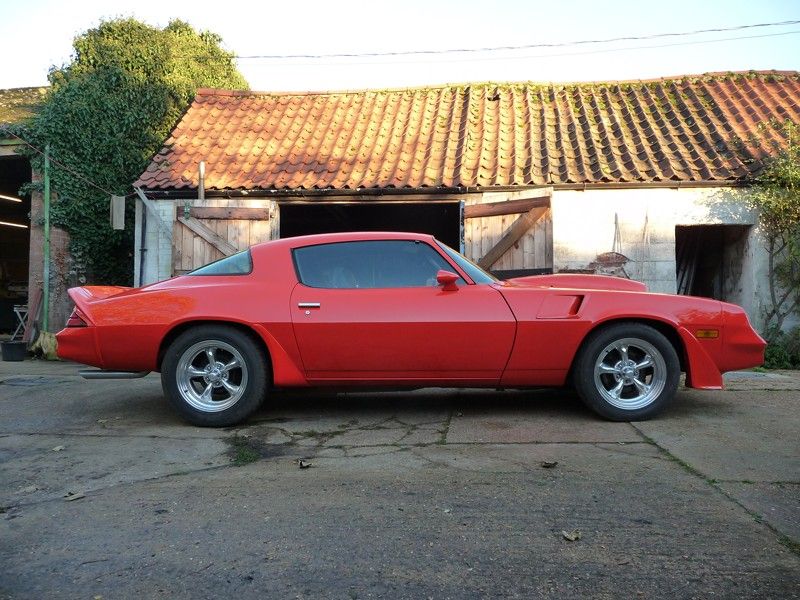
Thanks guys. Still lots to do 
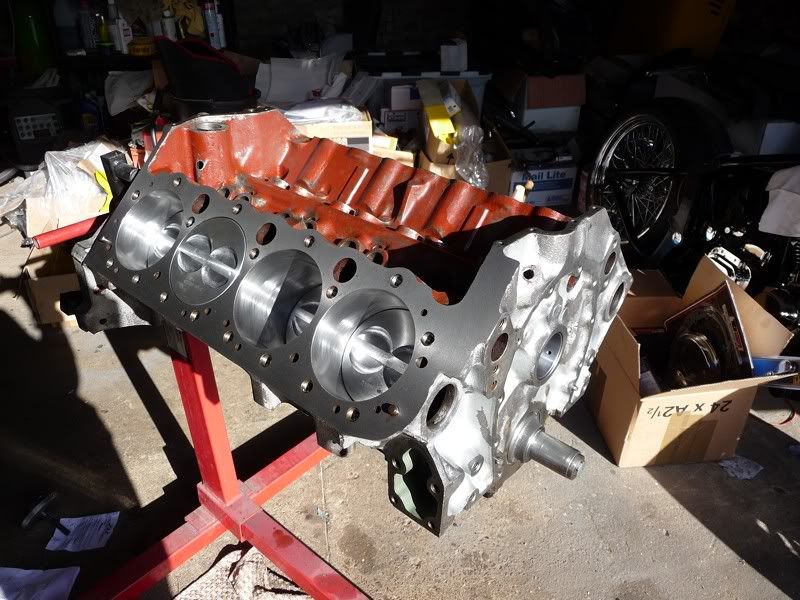
Done about 100 miles over the weekend just to identify a few bugs to be working on. Got the ECU set up well enough to start easily and drive smoothly
at all normal road speeds. Think I could do with adding some more timing in at cruising speeds which should let me lean it out some more.
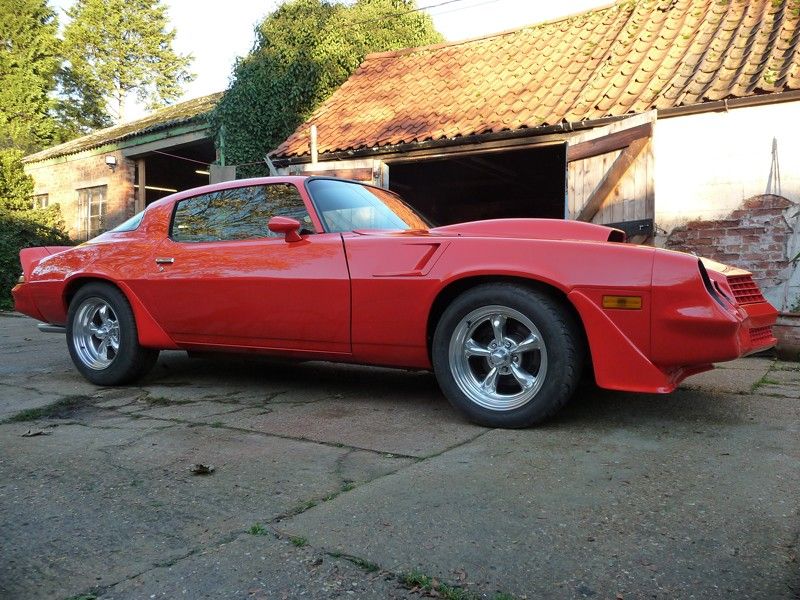
Gave it a quick polish up and tidied a few loose ends today. Just thought I would post a couple of before and after shots....
Before:

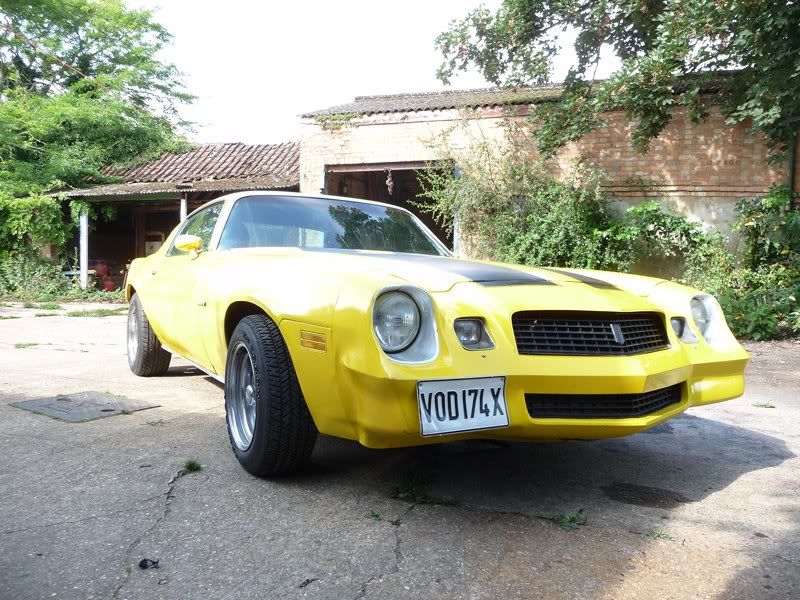
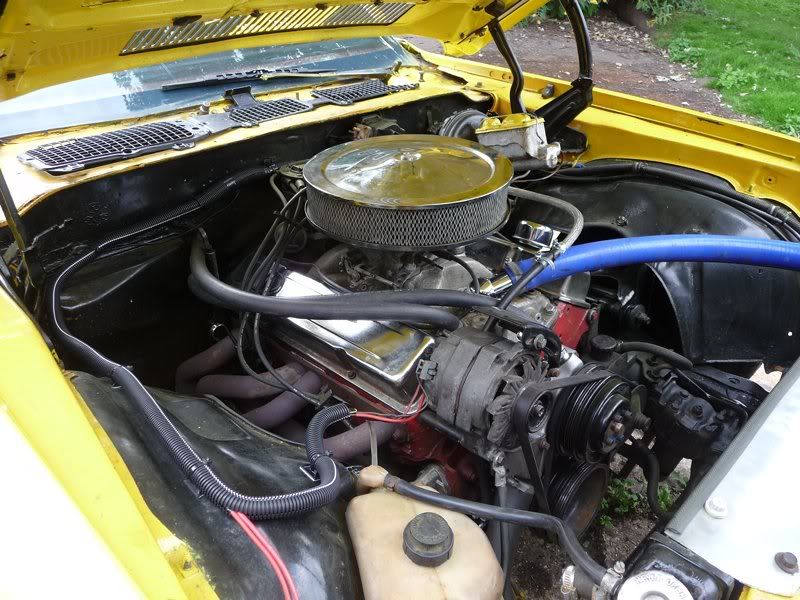
During:

After:
|
|
|
Ivan
|
| posted on 11/11/13 at 07:22 AM |
|
|
Superb job David - love the shape of the bonnet scoop.
|
|
|
ashg
|
| posted on 11/11/13 at 08:04 AM |
|
|
looks great! nice to see an old car brought back to life.
have you thought about painting the front grills and light recesses either all black or all silver? personally i think that would finish it off
Anything With Tits or Wheels Will cost you MONEY!!
Haynes Roadster (Finished)
Exocet (Finished & Sold)
New Project (Started)
|
|
|