DIY Tracking rig
AdrianH - 30/7/21 at 07:18 PM
My Haynes is in a garage tomorrow (Sat) to have a proper laser tracking job done, the last time it was check something like 11 years ago. So a few
days ago I thought I would try to free off the track-rod locking nuts etc and make sure things moved to help the job along. Well it was not that easy
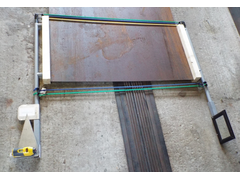
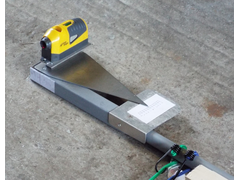
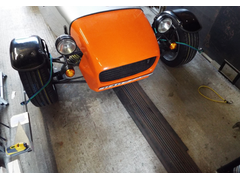
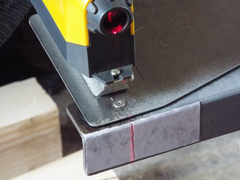
and it did mean settings were lost in the process. So I made a simple tracking jig to get it close so I could drive it OK to the garage.
I calibrated the rig first using a plate of 3mm steel and a few bits of wood and then put on the front wheels of the car and made adjustments, end
results look to be 0.5 degree toe in which is good enough to get me there OK and then I will check it all when the job is done to calibrate the rig
that bit better. Then it will probably sit on the shelves for the next few years.


tracking1


tracking2


tracking3


tracking4
Adrian
[Edited on 30-7-21 by AdrianH]
SteveWalker - 31/7/21 at 12:12 AM
My tracking device is basically a giant, home-made, g-clamp, just using it to compare front and rear edges of the front wheels. It works well for 0°
and simply calculating turns of the screw for other angles.
Sanzomat - 31/7/21 at 07:49 AM
quote:
Originally posted by AdrianH
My Haynes is in a garage tomorrow (Sat) to have a proper laser tracking job done, the last time it was check something like 11 years ago. So a few
days ago I thought I would try to free off the track-rod locking nuts etc and make sure things moved to help the job along. Well it was not that easy
and it did mean settings were lost in the process. So I made a simple tracking jig to get it close so I could drive it OK to the garage.
I calibrated the rig first using a plate of 3mm steel and a few bits of wood and then put on the front wheels of the car and made adjustments, end
results look to be 0.5 degree toe in which is good enough to get me there OK and then I will check it all when the job is done to calibrate the rig
that bit better. Then it will probably sit on the shelves for the next few years.


tracking1


tracking2


tracking3


tracking4
Adrian
[Edited on 30-7-21 by AdrianH]
I'd be surprised if the pro's tool is much better than that. I've previously used string lines for toe and a spirit level for camber
and when it was checked professionly they said it was close enough to not make it worth adjusting further. I recently got a cross line laser and
formed the "box" with a couple of lengths of timber placed on the floor in front of and behind the car with equidistant side marks and
centre marks centred on the car. Setting the laser so it hits both side marks on the timbers and then measuring off the laser vertical plane with a
tape to the wheel rim get me similarly close.
[Edited on 31/7/21 by Sanzomat]
AdrianH - 31/7/21 at 01:40 PM
The pro tool (laser setup) agreed with the 0.5 degrees so all in all the home made is simple but good enough. What I could not check at the time was
all the cambers and making sure I had no crab etc due to wear and tear on the bushes etc. But all OK and had it set for a final toe-in setting of
just over 0.25 degrees.
Combined with some new tyres bought this past week I am hoping for a easier drive. I was finding that the car would try and wander out of the
motorway wheel ruts in the surface. I was not sure if down to tracking or the old tyres which I bought 5 to 6 years ago but turned out to be 9 years
old. Time will tell.
Adrian
SJ - 3/8/21 at 02:29 PM
I bought a Gunsons Trackrite - just drive over it and look at the reading. Works great.
coyoteboy - 4/8/21 at 03:20 PM
I've been pretty determined to make a home-use laser setup for a sensible price for ages. However it's roundly accepted even in motorsport
that some bits of string and wood are usually close enough.
I set up my 4x4 with wood and string. Seems OK, but I've not had it on a proper set up yet. I got the caster gauge too, but don't have
turntables to measure out the 20 deg angle turn required yet - they're expensive enough as it is.
AdrianH - 4/8/21 at 10:22 PM
I guess i was lucky when it came to building this as the only additional thing I had to buy was the mirror for £2 everything else i had around the
workshop left over from other projects.
The good thing about it was when making adjustments the results were very quickly indicated. But as I said probably not going to be used again for a
few years, , so I must remember to remove the batteries from the laser line.
Adrian
