jps
|
| posted on 28/11/25 at 10:13 AM |

|
|
String box alignment jigs...
At some point i'll want to do my own alignment, using the 'string box' method. I've seen plenty of posts about using pairs of axle
stands front/back and a bar across. But i've also seen setups where they fasten directly the car - and a quick Google threw up this:
https://mostlymiata.com/alignment-string-jig/
I'm thinking I can go one step further than that MX5 setup, and if necessary put in some specific fixings somewhere on the chassis to hold things
more sturdily (and allow them to be mounted/re-mounted reliably in the same place).
Has anyone done this for a Locost and got hints/tips on where it might make sense to mount them off the chassis/how best to make the bars?
|
|
|
|
|
overdriver
|
| posted on 28/11/25 at 01:57 PM |
|
|
When changing the rack on my Tiger I used a straight length of 1" dowelling fixed to the spare wheel carrier brackets and axle stands to form a
string box (see photos in my archive - Tracking). As it is unlikely you will have a spare wheel carrier, you may have to somehow utilise the rearmost
chassis tubes or rear body panel to mount a lateral 'datum' bar (as per my dowelling). Just ensure it is square by taking measurements to,
say, the centre point of the rear wheels.
This was a 'rough & ready' fix but it was found to be very accurate when subsequently checked on a laser tracking facility.
Michael.
|
|
|
MikeR
|
| posted on 28/11/25 at 04:32 PM |
|
|
Over the last 6 months I've been slowly building my own laser alignment solution based initially on the string box approach.
A few tips ....
Get two lengths of 'something' like wood - i'm using a 1.8m spirit level but i'll assume wood for the rest of this post. Wrap tape
(masking tape) around both bits of wood in three places. The middle and at the point you want the string either side of the wood. Now fasten the two
lengths together. On the center point, make a line across both bits of wood at 90 degrees to the length. This means you can always now return them to
the same alignment. Now on the outer two bits of tape use a knife to cut a mark into the tape across both bits of wood - this means when you tie the
string you have an exact corresponding point on the other length to aim at.
For string use brightly coloured fishing line. Something like 0.5mm thick.
I was planning on removing the front nose cone and clamping a frame onto the chassis by the front suspension mount to aid alignment.
The car doesn't need to be exactly in the middle of the box if you do enough maths - but the box has to be square to front and rear of the car.
My way of setting this is the assumption the suspension mounts are exactly the same distance from the middle of the car and square to the front of the
car. Align the wood based off that.
Now measure exactly the distance from the cuts for the string to the rear piece of wood and adjust till both sides are equal.
Now measure diagonally from the markings for the string and keep adjusting till they're equal. This isn't easy due to the car being in the
way. I was planning on putting the wood on axle stands and marking them on the floor. Removing the frame & pushing the car out of the way and
adjusting till it was right and remarking the floor. Return the car and reset up.
Tie fishing line around the front bit of wood ensuring its in the groove you've cut. Weight the string and ensure its tight and in the groove at
the rear piece of wood. Measure away - ideally using a magnifying glass and ruler with 0.5mm increments. Before you start decided if you're
measuring the side of the fishing line closest to the wheel or furthest away. Try to keep the ruler level.
My changes are to use lasers and mirrors to bounce the laser beam back to the mounted laser. I measure the difference from the laser source to the
point it returns. I then only need a laser on the front spirit level and nothing at the rear. I have increased accuracy as the wheel deflection is
magnified by the distance involved. To mount the mirror i'm 3d printing wheel attachments. To mount the laser i'm 3d printing an adjustable
mounting so I can then dial out any errors in the laser beam alignment.
Stick to the string - its proven. What I'm doing is a good excuse to not finish other projects.
|
|
|
Sanzomat
|
| posted on 28/11/25 at 05:07 PM |
|
|
I've done it with a string box using the axle stand method. It was subsequently checked by an expert with a full laser rig and he was surprised
how accurate I'd got it - barely a tweak needed. So it does work well if you take care. For me the clear advantage of hanging the string supports
from the car rather than on the ground off axle stands is you ideally need to roll the car backwards and forwards after each adjustment to let
everything settle which inevitable moves the centre line a bit and also maybe skews the angle of the car a smidge so you have to reset the string box.
If the string box is suspended from the car then the string lines stay put!
Recently since I got a DIY laser level (the kind that project a horizontal and vertical line of laser light). I can mount the laser projector to the
car using the clamp mount that comes with it and can set the vertical plane of laser parallel to the car centre line (I know the correct distance from
certain fixed points on each side). I can then make all my measurements by measuring from the laser plane and as its fixed to the car its basically
the same as a string box suspended from the car but with the advantage that its also there at any height. Screwfix have a suitable laser level for £30
as a black friday deal at the moment.
|
|
|
MikeR
|
| posted on 28/11/25 at 05:16 PM |
|
|
Be careful with builders laser levels. I was planning on using them for my laser approach - till i discovered "builder accurate" isn't
"car alignment" accurate. Ensure you've got some way of adjusting the laser to be accurate instead of trusting its accurate.
|
|
|
Sanzomat
|
| posted on 28/11/25 at 05:30 PM |
|
|
quote:
Originally posted by MikeR
Be careful with builders laser levels. I was planning on using them for my laser approach - till i discovered "builder accurate" isn't
"car alignment" accurate. Ensure you've got some way of adjusting the laser to be accurate instead of trusting its accurate.
Fair point but the way I'm using it for alignment the plane parallel to the car is set up in the same way as a string line by measuring the
plane's distance from the car at fixed points which are close to the wheel centres in height. The light definitely shines in a straight line so
similar to a taught string. If the plane projected isn't perfectly vertical it only affects the camber adjustment but over the distance between
top and bottom of the wheel rim it isn't going to be a long way out and it matches the bubble on my plumb stick (which I can turn both ways to
check)
|
|
|
MikeP001
|
| posted on 29/11/25 at 12:27 PM |
|
|
For mine on the street it's rare that I need to do an alignment and the ease of access to the wheels/tires compared to "ordinary" cars
seemed to make anything fancy unnecessary. Mine is solid axel so it's even easier. For the rear I did a string alignment to set it up, though
I'm pretty sure I could have done it by measuring out from the rear chassis members with the fenders removed.
For the fronts I use a 4' square tube with carpenter squares clamped to each end, short side up. Tuck them up to the treads on the rear and then
again on the front to measure the difference to get the toe. There's space to fit around the fender and to remove the jig by laying it flat. A
few times back and forth making the same adjustment on each side (keep checking the steering wheel doesn't move) gets it done pretty quick.
|
|
|
gremlin1234
|
| posted on 29/11/25 at 07:26 PM |
|
|
string can be surprisingly accurate. 80 years ago, they used it on maps to locate hostile vessels in the north Atlantic.
|
|
|
pewe
|
| posted on 30/11/25 at 05:20 PM |
|
|
I bought my flourescent fishing line from the local tackle shop. He said he also supplied a car builder in Woking!
I then used a couple of lengths of thick wall 25mm SST across the front and back suported on axle stands.
You can position accurately by measuring from the chassis centre line to ensure your box is square.
Worked for me.
|
|
|
roadrunner
|
| posted on 1/12/25 at 12:55 PM |
|
|
I used the string method last year to check my alignment, and found that it works rather well.
What doesn't work well though is how far the rears are out.
I've never had complete confidence when pushing round corners or roundabouts.
I now know why. 5mm toe in on NSR and 7mm toe in on OSR 
I have shimmed the rear drums out somewhat, but I need to check how much this has moved.
MK supply bottom rear wishbones with rose joints to correct this, so they are on a future Santa list
|
|
|
Andrzejsr
|
| posted on 20/12/25 at 11:02 PM |
|
|
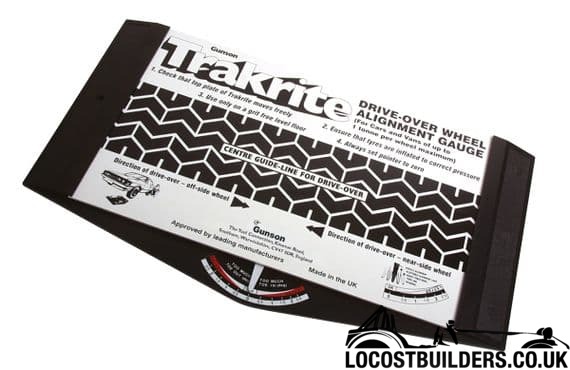
Ive set wheel alignment many times (front and rear toe, which is what this method is about) using strings (the string method). It involves quite a
lot of hassle, and if you accidentally knock over an axle stand thats holding the bar with the strings attached, you have to start all over again.
Theres also a lot of bending down. That said, the method is accurate.
Later on I bought the Gunson Trakrite tool (https://www.youtube.com/watch?v=_MpOTawuFJI
) brilliant piece of kit! With our lightweight cars its enough just to push the car through it and voilà!
For setting camber, I simply use an electronic spirit level attached to a steel bar resting against the wheel rim edges.
https://aswestfield.wordpress.com/
|
|
|
Mr Whippy
|
| posted on 21/12/25 at 12:06 AM |
|
|
I saved up for one of these and it's been just fantastic, lost count of how many times it's been used now. Simplest damn thing to use I can
think of and is very accurate. Really wish I'd got one ages ago.
[Edited on 21/12/25 by Mr Whippy]
|
|
|
MikeR
|
| posted on 23/12/25 at 02:23 PM |
|
|
how does that work for figuring out how much to adjust each wheel - do you test each wheel separately?
|
|
|
Andrzejsr
|
| posted on 23/12/25 at 02:54 PM |
|
|
Yes.
Look at video I have attached link to.
Exept with 7 i just push car instead of driving on this tool.
https://aswestfield.wordpress.com/
|
|
|
Mr Whippy
|
| posted on 23/12/25 at 07:06 PM |
|
|
quote:
Originally posted by MikeR
how does that work for figuring out how much to adjust each wheel - do you test each wheel separately?
I usually use it when I have replaced part of the suspension and it is that side I adjust. It really is super simple to use and if you don't have
a flat drive just take it to a car park. Considering how much tyre places charge for it, this is totally worth getting.
|
|
|
Andrzejsr
|
| posted on 23/12/25 at 09:34 PM |
|
|
After some work on the suspension, or just to try how it feels to drive with different toe settings. I go for a test drive, come back (or find a
piece of parking), take two spanners, and in a few minutes I can feel ifand whatthe difference is, just out of curiosity.
https://aswestfield.wordpress.com/
|
|
|