smart51
|
| posted on 6/9/08 at 04:29 PM |

|
|
GRP over foam bodywork
I've taken the plunge and started the body work for my new car. This is the second attempt as the first was a disaster. The use of a profile
gauge cut out of card really helped.
 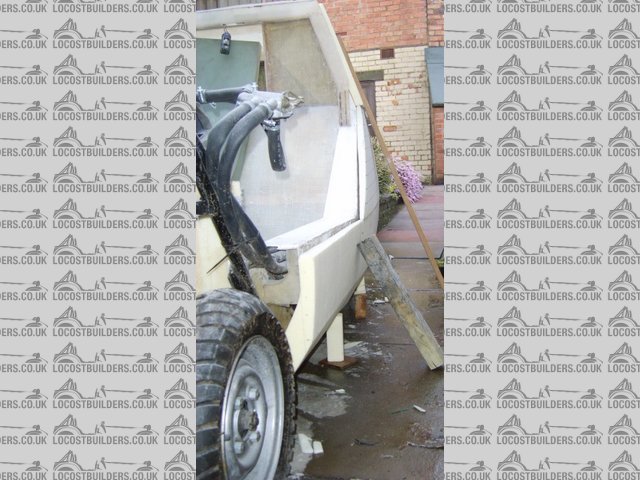
Rescued attachment FL lower side.JPG
|
|
|
|
|
smart51
|
| posted on 6/9/08 at 04:30 PM |

|
|
The pieces are just stacked on top of one another at the moment. I just wanted to see how it might look. The top piece hasn't been carved yet,
obviously. When glued together, they won't sag in the middle.
Once the pieces are cut to shape and have a coat of GRP on the back for stiffness, I'll give the outside a final sand to take out any ripples and
GRP over the outside to totally encase the foam.
[Edited on 6-9-2008 by smart51]
Rescued attachment RL lower side.JPG
|
|
|
blakep82
|
| posted on 6/9/08 at 05:00 PM |

|
|
just been looking in your archive, is that those hella lights you're using?
looks like a nice little project too 
________________________
IVA manual link http://www.businesslink.gov.uk/bdotg/action/detail?type=RESOURCES&itemId=1081997083
don't write OT on a new thread title, you're creating the topic, everything you write is very much ON topic!
|
|
|
smart51
|
| posted on 6/9/08 at 07:08 PM |

|
|
quote:
Originally posted by blakep82
just been looking in your archive, is that those hella lights you're using?
looks like a nice little project too 
Yes, the hella lights are the smallest I could find. Since then, SVC have started selling the version with main and dipped beam in 1 housing. They
said earlier this year that they wouldn't get any for me. Oh well.
|
|
|
blakep82
|
| posted on 6/9/08 at 07:12 PM |

|
|
i was going to use them. as much as i hate to say it, i'll be getting the ones in one housing now, coz thats all the space i've got in
mine too...
if you really wanted the other ones, i'm sure you could put those on ebay or something and make your money back?
________________________
IVA manual link http://www.businesslink.gov.uk/bdotg/action/detail?type=RESOURCES&itemId=1081997083
don't write OT on a new thread title, you're creating the topic, everything you write is very much ON topic!
|
|
|
smart51
|
| posted on 24/10/08 at 06:27 PM |

|
|
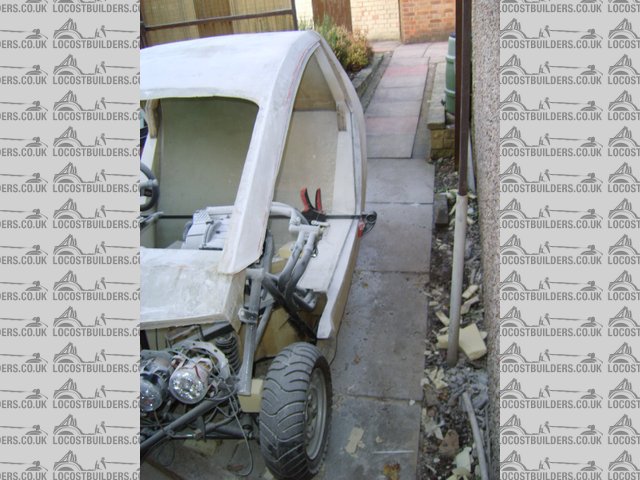
Here are a couple of pics of some of the body work. The foam has been covered on both sides with GRP and there's a rough coat of filler in
places to build up the detail.
[Edited on 28-10-2008 by smart51]
Rescued attachment raw roof front.JPG
|
|
|
smart51
|
| posted on 24/10/08 at 06:28 PM |

|
|
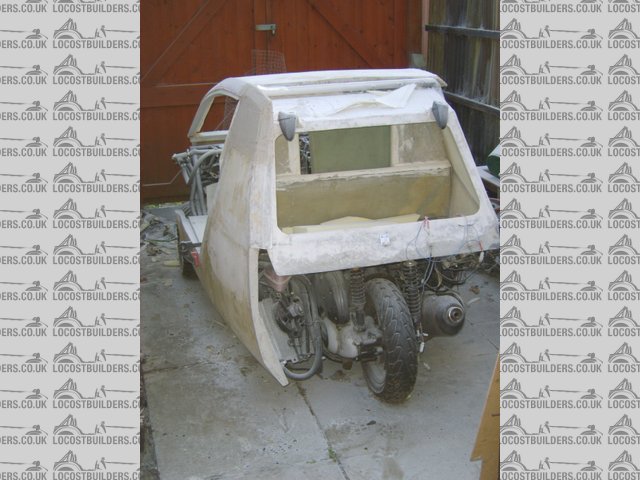
And another from the rear.
Rescued attachment raw bodywork rear.JPG
|
|
|
Fred W B
|
| posted on 28/10/08 at 06:37 PM |

|
|
Congrats on getting so far so quickly, really starting to look like something.
Cheers
Fred W B
You can do it quickly. You can do it cheap. You can do it right. – Pick any two.
|
|
|
smart51
|
| posted on 16/11/08 at 10:19 AM |

|
|
Here's a picture of the headlight shells I've been making. The back is fibreglass and the cover acrylic. Vacuum forming didn't work
well enough so in the end I glued together lots of small pieces.
 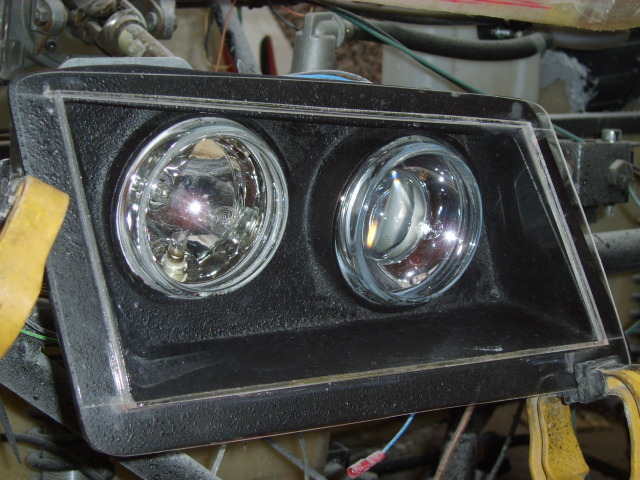
Rescued attachment headlight 2.JPG
|
|
|
smart51
|
| posted on 16/11/08 at 10:19 AM |

|
|
and one from the other side
 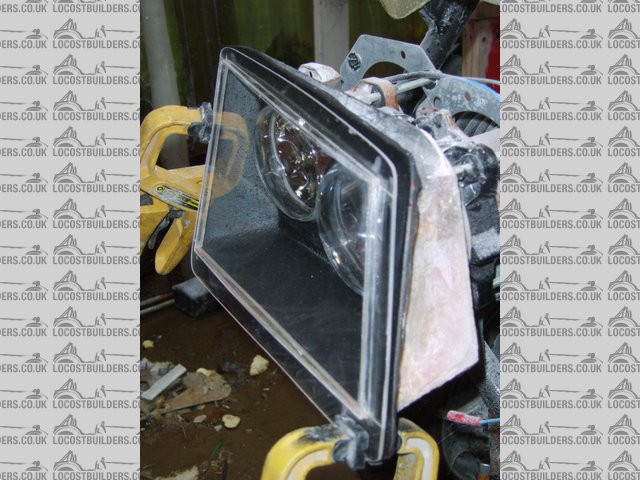
Rescued attachment hedlight 1.JPG
|
|
|
blakep82
|
| posted on 16/11/08 at 11:40 AM |

|
|
they look amazing! 
hope mine turn out as good when i get round to doing them 
going to order my lights next week i think
________________________
IVA manual link http://www.businesslink.gov.uk/bdotg/action/detail?type=RESOURCES&itemId=1081997083
don't write OT on a new thread title, you're creating the topic, everything you write is very much ON topic!
|
|
|
smart51
|
| posted on 22/12/08 at 10:24 AM |

|
|
Another month, another picture. This time of the rear bumper skirt. Its a bit heavy so this one will be a buck from which I'll make a mould and
then the final part. It also looks like I'll have to re centralise the tail gate lock hole. Oops.
The rear vents are for the radiator on the left and the exhaust on the right. Should I leave them open or cover them with grille or what? All
suggestions welcome.
Rescued attachment rear bumper.JPG
|
|
|
smart51
|
| posted on 28/12/08 at 02:32 PM |

|
|
And here it is again with the rear part of the roof.
 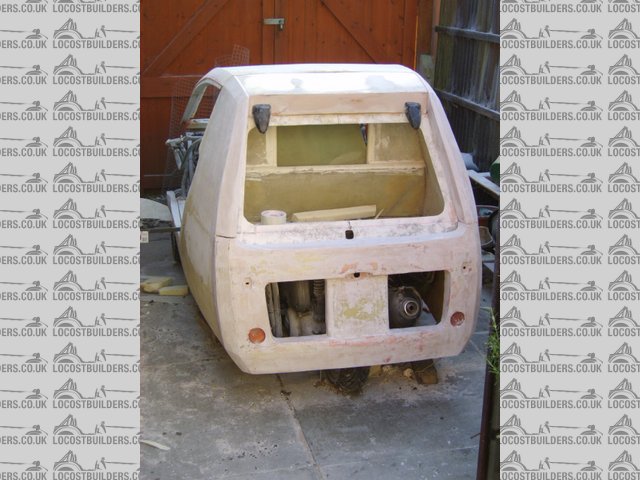
Rescued attachment rear_with_roof.JPG
|
|
|
blakep82
|
| posted on 28/12/08 at 03:00 PM |

|
|
i think you should cover them with a grille. i think the holes are a little bit too big to leave open. looking goo though!
________________________
IVA manual link http://www.businesslink.gov.uk/bdotg/action/detail?type=RESOURCES&itemId=1081997083
don't write OT on a new thread title, you're creating the topic, everything you write is very much ON topic!
|
|
|
smart51
|
| posted on 1/2/09 at 05:19 PM |

|
|
Here's a view of the front bonnet. A bit of body filler and it should look all right.
 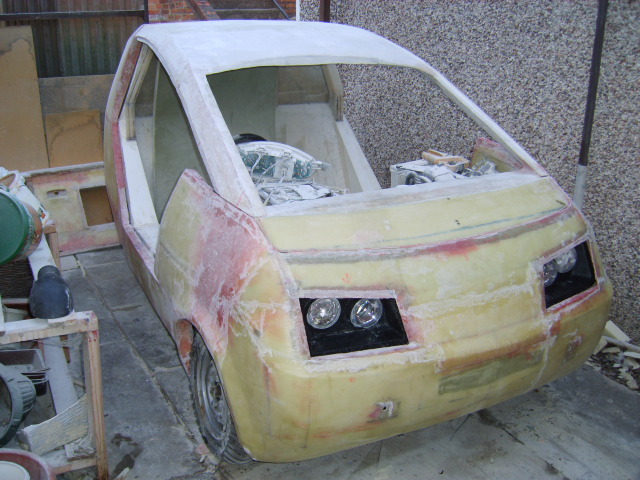
Rescued attachment front right.JPG
|
|
|
FUORISERIE
|
| posted on 4/2/09 at 04:23 PM |

|
|
quote:
Originally posted by smart51
Here's a view of the front bonnet. A bit of body filler and it should look all right.
looking really good........

|
|
|
blakep82
|
| posted on 4/2/09 at 06:14 PM |

|
|
looks brilliant! 
________________________
IVA manual link http://www.businesslink.gov.uk/bdotg/action/detail?type=RESOURCES&itemId=1081997083
don't write OT on a new thread title, you're creating the topic, everything you write is very much ON topic!
|
|
|
smart51
|
| posted on 19/4/09 at 01:51 PM |

|
|
Here's a pic of the dash. I was hoping to finish this by the end of February. Some things take a lot longer than expected. I've got to
find some way of mounting the front part without resorting to PU.
 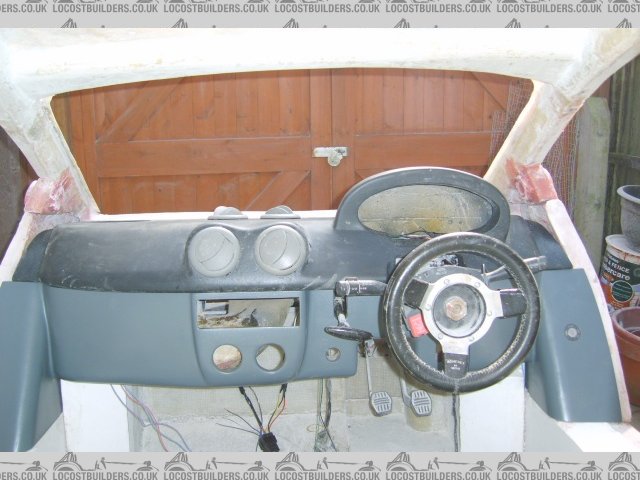
Rescued attachment Dash.JPG
|
|
|
kipper
|
| posted on 19/4/09 at 04:45 PM |

|
|
3 wheeler
Well I have to say that is looking good.
Are you using the scoot dash.?
if so how are you driving the speedo?
i am trying to incorporate the scoot speedo drive on the cortina front axle but I think it will be too small. I wish the speedo was elecronic, ho
hum.
Anyow, keep it up and dont get downhearted, it will take time.
Regards Kipper.
Where did that go?
<<<<
|
|
|
smart51
|
| posted on 19/4/09 at 05:26 PM |

|
|
Yes, I'm using the scooter's instrument pack which has a mechanical speedo. I'm using mini front hubs which have the drive shafts
removed leaving a nice spline. A little bit of welding made up a bracket to join the bike speedo pickup to the wheel hub. I then got an inline
reducer to reduce the speed (small mini wheels) and scanned and reprinted the speedo face plate so that Miles were the larger size and Km the smaller.
The scanner picked up the grain pattern in the original fascia and printed it out the same so it looks surprisingly good. Speedy cables in south
wales did the cable for me. A tidy job too.
|
|
|
smart51
|
| posted on 26/9/09 at 04:59 PM |

|
|
It's been a while since I've updated this thread. The last 6 months have just been filling and sanding with little progress that would show
up well on a photo. To be honest, my enthusiasm has been flagging and with a baby to look after I haven't had much time. Anyway, with a few
panels close to being ready for paint, I thought I'd try out my spraying equipment. The plan was that once I'd seen the colour on a
finished panel, the end wouldn't look quite so far away and I might pick up some more interest in the project. This photo is the first finished
result, touch dry and straight from the garage.
 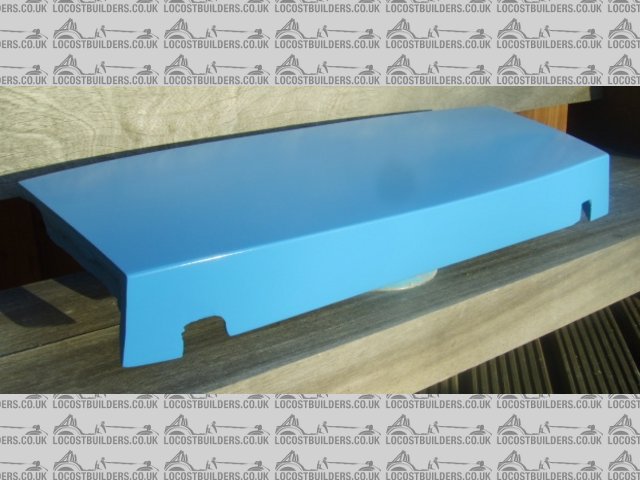
Rescued attachment rear roof painted.JPG
|
|
|
iank
|
| posted on 26/9/09 at 05:16 PM |

|
|
Looks like a nice finish to me.
--
Never argue with an idiot. They drag you down to their level, then beat you with experience.
Anonymous
|
|
|
kipper
|
| posted on 27/9/09 at 04:46 PM |

|
|
Replay the clarkson vid for inspiration . .
I think you are doing great , that bodywork puts my sheet alloy effort to shame.
Well done mate.
Denis.
Where did that go?
<<<<
|
|
|
smart51
|
| posted on 3/10/09 at 01:59 PM |

|
|
This was meant to be a pic of all the body panels I've painted so far but the two I finished today have got a couple of runs than need
fixing.
 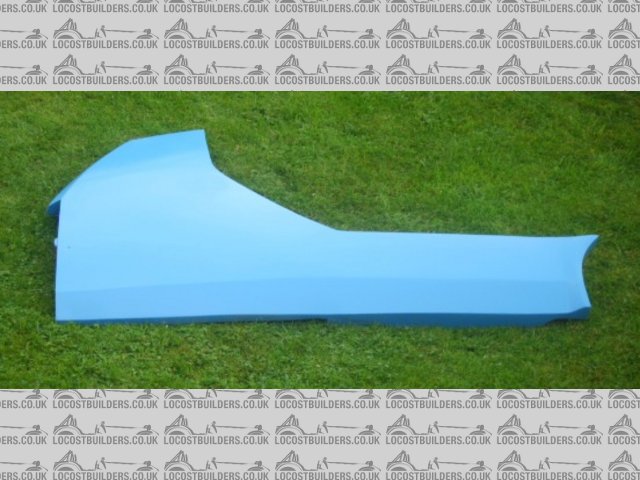
Rescued attachment RHS.JPG
|
|
|
smart51
|
| posted on 14/3/10 at 06:55 PM |

|
|
It's been a while since I last posted, partly because it's been dark outside in the evenings, partly because I'm hacked off doing
bodywork now. Anyway, here are some pictures of where I am.
 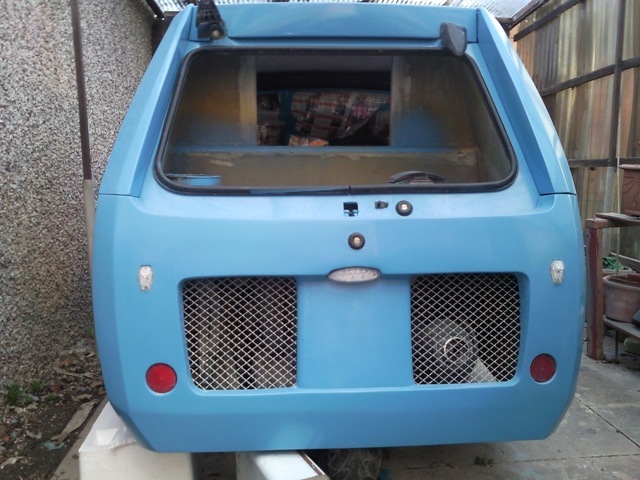
rear bumper skirt
When I made the rear panel, I put tape one the car and fitted the panel, then put filler in all the gaps so it was a perfect fit. It was all sanded
down in place to it was perfect. I took it off to paint it and now it is built up, it has shrunk by about 5mm per side. You can see it in the detail
shot. What do I do about it? Do I leave it and hope the MSVA man won't care, then fix it next winter? Or, do I cut 2 slots with the grinder,
bend it out and GRP over the back then patch up and re-paint now? I've already taken 18 months more than I wanted to and there's about 6
months work to finish. I want it on the road ready for the micro car rally in September really.
 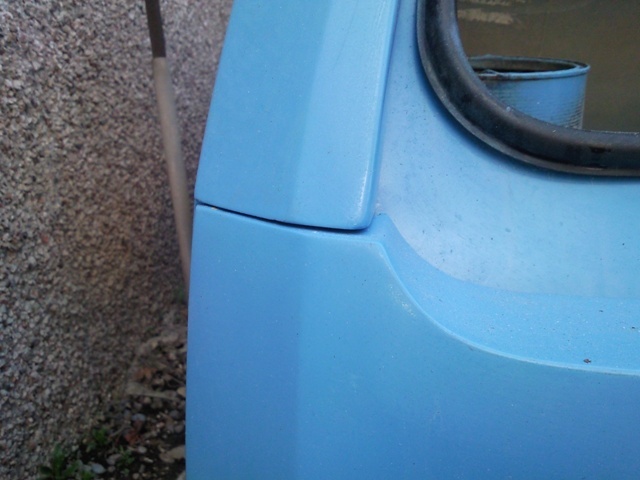
GRP has shrunk
 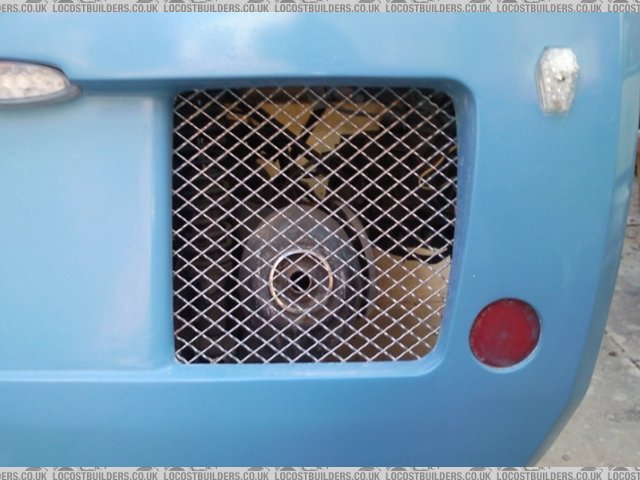
close up of exhaust grille
|
|
|


