Benzo
|
| posted on 5/2/13 at 07:47 PM |

|
|
quote:
Originally posted by yellowcab
Having got my engine cradle back from the powder coaters in gloss black, and how nice it looks and smooth - it's made me decide to strip back my
newly painted chassis back to bare metal, and I've placed an order today with Frosts for some POR Paint Stripper, POR Marine Clean, POR Prep
& Ready, POR Rust Preventative and POR15 Blackcote lol lol lol 
Should have it looking a damn site nice than the Hammerite/ Smoothrite currently does, and more permanent!
would it be a huge job to strip the rest now you are there and have it sandblasted and powdercoated?
|
|
|
|
|
yellowcab
|
| posted on 10/2/13 at 08:19 PM |
|
|
Went down the garage this afternoon as I found a couple of hours (isn't it nice when that happens!)
Delivery from Frosts came rather quick
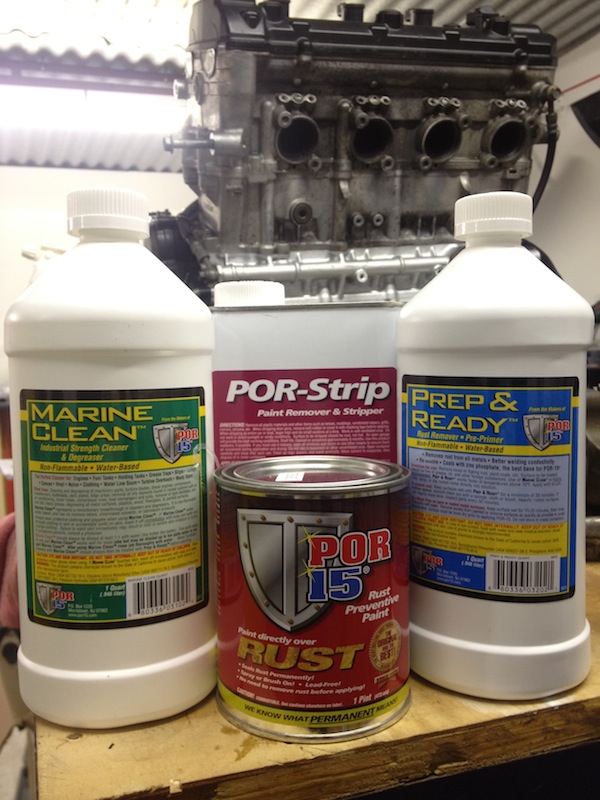
First things first, was the POR Strip... works a damn site better than Nitromors - and much cheaper!
Then ReMan popped in to lend a second pair of hands, getting the car up in the air much easier to work on

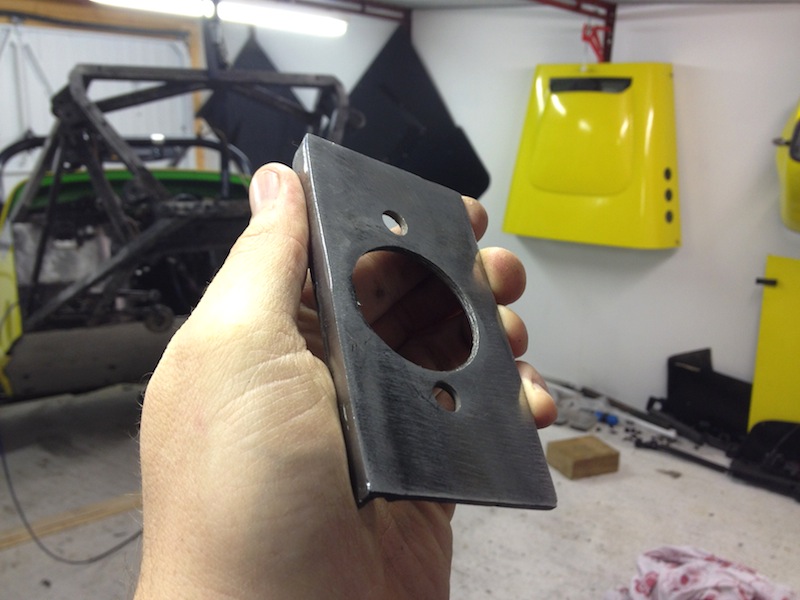
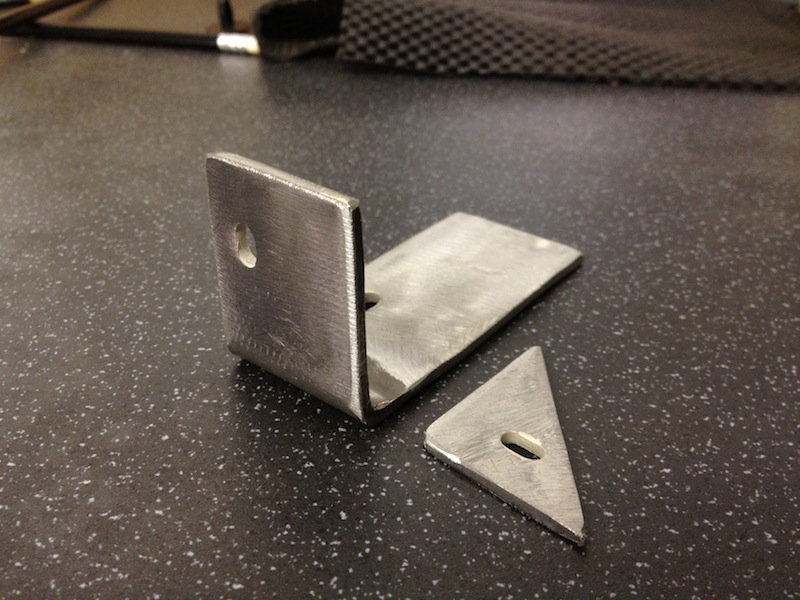
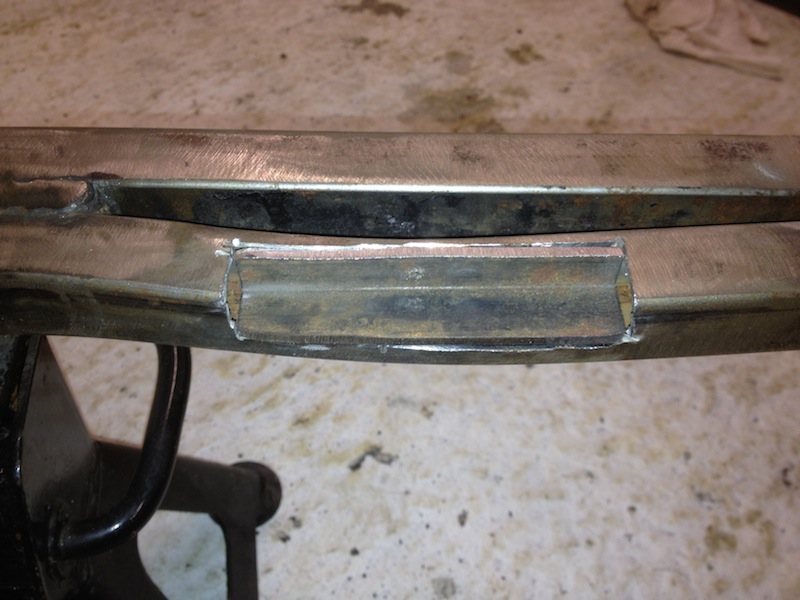
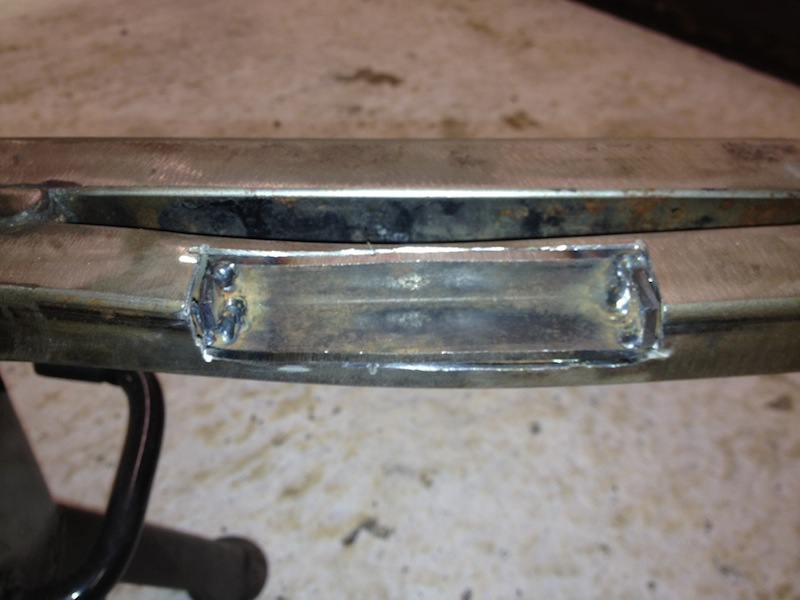
Tacked together some 3mm, to make a right angle for the clutch MC to sit on, so it exits the pedal bang on 90degrees
Drilled the cylinder hole, and the mounting holes - and dry mounted it to make sure its all spot on
Seam welded it together, making sure plenty of penetration... I know tacks would have suffice, but better safe than sorry
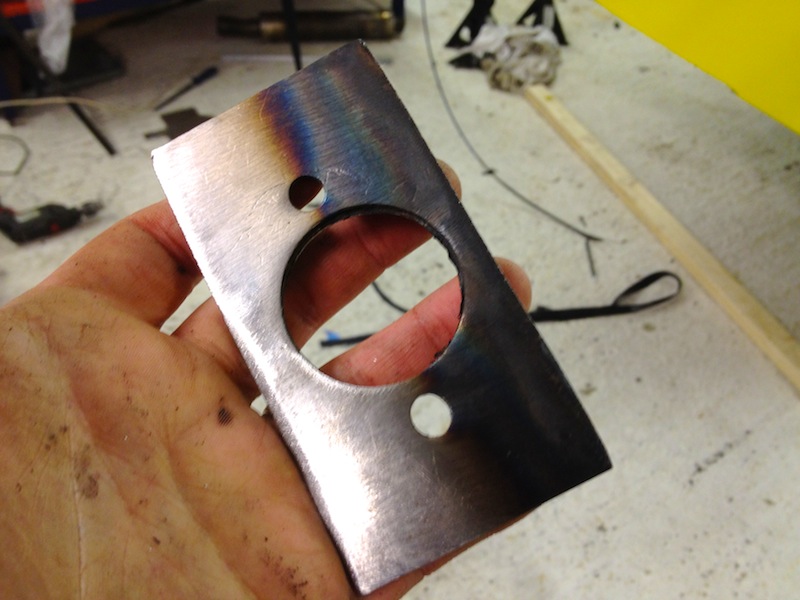
Both sides, on the inside and outside
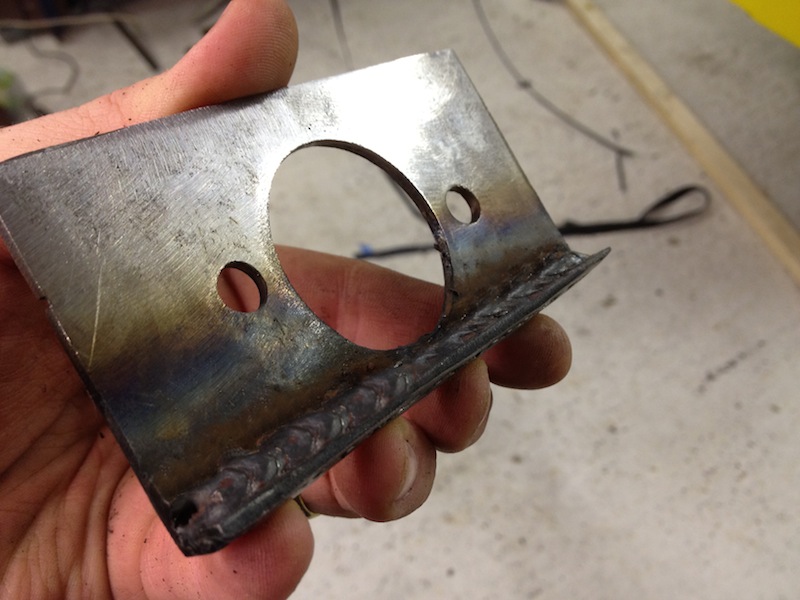
Tidied it up, buzzed it off ready for welding to the car
Job jobbed, thanks for your help today Col
[Edited on 10/2/13 by yellowcab]
|
|
|
:{THC}:YosamiteSam
|
| posted on 13/2/13 at 08:42 PM |
|
|
quote:
Originally posted by BobM
quote:
Originally posted by yellowcab
Do people with Busas tend to have a list of 'suppliers' in their favourites that they'd like to share?
As already stated most stuff from local Suzuki dealer but I also occasionally used to get stuff from Powertec, now changed their name to Radical
Performance Engines:
http://www.rpeonline.co.uk/categories/Suzuki-Hayabusa/
Also on Ebay (often have more stuff than currently):
http://stores.ebay.co.uk/Powertec-Engineering-Ltd
Also occasionally stuff from BigCC Racing:
http://www.bigccracing.com/shop/category.asp?idCategory=50
another i use is
extreme engines
just found this thread - keep it up - some good work
btw the clutch i use is standard oem suzuki and use 10% stiffer springs from extreme - they work great
|
|
|
ceebmoj
|
| posted on 13/2/13 at 09:14 PM |
|
|
Did you get the wilwood's from a trader? If so do you have a link im looking for a good price for a pair at the moment.
|
|
|
yellowcab
|
| posted on 13/2/13 at 09:15 PM |
|
|
I got my Wilwoods from RalDes mate
|
|
|
cfc999
|
| posted on 14/2/13 at 11:06 PM |
|
|
Just spent the last hour reading all your post's. Well impressed.
I had my 1995 Striker chassis stripped (placed in a big oven and cooked for 24hrs) then had a custom cage fitted and sent it back to be powder
coated.
The stripping plus the powder coating cost around the £200 mark.
Done by Ribble Technology in Preston Lancs.
Description
 
Description
Description
 
Description
[Edited on 14/2/13 by cfc999]
[Edited on 14/2/13 by cfc999]
[Edited on 14/2/13 by cfc999]
[Edited on 14/2/13 by cfc999]
|
|
|
phelpsa
|
| posted on 14/2/13 at 11:14 PM |
|
|
quote:
Originally posted by cfc999
The stripping plus the powder coating cost around the £200 mark.
Done by Ribble Technology in Preston Lancs.
That sounds like a bargain to me!
|
|
|
yellowcab
|
| posted on 15/2/13 at 07:03 PM |
|
|
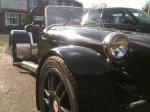
cfc99 that does sound like a fantastic price mate! in hindsight maybe I should have continued stripping it back down to nothing - but hey ho,
i've got all the gear now, so its go go go.
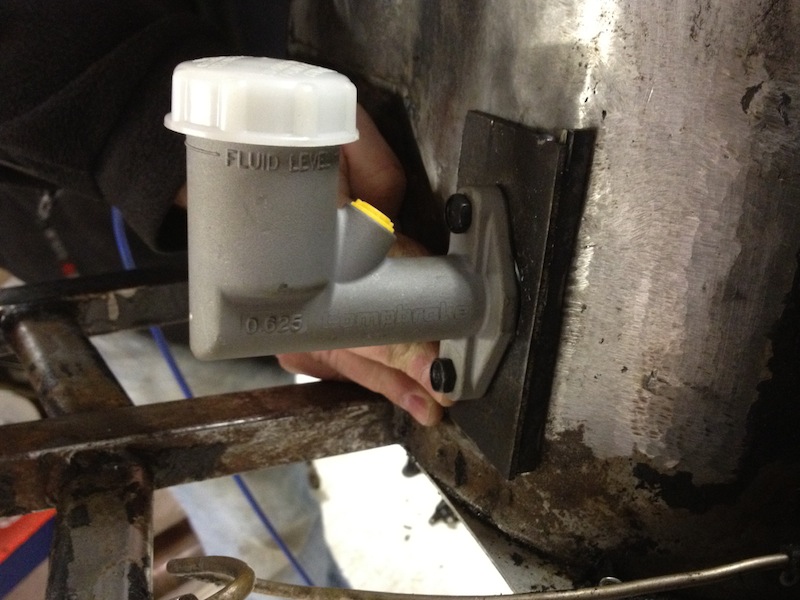
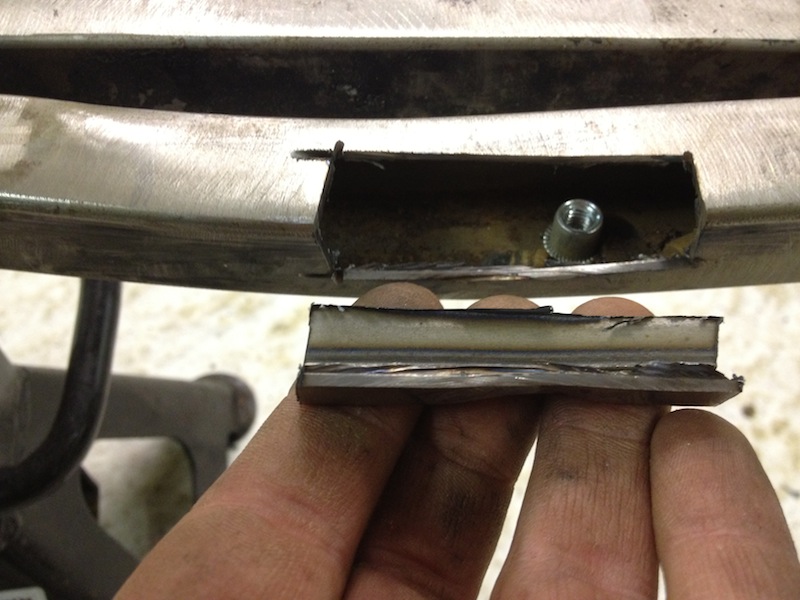
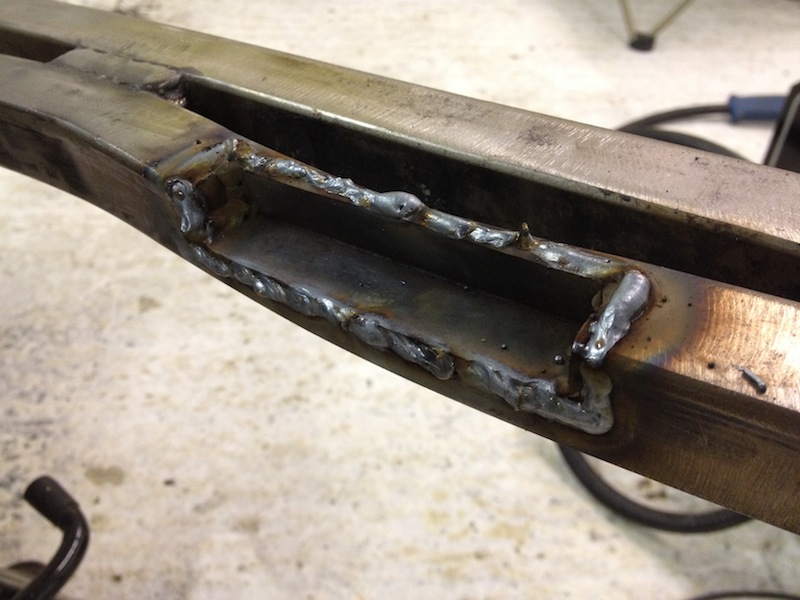
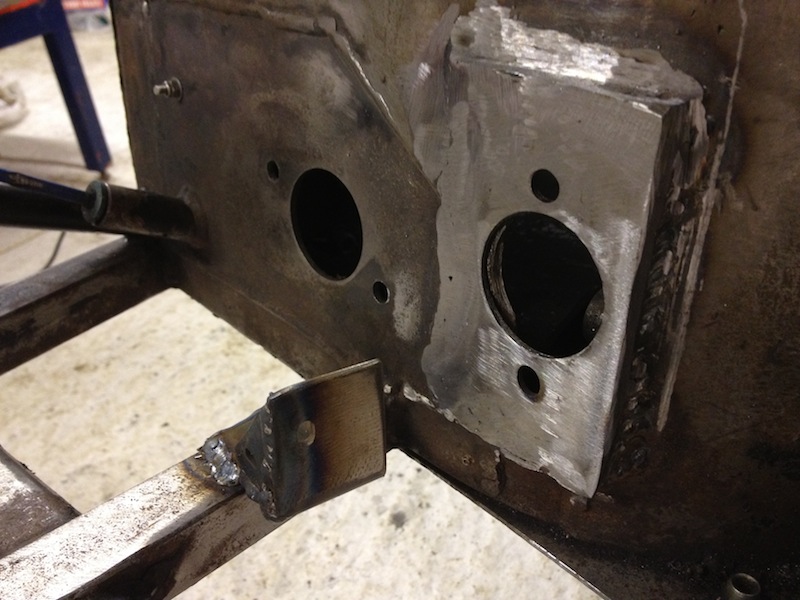
So it still needs neatening up, but I welded my box section to the bulkhead for my clutch MC, and to give me the 90degrees that I needed
Front end now full stripped, awaiting dry fit of engine so I know where the gear cable brackets need to be mounted, then it'll get painted back
up again
Off to the garage now, as the misses has mates coming around, win/win
|
|
|
yellowcab
|
| posted on 20/2/13 at 09:14 PM |
|
|
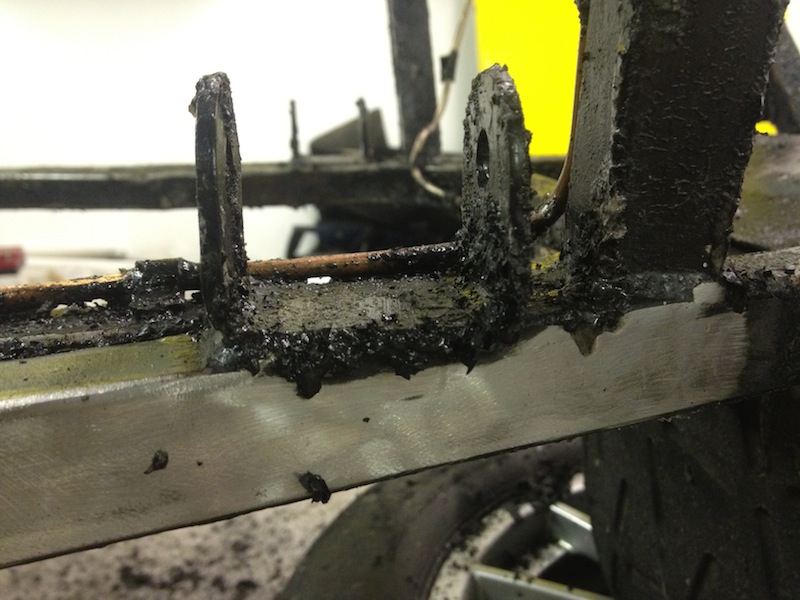
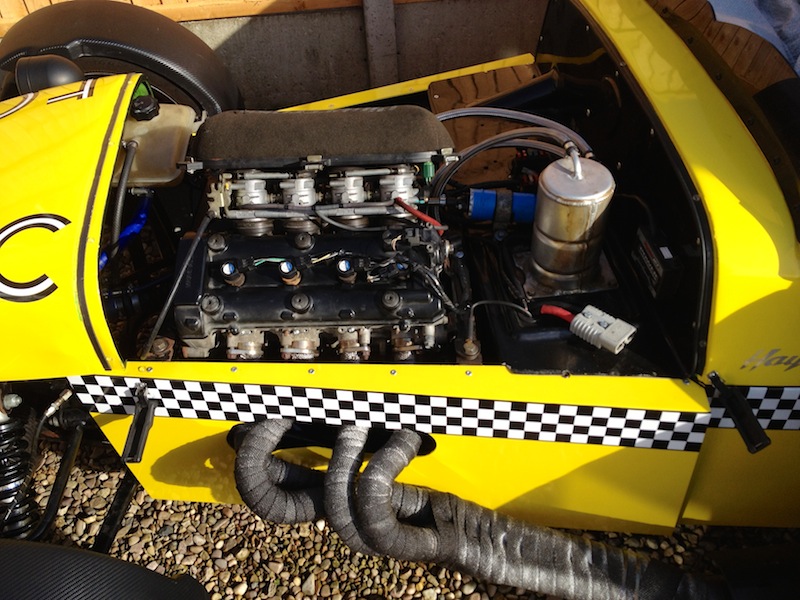
So I spent a couple of hours in the garage tonight, doing something that I had been putting off doing alone... but I did it lol
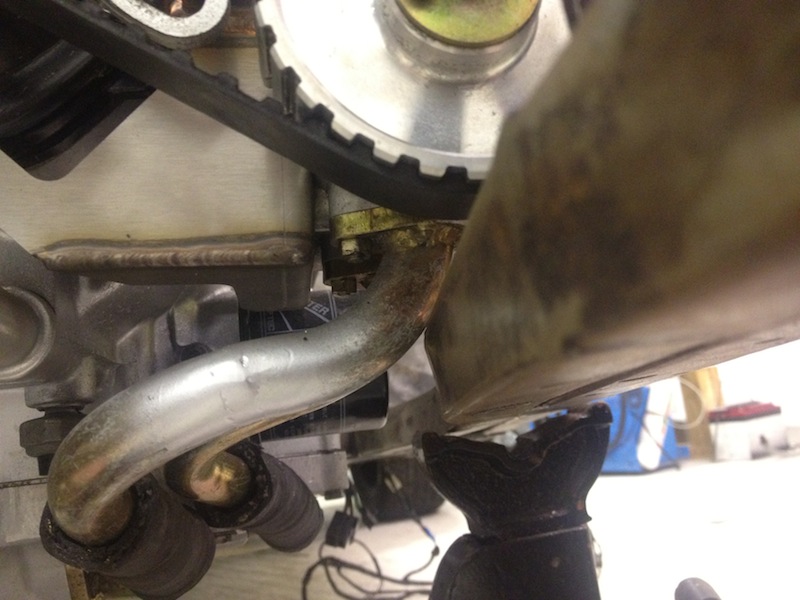
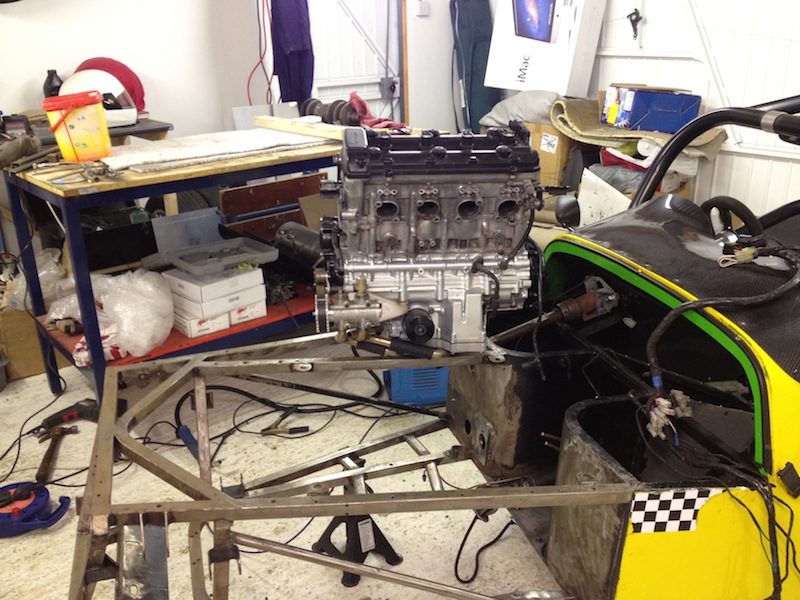
Got the car down from the roof, and decided to dry-fit the engine, to see where I needed to re-weld the chassis tube that was fouling exhaust
manifold primary no1.
However, upon killing myself dropping it in by myself, I noticed that it wouldn't sit all the way down comfortably, and straight... which was
odd - because it was the same engine that I took out... or is it ?!.... NO, it has a dry sump setup & pump on it now...
So I see that the previous owner once upon a time also had one, as he decided to let a hammer, meet the chassis in order to get his to fit
See here is where it fouls
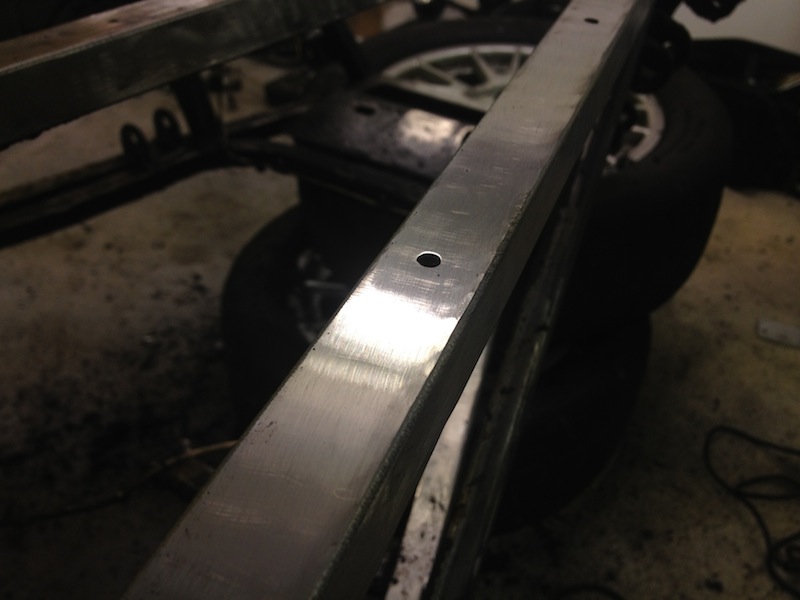
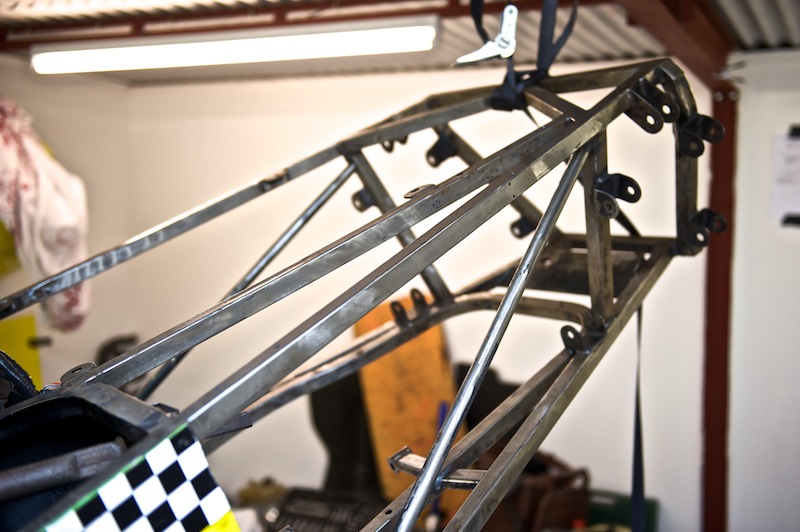
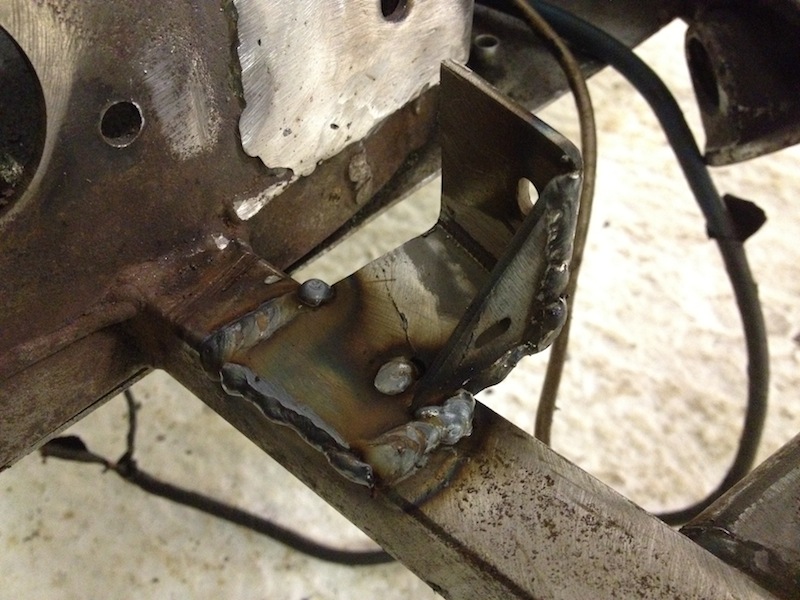
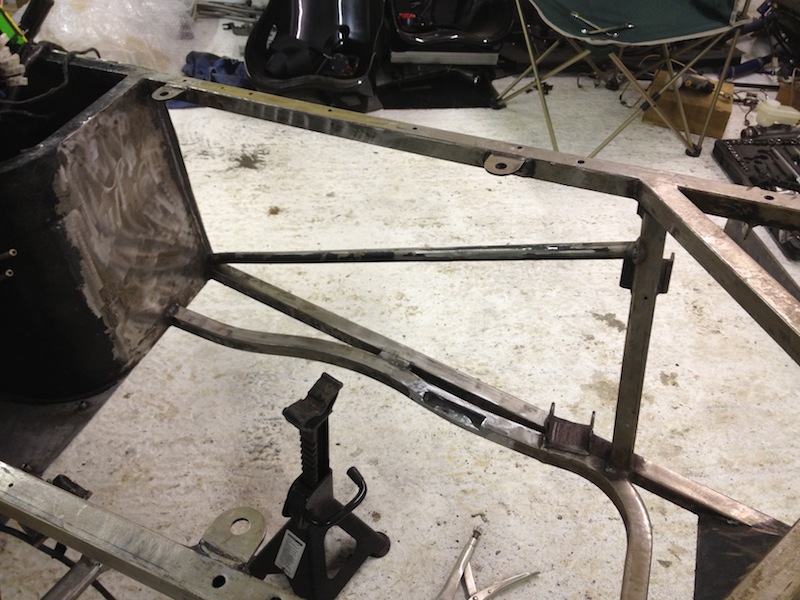
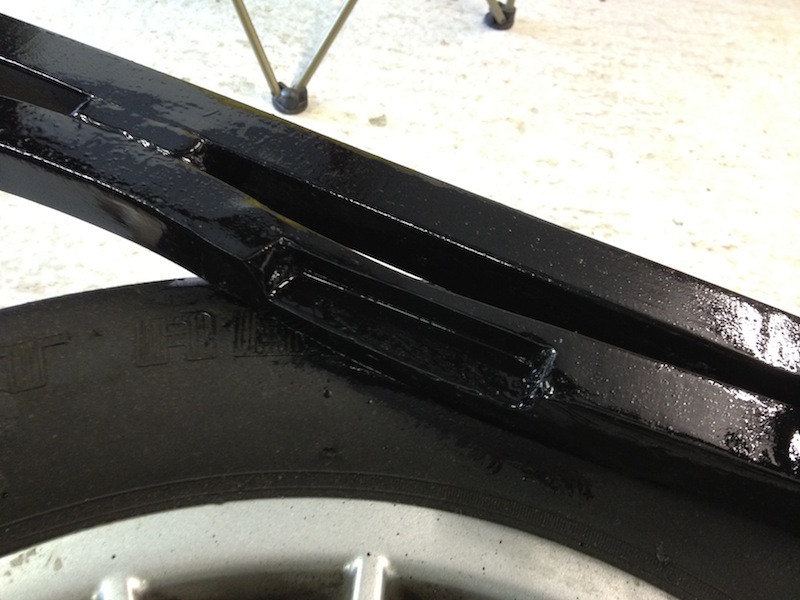
Continuing with that I had set out to do, I moved the triangulation bar down so the exhaust cleared nicely, and rewelded this back into place
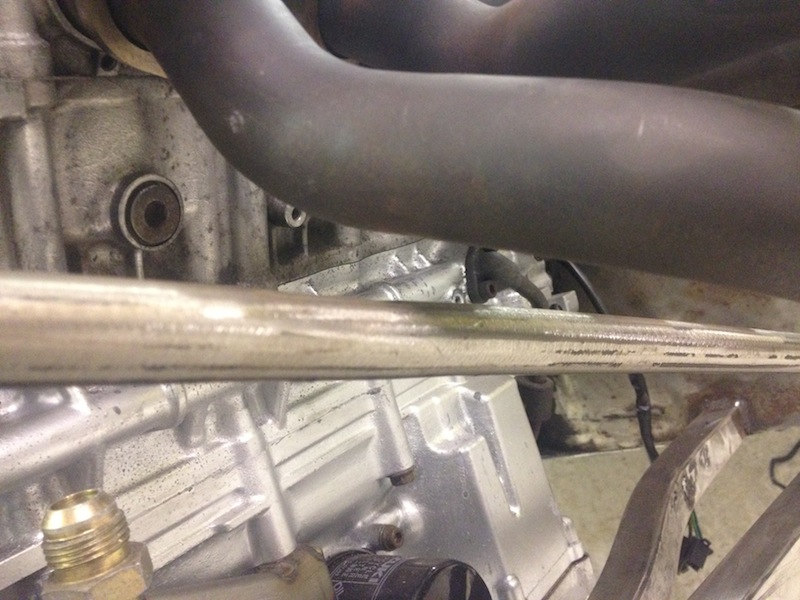
This is how far it had to be moved down in order to clear
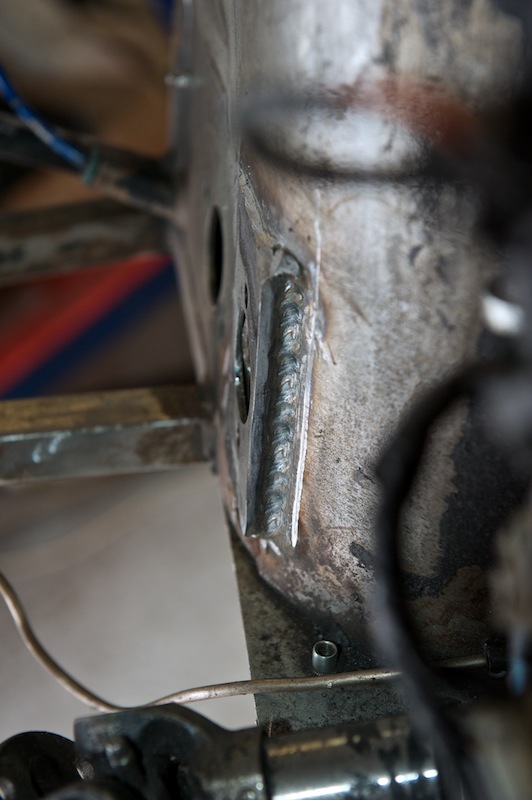
So I seam welded around the tubing making sure it got plenty of penetration - job jobbed!
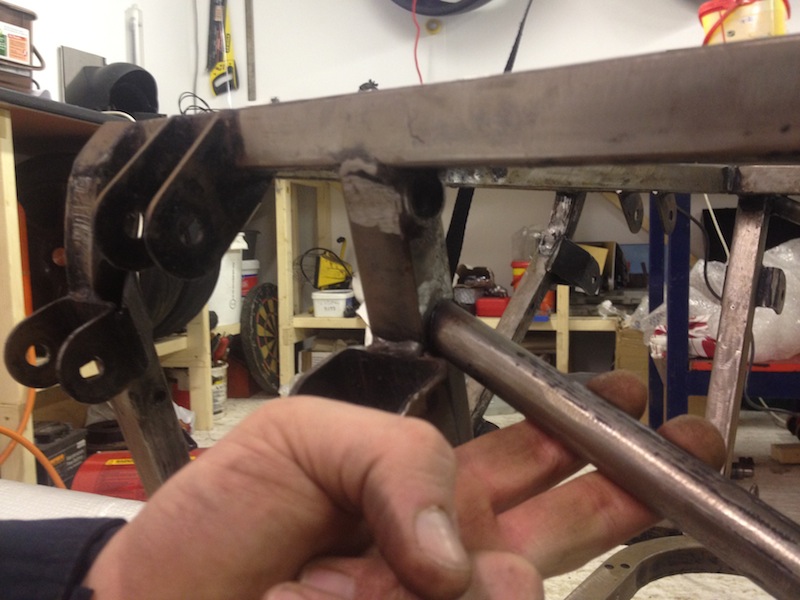
Next up was to weld the bracket to my chassis where the gear cable will be mounted, so I measured exactly 90 degrees to the gear selector take off in
the engine bay

Peened a piece of 3mm, into a 90degree corner, and speaking to Andy Bates, he said for me to never under estimate the amount of force that goes
through a gear cable bracket when you're changing gears fast on a spirited drive, and also advised me brace it, so I cut a triangle out also for
strength
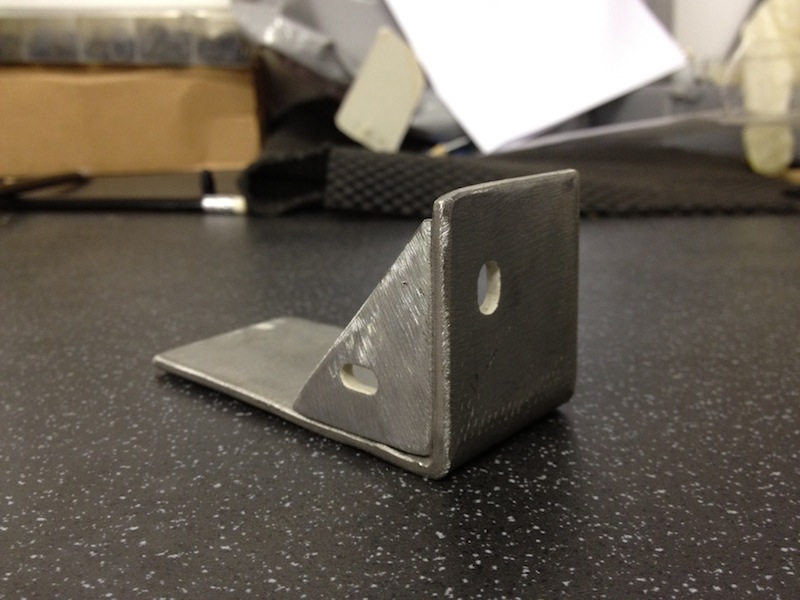
Offered it up 90degreed adjacent to the gear selector, and cut the back angle accordingly, so I had no messy metal over hanging the chassis
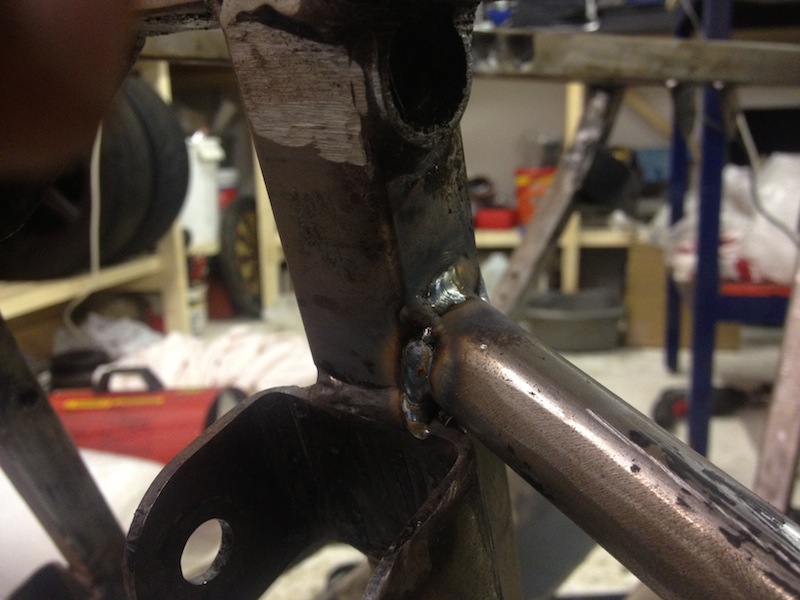
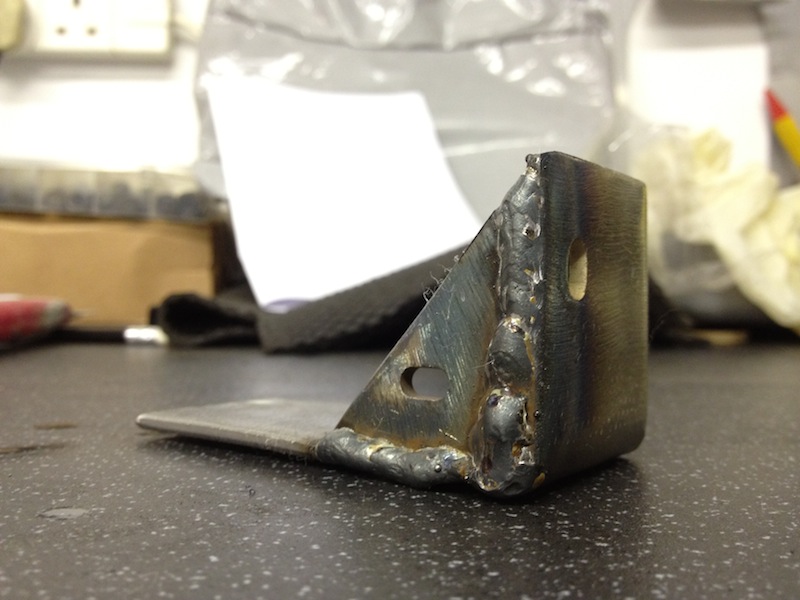
Buzzed it around with the welder, and pool welded the little hole in the centre of the of said bracket
Lifting the engine back out seemed to be harder than putting it in in the first place so it had to stop for half time
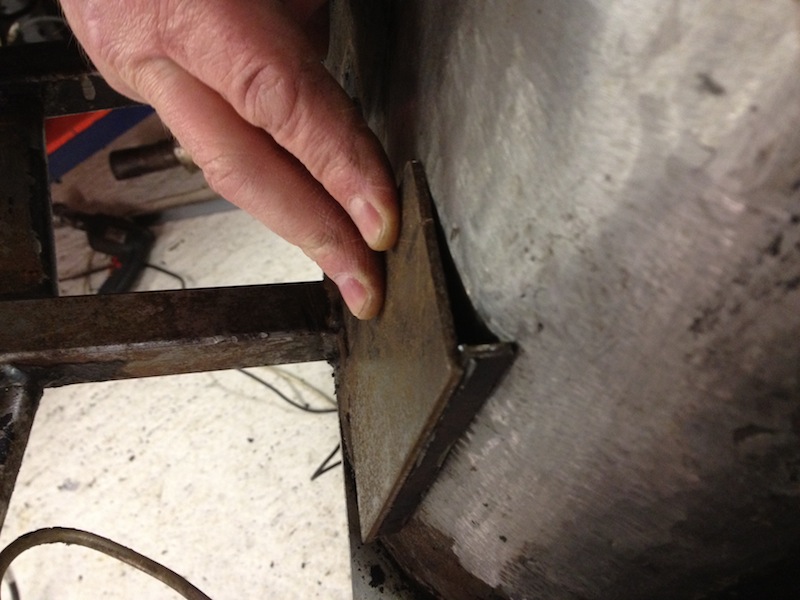
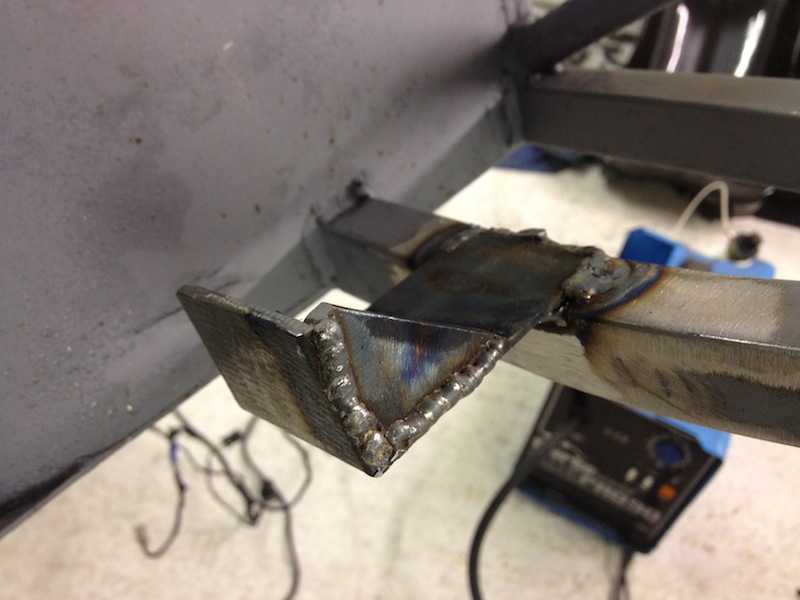
So I had pencil marked where the dry sump pipework had slightly fouled the chassis, although as you can see - it had already been whacked with a
hammer previously
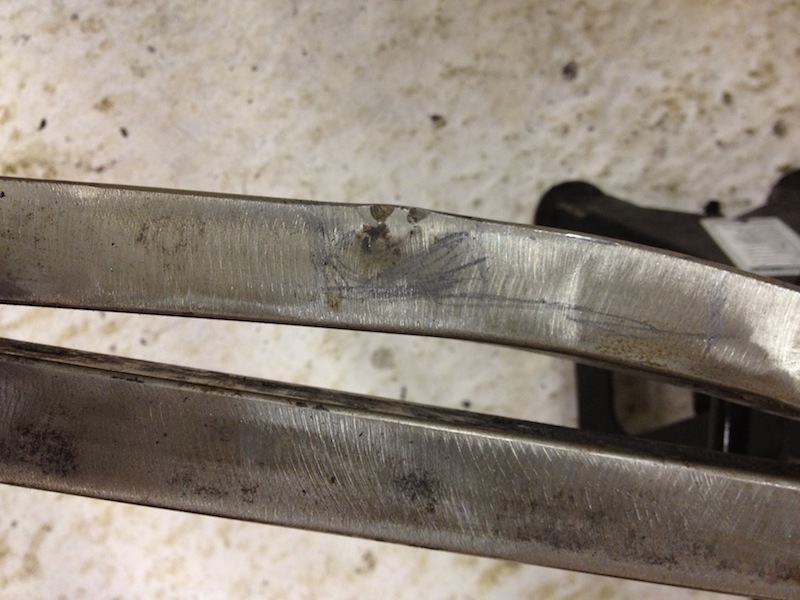
Got Mr Angry Grinder out - cut out the fouling piece
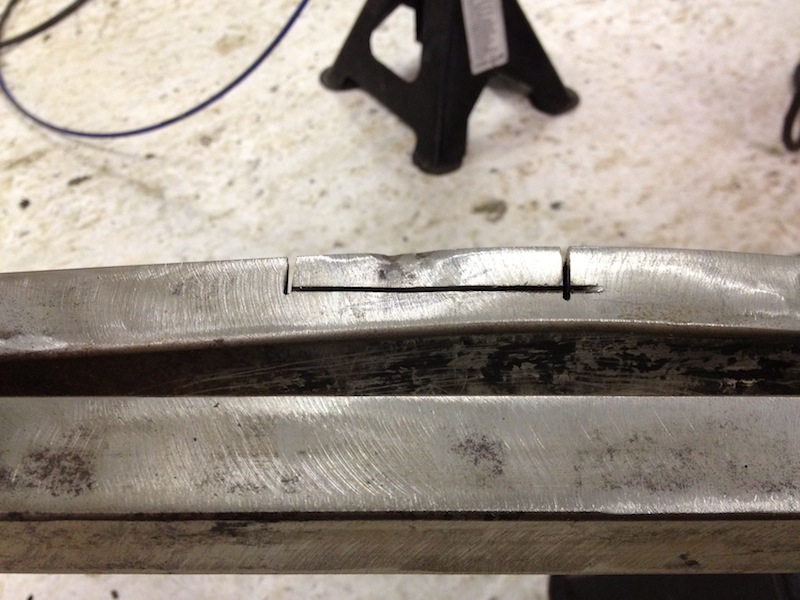
Got a new piece of angle, turned it upside down thus creating a upside down box
welded on the sides to make it waterproof and sealed
Seam welded around the whole boxing off
Buzzed it back so it was nice and smooth with no bits sticking proud - and we have the finished article now of a chassis that will not foul the
manifold primary, nor the dry sump pipework
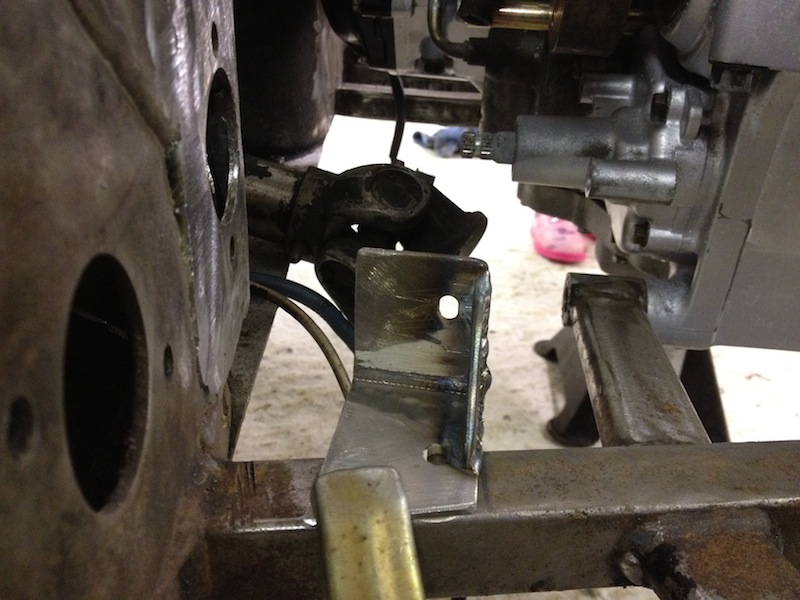
And a gear push/pull cable bracket in the engine bay - not drilled the hole yet - as I'm unsure the size of the thread & nut
Now its time to crack on with prepping & painting the engine bay... again! lol
[Edited on 20/2/13 by yellowcab]
[Edited on 20/2/13 by yellowcab]
|
|
|
ReMan
|
| posted on 20/2/13 at 09:42 PM |
|
|
Good work!
www.plusnine.co.uk
|
|
|
Proby
|
| posted on 20/2/13 at 09:53 PM |
|
|
Looking good!
Visit GraphicMonster
|
|
|
cosmick
|
| posted on 20/2/13 at 10:20 PM |
|
|
I recognise that engine. Well done sir, keep up the good work.
If it can't be fixed with a hammer then its probably an electrical problem.
|
|
|
yellowcab
|
| posted on 24/2/13 at 06:41 PM |
|
|
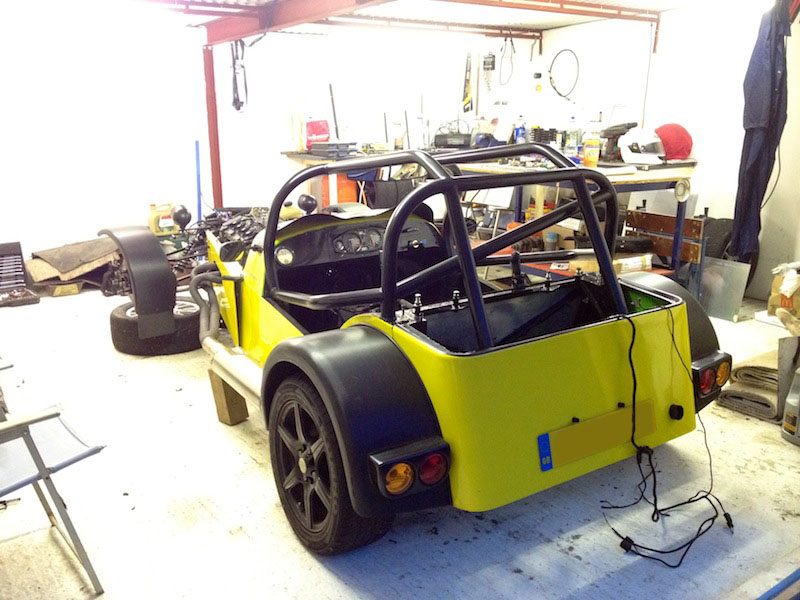
Just a small update really, put some grey primer on the front part of the chassis, to protect it before I come to paint it properly.
It was pointed out by Danny @ MK that I had welded the gear cable bracket on the wrong side of the car if I wanted to pull back to shift up, and push
forward to down shift - D'OH!!! - so on I go and make another bracket, and weld it onto the correct (passenger) side lol
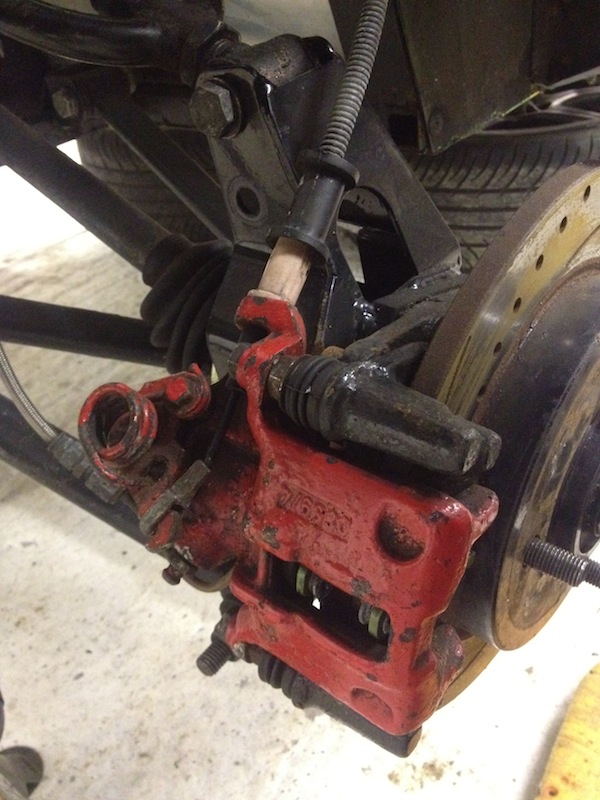
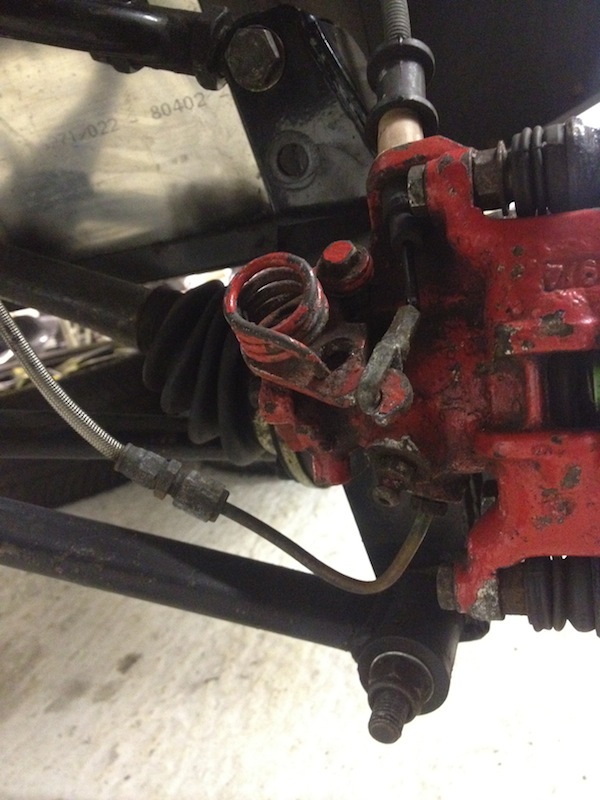
Also, my rear calipers have been mounted upside down, thus causing the bleed nipple to be at the bottom, and a bugger to bleed... can I not just flip
them left to right, so they're at the top - and also, will the handbrake cable still operate OK?

Did a little test, regarding positive camber in roll too... have a check:
http://www.youtube.com/watch?v=Yr11TIjzywI&feature=youtu.be
|
|
|
yellowcab
|
| posted on 3/3/13 at 04:03 PM |
|
|
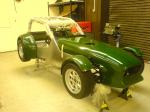
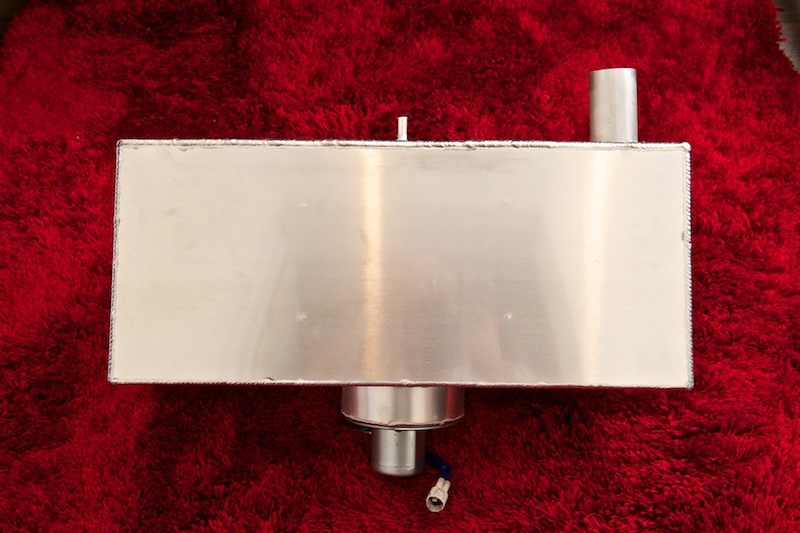
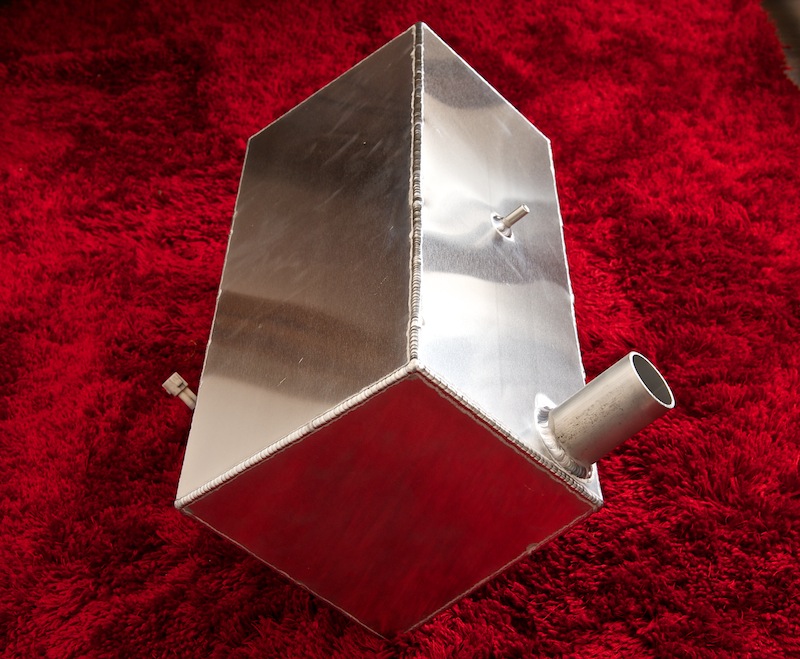
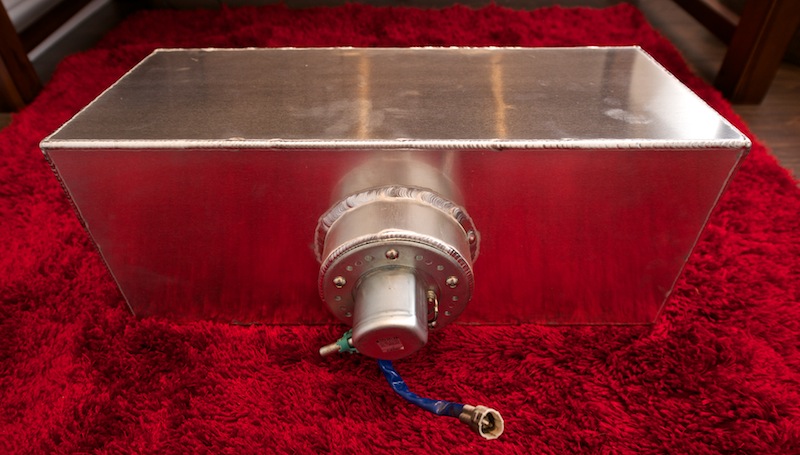
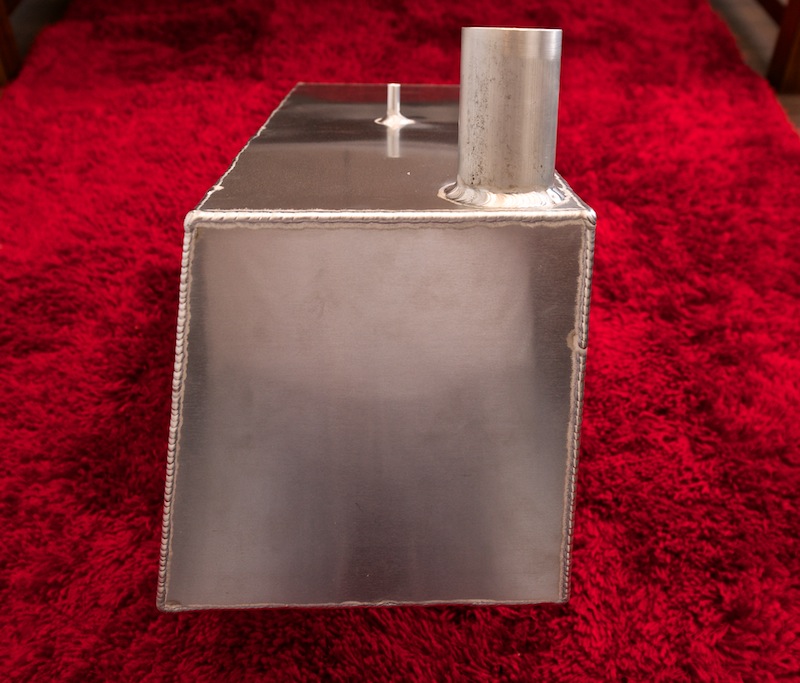
Things are coming together... slowly...
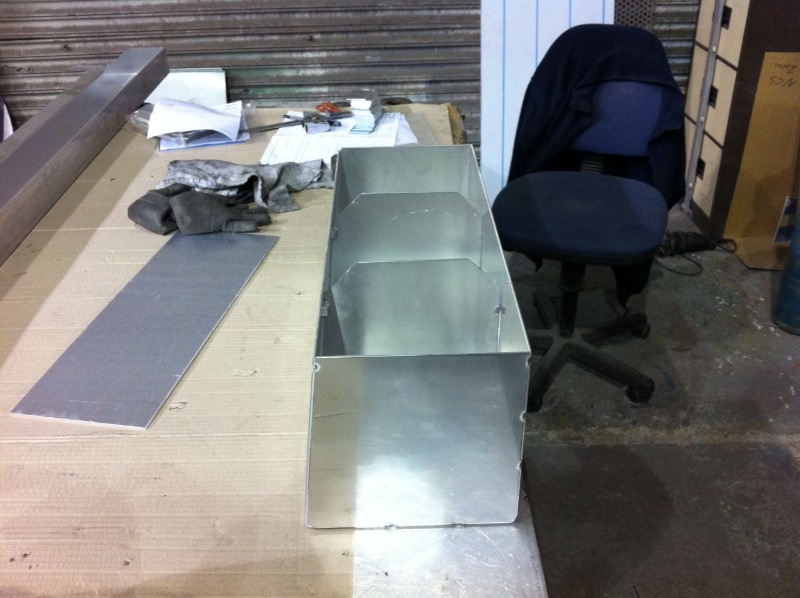
I've had a custom fuel tank made by Jamie Start, a very talented ally fabricator based in Hucknall, Nottinghamshire
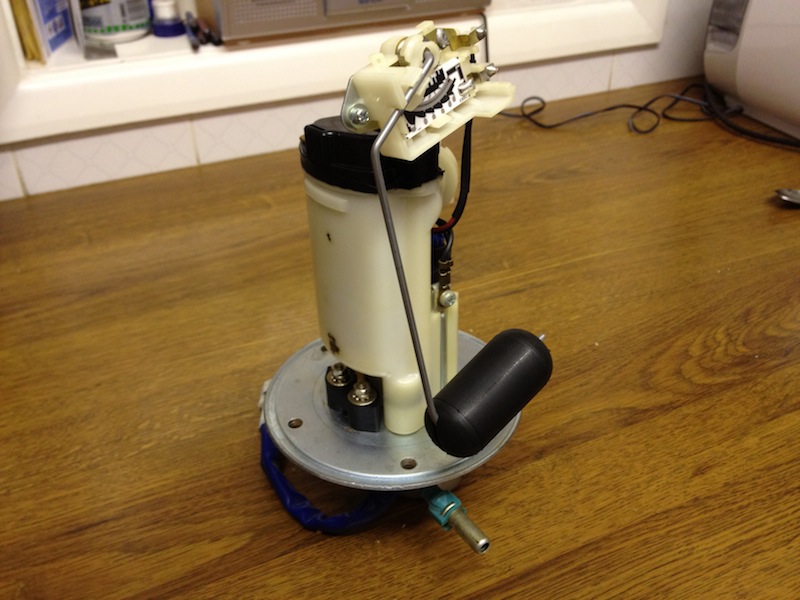
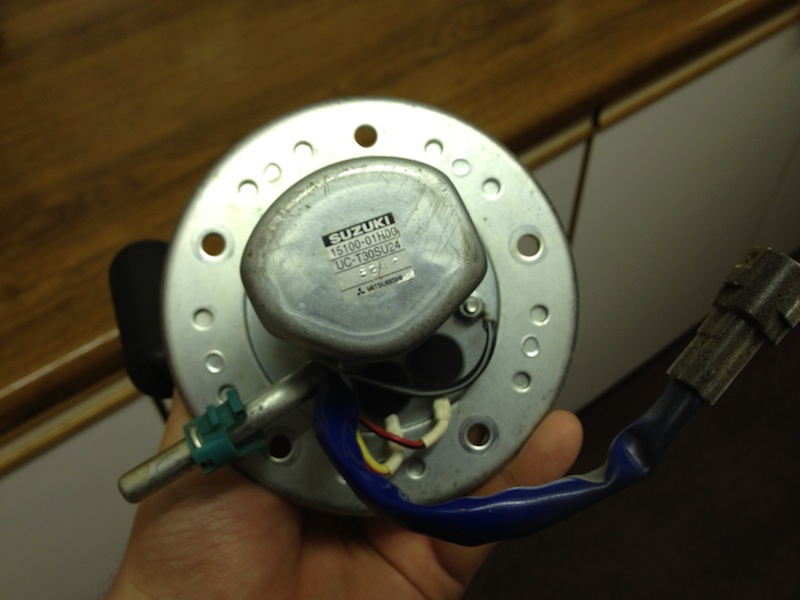
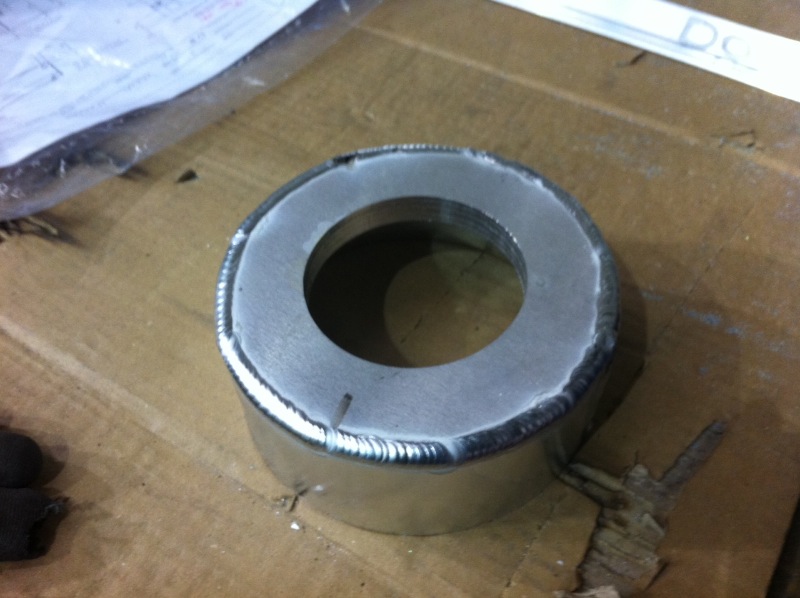
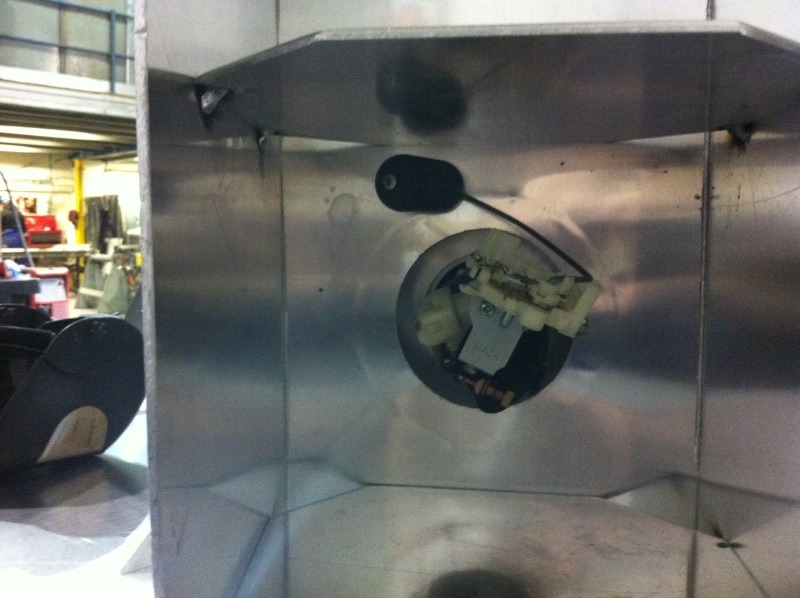
I bought a Suzuki Hayabusa integral fuel pump, sender & float
Sent it up to Jamie, for him to fabricate a mounting ring on the bottom of the tank, within a swirl pot
Tank being made with vertical baffles

Integral fuel swirl pot taking place, with a 14mm thick ally ring, for it to be blind drilled & tapped for the fuel pump to mount to
Dry fit of the pump, to be sure the float has free movement from top to bottom of the tank, without fouling the sides or baffles
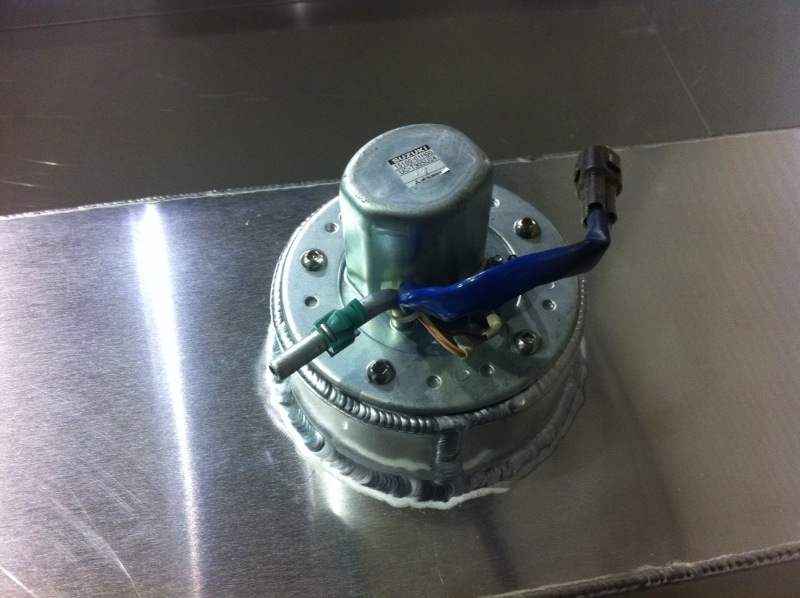
Float at the top, and the gauge will read full... stops its travel about 20mm from the top of the tank
Finished article - very happy chappy
Nice snug fit... which means I can make some sort of boot for my camera equipment!
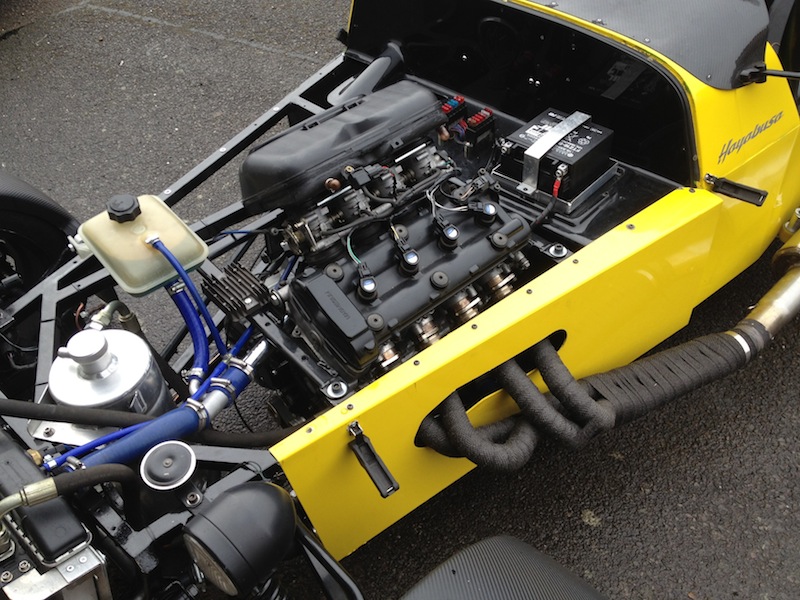
Behind the scenes, and 200 miles away, Mike has been working hard and rewiring my car, from memory - and has done a smashing job of streamlining my
existing bodged loom, and shed all the unnecessary wiring, which has halved the weight of the loom itself
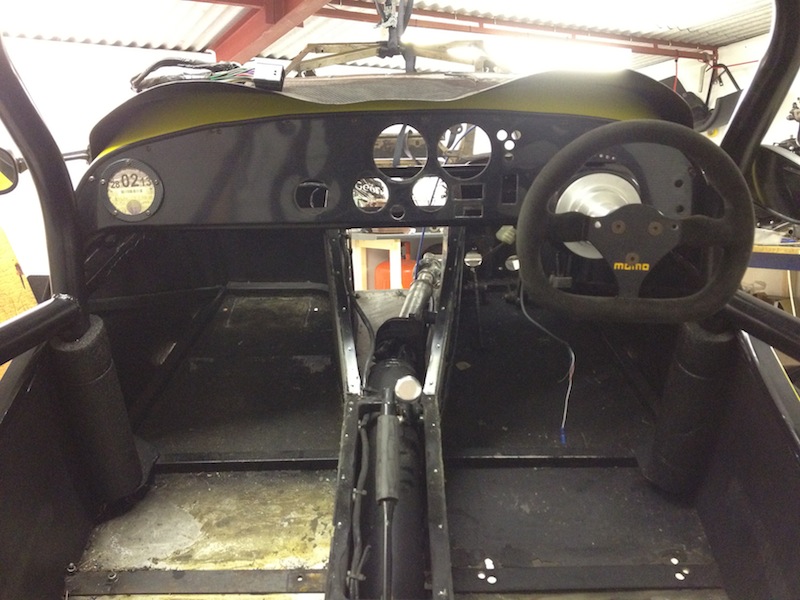
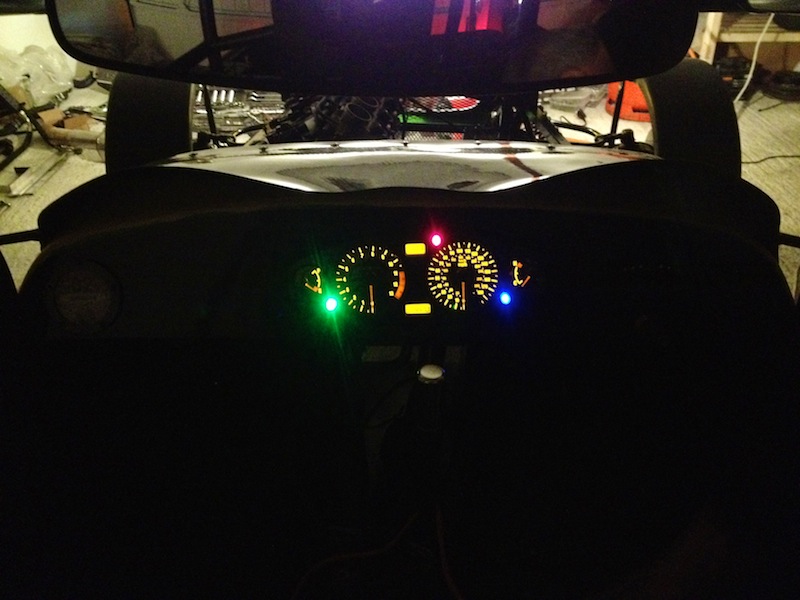
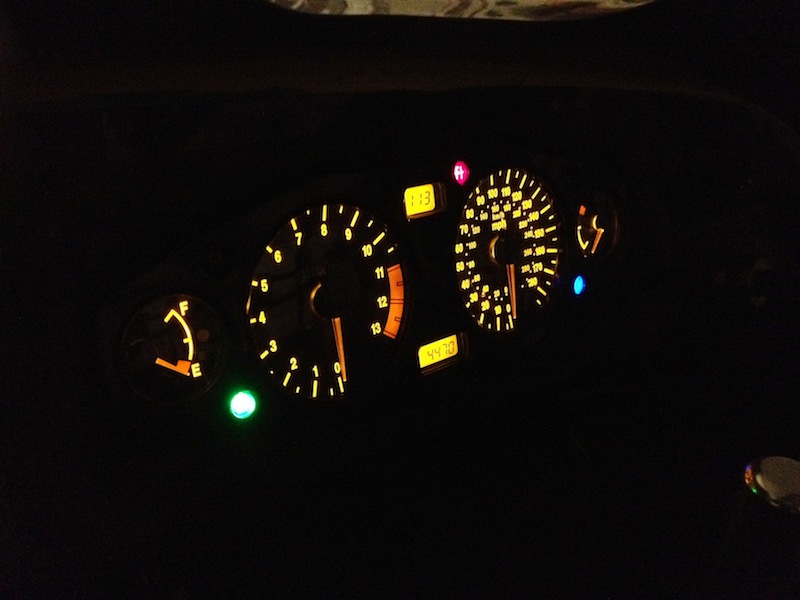
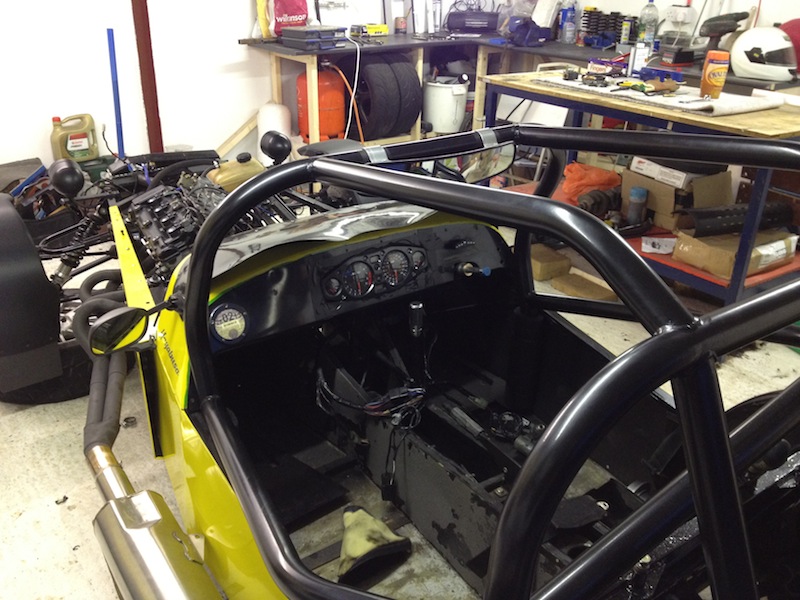
My dashboard is being minimised from lots of buttons, lights and switches doing various things, to a simple set of Hayabusa clocks, which shows me
everything I need to know (bar oil pressure)
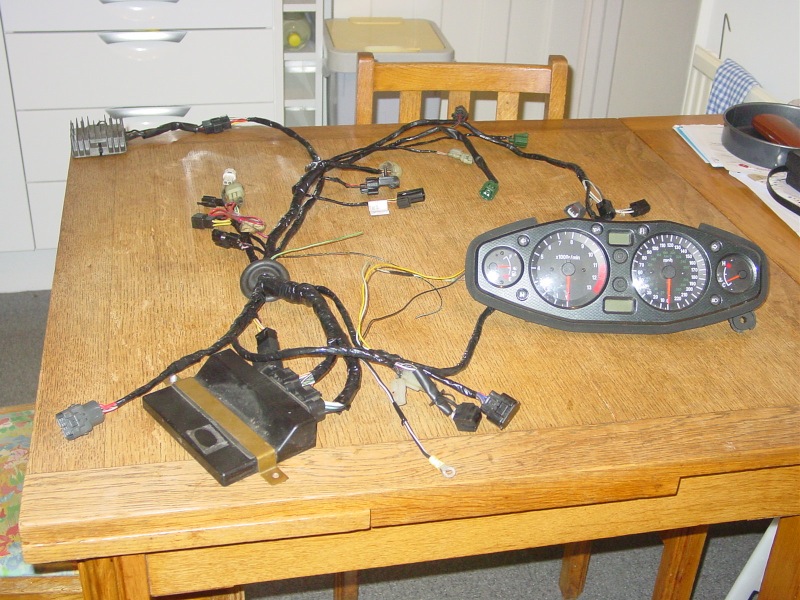
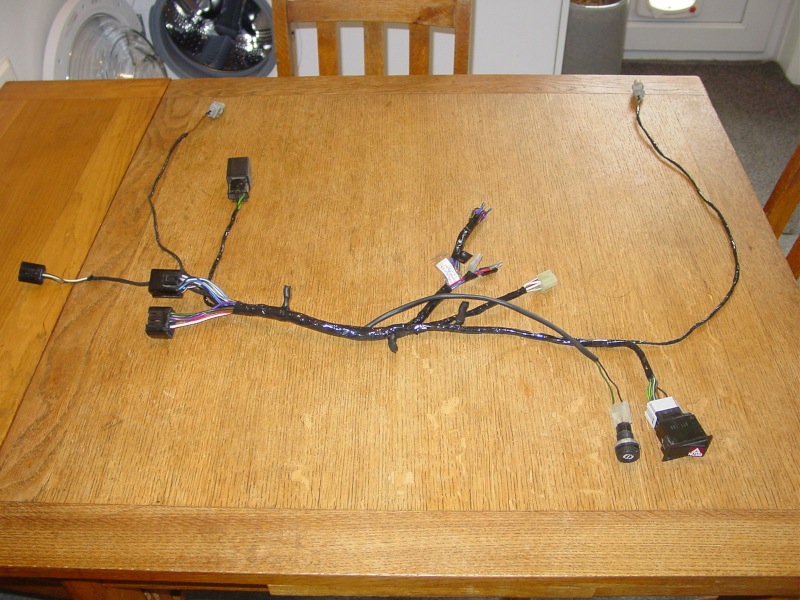
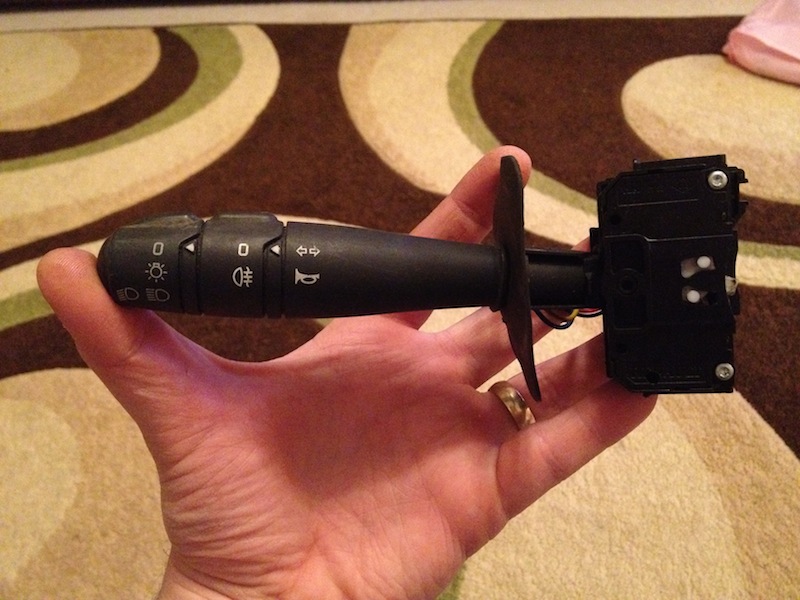
All my switches, lights and buttons are being replaced with a single Renault Clio MK2 indicator stalk, which will operate side lights, dipped
headlights, full beam, indicators, rear fog light and horn
All my old gauges, switches etc will now be for sale
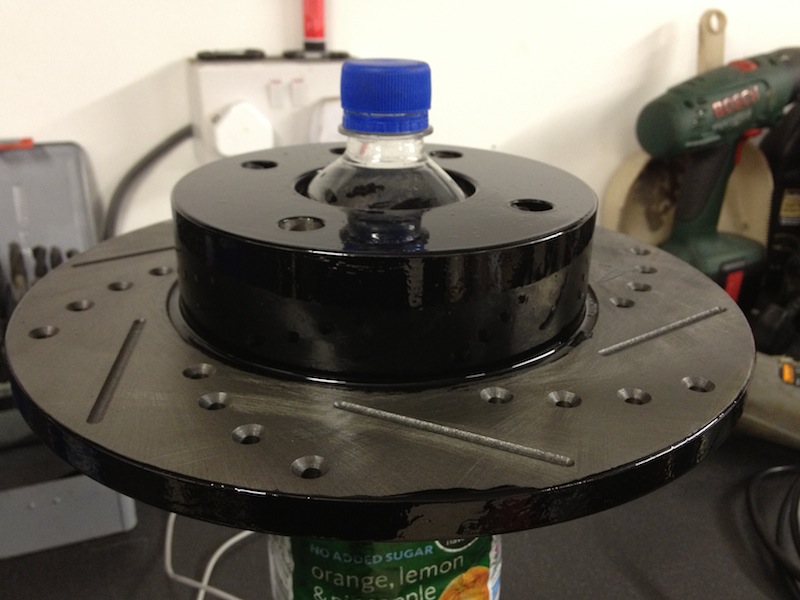
Whilst the POR15 chassis paint was out - I painted the bells and edges of the disks to prevent them from going rusty
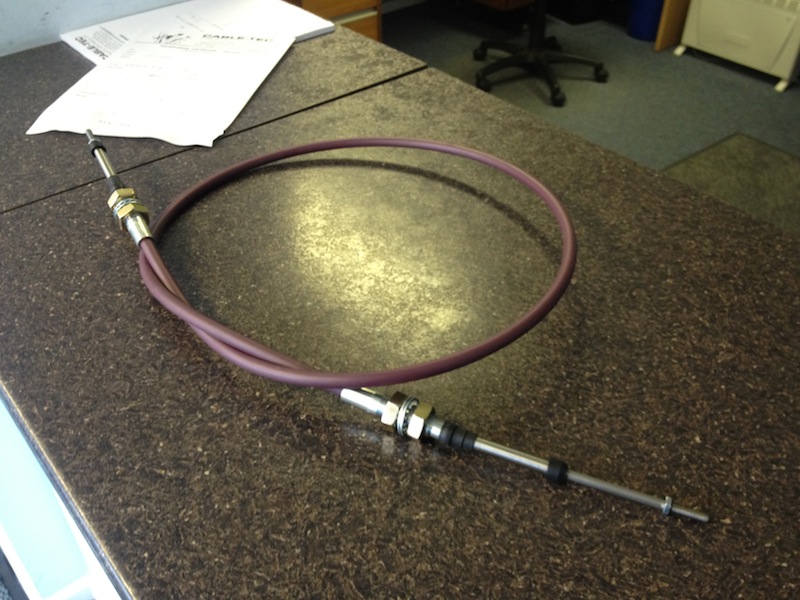
Whilst collecting my fuel tank from Nottinghamshire, I popped into Cabletec and collected my gear cables (thanks DK)
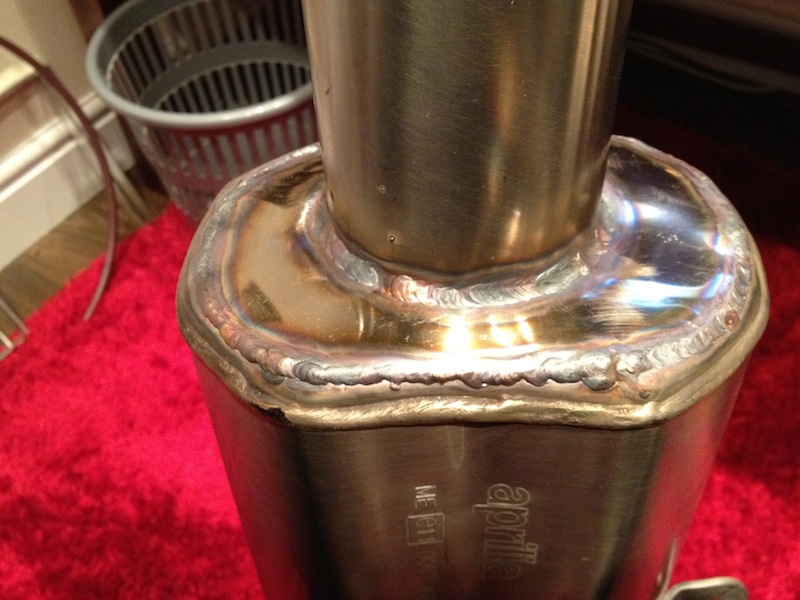
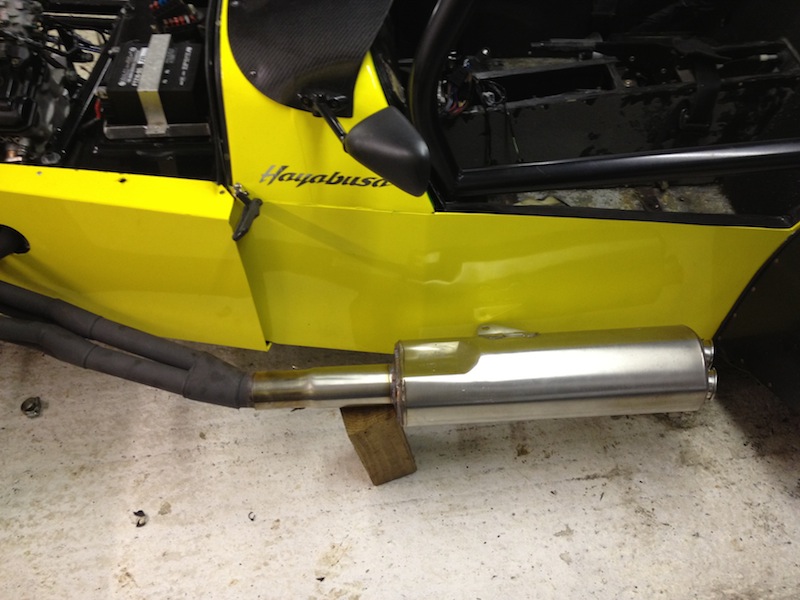
Had my Aprillia RSV Mille rear can remodelled at the rear end so the inlet pipe comes out straight, which should quieten things down a fair bit...
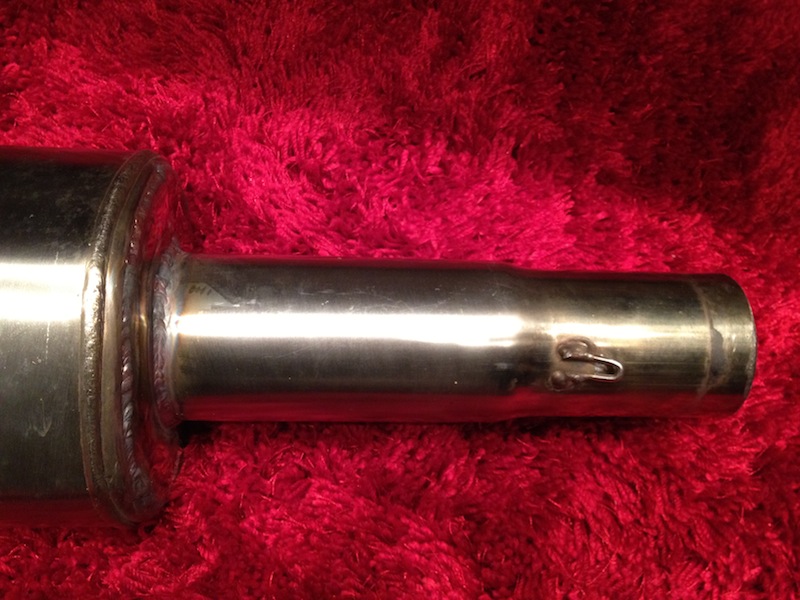
Chassis is now black (again) with the correct POR15
Thats all folks!
|
|
|
yellowcab
|
| posted on 8/3/13 at 05:58 PM |
|
|
Nat - still can't remember your username (again) but thanks for all your work with remodelling the back end of my can, and my indicator bracket
welding you did today for me!
Some more progress on the car... thanks to cosmick, mikE and Col for your help!
Whacked the brakes on - just need pads & braided lines from Andy @ AB


Lost the swirl pot, and the amalgamation of braided fuel hose being wrapped around my engine, by, so much tidier look with battery in the correct
position
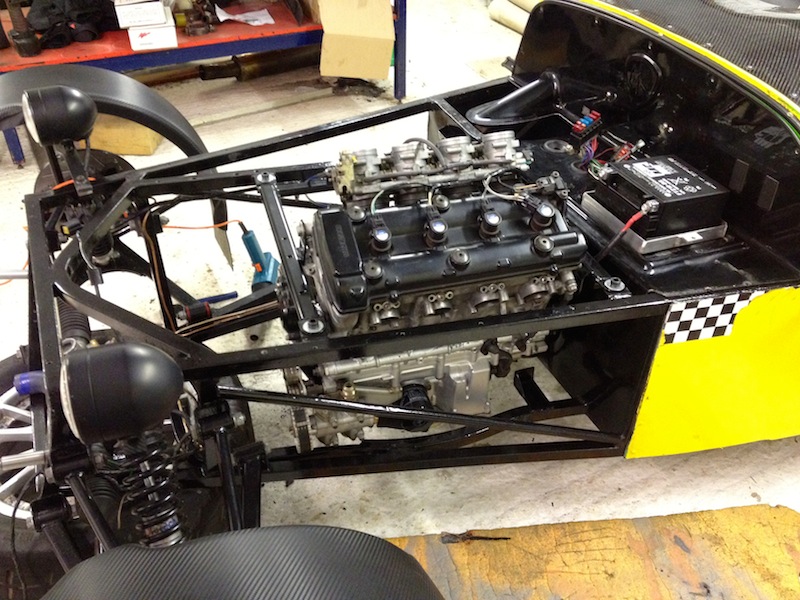
Thanks to cosmicks wiring wizardy, he managed to rewire my complete car from 200miles away, pretty much from memory, which enabled me to lose all my
individual gauges, switches, buttons, warning lights - for a set of standard Hayabusa gen1 clocks, fully working
cosmick in the middle of re-wiring the rear end part of the car harness, rose jointed rear arms fitted
Dashboard bodged back in place, with Hayabusa clocks resting in, steering adapter off, Clio MK2 indicator stalk being trialled, manifold on (now
clears chassis) and new Aprillia rear car modified by Nat @ RetroPower...

|
|
|
Ben_Copeland
|
| posted on 10/3/13 at 08:53 PM |
|
|
Looking good mate. Keep the updates coming 
Ben
Locost Map on Google Maps
Z20LET Astra Turbo, into a Haynes
Roadster
Enter Your Details Here
http://www.facebook.com/EquinoxProducts for all your bodywork needs!
|
|
|
cosmick
|
| posted on 18/3/13 at 09:08 PM |
|
|
I am waiting patiently for the next instalment.
If it can't be fixed with a hammer then its probably an electrical problem.
|
|
|
yellowcab
|
| posted on 19/3/13 at 09:14 PM |
|
|
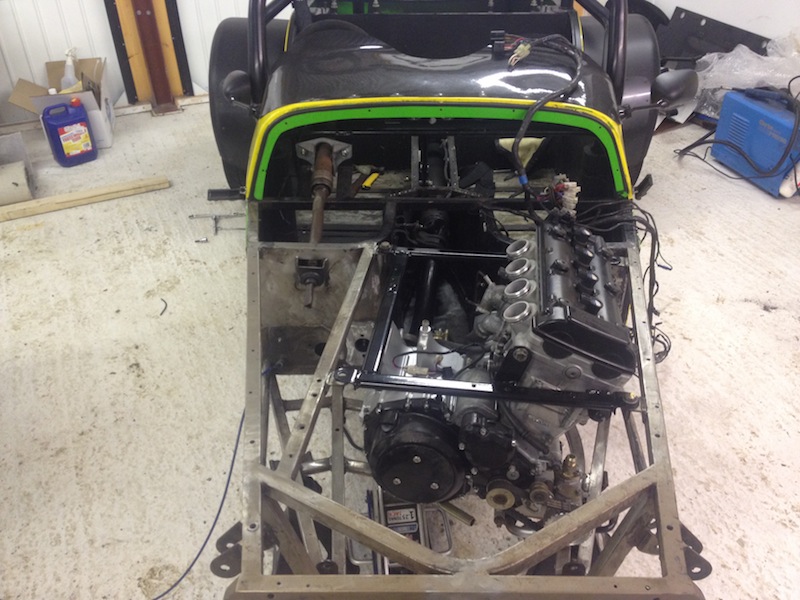
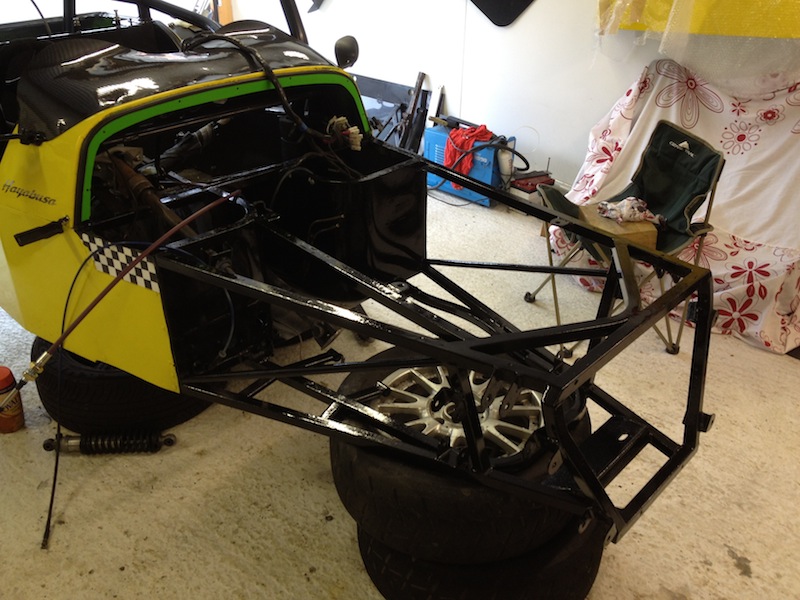
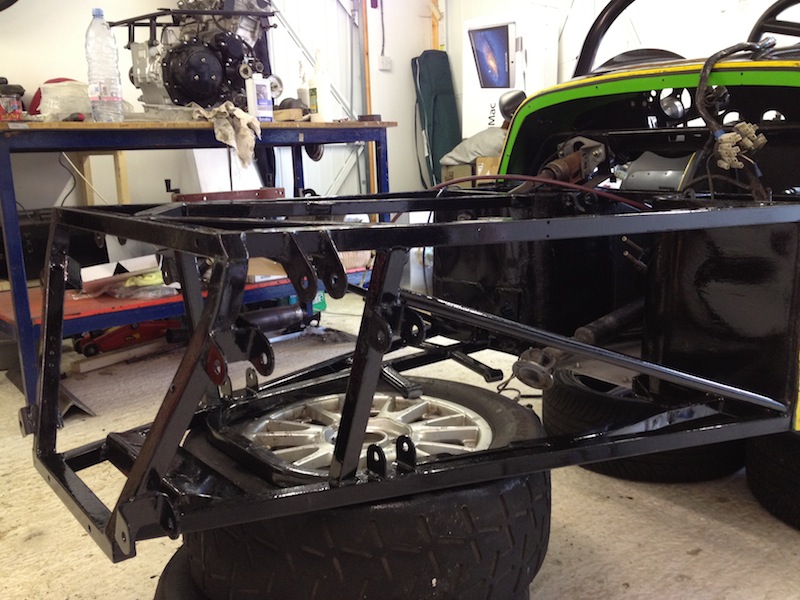
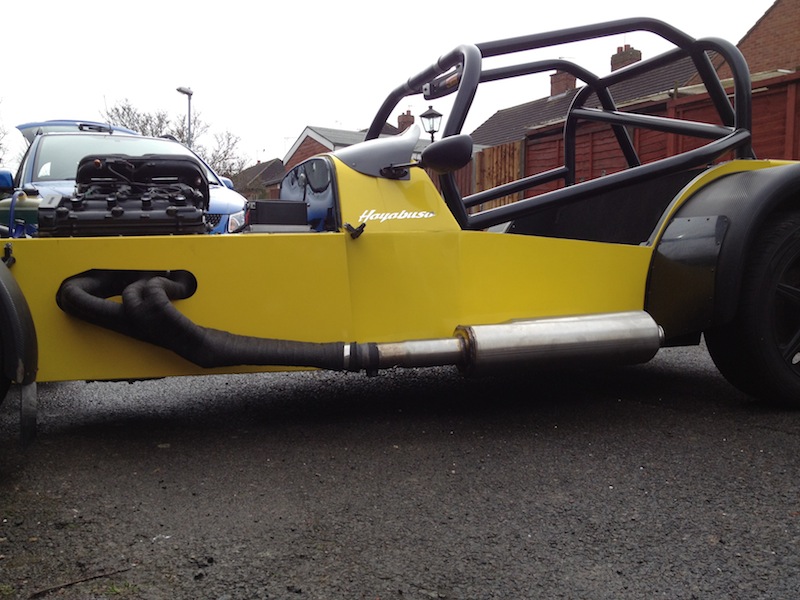
Huge thanks to cosmick & Mike yet again - we have a 90% car which is complete.
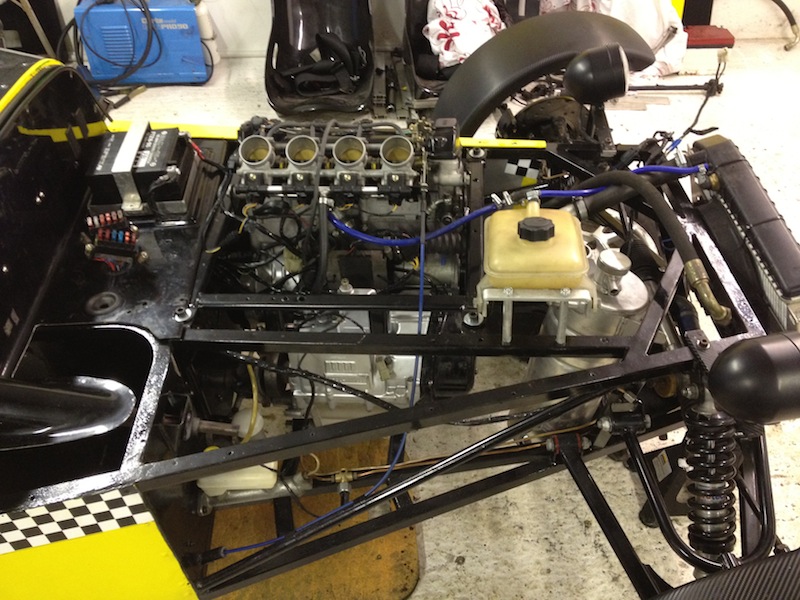
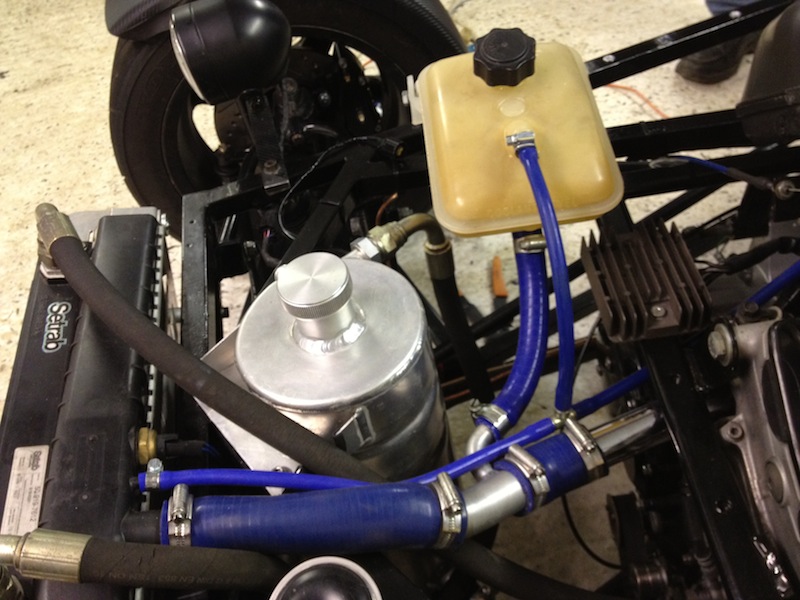
We mocked up some ally brackets to mount the oil cooler so it would stand off the rad by 10mm...

Made four of, and riveted them together
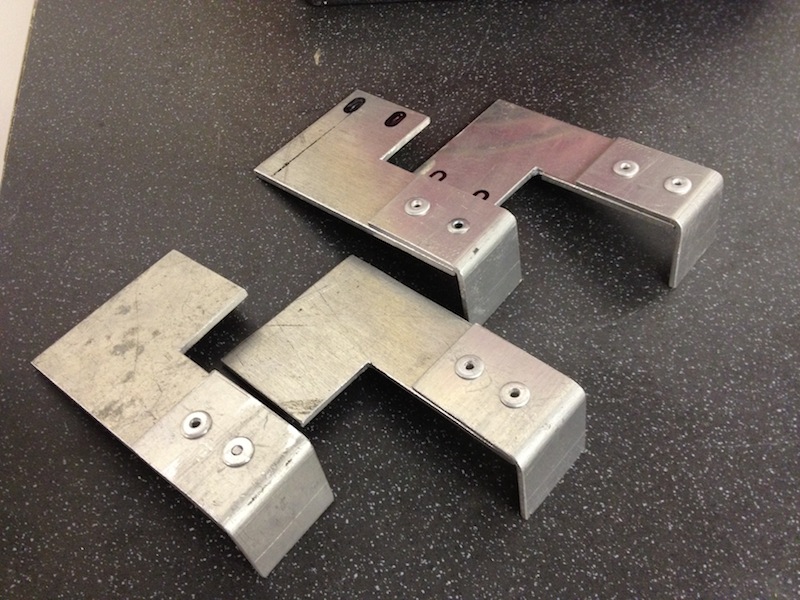
Mounted and ready to be radius'd
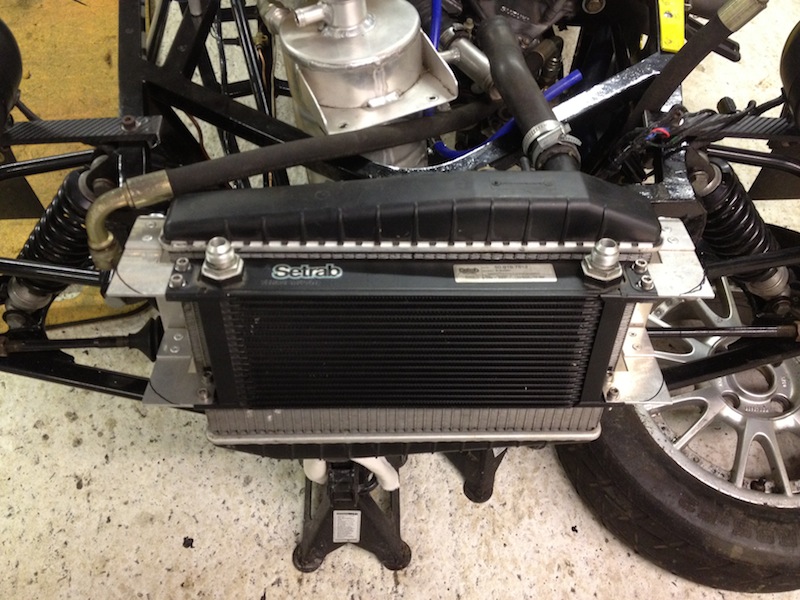
Done, and onto coolant pipe work and neaten up, dry sump tank still to be mounted correctly
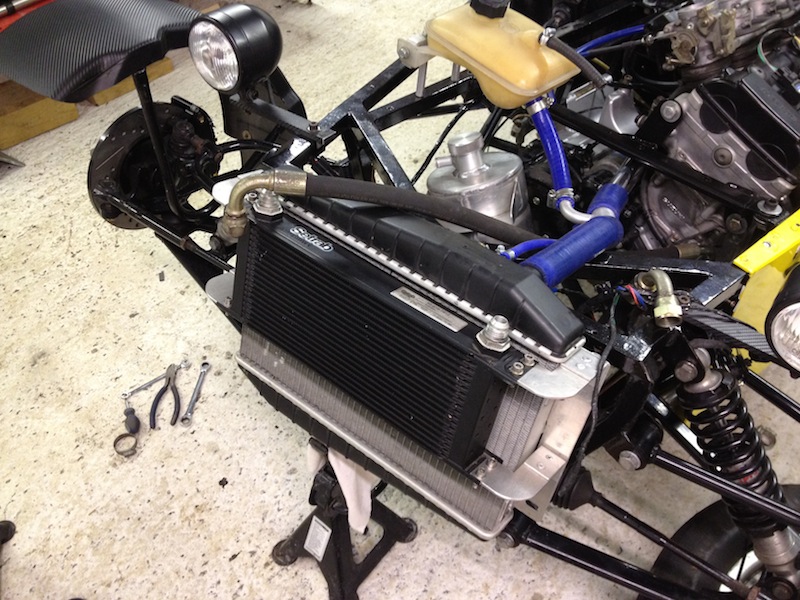
Dry sump tank mounted, and coolant pipes now in, header tank was in the dishwasher at this point.
Thanks to Mike who saved the day by using some vacuum cleaner metal pipework to extend coolant pipes so neatly
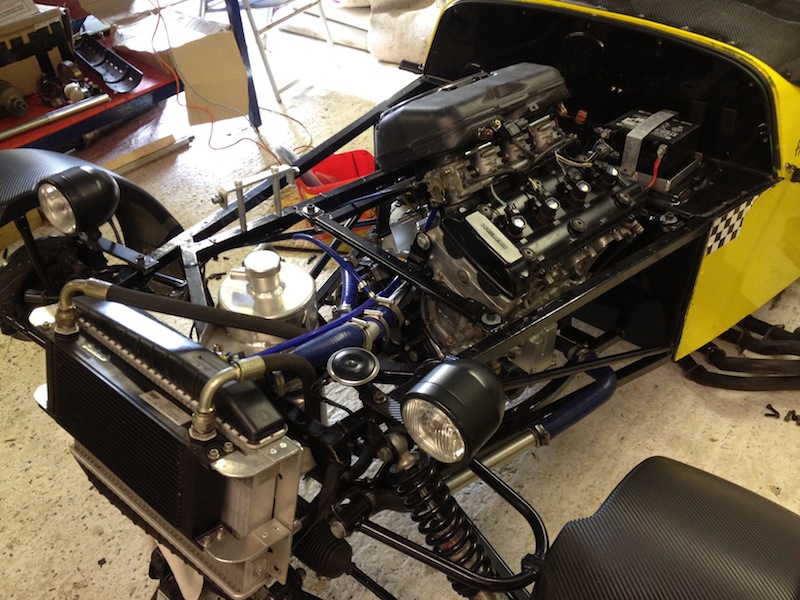
Horrid but very rewarding job of wrapping the manifold, used 19 metres in total
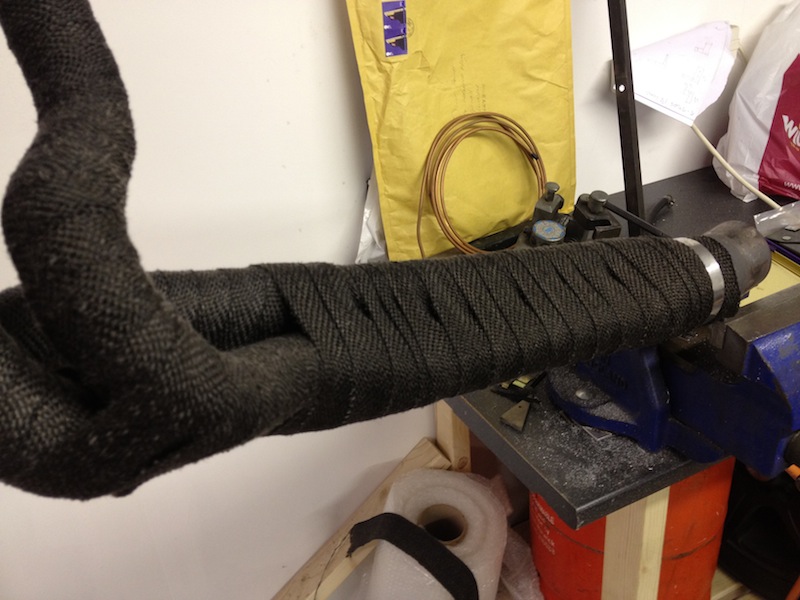
Scuttle area much more clean and tidy compared to what it used to be...

Coolant pipework neatened up too
Mike advised a more direct route of the throttle cable, rather than going to timbuck-too and back, also his wiring wizardry makes the loom hard to
see
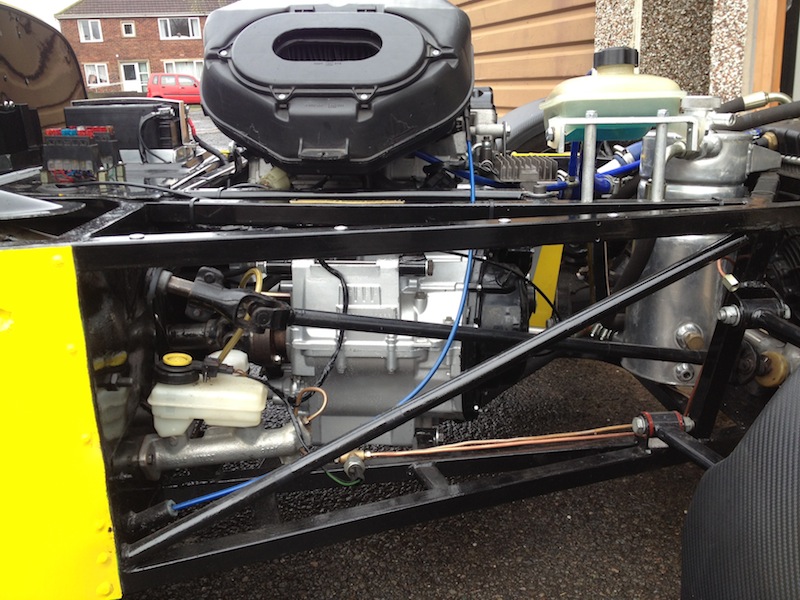
Old setup:
General pics of it outside, and running...

|
|
|
yellowcab
|
| posted on 19/3/13 at 09:23 PM |
|
|
We jotted down things that had changed on the car, it started out as a mental note... but then we had to write it as the list got so long...
1. New Fuel tank and hoses, ditched return feed to tank
2. New genuine Suzuki Hayabusa fuel pump
3. Modified & streamlined main car wiring harness
4. Modified & streamlined No.2 wiring harness
5. Modified Hayabusa harness
6. New carbon dashboard
7. New Hayabusa instrument clocks - ditched individual gauges
8. New Clio MK2 indicator and light switch - ditched all separate buttons & switches
9. Engine rebuilt and refreshed
10. New dry pump system fitted, including custom idler pulley
11. New oil cooler mounted off radiator
12. New Rose Jointed rear suspension
13. New Wilwood 4-pot front callipers
14. New Wilwood Polymatrix E pads
15. New drilled & grooved solid front discs
16. New Compbrake integral clutch Master cylinder
17. New SBD billet clutch slave cylinder
18. New Hayabusa speedo pick up
19. New Geartronics gear indicator
20. Fixed dip beam wiring
21. New horn
22. Modified and improved gearchange mechanism
23. New airbox
24. Modified steering column
25. Modified steering boss
26. New Aprillia RSV Mille exhaust silencer
27. Modified and strengthened rear chassis
28. Modified front chassis rail to allow proper fitting of exhaust manifold
29. New Hayabusa battery and tray
30. Modified throttle cable and pulley system.
31. Modified clutch pedal bush
32. Modified brake pedal bush
33. Rubbed down and painted chassis
34. Modified radiator position and fan mounting.
35. Modified radiator hose layout
36. New braided brake hoses fitted
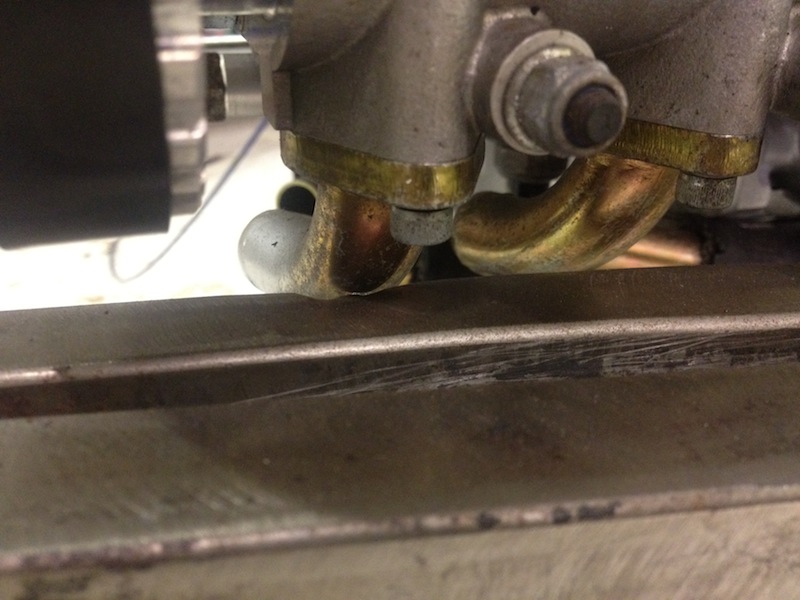
37. Balanced throttle bodies
I feel the car is now mine, built by me/ us... rather than having things bodged and blaming it on the previous owner...
Happy chappy!
|
|
|
Custardpants
|
| posted on 19/3/13 at 09:44 PM |
|
|
Will be interesting to see how you get on with your willwoods. Did Andy specifically recommend poly matrix E for the rear calipers as well? I have
ds2500 on my fronts and smart pads on the rear, but I'm about to change my brake pedal moment to get a bit more leverage on the master cylinder
- as I'm still not as good on the brakes as a caterham .
|
|
|
yellowcab
|
| posted on 19/3/13 at 10:15 PM |
|
|
Andy recommended Polymatrix E's for my front Wilwoods, my rears are standard Sierra calipers and he advised me to stick with just standard
pads.
Think I actually had EBC Green Stuff in there, so will just leave them in.
I loved Ferrodo DS2500s on my Nova, awesome pad!
|
|
|
yellowcab
|
| posted on 2/4/13 at 09:09 PM |
|
|
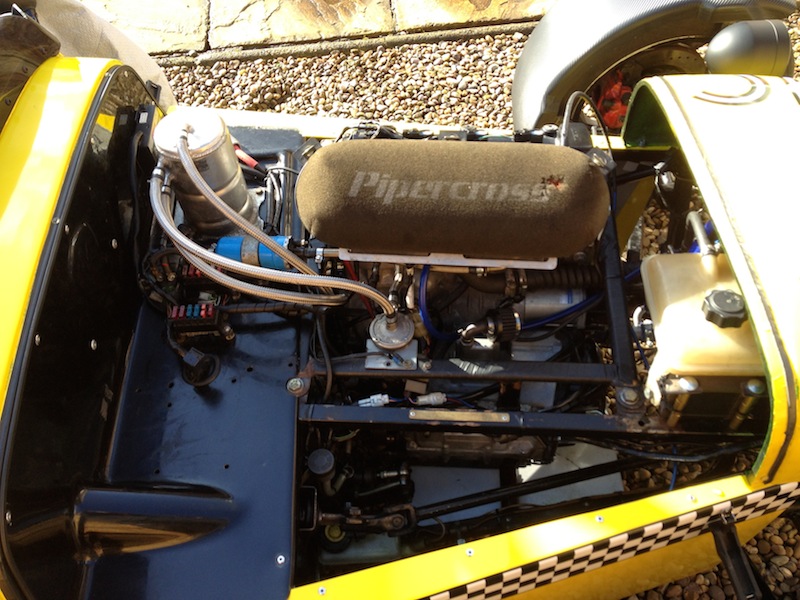
Got a carbon dashboard from Danny @ MK, yet again amazing customer service, couldn't ask for better!
Received my Wilwood Polymatrix E brake pads from Andy Bates too
Coming together slowly...
|
|
|
Benzo
|
| posted on 2/4/13 at 09:19 PM |
|
|
With wilwoods and Sierra rears i needed a bias valve to turn the rears down, have you fitted one? might be worth considering.. mine was locking a rear
on the way into corners and upsetting the balance, only i watch back race video footage did i notice a puff of smoke braking hard at the end of the
straights.
|
|
|
INDY BIRD
|
| posted on 2/4/13 at 09:43 PM |
|
|
Looking good but just one Pointer if I may , your rectifier or electric regulator as some call it, it's good to mount them on some Ali so to
disapate the heat from them as can over heat only a pointer thought,
It's good that it will be in some air to keep it cool,
Thanks sean
|
|
|
yellowcab
|
| posted on 2/4/13 at 11:31 PM |
|
|
Cheers Benzo - I don't have a bias valve at the moment, so I will keep a close eye on that!
INDY BIRD - Good shout, I will certainly be sure to move it and mount it in a different place, cheers for the heads up!
|
|
|