yellowcab
|
| posted on 8/12/13 at 09:39 PM |

|
|
Nah the video is for Mike who I've bought one of the diffs for, so they can see no adverse noises, and turns freely.
[Edited on 8/12/13 by yellowcab]
|
|
|
|
|
daveb666
|
| posted on 9/12/13 at 09:57 AM |
|
|
Really like the look of the new nose-cone, especially with the top vent holes. I need more vents in my life I think.
2007bc Photography - Commercial and Wedding Photographer based in West Yorkshire
http://www.2007bc.co.uk / http://www.huddersfieldcommercialphotographer.co.uk
|
|
|
yellowcab
|
| posted on 9/12/13 at 12:26 PM |
|
|
I concur!
More vents, less weight, win/win.
(until you add mesh) LOL 
|
|
|
PAUL FISHER
|
| posted on 9/12/13 at 03:32 PM |
|
|
Its good to see my old Donkervoort nose cone being fitted to a MK at long last, looks the dogs dangles
|
|
|
yellowcab
|
| posted on 10/12/13 at 06:24 PM |
|
|
Yes Paul, it finally goes on a car after being passed around, for what, 6 years did I hear?
It's sooo light too, it needs a few tweaks, but I'm confident it'll look awesome when in place.
Its a marmite nose though, some will hate it, which is the main attraction for me
|
|
|
yellowcab
|
| posted on 29/12/13 at 06:18 PM |
|
|
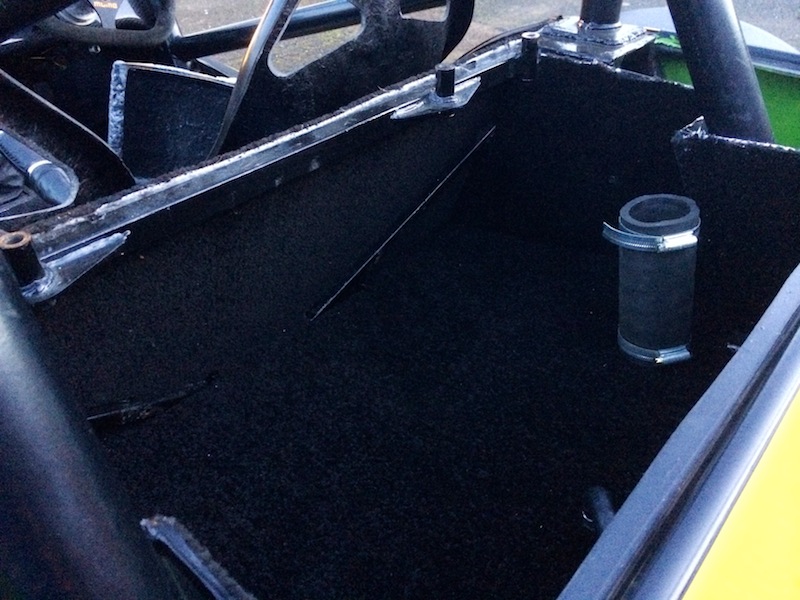
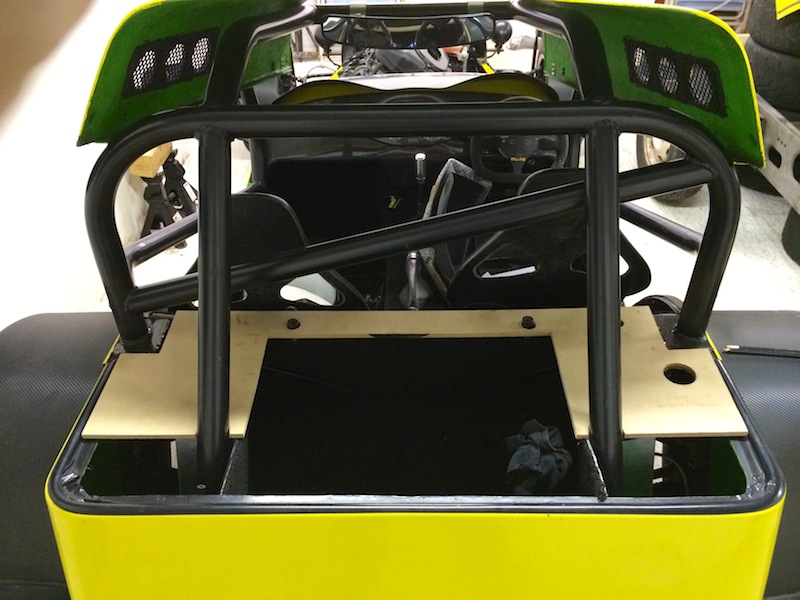
First time down the garage in a few weeks - finished off my boot & lining.
I was putting off completing this as I was going to be changing the diff over to the 3.14, but I've decided to do that next winter instead.
I don't feel as though I've had enough use of the car with the current diff, and I've been very lucky and got an all expenses paid
open pit trackday at Silverstone circuit with a garage/pit too, booked for Sunday 23rd March... so I don't want to dismantle the car too much
and put myself under unnecessary pressure.
Heated up the aluminium and sprayed it with adhesive
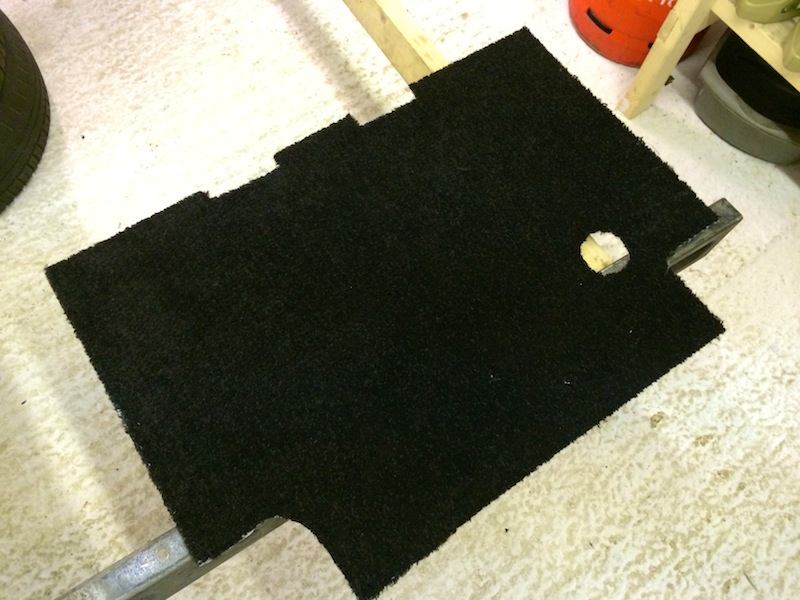
Dropped in and checked of size & over hangs
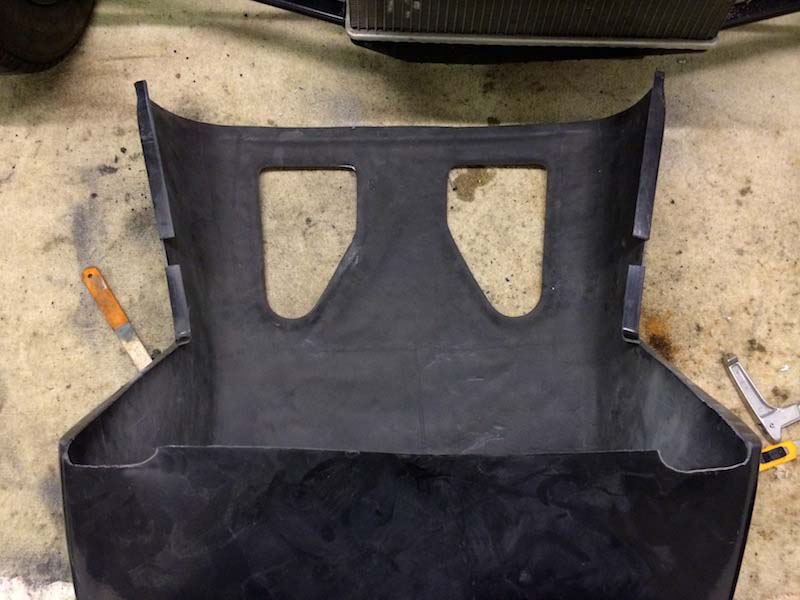
Then carpeted the rear panel in between the bracing

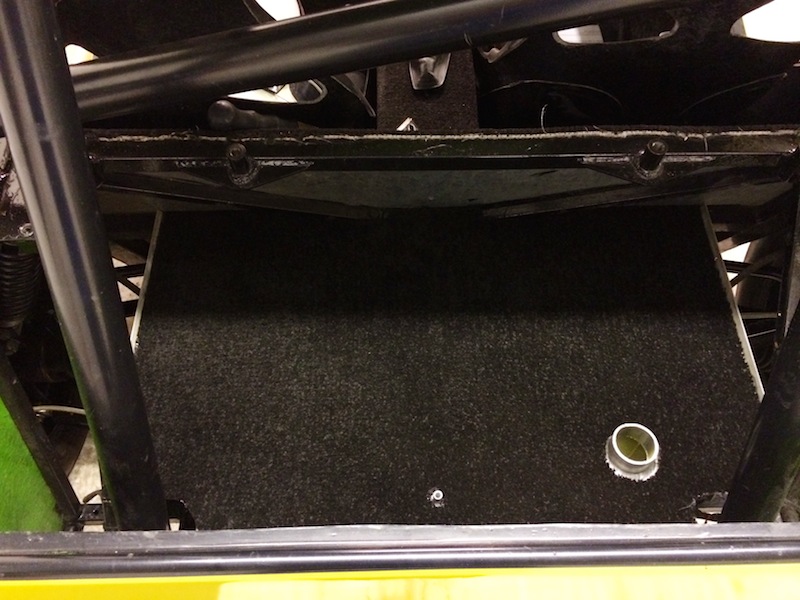
Then added the sides, and bolted, everything is removable without any tools
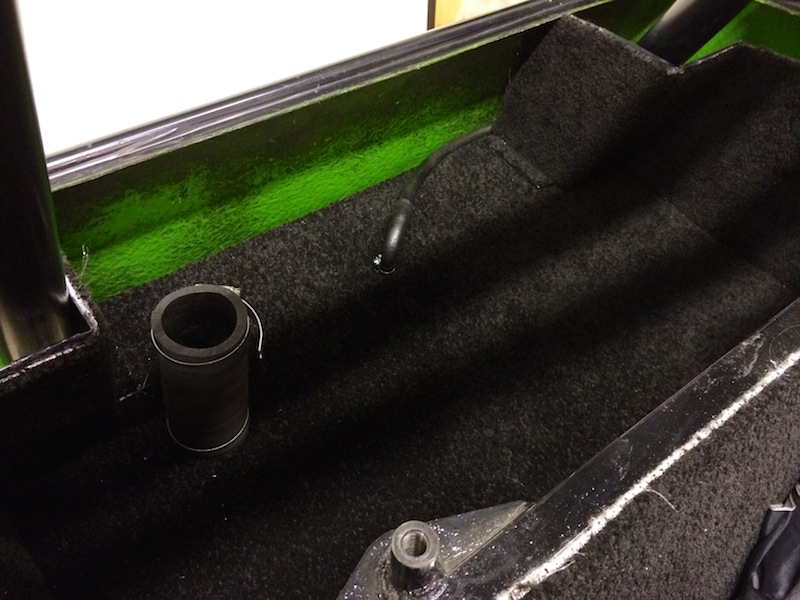
View of the back panel - I may carpet the green section for aesthetics, not sure yet
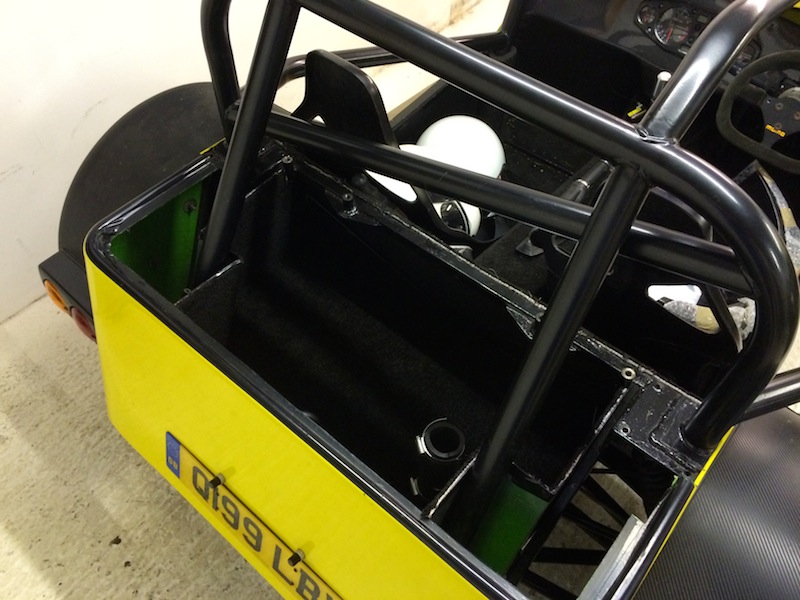
Job done - now just the lid to sort
|
|
|
yellowcab
|
| posted on 30/12/13 at 12:15 PM |
|
|
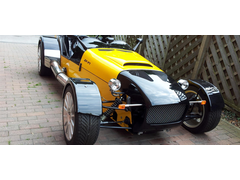
So todays objective was to try and get the Donkervoort nose fitting nicely.
A time consuming job again, as its a lot of fitting, marking, removing, chopping bits out, refitting, remarking, realising you'd done it wrong,
trying to correct what you'd done wrong, re-removing more stuff, and repeat... several times... over, and over.... and probably over again.
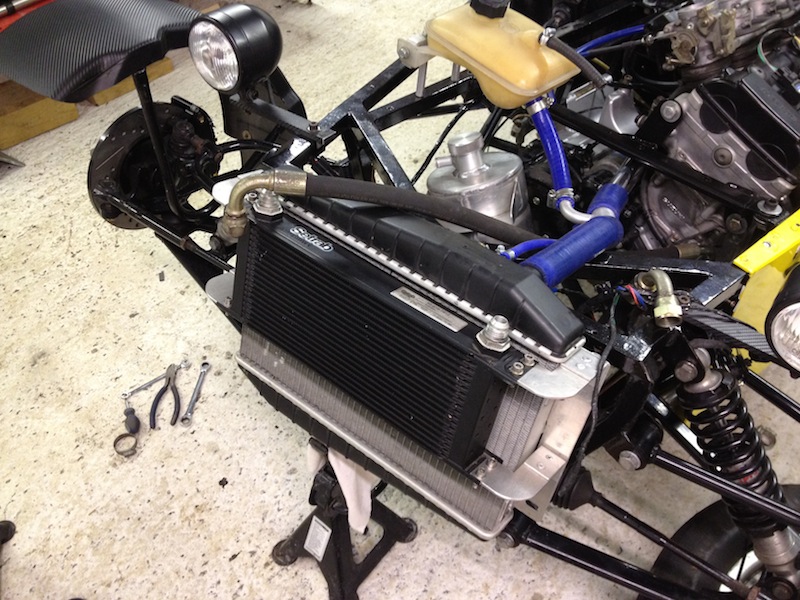
The annoying thing about photos, as the first one below shows it just resting on with it not fitting at all, no where, with no modifications done to
it... and the final result, looks exactly the same lol
This is it just resting in place whilst I marked it out for where it fouled
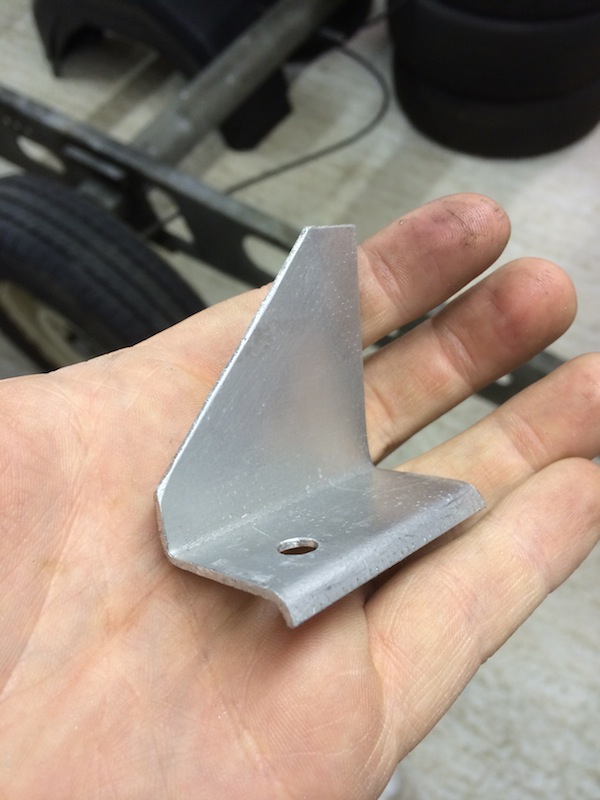
First off, was my home made oil cooler brackets that I made to make the cooler stand proud of the radiator needed slimming down, as the new nose at
the front is slightly narrower than the original item
How they were made to begin with:
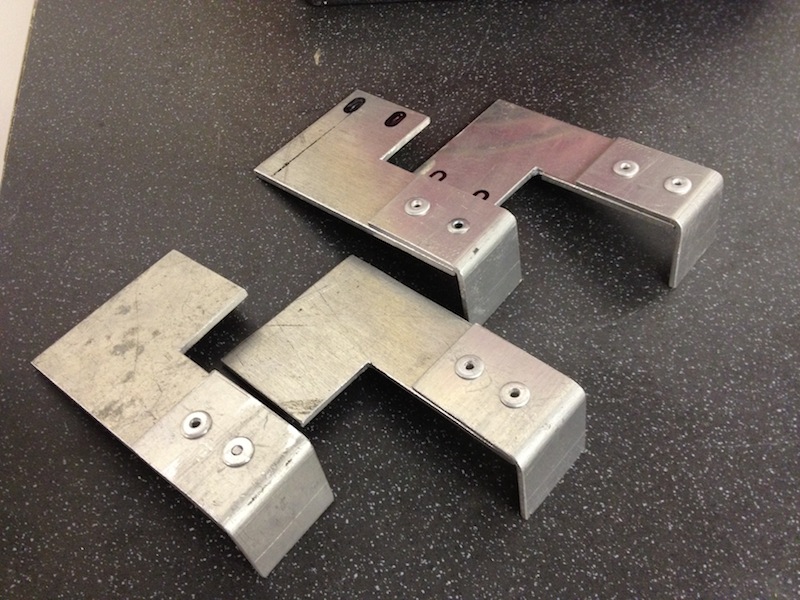
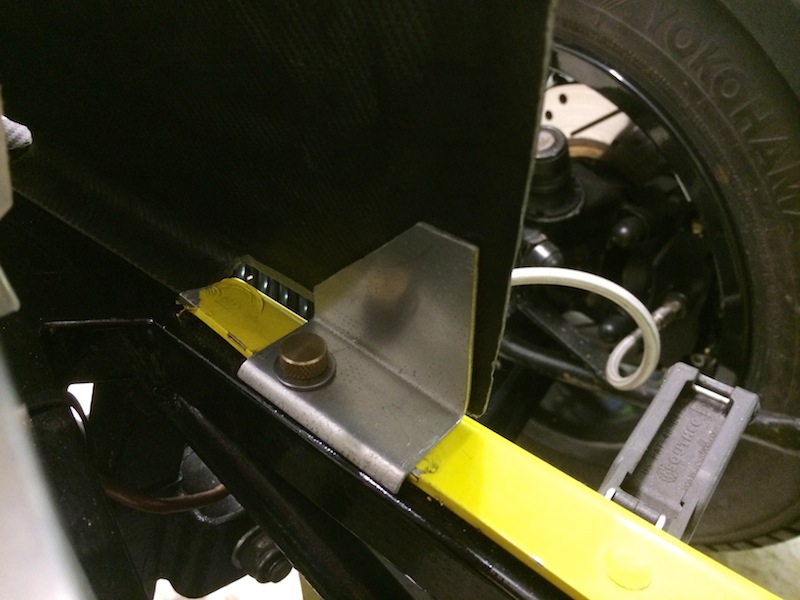
And how they needed modifying to allow the nose to fit on snug
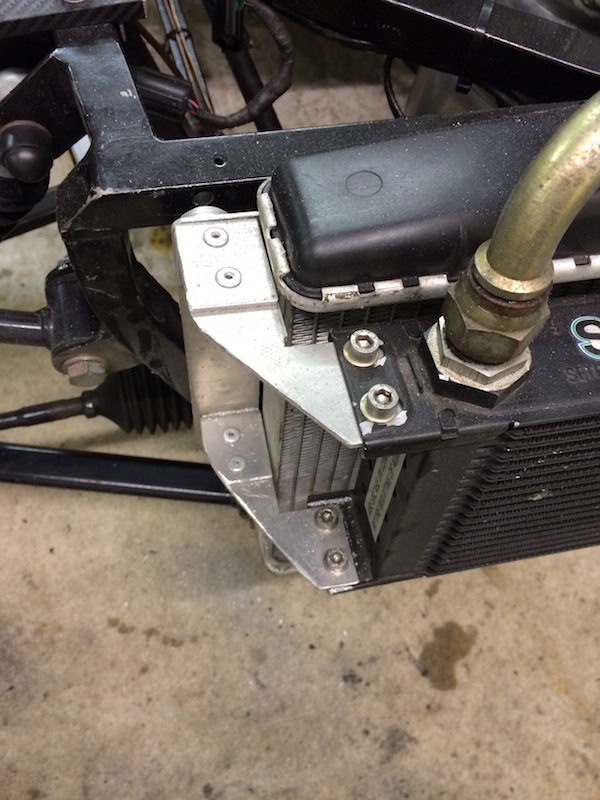
In order for the nose to fit nicely up to the box seciton, space the for two front lower wishbone bolts needed nibbling out, aswell as the the
headlight stay bars
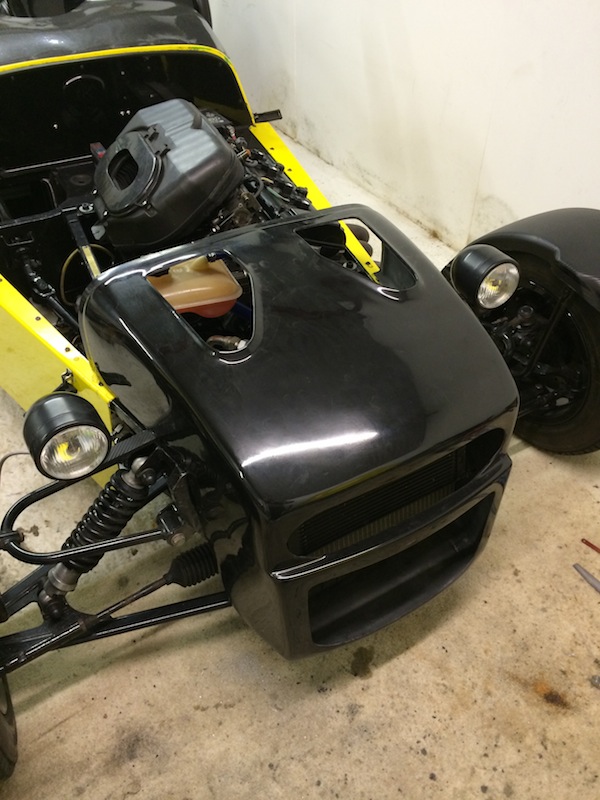
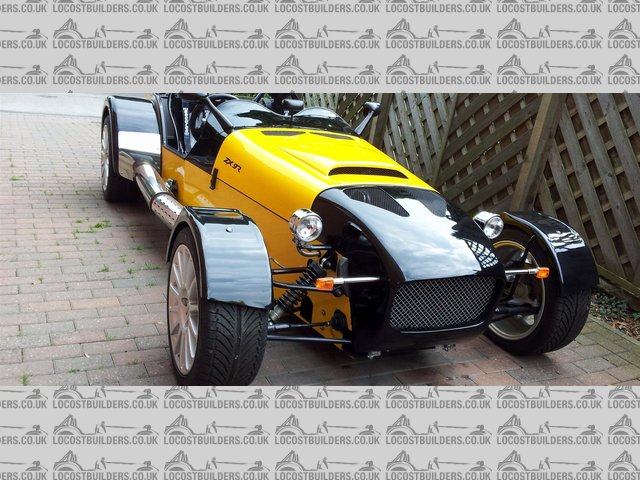
Fast forward several faffing and hours, and here is the (semi) finished article
You'll notice that where the back of the nose, meets the bonnet, it needs pulling out slightly, but thats no biggie
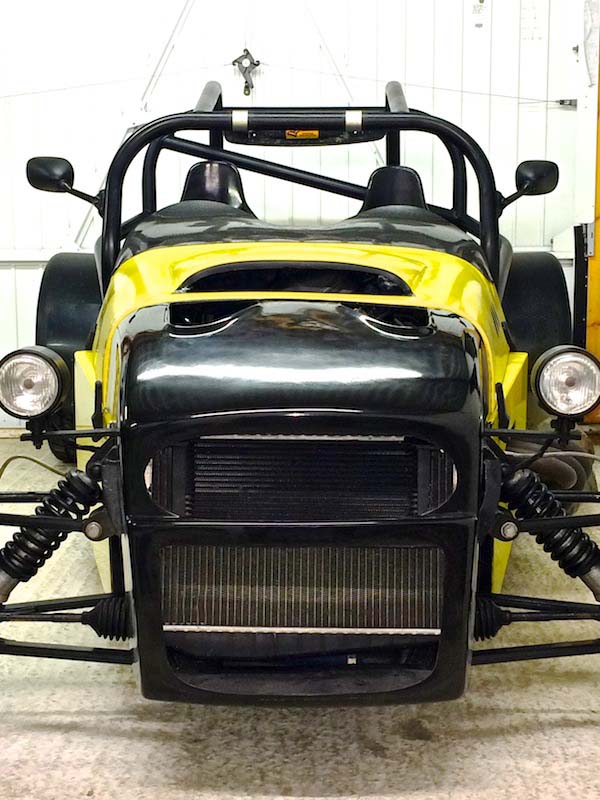
Job jobbed, just needs black mesh & wrapping... along with the rest of the car at some point lol
[Edited on 30/12/13 by yellowcab]
|
|
|
ReMan
|
| posted on 30/12/13 at 02:05 PM |
|
|
Good work, fits better than I expected and goes well
www.plusnine.co.uk
|
|
|
yellowcab
|
| posted on 30/12/13 at 06:03 PM |
|
|
It won't look so odd when its the same colour as the car I presume lol
|
|
|
yellowcab
|
| posted on 3/1/14 at 05:15 PM |
|
|
Bootlid making tonight, followed by fitting carbon front cycle wings
|
|
|
yellowcab
|
| posted on 5/1/14 at 06:49 PM |
|
|
So more fettling with the new nosecone, where the nose overlapped the wider ally panels of the engine bay, the nose cone obviously lifted off the
chassis box section, leaving a slight gap that I wasn't chuffed about, so I marked and cut off the overlap, and cut a section out so the
nosecone sat flat agains the black box section
This obviously left the whole bare where it was being mounted to, excuse the rucked up wrap lol
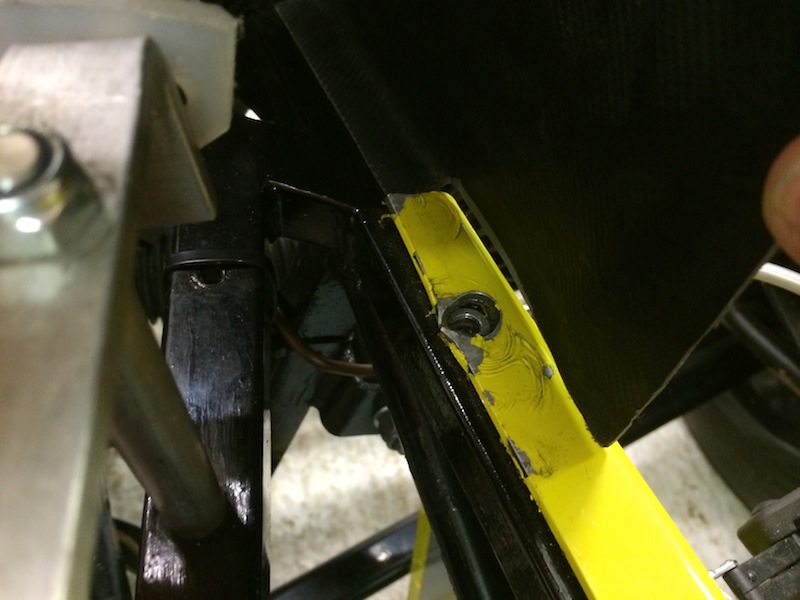
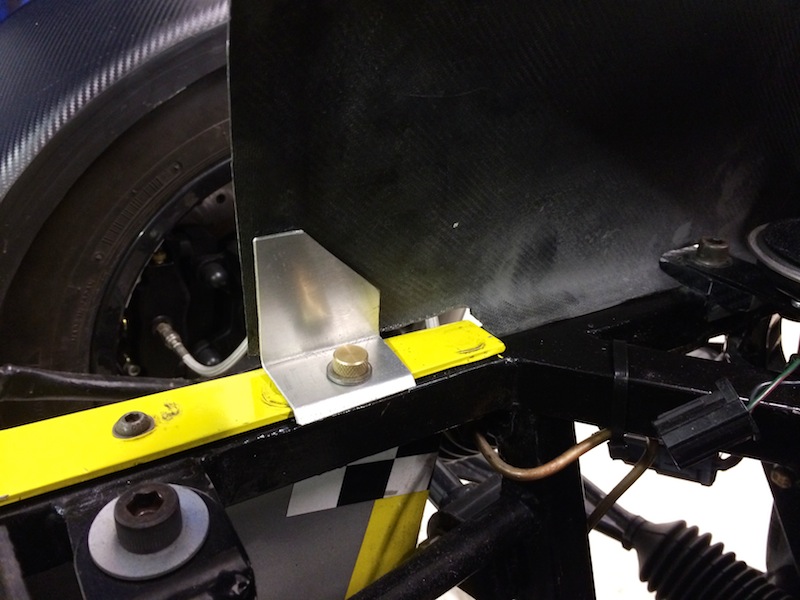
So I 90degree bent some ally, and put a little return fold on it so it folds around the ally panel nicely leaving no sharp edges
Offered it up, and put the original finger bolt back in - looks alright
Same goes for the other side, just need tigersealing in place, as I don't want any rivets seen on the outside as it'll show under the new
wrap
Then attention turned to the bootlid, but immediately got fed up and bored, so left it and locked up

|
|
|
yellowcab
|
| posted on 5/1/14 at 10:33 PM |
|
|
So I said to the misses, just "popping" down the garage, won't be a minute, well that was 3 hours ago - you know how it is? Surely
its not just me?
Anyway, progress - I went down to start and finish the boot lid, did I? Did I heck. Can't bare the thought of such a mind numbing job.
So I decided to take the car to bits, and use an angle grinder instead - yes. That'll work.
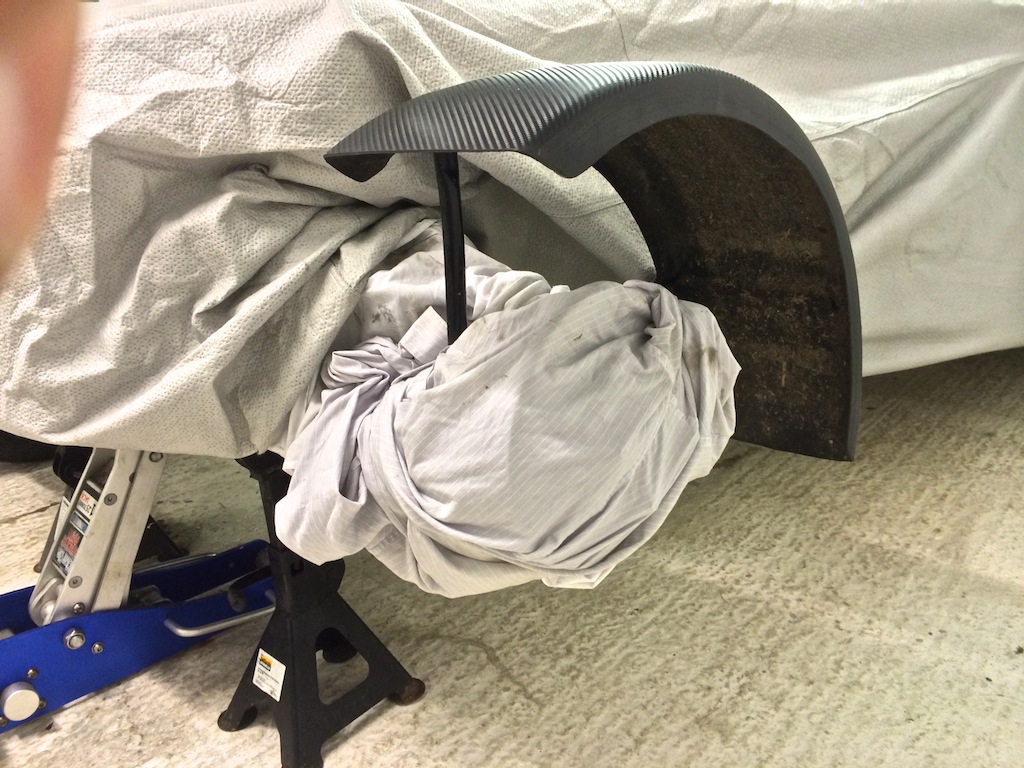
So the job in hand, front plastic cycle wing swap over to Carbon CSR style ones...
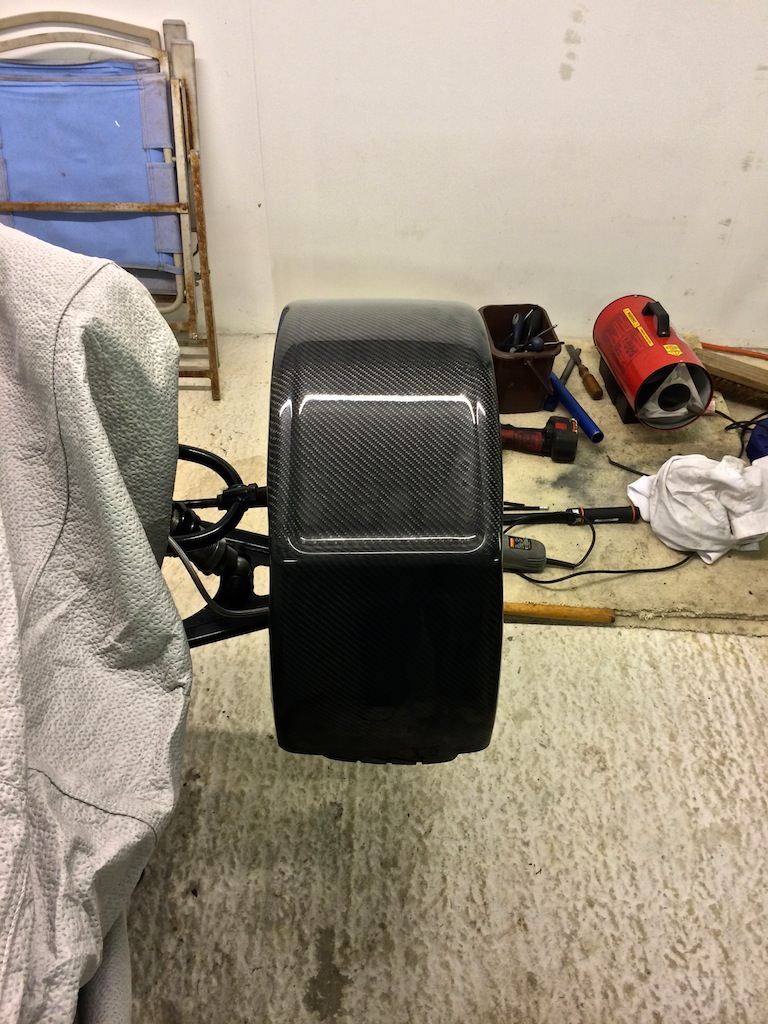
This is the carbon one sat on top, again, I may aswell say - here you go, job done - as this is pretty much what it'll look like anyway
lol
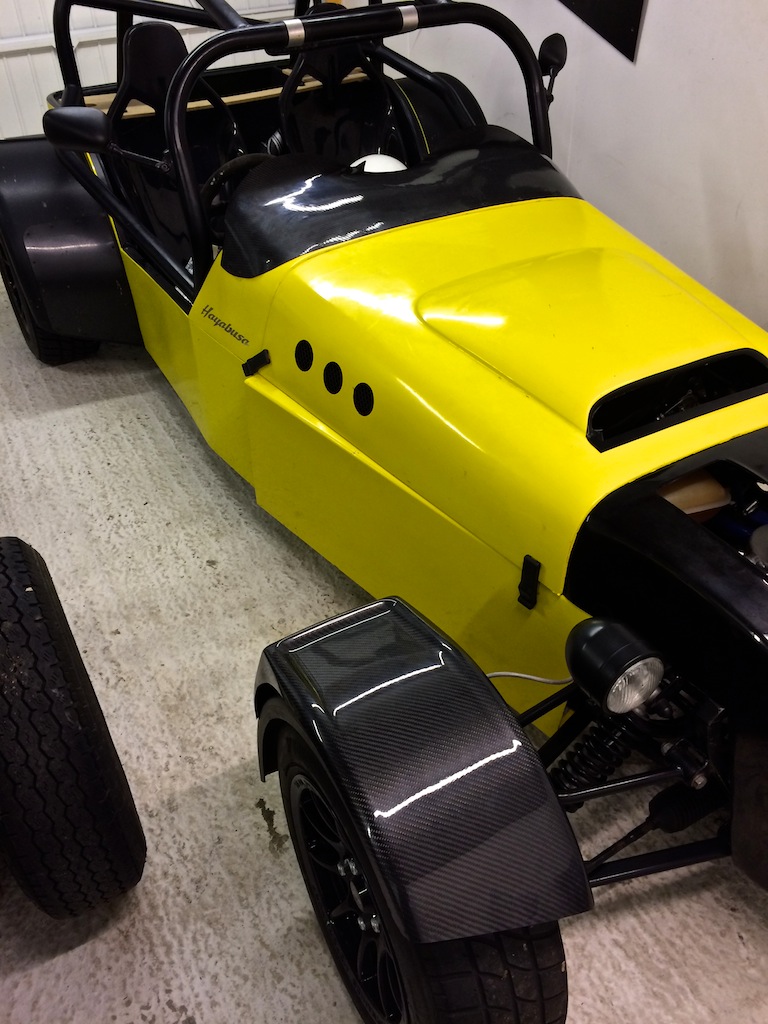
I'm actually going to miss the harder looking plastic 'dry-look' carbon wrapped ones, as they're not as pretty, they look more
mean...
Here is new & old side by side...
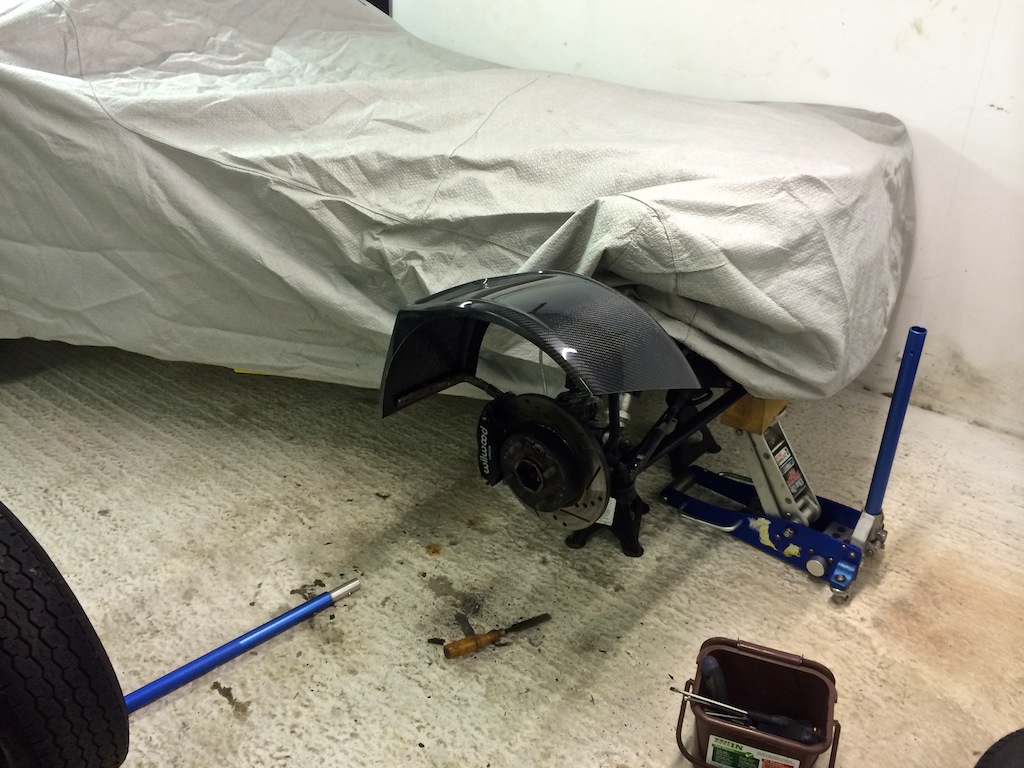
First off, operation cover up, I've learnt my lesson with grinding fibreglass away and the sheer amount of dust it produces!
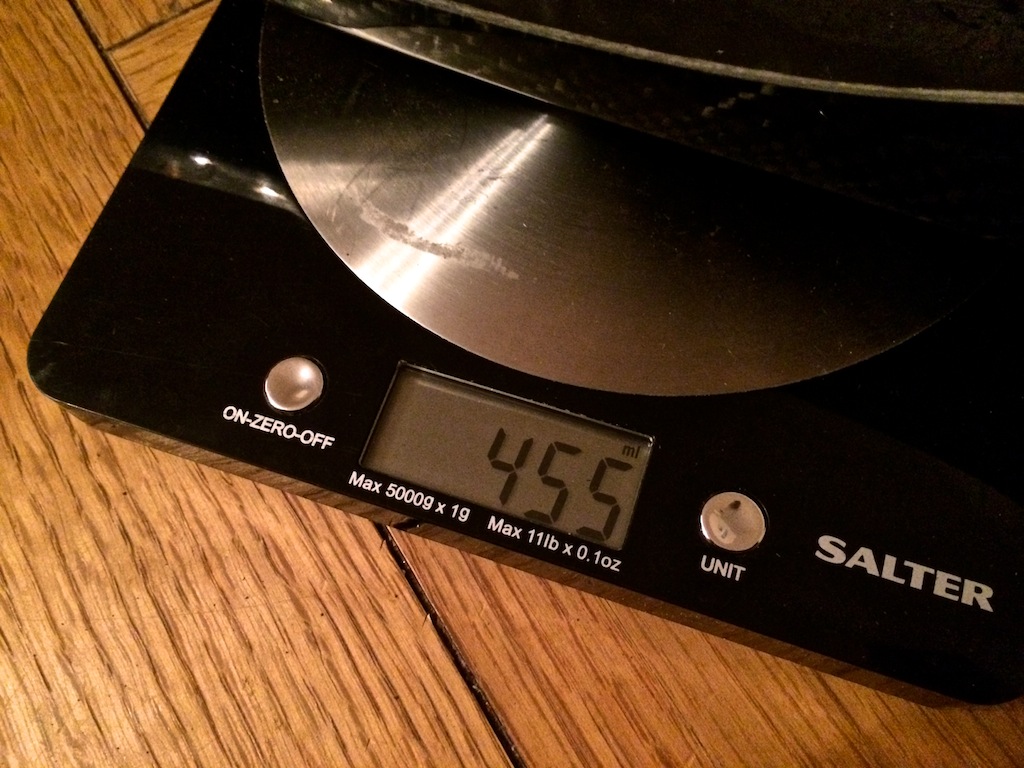
Once removed, first thing - weigh them... 1 plastic MK cycle wing guard is 867grams x2 = 1.734kg
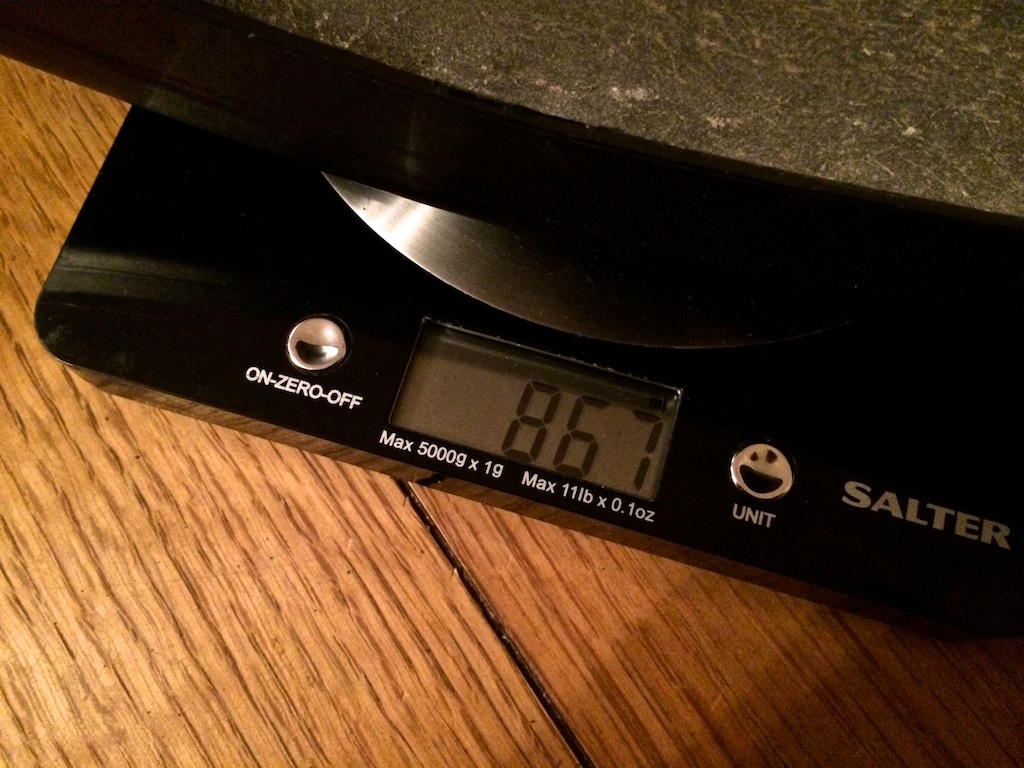
One new carbon CSR cycle wing is 455grams x2 = 910grams (total saving of 824grams, another kilo near as damn it)
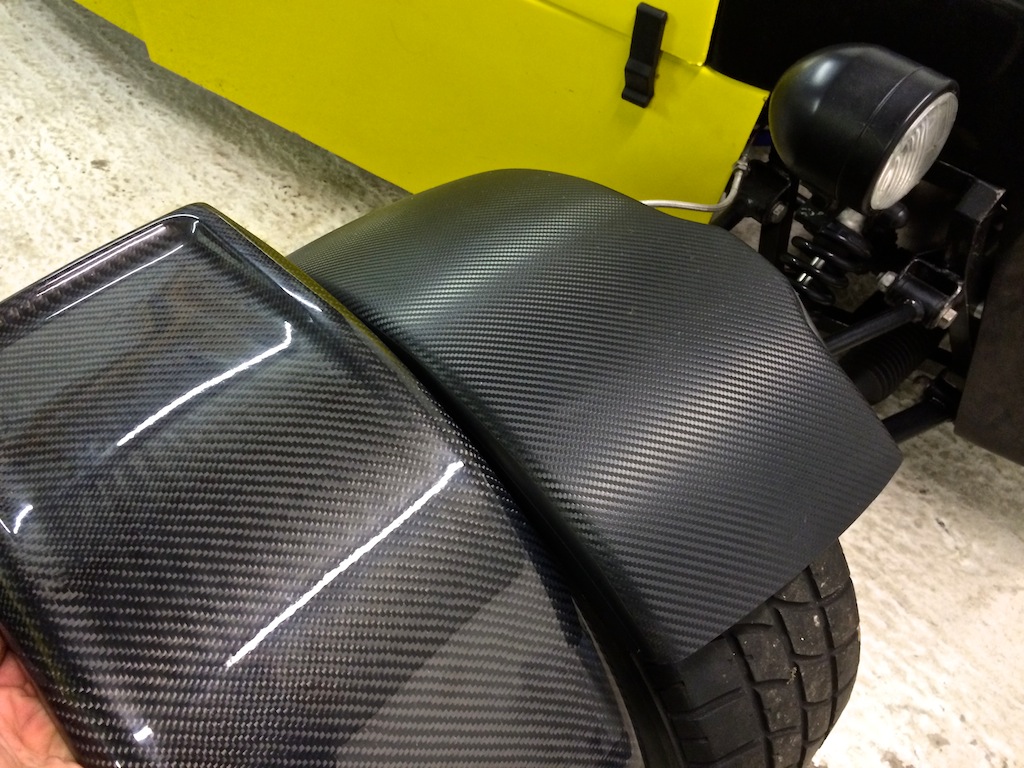
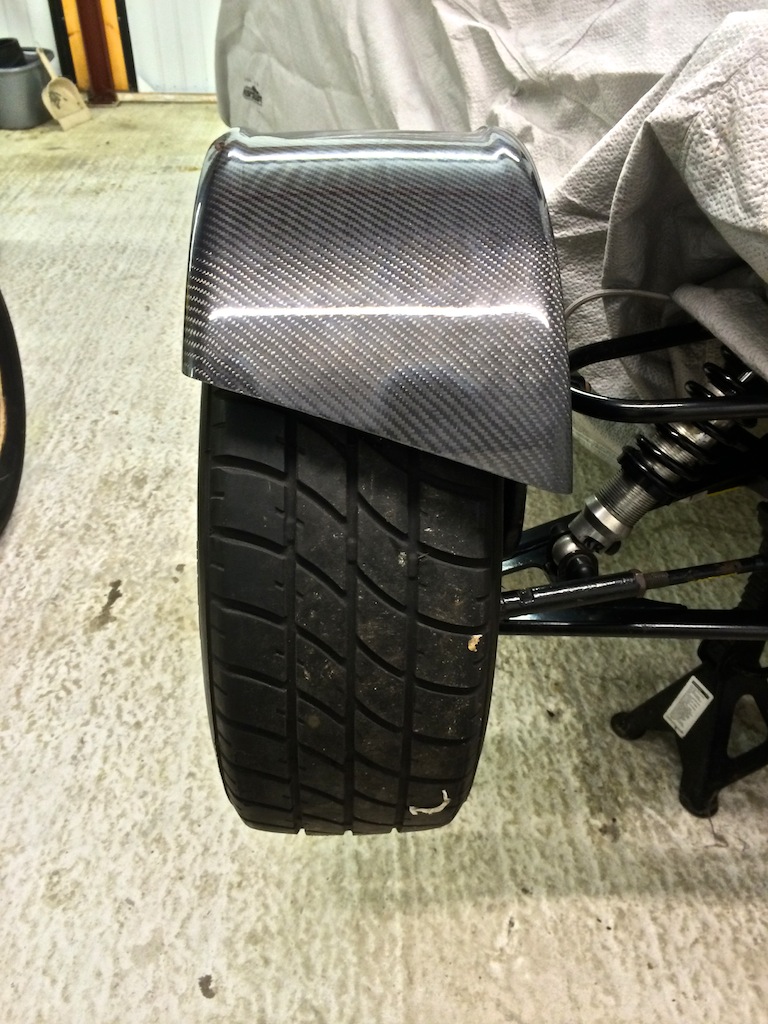
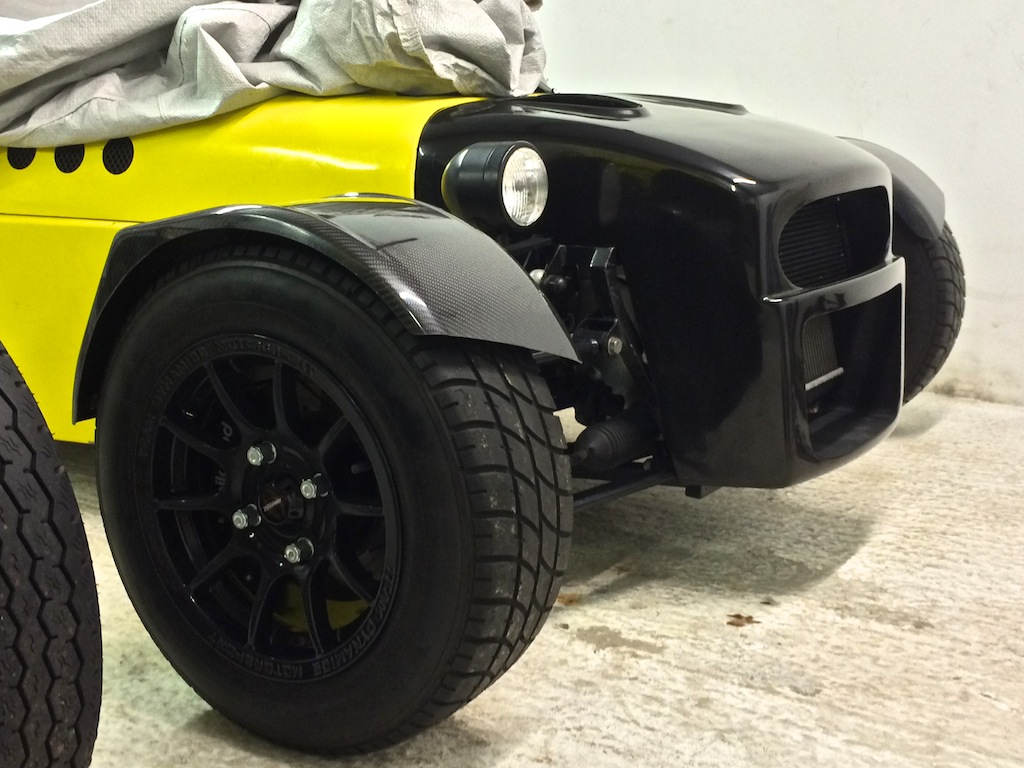
Here is the new one offered up, and how I tend on fitting it - but could do with some advice...
I presume the idea is to have the 'flat top' as horizontal as possible (obviously when car is on the ground)
They will be Tiger Sealed on like so
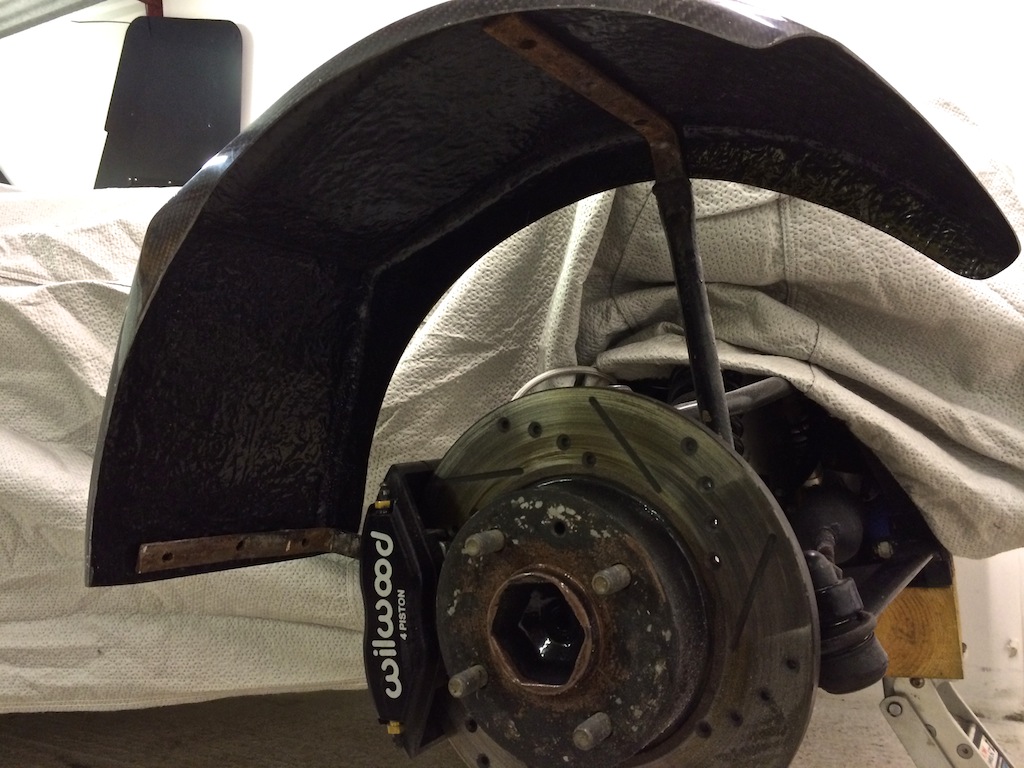
Would you say this is enough, or too much clearence over above the tyre itself, it measure about an inch
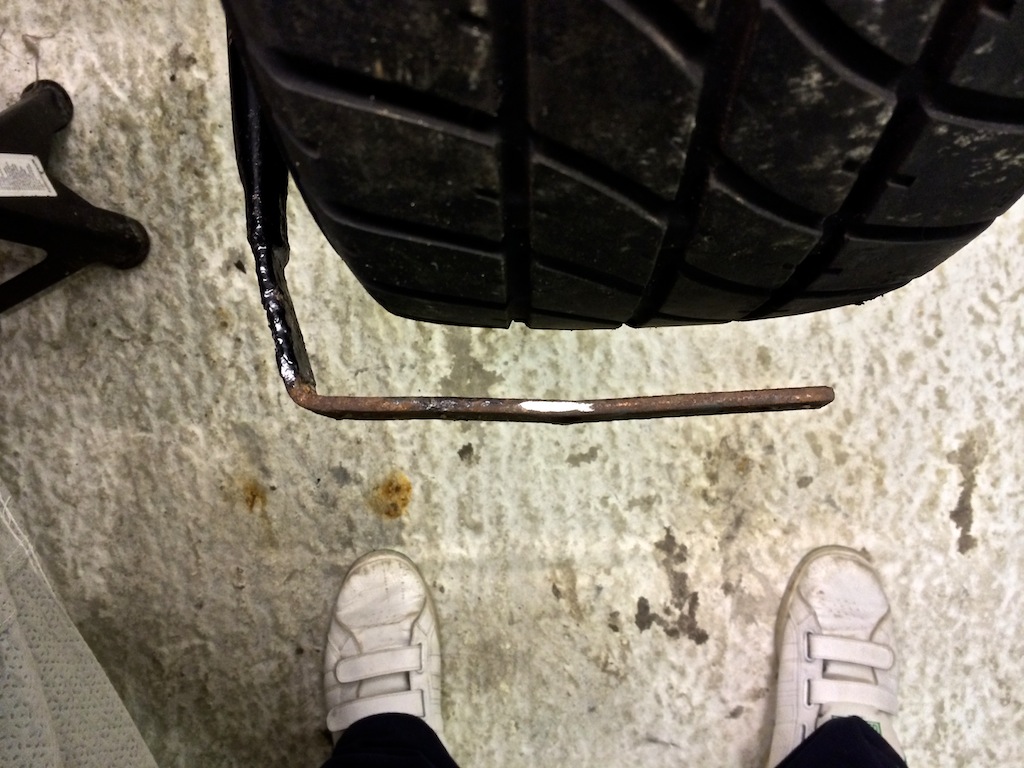
From the rear, and side they look OK (dont forget front end is in the air, hence top of CSR wing not horizontal)
But from the front, they seem to be too far inward, would you have the tyre mounted centrally? or off centre, and why?
|
|
|
yellowcab
|
| posted on 5/1/14 at 10:36 PM |
|
|
Remember what I said about learning my lesson with the dust, well I clearly didn't... didn't cover up the disk & calliper etc lol
I did this time though
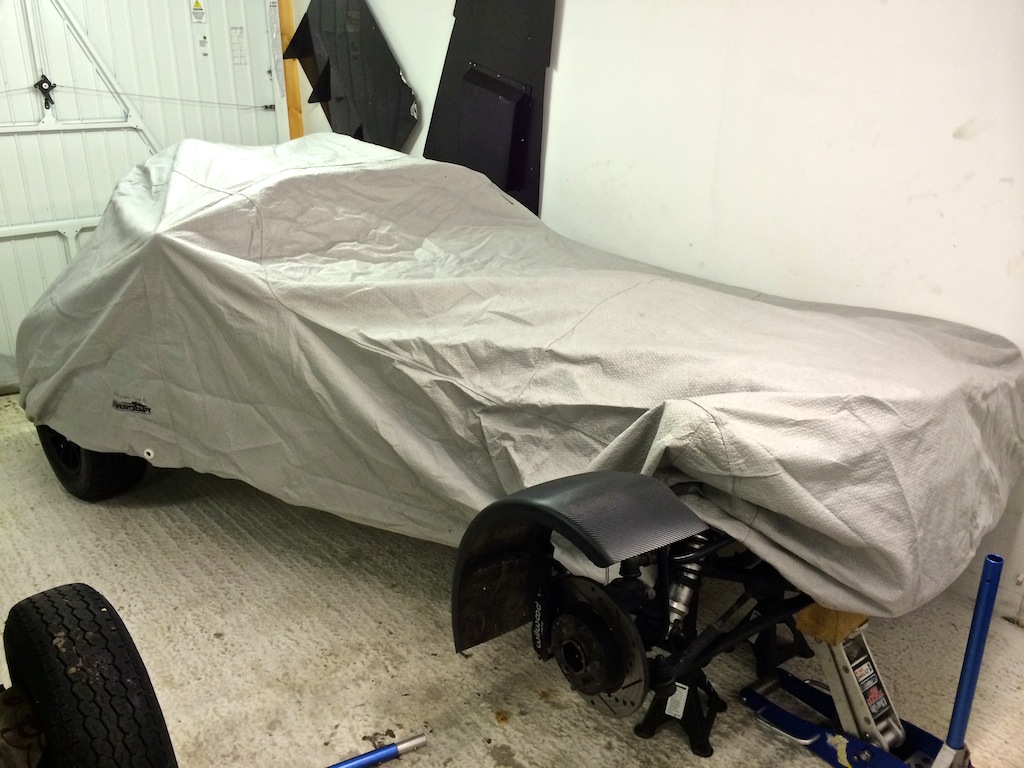
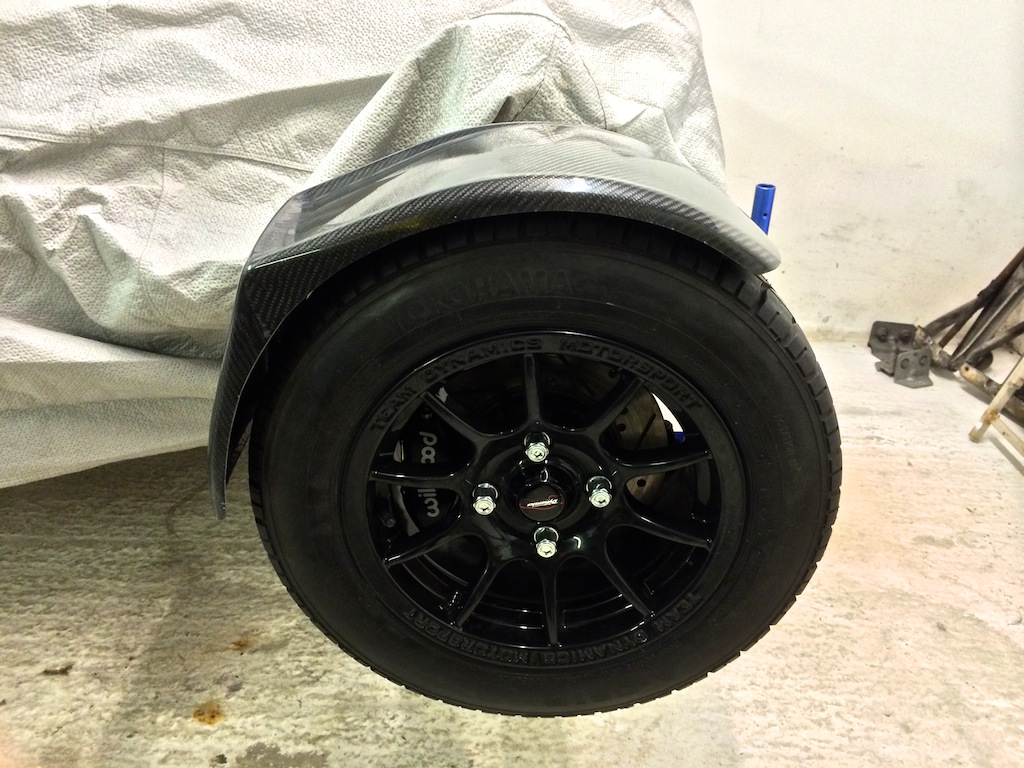
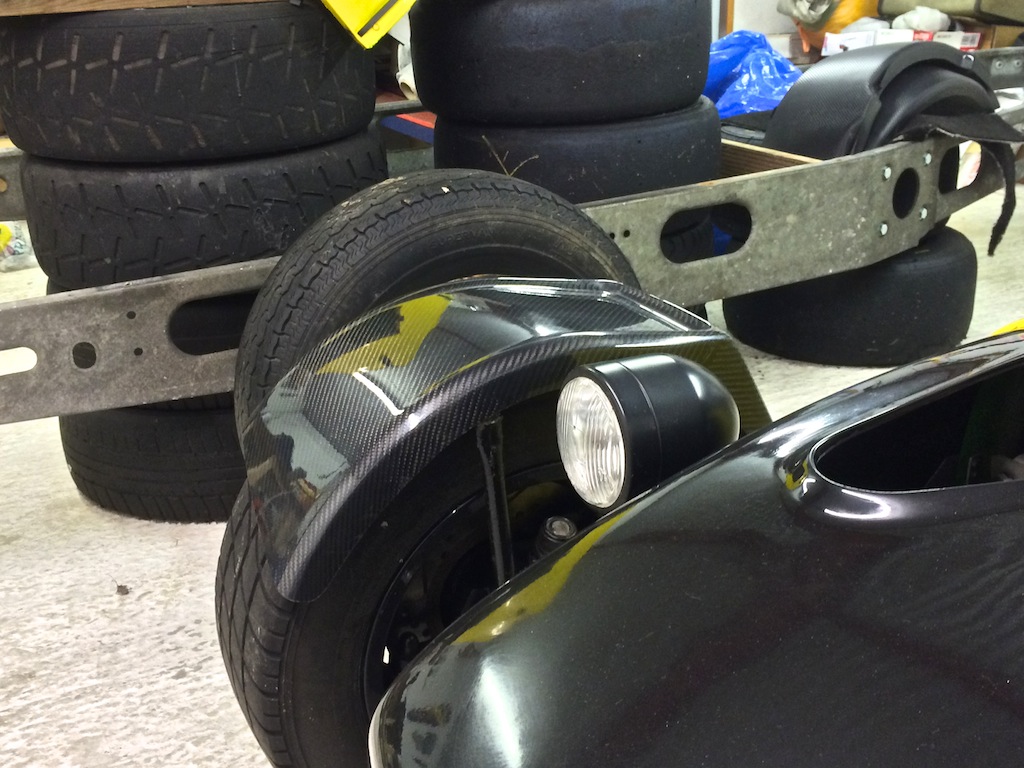
Back down on the wheels, carbon cycle wings just resting on the stays as I have no tiger seal yet, and I want to be sure they're fitted
correctly so need some advice before I do so
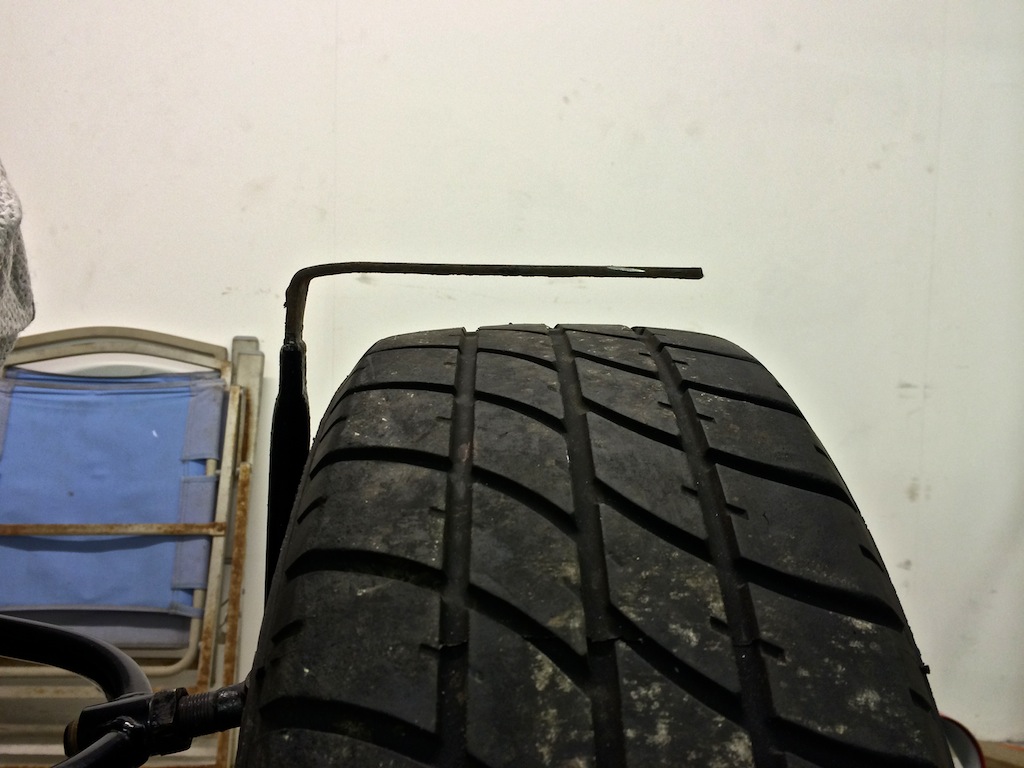
This is about as horizontal as they can get, I cannot roll them forward anymore as the back lower bracket is already on the bottom edge of the cycle
wing - is this enough? or would you advice me start chopping & re-welding the brackets?
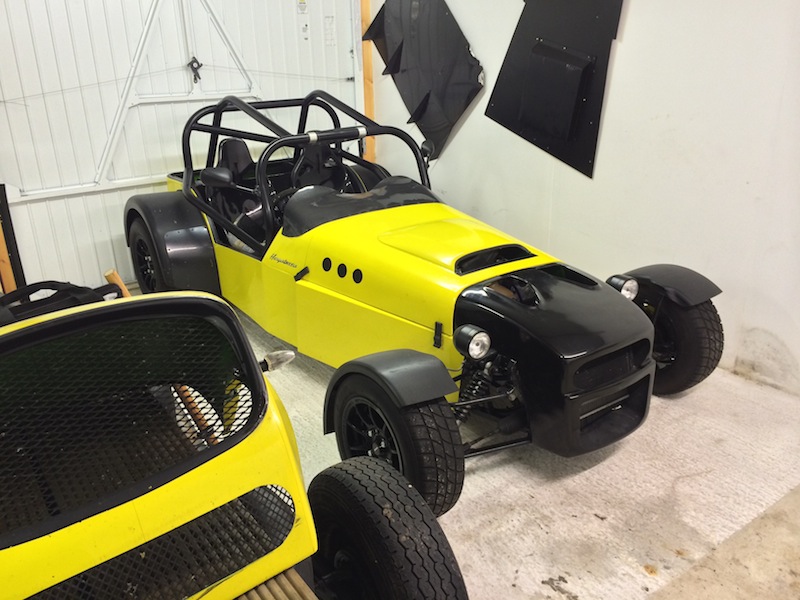
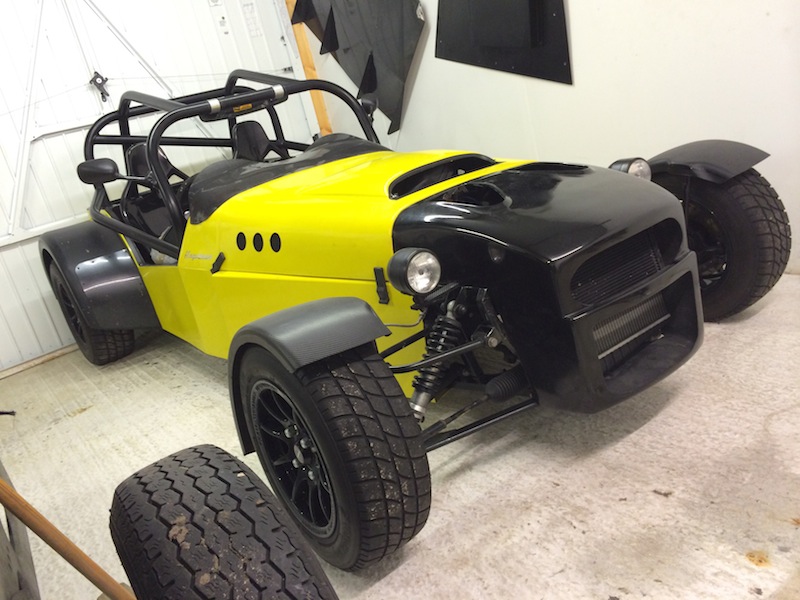
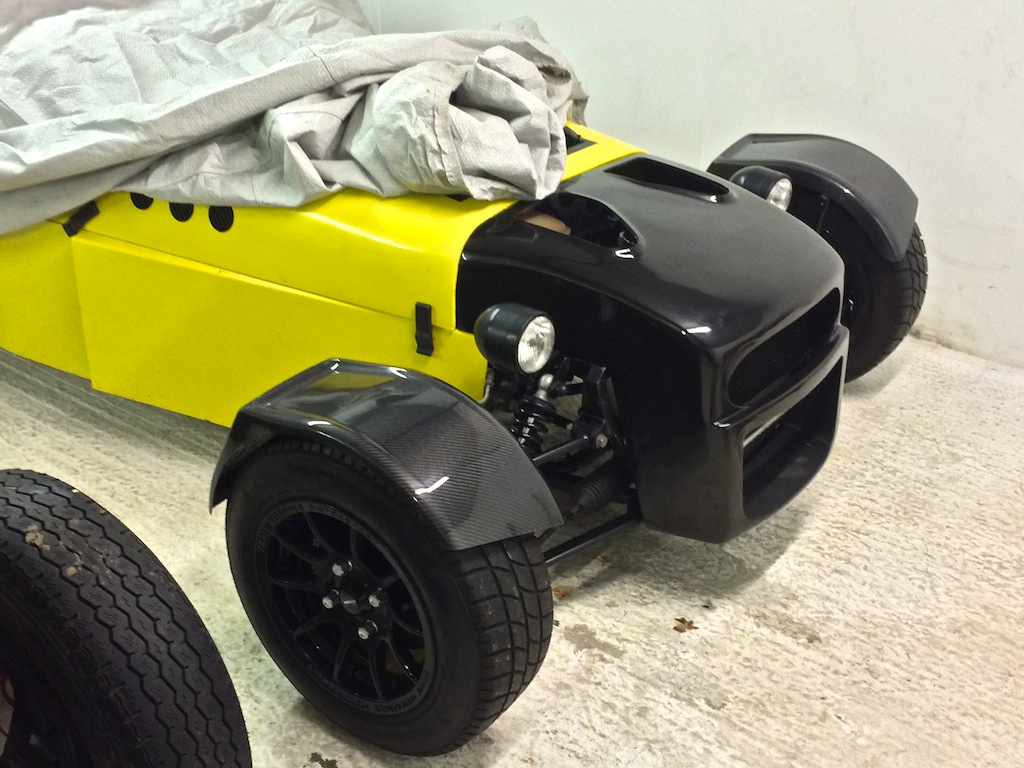
New front end is starting to take shape slowly... I think I'm liking the look
[Edited on 5/1/14 by yellowcab]
|
|
|
sam919
|
| posted on 6/1/14 at 02:59 AM |
|
|
Youll still be able to take some off the rear part of the cycle wing, only problem is the stay is at a low position:
5.2.6. With the exception of racing cars or cars of
periods A to D be equipped on all wheels with
mudguards which present no sharp edges and cover
the complete wheel (flange+rim+tyre) around an arc of
120 degrees. This minimum coverage must:
a) be achieved with a continuous surface of rigid
material within which ventilation louvres may be
fitted. The tyre must not be visible when viewed
from above. When viewed from the rear, the tyre
must not be visible above any point 50mm or
more above the axle centre line
This might shave some weight of , but you axle line compared to the bottom most part of the wing might be near this already?
Edited: you might find with the lack of support at the front you get vibration, can you swap each wing stay over from hub to hub, i.e. right one to
the left and left to right, this would mean you foremost stay would be at the front of the wing and the rear most would be at the square part. The
flatter the top surface in essence the better the air flow across it will be, and the less turbulent it will get behind the wing.....just think banned
Volvo Esate in the touring cars, its square shape gave it less drag.
[Edited on 6/1/14 by sam919]
|
|
|
ReMan
|
| posted on 6/1/14 at 08:38 AM |
|
|
Don't they want rolling back further anyway.
The more guard at the back th better.
MNRs are not just for looks!
www.plusnine.co.uk
|
|
|
yellowcab
|
| posted on 6/1/14 at 09:12 AM |
|
|
After a bit of mooching, I searched Google Images for 'Caterham CSR'
It seems the flats want to be completely horizontal, unless anyone else knows different?
|
|
|
yellowcab
|
| posted on 6/1/14 at 09:14 AM |
|
|
Sorry Colin, didn't see your reply.
I'm not familiar with MNR cycle wings, do they have the aero flats on too?
|
|
|
40inches
|
| posted on 6/1/14 at 09:25 AM |
|
|
I set mine up with a spirit level along the top, they do hang over the front a lot, but I think it looks ok that way. I will be fitting
some mud flaps though, stones hit the rear arches above the stainless guards.
Description
Don't know if it makes any difference as regards aerodynamics, but that's how Caterham fit them, notice the extra large stone guards.

|
|
|
sam919
|
| posted on 6/1/14 at 09:35 AM |
|
|
quote:
Originally posted by yellowcab
After a bit of mooching, I searched Google Images for 'Caterham CSR'
It seems the flats want to be completely horizontal, unless anyone else knows different?
The more mudguard at the back the less air will escape making the drag greater.
|
|
|
sam919
|
| posted on 6/1/14 at 09:37 AM |
|
|
quote:
Originally posted by ReMan
Don't they want rolling back further anyway.
The more guard at the back th better.
MNRs are not just for looks!
Sorry wrong person:
The more mudguard at the back the less air will escape making the drag greater, depands if you want an efficient car or a practical car i suppose
|
|
|
ReMan
|
| posted on 6/1/14 at 10:01 AM |
|
|
mnr
www.plusnine.co.uk
|
|
|
daveb666
|
| posted on 6/1/14 at 10:05 AM |
|
|
I'd set them up flat as per the photos, but that does leave a large gap at the rear so prepare to get wet/stonechipped.
I prefer the ones in the link above that show the full wrap-around arch at the rear.
2007bc Photography - Commercial and Wedding Photographer based in West Yorkshire
http://www.2007bc.co.uk / http://www.huddersfieldcommercialphotographer.co.uk
|
|
|
yellowcab
|
| posted on 6/1/14 at 10:40 AM |
|
|
I used to have some mudflaps hanging off the back of my old ones, but removed them, think it's because they scraped the floor and annoyed me
lol
I'll fit them rolled as far forward possible to make flat top spirit level horizontal, if i get battered with stones and soaking wet, then I can
always rivet some mudflap material onto them at the back
|
|
|
yellowcab
|
| posted on 6/1/14 at 10:44 AM |
|
|
Oh regarding the left to right fitting (when viewing from the front)
I'll fit them so my widest slicks fit comfortably, at least that way I know both wet & dry setups will have no problems
|
|
|
CosKev3
|
| posted on 6/1/14 at 12:15 PM |
|
|
Looking good the work your doing.
Boot install looks spot on.
How did you go about 'stepping' out your side panels to create the gap?
quote:
Originally posted by ReMan
Don't they want rolling back further anyway.
The more guard at the back th better.
MNRs are not just for looks!
Deffo not for the looks,they look awfull imo!!!
|
|
|