yellowcab
|
| posted on 11/2/14 at 08:19 AM |

|
|
I was going to wrap them in carbon, but they'll get scrubbed up against lol
Not much of that carbon I have is 100% flat panels, they have slight curves in
|
|
|
|
|
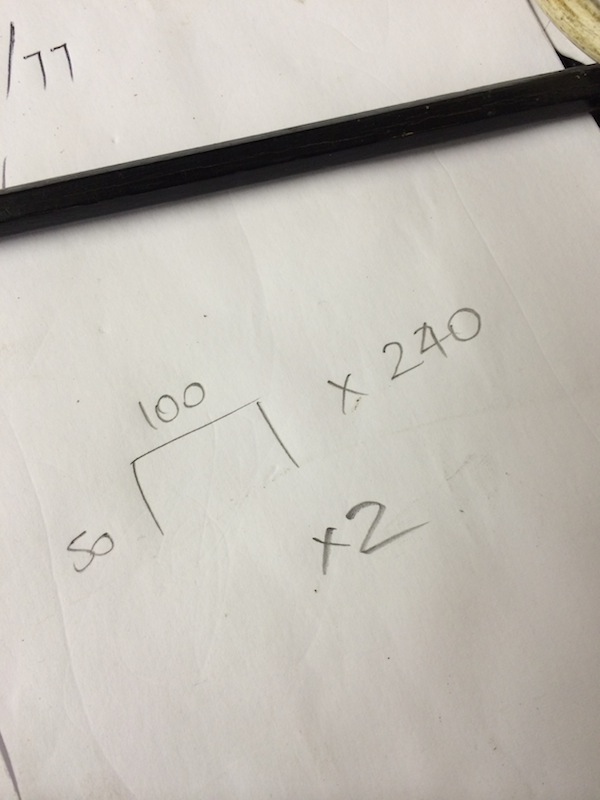
40inches
|
| posted on 11/2/14 at 10:07 AM |
|
|
"to save my ever aging knees from the concrete floor" 
What a wuss 
|
|
|
hkp57
|
| posted on 11/2/14 at 11:16 AM |
|
|
Information
Yellowcab, your trailer looks great.
I am in the middle of drawing up some plans for a home made tilt bed trailer and I am ver interested in the balance pont you got for the nose weight.
I know I can't expect like for like results but it is a starting point.
Can I ask where you got the pressed steel sections for your bed?
Also could you give me the width
Along with where the center point of your trailer axle was in relation to the wheelbase?
Thanks
Fleet
SKC Raptor R - Hayabusa
Toyota C-HR Hybrid Limited Edition
Honda VFR1200 CrossTourer
DCT
Marlin Roadster 1800
Mercedes Vito 116 Sport
|
|
|
yellowcab
|
| posted on 13/2/14 at 05:31 PM |
|
|
Hiya mate,
Got the galvanised steel all from a 'sheet metal' place - on the local industrial estate 
As for measurements - I'll by all means u2u you them - the reason I haven't made the public, as I'd hate for someone to naively use
my measurements expecting their car to just roll on
there are some many different variables
I'll measure up tonight and let you know - but please bare in mind mine is a BEC with not a lot of nose weight, so take this into consideration
if you're CEC
the easiest way I could advise, is just like we did - roll the car up onto the ramps that were only temporarily fixed, lift
jockey wheel onto scales, and move car forwards & backwards accordingly
Furthermore, from centre line of trailer wheels, to centre line of car front & rear wheels is completely irrelevant, as it all depends on length
from end of troughs, to hitch - mine will be shortened even more than it already has been
|
|
|
yellowcab
|
| posted on 14/2/14 at 12:24 AM |
|
|
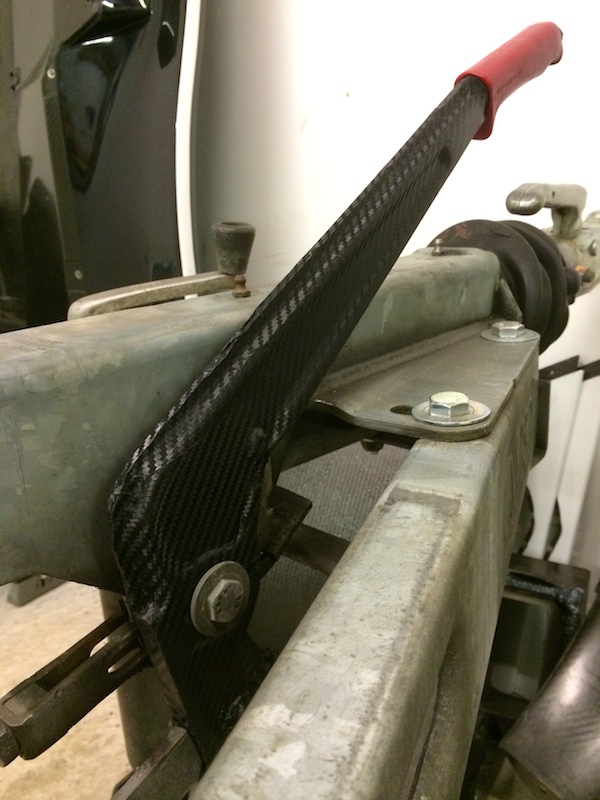
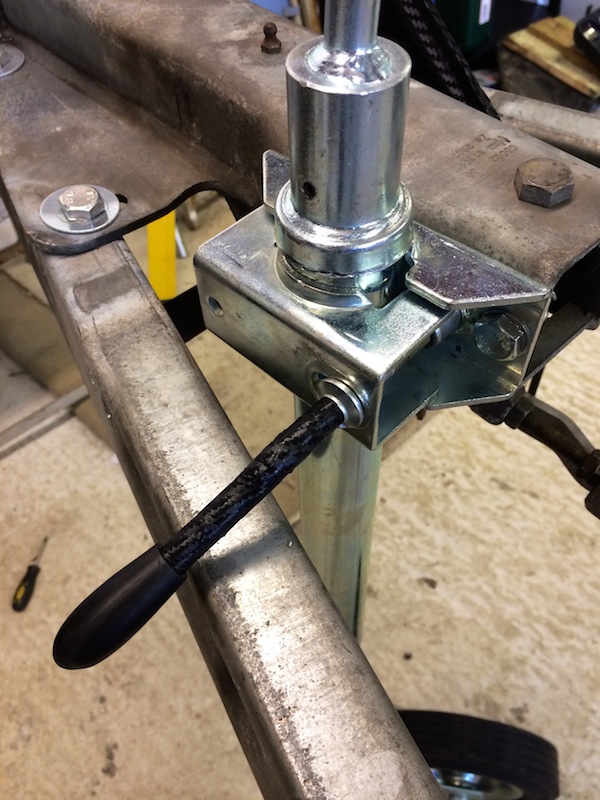
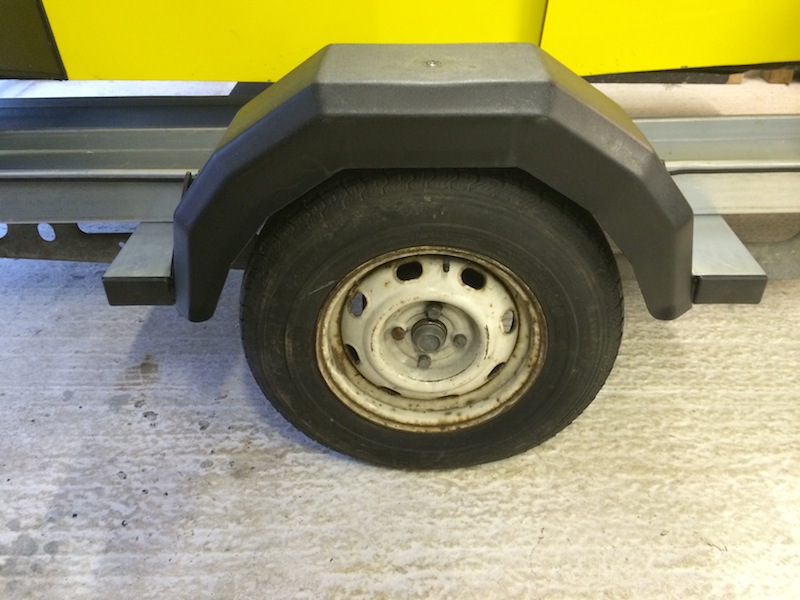
Didn't get up to much tonight, was feeling kinda crap, so I just did some tarty bits 
Trailer handbrake looked sorry for itself
So I treated it to a new Alko grip, and some wrappage lol
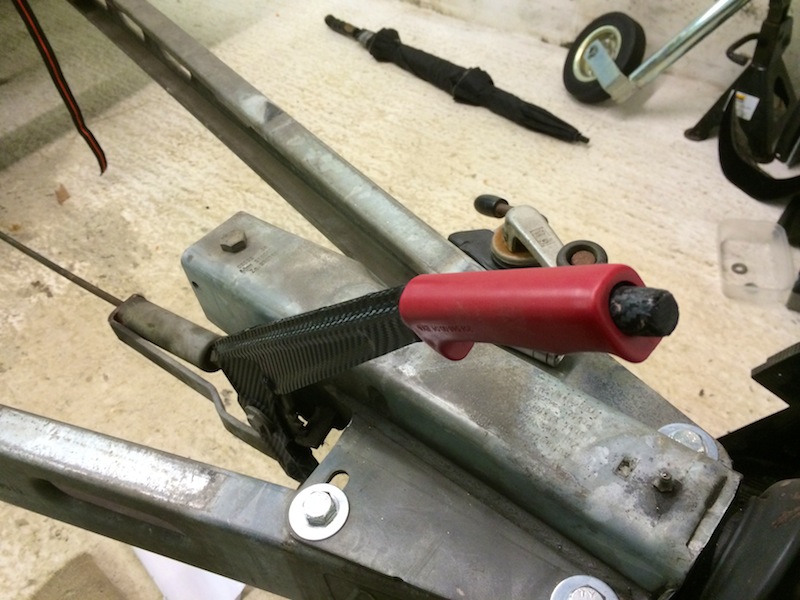
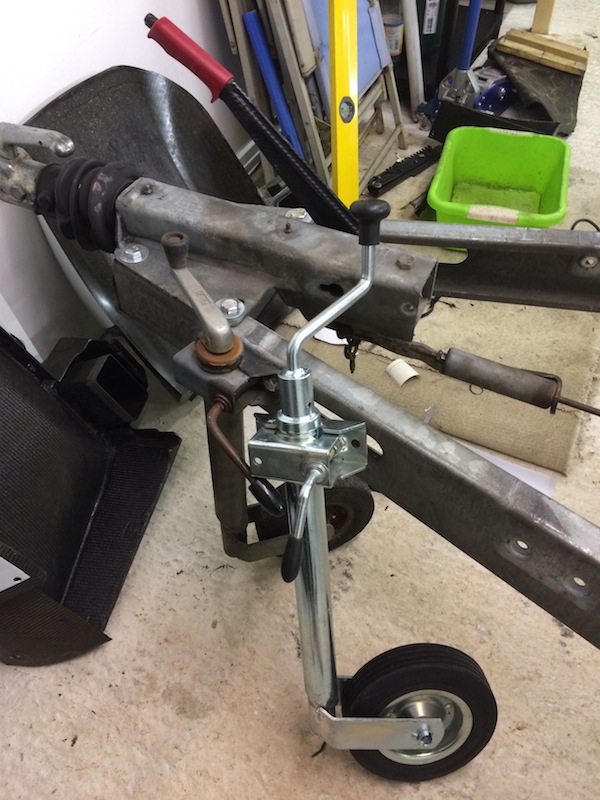
New taller jockey wheel ready to go on after I've shortened the A-section
Put some rubber edging on all the bare metal edges on the outside of the trailer, waiting for some end caps too
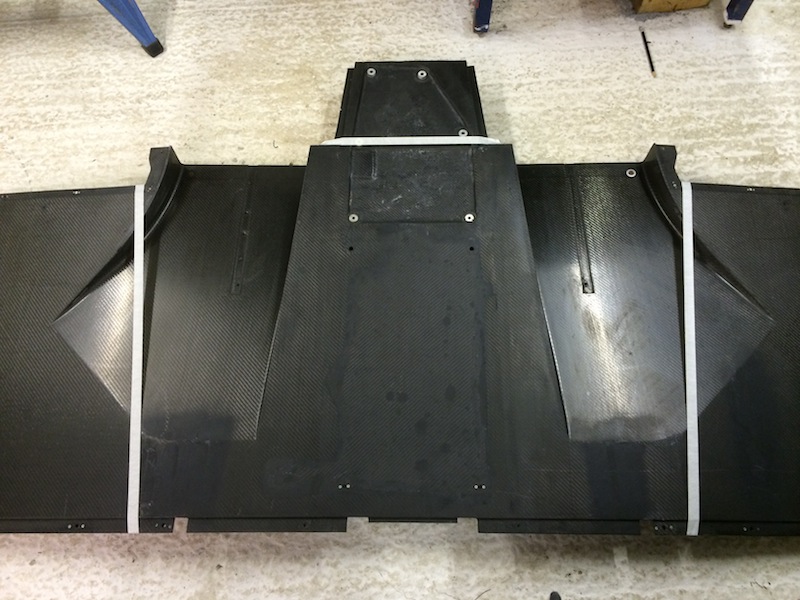
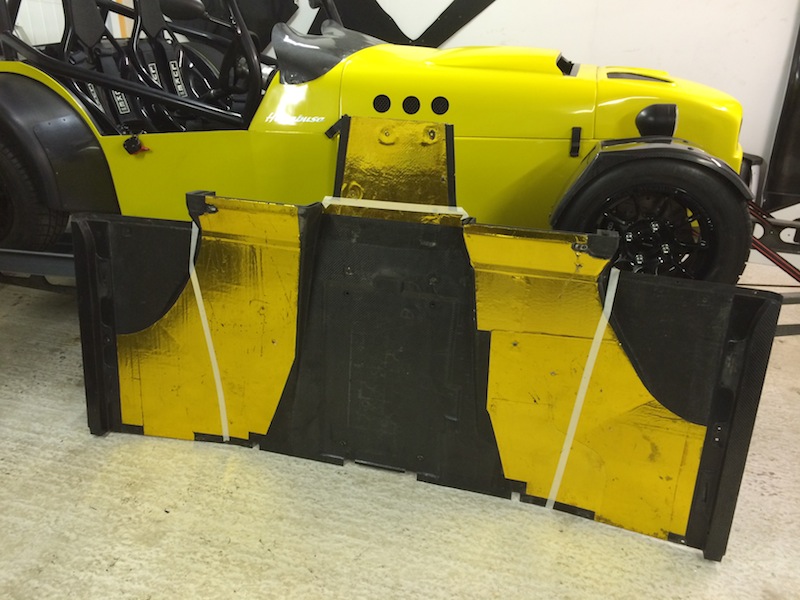
Then the next carbon cutting up culprit got marked up for its death, this shall be my rear diffuser, unless I cut it wrong and it all goes tits up
lol

[Edited on 14/2/14 by yellowcab]
|
|
|
hkp57
|
| posted on 14/2/14 at 10:47 AM |
|
|
quote:
Originally posted by yellowcab
Hiya mate,
Got the galvanised steel all from a 'sheet metal' place - on the local industrial estate
As for measurements - I'll by all means u2u you them - the reason I haven't made the public, as I'd hate for someone to naively use
my measurements expecting their car to just roll on
there are some many different variables
I'll measure up tonight and let you know - but please bare in mind mine is a BEC with not a lot of nose weight, so take this into consideration
if you're CEC
the easiest way I could advise, is just like we did - roll the car up onto the ramps that were only temporarily fixed, lift
jockey wheel onto scales, and move car forwards & backwards accordingly
Furthermore, from centre line of trailer wheels, to centre line of car front & rear wheels is completely irrelevant, as it all depends on length
from end of troughs, to hitch - mine will be shortened even more than it already has been
Thanks, Mine is BEC also
Fleet
SKC Raptor R - Hayabusa
Toyota C-HR Hybrid Limited Edition
Honda VFR1200 CrossTourer
DCT
Marlin Roadster 1800
Mercedes Vito 116 Sport
|
|
|
yellowcab
|
| posted on 15/2/14 at 09:15 PM |
|
|
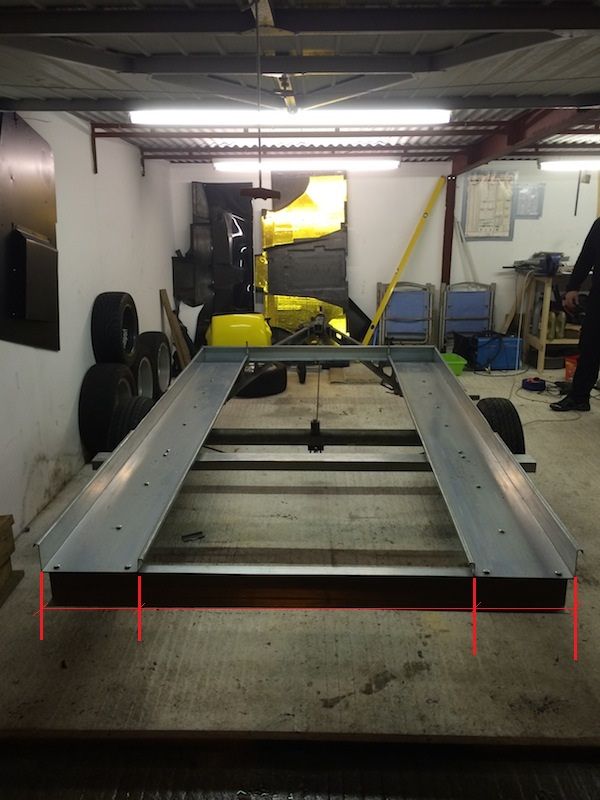
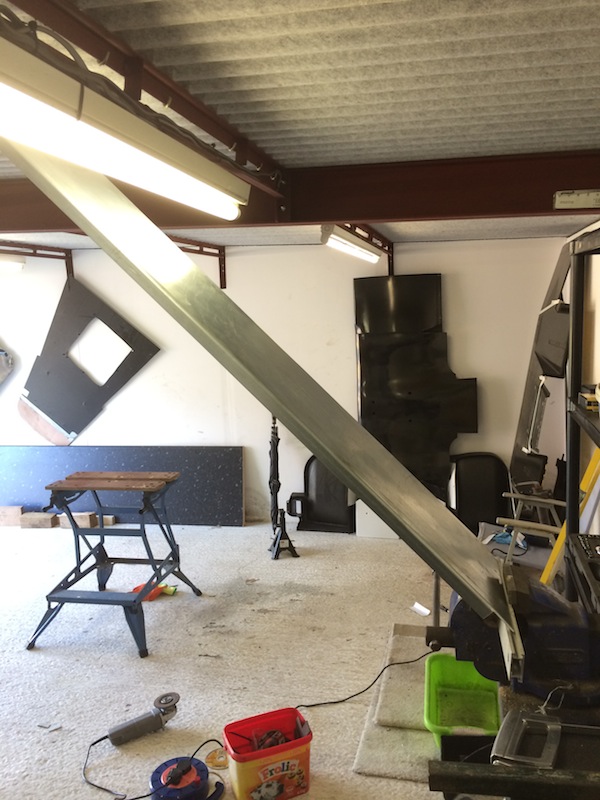
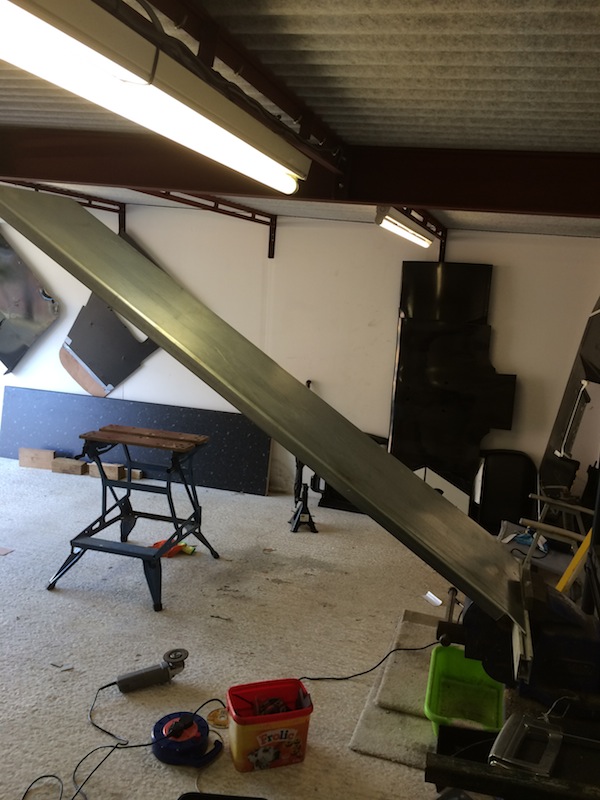
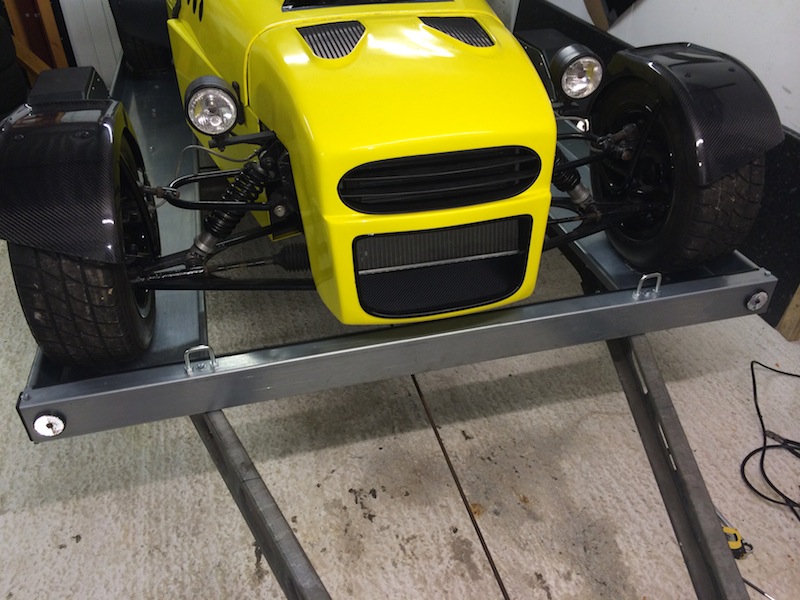
Bit of a long winded and tedious post - but worth it for those looking at making a trailer for themselves
When I had the sections cut & bent by the sheet metal factory, I didn't let on what it was for, just the dimensions, so they just supplied
me with bent ramps, no cuts
so that was todays task
to make them
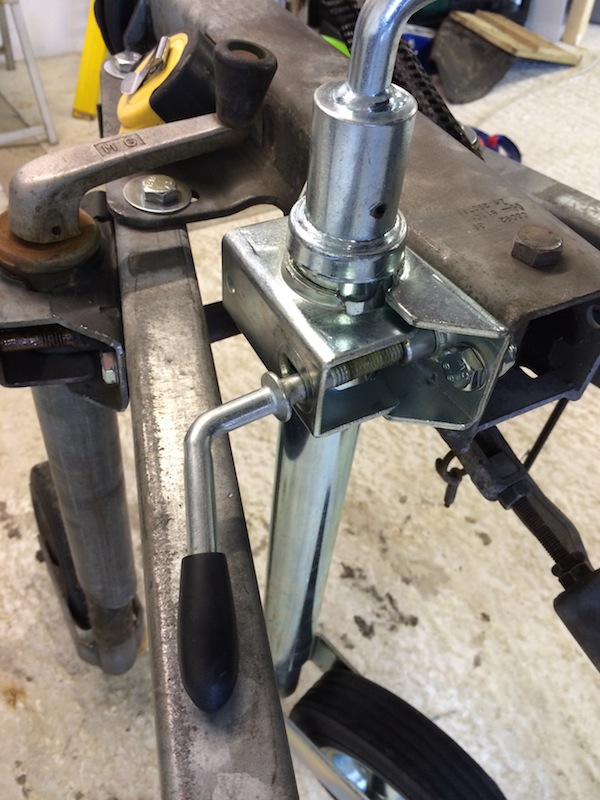
New longer jockey wheel will now be positioned onto the hitch itself as it already had bolt holes the correct spacing
With a problem that I knew was going to happen, couldn't be tightened
Whipped if off, stuck it in the vice, and wrapped it as it snarled up the metal a little, job jobbed
Something rather bright in the sky today, think it was the sun, which gave me the opportunity to make the ramps on level ground, I couldn't do
this inside the garage, it's sat on a 4inch base, so the angles would have been wrong with them hanging out the garage door
So with the jockey wheel up all the way, we have a very slight angle, however we are shortening the A-section, which will bring the jockey wheel 2ft
further towards the trailer wheels, which may or may not eliminate this slight angle change
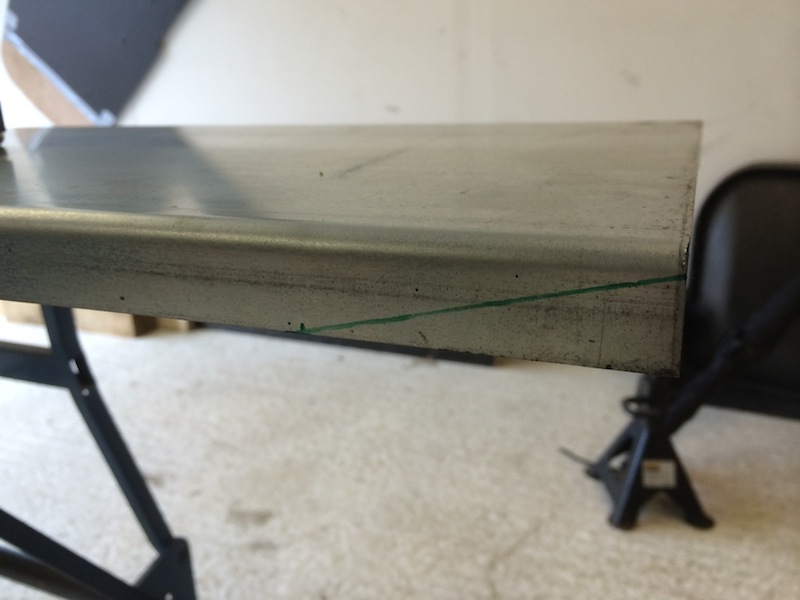
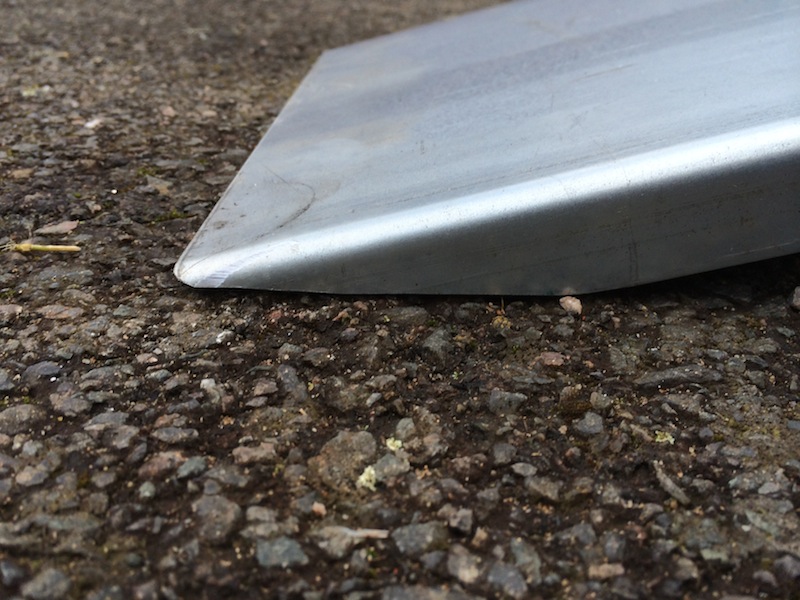
You can see here the ramps are just crude bits of metal, with folded 25mm edges, nothing else done them
so this is how I went about it

Marked the overlap, where I wanted the ramp to overlap the troughs, and I didn't want a securing bolt to have to turn upside down when the ramps
are in use, as I wanted to use the bolt heads that were bolting the numberplate/light metal, to the troughs

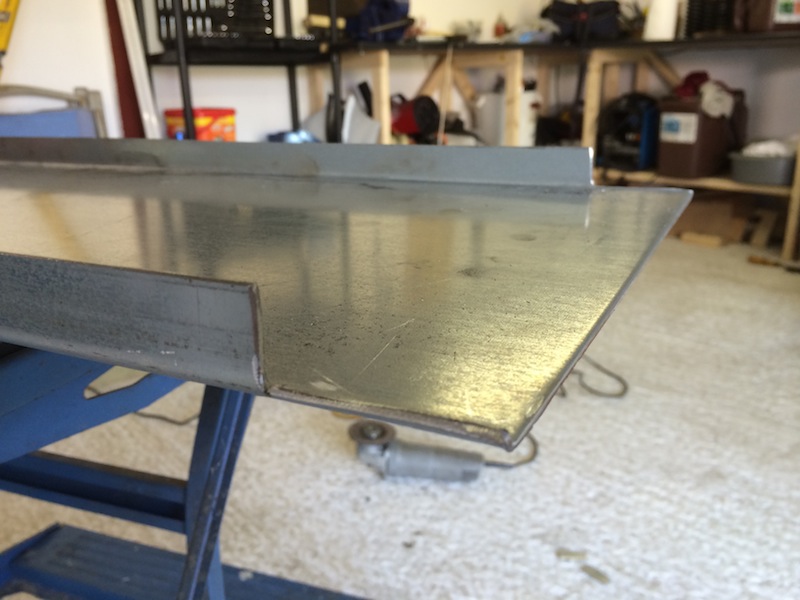
Got a piece of ally in the vice, and used a straight edge to put a nice neat kink in it
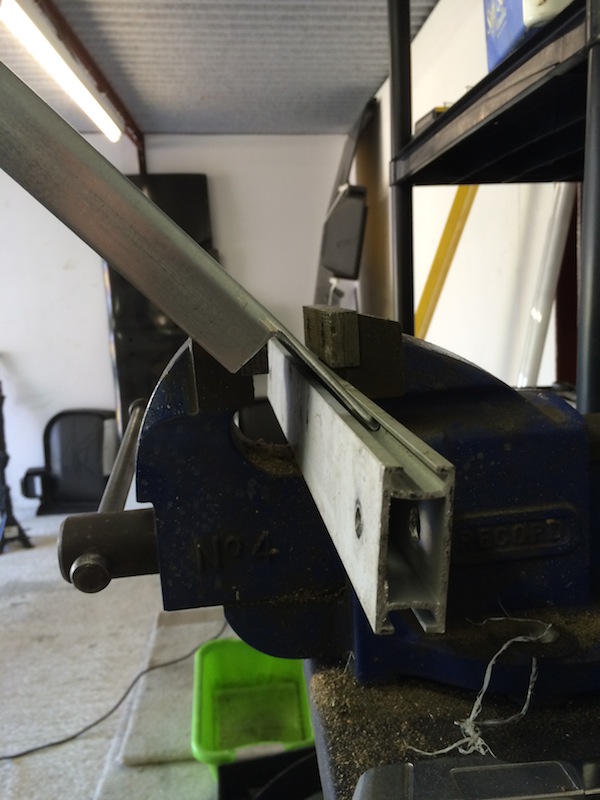
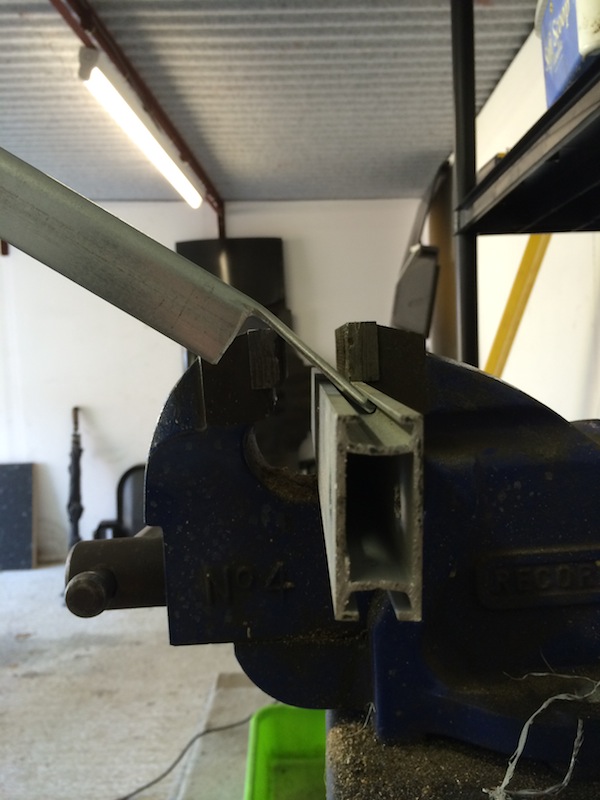
Happy with the angle, now to mark out meticulously, for the bolt heads
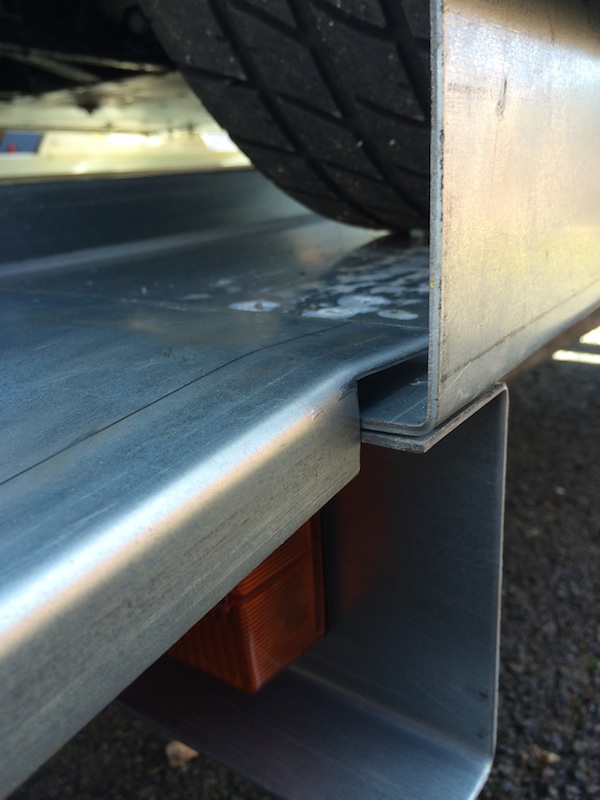
Drill a pilot hole to begin with, the mark through, to check we're in the right place

Happy with that
As the largest drill bit I had was 10mm, and these were 17mm bolts, I had a lot of hand filing to do, took me about 4 hours all told, but a well
worthy job
my holes saws weren't up to the job, and I didn't want to have to go out and buy kit for this one job
So three hours later, I couldn't be happier with the result
|
|
|
yellowcab
|
| posted on 15/2/14 at 09:21 PM |
|
|
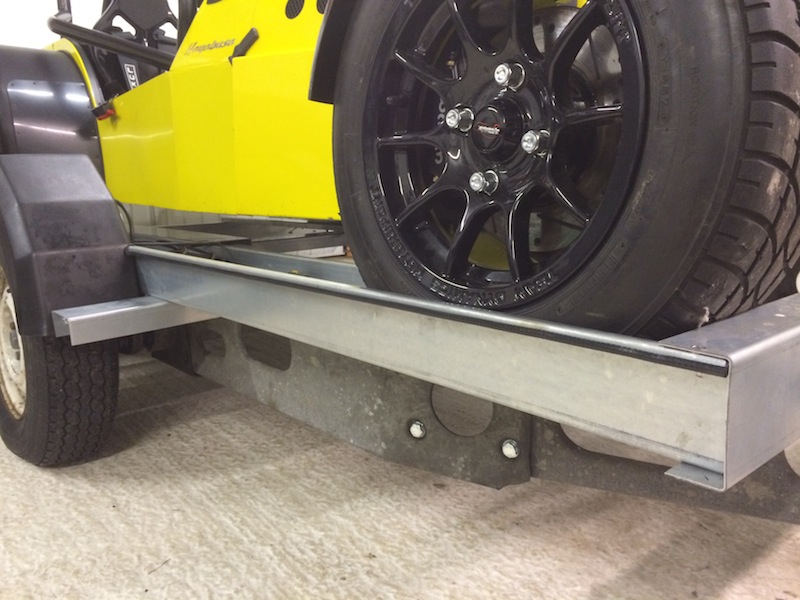
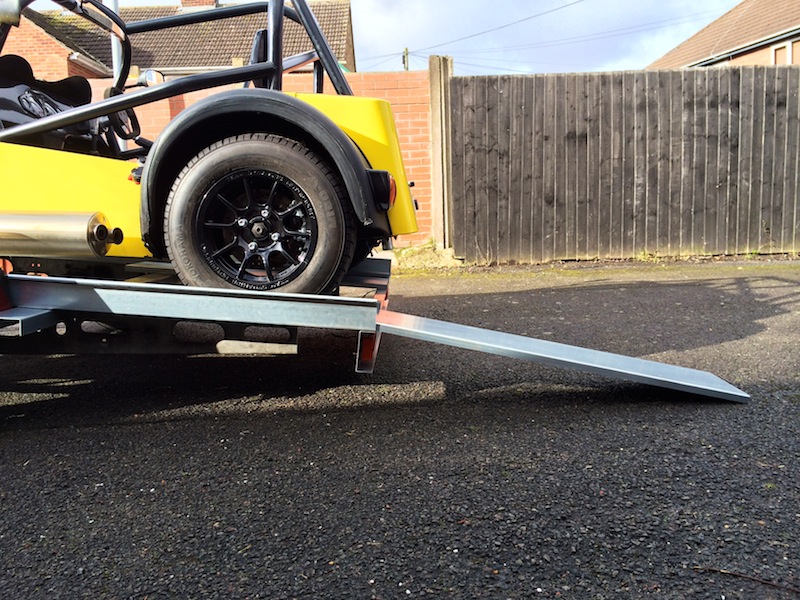
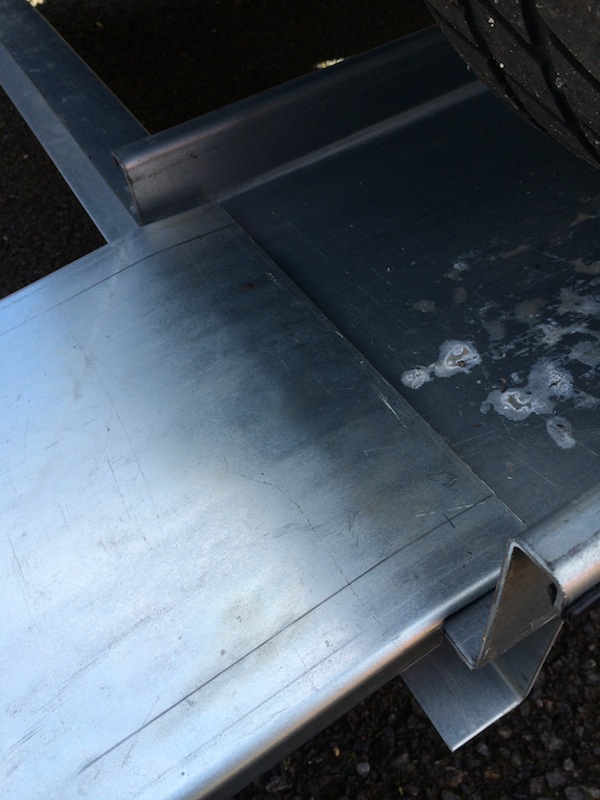
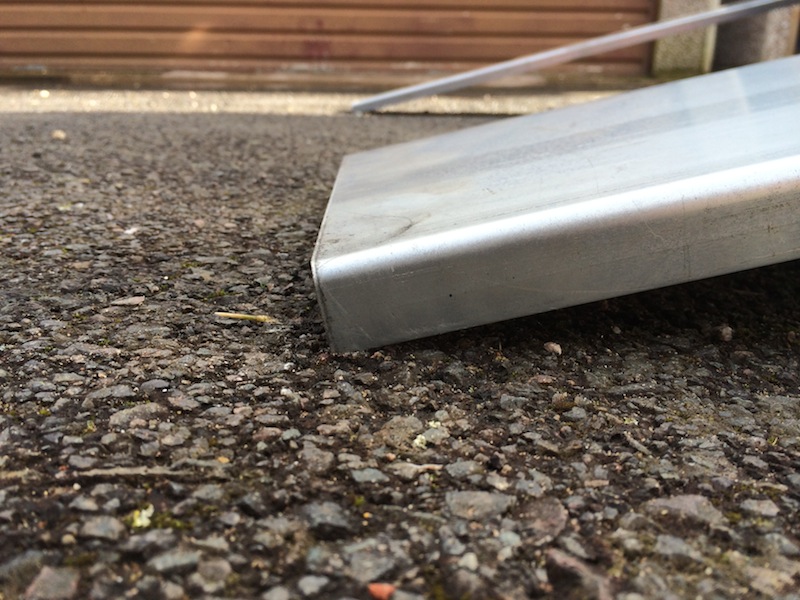
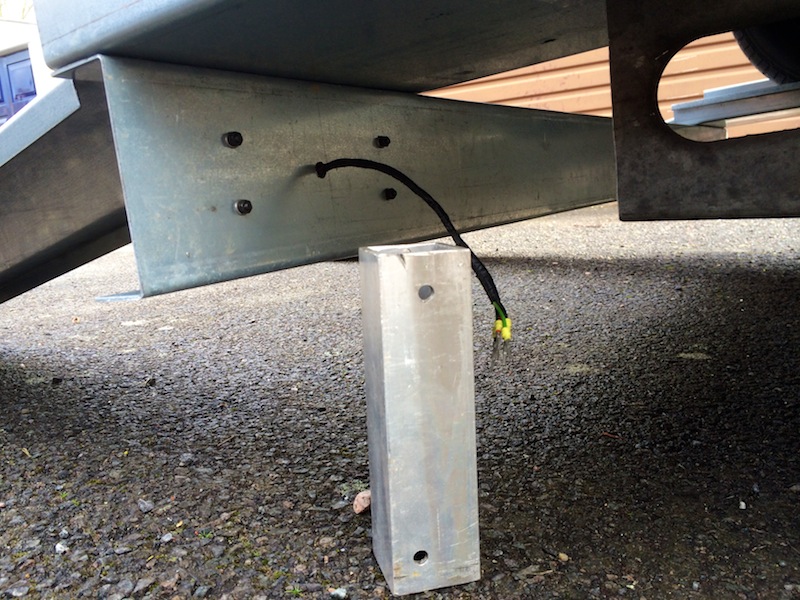
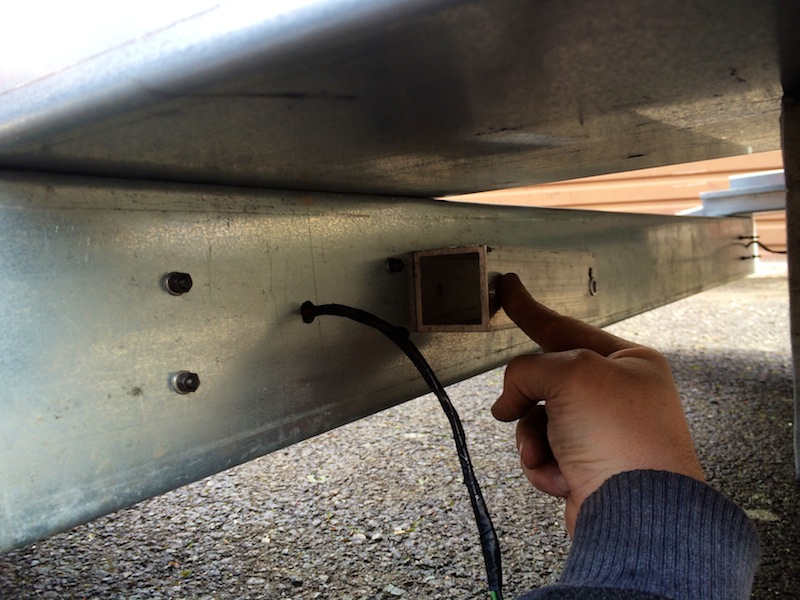
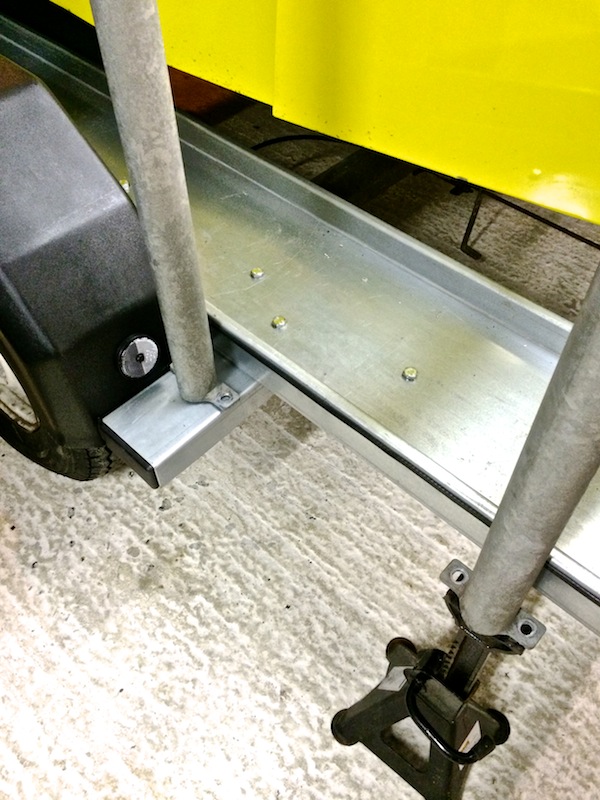
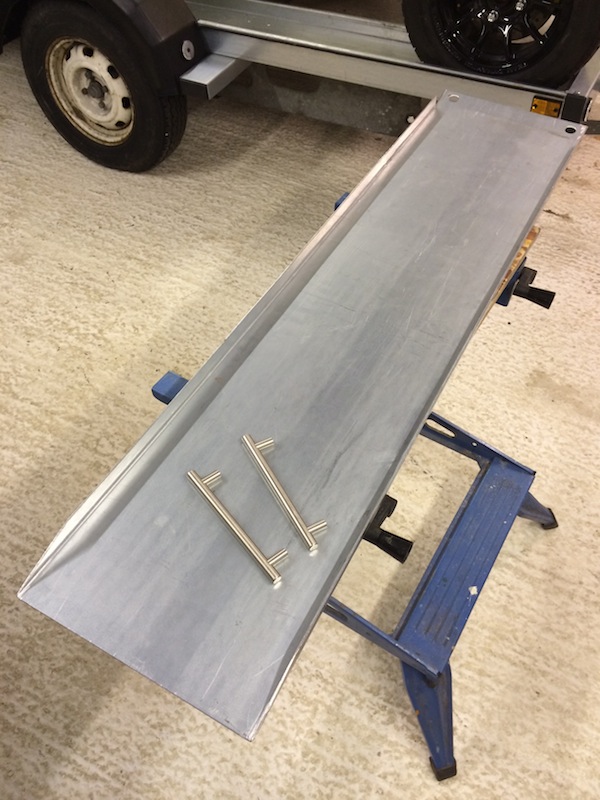
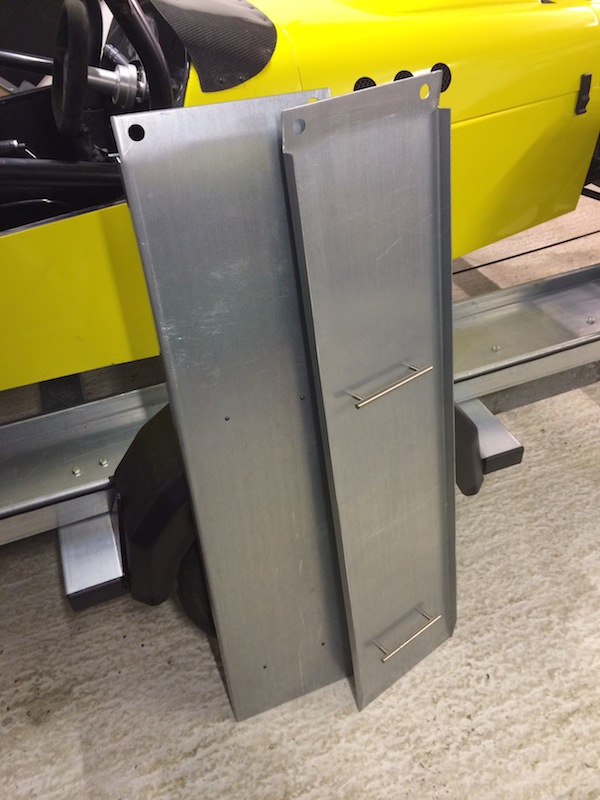
Other end of the ramps is self explanatory, just put a straight edge along the ground to get the correct angle, mark and cut

My idea of for legs to stop it tipping, as I don't want them seen, is using this ally box section that I've had for ages, and put a catch
& bolt thought it, so it can pivot 90 degrees

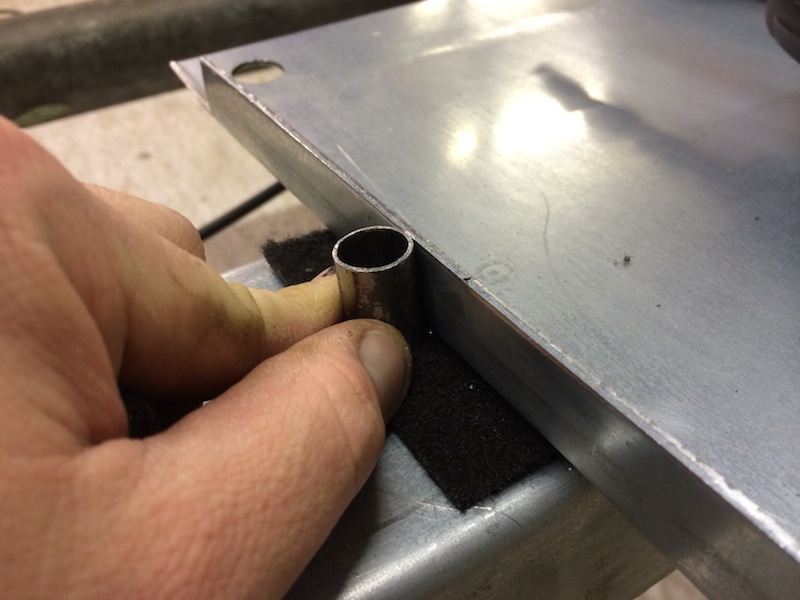
Got my end caps today, to neaten up the trailer to make it look not so 'home made' to to speak
which covers up the bare ends nicely,
before & after
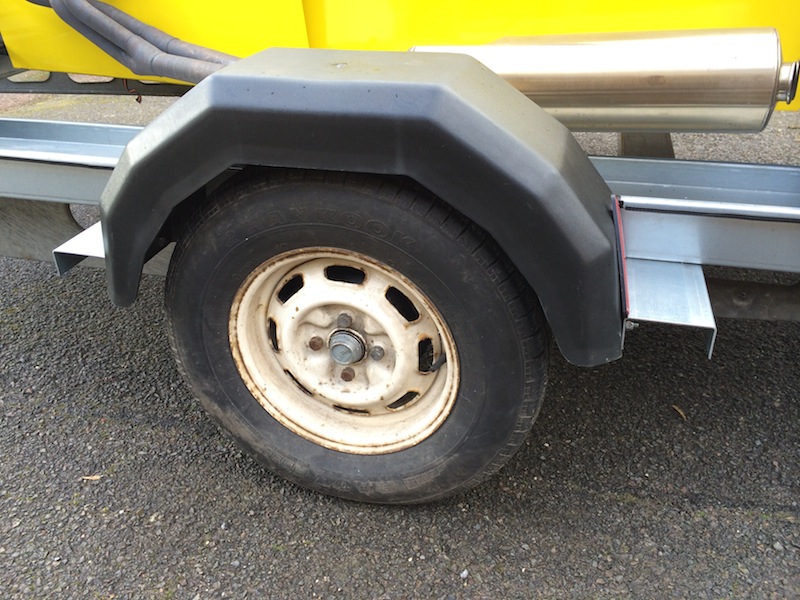
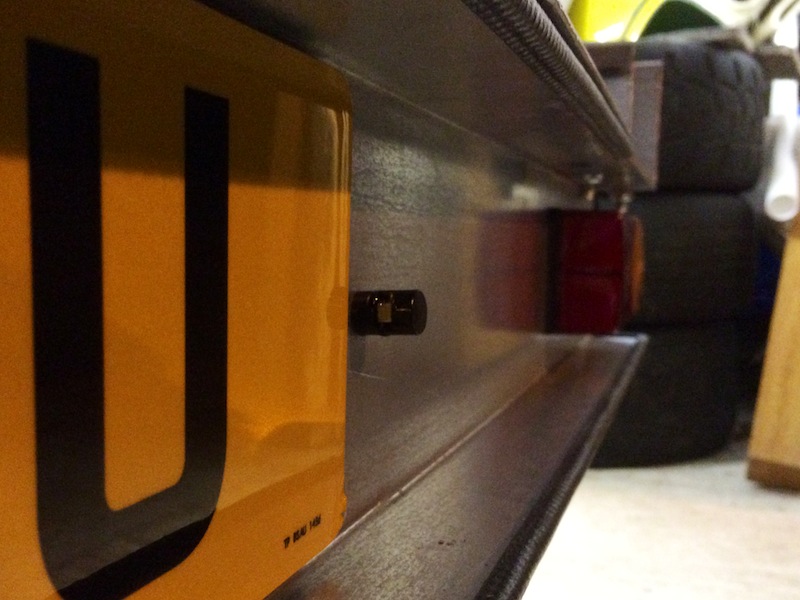
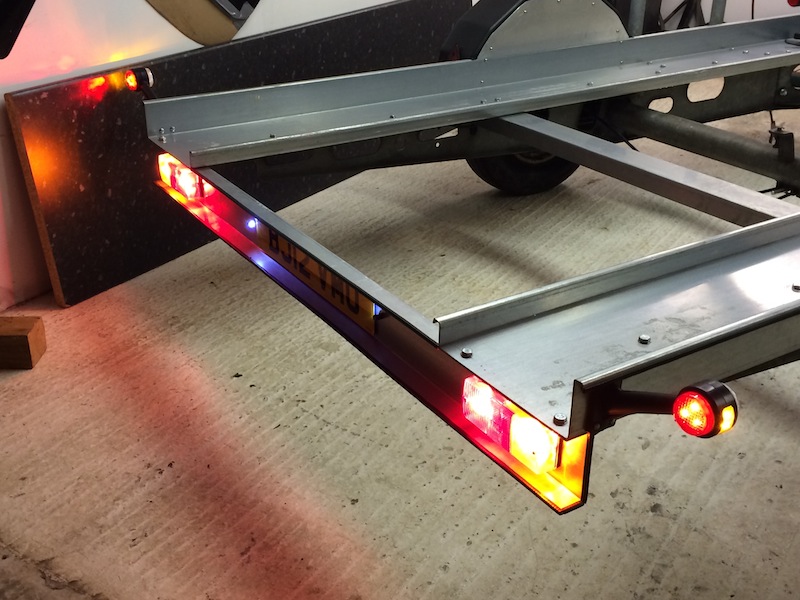
Neatening up the rear end with more edging, ready for number plate & lights now
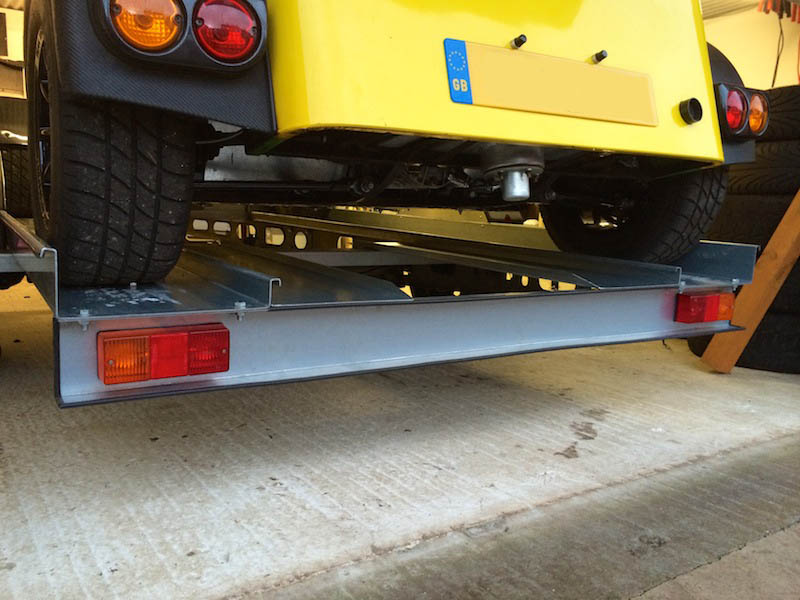
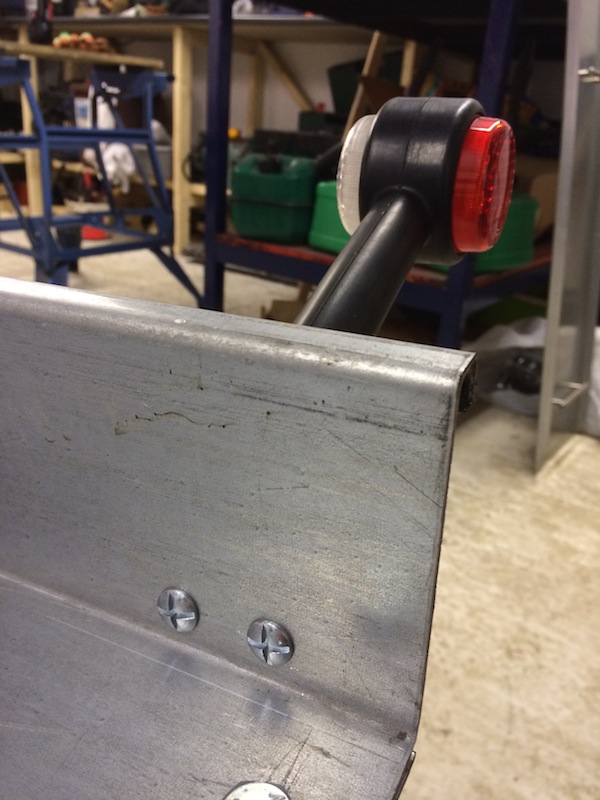
Bought some cheap amber reflectors for the sides, and clear for the front edges of the trailer
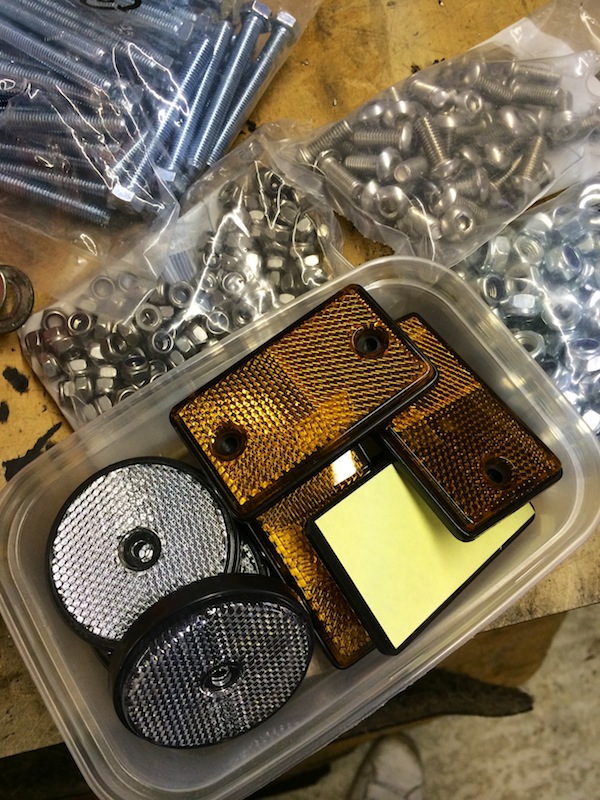
Three ambers down either side, front, mudguards, and rear
and the two clear/ white on the front edges
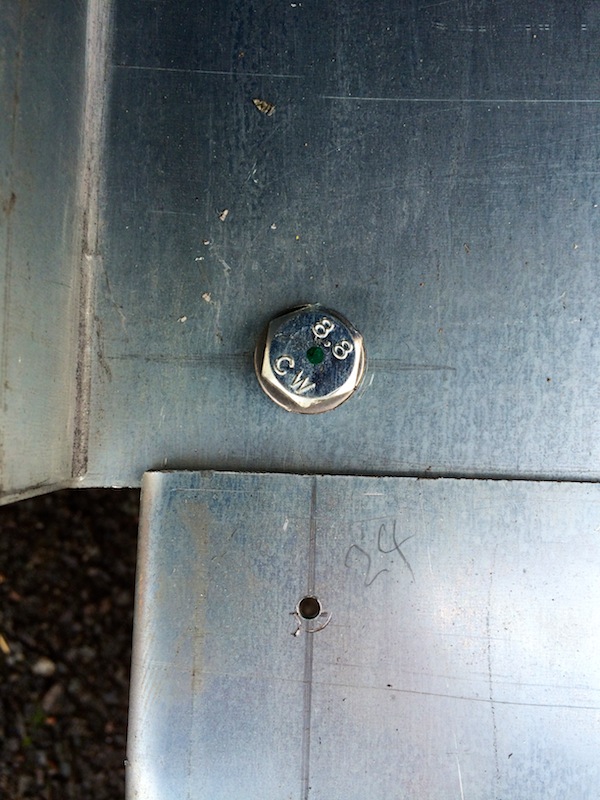
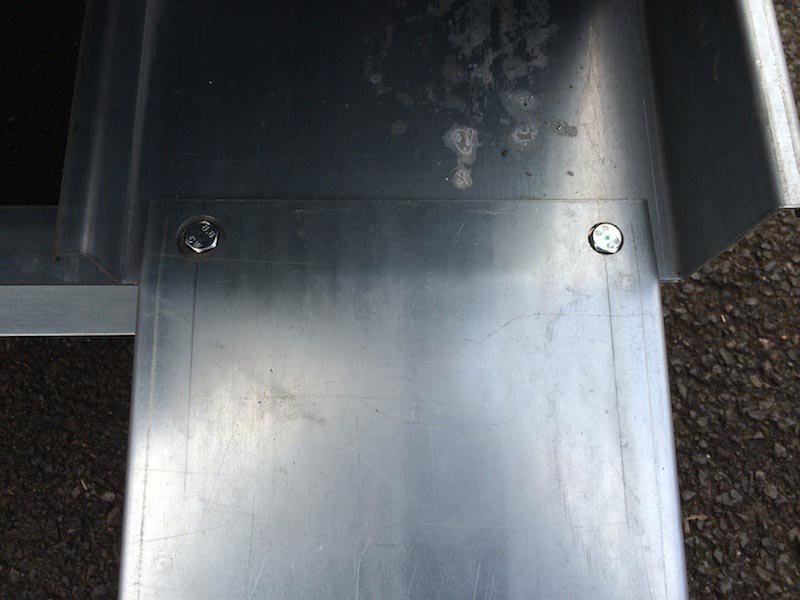
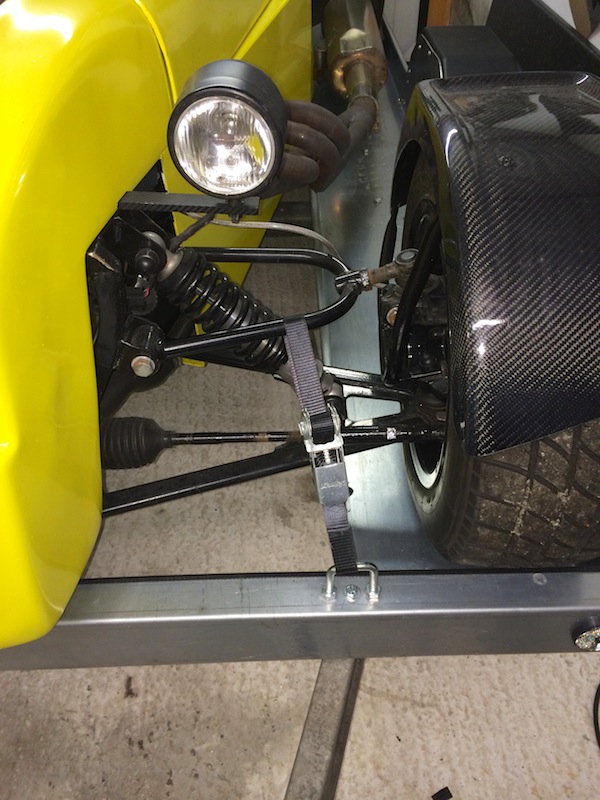
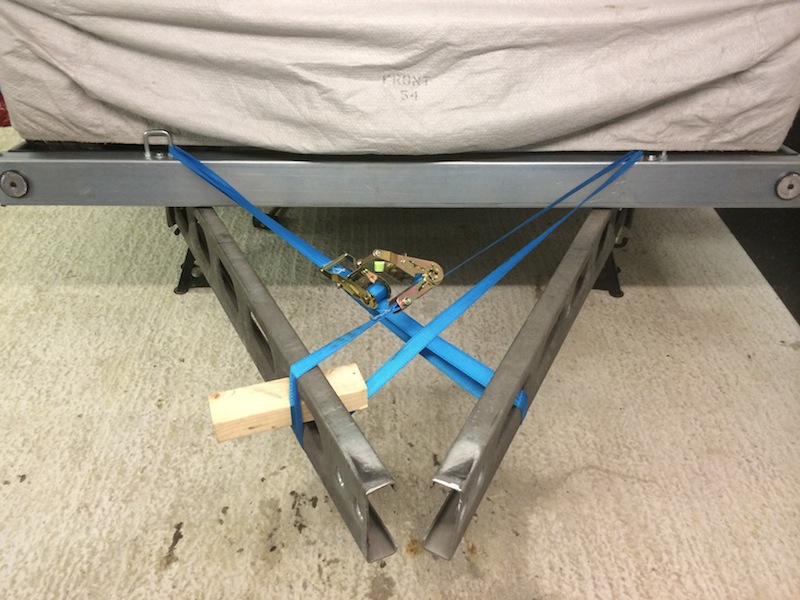
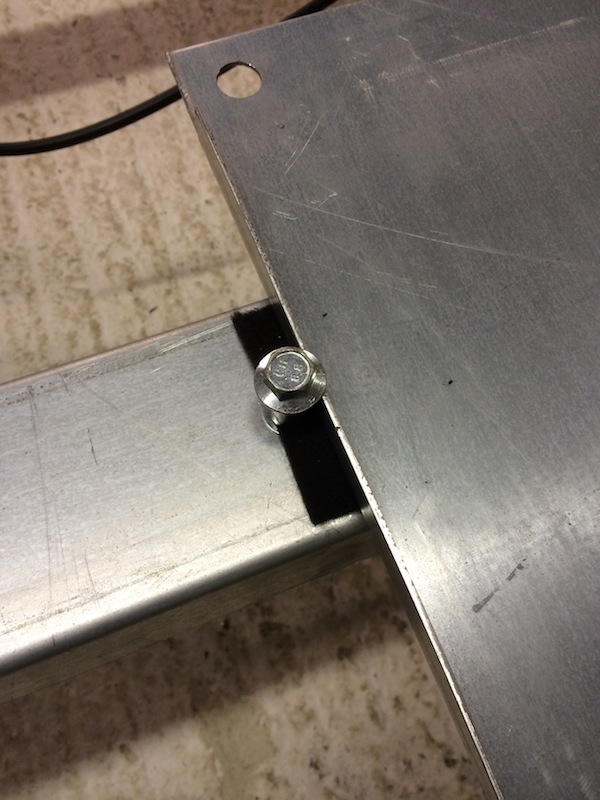
Ending today on the harness tie downs, put them either side of the bolt holding it all together, as I can imagine there is a lot of stress being
pulled up on here, so will not bend
Thats all folks...
|
|
|
yellowcab
|
| posted on 16/2/14 at 10:11 PM |
|
|
hkp57 - u2u sent with measurements that you asked for
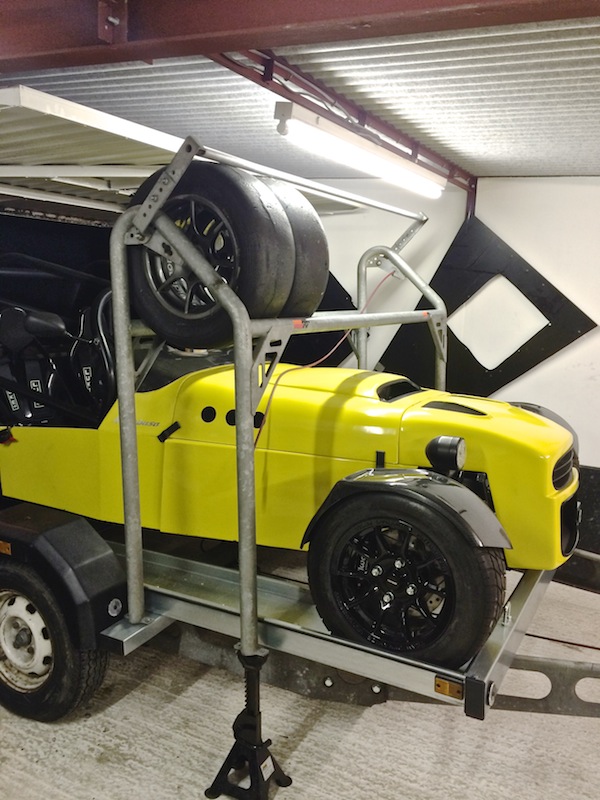
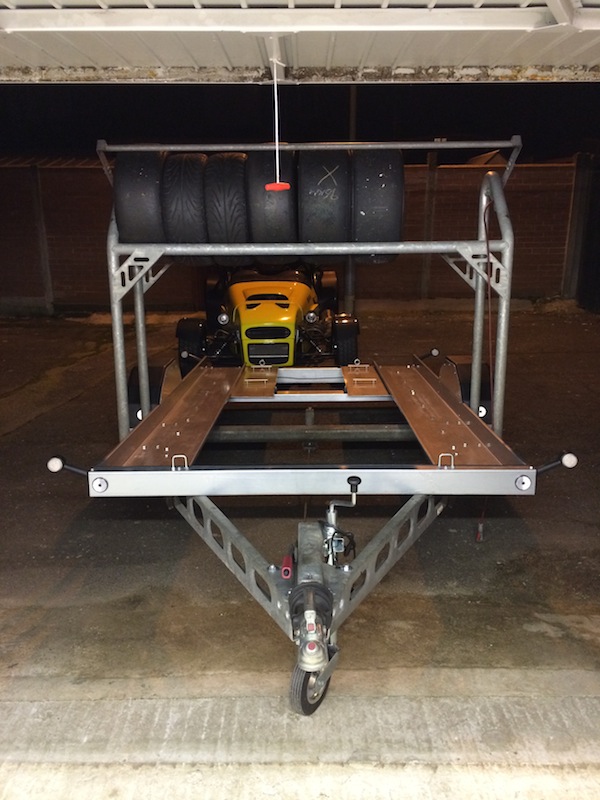
So I spotted a bargain on eBay this morning, and drove up to Lincoln, and snapped up a Brian James tyre rack on a whim, hoping it would fit, and
wouldn't be too wide nor narrow
Pretty spot on, all I need to have made up, is two more U sections of galv, similar to those that hole the mudguards, then job jobbed!

Put a couple of wheels & tyres ontop to check for heights, and fits with no problems, the pivot bar needs extending to the next holes to make it
longer, which means it'll sit further around towards the front of the tyres, and not stick up in the air
Attention turned back to ramps, not wanting to make too much noise, I had some kitchen door handles that we never used lying around for ages, so I dug
them out, to make handling the ramps a damn site easier, looks and works very well, when removing and putting them under the car, nearest to the
ground has to be 5.5inches up from the bottom in order to clear the floor when sat at the correct angle

|
|
|
Matt21
|
| posted on 17/2/14 at 02:46 PM |
|
|
looks great
whats that on the back of your car in the last pic?
|
|
|
femster87
|
| posted on 17/2/14 at 02:52 PM |
|
|
Fuel pump and sender assembly?
|
|
|
yellowcab
|
| posted on 17/2/14 at 03:23 PM |
|
|
Yep, bang on.
Suzuki Hayabusa fuel pump & sender, in the integrated swirl pot inside the fuel tank.
|
|
|
yellowcab
|
| posted on 18/2/14 at 07:39 PM |
|
|
No real update, but my antics nonetheless
Trailer number plate bolt lights turned up, and just waiting for a number plate
then we're ready to rock n roll!
Might do a cheeky trackday at the weekend to celebrate
It's so easy to pop car outside now, when I want the garage clear, much easier to manoeuvre the trailer than it is the car itself lol
Undecided on trailer wheel colour, not sure whether to go silver, or black to match the car
Thought it may rain whilst I was working in the garage, but it actually stayed dry
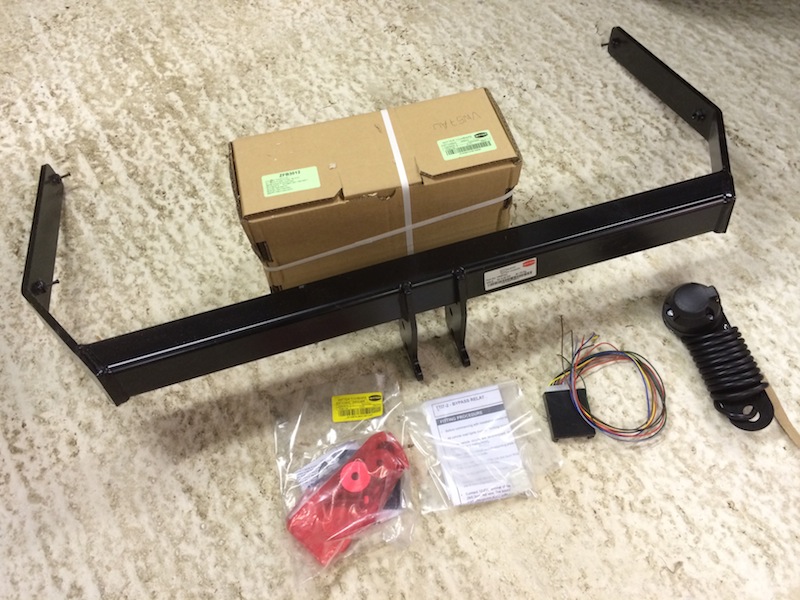
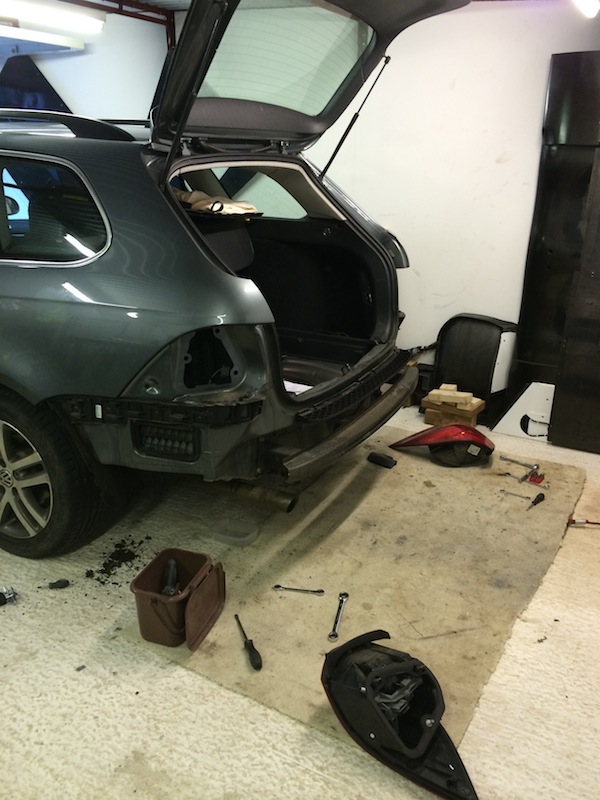
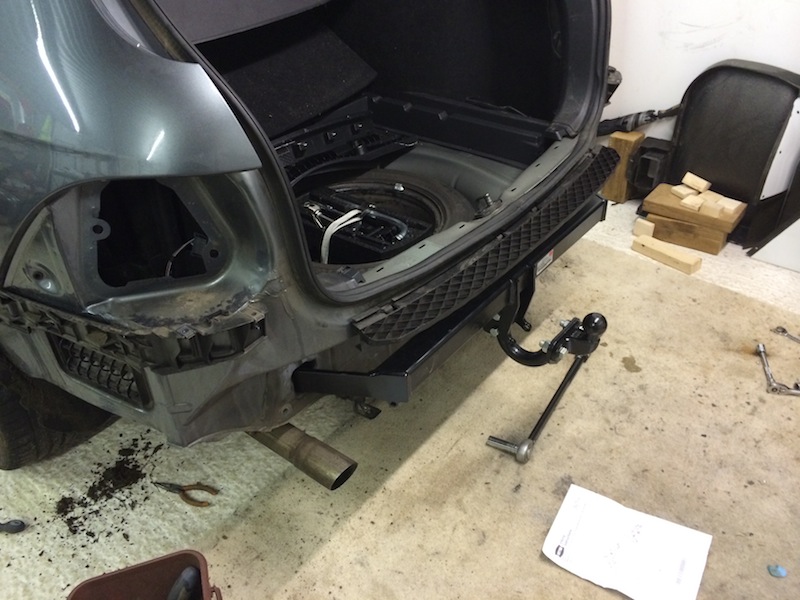
Great service for a tow bar & electrics from P.F.Jones, thanks to daveb666 for doing all the research for me, relatively simple task - not done
the wiring yet - but just the metal work
My next day delivery from PFJones
Took about 45 mins to figure out how the rear bumper came off without ripping it off completely, after that it was a breeze and only took a further
20mins to complete the rest of the job lol


|
|
|
jamesd
|
| posted on 18/2/14 at 08:22 PM |
|
|
Great thread and car, an absolute inspiration.
Can I ask what model the car cover is for? And make?
|
|
|
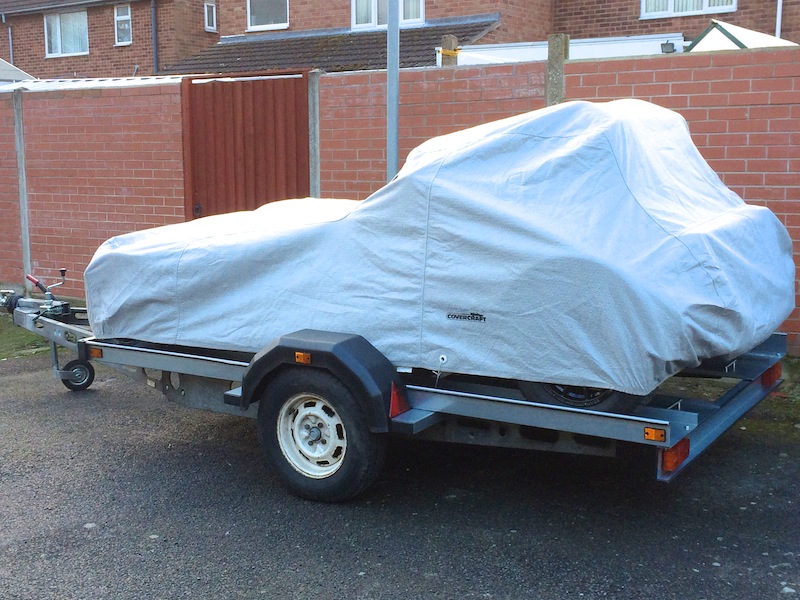
yellowcab
|
| posted on 18/2/14 at 08:31 PM |
|
|
Cheers for the reply & comments
It's a 'CoverCraft Noah (Block-It Fabric)' specifically made for a Seven
http://www.covercraft.com/carcovers/noah.html
(video is interesting to explain why they're so good)
|
|
|
rdodger
|
| posted on 19/2/14 at 06:42 PM |
|
|
I have been lurking on your thread for a while and thought it about time I commented.
You have inspired me to find a caravan chassis and get busy.
I have discounted them in the past as a lot I have seen have been very rough and not well though out at all.
I am looking forward to the next carbon update, especially the diffuser as I am looking at making one for mine at the moment.
Keep up the good work. 
|
|
|
fostrike
|
| posted on 19/2/14 at 08:52 PM |
|
|
Wait a second, are you seriously telling me that you can build a trailer out of a trashed camper and install by yourself a tow bar in you garage?
And it's all road legal????
Damn, I live in the wrong country
|
|
|
mccsp
|
| posted on 19/2/14 at 09:26 PM |
|
|
I may be being an idiot, but I can't find the seven version on their website. Did you buy it direct?
If you didn't mind, it would be very interesting to see a cost break down of the trailer.
[Edited on 19/2/14 by mccsp]
Why do it the easy way, when I can do things my way!
|
|
|
yellowcab
|
| posted on 23/2/14 at 08:10 AM |
|
|
rdodger - cheers for looking, always feel free to ask any questions along the way - its how we all learn
and more importantly - tell me when
I'm doing it wrong! lol
fostrike - I've never heard that expression before about England being the 'country to be in'
mccsp - I cannot remember where I got the cover from, but I'll have a mooch, I think its 'made' for a Caterham specifically
|
|
|
yellowcab
|
| posted on 23/2/14 at 08:17 AM |
|
|
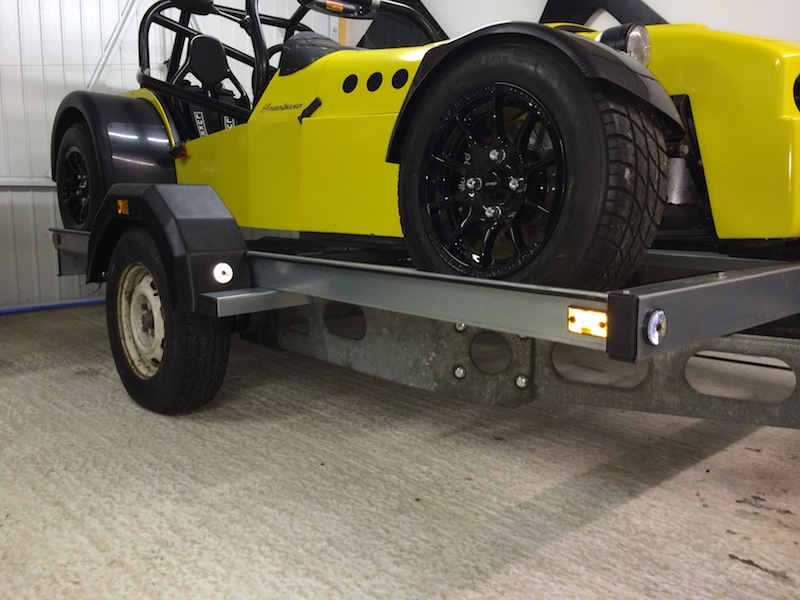
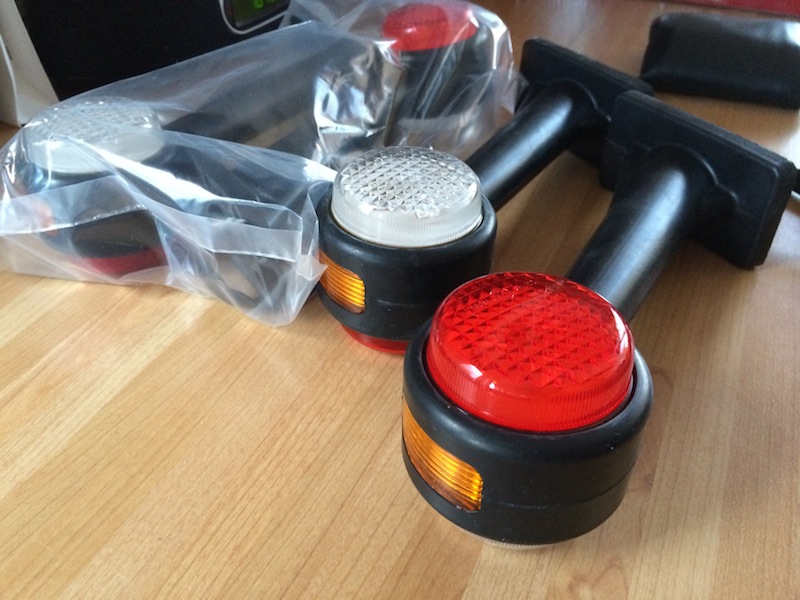
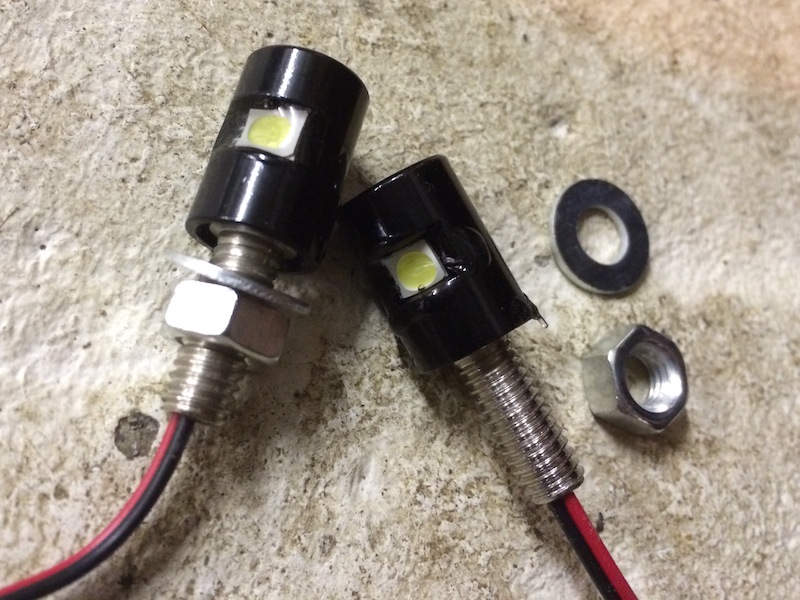
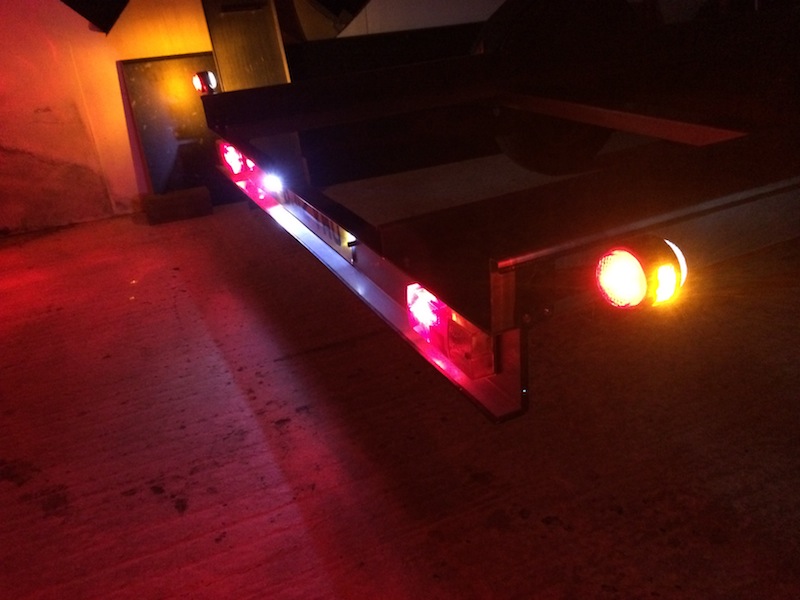
Update time, nothing car related - just trailer
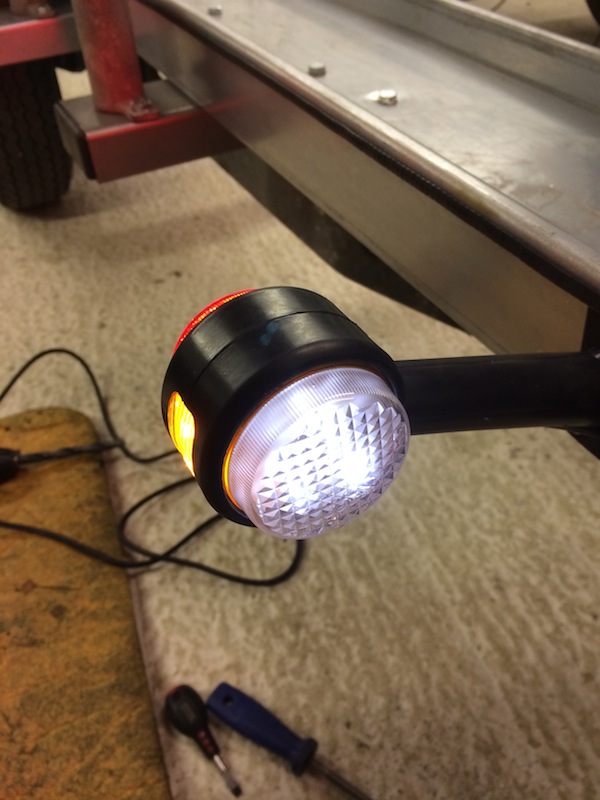
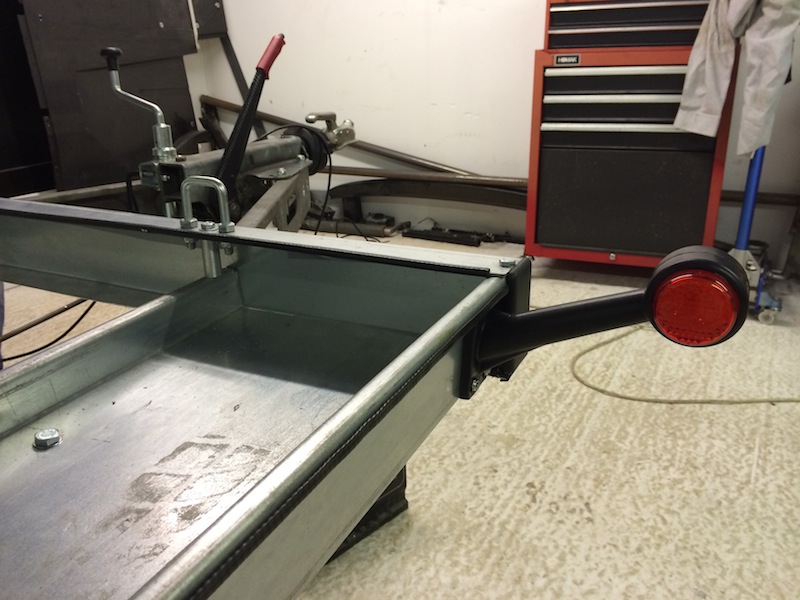
Picked up some bargain 60degree LED marker lights after being persuaded by daveb666 that I should make the sides & front more visible
all four
cost £13.50 delivered, thats not even £3.50 each!
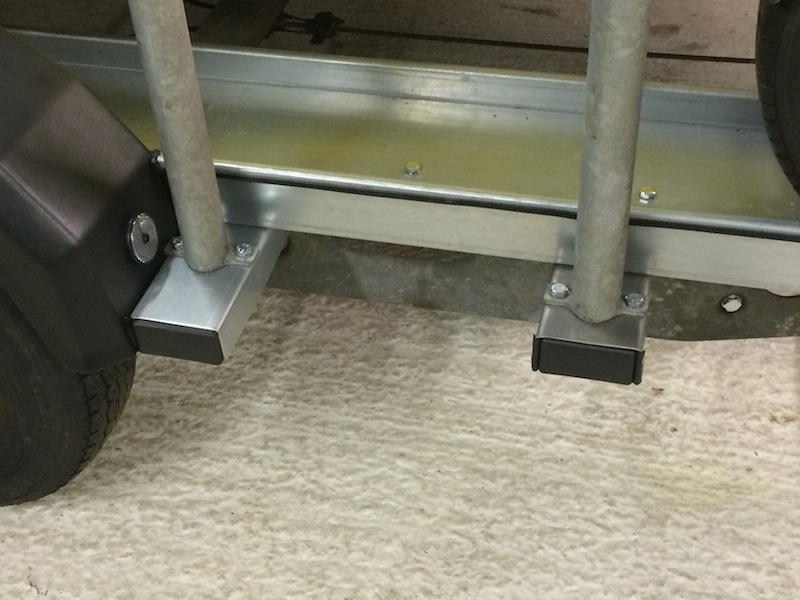
I had the two profiles made by Nat @ RetroPower - thanks pal, for the front feet of my tyre rack to sit onto
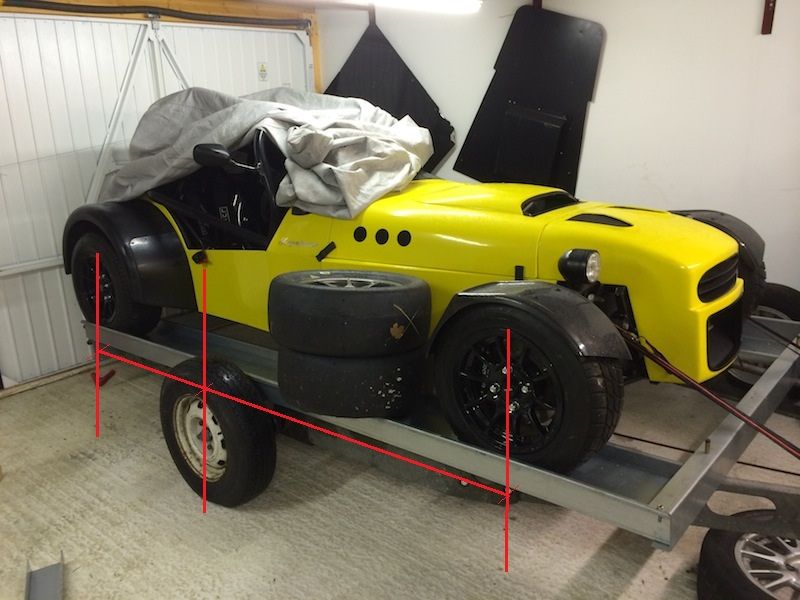
All marked, drilled, bolted & end capped
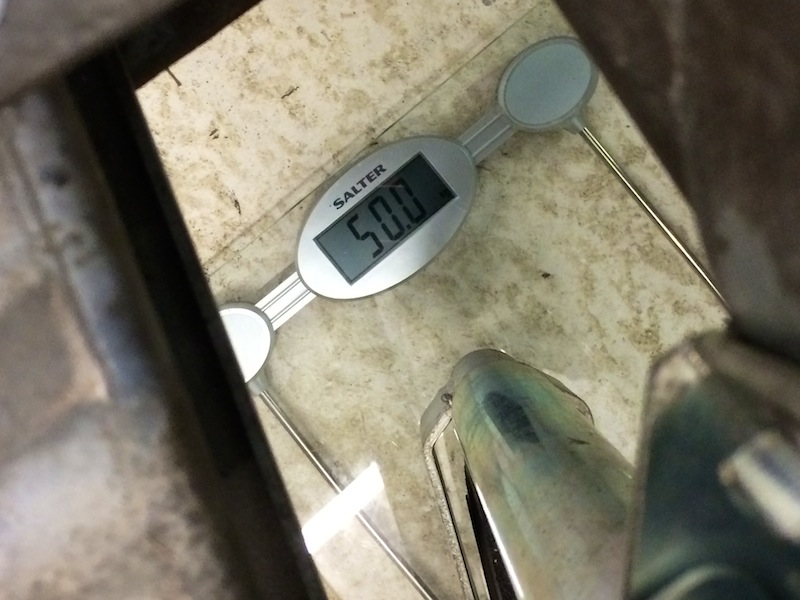
So with the car on, tyre rack over the bonnet with 4 dry wheels & tyres on - the hitch weight couldn't have possibly been any more accurate
More tarting, bought some bargain £2.99 LED number plate lights, to mount either side of the plate shining inwards to give a more even spread
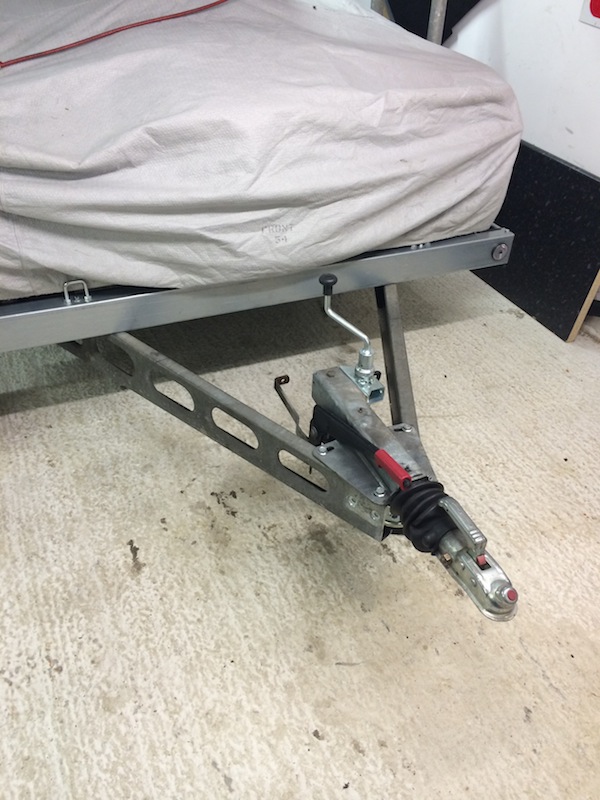
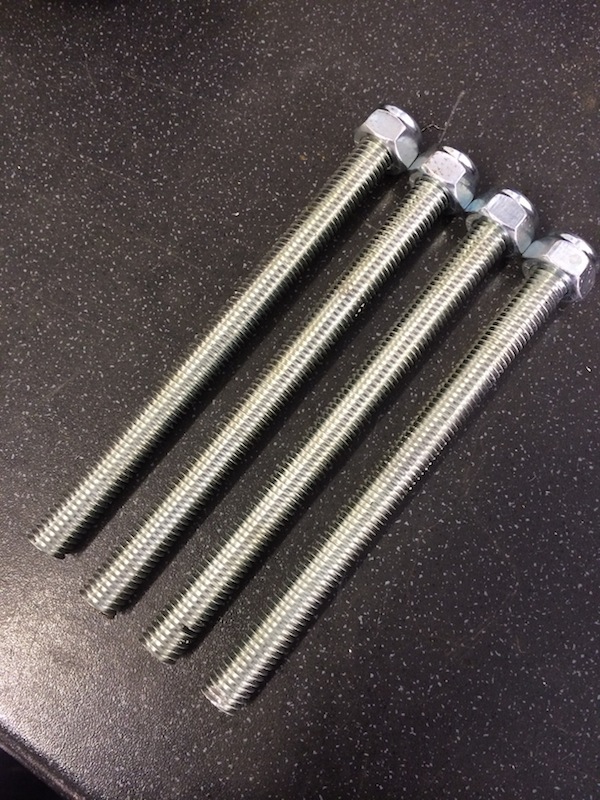
Next up was shortening the A-frame, as it always needed doing but was putting it off, as it was over 2metres in length, hitch off
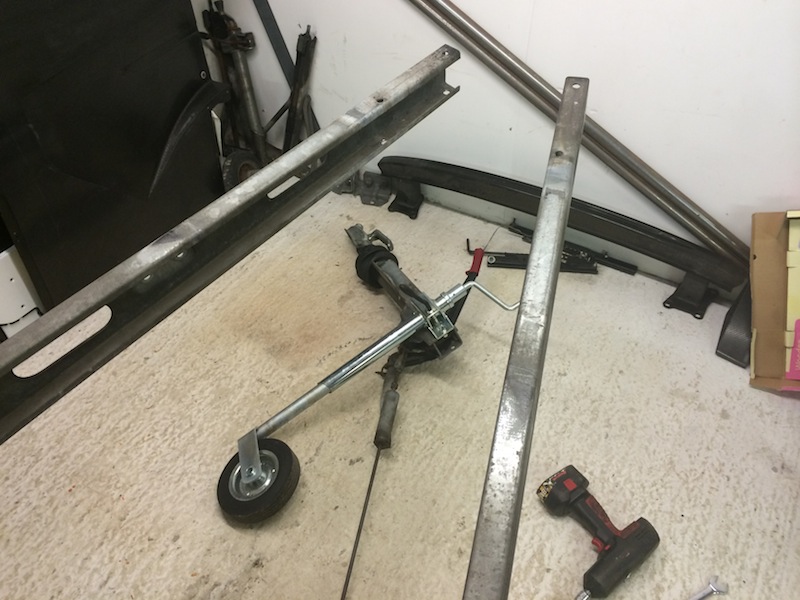
Strap it up to increase the angle - I hadn't bolted the troughs to the A-frame yet for this exact reason
All drilled & bolted through, now from front of trailer to hitch tip is 115cm
|
|
|
yellowcab
|
| posted on 23/2/14 at 08:30 AM |
|
|
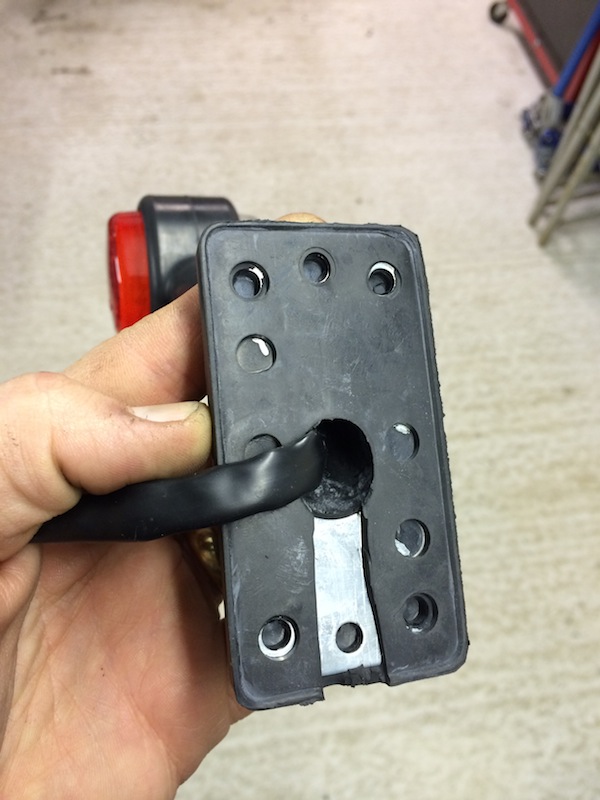
So the marker lights are going to be mounted at the rear, on the sides of the troughs but don't want the wiring to enter where the wheel
& tyre sits, so channelled out the rubber backing for the wiring to run on the outside of the trailer and tuck under nicely
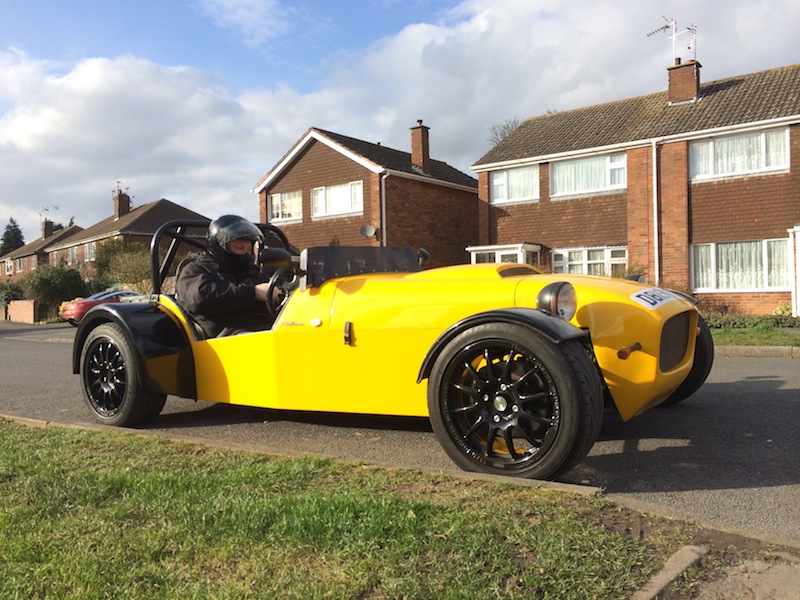
Early start yesterday, sun was shining so the car got some warmth - pootled up and down the street a little just to have a feel, first time in nigh 4
months, felt great
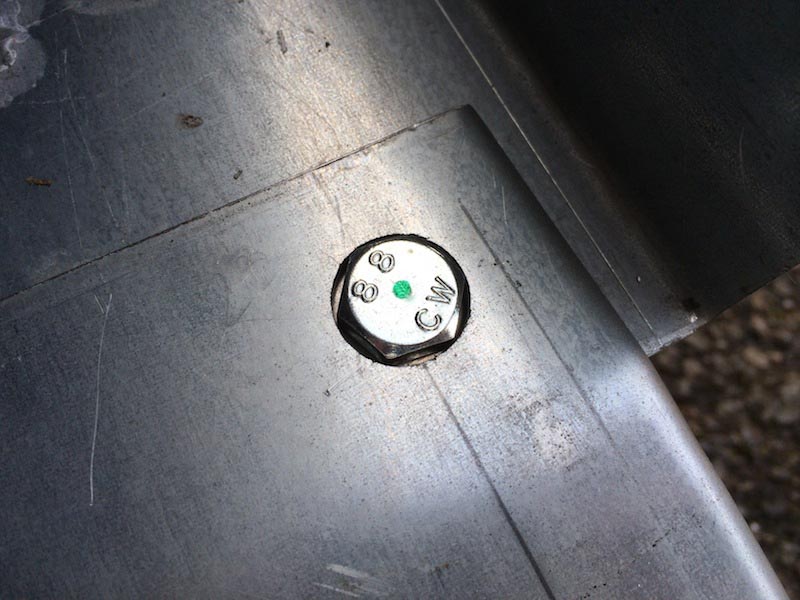
Where the hitch had moved back, the size of the Alko chassis where the hitch bolts to obviously increases, as it starts off small and gets bigger the
further back towards the wheels it goes, so popped down B&Q (instead of Colin Williams AutoSpares) and picked up some M12 threaded bar, and some
M12 nyloc-nuts
Then Mr.CW Auto Spares popped in to say hello
Back to it that evening, testing the markers, look really quite smart for their price tag
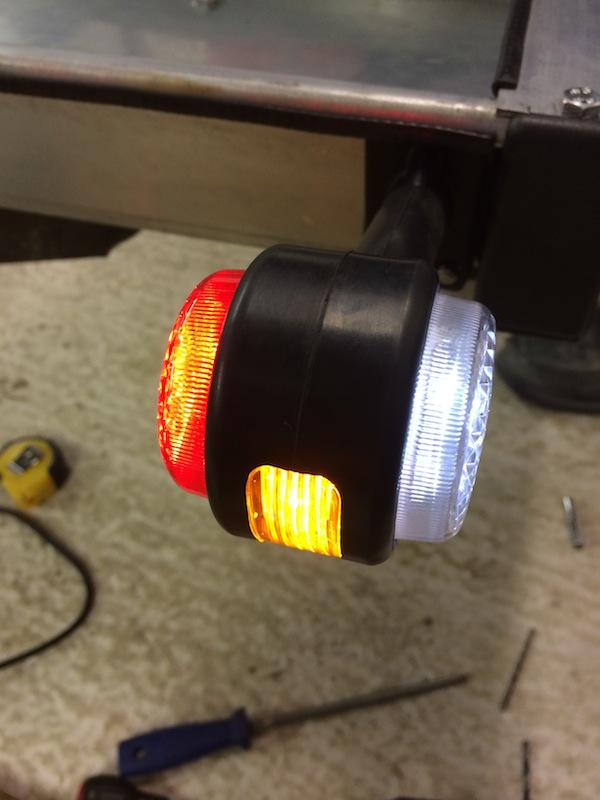
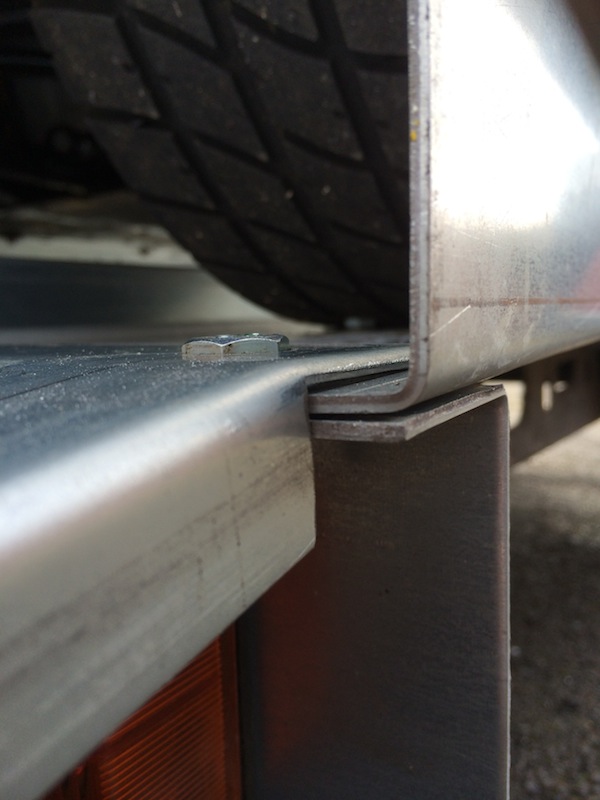
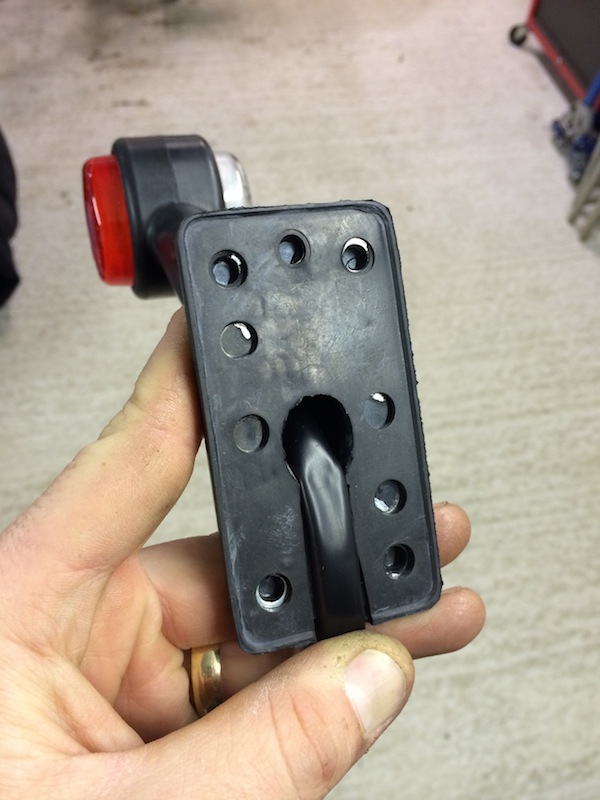
Here is the back end of the trough, and the wiring not coming through, you'll notice that there are only two dome headed bolts holding them on -
because more luck than judgment but they just fit snug up inside the turnover on the outside of the trough which held them steadier than I could ever
hope for
Front one wired up with no visible sign of wiring, these do pass through the trough, and then run up under the from box section, because it
doesn't encroach on the car wheels or tyres
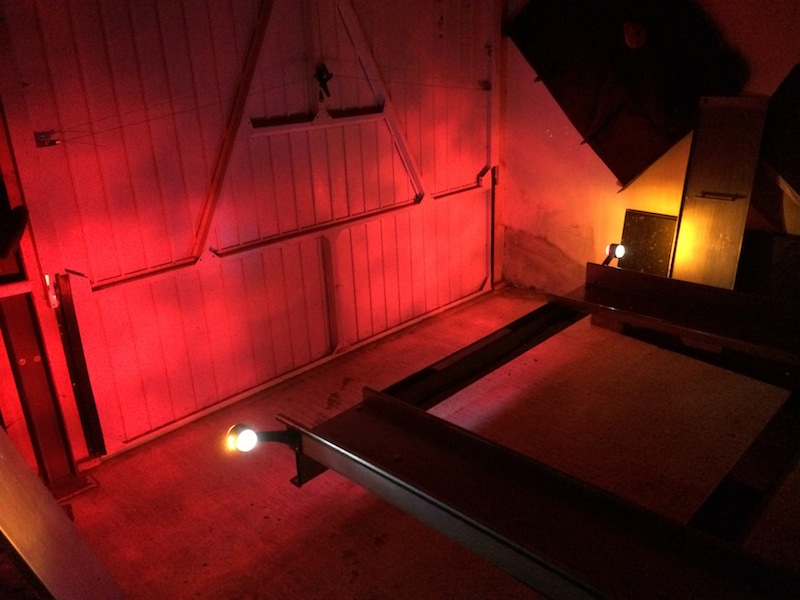
Testing testing
Not keen on rattles, cut some carpet, and Tiger-sealed it onto where the ramps are going to be mounted, to make them silent and easier to slide on and
off the trailer
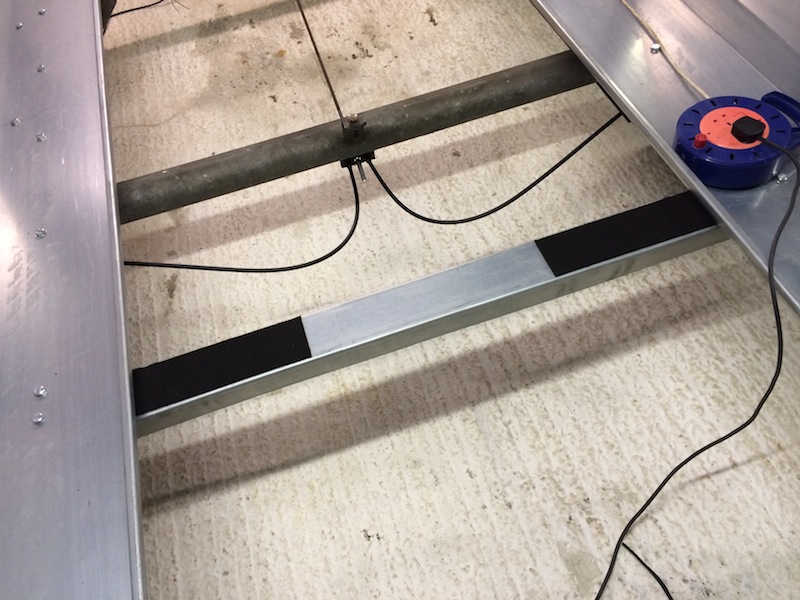
And on the rear too, drilled through the ends, and the number plate board to put the eye bolts in which double up to hold the ramps down

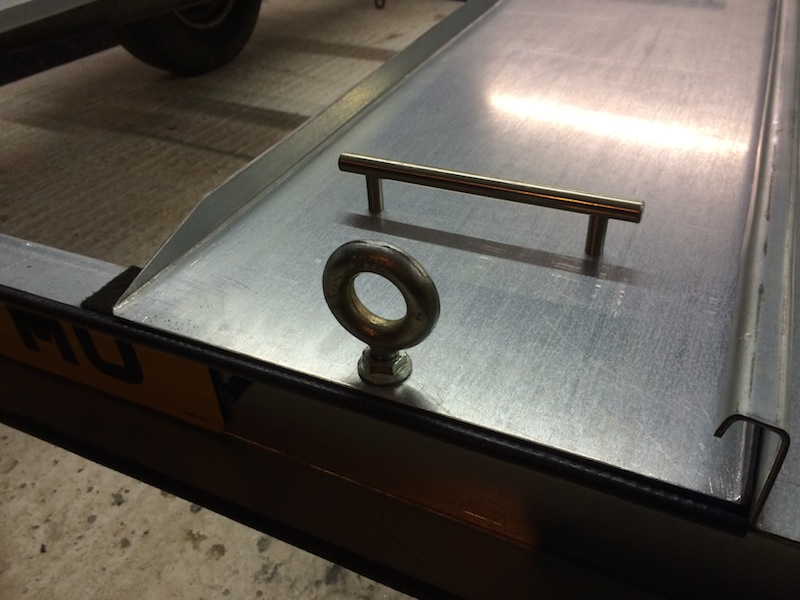
So for in the middle of the car
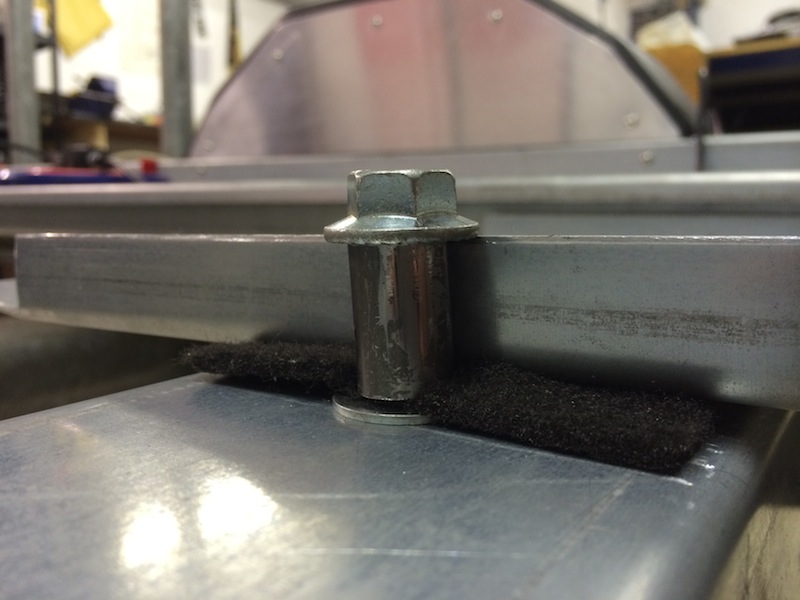
Cut a spacer the same height as the edge of the ramps, and passed an M12 bolt straight through with an incorporated washer, to use the head as a way
to slide the ramp in and it'd hold down
the outside of the ramps is tucked under the inside roller over of the trouhs
Job jobbed - trailer (almost) complete
now just need to wire the car up!
I can load and unload the car off the trailer with the ramps down and they stay in place, and closer the garage door, which is a good thing to have
such short (1.2m ramps)

[Edited on 23/2/14 by yellowcab]
|
|
|
Ben_Copeland
|
| posted on 23/2/14 at 09:21 AM |
|
|
Definately a good idea to have side markers. Makes it much easier to tow in the dark
Ben
Locost Map on Google Maps
Z20LET Astra Turbo, into a Haynes
Roadster
Enter Your Details Here
http://www.facebook.com/EquinoxProducts for all your bodywork needs!
|
|
|
40inches
|
| posted on 23/2/14 at 12:16 PM |
|
|
Blimey! It's almost as if you know what your doing
|
|
|
yellowcab
|
| posted on 23/2/14 at 01:58 PM |
|
|
Not a clue Dave, not a clue
|
|
|
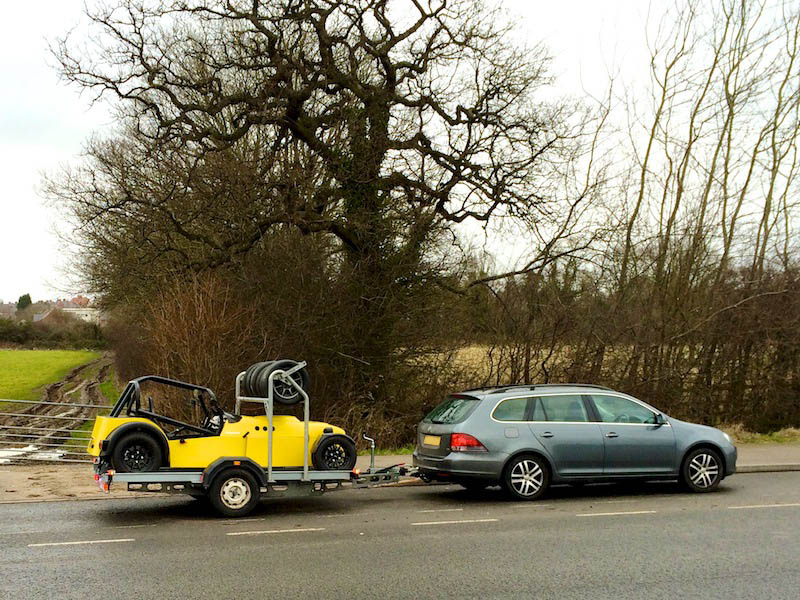
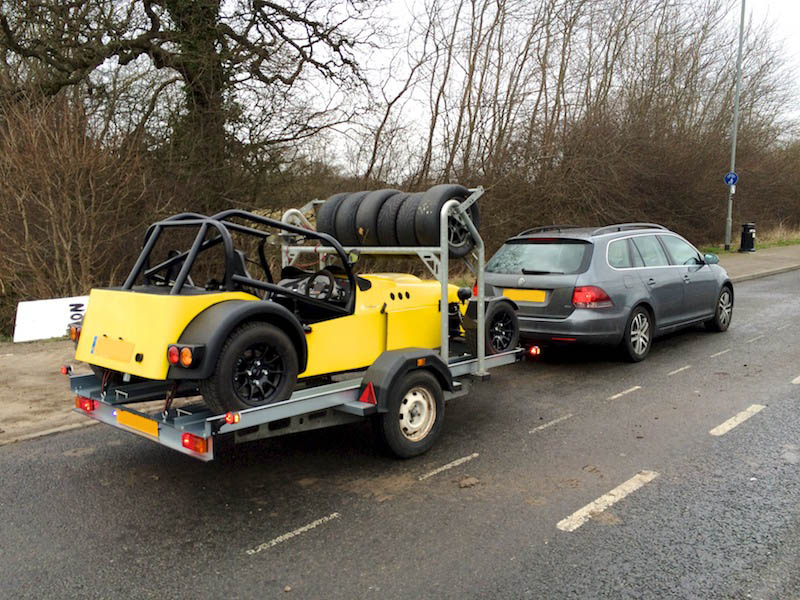
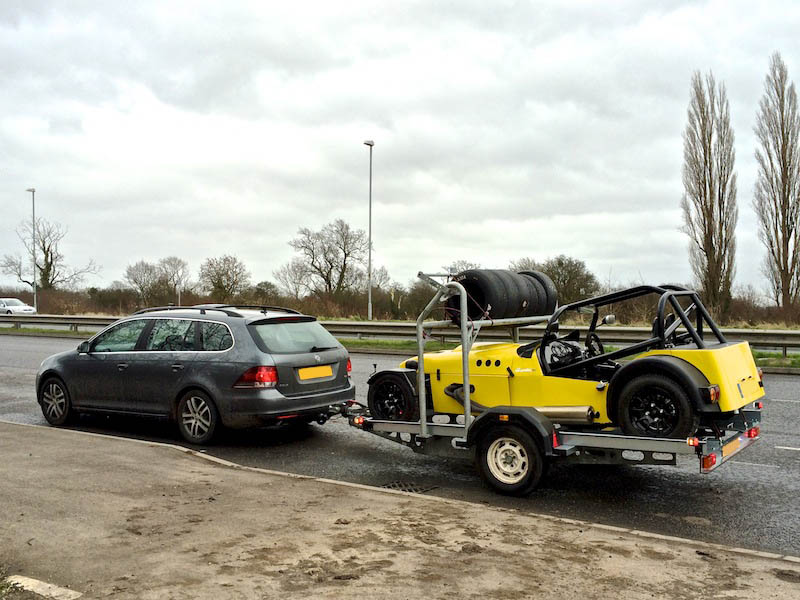
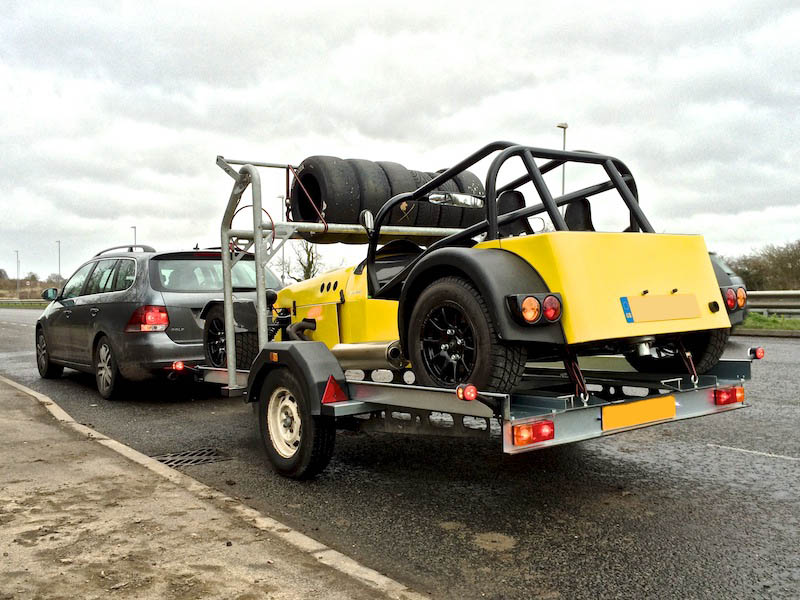
yellowcab
|
| posted on 23/2/14 at 04:50 PM |
|
|
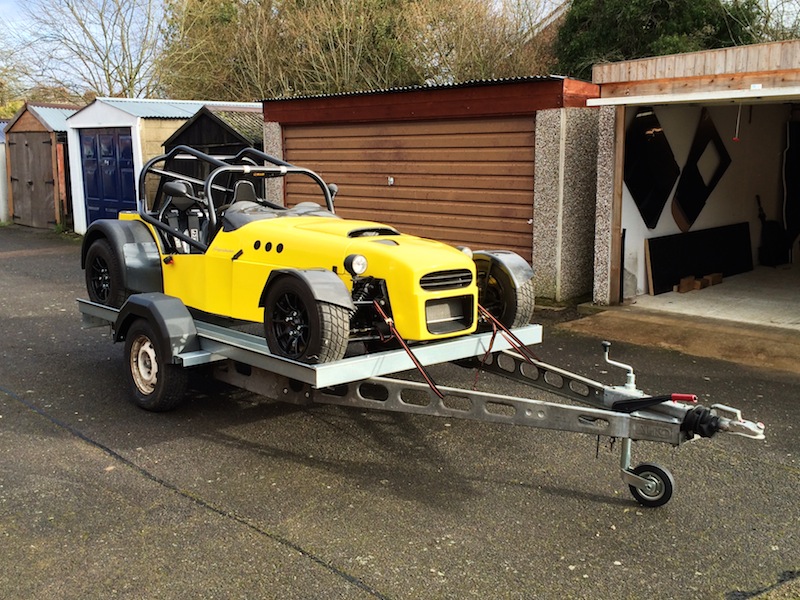
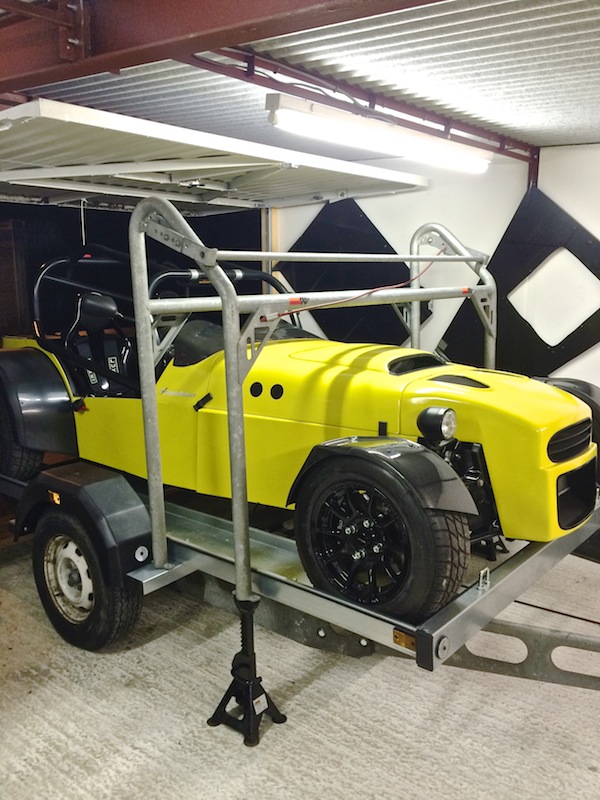
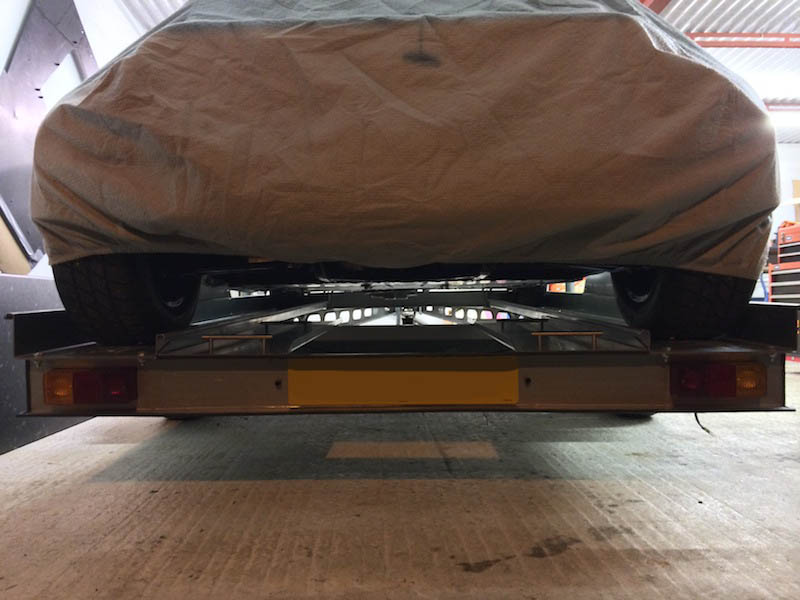
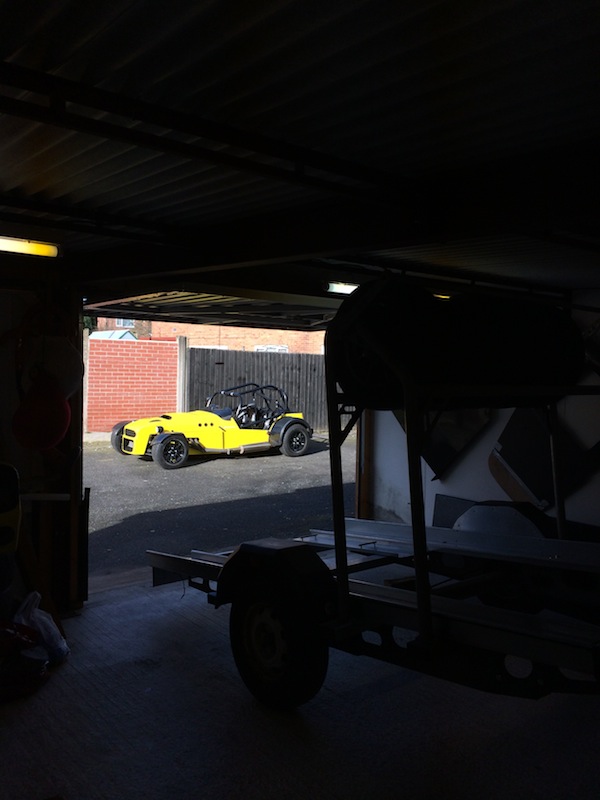
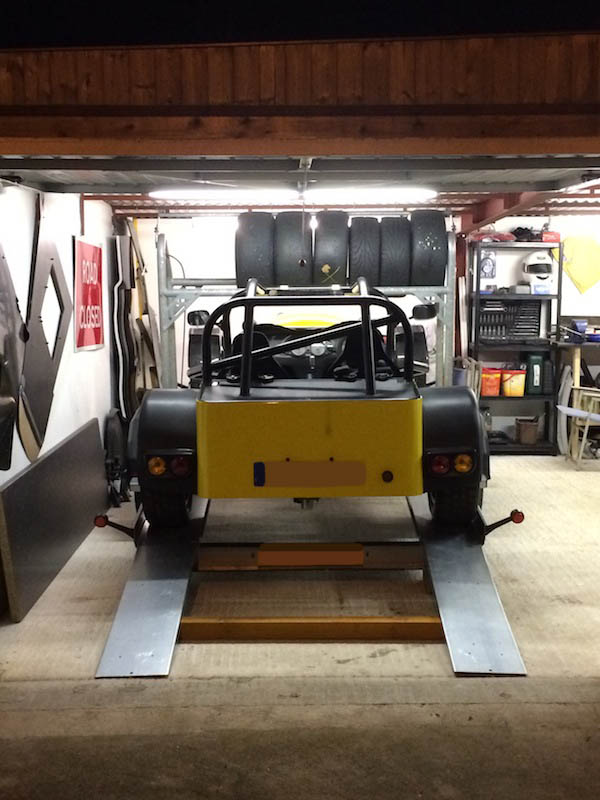
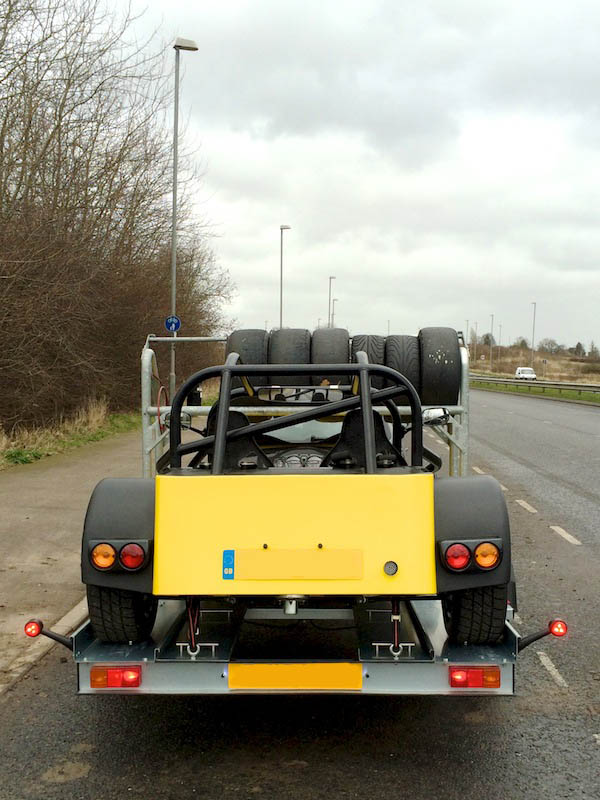
So here is the maiden voyage, no rattles, brakes work well, tows nicely (albeit need wheel balancing and tyre pressures inflated after I've
painted the wheels)
Yes there are 5 photos of the same thing, thats how chuffed to bits I am
|
|
|