ceebmoj
|
| posted on 16/11/14 at 10:04 PM |

|
|
looks great, how are you going to finish the lip of the wheel arch?
|
|
|
|
|
mark chandler
|
| posted on 16/11/14 at 10:10 PM |
|
|
Fantastic work John, when finished you will have a lovely car to enjoy.
|
|
|
John Bonnett
|
| posted on 16/11/14 at 10:50 PM |
|
|
quote:
Originally posted by ceebmoj
looks great, how are you going to finish the lip of the wheel arch?
The edge lips under and is bonded and countersunk riveted to the inner wheel arch. I've cut a piece of plywood that I shall use to clamp the
aluminium tightly against the inner wing and then it can be tapped over with a nice tight bend. I did the same on the other side and it worked out
well. Hopefully some pictures tomorrow.
Thank you Mark, yes I hope so. I'm hoping to do three events in France next year and also get up to Donnington for the TriumphFest so
there's no time to lose.
|
|
|
John Bonnett
|
| posted on 17/11/14 at 07:02 PM |
|
|
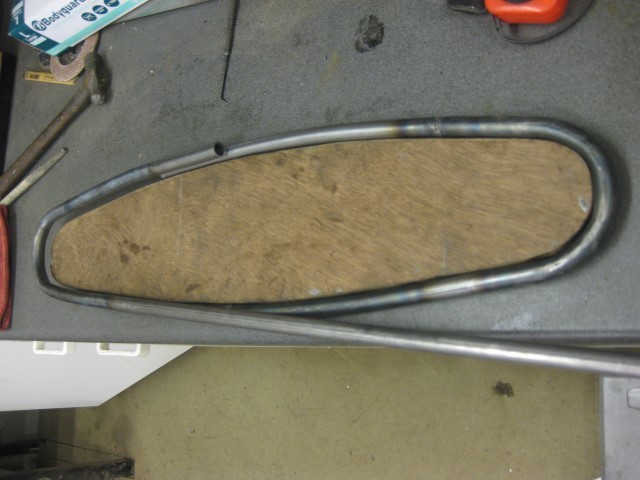
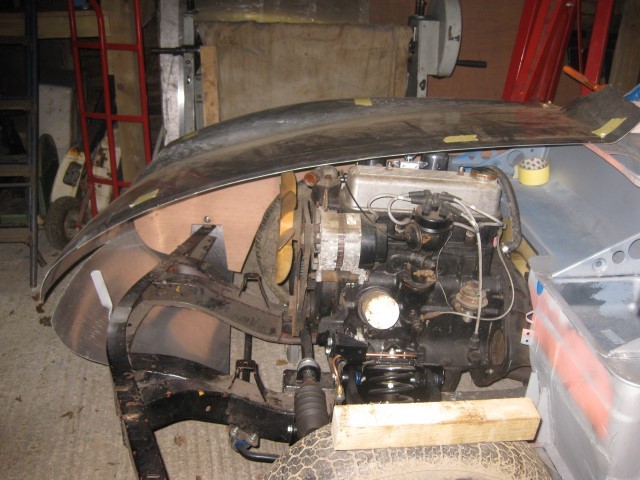
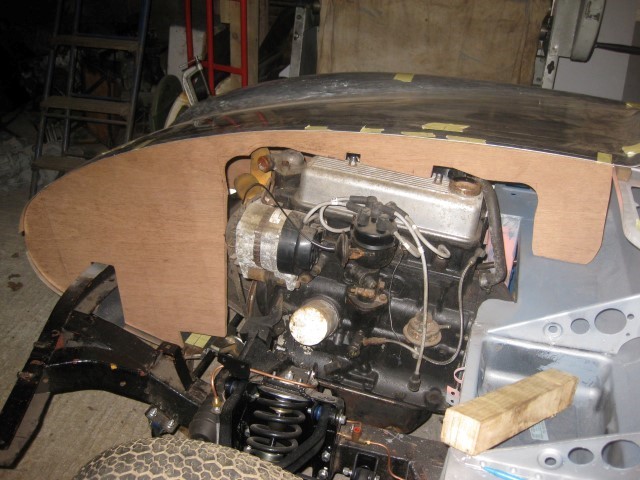
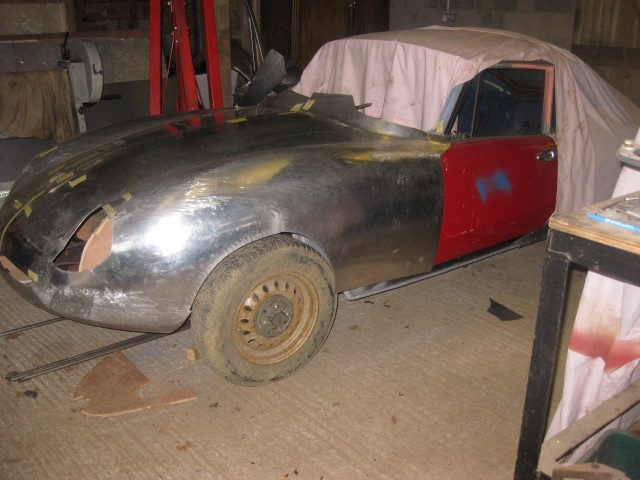
Well, I had to work hard today but the wing is pretty much there now with just a bit of tidying needed. The picture show the B post return in place
over the top of the wing ready to scribe and cut and trim. The second the wing tacked to the return. The third fully TIG welded and the final one the
return starting to be tapped over against the inner wing.


|
|
|
snakebelly
|
| posted on 17/11/14 at 07:16 PM |
|
|
don't know what to say that hasn't already been said, this thread is becoming legendry
|
|
|
ceebmoj
|
| posted on 17/11/14 at 07:31 PM |
|
|
looks great.
|
|
|
rdodger
|
| posted on 17/11/14 at 07:57 PM |
|
|
Legend........................... wait for it......... ary!
|
|
|
Mr Whippy
|
| posted on 18/11/14 at 12:45 AM |
|
|
it always seems a shame to paint cars built like this, I'd just polish it up like chrome
|
|
|
John Bonnett
|
| posted on 18/11/14 at 09:09 AM |
|
|
Thanks guys, to be honest it ain't that great but you know the right things to say 
It will be painted I'm afraid because the car is going to be used and nothing corrodes aluminium better than a salt/water solution.
|
|
|
Mr Whippy
|
| posted on 18/11/14 at 12:42 PM |
|
|
I'm assuming and sorry if this has been already covered before in conversation, but is there a barrier between the steel and aluminium
panelling? I notice that some of the recent pictures seem to show the aluminium being on top of what appears to be bare steel.
It's just I've just spent the last few months and heaps of cash replacing corroded aluminium panels on a landrover where they had been
contacting the steel work or bolts or washers...it's a nightmare 
|
|
|
mark chandler
|
| posted on 18/11/14 at 01:01 PM |
|
|
John
You started off with gas welding, now it's TIG what changed and why?
I once tried gas on thin ali sheet, trying to repair a rangerover tail gate, everything fell apart in molten blobs
|
|
|
mcerd1
|
| posted on 18/11/14 at 01:18 PM |
|
|
VVVV
quote:
Originally posted by John Bonnett
quote:
Originally posted by rdodger
Can I ask about the welding? Is it all gas welded? If so why is it gas rather than tig? Sorry if you have already told us earlier in the thread.
I've gas welded most of the panels because the weld bead is very malleable and the heat affected zone is annealed. This makes the planishing and
further working of the panel easier than if they had been TIG welded. The long weld across the rear of the body below the tailgate aperture is TIG
welded because it would have been difficult to wash the flux off if it had been gas welded. I shall also TIG weld the B Post return onto the wing
because this will lead to minimal distortion and no further forming will be needed. I'll just need to sand the weld bead flush. That's the
plan anyway. I hope to report some good news tomorrow night!
[Edited on 18/11/2014 by mcerd1]
-
|
|
|
mark chandler
|
| posted on 18/11/14 at 02:55 PM |
|
|
Ah, already answered then it's a a long post now.
Thanks
|
|
|
John Bonnett
|
| posted on 27/11/14 at 01:40 PM |
|
|
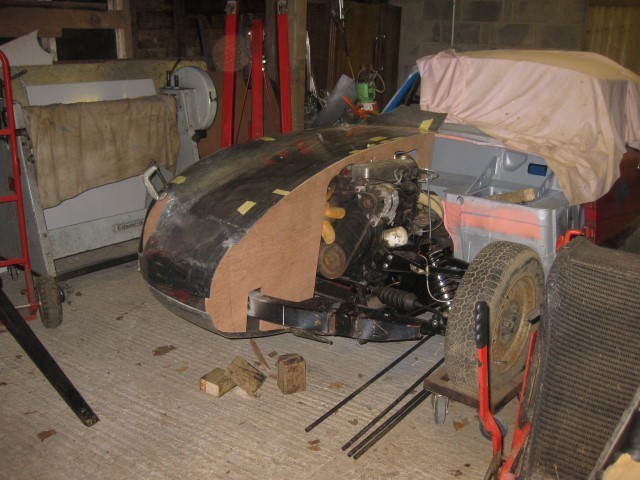
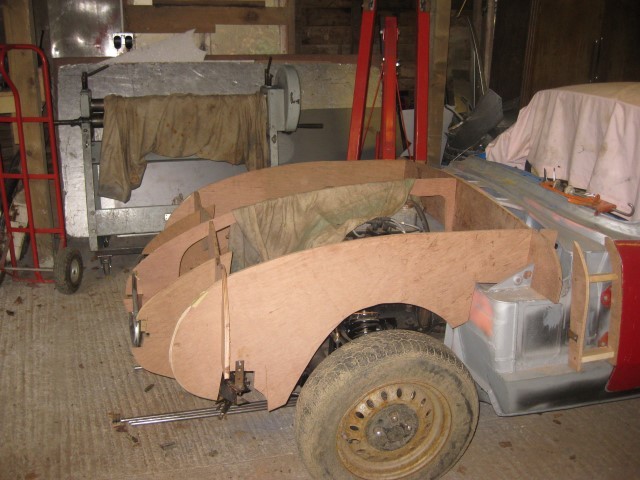
With the body panels all made and fitted I've been turning my attention to fitting the bonnet and making a a tubular steel frame for the air
intake aperture and around which the aluminium will be dressed.
I'm making a simple plywood buck to hold the bonnet in place and the transverse stages will be notched to locate the tubes for the bonnet
supporting frame. Here are a few pictures.


|
|
|
rdodger
|
| posted on 27/11/14 at 02:34 PM |
|
|
No pressure John!
You can always have another bonnet made 
|
|
|
John Bonnett
|
| posted on 27/11/14 at 04:24 PM |
|
|
quote:
Originally posted by rdodger
No pressure John!
You can always have another bonnet made
|
|
|
John Bonnett
|
| posted on 27/11/14 at 06:39 PM |
|
|
A lot of time today spent looking and adjusting so not much to show. However I have made a longitudinal sweep and from that cut the centre station for
the buck. Just a couple of pictures I'm afraid.
|
|
|
John Bonnett
|
| posted on 7/12/14 at 04:50 PM |
|
|
Quite a while since I posted any progress but I've been beavering away. Not a huge amount of perceived progress but I've spent a lot of
time measuring and fitting in an effort to get the bonnet sitting in the best position with respect to the body and the general appearance.
The buck is now finished and this provides some reliable datum points as well as a firm base to support the two bonnet halves.
Right from the outset, it did look as if there was too much shape in the bonnet where it meets the door so I took the bull by the horns and cut a Vee
stretching from the door end a foot towards the front. I then tapped the aluminium down onto the buck which closed the gap and then welded it up.
Phew! Glad that's done. The transition is definitely much closer now so it was the right thing to do.


|
|
|
ceebmoj
|
| posted on 7/12/14 at 05:25 PM |
|
|
Great progress. Will the steel opening form be left in why'd bonnet? Or will it come out once the shape is there.
|
|
|
John Bonnett
|
| posted on 7/12/14 at 05:45 PM |
|
|
quote:
Originally posted by ceebmoj
Great progress. Will the steel opening form be left in why'd bonnet? Or will it come out once the shape is there.
A good question. The steel hoop is actually a fundamental piece of the bonnet supporting frame. There will be two longitudinal legs coming off the
lower part of the hoop going back to the hinges and two longitudinals inboard of the headlights going back from the top of the hoop to a transverse
tube near the scuttle. The aluminium will be dressed around the the hoop which will secure the bonnet to the frame in that area.
The buck itself was quite fiddly and time consuming to make but well worth the effort as all I have to do is to notch out the transverse stations to
lay the tubes in and they should be located perfectly. Fingers crossed on that!
I'm going to make a start on the hinges tomorrow. I've been given some really nice oilite bronze bushes which are absolutely ideal. They
have an 8mm bore and the shank fits nicely inside the 5/8" tubing that I'm using. Deep joy
|
|
|
John Bonnett
|
| posted on 9/12/14 at 09:50 PM |
|
|
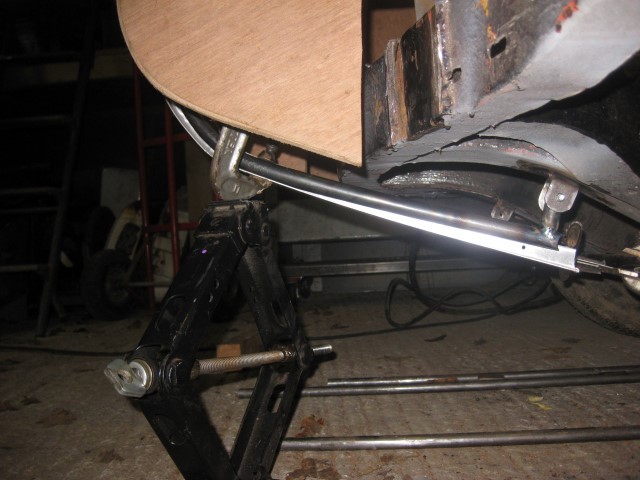
I've now made the hinges for the bonnet which are a very simple affair but hopefully will be up to the job. The bonnet itself is light and the
inner wings will be fixed to the chassis rather than an integral part of the bonnet. So the hinges will never have a huge load to cope with. The
aluminium sweep represents the bonnet and shows that the opening will be sufficient to access the the engine bay.


|
|
|
stevebubs
|
| posted on 9/12/14 at 10:34 PM |
|
|
Holy cow .. not really looked at this site properly in a while and I see this... coming on really well, John...
|
|
|
John Bonnett
|
| posted on 10/12/14 at 07:39 AM |
|
|
quote:
Originally posted by stevebubs
Holy cow .. not really looked at this site properly in a while and I see this... coming on really well, John...
It's coming on nicely Steve and early in the New Year, I've got the added bonus of Trev D's colleague Martin who made the bonnet
coming down to my workshop to make sure it fits properly; all very exciting.
|
|
|
nick205
|
| posted on 10/12/14 at 09:32 AM |
|
|
Just a real pleasure to watch John
|
|
|
John Bonnett
|
| posted on 11/12/14 at 06:18 PM |
|
|
quote:
Originally posted by nick205
Just a real pleasure to watch John
That's really kind of you Nick, thank you.
Trev |D's mate Martin reckoned with the hinges where I've put them the bonnet doesn't open wide enough and of course, he is right.
The sweep looks as if the open position is more than adequate to give good access to the engine bay but I'd not allowed for the restriction of
the wings. So, today I've moved the hinges three inches towards the front and I think that has done the trick. I'd only tacked the
clevises so it was no great problem to get them off.
I've also started bending the tube for the bonnet supporting frame so we are still progressing albeit slowly.
|
|
|