John Bonnett
|
| posted on 2/10/20 at 08:25 PM |

|
|
quote:
Originally posted by ettore bugatti
That is great progress!
Have you trial fitted the pedal box yet? If you can left foot brake then I would say the column is at the right height.
Difficult to judge the steering column position, I guess in a Locost the steering column is more horizontal in combination with a different mounting
scheme.
Although I drove a modern Merc SL the other day that had the ignition key sticking out from the column and only 5cm away from my knee.
Any further development/ ideas on the doors?
Thank you EB. I was hoping you would see my post and let me know what you think.
I'm not sure what to do about the pedal box. I can't use the one from the Fiesta without a lot of work because the brake pedal operates a
rod that goes to the master cyliner/servo located on the lefthand side of the car. The Reliant pedal box uses an MGB master cylinder which is mounted
on the back facing the steering wheel not at the front. My thoughts are to use the pedal box but fit a master cylinder with a remote reservoir which
would make installation easier. Getting the distance between the pedals and the floor is critical so I do want to get that right. Are there any
standards I could refer to?
To be honest I was surprised when I sat behind the wheel and found how right it felt. I was expecting the wheel to be too low and angled too much
upwards but strangely that wasn't the case. It felt as if it had been tailored for me. I can place the seat in line with the steering wheel and
the pedals will be in line too. No more offset steering, seating and pedals on this build (I hope!).
I'm sure I'll be able to form a padded panel around the column and mounting bracket once a little trimming has been done.
The doors. Well, I'm going to make them and my plan is to use Lexan instead of glass but still using the electric operation from the Fiesta. .
The lower front side window corner which is a triangle will be filled as on the Fiesta with a door mirror. That's the plan but as we know plans
do change, never more so than on this project.

[Edited on 2/10/20 by John Bonnett]
|
|
|
|
|
John Bonnett
|
| posted on 3/10/20 at 09:24 AM |
|
|
One advantage of the early stages of a build is that there is a multiplicity of areas that can be tackled completely seperate from each other so if
boredom sets in in one direction it is easy to set about doing something else. At the moment I've been concentrating on the basics of the front
bulkhead, radiator and seat mountings all very necessary in determining where other bits will fit in. But, do you know, I fancy doing a bit of metal
shaping and I thought I might start with the roof which although low crown is probably the most difficult panel for me to make. But before that
I'll need a buck and this time instead of using plywood I thought I'd try wire. This is 6mm diameter steel and not as easy as one would
think to bend but I'm going to give it a try anyway.
|
|
|
John Bonnett
|
| posted on 4/10/20 at 03:22 PM |
|
|
With a little bit of adjustment my formed screen aperture interfaced nicely with the Fiesta base and scuttle. At the moment my formed frame is only
held in with welded tabs but when I'm confident that everything is true I can make it secure and solid with some more material.

|
|
|
Deckman001
|
| posted on 4/10/20 at 04:31 PM |
|
|
Hi John,
Am not sure if I've posted on your topic yet, but having looked through your posts and what you are doing, I'm very impressed what you are
trying to do and are actually doing it. I thought building a locost was not for the fainthearted, but what you are doing takes real engineering and
determination.
Well done and please keep it up it helps us all.
Jason
|
|
|
John Bonnett
|
| posted on 4/10/20 at 05:04 PM |
|
|
quote:
Originally posted by Deckman001
Hi John,
Am not sure if I've posted on your topic yet, but having looked through your posts and what you are doing, I'm very impressed what you are
trying to do and are actually doing it. I thought building a locost was not for the fainthearted, but what you are doing takes real engineering and
determination.
Well done and please keep it up it helps us all.
Jason
Jason, thank you. Actually it is our community that helps me, keeps me motivated and on course through amazing generosity, knowledge and advice so
freely given.
As far as this project is concerned, I do realise that it is massive and absolute madness, pushing 80 as I am to even consider undertaking such a
thing but I'm loving every minute of it, well almost and I'm convinced it is keeping me going. I'm trying to block out the bigger
picture which could be very daunting and concentrate on the individual jobs, complete in themselves and one by one they get ticked off. Bitesize
mouthfuls.
I really appreciate your comments and advice so please do keep them coming. Thank you.
|
|
|
ettore bugatti
|
| posted on 4/10/20 at 05:08 PM |
|
|
Are you going to upgrade to a dual master cylinder? Would be nice to have a front/rear split brake system.
Pedal position wise, it would make sense that you operate the pedal with the ball of your feet not the heel. And you have to take in account the pedal
ratio, so you get the right pedal feel and required force.
|
|
|
John Bonnett
|
| posted on 4/10/20 at 05:44 PM |
|
|
quote:
Originally posted by ettore bugatti
Are you going to upgrade to a dual master cylinder? Would be nice to have a front/rear split brake system.
Pedal position wise, it would make sense that you operate the pedal with the ball of your feet not the heel. And you have to take in account the pedal
ratio, so you get the right pedal feel and required force.
Big problems in the pedal box department EB and I don't know how to proceed. My original intention was to use the one from the Kitten which is
suitable for a cable clutch and because I have it. But it has to be in line with the steering however, in that position the rearward facing master
cylinder will foul the wiper motor mounting. So I'm going to investigate whether it might be possible to move the motor out of the way which
will involve cutting and welding of the linkage, not straightforward but no cost if it is possible. The obvious solution is to have a floor mounted
pedal box which would get round the problem but I don't want a bias system which seems to be all that the after market suppliers offer and to my
mind they are enormously expensive for what they are. Failing everything else, I may have to make one myself.
Dual circuit? Probably not although I can see the advantage. Disadvantage is the additional length of the master cylinder although academic if I
cannot find room for a single.
[Edited on 4/10/20 by John Bonnett]
|
|
|
John Bonnett
|
| posted on 5/10/20 at 06:31 AM |
|
|
Having given the pedal box some more thought I think the best option is to fit a floor mounted one whre I don't think there will be any
clearance issues. Having remote reservoir(s) rather an integral they can be placed anywhere convenient for topping up. Although I could make one
it's another job and if I could buy one for a reasonable cost that would be my preferred option.
Stop Press
By sheer luck a brand new OBP pedal box has come up on Ebay with a Best Offer option and I have managed to snag it. This is complete with master
cylinders, reservoirs and clutch cable attachment.
[Edited on 5/10/20 by John Bonnett]
[Edited on 6/10/20 by John Bonnett]
|
|
|
John Bonnett
|
| posted on 7/10/20 at 12:59 PM |
|
|
At last, a bit of metal shaping. This first bit is a corner piece to reinforce the fixing of the windscreen frame onto the round tube. Using the
trusty cardboard aided design technique the curve was marked out and transferred onto two pieces of plywood. The material was also marked up using a
simple trick to draw in the extra material for the 12mm flange. The steel sheet was sandwiched between the two peces of wood and clamped really tight
to prevent any movement. The flange was tapped over progressively until it stretched sufficiently to follow the curve of the wood and to be in close
contact with it throughout the curve and with a nice sharp fold line. I'm using 1mm steel sheet hammer formed over 12mm ply. Care was needed
when welding the piece in place because thin to thick is never easy but all went well with no holes blown through.
The excees flange of the windscreen frame will be reduced when all the reinforcing pieces are in place.


[Edited on 7/10/20 by John Bonnett]

[Edited on 7/10/20 by John Bonnett]
[Edited on 7/10/20 by John Bonnett]
|
|
|
John Bonnett
|
| posted on 9/10/20 at 05:09 PM |
|
|
I'm sure many of you will remember Trev D who built a stunning polished aluminium bodied Locost, Saint Trev to some of us. Some years ago he
shared a design for a tool to mark an offset and like all tools perhaps not something you use all the time but when you need it its there and
invaluable. It is very simple and easy to make so I thought I'd share it with you. I used it to put a line on the windscreen frame return so
that it can be trimmed. One point rests on the glass and the other which has a point at 90 degrees scribes a line. Very effective.
Two very important deliveries arrived today. All the bits needed to fab up a steering column and the brand new pedal box and the bits to go with
it.


|
|
|
John Bonnett
|
| posted on 10/10/20 at 04:29 PM |
|
|
Once again EB was right. Having placed the pedal box in position, the steering wheel and column are too low and interfere the the brake pedal
operation. It is a shame that the nice Ford mounting bracket will have to be altered but sadly, that's what's got to happen. But
that's in the future.
Meanwhile I've continued infilling the screen frame to the round tube and that, I'm pleased to report, has gone well.


|
|
|
ettore bugatti
|
| posted on 12/10/20 at 01:00 PM |
|
|
Good to see progress on the windscreen surround filling.
I'm sure you figure the pedalbox and steering column positions out, you got now all the components to play with.
|
|
|
John Bonnett
|
| posted on 12/10/20 at 01:24 PM |
|
|
quote:
Originally posted by ettore bugatti
Good to see progress on the windscreen surround filling.
I'm sure you figure the pedalbox and steering column positions out, you got now all the components to play with.
Thank you EB. With the pedal box in position I can see what needs to be done which is to raise the steering wheel by 40mm and lift the end of the
column by 50mm to bring it clear of the brake pedal. To do this I'll have to remove the Ford mounting and fabricate a new one. Not a disaster by
any means.
Despite being careful, infilling the screen frame has caused distortion and it has lost some of its bow along the top edge which means the glass is
well clear of the bed in the centre and sitting nicely on the corners and all the way down the sides. I've tried jacking up at the centre but it
is too firmly welded to move very much so time for a cup of tea and a bit of a think.
[Edited on 12/10/20 by John Bonnett]
|
|
|
John Bonnett
|
| posted on 16/10/20 at 05:11 PM |
|
|
Some good progress to report for once.
Following distortion during welding of the infill of the top horizontal section of the windscreen frame I cut the section out and remade it this time
making very sure it didn't move. All done now and the screen is back to sitting nicely on all surfaces. Forewarned I know what to do for the
rest of the infilling.
The Ford column mount has now been modified without losing any of its inherent strength to put the steering wheel and the column in the desired
position.


|
|
|
John Bonnett
|
| posted on 18/10/20 at 08:34 AM |
|
|
So we're making some solid progress now and looking at it I can see that to me anyway the proportions look right, the steering wheel to seat
looks right and sitting in eye level is middle of the screen. So after a few false starts I'm hopeful that I now have a good basis on which to
build.
There's still a bit to do aon the windscreen frame which I hope to complete over the next day or so.
I now have all the bits to make the steering column including the support bearing so I'll be looking at that very soon. Making the floor and
transmission tunnel is high on the agenda but before that I might have a dabble into a bit of metal shaping. I'm fancying stating the roof which
I know is going to be difficult. Low crown curvature is always the hardest as I found out on the Lightweight. But I do have that experience to draw on
so I know how to do it.
|
|
|
John Bonnett
|
| posted on 20/10/20 at 03:49 PM |
|
|
I've made a bit of a meal over the windscreen frame but it is the first one I've done and I wanted to get the best fit possible.
I've got to the stage where I can do no better and that's my yardstick. The glass sits nicely on the flange and this should I hope ensure
a watertight seal.

|
|
|
HowardB
|
| posted on 20/10/20 at 07:57 PM |
|
|
quote:
Originally posted by John Bonnett
I've made a bit of a meal over the windscreen frame but it is the first one I've done and I wanted to get the best fit possible.
I've got to the stage where I can do no better and that's my yardstick. The glass sits nicely on the flange and this should I hope ensure
a watertight seal.
that looks brilliant! Better than some modern cars!
Howard
Fisher Fury was 2000 Zetec - now a 1600 (it Lives again  and goes zoom) and goes zoom)
|
|
|
John Bonnett
|
| posted on 21/10/20 at 01:59 AM |
|
|
Thank you Howard. In order to clad the frame in aluminium I may try to use what's left of the Fiesta frame as a former and use that profile
which is certainly what I'm intending to do for the front part of the roof. The plan is to wheel some curvature into a section of the roof panel
and then anneal the front 20mm or so. I can fix my panel to the Fiesta roof and then tap over the return into the windscreen reveal to give a perfect
fit. The return will eventually be bonded and riveted in place. This should get the roof off to a flying start and possibly the A pillars too.
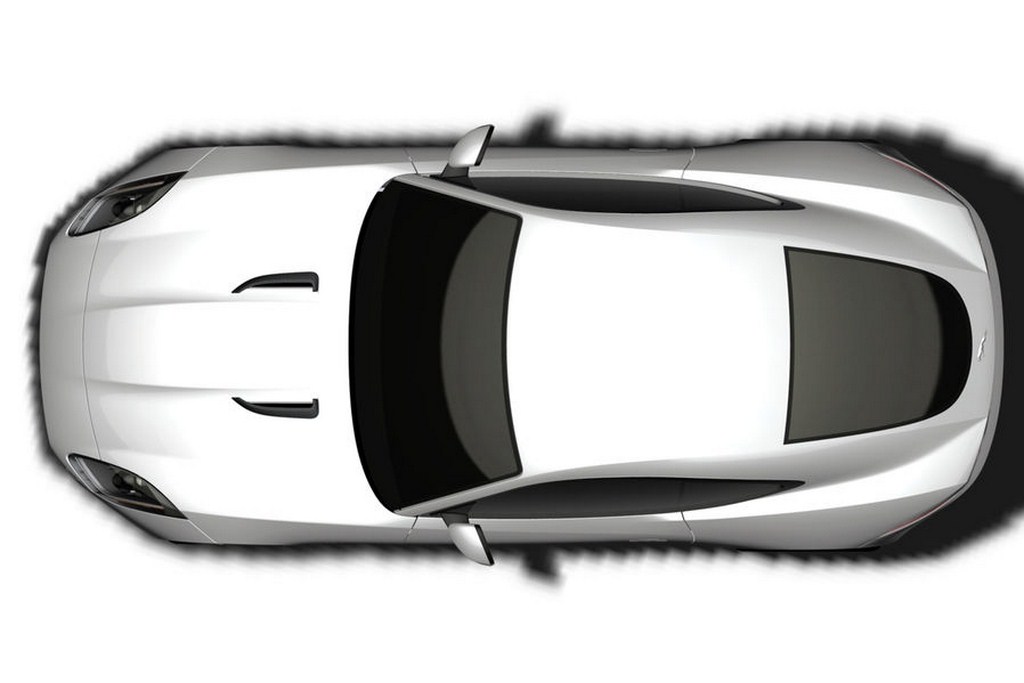
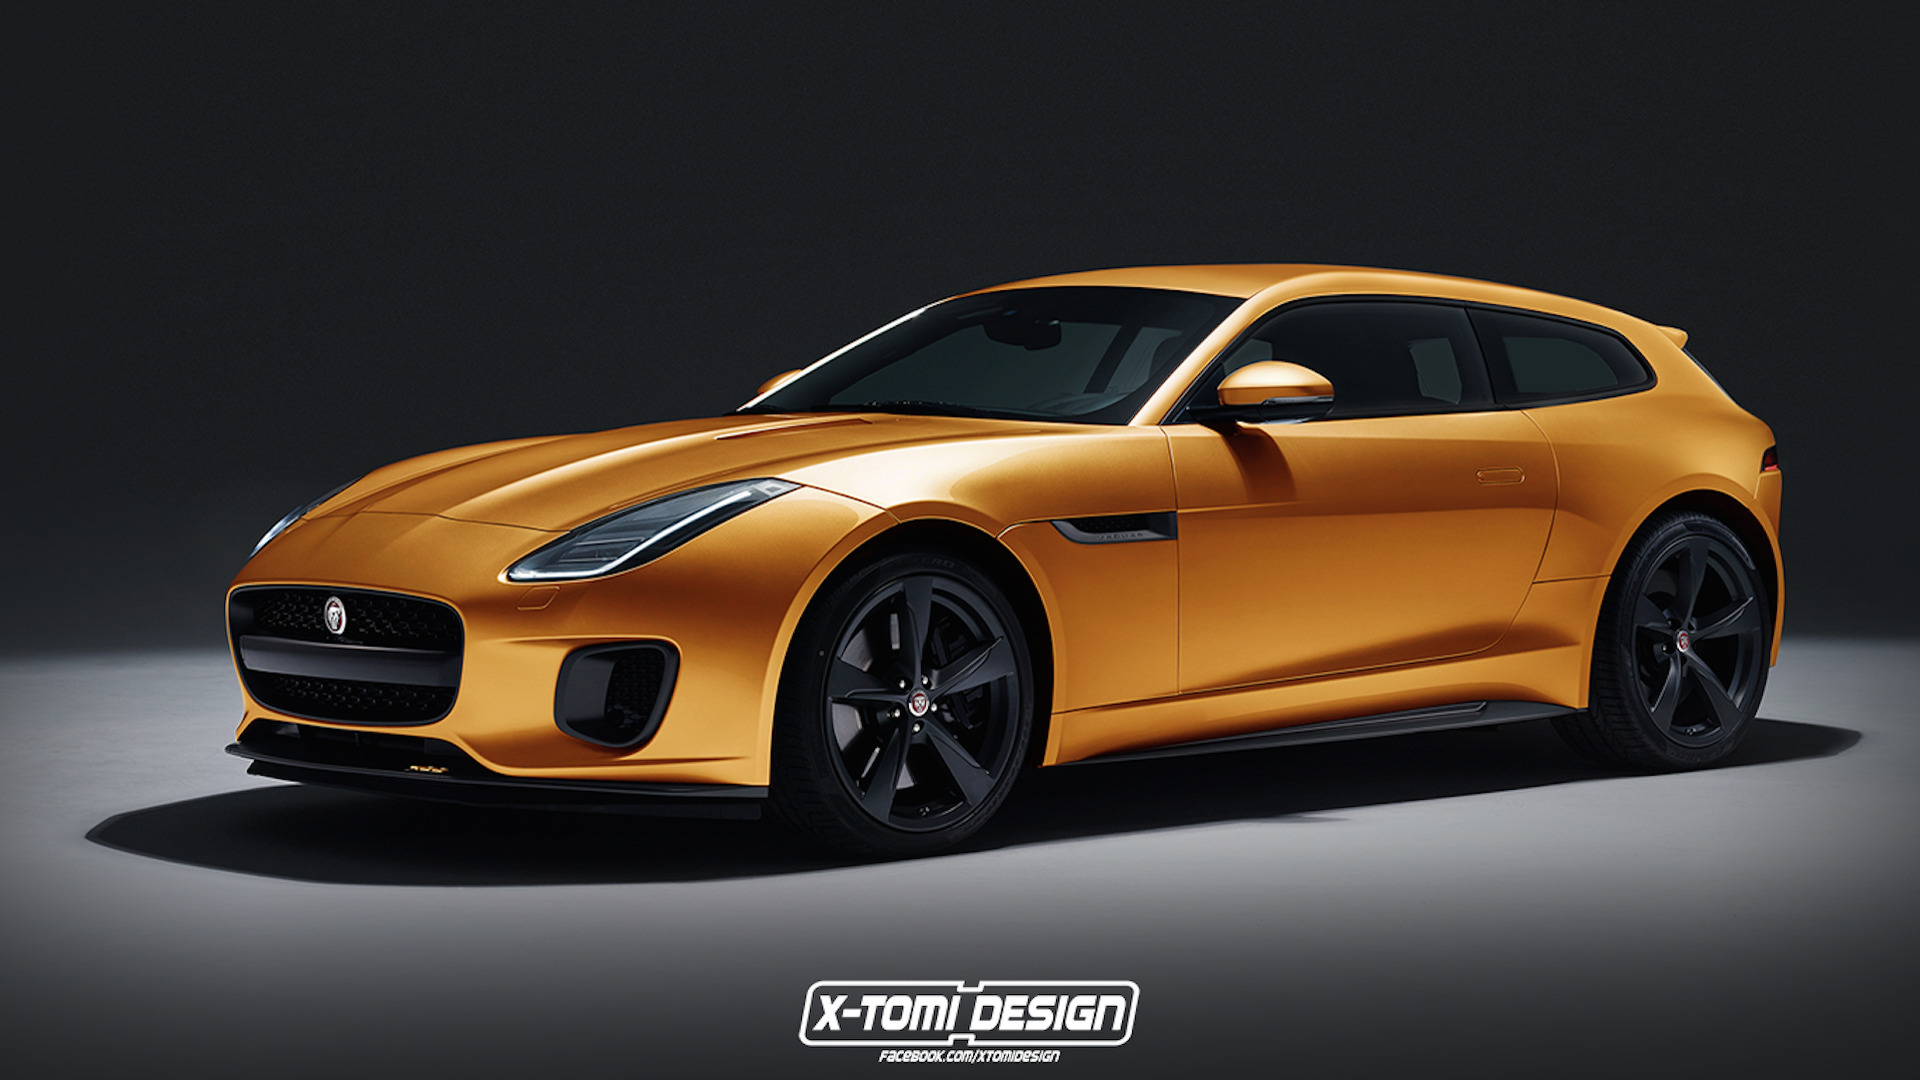
The beauty of bodywork is subjective and totally down to taste of the individual; like or droolover and all points in between. I really enjoy Harry
Metcalfe's "Harry's Garage" videos and his latest offering is a review of the Jaguar F type, another very well presented and
entertaining piece of work. I love the way the curves of the F type just flow and it looks good from every angle. I particularly like the way the roof
follows the slope of the windscreen and then about level with halfway along the door gracefully slopes down in a teardrop with the windows made to
match. I'd like to do something along those lines so I'm going to make up a wireform using 6mm steel rod and see how it might translate
onto my build.
By close of play today I'm hoping to have the steering column built now that the column is sitting in the right place and we can see where it
has to be routed. CBS supply a U/J adapter with the Ford "D" fitting at one end and the 14mm 36 spline at the other which simplifies
things. I'm also using one of their pillow block bearings to support the column and a length of spline rod to suit.


|
|
|
HowardB
|
| posted on 21/10/20 at 07:28 AM |
|
|
they would make amazing before and after pictures!
Looking forward to the updates
Howard
Fisher Fury was 2000 Zetec - now a 1600 (it Lives again and goes zoom)
|
|
|
ettore bugatti
|
| posted on 21/10/20 at 01:54 PM |
|
|
Steady progress!
Looks like the steering column wasn't too much of a job to be relocated.
The top view of the F-type contains a lot of information too.
Shame, Jaguar haven't done a Shooting brake version of it though.
|
|
|
John Bonnett
|
| posted on 21/10/20 at 05:37 PM |
|
|
That's brilliant EB thank you. A really useful view and a great find.
The day has gone well and the steering column is in place and the pedal box bolted in position.
I've used the lower steering joint from the Reliant connected to a new length of splined shaft connecting to the Fiesta column. The column
mounting bracket needed a bit of relieving to stop the U/J from fouling as the steering was rotated but nothing too serious and easily sorted. The
front of the pedal box sits immediately below the ledge on the Fiesta scuttle so it will be an easy job to drop the panel for the driver's
footwell down and sandwich it between the master cylinders and their mounting plate. The pillow block bearing bolts up very nicely to a bracket welded
to the 20mm tube which will be welded to the scuttle ledge.
Although the pedal box will be part of the body and lifted off with the body it is also screwed to the chassis so there will be no worries about any
possible flexing under panic braking.


[Edited on 21/10/20 by John Bonnett]
|
|
|
John Bonnett
|
| posted on 22/10/20 at 10:15 AM |
|
|
I've just loaded as a canvas the side profile of the F type Jaguar onto Fusion and put a few dimensions in. I was particularly interested in the
slope of the rear window and how that might transpose onto my project.

|
|
|
ettore bugatti
|
| posted on 22/10/20 at 12:38 PM |
|
|
Is it scaled down by 10%?
|
|
|
John Bonnett
|
| posted on 22/10/20 at 02:42 PM |
|
|
quote:
Originally posted by ettore bugatti
Is it scaled down by 10%?
Sorry EB I should have said that I scaled it to have a wheelbase of 2311mm to be the same as my car. The height of the F type on my scaled drawing is
given as 1176mm as opposed to 1311 in real life so yes you're right about 10% difference. My project currently stands at 1220mm overall height
but with an eight inch ground clearance. This should drop at least 25mm when at ride height so height wise perhaps the proportions would work.
I'd be interested to hear what you think.
|
|
|
ettore bugatti
|
| posted on 22/10/20 at 03:59 PM |
|
|
Your wheels are smaller (only 30mm difference TBH) in diameter than the scaled down Jag, but I'm not sure whether that actually make a
significant difference.
If the A-pillar match up in position and the scuttle height as well, I think it should work. The proportions of the F-type are not that different to
the Ferrari FF you used earlier apart from the sloping roofline.
Get the cardboard out and you will know.
|
|
|